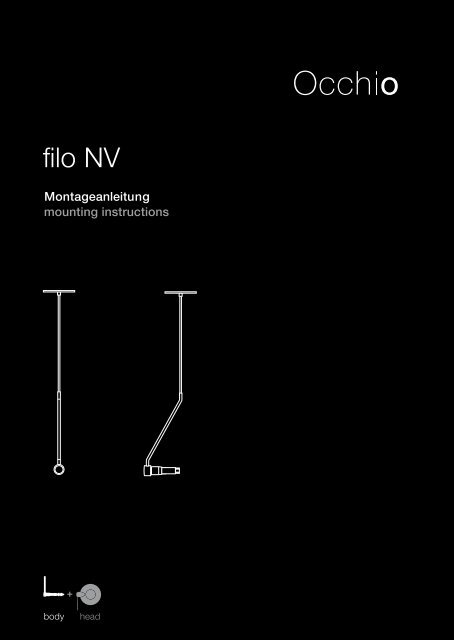
filo NV - Occhio
filo NV - Occhio
filo NV - Occhio

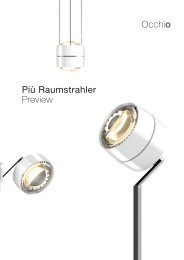
Erfolgreiche ePaper selbst erstellen
Machen Sie aus Ihren PDF Publikationen ein blätterbares Flipbook mit unserer einzigartigen Google optimierten e-Paper Software.
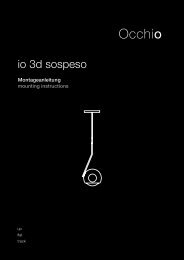
<strong>filo</strong> <strong>NV</strong><br />
Montageanleitung<br />
mounting instructions<br />
body<br />
head
<strong>filo</strong> <strong>NV</strong><br />
Montageanleitung S. 2<br />
mounting instructions p. 21
$<br />
0.2m<br />
Sicherheitshinweise<br />
Die Montage von Elektrokomponenten<br />
darf nur von qualifiziertem Fachpersonal<br />
durchgeführt werden!<br />
Vor den Arbeiten an der Leuchte diese<br />
unbedingt vom Netz trennen!<br />
Den Sicherheitsabstand zu brennbaren<br />
Objekten einhalten!<br />
Vor dem Wechsel des Reflektorkopfes,<br />
des Reflektors und des Leuchtmittels,<br />
Leuchte ausschalten und abkühlen<br />
lassen.<br />
Vorsicht, Verbrennungsgefahr!<br />
Niemals den heißen Reflektorkopf,<br />
nur den Leuchtenarm im mittleren<br />
oder unteren Bereich berühren!<br />
Reparaturarbeiten dürfen nur von autorisiertem<br />
Fachpersonal oder dem Hersteller<br />
durchgeführt werden.<br />
2
Produktbeschreibung<br />
<strong>Occhio</strong> <strong>filo</strong> <strong>NV</strong> ist eine Niedervolt-<br />
Halogen-Leuchte der Schutzklasse 3.<br />
Die Leuchte wird wahlweise mit verschiedenen<br />
Reflektorköpfen ausgeliefert.<br />
Inhalt<br />
3 Produktbeschreibung<br />
5 Aufbau<br />
6 Montage Höhenverstellung<br />
7 Montagemöglichkeiten<br />
8 Montage mit Hohlraum-/Einputzdose<br />
10 Montage mit Aufbaudose<br />
12 Montage mit Baldachin und Kabel<br />
16 Leuchtmittel einsetzen<br />
17 Reflektorkopf aufsetzen/wechseln<br />
17 Leuchtmittel wechseln<br />
18 Leuchte einstellen<br />
20 Pflegehinweise<br />
20 Info & Kontakt<br />
20 Technische Daten<br />
3
Aufbau<br />
Höhenverstellung<br />
(optional)<br />
Leuchtenkörper<br />
Reflektorkopf<br />
5
Montage Höhenverstellung<br />
Die optionale Höhenverstellung muss vor<br />
der Montage der Leuchte angebracht<br />
werden!<br />
Silikonring auf die Höhenverstellung<br />
aufschieben.<br />
Kabel nach Schema durch untere Öse,<br />
Silikonring und obere Öse führen.<br />
6
Montagemöglichkeiten<br />
Hohlraum-/Einputzdose<br />
Die <strong>filo</strong> Version mit flacher Deckendose<br />
und Abdeckplatte für direkten Kabeleinlass,<br />
ermöglicht die direkte Montage auf<br />
einer Deckeneinputz oder Hohlraumdose.<br />
Aufbaudose<br />
Mit der Aufbaudose und der Abdeckplatte<br />
für direkten Kabeleinlass ist die<br />
Montage auf festen Decken möglich.<br />
Baldachin und Kabel<br />
Das Zubehörset Baldachin und Kabelumlenkung<br />
erlaubt die Montage<br />
einer oder mehrerer Leuchten<br />
neben einem Deckenanschluss.<br />
7
12 V<br />
Montage mit Hohlraum-/Einputzdose<br />
$<br />
Achtung!<br />
Vor der Montage alle stromführenden<br />
Leitungen vom Stromnetz trennen!<br />
Flache Dose auf Hohlraum-Einputzdose<br />
aufschrauben. So drehen, dass die<br />
Leuchte die gewünschte Ausrichtung<br />
besitzt.<br />
Leuchtenanschlusskabel durch Abdeckplatte<br />
und Zugentlastung führen.<br />
Die gewünschte Höhe der Leuchtenabhängung<br />
einstellen und die Schraube in<br />
der Zugentlastung festziehen. Dann das<br />
überstehende Kabel auf ca. 8 cm kürzen.<br />
Kabelenden abisolieren und mit<br />
Aderendhülsen versehen.<br />
Schutzleiter ist nicht notwendig.<br />
Stahlseil (nicht stromführend) am Ende<br />
des Aussenmantels ablängen.<br />
Stahlseil nicht elektrisch verbinden!<br />
8
Montage mit Hohlraum-/Einputzdose<br />
Kabelenden nach Schema anschließen.<br />
Polung beachten!<br />
12 V<br />
12 V<br />
Abdeckplatte auf flache Dose aufsetzen<br />
und mit mitgelieferten Inbusschrauben<br />
anschrauben.<br />
9
12 V<br />
Montage mit Aufbaudose<br />
$<br />
Achtung!<br />
Vor der Montage alle stromführenden<br />
Leitungen vom Stromnetz trennen!<br />
Aufbaudose über den Stromauslass an<br />
der Decke setzen und so drehen, dass<br />
die Leuchte die gewünschte Ausrichtung<br />
hat. Positionen der Bohrlöcher durch die<br />
Befestigungsschlitze anzeichnen.<br />
Auf den Verlauf der Zuleitung in der<br />
Decke achten!<br />
Zwei Löcher ø 6 mm bohren, Dübel bündig<br />
einsetzen und Dose anschrauben.<br />
12 V<br />
Die Kabelenden der Netzleitung an der<br />
Klemme der Aufbaudose nach Schema<br />
anschließen.<br />
Leuchtenanschlusskabel durch Abdeckplatte<br />
und Zugentlastung führen.<br />
Schraube der Zugentlastung auf gewünschter<br />
Höhe festziehen.<br />
Überstehendes Kabel auf ca. 8 cm<br />
kürzen. Kabelenden abisolieren und mit<br />
Aderendhülsen versehen.<br />
Schutzleiter ist nicht notwendig.<br />
Stahlseil (nicht stromführend) am Ende<br />
des Aussenmantels ablängen.<br />
Stahlseil nicht elektrisch verbinden!<br />
10
Montage mit Aufbaudose<br />
Kabelenden nach Schema anschließen.<br />
Polung beachten!<br />
12 V<br />
Abdeckplatte auf die Aufbaudose<br />
aufsetzen und anschrauben.<br />
11
Montage mit Baldachin und Kabel<br />
$<br />
Achtung!<br />
Vor der Montage alle stromführenden<br />
Leitungen vom Stromnetz trennen!<br />
Die Kabelumlenkung an die gewählte<br />
Position an der Decke setzen und die<br />
Bohrung anzeichnen. Dabei auf den Verlauf<br />
der Zuleitung in der Decke achten!<br />
Loch ø 6 mm bohren und Dübel bündig<br />
einsetzen.<br />
Beiliegenden Inbusschlüssel in<br />
das Montageloch der Kabelumlenkung<br />
stecken und mit diesem die Kabelumlenkung<br />
einschrauben.<br />
12
Montage mit Baldachin und Kabel<br />
Leuchtenanschlusskabel durch Tülle<br />
führen.<br />
Die gewünschte Höhe der Leuchtenabhängung<br />
einstellen und die Schraube in<br />
der Zugentlastung festziehen.<br />
Überstehendes Kabel auf ca. 8 cm<br />
kürzen.<br />
Kabelenden abisolieren und mit Aderendhülsen<br />
versehen.<br />
Stahlseil (nicht stromführend) am Ende<br />
des Aussenmantels ablängen.<br />
Stahlseil nicht elektrisch verbinden!<br />
12 V<br />
Leuchte und Erdung der Abdeckplatte<br />
nach Schema an die Klemme<br />
anschließen.<br />
Abdeckplatte auf Aufbaudose aufsetzen<br />
und anschrauben.<br />
14
Leuchtmittel einsetzen<br />
$<br />
Achtung!<br />
Vor der Montage alle stromführenden<br />
Leitungen vom Stromnetz trennen!<br />
Reflektorköpfe abkühlen lassen!<br />
Niedervolthalogen Leuchtmittel in die<br />
Gy6.35 Stiftfassung setzen.<br />
Den Glaskolben des Leuchtmittels nur mit<br />
einem weichen Tuch, nicht mit der bloßen<br />
Hand anfassen.<br />
Fingerabdrücke auf dem Leuchtmittel vor<br />
dem Einschalten der Leuchte mit einem<br />
weichen Tuch abwischen.<br />
16
Reflektorkopf aufsetzen/wechseln<br />
Die Montage des Reflektorkopfes wird in<br />
der getrennt beiliegenden Anleitung zum<br />
entsprechenden Reflektorkopf beschrieben.<br />
Leuchtmittel wechseln<br />
Das Wechseln des Leuchtmittels wird in<br />
der getrennt beiliegenden Anleitung zum<br />
entsprechenden Reflektorkopf beschrieben.<br />
17
Leuchte einstellen<br />
Höhenverstellung<br />
Leuchte niedriger hängen:<br />
Kabel durch untere Öse nach unten schieben<br />
und durch Silikonring nachführen.<br />
Leuchte höher hängen:<br />
Kabel durch untere Öse nach oben schieben<br />
und durch Silikonring nachführen.<br />
Verstellbereich: ca. 30cm.<br />
D er Reflektorkopf ist ohne An schlag frei<br />
dreh bar.<br />
Reflektorkopf ausschließlich am Karbongriff<br />
drehen!<br />
Nur bei <strong>filo</strong> singolo:<br />
Um den Leuchtenkopf genau waagrecht<br />
auszurichten, kann der Ausleger durch<br />
leichtes Biegen vorsichtig justiert werden.<br />
Reflektorkopf waagerecht<br />
Reflector head horizontal<br />
18
Leuchte einstellen<br />
Durch Drehen der Hülse unter der Abdeckplatte<br />
kann die Leuchte ausgerichtet<br />
werden.<br />
Umgelenkte Leuchten können durch Drehen<br />
des Kabels unterhalb der Kabelumlenkung<br />
und vor dem Baldachin ausgerichtet<br />
werden.<br />
MA_53471_<strong>filo</strong>_<strong>NV</strong>_de | 07_2013<br />
19
Pflegehinweise<br />
Zur Reinigung der Metall- als auch der<br />
Glasteile der Leuchte empfehlen wir die<br />
Verwendung eines Glasreinigers.<br />
Leuch te nur in abgekühltem Zu stand<br />
reinigen!<br />
Info & Kontakt<br />
Weitere Fragen beantwortet gerne Ihr<br />
<strong>Occhio</strong> Fachhändler<br />
www.occhio.com<br />
info@occhio.com<br />
Technische Daten<br />
Artikelbezeichnung:<br />
<strong>Occhio</strong> <strong>filo</strong> <strong>NV</strong> singolo<br />
Niedervolt-Halogen IRC Leuchtmittel<br />
Sockel Gy 6.35<br />
max. 60 W<br />
Die Leuchte lässt sich über Niedervolt-<br />
Halogen-geeignete Wandeinbaudimmer<br />
betreiben.<br />
Technische und gestalterische Änderungen<br />
vorbehalten.<br />
20
<strong>filo</strong> <strong>NV</strong><br />
mounting instructions
$<br />
0.2m<br />
Safety precautions<br />
The assembly and installation of electrical<br />
components must be carried out only by<br />
qualified personnel.<br />
Before working on the lamp, always<br />
disconnect it from the mains.<br />
Maintain the minimum safety distance<br />
from flammable materials.<br />
Before changing the reflector head, the<br />
reflector, or the bulb, switch off the lamp<br />
and allow it to cool down.<br />
Caution, risk of burns.<br />
Never touch the reflector head while<br />
it is hot. Only handle the middle or<br />
bottom part of the lamp stem.<br />
Repairs must be carried out only by<br />
authorised, qualified personnel or the<br />
manufacturer.<br />
22
Product description<br />
The <strong>Occhio</strong> <strong>filo</strong> <strong>NV</strong> is a safety<br />
class 3, low-voltage halogen lamp.<br />
The lamp is available with a choice of<br />
different reflector heads.<br />
Contents<br />
23 Product description<br />
25 Configuration<br />
26 Fitting the height adjustment<br />
27 Mounting options<br />
28 Mounting with hollow ceiling/<br />
plastering box<br />
30 Mounting with spacing box<br />
32 Fitting with baldachin and cable<br />
36 Inserting the bulb<br />
37 Fitting/replacing the reflector head<br />
37 Replacing the bulb<br />
38 Adjusting the lamp<br />
40 Care instructions<br />
40 Information & contact<br />
40 Technical data<br />
23
Configuration<br />
Height adjustment<br />
(optional)<br />
Lamp body<br />
Reflector head<br />
25
Fitting the height adjustment<br />
The optional height adjustment must be<br />
fitted before mounting the lamp.<br />
Slide the silicon ring onto the height<br />
adjustment.<br />
Guide the cable through the lower eye,<br />
silicon ring and upper eye as shown in<br />
the diagram.<br />
26
Mounting options<br />
Hollow ceiling/plastering box<br />
The <strong>filo</strong> version with a flat ceiling box and<br />
cover plate for direct cable entry allows<br />
the lamp to be mounted directly on a ceiling<br />
plastering box or a hollow ceiling box.<br />
Spacing box<br />
Using the spacing box and cover plate for<br />
direct cable entry, it is possible to mount<br />
the lamp onto a solid ceiling.<br />
Baldachin and cable<br />
The baldachin and cable deflector accessory<br />
kit allows one or several lamps to be<br />
mounted next to a ceiling connection.<br />
27
12 V<br />
Mounting with hollow ceiling/plastering box<br />
$<br />
Caution<br />
Before fitting, disconnect all currentcarrying<br />
lines from the mains supply.<br />
Screw the flat box onto the hollow ceiling/<br />
plastering box. Turn it until the lamp has<br />
the required alignment.<br />
Guide the lamp connection cable through<br />
the cover plate and cord grip.<br />
Adjust the suspension of the lamp to the<br />
desired height and tighten the screw in<br />
the cord grip. Then shorten the remaining<br />
cable to approx. 8 cm.<br />
Strip the ends of the cable and fit them<br />
with wire end sleeves.<br />
A grounding conductor is not necessary.<br />
Cut to length the steel cable (not carrying<br />
a current) at the end of the outer sheath.<br />
Do not electrically connect the steel<br />
cable.<br />
28
Mounting with hollow ceiling/plastering box<br />
12 V<br />
Connect the ends of the cable as shown<br />
in the diagram.<br />
Correct polarity must be observed.<br />
12 V<br />
Fit the cover plate onto the flat box and<br />
screw this on using the Allen screws<br />
provided.<br />
29
12 V<br />
Mounting with spacing box<br />
$<br />
Caution<br />
Before fitting, disconnect all currentcarrying<br />
lines from the mains supply.<br />
Place the spacing box over the power<br />
outlet cable and against the ceiling, and<br />
turn it until the lamp has the required<br />
alignment. Mark the position of the drill<br />
holes through the fixing slots.<br />
Check where the supply cable is routed<br />
in the ceiling.<br />
Drill two 6 mm diameter holes, insert the<br />
rawlplugs flush with the ceiling and screw<br />
on the spacing box.<br />
12 V<br />
Connect the ends of the mains cable<br />
wires to the terminal block in the spacing<br />
box according to the wiring diagram.<br />
Guide the lamp connection cable through<br />
the cover plate and cord grip.<br />
Tighten the cord grip screw at the desired<br />
height.<br />
Shorten the remaining cable to approx.<br />
8 cm. Strip the ends of the cable and fit<br />
them with wire end sleeves.<br />
A grounding conductor is not necessary.<br />
Cut to length the steel cable (not carrying<br />
a current) at the end of the outer sheath.<br />
Do not electrically connect the steel<br />
cable.<br />
30
Mounting with spacing box<br />
12 V<br />
Connect the ends of the cable as shown<br />
in the diagram.<br />
Correct polarity must be observed.<br />
Fit the cover plate onto the cable socket<br />
and screw it on.<br />
31
Fitting with baldachin and cable<br />
$<br />
Caution<br />
Before fitting, disconnect all currentcarrying<br />
lines from the mains supply.<br />
Place the cable deflector against the ceiling<br />
in the desired position and mark the<br />
drill hole. At the same time, check where<br />
the supply cable is routed in the ceiling.<br />
Drill a 6 mm diameter hole and insert the<br />
rawlplug flush with the ceiling.<br />
Insert the enclosed Allen key into the<br />
cable deflector fitting hole and, using the<br />
Allen key, screw the cable deflector into<br />
the ceiling.<br />
32
Fitting with baldachin and cable<br />
12 V<br />
Place the spacing box over the power<br />
outlet cable and against the ceiling, and<br />
turn it until the lamp has the required<br />
alignment. Mark the position of the drill<br />
holes through the fixing slots.<br />
Check where the supply cable is routed<br />
in the ceiling.<br />
Drill two 6 mm diameter holes, insert the<br />
rawlplugs flush with the ceiling, and screw<br />
on the spacing box.<br />
12 V<br />
Connect the ends of the mains cable<br />
wires to the terminal block in the spacing<br />
box according to the wiring diagram.<br />
Pull the connection cable through the eye<br />
in the cable deflector and guide it across<br />
to the spacing box.<br />
33
Fitting with baldachin and cable<br />
Guide the lamp connection cable through<br />
the grommet.<br />
Adjust the suspension of the lamp to the<br />
desired height and tighten the screw in<br />
the cord grip.<br />
Shorten the remaining cable to approx.<br />
8 cm.<br />
Strip the ends of the cable and fit them<br />
with wire end sleeves.<br />
Cut to length the steel cable (not carrying<br />
a current) at the end of the outer sheath.<br />
Do not electrically connect the steel<br />
cable.<br />
12 V<br />
Connect the lamp and cover plate earth<br />
to the terminal block as shown in the<br />
wiring diagram.<br />
Fit the cover plate onto the spacing box<br />
and screw it on.<br />
34
Inserting the bulb<br />
$<br />
Caution<br />
Before fitting, disconnect all currentcarrying<br />
lines from the mains supply.<br />
Allow reflector heads to cool.<br />
Fit the low voltage halogen bulb into the<br />
Gy 6.35 pin socket.<br />
Always use a soft cloth when handling<br />
the bulb glass. Never touch it with bare<br />
hands.<br />
Use a soft cloth to wipe off any finger<br />
prints left on the bulb before switching<br />
the lamp on.<br />
36
Fitting/replacing the reflector head<br />
Fitting the reflector head is described<br />
separately in the enclosed instructions for<br />
the respective reflector head.<br />
Replacing the bulb<br />
Replacing the bulb is described separately<br />
in the enclosed instructions for the<br />
respective reflector head.<br />
37
Adjusting the lamp<br />
Height adjustment<br />
To hang the lamp lower:<br />
Push the cable downwards through the<br />
lower eye guide and pull it through the<br />
silicon ring.<br />
To hang the lamp higher:<br />
Push the cable upwards through the lower<br />
eye guide and pull it through the silicon<br />
ring.<br />
Adjustable range: Approx. 30 cm.<br />
The reflector head does not have any limiters<br />
and can be freely rotated.<br />
Only turn the reflector head by the carbon<br />
rod.<br />
Only for the <strong>filo</strong> singolo:<br />
In order to align the lamp head perfectly<br />
horizontal, the bracket can be adjusted by<br />
gently bending it slightly.<br />
Reflektorkopf waagerecht<br />
Reflector head horizontal<br />
38
Adjusting the lamp<br />
The lamp can be aligned by turning the<br />
sleeve under the cover plate.<br />
Deflected lamps can be aligned by turning<br />
the cable beneath the cable deflector and<br />
in front of the baldachin.<br />
MA_53471_<strong>filo</strong>_<strong>NV</strong>_en | 07_2013<br />
39
Care instructions<br />
For cleaning both the metal and the glass<br />
parts of the lamp, we recommend using a<br />
glass cleaner.<br />
Always allow the lamp to cool down<br />
before cleaning.<br />
Information & contact<br />
Your <strong>Occhio</strong> specialist retailer will gladly<br />
answer any other questions<br />
www.occhio.com<br />
info@occhio.com<br />
Technical data<br />
Product designation:<br />
<strong>Occhio</strong> <strong>filo</strong> <strong>NV</strong> singolo<br />
Low-voltage halogen IRC bulb<br />
Gy 6.35 socket<br />
Max. 60 W<br />
The lamp can be operated by built-in wall<br />
dimmers suitable for low-voltage halogen<br />
bulbs.<br />
Subject to technical and design modifications<br />
without notice.<br />
40
<strong>Occhio</strong> GmbH<br />
Wiener Platz 7<br />
D 81667 München<br />
Fon +49-89-44 77 86 30<br />
Fax +49-89-44 77 86 39<br />
info@occhio.com<br />
www.occhio.com