ND 1200 R Radial - Heidenhain.de
ND 1200 R Radial - Heidenhain.de
ND 1200 R Radial - Heidenhain.de

Erfolgreiche ePaper selbst erstellen
Machen Sie aus Ihren PDF Publikationen ein blätterbares Flipbook mit unserer einzigartigen Google optimierten e-Paper Software.
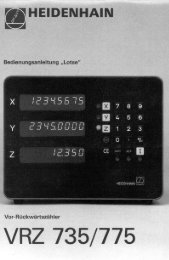
<strong>ND</strong> <strong>1200</strong> R RADIAL<br />
Setup<br />
Operation<br />
2<br />
4. Enco<strong>de</strong>r setup<br />
• Use the arrow cursor keys to navigate<br />
to the ENCODERS setup screen.<br />
• Select an axis and enter the required<br />
enco<strong>de</strong>r parameters.<br />
• Repeat setup for all axes.<br />
• Press the FINISH key.<br />
5. <strong>Radial</strong> Drill setup<br />
• Use the arrow cursor keys to navigate<br />
to the RADIAL DRILL setup screen.<br />
• Enter the <strong>de</strong>sired parameters and<br />
press the FINISH key.<br />
6. Error correction<br />
Linear error correction (LEC) methods<br />
can be used to compensate for enco<strong>de</strong>r<br />
and machine measurement errors.<br />
Refer to the <strong>ND</strong> <strong>1200</strong> R User Gui<strong>de</strong> for<br />
instructions.<br />
7. Display formatting<br />
• Use the arrow cursor keys to navigate<br />
to the DISPLAY screen.<br />
• Enter the <strong>de</strong>sired display resolutions<br />
and other parameters.<br />
• Press the FINISH key.<br />
Note:<br />
Refer to the <strong>ND</strong> <strong>1200</strong> R User Gui<strong>de</strong> for<br />
additional setup functions.<br />
Preparation<br />
1. Power up the <strong>ND</strong> <strong>1200</strong> R<br />
• Check connections to the <strong>ND</strong> <strong>1200</strong> R.<br />
• Press the POWER switch to power<br />
the <strong>ND</strong> <strong>1200</strong> R.<br />
• Press the FINISH key to display the<br />
DRO screen.<br />
2. Find machine zero<br />
Move the stage to cross reference<br />
marks if the system was setup to<br />
establish machine zero at startup.<br />
3. Select a unit of measure<br />
Press the MM (IN) soft key to toggle<br />
between mm and inches.<br />
4. Select coordinates<br />
Press the X/Y (R/A) soft key to toggle<br />
between rectangular and polar<br />
coordinates<br />
5. Replacement<br />
The <strong>ND</strong> <strong>1200</strong> R must be parameterized<br />
in accordance with the machine<br />
settings. Transfer the correct parameters<br />
or have a (re)calibration performed.<br />
Probing a position<br />
A position can be probed with a hard<br />
probe or a touch probe.<br />
1. Probing with a hard probe<br />
• Touch the probe to the edge of the<br />
workpiece.<br />
• Press ENTER.<br />
• Enter the probe diameter.<br />
• Press the arrow cursor key that<br />
indicates the probe compensation<br />
direction.<br />
2. Probing with a touch probe<br />
• Touch the edge of the workpiece with<br />
the probe.<br />
Aligning the part<br />
Perform a skew alignment to eliminate<br />
cosine errors resulting from misaligned<br />
parts.<br />
1. Align the part on the stage<br />
Align the reference edge of the part to a<br />
measurement axis.<br />
2. Perform a skew alignment<br />
• Press the DATUM soft key.<br />
• Press the SKEW soft key.<br />
• Probe points along the part edge<br />
aligned to the reference axis.<br />
• Press the FINISH key to complete the<br />
alignment.<br />
Set zero point<br />
The first point of the skew will be used<br />
as the zero point. Use ZERO to change<br />
the zero point along the reference axis.<br />
• Press the ZERO soft key.<br />
• Press the soft key for the axis to zero<br />
along (skew edge).<br />
• Probe the part edge perpendicular to<br />
the skew edge.<br />
Note:<br />
The center of a hole can be used as a<br />
point for a skew alignment or setting a<br />
zero point. Refer to the <strong>ND</strong> <strong>1200</strong> R User<br />
Gui<strong>de</strong> for <strong>de</strong>tailed instructions.<br />
Move zero point<br />
If the zero point of a part is not reachable<br />
by a probe the zero point can be moved.<br />
• Press the DATUM soft key<br />
• Press the MOVE 0 soft key.<br />
• Enter the X and Y coordinates to<br />
move the zero point to.<br />
• Press FINISH.<br />
Target entry<br />
• Press the X or Y axis key.<br />
• Enter the <strong>de</strong>sired position to target.<br />
• Press the ENTER key.<br />
• Repeat for the opposite axis.<br />
• Press the FINISH key. The distance<br />
from the target is displayed.<br />
Hole patterns<br />
• Press the MENU soft key.<br />
• Press the PATTERN soft key.<br />
• Press the soft key to select the<br />
<strong>de</strong>sired pattern.<br />
• Enter the <strong>de</strong>sired parameters.<br />
• Press FINISH.<br />
Programs<br />
1. Save a program<br />
• Create a target sequence.<br />
• Press the MENU soft key.<br />
• Press the PROG soft key.<br />
• Press the SAVE soft key.<br />
• Use the numeric keypad to enter a<br />
name for the program.<br />
• Press the ENTER key.<br />
2. Run a program<br />
• Press the MENU soft key.<br />
• Press the PROG soft key.<br />
• Use the arrow cursor keys to highlight<br />
a program.<br />
• Press the RUN soft key.<br />
3. Delete a program<br />
• Press the MENU soft key.<br />
• Press the PROG soft key.<br />
• Use the arrow cursor keys to highlight<br />
a program.<br />
• Press the DELETE soft key.<br />
• Press the YES soft key.<br />
Note:<br />
Refer to the <strong>ND</strong> <strong>1200</strong> R User Gui<strong>de</strong> for<br />
<strong>de</strong>tailed instructions.<br />
DR. JOHANNES HEIDENHAIN GmbH<br />
Dr.-Johannes-<strong>Hei<strong>de</strong>nhain</strong>-Straße 5<br />
83301 Traunreut, Germany<br />
{ +49 8669 31-0<br />
| +49 8669 5061<br />
E-mail: info@hei<strong>de</strong>nhain.<strong>de</strong><br />
www.hei<strong>de</strong>nhain.<strong>de</strong>