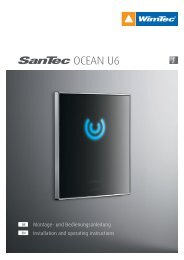
OCEAN P6 - 12 V - WimTec
OCEAN P6 - 12 V - WimTec
OCEAN P6 - 12 V - WimTec

Erfolgreiche ePaper selbst erstellen
Machen Sie aus Ihren PDF Publikationen ein blätterbares Flipbook mit unserer einzigartigen Google optimierten e-Paper Software.
<strong>OCEAN</strong> <strong>P6</strong> - <strong>12</strong> V<br />
DE<br />
EN<br />
Montage- und Bedienungsanleitung<br />
Installation and operating instructions
DE<br />
<strong>OCEAN</strong> <strong>P6</strong><br />
Allgemeine Hinweise<br />
Gratulation zum Kauf Ihres elektronischen Duschepaneels<br />
SanTec <strong>OCEAN</strong> <strong>P6</strong>.<br />
Damit Sie lange Jahre Freude mit dieser hochwertigen Armatur<br />
haben, empfehlen wir Ihnen folgende Punkte bei der Reinigung<br />
und Pflege zu beachten:<br />
milde, seifenhaltige Reinigungsmittel verwenden<br />
keine kratzenden, scheuernden oder säurehaltigen<br />
Reinigungs- oder Desinfektionsmittel verwenden<br />
nur mit weichem Schwamm oder Tuch behandeln<br />
keine Reinigung mit Dampfstrahlgeräten<br />
Diese Anleitung ist gültig für folgende Produkte:<br />
SanTec <strong>OCEAN</strong> <strong>P6</strong> Dusche-Paneel für <strong>12</strong> V extern Versorgung:<br />
mit Kopf- und Handbrause weiß Art.Nr. 1<strong>12</strong> 160<br />
mit Kopf- und Handbrause schwarz Art.Nr. 1<strong>12</strong> 177<br />
mit Kopfbrause weiß Art.Nr. 1<strong>12</strong> 191<br />
mit Kopfbrause schwarz Art.Nr. 1<strong>12</strong> 207<br />
Lieferumfang:<br />
Grundkörper, Glas-Paneel mit integrierter Elektronik und<br />
Thermostatgriff, <strong>OCEAN</strong> Regendusche, Handbrause (je nach<br />
Ausführungsvariante), Bohrschablone, Schutzkleinspannungskabel<br />
3 m zum Anschluss an das Netzgerät, sämtliches<br />
Befestigungsmaterial und ON/OFF Aufkleber.<br />
!<br />
Es gelten die „Allgemeinen<br />
Installationsbedingungen“<br />
unter www.wimtec.com.<br />
Wichtige Installationshinweise:<br />
UP-Dose für optionales Netzteil außerhalb des Schutzbereichs<br />
vorsehen. Die Montage und Installation darf nur durch einen<br />
konzessionierten Fachbetrieb gemäß DIN 1988, ÖVE/ÖNORM<br />
E8001 sowie VDE 0100 Teil 701 erfolgen. Bei der Planung und<br />
Errichtung von Sanitäranlagen sind die entsprechenden örtlichen,<br />
nationalen und internationalen Normen und Vorschriften zu<br />
beachten!<br />
2 Dusche-Paneel SanTec <strong>OCEAN</strong> <strong>P6</strong>
<strong>OCEAN</strong> <strong>P6</strong><br />
DE<br />
Technische Daten<br />
Betriebsspannung: <strong>12</strong> V / 50 Hz direkt bzw.<br />
über 230 V / <strong>12</strong> V Netzteil (Art. Nr. 231 <strong>12</strong>0)<br />
Leistungsaufnahme: 4,8 VA Spitze<br />
Magnetventil:<br />
6 V<br />
Ansprechbereich: 70 cm vorjustiert,<br />
30 - 70 cm einstellbar<br />
Nah-Ansprechbereich: 4 - 5 cm<br />
Sicherheits-Spülstopp: 10 min voreingestellt, 30 s bis 10 min einstellbar<br />
Reinigungsstopp: 10 min<br />
Hygienespülung: 48 Stunden (3 - 48 h einstellbar)<br />
nach der letzten Spülung für 10 s (schaltbar)<br />
Durchflussmenge: max. 30 l/min bei 0,3 MPa (3 bar)<br />
Fließdruck:<br />
0,05 - 0,6 MPa (0,5 - 6 bar)<br />
Statischer Druck: max. 0,8 MPa (max. 8 bar)<br />
Wasserzulauf:<br />
R 1/2“ IG<br />
Wasserablauf Brause: R 1/2“ IG<br />
Wassertemperatur: max. 70°C<br />
Abmessungen:<br />
200<br />
908<br />
445<br />
Alle Maße in mm<br />
35<br />
30<br />
1013<br />
* Bei bestehenden Anschlüssen<br />
(Standardmaß 153 mm) ist eine<br />
Montage auch möglich.<br />
E-Anschluss **<br />
** E-Anschluss <strong>12</strong> V / 50 Hz vorsehen.<br />
Netzteil 230 V / <strong>12</strong> V außerhalb<br />
des geschützten Bereichs anbringen.<br />
524<br />
80-110*<br />
260<br />
1590<br />
105-115<br />
30<br />
1404<br />
½"<br />
Ansprechbereich<br />
300-700<br />
Unterkante Regendusche 2000 - 2010<br />
Dusche-Paneel SanTec <strong>OCEAN</strong> <strong>P6</strong> 3
ON<br />
OFF<br />
1 2 3 4 5 6<br />
DE<br />
<strong>OCEAN</strong> <strong>P6</strong><br />
ON<br />
OFF<br />
1 2 3 4<br />
Reinigungsstopp:<br />
ON<br />
OFF<br />
1 2 3 4<br />
Einstellung der Programme & Funktionen<br />
Hygienespülung:<br />
ON<br />
A<br />
Bedienelemente:<br />
Einstellelemente:<br />
Halbautomatik:<br />
ON<br />
C<br />
OFF<br />
1 2 3 4<br />
D<br />
OFF<br />
1 2 3 4<br />
Vollautomatik:<br />
ON<br />
OFF<br />
1 2 3 4<br />
B<br />
E<br />
F<br />
H<br />
ON<br />
OFF<br />
1 2 3 4 5 6<br />
Manuell:<br />
ON<br />
OFF<br />
1 2 3 4<br />
G<br />
A Regendusche<br />
B Handbrause mit innenliegender<br />
Schlauchführung (nur bei<br />
Variante mit Handbrause)<br />
C Touch-Tronic-Taste zum Ein-/Ausschalten<br />
der Regendusche<br />
(nur bei Variante mit Handbrause)<br />
D Touch-Tronic-Taste zum Ein-/Ausschalten<br />
der Handbrause<br />
(nur bei Variante mit Handbrause)<br />
E Touch-Tronic-Taste (ON/OFF<br />
Symbol) zum Ein-/Ausschalten<br />
der Regendusche<br />
I J K<br />
F Thermostatgriff zur Temperaturregelung<br />
mit Taste zum Öffnen<br />
der 38 °C Sicherheitssperre.<br />
G Infrarot-Sensor für die Benutzererkennung<br />
(Ansprechbereich).<br />
H Dip-Schalter zum Einstellen der<br />
Programme und Funktionen<br />
I Reichweiten-Regler<br />
J Zeit-Regler<br />
K Intervall-Regler<br />
Generell gilt für alle Regler:<br />
Gegen den Uhrzeigersinn<br />
zum Reduzieren.<br />
Im Uhrzeigersinn zum<br />
Erhöhen.<br />
!<br />
4 Dusche-Paneel SanTec <strong>OCEAN</strong> <strong>P6</strong>
<strong>OCEAN</strong> <strong>P6</strong><br />
DE<br />
Einstellung der Programme & Funktionen<br />
Dip-Schalter:<br />
Programm-Aktivierung - Dip-Schalter 1 und 2:<br />
Programm Dip 1 Dip 2 Beschreibung<br />
Halb-Automatik 1) OFF ON Seite 10<br />
Voll-Automatik ON ON Seite 11<br />
Manuell OFF OFF Seite <strong>12</strong><br />
Funktions-Aktivierung - Dip-Schalter 3 - 6:<br />
Dip-Schalter Funktion Beschreibung<br />
3 Nachlaufzeit ON = 5 s / OFF 1) = 2 s<br />
4 Warmlauffunktion 1) Seite 13<br />
5 Reinigungsstopp 1) Seite 14<br />
6 Hygienespülung Seite 15<br />
1)<br />
Programm oder Funktionen bereits<br />
werksseitig voreingestellt.<br />
Einstellregler:<br />
I.<br />
Reichweiten-Regler<br />
für die Benutzererkennung<br />
Ansprechbereich 70 cm<br />
voreingestellt<br />
(30 - 70 cm einstellbar).<br />
Begrenzt die Reichweite des<br />
Infrarot-Sensors von 30-70 cm.<br />
Automatische Reichweiten-<br />
Adjustierung innerhalb der<br />
eingestellten Maximal-<br />
Reichweite.<br />
J.<br />
Zeit-Regler<br />
für den Sicherheitsspülstopp<br />
10 min voreingestellt<br />
(10 s bis 10 min einstellbar).<br />
Nach Ablauf der eingestellten<br />
Maximallaufzeit schaltet die<br />
Duschearmatur automatisch<br />
ab. Um bei einer unbeabsichtigten<br />
Daueraktivierung<br />
Wasser zu sparen.<br />
K.<br />
Intervall-Regler<br />
für die Hygienespülung<br />
48 h voreingestellt<br />
(3 - 48 h einstellbar).<br />
Wird die Duschearmatur für<br />
die voreingestellte Zeit nicht<br />
benutzt, löst die Armatur<br />
selbstständig eine Spülung<br />
für 10 s aus, um die Rohr<br />
leitungen von Stagnationswasser<br />
freizuspülen.<br />
Dusche-Paneel SanTec <strong>OCEAN</strong> <strong>P6</strong> 5
DE<br />
<strong>OCEAN</strong> <strong>P6</strong><br />
Montage<br />
1 2 3<br />
4 5 6<br />
!<br />
ACHTUNG!<br />
Folgende Schritte unbedingt<br />
in beschriebener<br />
Reihenfolge ausführen!<br />
1. Sicherungsdeckel an der Oberseite des Dusche-Paneels<br />
abschrauben.<br />
2. Grundkörper nach unten schieben, vorsichtig anheben<br />
und aushängen.<br />
3. Bohrschablone auf der Rückwand aufkleben. Unterkante<br />
Duschkopf auf Bohrschablone beachten für gewünschte<br />
Montagehöhe (Standard 200 - 210 cm).<br />
4. Vier Befestigungsbohrungen ø 8 mm herstellen und danach<br />
Bohrschablone wieder ablösen.<br />
5. Wandanschlusswinkel und Vorabsperrungen senkrecht,<br />
nach oben stehend, montieren.<br />
6. Vorspülung durchführen.<br />
6 Dusche-Paneel SanTec <strong>OCEAN</strong> <strong>P6</strong>
<strong>OCEAN</strong> <strong>P6</strong><br />
DE<br />
Montage<br />
7 8<br />
9<br />
10 11<br />
<strong>12</strong><br />
7. Vorabsperrungen schließen und Rückflussverhinderer mit<br />
Schmutzsieben montieren.<br />
8. Grundkörper mit dem beiliegenden Befestigungsmaterial<br />
(4x Linsenschraube 5,5 x 50 mm) an der Wand montieren.<br />
9. Duschkopf mittels beiliegendem Befestigungsmaterial<br />
(Sechskantschraube M8 x 25 mm) am Glaspaneel montieren.<br />
ACHTUNG!<br />
Folgende Schritte unbedingt<br />
in beschriebener<br />
Reihenfolge ausführen!<br />
!<br />
10. Den im Grundkörper vormontierten Anschlussschlauch am<br />
Duschkopf befestigen.<br />
11. Duschkopf-Abdeckung mit 2 Schrauben (Linsenschraube<br />
2,2 x 9,5 mm) von oben befestigen.<br />
<strong>12</strong>. Glaspaneel an der Oberseite des Grundkörpers auf dem<br />
hinteren Revisionshaken einhängen.<br />
Dusche-Paneel SanTec <strong>OCEAN</strong> <strong>P6</strong> 7
DE<br />
<strong>OCEAN</strong> <strong>P6</strong><br />
Montage<br />
13 14 15<br />
!<br />
ACHTUNG!<br />
Folgende Schritte unbedingt<br />
in beschriebener<br />
Reihenfolge ausführen!<br />
13. Kalt- und Warmwasser-Anschlussschläuche anschließen.<br />
14. Optional: Handbrause anschließen (beiliegende Dichtung<br />
verwenden).<br />
15. Netzversorgung herstellen und Vorabsperrungen öffnen.<br />
8 Dusche-Paneel SanTec <strong>OCEAN</strong> <strong>P6</strong>
<strong>OCEAN</strong> <strong>P6</strong><br />
DE<br />
Inbetriebnahme<br />
16 17<br />
18<br />
16. Funktion prüfen: Spül- und Programm-Einstellungsmöglichkeiten<br />
siehe auf den folgenden Seiten.<br />
Beim Funktionstest ist darauf zu achten, dass sich der<br />
Benutzer im Ansprechbereich befindet. Dabei beginnt das<br />
Leuchtsymbol langsam zu pulsieren. Sollten es die räumlichen<br />
Gegebenheiten nicht ermöglichen, dass sich jemand<br />
im Ansprechbereich befindet, so ist ein Objekt (z.B. Hand)<br />
während des gesamten Funktionstests permanent<br />
ca. 10 bis 15 cm vor dem Infrarot-Raumüberwachungssensor<br />
(unmittelbar unterhalb der Temperatureinstellung)<br />
zu halten. Andernfalls kann es dazu führen, dass sich die<br />
Dusche nicht aktivieren lässt oder sofort wieder abschaltet.<br />
ON/OFF Aufkleber:<br />
19<br />
17. Glaspaneel anheben und in Endposition am vorderen<br />
Einhängehaken einhängen.<br />
18. Sicherungsdeckel montieren.<br />
19. Optional: Für Einsatzgebiete mit permanent wechselnden<br />
Benutzern kann der beiliegende „ON/OFF“ Aufkleber im<br />
Leuchtsymbol angebracht werden.<br />
Dusche-Paneel SanTec <strong>OCEAN</strong> <strong>P6</strong> 9
ON<br />
OFF<br />
1 2 3 4 5 6<br />
ON<br />
DE<br />
<strong>OCEAN</strong> <strong>P6</strong><br />
OFF<br />
1 2 3 4 5 6<br />
Reinigungsstopp:<br />
ON<br />
OFF<br />
1 2 3 4 5 6<br />
Programm-Beschreibung<br />
Programm Halb-Automatik (voreingestellt):<br />
DIP Schalter 1=OFF, 2=ON<br />
Hygienespülung:<br />
ON<br />
OFF<br />
1 2 3 4 5 6<br />
Halbautomatik:<br />
ON<br />
OFF<br />
1 2 3 4 5 6<br />
EINSCHALTEN:<br />
Benutzererkennung<br />
Der Benutzer tritt vor die Dusche<br />
und wird von der Armatur<br />
erkannt. Das Leuchtsymbol<br />
beginnt langsam zu pulsieren.<br />
Touch-Tronic-Taste<br />
Antippen innerhalb des<br />
ON/OFF Symbols schaltet<br />
die Regendusche ein.<br />
Vollautomatik:<br />
ON<br />
OFF<br />
1 2 3 4 5 6<br />
Touch-Tronic-Taste 1)<br />
Manuell:<br />
Antippen der gewünschten<br />
Wasserabgabestelle ON (Regendusche<br />
und/oder Handbrause)<br />
1 2 3 4 5 6<br />
OFF<br />
schaltet diese ein.<br />
30-70 cm<br />
AUSSCHALTEN:<br />
Touch-Tronic-Taste<br />
Antippen des ON/OFF Symbols<br />
schaltet alle aktiven Wasserabgabestellen<br />
ab.<br />
Touch-Tronic-Taste 1)<br />
Antippen der gewünschten<br />
Wasserabgabestelle (Regendusche-<br />
oder Handbrause)<br />
schaltet diese ab.<br />
Automatik<br />
Dusche stoppt nach Ablauf der<br />
Nachlaufzeit wenn der Benutzer<br />
den Ansprechbereich verlässt<br />
oder nach Ablauf der Sicherheitsspülstopp-Zeit.<br />
1)<br />
Nur bei der Ausführung SanTec <strong>OCEAN</strong> <strong>P6</strong> mit Regendusche und Handbrause.<br />
10 Dusche-Paneel SanTec <strong>OCEAN</strong> <strong>P6</strong>
ON<br />
OFF<br />
1 2 3 4 5 6<br />
ON<br />
<strong>OCEAN</strong> <strong>P6</strong><br />
Programm-Beschreibung<br />
Programm Voll-Automatik:<br />
DIP Schalter 1=ON, 2=ON<br />
EINSCHALTEN:<br />
OFF<br />
1 2 3 4 5 6<br />
Hygienespülung:<br />
DE<br />
ON<br />
OFF<br />
1 2 3 4 5 6<br />
Halbautomatik:<br />
ON<br />
OFF<br />
1 2 3 4 5 6<br />
Vollautomatik:<br />
ON<br />
OFF<br />
1 2 3 4 5 6<br />
Manuell:<br />
ON<br />
Benutzererkennung<br />
Der Benutzer tritt vor die Dusche<br />
und wird von der Armatur<br />
erkannt. Das Leuchtsymbol<br />
beginnt langsam zu pulsieren.<br />
Automatisch<br />
Nach der Benutzererkennung<br />
schaltet sich die Regendusche<br />
automatisch nach 2 s ein.<br />
OFF<br />
1 2 3 4 5 6<br />
30-70 cm<br />
AUSSCHALTEN:<br />
Touch-Tronic-Taste<br />
Antippen des ON/OFF Symbols<br />
schaltet alle aktiven Wasserabgabestellen<br />
ab.<br />
Touch-Tronic-Taste 1)<br />
Antippen der gewünschten<br />
Wasserabgabestelle (Regendusche-<br />
oder Handbrause)<br />
schaltet diese ab.<br />
Automatisch<br />
Dusche stoppt nach Ablauf der<br />
Nachlaufzeit wenn der Benutzer<br />
den Ansprechbereich verlässt<br />
oder nach Ablauf der Sicherheitsspülstopp-Zeit.<br />
1)<br />
Nur bei der Ausführung SanTec <strong>OCEAN</strong> <strong>P6</strong> mit Regendusche und Handbrause.<br />
Dusche-Paneel SanTec <strong>OCEAN</strong> <strong>P6</strong> 11
ON<br />
OFF<br />
1 2 3 4 5 6<br />
DE<br />
<strong>OCEAN</strong> <strong>P6</strong><br />
ON<br />
OFF<br />
1 2 3 4 5 6<br />
Halbautomatik:<br />
ON<br />
OFF<br />
1 2 3 4 5 6<br />
Programm-Beschreibung<br />
Vollautomatik:<br />
ON<br />
OFF<br />
1 2 3 4 5 6<br />
Programm Manuell:<br />
DIP Schalter 1=OFF, 2=OFF<br />
EINSCHALTEN:<br />
Manuell:<br />
ON<br />
OFF<br />
1 2 3 4 5 6<br />
Touch-Tronic-Taste<br />
Antippen innerhalb des<br />
ON/OFF Symbols schaltet die<br />
Regendusche ein.<br />
Touch-Tronic-Taste 1)<br />
Antippen der gewünschten<br />
Wasserabgabestelle (Regendusche<br />
und/oder Handbrause)<br />
schaltet diese ein.<br />
AUSSCHALTEN:<br />
Touch-Tronic-Taste<br />
Antippen des ON/OFF Symbols<br />
schaltet alle aktiven Wasserabgabestellen<br />
ab.<br />
Touch-Tronic-Taste 1)<br />
Antippen der gewünschten<br />
Wasserabgabestelle (Regendusche-<br />
oder Handbrause)<br />
schaltet diese ab.<br />
Sicherheitsspülstopp<br />
Nach Ablauf der eingestellten<br />
Spülstopp-Zeit (siehe S. 5)<br />
schaltet die Dusche ab.<br />
1)<br />
Nur bei der Ausführung SanTec <strong>OCEAN</strong> <strong>P6</strong> mit Regendusche und Handbrause.<br />
<strong>12</strong> Dusche-Paneel SanTec <strong>OCEAN</strong> <strong>P6</strong>
ON<br />
OFF<br />
1 2 3 4 5 6<br />
<strong>OCEAN</strong> <strong>P6</strong><br />
DE<br />
Funktions-Beschreibung<br />
Warmlauf:<br />
DIP Schalter 4<br />
Warmlauf:<br />
ON<br />
OFF<br />
1 2 3 4 5 6<br />
Reinigungsstopp:<br />
Dient zum Freispülen der Warmwasserleitung, ohne dass der<br />
Benutzer vor der Dusche im Ansprechbereich verweilen muss.<br />
Dip Schalter 4 ON = Warmlauf-Funktion aktiviert (voreingestellt).<br />
Dip Schalter 4 OFF = Warmlauf-Funktion deaktiviert.<br />
Benutzererkennung<br />
Der Benutzer tritt vor die Dusche<br />
und wird von der Armatur<br />
erkannt. Das Leuchtsymbol<br />
beginnt langsam zu pulsieren.<br />
Einschalten<br />
Der Benutzer hat 5 s nach der<br />
Benuterzerkennung Zeit, durch<br />
Antippen innerhalb des<br />
ON/OFF Symbols, die Warmlauffunktion<br />
zu aktivieren ohne<br />
sich dabei im Ansprechbereich<br />
zu befinden.<br />
Dabei leuchtet beim ON/OFF<br />
Symbol der senkrechte Strich<br />
während der Ring pulsiert.<br />
ON<br />
OFF<br />
1 2 3 4 5 6<br />
Es wird empfohlen, Hygienespülung: die<br />
Warmlauffunktion ON nicht<br />
mit dem OFF Programm<br />
1 2 3 4 5 6<br />
„Voll-Automatik“ zu<br />
Halbautomatik:<br />
kombinieren!<br />
ON<br />
Betrieb<br />
OFF<br />
1 2 3 4 5 6<br />
Das Wasser läuft für 30 s zuzüglich<br />
der eingestellten Nach-<br />
Vollautomatik:<br />
ON<br />
laufzeit ohne dass sich der<br />
OFF<br />
Benutzer im Ansprechbereich<br />
1 2 3 4 5 6<br />
befinden muss und Manuell: schaltet<br />
danach automatisch<br />
ON<br />
ab.<br />
Tritt während dieser OFF 30 s der<br />
1 2 3 4 5 6<br />
Benutzer für mindestens 5 s in<br />
den Ansprechbereich geht die<br />
Dusche in den Normalbetrieb<br />
über.<br />
!<br />
30-70 cm<br />
Dusche-Paneel SanTec <strong>OCEAN</strong> <strong>P6</strong> 13
ON<br />
OFF<br />
1 2 3 4 5 6<br />
DE<br />
<strong>OCEAN</strong> <strong>P6</strong><br />
Funktions-Beschreibung<br />
Reinigungsstopp:<br />
DIP Schalter 5<br />
Warmlauf:<br />
ON<br />
OFF<br />
1 2 3 4 5 6<br />
Reinigungsstopp:<br />
ON<br />
OFF<br />
1 2 3 4 5 6<br />
Hygienespülung:<br />
Dient zum Deaktivieren der Armatur beim Reinigen.<br />
Dip Schalter 5 ON = Reinigungsstopp-Funktion aktiviert (voreingestellt).<br />
Dip Schalter 5 OFF = Reinigungsstopp-Funktion deaktiviert.<br />
ON<br />
OFF<br />
1 2 3 4 5 6<br />
Halbautomatik:<br />
ON<br />
OFF<br />
1 2 3 4 5 6<br />
Benutzererkennung<br />
Der Benutzer tritt vor die Dusche<br />
und wird von der Armatur<br />
erkannt. Das Leuchtsymbol<br />
beginnt langsam zu pulsieren.<br />
Reinigungsstopp aktivieren<br />
Heranführen der Hand an den<br />
Infrarot-Sensor (siehe Bild).<br />
Nach 2 s Verweilen beginnt<br />
der senkrechte Strich des<br />
ON/OFF Symbols schnell zu<br />
blinken. Währenddessen mit<br />
der zweiten Hand auf das<br />
ON/OFF Symbol tippen und der<br />
Reinigungsstopp ist aktiviert.<br />
Die Reinigungsstoppzeit dauert<br />
10 Minuten ab Verlassen des<br />
Ansprechbereiches.<br />
Vollautomatik:<br />
Reinigungsstopp ONdeaktivieren<br />
Automatisch wenn OFF<br />
1<br />
10 2<br />
Minuten<br />
3 4 5 6<br />
kein Benutzer erkannt wurde.<br />
Manuell:<br />
Manuelles Deaktivieren gleich<br />
ON<br />
wie beim Aktivieren. Nach Verlassen<br />
des Ansprechbereiches<br />
1 2 3 4 5 6<br />
OFF<br />
geht die Armatur nach einer<br />
Sicherheitszeit von 3 s wieder<br />
in den Normalbetrieb über.<br />
30-70 cm<br />
14 Dusche-Paneel SanTec <strong>OCEAN</strong> <strong>P6</strong>
ON<br />
OFF<br />
1 2 3 4 5 6<br />
Hygienespülung:<br />
DIP Schalter 6<br />
<strong>OCEAN</strong> <strong>P6</strong><br />
Funktions-Beschreibung<br />
Warmlauf:<br />
ON<br />
DE<br />
OFF<br />
1 2 3 4 5 6<br />
Reinigungsstopp:<br />
ON<br />
OFF<br />
1 2 3 4 5 6<br />
Hygienespülung:<br />
ON<br />
OFF<br />
1 2 3 4 5 6<br />
Halbautomatik:<br />
Dient zum Freispülen der Wasserzuleitungen um Stagnationswasser bei<br />
längerer Nichtbenutzung zu vermeiden.<br />
Dip Schalter 6 ON = Hygienespülungs-Funktion aktiviert<br />
Dip Schalter 6 OFF = Hygienespülungs-Funktion deaktiviert (voreingestellt)<br />
ON<br />
OFF<br />
1 2 3 4 5 6<br />
Vollautomatik:<br />
ON<br />
OFF<br />
1 2 3 4 5 6<br />
Zeitintervall<br />
Einstellbar am Intervall-Regler<br />
von 3 - 48 h (siehe Seite 5).<br />
Automatische<br />
Hygienespülung<br />
Wird die Armatur für die eingestellte<br />
Zeit nicht benützt,<br />
löst die Armatur eine automatische<br />
Hygienespülung für<br />
10 s aus.<br />
Manuell:<br />
Sicherheit ON<br />
Befindet sich ein OFF Benutzer 1 2 3 4 5<br />
im 6<br />
Ansprechbereich oder ist der<br />
Reinigungsstopp aktiviert,<br />
löst die Hygienespülung erst<br />
2 min nach deren Deaktivierung<br />
aus. 5 s vor und nach der<br />
Hygienespülung wird diese<br />
durch ein schnelles Blinken der<br />
ON/OFF Symbolik signalisiert.<br />
3 - 48 h 10 s<br />
30-70 cm<br />
!<br />
Ersatzteile siehe S. 31<br />
Dusche-Paneel SanTec <strong>OCEAN</strong> <strong>P6</strong> 15
EN<br />
<strong>OCEAN</strong> <strong>P6</strong><br />
General notes<br />
Congratulations on purchasing your electronic shower panel<br />
SanTec <strong>OCEAN</strong> <strong>P6</strong>.<br />
In order that you will be satisfied with this high-valued armature for<br />
long years, we recommend considering following points for cleaning<br />
and maintenance:<br />
Only use gentle cleaning supplies based on soap.<br />
Don´t use acidic cleaning supplies or disinfectant, which scrape<br />
or rub.<br />
Only clean by using soft sponge or cloth.<br />
Don´t use steam stream equipment.<br />
These instructions are valid for the following products:<br />
SanTec <strong>OCEAN</strong> <strong>P6</strong> shower panel for <strong>12</strong> V external supply:<br />
with head and hand shower white Art.No. 1<strong>12</strong> 160<br />
with head and hand shower black Art.No. 1<strong>12</strong> 177<br />
with head shower white Art.No. 1<strong>12</strong> 191<br />
with head shower black Art.No. 1<strong>12</strong> 207<br />
Scope of supply:<br />
Base plate, glass panel with integrated electronic and thermostat<br />
handle, <strong>OCEAN</strong> rain shower, hand shower (depends on variant),<br />
drill template, protect voltage cable 3 m for connecting to<br />
the power supply, fixing materials and ON/OFF sticker.<br />
Important installation hints:<br />
Provide an in wall box for optional power supply outside of<br />
protection area. Mounting and installation must be performed<br />
by licensed craftsmen to DIN 1988, OVE/ONOERM E8001 as well<br />
as VDE 0100 part 701. When planning and installing sanitary<br />
systems, the relevant local, national and international standards<br />
and regulations must be complied with!<br />
The “general installation conditions” at www.wimtec.com are<br />
valid.<br />
16 Shower panel SanTec <strong>OCEAN</strong> <strong>P6</strong>
<strong>OCEAN</strong> <strong>P6</strong><br />
EN<br />
Technical specifications<br />
Operating voltage: <strong>12</strong> V/50 Hz directly resp. by a<br />
230 V/<strong>12</strong> V power supply (Art.no. 231 <strong>12</strong>0)<br />
Power consumption: 4,8 VA peak<br />
Magnetic valve: 6 V<br />
Active range:<br />
70 cm pre-adjusted, 30 – 70 cm adjustable<br />
Close-active range: 4 - 5 cm<br />
Flushing stop:<br />
10 min pre-adjusted, 10 s - 10 min adjustable<br />
Cleaning stop:<br />
10 min<br />
Hygiene flushing: 48 h (3 – 48 h adjustable) after the last<br />
flushing for 10 s (switchable)<br />
Flow quantity:<br />
max. 30 l/min at 0,3 MPa (3 bar)<br />
Flow pressure:<br />
0,05 – 0,6 MPa (0,5 – 6 bar)<br />
Static pressure: max. 0,8 MPa (8 bar)<br />
Water inlet:<br />
R 1/2” inside thread<br />
Water outlet shower: R 1/2” inside thread<br />
Water temperature: max. 70°C<br />
Dimensions in mm:<br />
200<br />
908<br />
445<br />
524<br />
1013<br />
35<br />
30<br />
* At existing connections<br />
(standard dimension 153 mm) the<br />
installation is also possible.<br />
E-connection **<br />
** Prepare a power connection <strong>12</strong> V / 50 Hz.<br />
Mount the power supply 230 V / <strong>12</strong> V<br />
outside the secured area.<br />
80-110*<br />
260<br />
1590<br />
105-115<br />
30<br />
1404<br />
½"<br />
Active range<br />
300-700<br />
Lower edge rain shower 2000 - 2010<br />
Shower panel SanTec <strong>OCEAN</strong> <strong>P6</strong> 17
ON<br />
OFF<br />
1 2 3 4 5 6<br />
EN<br />
<strong>OCEAN</strong> <strong>P6</strong><br />
ON<br />
OFF<br />
1 2 3 4<br />
Reinigungsstopp:<br />
ON<br />
OFF<br />
1 2 3 4<br />
Adjustment of programs & functions<br />
Hygienespülung:<br />
ON<br />
A<br />
Operating elements:<br />
Adjustable elements:<br />
Halbautomatik:<br />
ON<br />
C<br />
OFF<br />
1 2 3 4<br />
D<br />
OFF<br />
1 2 3 4<br />
Vollautomatik:<br />
ON<br />
OFF<br />
1 2 3 4<br />
B<br />
E<br />
F<br />
H<br />
ON<br />
OFF<br />
1 2 3 4 5 6<br />
Manuell:<br />
ON<br />
OFF<br />
1 2 3 4<br />
G<br />
A Rain shower<br />
B Hand shower with<br />
inside hose reel (only at variant<br />
with hand shower)<br />
C Touch-Tronic-Icon to switch on/off<br />
the rain shower (only at variant<br />
with hand shower)<br />
D Touch-Tronic-Icon to switch on/off<br />
the hand shower (only at variant<br />
with hand shower)<br />
E Touch-Tronic-Icon (ON/OFF<br />
Icon) to switch on/off<br />
the rain shower<br />
I J K<br />
F Thermostat handle for<br />
temperature adjustment with<br />
button to open the 38 °C<br />
security bar.<br />
G Infrared sensor for user<br />
recognition (active range)<br />
H Dip-switch for adjustement of<br />
programs and functions<br />
I Active range controller<br />
J Time controller<br />
K Interval controller<br />
Generally for all controllers it is essential:<br />
Counterclockwiserotation<br />
for reducing.<br />
Clockwise roation<br />
for increasing.<br />
!<br />
18 Shower panel SanTec <strong>OCEAN</strong> <strong>P6</strong>
<strong>OCEAN</strong> <strong>P6</strong><br />
EN<br />
Adjustment of programs & functions<br />
Dip-switch:<br />
Program activation - Dip-switch 1 and 2:<br />
Program Dip 1 Dip 2 Description<br />
Half automatic 1) OFF ON Page 24<br />
Fully automatic ON ON Page 25<br />
Manual OFF OFF Page 26<br />
Function activation - Dip-switch 3 - 6:<br />
Dip-switch Function Description<br />
3 Follow-up time ON = 5 s / OFF 1) = 2 s<br />
4 Warmup 1) Page 27<br />
5 Cleaning stop 1) Page 28<br />
6 Hygiene flushing Page 29<br />
1)<br />
Programs or functions are pre-adjusted fatory-made.<br />
Adjustable controller:<br />
I.<br />
Active range controller<br />
for user recognition<br />
Active range 70 cm<br />
pre-adjusted<br />
(30 - 70 cm adjustable).<br />
Delimits de active range of<br />
the inrared sensor from<br />
30 - 70 cm.<br />
Automatic active range adjustment<br />
within the maximum<br />
active range.<br />
J.<br />
Time controller<br />
for security flushing stop<br />
10 min pre-adjusted<br />
(10 s bis 10 min adjustable).<br />
After elapsing of adjusted<br />
maximum flushing time the<br />
shower control stops automatically.<br />
To save water at<br />
an unintended permanent<br />
activation.<br />
K.<br />
Interval controller<br />
for hygiene flushing<br />
48 h pre-adjusted<br />
(3 - 48 h adjustable).<br />
If the shower control is not<br />
used for the adjusted time the<br />
armature releases a flushing<br />
to rinse the pipes of stagnancy<br />
water for 10 s by itself.<br />
Shower panel SanTec <strong>OCEAN</strong> <strong>P6</strong> 19
EN<br />
<strong>OCEAN</strong> <strong>P6</strong><br />
Installation<br />
1 2 3<br />
4 5 6<br />
!<br />
ATTENTION!<br />
Following steps must be<br />
done in order as described<br />
necessarily!<br />
1. Screw on protection cover at the top of the shower panel.<br />
2. Move down the base plate, lift carefully and unhook.<br />
3. Stick boring template at the back wall. Consider lower edge<br />
of shower head for mounting in desired height<br />
(standard: 200 - 210 cm).<br />
4. Prepare four mounting holes ø 8 mm and remove the<br />
template then.<br />
5. Mount wall fixing angles and shutt-off valves vertical,<br />
standing upwards.<br />
6. Carry out pre-flushing.<br />
20 Shower panel SanTec <strong>OCEAN</strong> <strong>P6</strong>
<strong>OCEAN</strong> <strong>P6</strong><br />
EN<br />
Installation<br />
7 8<br />
9<br />
10 11<br />
<strong>12</strong><br />
7. Close shutt-off valves and mount reflux preventers with dirt<br />
filter.<br />
8. Mount base plate with enclosed fixing material<br />
(4x lens screws 5,5 x 50 mm) on the wall.<br />
9. Mount shower head with enclosed fixing material<br />
(hexagon screw M8 x 25 mm) at the glass panel.<br />
ATTENTION!<br />
Following steps must be<br />
done in order as described<br />
necessarily!<br />
!<br />
10. Fix the in the base plate pre-mounted connection hose at<br />
the shower head.<br />
11. Fix the shower head cover plate with 2 screws<br />
(lens screws 2,2 x 9,5 mm) from above.<br />
<strong>12</strong>. Hook the glas paneel at the top side of the base plate in<br />
the retral revision hook.<br />
Shower panel SanTec <strong>OCEAN</strong> <strong>P6</strong> 21
EN<br />
<strong>OCEAN</strong> <strong>P6</strong><br />
Installation<br />
13 14 15<br />
!<br />
ATTENTION!<br />
Following steps must be<br />
done in order as described<br />
necessarily!<br />
13. Connect cold and warm water connection hoses.<br />
14. Optional: Connect hand shower (use enclosed sealing).<br />
15. Establish power supply and open shut-off valves.<br />
22 Shower panel SanTec <strong>OCEAN</strong> <strong>P6</strong>
<strong>OCEAN</strong> <strong>P6</strong><br />
EN<br />
Start of operation<br />
16 17<br />
18<br />
16. Make function test: Function and program adjustments see<br />
the following pages.<br />
At function test pay attention that at most of operation<br />
mode (depends on DIP switch) the shower only can be<br />
released if the infrared sensor recognizes a user. Is a user<br />
recognized, the symbol pulsates blue. If the space conditions<br />
don´t allow that someone is inside the active area, so<br />
an object (f.ex. hand) must be hold approx. 10 – 15 cm in<br />
front of the room supervising sensor (below the temperature<br />
adjustment) during the whole function text permanently.<br />
Otherwise it can happen that the shower can not be<br />
activated or it will switch off immediately.<br />
ON/OFF sticker:<br />
19<br />
17. Lift glass panel and hook it in final position in the front<br />
hook.<br />
18. Mount protection cover.<br />
19. Optional: For application areas with permanent changing<br />
users the enclosed “ON/OFF” sticker can be attached at<br />
the light symbol.<br />
Shower panel SanTec <strong>OCEAN</strong> <strong>P6</strong> 23
ON<br />
OFF<br />
1 2 3 4 5 6<br />
ON<br />
EN<br />
<strong>OCEAN</strong> <strong>P6</strong><br />
OFF<br />
1 2 3 4 5 6<br />
Reinigungsstopp:<br />
ON<br />
OFF<br />
1 2 3 4 5 6<br />
Program instruction<br />
Program Half automatic (pre-adjusted):<br />
DIP-switch 1=OFF, 2=ON<br />
Switch ON:<br />
Hygienespülung:<br />
ON<br />
OFF<br />
1 2 3 4 5 6<br />
Halbautomatik:<br />
ON<br />
OFF<br />
1 2 3 4 5 6<br />
Vollautomatik:<br />
ON<br />
User recognition<br />
The user approaches to the<br />
shower and will be recognized<br />
by the control. The light<br />
symbol starts pulsating slowly.<br />
Touch-Tronic-Icon<br />
Tap inside the ON/OFF icon<br />
and the rain shower starts.<br />
OFF<br />
1 2 3 4 5 6<br />
Touch-Tronic-Icon 1)<br />
Manuell:<br />
Tapping the desired water<br />
point (rain shower ON and/or<br />
hand shower) starts it.<br />
OFF<br />
1 2 3 4 5 6<br />
30-70 cm<br />
Switch OFF:<br />
Touch-Tronic-Icon<br />
Tapping inside the ON/OFF<br />
icon stops all active water<br />
points.<br />
Touch-Tronic-Icon 1)<br />
Tapping the desired water<br />
point (rain shower and/or<br />
hand shower) stops it.<br />
Automatic<br />
Shower stops after follow-up<br />
time if the user leaves the<br />
active range or after elapsing of<br />
security flushing time.<br />
1)<br />
Only at variant SanTec <strong>OCEAN</strong> <strong>P6</strong> with rain and hand shower.<br />
24 Shower panel SanTec <strong>OCEAN</strong> <strong>P6</strong>
ON<br />
OFF<br />
1 2 3 4 5 6<br />
ON<br />
<strong>OCEAN</strong> <strong>P6</strong><br />
Program instruction<br />
Programm Fully automatic:<br />
DIP switch 1=ON, 2=ON<br />
Switch ON:<br />
OFF<br />
1 2 3 4 5 6<br />
Hygienespülung:<br />
EN<br />
ON<br />
OFF<br />
1 2 3 4 5 6<br />
Halbautomatik:<br />
ON<br />
OFF<br />
1 2 3 4 5 6<br />
Vollautomatik:<br />
ON<br />
OFF<br />
1 2 3 4 5 6<br />
Manuell:<br />
ON<br />
User recognition<br />
The user approaches to the<br />
shower and will be recognized<br />
by the control. The light<br />
symbol starts pulsating slowly.<br />
Automatic<br />
According to user recognition<br />
the shower starts after 2 s<br />
automatically.<br />
OFF<br />
1 2 3 4 5 6<br />
30-70 cm<br />
Switch OFF:<br />
Touch-Tronic-Icon<br />
Tapping inside the ON/OFF<br />
icon stops all active water<br />
points.<br />
Touch-Tronic-Icon 1)<br />
Tapping the desired water<br />
point (rain shower and/or<br />
hand shower) stops it.<br />
Automatic<br />
Shower stops after follow-up<br />
time if the user leaves the<br />
active range or after elapsing of<br />
security flushing time.<br />
1)<br />
Only at variant SanTec <strong>OCEAN</strong> <strong>P6</strong> with rain and hand shower.<br />
Shower panel SanTec <strong>OCEAN</strong> <strong>P6</strong> 25
ON<br />
OFF<br />
1 2 3 4 5 6<br />
EN<br />
<strong>OCEAN</strong> <strong>P6</strong><br />
ON<br />
OFF<br />
1 2 3 4 5 6<br />
Halbautomatik:<br />
ON<br />
OFF<br />
1 2 3 4 5 6<br />
Program instruction<br />
Vollautomatik:<br />
ON<br />
OFF<br />
1 2 3 4 5 6<br />
Program Manual:<br />
DIP-switch 1=OFF, 2=OFF<br />
Switch ON:<br />
Manuell:<br />
ON<br />
OFF<br />
1 2 3 4 5 6<br />
Touch-Tronic-Taste<br />
Tapping inside the<br />
ON/OFF icon starts the rain<br />
shower.<br />
Touch-Tronic-Icon 1)<br />
Tapping the desired water<br />
point (rain shower and/or<br />
hand shower) starts it.<br />
Switch OFF:<br />
Touch-Tronic-Icon<br />
Tapping inside the ON/OFF<br />
icon stops all active water<br />
points.<br />
Touch-Tronic-Icon 1)<br />
Tapping the desired water<br />
point (rain shower and/or<br />
hand shower) stops it.<br />
Security flushing stop<br />
After elapsing of adjusted<br />
flushing stop time (page 19)<br />
the shower stops automatically.<br />
1)<br />
Only at variant SanTec <strong>OCEAN</strong> <strong>P6</strong> with rain and hand shower.<br />
26 Shower panel SanTec <strong>OCEAN</strong> <strong>P6</strong>
ON<br />
OFF<br />
1 2 3 4 5 6<br />
<strong>OCEAN</strong> <strong>P6</strong><br />
EN<br />
Program instruction<br />
Warmup:<br />
DIP-switch 4<br />
Warmlauf:<br />
ON<br />
OFF<br />
1 2 3 4 5 6<br />
Reinigungsstopp:<br />
Conduces to rinse the warm water pipes, and the user is not<br />
forced to stay in the active area.<br />
Dip-switch 4 ON = Warmup function activated (pre-adjusted).<br />
Dip-switch 4 OFF = Warmup function deactivated.<br />
ON<br />
OFF<br />
1 2 3 4 5 6<br />
It is recommended, Hygienespülung: to<br />
combine ONthe warmup<br />
function not with OFF the fully<br />
1 2 3 4 5 6<br />
automatic program!<br />
Halbautomatik:<br />
!<br />
User recognition<br />
The user approaches to the<br />
shower and will be recognized<br />
by the control. The light symbol<br />
starts pulsating slowly.<br />
Switch on warmup<br />
5 s after user recognition<br />
the user has time by tapping<br />
inside the ON/OFF icon to start<br />
the warmup function without<br />
beeing in the active range.<br />
Thereby the vertical line is<br />
glowing in the symbol and the<br />
external ring is pulsating.<br />
ON<br />
Operation OFF<br />
1 2 3 4 5 6<br />
Water flows for 30 s additionally<br />
pre-adjusted follow-up<br />
Vollautomatik:<br />
ON<br />
time without a user in the<br />
OFF<br />
active range and stops 1 2 3 then 4 5 6<br />
automatically. While Manuell: this 30 s<br />
a user is in the active<br />
ON<br />
range for<br />
min 5 s, the shower OFF changes<br />
1 2 3 4 5 6<br />
into normal mode.<br />
30-70 cm<br />
Shower panel SanTec <strong>OCEAN</strong> <strong>P6</strong> 27
ON<br />
OFF<br />
1 2 3 4 5 6<br />
EN<br />
<strong>OCEAN</strong> <strong>P6</strong><br />
Function instruction<br />
Cleaning stop:<br />
DIP-switch 5<br />
Warmlauf:<br />
ON<br />
OFF<br />
1 2 3 4 5 6<br />
Reinigungsstopp:<br />
ON<br />
OFF<br />
1 2 3 4 5 6<br />
Hygienespülung:<br />
The shower can be deactivated for example for cleaning the shower.<br />
Dip-switch 5 ON = Cleaning stop function activated (pre-adjusted).<br />
Dip-switch 5 OFF = Cleaning stop function deactivated.<br />
ON<br />
OFF<br />
1 2 3 4 5 6<br />
Halbautomatik:<br />
ON<br />
OFF<br />
1 2 3 4 5 6<br />
User recognition<br />
The user approaches to the<br />
shower and will be recognized<br />
by the control. The light symbol<br />
starts pulsating slowly.<br />
Cleaning stop activation<br />
Approaching the hand to the<br />
infrared sensor (see picture).<br />
After 2 s the vertical line of the<br />
ON/OFF icon begins flashing.<br />
At the same time tap with the<br />
second hand inside the ON/<br />
OFF icon and the cleaning stop<br />
is activated.<br />
The cleaning stop time lasts<br />
10 min after leaving the active<br />
area.<br />
Vollautomatik:<br />
Cleaning stop deactivation<br />
ON<br />
If no user is recognized OFF<br />
1 2 3<br />
automatically<br />
after 10 min.<br />
4 5 6<br />
Manuell:<br />
Manual deactivation in the<br />
ON<br />
same manner as activation.<br />
OFF<br />
After leaving the active 1 2 3 area 4 5 6<br />
the control changes into normal<br />
function after a security<br />
time of 3 s.<br />
30-70 cm<br />
28 Shower panel SanTec <strong>OCEAN</strong> <strong>P6</strong>
ON<br />
OFF<br />
1 2 3 4 5 6<br />
Hygiene flushing:<br />
DIP-switch 6<br />
<strong>OCEAN</strong> <strong>P6</strong><br />
Function instruction<br />
Warmlauf:<br />
ON<br />
EN<br />
OFF<br />
1 2 3 4 5 6<br />
Reinigungsstopp:<br />
ON<br />
OFF<br />
1 2 3 4 5 6<br />
Hygienespülung:<br />
ON<br />
OFF<br />
1 2 3 4 5 6<br />
Halbautomatik:<br />
Conduces to a flushing if the shower was not used for longer tim to<br />
rinse the pipes of stagnancy water.<br />
Dip-switch 6 ON = Hygiene flushing activated.<br />
Dip-switch 6 OFF = Hygiene flushing deactivated (pre-adjusted).<br />
ON<br />
OFF<br />
1 2 3 4 5 6<br />
Vollautomatik:<br />
ON<br />
OFF<br />
1 2 3 4 5 6<br />
Time interval<br />
Adjustable at interval controller<br />
from 3 - 48 h (see page 19).<br />
Automatic hygiene flushing<br />
If the shower control is not<br />
used for the adjusted time<br />
the armature releases a<br />
flushing to rinse the pipes of<br />
stagnancy water for 10 s by<br />
itself.<br />
Manuell:<br />
Safety<br />
ON<br />
If there is an user OFFin 1<br />
the 2 3 4<br />
active 5 6<br />
area or the cleaning stop is activated,<br />
the hyghiene flushing<br />
starts after deactivation.<br />
5 s before and after the<br />
hygiene flushing the ON/OFF<br />
icon signalizes it by pulsating<br />
quickly.<br />
3 - 48 h 10 s<br />
30-70 cm<br />
Shower panel SanTec <strong>OCEAN</strong> <strong>P6</strong> 29
EN<br />
<strong>OCEAN</strong> <strong>P6</strong><br />
Spare parts<br />
114 133<br />
114 140<br />
114 157<br />
114 171<br />
114 <strong>12</strong>6<br />
221 3<strong>12</strong><br />
114 164<br />
231 205<br />
114 119<br />
114 102<br />
231 205<br />
113 969<br />
221 3<strong>12</strong><br />
Art.No.:<br />
Description<br />
Art.No.:<br />
Description<br />
114 133<br />
114 140<br />
114 157<br />
114 <strong>12</strong>6<br />
114 119<br />
114 171<br />
114 164<br />
Cover base plate shower head<br />
Shower head cartridge<br />
Cover plate<br />
Hand shower<br />
Hose hand shower<br />
Flexible hose for shower head<br />
Connection hose 1 pc.<br />
221 3<strong>12</strong><br />
231 205<br />
114 102<br />
113 969<br />
231 <strong>12</strong>0<br />
114 232<br />
Magnetic valve adapter<br />
Magnetic valve<br />
Elektronic module<br />
Thermostate<br />
Power supply<br />
Supply cable 4 m<br />
30 Shower panel SanTec <strong>OCEAN</strong> <strong>P6</strong>
<strong>OCEAN</strong> <strong>P6</strong><br />
DE<br />
Ersatzteile<br />
114 133<br />
114 140<br />
114 157<br />
114 171<br />
114 <strong>12</strong>6<br />
221 3<strong>12</strong><br />
114 164<br />
231 205<br />
114 119<br />
114 102<br />
231 205<br />
113 969<br />
221 3<strong>12</strong><br />
Art.Nr.:<br />
Bezeichnung<br />
Art.Nr.:<br />
Bezeichnung<br />
114 133<br />
114 140<br />
114 157<br />
114 <strong>12</strong>6<br />
114 119<br />
114 171<br />
114 164<br />
Abdeckung Grundkörper Duschkopf<br />
Einsatz Duschkopf<br />
Sicherungsdeckel<br />
Handbrause<br />
Handbrause Schlauch<br />
Flex-Schlauch zu Duschkopf<br />
Anschlussschlauch 1 Stk.<br />
221 3<strong>12</strong><br />
231 205<br />
114 102<br />
113 969<br />
231 <strong>12</strong>0<br />
114 232<br />
Magnetventil-Adapter<br />
Magnetventil<br />
Elektronik-Modul<br />
Thermostat<br />
Netzteil<br />
Versorgungskabel 4 m<br />
Dusche-Paneel SanTec <strong>OCEAN</strong> <strong>P6</strong> 31
www.wimtec.com<br />
WIMTEC Elektronische Steuerungs- u. Meßgeräte GmbH<br />
p: A - 3325 Ferschnitz, Freidegg 50, AUSTRIA<br />
t: +43 (0) 7473 5000 f: +43 (0) 7473 5000 - 500<br />
m: verkauf@wimtec.com i: www.wimtec.com<br />
Auflage: 11.10.2010 Art.Nr. 1001354