Bedienungsanleitung T-RAXX TAUCHSÄGE 1400W

Sie wollen auch ein ePaper? Erhöhen Sie die Reichweite Ihrer Titel.
YUMPU macht aus Druck-PDFs automatisch weboptimierte ePaper, die Google liebt.
TM<br />
When working with the guide rail the kickback<br />
stop (6) automatically clicks into place on the<br />
base plate as soon as the base plate is placed<br />
on the guide rail. The kickback stop (6)<br />
counteracts the movement if you try to guide<br />
the plunge saw on the guide rail back or if the<br />
saw kicks back, e.g. due to the saw blade<br />
jamming.<br />
1. Turn the spring-loaded screw of the<br />
kickback stop (6) towards 0 to manually<br />
unlock. Now the saw can be moved forward<br />
and back.<br />
2. Release the spring-loaded screw for the<br />
kickback stop to click into place on the<br />
guide rail again.<br />
After a kickback always check the guide rail for<br />
damages and dispose of a damaged guide rail<br />
to prevent accidents.<br />
Plunge cut with guide rail<br />
1. Hold the plunge saw with both hands at<br />
handles (3) and (15).<br />
2. Switch the plunge saw on and wait until it<br />
runs on full speed.<br />
3. Push the saw slowly down and guide the<br />
saw towards the plunge position.<br />
Note: The cutting width markings (18) at<br />
the side of the protective cover show the<br />
foremost and rearmost cutting points of the<br />
saw blade at maximum cutting depth when<br />
using the guide rail and a 165 mm diameter<br />
saw blade.<br />
90° limit stop for guide rail<br />
(optional)<br />
When using the 90° limit stop precise cuts are<br />
possible.<br />
1. Attach the 90° limit stop from the bottom to<br />
the guide rail and tighten the clamping<br />
screw to fix the 90° limit stop in place.<br />
2. Place the 90° limit stop at the straight side<br />
of the work piece, as shown in the<br />
illustration.<br />
Miter limit stop for guide rail<br />
(optional)<br />
When using the miter limit stop precise miter<br />
cuts with angles and fitting are possible.<br />
You can use the miter limit stop in such way<br />
that either the angle is set from -55° over 0° to<br />
55° by means of the curved angle scale.<br />
Alternatively, the miter angle limit stop can be<br />
installed on the guide rail in such way that the<br />
pre-punched angle settings 0°, 15°, 30° and<br />
45° can be used.<br />
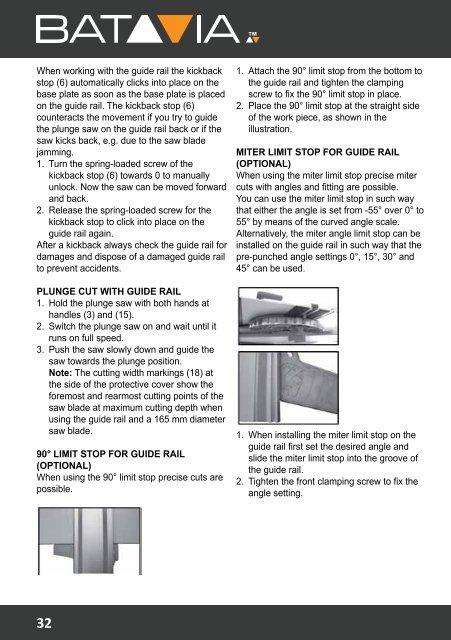
1. When installing the miter limit stop on the<br />
guide rail first set the desired angle and<br />
slide the miter limit stop into the groove of<br />
the guide rail.<br />
2. Tighten the front clamping screw to fix the<br />
angle setting.<br />
32