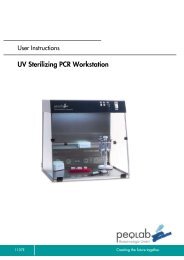
PCR Workstation Pro - PEQLAB Biotechnologie GmbH
PCR Workstation Pro - PEQLAB Biotechnologie GmbH
PCR Workstation Pro - PEQLAB Biotechnologie GmbH

Erfolgreiche ePaper selbst erstellen
Machen Sie aus Ihren PDF Publikationen ein blätterbares Flipbook mit unserer einzigartigen Google optimierten e-Paper Software.
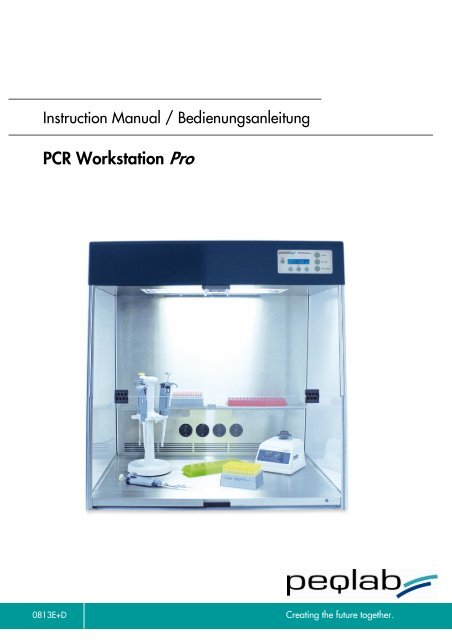
Instruction Manual / Bedienungsanleitung<br />
<strong>PCR</strong> <strong>Workstation</strong> <strong>Pro</strong><br />
0813E+D<br />
Creating the future together.
Instruction Manual <strong>PCR</strong> <strong>Workstation</strong> <strong>Pro</strong><br />
CONTENTS<br />
INTRODUCTION 2<br />
WARRANTY 2<br />
DELIVERY CONTENTS 3<br />
SAFETY INSTRUCTIONS 4<br />
ASSEMBLING THE <strong>PCR</strong> WORKSTATION PRO 6<br />
SPECIFICATIONS 10<br />
<strong>PEQLAB</strong> <strong>PCR</strong> <strong>Workstation</strong> <strong>Pro</strong> 10<br />
Power supply 10<br />
CONNECTIONS 11<br />
AC Power inlet 11<br />
AC power outlets 12<br />
OPERATING THE <strong>PCR</strong> WORKSTATION PRO 13<br />
Use of <strong>PCR</strong> equipment inside the workstation 13<br />
Operating the UV and white lights 13<br />
Timer 13<br />
Turning on UV decontamination 14<br />
White light and UV Air Recirculation 14<br />
Changing the decontamination time 15<br />
Setting up a daily decontamination routine 15<br />
Changing date and time 16<br />
Checking the operating hours of the surface UV tubes 16<br />
Resetting the operating hours of the surface UV tubes 17<br />
Checking the operating hours of the UV Air Recirculator UV tube 17<br />
Resetting the operating hours of the UV Air Recirculator UV tube 18<br />
Overhead white light 19<br />
UV Air Recirculator 17<br />
Measuring the UV tube intensity 20<br />
Bacterial destruction chart 21<br />
MAINTENANCE 22<br />
Care and cleaning 22<br />
Replacing the UV germicidal or white light tubes 22<br />
Replacing the UV tube of the UV Air Recirculator 23<br />
Replacing the fuse 23<br />
Replacing the filter of the UV Air Recirculator 23<br />
TECHNICAL SERVICE AND ORDER INFORMATION 24<br />
DISPOSAL INSTRUCTION 24<br />
Eine deutsche Bedienungsanleitung finden Sie ab S. 23 dieses Manuals.<br />
<strong>PEQLAB</strong>_v0813E 1
Instruction Manual <strong>PCR</strong> <strong>Workstation</strong> <strong>Pro</strong><br />
INTRODUCTION<br />
The <strong>PEQLAB</strong> <strong>PCR</strong> <strong>Workstation</strong> <strong>Pro</strong> is designed as an ideal environment for the manipulation of DNA<br />
and RNA, especially for the setup of <strong>PCR</strong> assays. Contaminations can lead to false or misleading results<br />
which costs time and money. The <strong>PEQLAB</strong> <strong>PCR</strong> <strong>Workstation</strong> <strong>Pro</strong> minimizes the risk of contamination. It<br />
provides a 'separated room', e.g. for the setup of <strong>PCR</strong> reactions.<br />
The high intensity surface UV tubes inactivate DNA as a source of contamination between experiments.<br />
In addition, an UV Air Recirculator is integrated into the workstation system which reduces airborne<br />
contaminants during experiments. UV light is effectively blocked by solid polycarbonate screens to ensure<br />
maximum protection of the user.<br />
The surface of the workstation consists of stainless steel, which is very robust, can easily be cleaned and<br />
has an antimicrobial effect.<br />
The <strong>PEQLAB</strong> <strong>PCR</strong> <strong>Workstation</strong> <strong>Pro</strong> offers a controlled environment for <strong>PCR</strong> and RNA applications that<br />
protects your samples and helps to achieve optimal results.<br />
WARRANTY<br />
<strong>PEQLAB</strong> warrants its products to be free of defects in materials and workmanship for a period of two<br />
years from date of purchase. The foregoing warranty of <strong>PEQLAB</strong> shall be of no force and effect if buyer<br />
has modified or damaged the product. Tubes and filters are warranted for 90 days. Crazing of the<br />
polycarbonate panels may occur within the warranty period and is regarded as normal wear and tear<br />
not covered by the warranty.<br />
All warranties or merchantability and fitness for any purpose and all other warranties, expressed or<br />
implied, except those expressly set forth herein, are deemed waived and excluded.<br />
<strong>PEQLAB</strong>’s duty under the warranty is limited to replacement and/or repair of the defective part at the<br />
option of <strong>PEQLAB</strong>. <strong>PEQLAB</strong> shall not be liable for any expenses or damages incurred by the purchaser<br />
except as expressly set forth herein, and in no event shall <strong>PEQLAB</strong> be liable for any special, incidental<br />
or consequential damages of any kind. This warranty does not supersede any statutory rights that may<br />
be available in certain countries.<br />
For research use only. Not for use in veterinary or human medicine or diagnostic procedures.<br />
<strong>PEQLAB</strong>_v0813E 2
Instruction Manual <strong>PCR</strong> <strong>Workstation</strong> <strong>Pro</strong><br />
DELIVERY CONTENTS<br />
After receipt of the system, please check if the following items are included in the shipment:<br />
1 Base (1x)<br />
2 Rear panel (1x)<br />
3 Side panel (2x)<br />
4 Front panel (1x)<br />
5 Shelf (2x)<br />
6 Top assembly (1x)<br />
7 Ventilation cover (1x)<br />
<strong>PEQLAB</strong>_v0813E 3
Instruction Manual <strong>PCR</strong> <strong>Workstation</strong> <strong>Pro</strong><br />
8 Screw (31x)<br />
9 Screwdriver (1x)<br />
Mains cable (1x)<br />
SAFETY INSTRUCTIONS<br />
The <strong>PCR</strong> <strong>Workstation</strong> <strong>Pro</strong> is designed with function, reliability, and safety in mind.<br />
Before using the <strong>PCR</strong> <strong>Workstation</strong> <strong>Pro</strong> please read this manual entirely and strictly follow the safety instructions!<br />
Caution: The unit includes shortwave UV, which is a powerful source of UV radiation that will cause<br />
damage to unprotected eyes and skin if directly exposed to the UV lamps. Before operating any unit,<br />
ensure that the <strong>PCR</strong> <strong>Workstation</strong> <strong>Pro</strong> is not damaged, and that instructions for use of this equipment are<br />
followed to. A safety shut-off switch automatically turns the UV light off when the front panel is open,<br />
protecting users from UV exposure. The polycarbonate panels are UV-blocking.<br />
Intended use of the <strong>PCR</strong> <strong>Workstation</strong> <strong>Pro</strong>: Working environment for protection of <strong>PCR</strong> instruments and<br />
genetic substances against pollution and contamination.<br />
<strong>PEQLAB</strong>_v0813E 4
Instruction Manual <strong>PCR</strong> <strong>Workstation</strong> <strong>Pro</strong><br />
Safety and protection of the user can not be ensured if the <strong>PCR</strong> <strong>Workstation</strong> <strong>Pro</strong> is used in any manner<br />
that is not specified in this instruction. Special notice must be taken of the following instructions:<br />
Caution of dangerous voltage<br />
Ensure that the voltage requirements of the <strong>PCR</strong> <strong>Workstation</strong> <strong>Pro</strong> exactly match your local AC<br />
power supply.<br />
Only use the original AC cable supplied with the <strong>PCR</strong> <strong>Workstation</strong> <strong>Pro</strong>.<br />
Caution of liquids<br />
Ensure that no liquids can enter the device. Do not place liquids on top of the <strong>PCR</strong> <strong>Workstation</strong><br />
<strong>Pro</strong>.<br />
Caution of dangerous explosive material<br />
Do not use reactive or explosive substances in the <strong>PCR</strong> <strong>Workstation</strong> <strong>Pro</strong>.<br />
Caution of damages<br />
Check for transport damages and completeness of the accessories upon arrival. If any damage<br />
is noticed, contact your distributor or manufacturer immediately. If you detect any damages<br />
of the <strong>PCR</strong> <strong>Workstation</strong> <strong>Pro</strong> or one of its accessories, do not connect the <strong>PCR</strong> <strong>Workstation</strong><br />
<strong>Pro</strong> to the AC wall outlet and do not use the device in any manner!<br />
Caution of optical radiation<br />
Do not switch on the <strong>PCR</strong> <strong>Workstation</strong> <strong>Pro</strong> if not completely assembled. See “ASSEMBLING<br />
THE <strong>PCR</strong> WORKSTATION PRO”, page 5.<br />
Do not look directly into the UV lamps.<br />
<strong>PEQLAB</strong>_v0813E 5
Instruction Manual <strong>PCR</strong> <strong>Workstation</strong> <strong>Pro</strong><br />
ASSEMBLING THE <strong>PCR</strong> WORKSTATION PRO<br />
The <strong>PCR</strong> <strong>Workstation</strong> <strong>Pro</strong> should be assembled by two people, directly at the site of operation. We recommend<br />
to wear safety gloves for the protection of hands.<br />
Step 1<br />
Put the base 1 on an even surface with the<br />
rubber feet facing down and the sensor cable<br />
outlet facing to the front. Lay the back panel<br />
2 onto the base 1 with the power outlets<br />
facing down, and the power input and the<br />
type label facing to the right.<br />
Base 1<br />
Back panel 2<br />
Connect both sensor cables.<br />
Slide the connection assembly into the cavity<br />
of the back panel.<br />
<strong>PEQLAB</strong>_v0813E 6
Instruction Manual <strong>PCR</strong> <strong>Workstation</strong> <strong>Pro</strong><br />
Assemble the back panel 2 onto the base 1.<br />
The connecting link of the base 1 must fit in<br />
the back panel 2. Pay attention not to<br />
squeeze the sensor cable.<br />
Connect both parts by screwing 3 screws 8 into the back side. Use the screw driver 9 to do this. Turn<br />
the parts around 90° on the site of operation and incline both screwed parts to the back part of the back<br />
panel 2. Screw both panels with 2 screws 8 from underneath. Tilt back the panels in starting position<br />
with the back panel facing backwards.<br />
Step 2<br />
Remove the protective foil from the side panels.<br />
Insert the side panels 3 into the guiding rails at<br />
the base 1 and push up against the back<br />
panel 2 within the guiding rails at both sides.<br />
Carefully screw the side panels 3 with 3 screws<br />
each in the base 1 and the back panel 2,<br />
respectively. Use the supplied screws 8 and the<br />
screwdriver 9.<br />
Side panel 3<br />
Side panel 3<br />
Back panel 2<br />
Base 1<br />
<strong>PEQLAB</strong>_v0813E 7
Instruction Manual <strong>PCR</strong> <strong>Workstation</strong> <strong>Pro</strong><br />
Step 3<br />
Put the shelves 5 into the shelf brackets at the<br />
back panel 2.<br />
Remove the protective foil from the front panel.<br />
Put the front panel 4 onto the side panels 3.<br />
Take care that the screw holes of the front panel<br />
match the threaded holes in the side panels 3.<br />
Hold the front panel 4 in place. Screw the front<br />
panel 4 to both side panels 3 using 3<br />
screws 8 each. Use the screwdriver 9.<br />
Side panel 3<br />
Front panel 4<br />
Shelves 5<br />
Side panel 3<br />
Step 4<br />
Turn the assembled parts around 180°.<br />
Top assembly 6<br />
Remove the small UV tube at the back of the top<br />
assembly.<br />
Put the top assembly 6 onto the panels. Take<br />
care not to squeeze the cables protruding from<br />
the back panel. Screw the top assembly to the<br />
back panel 2 at two positions. Use the<br />
screws 8 and screwdriver 9 supplied.<br />
Back panel 2<br />
<strong>PEQLAB</strong>_v0813E 8
Instruction Manual <strong>PCR</strong> <strong>Workstation</strong> <strong>Pro</strong><br />
Connect the sensor cables from the back panel<br />
2 and the top assembly 6. Put the power<br />
plug of the back panel 2 into the power outlet<br />
of the top assembly 6.<br />
Step 5<br />
Insert the UV tube back in place.<br />
Cover the service access of the top assembly 6<br />
with the ventilation cover 7. Screw both parts<br />
together with 6 screws 8. Use the screwdriver<br />
9.<br />
Turn the system around 180° and place it on the<br />
site of operation as needed.<br />
Top assembly 6<br />
Ventilation cover 7<br />
Finally connect the system to the power supply by plugging the power plug from the back panel 2<br />
into the local power outlet.<br />
The system is now ready for use.<br />
<strong>PEQLAB</strong>_v0813E 9
Instruction Manual <strong>PCR</strong> <strong>Workstation</strong> <strong>Pro</strong><br />
SPECIFICATIONS<br />
<strong>PEQLAB</strong> <strong>PCR</strong> <strong>Workstation</strong> <strong>Pro</strong><br />
Light Sources integrated into the top assembly:<br />
• 2 x 25 W 254 nm UV light tubes – for effective surface decontamination<br />
• 1 x 8 W 254 nm UV light tube – for decontamination of air during work in UV Air<br />
Recirculator<br />
• 1 x 15 W white light tube – for a bright work surface<br />
Features:<br />
• Four power outlets<br />
• Two shelves made from stainless steel<br />
• Electronic UV timer<br />
• Working area and back panel made from stainless steel<br />
• Front and side panels made from polycarbonate (Makrolon ® ) that blocks wavelengths below 400nm<br />
Dimensions (W x H x D):<br />
Weight:<br />
Pollution rate: 2<br />
750 x 780 x 620 mm<br />
48 kg<br />
Environmental temperature range: +10 °C to +30 °C<br />
Maximum relative humidity: 70 %<br />
Maximum height above sea level:<br />
Noise level:<br />
2000 m<br />
< 51 dB (A)<br />
Circulation rate fan: 56 m 3 /h<br />
Power supply<br />
EU/UK version:<br />
US version:<br />
Fuse:<br />
220 - 240 V AC, 50/60 Hz, max. 1650 VA<br />
120 V, 60 Hz, max. 900 VA<br />
10 AT, 5 x 20 mm<br />
For indoor use only!<br />
<strong>PEQLAB</strong>_v0813E 10
Instruction Manual <strong>PCR</strong> <strong>Workstation</strong> <strong>Pro</strong><br />
CONNECTIONS<br />
AC Power inlet<br />
AC power switch<br />
AC power inlet<br />
Fuse<br />
Before the first use, ensure that the voltage requirements of the <strong>PCR</strong> <strong>Workstation</strong> <strong>Pro</strong> exactly match your<br />
local AC power supply. Connect the <strong>PCR</strong> <strong>Workstation</strong> <strong>Pro</strong> to the AC power supply only by the AC<br />
power cord delivered with your <strong>PCR</strong> <strong>Workstation</strong> <strong>Pro</strong>. Only connect the <strong>PCR</strong> <strong>Workstation</strong> <strong>Pro</strong> to electric<br />
power systems with an earth conductor. The AC power inlet and the AC power switch are located at the<br />
rear side of the workstation. The AC power switch serves as disconnection of the AC power supply from<br />
the device. The accessibility of the AC power switch must be assured and not hindered.<br />
The electric fuse is placed at the back of the device between the power switch and the AC power inlet.<br />
After pulling off the AC power cord and pushing upwards a safety catch, the fuse can be changed. Use<br />
only a fuse with correct values (see "SPECIFICATIONS", page 8). Indications about the fuse type are<br />
also located at the back of the device.<br />
If service is required, contact your local distributor or the manufacturer (see "TECHNICAL SERVICE AND<br />
ORDER INFORMATION", page 22).<br />
The serial number of the <strong>PCR</strong> <strong>Workstation</strong> <strong>Pro</strong> is located at the rear side of the instrument. The replacement<br />
of single components of the device (except polycarbonate panels, UV tubes, fuse and filter of the<br />
UV Air Recirculator) must not be done by the user but exclusively by authorized specialists using original<br />
replacement parts. Therefore the device must be sent to the manufacturer. Unauthorized work on the<br />
device voids the warranty.<br />
The surface of the device should be decontaminated with a lint free cloth soaked with 70 % ethanol be-<br />
b<br />
fore sending. Please fill in and sign the decontamination certificate and send it to the manufacturer to-t<br />
gether with the device.<br />
For safety reasons the device must be switched off and the mains plug pulled before cleaning is per-<br />
formed!<br />
<strong>PEQLAB</strong>_v0813E 11
Instruction Manual <strong>PCR</strong> <strong>Workstation</strong> <strong>Pro</strong><br />
AC power outlets<br />
4 x AC power outlet<br />
The 4 AC power outlets serve as power supplies for devices used inside the <strong>PCR</strong> chamber.<br />
The sum of the maximum power ratings of devices connected to these power outlets must<br />
not exceed the values specified for the <strong>PCR</strong> <strong>Workstation</strong> <strong>Pro</strong>.<br />
See chapter "OPERATING THE <strong>PCR</strong> WORKSTATION PRO ", page 11, for further information.<br />
<strong>PEQLAB</strong>_v0813E 12
Instruction Manual <strong>PCR</strong> <strong>Workstation</strong> <strong>Pro</strong><br />
OPERATING THE <strong>PCR</strong> WORKSTATION PRO<br />
Use of <strong>PCR</strong> equipment inside the workstation<br />
Shelves are provided for placement of small tools for storage and decontamination.<br />
Power outlets allow use of shakers, rockers, and other equipment for <strong>PCR</strong> experiments inside the <strong>PCR</strong><br />
chamber. The equipment can be decontaminated between experiments. To operate equipment within the<br />
chamber, plug the equipment into the power plug. Specific power plugs are installed as shown in the<br />
illustration "AC power outlets", page 10.<br />
Timing of the UV decontamination can be programmed for time-controlled every day decontamination.<br />
NOTE: When operating equipment plugged into the outlets, combined Amps total is not to exceed<br />
6 Amps.<br />
NOTE: Crazing is a normal process for polycarbonate panels exposed to UV light. Crazing will occur<br />
over a period of time. Reduce crazing by keeping exposure to UV to a minimum. Crazing may occur<br />
within the warranty period and is regarded as normal wear and tear not covered by the warranty.<br />
Polycarbonate panels are available as spare parts and can be replaced.<br />
Operating the UV and white lights<br />
The <strong>PCR</strong> <strong>Workstation</strong> <strong>Pro</strong> provides an automated process for eliminating contamination by utilizing the<br />
decontaminating properties of shortwave 254 nm ultraviolet light. The UV light is typically operated<br />
when no samples are inside the chamber. The chamber is decontaminated and DNA as possible contamination<br />
is inactivated.<br />
Timer<br />
The default setting is 30 minutes adjustable at 5 minutes increments down to a minimum of 5 minutes.<br />
For information on setting the timer please see page 13.<br />
Note: A magnetic sensor is built into the bottom of the front panel. When the front panel is opened, the<br />
ultraviolet light will automatically shut off!<br />
Note: Do not attempt to perform <strong>PCR</strong> procedures with the germicidal lamp on. The germicidal lamp is<br />
used to decontaminate the chamber between experiments.<br />
<strong>PEQLAB</strong>_v0813E 13
Instruction Manual <strong>PCR</strong> <strong>Workstation</strong> <strong>Pro</strong><br />
Turning on UV decontamination<br />
To turn on UV decontamination of the workspace push the > button. It automatically activates<br />
the program to decontaminate the workspace.<br />
The default time for the decontamination process is 30 min.<br />
The display will show the remaining time of the decontamination program.<br />
White light and UV Air Recirculation<br />
• To turn on white light push the > button. A red light will light up to indicate that<br />
the white lights are turned on.<br />
• To turn off the white light push the > button again.<br />
• To turn on the UV Air Recirculator that decontaminates the air during work push >. A red light will light up to indicate that the UV Air Recirculator is turned on.<br />
• To turn off the UV Air Recirculator push the > button again.<br />
<strong>PEQLAB</strong>_v0813E 14
Instruction Manual <strong>PCR</strong> <strong>Workstation</strong> <strong>Pro</strong><br />
Changing the decontamination time<br />
• To run a shorter decontamination press >.<br />
• The screen will show "Decontaminated". Time can be changed from 5 to 30 min in 5 min steps<br />
by pushing the > and > buttons.<br />
• Push > to set the default UV light decontamination time to the indicated value.<br />
Setting up a daily decontamination routine<br />
• To set up a daily start program that starts a decontamination program every day at the same<br />
time push > two times until the display shows “Daily Start”.<br />
• Push > to change the settings.<br />
• By pushing > the program can be turned “ON”.<br />
• To confirm push >.<br />
• The cursor will automatically switch to set up the minutes.<br />
• Change minutes by pushing > and >.<br />
• Push > to confirm.<br />
• The cursor will jump to hours.<br />
• Change the hour to turn on the <strong>PCR</strong> <strong>Workstation</strong> <strong>Pro</strong> by pushing > and >.<br />
• Push > to confirm.<br />
The <strong>PCR</strong> <strong>Workstation</strong> <strong>Pro</strong> will now start a decontamination program every day at the set time (e.g. for<br />
30 minutes at 10:30)<br />
<strong>PEQLAB</strong>_v0813E 15
Instruction Manual <strong>PCR</strong> <strong>Workstation</strong> <strong>Pro</strong><br />
Changing date and time<br />
The <strong>PEQLAB</strong> <strong>PCR</strong> <strong>Workstation</strong> <strong>Pro</strong> has an integrated date and time function.<br />
• To change the date and time push the > button three times until you see the time and<br />
date.<br />
• Push > to change the seconds using the > and > buttons.<br />
• Push > to change the minutes using the > and > buttons.<br />
• Push > to change the hours using the > and > buttons.<br />
• Push > to change the day using the > and > buttons.<br />
• Push > to change the month using the > and > buttons.<br />
• Push > to change the year using the > and > buttons.<br />
• Push > to confirm.<br />
Checking the operating hours of the surface UV tubes<br />
To see the operating hours of the light tubes push the > button 4 times.<br />
We recommend to change the UV tubes after 1000 – 1500 operating hours as the UV intensity decreases<br />
significantly after that time.<br />
<strong>PEQLAB</strong>_v0813E 16
Instruction Manual <strong>PCR</strong> <strong>Workstation</strong> <strong>Pro</strong><br />
Resetting the operating hours of the surface UV tubes<br />
After renewing the surface UV tubes the operating hours should be set back to zero.<br />
To reset the time<br />
• Push > 4 times until you see the operating hours screen.<br />
• Push >. You will see the Reset Surface Screen.<br />
• To reset the operating hours push >.<br />
• To go back without resetting the operating hours push >.<br />
Checking the operating hours of the UV Air Recirculator UV tube<br />
To see the operating hours of the UV Air Recirculator UV tube push the > button 5 times.<br />
We recommend to change the UV tube after 1000 – 1500 operating hours as the UV intensity decreases<br />
significantly after that time.<br />
<strong>PEQLAB</strong>_v0813E 17
Instruction Manual <strong>PCR</strong> <strong>Workstation</strong> <strong>Pro</strong><br />
Resetting the operating hours of the UV Air Recirculator UV tube<br />
After renewing the UV Air Recirculator UV tube the operating hours should be set back to zero.<br />
To reset the time<br />
• Push > 5 times until you see the operating hours screen.<br />
• Push >. You will see the Reset Surface Screen.<br />
• To reset the operating hours push >.<br />
• To go back without resetting the operating hours push >.<br />
[Warning] Exposure to UV light is harmful.<br />
The polycarbonate front panel is UV blocking and will not allow UV radiation to<br />
pass through the panel. The UV lamp will shut off if the front panel is opened. The<br />
<strong>PCR</strong> <strong>Workstation</strong> <strong>Pro</strong> contains a powerful source of UV radiation that will cause<br />
damage to unprotected eyes and skin. Before operating any unit, be sure all personnel<br />
in the area are properly protected. Even though the unit shuts the UV off when the front panel is<br />
open, UV blocking eyewear should be worn as well.<br />
Extended periods of time UV exposure can be used to decontaminate the interior chamber by inactivation<br />
of DNA. Refer to “Measuring the UV tube intensity", page 18, for information on measuring the<br />
intensity of the UV tubes with a UV meter.<br />
<strong>PEQLAB</strong>_v0813E 18
Instruction Manual <strong>PCR</strong> <strong>Workstation</strong> <strong>Pro</strong><br />
Overhead white light<br />
The overhead white light can remain lit at any time throughout experiment procedures or the decontamination<br />
process. The fluorescent white light provides a bright light within the <strong>PCR</strong> <strong>Workstation</strong> <strong>Pro</strong>.<br />
UV Air Recirculator<br />
The <strong>PEQLAB</strong> <strong>PCR</strong> <strong>Workstation</strong> <strong>Pro</strong> includes a built-in UV Air Recirculator for elimination of airborne<br />
microbes during experiments.<br />
NOTE: The UV Air Recirculator can operate while the front panel is open.<br />
The UV Air Recirculator circulates airflow into and out of the chamber. The air is sucked into the UV Air<br />
Recirculator in the top of the chamber, the air outlets are at the bottom of the back panel. The drawing<br />
indicates the location of the air vents.<br />
NOTE: Equipment in front of the air vents will block air flow.<br />
<strong>PEQLAB</strong>_v0813E 19
Instruction Manual <strong>PCR</strong> <strong>Workstation</strong> <strong>Pro</strong><br />
Measuring the UV tube intensity<br />
As UV tubes age, the intensity and germicidal destruction rate decreases. We recommend to change the<br />
UV tubes after 1000 – 1500 hours of operation (please refer to "Checking the operating hours of the<br />
surface tubes/UV Air Recirculator tube", page 14/15). Otherwise it is important to monitor the efficiency<br />
of the tubes to ensure the germicidal requirements are met. The germicidal destruction rate is a<br />
function of the UV intensity at wavelength 254 nm and exposure time. The lower the tube intensity, the<br />
longer the lamps must be on to accomplish the same objective.<br />
An UV Intensity Meter with 254 nm sensor will allow the user to measure the 254 nm emissions from the<br />
tubes. When it is time to measure the UV intensity inside the <strong>PCR</strong> <strong>Workstation</strong> <strong>Pro</strong>, the sensors can be<br />
placed on the floor of the <strong>PCR</strong> <strong>Workstation</strong> <strong>Pro</strong>. Close the front panel and turn on the UV tubes. Please<br />
refer to the manual of your UV radiometer on how to perform the measurement. It is recommended that<br />
the user records an initial value upon receipt and assembly of the <strong>PCR</strong> <strong>Workstation</strong> <strong>Pro</strong>.<br />
To measure the UV intensity from the UV Air Recirculator tube, open the cover lid on the back side of<br />
the <strong>PCR</strong> <strong>Workstation</strong> <strong>Pro</strong> and perform the measurement as described on the manual of the UV radiometer.<br />
Wear protective eyewear and shielding when operating the UV Air Recirculator with the ventilation<br />
cover open. Replace the cover and screws after the measurement is completed.<br />
<strong>PEQLAB</strong>_v0813E 20
Instruction Manual <strong>PCR</strong> <strong>Workstation</strong> <strong>Pro</strong><br />
Bacterial destruction chart<br />
The germicidal destruction rate calculation:<br />
Microwatt seconds/cm 2 = microwatts/cm 2 x seconds of exposure<br />
The bacterial destruction chart below indicates the amount of shortwave (254 nm) UV energy required<br />
for complete destruction of various organisms.<br />
Bacteria<br />
Microwatt<br />
Microwatt<br />
Other organisms<br />
seconds/cm 2<br />
seconds/cm 2<br />
Bacillus anthracis<br />
8700 YEAST<br />
S. enteritidis 7600<br />
Saccharomyces ellipsoideus<br />
13200<br />
B. Megatherium sp. (veg.) 2500 Saccharomyces sp. 17600<br />
B. Megatherium sp.<br />
(spores)<br />
5200 Saccharomyces cerevisiae 13200<br />
B. parathyphosus 6100 Brewer’s yeast 6600<br />
B. subtilis 11000 Baker’s yeast 8800<br />
B. subtilis spores 22000 Common yeast cake 13200<br />
Clostridium tetani 22000<br />
Corynebacterium diptheriae<br />
6500 MOLD SPORES<br />
Eberthella typosa 4100 Penicillium roqueforti 26400<br />
Escherichia coli 6600 Penicillium expansum 22000<br />
Micrococcus cadidus 12300 Penicillium digitatus 88000<br />
Micrococcus sphaeroides 15400 Aspergillus glaucus 88000<br />
Mycobacterium tuberculosis<br />
1000 Aspergillus flavus 99000<br />
Neisseria catarrhalis 8500 Aspergillus niger 330000<br />
Phytomonas tumefaciens 8500 Rhisopus nigricans 220000<br />
<strong>Pro</strong>teus vulgaris 6600 Mucor racemosus A 35200<br />
Pseudomonas aeruginosa 10500 Mucor racemosus B 35200<br />
Pseudomonas fluorescens 6600 Oospora lactis 11000<br />
S. typhimusium 15200<br />
Salmonella<br />
10000 VIRUS<br />
Sarcina lutea 26400 Bacteriophage (E. coli) 6600<br />
Sarratia marcescens 6160 Tobacco mosaic 44000<br />
Dysentery bacilli 4200 Influenza 6600<br />
Shigella paradyseneriae 3200<br />
Spirillum rubrum<br />
6160 PROTOZOA<br />
Staphylococcus albus 5720 Paramecium 200000<br />
Staphylococcus aereus 6600 Nematode eggs 9200<br />
Streptococcus hemolyticus 5500 Chlorella vulgaris (algae) 22000<br />
Streptococcus lactis 8800<br />
Streptococcus viridans 3800<br />
<strong>PEQLAB</strong>_v0813E 21
Instruction Manual <strong>PCR</strong> <strong>Workstation</strong> <strong>Pro</strong><br />
MAINTENANCE<br />
NOTE: Polycarbonate is aging in UV light, therefore crazing is considered as a normal process. Crazing<br />
will occur with time. Reduce crazing by keeping exposure to UV to a minimum. Crazing may occur<br />
within the warranty period and is regarded as normal wear and not covered by the warranty. Polycarbonate<br />
panels can be replaced.<br />
Care and cleaning<br />
The front and side panels are made of polycarbonate and are subject to scuffing and scratches if improperly<br />
cleaned. Therefore it is strongly recommended to use a soft cloth (preferentially microfiber)<br />
for cleaning.<br />
• Wipe excess water from inside the unit and outside the unit with an absorbent soft cloth or sponge.<br />
• Use mild detergent and water with a soft cloth or sponge to clean the exterior and interior of the<br />
unit.<br />
• Clean the front and side panels with a mild detergent only.<br />
• Do not use abrasive pads or cleansers.<br />
• A plastic cleaner solution is recommended to clean the front panel and is available from local plastic<br />
supply distributors.<br />
Never use organic based compounds like acetone or ammonia containing cleaners for polycarbonate<br />
panels!<br />
Due to the specific qualities of polycarbonate panels made of Makrolon ® 70 % ethanol can be used<br />
for cleaning.<br />
Warning: Unplug the unit before cleaning around the UV tube contacts and internal plug outlets.<br />
Replacing the UV germicidal or white light tubes<br />
Turn the unit power off and unplug the unit from the outlet. Lift up<br />
the front panel and locate the tubes. The tube has two prongs on<br />
each end that first fit into a socket, then rotate into place.<br />
Carefully hold the tube on the end and insert the tube into the<br />
socket. Twist the tube 90° until the tube locks into place.<br />
Drawing shows tube location in top assembly. Outer tubes are the<br />
shortwave 254 nm UV and the middle tube is white light.<br />
<strong>PEQLAB</strong>_v0813E 22
Instruction Manual <strong>PCR</strong> <strong>Workstation</strong> <strong>Pro</strong><br />
Replacing the UV tube of the UV Air Recirculator<br />
Locate and remove the six screws on the ventilation cover on<br />
the outer back panel of the workstation.<br />
Pull away the ventilation cover from the workstation.<br />
The tube has two prongs on each end that fit into a socket,<br />
then rotates into place.<br />
Carefully hold the tube on the ends and insert the tube into<br />
the socket. Twist the tube 90° until the tube locks into place.<br />
Replace the cover back into position and reattach the six<br />
screws.<br />
Replacing the fuse<br />
The fuse is located at the back right side of the system. To remove the<br />
fuse, use a flathead screwdriver to open the lid and pull out the fuse.<br />
Insert the new fuse and using the screwdriver, turn the fuse clockwise to<br />
lock.<br />
Replacing the filter of the UV Air Recirculator<br />
The fan filter of the UV Air Recirculator is placed on the inner<br />
top of the <strong>PCR</strong> <strong>Workstation</strong> <strong>Pro</strong> in front of the light tubes (see<br />
picture to the right). To change the filter, take off the plastic<br />
cover with the filter attached to it and replace it with a new filter.<br />
Plunge the plastic cover back into its fixation.<br />
<strong>PEQLAB</strong>_v0813E 23
Instruction Manual <strong>PCR</strong> <strong>Workstation</strong> <strong>Pro</strong><br />
TECHNICAL SERVICE AND ORDER INFORMATION<br />
Should you have any questions about the <strong>PCR</strong> <strong>Workstation</strong> <strong>Pro</strong> or its accessories, please visit<br />
www.peqlab.com to find the respective contact person or send an email to service@peqlab.de.<br />
Please have the unit’s serial number (located at the back side of the instrument) available when calling.<br />
Should an item require return to <strong>PEQLAB</strong> for service, a decontamination form must be completed first by<br />
the user. Items sent without decontamination form will not be accepted.<br />
All returns must be pre-approved by <strong>PEQLAB</strong>!<br />
Order information:<br />
Article Description Order number<br />
<strong>PCR</strong> <strong>Workstation</strong> <strong>Pro</strong> <strong>PCR</strong> <strong>Workstation</strong> <strong>Pro</strong> with UV Air Recirculator, DE & AT 90-UV/<strong>PCR</strong>2<br />
<strong>PCR</strong> <strong>Workstation</strong> <strong>Pro</strong> <strong>PCR</strong> <strong>Workstation</strong> <strong>Pro</strong> with UV Air Recirculator, export version 90-UV/<strong>PCR</strong>2-EU<br />
<strong>PCR</strong> <strong>Workstation</strong> <strong>Pro</strong> <strong>PCR</strong> <strong>Workstation</strong> <strong>Pro</strong> with UV Air Recirculator, UK version 90-UV/<strong>PCR</strong>2-UK<br />
<strong>PCR</strong> <strong>Workstation</strong> <strong>Pro</strong> <strong>PCR</strong> <strong>Workstation</strong> <strong>Pro</strong> with UV Air Recirculator, US version 90-UV/<strong>PCR</strong>2-US<br />
UV tubes 254 nm UV tubes for <strong>PCR</strong> <strong>Workstation</strong> <strong>Pro</strong>, 2 tubes 90-UV/<strong>PCR</strong>-TUV<br />
UV tube 254 nm UV tube for UV Air Recirculator, 1 tube 90-UV/<strong>PCR</strong>-TAR<br />
White light tube White light tube for <strong>PCR</strong> <strong>Workstation</strong> <strong>Pro</strong>, 1 tube 90-UV/<strong>PCR</strong>-TWL<br />
DISPOSAL INSTRUCTION<br />
This product is subject to the WEEE disposal regulations and cannot be disposed of with<br />
regular waste.<br />
Please contact <strong>PEQLAB</strong> <strong>Biotechnologie</strong> <strong>GmbH</strong> or your local distributor for disposal of<br />
the <strong>PCR</strong> <strong>Workstation</strong> <strong>Pro</strong>. Old electronic equipment is not useless waste.<br />
Environmentally friendly disposal can help to retrieve valuable resources. Thereby you<br />
contribute to the protection of the environment and human health.<br />
<strong>PEQLAB</strong>_v0813E 24
Bedienungsanleitung <strong>PCR</strong> <strong>Workstation</strong> <strong>Pro</strong><br />
INHALT<br />
EINLEITUNG 26<br />
GARANTIE 26<br />
LIEFERUMFANG 27<br />
SICHERHEITSHINWEISE 28<br />
AUFBAU DER <strong>PCR</strong> WORKSTATION PRO 30<br />
SPEZIFIKATIONEN 34<br />
<strong>PEQLAB</strong> <strong>PCR</strong> <strong>Workstation</strong> <strong>Pro</strong> 34<br />
Stromversorgung 34<br />
ANSCHLÜSSE 35<br />
AC Netzversorgung 35<br />
AC Steckdosen 36<br />
BEDIENUNG DER <strong>PCR</strong> WORKSTATION PRO 37<br />
Verwendung von <strong>PCR</strong> Zubehör innerhalb der <strong>Workstation</strong> 37<br />
Bedienung des UV- und Weißlichts 37<br />
Timer 37<br />
Einschalten der UV-Dekontamination 38<br />
Weißlicht und UV-Luft-Rezirkulator 38<br />
Einstellen der Dekontaminationszeit 39<br />
<strong>Pro</strong>grammieren einer täglichen Dekontaminationsroutine 39<br />
Einstellen von Datum und Uhrzeit 40<br />
Überprüfung der Betriebsstunden der UV-Röhren im Innenraum 40<br />
Zurücksetzen des Betriebsstundenzählers der UV-Röhren im Innenraum 41<br />
Überprüfung der Betriebsstunden der UV-Röhre im UV-Luft-Rezirkulator 41<br />
Zurücksetzen des Betriebsstundenzählers der UV-Röhre im UV-Luft-Rezirkulator 42<br />
Oberflächenlicht 43<br />
UV-Luft-Rezirkulator 43<br />
Messen der UV-Intensität 44<br />
Benötigte Bestrahlungsraten zur Zerstörung von Bakterien 45<br />
WARTUNG 46<br />
Pflege und Reinigung 46<br />
Austausch der UV- oder Weißlichtröhren im Geräteinneren 46<br />
Austausch der UV-Röhre im UV-Luft-Rezirkulator 47<br />
Austausch der Sicherung 47<br />
Ersatz des Filters im UV-Luft-Rezirkulator 47<br />
TECHNISCHER SERVICE UND BESTELLINFORMATIONEN 48<br />
ENTSORGUNGSHINWEISE 48<br />
<strong>PEQLAB</strong>_v0813D 25
Bedienungsanleitung <strong>PCR</strong> <strong>Workstation</strong> <strong>Pro</strong><br />
EINLEITUNG<br />
Die <strong>PCR</strong> <strong>Workstation</strong> <strong>Pro</strong> von <strong>PEQLAB</strong> wurde als ideale Arbeitsumgebung für Experimente mit DNA und<br />
RNA entwickelt, insbesondere zur Vorbereitung von <strong>PCR</strong> Experimenten. Kontaminationen können hier<br />
zu falschen oder irreführenden Ergebnissen führen, was erheblichen Zeitaufwand und Kosten verursacht.<br />
Die <strong>PCR</strong> <strong>Workstation</strong> <strong>Pro</strong> von <strong>PEQLAB</strong> minimiert dieses Kontaminationsrisiko erheblich. Sie stellt<br />
gewissermaßen einen abgetrennten Raum dar, der optimal für die Präparation von <strong>PCR</strong>-Reaktionen<br />
genutzt werden kann.<br />
Die hochintensiven UV-Röhren oberhalb der Arbeitsfläche inaktivieren DNA als mögliche Kontaminationsquelle<br />
zwischen den Experimenten. Zusätzlich ist ein UV-Luft-Rezirkulator in der <strong>Workstation</strong> integriert,<br />
der durch Luft übertragene Kontaminationen während der Arbeiten an der <strong>Workstation</strong> reduziert.<br />
Das Austreten von UV-Licht wird durch stabile Scheiben aus Polycarbonat effektiv verhindert, um eine<br />
maximale Sicherheit für den Anwender zu gewährleisten.<br />
Die Oberfläche der <strong>Workstation</strong> besteht aus rostfreiem Edelstahl, der sehr robust ist, einfach gereinigt<br />
werden kann und zugleich antimikrobielle Eigenschaften aufweist.<br />
Die <strong>PCR</strong> <strong>Workstation</strong> <strong>Pro</strong> von <strong>PEQLAB</strong> bietet eine kontrollierbare Umgebung für <strong>PCR</strong> und RNA Applikationen,<br />
die Ihre <strong>Pro</strong>ben schützt und somit optimale Ergebnisse ermöglicht.<br />
GARANTIE<br />
Auf jede <strong>PCR</strong> <strong>Workstation</strong> <strong>Pro</strong> gewährt <strong>PEQLAB</strong> 24 Monate Garantie, sofern das System ausschließlich<br />
der Bedienungsanleitung entsprechend verwendet wurde und keine anderslautende Vereinbarung besteht.<br />
Die Garantiezeit für Röhren und Filter beträgt 90 Tage. Rissbildung in Polycarbonat kann während<br />
der Garantiezeit auftreten, unterliegt dem normalen Verschleiß und ist somit nicht von der Garantie<br />
abgedeckt.<br />
Jegliche Garantieansprüche, Marktgängigkeit oder Eignung des <strong>Pro</strong>duktes für einen bestimmten Zweck,<br />
sowie alle anderen ausdrücklichen oder stillschweigenden Garantien, ausgenommen der hier genannten,<br />
sollen somit als aufgehoben erachtet und ausgeschlossen werden.<br />
Die <strong>PEQLAB</strong> <strong>GmbH</strong> verpflichtet sich zur Reparatur oder dem Ersatz des Gerätes bzw. der Rückerstattung<br />
des Kaufpreises nach ihren Bedingungen. Ansprüche auf Ersatz oder Reparatur, die aus einer fehlerhaften<br />
Verwendung oder allgemeinem Verschleiß entstanden sind, werden nicht erfüllt. <strong>PEQLAB</strong> haftet<br />
nicht für Folgeschäden, die aus der Verwendung des Systems entstanden sind. Diese Garantieerklärung<br />
ersetzt keine gesetzlichen Regelungen, die unter Umständen in anderen Ländern gültig sind.<br />
Nur für Forschungszwecke. Nicht geeignet zum Einsatz in Tier- oder Humanmedizin oder für diagnostische<br />
Zwecke.<br />
<strong>PEQLAB</strong>_v0813D 26
Bedienungsanleitung <strong>PCR</strong> <strong>Workstation</strong> <strong>Pro</strong><br />
LIEFERUMFANG<br />
Bitte kontrollieren Sie, ob sämtliche Teile der <strong>Workstation</strong> bei Lieferung vorhanden sind:<br />
1 Boden (1x)<br />
2 Rückwand (1x)<br />
3 Seitenscheibe (2x)<br />
4 Frontscheibe (1x)<br />
5 Regalelement (2x)<br />
6 Haube (1x)<br />
<strong>PEQLAB</strong>_v0813D 27
Bedienungsanleitung <strong>PCR</strong> <strong>Workstation</strong> <strong>Pro</strong><br />
7 Lüfterabdeckung (1x)<br />
8 Schraube (31x)<br />
9 Schraubendreher (1x)<br />
Netzzuleitung (1x)<br />
SICHERHEITSHINWEISE<br />
Die <strong>PCR</strong> <strong>Workstation</strong> <strong>Pro</strong> wurde im Hinblick auf Funktion, Verlässlichkeit und Sicherheit entwickelt.<br />
Vor Inbetriebnahme der <strong>PCR</strong> <strong>Workstation</strong> <strong>Pro</strong> sollten Sie diese Bedienungsanleitung sorgfältig lesen und<br />
die Sicherheitshinweise unbedingt befolgen!<br />
ACHTUNG: Das in diesem System verwendete kurzwellige UV-Licht kann erhebliche Verletzungen auf<br />
ungeschützter Haut oder den Augen hervorrufen, wenn ein direkter Kontakt mit UV-Strahlung erfolgt.<br />
Bevor Sie mit dem Gerät arbeiten, stellen Sie sicher, dass die <strong>PCR</strong> <strong>Workstation</strong> <strong>Pro</strong> nicht beschädigt ist<br />
und alle Hinweise zur Anwendung befolgt werden. Zum Schutz des Anwenders vor UV-Strahlung schaltet<br />
ein integrierter Sicherheitsmechanismus das UV-Licht sofort ab, sobald die Frontscheibe geöffnet<br />
wird. Die verwendeten Polycarbonat-Scheiben aus Makrolon ® sind undurchlässig für UV-Strahlen.<br />
Vorgesehener Einsatzbereich für die <strong>PCR</strong> <strong>Workstation</strong> <strong>Pro</strong>: Arbeitsumgebung zum Schutz von <strong>PCR</strong>-<br />
Arbeitsmitteln und genetischen Materials gegen Verschmutzung und Kontamination.<br />
<strong>PEQLAB</strong>_v0813D 28
Bedienungsanleitung <strong>PCR</strong> <strong>Workstation</strong> <strong>Pro</strong><br />
Die Sicherheit und der Schutz des Anwenders können nicht sichergestellt werden, wenn das Gerät anders<br />
als in der Bedienungsanleitung erläutert verwendet wird. Folgende Hinweise müssen besonders zur<br />
Kenntnis genommen werden:<br />
Warnung vor gefährlicher Spannung<br />
Stellen Sie sicher, dass die Spannung der lokalen Stromversorgung zu den Spezifikationen der<br />
<strong>PCR</strong> <strong>Workstation</strong> <strong>Pro</strong> passt.<br />
Verwenden Sie nur das original mitgelieferte Stromkabel mit der <strong>PCR</strong> <strong>Workstation</strong> <strong>Pro</strong>.<br />
Vorsicht vor Flüssigkeiten<br />
Stellen Sie sicher, dass keine Flüssigkeiten in das Gerät gelangen können. Platzieren Sie keine<br />
Flüssigkeiten auf dem Deckel der <strong>PCR</strong> <strong>Workstation</strong> <strong>Pro</strong>.<br />
Vorsicht vor gefährlichen explosiven Stoffen<br />
Verwenden Sie keine reaktiven oder explosiven Stoffe innerhalb der <strong>PCR</strong> <strong>Workstation</strong> <strong>Pro</strong>.<br />
Vorsicht vor Beschädigungen<br />
Überprüfen Sie das Gerät bei der Ankunft auf Transportschäden und vollständige Lieferung<br />
aller Zubehörteile. Sollten Beschädigungen erkennbar sein, kontaktieren Sie umgehend den<br />
Lieferanten oder Hersteller. Falls Sie Beschädigungen an der <strong>PCR</strong> <strong>Workstation</strong> <strong>Pro</strong> oder deren<br />
Zubehör entdecken, darf das Gerät nicht mit der Stromversorgung verbunden oder in irgendeiner<br />
Weise genutzt werden!<br />
Vorsicht vor optischer Strahlung<br />
Schalten Sie die <strong>PCR</strong> <strong>Workstation</strong> <strong>Pro</strong> nicht ein, wenn sie nicht komplett aufgebaut wurde,<br />
siehe auch "AUFBAU DER <strong>PCR</strong> WORKSTATION PRO", S.27.<br />
Schauen Sie nicht direkt in die UV-Lampen.<br />
<strong>PEQLAB</strong>_v0813D 29
Bedienungsanleitung <strong>PCR</strong> <strong>Workstation</strong> <strong>Pro</strong><br />
AUFBAU DER <strong>PCR</strong> WORKSTATION PRO<br />
Wir empfehlen, die Montage der <strong>PCR</strong> <strong>Workstation</strong> <strong>Pro</strong> direkt am Einsatzort durch zwei Personen durchzuführen<br />
und Sicherheitshandschuhe zum Schutz der Hände zu tragen.<br />
Schritt 1<br />
Legen Sie den Boden 1 mit den Gummifüßen<br />
nach unten und der Sensorkabeldose nach<br />
vorne auf eine ebene Fläche. Legen Sie die<br />
Rückwand 2 mit den Steckdosen nach unten<br />
und dem Netzeingang und Typenschild nach<br />
rechts auf den Boden 1.<br />
Boden 1<br />
Rückwand 2<br />
Verbinden Sie die beiden Sensorkabel<br />
miteinander.<br />
Schieben Sie die Steckerverbindung in den<br />
Hohlraum der Rückwand.<br />
<strong>PEQLAB</strong>_v0813D 30
Bedienungsanleitung <strong>PCR</strong> <strong>Workstation</strong> <strong>Pro</strong><br />
Stellen Sie die Rückwand 2 auf den Boden 1.<br />
Die hintere Lasche des Bodens 1 muss dabei in<br />
die Rückwand 2 tauchen. Achten Sie dabei<br />
darauf, dass das Sensorkabel nicht<br />
eingeklemmt wird.<br />
Verschrauben Sie die beiden Teile von hinten mit drei Schrauben 8. Verwenden Sie hierzu den<br />
Schraubendreher 9. Drehen Sie die Teile auf der Arbeitsfläche um 90° und kippen Sie die beiden verschraubten<br />
Teile auf die hintere Fläche der Rückwand 2. Verschrauben Sie die beiden Teile zusätzlich<br />
von der Bodenseite aus mit zwei Schrauben 8. Kippen Sie die nun fertig verschraubten Teile wieder<br />
zurück und drehen Sie sie mit der Rückwand nach hinten.<br />
Schritt 2<br />
Entfernen Sie die Schutzfolien von den<br />
Seitenscheiben.<br />
Setzen Sie die beiden Seitenscheiben 3 in die<br />
Führungen links und rechts am Boden 1 und<br />
schieben Sie sie bis zum Anschlag in die Führungen<br />
links und rechts in der Rückwand 2.<br />
Verschrauben Sie vorsichtig die Seitenscheiben<br />
3 jeweils drei Mal mit dem Boden 1 und der<br />
Rückwand 2. Benutzen Sie auch hier die<br />
Schrauben 8 und den Schraubendreher 9.<br />
Seitenscheibe 3<br />
Rückwand 2<br />
Seitenscheibe 3<br />
Boden 1<br />
<strong>PEQLAB</strong>_v0813D 31
Bedienungsanleitung <strong>PCR</strong> <strong>Workstation</strong> <strong>Pro</strong><br />
Schritt 3<br />
Stecken Sie die Regalelemente 5 in die Halterungen<br />
an der Rückwand 2.<br />
Seitenscheibe 3<br />
Entfernen Sie die Schutzfolien von der Frontscheibe.<br />
Setzen Sie die Frontscheibe 4 auf die<br />
Seitenscheiben 3 auf. Achten Sie dabei<br />
darauf, dass die seitlichen Bohrungen im<br />
Frontscheibenrahmen mit den Gewindebohrungen<br />
in den Seitenscheiben 3 fluchten.<br />
Halten Sie die Frontscheibe 4 in dieser<br />
Position. Verschrauben Sie die Frontscheibe 4<br />
mit den Seitenscheiben 3 mittels der<br />
Schrauben 8 jeweils drei Mal. Verwenden Sie<br />
hierzu den Schraubendreher 9.<br />
Frontscheibe 4<br />
Regalelemente<br />
5<br />
Seitenscheibe 3<br />
Schritt 4<br />
Drehen Sie die soweit verschraubten Teile um<br />
180°.<br />
Haube 6<br />
Entfernen Sie die kleine UV-Röhre an der<br />
Rückseite der Haube 6.<br />
Setzen Sie die Haube 6 auf. Achten Sie dabei<br />
darauf die Kabel, die aus der Rückwand ragen,<br />
nicht einzuklemmen. Verschrauben Sie die<br />
Haube zwei Mal mit der Rückwand 2. Verwenden<br />
Sie hierzu die Schrauben 8 und den<br />
Schraubendreher 9.<br />
Rückwand 2<br />
<strong>PEQLAB</strong>_v0813D 32
Bedienungsanleitung <strong>PCR</strong> <strong>Workstation</strong> <strong>Pro</strong><br />
Verbinden Sie die Sensorleitung aus der<br />
Rückwand 2 und der Haube 6 miteinander.<br />
Stecken Sie den Netzstecker aus der Rückwand<br />
2 in die Netzdose in der Haube 6.<br />
Schritt 5<br />
Setzen Sie die UV-Röhre wieder ein.<br />
Verschließen Sie die Serviceöffnung in der<br />
Haube 6 mit der Lüfterabdeckung 7. Verschrauben<br />
Sie die beiden Teile mit sechs<br />
Schrauben 8. Verwenden Sie hierzu den<br />
Schraubendreher 9.<br />
Drehen Sie das Gerät um 180° und<br />
positionieren Sie es wie gewünscht auf der<br />
Arbeitsfläche.<br />
Haube 6<br />
Lüfterabdeckung 7<br />
Abschließend verbinden Sie den Netzanschluss an der Rückwand 2 des Gerätes mittels der Netzzuleitung<br />
mit dem Stromnetz.<br />
Das Gerät ist nun betriebsbereit.<br />
<strong>PEQLAB</strong>_v0813D 33
Bedienungsanleitung <strong>PCR</strong> <strong>Workstation</strong> <strong>Pro</strong><br />
SPEZIFIKATIONEN<br />
<strong>PEQLAB</strong> <strong>PCR</strong> <strong>Workstation</strong> <strong>Pro</strong><br />
Lichtquellen integriert in der Haube:<br />
• 2 x 25 W 254 nm UV-Röhren – zur effektiven Oberflächendekontamination<br />
• 1 x 8 W 254 nm UV-Röhre – zur Dekontamination der Luft im UV-Luft-Rezirkulator<br />
während der Arbeit<br />
• 1 x 15 W Weißlichtröhre – zur Beleuchtung der Arbeitsfläche<br />
Ausstattung:<br />
• Vier Steckdosen<br />
• Zwei Regalelemente aus Edelstahl<br />
• Elektronischer Timer für UV-Oberflächenlicht<br />
• Arbeitsfläche und Rückwand aus rostfreiem Edelstahl<br />
• Front- und Seitenscheiben aus Polycarbonat (Makrolon ® ), undurchlässig gegen Wellenlängen unterhalb<br />
400 nm.<br />
Maße (B x H x T):<br />
Gewicht:<br />
Verschmutzungsrate: 2<br />
750 x 780 x 620 mm<br />
48 kg<br />
Umgebungstemperatur: +10 °C bis +30 °C<br />
Maximale relative Luftfeuchtigkeit: 70 %<br />
Maximale Höhe über NN:<br />
Geräuschlevel:<br />
2000 m<br />
< 51 dB (A)<br />
Umwälzraten Lüfter: 56 m 3 /h<br />
Stromversorgung<br />
EU/UK Version:<br />
US Version:<br />
Sicherung:<br />
220 - 240 V AC, 50/60 Hz, max. 1650 VA<br />
120 V, 60 Hz, max. 900 VA<br />
10 AT, 5 x 20 mm<br />
Nur für den Einsatz im Innenbereich!<br />
<strong>PEQLAB</strong>_v0813D 34
Bedienungsanleitung <strong>PCR</strong> <strong>Workstation</strong> <strong>Pro</strong><br />
ANSCHLÜSSE<br />
AC Netzversorgung<br />
AC Hauptnetzschalter<br />
AC Stromanschlussbuchse<br />
Sicherung<br />
Stellen Sie sicher, dass die Spannung der lokalen Stromversorgung zu den Spezifikationen der <strong>PCR</strong><br />
<strong>Workstation</strong> <strong>Pro</strong> passt, bevor Sie das Gerät zum ersten Mal in Betrieb nehmen. Verwenden Sie ausschließlich<br />
das mitgelieferte Stromkabel zum Anschluss an die Stromversorgung. Schließen Sie die die<br />
<strong>PCR</strong> <strong>Workstation</strong> <strong>Pro</strong> nur an Stromanschlüssen mit Schutzleiter an. Die AC Stromanschlussbuchse und<br />
der AC Hauptnetzschalter sind an der Geräterückseite angebracht. Um das Gerät von der Stromversorgung<br />
zu trennen, verwenden Sie den Hauptnetzschalter. Ein freier Zugang zum Hauptschalter muss immer<br />
sichergestellt sein und darf nicht blockiert werden.<br />
Die elektrische Sicherung ist ebenfalls an der Geräterückseite, zwischen Hauptnetzschalter und Stromanschlussbuchse,<br />
angebracht. Um die Sicherung wechseln zu können, ziehen Sie bitte das Stromkabel ab<br />
und schieben den Sicherheitsbügel nach oben. Verwenden Sie nur eine entsprechende Sicherung mit<br />
den korrekten Werten (siehe "SPEZIFIKATIONEN", S.30). Angaben zu den Sicherungswerten finden Sie<br />
außerdem an der Geräterückseite.<br />
Sollte ein Service für das Gerät notwendig werden, kontaktieren Sie bitte Ihren lokalen Händler oder<br />
den Hersteller (siehe "TECHNISCHER SERVICE UND BESTELLINFORMATIONEN", S.44).<br />
Die Geräte-Seriennummer ist an der Rückseite der <strong>PCR</strong> <strong>Workstation</strong> <strong>Pro</strong> angebracht. Der Austausch<br />
einzelner Bauteile des Gerätes (mit Ausnahme der Polycarbonat-Scheiben, der UV-Röhren, der Sicherung<br />
und des Filters im UV-Luft-Rezirkulator) darf nicht durch den Nutzer durchgeführt werden, sondern<br />
ausschließlich durch geschulte Spezialisten unter Verwendung von Original-Ersatzteilen. Dafür muss das<br />
Gerät zum Hersteller zurückgeschickt werden. Ein unautorisierter Zugriff führt zum Verlust von Garantieansprüchen.<br />
Die Geräteoberflächen müssen vor der Einsendung vom Anwender dekontaminiert werden. Dafür<br />
kann ein fusselfreies Tuch, angefeuchtet mit 70 % Ethanol, verwendet werden. Bitte füllen Sie das<br />
Dekontaminationszertifikat aus und legen es dem Gerät bei der Rücksendung bei.<br />
Aus Sicherheitsgründen muss das Gerät vor der Reinigung ausgeschaltet und von der Stromversorgung<br />
getrennt werden!<br />
<strong>PEQLAB</strong>_v0813D 35
Bedienungsanleitung <strong>PCR</strong> <strong>Workstation</strong> <strong>Pro</strong><br />
AC Steckdosen<br />
4 x AC Steckdosen<br />
Die 4 AC Steckdosen können für Kleingeräte zum Betrieb innerhalb der <strong>PCR</strong> <strong>Workstation</strong> <strong>Pro</strong> genutzt<br />
werden.<br />
Die Gesamtsumme des maximalen Stromverbrauchs aller angeschlossenen Geräte darf<br />
die für die <strong>PCR</strong> <strong>Workstation</strong> <strong>Pro</strong> vorgegebenen Werte nicht überschreiten!<br />
Siehe "BEDIENUNG DER <strong>PCR</strong> WORKSTATION PRO ", S.33, für weitere Informationen.<br />
<strong>PEQLAB</strong>_v0813D 36
Bedienungsanleitung <strong>PCR</strong> <strong>Workstation</strong> <strong>Pro</strong><br />
BEDIENUNG DER <strong>PCR</strong> WORKSTATION PRO<br />
Verwendung von <strong>PCR</strong> Zubehör innerhalb der <strong>Workstation</strong><br />
Kleinere Arbeitsmittel können auf den Ablagefächern zur Dekontamination abgelegt werden.<br />
An den innenliegenden Steckdosen können für <strong>PCR</strong> Experimente benötigte Kleingeräte wie z.B. Schüttler,<br />
Wippen etc. angeschlossen werden. Die Geräte können so zwischen den Experimenten dekontaminiert<br />
werden. Um die Geräte innerhalb der <strong>PCR</strong> <strong>Workstation</strong> <strong>Pro</strong> betreiben zu können, müssen sie mit<br />
den Steckdosen verbunden werden. Es wurden spezielle Steckdosen installiert, siehe Abbildung<br />
"AC Steckdosen", S.32.<br />
Für die UV-Dekontamination kann eine Routine zur täglichen, zeitlich gesteuerten Ausführung programmiert<br />
werden.<br />
HINWEIS: Wenn Geräte an den Steckdosen angeschlossen sind, darf die gesamte Stromstärke 6 Ampere<br />
nicht übersteigen!<br />
HINWEIS: Die Bildung von feinen Haarrissen in Polycarbonat unter UV-Einwirkung ist nach einer<br />
gewissen Zeit normal. Diese Rissbildung kann vermindert werden, indem die UV-Bestrahlung auf ein<br />
Minimum reduziert wird. Haarrisse innerhalb der Garantiezeit werden als normaler Verschleiß<br />
angesehen und unterliegen nicht der Garantie. Die Polycarbonat-Scheiben der <strong>PCR</strong> <strong>Workstation</strong> <strong>Pro</strong> sind<br />
als Ersatzteile erhältlich und können ersetzt werden.<br />
Bedienung des UV- und Weißlichts<br />
Die <strong>PCR</strong> <strong>Workstation</strong> <strong>Pro</strong> bietet einen automatisierten <strong>Pro</strong>zess zur Elimination von Kontaminationen<br />
durch Verwendung der dekontaminierenden Eigenschaften kurzwelliger UV-Strahlung bei 254 nm. Das<br />
UV-Licht wird üblicherweise dann verwendet, wenn sich keine <strong>Pro</strong>ben auf der Arbeitsfläche befinden.<br />
Dadurch wird die Arbeitsfläche dekontaminiert und DNA als mögliche Kontaminationsquelle inaktiviert.<br />
Timer<br />
Die Standardeinstellung beträgt 30 Minuten, einstellbar in 5-Minuten-Schritten bis zu einem Minimum<br />
von 5 Minuten. Hinweise zur Einstellung des Timers finden Sie auf Seite 35.<br />
HINWEIS: In der Frontscheibe ist ein magnetischer Sensor integriert. Sobald die Frontscheibe geöffnet<br />
wird, schaltet das UV-Licht automatisch ab!<br />
HINWEIS: Versuchen Sie nicht, die offenen UV-Röhren während der Arbeit in der <strong>PCR</strong> <strong>Workstation</strong> <strong>Pro</strong><br />
einzuschalten. Diese sind zur Dekontamination der <strong>Workstation</strong> zwischen den Experimenten gedacht.<br />
<strong>PEQLAB</strong>_v0813D 37
Bedienungsanleitung <strong>PCR</strong> <strong>Workstation</strong> <strong>Pro</strong><br />
Einschalten der UV-Dekontamination<br />
Zur Dekontamination der Arbeitsfläche drücken Sie die > Taste. Dadurch wird das Dekontaminationsprogramm<br />
automatisch aktiviert.<br />
Die Standardeinstellung für den Dekontaminationsprozess beträgt 30 Minuten.<br />
Im Display wird die verbleibende Zeit des Dekontaminationsprogramms angezeigt.<br />
Weißlicht und UV-Luft-Rezirkulator<br />
• Um das Weißlicht einzuschalten drücken Sie die > Taste. Ein rotes Licht leuchtet<br />
als Hinweis für das angeschaltete Weißlicht auf.<br />
• Zum Ausschalten des Weißlichts drücken Sie die > Taste erneut.<br />
• Um den UV-Luft-Rezirkulator zur Dekontamination der Luft während der Arbeit an der <strong>Workstation</strong><br />
einzuschalten, drücken Sie die > Taste. Ein rotes Licht leuchtet als<br />
Hinweis auf den eingeschalteten UV-Luft-Rezirkulator auf.<br />
• Zum Ausschalten des UV-Luft-Rezirkulators drücken Sie die > Taste erneut.<br />
<strong>PEQLAB</strong>_v0813D 38
Bedienungsanleitung <strong>PCR</strong> <strong>Workstation</strong> <strong>Pro</strong><br />
Einstellen der Dekontaminationszeit<br />
• Um die Dekontaminationszeit zu verkürzen drücken Sie die > Taste.<br />
• Im Display erscheint "Decontaminated". Die Zeit kann zwischen 5 und 30 Minuten in 5-Minuten-<br />
Schritten durch Drücken der > und > Tasten eingestellt werden.<br />
• Durch Drücken der > Taste wird der eingestellte Wert gespeichert.<br />
<strong>Pro</strong>grammieren einer täglichen Dekontaminationsroutine<br />
• Um die tägliche Dekontaminationsroutine zu programmieren, die jeden Tag zur selben Zeit mit<br />
der Dekontamination beginnt, drücken Sie die > Taste zweimal. Im Display erscheint<br />
"Daily Start".<br />
• Drücken Sie > um die Einstellungen zu ändern.<br />
• Durch Drücken der > Taste wird das <strong>Pro</strong>gramm aktiviert.<br />
• Drücken Sie > zur Bestätigung.<br />
• Der Cursor springt automatisch zur Minutenanzeige.<br />
• Stellen Sie die Minuten durch Drücken der > und > Tasten ein.<br />
• Bestätigen Sie mit >.<br />
• Der Cursor wechselt nun zur Stundenanzeige.<br />
• Stellen Sie die Stunde, zu der die <strong>Workstation</strong> täglich angeschaltet werden soll, durch Drücken<br />
der > und > Tasten ein.<br />
• Bestätigen Sie mit >.<br />
Die <strong>PCR</strong> <strong>Workstation</strong> <strong>Pro</strong> beginnt nun täglich zur eingestellten Zeit mit der Dekontaminationsroutine<br />
(z.B. für 30 Minuten um 10:30).<br />
<strong>PEQLAB</strong>_v0813D 39
Bedienungsanleitung <strong>PCR</strong> <strong>Workstation</strong> <strong>Pro</strong><br />
Einstellen von Datum und Uhrzeit<br />
Die <strong>PCR</strong> <strong>Workstation</strong> <strong>Pro</strong> verfügt über eine integrierte Datums- und Zeitfunktion.<br />
• Um die Einstellungen von Datum und Uhrzeit zu ändern, drücken Sie die > Taste 3<br />
Mal, bis Datum und Uhrzeit erscheinen.<br />
• Drücken Sie >, um mit Hilfe der > und > Tasten die Sekunden einzustellen.<br />
• Drücken Sie >, um mit Hilfe der > und > Tasten die Minuten einzustellen.<br />
• Drücken Sie >, um mit Hilfe der > und > Tasten die Stunden einzustellen.<br />
• Drücken Sie >, um mit Hilfe der > und > Tasten den Tag einzustellen.<br />
• Drücken Sie >, um mit Hilfe der > und > Tasten den Monat einzustellen.<br />
• Drücken Sie >, um mit Hilfe der > und > Tasten das Jahr einzustellen.<br />
• Bestätigen Sie Ihre Eingaben mit >.<br />
Überprüfung der Betriebsstunden der UV-Röhren im Innenraum<br />
Um die Betriebsstunden abzulesen, drücken Sie die > Taste 4 Mal.<br />
Wir empfehlen, die UV-Röhren nach ca. 1000 – 1500 Betriebsstunden zu wechseln, da nach dieser Zeit<br />
die UV-Intensität deutlich nachlässt.<br />
<strong>PEQLAB</strong>_v0813D 40
Bedienungsanleitung <strong>PCR</strong> <strong>Workstation</strong> <strong>Pro</strong><br />
Zurücksetzen des Betriebsstundenzählers der UV-Röhren im Innenraum<br />
Nach dem Austausch der UV-Röhren im Innenraum sollte der Betriebsstundenzähler wieder auf Null<br />
zurückgesetzt werden.<br />
Um den Zähler zurück zu setzen<br />
• Drücken Sie > 4 Mal, bis der Betriebsstundenzähler erscheint.<br />
• Drücken Sie die > Taste. Es erscheint der Bildschirm "Reset Surface" zum Zurücksetzen<br />
des Zählers.<br />
• Drücken Sie >, um die Betriebsstunden zurückzusetzen.<br />
• Sie können den Bildschirm ohne Zurücksetzen des Zählers durch Drücken der > Taste verlassen.<br />
Überprüfung der Betriebsstunden der UV-Röhre im UV-Luft-Rezirkulator<br />
Um die Betriebsstunden abzulesen, drücken Sie die > Taste 5 Mal.<br />
Wir empfehlen, die UV-Röhre nach ca. 1000 – 1500 Betriebsstunden zu wechseln, da nach dieser Zeit<br />
die UV-Intensität deutlich nachlässt.<br />
<strong>PEQLAB</strong>_v0813D 41
Bedienungsanleitung <strong>PCR</strong> <strong>Workstation</strong> <strong>Pro</strong><br />
Zurücksetzen des Betriebsstundenzählers der UV-Röhre im UV-Luft-Rezirkulator<br />
Nach dem Austausch der UV-Röhre im UV-Luft-Rezirkulator sollte der Betriebsstundenzähler wieder auf<br />
Null zurückgesetzt werden.<br />
Um den Zähler zurück zu setzen<br />
• Drücken Sie > 5 Mal, bis der Betriebsstundenzähler erscheint.<br />
• Drücken Sie die > Taste. Es erscheint der Bildschirm "Reset Surface" zum Zurücksetzen<br />
des Zählers.<br />
• Drücken Sie >, um die Betriebsstunden zurückzusetzen.<br />
• Sie können den Bildschirm ohne Zurücksetzen des Zählers durch Drücken der > Taste verlassen.<br />
[Warnung] Bestrahlung mit UV-Licht ist schädlich!<br />
Die Frontscheibe aus Polycarbonat ist UV-undurchlässig. Die UV-Lampen schalten<br />
sich sofort ab, wenn die Frontscheibe geöffnet wird. Die <strong>PCR</strong> <strong>Workstation</strong> <strong>Pro</strong> enthält<br />
eine starke Strahlungsquelle für UV-Licht, die ungeschützte Augen und Haut verletzen<br />
könnte. Bevor Sie ein Gerät in Betrieb nehmen, sollte sichergestellt sein, dass<br />
alle in der Nähe anwesenden Personen entsprechend geschützt sind. Auch wenn das Gerät die UV-<br />
Lampen beim Öffnen der Frontscheibe unterbricht, sollte vorsichtshalber ein Augenschutz getragen werden.<br />
Die Bestrahlung des Innenraums mit UV-Licht für eine längere Zeitspanne bewirkt eine Dekontamination<br />
der Arbeitsfläche durch DNA-Inaktivierung. Bitte berücksichtigen Sie auch das Kapitel "Messen der UV-<br />
Intensität", S.40, für weiterführende Informationen zur Messung der UV-Intensität mittels UV-Meter.<br />
<strong>PEQLAB</strong>_v0813D 42
Bedienungsanleitung <strong>PCR</strong> <strong>Workstation</strong> <strong>Pro</strong><br />
Oberflächenlicht<br />
Das Oberflächenlicht kann während der Arbeiten an der <strong>PCR</strong> <strong>Workstation</strong> <strong>Pro</strong>, sowie während der Dekontamination<br />
mit UV-Licht jederzeit angeschaltet bleiben. Die Weißlichtröhre liefert helles Licht zur<br />
ausgezeichneten Ausleuchtung der Arbeitsfläche.<br />
UV-Luft-Rezirkulator<br />
Die <strong>PEQLAB</strong> <strong>PCR</strong> <strong>Workstation</strong> <strong>Pro</strong> enthält einen integrierten UV-Luft-Rezirkulator zur Inaktivierung von<br />
durch die Luft übertragenen Kontaminanten während der Arbeiten an der <strong>PCR</strong> <strong>Workstation</strong> <strong>Pro</strong>.<br />
HINWEIS: Der UV-Luft-Rezirkulator kann bei geöffneter Frontscheibe betrieben werden.<br />
Der UV-Luft-Rezirkulator erzeugt einen Luftstrom in den Innenraum der <strong>PCR</strong> <strong>Workstation</strong> <strong>Pro</strong> hinein und<br />
heraus. Die Luft wird oben im Innenraum angesaugt und an den Luftschlitzen in der Nähe des Bodens<br />
wieder ausgeblasen. Die folgende Zeichnung veranschaulicht die Position der Luftschlitze.<br />
HINWEIS: Geräte direkt vor den Luftschlitzen können den Luftstrom blockieren.<br />
<strong>PEQLAB</strong>_v0813D 43
Bedienungsanleitung <strong>PCR</strong> <strong>Workstation</strong> <strong>Pro</strong><br />
Messen der UV-Intensität<br />
Durch die physikalische Alterung von UV-Röhren nehmen Intensität und keimtötende Eigenschaften mit<br />
der Zeit ab. Wir empfehlen daher den Austausch der UV-Röhren nach 1000 – 1500 Betriebsstunden<br />
(siehe auch "Überprüfung der Betriebsstunden der UV-Röhren/der UV-Röhre im Innenraum/im UV-Luft-<br />
Rezirkulator", S.36/37). Ansonsten sollte die Effizienz der UV-Röhren überprüft werden, um die keimtötenden<br />
Eigenschaften sicherzustellen. Die keimtötende Wirkungsrate berechnet sich aus UV-Intensität bei<br />
254 nm und Bestrahlungszeit. Je geringer die UV-Intensität der Röhren, desto länger müssen die Lampen<br />
brennen, um dieselbe Wirkung zu erzielen.<br />
Die Emission der Röhren bei 254 nm kann mittels einem UV-Meter mit 254 nm-Sensor vom Anwender<br />
überprüft werden. Zur Durchführung kann der Sensor des UV-Meters auf der Arbeitsplatte der <strong>PCR</strong><br />
<strong>Workstation</strong> <strong>Pro</strong> platziert werden. Schließen Sie die Frontscheibe und schalten Sie UV-Beleuchtung an.<br />
Bitte halten Sie sich an die Instruktionen im Manual Ihres UV-Meters für die genaue Durchführung der<br />
Messung. Wir empfehlen einen Ausgangswert bei Installation der <strong>PCR</strong> <strong>Workstation</strong> <strong>Pro</strong> zu ermitteln<br />
und für spätere Vergleichsmessungen zu notieren.<br />
Um die UV-Intensität der UV-Röhre im UV-Luft-Rezirkulator zu messen, kann die Lüfterabdeckung an der<br />
Rückseite der <strong>PCR</strong> <strong>Workstation</strong> <strong>Pro</strong> entfernt und der Sensor des UV-Meters dort platziert werden. Bitte<br />
halten Sie sich an die Instruktionen im Manual Ihres UV-Meters für die genaue Durchführung der Messung.<br />
Tragen Sie unbedingt Schutzbrille und Schutzschild, wenn Sie den UV-Luft-Rezirkulator bei geöffneter<br />
Abdeckung betreiben! Setzen Sie die Abdeckung und Schrauben nach Abschluss der Messung<br />
wieder ein.<br />
<strong>PEQLAB</strong>_v0813D 44
Bedienungsanleitung <strong>PCR</strong> <strong>Workstation</strong> <strong>Pro</strong><br />
Benötigte Bestrahlungsraten zur Zerstörung von Bakterien<br />
Berechnung der keimtötenden Wirkungsrate:<br />
Mikrowatt Sekunden/cm 2 = Mikrowatt/cm 2 x Bestrahlungszeit<br />
Die Tabelle enthält die jeweils benötigte Strahlungsenergie kurzwelligen UV-Lichts (254 nm), die zur<br />
kompletten Zerstörung des jeweiligen Mikroorganismus benötigt wird.<br />
Bakterien<br />
Mikrowatt<br />
Mikrowatt<br />
Andere Organismen<br />
Sekunden/cm 2<br />
Sekunden/cm 2<br />
Bacillus anthracis<br />
8700 Hefe<br />
S. enteritidis 7600<br />
Saccharomyces ellipsoideus<br />
13200<br />
B. Megatherium sp.<br />
(veg.)<br />
2500 Saccharomyces sp. 17600<br />
B. Megatherium sp.<br />
Saccharomyces cerevisiae<br />
5200<br />
(spores)<br />
13200<br />
B. parathyphosus 6100 Brewer’s yeast 6600<br />
B. subtilis 11000 Baker’s yeast 8800<br />
B. subtilis spores 22000 Common yeast cake 13200<br />
Clostridium tetani 22000<br />
Corynebacterium diptheriae<br />
6500 Schimmelpilzsporen<br />
Eberthella typosa 4100 Penicillium roqueforti 26400<br />
Escherichia coli 6600 Penicillium expansum 22000<br />
Micrococcus cadidus 12300 Penicillium digitatus 88000<br />
Micrococcus sphaeroides<br />
15400 Aspergillus glaucus 88000<br />
Mycobacterium tuberculosis<br />
1000 Aspergillus flavus 99000<br />
Neisseria catarrhalis 8500 Aspergillus niger 330000<br />
Phytomonas tumefaciens 8500 Rhisopus nigricans 220000<br />
<strong>Pro</strong>teus vulgaris 6600 Mucor racemosus A 35200<br />
Pseudomonas aeruginosa<br />
10500 Mucor racemosus B 35200<br />
Pseudomonas fluorescens<br />
6600 Oospora lactis 11000<br />
S. typhimusium 15200<br />
Salmonella<br />
10000 Viren<br />
Sarcina lutea 26400 Bacteriophage (E. coli) 6600<br />
Sarratia marcescens 6160 Tobacco mosaic 44000<br />
Dysentery bacilli 4200 Influenza 6600<br />
Shigella paradyseneriae 3200<br />
Spirillum rubrum<br />
6160 <strong>Pro</strong>tozoen<br />
Staphylococcus albus 5720 Paramecium 200000<br />
Staphylococcus aereus 6600 Nematode eggs 9200<br />
Streptococcus hemolyticus<br />
5500 Chlorella vulgaris (algae) 22000<br />
Streptococcus lactis 8800<br />
Streptococcus viridans 3800<br />
<strong>PEQLAB</strong>_v0813D 45
Bedienungsanleitung <strong>PCR</strong> <strong>Workstation</strong> <strong>Pro</strong><br />
WARTUNG<br />
HINWEIS: Die Bildung von feinen Haarrissen in Polycarbonat unter UV-Einwirkung ist nach einer<br />
gewissen Zeit normal. Diese Rissbildung kann vermindert werden, indem die UV-Bestrahlung auf ein<br />
Minimum reduziert wird. Haarrisse innerhalb der Garantiezeit werden als normaler Verschleiß<br />
angesehen und unterliegen nicht der Garantie. Die Polycarbonat-Scheiben der <strong>PCR</strong> <strong>Workstation</strong> <strong>Pro</strong><br />
sind als Ersatzteile erhältlich und können ersetzt werden.<br />
Pflege und Reinigung<br />
Front- und Seitenscheiben bestehen aus Polycarbonat und können bei unsachgemäßer Reinigung zerkratzt<br />
werden. Zur Reinigung wird deshalb nachdrücklich der Gebrauch eines weichen Stofftuchs (bevorzugt<br />
Mikrofaser) empfohlen.<br />
• Nehmen Sie überschüssige Flüssigkeit innerhalb oder außerhalb der <strong>PCR</strong> <strong>Workstation</strong> <strong>Pro</strong> mit einem<br />
weichen, saugfähigen Tuch oder Schwamm umgehend auf.<br />
• Milde Reinigungsmittel und Wasser können zusammen mit einem weichen Tuch oder Schwamm zur<br />
Reinigung der <strong>Workstation</strong> benutzt werden.<br />
• Zur Reinigung der Front- und Seitenscheiben (Polycarbonat!) dürfen nur milde Haushaltsreiniger<br />
verwendet werden.<br />
• Auf keinen Fall dürfen grobe oder abschleifende Putzmittel zur Reinigung verwendet werden.<br />
• Kunststoffreiniger können zur Reinigung der Frontscheibe verwendet werden. Diese sind in lokalen<br />
Fachgeschäften erhältlich.<br />
Verwenden Sie keine organischen Lösungsmittel wie Aceton oder Ammoniak-haltige Reinigungsmittel<br />
zur Reinigung von Polycarbonat-Scheiben.<br />
Aufgrund der besonderen Eigenschaften der Polycarbonat-Scheiben aus Makrolon ® kann 70 %iger<br />
Alkohol zur Reinigung verwendet werden.<br />
Warnung: Trennen Sie das Gerät von der Stromversorgung, bevor Sie mit der Reinigung in der Nähe<br />
der UV-Röhren oder der internen Steckdosen beginnen!<br />
Austausch der UV- oder Weißlichtröhren im Geräteinneren<br />
Schalten Sie das Gerät aus und trennen Sie es von der Stromversorgung.<br />
Öffnen Sie die Frontscheibe und bestimmen Sie die<br />
auszutauschenden Röhren. Jede Röhre hat zwei Gabeln an<br />
beiden Enden, die sich zuerst in die Halterung einführen und<br />
dann in Position drehen lassen.<br />
Halten Sie die Röhre vorsichtig am Ende und setzen Sie sie in<br />
die Halterung ein. Drehen Sie die Röhre um 90°, bis sie in der<br />
richtigen Position einrastet.<br />
Die Abbildung zeigt die Position der Röhren von unten in der<br />
Haube der <strong>PCR</strong> <strong>Workstation</strong> <strong>Pro</strong>. Bei den äußeren Röhren handelt<br />
es sich um die 254 nm UV-Röhren, die mittlere Röhre ist die Weißlichtröhre.<br />
<strong>PEQLAB</strong>_v0813D 46
Bedienungsanleitung <strong>PCR</strong> <strong>Workstation</strong> <strong>Pro</strong><br />
Austausch der UV-Röhre im UV-Luft-Rezirkulator<br />
Entfernen Sie die 6 Schrauben an der UV-Luft-Rezirkulator-<br />
Abdeckplatte an der Geräterückseite der <strong>PCR</strong> <strong>Workstation</strong><br />
<strong>Pro</strong>.<br />
Ziehen Sie die Abdeckplatte von der Rückwand ab.<br />
Die UV-Röhre hat zwei Gabeln an beiden Enden, die sich<br />
zuerst in die Halterung einführen und dann in Position drehen<br />
lassen. Halten Sie die Röhre vorsichtig am Ende und setzen<br />
Sie sie in die Halterung ein. Drehen Sie die Röhre um 90° bis<br />
sie in der richtigen Position einrastet.<br />
Setzen Sie die Abdeckplatte wieder ein und befestigen Sie die 6 Schrauben.<br />
Austausch der Sicherung<br />
Die Sicherung ist an der Geräterückseite rechts unten integriert. Um die<br />
Sicherung zu entfernen, kann die Abdeckung mit einem Schlitz-<br />
Schraubendreher geöffnet und die Sicherung herausgezogen werden.<br />
Setzen Sie die neue Sicherung ein und drehen Sie sie mit Hilfe des<br />
Schraubendrehers bis sie in der richtigen Position einrastet.<br />
Ersatz des Filters im UV-Luft-Rezirkulator<br />
Der Filter des Lüfters ist in der Haube vor den Lichtröhren in der<br />
<strong>PCR</strong> <strong>Workstation</strong> <strong>Pro</strong> lokalisiert (siehe Abbildung rechts). Um<br />
den Filter zu wechseln, entnehmen Sie die Abdeckung inkl. Filter<br />
and ersetzen den Filter. Die Abdeckung mit neuem Filter anschließend<br />
wieder vor dem Lüfter platzieren.<br />
<strong>PEQLAB</strong>_v0813D 47
Bedienungsanleitung <strong>PCR</strong> <strong>Workstation</strong> <strong>Pro</strong><br />
TECHNISCHER SERVICE UND BESTELLINFORMATIONEN<br />
Sollten Sie Fragen zur <strong>PCR</strong> <strong>Workstation</strong> <strong>Pro</strong> oder deren Zubehör haben, besuchen Sie bitte unsere<br />
Website www.peqlab.de für die entsprechenden Kontaktdaten oder schreiben Sie eine Email an<br />
service@peqlab.de.<br />
Bitte halten Sie die Geräte-Seriennummer bereit, Sie finden diese auf einem Aufkleber an der Rückseite<br />
des Gerätes. Im Fall einer Rücksendung an <strong>PEQLAB</strong> muss ein Dekontaminationszertifikat ausgefüllt und<br />
dem Gerät beigelegt werden. Rücksendungen ohne Dekontaminationszertifikat können nicht bearbeitet<br />
werden.<br />
Alle Rücksendungen müssen vorab mit <strong>PEQLAB</strong> abgesprochen sein!<br />
Bestellinformationen:<br />
Artikel Beschreibung Bestellnummer<br />
<strong>PCR</strong> <strong>Workstation</strong> <strong>Pro</strong> <strong>PCR</strong> <strong>Workstation</strong> <strong>Pro</strong> mit UV-Luft-Rezirkulator, DE & AT 90-UV/<strong>PCR</strong>2<br />
<strong>PCR</strong> <strong>Workstation</strong> <strong>Pro</strong> <strong>PCR</strong> <strong>Workstation</strong> <strong>Pro</strong> mit UV-Luft-Rezirkulator, Export Version 90-UV/<strong>PCR</strong>2-EU<br />
<strong>PCR</strong> <strong>Workstation</strong> <strong>Pro</strong> <strong>PCR</strong> <strong>Workstation</strong> <strong>Pro</strong> mit UV-Luft-Rezirkulator, UK Version 90-UV/<strong>PCR</strong>2-UK<br />
<strong>PCR</strong> <strong>Workstation</strong> <strong>Pro</strong> <strong>PCR</strong> <strong>Workstation</strong> <strong>Pro</strong> mit UV-Luft-Rezirkulator, US Version 90-UV/<strong>PCR</strong>2-US<br />
UV-Röhren 254 nm UV-Röhre für <strong>PCR</strong> <strong>Workstation</strong> <strong>Pro</strong>, 2 Stück 90-UV/<strong>PCR</strong>-TUV<br />
UV-Röhre 254 nm UV-Röhre für UV-Luft-Rezirkulator, 1 Stück 90-UV/<strong>PCR</strong>-TAR<br />
Weißlichtröhre Weißlichtröhre für <strong>PCR</strong> <strong>Workstation</strong> <strong>Pro</strong>, 1 Stück 90-UV/<strong>PCR</strong>-TWL<br />
ENTSORGUNGSHINWEISE<br />
Elektrische Geräte, die mit dem Symbol der durchgekreuzten Mülltonne<br />
gekennzeichnet sind, sind für den Einsatz in Ländern unter Einhaltung der<br />
2002/96/EC Direktive vorgesehen, und dürfen EU-weit nicht mit dem normalen,<br />
unsortierten Hausmüll entsorgt werden.<br />
Es liegt in der Verantwortung des Nutzers, Altgeräte einer autorisierten<br />
Entsorgungs- und Recyclingfirma zu übergeben. Es unterliegt ebenfalls der<br />
Verantwortung des Nutzers, das Gerät vor der Entsorgung von biologischen,<br />
chemischen und/oder radioaktiven Abfällen zu dekontaminieren.<br />
Altgeräte sind kein wertloser Abfall. Durch umweltgerechte Entsorgung können wertvolle Rohstoffe wiedergewonnen<br />
werden. Sie leisten dadurch einen Beitrag zum Schutze unserer Umwelt und der menschlichen<br />
Gesundheit.<br />
<strong>PEQLAB</strong>_v0813D 48
<strong>PEQLAB</strong>_v0813D 49
D <strong>PEQLAB</strong> <strong>Biotechnologie</strong> <strong>GmbH</strong>, 91052 Erlangen, Freecall (D): 0800 100 20 16, info@peqlab.de, www.peqlab.de<br />
AT <strong>PEQLAB</strong> <strong>Biotechnologie</strong> <strong>GmbH</strong>, 6404 Polling, Tel: +43 (0) 5238 84 169, info@peqlab.at, www.peqlab.at<br />
UK <strong>PEQLAB</strong> Ltd., Southampton SO31 7ZN, Freephone (UK): 0808 202 1302, info@peqlab.co.uk, www.peqlab.co.uk<br />
USA <strong>PEQLAB</strong> LLC, Wilmington, DE 19810, Toll-Free (US): 877 737 5220, info@peqlab.us, www.peqlab.us<br />
Creating the future together.