DVB-T Outdoor Antenne - Zehnder
DVB-T Outdoor Antenne - Zehnder
DVB-T Outdoor Antenne - Zehnder

Sie wollen auch ein ePaper? Erhöhen Sie die Reichweite Ihrer Titel.
YUMPU macht aus Druck-PDFs automatisch weboptimierte ePaper, die Google liebt.
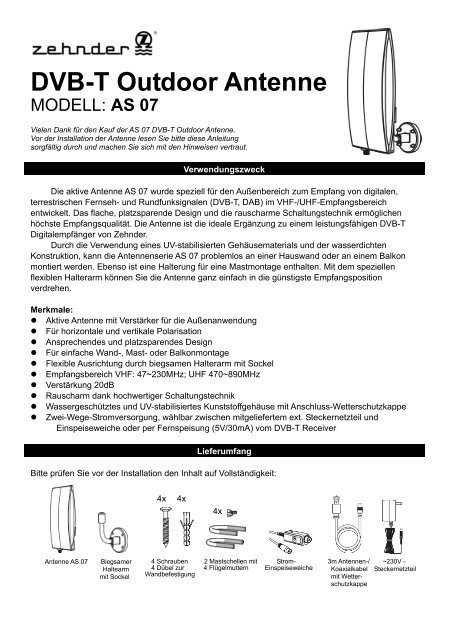
<strong>DVB</strong>-T <strong>Outdoor</strong> <strong>Antenne</strong><br />
MODELL: AS 07<br />
Vielen Dank für den Kauf der AS 07 <strong>DVB</strong>-T <strong>Outdoor</strong> <strong>Antenne</strong>.<br />
Vor der Installation der <strong>Antenne</strong> lesen Sie bitte diese Anleitung<br />
sorgfältig durch und machen Sie sich mit den Hinweisen vertraut.<br />
Verwendungszweck<br />
Die aktive <strong>Antenne</strong> AS 07 wurde speziell für den Außenbereich zum Empfang von digitalen,<br />
terrestrischen Fernseh- und Rundfunksignalen (<strong>DVB</strong>-T, DAB) im VHF-/UHF-Empfangsbereich<br />
entwickelt. Das flache, platzsparende Design und die rauscharme Schaltungstechnik ermöglichen<br />
höchste Empfangsqualität. Die <strong>Antenne</strong> ist die ideale Ergänzung zu einem leistungsfähigen <strong>DVB</strong>-T<br />
Digitalempfänger von <strong>Zehnder</strong>.<br />
Durch die Verwendung eines UV-stabilisierten Gehäusematerials und der wasserdichten<br />
Konstruktion, kann die <strong>Antenne</strong>nserie AS 07 problemlos an einer Hauswand oder an einem Balkon<br />
montiert werden. Ebenso ist eine Halterung für eine Mastmontage enthalten. Mit dem speziellen<br />
flexiblen Halterarm können Sie die <strong>Antenne</strong> ganz einfach in die günstigste Empfangsposition<br />
verdrehen.<br />
Merkmale:<br />
• Aktive <strong>Antenne</strong> mit Verstärker für die Außenanwendung<br />
• Für horizontale und vertikale Polarisation<br />
• Ansprechendes und platzsparendes Design<br />
• Für einfache Wand-, Mast- oder Balkonmontage<br />
• Flexible Ausrichtung durch biegsamen Halterarm mit Sockel<br />
• Empfangsbereich VHF: 47~230MHz; UHF 470~890MHz<br />
• Verstärkung 20dB<br />
• Rauscharm dank hochwertiger Schaltungstechnik<br />
• Wassergeschütztes und UV-stabilisiertes Kunststoffgehäuse mit Anschluss-Wetterschutzkappe<br />
• Zwei-Wege-Stromversorgung, wählbar zwischen mitgeliefertem ext. Steckernetzteil und<br />
Einspeiseweiche oder per Fernspeisung (5V/30mA) vom <strong>DVB</strong>-T Receiver<br />
Lieferumfang<br />
Bitte prüfen Sie vor der Installation den Inhalt auf Vollständigkeit:<br />
4x<br />
4x<br />
4x<br />
<strong>Antenne</strong> AS 07<br />
Biegsamer<br />
Haltearm<br />
mit Sockel<br />
4 Schrauben 2 Mastschellen mit Strom-<br />
4 Dübel zur 4 Flügelmuttern Einspeiseweiche<br />
Wandbefestigung<br />
3m <strong>Antenne</strong>n-/ ~230V -<br />
Koaxialkabel Steckernetzteil<br />
mit Wetterschutzkappe
INSTALLATION<br />
Aufstellungs- und Betriebshinweise:<br />
Um bestmöglichen Empfang zu gewährleisten sollten Sie folgende Punkte bei der Installation<br />
beachten:<br />
• Bei einer Installation an der Wand sollte zuvor die Empfangsqualität an dem Ort überprüft werden.<br />
• Montage nicht in der Nähe von Geräten und Anlagen mit hohen elektromagnetischen Störfeldern,<br />
wie Motoren, Heizgeräten, sowie sendenden elektronischen Geräten (z.B. Mobiltelefone) usw.<br />
• Montage so hoch wie möglich, um Störungen und Unterbrechungen zwischen Sendemast und<br />
Empfangsantenne zu vermeiden.<br />
• Die Montage an Stahlbetonbauten oder an geschlossenen Metallstrukturen und –verkleidungen<br />
kann zu Beeinträchtigungen des Empfangs führen.<br />
• In Gebieten mit geringen oder zu starken Empfangsfeldstärken ist ein störungsfreier Empfang<br />
nicht in allen Fällen gewährleistet. Bei zu schwachem Signalpegel sollte eine Richtantenne mit<br />
Mastmontage am Dach des Gebäudes verwendet werden.<br />
• In unmittelbarer Nähe zum Sender kann der Empfang durch zu hohe Empfangspegel<br />
beeinträchtigt werden. Dann sollten Sie die <strong>Antenne</strong> als Zimmerantenneverwenden. Eine<br />
fensternahe Aufstellung sollte vermieden werden.<br />
Wandmontage:<br />
1. Nach Herausfinden der günstigsten Stelle an der Wand markieren Sie mit einem Bleistift die<br />
4 Positionen der zu bohrenden Schraubenlöcher zur Befestigung des biegsamen<br />
Haltearms.<br />
ACHTUNG!<br />
Stellen Sie zuvor sicher, dass an den Bohrstellen keine elektrischen<br />
Leitungen in der Wand verlaufen. Es besteht Lebensgefahr durch<br />
Stromschlag!<br />
2. Bohren Sie mit einem 5,8mm-Bohrer die Löcher auf eine Tiefe von ungefähr 35mm in die<br />
Wand. (Bei Befestigung auf einem Holzuntergrund benötigen Sie keine Bohrungen und<br />
Dübel)<br />
3. Schlagen Sie mit einem Hammer die<br />
Dübel in die Bohrungen ein.<br />
4. Drehen Sie die Schrauben mit Hilfe<br />
eines Schraubendrehers nur so fest in<br />
die Dübel hinein, damit der Kunststofffuß<br />
nicht durch zu große Kräfte brechen<br />
kann.<br />
5. Stecken Sie die <strong>Antenne</strong> so weit auf den<br />
biegsamen Haltearm, damit Sie die<br />
Position mit der kleinen Schraube<br />
sichern können. Der Kabelanschluss muss nach unten zeigen.<br />
6. Verbinden Sie das Kabel mit der <strong>Antenne</strong>.<br />
Mastmontage:<br />
1. Im Lieferumfang befinden sich auch 2 Mastschellen (U-Bügel) mit Flügelmuttern zum<br />
Befestigen an einem Holz- oder Metallmast (max. Durchmesser 35mm).<br />
2. Stecken Sie die beiden U-Bügel durch die Löcher des Kunststofffußes des biegsamen<br />
Haltearms und schrauben Sie, wie in nebenstehender Zeichnung, die Flügelmuttern auf.<br />
3. Dann stecken Sie die Halterung auf den Mast.<br />
2
4. Ziehen Sie die Muttern von Hand<br />
nur so fest an, damit der<br />
Kunststofffuß nicht durch zu<br />
große Kräfte brechen kann.<br />
5. Stecken Sie die <strong>Antenne</strong> so weit<br />
auf den biegsamen Haltearm,<br />
damit Sie die Position mit der<br />
kleinen Schraube sichern können.<br />
Der Kabelanschluss muss nach<br />
unten zeigen.<br />
6. Verbinden Sie das Kabel mit der<br />
<strong>Antenne</strong>.<br />
Anschluss/Inbetriebnahme<br />
Es gibt zwei verschiedene Möglichkeiten der Stromversorgung für die <strong>Antenne</strong>. Die Fernspeisung<br />
durch den Receiver (5V) oder mit Hilfe der mitgelieferten Stromeinspeiseweiche und des externen<br />
Steckernetzteils. In ersterem Fall können Sie auf die Installation der Einspeiseweiche und des<br />
Netzteils verzichten.<br />
3
Schritt 1:<br />
Schritt 2:<br />
Schritt 3:<br />
Schritt 4:<br />
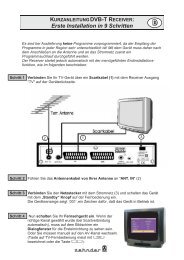
Verbinden Sie die <strong>Antenne</strong> über das mitgelieferte <strong>Antenne</strong>nkabel mit dem <strong>DVB</strong>-T<br />
Receiver oder einem Fernsehgerät mit integriertem <strong>DVB</strong>-T Tuner.<br />
Wenn Ihr <strong>DVB</strong>-T Receiver/TV über keine 5-Volt-Fernspeisemöglichkeit über den<br />
<strong>Antenne</strong>neingang verfügt (z.B. <strong>Zehnder</strong> <strong>DVB</strong>-T-Box), dann benötigen Sie außerdem die<br />
mitgelieferte Einspeiseweiche und das Steckernetzteil.<br />
Verbinden Sie die mitgelieferte Einspeiseweiche mit dem <strong>DVB</strong>-T Receiver oder einem<br />
Fernsehgerät mit integriertem <strong>DVB</strong>-T Tuner und stecken Sie das Steckernetzteil<br />
anschließend in die 230V Wandsteckdose (siehe Anschlussbild 2).<br />
Hinweis: Die Einspeiseweiche und das Netzteil dürfen nur in trockenen Räumen<br />
installiert werden.<br />
Verbinden Sie den Receiver mit dem TV-Gerät (siehe Receiver-Handbuch) und schalten<br />
Sie beide Geräte ein.<br />
Hinweis: Bei Verwendung des Receivers mit 5V-Fernspeisung müssen Sie über<br />
das Einstellmenü des Receivers sicherstellen, dass die 5V Stromversorgung der<br />
<strong>Antenne</strong> über das <strong>Antenne</strong>nkabel eingeschaltet ist (siehe Receiver-Handbuch).<br />
Richten Sie nun die <strong>Antenne</strong> für einen optimalen Empfang aus.<br />
Tipps zur Ausrichtung der <strong>Antenne</strong><br />
Zur Beurteilung der Empfangsqualität kann sowohl das Fernsehbild, als auch die<br />
Signalpegel-/qualitätsanzeige im Einstellmenü des Receivers herangezogen werden.<br />
Sollte der Empfang gestört sein, drehen Sie die <strong>Antenne</strong> leicht oder wechseln Sie durch<br />
seitliches Kippen (horizontal – vertikal) die Polarisationsausrichtung und kontrollieren Sie die<br />
Empfangsqualität.<br />
Sollte kein optimaler Empfang möglich sein, so montieren Sie die <strong>Antenne</strong> an einem anderen Ort<br />
und wiederholen Sie die Prozedur.<br />
Technische Daten<br />
Frequenzbereich VHF 47~230MHz, Kanal 02~12,UHF 470~890MHz,Kanal 21~69<br />
Verstärkung<br />
20 ±3 dB<br />
Stromversorgung 9V DC/100mA, mit Netzteil ,<br />
5V DC/50mA, mit <strong>DVB</strong>-T Receiver<br />
Steckernetzteil<br />
AC ~230V/50Hz ; DC 9V/100mA<br />
Größe: B x H x T<br />
112 x 210 x 60 mm<br />
Mastdurchmesser<br />
max. 35mm<br />
Entsorgung<br />
Elektronische Geräte gehören nicht in den Hausmüll, sondern müssen gemäß der<br />
RICHTLINIE 2002/96/EG DES EURO-PÄISCHEN PARLAMENTS UND DES RATES<br />
vom 27. Januar 2003 über Elektro- und Elektronik-Altgeräte fachgerecht entsorgt werden.<br />
„Bitte geben Sie dieses Gerät am Ende seiner Verwendung zur Entsorgung an den dafür<br />
vorgesehenen öffentlichen Sammelstellen ab."<br />
4
<strong>DVB</strong>-T <strong>Outdoor</strong> Antenna<br />
MODEL: AS 07<br />
Thanks for your purchasing this AS 07 Digital <strong>Outdoor</strong> Antenna.<br />
Before your installation,<br />
Please read this manual carefully and keep this manual<br />
for further information.<br />
INTRODUCTION<br />
AS 07 is a special designed for digital terrestrial broadcasting reception. With state-of-art low<br />
noise amplifier technology and circuitry, it will provide best reception. And compact and stylish housing,<br />
it can be accompany with your digital STB.<br />
With UV protected housing and water-proof sealing, AS 07 series antenna can be installed on<br />
your wall, window-shelter and with bundle pole fixing kit, you can put AS 07 series on the wooden or<br />
metal pole. With special multi-directional tunable mechanism, you can turn your antenna to any<br />
direction to get the best reception<br />
Feature:<br />
• Compact and Stylish design<br />
• different installations method, wall-mounted or pole-mounted installation<br />
• UHF 470~890MHz<br />
• VHF 47~230MHz<br />
• Gain 20dB<br />
• Low noise amplifier technology<br />
• High Directionality<br />
• Water-proof and anti-UV housing<br />
PACKAGE CONTENT<br />
Please check the content before your installation<br />
1. AS 07 main unit<br />
2. Mutli-directional base<br />
3. Wall mounting package(plastic poleX4, screw X4)<br />
4. Pole Mounting kits( U type screws X2, butterfly type washer X4)<br />
5. Power inserter<br />
6. AC Adaptor X1<br />
7. IEC male to F female coaxial cable X1<br />
8. Operational Manual<br />
Coaxial Cable<br />
AC Adaptor<br />
Fixing Base<br />
main unit<br />
Wall Mounting Pole Mounting kits Power Inserter<br />
kits<br />
1
INSTALLATION<br />
Notice:<br />
For the best reception, Please check the following conditions<br />
1. Far away the source of interference: Far away those big power consumption devices, such as air<br />
conditioner, elevator, hair dryer and microwave oven. Etc<br />
2. Installed As high as possible: In case of digital terrestrial reception, if there are some interceptions<br />
between Antenna and transmission tower, it will cause the signal loss temporary. So if the antenna is<br />
installed as high as possible , those interceptions will be reduced.<br />
2
The normal installation is like the above<br />
Condition 1:<br />
Powering the Antenna by STB or Digital TV<br />
Step 1.Take out the main unit AS 07<br />
Step 2.Take out the multi-directional base. Fixed it on the wooden pole or at a wall (as figure, please<br />
check the follow paragraph for information)<br />
Step 3.fix the main unit to the multi-directional base<br />
Step 4.Take the Coaxial(IEC male to F female) Cable connect the IEC Male end to the IEC Female<br />
End of your Set Top Box or TV Set and F female the F-Female End of the AS 07.<br />
Please note: all the connection should be fixed. It is recommended that you should had a<br />
water-drop loop at the end of cable before entering your home.)<br />
Step 5Adjust the orientation of AS 07. (Normally speaking, the signal is horizontal direction.)<br />
Condition 2:<br />
Powering the antenna by AC adaptor( in cases that there is no DC<br />
power out from the STB or Digital TV, you need to do this installation)<br />
Tips for correct Antenna Adjustment<br />
When you finished the installation, you can use your Set Top Box to check the signal strength<br />
and quality. If the quality is not good enough to have good picture, you can move the antenna<br />
to get the best reception position, when you find the best position , please fixed it. If not, you<br />
can change the reception direction by adjust the main unit<br />
Indoor /<strong>Outdoor</strong> Wall Mounted installation<br />
If you want to hook this unit onto a brick wall or RC<br />
wall, please follow the steps bellow<br />
Before the following step, please make sure that you<br />
have enough protection when you try to drill on the<br />
wall.<br />
Step 1. Mark the fixing position with pencil or another<br />
pen( please use the multi-directional base to<br />
mark the position)<br />
Final<br />
Step 2.Take the electric drill, using 5.8mm drill bit( please note , when you use the electric drill, you<br />
should better to wear the protection device. And the drill bit should be fixed, otherwise there<br />
will be a serious injuring happened when the bit is broken or loose). Drill the depth to 35mm.<br />
Then clean the hole.<br />
Please note , if you want to install On a wooden wall , you don´t need to drill holes<br />
before!<br />
Step 3.Take out the plastic pole, using hammer to ham it into the hole made by step1<br />
Step 4.Take out the screws attached, using screw driver to fix these screws through the base and fix it<br />
on the wall.<br />
Step 5. Fix the main unit on the multi-directional base<br />
Step 6.Take the Coaxial(IEC male to IEC female) Cable connect the IEC Male end to the IEC Female<br />
End of your Set Top Box or TV Set and IEC female to “Receiver” on power inserter. Take<br />
another coaxial (F male to IEC male) cable, connect the F-male End to the F-Female End of the<br />
AS 07 and IEC male to “Antenna” on Power inserter. Please note: all the connection should be<br />
fixed. It is recommended that you should had a water-drop loop at the end of cable before<br />
entering your home. (if your installation is outdoor)<br />
Step 7.Take out the AC-DC Adaptor, connect the barrel end to the DC input of Power inserter, AC end<br />
to the AC Outlet. Please note use only supplied AC adaptor<br />
Step 8.Adjust the orientation of AS 07. (Normally speaking, the signal is horizontal direction.)<br />
3
Pole Mounted application<br />
Step 1.Take a wooden pole or metallic pole<br />
Step 2.Take the pole mounting kits<br />
Step 3.Hooks 2 U type screws on the pole.<br />
Take the multi-directional base<br />
through screws. Fixed 4 butterfly<br />
type washers and fixed them.<br />
Step 4.Fix the main unit on the<br />
multi-directional base<br />
Step 5.Take the Coaxial(IEC male to IEC<br />
female) Cable connect the IEC Male<br />
Final<br />
end to the IEC Female End of your<br />
Set Top Box or TV Set and IEC<br />
female to “Receiver” on power inserter. Take another coaxial (F male to IEC male) cable,<br />
connect the F-male End to the F-Female End of the AS 07 and IEC male to “Antenna” on<br />
Power inserter. Please note: all the connection should be fixed. It is recommended that you<br />
should had a water-drop loop at the end of cable before entering your home.) (if your<br />
installation is outdoor)<br />
Step 6.Take out the AC-DC Adaptor, connect the barrel end to the DC input of Power inserter, AC end<br />
to the AC Outlet. Please note use only supplied AC adaptor<br />
Step 7.Adjust the orientation of AS 07.<br />
(Normally speaking, the signal is horizontal direction.)<br />
Specifications:<br />
Frequency Range VHF 47~230MHz,Channel 02~12, UHF 470~890MHz,CH 21~69<br />
Amplifier Gain<br />
20 ±3 dB<br />
Power supply<br />
9V DC/100mA, with power adaptor<br />
5V DC/50mA, with <strong>DVB</strong>-T receiver<br />
Power Adaptor<br />
AC ~230V/50Hz ; DC 9V/100mA<br />
Size: L x H x W<br />
112 x 210 x 60 mm<br />
Mast diametter<br />
Max. 35mm<br />
Disposal<br />
Electronic equipment is not household waste. In accordance with directive 2002/9<br />
6/EC OF THE EUROPEAN PARLIAMENT AND THE COUNCIL of 27th January<br />
2003 on used electrical and electronic equipment, it must be disposed of properly.<br />
„At the end of its service life, take this unit for disposal at the designated public collection points."<br />
HEINRICH ZEHNDER GMBH Telefon: 07729/881-0<br />
Weierhalden 37/1 FAX: 07729/881-72<br />
78144 Tennenbronn info@zehnder-sat.de