Fahrrad-Anhänger Anleitung Tipps zur Gewöhnung des ... - Trixie
Fahrrad-Anhänger Anleitung Tipps zur Gewöhnung des ... - Trixie
Fahrrad-Anhänger Anleitung Tipps zur Gewöhnung des ... - Trixie

Erfolgreiche ePaper selbst erstellen
Machen Sie aus Ihren PDF Publikationen ein blätterbares Flipbook mit unserer einzigartigen Google optimierten e-Paper Software.
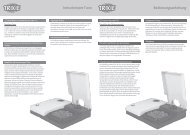
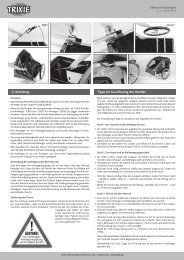
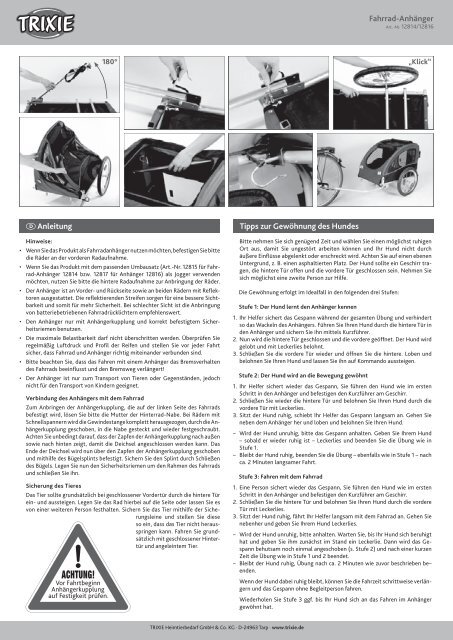
<strong>Fahrrad</strong>-<strong>Anhänger</strong>Art.-Nr. 12814/12816180°„Klick“ <strong>Anleitung</strong> <strong>Tipps</strong> <strong>zur</strong> <strong>Gewöhnung</strong> <strong>des</strong> Hun<strong>des</strong>Hinweise:• Wenn Sie das Produkt als <strong>Fahrrad</strong>anhänger nutzen möchten, befestigen Sie bittedie Räder an der vorderen Radaufnahme.• Wenn Sie das Produkt mit dem passenden Umbausatz (Art.-Nr. 12815 für <strong>Fahrrad</strong>-<strong>Anhänger</strong>12814 bzw. 12817 für <strong>Anhänger</strong> 12816) als Jogger verwendenmöchten, nutzen Sie bitte die hintere Radaufnahme <strong>zur</strong> Anbringung der Räder.• Der <strong>Anhänger</strong> ist an Vorder- und Rückseite sowie an beiden Rädern mit Reflektorenausgestattet. Die reflektierenden Streifen sorgen für eine bessere Sichtbarkeitund somit für mehr Sicherheit. Bei schlechter Sicht ist die Anbringungvon batteriebetriebenen <strong>Fahrrad</strong>rücklichtern empfehlenswert.• Den <strong>Anhänger</strong> nur mit <strong>Anhänger</strong>kupplung und korrekt befestigtem Sicherheitsriemenbenutzen.• Die maximale Belastbarkeit darf nicht überschritten werden. Überprüfen Sieregelmäßig Luftdruck und Profil der Reifen und stellen Sie vor jeder Fahrtsicher, dass <strong>Fahrrad</strong> und <strong>Anhänger</strong> richtig miteinander verbunden sind.• Bitte beachten Sie, dass das Fahren mit einem <strong>Anhänger</strong> das Bremsverhalten<strong>des</strong> <strong>Fahrrad</strong>s beeinflusst und den Bremsweg verlängert!• Der <strong>Anhänger</strong> ist nur zum Transport von Tieren oder Gegenständen, jedochnicht für den Transport von Kindern geeignet.Verbindung <strong>des</strong> <strong>Anhänger</strong>s mit dem <strong>Fahrrad</strong>Zum Anbringen der <strong>Anhänger</strong>kupplung, die auf der linken Seite <strong>des</strong> <strong>Fahrrad</strong>sbefestigt wird, lösen Sie bitte die Mutter der Hinterrad-Nabe. Bei Rädern mitSchnellspannern wird die Gewin<strong>des</strong>tange komplett herausgezogen, durch die <strong>Anhänger</strong>kupplunggeschoben, in die Nabe gesteckt und wieder festgeschraubt.Achten Sie unbedingt darauf, dass der Zapfen der <strong>Anhänger</strong>kupplung nach außensowie nach hinten zeigt, damit die Deichsel angeschlossen werden kann. DasEnde der Deichsel wird nun über den Zapfen der <strong>Anhänger</strong>kupplung geschobenund mithilfe <strong>des</strong> Bügelsplints befestigt. Sichern Sie den Splint durch Schließen<strong>des</strong> Bügels. Legen Sie nun den Sicherheitsriemen um den Rahmen <strong>des</strong> <strong>Fahrrad</strong>sund schließen Sie ihn.Sicherung <strong>des</strong> TieresDas Tier sollte grundsätzlich bei geschlossener Vordertür durch die hintere Türein- und aussteigen. Legen Sie das Rad hierbei auf die Seite oder lassen Sie esvon einer weiteren Person festhalten. Sichern Sie das Tier mithilfe der Sicherungsleineund stellen Sie dieseso ein, dass das Tier nicht herausspringenkann. Fahren Sie grundsätzlichmit geschlossener Hintertürund angeleintem Tier.Vor Fahrtbeginn<strong>Anhänger</strong>kupplungauf Festigkeit prüfen.Bitte nehmen Sie sich genügend Zeit und wählen Sie einen möglichst ruhigenOrt aus, damit Sie ungestört arbeiten können und Ihr Hund nicht durchäußere Einflüsse abgelenkt oder erschreckt wird. Achten Sie auf einen ebenenUntergrund, z. B. einen asphaltierten Platz. Der Hund sollte ein Geschirr tragen,die hintere Tür offen und die vordere Tür geschlossen sein. Nehmen Siesich möglichst eine zweite Person <strong>zur</strong> Hilfe.Die <strong>Gewöhnung</strong> erfolgt im Idealfall in den folgenden drei Stufen:Stufe 1: Der Hund lernt den <strong>Anhänger</strong> kennen1. Ihr Helfer sichert das Gespann während der gesamten Übung und verhindertso das Wackeln <strong>des</strong> <strong>Anhänger</strong>s. Führen Sie Ihren Hund durch die hintere Tür inden <strong>Anhänger</strong> und sichern Sie ihn mittels Kurzführer.2. Nun wird die hintere Tür geschlossen und die vordere geöffnet. Der Hund wirdgelobt und mit Leckerlies belohnt.3. Schließen Sie die vordere Tür wieder und öffnen Sie die hintere. Loben undbelohnen Sie Ihren Hund und lassen Sie ihn auf Kommando aussteigen.Stufe 2: Der Hund wird an die Bewegung gewöhnt1. Ihr Helfer sichert wieder das Gespann, Sie führen den Hund wie im erstenSchritt in den <strong>Anhänger</strong> und befestigen den Kurzführer am Geschirr.2. Schließen Sie wieder die hintere Tür und belohnen Sie Ihren Hund durch dievordere Tür mit Leckerlies.3. Sitzt der Hund ruhig, schiebt Ihr Helfer das Gespann langsam an. Gehen Sieneben dem <strong>Anhänger</strong> her und loben und belohnen Sie Ihren Hund.– Wird der Hund unruhig, bitte das Gespann anhalten. Geben Sie Ihrem Hund– sobald er wieder ruhig ist – Leckerlies und beenden Sie die Übung wie inStufe 1.– Bleibt der Hund ruhig, beenden Sie die Übung – ebenfalls wie in Stufe 1 – nachca. 2 Minuten langsamer Fahrt.Stufe 3: Fahren mit dem <strong>Fahrrad</strong>1. Eine Person sichert wieder das Gespann, Sie führen den Hund wie im erstenSchritt in den <strong>Anhänger</strong> und befestigen den Kurzführer am Geschirr.2. Schließen Sie die hintere Tür und belohnen Sie Ihren Hund durch die vordereTür mit Leckerlies.3. Sitzt der Hund ruhig, fährt Ihr Helfer langsam mit dem <strong>Fahrrad</strong> an. Gehen Sienebenher und geben Sie Ihrem Hund Leckerlies.– Wird der Hund unruhig, bitte anhalten. Warten Sie, bis Ihr Hund sich beruhigthat und geben Sie ihm zunächst im Stand ein Leckerlie. Dann wird das Gespannbehutsam noch einmal angeschoben (s. Stufe 2) und nach einer kurzenZeit die Übung wie in Stufe 1 und 2 beendet.– Bleibt der Hund ruhig, Übung nach ca. 2 Minuten wie zuvor beschrieben be–enden.Wenn der Hund dabei ruhig bleibt, können Sie die Fahrzeit schrittweise verlängernund das Gespann ohne Begleitperson fahren.Wiederholen Sie Stufe 3 ggf. bis Ihr Hund sich an das Fahren im <strong>Anhänger</strong>gewöhnt hat.TRIXIE Heimtierbedarf GmbH & Co. KG · D-24963 Tarp · www.trixie.de
Bicycle Traileritems 12814/12816180°„Click“ InstructionsNote:• If you want to use the product as a bicycle trailer, please attach the wheels tothe front wheel receiver.• If you want to use the product for jogging with the corresponding conversionkit (item 12815 for Bicycle Trailer 12814 and item 12817 for Trailer 12816),please use the rear wheel receiver for attaching the wheels.• The trailer is equipped with reflectors at the front and rear of the cabin and oneach wheel. There is also a reflective strip across the top of the cabin at theback. When riding in low visibility, use a battery powered light on the trailer.• Never tow the trailer without a correctly connected hitch and hitch safetystrap.• Carefully check the connection of the trailer to the bike before riding.• Be aware that riding with the trailer increases your braking distance and mayaffect your ability to control the bicycle. Thoroughly practise in a safe areabefore riding with the trailer in busy areas.• The trailer is intended for carrying pets only and not for transporting children!To connect to the bicycle:The tow bar connects to the bicycle via the included quick-connect hitch.Attach the hitch to the left side of the rear bicycle wheel by removing the axlenut, positioning the hitch on the axle, and re-tightening the axle nut. If yourbicycle has a quick-release wheel, remove the quick-release pin from the axle,insert it through the hitch, then re-assemble through the axle. The hitch shouldbe installed with the male connector piece facing backwards and angling awayfrom the bicycle. Position the trailer behind the bicycle so that the female connectoron the tow bar can slide over the male connector on the hitch. Lockthese connectors in place with the cotter pin. Loop the black safety straparound the bike frame and attach the snap swivel to the D-ring on the tow bar.To secure your pet:Only ever allow your pet to get in or out through the rear door, with the frontdoor closed. Have someone hold the bicycle firmly in an upright position, orlay the bicycle on its side. With the pet inside the trailer, snap one end of the(included) safety leash to the pet’s collar and the other end to the D-ring locatedinside the trailer. Adjust the length of this leash so the pet cannot get outof the front window when it is open. Always close the rear door before riding off.Check iftrailer hitch issecure before cycling.How to accustom your dog to the trailerPlease take plenty of time and choose a quiet place so that you can trainyour dog without interruptions, which might distract or frighten the dog. It isalso important to choose an even surface like a tarmac lot, for example. Thedog should wear a harness; the rear door should be open and the front doorshould be closed. If possible take a second person to assist.To get the dog used to the bicycle trailer the training will ideally be carriedout in 3 steps:Step 1: The dog becomes acquainted with the bicycle trailer1. Your assistant holds the bike and trailer steady during the entire training andprevents the trailer from wobbling. Lead your dog through the rear door intothe trailer and hold him with the short lead.2. Now close the rear door and open the front door. Then praise the dog and givehim some tasty treats.3. Close the front door again and open the rear door. Praise and reward your dogand let him get out on command.Step 2: The dog becomes acquainted with the trailer’s motion1. The assistant once again holds the bike and trailer steady while you guide thedog into the trailer. Attach the short lead to the dog’s harness.2. Close the rear door again and reward your dog by giving him some treatsthrough the front door.3. When the dog is sitting still the assistant slowly puts bike and trailer intomotion. Walk alongside the trailer and praise and reward your dog.– If the dog becomes anxious please stop the trailer. As soon as the dog hascalmed down, reward your dog with some treats and stop the training as instep 1.– If the dog keeps calm stop the training – as in step 1 – after 2 minutes of aslow ride.Step 3: Riding with bike and trailer1. The assistant once again holds the bike and trailer steady while you guide thedog into the trailer and attach the short lead to the dog’s harness.2. Close the rear door and reward your dog by giving him some treats throughthe front door.3. When the dog is sitting still the assistant slowly starts to ride the bike withtrailer. Walk alongside the trailer and give your dog tasty treats.– If the dog becomes anxious please stop cycling. Wait until the dog calmsdown again and give him a tasty treat while standing still. Now gently put thetrailer into motion again (see step 2) and after a short time stop the trainingas in step 1 or step 2.– If the dog keeps calm stop the training as <strong>des</strong>cribed after approx. 2 minutes.If the dog stays calm you can extend the riding time step-by-step and cyclewithout any escort.Repeat step 3 if necessary until your dog gets used to riding in the bicycletrailer.TRIXIE Heimtierbedarf GmbH & Co. KG · D-24963 Tarp · www.trixie.de