Oyster 500 - Audioline
Oyster 500 - Audioline
Oyster 500 - Audioline

Sie wollen auch ein ePaper? Erhöhen Sie die Reichweite Ihrer Titel.
YUMPU macht aus Druck-PDFs automatisch weboptimierte ePaper, die Google liebt.
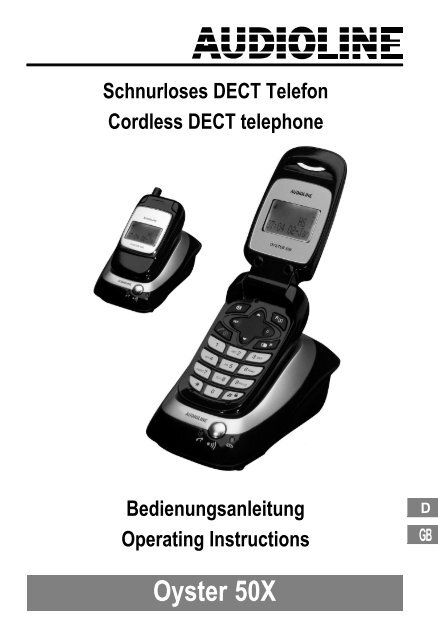
Schnurloses DECT Telefon<br />
Cordless DECT telephone<br />
Bedienungsanleitung<br />
Operating Instructions<br />
<strong>Oyster</strong> 50X
2<br />
<strong>Oyster</strong> 50X<br />
Bedienungsanleitung . . . . . . . . . . . . . . . . . . . . . . . . . . 3<br />
Operating Instructions . . . . . . . . . . . . . . . . . . . . . . . . .<br />
29
1<br />
Inhaltsverzeichnis<br />
1 Sicherheitshinweise . . . . . . . . . . . . . . . . . . . . . . 4<br />
2 Telefon in Betrieb nehmen . . . . . . . . . . . . . . . . . . 5<br />
3 Bedienelemente . . . . . . . . . . . . . . . . . . . . . . . . . 7<br />
4 Wie bediene ich mein Telefon? . . . . . . . . . . . . . . . 8<br />
5 Telefonieren . . . . . . . . . . . . . . . . . . . . . . . . . . . . 11<br />
6 Nebenstellenanlagen / Zusatzdienste . . . . . . . . . . 14<br />
7 Menüstruktur . . . . . . . . . . . . . . . . . . . . . . . . . . . 15<br />
8 Telefonbuch . . . . . . . . . . . . . . . . . . . . . . . . . . . . 19<br />
9 Anrufliste . . . . . . . . . . . . . . . . . . . . . . . . . . . . . . 20<br />
10 Besondere Funktionen . . . . . . . . . . . . . . . . . . . . . 22<br />
11 Erweitern des Telefonsystems . . . . . . . . . . . . . . . 23<br />
12 Falls es Probleme gibt . . . . . . . . . . . . . . . . . . . . . 25<br />
13 Technische Eigenschaften . . . . . . . . . . . . . . . . . . 26<br />
14 Pflegehinweise / Garantie . . . . . . . . . . . . . . . . . . 27<br />
15 Stichwortverzeichnis . . . . . . . . . . . . . . . . . . . . . .<br />
28<br />
3
4<br />
Sicherheitshinweise<br />
1 Sicherheitshinweise<br />
Lesen Sie diese Bedienungsanleitung sorgfältig durch.<br />
Bestimmungsgemäße Verwendung<br />
Dieses Telefon ist geeignet für das Telefonieren innerhalb eines Telefonnetzes. Jede andere<br />
Verwendung gilt als nicht bestimmungsgemäß. Eigenmächtige Veränderungen oder<br />
Umbauten sind nicht zulässig. Öffnen Sie das Gerät in keinem Fall selbst und führen Sie<br />
keine eigenen Reparaturversuche durch.<br />
Aufstellungsort<br />
Vermeiden Sie Belastungen durch Rauch, Staub, Erschütterungen, Chemikalien, Feuchtigkeit,<br />
Hitze oder direkte Sonneneinstrahlung.<br />
Verwenden Sie das Mobilteil nicht in explosionsgefährdeten Bereichen.<br />
Netzteil<br />
Aufladbare Akkus<br />
Achtung: Verwenden Sie nur das mitgelieferte Steckernetzteil, da andere Netzteile<br />
das Telefon beschädigen können. Sie dürfen den Zugang zum Steckernetzteil<br />
nicht durch Möbel oder andere Gegenstände versperren.<br />
Achtung: Werfen Sie Akkus nicht ins Feuer. Verwenden Sie nur Akkus des gleichen<br />
Typs! Achten Sie auf die richtige Polung! Bei verkehrter Polung der Akkus<br />
besteht auf der Ladestation Explosionsgefahr.<br />
Stromausfall<br />
Bei Stromausfall kann mit dem Telefon nicht telefoniert werden. Halten Sie für Notfälle ein<br />
schnurgebundenes Telefon bereit, welches ohne externe Stromversorgung arbeitet.<br />
Medizinische Geräte<br />
Achtung: Benutzen Sie das Telefon nicht in der Nähe von medizinischen Geräten.<br />
Eine Beeinflussung kann nicht völlig ausgeschlossen werden.<br />
DECT 1 −Telefone können in Hörgeräten einen unangenehmen Brummton verursachen.<br />
Entsorgung<br />
Wollen Sie Ihr Gerät entsorgen, bringen Sie es zur Sammelstelle Ihres kommunalen<br />
Entsorgungsträgers (z. B. Wertstoffhof). Das nebenstehende Symbol bedeutet,<br />
dass Sie das Gerät auf keinen Fall in den Hausmüll werfen dürfen!<br />
Nach dem Elektro− und Elektronikgerätegesetz sind Besitzer von Altgeräten gesetzlich<br />
gehalten, alte Elektro− und Elektronikgeräte einer getrennten Abfallerfassung<br />
zuzuführen.<br />
Akkus entsorgen Sie beim batterievertreibenden Handel sowie bei zuständigen<br />
Sammelstellen, die entsprechende Behälter bereitstellen. Verpackungsmaterialien<br />
entsorgen Sie entsprechend den lokalen Vorschriften.<br />
1 DECT: Digital Enhanced Cordless Telecommunication = Standard für kabellose Telefone.
2 Telefon in Betrieb nehmen<br />
Sicherheitshinweise<br />
Verpackungsinhalt prüfen 2<br />
Zum Lieferumfang gehören:<br />
Inhalt<br />
Telefon in Betrieb nehmen<br />
Achtung: Lesen Sie vor der Inbetriebnahme unbedingt die Sicherheitshinweise<br />
in Kapitel 1.<br />
<strong>Oyster</strong> 50X<br />
<strong>500</strong> 502 1 503 1 504 1<br />
Basisstation mit Netzteil 1 1 1 1<br />
Ladestation mit Netzteil − 1 2 3<br />
Mobilteil 1 2 3 4<br />
Telefonanschlusskabel 1 1 1 1<br />
Akkus 1 2 3 4<br />
Bedienungsanleitung 1 1 1 1<br />
Basisstation anschließen<br />
Achtung: Stellen Sie die Basisstation mit einem Mindestabstand von 1 m zu anderen<br />
elektronischen Geräten auf, da es sonst zu gegenseitigen Störungen kommen<br />
kann.<br />
Schließen Sie die Basisstation wie auf der Skizze abgebildet an. Verwenden Sie aus Sicherheitsgründen<br />
nur das mitgelieferte Netzteil sowie das beigefügte Telefonanschlusskabel.<br />
Netzsteckdose<br />
Telefonanschlussdose<br />
1 Unter www.audioline.de erfahren Sie, ob dieses Telefonset bereits erhältlich ist.<br />
5
6<br />
Telefon in Betrieb nehmen<br />
Ladestation anschließen<br />
3<br />
1<br />
Schließen Sie die Ladestation wie<br />
auf der Skizze abgebildet an. Verwenden<br />
Sie aus Sicherheitsgründen<br />
nur das mitgelieferte Netzteil.<br />
Netzsteckdose<br />
Akkus einlegen<br />
Legen Sie das Akkupack in das geöffnete Akkufach<br />
und stecken Sie den Stecker in die<br />
Anschlussbuchse. Legen Sie das Anschlusskabel<br />
in den grauen Bereich entlang des Akkupacks.<br />
Verwenden Sie beim Austauschen<br />
nur Akkupacks des gleichen Typs. Schließen<br />
Sie das Akkufach.<br />
Akkus aufladen<br />
Stellen Sie das Mobilteil bei der ersten Inbetriebnahme für mindestens 14 Stunden<br />
in die Basisstation / Ladestation.<br />
Haben Sie das Mobilteil richtig in die Basisstation / Ladestation gestellt, ertönt ein Hinweissignal<br />
und die Ladekontrollleuchte leuchtet. Das Mobilteil erwärmt sich beim Laden.<br />
Dies ist normal und ungefährlich. Laden Sie das Mobilteil nicht mit fremden Aufladegeräten.<br />
Der aktuelle Akkuladezustand wird im Display angezeigt:<br />
Voll Halb Schwach Leer<br />
Uhrzeit des Mobilteils einstellen<br />
Uhrzeit und Datum stellen Sie über das Menü ein. Auf Seite 16 finden Sie die Position im<br />
Menü.<br />
Nebenstellenanlagen<br />
Auf Seite 14 erhalten Sie weitere Informationen, falls Sie Ihr Telefon an einer Nebenstellenanlage<br />
anschließen möchten.<br />
1 Gilt nur für Telefonsets mit mindestens zwei Mobilteilen � �Verpackungsinhalt" auf<br />
Seite 5.
3 Bedienelemente<br />
Bedienelemente<br />
Die Tasten werden in dieser Bedienungsanleitung mit einer einheitlichen Kontur abgebildet.<br />
Abweichungen von Tastensymbolen Ihres Telefons gegenüber den hier abgebildeten<br />
Tastensymbolen sind möglich.<br />
Mobilteil<br />
1 Display 1 (außen)<br />
2<br />
3<br />
Display 2 (innen)<br />
Menütaste / Aufwärts bewegen<br />
2<br />
4 R−Taste / Telefonbuch öffnen<br />
5<br />
6<br />
7<br />
Löschen / 1 Ebene zurück<br />
Wahlwiederholung /<br />
Wahlpause<br />
Menütaste / Abwärts bewegen<br />
1<br />
12<br />
3<br />
4<br />
8<br />
9<br />
Tastensperre<br />
Tonruf aus− / einschalten /<br />
Temporäre Tonwahl<br />
11<br />
10<br />
5<br />
6<br />
10 Gesprächstaste /<br />
Mobilteil aus− / einschalten<br />
11 Interngespräche / OK−Taste<br />
12 Mikrofon stummschalten<br />
9<br />
7<br />
8<br />
Basisstation<br />
1 LED Gesprächsanzeige<br />
2 Pagingtaste (Mobilteil suchen)<br />
3 LED Akkuladekontrollanzeige<br />
Ladestation<br />
1 LED Akkuladekontrollanzeige<br />
1 2 3<br />
1<br />
7
8<br />
Wie bediene ich mein Telefon?<br />
4 Wie bediene ich mein Telefon?<br />
Darstellungen und Schreibweisen<br />
� Nummern und Buchstaben eingeben<br />
� Abgebildete Taste kurz drücken<br />
2 sec � Abgebildete Taste 2 Sekunden drücken<br />
halten � Abgebildete Taste halten<br />
loslassen � Abgebildete Taste loslassen<br />
1 bis 10 x � Abgebildete Taste 1 bis 10 mal drücken<br />
��� Mobilteil klingelt<br />
� Mobilteil aufklappen<br />
� Mobilteil zuklappen<br />
Telefonbuch oder Text oder Symbole im Display<br />
Symbole im Display<br />
Display Beschreibung<br />
Konstant: Die Verbindung zur Basisstation ist gut.<br />
Blinkend: Die Verbindung zur Basisstation ist schwach. Nähern Sie sich<br />
der Basisstation. Je mehr Balken das Symbol zeigt, desto besser ist die<br />
Verbindung zur Basisstation.<br />
Die Tastensperre ist aktiviert. � Seite 13<br />
Konstant: Sie führen ein Gespräch.<br />
Blinkend: Es erreicht Sie ein Anruf. � Seite 11<br />
Das Freisprechen ist aktiviert. � Seite 12<br />
Das Mikrofon ist stummgeschaltet. � Seite 13<br />
INT Konstant: Sie führen ein internes Gespräch.<br />
Blinkend: Es erreicht Sie ein interner Anruf. � Seite 11<br />
Es sind neue Anrufe in der Anrufliste. � Seite 20<br />
L1 Sie führen ein Gespräch.<br />
Konstant: Anzeige der Batteriekapazität.<br />
Blinkend: Laden Sie die Akkus.<br />
Durchlaufende Segmente: Die Akkus werden geladen. � Seite 6<br />
<strong>Oyster</strong><strong>500</strong> Der Name des Mobilteils � Seite 16<br />
1 Interne Rufnummer des Mobilteils � Seite 23<br />
13:23 Anzeige der Uhrzeit � Seite 16<br />
12−Apr Anzeige des Datums � Seite 16<br />
Ruhe Der Tonruf ist ausgeschaltet. � Seite 13
Wie bediene ich mein Telefon?<br />
Standby−Modus 4<br />
Alle Beschreibungen in dieser Bedienungsanleitung gehen davon aus, dass sich das Mobilteil<br />
im Standby−Modus befindet. Den Standby−Modus erreichen Sie, indem Sie die Taste<br />
� drücken.<br />
Navigationstasten<br />
4<br />
Taste Im Standby−Modus Im Menü<br />
1 − öffnet das Hauptmenü<br />
− in den Menüs aufwärts blättern<br />
− ändern von Einstellungen<br />
− eine Ebene zurück / Ziffern löschen<br />
(kurz drücken)<br />
2<br />
− Programmier− und Speichervorgänge<br />
abbrechen und in den Standby−Modus<br />
zurückkehren (lang drücken)<br />
3 − öffnet das Hauptmenü<br />
− in den Menüs abwärts blättern<br />
− ändern von Einstellungen<br />
− öffnet angezeigtes Menü<br />
4 − Interngespräche<br />
− Programmier− und Speichervorgänge<br />
bestätigen<br />
1<br />
2<br />
3<br />
9
10<br />
Wie bediene ich mein Telefon?<br />
Navigation im Menü 5<br />
Alle Funktionen sind über unterschiedliche Menüs zu erreichen. Den Weg zur gewünschten<br />
Funktion entnehmen Sie der Menüstruktur. � Seite 15<br />
� oder � Hauptmenü öffnen<br />
� oder � Gewünschtes Untermenü auswählen<br />
� Untermenü öffnen<br />
� oder � Gewünschte Funktion auswählen<br />
� Funktion öffnen<br />
� oder � Gewünschte Einstellung auswählen<br />
� Über Tastenfeld Nummern und Buchstaben<br />
eingeben<br />
� Eingaben bestätigen<br />
� Löschen / eine Ebene zurück<br />
2 sec � Programmier− und Speichervorgänge abbrechen<br />
und in den Standby−Modus zurückkehren<br />
Jeder Vorgang wird automatisch abgebrochen, wenn innerhalb von 20 Sekunden<br />
keine Eingabe erfolgt.<br />
Telefonbucheinträge erstellen − Beispiel 6<br />
Wie Sie in den Menüs navigieren und Eingaben vornehmen, ist hier anhand des Beispiels<br />
Telefonbucheinträge erstellen, erklärt. Verfahren Sie bei allen Einstellungen wie bei<br />
diesem Beispiel.<br />
� oder � Hauptmenü öffnen<br />
� oder � Telefonbuch , � Telefonbuch öffnen<br />
� oder � Zufügen , � Gewünschte Funktion auswählen<br />
�, � Namen eingeben (max. 12 Stellen) und<br />
bestätigen<br />
�, � Rufnummer eingeben (max. 16 Ziffern) und<br />
bestätigen
5 Telefonieren<br />
Anruf annehmen<br />
���, � oder � Anruf annehmen<br />
Telefonieren<br />
Gespräch beenden<br />
� oder � Gespräch beenden<br />
Anrufen<br />
� Rufnummer eingeben (max. 16 Ziffern)<br />
� Bei Falscheingabe letzte Ziffer löschen<br />
� Rufnummer wählen<br />
Sie können auch zuerst die Gesprächstaste drücken und erhalten damit das Freizeichen.<br />
Die eingegebenen Ziffern Ihrer gewünschten Rufnummer werden sofort<br />
gewählt. Eine Korrektur einzelner Ziffern der Rufnummer ist bei dieser Form des<br />
Gesprächaufbaus nicht möglich.<br />
Wahlwiederholung<br />
Ihr Telefon speichert die 10 zuletzt gewählten Rufnummern in einer Wahlwiederholungsliste.<br />
� Wahlwiederholungsliste öffnen<br />
1 bis 10 x �, � Eintrag auswählen und Verbindung herstellen<br />
Eingegangene Anrufe zurückrufen<br />
Ihr Telefon speichert 50 eingegangene Anrufe in einer Anrufliste.<br />
� oder � Hauptmenü öffnen<br />
� oder � Anrufliste , � Untermenü öffnen<br />
� oder � Lesen , � Funktion öffnen<br />
� oder �, � Eintrag auswählen, Verbindung herstellen<br />
Rufnummern aus dem Telefonbuch wählen<br />
Sie müssen Rufnummern im Telefonbuch gespeichert haben � Seite 19.<br />
� Telefonbuch öffnen<br />
� oder �, � Eintrag auswählen, Verbindung herstellen<br />
Intern telefonieren 7<br />
Interne Gespräche führen<br />
Sie müssen zwei oder mehr Mobilteile (MT1, MT2, ...) an Ihrer Basisstation angemeldet<br />
haben, um interne, kostenlose Gespräche führen zu können.<br />
MT1: �, z. B. � Interne Rufnummer des gewünschten Mobilteils<br />
wählen<br />
MT2: � Internes Gespräch am anderen Mobilteil<br />
annehmen<br />
MT1 / MT2: � Internes Gespräch beenden<br />
11
12<br />
Telefonieren<br />
Externe Gespräche intern weiterleiten<br />
MT1: �, z. B. � Während des externen Gesprächs interne<br />
Rufnummer wählen<br />
MT2: � Internes Gespräch am anderen Mobilteil<br />
annehmen<br />
MT1: � Gespräch weiterleiten<br />
Sollte sich das gerufene Mobilteil nicht melden, können Sie sich das externe<br />
Gespräch durch Drücken der Taste � wieder zurückholen.<br />
Rücksprache / Makeln<br />
Während eines externen Gesprächs können Sie ein anderes Mobilteil anwählen, um<br />
Rücksprache zu halten. Der externe Gesprächspartner wird gehalten, während Sie mit<br />
dem internen Gesprächspartner sprechen. Sie können den Gesprächspartner beliebig oft<br />
wechseln.<br />
MT1: �, z. B � Während des externen Gesprächs interne<br />
Rufnummer wählen<br />
MT2: � Internes Gespräch am anderen Mobilteil<br />
annehmen<br />
MT1: � Gesprächspartner wechseln<br />
Konferenzgespräche führen<br />
Ein externes Gespräch kann mit einem weiteren internen Gesprächspartner zum Konferenzgespräch<br />
geschaltet werden.<br />
MT1: �, z. B. � Während des externen Gesprächs interne<br />
Rufnummer wählen<br />
MT2: � Internes Gespräch am anderen Mobilteil<br />
annehmen<br />
MT1: 2 sec � Konferenz starten<br />
MT1 / MT2: � Durch Auflegen eines internen<br />
Gesprächspartners wird die Konferenz beendet<br />
Einstellen der Hörerlautstärke<br />
Sie können während eines Gesprächs die Lautstärke in 4 Stufen anpassen.<br />
� oder � Gewünschte Lautstärke auswählen<br />
Anzeige der Gesprächsdauer<br />
Während eines Gesprächs wird die Gesprächsdauer in Stunden, Minuten und Sekunden<br />
angezeigt. Nach dem Beenden eines Gesprächs bleibt diese Anzeige noch ca. 5 sec bestehen.<br />
Freisprechen 8<br />
Nutzen Sie diese Funktion während des Gesprächs, um den Gesprächspartner über den<br />
Lautsprecher zu hören.<br />
2 sec � Freisprechen einschalten<br />
2 sec � Freispechen ausschalten
Mikrofon im Mobilteil stummschalten 9<br />
Sie können während eines Telefongesprächs das Mikrofon des Mobilteils aus− und einschalten.<br />
� Mikrofon ausschalten (stummschalten)<br />
� Mikrofon einschalten<br />
Tastensperre 10<br />
Die Tastensperre verhindert, dass versehentlich Tasten gedrückt werden.<br />
2 sec � Tastensperre einschalten<br />
Tonrufmelodie des Mobilteils 11<br />
Sie können die Tonrufmelodie am Mobilteil ausschalten.<br />
2 sec � Tonrufmelodie ausschalten<br />
Telefonieren<br />
Bei eingeschalteter Tastensperre können eingehende Anrufe wie gewohnt angenommen<br />
werden. Der Notruf 112 kann gewählt werden.<br />
2 sec � Tastensperre ausschalten<br />
Anrufe werden nur noch optisch signalisiert. Blinkende LED an der Basisstation<br />
und eingeschaltete Displaybeleuchtung am Mobilteil.<br />
2 sec � Tonrufmelodie einschalten<br />
Mobilteil suchen (Paging)<br />
Wenn Sie Ihr Mobilteil verlegt haben, können Sie es über einen Suchton leicht wiederfinden.<br />
� ��� Suchton starten<br />
� Suchton beenden<br />
Mobilteil aus− und einschalten<br />
Um die Akkus zu schonen, können Sie das Mobilteil ausschalten.<br />
2 sec � Mobilteil ausschalten<br />
5 sec � Mobilteil einschalten<br />
13
14<br />
Nebenstellenanlagen / Zusatzdienste<br />
6 Nebenstellenanlagen / Zusatzdienste<br />
R−Taste an Nebenstellenanlagen<br />
Ist Ihr Telefon an einer Nebenstellenanlage angeschlossen, können Sie über die R−Taste<br />
Funktionen, wie z. B. Anrufe weiterleiten und automatischen Rückruf, nutzen. Lesen Sie<br />
bitte in der Bedienungsanleitung Ihrer Nebenstellenanlage, welche Flash−Zeit Sie zur Nutzung<br />
dieser Funktionen einstellen müssen. Ob Ihr Telefon an Ihrer Nebenstellenanlage<br />
einwandfrei funktioniert, erfahren Sie bei dem Händler, bei dem die Anlage gekauft wurde.<br />
Einstellen der Flash−Zeit � Seite 17.<br />
Wahlpause<br />
Bei Nebenstellenanlagen ist es erforderlich, eine Amtskennziffer vorzuwählen, um ein<br />
Freizeichen zu bekommen. Bei wenigen, älteren Nebenstellenanlagen dauert es einige<br />
Zeit, bis das Freizeichen zu hören ist. Für diese Nebenstellenanlagen kann nach der<br />
Amtskennziffer eine Wahlpause eingefügt werden, um direkt weiter wählen zu können,<br />
ohne das Freizeichen abzuwarten. Einstellen der Wahlpause � Seite 17.<br />
� Wahlpause einfügen<br />
Nach der Amtskennziffer wartet Ihr Telefon für eine bestimmte Zeit mit dem Wählen der<br />
eigentlichen Rufnummer.<br />
Die Pause kann auch bei der Eingabe von Rufnummern im Telefonbuch gespeichert<br />
werden.<br />
R−Taste und Zusatzdienste<br />
Ihr Telefon unterstützt Zusatzdienste Ihres Netzbetreibers, wie z. B. Makeln, Anklopfen<br />
und Konferenz. Über die R−Taste können Sie diese Zusatzdienste nutzen. Bitte fragen<br />
Sie Ihren Netzbetreiber, welche Flash−Zeit Sie zur Nutzung von Zusatzdiensten einstellen<br />
müssen. Zur Freischaltung von Zusatzdiensten wenden Sie sich bitte an Ihren Netzbetreiber.<br />
Einstellen der Flash−Zeit � Seite 17.<br />
Rufnummernanzeige (CLIP 1 )<br />
Die Rufnummernanzeige ist ein Zusatzdienst Ihres Netzbetreibers. Fragen Sie<br />
Ihren Netzbetreiber nach weiteren Informationen.<br />
Wenn diese Funktion an Ihrer Telefonleitung zur Verfügung steht, wird Ihnen bereits die<br />
Rufnummer des Anrufers angezeigt, wenn das Telefon klingelt. Hat der Anrufer das Übertragen<br />
seiner Rufnummer unterdrückt, wird eine entsprechende Meldung angezeigt. Die<br />
Rufnummer kann nicht angezeigt und somit auch nicht in der Anrufliste gespeichert werden.<br />
1 CLIP: Calling Line Identification Presentation
7 Menüstruktur<br />
Menüstruktur<br />
Hauptmenü<br />
In das Hauptmenü gelangen Sie durch Drücken der Taste � oder �. Wie Sie sich im<br />
Menü bewegen und Eingaben vornehmen, zeigt Ihnen Seite 10.<br />
Telefonbuch<br />
Lesen<br />
Bearbeiten Eintrag 1 � Name � 1 Nummer � Ext. Anruf 2<br />
Eintrag 2<br />
Eintrag ...<br />
Zufügen Name � Nummer �<br />
Löschen Eintrag 1<br />
Eintrag 2<br />
Eintrag ...<br />
� Sicher?<br />
Alles lösch Sicher?<br />
Anrufliste 3<br />
Lesen<br />
Löschen Eintrag 1 � Sicher?<br />
Eintrag 2<br />
Eintrag ...<br />
Alles lösch Sicher?<br />
1 Die Zahlentasten sind mit Buchstaben beschriftet. Durch mehrmaliges Drücken der<br />
entsprechenden Taste können Buchstaben, Zahlen und Sonderzeichen eingegeben<br />
werden. Mit der Sterntaste können Sie zwischen Groß− und Kleinschreibung umschalten<br />
.<br />
2 Hier können Sie einem Telefonbucheintrag eine bestimmte Tonrufmelodie zuordnen.<br />
Ihr Mobilteil meldet sich dann bei eingehenden Anrufen dieses Anrufers mit der eingestellten<br />
Tonrufmelodie. Für diese Funktion wird die Rufnummernanzeige (CLIP 4 ) benötigt.<br />
3 Für das Anzeigen und Speichern von Rufnummern in Anruflisten wird die Rufnummernanzeige<br />
(CLIP 4 ) benötigt. Die Rufnummernanzeige ist ein Zusatzdienst Ihres<br />
Netzbetreibers. Fragen Sie Ihren Netzbetreiber nach weiteren Informationen. Weitere<br />
Informationen über die Rufnummernanzeige � Seite 14.<br />
4 CLIP: Calling Line Identification Presentation<br />
15
16<br />
Menüstruktur<br />
12<br />
MT Einstell.<br />
Ext.Melodie 1 Ext. Anruf 1 − 25 1 − 4<br />
Int.Melodie 1 Int. Anruf 1 − 25 1 − 4<br />
Ton Einst. 2 Ein<br />
Aus<br />
Auto Annahm 3 Ein<br />
Aus<br />
Name 4 Name �<br />
PIN ändern 5 MT PIN: � Neue PIN: � PIN wiederh: �<br />
Direkt Anr. 6 Nummer �<br />
Sprache 7 1 − 10<br />
Zeit Einst. Zeit eingeb: � Datum eingeb: �<br />
Werkseinst. MT PIN: � Sicher?<br />
1 Es stehen Ihnen 9 monophone und 16 polyphone Tonrufmelodien zur Verfügung. Sie<br />
können die Lautstärke der monophonen und polyphonen Tonrufmelodien in 4 Stufen<br />
einstellen.<br />
2 An dieser Stelle schalten Sie die Tastentöne ein und aus.<br />
3 Haben Sie die Funktion aktiviert, wird ein externer Anruf automatisch beim Aufklappen<br />
des Mobilteils angenommen und beim Schließen beendet. Haben Sie diese Funktion<br />
deaktiviert müssen Sie jedes Gespräch mit der Gesprächstaste annehmen und beenden.<br />
4 Der eingegebene Name erscheint im Standby−Modus im Display.<br />
5 Die Werkseinstellung des Mobilteil PIN−Codes (MT PIN:) ist "1590". Wenn Sie den<br />
PIN−Code ändern, bewahren Sie den neuen PIN−Code gut auf. Sollten Sie den PIN−<br />
Code vergessen oder verloren haben, wenden Sie sich an unsere Service−Hotline �<br />
Seite 25.<br />
6 Mit dieser Funktion haben Sie die Möglichkeit, eine bestimmte Rufnummer zu speichern,<br />
die bei Betätigen einer beliebigen Taste automatisch angerufen wird. Drücken<br />
Sie zweimal schnell nacheinander Taste �, um die Funktion zu beenden.<br />
7 Insgesamt stehen Ihnen 10 Sprachen zur Verfügung: Englisch, Französisch, Deutsch,<br />
Spanisch, Niederländ., Italienisch, Griechisch, Türkisch, Russisch und Portugies.
13<br />
BS Einstell.<br />
Basis PIN: � Wahlverf. 1 TON<br />
IMPULS<br />
Flash 2 Flash 100ms<br />
Flash 120ms<br />
Flash 300ms<br />
Flash 600ms<br />
Pause 2 Pause 2 Sek<br />
Pause 3 Sek<br />
Pause 4 Sek<br />
Neues MT 3 PIN eingeb: �<br />
MT abmelden 4 MT abmeld: �<br />
Menüstruktur<br />
PIN ändern 5 Neue PIN: � PIN wiederh: �<br />
1 Sie können Ihr Telefon sowohl an den analogen Vermittlungsstellen (Impuls−Wahlverfahren)<br />
als auch an den neuen digitalen Vermittlungsstellen (Ton−Wahlverfahren) betreiben.<br />
2 Weitere Informationen � Seite 14.<br />
3 In diesem Menü setzen Sie Ihre Basisstation in den Registriermodus. Weitere Informationen<br />
� Seite 23.<br />
4 Hier können Sie angemeldete Mobilteile von Ihrer Basisstation abmelden. Weitere Informationen<br />
� Seite 23.<br />
5 Die Werkseinstellung des Basisstation PIN−Codes (Basis PIN:) ist "1590". Wenn Sie<br />
den PIN−Code ändern, bewahren Sie den neuen PIN−Code gut auf. Sollten Sie den<br />
PIN−Code vergessen oder verloren haben, wenden Sie sich an unsere Service−Hotline<br />
� Seite 25.<br />
17
18<br />
Menüstruktur<br />
14<br />
BS ausw. 1 * Basis 1<br />
Basis 2<br />
Basis 3<br />
Basis 4<br />
Automat<br />
MT anmelden 2 * Basis 1 Suchen . . . �012345" � �<br />
Basis 2<br />
Basis 3 � PIN: � 3<br />
Basis 4<br />
1 Speicherplätze, die mit einem Sternchen gekennzeichnet sind, sind bereits mit einer<br />
Basisstation belegt. Wählen Sie eine dieser Basisstationen aus oder schalten Sie die<br />
automatische Wahl (Automat) von Basisstationen ein. Weitere Informationen � Seite<br />
23.<br />
2 Speicherplätze die bereits mit einer Basisstationen belegt sind, sind mit einem Sternchen<br />
gekennzeichnet. Wählen Sie für eine weitere Anmeldung einen freien Speicherplatz.<br />
Sie können auch einen belegten Speicherplatz auswählen. Die gespeicherte Basisstation<br />
auf diesem Speicherplatz wird dann überschrieben. Weitere Informationen<br />
über das Anmelden von Mobilteilen � Seite 23.<br />
3 Die Werkseinstellung des Basisstation PIN−Codes (Basis PIN:) ist "1590".
8 Telefonbuch<br />
Telefonbuch<br />
Im Telefonbuch können Sie 50 Rufnummern mit den dazugehörigen Namen speichern.<br />
� Geben Sie bei allen Rufnummern immer die Vorwahl mit ein, damit das Telefon auch<br />
eingehende Ortsgespräche einem Telefonbucheintrag zuordnen kann.<br />
� Ist die Speicherkapazität erschöpft, zeigt das Display beim nächsten Speichern die<br />
Meldung Telb. voll . Um wieder Platz zu schaffen, müssen Sie zuerst einen<br />
anderen Eintrag löschen.<br />
� Die Telefonbucheinträge sind alphabetisch geordnet. Um direkt zum gewünschten<br />
Telefonbucheintrag zu springen, drücken Sie den entsprechenden<br />
Anfangsbuchstaben.<br />
Namen eingeben<br />
Zur Eingabe von Namen sind die Zahlentasten mit Buchstaben beschriftet. Durch mehrmaliges<br />
Drücken der entsprechenden Taste können Buchstaben sowie Zahlen eingegeben<br />
werden.<br />
2 x � Leerzeichen eingeben<br />
� Löschen<br />
� Zwischen Groß− und Kleinschreibung umschalten<br />
Um den gleichen Buchstaben zweimal einzugeben, drücken Sie den entsprechenden<br />
Buchstaben. Warten Sie, bis der Cursor eine Stelle weiter gesprungen<br />
ist. Geben Sie den Buchstaben erneut ein.<br />
Telefonbucheinträge erstellen 15<br />
� oder � Hauptmenü öffnen<br />
� oder � Telefonbuch , � Telefonbuch öffnen<br />
� oder � Zufügen , � Funktion auswählen<br />
�, � Namen eingeben (max. 12 Stellen) und<br />
bestätigen<br />
�, �<br />
Einträge im Telefonbuch ändern 16<br />
Rufnummer eingeben (max. 16 Ziffern) und<br />
bestätigen<br />
� oder � Hauptmenü öffnen<br />
� oder � Telefonbuch , � Telefonbuch öffnen<br />
� oder � Bearbeiten , � Funktion auswählen<br />
� oder � Eintrag ... , � Gewünschten Eintrag auswählen<br />
�, � Namen ändern und bestätigen<br />
�, � Rufnummer ändern und bestätigen<br />
� oder � Ext. Anruf ... , � Gewünschten VIP−Tonruf 1 auswählen<br />
1 Hier können Sie einem Telefonbucheintrag eine bestimmte Tonrufmelodie zuordnen.<br />
Ihr Mobilteil meldet sich dann bei eingehenden Anrufen dieses Anrufers mit der eingestellten<br />
Tonrufmelodie. Für diese Funktion wird die Rufnummernanzeige (CLIP 2 ) benötigt.<br />
Weitere Informationen über die Rufnummernanzeige � Seite 14.<br />
2 CLIP: Calling Line Identification Presentation<br />
19
20<br />
Anrufliste<br />
Einträge aus dem Telefonbuch löschen<br />
Einen Eintrag löschen<br />
� oder � Hauptmenü öffnen<br />
� oder � Telefonbuch , � Telefonbuch öffnen<br />
� oder � Löschen , � Gewünschte Funktion auswählen<br />
� oder � Eintrag ... , � Gewünschten Eintrag auswählen<br />
Sicher? , � oder � Löschvorgang bestätigen oder abbrechen<br />
Alle Einträge löschen<br />
� oder � Hauptmenü öffnen<br />
� oder � Telefonbuch , � Telefonbuch öffnen<br />
� oder � Alles lösch , � Gewünschte Funktion auswählen<br />
9 Anrufliste<br />
Sicher? , � oder � Löschvorgang bestätigen oder abbrechen<br />
Insgesamt werden 50 Rufnummern in einer Anrufliste gespeichert.<br />
Die Rufnummernanzeige ist ein Zusatzdienst Ihres Netzbetreibers. Ihr Telefon<br />
zeigt die Rufnummern im Display, wenn Ihr Netzbetreiber diesen Service anbietet.<br />
Bitte fragen Sie Ihren Netzbetreiber nach weiteren Informationen.<br />
Meldungen im Display:<br />
Unbekannt Die Rufnummer wurde nur teilweise oder fehlerhaft empfangen.<br />
Die Information der Rufnummer ist nicht verfügbar. Es könnte<br />
sich um ein internationales Gespräch handeln.<br />
Privat Der Anrufer hat das Senden seiner Rufnummer unterdrückt.<br />
Rufnummern aus der Anrufliste anzeigen<br />
� oder � Hauptmenü öffnen<br />
� oder � Anrufliste , � Anrufliste öffnen<br />
� oder � Lesen , � Gewünschte Funktion auswählen<br />
� oder � In der Anrufliste auf− oder abwärts blättern
Anrufliste<br />
Rufnummer aus der Anrufliste im Telefonbuch speichern<br />
Eine Rufnummer kann direkt aus der Anrufliste im Telefonbuch gespeichert werden.<br />
� oder � Hauptmenü öffnen<br />
� oder � Anrufliste , � Anrufliste öffnen<br />
� oder � Lesen , � Gewünschte Funktion auswählen<br />
� oder � z. B.: 012345 Gewünschte Rufnummmer auswählen<br />
2 sec � Telefonbuch , � Speichervorgang starten<br />
�, � Namen eingeben (max. 12 Stellen) und<br />
bestätigen<br />
Sobald die Rufnummer im Telefonbuch mit einem Namen gespeichert wurde, erscheint<br />
in der Anrufliste der eingegebene Name.<br />
Rufnummern aus der Anrufliste löschen<br />
Einzelne Rufnummer löschen<br />
� oder � Hauptmenü öffnen<br />
� oder � Anrufliste , � Anrufliste öffnen<br />
� oder � Löschen , � Gewünschte Funktion auswählen<br />
� oder � Eintrag ... , � Gewünschten Eintrag auswählen<br />
Sicher? , � oder � Löschvorgang bestätigen oder abbrechen<br />
Alle Rufnummern löschen<br />
� oder � Hauptmenü öffnen<br />
� oder � Anrufliste , � Anrufliste öffnen<br />
� oder � Alles lösch , � Gewünschte Funktion auswählen<br />
Sicher? , � oder � Löschvorgang bestätigen oder abbrechen<br />
21
22<br />
Besondere Funktionen<br />
10 Besondere Funktionen<br />
Wahlverfahren<br />
Sie können Ihr Telefon sowohl an den analogen Vermittlungsstellen (Impuls−Wahlverfahren)<br />
als auch an den neuen digitalen Vermittlungsstellen (Ton−Wahlverfahren) betreiben.<br />
Das Wahlverfahren wird über das Menü eingestellt. Auf Seite 17 finden Sie die Position<br />
im Menü.<br />
Temporäre Tonwahl<br />
Können Sie Ihr Telefon nur mit dem Impuls−Wahlverfahren betreiben, brauchen Sie nicht<br />
auf die Vorteile des Ton−Wahlverfahrens (z. B.: Abfrage eines Anrufbeantworters im Telefonnetz)<br />
zu verzichten. Während einer bestehenden Verbindung können Sie vorübergehend<br />
zum Ton−Wahlverfahren wechseln.<br />
2 sec � Während des Gesprächs drücken<br />
Nach Gesprächsende wird wieder automatisch auf das Impuls−Wahlverfahren zurückgeschaltet.
Erweitern des Telefonsystems<br />
11 Erweitern des Telefonsystems<br />
Über den international genormten GAP1 Standard ist die Kompatibilität von Mobilteilen<br />
und Basisstationen unterschiedlicher Hersteller geregelt. So ist es möglich, AUDIOLINE−<br />
Geräte und Geräte anderer Hersteller zusammen in einem Telefonsystem zu integrieren.<br />
Es ist jedoch möglich, dass einige Funktionen nicht zur Verfügung stehen.<br />
Mehrere Mobilteile<br />
Sie können insgesamt 5 Mobilteile an Ihrer Basisstation anmelden.<br />
Anmelden von Mobilteilen<br />
Bevor Sie ein Mobilteil anmelden, müssen Sie die Basisstation in den Registriermodus<br />
setzen.<br />
� oder � Hauptmenü öffnen<br />
� oder � BS Einstell. , � Untermenü öffnen<br />
Basis PIN: �, � Basisstation PIN−Code (Werkseinstellung: �1590")<br />
eingeben und bestätigen<br />
� oder � Neues MT , � Untermenü öffnen<br />
PIN eingeb: �, � Basisstation PIN−Code (Werkseinstellung: �1590")<br />
eingeben und bestätigen<br />
Sie können den Registriermodus auch starten, indem Sie die Taste � an der<br />
Basisstation 5 Sekunden drücken.<br />
Melden Sie nun das Mobilteil an � Seite 18. Benutzen Sie zur Anmeldung den aktuell<br />
eingestellten Basisstation PIN−Code � Seite 17.<br />
Nach dem Anmelden wird dem Mobilteil eine interne Rufnummer gegeben. Diese interne<br />
Rufnummer wird im Display angezeigt.<br />
Um Mobilteile anderer Hersteller anzumelden, lesen Sie bitte deren Bedienungsanleitungen.<br />
Abmelden von Mobilteilen<br />
Sie können ein Mobilteil von einer Basisstation nur durch ein weiteres an dieser<br />
Basisstation angemeldetes Mobilteil abmelden. Im Display des abgemeldeten<br />
Mobilteils erscheint dann die Meldung �Nicht angem.�.<br />
Mobilteile werden über das Menü abgemeldet � Seite 17.<br />
Mehrere Basisstationen<br />
Sie können die Reichweite Ihres Mobilteils vergrößern, wenn Sie es an mehrere Basisstationen<br />
anmelden. Es kann gleichzeitig an 4 verschiedenen Basisstationen angemeldet<br />
sein. Jede Basisstation benötigt eine eigene Telefonsteckdose. Es können Anschlüsse mit<br />
der selben und auch mit unterschiedlichen Rufnummern sein.<br />
Laufende Gespräche können nicht von einer zur anderen Basisstation übertragen<br />
werden.<br />
1 GAP: Generic Access Profile = Standard für das Zusammenwirken von Mobilteilen<br />
und Basisstationen unterschiedlicher Hersteller.<br />
23
24<br />
Erweitern des Telefonsystems<br />
Erhöhung der Reichweite<br />
Platzieren Sie die Basisstationen so, dass sich die Reichweite der einzelnen Basisstationen<br />
überschneidet. Testen Sie die Reichweite Ihrer Mobilteile, da Hindernisse in Gebäuden<br />
die Reichweite einschränken. Melden Sie das Mobilteil an alle Basisstationen an.<br />
Schalten Sie die Funktion automatische Wahl von Basisstationen ein � Seite 18. Das<br />
Mobilteil sucht sich automatisch die nächstgelegene Basisstation mit der besten Verbindung.<br />
Mobilität durch verschiedene Standorte<br />
Melden Sie das Mobilteil an verschiedenen Standorten an Basisstationen an. Schalten<br />
Sie die Funktion automatische Wahl von Basisstationen ein � Seite 18. An welchem<br />
Standort Sie sich auch befinden, das Mobilteil sucht sich automatisch eine in Reichweite<br />
liegende Basisstation.
12 Falls es Probleme gibt<br />
Falls es Probleme gibt<br />
Service Hotline<br />
Haben Sie Probleme mit Ihrem Telefon, kontrollieren Sie zuerst die folgenden Hinweise.<br />
Bei technischen Problemen können Sie sich an unsere Service−Hotline unter Tel. 0180 5<br />
00 13 88 (Kosten Telekom bei Drucklegung: 12ct/min) wenden. Bei Garantieansprüchen<br />
wenden Sie sich an Ihren Fachhändler. Die Garantiezeit beträgt 2 Jahre.<br />
Fragen und Antworten<br />
Fragen Antworten<br />
Keine Verbindung zur Basisstation<br />
möglich<br />
Kein Telefongespräch möglich<br />
Verbindung abgehackt, fällt<br />
aus<br />
Das System reagiert nicht<br />
mehr<br />
Die Akkus sind in kürzester<br />
Zeit leer<br />
Die Rufnummernanzeige<br />
(CLIP 1 ) funktioniert nicht<br />
1 CLIP: Calling Line Identification Presentation<br />
− Prüfen Sie, ob Sie sich mit dem richtigen PIN−Code<br />
an der Basisstation angemeldet haben. � Seite 23<br />
− Das Telefon ist nicht korrekt angeschlossen oder gestört.<br />
Verwenden Sie nur das mitgelieferte Telefonanschlusskabel.<br />
− Testen Sie mit einem anderen Telefon, ob Ihr Telefonanschluss<br />
in Ordnung ist.<br />
− Das Netzteil ist nicht eingesteckt oder es liegt ein<br />
totaler Stromausfall vor.<br />
− Die aufladbaren Akkus sind leer oder defekt.<br />
− Sie haben sich zu weit von der Basisstation entfernt.<br />
− Wahlverfahren falsch eingestellt. � Seite 17<br />
− Sie haben sich zu weit von der Basisstation entfernt.<br />
− Falscher Aufstellungsort der Basisstation.<br />
− Setzen Sie alle Funktionen in den Werkszustand zurück.<br />
� Seite 26<br />
− Ziehen Sie kurzzeitig das Netzteil aus der Steckdose.<br />
− Die Akkus sind leer oder defekt.<br />
− Stellen Sie das Mobilteil richtig auf die Basisstation.<br />
Reinigen Sie die Kontaktflächen am Mobilteil und an<br />
der Basisstation mit einem weichen, trockenen Tuch.<br />
− Stellen Sie das Mobilteil für 14 Stunden in die Basisstation.<br />
− Die Rufnummernanzeige ist ein Zusatzdienst Ihres<br />
Netzbetreibers. Bitte fragen Sie Ihren Netzbetreiber<br />
nach weiteren Informationen.<br />
− Der Anrufer hat das Übertragen seiner Rufnummer<br />
unterdrückt.<br />
25
26<br />
Technische Eigenschaften<br />
13 Technische Eigenschaften<br />
Technische Daten<br />
Merkmal Wert<br />
Standard DECT−GAP 1<br />
Stromversorgung Eingang: 220/230 V, 50 Hz<br />
Ausgang: 9 V, 300 mA<br />
Reichweite Außen: ca. 300 m<br />
Innen: ca. 50 m<br />
Standby bis zu 100 h<br />
Max. Gesprächsdauer bis zu 6 h<br />
Aufladbarer Akkupack 3.6 V, 400 mAh<br />
Wahlverfahren Ton−Wahlverfahren<br />
Impuls−Wahlverfahren<br />
Zulässige Umgebungstemperatur 5°C bis 45°C<br />
Zulässige relative Luftfeuchtigkeit 20% bis 75%<br />
Flash−Funktion 100 ms, 120 ms, 300 ms, 600 ms<br />
Werkseinstellungen 17<br />
Die Werkseinstellungen werden über das Menü wiederhergestellt � Seite 16.<br />
Sprache: Deutsch Tastensperre: Aus Tastentöne: Ein<br />
Hörerlautstärke: 2 Externe Melodie: 1 Externe Lautstärke: 5<br />
Interne Melodie: 1 Interne Lautstärke: 5 Basisauswahl: Basis 1<br />
Mobilteilname: <strong>Oyster</strong><strong>500</strong><br />
Konformitätserklärung<br />
Mobilteil PIN−Code: 1590<br />
Dieses Gerät erfüllt die Anforderungen der EU−Richtlinie:<br />
1999/5/EG Richtlinie über Funkanlagen und Telekommunikationsendeinrichtungen<br />
und die gegenseitige Anerkennung ihrer Konformität. Die Konformität<br />
mit der o. a. Richtlinie wird durch das CE−Zeichen auf dem Gerät bestätigt.<br />
Für die komplette Konformitätserklärung nutzen Sie bitte den kostenlosen<br />
Download von unserer Website www.audioline.de.<br />
1 DECT: Digital Enhanced Cordless Telecommunication = Standard für kabellose Telefone.<br />
GAP: Generic Access Profile = Standard für das Zusammenwirken von Mobilteilen und<br />
Basisstationen unterschiedlicher Hersteller.
14 Pflegehinweise / Garantie<br />
Pflegehinweise / Garantie<br />
Pflegehinweise<br />
� Reinigen Sie die Gehäuseoberflächen mit einem weichen und fusselfreien Tuch.<br />
� Verwenden Sie keine Reinigungsmittel oder Lösungsmittel.<br />
Garantie<br />
AUDIOLINE − Geräte werden nach den modernsten Produktionsverfahren hergestellt und<br />
geprüft. Ausgesuchte Materialien und hoch entwickelte Technologien sorgen für einwandfreie<br />
Funktion und lange Lebensdauer. Ein Garantiefall liegt nicht vor, wenn die Ursache<br />
einer Fehlfunktion des Gerätes bei dem Telefonnetzbetreiber oder einer eventuell zwischengeschalteten<br />
Nebenstellenanlage liegt. Die Garantie gilt nicht für die in den Produkten<br />
verwendeten Batterien, Akkus oder Akkupacks. Die Garantiezeit beträgt 24 Monate,<br />
gerechnet vom Tage des Kaufs.<br />
Innerhalb der Garantiezeit werden alle Mängel, die auf Material− oder Herstellungsfehler<br />
zurückzuführen sind, kostenlos beseitigt. Der Garantieanspruch erlischt bei Eingriffen<br />
durch den Käufer oder durch Dritte. Schäden, die durch unsachgemäße Behandlung oder<br />
Bedienung, durch falsches Aufstellen oder Aufbewahren, durch unsachgemäßen Anschluss<br />
oder Installation sowie durch höhere Gewalt oder sonstige äußere Einflüsse entstehen,<br />
fallen nicht unter die Garantieleistung. Wir behalten uns vor, bei Reklamationen<br />
die defekten Teile auszubessern, zu ersetzen oder das Gerät auszutauschen. Ausgetauschte<br />
Teile oder ausgetauschte Geräte gehen in unser Eigentum über. Schadenersatzansprüche<br />
sind ausgeschlossen, soweit sie nicht auf Vorsatz oder grober Fahrlässigkeit<br />
des Herstellers beruhen.<br />
Sollte Ihr Gerät dennoch einen Defekt innerhalb der Garantiezeit aufweisen, wenden Sie<br />
sich bitte unter Vorlage Ihrer Kaufquittung ausschließlich an das Geschäft, in dem Sie Ihr<br />
AUDIOLINE − Gerät gekauft haben. Alle Gewährleistungsansprüche nach diesen Bestimmungen<br />
sind ausschließlich gegenüber Ihrem Fachhändler geltend zu machen. Nach Ablauf<br />
von zwei Jahren nach Kauf und Übergabe unserer Produkte können Gewährleistungsrechte<br />
nicht mehr geltend gemacht werden.<br />
27
28<br />
Stichwortverzeichnis<br />
15 Stichwortverzeichnis<br />
A<br />
Abmelden, 17, 23<br />
Abnehmen, 11<br />
Akkuladezustand, 6<br />
Akkus einlegen, 6<br />
Ändern, 19<br />
Anmelden, 17, 18, 23<br />
Anrufannahme, 11<br />
Anrufen, 11<br />
Anrufliste, 15, 20<br />
Anschließen, 5, 6<br />
Aufladen, 6<br />
Auflegen, 11<br />
Ausschalten, 13<br />
automatische Wahl, 18<br />
B<br />
Basisstation, 5, 23<br />
Bedienelemente, 7<br />
Bedienung, 8<br />
C<br />
CLIP, 14<br />
D<br />
Darstellungen, 8<br />
Datum, 16<br />
Display, 8<br />
Displaymeldungen, 20<br />
E<br />
Einschalten, 13<br />
Erstellen, 10, 19<br />
Erweiterung, 23<br />
F<br />
Fehlerbehebung, 25<br />
Fragen und Antworten, 25<br />
Freisprechen, 12<br />
Funktionen, 22<br />
G<br />
Garantie, 27<br />
Gespräch beenden, 11<br />
Gesprächsdauer, 12<br />
Gesprächsweiterleitung, 12<br />
H<br />
Hauptmenü, 15<br />
Hörerlautstärke, 12<br />
I<br />
Impuls−Wahlverfahren, 17, 22<br />
Inbetriebnahme, 5<br />
Interngespräche, 11<br />
K<br />
Konferenzgespräche, 12<br />
Konformitätserklärung, 26<br />
L<br />
Ladestation, 6<br />
Löschen, 20, 21<br />
M<br />
Makeln, 12<br />
Meldungen, 20<br />
Menüstruktur, 15<br />
Mikrofonstummschaltung, 13<br />
Mobilteil, 23<br />
N<br />
Namenseingabe, 19<br />
Navigation, 10<br />
Navigationstasten, 9<br />
Nebenstellenanlagen, 14<br />
P<br />
Paging, 13<br />
Pflegehinweise, 27<br />
Probleme, 25<br />
R<br />
R−Taste, 14<br />
Reichweite, 24<br />
Rückruf, 11<br />
Rücksprache, 12<br />
Rufnummernanzeige, 14, 20<br />
S<br />
Schreibweisen, 8<br />
Service Hotline, 25<br />
Sicherheitshinweise, 4<br />
Speichern, 10, 19, 21<br />
Standby−Modus, 9<br />
Stummschaltung, 13<br />
Suchen, 13<br />
Symbole, 8<br />
T<br />
Tastensperre, 13<br />
Tastentöne, 16<br />
Technische Daten, 26<br />
Telefonbuch, 11, 15, 19<br />
Telefonbucheinträge, 10, 19<br />
Telefonieren, 11<br />
Temporäre Tonwahl, 22<br />
Texteingabe, 19<br />
Ton−Wahlverfahren, 17, 22<br />
Tonrufmelodie, 13, 16<br />
U<br />
Uhrzeit, 6, 16<br />
V<br />
Verpackungsinhalt, 5<br />
W<br />
Wählen, 11<br />
Wahlpause, 14, 17<br />
Wahlverfahren, 17, 22<br />
Wahlwiederholung, 11<br />
Weiterleitung, 12<br />
Werkseinstellungen, 16, 26<br />
Z<br />
Zusatzdienste, 14
18<br />
Contents<br />
1 Safety Information . . . . . . . . . . . . . . . . . . . . . . . . 30<br />
2 Putting the Telephone into Operation . . . . . . . . . . . 31<br />
3 Operating Elements . . . . . . . . . . . . . . . . . . . . . . . 33<br />
4 Operating the Telephone . . . . . . . . . . . . . . . . . . . 34<br />
5 Telephoning . . . . . . . . . . . . . . . . . . . . . . . . . . . . 37<br />
6 PBX / Supplementary Services . . . . . . . . . . . . . . . 40<br />
7 Menu Structure . . . . . . . . . . . . . . . . . . . . . . . . . . 41<br />
8 Phone Book . . . . . . . . . . . . . . . . . . . . . . . . . . . . 45<br />
9 Call Log . . . . . . . . . . . . . . . . . . . . . . . . . . . . . . . 46<br />
10 Special Functions . . . . . . . . . . . . . . . . . . . . . . . . 48<br />
11 Extending the Telephone System . . . . . . . . . . . . . 49<br />
12 In the Case of Problems . . . . . . . . . . . . . . . . . . . 51<br />
13 Technical Properties . . . . . . . . . . . . . . . . . . . . . . 52<br />
14 Maintenance / Guarantee . . . . . . . . . . . . . . . . . . . 53<br />
15 Index . . . . . . . . . . . . . . . . . . . . . . . . . . . . . . . . .<br />
54<br />
29
30<br />
Safety Information<br />
1 Safety Information<br />
Please read this operating instruction manual thoroughly.<br />
Intended use<br />
The telephone is suitable for telephoning within a public telephone network system. Any<br />
other use is considered unintended use. Unauthorised modification or reconstruction is<br />
not permitted. Under no circumstances open the device or complete any repair work yourself.<br />
Installation location<br />
Prevent excessive exposure to smoke, dust, vibration, chemicals, moisture, heat and<br />
direct sunlight.<br />
Do not use the handset in potentially explosive areas.<br />
Power supply<br />
Caution: Only use the power adapter plug supplied because other power supplies<br />
could damage the telephone. Ensure access to the power adapter plug is<br />
not obstructed by furniture or such.<br />
Rechargeable battery pack<br />
Caution: Never throw batteries into a fire. Only use batteries of the same type!<br />
Pay attention to correct polarity. There is a risk of explosion if the batteries are inserted<br />
in the charging station with incorrect polarity.<br />
Power failure<br />
The telephone cannot be used to make calls in the event of a power failure. Always keep<br />
a cord connected telephone which operates without an external power supply available in<br />
case of emergency situations.<br />
Medical equipment<br />
Caution: Never use the telephone in the vicinity of medical equipment. Effects<br />
on such equipment cannot be fully ruled out.<br />
DECT 1 telephones can cause an unpleasant humming sound in hearing aids.<br />
Disposal<br />
When you want to dispose of your device, bring it to a collection point provided<br />
by your local public waste authorities (e.g. recycling company). The adjacent<br />
symbol indicates that the device must not be disposed of in normal domestic<br />
waste! According to laws on the disposal of electronic and electrical devices,<br />
owners are obliged to dispose of old electronic and electrical devices in a<br />
separate waste container.<br />
Batteries must be disposed of at the point of sale or at appropriate collection<br />
points provided by the public waste authorities.<br />
Packaging materials must be disposed of according to local regulations.<br />
1 DECT: Digital Enhanced Cordless Telecommunication = Standard for cordless telephones.
Putting the Telephone into Operation<br />
2 Putting the Telephone into Operation<br />
Safety information<br />
Caution: It is essential to read the Safety Information in Chapter 1 before starting<br />
up.<br />
Checking the contents of the package 19<br />
The package contains:<br />
<strong>Oyster</strong> 50X<br />
Content<br />
<strong>500</strong> 502 1 503 1 504 1<br />
Base station with power adapter plug 1 1 1 1<br />
Charging station with power adapter plug − 1 2 3<br />
Handset 1 2 3 4<br />
Telephone connection cable 1 1 1 1<br />
Batteries 1 2 3 4<br />
Operating manual 1 1 1 1<br />
Connecting the base station<br />
Caution: Position the base station at least 1 metre away from other electronic<br />
devices, otherwise there is a risk of mutual disturbance.<br />
Connect the base station as illustrated in the diagram. For reasons of safety, only use the<br />
power adapter plug supplied and telephone connection line enclosed.<br />
Mains power outlet<br />
Telephone line socket<br />
1 Visit www.audioline.de to find out whether this telephone is available.<br />
31
32<br />
Putting the Telephone into Operation<br />
Connecting the charging station<br />
20<br />
1<br />
Connect the charging station as<br />
illustrated in the diagram.<br />
For safety reasons, only use the<br />
power adapter plug supplied.<br />
Mains power outlet<br />
Inserting the rechargeable batteries<br />
Insert the battery pack in the open battery<br />
compartment and plug the connector in the<br />
connection socket. Lay the cable in the grey<br />
area beside the batteries. When replacing the<br />
batteries, only use ones of the same type.<br />
Close the battery compartment.<br />
Charging the batteries<br />
Before the handset is used for the first time, insert it in the base station / charging<br />
station for at least 14 hours.<br />
When the handset is inserted in the base/charging station properly, you will hear a confirmation<br />
signal and the charge control lamp lights up. The handset warms up during the<br />
charging process. This is normal and does not represent a risk. Do not charge the handset<br />
with charging units from other manufacturers. The current battery charge status is<br />
indicated in the display:<br />
Full Half empty Low Empty<br />
Setting the time on the handset<br />
The time and date are set via the menu. Refer to Page 42 for the sequence of option<br />
selections.<br />
Private branch exchanges<br />
The information on Page 40 explains how to install your telephone in a private branch<br />
exchange.<br />
1 Only applies to telephone sets with at least two handsets; � �Checking the contents<br />
of the package" on Page 31.
3 Operating Elements<br />
Operating Elements<br />
The buttons in this operating manual are depicted with a uniform contour. Variations in the<br />
symbols on the telephone buttons compared to those depicted here are possible.<br />
Handset<br />
1 Display 1 (outer)<br />
2<br />
3<br />
Display 2 (inner)<br />
Menu button / Scroll upwards<br />
2<br />
4 R−button / Open the phone book<br />
5<br />
6<br />
Delete / Move 1 level back<br />
Redial / Dialling pause<br />
1<br />
3<br />
7 Menu button /<br />
Scroll downwards<br />
12<br />
4<br />
8<br />
9<br />
Key lock<br />
Switch ringing tone on/off /<br />
Temporary tone dialling<br />
11<br />
10<br />
5<br />
6<br />
10 Call button /<br />
Switch handset on/off<br />
11 Internal call / OK button<br />
12 Muting button<br />
(microphone off/on)<br />
9<br />
7<br />
8<br />
Base station<br />
1 LED, call indicator<br />
2 Paging button (locate handset)<br />
3 LED, battery charge control lamp<br />
Charging station<br />
1 LED, battery charge control lamp<br />
1 2 3<br />
1<br />
33
34<br />
Operating the Telephone<br />
4 Operating the Telephone<br />
Display and notation of operation sequences<br />
� Enter digits and letters<br />
� Press the button depicted briefly<br />
2 sec Press the button depicted for 2 seconds<br />
Press and hold � Press and hold the button depicted<br />
Release � Release the button depicted<br />
1 to 10 x � Press the button depicted 1 to 10 times<br />
��� Handset rings<br />
� Open the handset (flip open)<br />
� Close the handset (flip shut)<br />
Phone Book or Text or icon in the display<br />
Icons in the display<br />
Display Description<br />
On: The connection to the base station is good.<br />
Flashing: The connection to the base station is poor. Move towards the<br />
base station. The more bars in the icon, the better the connection to the<br />
base station.<br />
The key lock is activated. � Page 39<br />
On: A call is currently being made.<br />
Flashing: A call has been received. � Page 37<br />
Handsfree mode has been activated. � Page 38<br />
The microphone is switched off (muting). � Page 39<br />
Int On: An internal call is currently being made.<br />
Flashing: An internal call has been received. � Page 37<br />
New calls have been registered in the call log. � Page 46<br />
L1 A call is currently being made.<br />
On: Displays battery capacity.<br />
Flashing: The batteries must be recharged.<br />
Run−through segments: Batteries are being charged. � Page 32<br />
<strong>Oyster</strong><strong>500</strong> Name of the handset. � Page 42<br />
1 Internally assigned call number of the handset. � Page 49<br />
13:23 Time display. � Page 42<br />
12−Apr Date display. � Page 42<br />
Silence The ringing tone has been switched off. � Page 39
Operating the Telephone<br />
Standby mode 21<br />
All the descriptions in this operating manual assume that the handset is in Standby mode.<br />
Standby mode can be activated by pressing the � button.<br />
4<br />
Navigation buttons<br />
Button In Standby mode In a menu<br />
1 − Open the main menu<br />
− Scroll upwards in the menu<br />
− Change settings<br />
− Move one level back / Delete characters<br />
(short press)<br />
2<br />
− Cancel programming and saving processes<br />
and return to Standby mode<br />
(long press)<br />
3 − Open the main menu<br />
− Scroll downwards in the menu<br />
− Change settings<br />
− Open the menu displayed<br />
4 − Internal call<br />
− Confirm the programming and saving<br />
processes<br />
1<br />
2<br />
3<br />
35
36<br />
Operating the Telephone<br />
Navigation in the menu 22<br />
All the functions can be accessed via the various menus. Refer to the menu structure to<br />
find out how to access the respective functions. � Page 41<br />
� or � Open the main menu<br />
� or � Select the submenu required<br />
� Open the submenu<br />
� or � Select the function required<br />
� Open the function<br />
� or � Select the setting required<br />
� Enter digits and letters using the relevant digit<br />
keys<br />
� Confirm the input<br />
� Delete / Move one level back<br />
2 sec � Cancel programming and saving processes and<br />
return to Standby mode<br />
Every process is automatically cancelled if there is no input within 20 seconds.<br />
Creating phone book entries − example 23<br />
The way in which to navigate through the menus and enter data is explained by means of<br />
the example Creating phone book entries. Proceed as in this example for all the settings.<br />
� or � Open the main menu<br />
� or � Phone Book , � Open the phone book<br />
� or � Add , � Select the required function<br />
�, � Enter the name (max. 12 characters) and confirm<br />
it<br />
�, � Enter the phone number (max. 16 digits) and<br />
confirm it
5 Telephoning<br />
Telephoning<br />
Taking a call<br />
���, �or �<br />
Ending a call<br />
Take the call<br />
�or �<br />
Making a call<br />
End the call<br />
� Enter the phone number (max. 16 digits)<br />
� Delete the last digit if incorrect<br />
� Dial the phone number<br />
It is also possible to press the Call button first to obtain the dialling tone. The digits<br />
in the phone number then entered are dialled immediately. It is not possible to correct<br />
wrong digits individually using this dialling procedure.<br />
Redialling<br />
The telephone stores the last 10 phone numbers dialled in a redialling list.<br />
� Open the redialling list<br />
1 to 10 x �, �<br />
Calling back received calls<br />
Select the entry and dial the number<br />
The telephone stores the numbers of the last 50 calls received in a call log.<br />
� or � Open the main menu<br />
� or � Caller ID<br />
Searc<br />
, � Open the submenu<br />
� or � h , � Open the function<br />
� or �, � Select an entry and dial the number<br />
Dialling numbers from the phone book<br />
Phone numbers must have been stored in the phone book for this function; � Page 45.<br />
� Open the phone book<br />
� or �, � Select an entry and dial the number<br />
Internal calls 24<br />
Making internal calls<br />
There must be two or more handsets (HS1, HS2, ...) registered on your base station in<br />
order to make internal calls free of charge.<br />
HS1: �, e.g. � Dial the internal call number of the handset<br />
required<br />
HS2: � Take the call on the other handset<br />
HS1 / HS2: � End the internal call<br />
37
38<br />
Telephoning<br />
Forwarding external calls internally<br />
HS1: �, e.g. � Dial the internal call number of the handset<br />
required during the external call<br />
HS2: � Take the call on the other handset<br />
HS1: � Forward the call<br />
If the handset called does not answer, take the external call back by pressing the<br />
� button.<br />
Holding a call / brokering<br />
While a call is in progress, it is possible to dial another handset in order to consult with<br />
someone. The external caller is put on hold while you converse with the second, internal<br />
person called. You can switch between the callers as often as necessary.<br />
HS1: �, e.g. � Dial the internal call number of the handset<br />
required during the external call<br />
HS2: � Take the call on the other handset<br />
HS1: � Change back and forth between the callers<br />
Conference calls<br />
An external call can be transferred to another internal handset for a conference call.<br />
HS1: �, e.g. � Dial the internal call number of the handset<br />
required during the external call<br />
HS2: � Take the call on the other handset<br />
HS1: 2 sec � Start the conference facility<br />
HS1 / HS2: � The conference is terminated by one of the<br />
internal handset users ending the call<br />
Adjusting the receiver volume<br />
The volume can be adjusted to one of 4 settings during a call.<br />
� or � Select the required volume<br />
Talk time display<br />
The duration of a call is displayed in hours, minutes and seconds during the call. This information<br />
remains in the display for about 5 seconds after ending the call.<br />
Handsfree 25<br />
This function is used to listen to the caller via the loudspeaker during a call.<br />
2 sec � Activate the handsfree facility<br />
2 sec � Deactivate the handsfree facility
Muting the microphone in the handset 26<br />
The microphone in the handset can be activated and deactivated during a telephone conversation.<br />
� Deactivate the microphone (muting function<br />
activated)<br />
� Activate the microphone<br />
Key lock 27<br />
The key lock function prevents functions being activated inadvertently.<br />
2 sec � Activate the key lock function<br />
Handset ringing melody 28<br />
The ringing melody on the handset can be switched off.<br />
2 sec � Deactivate the ringing melody<br />
Telephoning<br />
Calls can still be taken in the normal way even when the key lock function is<br />
activated. The emergency calls number 112 can still be dialled.<br />
2 sec � Deactivate the key lock function<br />
Calls are subsequently only indicated visually. The LED on the base station<br />
flashes and the display lighting on the handset lights up.<br />
2 sec � Activate the ringing melody<br />
Searching for the handset (Paging)<br />
If you have mislaid your handset, you can locate it with the aid of a search tone.<br />
� ��� Start the search tone<br />
� End the search tone<br />
Switching the handset off and on<br />
You can switch the handset off to save the batteries.<br />
2 sec � Switch the handset off<br />
5 sec � Switch the handset on<br />
39
40<br />
PBX / Supplementary Services<br />
6 PBX / Supplementary Services<br />
R−button on private branch exchanges<br />
If the telephone is connected to a private branch exchange, functions such as transferring<br />
calls and automatic call back can be used via the R button. Please refer to the operating<br />
manual supplied with your private branch exchange to determine which Flash time must<br />
be set in order to use these functions. The dealer where you purchased the exchange can<br />
provide information as to whether the telephone will work properly with the exchange.<br />
Setting the Flash time, � Page 43.<br />
Dialling pause<br />
In the case of private branch exchanges, it is necessary to dial a number to get an outside<br />
line with its corresponding dialling tone. When using some older private branch exchanges,<br />
it takes a little time before the dialling tone becomes audible. Particularly in the<br />
case of such private branch exchanges, it is advantageous to insert a dialling pause after<br />
the number for the outside line so that the number can be dialled in a continuous process<br />
without having to wait for the dialling tone. Setting the dialling pause, � Page 43.<br />
� Insert the dialling pause<br />
After dialling the number for the outside line, the telephone then waits a specific time before<br />
dialling the actual phone number.<br />
The pause can also be entered with the phone numbers in the phone book.<br />
R−button and supplementary services<br />
Your telephone supports the supplementary services offered by your telephone network<br />
provider, such as brokering, call waiting and conference calls. The supplementary services<br />
can be used in conjunction with the R button. Please contact your telephone network<br />
provider regarding which Flash time must be set to use the supplementary services.<br />
Please contact the telephone network provider with regard to enabling the supplementary<br />
services. Setting the Flash time, � Page 43.<br />
Caller ID (CLIP 1 )<br />
The caller ID display function is a supplementary service offered by telephone<br />
network providers. Contact your network provider for further information.<br />
If this function is available with your telephone line, the number of the caller appears in the<br />
display when the phone rings. If the caller has suppressed transmission of his phone<br />
number, a corresponding message appears in the display. The phone number is not displayed<br />
and, as a result, is not stored in the call log.<br />
1 CLIP: Calling Line Identification Presentation
7 Menu Structure<br />
Menu Structure<br />
Main menu<br />
Open the main menu by pressing the � or � button. Refer to Page 36 for information<br />
on navigating through the menu and entering data.<br />
Phone Book<br />
Search<br />
Edit Entry 1 � Name: � 1 Number: � Ext Ring: 2<br />
Entry 2<br />
Entry ...<br />
Add Name: � Number: �<br />
Delete Entry 1<br />
Entry 2<br />
Entry ...<br />
� Sure ?<br />
Erase All Sure ?<br />
Caller ID 3<br />
Search<br />
Delete Entry 1 � Sure ?<br />
Entry 2<br />
Entry ...<br />
Erase All Sure ?<br />
1 Letters are also imprinted on the digit keys. Letters, digits and special characters are<br />
entered by pressing the relevant key the respective number of times. Use the Star button<br />
to switch between upper and lower case .<br />
2 This function is used to assign a certain ringing melody to a phone book entry. Your<br />
handset then rings with this melody when a call is received from this caller. This function<br />
requires the caller ID feature (CLIP 4 ).<br />
3 The (CLIP 4 ) feature is necessary to display and save phone numbers in various call<br />
logs. The caller number display function is a supplementary service offered by telephone<br />
network providers. Contact your network provider for further information. Further<br />
information on the caller ID (CLIP), � Page 40.<br />
4 CLIP: Calling Line Identification Presentation<br />
41
42<br />
Menu Structure<br />
29<br />
HS Setting<br />
Melody Ext 1 Ext Ring: 1 − 25 1 − 4<br />
Melody Int 1 Int Ring: 1 − 25 1 − 4<br />
Set Keytone 2 ON<br />
OFF<br />
Switch 3 ON<br />
OFF<br />
User Name 4 User Name �<br />
Set PIN 5 HS PIN: � New PIN: � Retype PIN: �<br />
Direct Call 6 Number: �<br />
Language 7 1 − 10<br />
Set Clock Input Time: � Input Date: �<br />
Set Default HS PIN: � Sure ?<br />
1 There are 9 monophone and 16 polyphone ringing melodies available for selection.<br />
The volume of the monophone and polyphone ringing melodies can be set to one of 4<br />
levels.<br />
2 This option is used to switch the key tones on and off.<br />
3 If you have activated the function, an external call is automatically taken when the<br />
handset is flipped open and ended when closed. If you deactivate this function, you<br />
must take and end each call received by pressing the Call button.<br />
4 The name entered appears in the display in Standby mode.<br />
5 The default setting of the handset PIN code (HS PIN:) is �1590". If you change a PIN<br />
code, keep a note of the new PIN code in a safe place. If you forget or lose the PIN<br />
code, please contact our Service Hotline, � Page 51.<br />
6 This function enables you to store a number which is automatically dialled after any<br />
button is pressed. Press the � button twice in quick succession to end the function.<br />
7 A total of 10 languages are available: English, French, German, Spanish, Dutch, Italian,<br />
Greek, Turkish, Russian and Portuguese.
30<br />
BS Setting<br />
Base PIN: � Dial Mode 1 Tone<br />
Pulse<br />
Flash Time 2 Flash 100ms<br />
Flash 120ms<br />
Flash 300ms<br />
Flash 600ms<br />
Pause Time 2 Pause 2 Sec<br />
Pause 3 Sec<br />
Pause 4 Sec<br />
New HS 3 Subsc PIN: �<br />
Remove HS 4 Remove HS: �<br />
Menu Structure<br />
Change PIN 5 New PIN: � Retype PIN: �<br />
1 The telephone can be operated in new, digital exchanges (Tone) as well as analogue<br />
exchanges (Pulse).<br />
2 Further information, � Page 40.<br />
3 This menu is used to set the base station in Registration mode. Further information,<br />
� Page 49.<br />
4 This can be used to deregister handsets from your base station. Further information,<br />
� Page 49.<br />
5 The default setting of the base station PIN code (Base PIN:) is �1590". If you change a<br />
PIN code, keep a note of the new PIN code in a safe place. If you forget or lose the PIN<br />
code, please contact our Service Hotline, � Page 51.<br />
43
44<br />
Menu Structure<br />
31<br />
Select BS 1 * Base 1<br />
Base 2<br />
Base 3<br />
Base 4<br />
Base auto<br />
HS Register 2 * Base 1 Searching� �012345" � �<br />
Base 2<br />
Base 3 � PIN: �3 Base 4<br />
1 Memory locations marked by an asterisk are already assigned to a base station.<br />
Select this base station or switch to Base auto for automatic base station selection.<br />
Further information, � Page 49.<br />
2 Memory locations already assigned to base stations are identified by an asterisk.<br />
Select a free memory location for a further registration. You can also select a memory<br />
location already assigned. The base station assigned in this memory location is then<br />
overwritten. For further information on registering handsets, � Page 49.<br />
3 The default setting of the base station PIN code (Base PIN:) is �1590".
8 Phone Book<br />
Phone Book<br />
You can use the phone book to store up to 50 phone numbers together with the associated<br />
names.<br />
� Always enter the area access code with the phone numbers so that the telephone<br />
can also assign incoming local calls to a phone book entry.<br />
� When the memory capacity is fully used up, the message Phone Book is Full<br />
appears in the display. In order to create space, existing entries must be deleted.<br />
� The phone book entries are arranged in alphabetical order. To skip directly to the<br />
required phone book entry, press the first letters of the corresponding name.<br />
Entering names<br />
The digit keys are also labelled with letters for the entry of the respective letters. Letters<br />
and digits are entered by pressing the relevant key the respective number of times.<br />
2 x � Enter a space<br />
� Delete characters<br />
� Switch between upper and lower case<br />
To enter the same letter twice, press the button to enter the letter. Wait until the<br />
cursor skips one position forwards. Enter the letter again.<br />
Creating phone book entries 32<br />
� or � Open the main menu<br />
� or � Phone Book , � Open the phone book<br />
� or � Add , � Select the required function<br />
�, � Enter the name (max. 12 characters) and confirm<br />
it<br />
�, � Enter the phone number (max. 16 digits) and<br />
confirm it<br />
Editing entries in the phone book 33<br />
� or � Open the main menu<br />
� or � Phone Book , � Open the phone book<br />
� or � Edit , � Select the required function<br />
� or � Entry ... , � Select the required entry<br />
�, � Modify the name and confirm the changes<br />
�, � Modify the phone number and confirm the<br />
changes<br />
� or � Ext Ring:... , � Select the required VIP ringing tone 1<br />
1 This function is used to assign a certain ringing melody to a phone book entry. Your<br />
handset then rings with this melody when a call is received from this caller. This function<br />
requires the caller ID feature (CLIP 2 ). Further information on the caller ID (CLIP),<br />
� Page 40.<br />
2 CLIP: Calling Line Identification Presentation<br />
45
46<br />
Call Log<br />
Deleting entries from the phone book<br />
Deleting a single entry<br />
� or � Open the main menu<br />
� or � Phone Book , � Open the phone book<br />
� or � Delete , � Select the required function<br />
� or � Entry ... , � Select the required entry<br />
Sure ? , � or � Confirm or cancel the deleting process<br />
Deleting all the entries<br />
� or � Open the main menu<br />
� or � Phone Book , � Open the phone book<br />
� or � Erase All , � Select the required function<br />
9 Call Log<br />
Sure ? , � or � Confirm or cancel the deleting process<br />
A total of 50 phone numbers are stored in a call log.<br />
The caller ID function is a supplementary service offered by telephone network<br />
providers. Your telephone displays the phone number of the caller when your<br />
telephone network provider offers this service. Contact your network provider for<br />
further information.<br />
Messages in the display:<br />
Unavailable The phone number is received only partially or with errors.<br />
Information related to the phone number is not available. It could<br />
concern an international call.<br />
Private The caller has suppressed the transmission of their phone<br />
number.<br />
Displaying numbers in the call log<br />
� or � Open the main menu<br />
� or � Caller ID , � Open the call log<br />
� or � Search , � Select the required function<br />
� or � Scroll up or down in the call log
Call Log<br />
Saving a phone number in the call log in the phone book<br />
A phone number stored in the call log can be saved in the phone book directly.<br />
� or � Open the main menu<br />
� or � Caller ID , � Open the call log<br />
� or � Search , � Select the required function<br />
� or � e.g: 012345 Select the required phone number<br />
2 sec � Phone Book , � Start the saving process<br />
�, � Enter the name (max. 12 characters) and confirm<br />
it<br />
As soon as the phone number in the phone book has been saved together with<br />
a name, the name entered appears in the call log.<br />
Deleting phone numbers from the call log<br />
Deleting individual phone numbers<br />
� or � Open the main menu<br />
� or � Caller ID , � Open the call log<br />
� or � Delete , � Select the required function<br />
� or � Entry ... , � Select the required entry<br />
Sure ? , � or � Confirm or cancel the deleting process<br />
Deleting all phone numbers<br />
� or � Open the main menu<br />
� or � Caller ID , � Open the call log<br />
� or � Erase All , � Select the required function<br />
Sure ? , � or � Confirm or cancel the deleting process<br />
47
48<br />
Special Functions<br />
10 Special Functions<br />
Dialling mode<br />
The telephone can be operated in new, digital exchanges (TONE) as well as analogue exchanges<br />
(PULSE). The dialling mode is controlled via the menu. Refer to Page 43 for the<br />
sequence of option selections.<br />
Temporary tone dialling<br />
If you only operate the telephone using PULSE dialling mode, you can still make use of<br />
the advantages of TONE dialling mode (e.g.: remote access of the answering machine in<br />
the conventional telephone network). You can temporarily switch to Tone dialling when a<br />
connection has already been made.<br />
2 sec � Press when a connection has been established<br />
When the call is ended, the equipment automatically switches back to Pulse dialling.
Extending the Telephone System<br />
11 Extending the Telephone System<br />
The international GAP1 standard regulates the compatibility of handsets and base stations<br />
from different manufacturers. As a result, it is possible to integrate AUDIOLINE devices<br />
and devices from other manufacturers together in one telephone system. It is possible,<br />
however, that certain functions are not available.<br />
Multiple handsets<br />
Up to 5 handsets can be registered on the base station.<br />
Registering handsets<br />
Before starting to register a handset, switch the base station to Registration mode.<br />
� or � Open the main menu<br />
� or � BS Setting , � Open the submenu<br />
Base PIN: �, � Enter the base station PIN code<br />
(default setting: �1590") and confirm it<br />
� or � New HS , � Open the submenu<br />
Subsc PIN: �, � Enter the base station PIN code<br />
(default setting: �1590") and confirm it<br />
Registration mode can also be started by pressing the � button on the base<br />
station for 5 seconds.<br />
Now register the handset, � Page 44. The currently valid base station PIN code is used<br />
for registration purposes, � Page 43.<br />
The handset is automatically assigned an internal call number following registration. The<br />
internal call number appears in the display.<br />
To register handsets from other manufacturers, please refer to the operating<br />
manual supplied with them.<br />
Deregistering handsets<br />
A handset can only be removed from a base station using another handset which<br />
is registered to that base station. The message �No Base" appears in the display<br />
of the handset deregistered.<br />
Handsets are deregistered via the menu, � Page 43.<br />
Multiple base stations<br />
The range of the handset can be increased by registering it on several base stations. The<br />
handset can be registered on up to 4 different base stations simultaneously. Each base<br />
station requires its own telephone cable socket. Connections can be used with the same<br />
call number or with different ones.<br />
Calls in progress, however, cannot be transferred from one base station to<br />
another.<br />
1 GAP: Generic Access Profile = Standard for the interoperation of handsets and base<br />
stations from other manufacturers.<br />
49
50<br />
Extending the Telephone System<br />
Increasing the range<br />
Position the base stations so that the ranges of the individual base stations overlap. Test<br />
the range of your handsets because obstructions in buildings restrict the range. Register<br />
the handset on all the base stations. Activate the Base auto option for the automatic<br />
selection of a base station, � Page 44. The handset then automatically searches for the<br />
nearest base station with the best connection.<br />
Mobility through registration at various locations<br />
Register the handset on base stations at various locations. Activate the Base auto option<br />
for the automatic selection of a base station, � Page 44. Regardless of your current location,<br />
the handset automatically searches for a base station within range.
12 In the Case of Problems<br />
In the Case of Problems<br />
Service hotline<br />
Should problems arise with the telephone, please refer to the following information first. In<br />
the case of technical problems, you can contact our hotline service, tel. 0180 5 00 13 88<br />
(cost via Telekom at time of going to print: 12 ct/min). In the case of claims under the<br />
terms of guarantee, contact your sales outlet. There is a 2 year period of guarantee.<br />
Problems and solutions<br />
Problems Solutions<br />
No connection to base<br />
station possible<br />
− Check that the handset has been registered on the<br />
base station with the correct PIN code. � Page 49<br />
No telephone calls possible − The telephone is not connected properly or is defective.<br />
Only use the telephone connection cable supplied.<br />
− Test whether the telephone connection is in order by<br />
using another telephone.<br />
− The power adaptor plug is not plugged in or there is a<br />
complete power failure.<br />
− The rechargeable batteries are empty or defective.<br />
− The handset is too far from the base station.<br />
− Dialling mode is set incorrectly. � Page 43<br />
Connection is disturbed or<br />
cut off<br />
The system no longer<br />
responds<br />
The batteries are empty in a<br />
short time<br />
The CLIP 1 function does<br />
not work<br />
1 CLIP: Calling Line Identification Presentation<br />
− The handset is too far from the base station.<br />
− The base station is in an unsuitable location.<br />
− Reset all the functions to their default settings.<br />
� Page 52<br />
− Disconnect the power adapter plug briefly from the<br />
power socket.<br />
− The batteries are empty or defective.<br />
− Place the handset in the base station properly. Clean<br />
the contact surfaces on the handset and base station<br />
with a soft, dry cloth.<br />
− Place the handset in the base station for 14 hours.<br />
− The caller ID function is a supplementary service<br />
offered by telephone network providers. Contact your<br />
network provider for further information.<br />
− The caller has suppressed the transmission of their<br />
phone number.<br />
51
52<br />
Technical Properties<br />
13 Technical Properties<br />
Technical data<br />
Feature Value<br />
Standard DECT−GAP 1<br />
Power supply Input: 220/230 V, 50 Hz<br />
Output: 9 V, 300 mA<br />
Range Outdoors: Approx. 300 m<br />
Indoors: Approx. 50 m<br />
Standby Up to 100 h<br />
Max. talk time Up to 6 h<br />
Rechargeable battery pack 3.6 V, 400 mAh<br />
Dialling mode Tone dialling mode<br />
Pulse dialling mode<br />
Permissible ambient temperature 5°C to 45°C<br />
Permissible relative humidity 20% to 75%<br />
Flash function 100 ms, 120 ms, 300 ms, 600 ms<br />
Default settings 34<br />
The default settings can be restored via the menu,� Page 42.<br />
Language: German Key lock: Off Key tones: On<br />
Receiver volume: 2 External call melody: 1 External call volume: 5<br />
Internal call melody: 1 Internal call volume: 5 Base selection: Base 1<br />
Handset name: <strong>Oyster</strong><strong>500</strong><br />
Declaration of Conformity<br />
Handset PIN code: 1590<br />
This device fulfils the requirements stipulated in the EU directive:<br />
1999/5/EU directive on radio equipment and telecommunications terminal<br />
equipment and the mutual recognition of their conformity. Conformity with the<br />
above mentioned directive is confirmed by the CE symbol on the device.<br />
To view the complete Declaration of Conformity, please refer to the free download<br />
available on our web site www.audioline.de.<br />
1 DECT: Digital Enhanced Cordless Telecommunication = Standard for cordless telephones.<br />
GAP: Generic Access Profile = Standard for the interoperation of handsets and base<br />
stations from other manufacturers.
14 Maintenance / Guarantee<br />
Maintenance / Guarantee<br />
Maintenance<br />
� Clean the housing surfaces with a soft, fluff−free cloth.<br />
� Never use cleaning agents or solvents.<br />
Guarantee<br />
AUDIOLINE equipment is produced and tested according to the latest production methods.<br />
The implementation of carefully chosen materials and highly developed technologies<br />
ensure trouble−free functioning and a long service life. The terms of guarantee do not<br />
apply where the cause of equipment malfunction is the fault of the telephone network operator<br />
or any interposed private branch extension system. The terms of guarantee do not<br />
apply to the batteries or power packs used in the products. The period of guarantee is 24<br />
months from the date of purchase.<br />
All deficiencies resulting from material or production faults which occur during the period<br />
of guarantee will be eliminated free of charge. Rights to claims under the terms of guarantee<br />
are annulled following intervention by the purchaser or third parties. Damage caused<br />
as a result of improper handling or operation, incorrect positioning or storing, improper<br />
connection or installation, Acts of God or other external influence are not covered by the<br />
terms of guarantee. In the case of complaints, we reserve the right to repair or replace defect<br />
parts or provide a replacement device. Replacement parts or devices become our<br />
property. Rights to compensation in the case of damage are excluded where there is no<br />
evidence of intent or gross negligence by the manufacturer.<br />
If your equipment shows signs of defect during the period of guarantee, please return it to<br />
the sales outlet in which you purchased the AUDIOLINE equipment together with the purchase<br />
receipt. All rights to claims under the terms of guarantee in accordance with this<br />
agreement must be asserted exclusively with regard to your sales outlet. Two years after<br />
the purchase and transfer of our products, claims under the terms of guarantee can no<br />
longer be asserted.<br />
53
54<br />
Index<br />
15 Index<br />
B<br />
Base auto, 44<br />
Base station, 31, 49<br />
Battery charge status, 32<br />
Brokering, 38<br />
C<br />
Call log, 41, 46<br />
Caller ID, 40, 46<br />
Calling back, 37<br />
Charging, 32<br />
Charging station, 32<br />
CLIP, 40<br />
Conference calls, 38<br />
Connection, 31, 32<br />
Creating, 36, 45<br />
D<br />
Date, 42<br />
Declaration of Conformity, 52<br />
Default settings, 42, 52<br />
Deleting, 46, 47<br />
Deregistering, 43, 49<br />
Dialling, 37<br />
Dialling mode, 43, 48<br />
Dialling pause, 40, 43<br />
Display, 34<br />
Display messages, 46<br />
E<br />
Editing, 45<br />
Ending a call, 37<br />
Entering names, 45<br />
Entering text, 45<br />
Explanations, 34<br />
Extending, 49<br />
F<br />
Forwarding, 38<br />
Functions, 48<br />
G<br />
Guarantee, 53<br />
H<br />
Handset, 49<br />
Handsfree, 38<br />
Holding a call, 38<br />
I<br />
Icons, 34<br />
Inserting the batteries, 32<br />
Internal call, 37<br />
K<br />
Key lock, 39<br />
Key tones, 42<br />
M<br />
Main menu, 41<br />
Maintenance , 53<br />
Making a call, 37<br />
Menu Structure, 41<br />
Messages, 46<br />
Muting, 39<br />
Muting button, 39<br />
N<br />
Navigation, 36<br />
Navigation buttons, 35<br />
Notation, 34<br />
O<br />
Off−hook, 37<br />
On−hook, 37<br />
Operating elements, 33<br />
Operation, 34<br />
P<br />
Package contents, 31<br />
Paging, 39<br />
Phone book, 37, 41, 45<br />
Phone book entries, 45<br />
phone book entries, 36<br />
Private branch exchanges, 40<br />
Problems, 51<br />
Problems and solutions, 51<br />
Pulse dialling mode, 43, 48<br />
R<br />
R−button, 40<br />
Range, 50<br />
Receiver volume, 38<br />
Redialling, 37<br />
Registering, 43, 44, 49<br />
Ringing melody, 39, 42<br />
S<br />
Safety information, 30<br />
Save, 47<br />
Saving, 36, 45<br />
Search, 39<br />
Service hotline, 51<br />
Standby mode, 35<br />
Starting up, 31<br />
Supplementary services, 40<br />
Switching off, 39<br />
Switching on, 39<br />
T<br />
Taking a call, 37<br />
Talk time, 38<br />
Technical data, 52<br />
Telephoning, 37<br />
Temporary tone dialling, 48<br />
Time, 32, 42<br />
Tone dialling mode, 43, 48<br />
Transferring calls, 38<br />
Troubleshooting, 51
Wichtige Garantiehinweise<br />
Die Garantiezeit für Ihr AUDIOLINE − Produkt beginnt mit dem Kaufdatum. Ein Garantieanspruch<br />
besteht bei Mängeln, die auf Material− oder Herstellungsfehler zurückzuführen sind. Der<br />
Garantieanspruch erlischt bei Eingriffen durch den Käufer oder durch Dritte. Schäden, die durch<br />
unsachgemäße Behandlung oder Bedienung, natürliche Abnutzung, durch falsches Aufstellen<br />
oder Aufbewahren, durch unsachgemäßen Anschluss oder Installation sowie durch höhere Gewalt<br />
oder sonstige äußere Einflüsse entstehen, fallen nicht unter die Garantieleistung.<br />
BITTE WENDEN SIE SICH IM GARANTIEFALL AUSSCHLIESSLICH AN DEN HÄNDLER, BEI<br />
DEM SIE DAS GERÄT GEKAUFT HABEN, UND VERGESSEN SIE NICHT, DEN KAUFBELEG<br />
VORZULEGEN.<br />
UM UNNÖTIG LANGE WARTEZEITEN ZU VERMEIDEN, SENDEN SIE<br />
REKLAMATIONSGERÄTE BITTE NICHT AN UNSERE BÜROADRESSE.<br />
BEI FRAGEN ZUR BEDIENUNG UND GARANTIELEISTUNG LESEN SIE BITTE DIE<br />
BEDIENUNGSANLEITUNG ODER WENDEN SIE SICH AN UNSERE HOTLINE:<br />
0180 <strong>500</strong> 13 88 (Kosten Telekom bei Drucklegung: 12ct/min)<br />
AUDIOLINE GmbH<br />
Neuss<br />
Service Hotline 0180 <strong>500</strong> 13 88<br />
(Kosten Telekom bei Drucklegung: 12ct/min)<br />
Internet: www.audioline.de − E−mail: info@audioline.de<br />
Version 1.0 − 29.05.2006