5400 TECH ALARM de_en - Audioline
5400 TECH ALARM de_en - Audioline
5400 TECH ALARM de_en - Audioline

Sie wollen auch ein ePaper? Erhöhen Sie die Reichweite Ihrer Titel.
YUMPU macht aus Druck-PDFs automatisch weboptimierte ePaper, die Google liebt.
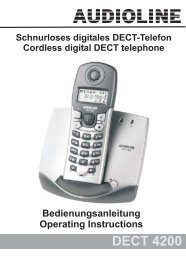
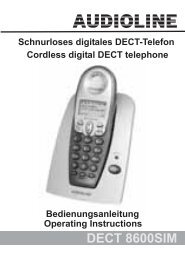
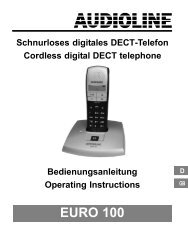
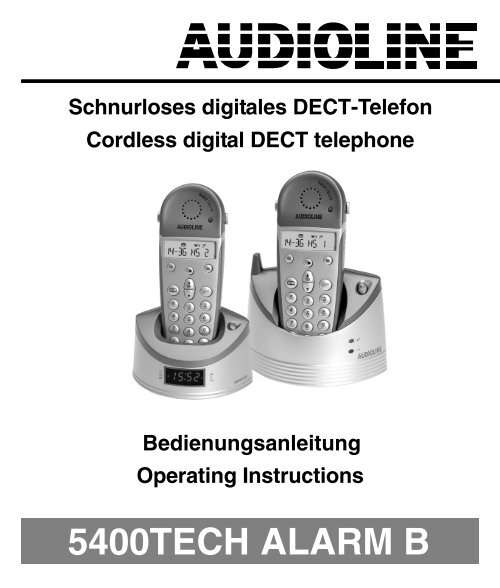
Schnurloses digitales DECT−Telefon<br />
Cordless digital DECT telephone<br />
Bedi<strong>en</strong>ungsanleitung<br />
Operating Instructions<br />
<strong>5400</strong><strong>TECH</strong> <strong>ALARM</strong> B
2<br />
<strong>5400</strong> <strong>TECH</strong> <strong>ALARM</strong> B<br />
Bedi<strong>en</strong>ungsanleitung........3<br />
Operating Instructions....45
− Inhaltsverzeichnis −<br />
1 Allgemeine Hinweise . . . . . . . . . . . . . . . . . . . . . . . . . . . . . . . . . 6<br />
1.1 Bestimmungsgemäße Verw<strong>en</strong>dung . . . . . . . . . . . . . . . . . . . . . . . . . . . . . 6<br />
1.2 Stromausfall . . . . . . . . . . . . . . . . . . . . . . . . . . . . . . . . . . . . . . . . . . . . . . . . 6<br />
1.3 Aufstellungsort . . . . . . . . . . . . . . . . . . . . . . . . . . . . . . . . . . . . . . . . . . . . . . 6<br />
1.4 Netzteil . . . . . . . . . . . . . . . . . . . . . . . . . . . . . . . . . . . . . . . . . . . . . . . . . . . . 7<br />
1.5 La<strong>de</strong>n <strong>de</strong>s Mobilteils . . . . . . . . . . . . . . . . . . . . . . . . . . . . . . . . . . . . . . . . . 7<br />
1.6 Neb<strong>en</strong>stell<strong>en</strong>anlag<strong>en</strong> . . . . . . . . . . . . . . . . . . . . . . . . . . . . . . . . . . . . . . . . 7<br />
1.7 Hinweise zur Entsorgung . . . . . . . . . . . . . . . . . . . . . . . . . . . . . . . . . . . . . 7<br />
1.8 Hinweis für medizinische Geräte . . . . . . . . . . . . . . . . . . . . . . . . . . . . . . . 8<br />
1.9 Temperatur und Umgebungsbedingung<strong>en</strong> . . . . . . . . . . . . . . . . . . . . . . . 9<br />
1.10 Reinigung und Pflege . . . . . . . . . . . . . . . . . . . . . . . . . . . . . . . . . . . . . . . . 9<br />
2 Bedi<strong>en</strong>elem<strong>en</strong>te . . . . . . . . . . . . . . . . . . . . . . . . . . . . . . . . . . . . . 10<br />
3 Neb<strong>en</strong>stell<strong>en</strong>anlag<strong>en</strong> / T−Net . . . . . . . . . . . . . . . . . . . . . . . . . . 11<br />
3.1 R−Taste an Neb<strong>en</strong>stell<strong>en</strong>anlag<strong>en</strong> . . . . . . . . . . . . . . . . . . . . . . . . . . . . . . . 11<br />
3.2 R−Taste und das T−Net <strong>de</strong>r Deutsch<strong>en</strong> Telekom . . . . . . . . . . . . . . . . . . 11<br />
3.3 Wahlpause . . . . . . . . . . . . . . . . . . . . . . . . . . . . . . . . . . . . . . . . . . . . . . . . . 11<br />
4 Inbetriebnahme . . . . . . . . . . . . . . . . . . . . . . . . . . . . . . . . . . . . . . 12<br />
4.1 Sicherheitshinweise . . . . . . . . . . . . . . . . . . . . . . . . . . . . . . . . . . . . . . . . . 12<br />
4.2 Verpackungsinhalt prüf<strong>en</strong> . . . . . . . . . . . . . . . . . . . . . . . . . . . . . . . . . . . . . 12<br />
4.3 Basisstation anschließ<strong>en</strong> . . . . . . . . . . . . . . . . . . . . . . . . . . . . . . . . . . . . . 12<br />
4.4 La<strong>de</strong>station anschließ<strong>en</strong> . . . . . . . . . . . . . . . . . . . . . . . . . . . . . . . . . . . . . . 13<br />
4.5 Uhrzeit an <strong>de</strong>r La<strong>de</strong>station einstell<strong>en</strong> . . . . . . . . . . . . . . . . . . . . . . . . . . . 13<br />
4.6 Alarmzeit einstell<strong>en</strong> und Alarmzeit aktivier<strong>en</strong> . . . . . . . . . . . . . . . . . . . . . 14<br />
4.7 Standard−Akkus einsetz<strong>en</strong> . . . . . . . . . . . . . . . . . . . . . . . . . . . . . . . . . . . . 15<br />
4.8 Aufla<strong>de</strong>n <strong>de</strong>r Standard−Akkus . . . . . . . . . . . . . . . . . . . . . . . . . . . . . . . . . 15<br />
4.9 Ton (MFV)− o<strong>de</strong>r Impuls (IWV) − Wahlverfahr<strong>en</strong> . . . . . . . . . . . . . . . . . . . 16<br />
4.10 Gürtelclip anbring<strong>en</strong> . . . . . . . . . . . . . . . . . . . . . . . . . . . . . . . . . . . . . . . . . 16<br />
5 M<strong>en</strong>üstruktur . . . . . . . . . . . . . . . . . . . . . . . . . . . . . . . . . . . . . . . .<br />
17<br />
3
4<br />
− Inhaltsverzeichnis −<br />
6 Bedi<strong>en</strong>ung . . . . . . . . . . . . . . . . . . . . . . . . . . . . . . . . . . . . . . . . . . 19<br />
6.1 Das Display . . . . . . . . . . . . . . . . . . . . . . . . . . . . . . . . . . . . . . . . . . . . . . . . 19<br />
6.2 Externer Anrufbeantworter . . . . . . . . . . . . . . . . . . . . . . . . . . . . . . . . . . . . 20<br />
6.3 Anrufe <strong>en</strong>tgeg<strong>en</strong>nehm<strong>en</strong> . . . . . . . . . . . . . . . . . . . . . . . . . . . . . . . . . . . . . 20<br />
6.4 Anrufe führ<strong>en</strong> . . . . . . . . . . . . . . . . . . . . . . . . . . . . . . . . . . . . . . . . . . . . . . . 20<br />
6.5 Gespeicherte Rufnummern aus <strong>de</strong>m Telefonbuch wähl<strong>en</strong> . . . . . . . . . . 21<br />
6.6 Anzeige <strong>de</strong>r Gesprächsdauer . . . . . . . . . . . . . . . . . . . . . . . . . . . . . . . . . 21<br />
6.7 Mobilteil ein−/ausschalt<strong>en</strong> . . . . . . . . . . . . . . . . . . . . . . . . . . . . . . . . . . . . . 21<br />
6.8 Einstell<strong>en</strong> <strong>de</strong>r Hörerlautstärke . . . . . . . . . . . . . . . . . . . . . . . . . . . . . . . . . 21<br />
6.9 Wahlwie<strong>de</strong>rholung . . . . . . . . . . . . . . . . . . . . . . . . . . . . . . . . . . . . . . . . . . . 21<br />
6.10 Mikrofon im Mobilteil stummschalt<strong>en</strong> . . . . . . . . . . . . . . . . . . . . . . . . . . . . 22<br />
6.11 Tast<strong>en</strong>sperre ein−/ ausschalt<strong>en</strong> . . . . . . . . . . . . . . . . . . . . . . . . . . . . . . . . 22<br />
6.12 Temporäre Tonwahl . . . . . . . . . . . . . . . . . . . . . . . . . . . . . . . . . . . . . . . . . . 23<br />
6.13 Hinweise zur Reichweite . . . . . . . . . . . . . . . . . . . . . . . . . . . . . . . . . . . . . 23<br />
6.14 Mobilteil such<strong>en</strong> (Paging) . . . . . . . . . . . . . . . . . . . . . . . . . . . . . . . . . . . . . 23<br />
7 Das Telefonbuch . . . . . . . . . . . . . . . . . . . . . . . . . . . . . . . . . . . . . 24<br />
7.1 Rufnummern in das Telefonbuch eingeb<strong>en</strong> . . . . . . . . . . . . . . . . . . . . . . 24<br />
7.2 Gespeicherte Einträge im Telefonbuch än<strong>de</strong>rn . . . . . . . . . . . . . . . . . . . 25<br />
7.3 Gespeicherte Einträge aus <strong>de</strong>m Telefonbuch lösch<strong>en</strong> . . . . . . . . . . . . . 25<br />
8 Rufnummernanzeige (CLIP) . . . . . . . . . . . . . . . . . . . . . . . . . . . 26<br />
8.1 Die Anruferliste . . . . . . . . . . . . . . . . . . . . . . . . . . . . . . . . . . . . . . . . . . . . . 26<br />
9 Son<strong>de</strong>rfunktion<strong>en</strong> . . . . . . . . . . . . . . . . . . . . . . . . . . . . . . . . . . . . 29<br />
9.1 Basis − Lautstärke einstell<strong>en</strong> . . . . . . . . . . . . . . . . . . . . . . . . . . . . . . . . . . 29<br />
9.2 Basis − Melodie einstell<strong>en</strong> . . . . . . . . . . . . . . . . . . . . . . . . . . . . . . . . . . . . . 29<br />
9.3 PIN än<strong>de</strong>rn . . . . . . . . . . . . . . . . . . . . . . . . . . . . . . . . . . . . . . . . . . . . . . . . . 30<br />
9.4 Ton (MFV)− o<strong>de</strong>r Impuls (IWV) − Wahlverfahr<strong>en</strong> . . . . . . . . . . . . . . . . . . . 30<br />
9.5 Flash−Zeit einstell<strong>en</strong> . . . . . . . . . . . . . . . . . . . . . . . . . . . . . . . . . . . . . . . . . 30<br />
9.6 Werkseinstellung<strong>en</strong> wie<strong>de</strong>rherstell<strong>en</strong> . . . . . . . . . . . . . . . . . . . . . . . . . . .<br />
31
− Inhaltsverzeichnis −<br />
9.7 Tast<strong>en</strong>ton und Hinweistöne ein−/ausschalt<strong>en</strong> . . . . . . . . . . . . . . . . . . . . . 31<br />
9.8 Mobilteil − Ruftonlautstärke einstell<strong>en</strong> . . . . . . . . . . . . . . . . . . . . . . . . . . . 32<br />
9.9 Mobilteil − Ruftonmelodie einstell<strong>en</strong> . . . . . . . . . . . . . . . . . . . . . . . . . . . . . 33<br />
9.10 Uhrzeit einstell<strong>en</strong> . . . . . . . . . . . . . . . . . . . . . . . . . . . . . . . . . . . . . . . . . . . . 33<br />
9.11 Wecker ein/aus . . . . . . . . . . . . . . . . . . . . . . . . . . . . . . . . . . . . . . . . . . . . . 33<br />
9.12 Anrufe automatisch <strong>en</strong>tgeg<strong>en</strong>nehm<strong>en</strong> . . . . . . . . . . . . . . . . . . . . . . . . . . 34<br />
9.13 Nam<strong>en</strong> <strong>de</strong>s Mobilteils än<strong>de</strong>rn . . . . . . . . . . . . . . . . . . . . . . . . . . . . . . . . . . 34<br />
9.14 Sprache einstell<strong>en</strong> . . . . . . . . . . . . . . . . . . . . . . . . . . . . . . . . . . . . . . . . . . . 35<br />
10 Mehrere Mobilteile . . . . . . . . . . . . . . . . . . . . . . . . . . . . . . . . . . . 36<br />
10.1 Intern telefonier<strong>en</strong> . . . . . . . . . . . . . . . . . . . . . . . . . . . . . . . . . . . . . . . . . . . 36<br />
10.2 Externe Gespräche an ein an<strong>de</strong>res Mobilteil weiterleit<strong>en</strong> . . . . . . . . . . . 37<br />
10.3 Konfer<strong>en</strong>zgespräche führ<strong>en</strong> . . . . . . . . . . . . . . . . . . . . . . . . . . . . . . . . . . . 37<br />
10.4 An− und Abmel<strong>de</strong>n von Mobilteil<strong>en</strong> . . . . . . . . . . . . . . . . . . . . . . . . . . . . . 38<br />
10.5 Zusätzliche Basisstation<strong>en</strong> . . . . . . . . . . . . . . . . . . . . . . . . . . . . . . . . . . . . 40<br />
11 Fehlerbeseitigung . . . . . . . . . . . . . . . . . . . . . . . . . . . . . . . . . . . 41<br />
12 Wichtige Information<strong>en</strong> . . . . . . . . . . . . . . . . . . . . . . . . . . . . . . . 43<br />
12.1 Technische Dat<strong>en</strong> . . . . . . . . . . . . . . . . . . . . . . . . . . . . . . . . . . . . . . . . . . . 43<br />
12.2 Garantie . . . . . . . . . . . . . . . . . . . . . . . . . . . . . . . . . . . . . . . . . . . . . . . . . . . 43<br />
12.3 Konformitätserklärung . . . . . . . . . . . . . . . . . . . . . . . . . . . . . . . . . . . . . . . .<br />
44<br />
5
1 Allgemeine Hinweise<br />
6<br />
− Allgemeine Hinweise −<br />
Bitte les<strong>en</strong> Sie diese Bedi<strong>en</strong>ungsanleitung sorgfältig durch.<br />
Bei auftret<strong>en</strong><strong>de</strong>n Frag<strong>en</strong> w<strong>en</strong><strong>de</strong>n Sie sich bitte an unser<strong>en</strong> Service unter<br />
<strong>de</strong>r Service−Hotline 0180 5 00 13 88 (Kost<strong>en</strong> Telekom bei Drucklegung:<br />
12ct/min). Öffn<strong>en</strong> Sie das Gerät in keinem Fall selbst und führ<strong>en</strong> Sie keine<br />
eig<strong>en</strong><strong>en</strong> Reparaturversuche durch. Bei Gewährleistungsansprüch<strong>en</strong><br />
w<strong>en</strong><strong>de</strong>n Sie sich bitte an Ihr<strong>en</strong> Fachhändler.<br />
Im Zuge von Projektverbesserung<strong>en</strong> behalt<strong>en</strong> wir uns technische und<br />
optische Verän<strong>de</strong>rung<strong>en</strong> am Artikel vor.<br />
1.1 Bestimmungsgemäße Verw<strong>en</strong>dung<br />
Dieses Telefon ist für <strong>de</strong>n Betrieb an einem analog<strong>en</strong> Telefonanschluss<br />
(PSTN) innerhalb Deutschlands <strong>en</strong>twickelt wor<strong>de</strong>n. Allerdings kann, weg<strong>en</strong><br />
<strong>de</strong>r Unterschie<strong>de</strong> zwisch<strong>en</strong> <strong>de</strong>n verschie<strong>de</strong>n<strong>en</strong><br />
Telekommunikations−Netzbetreibern, keine Garantie für einwandfreie<br />
Funktion an je<strong>de</strong>m Telekommunikations−Endgeräteanschluss<br />
übernomm<strong>en</strong> wer<strong>de</strong>n. Das Telefon kann an einer TAE−Steckdose mit<br />
F/N−Codierung gemeinsam mit an<strong>de</strong>r<strong>en</strong> Anschlussgerät<strong>en</strong> wie Fax,<br />
Anrufbeantworter o<strong>de</strong>r einem Mo<strong>de</strong>m b<strong>en</strong>utzt wer<strong>de</strong>n. Schließ<strong>en</strong> Sie das<br />
Anschlusskabel <strong>de</strong>s Telefons nur an eine dafür bestimmte<br />
Telefonsteckdose an. Wechseln Sie <strong>de</strong>n Stecker <strong>de</strong>s Anschlusskabels<br />
nicht aus.<br />
1.2 Stromausfall<br />
Bei Stromausfall kann mit <strong>de</strong>m Telefon nicht telefoniert wer<strong>de</strong>n. Halt<strong>en</strong> Sie<br />
für Notfälle ein schnurgebun<strong>de</strong>nes Telefon bereit, welches ohne eine<br />
externe Stromversorgung arbeitet.<br />
1.3 Aufstellungsort<br />
Der Aufstellungsort hat ein<strong>en</strong> <strong>en</strong>tschei<strong>de</strong>n<strong>de</strong>n Einfluss auf ein<strong>en</strong><br />
einwandfrei<strong>en</strong> Betrieb <strong>de</strong>s Telefons. Am Aufstellungsort muss sich eine<br />
230 Volt Netzsteckdose befin<strong>de</strong>n.
− Allgemeine Hinweise −<br />
Stell<strong>en</strong> Sie die Basisstation nicht in die unmittelbare Umgebung von<br />
an<strong>de</strong>r<strong>en</strong> elektronisch<strong>en</strong> Gerät<strong>en</strong> wie z. B. Mikrowell<strong>en</strong> o<strong>de</strong>r HIFI−Gerät<strong>en</strong>,<br />
da es sonst zu geg<strong>en</strong>seitiger Beeinflussung komm<strong>en</strong> kann. Halt<strong>en</strong> Sie<br />
ein<strong>en</strong> Abstand von min<strong>de</strong>st<strong>en</strong>s einem Meter zu elektronisch<strong>en</strong> Gerät<strong>en</strong><br />
ein.<br />
Stell<strong>en</strong> Sie die Basisstation auf eine eb<strong>en</strong>e und rutschfeste Fläche.<br />
Normalerweise hinterlass<strong>en</strong> die Füße <strong>de</strong>r Basisstation keine Spur<strong>en</strong> auf<br />
<strong>de</strong>r Aufstellfläche. Bei einig<strong>en</strong> empfindlich<strong>en</strong> Lack<strong>en</strong> und Oberfläch<strong>en</strong><br />
kann es jedoch nicht ausgeschloss<strong>en</strong> wer<strong>de</strong>n, dass durch die Gerätefüße<br />
Spur<strong>en</strong> auf <strong>de</strong>r Abstellfläche <strong>en</strong>tsteh<strong>en</strong>.<br />
1.4 Netzteil<br />
Verw<strong>en</strong><strong>de</strong>n Sie nur das mitgelieferte AUDIOLINE Steckernetzteil, da<br />
an<strong>de</strong>re Netzteile das Telefon zerstör<strong>en</strong> könn<strong>en</strong>. Netzteil nicht öffn<strong>en</strong>. Es<br />
besteht Leb<strong>en</strong>sgefahr, w<strong>en</strong>n das Netzteil geöffnet wird, solange es an das<br />
Stromnetz angeschloss<strong>en</strong> ist.<br />
Sie dürf<strong>en</strong> <strong>de</strong>n Zugang zum Steckernetzteil nicht durch Möbel o<strong>de</strong>r an<strong>de</strong>re<br />
Geg<strong>en</strong>stän<strong>de</strong> versperr<strong>en</strong>.<br />
1.5 La<strong>de</strong>n <strong>de</strong>s Mobilteils<br />
Das Mobilteil erwärmt sich beim La<strong>de</strong>n. Dies ist normal und ungefährlich.<br />
La<strong>de</strong>n Sie das Mobilteil nicht mit frem<strong>de</strong>n Aufla<strong>de</strong>gerät<strong>en</strong>, da sonst<br />
Beschädigung<strong>en</strong> auftret<strong>en</strong> könn<strong>en</strong>.<br />
1.6 Neb<strong>en</strong>stell<strong>en</strong>anlag<strong>en</strong><br />
Das Telefon kann auch an einer Neb<strong>en</strong>stell<strong>en</strong>anlage angeschloss<strong>en</strong><br />
wer<strong>de</strong>n. Ob Ihr Telefon an Ihrer Neb<strong>en</strong>stell<strong>en</strong>anlage einwandfrei<br />
funktioniert, erfahr<strong>en</strong> Sie bei <strong>de</strong>m Händler, bei <strong>de</strong>m die<br />
Neb<strong>en</strong>stell<strong>en</strong>anlage gekauft wur<strong>de</strong>. Es kann nicht garantiert wer<strong>de</strong>n, dass<br />
das Telefon an je<strong>de</strong>r Neb<strong>en</strong>stell<strong>en</strong>anlage funktioniert.<br />
1.7 Hinweise zur Entsorgung<br />
Die Umsetzung europäisch<strong>en</strong> Rechtes in nationale Gesetze und<br />
Verordnung<strong>en</strong> verpflichtet Sie zur sachgerecht<strong>en</strong> Entsorgung von<br />
Gebrauchsgütern. Dies di<strong>en</strong>t <strong>de</strong>m Schutz von Person<strong>en</strong> und Umwelt.<br />
7
8<br />
− Allgemeine Hinweise −<br />
Das neb<strong>en</strong>steh<strong>en</strong><strong>de</strong> Symbol be<strong>de</strong>utet, dass elektrische und<br />
elektronische Altgeräte und Batteri<strong>en</strong> getr<strong>en</strong>nt vom Hausmüll<br />
zu <strong>en</strong>tsorg<strong>en</strong> sind.<br />
Alte o<strong>de</strong>r ausgedi<strong>en</strong>te Geräte <strong>en</strong>tsorg<strong>en</strong> Sie bei einer<br />
Sammelstelle eines geeignet<strong>en</strong> Entsorgungsträgers.<br />
Batteri<strong>en</strong> und Akkumulator<strong>en</strong> <strong>en</strong>tsorg<strong>en</strong> Sie beim<br />
batterievertreib<strong>en</strong><strong>de</strong>n Han<strong>de</strong>l sowie zuständig<strong>en</strong><br />
Sammelstell<strong>en</strong>, die <strong>en</strong>tsprech<strong>en</strong><strong>de</strong> Behälter bereitstell<strong>en</strong>.<br />
Verpackungsmateriali<strong>en</strong> <strong>en</strong>tsorg<strong>en</strong> Sie <strong>en</strong>tsprech<strong>en</strong>d <strong>de</strong>n lokal<strong>en</strong><br />
Vorschrift<strong>en</strong>.<br />
1.8 Hinweis für medizinische Geräte<br />
Das Telefon arbeitet mit einer sehr gering<strong>en</strong> S<strong>en</strong><strong>de</strong>leistung. Diese geringe<br />
S<strong>en</strong><strong>de</strong>leistung schließt eine gesundheitliche Gefährdung nach <strong>de</strong>m<br />
<strong>de</strong>rzeitig<strong>en</strong> Stand von Forschung und Technik aus. Es hat sich aber<br />
gezeigt, dass eingeschaltete tragbare Telefone medizinische Geräte<br />
beeinfluss<strong>en</strong> könn<strong>en</strong>. B<strong>en</strong>utz<strong>en</strong> Sie das Telefon <strong>de</strong>shalb nicht in <strong>de</strong>r Nähe<br />
von medizinisch<strong>en</strong> Gerät<strong>en</strong>.<br />
Eine Beeinflussung von Herzschrittmachern durch DECT−Telefone ist<br />
bisher nicht beobachtet wor<strong>de</strong>n, kann jedoch nicht völlig ausgeschloss<strong>en</strong><br />
wer<strong>de</strong>n.<br />
DECT−Telefone könn<strong>en</strong> in Hörgerät<strong>en</strong> ein<strong>en</strong> unang<strong>en</strong>ehm<strong>en</strong> Brummton<br />
verursach<strong>en</strong>.
− Allgemeine Hinweise −<br />
1.9 Temperatur und Umgebungsbedingung<strong>en</strong><br />
Das Telefon ist für <strong>de</strong>n Betrieb in geschützt<strong>en</strong> Räum<strong>en</strong> mit einem<br />
Temperaturbereich von<br />
10 °C bis 30 °C ausgelegt. Die Basisstation darf nicht in Feuchträum<strong>en</strong> wie<br />
Bad o<strong>de</strong>r Waschküche aufgestellt wer<strong>de</strong>n. Vermei<strong>de</strong>n Sie die Nähe zu<br />
Wärmequell<strong>en</strong> wie Heizkörpern und setz<strong>en</strong> Sie das Gerät keiner direkt<strong>en</strong><br />
Sonn<strong>en</strong>bestrahlung aus.<br />
Verw<strong>en</strong><strong>de</strong>n Sie das Mobilteil nicht in explosionsgefähr<strong>de</strong>t<strong>en</strong> Bereich<strong>en</strong>.<br />
Vermei<strong>de</strong>n Sie Belastung<strong>en</strong> durch Rauch, Staub, Erschütterung<strong>en</strong>,<br />
Chemikali<strong>en</strong>, Feuchtigkeit, Hitze o<strong>de</strong>r direkte Sonn<strong>en</strong>einstrahlung.<br />
1.10 Reinigung und Pflege<br />
Reinig<strong>en</strong> Sie die Gehäuseoberfläch<strong>en</strong> mit einem trock<strong>en</strong><strong>en</strong>, weich<strong>en</strong> und<br />
fusselfrei<strong>en</strong> Tuch. Verw<strong>en</strong><strong>de</strong>n Sie keine Reinigungsmittel o<strong>de</strong>r aggressiv<strong>en</strong><br />
Lösungsmittel. Außer einer geleg<strong>en</strong>tlich<strong>en</strong> Gehäusereinigung ist keine<br />
weitere Pflege erfor<strong>de</strong>rlich. Die Gummifüße <strong>de</strong>r Basisstation sind nicht<br />
geg<strong>en</strong> alle Reinigungsmittel beständig. Der Hersteller kann daher nicht für<br />
evtl. Schä<strong>de</strong>n an Möbeln o. Ä. haftbar gemacht wer<strong>de</strong>n.<br />
9
10<br />
− Bedi<strong>en</strong>elem<strong>en</strong>te −<br />
2 Bedi<strong>en</strong>elem<strong>en</strong>te<br />
Mobilteil<br />
1. Gesprächsanzeige<br />
2. Wahlwie<strong>de</strong>rholung<br />
3. M<strong>en</strong>ü<br />
4. Gesprächstaste<br />
5. Auswahltast<strong>en</strong> / Anruferliste CLIP<br />
6. Interne und Konfer<strong>en</strong>zgespräche<br />
7. R−Signaltaste / Ein / Aus<br />
8. Telefonbuch<br />
9. Stumm / Löschtaste<br />
Basisstation<br />
10. Paging−Taste (Mobilteil such<strong>en</strong>)<br />
11. LED Gesprächs− und Netzanzeige<br />
12. LED La<strong>de</strong>kontrollleuchte<br />
La<strong>de</strong>station<br />
13. Alarm aus<br />
14. Anzeige AM (vormittags)<br />
15. 24 Stun<strong>de</strong>n Mo<strong>de</strong><br />
16. Anzeige PM (nachmittags)<br />
17. Alarmzeiteinstellung<br />
18. La<strong>de</strong>kontrollleuchte<br />
19. Alarm eingeschaltet<br />
20. Taste MODE<br />
21. Taste SET<br />
22. Taste UP<br />
19<br />
18<br />
17<br />
9<br />
8<br />
7<br />
22<br />
21<br />
AM<br />
24<br />
FM<br />
20<br />
1<br />
2<br />
3<br />
4<br />
5<br />
6<br />
10<br />
11<br />
12<br />
13<br />
14<br />
15<br />
16
− Neb<strong>en</strong>stell<strong>en</strong>anlag<strong>en</strong> / T−Net −<br />
3 Neb<strong>en</strong>stell<strong>en</strong>anlag<strong>en</strong> / T−Net<br />
Die Taste Ihres Telefons könn<strong>en</strong> Sie an Neb<strong>en</strong>stell<strong>en</strong>anlag<strong>en</strong> und bei<br />
<strong>de</strong>r Verw<strong>en</strong>dung <strong>de</strong>r T−Net Funktion<strong>en</strong> <strong>de</strong>r Deutsch<strong>en</strong> Telekom nutz<strong>en</strong>.<br />
3.1 R−Taste an Neb<strong>en</strong>stell<strong>en</strong>anlag<strong>en</strong><br />
Ist Ihr Telefon über eine Neb<strong>en</strong>stell<strong>en</strong>anlage angeschloss<strong>en</strong>, könn<strong>en</strong> Sie<br />
über die Taste alle Möglichkeit<strong>en</strong>, wie z. B. Anrufe weiterleit<strong>en</strong>,<br />
automatisch<strong>en</strong> Rückruf usw., nutz<strong>en</strong>. An einer Neb<strong>en</strong>stell<strong>en</strong>anlage wird<br />
eine Flash−Zeit von 100 ms b<strong>en</strong>ötigt (Einstellung siehe Kapitel 9.5). Ob Ihr<br />
Telefon an Ihrer Neb<strong>en</strong>stell<strong>en</strong>anlage einwandfrei funktioniert, erfahr<strong>en</strong> Sie<br />
bei <strong>de</strong>m Händler, bei <strong>de</strong>m die Anlage gekauft wur<strong>de</strong>.<br />
3.2 R−Taste und das T−Net <strong>de</strong>r Deutsch<strong>en</strong> Telekom<br />
Ihr AUDIOLINE−Telefon unterstützt die wichtigst<strong>en</strong> Mehrwertdi<strong>en</strong>ste <strong>de</strong>r<br />
Deutsch<strong>en</strong> Telekom (z. B. Makeln, Anklopf<strong>en</strong>, Dreier−Konfer<strong>en</strong>z). Das<br />
T−Net arbeitet mit einer Flash−Zeit von 300 ms (Einstellung siehe<br />
Kapitel 9.5). Zur Freischaltung <strong>de</strong>r T−Net Funktion<strong>en</strong> w<strong>en</strong><strong>de</strong>n Sie sich bitte<br />
an die Deutsche Telekom.<br />
3.3 Wahlpause<br />
Bei Neb<strong>en</strong>stell<strong>en</strong>anlag<strong>en</strong> ist es erfor<strong>de</strong>rlich, eine bestimmte Nummer zu<br />
wähl<strong>en</strong> (z. B. 9" o<strong>de</strong>r 0), um ein Freizeich<strong>en</strong> für eine Amtsleitung zu<br />
bekomm<strong>en</strong>. Bei w<strong>en</strong>ig<strong>en</strong>, älter<strong>en</strong> Neb<strong>en</strong>stell<strong>en</strong>anlag<strong>en</strong> dauert es einige<br />
Zeit, bis das Freizeich<strong>en</strong> zu hör<strong>en</strong> ist. Speziell für diese<br />
Neb<strong>en</strong>stell<strong>en</strong>anlag<strong>en</strong> kann nach <strong>de</strong>r Amtsholung eine automatische Pause<br />
eingefügt wer<strong>de</strong>n, so dass Sie direkt weiter wähl<strong>en</strong> könn<strong>en</strong>, ohne das<br />
Freizeich<strong>en</strong> abzuwart<strong>en</strong>.<br />
Drück<strong>en</strong> Sie zwisch<strong>en</strong> <strong>de</strong>r Amtsk<strong>en</strong>nziffer und <strong>de</strong>r Rufnummer einmal die<br />
Taste . Im Display erscheint die Anzeige P". Nach <strong>de</strong>r Amtsholung<br />
wartet Ihr Telefon für 3 Sekun<strong>de</strong>n mit <strong>de</strong>m Wähl<strong>en</strong> <strong>de</strong>r eig<strong>en</strong>tlich<strong>en</strong><br />
Rufnummer.<br />
Hinweis: Die Pause kann auch bei <strong>de</strong>r Eingabe von Rufnummern in das<br />
Telefonbuch eingegeb<strong>en</strong> wer<strong>de</strong>n.<br />
11
4 Inbetriebnahme<br />
12<br />
− Inbetriebnahme −<br />
4.1 Sicherheitshinweise<br />
Achtung: Les<strong>en</strong> Sie vor <strong>de</strong>r Inbetriebnahme unbedingt die allgemein<strong>en</strong><br />
Hinweise am Anfang dieser Bedi<strong>en</strong>ungsanleitung.<br />
4.2 Verpackungsinhalt prüf<strong>en</strong><br />
Zum Lieferumfang gehör<strong>en</strong>:<br />
eine Basisstation ein Telefonanschlusskabel<br />
eine La<strong>de</strong>station vier Standard−Akkus<br />
zwei Mobilteile zwei Netzteile<br />
zwei Gürtelclip eine Bedi<strong>en</strong>ungsanleitung<br />
4.3 Basisstation anschließ<strong>en</strong><br />
Stell<strong>en</strong> Sie die Basisstation in <strong>de</strong>r Nähe Ihrer Telefonanschlussdose und<br />
einer Netzsteckdose auf. Verw<strong>en</strong><strong>de</strong>n Sie nur die mitgeliefert<strong>en</strong><br />
Kompon<strong>en</strong>t<strong>en</strong>.<br />
1. Steck<strong>en</strong> Sie <strong>de</strong>n klein<strong>en</strong> Stecker <strong>de</strong>s Netzteils in die<br />
<strong>en</strong>tsprech<strong>en</strong><strong>de</strong> Buchse auf <strong>de</strong>r Unterseite <strong>de</strong>r Basisstation.<br />
Hinweis: Sie könn<strong>en</strong> die Stecker nicht falsch anschließ<strong>en</strong>, weil Stecker<br />
und Buchs<strong>en</strong> konstruktiv geg<strong>en</strong> eine Verpolung geschützt sind.<br />
Die Stecker müss<strong>en</strong> hörbar in die Buchs<strong>en</strong> an <strong>de</strong>r Basisstation<br />
einrast<strong>en</strong>.<br />
2. Steck<strong>en</strong> Sie <strong>de</strong>n klein<strong>en</strong> Stecker <strong>de</strong>s Telefonanschlusskabels in<br />
die <strong>en</strong>tsprech<strong>en</strong><strong>de</strong> Buchse auf <strong>de</strong>r Unterseite <strong>de</strong>r Basisstation.<br />
3. Führ<strong>en</strong> Sie bei<strong>de</strong> Kabel auf <strong>de</strong>r Unterseite <strong>de</strong>r Basisstation im<br />
vorgeseh<strong>en</strong><strong>en</strong> Kabelkanal zur Rückseite.<br />
4. Steck<strong>en</strong> Sie das Netzteil in eine vorschriftsmäßig installierte<br />
230 Volt Netzsteckdose.<br />
Das Netzteil <strong>de</strong>r Basisstation muss immer angeschloss<strong>en</strong> sein.
− Inbetriebnahme −<br />
5. Verbin<strong>de</strong>n Sie das beilieg<strong>en</strong><strong>de</strong> Telefonanschlusskabel mit <strong>de</strong>r<br />
Telefonsteckdose.<br />
4.4 La<strong>de</strong>station anschließ<strong>en</strong><br />
Stell<strong>en</strong> Sie die La<strong>de</strong>station für das zweite Mobilteil in <strong>de</strong>r Nähe einer<br />
Netzsteckdose auf. Steck<strong>en</strong> Sie das Steckernetzteil in eine<br />
vorschriftsmäßig installierte Netzsteckdose mit 230 Volt.<br />
Hinweis: Sie dürf<strong>en</strong> <strong>de</strong>n Zugang zum Steckernetzteil nicht durch Möbel<br />
o<strong>de</strong>r an<strong>de</strong>re Geg<strong>en</strong>stän<strong>de</strong> versperr<strong>en</strong>.<br />
4.5 Uhrzeit an <strong>de</strong>r La<strong>de</strong>station einstell<strong>en</strong><br />
Um die Uhrzeit einzustell<strong>en</strong>, fin<strong>de</strong>n Sie unter <strong>de</strong>r La<strong>de</strong>station die drei<br />
Funktionstast<strong>en</strong> UP", SET" und MODE". Die Uhr arbeitet g<strong>en</strong>erell im<br />
24 Stun<strong>de</strong>nformat. Wie Sie die Uhr auf das 12 Stun<strong>de</strong>nformat umschalt<strong>en</strong><br />
könn<strong>en</strong>, erfahr<strong>en</strong> Sie in diesem Kapitel.<br />
Wie Sie die Alarmfunktion einstell<strong>en</strong>, erfahr<strong>en</strong> Sie unter 4.6.<br />
1. Drück<strong>en</strong> Sie zweimal die Taste MODE".<br />
2. Stell<strong>en</strong> Sie jetzt durch mehrmaliges Drück<strong>en</strong> <strong>de</strong>r Taste UP" die<br />
gewünschte Stun<strong>de</strong> ein und bestätig<strong>en</strong> Sie mit SET".<br />
3. Stell<strong>en</strong> Sie jetzt durch mehrmaliges Drück<strong>en</strong> <strong>de</strong>r Taste UP" die<br />
gewünschte Minut<strong>en</strong>zahl ein und bestätig<strong>en</strong> Sie mit SET".<br />
4. Drück<strong>en</strong> Sie zweimal MODE" und die befin<strong>de</strong>n sich wie<strong>de</strong>r in<br />
<strong>de</strong>r normal<strong>en</strong> Anzeige.<br />
Hinweis: Betreib<strong>en</strong> Sie die Uhr im 12 Stun<strong>de</strong>nformat, führ<strong>en</strong> Sie nach<br />
Punkt 3. die folg<strong>en</strong><strong>de</strong> Einstellung durch und fahr<strong>en</strong> Sie dann mit<br />
Punkt 4. fort:<br />
Stell<strong>en</strong> Sie jetzt durch mehrmaliges Drück<strong>en</strong> <strong>de</strong>r Taste UP" die<br />
Angabe AM" für vormittags und PM" für nachmittags ein und<br />
bestätig<strong>en</strong> Sie mit SET".<br />
Nach einem Stromausfall muss die Uhrzeit neu eingestellt<br />
wer<strong>de</strong>n.<br />
Halt<strong>en</strong> Sie die Taste UP" für länger als eine Sekun<strong>de</strong> gedrückt,<br />
än<strong>de</strong>rn sich die Zahl<strong>en</strong> im Display kontinuierlich.<br />
13
14<br />
− Inbetriebnahme −<br />
Entsteht währ<strong>en</strong>d <strong>de</strong>r Eingabe eine Pause von mehr als 30<br />
Sekun<strong>de</strong>n, wird <strong>de</strong>r Eingabemodus abgebroch<strong>en</strong>.<br />
4.5.1 Umschalt<strong>en</strong> in das 12 Stun<strong>de</strong>nformat<br />
1. Drück<strong>en</strong> Sie einmal die Taste MODE".<br />
2. Wähl<strong>en</strong> Sie mit <strong>de</strong>r Taste SET" das gewünschte Format. Das<br />
ausgewählte Format blinkt.<br />
3. Drück<strong>en</strong> Sie dreimal MODE" und Sie befin<strong>de</strong>n sich wie<strong>de</strong>r in <strong>de</strong>r<br />
normal<strong>en</strong> Anzeige.<br />
4.6 Alarmzeit einstell<strong>en</strong> und Alarmzeit aktivier<strong>en</strong><br />
Mit <strong>de</strong>r eingebaut<strong>en</strong> Alarmfunktion <strong>de</strong>r La<strong>de</strong>station könn<strong>en</strong> Sie eine feste<br />
Alarmzeit eingeb<strong>en</strong>, die alle 24 Stun<strong>de</strong>n ausgelöst wird.<br />
Alarmzeit eingeb<strong>en</strong>:<br />
1. Drück<strong>en</strong> Sie dreimal die Taste MODE". Die Anzeige leuchtet<br />
und die Stun<strong>de</strong>nangabe blinkt.<br />
2. Stell<strong>en</strong> Sie jetzt durch mehrmaliges Drück<strong>en</strong> <strong>de</strong>r Taste UP" die<br />
gewünschte Stun<strong>de</strong> ein und bestätig<strong>en</strong> Sie mit SET".<br />
3. Stell<strong>en</strong> Sie jetzt durch mehrmaliges Drück<strong>en</strong> <strong>de</strong>r Taste UP" die<br />
gewünschte Minut<strong>en</strong>zahl ein und bestätig<strong>en</strong> Sie mit SET".<br />
4. Schalt<strong>en</strong> Sie nun <strong>de</strong>n Alarm mit <strong>de</strong>r Taste UP" ein. Bei<br />
eingeschaltetem Alarm leuchtet die Anzeige . Durch<br />
mehrmaliges Drück<strong>en</strong> wird <strong>de</strong>r Alarm aus− und eingeschaltet.<br />
5. Drück<strong>en</strong> Sie einmal MODE" und Sie befin<strong>de</strong>n sich wie<strong>de</strong>r in <strong>de</strong>r<br />
normal<strong>en</strong> Anzeige.<br />
Hinweis: Betreib<strong>en</strong> Sie die Uhr im 12 Stun<strong>de</strong>nformat, führ<strong>en</strong> Sie nach<br />
Punkt 3. die folg<strong>en</strong><strong>de</strong> Einstellung durch und fahr<strong>en</strong> Sie dann mit<br />
Punkt 4. fort: Stell<strong>en</strong> Sie jetzt durch mehrmaliges Drück<strong>en</strong> <strong>de</strong>r<br />
Taste UP" die Angabe AM" für vormittags und PM" für<br />
nachmittags ein und bestätig<strong>en</strong> Sie mit SET".
− Inbetriebnahme −<br />
Alarm abschalt<strong>en</strong>:<br />
Wird die eingestellte Alarmzeit erreicht, hör<strong>en</strong> Sie für eine Minute das<br />
Alarmsignal. Mit <strong>de</strong>r Taste auf <strong>de</strong>r Oberseite <strong>de</strong>r La<strong>de</strong>station könn<strong>en</strong><br />
Sie das Alarmsignal vorher be<strong>en</strong><strong>de</strong>n.<br />
Alarmfunktion ausschalt<strong>en</strong>:<br />
3 x MODE", 2 x SET", 1 x UP", 1 x MODE". Die Anzeige erlischt.<br />
Alarmfunktion einschalt<strong>en</strong>:<br />
3 x MODE", 2 x SET", 1 x UP", 1 x MODE". Die Anzeige leuchtet.<br />
Bei einem Stromausfall geh<strong>en</strong> die aktuelle Uhrzeit und die Alarmzeit<br />
verlor<strong>en</strong>.<br />
4.7 Standard−Akkus einsetz<strong>en</strong><br />
Um die mitgeliefert<strong>en</strong> wie<strong>de</strong>raufladbar<strong>en</strong> Standard−Akkus in das Mobilteil<br />
einzuleg<strong>en</strong>, drück<strong>en</strong> Sie auf <strong>de</strong>n Batteriefach<strong>de</strong>ckel am ober<strong>en</strong> Rand und<br />
schieb<strong>en</strong> Sie ihn nach unt<strong>en</strong>. Leg<strong>en</strong> Sie nun die Standard−Akkus ein.<br />
Acht<strong>en</strong> Sie dabei auf die richtige Polung. Schließ<strong>en</strong> Sie das Batteriefach.<br />
4.8 Aufla<strong>de</strong>n <strong>de</strong>r Standard−Akkus<br />
Stell<strong>en</strong> Sie das Mobilteil mit <strong>de</strong>m Display nach vorne für min<strong>de</strong>st<strong>en</strong>s 14<br />
Stun<strong>de</strong>n auf die Basisstation. An <strong>de</strong>r Basisstation leuchtet die<br />
La<strong>de</strong>kontrollleuchte. Bei nicht richtig gela<strong>de</strong>n<strong>en</strong> Standard−Akkus kann es<br />
zu Fehlfunktion<strong>en</strong> <strong>de</strong>s Telefons komm<strong>en</strong>.<br />
Die wie<strong>de</strong>raufladbar<strong>en</strong> Standard−Akkus Ihres Mobilteils besitz<strong>en</strong> eine<br />
Standby−Zeit bei Zimmertemperatur von max. 100 Stun<strong>de</strong>n. Die maximale<br />
Gesprächsdauer beträgt 10 Stun<strong>de</strong>n.<br />
Der aktuelle Akkula<strong>de</strong>zustand wird im Display angezeigt:<br />
<br />
Voll Halb Schwach Leer<br />
15
16<br />
− Inbetriebnahme −<br />
4.9 Ton (MFV)− o<strong>de</strong>r Impuls (IWV) − Wahlverfahr<strong>en</strong><br />
Dieses Merkmal ermöglicht Ihn<strong>en</strong>, Ihr Telefon sowohl an <strong>de</strong>n analog<strong>en</strong><br />
Anschlüss<strong>en</strong> (Impuls−Wahl/IWV) als auch an <strong>de</strong>n digital<strong>en</strong> Anschlüss<strong>en</strong><br />
(Ton−Wahl/MFV) zu betreib<strong>en</strong>. Das Gerät ist werkseitig auf das<br />
Ton−Wahlverfahr<strong>en</strong> (MFV) eingestellt. Sollte Ihr Telefon nicht an Ihrem<br />
Anschluss funktionier<strong>en</strong>, erfahr<strong>en</strong> Sie im Kapitel 9.4 wie Sie Ihr Telefon auf<br />
das Impuls−Wahlverfahr<strong>en</strong> (IWV) umstell<strong>en</strong> könn<strong>en</strong>.<br />
4.10 Gürtelclip anbring<strong>en</strong><br />
Schieb<strong>en</strong> Sie <strong>de</strong>n Gürtelclip in die Führung, bis er auf <strong>de</strong>n Seit<strong>en</strong> hörbar<br />
einrastet.
5 M<strong>en</strong>üstruktur<br />
− M<strong>en</strong>üstruktur −<br />
Hier fin<strong>de</strong>n Sie die M<strong>en</strong>üstruktur Ihres Telefons. Im Stand−by öffn<strong>en</strong> Sie die<br />
M<strong>en</strong>üauswahl durch Drück<strong>en</strong> <strong>de</strong>r Taste .<br />
Telefonbuch Hinzufueg<strong>en</strong> Name ? Nummer ? Melodie 1−5<br />
A<strong>en</strong><strong>de</strong>rn<br />
Loesch<strong>en</strong><br />
Einstellung Basis−Lautst Lautstaerke 1, 2, 3, 4, 5, Ton aus<br />
Basis−Melody Melodie 1, 2, 3, 4, 5<br />
MT−abmel<strong>de</strong>n PIN ? (Werkseinstellung 0000)<br />
PIN Co<strong>de</strong><br />
MFV−IWV MFV<br />
IWV<br />
PIN ? (Werkseinstellung<br />
0000)<br />
Flashzeit Flash 1<br />
Flash 2<br />
PIN neu Wie<strong>de</strong>rh PIN<br />
Werkseinst PIN ? (Werkseinstellung 0000) Bestaetig<strong>en</strong> ?<br />
17
18<br />
− M<strong>en</strong>üstruktur −<br />
Mobilteil To<strong>en</strong>e Tast<strong>en</strong>ton Ein − Aus<br />
Akku Leer Ein − Aus<br />
Reichweite Ein − Aus<br />
Int Ruf Laut Lautstaerke 1, 2, 3, 4, 5, Ton aus<br />
Ext Ruf Laut Lautstaerke 1, 2, 3, 4, 5, Ton aus<br />
Int Melodie Melodie 1, 2, 3, 4, 5<br />
Ext Melodie Melodie 1, 2, 3, 4, 5<br />
Uhr einst Aktuelle Uhrzeit<br />
Wecker einst Ein − Aus Weckzeit<br />
Auto Annahme Ein − Aus<br />
Name .............<br />
Sprache Deutsch<br />
English<br />
Francais<br />
Italiano<br />
...<br />
Tast<strong>en</strong>sperre<br />
Anmel<strong>de</strong>n Basis−Wahl BS 1 _ _ _<br />
Auto<br />
Basis Anmeld BS 1 2 3 4
6 Bedi<strong>en</strong>ung<br />
6.1 Das Display<br />
− Bedi<strong>en</strong>ung −<br />
Display Beschreibung<br />
Konstant: Sie führ<strong>en</strong> ein Gespräch.<br />
EXT<br />
INT<br />
<br />
<br />
<br />
<br />
<br />
<br />
<br />
<br />
Konstant: Sie führ<strong>en</strong> ein externes Gespräch.<br />
Blinkt: Es erreicht Sie ein externer Anruf.<br />
Konstant: Sie führ<strong>en</strong> ein internes Gespräch.<br />
Blinkt: Es erreicht Sie ein interner Anruf.<br />
Konstant: Sie befin<strong>de</strong>n sich in <strong>de</strong>r Anruferliste (CLIP).<br />
Blinkt: Es sind neue Anrufe in <strong>de</strong>r Anruferliste (CLIP).<br />
Konstant: Diese Rufnummer <strong>de</strong>r Anruferliste wur<strong>de</strong> nicht<br />
<strong>en</strong>tgeg<strong>en</strong>g<strong>en</strong>omm<strong>en</strong>.<br />
Konstant: Diese Rufnummer <strong>de</strong>r Anruferliste wur<strong>de</strong> <strong>en</strong>tgeg<strong>en</strong>g<strong>en</strong>omm<strong>en</strong>.<br />
Blinkt: Akkus aufla<strong>de</strong>n.<br />
Konstant: Anzeige <strong>de</strong>r Batteriekapazität.<br />
Durchlauf<strong>en</strong> <strong>de</strong>r Segm<strong>en</strong>te: Die Akkus wer<strong>de</strong>n gela<strong>de</strong>n.<br />
Konstant: Sie befin<strong>de</strong>n sich im Telefonbuch.<br />
Konstant: Die Programmierung ist aktiviert.<br />
Konstant: Die Tastatursperre ist aktiviert.<br />
Konstant: Die Verbindung zur Basisstation ist gut.<br />
Blinkt: Die Reichweite <strong>de</strong>r Basisstation ist überschritt<strong>en</strong>.<br />
Konstant: Die Rufnummer ist länger als 12 Ziffern.<br />
19
20<br />
− Bedi<strong>en</strong>ung −<br />
6.2 Externer Anrufbeantworter<br />
W<strong>en</strong>n Ihr Netzbetreiber ein<strong>en</strong> extern<strong>en</strong> Anrufbeantworter für Sie<br />
bereitstellt, wer<strong>de</strong>n Sie mit <strong>de</strong>m Symbol über neue Nachricht<strong>en</strong><br />
informiert. W<strong>en</strong>n Sie sich alle Nachricht<strong>en</strong> von Ihrem extern<strong>en</strong><br />
Anrufbeantworter angehört hab<strong>en</strong>, erlischt das Symbol im Display. Das<br />
Symbol erlischt eb<strong>en</strong>falls im Display, w<strong>en</strong>n Sie die Taste fünf<br />
Sekun<strong>de</strong>n drück<strong>en</strong>.<br />
Achtung: Der externe Anrufbeantworter und die Information<br />
über neue Nachricht<strong>en</strong> mit <strong>de</strong>m Symbol sind optionale<br />
Services Ihres Netzbetreibers. Über diese Funktion könn<strong>en</strong> Sie<br />
nur dann verfüg<strong>en</strong>, w<strong>en</strong>n Ihr Netzbetreiber dies<strong>en</strong> Service anbietet.<br />
Bitte frag<strong>en</strong> Sie Ihr<strong>en</strong> Netzbetreiber nach weiter<strong>en</strong> Information<strong>en</strong>.<br />
6.3 Anrufe <strong>en</strong>tgeg<strong>en</strong>nehm<strong>en</strong><br />
Bei eingeh<strong>en</strong><strong>de</strong>m Anruf ertönt <strong>de</strong>r Tonruf am Mobilteil und an <strong>de</strong>r<br />
Basisstation. Nehm<strong>en</strong> Sie das Mobilteil von <strong>de</strong>r Basisstation o<strong>de</strong>r drück<strong>en</strong><br />
Sie die Gesprächstaste . Die Verbindung wird hergestellt.<br />
Zum Be<strong>en</strong><strong>de</strong>n <strong>de</strong>s Gespräches stell<strong>en</strong> Sie das Mobilteil zurück in die<br />
Basisstation o<strong>de</strong>r drück<strong>en</strong> Sie die Taste .<br />
Hinweis: Klingelt das Mobilteil, verän<strong>de</strong>rn Sie durch Drück<strong>en</strong> <strong>de</strong>r<br />
Tast<strong>en</strong> o<strong>de</strong>r die Lautstärke.<br />
6.4 Anrufe führ<strong>en</strong><br />
1. Geb<strong>en</strong> Sie die Rufnummer (max. 32 Stell<strong>en</strong>) ein. Das Display<br />
zeigt maximal 12 Stell<strong>en</strong> an. Bei länger<strong>en</strong> Rufnummern wer<strong>de</strong>n<br />
nur die letzt<strong>en</strong> 12 Stell<strong>en</strong> angezeigt.<br />
Hinweis: Falsch eingegeb<strong>en</strong>e Ziffern lösch<strong>en</strong> Sie durch kurzes Drück<strong>en</strong><br />
<strong>de</strong>r Taste . Langes Drück<strong>en</strong> <strong>de</strong>r Taste löscht die<br />
komplette Rufnummer.<br />
2. Drück<strong>en</strong> Sie die Gesprächstaste und die Verbindung wird<br />
hergestellt.<br />
Hinweis: Sie könn<strong>en</strong> auch zuerst die Taste drück<strong>en</strong> und dann die<br />
Rufnummer eingeb<strong>en</strong>. Die Korrektur einzelner Ziffern ist bei<br />
dieser Form <strong>de</strong>s Gesprächaufbaus nicht möglich.
− Bedi<strong>en</strong>ung −<br />
6.5 Gespeicherte Rufnummern aus <strong>de</strong>m Telefonbuch wähl<strong>en</strong><br />
Im Telefonbuch gespeicherte Rufnummern (siehe Rufnummer in das<br />
Telefonbuch eingeb<strong>en</strong>" Kapitel 7.1) könn<strong>en</strong> Sie schnell und einfach<br />
abruf<strong>en</strong>.<br />
1. Drück<strong>en</strong> Sie die Taste . Das Display zeigt nun in<br />
alphabetischer Reih<strong>en</strong>folge <strong>de</strong>n erst<strong>en</strong> gespeichert<strong>en</strong><br />
Telefonbucheintrag.<br />
Mit <strong>de</strong>n Tast<strong>en</strong> und könn<strong>en</strong> Sie ein<strong>en</strong> Telefonbucheintrag<br />
auswähl<strong>en</strong>. Um ein<strong>en</strong> Eintrag direkt auszuwähl<strong>en</strong>, drück<strong>en</strong> Sie<br />
die Taste, die <strong>de</strong>m Anfangsbuchstab<strong>en</strong> <strong>de</strong>s Eintrages <strong>en</strong>tspricht.<br />
Z. B. für <strong>de</strong>n Nam<strong>en</strong> Peters" drück<strong>en</strong> Sie einmal die Taste 7".<br />
2. Drück<strong>en</strong> Sie die Taste und die angezeigte Rufnummer wird<br />
gewählt.<br />
6.6 Anzeige <strong>de</strong>r Gesprächsdauer<br />
W<strong>en</strong>ige Sekun<strong>de</strong>n nach Beginn <strong>de</strong>s Gesprächs wird im Display statt <strong>de</strong>r<br />
gewählt<strong>en</strong> Rufnummer die Gesprächsdauer angezeigt.<br />
6.7 Mobilteil ein−/ausschalt<strong>en</strong><br />
Um das Mobilteil auszuschalt<strong>en</strong> bzw. einzuschalt<strong>en</strong>, drück<strong>en</strong> Sie die<br />
Taste für drei Sekun<strong>de</strong>n.<br />
Hinweis: W<strong>en</strong>n Ihr Mobilteil ausgeschaltet ist, könn<strong>en</strong> keine Gespräche<br />
empfang<strong>en</strong> wer<strong>de</strong>n.<br />
6.8 Einstell<strong>en</strong> <strong>de</strong>r Hörerlautstärke<br />
Drück<strong>en</strong> Sie währ<strong>en</strong>d <strong>de</strong>s Gespräches die Tast<strong>en</strong> o<strong>de</strong>r , um die<br />
Hörerlautstärke anzupass<strong>en</strong>. Es sind fünf verschie<strong>de</strong>ne Lautstärk<strong>en</strong><br />
wählbar.<br />
6.9 Wahlwie<strong>de</strong>rholung<br />
Die zehn zuletzt gewählt<strong>en</strong> Rufnummern könn<strong>en</strong> erneut gewählt wer<strong>de</strong>n.<br />
1. Drück<strong>en</strong> Sie die Taste . Die zuletzt gewählte Rufnummer<br />
wird im Display angezeigt.<br />
21
22<br />
− Bedi<strong>en</strong>ung −<br />
2. Mit <strong>de</strong>r Taste o<strong>de</strong>r wähl<strong>en</strong> Sie eine Rufnummer aus <strong>de</strong>r<br />
Wahlwie<strong>de</strong>rholungsliste.<br />
3. Drück<strong>en</strong> Sie die Taste und die angezeigte Rufnummer wird<br />
gewählt.<br />
Hinweis: Ist eine Rufnummer aus <strong>de</strong>r Wahlwie<strong>de</strong>rholungsliste im<br />
Telefonbuch gespeichert, erscheint <strong>de</strong>r <strong>en</strong>tsprech<strong>en</strong><strong>de</strong> Name im<br />
Display.<br />
6.9.1 Eine Rufnummer aus <strong>de</strong>r Wahlwie<strong>de</strong>rholungsliste lösch<strong>en</strong><br />
1. Drück<strong>en</strong> Sie die Taste und wähl<strong>en</strong> Sie mit <strong>de</strong>r Taste <br />
o<strong>de</strong>r <strong>de</strong>n zu lösch<strong>en</strong><strong>de</strong>n Eintrag.<br />
2. Drück<strong>en</strong> Sie die Taste und bestätig<strong>en</strong> Sie mit <strong>de</strong>r<br />
Taste .<br />
Hinweis: Die Wahlwie<strong>de</strong>rholungsliste wird komplett gelöscht, w<strong>en</strong>n Sie<br />
die Taste für zwei Sekun<strong>de</strong>n drück<strong>en</strong> und dann mit <strong>de</strong>r<br />
Taste bestätig<strong>en</strong>.<br />
6.10 Mikrofon im Mobilteil stummschalt<strong>en</strong><br />
W<strong>en</strong>n Sie die Taste währ<strong>en</strong>d eines Telefongespräches drück<strong>en</strong>,<br />
schalt<strong>en</strong> Sie das Mikrofon <strong>de</strong>s Mobilteils stumm. Im Display erscheint die<br />
Anzeige Stumm". Dadurch könn<strong>en</strong> Sie mit einer dritt<strong>en</strong> Person sprech<strong>en</strong>,<br />
ohne dass <strong>de</strong>r Gesprächspartner Sie hört. Der Lautsprecher im Mobilteil<br />
bleibt eingeschaltet, sodass Sie <strong>de</strong>n Gesprächspartner weiterhin hör<strong>en</strong>.<br />
W<strong>en</strong>n Sie die Taste erneut drück<strong>en</strong>, wird die Stummschaltung<br />
aufgehob<strong>en</strong>.<br />
6.11 Tast<strong>en</strong>sperre ein−/ ausschalt<strong>en</strong><br />
Trag<strong>en</strong> Sie das Mobilteil bei sich, könn<strong>en</strong> Sie die Tastatur sperr<strong>en</strong>, damit<br />
nicht ungewollt Tast<strong>en</strong> gedrückt wer<strong>de</strong>n. Trotz eingeschalteter<br />
Tast<strong>en</strong>sperre wer<strong>de</strong>n eingeh<strong>en</strong><strong>de</strong> Gespräche <strong>en</strong>tgeg<strong>en</strong>g<strong>en</strong>omm<strong>en</strong>.<br />
1. Zum Einschalt<strong>en</strong> <strong>de</strong>r Tast<strong>en</strong>sperre drück<strong>en</strong> Sie die Taste <br />
für drei Sekun<strong>de</strong>n. Zum Ausschalt<strong>en</strong> drück<strong>en</strong> sie zweimal die<br />
Taste .
− Bedi<strong>en</strong>ung −<br />
6.12 Temporäre Tonwahl<br />
W<strong>en</strong>n Sie Ihr Telefon mit <strong>de</strong>m Impuls−Wahlverfahr<strong>en</strong> betreib<strong>en</strong>, müss<strong>en</strong><br />
Sie nicht auf die Vorteile <strong>de</strong>s Ton−Wahlverfahr<strong>en</strong>s (z. B. die Fernabfrage<br />
eines Anrufbeantworters) verzicht<strong>en</strong>. Währ<strong>en</strong>d eines Gespräches<br />
wechseln Sie durch Drück<strong>en</strong> (vier Sekun<strong>de</strong>n) <strong>de</strong>r Taste <br />
vorübergeh<strong>en</strong>d zum Ton−Wahlverfahr<strong>en</strong>. Nach Gesprächs<strong>en</strong><strong>de</strong> wird<br />
wie<strong>de</strong>r auf Puls−Wahlverfahr<strong>en</strong> umgestellt.<br />
6.13 Hinweise zur Reichweite<br />
Die Reichweite <strong>de</strong>s Mobilteils beträgt ca. 50 Meter in geschloss<strong>en</strong><strong>en</strong><br />
Räum<strong>en</strong> und ca. 300 Meter im Frei<strong>en</strong>. Bei guter Verbindung zur<br />
Basisstation erscheint im Display das Symbol .<br />
Hinweis: Entfern<strong>en</strong> Sie sich zu weit von <strong>de</strong>r Basisstation, blinkt das<br />
Symbol und Sie hör<strong>en</strong> Warntöne. Nähern Sie sich <strong>de</strong>r<br />
Basisstation, da sonst das Gespräch unterbroch<strong>en</strong> wird. Hat das<br />
Mobilteil die Verbindung zur Basisstation verlor<strong>en</strong>, erscheint im<br />
Display die Meldung BASIS 1".<br />
6.14 Mobilteil such<strong>en</strong> (Paging)<br />
W<strong>en</strong>n Sie Ihr Mobilteil verlegt hab<strong>en</strong>, könn<strong>en</strong> Sie es mit Hilfe <strong>de</strong>r Basis<br />
such<strong>en</strong>.<br />
1. Drück<strong>en</strong> Sie an <strong>de</strong>r Basis die Paging−Taste . Alle an <strong>de</strong>r<br />
Basis angemel<strong>de</strong>t<strong>en</strong> Mobilteile klingeln.<br />
2. Zum Be<strong>en</strong><strong>de</strong>n <strong>de</strong>r Suche drück<strong>en</strong> Sie an <strong>de</strong>r Basisstation erneut<br />
die Paging−Taste o<strong>de</strong>r eine beliebige Taste am Mobilteil.<br />
23
24<br />
− Das Telefonbuch −<br />
7 Das Telefonbuch<br />
In das Telefonbuch könn<strong>en</strong> 50 Rufnummern inklusive eines Nam<strong>en</strong>s<br />
gespeichert wer<strong>de</strong>n. Für die Eingabe eines Nam<strong>en</strong>s hab<strong>en</strong> Sie<br />
12 Buchstab<strong>en</strong> zur Verfügung.<br />
Die maximale Länge einer Rufnummer beträgt 20 Stell<strong>en</strong>.<br />
7.1 Rufnummern in das Telefonbuch eingeb<strong>en</strong><br />
1. Drück<strong>en</strong> Sie dreimal die Taste .<br />
2. Geb<strong>en</strong> Sie <strong>de</strong>n gewünscht<strong>en</strong> Nam<strong>en</strong> und die Rufnummer ein.<br />
Bestätig<strong>en</strong> Sie die jeweilige Eingabe durch Drück<strong>en</strong> <strong>de</strong>r<br />
Taste (Texteingabe siehe 7.1.2.).<br />
Hinweis: Ist <strong>de</strong>r Name bereits im Telefonbuch gespeichert, ertönt ein<br />
Signal und im Display erscheint erneut Hinzufüg<strong>en</strong>". Sie<br />
müss<strong>en</strong> ein<strong>en</strong> an<strong>de</strong>r<strong>en</strong> Nam<strong>en</strong> eingeb<strong>en</strong>.<br />
3. Wähl<strong>en</strong> Sie mit <strong>de</strong>r Taste o<strong>de</strong>r die gewünschte Melodie<br />
und bestätig<strong>en</strong> Sie mit . Die gewählte Melodie ertönt beim<br />
Anruf <strong>de</strong>s eingetrag<strong>en</strong><strong>en</strong> Gesprächspartners. Diese Zuordnung<br />
funktioniert nur, w<strong>en</strong>n Ihr Telefonanschluss und <strong>de</strong>r <strong>de</strong>s Anrufers<br />
über die Rufnummernanzeige CLIP verfügt.<br />
7.1.1 Hinweise zum Telefonbuch<br />
Geb<strong>en</strong> Sie bei all<strong>en</strong> Rufnummern immer die Vorwahl mit ein,<br />
damit das Telefon auch eingeh<strong>en</strong><strong>de</strong> Ortsgespräche einem<br />
Telefonbucheintrag zuordn<strong>en</strong> kann.<br />
Ist die Speicherkapazität von 50 Rufnummern erreicht, zeigt das<br />
Display beim nächst<strong>en</strong> Speichern die Meldung SPEICH VOLL".<br />
Um wie<strong>de</strong>r Platz zu schaff<strong>en</strong>, müss<strong>en</strong> Sie zuerst eine an<strong>de</strong>re<br />
Rufnummer lösch<strong>en</strong>.<br />
7.1.2 Texteingabe<br />
Zur Eingabe <strong>de</strong>s Nam<strong>en</strong>s sind die Zahl<strong>en</strong>tast<strong>en</strong> mit Buchstab<strong>en</strong><br />
beschriftet. Durch mehrmaliges Drück<strong>en</strong> <strong>de</strong>r <strong>en</strong>tsprech<strong>en</strong><strong>de</strong>n Taste<br />
könn<strong>en</strong> Großbuchstab<strong>en</strong> sowie Zahl<strong>en</strong> eingegeb<strong>en</strong> wer<strong>de</strong>n.<br />
Beispiel: Sie möcht<strong>en</strong> <strong>de</strong>n Nam<strong>en</strong> "Peter" eingeb<strong>en</strong>. Drück<strong>en</strong> Sie:<br />
1 x Taste 7", 2 x Taste 3", 1 x Taste 8", 2 x Taste 3", 3 x Taste 7"
− Das Telefonbuch −<br />
Für ein Leerzeich<strong>en</strong> drück<strong>en</strong> Sie einmal die Taste 1", für ein<strong>en</strong><br />
Bin<strong>de</strong>strich zweimal die Taste 1".<br />
Um <strong>de</strong>n gleich<strong>en</strong> Buchstab<strong>en</strong> zweimal einzugeb<strong>en</strong>, geb<strong>en</strong> Sie<br />
<strong>de</strong>n <strong>en</strong>tsprech<strong>en</strong><strong>de</strong>n Buchstab<strong>en</strong> ein und wart<strong>en</strong> Sie dann, bis<br />
<strong>de</strong>r Cursor automatisch eine Stelle weiter springt.<br />
Falsche Eingab<strong>en</strong> könn<strong>en</strong> mit <strong>de</strong>r Taste gelöscht wer<strong>de</strong>n.<br />
Um <strong>de</strong>n Cursor zu beweg<strong>en</strong>, drück<strong>en</strong> Sie die Taste o<strong>de</strong>r .<br />
7.2 Gespeicherte Einträge im Telefonbuch än<strong>de</strong>rn<br />
1. Drück<strong>en</strong> Sie zweimal die Taste .<br />
2. Drück<strong>en</strong> Sie die Taste , um die Option AENDERN"<br />
auszuwähl<strong>en</strong>.<br />
3. Bestätig<strong>en</strong> Sie mit <strong>de</strong>r Taste und wähl<strong>en</strong> Sie mit <strong>de</strong>r<br />
Taste o<strong>de</strong>r <strong>de</strong>n gewünscht<strong>en</strong> Eintrag.<br />
Hinweis: Um ein<strong>en</strong> Eintrag direkt auszuwähl<strong>en</strong>, drück<strong>en</strong> Sie die Taste, die<br />
<strong>de</strong>m Anfangsbuchstab<strong>en</strong> <strong>de</strong>s Eintrages <strong>en</strong>tspricht. Um z. B. <strong>de</strong>n<br />
Nam<strong>en</strong> Peters" direkt anzuwähl<strong>en</strong>, drück<strong>en</strong> Sie einmal die<br />
Taste 7".<br />
4. Bestätig<strong>en</strong> Sie mit <strong>de</strong>r Taste und än<strong>de</strong>rn Sie ggf. <strong>de</strong>n<br />
angezeigt<strong>en</strong> Nam<strong>en</strong>, die Rufnummer und die Melodie.<br />
Bestätig<strong>en</strong> Sie je<strong>de</strong> Än<strong>de</strong>rung durch Drück<strong>en</strong> <strong>de</strong>r Taste .<br />
7.3 Gespeicherte Einträge aus <strong>de</strong>m Telefonbuch lösch<strong>en</strong><br />
1. Drück<strong>en</strong> Sie zweimal die Taste .<br />
2. Drück<strong>en</strong> Sie die Taste , um die Option LOESCHEN"<br />
auszuwähl<strong>en</strong>.<br />
3. Bestätig<strong>en</strong> Sie mit <strong>de</strong>r Taste und wähl<strong>en</strong> Sie mit <strong>de</strong>r<br />
Taste o<strong>de</strong>r <strong>de</strong>n gewünscht<strong>en</strong> Eintrag.<br />
Hinweis: Durch das Drück<strong>en</strong> <strong>de</strong>r Taste wird <strong>de</strong>r Löschvorgang<br />
abgebroch<strong>en</strong>.<br />
4. Bestätig<strong>en</strong> Sie das Lösch<strong>en</strong> durch zweimaliges Drück<strong>en</strong> <strong>de</strong>r<br />
Taste .<br />
25
26<br />
− Rufnummernanzeige (CLIP) −<br />
8 Rufnummernanzeige (CLIP)<br />
W<strong>en</strong>n Ihn<strong>en</strong> die Rufnummernanzeige zur Verfügung steht, zeigt das<br />
Display bei eingeh<strong>en</strong><strong>de</strong>m Anruf die Rufnummer <strong>de</strong>s Anrufers an. Hab<strong>en</strong><br />
Sie diese Rufnummer in Ihrem Telefonbuch gespeichert, wird <strong>de</strong>r Name<br />
angezeigt.<br />
Hat <strong>de</strong>r Anrufer das Übertrag<strong>en</strong> seiner Rufnummer unterdrückt, wird die<br />
Rufnummer nicht angezeigt. Es erscheint im Display die Meldung NR<br />
GEHEIM".<br />
Insgesamt wer<strong>de</strong>n 40 Rufnummern in <strong>de</strong>r Anruferliste gespeichert, so dass<br />
Sie auch währ<strong>en</strong>d Ihrer Abwes<strong>en</strong>heit kein<strong>en</strong> Anruf verpass<strong>en</strong>. Ist die Liste<br />
voll, wird immer die älteste Rufnummer gelöscht. Wur<strong>de</strong>n währ<strong>en</strong>d Ihrer<br />
Abwes<strong>en</strong>heit neue Rufnummern in <strong>de</strong>r Anruferliste gespeichert, erscheint<br />
im Display das Symbol .<br />
Achtung: Die Rufnummernanzeige (CLIP) sowie die Anzeige<br />
<strong>de</strong>s Datums und <strong>de</strong>r Uhrzeit ist ein optionaler Service Ihres Netzbetreibers.<br />
Bitte frag<strong>en</strong> Sie Ihr<strong>en</strong> Netzbetreiber nach weiter<strong>en</strong><br />
Information<strong>en</strong>.<br />
8.1 Die Anruferliste<br />
8.1.1 Rufnummer aus <strong>de</strong>r Anruferliste wähl<strong>en</strong><br />
Um die Rufnummern <strong>de</strong>r Anruferliste im Display zu seh<strong>en</strong>, geh<strong>en</strong> Sie bitte<br />
wie folgt vor:<br />
1. Drück<strong>en</strong> Sie die Taste . Die zuletzt empfang<strong>en</strong>e Rufnummer<br />
wird im Display angezeigt. Ist die Anruferliste leer, zeigt das<br />
Display die Meldung LEER".<br />
2. Mit <strong>de</strong>r Taste o<strong>de</strong>r könn<strong>en</strong> weitere Rufnummern aus <strong>de</strong>r<br />
Anruferliste angewählt wer<strong>de</strong>n. Sind keine weiter<strong>en</strong> Rufnummern<br />
vorhan<strong>de</strong>n, hör<strong>en</strong> Sie ein<strong>en</strong> Signalton. Zwei Displaysymbole
− Rufnummernanzeige (CLIP) −<br />
informier<strong>en</strong> Sie, ob <strong>de</strong>r Eintrag in <strong>de</strong>r Anruferliste schon einmal<br />
angeseh<strong>en</strong> wur<strong>de</strong> o<strong>de</strong>r ob <strong>de</strong>r Eintrag in <strong>de</strong>r Anruferliste neu ist.<br />
Display Beschreibung<br />
Die Rufnummer wur<strong>de</strong> nicht <strong>en</strong>tgeg<strong>en</strong>g<strong>en</strong>omm<strong>en</strong>.<br />
Die Rufnummer wur<strong>de</strong> <strong>en</strong>tgeg<strong>en</strong>g<strong>en</strong>omm<strong>en</strong>.<br />
<br />
3. Um eine angezeigte Rufnummer aus <strong>de</strong>r Anruferliste direkt<br />
zurückzuruf<strong>en</strong>, drück<strong>en</strong> Sie die Taste .<br />
4. Durch Drück<strong>en</strong> <strong>de</strong>r Taste verlass<strong>en</strong> Sie die Anruferliste.<br />
Hinweis: Durch Drück<strong>en</strong> <strong>de</strong>r Taste wer<strong>de</strong>n Information<strong>en</strong> zur<br />
angezeigt<strong>en</strong> Rufnummer abgeruf<strong>en</strong>:<br />
Ist die Rufnummer länger als 12 Stell<strong>en</strong>, wer<strong>de</strong>n die restlich<strong>en</strong><br />
Zahl<strong>en</strong> angezeigt.<br />
Zeigt die Rufnummer, w<strong>en</strong>n <strong>de</strong>r Anrufer bereits mit Nam<strong>en</strong> im<br />
Telefonbuch gespeichert ist.<br />
Zeigt das Datum und die Uhrzeit, w<strong>en</strong>n diese Dat<strong>en</strong> vom Anrufer<br />
übertrag<strong>en</strong> wur<strong>de</strong>n.<br />
8.1.2 Rufnummer aus <strong>de</strong>r Anruferliste im Telefonbuch speichern<br />
Eine in <strong>de</strong>r Anruferliste gespeicherte Rufnummer kann direkt im<br />
Telefonbuch gespeichert wer<strong>de</strong>n.<br />
1. Drück<strong>en</strong> Sie die Taste und wähl<strong>en</strong> mit o<strong>de</strong>r die<br />
gewünschte Rufnummer. Bestätig<strong>en</strong> Sie die Auswahl durch<br />
zweimaliges Drück<strong>en</strong> <strong>de</strong>r Taste .<br />
2. Geb<strong>en</strong> Sie <strong>de</strong>n gewünscht<strong>en</strong> Nam<strong>en</strong> ein. Bestätig<strong>en</strong> Sie die<br />
Eingabe durch Drück<strong>en</strong> <strong>de</strong>r Taste .<br />
Hinweis: Nam<strong>en</strong>seingabe siehe Kapitel 7.1.2.<br />
Hinweis: Ist <strong>de</strong>r Name bereits im Telefonbuch gespeichert, ertönt ein<br />
Signal. Drück<strong>en</strong> Sie zweimal die Taste und wie<strong>de</strong>rhol<strong>en</strong> Sie<br />
Schritt 2.<br />
27
28<br />
− Rufnummernanzeige (CLIP) −<br />
3. Die Rufnummer wird noch einmal im Display angezeigt.<br />
Bestätig<strong>en</strong> Sie durch Drück<strong>en</strong> <strong>de</strong>r Taste .<br />
4. Wähl<strong>en</strong> Sie mit <strong>de</strong>n Tast<strong>en</strong> o<strong>de</strong>r die gewünschte Melodie<br />
und bestätig<strong>en</strong> mit <strong>de</strong>r Taste .<br />
8.1.3 Einzelne Rufnummer aus <strong>de</strong>r Anruferliste lösch<strong>en</strong><br />
1. Drück<strong>en</strong> Sie die Taste und wähl<strong>en</strong> mit o<strong>de</strong>r die<br />
gewünschte Rufnummer.<br />
2. Drück<strong>en</strong> Sie die Taste . Bestätig<strong>en</strong> Sie das Lösch<strong>en</strong> durch<br />
Drück<strong>en</strong> <strong>de</strong>r Taste .<br />
Hinweis: Durch das Drück<strong>en</strong> <strong>de</strong>r Taste wird <strong>de</strong>r Löschvorgang<br />
abgebroch<strong>en</strong>.<br />
8.1.4 Alle Rufnummern aus <strong>de</strong>r Anruferliste lösch<strong>en</strong><br />
1. Drück<strong>en</strong> Sie die Taste .<br />
2. Drück<strong>en</strong> Sie die Taste für 3 Sekun<strong>de</strong>n. Bestätig<strong>en</strong> Sie das<br />
Lösch<strong>en</strong> durch Drück<strong>en</strong> <strong>de</strong>r Taste .
9 Son<strong>de</strong>rfunktion<strong>en</strong><br />
− Son<strong>de</strong>rfunktion<strong>en</strong> −<br />
Sie hab<strong>en</strong> die Möglichkeit, einige Einstellung<strong>en</strong> am Mobilteil und <strong>de</strong>r<br />
Basisstation Ihr<strong>en</strong> Wünsch<strong>en</strong> anzupass<strong>en</strong>. Dabei ist zu beacht<strong>en</strong>:<br />
W<strong>en</strong>n Sie sich im M<strong>en</strong>ü befin<strong>de</strong>n, erscheint im Display das<br />
Symbol .<br />
Durch Drück<strong>en</strong> <strong>de</strong>r Taste gelang<strong>en</strong> Sie eine M<strong>en</strong>üeb<strong>en</strong>e<br />
zurück.<br />
Durch langes Drück<strong>en</strong> <strong>de</strong>r Taste brech<strong>en</strong> Sie <strong>de</strong>n Vorgang<br />
an je<strong>de</strong>r Stelle im M<strong>en</strong>ü ab. Das Mobilteil kehrt zurück in <strong>de</strong>n<br />
Ruhezustand.<br />
Je<strong>de</strong>r Vorgang wird automatisch abgebroch<strong>en</strong>, w<strong>en</strong>n innerhalb<br />
von 20 Sekun<strong>de</strong>n keine Eingabe erfolgt.<br />
9.1 Basis − Lautstärke einstell<strong>en</strong><br />
1. Drück<strong>en</strong> Sie die Taste und wähl<strong>en</strong> Sie mit <strong>de</strong>r Taste <strong>de</strong>n<br />
M<strong>en</strong>üpunkt EINSTELLUNG".<br />
2. Bestätig<strong>en</strong> Sie mit <strong>de</strong>r Taste . Das Display zeigt<br />
BASIS−LAUTST".<br />
3. Bestätig<strong>en</strong> Sie mit <strong>de</strong>r Taste und wähl<strong>en</strong> Sie mit <strong>de</strong>r<br />
Taste o<strong>de</strong>r die gewünschte Lautstärke.<br />
4. Bestätig<strong>en</strong> Sie mit <strong>de</strong>r Taste .<br />
9.2 Basis − Melodie einstell<strong>en</strong><br />
1. Drück<strong>en</strong> Sie die Taste und wähl<strong>en</strong> Sie mit <strong>de</strong>r Taste <strong>de</strong>n<br />
M<strong>en</strong>üpunkt EINSTELLUNG".<br />
2. Bestätig<strong>en</strong> Sie mit <strong>de</strong>r Taste und wähl<strong>en</strong> Sie mit <strong>de</strong>r<br />
Taste <strong>de</strong>n M<strong>en</strong>üpunkt BASIS−MELODY".<br />
3. Bestätig<strong>en</strong> Sie mit <strong>de</strong>r Taste und wähl<strong>en</strong> Sie mit <strong>de</strong>r<br />
Taste o<strong>de</strong>r die gewünschte Melodie.<br />
4. Bestätig<strong>en</strong> Sie mit <strong>de</strong>r Taste .<br />
29
30<br />
− Son<strong>de</strong>rfunktion<strong>en</strong> −<br />
9.3 PIN än<strong>de</strong>rn<br />
1. Drück<strong>en</strong> Sie die Taste und wähl<strong>en</strong> Sie mit <strong>de</strong>r Taste <strong>de</strong>n<br />
M<strong>en</strong>üpunkt EINSTELLUNG".<br />
2. Bestätig<strong>en</strong> Sie mit <strong>de</strong>r Taste und wähl<strong>en</strong> Sie mit <strong>de</strong>r<br />
Taste <strong>de</strong>n M<strong>en</strong>üpunkt PIN CODE".<br />
3. Bestätig<strong>en</strong> Sie mit <strong>de</strong>r Taste , geb<strong>en</strong> Sie die vierstellige PIN<br />
(Werkseinstellung 0000") ein und bestätig<strong>en</strong> Sie mit .<br />
4. Geb<strong>en</strong> Sie die neue vierstellige PIN ein und bestätig<strong>en</strong> Sie<br />
mit .<br />
5. Geb<strong>en</strong> Sie nochmal die neue PIN ein und bestätig<strong>en</strong> Sie<br />
mit .<br />
9.4 Ton (MFV)− o<strong>de</strong>r Impuls (IWV) − Wahlverfahr<strong>en</strong><br />
1. Drück<strong>en</strong> Sie die Taste und wähl<strong>en</strong> Sie mit <strong>de</strong>r Taste <strong>de</strong>n<br />
M<strong>en</strong>üpunkt EINSTELLUNG".<br />
2. Bestätig<strong>en</strong> Sie mit <strong>de</strong>r Taste und wähl<strong>en</strong> Sie mit <strong>de</strong>r<br />
Taste <strong>de</strong>n M<strong>en</strong>üpunkt MFV−IWV".<br />
3. Bestätig<strong>en</strong> Sie mit <strong>de</strong>r Taste und wähl<strong>en</strong> Sie mit <strong>de</strong>r<br />
Taste o<strong>de</strong>r das gewünschte Wahlverfahr<strong>en</strong>.<br />
4. Bestätig<strong>en</strong> Sie mit <strong>de</strong>r Taste .<br />
9.5 Flash−Zeit einstell<strong>en</strong><br />
Sie könn<strong>en</strong> zwei Flash−Zeit<strong>en</strong> einstell<strong>en</strong>. Flash 1 <strong>en</strong>tspricht 100 ms und<br />
Flash 2 <strong>en</strong>tspricht 300 ms.<br />
1. Drück<strong>en</strong> Sie die Taste und wähl<strong>en</strong> Sie mit <strong>de</strong>r Taste <strong>de</strong>n<br />
M<strong>en</strong>üpunkt EINSTELLUNG".<br />
2. Bestätig<strong>en</strong> Sie mit <strong>de</strong>r Taste und wähl<strong>en</strong> Sie mit <strong>de</strong>r<br />
Taste <strong>de</strong>n M<strong>en</strong>üpunkt FLASHZEIT".<br />
3. Bestätig<strong>en</strong> Sie mit <strong>de</strong>r Taste und wähl<strong>en</strong> Sie mit <strong>de</strong>r<br />
Taste o<strong>de</strong>r die gewünschte Flashzeit.<br />
4. Bestätig<strong>en</strong> Sie mit <strong>de</strong>r Taste .
− Son<strong>de</strong>rfunktion<strong>en</strong> −<br />
9.6 Werkseinstellung<strong>en</strong> wie<strong>de</strong>rherstell<strong>en</strong><br />
Mit dieser Funktion wer<strong>de</strong>n das Mobilteil und die Basisstation auf die<br />
Werkseinstellung<strong>en</strong> zurückgesetzt.<br />
Werkseinstellung<strong>en</strong>:<br />
Sprache: Deutsch Name Mobilteil: <strong>5400</strong> <strong>TECH</strong><br />
Warnton Akku: Ein Automatische Rufannahme: Ein<br />
Warnton Reichweite: Ein Tonrufmelodie extern: 3<br />
Tast<strong>en</strong>klick: Ein Tonrufmelodie intern: 1<br />
Hörerlautstärke: 3 Tonruflautstärke Mobilteil: 3<br />
PIN: 0000 Tonrufmelodie Basis: 2<br />
Pause: 3 Sekun<strong>de</strong>n Tonruflautstärke Basis: 3<br />
Wahlverfahr<strong>en</strong>: MFV/Ton FLASH−Zeit: 100 ms<br />
Hinweis: Das Telefonbuch, die Anruferliste (CLIP) und alle Rufnummern<br />
<strong>de</strong>r Wahlwie<strong>de</strong>rholung wer<strong>de</strong>n gelöscht.<br />
1. Drück<strong>en</strong> Sie die Taste und wähl<strong>en</strong> Sie mit <strong>de</strong>r Taste <strong>de</strong>n<br />
M<strong>en</strong>üpunkt EINSTELLUNG".<br />
2. Bestätig<strong>en</strong> Sie mit <strong>de</strong>r Taste und wähl<strong>en</strong> Sie mit <strong>de</strong>r<br />
Taste <strong>de</strong>n M<strong>en</strong>üpunkt WERKSEINST".<br />
3. Bestätig<strong>en</strong> Sie mit <strong>de</strong>r Taste und geb<strong>en</strong> Sie die vierstellige<br />
PIN (Werkseinstellung 0000") ein.<br />
4. Bestätig<strong>en</strong> Sie durch zweimaliges Drück<strong>en</strong> <strong>de</strong>r Taste .<br />
Das Telefon ist jetzt auf die Werkseinstellung<strong>en</strong> zurückgesetzt.<br />
9.7 Tast<strong>en</strong>ton und Hinweistöne ein−/ausschalt<strong>en</strong><br />
Sie könn<strong>en</strong> verschie<strong>de</strong>ne Töne ein− o<strong>de</strong>r ausschalt<strong>en</strong>.<br />
Tast<strong>en</strong>ton<br />
Je<strong>de</strong>r Tast<strong>en</strong>druck am Mobilteil wird mit einem Ton bestätigt.<br />
31
32<br />
− Son<strong>de</strong>rfunktion<strong>en</strong> −<br />
Warnton Akku leer<br />
Bei zu geringer Akkukapazität erinnert ein Warnton daran, dass<br />
das Mobilteil gela<strong>de</strong>n wer<strong>de</strong>n muss.<br />
Reichweit<strong>en</strong>warnung<br />
Hab<strong>en</strong> Sie sich zu weit von <strong>de</strong>r Basis <strong>en</strong>tfernt, erklingt ein<br />
Warnton.<br />
1. Drück<strong>en</strong> Sie die Taste und wähl<strong>en</strong> Sie mit <strong>de</strong>r Taste <strong>de</strong>n<br />
M<strong>en</strong>üpunkt MOBILTEIL".<br />
2. Bestätig<strong>en</strong> Sie mit <strong>de</strong>r Taste . Das Display zeigt TOENE".<br />
3. Bestätig<strong>en</strong> Sie mit <strong>de</strong>r Taste und wähl<strong>en</strong> Sie mit <strong>de</strong>r<br />
Taste o<strong>de</strong>r aus <strong>de</strong>n Option<strong>en</strong> REICHWEITE",<br />
TASTENTON" und AKKU LEER".<br />
4. Bestätig<strong>en</strong> Sie mit <strong>de</strong>r Taste und wähl<strong>en</strong> Sie mit <strong>de</strong>r<br />
Taste o<strong>de</strong>r die Option EIN" bzw. AUS".<br />
5. Bestätig<strong>en</strong> Sie mit <strong>de</strong>r Taste .<br />
9.8 Mobilteil − Ruftonlautstärke einstell<strong>en</strong><br />
Die Ruftonlautstärke kann in verschie<strong>de</strong>n<strong>en</strong> Stuf<strong>en</strong> eingestellt, bzw. ganz<br />
ausgeschaltet wer<strong>de</strong>n. Ist <strong>de</strong>r Rufton ausgeschaltet, wer<strong>de</strong>n eingeh<strong>en</strong><strong>de</strong><br />
Anrufe an <strong>de</strong>r Basisstation und im Display am Mobilteil signalisiert.<br />
Sie könn<strong>en</strong> extern<strong>en</strong> und intern<strong>en</strong> Anruf<strong>en</strong> unterschiedliche Lautstärk<strong>en</strong><br />
zuordn<strong>en</strong>.<br />
1. Drück<strong>en</strong> Sie die Taste und wähl<strong>en</strong> Sie mit <strong>de</strong>r Taste <strong>de</strong>n<br />
M<strong>en</strong>üpunkt MOBILTEIL".<br />
2. Bestätig<strong>en</strong> Sie mit <strong>de</strong>r Taste und wähl<strong>en</strong> Sie mit <strong>de</strong>r<br />
Taste <strong>de</strong>n M<strong>en</strong>üpunkt INT RUF LAUT" o<strong>de</strong>r EXT RUF<br />
LAUT".<br />
3. Bestätig<strong>en</strong> Sie mit <strong>de</strong>r Taste und wähl<strong>en</strong> Sie mit <strong>de</strong>r<br />
Taste o<strong>de</strong>r die gewünschte Lautstärke.<br />
4. Bestätig<strong>en</strong> Sie mit <strong>de</strong>r Taste .
− Son<strong>de</strong>rfunktion<strong>en</strong> −<br />
9.9 Mobilteil − Ruftonmelodie einstell<strong>en</strong><br />
Sie könn<strong>en</strong> extern<strong>en</strong> und intern<strong>en</strong> Anruf<strong>en</strong> unterschiedliche Melodi<strong>en</strong><br />
zuordn<strong>en</strong>.<br />
1. Drück<strong>en</strong> Sie die Taste und wähl<strong>en</strong> Sie mit <strong>de</strong>r Taste <strong>de</strong>n<br />
M<strong>en</strong>üpunkt MOBILTEIL".<br />
2. Bestätig<strong>en</strong> Sie mit <strong>de</strong>r Taste und wähl<strong>en</strong> Sie mit <strong>de</strong>r<br />
Taste <strong>de</strong>n M<strong>en</strong>üpunkt INT MELODIE" o<strong>de</strong>r EXT MELODIE".<br />
3. Bestätig<strong>en</strong> Sie mit <strong>de</strong>r Taste und wähl<strong>en</strong> Sie mit <strong>de</strong>r<br />
Taste o<strong>de</strong>r die gewünschte Melodie.<br />
4. Bestätig<strong>en</strong> Sie mit <strong>de</strong>r Taste .<br />
9.10 Uhrzeit einstell<strong>en</strong><br />
1. Drück<strong>en</strong> Sie die Taste und wähl<strong>en</strong> Sie mit <strong>de</strong>r Taste <strong>de</strong>n<br />
M<strong>en</strong>üpunkt MOBILTEIL".<br />
2. Bestätig<strong>en</strong> Sie mit <strong>de</strong>r Taste und wähl<strong>en</strong> Sie mit <strong>de</strong>r<br />
Taste <strong>de</strong>n M<strong>en</strong>üpunkt UHR EINST".<br />
3. Bestätig<strong>en</strong> Sie mit <strong>de</strong>r Taste und geb<strong>en</strong> Sie über das<br />
Tast<strong>en</strong>feld die aktuelle Uhrzeit im 24−Stun<strong>de</strong>nformat ein.<br />
Beispiel: 17:53 Uhr => 1753 o<strong>de</strong>r 6:47 Uhr => 0647<br />
4. Bestätig<strong>en</strong> Sie mit <strong>de</strong>r Taste .<br />
9.11 Wecker ein/aus<br />
Hinweis: Der Weckton erklingt nur am Mobilteil, nicht an <strong>de</strong>r Basis.<br />
Der Weckton erklingt auch, w<strong>en</strong>n die Ruftonlautstärke am<br />
Mobilteil ausgeschaltet wur<strong>de</strong>.<br />
1. Drück<strong>en</strong> Sie die Taste und wähl<strong>en</strong> Sie mit <strong>de</strong>r Taste <strong>de</strong>n<br />
M<strong>en</strong>üpunkt MOBILTEIL".<br />
2. Bestätig<strong>en</strong> Sie mit <strong>de</strong>r Taste und wähl<strong>en</strong> Sie mit <strong>de</strong>r<br />
Taste <strong>de</strong>n M<strong>en</strong>üpunkt WECKER EINS".<br />
3. Bestätig<strong>en</strong> Sie mit <strong>de</strong>r Taste und wähl<strong>en</strong> Sie mit <strong>de</strong>r<br />
Taste o<strong>de</strong>r die Option EIN".<br />
Hinweis: Möcht<strong>en</strong> Sie <strong>de</strong>n Wecker ausschalt<strong>en</strong>, wähl<strong>en</strong> Sie unter Punkt 4<br />
die Option AUS" und bestätig<strong>en</strong> Sie mit <strong>de</strong>r Taste .<br />
33
34<br />
− Son<strong>de</strong>rfunktion<strong>en</strong> −<br />
4. Bestätig<strong>en</strong> Sie mit <strong>de</strong>r Taste und geb<strong>en</strong> Sie die<br />
gewünschte Weckzeit im 24−Stun<strong>de</strong>nformat ein.<br />
5. Bestätig<strong>en</strong> Sie mit <strong>de</strong>r Taste . Der Wecker ist jetzt<br />
eingeschaltet.<br />
9.12 Anrufe automatisch <strong>en</strong>tgeg<strong>en</strong>nehm<strong>en</strong><br />
W<strong>en</strong>n Sie das Mobilteil aus <strong>de</strong>r Basisstation nehm<strong>en</strong>, wer<strong>de</strong>n eingeh<strong>en</strong><strong>de</strong><br />
Anrufe automatisch <strong>en</strong>tgeg<strong>en</strong>g<strong>en</strong>omm<strong>en</strong>. W<strong>en</strong>n Sie möcht<strong>en</strong>, dass die<br />
Anrufe durch Drück<strong>en</strong> <strong>de</strong>r Taste <strong>en</strong>tgeg<strong>en</strong>g<strong>en</strong>omm<strong>en</strong> wer<strong>de</strong>n,<br />
schalt<strong>en</strong> Sie die automatische Annahme ab.<br />
1. Drück<strong>en</strong> Sie die Taste und wähl<strong>en</strong> Sie mit <strong>de</strong>r Taste <strong>de</strong>n<br />
M<strong>en</strong>üpunkt MOBILTEIL".<br />
2. Bestätig<strong>en</strong> Sie mit <strong>de</strong>r Taste und wähl<strong>en</strong> Sie mit <strong>de</strong>r<br />
Taste <strong>de</strong>n M<strong>en</strong>üpunkt AUTO ANNAHME".<br />
3. Bestätig<strong>en</strong> Sie mit <strong>de</strong>r Taste und wähl<strong>en</strong> Sie mit <strong>de</strong>r<br />
Taste o<strong>de</strong>r die Option EIN" bzw. AUS".<br />
4. Bestätig<strong>en</strong> Sie mit <strong>de</strong>r Taste .<br />
9.13 Nam<strong>en</strong> <strong>de</strong>s Mobilteils än<strong>de</strong>rn<br />
W<strong>en</strong>n Sie ein Gespräch be<strong>en</strong><strong>de</strong>n, erscheint im Display abwechselnd die<br />
Gesprächszeit und <strong>de</strong>r Name <strong>de</strong>s Mobilteils. Sind mehrere Mobilteile an<br />
<strong>de</strong>r Basisstation angemel<strong>de</strong>t, ist es sinnvoll, je<strong>de</strong>m Mobilteil ein<strong>en</strong> eig<strong>en</strong><strong>en</strong><br />
Nam<strong>en</strong> zu geb<strong>en</strong>.<br />
1. Drück<strong>en</strong> Sie die Taste und wähl<strong>en</strong> Sie mit <strong>de</strong>r Taste <strong>de</strong>n<br />
M<strong>en</strong>üpunkt MOBILTEIL".<br />
2. Bestätig<strong>en</strong> Sie mit <strong>de</strong>r Taste und wähl<strong>en</strong> Sie mit <strong>de</strong>r<br />
Taste <strong>de</strong>n M<strong>en</strong>üpunkt NAME".<br />
3. Bestätig<strong>en</strong> Sie mit <strong>de</strong>r Taste und geb<strong>en</strong> Sie <strong>de</strong>n<br />
gewünscht<strong>en</strong> Nam<strong>en</strong> ein (maximal 10 Zeich<strong>en</strong>).<br />
Hinweis: Texteingabe siehe Kapitel 7.1.2.<br />
4. Bestätig<strong>en</strong> Sie mit <strong>de</strong>r Taste .
− Son<strong>de</strong>rfunktion<strong>en</strong> −<br />
9.14 Sprache einstell<strong>en</strong><br />
Sie könn<strong>en</strong> die M<strong>en</strong>ü−Texte in verschie<strong>de</strong>n<strong>en</strong> Sprach<strong>en</strong> anzeig<strong>en</strong> lass<strong>en</strong>.<br />
1. Drück<strong>en</strong> Sie die Taste und wähl<strong>en</strong> Sie mit <strong>de</strong>r Taste <strong>de</strong>n<br />
M<strong>en</strong>üpunkt MOBILTEIL".<br />
2. Bestätig<strong>en</strong> Sie mit <strong>de</strong>r Taste und wähl<strong>en</strong> Sie mit <strong>de</strong>r<br />
Taste <strong>de</strong>n M<strong>en</strong>üpunkt SPRACHE".<br />
3. Bestätig<strong>en</strong> Sie mit <strong>de</strong>r Taste und wähl<strong>en</strong> Sie mit <strong>de</strong>r<br />
Taste o<strong>de</strong>r die gewünschte Sprache.<br />
4. Bestätig<strong>en</strong> Sie mit <strong>de</strong>r Taste .<br />
35
10 Mehrere Mobilteile<br />
36<br />
− Mehrere Mobilteile −<br />
Sie könn<strong>en</strong> insgesamt fünf Mobilteile an Ihre Basisstation anmel<strong>de</strong>n.<br />
Je<strong>de</strong>s Mobilteil kann gleichzeitig nur an eine Basisstation angemel<strong>de</strong>t sein.<br />
Hinweis: Über <strong>de</strong>n international g<strong>en</strong>ormt<strong>en</strong> GAP Standard könn<strong>en</strong><br />
AUDIOLINE−Mobilteile und auch Mobilteile von Fremdherstellern<br />
in das Telefonsystem integriert wer<strong>de</strong>n. G<strong>en</strong>auso könn<strong>en</strong> Sie ein<br />
AUDIOLINE−Mobilteil an Basisstation<strong>en</strong> an<strong>de</strong>rer Hersteller<br />
anmel<strong>de</strong>n, sofern diese Geräte nach <strong>de</strong>m GAP Standard<br />
arbeit<strong>en</strong>.<br />
Bei <strong>de</strong>r B<strong>en</strong>utzung von mehrer<strong>en</strong> Mobilteil<strong>en</strong> erhalt<strong>en</strong> Sie folg<strong>en</strong><strong>de</strong><br />
Möglichkeit<strong>en</strong>:<br />
Interne Gespräche zwisch<strong>en</strong> <strong>de</strong>n Mobilteil<strong>en</strong>.<br />
Externe Gespräche könn<strong>en</strong> zwisch<strong>en</strong> <strong>de</strong>n Mobilteil<strong>en</strong><br />
weitergeleitet wer<strong>de</strong>n.<br />
Eingeh<strong>en</strong><strong>de</strong> externe Gespräche wer<strong>de</strong>n an all<strong>en</strong> Mobilteil<strong>en</strong><br />
signalisiert.<br />
Konfer<strong>en</strong>zgespräch mit einem extern<strong>en</strong> und zwei intern<strong>en</strong><br />
Telefon<strong>en</strong>.<br />
Hinweis: B<strong>en</strong>utzt bereits ein an<strong>de</strong>res Mobilteil die externe Leitung,<br />
erscheint im Display das Symbol EXT". Ein weiteres externes<br />
Gespräch ist nicht möglich.<br />
10.1 Intern telefonier<strong>en</strong><br />
Sobald Sie mehrere Mobilteile an <strong>de</strong>r Basisstation angemel<strong>de</strong>t hab<strong>en</strong>,<br />
könn<strong>en</strong> Sie kost<strong>en</strong>lose interne Gespräche führ<strong>en</strong>.<br />
1. Drück<strong>en</strong> Sie die Taste und die interne Nummer <strong>de</strong>s<br />
Mobilteils, z. B. 2".<br />
2. Das Gespräch wird am geruf<strong>en</strong><strong>en</strong> Mobilteil <strong>en</strong>tgeg<strong>en</strong>g<strong>en</strong>omm<strong>en</strong>.<br />
Hinweis: Erreicht Sie währ<strong>en</strong>d eines intern<strong>en</strong> Gesprächs ein externer<br />
Anruf, hör<strong>en</strong> Sie kurze Signaltöne und Sie seh<strong>en</strong> die Rufnummer<br />
<strong>de</strong>s Anrufers im Display, falls diese verfügbar ist.
− Mehrere Mobilteile −<br />
3. Be<strong>en</strong><strong>de</strong>n Sie das interne Gespräch durch Drück<strong>en</strong> <strong>de</strong>r<br />
Taste .<br />
4. Drück<strong>en</strong> Sie erneut die Taste , um <strong>de</strong>n extern<strong>en</strong> Anruf<br />
anzunehm<strong>en</strong>.<br />
10.2 Externe Gespräche an ein an<strong>de</strong>res Mobilteil weiterleit<strong>en</strong><br />
Hab<strong>en</strong> Sie ein externes Gespräch an einem Mobilteil <strong>en</strong>tgeg<strong>en</strong>g<strong>en</strong>omm<strong>en</strong>,<br />
könn<strong>en</strong> Sie das externe Gespräch an ein an<strong>de</strong>res Mobilteil weiterleit<strong>en</strong>.<br />
Drück<strong>en</strong> Sie dazu die Taste und dann die interne Nummer z. B. 2"<br />
<strong>de</strong>s gewünscht<strong>en</strong> Mobilteils.<br />
Hinweis: Sollte sich das geruf<strong>en</strong>e Mobilteil nicht mel<strong>de</strong>n, könn<strong>en</strong> Sie das<br />
Gespräch durch Drück<strong>en</strong> <strong>de</strong>r Taste wie<strong>de</strong>r übernehm<strong>en</strong>.<br />
Nach<strong>de</strong>m das interne Gespräch am an<strong>de</strong>r<strong>en</strong> Mobilteil <strong>en</strong>tgeg<strong>en</strong>g<strong>en</strong>omm<strong>en</strong><br />
wur<strong>de</strong>, hab<strong>en</strong> Sie folg<strong>en</strong><strong>de</strong> Möglichkeit<strong>en</strong>:<br />
1. Rücksprache / Makeln: Sie könn<strong>en</strong> nun mit <strong>de</strong>m intern<strong>en</strong><br />
Teilnehmer sprech<strong>en</strong> und durch das Drück<strong>en</strong> <strong>de</strong>r Taste <br />
zum extern<strong>en</strong> Gesprächspartner zurückkehr<strong>en</strong>. Sie könn<strong>en</strong> so<br />
beliebig oft zwisch<strong>en</strong> <strong>de</strong>m extern<strong>en</strong> und intern<strong>en</strong> Gespräch<br />
wechseln.<br />
2. Gespräch übergeb<strong>en</strong>: Durch Drück<strong>en</strong> <strong>de</strong>r Taste am erst<strong>en</strong><br />
Mobilteil, wird das externe Gespräch an das geruf<strong>en</strong>e Mobilteil<br />
übergeb<strong>en</strong>.<br />
10.3 Konfer<strong>en</strong>zgespräche führ<strong>en</strong><br />
Ein externes Gespräch kann mit einem weiter<strong>en</strong> intern<strong>en</strong> Teilnehmer zum<br />
Konfer<strong>en</strong>zgespräch geschaltet wer<strong>de</strong>n. So könn<strong>en</strong> zwei Mobilteile<br />
gleichzeitig mit <strong>de</strong>m extern<strong>en</strong> Teilnehmer sprech<strong>en</strong>.<br />
1. Stell<strong>en</strong> Sie die gewünschte Verbindung zum extern<strong>en</strong><br />
Teilnehmer her.<br />
2. Drück<strong>en</strong> Sie dann die Taste und die interne Nummer <strong>de</strong>s<br />
gewünscht<strong>en</strong> zweit<strong>en</strong> Mobilteils.<br />
37
38<br />
− Mehrere Mobilteile −<br />
3. Hat <strong>de</strong>r zweite, interne Teilnehmer das Gespräch<br />
<strong>en</strong>tgeg<strong>en</strong>g<strong>en</strong>omm<strong>en</strong>, drück<strong>en</strong> Sie die Taste und alle drei<br />
Teilnehmer sind zu einer Konfer<strong>en</strong>z zusamm<strong>en</strong>geschaltet.<br />
Hinweis: Währ<strong>en</strong>d einer Konfer<strong>en</strong>z könn<strong>en</strong> Sie mit <strong>de</strong>r Taste <strong>de</strong>n<br />
extern<strong>en</strong> Gesprächspartner auf Halt<strong>en</strong> setz<strong>en</strong>. Durch Drück<strong>en</strong><br />
<strong>de</strong>r Tast<strong>en</strong>folge schalt<strong>en</strong> Sie zur Konfer<strong>en</strong>z zurück.<br />
4. Die Konfer<strong>en</strong>z wird durch das Aufleg<strong>en</strong> eines <strong>de</strong>r intern<strong>en</strong><br />
Gesprächspartner be<strong>en</strong><strong>de</strong>t.<br />
10.4 An− und Abmel<strong>de</strong>n von Mobilteil<strong>en</strong><br />
10.4.1 Anmel<strong>de</strong>n von Mobilteil<strong>en</strong><br />
1. Drück<strong>en</strong> Sie die Paging−Taste an <strong>de</strong>r Basisstation für drei<br />
Sekun<strong>de</strong>n, bis Sie zwei Signaltöne hör<strong>en</strong>. Mel<strong>de</strong>n Sie das neue<br />
Mobilteil jetzt innerhalb von 90 Sekun<strong>de</strong>n an.<br />
2. Drück<strong>en</strong> Sie die Taste am Mobilteil und wähl<strong>en</strong> Sie mit <strong>de</strong>r<br />
Taste <strong>de</strong>n M<strong>en</strong>üpunkt ANMELDEN".<br />
3. Bestätig<strong>en</strong> Sie mit <strong>de</strong>r Taste und wähl<strong>en</strong> Sie mit <strong>de</strong>r<br />
Taste o<strong>de</strong>r <strong>de</strong>n M<strong>en</strong>üpunkt BASIS ANMELD".<br />
4. Bestätig<strong>en</strong> Sie mit <strong>de</strong>r Taste und geb<strong>en</strong> Sie über das<br />
Zahl<strong>en</strong>feld die Nummer <strong>de</strong>r Basisstation ein (1 bis 4). Ist das<br />
Mobilteil bereits mit einer Basisstation verbun<strong>de</strong>n, blink<strong>en</strong> die<br />
<strong>en</strong>tsprech<strong>en</strong><strong>de</strong>n Nummern.<br />
5. Bestätig<strong>en</strong> Sie mit <strong>de</strong>r Taste . Die Basisstation wird gesucht.<br />
6. Nach<strong>de</strong>m die Basisstation gefun<strong>de</strong>n wur<strong>de</strong>, müss<strong>en</strong> Sie die PIN<br />
(Werkseinstellung 0 0 0 0) eingeb<strong>en</strong>.<br />
7. Bestätig<strong>en</strong> Sie mit <strong>de</strong>r Taste . Nach einig<strong>en</strong> Sekun<strong>de</strong>n<br />
hör<strong>en</strong> Sie ein<strong>en</strong> Signalton.<br />
Das Mobilteil ist nun angemel<strong>de</strong>t und kann für externe und<br />
interne Gespräche b<strong>en</strong>utzt wer<strong>de</strong>n.<br />
Hinweis: Dem Mobilteil wird eine interne Rufnummer zugeteilt. Das bereits<br />
angemel<strong>de</strong>te Mobilteil hat die interne Rufnummer 1. Das zweite<br />
angemel<strong>de</strong>te Mobilteil erhält die interne Rufnummer 2. Diese<br />
interne Rufnummer wird im Display rechts angezeigt.
− Mehrere Mobilteile −<br />
10.4.2 Anmel<strong>de</strong>n von an<strong>de</strong>r<strong>en</strong> DECT−GAP Telefon<strong>en</strong> an <strong>de</strong>r<br />
Basisstation<br />
Um ein DECT−GAP Mobilteil eines an<strong>de</strong>r<strong>en</strong> Herstellers anzumel<strong>de</strong>n, folg<strong>en</strong><br />
Sie <strong>de</strong>n Hinweis<strong>en</strong> in <strong>de</strong>r Bedi<strong>en</strong>ungsanleitung <strong>de</strong>s Fremdherstellers und<br />
drück<strong>en</strong> dann für 3 Sekun<strong>de</strong>n die Paging−Taste an Ihrer Basisstation.<br />
B<strong>en</strong>utz<strong>en</strong> Sie zur Anmeldung die PIN (Werkseinstellung: 0000).<br />
10.4.3 Abmel<strong>de</strong>n von Mobilteil<strong>en</strong><br />
Ein Mobilteil kann nur über ein an<strong>de</strong>res, noch angemel<strong>de</strong>tes Mobilteil<br />
abgemel<strong>de</strong>t wer<strong>de</strong>n. Es ist nicht möglich, diese Abmeldung mit <strong>de</strong>m<br />
Mobilteil durchzuführ<strong>en</strong>, das abgemel<strong>de</strong>t wer<strong>de</strong>n soll.<br />
1. Drück<strong>en</strong> Sie die Taste und wähl<strong>en</strong> Sie mit <strong>de</strong>r Taste <strong>de</strong>n<br />
M<strong>en</strong>üpunkt EINSTELLUNG".<br />
2. Bestätig<strong>en</strong> Sie mit <strong>de</strong>r Taste und wähl<strong>en</strong> Sie mit <strong>de</strong>r<br />
Taste o<strong>de</strong>r <strong>de</strong>n M<strong>en</strong>üpunkt MT−ABMELDEN".<br />
3. Bestätig<strong>en</strong> Sie mit <strong>de</strong>r Taste und geb<strong>en</strong> Sie über das<br />
Zahl<strong>en</strong>feld die PIN (Werkseinstellung: 0000) ein.<br />
Hinweis: Mit <strong>de</strong>r Taste brech<strong>en</strong> Sie <strong>de</strong>n Vorgang ab.<br />
4. Bestätig<strong>en</strong> Sie mit <strong>de</strong>r Taste und geb<strong>en</strong> Sie die interne<br />
Nummer <strong>de</strong>s abzumel<strong>de</strong>n<strong>en</strong> Mobilteils ein.<br />
5. Bei erfolgreicher Abmeldung hör<strong>en</strong> Sie nach einig<strong>en</strong> Sekun<strong>de</strong>n<br />
ein<strong>en</strong> Signalton. Das Mobilteil ist nun abgemel<strong>de</strong>t und kann für<br />
externe und interne Gespräche nicht mehr b<strong>en</strong>utzt wer<strong>de</strong>n.<br />
39
40<br />
− Mehrere Mobilteile −<br />
10.5 Zusätzliche Basisstation<strong>en</strong><br />
Bei <strong>de</strong>r Verw<strong>en</strong>dung mehrerer Basisstation<strong>en</strong> könn<strong>en</strong> Sie die Reichweite<br />
<strong>de</strong>s Mobilteils vergrößern. Um dies<strong>en</strong> Effekt zu nutz<strong>en</strong>, müss<strong>en</strong> alle<br />
Basisstation<strong>en</strong> mit einem Telefonanschluss verbun<strong>de</strong>n sein. Je nach<br />
Verw<strong>en</strong>dungszweck könn<strong>en</strong> Sie je<strong>de</strong> Basisstation mit <strong>de</strong>r gleich<strong>en</strong><br />
Telefonnummer beleg<strong>en</strong> o<strong>de</strong>r geb<strong>en</strong> Sie <strong>de</strong>n Basisstation<strong>en</strong><br />
unterschiedliche Rufnummern. Acht<strong>en</strong> Sie darauf, dass sich alle<br />
Basisstation<strong>en</strong> in ihrer Reichweite überschnei<strong>de</strong>n. Das Mobilteil muss an<br />
je<strong>de</strong>r Basisstation angemel<strong>de</strong>t wer<strong>de</strong>n. Bitte test<strong>en</strong> Sie vor je<strong>de</strong>r<br />
Inbetriebnahme einer neu<strong>en</strong> Basisstation die Reichweite <strong>de</strong>s Mobilteils.<br />
Ist ein Mobilteil an <strong>de</strong>n Basisstation<strong>en</strong> angemel<strong>de</strong>t und wur<strong>de</strong> am Mobilteil<br />
die automatische Wahl <strong>de</strong>r Basisstation eingeschaltet (siehe 10.5.1), wird<br />
das Mobilteil immer automatisch an die nächste Basisstation weitergeleitet.<br />
10.5.1 Wähl<strong>en</strong> einer Basisstation<br />
1. Drück<strong>en</strong> Sie die Taste am Mobilteil und wähl<strong>en</strong> Sie mit <strong>de</strong>r<br />
Taste <strong>de</strong>n M<strong>en</strong>üpunkt ANMELDEN".<br />
2. Bestätig<strong>en</strong> Sie mit <strong>de</strong>r Taste und wähl<strong>en</strong> Sie mit <strong>de</strong>r<br />
Taste o<strong>de</strong>r <strong>de</strong>n M<strong>en</strong>üpunkt BASIS−WAHL.<br />
3. Bestätig<strong>en</strong> Sie mit <strong>de</strong>r Taste . Im Display erschein<strong>en</strong> alle<br />
Basisstation<strong>en</strong>, an <strong>de</strong>n<strong>en</strong> das Mobilteil bereits angemel<strong>de</strong>t ist.<br />
Die Nummer <strong>de</strong>r aktiv<strong>en</strong> Basisstation blinkt. Wähl<strong>en</strong> Sie über<br />
das Zahl<strong>en</strong>feld die gewünschte Basisstation, auf die das<br />
Mobilteil umgeschaltet wer<strong>de</strong>n soll.<br />
O<strong>de</strong>r wechseln Sie mit <strong>de</strong>r Taste auf die Option AUTO". Bei<br />
dieser Einstellung wechselt das Mobilteil automatisch zur<br />
nächst<strong>en</strong> Basisstation, w<strong>en</strong>n die Verbindung zur aktuell<strong>en</strong><br />
Basisstation abbricht.
11 Fehlerbeseitigung<br />
− Fehlerbeseitigung −<br />
Hab<strong>en</strong> Sie Probleme mit Ihrem Telefon, kontrollier<strong>en</strong> Sie bitte zuerst die<br />
folg<strong>en</strong><strong>de</strong>n Hinweise.<br />
Bei Garantieansprüch<strong>en</strong> w<strong>en</strong><strong>de</strong>n Sie sich bitte an Ihr<strong>en</strong> Fachhändler.<br />
Fehler Lösung<strong>en</strong><br />
Kein Telefongespräch<br />
möglich<br />
Verbindung abgehackt,<br />
fällt aus<br />
− Die Telefonleitung ist nicht korrekt angeschloss<strong>en</strong><br />
o<strong>de</strong>r gestört. Verw<strong>en</strong><strong>de</strong>n Sie<br />
nur das mitgelieferte Telefonkabel.<br />
− Test<strong>en</strong> Sie mit einem an<strong>de</strong>r<strong>en</strong> Telefon,<br />
ob Ihr Telefonanschluss in Ordnung ist.<br />
− Das Steckernetzteil ist nicht eingesteckt<br />
o<strong>de</strong>r es liegt ein totaler Stromausfall vor.<br />
− Die aufladbar<strong>en</strong> Standard−Akkus sind<br />
leer o<strong>de</strong>r <strong>de</strong>fekt.<br />
− Sie hab<strong>en</strong> sich zu weit von <strong>de</strong>r Basisstation<br />
<strong>en</strong>tfernt.<br />
− Sie hab<strong>en</strong> sich zu weit von <strong>de</strong>r Basisstation<br />
<strong>en</strong>tfernt.<br />
− Falscher Aufstellungsort <strong>de</strong>r Basisstation.<br />
Keine Wahl möglich − Wahlverfahr<strong>en</strong> falsch eingestellt<br />
(siehe Kapitel 9.4).<br />
Das System reagiert nicht<br />
mehr o<strong>de</strong>r befin<strong>de</strong>t sich in<br />
einem un<strong>de</strong>finiert<strong>en</strong> Zustand<br />
− Stell<strong>en</strong> Sie die Werkseinstellung<strong>en</strong> wie<strong>de</strong>r<br />
her (siehe Kapitel 9.6). Zieh<strong>en</strong> Sie<br />
vorher kurzzeitig das Netzteil aus <strong>de</strong>r<br />
Steckdose.<br />
41
Die La<strong>de</strong>kontrollleuchte<br />
leuchtet nicht<br />
Im Display blinkt nach ein<br />
paar Stun<strong>de</strong>n das Batterie−Symbol<br />
42<br />
− Fehlerbeseitigung −<br />
− Stell<strong>en</strong> Sie das Mobilteil richtig auf die<br />
Basisstation, reinig<strong>en</strong> Sie die Kontaktfläch<strong>en</strong><br />
am Mobilteil und an <strong>de</strong>r Basisstation<br />
mit einem weich<strong>en</strong>, trock<strong>en</strong><strong>en</strong> Tuch.<br />
− Stell<strong>en</strong> Sie das Mobilteil für 14 Stun<strong>de</strong>n<br />
in die Basisstation. Hilft dies nicht, erneuern<br />
Sie die aufladbar<strong>en</strong> Standard−<br />
Akkus.<br />
Display−Anzeige dunkel − Verursacht durch direkte Sonn<strong>en</strong>einstrahlung,<br />
Mobilteil abkühl<strong>en</strong> lass<strong>en</strong>.
− Wichtige Information<strong>en</strong> −<br />
12 Wichtige Information<strong>en</strong><br />
12.1 Technische Dat<strong>en</strong><br />
Merkmal Wert<br />
Standard DECT−GAP<br />
Stromversorgung Basisstation 220/230V, 50 Hz<br />
Reichweite (Auß<strong>en</strong>/Inn<strong>en</strong>) 300 m / 50 m<br />
Standby bis zu 100 h<br />
Max. Gesprächsdauer bis zu 10 h<br />
Aufladbare Standard−Akkus 2x AAA (1.2V / 550 mAh)<br />
Wahlverfahr<strong>en</strong> MFV o<strong>de</strong>r IWV<br />
Zulässige Umgebungstemperatur 10°C bis 30°C<br />
Zulässige relative Luftfeuchtigkeit 20% bis 75%<br />
Flash−Zeit<strong>en</strong> 100 ms o<strong>de</strong>r 300 ms<br />
DECT: Digital European Cordless Telephone = Standard für kabellose<br />
Telefone.<br />
GAP: G<strong>en</strong>eric Access Profile = Standard für das Zusamm<strong>en</strong>wirk<strong>en</strong> von<br />
Mobilteil<strong>en</strong> und Basisstation<strong>en</strong> an<strong>de</strong>rer Hersteller.<br />
12.2 Garantie<br />
AUDIOLINE − Geräte wer<strong>de</strong>n nach <strong>de</strong>n mo<strong>de</strong>rnst<strong>en</strong> Produktionsverfahr<strong>en</strong><br />
hergestellt und geprüft. Ausgesuchte Materiali<strong>en</strong> und hoch <strong>en</strong>twickelte<br />
Technologi<strong>en</strong> sorg<strong>en</strong> für einwandfreie Funktion und lange Leb<strong>en</strong>sdauer.<br />
Ein Garantiefall liegt nicht vor, w<strong>en</strong>n die Ursache einer Fehlfunktion <strong>de</strong>s<br />
Gerätes bei <strong>de</strong>m Telefonnetzbetreiber o<strong>de</strong>r einer ev<strong>en</strong>tuell<br />
zwisch<strong>en</strong>geschaltet<strong>en</strong> Neb<strong>en</strong>stell<strong>en</strong>anlage liegt. Die Garantie gilt nicht für<br />
43
44<br />
− Wichtige Information<strong>en</strong> −<br />
die in <strong>de</strong>n Produkt<strong>en</strong> verw<strong>en</strong><strong>de</strong>t<strong>en</strong> Standard−Akkus o<strong>de</strong>r Akkupacks. Die<br />
Garantiezeit beträgt 24 Monate, gerechnet vom Tage <strong>de</strong>s Kaufs.<br />
Innerhalb <strong>de</strong>r Garantiezeit wer<strong>de</strong>n alle Mängel, die auf Material− o<strong>de</strong>r<br />
Herstellungsfehler zurückzuführ<strong>en</strong> sind, kost<strong>en</strong>los beseitigt. Der<br />
Garantieanspruch erlischt bei Eingriff<strong>en</strong> durch <strong>de</strong>n Käufer o<strong>de</strong>r durch<br />
Dritte. Schä<strong>de</strong>n, die durch unsachgemäße Behandlung o<strong>de</strong>r Bedi<strong>en</strong>ung,<br />
durch falsches Aufstell<strong>en</strong> o<strong>de</strong>r Aufbewahr<strong>en</strong>, durch unsachgemäß<strong>en</strong><br />
Anschluss o<strong>de</strong>r Installation sowie durch höhere Gewalt o<strong>de</strong>r sonstige<br />
äußere Einflüsse <strong>en</strong>tsteh<strong>en</strong>, fall<strong>en</strong> nicht unter die Garantieleistung. Wir<br />
behalt<strong>en</strong> uns vor, bei Reklamation<strong>en</strong> die <strong>de</strong>fekt<strong>en</strong> Teile auszubessern o<strong>de</strong>r<br />
zu ersetz<strong>en</strong> o<strong>de</strong>r das Gerät auszutausch<strong>en</strong>. Ausgetauschte Teile o<strong>de</strong>r<br />
ausgetauschte Geräte geh<strong>en</strong> in unser Eig<strong>en</strong>tum über.<br />
Scha<strong>de</strong>nersatzansprüche sind ausgeschloss<strong>en</strong>, soweit sie nicht auf<br />
Vorsatz o<strong>de</strong>r grober Fahrlässigkeit <strong>de</strong>s Herstellers beruh<strong>en</strong>.<br />
Sollte Ihr Gerät <strong>de</strong>nnoch ein<strong>en</strong> Defekt innerhalb <strong>de</strong>r Garantiezeit<br />
aufweis<strong>en</strong>, w<strong>en</strong><strong>de</strong>n Sie sich bitte unter Vorlage Ihrer Kaufquittung<br />
ausschließlich an das Geschäft, in <strong>de</strong>m Sie Ihr AUDIOLINE − Gerät gekauft<br />
hab<strong>en</strong>. Alle Gewährleistungsansprüche nach dies<strong>en</strong> Bestimmung<strong>en</strong> sind<br />
ausschließlich geg<strong>en</strong>über Ihrem Fachhändler gelt<strong>en</strong>d zu mach<strong>en</strong>. Nach<br />
Ablauf von zwei Jahr<strong>en</strong> nach Kauf und Übergabe unserer Produkte<br />
könn<strong>en</strong> Gewährleistungsrechte nicht mehr gelt<strong>en</strong>d gemacht wer<strong>de</strong>n.<br />
12.3 Konformitätserklärung<br />
Dieses Gerät erfüllt die Anfor<strong>de</strong>rung<strong>en</strong> <strong>de</strong>r EU−Richtlinie:<br />
1999/5/EG Richtlinie über Funkanlag<strong>en</strong> und<br />
Telekommunikations<strong>en</strong><strong>de</strong>inrichtung<strong>en</strong> und die geg<strong>en</strong>seitige Anerk<strong>en</strong>nung<br />
ihrer Konformität. Die Konformität mit <strong>de</strong>r o. a. Richtlinie wird durch das<br />
CE−Zeich<strong>en</strong> auf <strong>de</strong>m Gerät bestätigt.<br />
Für die komplette Konformitätserklärung nutz<strong>en</strong> Sie bitte <strong>de</strong>n kost<strong>en</strong>los<strong>en</strong><br />
Download von unserer Website www.audioline.<strong>de</strong>.
− Cont<strong>en</strong>ts −<br />
1 G<strong>en</strong>eral Information . . . . . . . . . . . . . . . . . . . . . . . . . . . . . . . . . . 48<br />
1.1 Int<strong>en</strong><strong>de</strong>d use . . . . . . . . . . . . . . . . . . . . . . . . . . . . . . . . . . . . . . . . . . . . . . . 48<br />
1.2 Power failure . . . . . . . . . . . . . . . . . . . . . . . . . . . . . . . . . . . . . . . . . . . . . . . 48<br />
1.3 Installation location . . . . . . . . . . . . . . . . . . . . . . . . . . . . . . . . . . . . . . . . . . 48<br />
1.4 Power supply . . . . . . . . . . . . . . . . . . . . . . . . . . . . . . . . . . . . . . . . . . . . . . . 49<br />
1.5 Charging the handset . . . . . . . . . . . . . . . . . . . . . . . . . . . . . . . . . . . . . . . . 49<br />
1.6 Private branch exchanges . . . . . . . . . . . . . . . . . . . . . . . . . . . . . . . . . . . . 49<br />
1.7 Information on disposal . . . . . . . . . . . . . . . . . . . . . . . . . . . . . . . . . . . . . . . 50<br />
1.8 Note on medical equipm<strong>en</strong>t . . . . . . . . . . . . . . . . . . . . . . . . . . . . . . . . . . . 50<br />
1.9 Temperature and ambi<strong>en</strong>t conditions . . . . . . . . . . . . . . . . . . . . . . . . . . . 51<br />
1.10 Cleaning and upkeep . . . . . . . . . . . . . . . . . . . . . . . . . . . . . . . . . . . . . . . . 51<br />
2 Operating Elem<strong>en</strong>ts . . . . . . . . . . . . . . . . . . . . . . . . . . . . . . . . . . 52<br />
3 Private Branch Exchanges / T−Net . . . . . . . . . . . . . . . . . . . . . 53<br />
3.1 R button on private branch exchanges . . . . . . . . . . . . . . . . . . . . . . . . . . 53<br />
3.2 R button with T−Net provi<strong>de</strong>d by Deutsch<strong>en</strong> Telekom . . . . . . . . . . . . . . 53<br />
3.3 Dialling pause . . . . . . . . . . . . . . . . . . . . . . . . . . . . . . . . . . . . . . . . . . . . . . 53<br />
4 Starting Up . . . . . . . . . . . . . . . . . . . . . . . . . . . . . . . . . . . . . . . . . . 54<br />
4.1 Safety notes . . . . . . . . . . . . . . . . . . . . . . . . . . . . . . . . . . . . . . . . . . . . . . . . 54<br />
4.2 Checking the package cont<strong>en</strong>ts . . . . . . . . . . . . . . . . . . . . . . . . . . . . . . . 54<br />
4.3 Connecting the base station . . . . . . . . . . . . . . . . . . . . . . . . . . . . . . . . . . . 54<br />
4.4 Connecting the charging station . . . . . . . . . . . . . . . . . . . . . . . . . . . . . . . 55<br />
4.5 Setting the time on the charging station . . . . . . . . . . . . . . . . . . . . . . . . . 55<br />
4.6 Setting the alarm time and activating the alarm . . . . . . . . . . . . . . . . . . . 56<br />
4.7 Inserting the standard batteries . . . . . . . . . . . . . . . . . . . . . . . . . . . . . . . . 57<br />
4.8 Charging the standard batteries . . . . . . . . . . . . . . . . . . . . . . . . . . . . . . . . 57<br />
4.9 Tone or Pulse dialling mo<strong>de</strong> . . . . . . . . . . . . . . . . . . . . . . . . . . . . . . . . . . . 58<br />
4.10 Fitting the belt clip . . . . . . . . . . . . . . . . . . . . . . . . . . . . . . . . . . . . . . . . . . . 58<br />
5 M<strong>en</strong>u Structure . . . . . . . . . . . . . . . . . . . . . . . . . . . . . . . . . . . . . .<br />
59<br />
45
46<br />
− Cont<strong>en</strong>ts −<br />
6 Operation . . . . . . . . . . . . . . . . . . . . . . . . . . . . . . . . . . . . . . . . . . . 61<br />
6.1 Display . . . . . . . . . . . . . . . . . . . . . . . . . . . . . . . . . . . . . . . . . . . . . . . . . . . . 61<br />
6.2 External answering machine . . . . . . . . . . . . . . . . . . . . . . . . . . . . . . . . . . 62<br />
6.3 Taking a call . . . . . . . . . . . . . . . . . . . . . . . . . . . . . . . . . . . . . . . . . . . . . . . . 62<br />
6.4 Making a call . . . . . . . . . . . . . . . . . . . . . . . . . . . . . . . . . . . . . . . . . . . . . . . 62<br />
6.5 Dialling phone numbers stored in the phone book . . . . . . . . . . . . . . . . . 63<br />
6.6 Displaying the call timer . . . . . . . . . . . . . . . . . . . . . . . . . . . . . . . . . . . . . . 63<br />
6.7 Switching the handset on /off . . . . . . . . . . . . . . . . . . . . . . . . . . . . . . . . . . 63<br />
6.8 Adjusting the receiver volume . . . . . . . . . . . . . . . . . . . . . . . . . . . . . . . . . 63<br />
6.9 Redialling button . . . . . . . . . . . . . . . . . . . . . . . . . . . . . . . . . . . . . . . . . . . . 63<br />
6.10 Muting the microphone in the handset . . . . . . . . . . . . . . . . . . . . . . . . . . 64<br />
6.11 Key lock on/off . . . . . . . . . . . . . . . . . . . . . . . . . . . . . . . . . . . . . . . . . . . . . . 64<br />
6.12 Temporary tone dialling . . . . . . . . . . . . . . . . . . . . . . . . . . . . . . . . . . . . . . . 64<br />
6.13 Information on the range . . . . . . . . . . . . . . . . . . . . . . . . . . . . . . . . . . . . . . 65<br />
6.14 Locating the handset (paging) . . . . . . . . . . . . . . . . . . . . . . . . . . . . . . . . . 65<br />
7 Phone Book . . . . . . . . . . . . . . . . . . . . . . . . . . . . . . . . . . . . . . . . . 66<br />
7.1 Entering phone numbers in the phone book . . . . . . . . . . . . . . . . . . . . . . 66<br />
7.2 Editing <strong>en</strong>tries in the phone book . . . . . . . . . . . . . . . . . . . . . . . . . . . . . . . 67<br />
7.3 Deleting stored <strong>en</strong>tries from the phone book . . . . . . . . . . . . . . . . . . . . . 67<br />
8 Caller Number Display (CLIP Function) . . . . . . . . . . . . . . . . 68<br />
8.1 Calls list . . . . . . . . . . . . . . . . . . . . . . . . . . . . . . . . . . . . . . . . . . . . . . . . . . . 68<br />
9 Special Functions . . . . . . . . . . . . . . . . . . . . . . . . . . . . . . . . . . . . 71<br />
9.1 Setting the base station volume . . . . . . . . . . . . . . . . . . . . . . . . . . . . . . . . 71<br />
9.2 Setting the base station melody . . . . . . . . . . . . . . . . . . . . . . . . . . . . . . . . 71<br />
9.3 Change PIN . . . . . . . . . . . . . . . . . . . . . . . . . . . . . . . . . . . . . . . . . . . . . . . . 72<br />
9.4 Tone or Pulse dialling mo<strong>de</strong> . . . . . . . . . . . . . . . . . . . . . . . . . . . . . . . . . . . 72<br />
9.5 Setting Recall (Flash time) . . . . . . . . . . . . . . . . . . . . . . . . . . . . . . . . . . . . 72<br />
9.6 Restoring the <strong>de</strong>fault settings . . . . . . . . . . . . . . . . . . . . . . . . . . . . . . . . . .<br />
73
− Cont<strong>en</strong>ts −<br />
9.7 Switching the key tone and warning tones on/off . . . . . . . . . . . . . . . . . . 74<br />
9.8 Setting the handset volume . . . . . . . . . . . . . . . . . . . . . . . . . . . . . . . . . . . 74<br />
9.9 Setting the handset ringing melody . . . . . . . . . . . . . . . . . . . . . . . . . . . . . 75<br />
9.10 Setting the time . . . . . . . . . . . . . . . . . . . . . . . . . . . . . . . . . . . . . . . . . . . . . 75<br />
9.11 Alarm on/off . . . . . . . . . . . . . . . . . . . . . . . . . . . . . . . . . . . . . . . . . . . . . . . . 75<br />
9.12 Answering calls automatically . . . . . . . . . . . . . . . . . . . . . . . . . . . . . . . . . 76<br />
9.13 Changing the name of the handset . . . . . . . . . . . . . . . . . . . . . . . . . . . . . 76<br />
9.14 Setting the language . . . . . . . . . . . . . . . . . . . . . . . . . . . . . . . . . . . . . . . . . 77<br />
10 Multiple Handsets . . . . . . . . . . . . . . . . . . . . . . . . . . . . . . . . . . . . 78<br />
10.1 Internal calls (intercom function) . . . . . . . . . . . . . . . . . . . . . . . . . . . . . . . 78<br />
10.2 Transferring external calls to another handset . . . . . . . . . . . . . . . . . . . . 79<br />
10.3 Confer<strong>en</strong>ce calls . . . . . . . . . . . . . . . . . . . . . . . . . . . . . . . . . . . . . . . . . . . . 79<br />
10.4 Registering and <strong>de</strong>registering handsets . . . . . . . . . . . . . . . . . . . . . . . . . 80<br />
10.5 Additional base stations . . . . . . . . . . . . . . . . . . . . . . . . . . . . . . . . . . . . . . 81<br />
11 Troubleshooting . . . . . . . . . . . . . . . . . . . . . . . . . . . . . . . . . . . . . 83<br />
12 Important Information . . . . . . . . . . . . . . . . . . . . . . . . . . . . . . . . 85<br />
12.1 Technical data . . . . . . . . . . . . . . . . . . . . . . . . . . . . . . . . . . . . . . . . . . . . . . 85<br />
12.2 Guarantee . . . . . . . . . . . . . . . . . . . . . . . . . . . . . . . . . . . . . . . . . . . . . . . . . 85<br />
12.3 Declaration of Conformity . . . . . . . . . . . . . . . . . . . . . . . . . . . . . . . . . . . . . 86<br />
13 Important Notes on the Guarantee . . . . . . . . . . . . . . . . . . . . .<br />
87<br />
47
1 G<strong>en</strong>eral Information<br />
48<br />
− G<strong>en</strong>eral Information −<br />
Please read this operating instruction manual thoroughly.<br />
In the case of any questions, please contact our Service Hotline 0180 5 00<br />
13 88 (cost via Telekom at time of going to print: 12 ct/min). Un<strong>de</strong>r no<br />
circumstances op<strong>en</strong> the <strong>de</strong>vice or complete any repair work yourself. In the<br />
case of claims un<strong>de</strong>r the terms of guarantee, contact your sales outlet.<br />
We reserve the right to make technical and optical modifications to the<br />
product during the course of product improvem<strong>en</strong>t.<br />
1.1 Int<strong>en</strong><strong>de</strong>d use<br />
This telephone has be<strong>en</strong> <strong>de</strong>veloped for use in an analogue telephone<br />
network (PSTN) within Germany. However, due to the differ<strong>en</strong>t services<br />
offered by the various telecommunication network provi<strong>de</strong>rs, there is no<br />
guarantee that the equipm<strong>en</strong>t will function trouble−free on every<br />
telecommunication terminal connection. The telephone can be connected<br />
to a TAE line socket with F/N coding and can be used together with other<br />
equipm<strong>en</strong>t such as facsimile unit, answering machine or mo<strong>de</strong>m. Only<br />
connect the telephone line from the telephone to a telephone line socket<br />
<strong>de</strong>signed for it. Never change the plug on the connection cable.<br />
1.2 Power failure<br />
The telephone cannot be used to make calls in the ev<strong>en</strong>t of a power<br />
failure. Always keep a cord connected telephone which operates without<br />
an external power supply available in the case of emerg<strong>en</strong>cy situations.<br />
1.3 Installation location<br />
The installation location is a <strong>de</strong>cisive factor to <strong>en</strong>sure trouble−free<br />
operation. The equipm<strong>en</strong>t must be set up in the vicinity of a 230 Volt mains<br />
power outlet.
− G<strong>en</strong>eral Information −<br />
Do not place the base station in the direct vicinity of other electronic<br />
equipm<strong>en</strong>t, such as microwave ov<strong>en</strong>s or hi−fi systems, since they could<br />
cause mutual disturbance. Therefore, maintain a distance of at least one<br />
meter from other electronic equipm<strong>en</strong>t.<br />
Place the base station on a level, non−slip surface. Normally, the footpads<br />
on the base station do not leave any marks on the surface where it is<br />
located. However, due the diverse types of paints and surfaces which<br />
come into question, it cannot be fully ruled out that the footpads will leave<br />
marks on the surface on which it is located.<br />
1.4 Power supply<br />
Only use the AUDIOLINE power adapter plug supplied because other<br />
power supplies could <strong>de</strong>stroy the telephone. Do not op<strong>en</strong> the power<br />
adapter plug. There is a risk of fatal injury if the power adapter plug is<br />
op<strong>en</strong>ed and not disconnected from the power supply.<br />
Access to the power adapter plug must not be blocked by furniture or other<br />
obstacles.<br />
1.5 Charging the handset<br />
The handset warms up during the charging process. This is normal and<br />
does not repres<strong>en</strong>t a risk. Do not charge the handset on an external<br />
charging unit as this could damage it.<br />
1.6 Private branch exchanges<br />
The telephone can also be connected to a private branch exchange. Ask<br />
the <strong>de</strong>aler where your private branch exchange was purchased whether<br />
the telephone will function properly on the private branch exchange. There<br />
is no guarantee that the telephone will work on every private branch<br />
exchange.<br />
49
1.7 Information on disposal<br />
50<br />
− G<strong>en</strong>eral Information −<br />
The implem<strong>en</strong>tation of European law in national laws and directives<br />
obliges you to dispose of consumable goods appropriately. This serves to<br />
protect both persons and the <strong>en</strong>vironm<strong>en</strong>t.<br />
The adjac<strong>en</strong>t symbol indicates that electrical and<br />
electronic apparatus no longer required must be<br />
disposed of separate from domestic waste.<br />
Equipm<strong>en</strong>t which is old or has outlived its<br />
service life must be disposed of at a suitable<br />
collection point provi<strong>de</strong>d by the public waste authorities.<br />
Batteries and power packs must be disposed of at the<br />
point of sale or at the appropriate collection points provi<strong>de</strong>d by the public<br />
waste authorities.<br />
Packaging materials must be disposed of according to local regulations.<br />
1.8 Note on medical equipm<strong>en</strong>t<br />
The telephone operates with a very low transmitting power. The curr<strong>en</strong>t<br />
level of knowledge from research and technology indicates that such low<br />
transmitting power does not repres<strong>en</strong>t a risk to health. It has be<strong>en</strong> shown,<br />
however, that portable telephones, wh<strong>en</strong> switched on, can affect medical<br />
equipm<strong>en</strong>t. Therefore, never use the telephone in the vicinity of medical<br />
equipm<strong>en</strong>t.<br />
There is no evi<strong>de</strong>nce to date that DECT telephones affect heart<br />
pacemakers but it cannot be fully ruled out.<br />
DECT telephones can cause an unpleasant humming sound in hearing<br />
aids.
− G<strong>en</strong>eral Information −<br />
1.9 Temperature and ambi<strong>en</strong>t conditions<br />
The telephone is <strong>de</strong>signed for use in protected rooms with a temperature<br />
range from 10 °C to 30 °C. The base station should not be used in rooms<br />
exposed to moisture, such as bathrooms or laundries. Do not locate the<br />
<strong>de</strong>vice in the vicinity of sources of heat such as radiators, and never<br />
expose it to direct sunlight.<br />
Do not use the handset in pot<strong>en</strong>tially explosive areas.<br />
Prev<strong>en</strong>t excessive exposure to smoke, dust, vibration, chemicals,<br />
moisture, heat and direct sunlight.<br />
1.10 Cleaning and upkeep<br />
Clean the housing surfaces with a soft, dry, fluff−free cloth. Never use<br />
cleaning ag<strong>en</strong>ts or aggressive solv<strong>en</strong>ts. Apart from occasionally cleaning<br />
the housing, no other upkeep is necessary. The rubber footpads on the<br />
base station are not resistant to all cleaning ag<strong>en</strong>ts. Therefore, the<br />
manufacturer is not liable for any damage caused to furniture etc.<br />
51
2 Operating Elem<strong>en</strong>ts<br />
Handset<br />
52<br />
− Operating Elem<strong>en</strong>ts −<br />
1. Call indicator<br />
2. Redialling button<br />
3. M<strong>en</strong>u<br />
4. Call button<br />
5. Scrolling button / Calls list (CLIP)<br />
6. Internal and confer<strong>en</strong>ce calls<br />
7. R−signal button / On/Off<br />
8. Phone book<br />
9. Muting / Delete button<br />
Base station<br />
10. Paging button (locate handset)<br />
11. LED, call and power indicator<br />
12. LED, charging control lamp<br />
Charger<br />
13. Alarm off<br />
14. AM indicator<br />
15. 24 hour mo<strong>de</strong><br />
16. PM indicator<br />
17. Alarm setting<br />
18. Charge monitoring lamp<br />
19. Alarm is on<br />
20. MODE button<br />
21. SET button<br />
22. UP button<br />
19<br />
18<br />
17<br />
9<br />
8<br />
7<br />
22<br />
21<br />
AM<br />
24<br />
FM<br />
20<br />
1<br />
2<br />
3<br />
4<br />
5<br />
6<br />
10<br />
11<br />
12<br />
13<br />
14<br />
15<br />
16
− Private Branch Exchanges / T−Net −<br />
3 Private Branch Exchanges / T−Net<br />
The button on the handset is used in private branch exchanges and<br />
for taking advantage of T−Net functions provi<strong>de</strong>d by Deutsch<strong>en</strong> Telekom.<br />
3.1 R button on private branch exchanges<br />
If the telephone is connected to a private branch exchange, all the<br />
functions associated with the button, such as transferring calls,<br />
automatic call back, etc., can be used. A private branch exchange requires<br />
a Flash time of 100 ms (refer to Chapter 9.5). The <strong>de</strong>aler where you<br />
purchased the exchange can provi<strong>de</strong> information as to whether the<br />
telephone will work properly with the exchange.<br />
3.2 R button with T−Net provi<strong>de</strong>d by Deutsch<strong>en</strong> Telekom<br />
Your AUDIOLINE telephone supports the most important supplem<strong>en</strong>tary<br />
services provi<strong>de</strong>d by Deutsch<strong>en</strong> Telekom (e.g. brokering, call waiting,<br />
three−way confer<strong>en</strong>cing, etc.). T−Net operates with a Recall time of 300 ms<br />
(refer to Chapter 9.5 for settings). Please contact Deutsch<strong>en</strong> Telekom with<br />
regard to <strong>en</strong>abling the T−Net functions.<br />
3.3 Dialling pause<br />
In the case of private branch exchanges, it is necessary to dial a specific<br />
number (e.g. 9" or 0") in or<strong>de</strong>r to obtain the dialling tone for an outsi<strong>de</strong><br />
line. Wh<strong>en</strong> using some ol<strong>de</strong>r private branch exchanges, it takes a little time<br />
before the dialling tone becomes audible. Particularly in the case of such<br />
private branch exchanges, it is possible to insert an automatic pause after<br />
the number for the outsi<strong>de</strong> line so that the number can be dialled in a<br />
continuous process without having to wait for the dialling tone.<br />
Press the button once betwe<strong>en</strong> dialling the number for the outsi<strong>de</strong><br />
line and the actual phone number. P" appears in the display. After dialling<br />
the number for the outsi<strong>de</strong> line, the telephone waits 3 seconds before<br />
dialling the actual phone number.<br />
Hinweis: The pause can also be <strong>en</strong>tered with the phone numbers in the<br />
phone book.<br />
53
4 Starting Up<br />
4.1 Safety notes<br />
54<br />
− Starting Up −<br />
Caution: It is ess<strong>en</strong>tial to read the G<strong>en</strong>eral Information at the<br />
beginning of this manual before starting up.<br />
4.2 Checking the package cont<strong>en</strong>ts<br />
The package contains:<br />
one base station a telephone connection cable<br />
one charging station four standard batteries<br />
two handsets two power adapter plugs<br />
two belt clips an operating manual<br />
4.3 Connecting the base station<br />
Position the base station within reach of the telephone line socket and a<br />
power outlet. Only use the compon<strong>en</strong>ts supplied.<br />
1. Insert the small plug on the power adapter plug cable in the<br />
corresponding socket on the un<strong>de</strong>rsi<strong>de</strong> of the base station.<br />
Note The plug cannot be connected incorrectly because the plug and<br />
socket are <strong>de</strong>signed in such a way to prev<strong>en</strong>t reverse poling.<br />
The plugs must snap audibly into the base station sockets.<br />
2. Insert the small plug on the telephone connection cable in the<br />
corresponding socket on the un<strong>de</strong>rsi<strong>de</strong> of the base station.<br />
3. Feed both cables on the un<strong>de</strong>rsi<strong>de</strong> of the base station in the<br />
cable duct provi<strong>de</strong>d.<br />
4. Plug the power adapter plug in a properly installed 230 Volt<br />
power outlet.The power adapter plug from the base station must<br />
remain connected at all times.
− Starting Up −<br />
5. Connect the telephone connection cable supplied in the<br />
telephone line socket.<br />
4.4 Connecting the charging station<br />
Place the charging station for the second handset in the vicinity of a power<br />
outlet. Plug the power adapter plug in a properly installed 230 Volt power<br />
outlet.<br />
Note Access to the power adapter plug must not be blocked by<br />
furniture or other obstacles.<br />
4.5 Setting the time on the charging station<br />
You will find the three function buttons UP", SET" and MODE" for setting<br />
the time un<strong>de</strong>rneath the charging station. The clock basically works using<br />
the 24−hour format. You can find out how to change the clock to the<br />
12−hour format in this chapter.<br />
You can find out how to set the alarm un<strong>de</strong>r 4.6.<br />
1. Press the MODE" button twice.<br />
2. Now set the required hour by repeatedly pressing the UP"<br />
button and confirm with SET".<br />
3. Now set the required minutes by repeatedly pressing the UP"<br />
button and confirm with SET".<br />
4. Press the MODE" button twice and you will return to the normal<br />
display.<br />
Note If you are using the clock in 12−hour format, make the following<br />
setting according to Item 3 and th<strong>en</strong> continue with Item 4.<br />
Now set the AM" indicator for morning or PM" indicator for<br />
afternoon by repeatedly pressing the UP" button and confirm<br />
with SET".<br />
The time must be reset following a supply failure.<br />
If you keep the UP" button pressed for longer than one minute,<br />
the numbers in the display will change continuously.<br />
The input mo<strong>de</strong> will be interrupted if there is a pause of more<br />
than 30 seconds while making an input.<br />
55
56<br />
− Starting Up −<br />
4.5.1 Changing to the 12−hour format<br />
1. Press the MODE" button once.<br />
2. Select the required format with the SET" button. The selected<br />
format will flash.<br />
3. Press MODE" three times and you will return to the normal<br />
display.<br />
4.6 Setting the alarm time and activating the alarm<br />
With the charging station’s in−built alarm function, you can <strong>en</strong>ter a fixed<br />
alarm time, which will sound every 24 hours.<br />
Entering the alarm time:<br />
1. Press three times the "MODE" button. The indicator will<br />
illuminate and the hour display will flash.<br />
2. Now set the required hour by repeatedly pressing the "UP"<br />
button and confirm with "SET".<br />
3. Now set the required minutes by repeatedly pressing the "UP"<br />
button and confirm with "SET".<br />
4. Now switch on the alarm with the "UP" button. Wh<strong>en</strong> the alarm is<br />
switched on, the indicator will flash. The alarm can be<br />
switched on and off by repeated pressing.<br />
5. Press MODE once and you will return to the normal display.<br />
Note If you are using the clock in 12−hour format, make the following<br />
setting according to Item 3 and th<strong>en</strong> continue with Item 4.<br />
Now set the "AM" indicator for morning or "PM" indicator for<br />
afternoon by repeatedly pressing the "UP" button and confirm<br />
with "SET".<br />
Cancel the alarm:<br />
Wh<strong>en</strong> the set alarm time is reached, you will hear the alarm signal for one<br />
minute. You can cancel the alarm signal earlier with the button on the<br />
upper si<strong>de</strong> if the charger.
− Starting Up −<br />
Switching off the alarm function:<br />
3 x "MODE", 2 x "SET", 1 x "UP", 1 x "MODE". The indicator will go off.<br />
Switching on the alarm function:<br />
3 x "MODE", 2 x "SET", 1 x "UP", 1 x "MODE". The indicator will come<br />
on.<br />
The curr<strong>en</strong>t time and the alarm time will be lost in the ev<strong>en</strong>t of a power<br />
failure.<br />
4.7 Inserting the standard batteries<br />
In or<strong>de</strong>r to insert the rechargeable standard batteries in the handset, press<br />
on the top edge of the battery compartm<strong>en</strong>t cover and sli<strong>de</strong> it downwards.<br />
Only insert standard batteries. Pay att<strong>en</strong>tion to correct polarity. Close the<br />
battery compartm<strong>en</strong>t cover.<br />
4.8 Charging the standard batteries<br />
Place the handset, with its display facing the front, in the base station for at<br />
least 14 hours. The charging control lamp on the base station lights up.<br />
Failure to charge the standard batteries properly can lead to telephone<br />
malfunction.<br />
The rechargeable standard batteries in the handset have a maximum<br />
standby time of 100 hours at room temperature. The maximum talk time is<br />
10 hours.<br />
The curr<strong>en</strong>t battery charge status is indicated in the display:<br />
<br />
Full Half empty Low Empty<br />
57
58<br />
− Starting Up −<br />
4.9 Tone or Pulse dialling mo<strong>de</strong><br />
This feature <strong>en</strong>ables the telephone to be connected and used on both<br />
analogue (pulse dialling) and digital (tone dialling) connections. The<br />
equipm<strong>en</strong>t is set to TONE dialling (DTMF) at the factory. If the telephone<br />
does not work on your telephone connection, refer to Chapter 9.4 to learn<br />
how to switch the telephone to pulse dialling.<br />
4.10 Fitting the belt clip<br />
Sli<strong>de</strong> the belt clip into the gui<strong>de</strong> until it audibly <strong>en</strong>gages at the si<strong>de</strong>s.
− M<strong>en</strong>u Structure −<br />
5 M<strong>en</strong>u Structure<br />
This section <strong>de</strong>scribes the m<strong>en</strong>u structure of your telephone. Wh<strong>en</strong> the<br />
telephone is in standby, op<strong>en</strong> the m<strong>en</strong>u by pressing the button.<br />
Phone Book Add Entry Name ? Number ? Melody 1−5<br />
Modify Entry<br />
Delete Entry<br />
Setup Base Volume Volume 1, 2, 3, 4, 5, Volume Off<br />
Base Melody Melody 1, 2, 3, 4, 5<br />
Del Handset PIN? (<strong>de</strong>fault 0000)<br />
PIN Co<strong>de</strong> PIN? (<strong>de</strong>fault 0000) New PIN Retype<br />
Dial Mo<strong>de</strong> Tone Dial<br />
Pulse Dial<br />
Recall Recall 1<br />
Recall 2<br />
Default PIN? (<strong>de</strong>fault 0000) Confirm ?<br />
59
60<br />
− M<strong>en</strong>u Structure −<br />
Handset Beep Key Tone On − Off<br />
Empty On − Off<br />
Range On − Off<br />
Int Ring Vol Volume 1, 2, 3, 4, 5, Volume Off<br />
Ext Ring Vol Volume 1, 2, 3, 4, 5, Volume Off<br />
Int Melody Melody 1, 2, 3, 4, 5<br />
Ext Melody Melody 1, 2, 3, 4, 5<br />
Clock Set Curr<strong>en</strong>t Time<br />
Alarm Set On − Off Time<br />
Auto Answer On − Off<br />
Name .............<br />
Language Deutsch<br />
English<br />
Francais<br />
Italiano<br />
...<br />
Key Lock<br />
Register Select Base BS 1 _ _ _<br />
Auto<br />
Reg Base BS 1 2 3 4
6 Operation<br />
6.1 Display<br />
− Operation −<br />
Display Description<br />
On: A call is curr<strong>en</strong>tly being ma<strong>de</strong>.<br />
EXT<br />
INT<br />
<br />
<br />
<br />
<br />
<br />
<br />
<br />
<br />
On: An external call is curr<strong>en</strong>tly being ma<strong>de</strong>.<br />
Flashing: An external call has be<strong>en</strong> received.<br />
On: An internal call is curr<strong>en</strong>tly being ma<strong>de</strong>.<br />
Flashing: An internal call has be<strong>en</strong> received.<br />
On: You have accessed the calls list.<br />
Flashing: There are new calls in the calls list.<br />
On: The phone number, called from the calls list, was not accepted.<br />
On: The phone number, called from the calls list, was accepted.<br />
Flashing: Batteries must be charged.<br />
On: Displays battery capacity.<br />
Runs through the segm<strong>en</strong>ts: Batteries are being charged.<br />
On: The phone book is op<strong>en</strong>.<br />
On: Programming mo<strong>de</strong> has be<strong>en</strong> activated.<br />
On: Key lock has be<strong>en</strong> activated.<br />
On: The connection to the base station is good.<br />
Flashing: The handset is out of range of the base station.<br />
On: The phone number is in excess of 12 digits.<br />
61
62<br />
− Operation −<br />
6.2 External answering machine<br />
If the telephone network provi<strong>de</strong>r has an external answering machine<br />
available, the icon indicates new messages have be<strong>en</strong> recor<strong>de</strong>d for<br />
you. After playing back all the messages on the external answering<br />
machine, the icon disappears from the display. The icon also disappears<br />
wh<strong>en</strong> the button is pressed for five seconds.<br />
Caution: The external answering machine and message indication<br />
by means of the icon are optional services from the<br />
network provi<strong>de</strong>r. This function can only be used wh<strong>en</strong> your telephone<br />
network provi<strong>de</strong>r actually offers the service. Contact your<br />
network provi<strong>de</strong>r for further information.<br />
6.3 Taking a call<br />
Wh<strong>en</strong> a call is received, both the handset and base station ring. Take the<br />
handset from the base station or press the Call button . A connection<br />
is established.<br />
To <strong>en</strong>d the call, replace the handset in the base station or press the <br />
button.<br />
Hinweis: Wh<strong>en</strong> the handset is ringing, press the or button to adjust<br />
the ringing volume.<br />
6.4 Making a call<br />
1. Enter the phone number (max. 32 digits). A maximum of 12<br />
characters can appear in the display. In the case of longer phone<br />
numbers, only the last 12 digits are displayed.<br />
Hinweis: Incorrect digits <strong>en</strong>tered can be <strong>de</strong>leted by briefly pressing the<br />
button. Pressing the button longer <strong>de</strong>letes the <strong>en</strong>tire<br />
phone number.<br />
2. Press the Call button and the connection is established.<br />
Hinweis: Alternatively, press the button and th<strong>en</strong> <strong>en</strong>ter the phone<br />
number. It is not possible to correct wrongly <strong>en</strong>tered numbers<br />
wh<strong>en</strong> using this method of dialling.
− Operation −<br />
6.5 Dialling phone numbers stored in the phone book<br />
Phone numbers stored in the phone book (refer to Storing phone numbers<br />
in the phone book" Chapter 7.1) can be dialled quickly and easily.<br />
1. Press the button. The callers stored in the phone book are<br />
displayed in alphabetical or<strong>de</strong>r.<br />
Use the and buttons to scroll through and select an <strong>en</strong>try<br />
stored in the phone book. To select an <strong>en</strong>try directly, press the<br />
corresponding button to <strong>en</strong>ter the first letter of the name<br />
required. E.g. to access the name Peters", press 7" once.<br />
2. Press the button and the number displayed is dialled.<br />
6.6 Displaying the call timer<br />
A few seconds after a conversation begins, the call timer appears in the<br />
display replacing the phone number dialled.<br />
6.7 Switching the handset on /off<br />
Press the button for three seconds to switch the handset on and off.<br />
Hinweis: No calls can be received wh<strong>en</strong> the handset is switched off.<br />
6.8 Adjusting the receiver volume<br />
Press the or button during a call to adjust the receiver volume.<br />
There are five levels available for selection.<br />
6.9 Redialling button<br />
The last t<strong>en</strong> phone numbers dialled are stored for immediate redialling.<br />
1. Press the button. The last phone number dialled appears in<br />
the display.<br />
2. Press the or button to select a phone number from the<br />
redialling list.<br />
3. Press the button and the number displayed is dialled.<br />
Hinweis: If the phone number in the redialling list is stored in the phone<br />
book, the corresponding name appears in the display.<br />
63
64<br />
− Operation −<br />
6.9.1 Deleting a number from the redialling list<br />
1. Press the button and use the or button to select the<br />
<strong>en</strong>try to be <strong>de</strong>leted.<br />
2. Press the button and confirm by pressing the button.<br />
Hinweis: The redialling list can be <strong>de</strong>leted completely by pressing the<br />
button for two seconds and th<strong>en</strong> confirming with the <br />
button.<br />
6.10 Muting the microphone in the handset<br />
After pressing the button during a call, the microphone in the handset<br />
is <strong>de</strong>activated. Mute" appears in the display. You can th<strong>en</strong> talk to someone<br />
else without the caller being able to hear you. The loudspeaker in the<br />
handset remains switched on, so that you can continue to hear the caller.<br />
The muting function is <strong>de</strong>activated on pressing the again.<br />
6.11 Key lock on/off<br />
If you carry the handset around a lot, you can lock the keypad so that<br />
buttons are not inadvert<strong>en</strong>tly activated. Calls can still be tak<strong>en</strong> in the<br />
normal way ev<strong>en</strong> wh<strong>en</strong> the key lock function is activated.<br />
1. Press the button for 3 seconds to activate the key lock<br />
function. To switch it off, press the button twice.<br />
6.12 Temporary tone dialling<br />
If you only operate the telephone using the Pulse dialling method, you can<br />
still make use of the advantages of the Tone dialling method (e.g.: remote<br />
access of the answering machine). During a call, press the button for<br />
four seconds to switch to Tone dialling temporarily. Wh<strong>en</strong> the call is <strong>en</strong><strong>de</strong>d,<br />
the telephone automatically switches back to Pulse dialling.
6.13 Information on the range<br />
− Operation −<br />
The handset has a range of approx. 50 meters in closed rooms and<br />
approx. 300 meters outdoors. In the case of a good connection to the base<br />
station, the icon appears in the display.<br />
Hinweis: If the handset is moved too far from the base station, the icon<br />
flashes and acoustic warning signals are issued. Move towards<br />
the base station, otherwise the call will be disconnected. If the<br />
connection to the handset has be<strong>en</strong> lost, the message BASE 1"<br />
appears in the display.<br />
6.14 Locating the handset (paging)<br />
If you have mislaid your handset, you can locate it with the aid of the base<br />
station.<br />
1. Press the Paging button . All the handsets registered on the<br />
base station ring.<br />
2. To stop the paging function, press the Paging button on the<br />
base station again or any button on the handset.<br />
65
66<br />
− Phone Book −<br />
7 Phone Book<br />
The phone book can store 50 phone numbers, each with the associated<br />
name. A name can have a maximum of 12 letters. The maximum l<strong>en</strong>gth of<br />
a phone number is 20 digits.<br />
7.1 Entering phone numbers in the phone book<br />
1. To do this, press the button three times.<br />
2. Enter the relevant name and associated phone number. Confirm<br />
each respective <strong>en</strong>try by pressing the button.<br />
Note: Refer to 7.1.2 to <strong>en</strong>ter text.<br />
Note If the name already exists in the phone book, an acoustic signal<br />
is issued and Add" appears in the display again. You have to<br />
<strong>en</strong>ter another name.<br />
3. Select the required melody by pressing the or button and<br />
confirm the selection by pressing .<br />
The corresponding melody rings wh<strong>en</strong> a call is received from the<br />
caller <strong>en</strong>tered. This assignm<strong>en</strong>t only functions wh<strong>en</strong> your<br />
telephone connection and that of the caller implem<strong>en</strong>t the caller<br />
number display (CLIP function).<br />
7.1.1 Information on the phone book<br />
Always <strong>en</strong>ter the area access co<strong>de</strong> with the phone numbers so<br />
that the telephone can also assign incoming local calls to a<br />
phone book <strong>en</strong>try.<br />
If the memory capacity of 50 phone numbers is reached, the<br />
message MEMORY FULL" appears wh<strong>en</strong> an attempt is ma<strong>de</strong> to<br />
store another number. Phone book <strong>en</strong>tries will th<strong>en</strong> have to be<br />
<strong>de</strong>leted in or<strong>de</strong>r create space.<br />
7.1.2 Text <strong>en</strong>try<br />
The digit keys are also labelled with letters for the <strong>en</strong>try of the respective<br />
letters. Pressing the respective key the necessary number of times<br />
<strong>en</strong>ables capital letters and digits to be <strong>en</strong>tered.
− Phone Book −<br />
Example: To <strong>en</strong>ter the name Peter".<br />
Press: 1 x button 7", 2 x button 3", 1 x button 8", 2 x button 3", 3 x button<br />
7"<br />
To <strong>en</strong>ter a space, press the 1" button once, for a hyph<strong>en</strong>, press<br />
1" twice.<br />
To <strong>en</strong>ter the same letter twice, press the relevant button until the<br />
letter appears th<strong>en</strong> wait till the cursor automatically skips one<br />
position forward.<br />
Delete any incorrect <strong>en</strong>tries with the button.<br />
Press the or button to move the cursor accordingly.<br />
7.2 Editing <strong>en</strong>tries in the phone book<br />
1. Press the button twice.<br />
2. Press the button to select the MODIFY ENTRY" option.<br />
3. Press the button to confirm the option and press the or<br />
button to select the required <strong>en</strong>try.<br />
Note To select an <strong>en</strong>try directly, press the corresponding button to<br />
<strong>en</strong>ter the first letter of the name required. To select the name<br />
Peters" directly, for example, press the 7" button once.<br />
4. Confirm by pressing the button and modify the name,<br />
phone number and melody as necessary. Confirm each<br />
respective modification by pressing the button.<br />
7.3 Deleting stored <strong>en</strong>tries from the phone book<br />
1. Press the button twice.<br />
2. Press the button to select the DELETE ENTRY" option.<br />
3. Press the button to confirm the option and press the or<br />
button to select the required <strong>en</strong>try.<br />
Note The <strong>de</strong>letion process is cancelled by pressing the button.<br />
4. Confirm <strong>de</strong>letion by pressing twice.<br />
67
68<br />
− Caller Number Display (CLIP Function) −<br />
8 Caller Number Display (CLIP Function)<br />
If the caller number display function (CLIP function) is available, the phone<br />
number of the caller is displayed wh<strong>en</strong> a call is received. If the caller’s<br />
number is stored in the phone book, the caller’s name appears in the<br />
display.<br />
If the caller has suppressed the transfer of his phone number, the number<br />
is not displayed. The message WITHHELD" appears in the display.<br />
A total of 40 phone numbers can be stored in the calls list so that you will<br />
not miss any calls ev<strong>en</strong> if your are abs<strong>en</strong>t. Wh<strong>en</strong> the list is full, the ol<strong>de</strong>st<br />
<strong>en</strong>try is automatically <strong>de</strong>leted on receipt of a new call. If new phone<br />
numbers have be<strong>en</strong> stored in the calls list in your abs<strong>en</strong>ce, the icon<br />
appears in the display.<br />
Caution: The caller number display function (CLIP), as well as<br />
the display of date and time, are supplem<strong>en</strong>tary services <strong>en</strong>abled<br />
by your telephone network provi<strong>de</strong>r. Contact your network<br />
provi<strong>de</strong>r for further information.<br />
8.1 Calls list<br />
8.1.1 Selecting phone numbers from the calls list<br />
Proceed as follows to view the phone numbers in the calls list in the<br />
display:<br />
1. Press the button. The last number received appears in the<br />
display. If the calls list is empty, the message EMPTY" appears<br />
in the display.<br />
2. Use the or buttons to select further phone numbers from<br />
the calls list. If no further phone numbers are available, an<br />
acoustic signal is issued. Two display icons indicate whether the
− Caller Number Display (CLIP Function) −<br />
<strong>en</strong>try in the calls list has already be<strong>en</strong> viewed or whether the<br />
<strong>en</strong>try is new.<br />
Display Description<br />
The phone number was not accepted.<br />
The phone number was accepted.<br />
<br />
3. To call back a number displayed in the calls list directly, press the<br />
button.<br />
4. Press the button to exit from the calls list.<br />
Note Press the button to call in information on the phone number<br />
displayed:<br />
If the phone number is longer than 12 digits, the remaining digits<br />
are displayed.<br />
Displays the phone number wh<strong>en</strong> the caller’s name is stored in<br />
the phone book.<br />
Displays the date and time this data was transferred from the<br />
caller.<br />
8.1.2 Storing phone numbers from the calls list in the phone book<br />
A phone number stored in the calls list can be transferred directly to the<br />
phone book.<br />
1. Press the button and th<strong>en</strong> use or to select the required<br />
phone number. Confirm selection by pressing the button<br />
twice.<br />
2. Enter the associated name. Confirm the <strong>en</strong>try by pressing the<br />
button.<br />
Note: Refer to Chapter 7.1.2 for information on<br />
<strong>en</strong>tering names.<br />
Note If the name already exists in the phone book, an acoustic signal<br />
is issued. Press the button twice and repeat Step 2.<br />
69
70<br />
− Caller Number Display (CLIP Function) −<br />
3. The phone number appears once more in the display. Confirm<br />
the <strong>en</strong>try by pressing the button.<br />
4. Press the or button to select the required melody and<br />
confirm the selection by pressing .<br />
8.1.3 Deleting individual numbers from the calls list<br />
1. Press the button and th<strong>en</strong> use or to select the required<br />
phone number.<br />
2. Press the button. Confirm <strong>de</strong>letion by pressing the <br />
button.<br />
Note The <strong>de</strong>letion process is cancelled by pressing the button.<br />
8.1.4 Deleting all the numbers from the calls list<br />
1. Press the button.<br />
2. Press the button for three seconds. Confirm <strong>de</strong>letion by<br />
pressing the button.
9 Special Functions<br />
− Special Functions −<br />
It is possible to adapt certain settings on the handset and base station to<br />
suit your personal requirem<strong>en</strong>ts. Observe the following in this case:<br />
Wh<strong>en</strong> you access the m<strong>en</strong>u, the icon appears in the display.<br />
Press the button to move one m<strong>en</strong>u level back.<br />
Press the button longer to stop the process at any point in<br />
the m<strong>en</strong>u. The handset returns to standby.<br />
Every process is automatically cancelled if there is no input<br />
within 20 seconds.<br />
9.1 Setting the base station volume<br />
1. Press and use the button to select m<strong>en</strong>u option<br />
SETUP".<br />
2. Confirm by pressing the button. BASE VOLUME" appears<br />
in the display.<br />
3. Press to confirm the <strong>en</strong>try and use the or button to<br />
select the required volume.<br />
4. Confirm by pressing the button.<br />
9.2 Setting the base station melody<br />
1. Press and use the button to select m<strong>en</strong>u option<br />
SETUP".<br />
2. Press to confirm the selection and th<strong>en</strong> press the button<br />
to select m<strong>en</strong>u option BASE MELODY".<br />
3. Press to confirm the selection and use the or button<br />
to select the required melody.<br />
4. Confirm by pressing the button.<br />
71
72<br />
− Special Functions −<br />
9.3 Change PIN<br />
1. Press and use the button to select m<strong>en</strong>u option<br />
SETUP".<br />
2. Press to confirm the selection and th<strong>en</strong> press the button<br />
to select m<strong>en</strong>u option PIN CODE".<br />
3. Confirm by pressing the button, <strong>en</strong>ter a four−digit PIN<br />
(<strong>de</strong>fault setting 0000") and<br />
confirm by pressing .<br />
4. Enter the new PIN and confirm by pressing .<br />
5. Enter the new PIN again and confirm by pressing .<br />
9.4 Tone or Pulse dialling mo<strong>de</strong><br />
1. Press and use the button to select m<strong>en</strong>u option<br />
SETUP".<br />
2. Press to confirm the selection and th<strong>en</strong> press the button<br />
to select m<strong>en</strong>u option DIAL MODE".<br />
3. Press to confirm the selection and use the or button<br />
to select the required dialling mo<strong>de</strong>.<br />
4. Confirm by pressing the button.<br />
9.5 Setting Recall (Flash time)<br />
There are two Recall times available for selection. Recall 1 corresponds to<br />
100 ms and Recall 2 to 300 ms.<br />
1. Press and use the button to select m<strong>en</strong>u option<br />
SETUP".<br />
2. Press to confirm the selection and th<strong>en</strong> press the button<br />
to select m<strong>en</strong>u option RECALL".<br />
3. Press to confirm the selection and use the or button<br />
to select the required recall time.<br />
4. Confirm by pressing the button.
− Special Functions −<br />
9.6 Restoring the <strong>de</strong>fault settings<br />
This function resets the handset and base station settings to their <strong>de</strong>fault<br />
status on leaving the factory.<br />
Default settings:<br />
Language: German Name of handset: <strong>5400</strong> <strong>TECH</strong><br />
Battery warning signal: On Automatic answer: On<br />
Range warning signal: On External ringing melody: 3<br />
Key tone: On Internal ringing melody: 1<br />
Receiver volume: 3 Ringing volume, handset: 3<br />
PIN: 0000 Ringing melody, base station: 2<br />
Pause: 3 seconds Ringing volume, base station: 3<br />
Dialling method: DTMF/Tone Recall (Flash) time: 100 ms<br />
Note The phone book, calls list (CLIP) and all phone numbers in the<br />
redialling list are <strong>de</strong>leted.<br />
1. Press and use the button to select m<strong>en</strong>u option<br />
SETUP".<br />
2. Press to confirm the selection and th<strong>en</strong> press the button<br />
to select m<strong>en</strong>u option DEFAULT".<br />
3. Confirm the selection by pressing the button and <strong>en</strong>ter the<br />
four−digit PIN (<strong>de</strong>fault setting "0000").<br />
4. Confirm by pressing the button twice.<br />
The telephone is th<strong>en</strong> reset to its <strong>de</strong>fault settings.<br />
73
74<br />
− Special Functions −<br />
9.7 Switching the key tone and warning tones on/off<br />
Various tones can be switched on or off.<br />
Key tone<br />
A tone is issued each time a button on the handset is pressed.<br />
Low battery" warning signal<br />
If the battery capacity is too low, a warning signal is issued to<br />
remind you to charge the handset.<br />
Out range" warning signal<br />
This acoustic warning signal is issued wh<strong>en</strong> the handset is<br />
moved too far from the base station.<br />
1. Press and use the button to select m<strong>en</strong>u option<br />
HANDSET".<br />
2. Confirm by pressing the button. BEEP" appears in the<br />
display.<br />
3. Press the button to confirm and use the or button to<br />
select the OUT RANGE", KEY TONE" or LOW BATTERY"<br />
options.<br />
4. Press to confirm the selection and use the or button<br />
to select the option ON" or OFF".<br />
5. Confirm by pressing the button.<br />
9.8 Setting the handset volume<br />
The ringing volume can be set to a number of levels or switched off<br />
completely. If the ringing tone is switched off, incoming calls are indicated<br />
by the base station and in the handset display.<br />
Internal and external calls can be assigned differ<strong>en</strong>t ringing volumes.<br />
1. Press and use the button to select m<strong>en</strong>u option<br />
HANDSET".<br />
2. Confirm by pressing and use the button to select the<br />
m<strong>en</strong>u option INT RING VOL" or EXT RING VOL".<br />
3. Press to confirm the selection and use the or button<br />
to select the required volume.<br />
4. Confirm by pressing the button.
− Special Functions −<br />
9.9 Setting the handset ringing melody<br />
Internal and external calls can be assigned differ<strong>en</strong>t ringing melodies.<br />
1. Press and use the button to select m<strong>en</strong>u option<br />
HANDSET".<br />
2. Confirm by pressing and use the button to select the<br />
m<strong>en</strong>u option INT MELODY" or EXT MELODY".<br />
3. Press to confirm the selection and use the or button<br />
to select the required melody.<br />
4. Confirm by pressing the button.<br />
9.10 Setting the time<br />
1. Press and use the button to select m<strong>en</strong>u option<br />
HANDSET".<br />
2. Press to confirm the selection and th<strong>en</strong> press the button<br />
to select m<strong>en</strong>u option CLOCK SET".<br />
3. Confirm by pressing and <strong>en</strong>ter the curr<strong>en</strong>t time, in the<br />
24−hour format, using the digit keys.<br />
Example: 17:53 => 1753 or 6:47 a.m => 0647<br />
4. Confirm by pressing the button.<br />
9.11 Alarm on/off<br />
Note The alarm signal only rings on the handset, not on the base<br />
station.<br />
The alarm also rings ev<strong>en</strong> if the ringing volume has be<strong>en</strong><br />
switched off for the handset.<br />
1. Press and use the button to select m<strong>en</strong>u option<br />
HANDSET".<br />
2. Press to confirm the selection and th<strong>en</strong> press the button<br />
to select m<strong>en</strong>u option <strong>ALARM</strong> ON".<br />
3. Press to confirm the selection and use the or button<br />
to select the option "ON".<br />
75
76<br />
− Special Functions −<br />
Note If you want to switch the alarm off, select the option"OFF" un<strong>de</strong>r<br />
Point 4 and confirm by pressing the button.<br />
4. Confirm the selection by pressing the button and <strong>en</strong>ter the<br />
required alarm time in 24−hour format.<br />
5. Confirm by pressing the button. The alarm is switched on.<br />
9.12 Answering calls automatically<br />
Incoming calls can be tak<strong>en</strong> automatically wh<strong>en</strong> the handset is removed<br />
from the base station. If you prefer to take calls by pressing the <br />
button, switch the automatic answering function off.<br />
1. Press and use the button to select m<strong>en</strong>u option<br />
HANDSET".<br />
2. Press to confirm the selection and th<strong>en</strong> press the button<br />
to select m<strong>en</strong>u option AUTO ANSWER".<br />
3. Press to confirm the selection and use the or button<br />
to select the option ON" or OFF".<br />
4. Confirm by pressing the button.<br />
9.13 Changing the name of the handset<br />
Wh<strong>en</strong> a call is <strong>en</strong><strong>de</strong>d, the call time and name of the handset appear<br />
alternately in the display. If several handsets are registered on the base<br />
station, it is useful to assign each handset with its own unique name.<br />
1. Press and use the button to select m<strong>en</strong>u option<br />
HANDSET".<br />
2. Press to confirm the selection and th<strong>en</strong> press the button<br />
to select m<strong>en</strong>u option NAME".<br />
3. Confirm the selection by pressing the button and <strong>en</strong>ter the<br />
required name (max. 10 characters).<br />
Note: Refer to Chapter 7.1.2 for information on<br />
<strong>en</strong>tering text.<br />
4. Confirm by pressing the button.
9.14 Setting the language<br />
− Special Functions −<br />
M<strong>en</strong>u texts and messages can appear in the display in various languages.<br />
1. Press and use the button to select m<strong>en</strong>u option<br />
HANDSET".<br />
2. Press to confirm the selection and th<strong>en</strong> press the button<br />
to select m<strong>en</strong>u option LANGUAGE".<br />
3. Press to confirm the selection and use the or button<br />
to select the required language.<br />
4. Confirm by pressing the button.<br />
77
10 Multiple Handsets<br />
78<br />
− Multiple Handsets −<br />
Up to five handsets can be registered on the base station. Each handset<br />
can only be registered on one base station at any particular time.<br />
Note The standardised GAP Standard <strong>en</strong>ables AUDIOLINE handsets<br />
and ev<strong>en</strong> those from other manufacturers to be integrated in the<br />
telephone system. In the same way, a AUDIOLINE handset can<br />
be registered on base stations from other manufacturers as long<br />
as they comply with the GAP Standard.<br />
The following options are available if several handsets are used:<br />
Internal calls betwe<strong>en</strong> the handsets (intercom),<br />
External calls can be transferred betwe<strong>en</strong> the handsets.<br />
Incoming external calls are received on all handsets.<br />
Confer<strong>en</strong>ce calls betwe<strong>en</strong> two handset users and one external<br />
caller.<br />
Note If one of the other handsets is curr<strong>en</strong>tly using the outsi<strong>de</strong> line,<br />
the EXT" icon appears in the display. It is not possible to make<br />
another external call.<br />
10.1 Internal calls (intercom function)<br />
As soon as several handsets are registered on the base station, they can<br />
be used free of charge for internal calls.<br />
1. Press the button and dial the number of the handset<br />
required, e.g. 2".<br />
2. The call can be tak<strong>en</strong> on the handset called.<br />
Note If an external call is received during an internal call, short<br />
acoustic signals are issued and the caller’s number appears in<br />
the display, if available.<br />
3. End the internal call by pressing the button.<br />
4. Press the button again to take the external call.
− Multiple Handsets −<br />
10.2 Transferring external calls to another handset<br />
If you have tak<strong>en</strong> an external call on a handset, the call can be transferred<br />
to another handset.<br />
To do this, press the button and th<strong>en</strong> the internal number, e.g. "2", of<br />
the handset required.<br />
Note If the handset called does not answer, take the call back by<br />
pressing the button.<br />
After the internal call has be<strong>en</strong> tak<strong>en</strong> by the handset called, the following<br />
options are available:<br />
1. Consultation / Brokering: You can talk to the party using the<br />
other handset and th<strong>en</strong> return the external caller by pressing the<br />
button. You can switch betwe<strong>en</strong> the external and internal<br />
parties as oft<strong>en</strong> as necessary.<br />
2. Transfer call: By pressing the button on the first handset,<br />
the external call is transferred to the handset called.<br />
10.3 Confer<strong>en</strong>ce calls<br />
An external call can be transferred to another internal handset for a<br />
confer<strong>en</strong>ce call. This <strong>en</strong>ables two handset users to confer with the external<br />
caller at the same time.<br />
1. Establish the required connection to the external caller.<br />
2. Press the button and dial the number of the second<br />
handset required.<br />
3. Wh<strong>en</strong> the second, internal handset user has tak<strong>en</strong> the call, press<br />
the button and all three parties are connected in a<br />
confer<strong>en</strong>ce call.<br />
Note During a confer<strong>en</strong>ce call, press the button to put the<br />
external caller on hold. Press the buttons in<br />
succession to activate the confer<strong>en</strong>ce facility again.<br />
4. The confer<strong>en</strong>ce is terminated by one of the handset users<br />
<strong>en</strong>ding the call.<br />
79
80<br />
− Multiple Handsets −<br />
10.4 Registering and <strong>de</strong>registering handsets<br />
10.4.1 Registering handsets<br />
1. Press the Paging button on the base station for three<br />
seconds until two acoustic signals are issued. Register the new<br />
handset within 90 seconds.<br />
2. Press the button on the handset and use the button to<br />
select m<strong>en</strong>u option REGISTER".<br />
3. Press the button to confirm the option and press the or<br />
button to select the m<strong>en</strong>u option REG BASE".<br />
4. Confirm by pressing and <strong>en</strong>ter the number of the base<br />
station (1 to 4) using the digit keys. If the handset is already<br />
connected to a base station, the corresponding number flashes.<br />
5. Confirm by pressing the button. A search is ma<strong>de</strong> for the<br />
base station.<br />
6. Wh<strong>en</strong> the base station is found, <strong>en</strong>ter the PIN (<strong>de</strong>fault setting 0 0<br />
0 0).<br />
7. Confirm by pressing the button. An acoustic signal is issued<br />
after a few seconds. The handset is now registered and can be<br />
used for internal and external calls.<br />
Note The handset is assigned an internal call number. The handset<br />
already registered has the internal call number 1. The second<br />
handset registered is assigned the internal call number 2. The<br />
internal call number appears on the right−hand si<strong>de</strong> of the display<br />
.<br />
10.4.2 Registering other DECT−GAP telephones on the base station<br />
In or<strong>de</strong>r to register a DECT−GAP handset from another manufacturer,<br />
follow the instructions in the operating manual provi<strong>de</strong>d by the original<br />
manufacturer and th<strong>en</strong> press the Paging button on your base station<br />
for 3 seconds. Use the PIN to register (<strong>de</strong>fault setting: 0000).
− Multiple Handsets −<br />
10.4.3 Deregistering handsets<br />
A handset can only be <strong>de</strong>registered by another handset still registered. It is<br />
not possible to complete <strong>de</strong>registration using the handset which is to be<br />
<strong>de</strong>registered.<br />
1. Press and use the button to select m<strong>en</strong>u option<br />
SETUP".<br />
2. Press the button to confirm the option and press the or<br />
button to select the m<strong>en</strong>u option DEL HANDSET".<br />
3. Confirm the selection by pressing the button and <strong>en</strong>ter the<br />
PIN (<strong>de</strong>fault setting 0000).<br />
Note Press the button to cancel the process.<br />
4. Confirm the selection by pressing the button and <strong>en</strong>ter the<br />
internal call number of the handset to be <strong>de</strong>registered.<br />
5. An acoustic signal is issued after a few seconds in the case of<br />
successful <strong>de</strong>registration. The handset is now <strong>de</strong>registered and<br />
can no longer be used for internal and external calls.<br />
10.5 Additional base stations<br />
The range of the handset can be increased by using several base stations.<br />
To implem<strong>en</strong>t the function, all the base stations must be connected to a<br />
telephone line socket. Dep<strong>en</strong>ding on the int<strong>en</strong><strong>de</strong>d use, each base station<br />
can be assigned the same telephone number or each can be assigned a<br />
differ<strong>en</strong>t call number. Pay att<strong>en</strong>tion that all the base stations overlap with<br />
regard to their range. The handset must be registered on each base<br />
station. Please test the range of the handset before starting up a new base<br />
station.<br />
If a handset is registered on the base stations and automatic dialling of the<br />
base station has be<strong>en</strong> activated on the handset (refer to 10.5.1), the<br />
handset is automatically transferred to the next base station.<br />
81
82<br />
− Multiple Handsets −<br />
10.5.1 Dialling a base station<br />
1. Press the button on the handset and use the button to<br />
select m<strong>en</strong>u option REGISTER".<br />
2. Press the button to confirm the option and press the or<br />
button to select the m<strong>en</strong>u option SELECT BASE".<br />
3. Confirm by pressing the button. All the base stations to<br />
which the handset is already registered appear in the display.<br />
The number of the base station curr<strong>en</strong>tly active flashes. Use the<br />
digit keys to <strong>en</strong>ter the number of the base station to which the<br />
handset should be switched.<br />
Or activate the AUTO" option by pressing the button. This<br />
option causes the handset to switch to the next base station<br />
automatically wh<strong>en</strong> the connection to the curr<strong>en</strong>t base station is<br />
interrupted.
11 Troubleshooting<br />
− Troubleshooting −<br />
Should problems arise with the telephone, refer to the following<br />
information.<br />
In the case of claims un<strong>de</strong>r the terms of guarantee, contact your sales<br />
outlet.<br />
Faults Corrective measures<br />
No telephone calls possible<br />
Connection is disturbed or<br />
cut off<br />
− The telephone line is not connected properly<br />
or is <strong>de</strong>fective. Only use the telephone<br />
line cable supplied.<br />
− Test whether the telephone connection<br />
is in or<strong>de</strong>r by using another telephone.<br />
− The power adaptor plug is not plugged<br />
in or there is a complete power failure.<br />
− The rechargeable standard batteries are<br />
empty or <strong>de</strong>fective.<br />
− The handset is too far from the base station.<br />
− The handset is too far from the base<br />
station.<br />
− The base station is in an unsuitable<br />
location.<br />
Dialling not possible − Dialling mo<strong>de</strong> set incorrectly (refer to<br />
Chapter 9.4).<br />
The system no longer responds<br />
or is in an un<strong>de</strong>fined<br />
state<br />
− Reset the <strong>de</strong>fault settings (refer to Chapter<br />
9.6). Before doing so, disconnect the<br />
power adapter plug briefly from the<br />
power socket.<br />
83
The charging control lamp<br />
does not light up<br />
The battery icon flashes in<br />
the display after a few<br />
hours<br />
84<br />
− Troubleshooting −<br />
− Place the handset correctly in the base<br />
station, clean the contact surfaces on<br />
the handset and the base station with a<br />
soft, dry cloth.<br />
− Place the handset in the base station for<br />
14 hours. If this does not help, replace<br />
the rechargeable standard batteries.<br />
Display is dark − Caused by direct sunlight, allow handset<br />
to cool down.
12 Important Information<br />
12.1 Technical data<br />
− Important Information −<br />
Feature Value<br />
Standard DECT−GAP<br />
Power supply Base station, 220/230 V, 50 Hz<br />
Range (outdoors/indoors) 300 m / 50 m<br />
Standby Up to 100 h<br />
Max. talk time Up to 10 h<br />
Rechargeable standard batteries 2 x AAA (1.2V / 550 mAh)<br />
Dialling method Tone or Pulse<br />
Permissible ambi<strong>en</strong>t temperature 10°C to 30°C<br />
Permissible relative humidity 20% to 75%<br />
Recall (Flash) times 100 ms or 300 ms<br />
DECT: Digital European Cordless Telephone = Standard for cordless<br />
telephones.<br />
GAP: G<strong>en</strong>eric Access Profile = Standard for the interoperation of handsets<br />
and base stations from other manufacturers.<br />
12.2 Guarantee<br />
AUDIOLINE equipm<strong>en</strong>t is produced and tested according to the latest<br />
production methods. The implem<strong>en</strong>tation of carefully chos<strong>en</strong> materials and<br />
highly <strong>de</strong>veloped technologies <strong>en</strong>sure trouble−free functioning and a long<br />
service life. The terms of guarantee do not apply where the cause of<br />
equipm<strong>en</strong>t malfunction is the fault of the telephone network operator or any<br />
interposed private branch ext<strong>en</strong>sion system. The terms of guarantee do<br />
85
86<br />
− Important Information −<br />
not apply to the standard batteries or power packs used in the products.<br />
The period of guarantee is 24 months from the date of purchase.<br />
All <strong>de</strong>fici<strong>en</strong>cies resulting from material or production faults which occur<br />
during the period of guarantee will be eliminated free of charge. Rights to<br />
claims un<strong>de</strong>r the terms of guarantee are annulled following interv<strong>en</strong>tion by<br />
the purchaser or third parties. Damage caused as a result of improper<br />
handling or operation, incorrect positioning or storing, improper connection<br />
or installation, Acts of God or other external influ<strong>en</strong>ce are not covered by<br />
the terms of guarantee. In the case of complaints, we reserve the right to<br />
repair or replace <strong>de</strong>fect parts or provi<strong>de</strong> a replacem<strong>en</strong>t <strong>de</strong>vice.<br />
Replacem<strong>en</strong>t parts or <strong>de</strong>vices become our property. Rights to<br />
comp<strong>en</strong>sation in the case of damage are exclu<strong>de</strong>d where there is no<br />
evi<strong>de</strong>nce of int<strong>en</strong>t or gross neglig<strong>en</strong>ce by the manufacturer.<br />
If your <strong>de</strong>vice shows signs of <strong>de</strong>fect during the period of guarantee, please<br />
return it to the sales outlet in which you purchased the AUDIOLINE <strong>de</strong>vice<br />
together with the purchase receipt. All rights to claims un<strong>de</strong>r the terms of<br />
guarantee in accordance with this agreem<strong>en</strong>t must be asserted exclusively<br />
with regard to your sales outlet. Two years after the purchase and transfer<br />
of our products, claims un<strong>de</strong>r the terms of guarantee can no longer be<br />
asserted.<br />
12.3 Declaration of Conformity<br />
This <strong>de</strong>vice fulfils the requirem<strong>en</strong>ts stipulated in the EU directive:<br />
1999/5/EU directive on radio equipm<strong>en</strong>t and telecommunications terminal<br />
equipm<strong>en</strong>t and the mutual recognition of their conformity. Conformity with<br />
the above m<strong>en</strong>tioned directive is confirmed by the CE symbol on the<br />
<strong>de</strong>vice.<br />
To view the complete Declaration of Conformity, please refer to the free<br />
download available on our web site www.audioline.<strong>de</strong>.
Important Notes on the Guarantee<br />
13 Important Notes on the Guarantee<br />
The period of guarantee for the AUDIOLINE product begins on the date of<br />
purchase. Rights to claims un<strong>de</strong>r the terms of guarantee relate to<br />
<strong>de</strong>fici<strong>en</strong>cies resulting from material or production faults. Rights to claims<br />
un<strong>de</strong>r the terms of guarantee are annulled following interv<strong>en</strong>tion by the<br />
purchaser or third parties. Damage caused as a result of improper handling<br />
or operation, normal wear and tear, incorrect positioning or storing,<br />
improper connection or installation, Acts of God or other external influ<strong>en</strong>ce<br />
are not covered by the terms of guarantee.<br />
CLAIMS UNDER THE TERMS OF GUARANTEE MAY ONLY BE<br />
ASSERTED TO THE RETAILER WHERE THE EQUIPMENT WAS<br />
PURCHASED, WHEREBY THE PURCHASE RECEIPT MUST ALSO BE<br />
SUBMITTED.<br />
TO PREVENT UNNECESSARY LONG DELAYS, PLEASE DO NOT<br />
SEND EQUIPMENT UNDER COMPLAINT TO OUR OFFICE ADDRESS.<br />
IN THE CASE OF QUESTIONS CONCERNING OPERATION OR THE<br />
TERMS OF GUARANTEE, PLEASE REFER TO THE OPERATING<br />
MANUAL OR CONTACT OUR HOTLINE:<br />
0180 500 13 88 (Telekom cost at time of going to print: 12 ct/min)<br />
AUDIOLINE GmbH<br />
Neuss<br />
Service Hotline 0180 500 13 88<br />
(Telekom cost at time of going to print: 12 ct/min)<br />
Internet: www.audioline.<strong>de</strong> − E−mail: info@audioline.<strong>de</strong><br />
87
Wichtige Garantiehinweise<br />
Die Garantiezeit für Ihr AUDIOLINE − Produkt beginnt mit <strong>de</strong>m Kaufdatum.<br />
Ein Garantieanspruch besteht bei Mängeln, die auf Material− o<strong>de</strong>r<br />
Herstellungsfehler zurückzuführ<strong>en</strong> sind. Der Garantieanspruch erlischt bei<br />
Eingriff<strong>en</strong> durch <strong>de</strong>n Käufer o<strong>de</strong>r durch Dritte. Schä<strong>de</strong>n, die durch<br />
unsachgemäße Behandlung o<strong>de</strong>r Bedi<strong>en</strong>ung, natürliche Abnutzung, durch<br />
falsches Aufstell<strong>en</strong> o<strong>de</strong>r Aufbewahr<strong>en</strong>, durch unsachgemäß<strong>en</strong> Anschluss<br />
o<strong>de</strong>r Installation sowie durch höhere Gewalt o<strong>de</strong>r sonstige äußere<br />
Einflüsse <strong>en</strong>tsteh<strong>en</strong>, fall<strong>en</strong> nicht unter die Garantieleistung.<br />
BITTE WENDEN SIE SICH IM GARANTIEFALL AUSSCHLIESSLICH AN<br />
DEN HÄNDLER, BEI DEM SIE DAS GERÄT GEKAUFT HABEN, UND<br />
VERGESSEN SIE NICHT, DEN KAUFBELEG VORZULEGEN.<br />
UM UNNÖTIG LANGE WARTEZEITEN ZU VERMEIDEN, SENDEN SIE<br />
REKLAMATIONSGERÄTE BITTE NICHT AN UNSERE<br />
BÜROADRESSE.<br />
BEI FRAGEN ZUR BEDIENUNG UND GARANTIELEISTUNG LESEN<br />
SIE BITTE DIE BEDIENUNGSANLEITUNG ODER WENDEN SIE SICH<br />
AN UNSERE HOTLINE:<br />
0180 500 13 88 (Kost<strong>en</strong> Telekom bei Drucklegung: 12ct/min)<br />
AUDIOLINE GmbH<br />
Neuss<br />
Service Hotline 0180 500 13 88<br />
(Kost<strong>en</strong> Telekom bei Drucklegung: 12ct/min)<br />
Internet: www.audioline.<strong>de</strong> − E−mail: info@audioline.<strong>de</strong><br />
Version 1.2 − 17.08.2005