JGC-MS-203 - E2 Fachhandels & Reparatur Servicecenter | Start
JGC-MS-203 - E2 Fachhandels & Reparatur Servicecenter | Start
JGC-MS-203 - E2 Fachhandels & Reparatur Servicecenter | Start

Erfolgreiche ePaper selbst erstellen
Machen Sie aus Ihren PDF Publikationen ein blätterbares Flipbook mit unserer einzigartigen Google optimierten e-Paper Software.
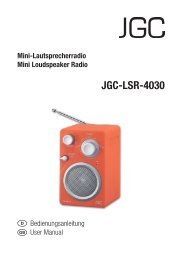
Radio Micro System<br />
Bedienungsanleitung<br />
User Manual<br />
<strong>JGC</strong>-<strong>MS</strong>-<strong>203</strong><br />
<strong>JGC</strong>-<strong>MS</strong>-<strong>203</strong>-01.indb 1 6/3/09 9:43:55 AM
deutSCh<br />
2<br />
inhaltSveRzeiChniS<br />
InHaltSvERzEIcHnIS ............................................................................................................................2<br />
WIcHtIGE SIcHERHEItSanWEISUnGEn ..................................................................................................3-4<br />
BEDIEnElEMEntE .................................................................................................................................5-7<br />
vORBEREItUnG .....................................................................................................................................8<br />
GRUnDFUnKtIOnEn ..............................................................................................................................9-11<br />
aUDIOEInStEllUnGEn, anScHlÜSSE ....................................................................................................12<br />
RaDIOBEtRIEB ......................................................................................................................................13<br />
cD-SPIElER ..........................................................................................................................................14-17<br />
USB-SPEIcHER UnD SD/MMc-KaRtEn ...................................................................................................18<br />
REInIGUnG UnD PFlEGE ........................................................................................................................19<br />
PROBlEMlÖSUnG .................................................................................................................................20<br />
tEcHnIScHE DatEn ..............................................................................................................................21<br />
GaRantIE .............................................................................................................................................22-23<br />
Korrekte Entsorgung dieses Produktes:<br />
Diese Kennzeichnung weist darauf hin, dass Elektrogeräte in der EU nicht mit dem normalen<br />
Haushaltsmüll entsorgt werden dürfen.<br />
Benutzen Sie bitte die Rückgabe- und Sammelsysteme in Ihrer Gemeinde oder wenden Sie<br />
sich an den Händler, bei dem das Produkt gekauft wurde.<br />
Bitte entsorgen Sie die Batterien umweltgerecht. Werfen Sie Batterien nicht in den Hausmüll.<br />
Benutzen Sie bitte die Rückgabe- und Sammelsysteme in Ihrer Gemeinde oder wenden Sie<br />
sich an den Händler, bei dem das Produkt gekauft wurde.<br />
<strong>JGC</strong>-<strong>MS</strong>-<strong>203</strong>-01.indb 2 6/3/09 9:43:55 AM
wiChtiGe SiCheRheitSanweiSunGen<br />
vORSIcHt<br />
Gefahr eines<br />
elektrischen Schlages<br />
nicht öffnen !<br />
warnung: Um die Gefahr eines elektrischen Schlages<br />
zu reduzieren, Gehäuse nicht entfernen. Keine für den<br />
anwender brauchbaren teile im Innern.<br />
<strong>Reparatur</strong> qualifiziertem Servicepersonal überlassen.<br />
allgemeines<br />
Das Blitzsymbol im gleichseitigen Dreieck<br />
macht den anwender auf nicht isolierte<br />
“gefährliche Spannung“ in diesem Gerät<br />
aufmerksam, die stark genug sein kann,<br />
einen elektrischen Schlag bei einer Person<br />
zu verursachen.<br />
Das ausrufezeichen im gleichseitigen<br />
Dreieck macht den anwender auf wichtige<br />
Bedienungs- und Wartungshinweise in der<br />
Gebrauchsanweisung aufmerksam.<br />
Dieses Gerät verwendet einen Klasse 1 laser.<br />
warnung: Unsichtbare laserstrahlung kann zur Erblindung führen. Setzen Sie deshalb nicht<br />
die Sicherheitsverriegelungen außer Kraft.<br />
• lesen Sie diese Bedienungsanleitung vor dem ersten Gebrauch gründlich durch. Sie enthält wichtige<br />
Informationen für Ihre Sicherheit sowie zum Gebrauch und Pflege des Gerätes. Heben Sie die anleitung zum<br />
späteren nachschlagen auf und geben Sie sie mit dem Gerät weiter.<br />
• Benutzen Sie das Gerät nur für den vorgesehenen zweck. Unsachgemäßer Gebrauch könnte zu<br />
Gefährdungen führen.<br />
• Öffnen Sie das Gerät nicht. Stecken Sie keine Gegenstände in die Öffnungen.<br />
• Dieses Gerät ist nicht dafür bestimmt, durch Personen (einschließlich Kinder) mit eingeschränkten<br />
physischen, sensorischen oder geistigen Fähigkeiten oder mangels Erfahrung und/oder mangels Wissen<br />
benutzt zu werden, es sei denn, sie werden durch eine für ihre Sicherheit zuständige Person beaufsichtigt<br />
oder erhielten von ihr anweisungen, wie das Gerät zu benutzen ist.<br />
• verwenden Sie nur zubehör, welches vom Hersteller empfohlen wurde.<br />
• warnung: Extreme lautstärke führt durch zu hohen Schalldruck zu dauerhaften Hörschäden.<br />
• Im Falle einer Fehlfunktion durch eine elektrostatische Entladung: trennen Sie das Gerät vom Stromnetz,<br />
indem Sie den netzstecker ziehen. Warten Sie etwas und stecken Sie den netzstecker wieder in die<br />
Steckdose. Schalten Sie das Gerät erneut ein, um in den normalen Betriebszustand zurückzukehren.<br />
• tauchen Sie elektrische teile des Geräts während des Reinigens oder des Betriebs nie in Wasser oder<br />
andere Flüssigkeiten. Halten Sie das Gerät nie unter fließendes Wasser.<br />
aufstellort<br />
• Benutzen Sie dieses Gerät nicht in der nähe von Wasser oder starker Feuchtigkeit, z. B. in einem feuchten<br />
Keller oder neben einem Schwimmbecken oder der Badewanne.<br />
• Betreiben Sie das Gerät nur in gut belüfteter Umgebung. Blockieren Sie die lüftungsöffnungen nicht. Stellen<br />
Sie das Gerät nur im Einklang mit den Herstelleranweisungen auf. Halten Sie einen Mindestabstand von 10<br />
cm rings um das Gerät ein, um für genügend Kühlung zu sorgen. Decken Sie das Gerät nicht mit zeitungen<br />
oder textilien ab, wie Gardinen, Decken und Kleidung.<br />
<strong>JGC</strong>-<strong>MS</strong>-<strong>203</strong>-01.indb 3 6/3/09 9:43:55 AM<br />
3<br />
deutSCh
deutSCh<br />
4<br />
wiChtiGe SiCheRheitSanweiSunGen<br />
•<br />
•<br />
Stellen Sie das Gerät nicht auf Heizkörper, Öfen oder andere Wärme erzeugenden Geräte, einschließlich<br />
verstärker.<br />
Um das Risiko von Feuer und elektrischem Schlag zu reduzieren, setzen Sie das Gerät weder Feuer (Kamin,<br />
Grill, Kerzen, zigaretten, usw.) noch Wasser aus (tropfwasser, Spritzwasser, vasen, Wannen, teiche, usw.).<br />
netzanschluss<br />
• Prüfen Sie vor dem Gebrauch, ob die technischen Daten (Spannung in volt) den Daten Ihres Stromnetzes<br />
entspricht. Prüfen Sie die technischen Daten in diesen anweisungen und auf dem typenschild des Gerätes.<br />
Das typenschild befindet sich auf der Rückseite des Gerätes. nur der netzstecker kann das Gerät vollständig<br />
vom Stromnetz trennen.<br />
• Die StandBY/On-taste trennt das Gerät nicht vom Stromnetz. Um das Gerät von der Stromversorgung zu<br />
trennen, ziehen Sie den netzstecker aus der Steckdose.<br />
• ziehen Sie den netzstecker nur am Stecker selbst aus der Steckdose. ziehen Sie nicht am Kabel.<br />
• ziehen Sie den netzstecker bei Gewitter und bei längerer abwesenheit, um die Elektronik vor Überspannung<br />
und zerstörung zu schützen.<br />
• achten Sie darauf, dass der netzstecker immer gut zugänglich und erreichbar ist.<br />
• Sollte die netzleitungen oder der netzstecker beschädigt sein, so muss dies durch den Hersteller, den<br />
Kundendienst oder eine qualifizierte Elektrofachkraft instand gesetzt werden, um Gefährdungen zu<br />
vermeiden.<br />
• Schützen Sie das netzkabel und das Gehäuse vor Beschädigung.<br />
Kondensation<br />
• Wenn das kalte Gerät in eine warme und eventuell leicht feuchte Umgebung gebracht wird, so kann sich<br />
im Inneren Kondenswasser bilden. Kondenswasser könnte die ordnungsgemäße Funktion des Gerätes<br />
beeinflussen. In extremen Fällen könnte Kondenswasser einen Schaden durch Kurzschluss verursachen.<br />
lassen Sie das Gerät 1-2 Stunden in warmer, trockener Umgebung stehen, um mögliches Kondenswasser<br />
zu trocknen, bzw. entweichen zu lassen, bevor Sie es in Betrieb nehmen.<br />
Batterie<br />
• Benutzen Sie nur den angegebenen Batterietyp.<br />
• Wechseln Sie immer den gesamten Batteriesatz. Mischen Sie keine alten und neuen Batterien, bzw.<br />
Batterien mit unterschiedlichem ladungszustand.<br />
• achten Sie darauf die Batterien korrekt einzusetzen. Beachten Sie die Polung (+) Plus / (-) Minus auf der<br />
Batterie und auf dem Gehäuse. Unsachgemäß eingesetzte Batterien können zum auslaufen führen oder in<br />
extremen Fällen einen Brand oder eine Explosion auslösen.<br />
• Setzen Sie Batterien niemals übermäßiger Hitze (z.B. pralle Sonne, Feuer) aus und werfen Sie sie niemals in<br />
Feuer. Die Batterien könnten explodieren.<br />
• Entfernen Sie verbrauchte Batterien. Entfernen Sie die Batterien, wenn Sie wissen, dass Sie das Gerät für<br />
längere zeit nicht benutzen. anderenfalls könnten die Batterien auslaufen und Schäden verursachen.<br />
• Bewahren Sie Batterien außerhalb der Reichweite von Kleinkindern auf. Wurden Batterien verschluckt,<br />
suchen Sie sofort ärztliche Hilfe auf.<br />
<strong>JGC</strong>-<strong>MS</strong>-<strong>203</strong>-01.indb 4 6/3/09 9:43:55 AM
vorderseite<br />
1 2 3 4 5 6 7<br />
20<br />
19<br />
18<br />
17<br />
16<br />
15<br />
14<br />
BedieneleMente<br />
1 MeMORY SD/MMc<br />
11 Band Band-taste<br />
CaRd Speicherkartensteckplatz<br />
(UKW / MW-Umschalter)<br />
2 uSB in USB-Steckplatz 12 id3/FM MOnO/ ID3-tag anzeige; FM (UKW)<br />
St.<br />
Mono/Stereo Empfang<br />
3 lcD-Display 13 Kopfhörerbuchse (3,5 mm)<br />
4 StOP Stopp-taste 14 eQ eQ-taste (Klangstufen)<br />
5<br />
Wiedergabe, Pause 15<br />
vorlauf; nächster titel;<br />
PlaY/PauSe<br />
SKiP/tune<br />
SeaRCh<br />
Sendersuche vorwärts<br />
6 iR Infrarotsensor (Fernbedienung) 16 vOluMe lautstärkeregler<br />
7 StandBY StandBY-anzeige 17<br />
Rücklauf; vorheriger titel;<br />
SKiP/tune<br />
SeaRCh<br />
Sendersuche rückwärts<br />
8 StandBY/On StandBY/On-taste 18 MeM/C-adJ. MeM/C-adJ.-taste<br />
(Standby-Modus / Ein)<br />
(Programmplatznummer/Sender<br />
speichern; Uhr einstellen)<br />
9 tiMeR tiMeR-taste (autom. Ein-/ 19<br />
vor (gespeicherten Sender/<br />
ausschalten)<br />
PReSet/FOldeR Ordner auswählen)<br />
10 FunCtiOn FunCtiOn-taste (Betriebsart 20<br />
zurück (gespeicherten Sender/<br />
auswählen)<br />
PReSet/FOldeR Ordner auswählen)<br />
<strong>JGC</strong>-<strong>MS</strong>-<strong>203</strong>-01.indb 5 6/3/09 9:43:55 AM<br />
13<br />
8<br />
9<br />
10<br />
11<br />
12<br />
5<br />
deutSCh
deutSCh<br />
6<br />
BedieneleMente<br />
Rückseite<br />
21 22 23<br />
28<br />
29<br />
26<br />
24<br />
25<br />
27<br />
30 31<br />
21 FM ant. UKW-Wurfantenne 27 MW-Schleifenantenne<br />
22 aM ant. anschluss MW-antenne 28 cD-Fach<br />
23 lautsprecherklemmen 29 OPen/ClOSe (cD-Fach öffnen / schließen)<br />
24 line in Buchse (anschluss externer Quellen) 30 lautsprecher<br />
25 On OFF netzschalter 31 lautsprecherabdeckung<br />
26 aC~ netzkabel<br />
<strong>JGC</strong>-<strong>MS</strong>-<strong>203</strong>-01.indb 6 6/3/09 9:43:56 AM
Fernbedienung<br />
53<br />
52<br />
51<br />
50<br />
49<br />
48<br />
32 33 34 35<br />
47<br />
36<br />
37<br />
38<br />
39<br />
40<br />
41<br />
42<br />
43<br />
44<br />
45<br />
46<br />
BedieneleMente<br />
32 StandBY/On StandBY/On-taste<br />
(Standby-Modus / Ein)<br />
33 id3/MO./St. id3/MO./St.-taste<br />
34 Infrarot-lED<br />
35 Band Band-taste<br />
(UKW / MW-Umschalter)<br />
36 FunCtiOn FunCtiOn-taste (Betriebsart<br />
auswählen)<br />
37 Stopp-taste<br />
38 Wiedergabe, Pause<br />
39<br />
40<br />
SKiP/tune<br />
SeaRCh<br />
SKiP/tune<br />
SeaRCh<br />
Rücklauf; vorheriger titel;<br />
Sendersuche rückwärts<br />
vorlauf; nächster titel;<br />
Sendersuche vorwärts<br />
41<br />
zurück (gespeicherten Sender/<br />
PReSet/FOldeR Ordner auswählen)<br />
42<br />
vor (gespeicherten Sender/<br />
PReSet/FOldeR Ordner auswählen)<br />
43 RePeat RePeat-taste (Wiederholen)<br />
44 RandOM RandOM-taste<br />
(zufallswiedergabe)<br />
45 vOluMe + vOluMe+ taste (lautstärke +)<br />
46 vOluMe - vOluMe– taste (lautstärke –)<br />
47 Batteriefach (Rückseite)<br />
48 Mute<br />
Mute-taste (Stummschaltung)<br />
49 eQ eQ-taste (Klangstufen)<br />
50 intRO intRO-taste (titel anspielen)<br />
51 SleeP SleeP-taste<br />
(Einschlaffunktion)<br />
52 MeM/C-adJ. MeM/C-adJ.-taste<br />
(Programmplatz/ Sender<br />
speichern; Uhr einstellen)<br />
53 tiMeR tiMeR-taste (autom. Ein-/<br />
ausschalten)<br />
<strong>JGC</strong>-<strong>MS</strong>-<strong>203</strong>-01.indb 7 6/3/09 9:43:56 AM<br />
7<br />
deutSCh
deutSCh<br />
8<br />
vORBeReitunG<br />
Bestimmungsgemäßer Gebrauch<br />
Der bestimmungsgemäße Gebrauch dieses Hi-Fi Systems umfasst das abspielen von audio- und MP3/WMa-cDs,<br />
Radio, USB Speichergeräten, Speicherkarten (SD/MMc) mit MP3/WMa Dateien und externen Quellen. Das Gerät<br />
ist nur für den häuslichen Privatgebrauch bestimmt. Benutzen Sie das Gerät niemals im Freien!<br />
auspacken und Kontrolle<br />
• Entfernen Sie das verpackungsmaterial und untersuchen Sie das Gerät auf transportschäden.<br />
• nehmen Sie das Gerät nicht in Betrieb, wenn es in irgendeiner Weise beschädigt ist, sondern bringen Sie es<br />
umgehend zum Händler zurück.<br />
• Überprüfen Sie, ob der lieferumfang vollständig ist.<br />
• Bewahren Sie die verpackung nach Möglichkeit bis zum ablauf der Garantiezeit auf.<br />
• achten Sie auf eine ausreichende Belüftung. Halten Sie einen Mindestabstand von 10 cm rings um das<br />
Gerät ein, um für genügend Kühlung zu sorgen.<br />
• Öffnen Sie das cD Fach (28) und entnehmen Sie die transportsicherung.<br />
Fernbedienung<br />
•<br />
•<br />
•<br />
•<br />
•<br />
•<br />
Entfernen Sie die transportsicherung am Batteriefach (47) der Fernbedienung. ziehen Sie die kleine Folie<br />
vorsichtig nach hinten heraus.<br />
Wechseln Sie die Batterie, wenn sie verbraucht ist.<br />
Öffnen Sie das Batteriefach und legen Sie eine Batterie<br />
des typs cR <strong>203</strong>2 ein (abb. 1).<br />
achten Sie dabei auf die korrekte Polarität (+/-) gemäß<br />
dem aufdruck.<br />
Schließen Sie das Batteriefach. achten Sie darauf, dass<br />
der Deckel korrekt einrastet.<br />
lesen Sie auch die Sicherheitsanweisungen zum Umgang<br />
abb.1<br />
mit Batterien (siehe Kapitel Wichtige Sicherheitsanweisungen).<br />
lautsprecher<br />
•<br />
•<br />
verbinden Sie die grauen und schwarzen Kabel des linken und rechten lautsprechers mit den<br />
entsprechenden grauen und schwarzen lautsprecherklemmen (23) auf der Rückseite des Gerätes.<br />
Die lautsprecher sind mit einer lautsprecherabdeckung (31) versehen. Setzen Sie die abdeckungen auf die<br />
lautsprecher auf oder betreiben Sie die lautsprecher ohne abdeckungen.<br />
antennen<br />
• Das Gerät ist mit zwei antennen ausgestattet – einer Wurfantenne (21) für den UKW-Bereich und einer<br />
Schleifenantenne (27) für den Mittelwellenbereich. Wickeln Sie die UKW-Wurfantenne ab und legen Sie sie<br />
aus.<br />
• Wickeln Sie die MW-Schleifenantenne nicht vom träger ab. Biegen Sie das Plastikteil in der Mitte nach<br />
außen und befestigen es an der Unterseite der antenne. verbinden Sie den Stecker mit der vorgesehenen<br />
Buchse aM ant. (22) am Gerät und stellen Sie die antenne auf.<br />
<strong>JGC</strong>-<strong>MS</strong>-<strong>203</strong>-01.indb 8 6/3/09 9:43:57 AM
hinweise zur Fernbedienung<br />
GRundFunKtiOnen<br />
• achten Sie darauf, dass sich keine Gegenstände zwischen der Infrarot-lED (34) der Fernbedienung und dem<br />
Infrarotsensor (6) am Gerät befinden.<br />
• Beachten Sie, dass direktes Sonnenlicht oder Raumbeleuchtung die korrekte Funktion der Fernbedienung<br />
beeinflussen kann. Wenn die Fernbedienung nicht richtig funktioniert, versuchen Sie den Raum abzudunkeln<br />
oder den abstand zwischen Gerät und Fernbedienung zu reduzieren. Wenn das Problem weiterhin besteht,<br />
wechseln Sie die Batterien der Fernbedienung aus.<br />
• Die tasten auf der Fernbedienung decken sich von Ihrer Funktion mit den tasten auf dem Gerät. alle<br />
Hauptfunktionen können mit der Fernbedienung gesteuert werden.<br />
• Die nachfolgenden Funktionen werden mit der Fernbedienung vorgenommen und erklärt, falls nicht anders<br />
angegeben.<br />
Gerät ein-/ausschalten<br />
• Stecken Sie den netzstecker in eine geeignete Steckdose.<br />
• Schalten Sie das Gerät mit dem netzschalter (25) auf der Rückseite ein. Das Gerät befindet sich im Standby-<br />
Modus und die StandBY-anzeige (7) leuchtet rot. Die Uhranzeige im lcD-Display (3) blinkt, solange die Uhr<br />
nicht gestellt wurde.<br />
• Drücken Sie die StandBY/On-taste (8), um das Gerät einzuschalten. Drücken Sie die taste erneut, um das<br />
Gerät wieder in den Standby-Modus zu schalten.<br />
• Mit dem netzschalter auf der Rückseite schalten Sie den Standby-Stromverbrauch ab.<br />
• Um das Gerät vollständig vom netz zu trennen, ziehen Sie den Stecker aus der Steckdose.<br />
hinweise:<br />
• Wenn in der Betriebsart cD, USB oder caRD keine audiodateien abgespielt werden und keine taste betätigt<br />
wird, schaltet das Gerät nach 15 Minuten automatisch in den Standby-Modus.<br />
• Das Gerät erwärmt sich, wenn es längere zeit in Betrieb ist. Dies ist normal und keine Fehlfunktion des<br />
Gerätes.<br />
Betriebsart wählen<br />
• Drücken Sie die FunCtiOn-taste (36), um eine der folgenden Betriebsarten zu wählen.<br />
anzeige erklärung<br />
CD audiodateien von cD wiedergeben (z.B. audio-cD, MP3/WMa-cD).<br />
USB MP3/WMa-Dateien von einem USB Speichergerät wiedergeben.<br />
CARD MP3/WMa-Dateien von einer SD/MMc-Speicherkarte wiedergeben.<br />
AUX Externe audio-Quellen wiedergeben (anschluss an line in Buchse).<br />
TUNER Radiobetrieb<br />
<strong>JGC</strong>-<strong>MS</strong>-<strong>203</strong>-01.indb 9 6/3/09 9:43:57 AM<br />
9<br />
deutSCh
deutSCh<br />
10<br />
GRundFunKtiOnen<br />
automatisches ausschalten<br />
• Das Gerät hat eine automatische abschalt-Funktion. Sie können eine abschaltzeit von 90 bis 10 Minuten<br />
einstellen.<br />
• Drücken Sie während des Betriebes mehrfach die SleeP-taste (51), um die abschaltzeit in 10 Minuten-<br />
Schritten zu verringern. Wählen Sie damit die verbleibende zeit bis zum ausschalten aus.<br />
• nach einigen Sekunden erscheint wieder die bisherige anzeige und zusätzlich wird ein Symbol im Display<br />
angezeigt:<br />
hinweise:<br />
• Sie können das Gerät mit der StandBY/On-taste (8) vor ablauf der abschaltzeit ausschalten.<br />
• Wenn Sie die automatische abschalt-Funktion im cD-Modus verwenden, kann es sein, dass die cD vor dem<br />
automatischen abschalten zu Ende gespielt ist. Beispielsweise wenn Sie eine abschaltzeit von 90 Minuten<br />
eingestellt haben, aber die cD-Spielzeit nur 45 Minuten beträgt, wird die cD vor der abschaltzeit zu Ende<br />
gespielt sein.<br />
uhrzeit einstellen<br />
• nachdem Sie den netzstecker mit einer Steckdose verbunden haben, blinkt --:-- im lcD-Display (3).<br />
• Die Uhrzeit kann nur im Standby-Modus eingestellt werden.<br />
• Halten Sie die MeM/C-adJ.-taste (52) gedrückt. Im Display wird 24 HOUR angezeigt.<br />
• Drücken Sie (39) oder (40), um die Uhrzeit von 24 auf 12 Stunden umzuschalten. Speichern Sie Ihre<br />
•<br />
auswahl mit der MeM/C-adJ.-taste.<br />
nun blinkt die Stundenanzeige. Drücken Sie (39) oder (40), um die Stunden einzustellen und<br />
•<br />
bestätigen Sie mit der MeM/C-adJ.-taste. Stellen Sie die Minuten in gleicher Weise ein.<br />
nachdem die Minuten eingestellt und gespeichert sind, wird die Uhrzeit angezeigt und die anzeige wechselt<br />
wieder in den Ruhezustand (ohne Beleuchtung).<br />
hinweise:<br />
• Wenn Sie 10 Sekunden lang keine taste drücken, wird die Einstellung der Uhrzeit abgebrochen und die<br />
anzeige wechselt in den Ruhestand.<br />
• Die Einstellungen werden gelöscht, wenn Sie den netzstecker ziehen oder das Gerät mit dem netzschalter<br />
(25) ausschalten. Stellen Sie dann die Uhrzeit erneut ein.<br />
<strong>JGC</strong>-<strong>MS</strong>-<strong>203</strong>-01.indb 10 6/3/09 9:43:57 AM
weckzeit einstellen<br />
GRundFunKtiOnen<br />
• Sie können eine Einschalt- und eine ausschalt-Uhrzeit einstellen, zu der sich das Radio, der cD-Spieler oder<br />
eine andere audioquelle (USB-Speichergerät oder SD/MMc-Karte) einschaltet bzw. ausschaltet.<br />
• Sie können die Einschalt/ausschalt-Uhrzeit einstellen, wenn das Gerät eingeschaltet ist oder im Standby-<br />
Modus.<br />
• Drücken Sie die tiMeR-taste (53), um die Einschalt-Uhrzeit<br />
einzustellen. Im Display (3) erscheint<br />
(abb. 2).<br />
ON und 00:00<br />
• Stellen Sie die Stunden mit (39) oder<br />
bestätigen Sie mit der tiMeR-taste.<br />
(40) ein und<br />
abb. 2<br />
• Stellen Sie die Minuten in gleicher Weise ein und bestätigen Sie<br />
mit der tiMeR-taste.<br />
• Im Display wird nun OFF und 00:00 angezeigt (abb. 3).<br />
• Stellen Sie die ausschalt-Uhrzeit (Stunden, Minuten), wie oben<br />
beschrieben, ein.<br />
• nachdem Sie die tiMeR-taste gedrückt haben, blinkt<br />
TUNER im Display. Wählen Sie mit (39) oder (40) die<br />
gewünschte audioquelle aus (TUNER, CD, USB, CARD).<br />
abb. 3<br />
• Bestätigen Sie Ihre auswahl mit der tiMeR-taste.<br />
• Wählen Sie nun mit (39) oder (40) die lautstärke aus und bestätigen Sie mit der tiMeR-taste.<br />
• Ihre Einstellungen werden nacheinander im Display angezeigt. Danach erscheint wieder die bisherige<br />
anzeige und zusätzlich wird das Uhr-Symbol im Display angezeigt:<br />
• Wenn Sie die tiMeR-taste erneut drücken, wird die Weckfunktion ausgeschaltet.<br />
hinweise:<br />
• Wenn nach der Einstellung der ausschalt-Uhrzeit ERROR angezeigt wird, ist die Eingabe der zeit unlogisch<br />
(Einschalt-Uhrzeit gleich ausschalt-Uhrzeit). nach einigen Sekunden können Sie die ausschalt-Uhrzeit erneut<br />
eingeben (wie im abschnitt Weckzeit einstellen beschrieben).<br />
• Wenn Sie 10 Sekunden lang keine taste drücken, wird die Einstellung der Weckzeit abgebrochen.<br />
<strong>JGC</strong>-<strong>MS</strong>-<strong>203</strong>-01.indb 11 6/3/09 9:43:57 AM<br />
11<br />
deutSCh
deutSCh<br />
12<br />
audiOeinStellunGen, anSChlÜSSe<br />
lautstärke<br />
• Stellen Sie die gewünschte lautstärke mit den tasten vOluMe+ (45) und vOluMe– (46) ein. Sie können<br />
die lautstärke auch durch Drehen des lautstärkereglers (16) am Gerät einstellen.<br />
• Die lautstärke wird auf dem lcD-Display (3) angezeigt, z.B. VOL 11. Kleinere zahlen stehen für niedrige<br />
•<br />
lautstärke, höhere für größere lautstärke. zusätzlich sehen Sie im Display unten immer VOLUME mit<br />
lautstärkebalken.<br />
Das Gerät speichert die lautstärke im Standby-Modus. Bei ziehen des netzsteckers geht die Einstellung<br />
verloren. nachdem der netzstecker wieder eingesteckt wurde, hat die lautstärke beim Einschalten die Stufe<br />
15.<br />
• warnung: Extreme lautstärke führt durch zu hohen Schalldruck zu dauerhaften Hörschäden.<br />
ton stummschalten<br />
• Drücken Sie die Mute-taste (48), um den ton auszuschalten.<br />
• Im Display blinken die lautstärkebalken (abb. 4).<br />
• Drücken Sie die Mute-taste erneut, um den ton wieder<br />
einzuschalten.<br />
• Sie können den ton auch durch Drücken der tasten<br />
vOluMe+ (45) und vOluMe– (46) wieder einschalten.<br />
equalizer – Klangfarbe einstellen<br />
abb. 4<br />
• Der Equalizer bietet unterschiedliche Soundeffekte, indem er tiefe, mittlere oder hohe Frequenzen je nach<br />
Musikrichtung verstärkt.<br />
• Drücken Sie mehrfach die eQ-taste (49), um die Effekte zu wechseln. Im Display werden die Effekte in<br />
folgender Reihenfolge angezeigt: PASS, CLASSIC, ROCK, POP, Jazz.<br />
• PASS zeigt an, dass der Equalizer ausgeschaltet ist.<br />
• Der gewählte Soundeffekt wird kurz auf dem lcD-Display angezeigt.<br />
anschlüsse<br />
Kopfhörer<br />
• auf der Gerätevorderseite befindet sich eine Kopfhörerbuchse (13) für 3,5 mm Stecker.<br />
uSB-Speicher<br />
• Schließen Sie Ihren USB-Speicher am USB-Steckplatz (2) auf der Gerätevorderseite an.<br />
Sd/MMC-Speicherkarte<br />
• verbinden Sie Ihre Speicherkarte mit dem Speicherkartensteckplatz (1) auf der Gerätevorderseite.<br />
externe audio-Quellen<br />
• verbinden Sie eine externe audio-Quelle (mit lInE OUt Buchse) mit der line in Buchse (24) auf der<br />
Geräterückseite. verwenden Sie ein Kabel mit 3,5 mm Klinkenstecker (nicht mitgeliefert).<br />
• Wählen Sie mit der FunCtiOn-taste (36) die Betriebsart AUX.<br />
• Stellen Sie die lautstärke mit den tasten vOluMe+ (45) und vOluMe– (46) ein.<br />
<strong>JGC</strong>-<strong>MS</strong>-<strong>203</strong>-01.indb 12 6/3/09 9:43:58 AM
RadiOBetRieB<br />
• Drücken Sie die FunCtiOn-taste (36) so oft, bis im lcD-Display (3) TUNER anzeigt wird. Das Gerät ist nun<br />
im Radiobetrieb.<br />
• Drücken Sie die Band-taste (35), um zwischen UKW (Ultrakurzwelle) und MW (Mittelwelle) umzuschalten.<br />
Im Display wird UKW als FM (Frequenzmodulation) und MW als aM (amplitudenmodulation) angezeigt.<br />
• Mit der id3/MO./St.-taste (33) schalten Sie zwischen Mono und Stereo-Empfang um. nur UKW-Sender<br />
werden in Stereo ausgestrahlt. auf dem Display erscheint bei Stereo-Empfang ein Symbol<br />
• Wenn der UKW-Stereoempfang verrauscht oder schwach ist, können Sie in den Monobetrieb umschalten,<br />
um so die Empfangsqualität erhöhen.<br />
Sendersuche<br />
• Manuelle Senderwahl<br />
Drücken Sie wiederholt die tasten (39) oder (40), bis die anzeige die genaue Frequenz des<br />
•<br />
gewünschten Radiosenders anzeigt. verwenden Sie die manuelle Methode zur Feineinstellung von<br />
schwachen oder weit entfernten Sendern, die von der automatik nicht selbständig erkannt werden.<br />
automatische Senderwahl<br />
Drücken und halten Sie die tasten (39) oder (40), bis die anzeige sich zu bewegen beginnt. lassen<br />
Sie dann die taste los. Das Radio sucht sich den nächsten starken Sender. Wiederholen Sie diesen vorgang,<br />
bis Sie Ihren gewünschten Sender gefunden haben. Beenden Sie den automatischen Sendersuchlauf durch<br />
nochmaliges Drücken auf die tasten (39) oder (40).<br />
Senderprogrammierung<br />
• Sie können insgesamt 40 Sender abspeichern. Es stehen 30 Speicherplätze für UKW und 10 Speicherplätze<br />
für MW zur verfügung.<br />
• Wählen Sie einen Sender mit der manuellen oder automatischen Sendersuche.<br />
• Drücken Sie die MeM/C-adJ.-taste (52). Die nummer des aktuellen Speicherplatzes blinkt. zusätzlich wird<br />
das Wort MEMORY angezeigt.<br />
• Wählen Sie den gewünschten Speicherplatz mit den tasten (41) oder (42) aus.<br />
• Drücken Sie die MeM/C-adJ.-taste erneut, um das abspeichern des angezeigten Senders auf diesem<br />
Speicherplatz zu bestätigen. Wenn die nummer aufhört zu blinken, ist der Sender gespeichert.<br />
• Gehen Sie bei der Speicherung weiterer Sender analog vor.<br />
• nachdem Sie einige Sender abgespeichert haben, können Sie diese aufrufen, indem Sie mehrfach die tasten<br />
(41) oder (42) drücken.<br />
• Sie löschen einen Sender aus einem Speicherplatz, wenn Sie einen anderen Sender auf diesem<br />
Speicherplatz abspeichern. Der vorher gespeicherte Sender wird gelöscht.<br />
• Sie können alle gespeicherten Sender löschen. Halten Sie die -taste (38) im Standby-Modus gedrückt.<br />
Das lcD-Display und die StandBY-anzeige (7) leuchten einmal kurz auf. lassen Sie die<br />
los.<br />
-taste wieder<br />
hinweise:<br />
• Die gespeicherten Sender werden nicht gelöscht, wenn Sie das Gerät mit dem netzschalter (25) ausschalten<br />
oder den netzstecker ziehen.<br />
• Wenn Sie 10 Sekunden lang keine taste drücken, wird die Senderprogrammierung abgebrochen.<br />
<strong>JGC</strong>-<strong>MS</strong>-<strong>203</strong>-01.indb 13 6/3/09 9:43:58 AM<br />
13<br />
deutSCh
deutSCh<br />
14<br />
Cd-SPieleR<br />
• Eine cD kann sowohl eine im Handel erworbene audio-cD sein, als auch eine Daten cD (cD-R, cD-RW) mit<br />
MP3/WMa-Dateien. Während auf einer audio-cD bis zu 80 Minuten Spielzeit untergebracht ist, kann eine<br />
MP3/WMa-cD 12 Stunden und mehr enthalten.<br />
• Dieses Gerät unterstützt die cD-Formate audio-cD, beschreibbare cD-R und cD-RW mit MP3/WMa-<br />
Dateien.<br />
• Das Gerät unterstützt das abspielen von beschreibbaren cDs. Die Qualität beim abspielen hängt von der<br />
aufnahme und der Qualität des cD-Rohlings ab. Das abspielen kann nicht immer garantiert werden. Dies ist<br />
kein Mangel dieses Gerätes.<br />
Cd einlegen und entnehmen<br />
• Öffnen Sie das cD-Fach (28) mit OPen/ClOSe (29) an der<br />
Oberseite des Gerätes. Im Display (3) wird OPEN angezeigt<br />
(abb. 5).<br />
• legen Sie eine cD mit der bedruckten Seite nach oben in das<br />
cD-Fach. Drücken Sie auf einen Punkt in der Mitte der cD bis<br />
sie auf der achse einrastet.<br />
abb. 5<br />
• Senken Sie die cD-Klappe, bis sie sich schließt. Die cD kann nun abgespielt werden.<br />
• Bevor Sie das cD-Fach wieder öffnen, vergewissern Sie sich stets, dass die cD sich nicht mehr dreht.<br />
Drücken Sie immer zuerst auf die Stopp-taste (37), um die Drehung der cD zu beenden.<br />
• zum Herausnehmen der cD positionieren Sie einen Finger mittig auf der cD (Mitte der Spindel) und den<br />
anderen Finger am Rand der cD. ziehen Sie die cD vorsichtig nach oben.<br />
hinweise:<br />
• Entnehmen Sie die cD nur, nachdem sich das cD-Fach vollständig geöffnet hat.<br />
• legen Sie nie mehr als eine cD gleichzeitig in das Fach.<br />
• legen Sie nur cDs in das cD-Fach, keine anderen Objekte.<br />
• Berühren Sie niemals die klare linse des lasers.<br />
• Wenn Sie am Gerät anstoßen, kann dies zum Überspringen von Spuren führen.<br />
• Sehr hohe lautstärke kann durch die vibrationen auch zum Überspringen von Spuren führen.<br />
• Halten Sie das cD-Fach geschlossen, außer zum cD-Wechsel.<br />
• Öffnen Sie niemals das cD-Fach, wenn gerade eine cD abgespielt wird oder wenn die cD noch rotiert.<br />
Cd abspielen<br />
• Wählen Sie den cD Modus aus. Drücken Sie die FunCtiOn-taste (36) so oft, bis CD im Display erscheint.<br />
• legen Sie eine cD ein und schließen Sie das cD-Fach (28). Im Display wird READING angezeigt.<br />
• Wenn sich keine cD im cD-Fach befindet oder die cD nicht erkannt wird, zeigt das Display NO DISC an.<br />
• Drücken Sie die -taste (38) zum abspielen der cD.<br />
• Drücken Sie die -taste (38) erneut, um das abspielen zu<br />
•<br />
unterbrechen. auf dem Display blinkt die zeit (abb. 6).<br />
Drücken Sie die Stopp-taste (37), um das abspielen zu<br />
beenden.<br />
abb. 6<br />
<strong>JGC</strong>-<strong>MS</strong>-<strong>203</strong>-01.indb 14 6/3/09 9:43:58 AM
titelsuche, vor- und Rücklauf<br />
Cd-SPieleR<br />
• Drücken Sie auf (40), um zum titelanfang des nächsten titels zu springen.<br />
• Drücken Sie auf (39), um zum titelanfang des laufenden titels zurück zu springen. Durch zweifaches<br />
•<br />
Drücken springen Sie auf den anfang des vorherigen titels zurück.<br />
Wenn Sie diese tasten länger gedrückt halten, erhöht sich die abspielgeschwindigkeit. Sobald Sie die taste<br />
loslassen, wird die Wiedergabe in normaler Geschwindigkeit wird fortgesetzt.<br />
zufallswiedergabe<br />
• Drücken Sie die RandOM-taste (44), um alle titel in zufälliger Reihenfolge abzuspielen. Im Display (3) wird<br />
RANDOM angezeigt.<br />
• Schalten Sie die Funktion durch Drücken auf die RandOM-taste wieder aus.<br />
titel anspielen<br />
• Sie können die titel eine cD hintereinander jeweils 10 Sekunden lang abspielen lassen.<br />
• Drücken Sie im Stopp-Modus die intRO-taste (50), um die Funktion einzuschalten. Im Display wird INTRO<br />
angezeigt. Das anspielen beginnt mit dem ersten titel auf der cD.<br />
• Wenn Sie die intRO-taste während der Wiedergabe drücken, beginnt das anspielen mit dem derzeit<br />
abgespielten titel.<br />
• Schalten Sie die Funktion durch Drücken auf die intRO-taste wieder aus.<br />
wiederholungs-Funktion<br />
• Sie können diese Funktion während der Wiedergabe eines titels oder im Stopp-Modus einstellen.<br />
• Drücken Sie die RePeat-taste (43) einmal, um den abgespielten titel zu wiederholen. Im Display wird<br />
REPEAT angezeigt.<br />
• Drücken Sie die RePeat-taste zweimal, um die gesamte cD zu wiederholen. Im Display wird REPEAT ALL<br />
angezeigt.<br />
• Drücken Sie die RePeat-taste dreimal, um die Funktion auszuschalten.<br />
titelwiedergabe programmieren<br />
• Sie können den cD-Spieler programmieren, eine beliebige abfolge von bis zu 32 titeln (für audio-cD) zu<br />
spielen. Drücken Sie die Stopp-taste (37), bevor Sie mit der Programmierung beginnen.<br />
• Drücken Sie die MeM/C-adJ.-taste (52), um in den<br />
Programmier-Modus zu wechseln. Im Display werden MEMORY<br />
und die Programmplatznummer P-- 01 angezeigt.<br />
Die titelnummer 00 blinkt (abb. 7).<br />
abb. 7<br />
• Wählen Sie einen titel mit (39) oder (40) und bestätigen Sie Ihre auswahl mit MeM/C-adJ.-taste.<br />
• Im Display wird die nächste Programmplatznummer angezeigt. Gehen Sie wie oben beschrieben vor, um<br />
weitere titel zu programmieren.<br />
• Drücken Sie die -taste (38), um die Wiedergabe der programmierten titel zu starten.<br />
• Drücken Sie die Stopp-taste (37), um die Programmwiedergabe zu beenden. <strong>Start</strong>en Sie das Programm<br />
erneut durch Drücken der -taste (38).<br />
• Um das Programm zu löschen, drücken Sie die Stopp-taste (37). Das Programm wird ebenfalls gelöscht,<br />
wenn Sie die cD-Klappe öffnen, die FunCtiOn-taste (36) oder StandBY/On-taste (32) drücken.<br />
<strong>JGC</strong>-<strong>MS</strong>-<strong>203</strong>-01.indb 15 6/3/09 9:43:58 AM<br />
15<br />
deutSCh
deutSCh<br />
16<br />
Cd-SPieleR<br />
hinweise:<br />
• Die Wiederholungs-Funktion kann mit dem abspielen eines Programms kombiniert werden. lesen Sie dazu<br />
den abschnitt Wiederholungs-Funktion.<br />
• Wenn Sie 10 Sekunden lang keine taste drücken, wird die titelprogrammierung abgebrochen.<br />
MP3/wMa-Cd abspielen<br />
• Im folgenden abschnitt werden die Unterschiede beim abspielen eine MP3/WMa-cD beschrieben.<br />
• Da MP3/WMa-cDs wesentlich mehr titel enthalten können, kann es länger dauern, bis der cD-Spieler<br />
das gesamte Inhaltsverzeichnis gelesen hat. auf dem lcD-Display (3) werden die anzahl der verzeichnisse<br />
(alben) und die anzahl der titel angezeigt. Es können maximal 99 verzeichnisse und 999 tracks gelesen<br />
werden.<br />
• Je nach vorhandenen Dateien wird MP3 oder WMa angezeigt<br />
(abb. 8).<br />
• Wenn die MP3/WMa-cD Ordner enthält, so können Sie mit<br />
(41) oder<br />
springen.<br />
(42) in den vorherigen oder nächsten Ordner<br />
abb. 8<br />
wiederholungs-Funktion<br />
• Beim abspielen von MP3/WMa-cDs haben Sie drei Optionen.<br />
• Drücken Sie die RePeat-taste (43) einmal, um den abgespielten titel zu wiederholen. Im Display wird<br />
REPEAT angezeigt.<br />
• Drücken Sie die RePeat-taste zweimal, um die gesamte cD zu wiederholen. Im Display wird REPEAT ALL<br />
angezeigt.<br />
• Drücken Sie die RePeat-taste dreimal, um das derzeit abgespielte album zu wiederholen. Im Display wird<br />
REPEAT ALBUM angezeigt.<br />
• Drücken Sie die RePeat-taste viermal, um die Funktion auszuschalten.<br />
id3-tag informationen anzeigen<br />
• ID3 ist ein Format, um bestimmte Informationen über die Musik in derselben Datei abzuspeichern (sog.<br />
Metadaten). Dies können sein: der titel, der Sänger, der albumname, das Erscheinungsjahr und ein<br />
beliebiger Kommentar.<br />
• Drücken Sie die id3/MO./St.-taste (33), um die Funktion einzuschalten. Im Display wird ID3 ON angezeigt.<br />
Falls die Informationen vollständig in der audiodatei vorhanden sind, werden Sie als Durchlauftext in dieser<br />
Reihenfolge angezeigt: titel, Künstler und album.<br />
• Wenn die Informationen fehlen wird NO ID3 angezeigt.<br />
• Drücken Sie die id3/MO./St.-taste, um die Funktion wieder auszuschalten. Im Display wird ID3 OFF<br />
angezeigt.<br />
<strong>JGC</strong>-<strong>MS</strong>-<strong>203</strong>-01.indb 16 6/3/09 9:43:58 AM
titelwiedergabe programmieren<br />
Cd-SPieleR<br />
• Sie können den cD-Spieler programmieren, eine beliebige abfolge von bis zu 64 titeln (für MP3/WMa-<br />
Dateien) zu spielen. Drücken Sie die Stopp-taste (37), bevor Sie mit der Programmierung beginnen.<br />
• Drücken Sie die MeM/C-adJ.-taste (52), um in den<br />
Programmier-Modus zu wechseln. Im Display werden MEMORY<br />
und die Programmplatznummer P-- 01 angezeigt. Die<br />
•<br />
Ordnernummer 00 blinkt (abb. 9).<br />
Wählen Sie einen Ordner mit (41) oder (42) und<br />
abb. 9<br />
•<br />
bestätigen Sie Ihre auswahl mit MeM/C-adJ.-taste.<br />
Im Display blinkt nun die titelnummer 00 (abb. 10).<br />
• Wählen Sie einen titel mit (39) oder (40) und<br />
•<br />
bestätigen Sie Ihre auswahl mit der MeM/C-adJ.-taste.<br />
Im Display wird die nächste Programmplatznummer angezeigt.<br />
Gehen Sie wie oben beschrieben vor, um weitere titel zu<br />
programmieren.<br />
abb. 10<br />
• Drücken Sie die -taste (38), um die Wiedergabe der programmierten titel zu starten.<br />
• Drücken Sie die Stopp-taste (37), um die Programmwiedergabe zu beenden. <strong>Start</strong>en Sie das Programm<br />
erneut durch Drücken der -taste (38).<br />
• Um das Programm zu löschen, drücken Sie die Stopp-taste (37). Das Programm wird ebenfalls gelöscht,<br />
wenn Sie den cD-Klappe öffnen, die FunCtiOn-taste (36) oder StandBY/On-taste (32) drücken.<br />
hinweise:<br />
• Die Wiederholungs-Funktion kann mit dem abspielen eines Programms kombiniert werden. lesen Sie dazu<br />
den abschnitt Wiederholungs-Funktion.<br />
• Wenn Sie 10 Sekunden lang keine taste drücken, wird die titelprogrammierung abgebrochen.<br />
<strong>JGC</strong>-<strong>MS</strong>-<strong>203</strong>-01.indb 17 6/3/09 9:43:59 AM<br />
17<br />
deutSCh
deutSCh<br />
18<br />
uSB-SPeiCheR und Sd/MMC-KaRten<br />
• achten Sie darauf, dass das Gerät im Standby-Modus ist. Stecken Sie den USB-Speicher vorsichtig in den<br />
USB-Steckplatz (2), und die SD/MMc-Karte in deren Kartensteckplatz (1).<br />
• Schalten Sie das Gerät mit dem StandBY/On-taste (8) ein.<br />
• Wählen Sie mit der FunCtiOn-taste (36) die Betriebsart USB für USB-Speicher oder CARD für<br />
Speicherkarten aus.<br />
• Die Funktionen für MP3/WMa-cDs gelten auch für USB-Speicher und Speicherkarten. Weitere Informationen<br />
finden Sie im Kapitel CD-Spieler.<br />
• Entfernen Sie niemals den USB-Speicher oder die SD/MMc-Karte aus dem anschluss, wenn Sie gerade<br />
einen titel abspielen. Stoppen Sie immer den aktuellen titel mit der Stopp-taste (37).<br />
• Ändern Sie den Betriebsmodus oder schalten Sie das Gerät vollständig ab, bevor Sie den USB-Speicher<br />
oder die SD/ MMc-Karte vorsichtig aus dem anschluss ziehen. Dies verhindert die Beschädigung des USB<br />
Speichers, der SD/ MMc-Karte oder der Dateien.<br />
hinweise:<br />
• Der USB-Steckplatz (2) ist mit den Standards 1.1 und 2.0 verwendbar.<br />
• Das Gerät unterstützt nur USB-Speicher und SD/ MMc-Karten mit einer Kapazität von bis zu 2 GB.<br />
• Das Gerät ermöglicht die Wiedergabe von audiodateien nur im MP3-und WMa-Format (ohne DRM).<br />
• aufgrund von sich ändernden technologien kann es vorkommen, dass bestimmte USB-Speicher oder SD/<br />
MMc-Karten nicht kompatibel mit diesem Gerät sind.<br />
• Benutzen Sie keine USB-verlängerungskabel, um Ihren USB-Speicher mit dem USB-Steckplatz zu verbinden.<br />
Es kann zu Störungen kommen, die die Musikwiedergabe beeinflussen kann. In extremen Fällen könnte der<br />
USB-Speicher beschädigt werden.<br />
<strong>JGC</strong>-<strong>MS</strong>-<strong>203</strong>-01.indb 18 6/3/09 9:43:59 AM
Compact disc<br />
•<br />
•<br />
•<br />
•<br />
•<br />
abb. 11<br />
ReiniGunG und PFleGe<br />
Wischen Sie Fingerabdrücke und Staub sorgfältig mit einem weichen tuch ab. Wischen Sie vom zentrum<br />
zum Rand (nicht kreisförmig).<br />
Reinigen Sie die Disc in regelmäßigen abständen mit einem weichen, fusselfreien, trockenen tuch.<br />
verwenden Sie auf keinen Fall lösungs- oder Scheuermittel.<br />
Schreiben Sie nicht auf cDs. Bringen Sie auch keine aufkleber darauf an.<br />
Schützen Sie cDs vor Staub und Kratzern. Bewahren Sie sie deshalb bei nichtbenutzung immer in ihrer Hülle<br />
auf.<br />
Entnehmen Sie die cD aus der Hülle, indem Sie in der Mitte auf die Halterung drücken und dabei die cD<br />
vorsichtig nur am Rand anfassen.<br />
Pflege des Gehäuses<br />
• Ziehen Sie vor jeder Reinigung den Netzstecker aus der Steckdose.<br />
• Entfernen Sie Staub mit einem weichen Staubtuch.<br />
• Verwenden Sie keinen nassen Schwamm, Wachs, Poliersprays oder Scheuermittel.<br />
• achtung: In das Innere des Gehäuses darf kein Wasser gelangen. Wenn doch, trennen Sie das Gerät vom<br />
netz, und lassen es gründlich austrocknen, bevor Sie es wieder in Betrieb nehmen. Stellen Sie das Gerät<br />
zum trocknen bitte nicht in einen Ofen oder eine Mikrowelle.<br />
<strong>JGC</strong>-<strong>MS</strong>-<strong>203</strong>-01.indb 19 6/3/09 9:43:59 AM<br />
19<br />
deutSCh
deutSCh<br />
20<br />
PROBleMlÖSunG<br />
Wenn ein Fehler auftritt, überprüfen Sie zuerst unten stehende tabelle, bevor Sie sich an Ihren Händler wenden<br />
oder das Gerät einschicken. Die adresse und Hotlinenummer finden Sie auf der Garantiekarte. Öffnen Sie das<br />
Gerät nicht und versuchen Sie nicht, es selbst zu reparieren. Sie verlieren die Garantieansprüche und es besteht<br />
Unfallgefahr! Beachten Sie die Garantiebedingungen auf den folgenden Seiten.<br />
Problem ursache lösung<br />
Kein ton. lautstärke ist zu niedrig eingestellt. Stellen Sie die lautstärke höher.<br />
Die anzeige zeigt nichts<br />
an; keine Reaktion auf<br />
tastendruck.<br />
Die cD überspringt<br />
Spuren.<br />
Der netzstecker ist nicht richtig eingesteckt. Stecken Sie den netzstecker ein.<br />
Stummschaltung ist aktiviert. Drücken Sie die Mute-taste (48)<br />
oder stellen Sie eine lautstärke ein.<br />
netzschalter ausgeschaltet. Gerät mit dem netzschalter<br />
einschalten.<br />
Elektrostatische Entladung. Gerät ausschalten und netzstecker<br />
ziehen. Etwas warten und<br />
netzstecker wieder einstecken.<br />
cD verschmutzt oder beschädigt. cD reinigen oder ersetzen.<br />
Ein Programm wird gerade abgespielt. Beenden Sie die Wiedergabe des<br />
Programms.<br />
NO DISC wird angezeigt. Keine cD im cD-Fach eingelegt. legen Sie eine cD ein.<br />
cD kann nicht<br />
abgespielt werden.<br />
USB-/<br />
Speicherkartenfehler<br />
cD stark zerkratzt oder verschmutzt. verwenden Sie nur eine<br />
unzerkratzte und saubere cD.<br />
laserlinse verschmutzt oder angelaufen. Reinigen Sie die linse. lassen<br />
Sie das Gerät 1-2 Stunden in<br />
trockener Umgebung stehen damit<br />
Kondenswasser trocknen kann.<br />
cD-R ist leer oder nicht „abgeschlossen“. Schließen Sie die cD-R ab.<br />
cD stark zerkratzt oder verschmutzt. verwenden Sie nur eine<br />
unzerkratzte und saubere cD.<br />
laserlinse verschmutzt oder angelaufen. Reinigen Sie die linse. lassen<br />
Sie das Gerät 1-2 Stunden in<br />
trockener Umgebung stehen damit<br />
Kondenswasser trocknen kann.<br />
verbindungsfehler. ziehen Sie die Speicherkarte/USB<br />
heraus und stecken Sie sie wieder<br />
hinein.<br />
Keine spielbaren Dateien vorhanden. verwenden Sie eine Speicherkarte<br />
/ USB-Speicher mit MP3-oder<br />
WMa-Dateien.<br />
<strong>JGC</strong>-<strong>MS</strong>-<strong>203</strong>-01.indb 20 6/3/09 9:43:59 AM
Stromversorgung netzspannung 230-240 v~, 50Hz<br />
Fernbedienung cR<strong>203</strong>2 Batterie (im lieferumfang enthalten)<br />
leistungsaufnahme 15,6 W<br />
lasertyp Klasse 1<br />
lautsprecher 2 x 8 W lautsprecher<br />
abmessungen<br />
Gerät 180 (B) x 105 (H) x 220 (t) mm<br />
lautsprecher 100 (B) x 183(H) x 182 (t) mm<br />
Radio<br />
UKW-Bereich 87,5 - 108MHz<br />
MW-Bereich 522 - 1620 kHz<br />
teChniSChe daten<br />
laufwerk für 8 cm und 12 cm Durchmesser; nur kreisförmig, keine<br />
Sonderformen<br />
cD-Formate cD audio, cD-R, cD-RW<br />
Speicherformate USB typ 1.1, typ 2.0; SD/MMc-Speicherkarte<br />
Unterstützte Speichergröße Max. 2 GB<br />
Hergestellt für JGc-company GmbH<br />
Heckhofweg 146<br />
50739 Köln<br />
Kundendienst <strong>E2</strong> <strong>Servicecenter</strong> GmbH<br />
telefon<br />
Montag - Freitag 10-18 Uhr<br />
tragen Sie hier die Seriennummer Ihres<br />
Gerätes ein:<br />
Max-Planck-Strasse 13<br />
50858 Köln-Marsdorf<br />
01805- 22 17 84<br />
(EUR 14 /Min. aus dem deutschen Festnetz; ggf. abweichender<br />
Mobilfunktarif)<br />
<strong>JGC</strong>-<strong>MS</strong>-<strong>203</strong>-01.indb 21 6/3/09 9:43:59 AM<br />
21<br />
deutSCh
deutSCh<br />
22<br />
GaRantie<br />
Kunden info<br />
herstellergarantie<br />
Wir freuen uns, dass Sie sich für den Erwerb eines Produktes unseres Hauses entschieden haben<br />
und wünschen Ihnen viel Spaß und Freude mit diesem hochwertigen Produkt. Unsere strenge<br />
Fertigungskontrolle gewährleistet die hohe Qualität unserer Geräte. Für den Fall, dass Sie dennoch<br />
eine berechtigte Beanstandung haben, gewähren wir eine Garantie für die Dauer von<br />
3 Jahren<br />
ab Kaufdatum zu den nachfolgenden Bedingungen:<br />
auFBewahRen<br />
die Garantiedauer beträgt 3 Jahre ab Kaufdatum.<br />
JahRe 3 KauFnaChweiS<br />
Service-telefon: Mit<br />
O18O5 / 22 17 84 ( 0,14 per Min)<br />
Bitte<br />
e 2 <strong>Servicecenter</strong> Gmbh,<br />
Max-Planck-Strasse 13,<br />
50858 Köln-Marsdorf<br />
www.e2service.de<br />
dOKuMent!<br />
aChtunG: unfrei eingeschickte Sendungen werden nicht angenommen! wiChtiGeS<br />
Diese Garantie lässt Ihre gesetzlichen Gewährleistungsansprüche als verbraucher gegenüber<br />
dem verkäufer des Gerätes unberührt. Diese Rechte werden durch die von uns gewährte<br />
Herstellergarantie nicht eingeschränkt. Die von uns gewährte Garantie hat nur Gültigkeit für den<br />
privaten Gebrauch des Gerätes und beschränkt sich auf das Gebiet der Bundesrepublik Deutschland.<br />
Es liegt im Ermessen von <strong>JGC</strong>, ob die Garantie durch <strong>Reparatur</strong> oder austausch des Gerätes bzw.<br />
des defekten teiles erfüllt wird. Weitere ansprüche sind ausgeschlossen. Sollten Sie Fragen zu <strong>JGC</strong><br />
Produkten haben, sparen Sie sich den zeitraubenden Weg zum Händler und wenden sich direkt an<br />
unsere Servicehotline oder unser <strong>Servicecenter</strong>. Ein team von hochqualifizierten Produktberatern und<br />
technikern steht Ihnen Montag bis Freitag von 10 – 18 Uhr zur verfügung.<br />
Sollten Sie Ihr Gerät einsenden, ist eine kurze Beschreibung Ihrer Beanstandung erforderlich, das<br />
unterstützt die schnelle abwicklung. Senden Sie Ihr Gerät ausnahmslos nur zu unserem autorisierten<br />
Servicepartner und verwenden Sie bitte hierzu den beiliegenden Retourenzettel. Sollte dieser<br />
Retourenzettel fehlen, wenden Sie sich bitte an die oben genannte Servicehotline.<br />
<strong>JGC</strong>-<strong>MS</strong>-<strong>203</strong>-01.indb 22 6/3/09 9:43:59 AM
Kunden info<br />
herstellergarantie<br />
zur Durchführung einer Garantiereparatur benötigt unser Servicepartner unbedingt den<br />
Kaufnachweis, entweder als Originalrechnung oder den vom Händler maschinengedruckten<br />
Kassenbeleg. Weiterhin muss die Seriennummer am Gerät lesbar sein. Ohne Kaufnachweis<br />
können wir leider keine kostenlosen Garantieleistungen erbringen. Wir empfehlen Ihnen, die<br />
Originalverpackung aufzubewahren, um im Garantiefall einen sicheren transport des Gerätes zu<br />
gewährleisten.<br />
Garantie-<strong>Reparatur</strong>en dürfen ausschließlich von der <strong>E2</strong> <strong>Servicecenter</strong> GmbH oder von dieser<br />
autorisierten vertragswerkstätten ausgeführt werden. Bei <strong>Reparatur</strong>en, die selbst oder von anderen<br />
Werkstätten ausgeführt werden, entfällt jeglicher Garantieanspruch und es besteht kein anspruch<br />
auf Kostenerstattung.<br />
Kein Garantieanspruch besteht:<br />
bei unsachgemäßer Behandlung<br />
bei mechanischer Beschädigung des Gerätes von außen<br />
bei transportschäden<br />
für verschleißteile<br />
bei Bedienungsfehlern und zweckfremder Benutzung<br />
bei aufstellung des Gerätes in Feuchträumen oder im Freien<br />
bei Schäden, die auf höhere Gewalt, Krieg, Wasser, Blitzschlag, Überspannung und andere<br />
von <strong>JGC</strong> nicht zu verantwortende Gründe zurückzuführen sind<br />
bei übermäßiger nutzung, insbesondere bei anderer als privater nutzung<br />
bei Missachtung der Bedienungsanleitung und Installationsfehlern<br />
wenn das Gerät keinen technischen Defekt aufweist<br />
für transport- und Fahrtkosten sowie durch auf- und abbau des Gerätes entstandene Kosten<br />
Die Garantie umfasst keine weitergehende Haftung unsererseits, insbesondere keine Haftung für<br />
Schäden, die nicht am Gerät selbst entstanden sind oder die durch den ausfall des Gerätes bis zur<br />
Instandsetzung entstehen (z.B. Wegekosten, Handlingkosten, etc.). Hierdurch wird jedoch unsere<br />
gesetzliche Haftung, insbesondere nach dem Produkthaftungsgesetz, nicht eingeschränkt oder<br />
ausgeschlossen. Ebenfalls haftet <strong>JGC</strong> nicht für den indirekten bzw. in Folge auftretenden verlust<br />
von tonträgern (cD/DvD etc.) oder ähnlichem Material, sowie zusatzgeräten jeglicher art (netzteile,<br />
lautsprecher etc.).<br />
von uns erbrachte Garantieleistungen verlängern die Garantiefrist von 3 Jahren ab Kaufdatum nicht,<br />
auch nicht hinsichtlich eventuell ausgetauschter Komponenten.<br />
wir wünschen ihnen viel Spaß mit ihrem neuen Gerät und hoffen, dass auch ihr nächstes<br />
GaRantie<br />
wieder ein <strong>JGC</strong> Produkt sein wird. wiChtiGeS dOKuMent! Bitte Mit KauFnaChweiS 3 JahRe auFBewahRen<br />
<strong>JGC</strong>-<strong>MS</strong>-<strong>203</strong>-01.indb 23 6/3/09 9:43:59 AM<br />
23<br />
deutSCh
enGliSh<br />
24<br />
taBle OF COntentS<br />
taBlE OF cOntEntS.............................................................................................................................24<br />
IMPORtant SaFEtY InStRUctIOnS .......................................................................................................25-26<br />
cOntROl ElEMEntS.............................................................................................................................27-29<br />
PREPaRatIOn ........................................................................................................................................30<br />
BaSIc FUnctIOnS .................................................................................................................................31-33<br />
aUDIO SEttInGS, cOnnEctIOnS ...........................................................................................................34<br />
RaDIO ...................................................................................................................................................35<br />
cD PlaYER ............................................................................................................................................36-39<br />
USB FlaSH MEMORY anD SD/MMc MEMORY caRD ...............................................................................40<br />
clEanInG anD caRE .............................................................................................................................41<br />
tROUBlESHOOtInG ...............................................................................................................................42<br />
tEcHnIcal Data ...................................................................................................................................43<br />
WaRRantY ...........................................................................................................................................44-45<br />
Do not dispose of this appliance with household litter. Please bring it to the public collection<br />
centres of your city or return it to the retailer where you bought this appliance.<br />
Please dispose of batteries environmentally friendly. Do not dispose of the batteries with<br />
household litter. they should be disposed of at existing collection points or at a special waste<br />
disposal site.<br />
<strong>JGC</strong>-<strong>MS</strong>-<strong>203</strong>-01.indb 24 6/3/09 9:43:59 AM
caUtIOn<br />
RISK OF ElEctRIc SHOcK<br />
DO nOt OPEn<br />
warning: to reduce the risk of electric shock. Do not remove<br />
cover. no user serviceable parts inside. Refer servicing to<br />
qualified service personnel.<br />
iMPORtant SaFetY inStRuCtiOnS<br />
the lightning flash with arrowhead symbol,<br />
with in an equilateral triangle, is intended<br />
to alert user to the presence of uninsulated<br />
“dangerous voltage” within the product<br />
enclosure that may be of sufficient magnitude<br />
to constitute a risk of electric shock to<br />
persons.<br />
the exclamation point within an equilateral<br />
triangle is intended to alert the user to<br />
the presence of important operating and<br />
maintenance (servicing) instruction in the<br />
literature accompanying the appliance.<br />
this product contains a low-power laser emitter (class 1).<br />
warning: Invisible laser radiation could be a danger to your eyes. avoid direct exposure to<br />
laser beam. Do not damage the protective measure that will prevent the beam from coming<br />
out.<br />
General<br />
• Before using the appliance read this user manual carefully. It contains important information for your safety<br />
as well operating and maintenance advice. Keep the manual for future reference and pass it on together with<br />
the appliance.<br />
• Use the appliance for the intended uses only. Misuse can lead to danger.<br />
• Do not open the appliance. Do not put objects through the openings.<br />
• This appliance is not intended for use by persons (including children) with reduced physical, sensory or<br />
mental capabilities, or lack of experience and knowledge, unless they have been given supervision or<br />
instruction concerning the use of the appliance by a person responsible for their safety.<br />
• Only use accessories specified by the manufacturer.<br />
• warning: Extreme high volume leads to permanent hearing damage.<br />
• In case of malfunction due to electrostatic discharge: Disconnect the appliance from the mains supply by<br />
pulling the power plug. Wait a few seconds and reinsert the power plug into the wall outlet. Switch on the<br />
appliance to resume normal operation.<br />
• During cleaning or operation do not immerse the appliance in water or other liquids. Never hold the<br />
appliance under running water.<br />
location<br />
• Do not use this appliance near water or moisture e.g. a damp basement, or near a pool or bathtub.<br />
• Ensure that air is free to circulate through the product. Do not use it in poorly ventilated places or block<br />
ventilation openings with a tablecloth, newspaper or curtains. Your appliance has ventilation holes, which<br />
should never be obstructed. Keep a distance of 10cm at least.<br />
• Do not place the appliance on heaters, stoves or on any other heat sources (including amplifiers).<br />
• In order to reduce the risk of fire or electric shock, do not expose this appliance to open fires (fire places,<br />
barbeque grills, candles, cigarettes, etc.) nor water (dripping water, splashing water, vases, bathtubs, ponds<br />
and such).<br />
<strong>JGC</strong>-<strong>MS</strong>-<strong>203</strong>-01.indb 25 6/3/09 9:44:00 AM<br />
25<br />
enGliSh
enGliSh<br />
26<br />
iMPORtant SaFetY inStRuCtiOnS<br />
Power supply<br />
• Before using the appliance, check that your mains supply is suitable for the rated voltage of your appliance.<br />
Review the technical specification in these instructions and on the rating label located on the rear and the<br />
bottom of the appliance. Only the power plug can disconnect the appliance from the mains completely.<br />
• the StandBY/On button does not disconnect the appliance from the mains power supply. to disconnect<br />
the appliance from the power supply you must unplug the power cord.<br />
• Pull the power plug out of the wall outlet by using the plug. Do not pull the cord.<br />
• always unplug the appliance from the mains if you do not intend to use it for an extended period of time.<br />
Unplug the appliance especially during thunderstorm and lightning.<br />
• the power plug should never be obstructed and always easy accessible.<br />
• If the power cord or plug is damaged it has to be replaced by manufacturer, a service centre or a qualified<br />
person to avoid danger.<br />
• Protect the power chord and the casing against damage.<br />
Condensation<br />
• Water droplets or condensation may form inside the appliance if it is brought into a warm, damp<br />
atmosphere. the product may not operate correctly if condensation forms inside it. In severe cases, it<br />
may be damaged through short circuit. leave the product in a warm, dry room for 1-2 hours to allow the<br />
condensation to evaporate. In the event of a problem, unplug the power cord and contact our service centre.<br />
Battery<br />
• Only use the batteries specified.<br />
• always exchange the full set of batteries together. Make sure that you do not mix old batteries with new ones<br />
(batteries which are not at the same level of charging) or batteries of different types.<br />
• take care to fit your batteries correctly, observing the plus and minus marks on the battery, the appliance<br />
and the instructions. Incorrect fitting can cause leakage or, in extreme cases, fire or even an explosion.<br />
• Do not expose batteries to excessive heat, such as sunshine, fire or the like as and never dispose of<br />
batteries in fire. this can cause them to explode.<br />
• Remove used batteries from equipment and all batteries from the appliance if you know that you are not<br />
going to use the appliance for a long time. Otherwise the batteries may leak and cause damage.<br />
• Keep batteries out of reach of children. Immediately ask for medical assistance if a battery is swallowed.<br />
<strong>JGC</strong>-<strong>MS</strong>-<strong>203</strong>-01.indb 26 6/3/09 9:44:00 AM
Front side<br />
1 2 3 4 5 6 7<br />
20<br />
19<br />
18<br />
17<br />
16<br />
15<br />
COntROl eleMentS<br />
1 MeMORY SD/MMc memory card slot 11 Band Band button<br />
CaRd<br />
(FM / aM switch)<br />
2 uSB in USB jack 12 id3/FM MOnO/ show ID3 tag; FM mono/stereo<br />
St.<br />
reception<br />
3 lcD display 13 headphones jack (3.5mm)<br />
4 StOP stop button 14 eQ eQ button (sound characteristic)<br />
5<br />
playback, pause 15<br />
fast forward; next track; search<br />
PlaY/PauSe<br />
SKiP/tune<br />
SeaRCh<br />
station forwards<br />
6 iR infrared sensor (remote<br />
control)<br />
16 vOluMe volume control<br />
7 StandBY StandBY indicator 17<br />
fast backward; previous track;<br />
SKiP/tune<br />
SeaRCh<br />
search station backwards<br />
8 StandBY/On StandBY/On button 18 MeM/C-adJ. MeM/C-adJ. button<br />
(standby mode / on)<br />
(programme storage number/<br />
store station; adjust clock)<br />
9 tiMeR tiMeR button (autom. switch 19<br />
forwards (stored station /select<br />
on/off)<br />
PReSet/FOldeR folder)<br />
10 FunCtiOn FunCtiOn button (select 20<br />
backwards (stored station /<br />
operating mode)<br />
PReSet/FOldeR select folder)<br />
<strong>JGC</strong>-<strong>MS</strong>-<strong>203</strong>-01.indb 27 6/3/09 9:44:00 AM<br />
14<br />
13<br />
8<br />
9<br />
10<br />
11<br />
12<br />
27<br />
enGliSh
enGliSh<br />
28<br />
COntROl eleMentS<br />
Back side<br />
21 22 23<br />
28<br />
29<br />
26<br />
24<br />
25<br />
27<br />
30 31<br />
21 FM ant. FM wire aerial 27 MW loop antenna<br />
22 aM ant. aM loop antenna jack 28 cD compartment<br />
23 loudspeaker terminals 29 OPen/ClOSe (open / close cD compartment)<br />
24 line in jack (connect external devices) 30 loudspeaker<br />
25 On OFF power switch 31 loudspeaker cover<br />
26 aC~ power chord<br />
<strong>JGC</strong>-<strong>MS</strong>-<strong>203</strong>-01.indb 28 6/3/09 9:44:01 AM
Remote Control<br />
53<br />
52<br />
51<br />
50<br />
49<br />
48<br />
32 33 34 35<br />
47<br />
36<br />
37<br />
38<br />
39<br />
40<br />
41<br />
42<br />
43<br />
44<br />
45<br />
46<br />
COntROl eleMentS<br />
32 StandBY/On StandBY/On button<br />
(standby mode / on)<br />
33 id3/MO./St. id3/MO./St. button<br />
34 Infrared lED<br />
35 Band Band button<br />
(FM / aM switch)<br />
36 FunCtiOn FunCtiOn button (select<br />
operating mode)<br />
37 stop button<br />
38 playback, pause<br />
39<br />
40<br />
SKiP/tune<br />
SeaRCh<br />
SKiP/tune<br />
SeaRCh<br />
fast backward; previous track;<br />
search station backwards<br />
fast forward; next track; search<br />
station forwards<br />
41<br />
backwards (stored station /<br />
PReSet/FOldeR select folder)<br />
42<br />
forwards (stored station /select<br />
PReSet/FOldeR folder)<br />
43 RePeat RePeat button<br />
44 RandOM RandOM button (random<br />
playback)<br />
45 vOluMe + vOluMe+ button<br />
46 vOluMe - vOluMe– button<br />
47 battery compartment (back<br />
side)<br />
48 Mute<br />
Mute button<br />
49 eQ eQ button (sound<br />
characteristic)<br />
50 intRO intRO button (play track intro)<br />
51 SleeP SleeP button (sleep function)<br />
52 MeM/C-adJ. MeM/C-adJ. button<br />
(programme storage number/<br />
store station; adjust clock)<br />
53 tiMeR tiMeR button (autom. switch<br />
on/off)<br />
<strong>JGC</strong>-<strong>MS</strong>-<strong>203</strong>-01.indb 29 6/3/09 9:44:01 AM<br />
29<br />
enGliSh
enGliSh<br />
30<br />
PRePaRatiOn<br />
intended use<br />
• the intended use of this HiFi system includes the playback of audio- and MP3/WMa-cDs, radio, USB flash<br />
devices, memory cards (SD/MMc) with MP3/WMa files and external sources. the appliance is only intended<br />
for domestic and private use. never use the appliance outdoors!<br />
unpacking and checking<br />
• Remove all packaging and check the appliance for transport damage.<br />
• Do not use the appliance if it is damaged in any way. Bring it back to the dealer immediately.<br />
• check if the delivery is complete.<br />
• If possible, keep the packing until the end of the warranty.<br />
• Ensure that air is free to circulate through the product. Your appliance has ventilation holes, which should<br />
never be obstructed. Keep a distance of 10cm at least.<br />
• Open the cD compartment (28) and remove the transport protection.<br />
Remote control<br />
•<br />
•<br />
•<br />
•<br />
•<br />
•<br />
Remove the plastic tab from the battery compartment (47) at the rear of the remote control. Pull it gently.<br />
Replace a used battery.<br />
Open the battery compartment and insert one battery of the type<br />
cR <strong>203</strong>2 (Fig.1).<br />
Pay attention to the correct polarity (+/-) in accordance with the<br />
markings.<br />
close the battery compartment. Make sure that the cover is<br />
locked in place.<br />
also read the safety instructions for handling batteries (see<br />
Fig. 1<br />
chapter Important safety instructions).<br />
loudspeaker<br />
•<br />
•<br />
connect the grey and black cables of the left and right loudspeaker with the according grey and black<br />
loudspeaker terminals (23) on the back side of the appliance.<br />
the loudspeakers have a loudspeaker cover (31). Place the cover on the loudspeaker or use the<br />
loudspeakers without covers.<br />
antenna<br />
• the appliance has two antennas – a wire aerial (21) for FM and a loop antenna (27) for aM. Unroll the FM<br />
wire aerial and stretch it into the direction with the best reception.<br />
• Do not unroll the MW loop antenna. Bend the plastic part in the middle and attach it at the bottom side of<br />
the antenna. connect the plug with the designated aM ant. jack (22) on the appliance and position the<br />
antenna.<br />
<strong>JGC</strong>-<strong>MS</strong>-<strong>203</strong>-01.indb 30 6/3/09 9:44:01 AM
notes for remote control<br />
BaSiC FunCtiOnS<br />
• Make sure that there are no objects between the remote control infrared lED (34) and the infrared sensor<br />
(6) on the appliance.<br />
• Please note that bright sunlight or room lighting may interfere with the remote control operation. If the<br />
remote is not operating properly try reducing the brightness of the room or moving closer to the main<br />
appliance. If this does not solve the problem, replace the remote control battery.<br />
• the buttons on the remote control are consistent to the buttons on the appliance. all main functions can be<br />
operated by remote control.<br />
• the following functions are made by the remote control unless indicated otherwise.<br />
Switching the appliance on / off<br />
• connect the power plug to a suitable wall outlet.<br />
• Switch on the appliance with the power switch (25) on the back side. the appliance is in standby mode and<br />
the StandBY indicator (7) lights up red. the clock digits will flash on the lcD display (3) as the time is not<br />
set.<br />
• Press the StandBY/On button (8) to switch on the appliance. Press the button again to set the appliance to<br />
standby mode.<br />
• Use the power switch on the back side to switch off the standby power consumption.<br />
• Pull the power plug out of the wall outlet to completely disconnect the appliance from the mains supply.<br />
notes:<br />
• If audio files are not played and no button is pressed in cD, USB or caRD mode, the appliance will<br />
automatically switch to standby mode after 15 minutes.<br />
• the appliance heats up if it is operated for a long period of time. this is normal and not a malfunction of the<br />
appliance.<br />
Selecting the operation mode<br />
• Press the FunCtiOn button (36) to select one of the following operation modes.<br />
display explanation<br />
CD Playback audio files from cD (e.g. audio-cD, MP3/WMa-cD).<br />
USB Playback MP3/WMa files from USB flash memory.<br />
CARD Playback MP3/WMa files from SD/MMc memory card.<br />
AUX Playback external audio sources (connected to line in jack).<br />
TUNER Radio operation<br />
<strong>JGC</strong>-<strong>MS</strong>-<strong>203</strong>-01.indb 31 6/3/09 9:44:01 AM<br />
31<br />
enGliSh
enGliSh<br />
32<br />
BaSiC FunCtiOnS<br />
automatic switch off<br />
• this system provides a timer function. You can set the appliance to switch off automatically after a period of<br />
90 to 10 minutes.<br />
• During operation press repeatedly the SleeP button (51) to reduce the time in 10 minutes increments.<br />
adjust the remaining time to switch-off.<br />
• after a few seconds the normal display appears and additionally an icon is displayed:<br />
notes:<br />
• You still can switch off the appliance with the StandBY/On button (8) before the switch off time has<br />
elapsed.<br />
• If you use the automatic switch off time in cD mode it might be possible that the cD is played to the end<br />
before the automatic switch off. For example if the switch off time is set to 90 minutes and the cD play time<br />
is 45 minutes the cD playback ends before the set switch off time.<br />
Set the time<br />
• after the power plug is connected to a wall outlet --:-- is flashing in the lcD display (3).<br />
• the time can only be set in standby mode.<br />
• Press and hold the MeM/C-adJ. button (52).the display shows 24 HOUR.<br />
• Press (39) or (40) to select 24 or 12 hour time format. confirm your selection with the MeM/C-<br />
•<br />
adJ. button.<br />
the hour digits will flash. Press (39) or (40) to set the hour and confirm with the MeM/C-adJ.<br />
•<br />
button. Set the minutes in the same way.<br />
after setting and saving the minute digits the time is displayed and the appliance will switch to standby<br />
mode (without backlight).<br />
notes:<br />
• If no button is pressed within 10 seconds, the time setting function ends and the display will switch to<br />
standby mode.<br />
• If you pull the power plug or switch off the appliance with the power switch (25), the time settings will be<br />
cleared. Set the time again.<br />
<strong>JGC</strong>-<strong>MS</strong>-<strong>203</strong>-01.indb 32 6/3/09 9:44:01 AM
Set timer<br />
BaSiC FunCtiOnS<br />
• You can set a time at which the appliance will switch on or off and playback radio, cD or another audio<br />
source (USB flash memory, SD/MMc card).<br />
• the switch-on/off time can be set while the appliance is switched on or in standby mode.<br />
• Press the tiMeR button (53) to set the switch-on time. the<br />
display (3) shows ON and 00:00 (Fig. 2).<br />
• adjust the hour digits with (39) or (40) and confirm<br />
•<br />
with the tiMeR button.<br />
Set the minutes in the same way and confirm with the tiMeR<br />
button.<br />
Fig. 2<br />
• the display shows OFF and 00:00 (Fig. 3).<br />
• Set the switch-off time (hours, minutes) as described above.<br />
• after pressing the tiMeR button TUNER will flash on the<br />
display. Select with (39) or<br />
source (TUNER, CD, USB, CARD).<br />
(40) the desired audio<br />
Fig. 3<br />
• confirm your selection with the tiMeR button.<br />
• Set the volume with (39) or (40) and confirm your selection with the tiMeR button.<br />
• the lcD display shows all settings again as running text. then it switches to the normal display and<br />
additionally the clock icon is displayed:<br />
• If you press the tiMeR button again the timer function will be switched off.<br />
notes:<br />
• If ERROR is displayed after the switch-off time setting, the time input is not correct (switch-on time same as<br />
switch-off time). after a few seconds you can input the switch-off time again (as described in paragraph Set<br />
time).<br />
• If no button is pressed within 10 seconds, the set timer function automatically ends.<br />
<strong>JGC</strong>-<strong>MS</strong>-<strong>203</strong>-01.indb 33 6/3/09 9:44:02 AM<br />
33<br />
enGliSh
enGliSh<br />
34<br />
audiO SettinGS, COnneCtiOnS<br />
volume<br />
• Adjust the desired volume with the buttons vOluMe+ (45) or vOluMe– (46). You can also adjust the<br />
volume by turning the volume control (16) on the appliance.<br />
• The volume level is shown on the LCD display (3), e.g. VOL 11. Small numbers represent a low volume, large<br />
numbers represent a higher volume. Moreover VOLUME is displayed together with the volume level indicator.<br />
• The appliance stores the set volume in standby mode. When pulling the plug all volume settings will be<br />
deleted. after the power plug is reinserted, the volume level is set to level 15.<br />
• warning: Extreme high volume leads to permanent hearing damage<br />
Mute sound<br />
• Press the Mute button (48) to mute the sound.<br />
• the volume level indicator is flashing on the display (Fig. 4).<br />
• Press the Mute button again to switch on the sound.<br />
• You can also press the buttons vOluMe+ (45) or<br />
vOluMe– (46) to switch on the sound.<br />
equalizer – adjust sound characteristic<br />
Fig. 4<br />
• the equalizer provides different sound effects for different music styles in boosting low, medium, and high<br />
sound frequencies.<br />
• Press repeatedly the eQ button (49) to switch to the desired sound effect. the effects will be displayed in<br />
following order: PASS, CLASSIC, ROCK, POP, JAZZ.<br />
• PASS indicates that the equalizer function is switched off.<br />
• the selected setting is briefly shown on the lcD display.<br />
Connections<br />
headphones<br />
• there is a headphones jack (13) suitable for 3.5mm plugs on the appliance’s front side.<br />
uSB flash memory<br />
• connect your USB flash memory to the USB jack (2) on the appliance’s front side.<br />
Sd/MMC memory card<br />
• connect your memory card to the memory card slot (1) on the appliance’s front side.<br />
external audio sources<br />
• connect an external audio source (with lInE OUt jack) to the line in jack (24) on the appliance’s back side.<br />
Use a suitable cable with a 3.5mm stereo jacks (not included).<br />
• Select the operation mode AUX with the FunCtiOn button (36).<br />
• adjust the volume with the buttons vOluMe+ (45) or vOluMe– (46).<br />
<strong>JGC</strong>-<strong>MS</strong>-<strong>203</strong>-01.indb 34 6/3/09 9:44:02 AM
RadiO<br />
• Press the FunCtiOn button (36) until TUNER appears on the lcD display (3). the appliance is set to radio<br />
operation.<br />
• Press the Band button (35) to switch between FM and aM bands.<br />
• Switch between Mono and Stereo reception by pressing the id3/MO./St. button (33). Only FM stations are<br />
broadcasted in Stereo. the display shows a symbol to indicate an FM stereo signal.<br />
• If the FM Stereo reception is noisy or weak switch to Mono reception to increase the quality of the radio<br />
reception.<br />
tuning<br />
• Manual tuning<br />
Repeatedly press the buttons (39) or (40) until the display shows the exact frequency of the desired<br />
•<br />
station. Use the manual tuning method to tune to weak or distant stations that are not strong enough to be<br />
recognized by the automatic tuning system.<br />
automatic tuning<br />
Press and hold the buttons (39) or (40) until the display begins to move. then release the buttons.<br />
the tuner will search for the next strong station signal. Repeat this procedure until the tuner stops at your<br />
desired station. Press buttons (39) or (40) again to end the automatic tuning.<br />
Saving stations<br />
• Save up to 40 stations into the memory. there are 30 memory stations for the FM band and 10 memory<br />
stations for the aM band available.<br />
• choose a station by using either the manual tuning or automatic tuning method.<br />
• Press the MeM/C-adJ. button (52). the storage place number flashes. Moreover the word MEMORY is<br />
displayed.<br />
• Select the desired storage place number with the buttons (41) or (42).<br />
• Press the MeM/C-adJ. button again to confirm the storage place number and the station. the station is<br />
stored if the number stops flashing.<br />
• Store other stations in the same way.<br />
• after you have stored several stations you can select them by pressing the buttons<br />
repeatedly.<br />
(41) or (42)<br />
• to erase one memory station, simply store another station into the memory on the same storage place<br />
number. the previously stored station will be deleted.<br />
• You can delete all stored stations. In standby mode press and hold the button (38). the lcD display and<br />
the StandBY indicator (7) will flash once. then release the button .<br />
note:<br />
• the stored stations will not be deleted if you switch off the appliance with the power switch (25) or if you pull<br />
the power plug.<br />
• If no button is pressed within 10 seconds, the station saving function ends.<br />
<strong>JGC</strong>-<strong>MS</strong>-<strong>203</strong>-01.indb 35 6/3/09 9:44:02 AM<br />
35<br />
enGliSh
enGliSh<br />
36<br />
Cd PlaYeR<br />
• You can use a normal audio cD or a data cD (cD-R, cD-RW) with MP3/WMa files. While an audio cD<br />
contains up to 80 minutes music, a MP3/WMa cD can contain 12 hours and more.<br />
• this appliance supports the cD formats of audio cD, writable cD-R and cD-RW with MP3/WMa files.<br />
• the appliance supports the playback of writable cDs. the playback quality may depend on the recording<br />
quality and on the quality of the disc. Playback cannot be guaranteed in all situations. this is not a<br />
malfunction.<br />
inserting and removing a Cd<br />
• Open the cD compartment (28) with OPen/ClOSe (29) on the<br />
appliance’s top side. the display (3) shows OPEN (Fig. 5).<br />
• Put the cD with the printed side facing upwards into the cD<br />
compartment. Press down in the centre part of the cD until it<br />
Fig. 5<br />
locks onto the centre spindle.<br />
• lower the cD door downwards and close it. the cD is now ready to be played.<br />
• Before opening the cD compartment always ensure the cD is not rotating. always press the stop button (37)<br />
to stop a rotating cD.<br />
• Remove the cD by placing one finger at the middle of cD (centre spindle) and the other at the edge of the<br />
cD. Gently pull the cD upwards.<br />
notes:<br />
• Remove the cD from the compartment only when the cD compartment is completely open.<br />
• Do not insert more than one cD at the same time into the cD compartment.<br />
• Do not insert any other objects than cDs into the cD compartment.<br />
• never touch the lens.<br />
• Subjecting the appliance to shock or vibrations can cause it to skip cD tracks.<br />
• a high volume can cause skipping of tracks due to vibration.<br />
• Ensure that the cD compartment is closed unless changing the cD.<br />
• Do never open the cD compartment if a cD is played or if the cD is still rotating.<br />
Playing a Cd<br />
• choose the cD mode. Press the FunCtiOn button (36) repeatedly until CD is displayed.<br />
• Insert a cD and close the cD compartment (28). the display shows READING.<br />
• If no cD is inserted into the cD compartment or no cD is recognized, the display shows NO DISC.<br />
• Press (38) to start playback.<br />
• Press (38) again to pause playback. the time flashes in<br />
•<br />
the display (Fig. 6).<br />
Press the stop button (37) to stop playback.<br />
Fig. 6<br />
<strong>JGC</strong>-<strong>MS</strong>-<strong>203</strong>-01.indb 36 6/3/09 9:44:02 AM
track search, fast forward and fast backward<br />
Cd PlaYeR<br />
• Press (40) to go to the beginning of the next track.<br />
• Press (39) to go to the beginning of the currently played track. Press button twice to go to the beginning<br />
•<br />
of the previous track.<br />
If you press and hold these buttons the playback speed will increase. as soon as you release these buttons<br />
the playback will resume to normal speed.<br />
Random playback<br />
• Press the RandOM button (44) to playback all tracks in random order. the display (3) shows RANDOM.<br />
• End the function by pressing the RandOM button again.<br />
track intro<br />
• You can play all cD tracks in a row for 10 seconds each.<br />
• In stop mode, press the intRO button (50) to switch the function on. the display shows INTRO. the first<br />
track on the cD will start playing.<br />
• If you press the intRO button during playback the appliance will start playing the track intro of the currently<br />
played track.<br />
• Press the intRO button again to stop the function.<br />
Repeat function<br />
• Set this function during track playback or while in stop mode.<br />
• Press the RePeat button (43) once to repeat the current track. the display shows REPEAT.<br />
• Press the RePeat button twice to repeat the whole cD. the display shows REPEAT ALL.<br />
• Press the RePeat button three times to switch the function off.<br />
Programming Cd tracks<br />
• Programme the cD player to play a user-defined playlist of up to 32 tracks (for audio cD). Press the stop<br />
button (37) before starting to programme tracks.<br />
• Press the MeM/C-adJ. button (52) to switch to programme<br />
mode. the display shows MEMORY and the storage place<br />
number P--01. the track number 00 flashes (Fig. 7).<br />
Fig. 7<br />
• choose a track with (39) or (40) and confirm the selection with the MeM/C-adJ. button.<br />
• the display shows the next storage place number. Repeat above steps to programme more tracks.<br />
• Press (38) to start the programmed playback.<br />
• Press the stop button (37) to end the programmed playback. <strong>Start</strong> the programme playback again by<br />
pressing (38).<br />
• Press the stop button (37) to delete the programme. the programme will also be deleted if you open the lid<br />
of the cD compartment, press the FunCtiOn button (36) or the StandBY/On button (32).<br />
<strong>JGC</strong>-<strong>MS</strong>-<strong>203</strong>-01.indb 37 6/3/09 9:44:03 AM<br />
37<br />
enGliSh
enGliSh<br />
38<br />
Cd PlaYeR<br />
notes:<br />
• the repeat function can be combined with playing a programme. Refer to paragraph Repeat function.<br />
• If no button is pressed within 10 seconds, the track programming ends.<br />
Playback MP3/wMa-Cd<br />
• the following paragraph describes the differences in MP3/WMa-cD playback.<br />
• as MP3/WMa cDs contain more tracks than normal cDs this cD player will take longer to read the table of<br />
contents information. the lcD display (3) shows the number of directories (album) and the number of tracks.<br />
the appliance can read maximum 99 directories and 990 tracks.<br />
• Depending on the file format MP3 or WMa is displayed (Fig. 8).<br />
• If there are folders on the MP3/WMa-cD, use (41) or (42)<br />
to select the previous or next folder.<br />
Fig. 8<br />
Repeat function<br />
• there are three options when playback a MP3/WMa-cDs.<br />
• Press the RePeat button (43) once to repeat the current track. the display shows REPEAT.<br />
• Press the RePeat button twice to repeat the whole cD. the display shows REPEAT ALL.<br />
• Press the RePeat button three times to repeat the current album. the display shows REPEAT ALBUM.<br />
• Press the RePeat button four times to switch the function off.<br />
display id3 tag information<br />
• ID3 is a format to save information about the music into the same file (so called meta data). this could be:<br />
title, artist, album, year and any comment.<br />
• Press id3/MO./St. button (33) to switch on this function. ID3 ON is displayed. If the information is properly<br />
saved into the audio file the display shows a text in this order: title, artist and album.<br />
• If the information is missing NO ID3 is displayed.<br />
• Press the id3/MO./St. button to switch off the function. ID3 OFF is displayed.<br />
<strong>JGC</strong>-<strong>MS</strong>-<strong>203</strong>-01.indb 38 6/3/09 9:44:03 AM
Programming Cd tracks<br />
Cd PlaYeR<br />
• Programme the cD player to play a user-defined playlist of up to 64 tracks (for MP3/WMa files). Press the<br />
stop button (37) before starting to programme tracks.<br />
• Press the MeM/C-adJ. button (52) to switch to programme<br />
mode. the display shows MEMORY and the storage place<br />
number P--01. the track number 00 flashes (Fig. 9).<br />
• choose the folder with (41) or (42) and confirm your<br />
selection with the MeM/C-adJ. button.<br />
Fig. 9<br />
• the track number 00 flashes in the display (Fig. 10).<br />
• choose a track with (39) or (40) and confirm your<br />
•<br />
selection with the MeM/C-adJ. button.<br />
the display shows the next storage place number. Repeat<br />
above steps to programme more tracks.<br />
Fig. 10<br />
• Press (38) to start the programmed playback.<br />
• Press the stop button (37) to end the programmed playback. <strong>Start</strong> the programme playback again by<br />
pressing (38).<br />
• Press the stop button (37) to delete the programme. the programme will also be deleted if you open the lid<br />
of the cD compartment, press the FunCtiOn button (36) or the StandBY/On button (32).<br />
notes:<br />
• the repeat function can be combined with playing a programme. Refer to paragraph Repeat function.<br />
• If no button is pressed within 10 seconds, the track programming ends.<br />
<strong>JGC</strong>-<strong>MS</strong>-<strong>203</strong>-01.indb 39 6/3/09 9:44:03 AM<br />
39<br />
enGliSh
enGliSh<br />
40<br />
uSB FlaSh MeMORY and Sd/MMC MeMORY CaRd<br />
• Ensure that the appliance is set to standby mode. Insert the USB flash memory carefully into the USB jack<br />
(2), and the SD/MMc memory card into the memory card slot (1).<br />
• Switch on the appliance by pressing the StandBY/On button (8).<br />
• Press the FunCtiOn button (36) to select the operation mode USB for USB flash memory or CARD for<br />
memory cards.<br />
• the functions for MP3/WMa-cD also apply to USB flash memory and memory cards. For more information<br />
please refer to chapter CD Player.<br />
• Do never disconnect the USB flash memory or the SD/MMc memory card while a track is playing. always<br />
use the stop button (37) to end the track playback.<br />
• choose another operation mode or switch off the appliance completely before removing the USB flash<br />
memory or the SD/MMc card from the jack. In this way you avoid damaging the USB flash memory, the SD/<br />
MMc card or files.<br />
notes:<br />
• the USB jack (2) supports USB 1.1 and 2.0.<br />
• the appliance supports USB flash memory and SD/MMc memory card with a capacity up to 2 GB.<br />
• the appliance can only playback MP3 or WMa audio files (without DRM).<br />
• Due to changing It technology, this appliance may not be compatible with some USB or SD/MMc flash<br />
storage devices.<br />
• Do not use USB extension cables to connect your USB flash drive to the USB jack. Interference may affect<br />
the music playback. In extreme cases it may damage the USB flash memory.<br />
<strong>JGC</strong>-<strong>MS</strong>-<strong>203</strong>-01.indb 40 6/3/09 9:44:03 AM
Compact disc<br />
•<br />
•<br />
•<br />
•<br />
•<br />
Fig. 11<br />
CleaninG and CaRe<br />
Fingerprints and dust should be carefully wiped off the disc’s recorded surface with a soft cloth. Wipe in a<br />
straight line from the centre to the outside of the disc (never circular).<br />
clean the disc periodically with a soft, lint-free, dry cloth. never use detergents or abrasive cleaners to clean<br />
the disc.<br />
never write on or affix labels to the surface of cDs.<br />
Protect cDs from dust and scratches. always store them in their cases when they are not in use.<br />
to remove a cD from its storage case, press down on the centre of the case and lift the cD carefully out.<br />
Hold the cD by the edges only.<br />
Cleaning the casing<br />
• Pull the plug out of the wall outlet before every cleaning.<br />
• If casing becomes dusty wipe it off with a soft dry cloth.<br />
• Do not use a wet sponge, wax, polish sprays or abrasive cleaners.<br />
• Caution: never allow any water or other liquids to get inside the appliance while cleaning. If it does happen,<br />
unplug the appliance from the mains supply and let it completely dry before you try to operate it again. Do<br />
not put the appliance into an oven or a microwave oven for drying.<br />
<strong>JGC</strong>-<strong>MS</strong>-<strong>203</strong>-01.indb 41 6/3/09 9:44:03 AM<br />
41<br />
enGliSh
enGliSh<br />
42<br />
tROuBleShOOtinG<br />
If a fault occurs, first check the points listed below before taking the appliance for repair or sending it to the<br />
service centre. the address and phone number are shown on the warranty card. Do not open the casing as there<br />
is a risk of electric shock. Under no circumstances should you try to repair the set yourself, as this will invalidate<br />
the warranty. Pay attention to the warranty<br />
Problem Possible cause Solution<br />
no sound. volume is set too low. Set the volume higher.<br />
no display, no reaction<br />
to pushed buttons.<br />
Power cord is not properly plugged in. Plug in the power cord.<br />
Mute function is activated. Press the Mute button (48) or set<br />
a volume.<br />
Power switched off. Switch on the appliance with the<br />
power switch.<br />
Electrostatic discharge Switch off and disconnect<br />
appliance from the power supply.<br />
connect the power plug again.<br />
the cD skips tracks. cD damaged or dirty. clean or replace cD.<br />
Playback in programme mode. End programme mode.<br />
NO DISC is displayed. there is no cD in the cD tray. Insert a cD.<br />
cD playback does not<br />
work.<br />
USB/ memory card<br />
malfunction.<br />
cD badly scratched or dirty. clean or replace cD.<br />
laser lens is dirty or has steamed up. clean the lens. leave the appliance<br />
in a dry room for 1-2 hours to allow<br />
condensation to evaporate.<br />
cD-R is blank or the disc is not “finalized”. Use a finalized cD-R.<br />
cD badly scratched or dirty. clean or replace cD.<br />
laser lens is dirty or has steamed up. clean the lens. leave the appliance<br />
in a dry room for 1-2 hours to allow<br />
condensation to evaporate.<br />
connecting error Disconnect the memory card/USB<br />
and reinsert them.<br />
the files are not compatible. Use a memory card / USB device<br />
containing MP3 or WMa files.<br />
<strong>JGC</strong>-<strong>MS</strong>-<strong>203</strong>-01.indb 42 6/3/09 9:44:03 AM
Power supply 230-240 v~, 50 Hz<br />
Remote control cR<strong>203</strong>2 battery (battery included)<br />
Power consumption 15.6 W<br />
laser type class 1<br />
loudspeaker 2 x 8W loudspeaker<br />
dimensions<br />
appliance 180 (B) x 105 (H) x 220 (t) mm<br />
loudspeaker 100 (B) x 183(H) x 182 (t) mm<br />
Radio<br />
FM 87.5 - 108 MHz<br />
aM 522 - 1620 kHz<br />
teChniCal data<br />
Disc drive for 8cm and 12cm diameter; only circular, no special forms<br />
Disc compatibility cD audio, cD-R, cD-RW<br />
Memory compatibility USB 1.1, USB 2.0, SD/MMc memory card<br />
Supported memory size Max. 2GB<br />
Manufactured for JGc-company GmbH<br />
Heckhofweg 146<br />
50739 Köln<br />
customer Service <strong>E2</strong> <strong>Servicecenter</strong> GmbH<br />
Max-Planck-Strasse 13<br />
50858 Köln-Marsdorf<br />
telephone 01805- 22 17 84<br />
Monday - Friday 10:00 – 18:00 (EUR 14 /min. from the German landline; mobile rates might differ)<br />
Please enter here the serial number of<br />
your appliance<br />
<strong>JGC</strong>-<strong>MS</strong>-<strong>203</strong>-01.indb 43 6/3/09 9:44:03 AM<br />
43<br />
enGliSh
enGliSh<br />
44<br />
waRRantY<br />
Customer info<br />
Manufacturer‘s warranty<br />
We are pleased that you decided purchasing a product of our house and wish you a lot of fun and joy<br />
with this high quality product. Our strict production control ensures the high quality of our equipment.<br />
In case you still have a legitimate complaint, we provide a warranty for the duration of<br />
3 Years<br />
from the date of purchase to the following conditions:<br />
this warranty declaration does not limit your statutory warranty rights as a consumer against the<br />
seller of the device. Our warranty is only valid for the private use of the device and is limited to the<br />
territory of the Federal Republic of Germany.<br />
the warranty period is 3 years from date of purchase.<br />
at the discretion of <strong>JGC</strong>, the device will be repaired or replaced or defective parts are replaced. Other<br />
claims are excluded.<br />
If you have questions about <strong>JGC</strong> products, save yourself the time-consuming way to the retailer<br />
and turn directly to our service hotline or our Service center. a team of highly qualified product<br />
consultants and technicians is available to you Monday through Friday from 10am - 6pm.<br />
Service-telephone:<br />
O18O5 / 22 17 84 ( 0,14 per Min)<br />
e 2 <strong>Servicecenter</strong> Gmbh,<br />
Max-Planck-Strasse 13,<br />
50858 Köln-Marsdorf<br />
www.e2service.de<br />
If you send in your device add a brief description of your complaint to support the rapid settlement.<br />
Send your device without exception only to our authorized service partners and please use the<br />
enclosed return label. Should the return label be missing, please contact the above Service hotline.<br />
CautiOn: we don’t accept not prepaid items.<br />
<strong>JGC</strong>-<strong>MS</strong>-<strong>203</strong>-01.indb 44 6/3/09 9:44:03 AM<br />
important document! PleaSe Retain with PROOF OF PuRChaSe FOR 3 YeaRS
Customer info<br />
Manufacturer‘s warranty<br />
waRRantY<br />
to effect a warranty repair our service partner needs Proof of purchase, either as an original invoice<br />
from the dealer or the cash-register printed document. Furthermore, the serial number must be<br />
legible on the appliance. Without Proof of purchase unfortunately, we can not guarantee free services.<br />
We recommend that you keep the original packaging in order to ensure a safe transportation of the<br />
equipment.<br />
Warranty repairs may be performed only by the <strong>E2</strong> <strong>Servicecenter</strong> GmbH or from their authorized<br />
subcontractors or partners.<br />
For other repairs all warranty becomes null and void and no reimbursement is possible.<br />
no warranty is provided for:<br />
improper treatment<br />
mechanical damage to the enclosure<br />
damage during transport<br />
wear and tear<br />
for improper and inappropriate use<br />
for installation of the device in damp rooms or outdoors<br />
for damages caused by force majeure, wars, water, lightning, over voltage and other cases for<br />
which <strong>JGC</strong> is not responsible<br />
in case of excessive use, especially when other than private use<br />
disregarding the instruction manual and installation errors<br />
if the device has no technical defect<br />
for transport and travel cost, as well as setting up and dismantling costs<br />
the warranty does not cover any further liability on our part, particularly not for damages which are<br />
not on the device itself or those costs caused by the absence of the device until the return of the<br />
repaired or replaced appliance (e.g. transport costs, handling costs, etc.).<br />
However, our legal liability, especially according to the Product liability act, is not limited or excluded.<br />
<strong>JGC</strong> is also not responsible for loss of Phonograms (cD, DvD, etc) and additional equipment (acadaptors,<br />
speakers, etc.) as a result of equipment sent in for repair.<br />
Our repairs do not extend the warranty period of 3 years not even with regard to possibly exchanged<br />
components.<br />
have fun with your new device and hope that your next product is again a<br />
<strong>JGC</strong> product.<br />
<strong>JGC</strong>-<strong>MS</strong>-<strong>203</strong>-01.indb 45 6/3/09 9:44:03 AM<br />
important document! PleaSe Retain with PROOF OF PuRChaSe FOR 3 YeaRS<br />
45<br />
enGliSh