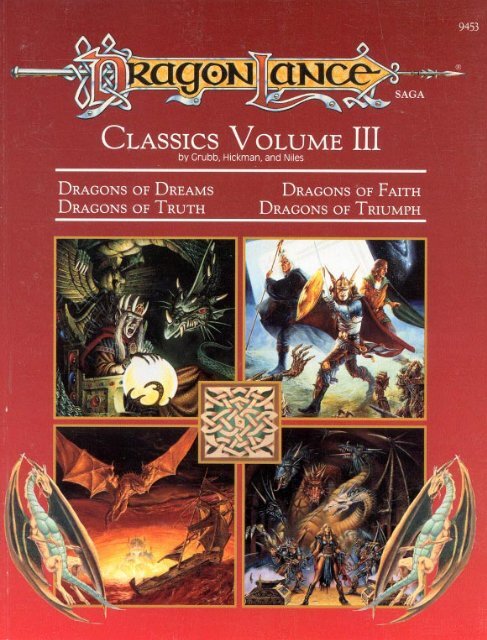
DRAGONLANCE® Classics, Volume 3 - Free
DRAGONLANCE® Classics, Volume 3 - Free
DRAGONLANCE® Classics, Volume 3 - Free

You also want an ePaper? Increase the reach of your titles
YUMPU automatically turns print PDFs into web optimized ePapers that Google loves.
Official Game Adventure<br />
<strong>DRAGONLANCE®</strong> <strong>Classics</strong>,<br />
<strong>Volume</strong> 3<br />
Table of Contents<br />
Prologue . . . . . . . . . . . . . . . . . . . . . . . . . . . . . . . . . . . . . . . . . . . . . . . . . . . . . . . . . . . . . . . . . . . . . . . . . . . . . . . . . . . . . . . . . . . . . 3.<br />
Wherein the tale is told and the story expounded thus far.<br />
The Fall of Silvanesti . . . . . . . . . . . . . . . . . . . . . . . . . . . . . . . . . . . . . . . . . . . . . . . . . . . . . . . . . . . . . . . . . . . . . . . . . . . . . .4<br />
Wherein is recounted the fall of the mighty elven lands through the fears of one king.<br />
Chapter 1: Griffon’s Flight . . . . . . . . . . . . . . . . . . . . . . . . . . . . . . . . . . . . . . . . . . . . . . . . . . . . . . . . . . . . . . . . . . . . . . . .5<br />
Wherein the Heroes of Legend are pursued across the great southern plains.<br />
Chapter 2: The Bleeding Forest . . . . . . . . . . . . . . . . . . . . . . . . . . . . . . . . . . . . . . . . . . . . . . . . . . . . . . . . . . . . . . .10<br />
Wherein beauty twists upon itself and nightmare tendrils reach.<br />
Chapter 3: Hollow Glory . . . . . . . . . . . . . . . . . . . . . . . . . . . . . . . . . . . . . . . . . . . . . . . . . . . . . . . . . . . . . . . . . . . . . . . . .18<br />
Wherein the streets of the most ancient elven capital flood with the unwaking dream.<br />
Chapter 4: The Web of Shadow & Night . . . . . . . . . . . . . . . . . . . . . . . . . . . . . . . . . . . . . . . . . . . . . . . . . . . . .22<br />
Wherein is found the Tower of Stars, from which the nightmare is spun.<br />
Epilogue . . . . . . . . . . . . . . . . . . . . . . . . . . . . . . . . . . . . . . . . . . . . . . . . . . . . . . . . . . . . . . . . . . . . . . . . . . . . . . . . . . . . . . . . . . . . 27 .<br />
Wherein the truth awakens at last, and the acts performed in the fear of night are<br />
accounted for in the waking morn.<br />
Interlude . . . . . . . . . . . . . . . . . . . . . . . . . . . . . . . . . . . . . . . . . . . . . . . . . . . . . . . . . . . . . . . . . . . . . . . . . . . . . . . . . . . . . . . . . . . 28 .<br />
Wherein the next step of the adventure is introduced.<br />
Chapter 5: The Prophecy . . . . . . . . . . . . . . . . . . . . . . . . . . . . . . . . . . . . . . . . . . . . . . . . . . . . . . . . . . . . . . . . . . . . . . . .29<br />
Wherein the Heroes’ journey through enemy lands is described.<br />
Chapter 6: Flotsam . . . . . . . . . . . . . . . . . . . . . . . . . . . . . . . . . . . . . . . . . . . . . . . . . . . . . . . . . . . . . . . . . . . . . . . . . . . . . . .37<br />
Wherein a ship is sought but fate is met.<br />
Chapter 7: The Blood Sea of Istar . . . . . . . . . . . . . . . . . . . . . . . . . . . . . . . . . . . . . . . . . . . . . . . . . . . . . . . . . . . .43<br />
Wherein the Heroes venture out upon the Haunted Sea to confront their destiny.<br />
Chapter 8: Istar of the Deep . . . . . . . . . . . . . . . . . . . . . . . . . . . . . . . . . . . . . . . . . . . . . . . . . . . . . . . . . . . . . . . . . . .50<br />
Wherein the wonders and horror of ancient lstar are revealed.<br />
Chapter 9: Friends in Need . . . . . . . . . . . . . . . . . . . . . . . . . . . . . . . . . . . . . . . . . . . . . . . . . . . . . . . . . . . . . . . . . . . . .55<br />
Wherein old friends and allies are captured by their foes.<br />
Chapter 10: A Hidden Refuge . . . . . . . . . . . . . . . . . . . . . . . . . . . . . . . . . . . . . . . . . . . . . . . . . . . . . . . . . . . . . . . . . .57<br />
Wherein the Heroes must overcome despair and deceit to capture the key to victory.<br />
1
Credits<br />
Epilogue . . . . . . . . . . . . . . . . . . . . . . . . . . . . . . . . . . . . . . . . . . . . . . . . . . . . . . . . . . . . . . . . . . . . . . . . . . . . . . . . . . . . . . . . . . . . .60<br />
Wherein there is a sad parting with old friends and new, and the dawning of a new<br />
day.<br />
Interlude . . . . . . . . . . . . . . . . . . . . . . . . . . . . . . . . . . . . . . . . . . . . . . . . . . . . . . . . . . . . . . . . . . . . . . . . . . . . . . . . . . . . . . . . . . . .61<br />
Wherein the next step of the adventure is introduced.<br />
Events: An Overview of the Tale . . . . . . . . . . . . . . . . . . . . . . . . . . . . . . . . . . . . . . . . . . . . . . . . . . . . . . . . . . . . . .62<br />
Wherein the timed Events of the adventure are described.<br />
Chapter 11: Land of Dark Empires . . . . . . . . . . . . . . . . . . . . . . . . . . . . . . . . . . . . . . . . . . . . . . . . . . . . . . . . . . .66<br />
Wherein the adventurers set out across the desolation of the occupied lands and begin<br />
their quest to penetrate the heart of the Dragon Empire.<br />
Chapter 12: Dark Passages . . . . . . . . . . . . . . . . . . . . . . . . . . . . . . . . . . . . . . . . . . . . . . . . . . . . . . . . . . . . . . . . . . . .73<br />
Wherein secret ways may offer passage beyond the defenses of the Dark Queen...if<br />
the passage can be survived.<br />
Chapter 13: Glitterpalace . . . . . . . . . . . . . . . . . . . . . . . . . . . . . . . . . . . . . . . . . . . . . . . . . . . . . . . . . . . . . . . . . . . . . . .76<br />
Wherein the gods test the character of the Heroes. Their choices may affect the fate of<br />
the world to come.<br />
Epilogue: The Gates of Darkness . . . . . . . . . . . . . . . . . . . . . . . . . . . . . . . . . . . . . . . . . . . . . . . . . . . . . . . . . . . . .85<br />
Wherein the Heroes find the city before them and the fate of Krynn in their hands.<br />
Interlude . . . . . . . . . . . . . . . . . . . . . . . . . . . . . . . . . . . . . . . . . . . . . . . . . . . . . . . . . . . . . . . . . . . . . . . . . . . . . . . . . . . . . . . . . . . 86 .<br />
Wherein the final step of the adventure is introduced.<br />
Events: An Overview of the Tale . . . . . . . . . . . . . . . . . . . . . . . . . . . . . . . . . . . . . . . . . . . . . . . . . . . . . . . . . . . . . .87<br />
Wherein the timed Events of the adventure are described.<br />
Chapter 14: The Neraka Plains . . . . . . . . . . . . . . . . . . . . . . . . . . . . . . . . . . . . . . . . . . . . . . . . . . . . . . . . . . . . . . . .92<br />
Wherein a shattered land of fire and smoke separates the Heroes from their goal.<br />
Chapter 15: Neraka . . . . . . . . . . . . . . . . . . . . . . . . . . . . . . . . . . . . . . . . . . . . . . . . . . . . . . . . . . . . . . . . . . . . . . . . . . . . . .96<br />
Wherein the Dragonarmies gather in the city, preparing for the arrival of their queen.<br />
Chapter 16: The Temple of Darkness . . . . . . . . . . . . . . . . . . . . . . . . . . . . . . . . . . . . . . . . . . . . . . . . . . . . . .103<br />
Wherein the Highlords gather for ceremony, competing for dominance at the right<br />
hand of Takhisis, Queen of Darkness. The stage is set.<br />
Epilogue . . . . . . . . . . . . . . . . . . . . . . . . . . . . . . . . . . . . . . . . . . . . . . . . . . . . . . . . . . . . . . . . . . . . . . . . . . . . . . . . . . . . . . . . . . .108<br />
Wherein the Heroes’ long quest reaches its conclusion.<br />
Appendix . . . . . . . . . . . . . . . . . . . . . . . . . . . . . . . . . . . . . . . . . . . . . . . . . . . . . . . . . . . . . . . . . . . . . . . . . . . . . . . . . . . . . . . . . .110<br />
Wherein are given the supplements to the tale-rumors, game clocks, random<br />
encounters, magical items, monster descriptions, NPCs, PC cards.<br />
Editor: Mike Breault<br />
Original Design: Tracy Hickman, Harold Johnson, Bruce Heard, and<br />
Douglas Niles<br />
Cover Art: Clyde Caldwell and Jeff Easley<br />
Interior Art: Diana Magnuson, George Barr<br />
Cartography: David Sutherland, David LaForce, Steven Sullivan<br />
Typography: Angelika Lokotz<br />
Keylining: Paul Hanchette<br />
The <strong>DRAGONLANCE®</strong> Series Design Team<br />
Tracy Hickman, Series Concept<br />
Harold Johnson, Director of Design<br />
Margaret Weis; Douglas Niles; Jeff Grubb; Linda Baak; Larry Elmore;<br />
Mike Breault; Bruce Nesmith; Michael Dobson; Garry Spiegle; Carl<br />
Smith; Laura Hickman; Roger Moore<br />
2<br />
Random House and its affiliate companies have worldwide distribution<br />
rights in the book trade for English-language products of TSR, Inc. Distributed<br />
to the book and hobby trade in the United Kingdom by TSR Ltd.<br />
Distributed to the toy and hobby trade by regional distributors.<br />
ADVANCED DUNGEONS & DRAGONS, AD&D, DUNGEON MASTER,<br />
and DRAGONLANCE are registered trademarks owned by TSR, Inc.<br />
The TSR logo is a trademark owned by TSR, Inc. All TSR characters,<br />
character names, and the distinctive likenesses thereof are trademarks<br />
owned by TSR, Inc.<br />
This adventure is protected under the copyright laws of the United<br />
States of America. Any reproduction or other unauthorized use of the<br />
material or artwork contained herein is prohibited without the express<br />
written permission of TSR, Inc.<br />
©1994 TSR, Inc. All Rights Reserved. Printed in U.S.A.<br />
Permission granted to photocopy or<br />
print this product for personal use.
Notes for the Dungeon Master<br />
DLC3 is the third, and final, compilation of the<br />
original <strong>DRAGONLANCE®</strong> modules. This volume<br />
contains the newly revised adventures first<br />
published as DL10 (“Dragons of Dreams”),<br />
DL12 (“Dragons of Faith”), DL13 (“Dragons of<br />
Truth”), and DL14 (“Dragons of Triumph”).<br />
DL11 is not included here, as it is a war game<br />
simulation of the DRAGONLANCE series.<br />
In DL6, “Dragons of Ice,” the original party<br />
of heroes was separated into two groups during<br />
the destruction of the city of Tarsis. Laurana,<br />
Sturm, Flint, Tasslehoff, and others fled<br />
south, then traveled northward. They left<br />
behind their friends, not knowing if they were<br />
dead or alive. DL6 through DL9 detailed the<br />
adventures of these heroes.<br />
This adventure starts out following the<br />
group of heroes left behind in Tarsis—Tanis,<br />
Caramon, Raistlin, Tika, Goldmoon, and<br />
Riverwind. It begins as they flee from Tarsis.<br />
About two-thirds of the way through this volume,<br />
the two groups of PCs are reunited to<br />
face the final battles.<br />
All DRAGONLANCE adventures attempt to<br />
recreate the conditions of the novels with the<br />
player characters cast in the roles of the<br />
epic’s heroes. Thus, it is recommended that<br />
the adventures be played using the player<br />
characters provided (in the “PCs” section of<br />
the Appendix). If players wish to use their<br />
own characters, however, allow them to do<br />
so.<br />
Obscure Death<br />
In the DRAGONLANCE epic, some NPC<br />
heroes and villains figure prominently in later<br />
adventures. If such “Name” characters as<br />
Fizban or Kitiara, for example, should be<br />
slain, invoke the “obscure death” rule. This<br />
rule states that the circumstances surrounding<br />
the death of an important character should<br />
be confused and the body not recovered.<br />
Later, the hero or villain can reappear, usually<br />
with a story of how he or she was miraculously<br />
saved.<br />
This is true of NPCs only. The obscure<br />
death rule does not apply to player characters.<br />
If a PC dies in this or later adventures—<br />
say good- bye!<br />
Events and Encounters<br />
Each chapter in DLC3 begins by listing several<br />
Events that occur at the times indicated,<br />
regardless of the actions of the PCs. Events<br />
are governed primarily by time.<br />
Following the Events comes the listing of<br />
Encounters, each representing areas the PCs<br />
can visit. Encounters are governed primarily<br />
by location. An Encounter occurs only if the<br />
PCs enter the appropriate area.<br />
For both Events and Encounters, the text<br />
enclosed in boxes should be read aloud to the<br />
players.<br />
Ability Checks<br />
Occasionally, an Ability Check is called for<br />
against one of the character’s abilities:<br />
Strength, Wisdom, Dexterity, etc. Roll 1d20. If<br />
the number rolled is less than or equal to the<br />
ability, the action succeeds; if greater than the<br />
ability, the action fails.<br />
The Novels<br />
Some of your players might have read the<br />
DRAGONLANCE novels. Reading the novels<br />
will not take the mystery and excitement out of<br />
your adventure; the information related in the<br />
books is similar, but by no means identical, to<br />
the events and encounters in this module.<br />
Indeed, players who assume the adventure<br />
modules to be exactly the same as the story<br />
might soon find themselves in trouble! The<br />
adventure attempts to re-create the conditions<br />
surrounding the story, while leaving the<br />
decision-making and role-playing up to the<br />
players. Do not feel obligated to have the<br />
adventure turn out the same way it did in the<br />
novels. Allow your game to have its own feeling<br />
and texture.<br />
Remember that the DRAGONLANCE story<br />
is a complex saga. To run it well, read the<br />
adventure carefully, anticipate your player’s<br />
actions, and think of ways to motivate players<br />
to stay within the boundaries given in this volume.<br />
Let the players explore the setting—do<br />
not lead them around by the nose. Instead,<br />
try to draw them in the direction desired by<br />
using tantalizing information. Do not be afraid<br />
to improvise to make the adventure more<br />
enjoyable for the players.<br />
3<br />
The World of Krynn<br />
There are several important differences<br />
between the world of Krynn and the standard<br />
AD&D® 2nd Edition campaign. New players<br />
should be made aware of this information.<br />
True clerics have been unknown on Krynn<br />
since the Cataclysm, a mighty catastrophe<br />
that changed the face of Krynn. Most clerics<br />
have no spellcasting abilities, since they worship<br />
false gods. True clerics of good, including<br />
Goldmoon and Elistan, wear a medallion<br />
bearing the symbol of their god or goddess.<br />
Only two of the true gods of good have so far<br />
been revealed—Mishakal, goddess of healing,<br />
and Paladine, leader of good, the Celestial<br />
Paladin. All PC clerics brought into the campaign<br />
must follow one of these two faiths.<br />
All PC elves here are Qualinesti elves.<br />
All PC dwarves are hill dwarves.<br />
The equivalent of halflings on Krynn are<br />
kender. Kender resemble wizened 14-yearolds.<br />
The values of gold and other trade items<br />
are completely different in this world than in<br />
familiar campaigns. Steel is the main trade<br />
metal, and 10 gold pieces are worth only one<br />
steel piece. PCs who enter Krynn from other<br />
campaigns can trade their gold pieces for<br />
steel.<br />
Finally, dragons had been absent from<br />
Krynn for nearly 1,000 years and have only<br />
recently returned as conquerors. The only<br />
dragons most people have seen are red,<br />
green, black, blue, and white dragons-all<br />
creatures of evil. Stories exist that once there<br />
were dragons of good-copper, bronze, brass,<br />
silver, and gold. Only the PCs have met some<br />
of these good dragons.<br />
A Note to the DM New to the<br />
DRAGONLANCE Series<br />
Even if you have never played any of the<br />
other adventures in the DRAGONLANCE<br />
series, you can still start out with the adventures<br />
contained in this volume. Options in the<br />
first chapter are provided that give you and<br />
your players some knowledge of the history<br />
and events in the story to date.<br />
Time: Because events are linked to time, it<br />
is important that you keep a record of the day<br />
and time of day. You may choose the time at<br />
which an event occurs, unless a specific time<br />
is listed in the text.
Wherein the most ancient kingdom of elves<br />
met its doom.<br />
Review of the Elven Chronicle<br />
Note to the DM: This section reviews the<br />
background history of elves. If you are already<br />
familiar with this information, proceed to the<br />
section titled “The Tragedy of Lorac.”<br />
It is said that, after the All-Saint’s War, the<br />
gods of Krynn peopled the world with the<br />
races of elves, men, and ogres. The elves<br />
were favored by the gods of good and were<br />
granted a long span of life and great powers.<br />
The elven races are collectively called Colinesti,<br />
“people of the morning,” in the ancient<br />
texts. The races are now more commonly<br />
known by their subracial names: the ancient<br />
Silvanesti, the outcast Qualinesti, the wild<br />
Kagonesti.<br />
The eldest of the established subraces is<br />
the Silvanesti. Theirs was the first race to<br />
emerge from the Age of Dreams as a unified<br />
civilization. They take their name from their<br />
first leader, Silvanos.<br />
The Silvanesti have endured for over 3,000<br />
years, surviving wars with dragonkind as well<br />
as the Kinslayer War against humans. The Silvanesti<br />
have become firmly set in their ways<br />
and traditions.<br />
The Silvanesti are a fair-skinned race. Their<br />
eyes are blue or brown, and their hair color<br />
ranges from light brown to blonde to white.<br />
They prefer wearing loose garments, flowing<br />
robes, and capes.<br />
In lifestyle, the Silvanesti differ greatly from<br />
their brethren. Long years in a safe empire<br />
has stratified the various crafts into a rigid<br />
system of castes, or houses. At the top of the<br />
system is House Royal, the descendants of<br />
Silvanos, who rule the land. Beneath them is<br />
House Cleric, once a religious order, but now<br />
mainly concerned with the keeping of records<br />
and lore.<br />
Beneath these two Houses are those of the<br />
craftsmen and guilds. The House Protector<br />
(the Wildrunners) serves as the army of the<br />
Silvanesti.<br />
The Qualinesti, or “Western Elves,” are elves<br />
originally from the western edges of Silvanesti.<br />
The enmity between the two races is strong.<br />
In the days of the ancient Dragon Wars, the<br />
western borders of Silvanesti were under<br />
assault from the forces of the Dragonarmies.<br />
The elves of western Silvanesti excelled in<br />
battle. Many were members of the Wildrunners,<br />
and cross-class war training prevented<br />
the stratification that typified Silvanesti life in<br />
the interior of the nation.<br />
Relations between the western provinces<br />
and the central Houses deteriorated until, with<br />
the issuing of the Swordsheath Scroll, the<br />
western elves were granted independence.<br />
The Qualinesti founded their own realm hundreds<br />
of miles to the west of ancient Silvanesti.<br />
After they left, the Gardeners of Silvanost<br />
grew the Hedge, a region of dense underbrush,<br />
to prevent western invaders from entering<br />
their lands.<br />
The Tragedy of Lorac<br />
Excerpted from the DRAGONLANCE Chronicles,<br />
<strong>Volume</strong> Two, “Dragons of Winter Night.”<br />
The Creation of the Dragon Orbs<br />
During the Age of Dreams, when wizards<br />
were respected and revered upon Krynn,<br />
there were five Towers of High Sorcery. These<br />
Towers were centers of learning and of power<br />
for the mages of Krynn. Here were housed<br />
great libraries of spell books and magical artifacts.<br />
Here all mages desiring to rise to higher<br />
levels came to take the grueling Tests.<br />
Here, also, the mages came together to<br />
work their greatest magic. Toward the end of<br />
the Second Dragon War, when the world itself<br />
seemed doomed, the highest of the mages of<br />
all three Orders (good, neutral, and evil) met<br />
together in the Tower of Palanthas and created<br />
five Dragon Orbs to help defeat the<br />
dragons. All but one of the orbs were taken<br />
from Palanthas and carried to each of the<br />
other four Towers.<br />
As Istar rose during the Age of Might to<br />
greater and greater glory, the Kingpriest of<br />
lstar and his clerics became increasingly jealous<br />
of the power of the mages. As times grew<br />
more and more evil, the priests placed the<br />
blame for the evil upon wizards. The Towers<br />
of High Sorcery became natural targets. Mobs<br />
attacked the Towers. For only the second<br />
time in their history, the wizards of all the<br />
Orders came together to defend the last bastions<br />
of their strength.<br />
When it became clear that the battle was<br />
hopeless, the wizards themselves destroyed<br />
two of the Towers. The blasts devastated the<br />
countryside for miles around. Only three Towers<br />
remained—the Tower of Istar, the Tower of<br />
4<br />
Palanthas, and the Tower of Wayreth.<br />
The terrible destruction frightened the Kingpriest.<br />
He granted the wizards passage from<br />
the Towers of lstar and Palanthas if they<br />
would leave the Towers undamaged.<br />
Before the Tower at lstar was abandoned,<br />
an elf named Lorac Caladon arrived at the<br />
Tower to take the Tests. During the Test the<br />
Dragon Orb spoke to Lorac’s mind. The orb<br />
foresaw a dreadful calamity. You must not<br />
leave me here in Istar, the orb told him. If so, I<br />
will perish and the world will be lost.<br />
Lorac took the orb away with him, hidden in<br />
a small bag. Some might say that this great<br />
lord of the elves stole the orb. He maintained,<br />
however, that he was rescuing it. The Towers<br />
were abandoned. The mages fled to the Tower<br />
at Wayreth. All knowledge of the Dragon Orbs<br />
perished during the wars against the mages,<br />
which became known as the Lost Battles.<br />
Lorac kept the orb hidden in Silvanesti.<br />
Then came the Cataclysm. The Silvanesti<br />
elves survived it far better than others in the<br />
world. The Silvanesti heard tales of the suffering<br />
of others, particularly of their cousins, the<br />
Qualinesti. There were some among the Silvanesti<br />
who said they should go to the aid of<br />
their brethren.<br />
But Lorac, their ruler, refused. After all, he<br />
told his people, what did they expect, living<br />
as they did among humans? Many agreed<br />
with Lorac, and the Silvanesti withdrew into<br />
their forest. None passed their borders for<br />
centuries.<br />
Then a new evil arose. Dragon Highlords<br />
sent emissaries to Lorac, promising to leave<br />
Silvanesti untouched if he promised to leave<br />
them alone in turn. Lorac agreed. He had<br />
lived in the world long enough to expect<br />
treachery, however.<br />
Thus, when the Dragonarmies attacked Silvanesti,<br />
the elves were prepared. Lorac<br />
ordered his people to sail to safety. Then he<br />
descended to the chambers beneath the<br />
Tower of the Stars where he had secreted the<br />
Dragon Orb.<br />
Lorac knew, even as he rested his fingers<br />
on the globe, that he had made a terrible<br />
mistake. He had neither the strength nor the<br />
control to command the magic. But, by then,<br />
it was too late. The orb had captured him<br />
and held him enthralled.<br />
And now, it is the most hideous part of his<br />
nightmare—to know that he is dreaming, yet<br />
unable to break free.
The major portion of this adventure deals with<br />
the elf king, Lorac, Speaker of the Stars, who<br />
is being held prisoner by a Dragon Orb and by<br />
the green dragon, Cyan Bloodbane. Cyan has<br />
been whispering nightmares into Lorac’s<br />
mind. These nightmares have become reality<br />
for the once-beautiful kingdom of Silvanesti.<br />
At the beginning of DL6, the heroes were<br />
under siege in the city of Tarsis, which was<br />
being attacked by the Dragonarmies. It was<br />
here in Tarsis that the party of heroes was<br />
split.<br />
Chapter One offers you several options for<br />
running the companions’ journey from Tarsis<br />
to the Nightmare Borders of Silvanesti.<br />
If You Have Never Played a<br />
DRAGONLANCE Adventure Before:<br />
Read the Game Start boxed text to your<br />
players, followed by the Quick Start boxed<br />
text. Then proceed to Encounter 8 of this<br />
chapter and begin the game.<br />
If You Have Played DL6,<br />
You Have Two Choices:<br />
1. You can use the Quick Start narrative<br />
text to describe the companion’s journey<br />
across the Plains of Dust. This option allows<br />
you to go right to the heart of the adventure.<br />
2. You can run the Wilderness Adventure.<br />
Read the Adventure Start boxed text to the<br />
players and begin the adventure with Encounter<br />
1: The Fall of Tarsis.<br />
If the players are using the DRAGONLANCE<br />
series characters, give them the character<br />
cards at the back of this book.<br />
Game Start<br />
Read this section to your players if they have<br />
not played DL6. Follow this by reading the<br />
Quick Start boxed text as well.<br />
The world of Krynn teeters on the brink of<br />
chaos. First came the Cataclysm. Man’s<br />
pride called down destruction from the<br />
gods over 300 years ago. The might and<br />
the glory that was Krynn passed away in<br />
that instant. Civilization was plunged into<br />
darkness.<br />
Then came the dragons. Awakened<br />
from their millennia-long sleep, they now<br />
ravage the land under the command of<br />
Dragon Highlords, whose highly trained<br />
armies are bringing the continent of Ansa-<br />
Ion under their domination.<br />
Yet there is hope. The gods have ended<br />
their centuries-long silence. A tribal princess<br />
of the plains has restored the light<br />
5<br />
and knowledge of the true gods. The healing<br />
arts—once lost—are now known<br />
again, and a small number of true clerics<br />
walk the land. They are eager to spread<br />
the truth, yet fearful that their knowledge<br />
might perish with them in an instant.<br />
But not all bend quietly to the will of the<br />
Dragon Highlords. You are among those<br />
who have fought the tyrants with your<br />
sword and shield, your magic and prayers.<br />
Your efforts have brought you to this city,<br />
where you had hoped to gain passage<br />
over the seas. Yet this once-fabled seaport<br />
is now landlocked, the harbor destroyed<br />
by the Cataclysm. You and your<br />
companions have come to the Red Dragon<br />
Inn to determine what to do now.<br />
So far, nothing has been able to stop<br />
the advance of the Dragonarmies. There<br />
are rumors of magical weapons that might<br />
aid your cause—powerful lances that slay<br />
dragons and mystical orbs that enable the<br />
user to control the monsters. But no one<br />
knows where to find these weapons. Somewhere<br />
in this gloomy city, you must find a<br />
ray of hope.<br />
But even as you and your friends discuss<br />
your plans, Tarsis is attacked! Flights<br />
of dragons appear in the skies, draconians<br />
fill the streets.
Quick Start<br />
Read this if players have played DL6 or as a<br />
continuation of the Game Start above.<br />
Your rest in Tarsis was all too short. Outside<br />
the inn, you hear the shrill screams of<br />
dragons. The chill air is filled with the<br />
smell of burning and the cries of death.<br />
Through the windows of the Red Dragon<br />
Inn, you see draconians glide down into<br />
the streets. Then the inn itself explodes.<br />
You seem to remember falling....<br />
A bitter wind rushing into your face<br />
awakens you. You are now flying high over<br />
frost-covered plains on the backs of griffons.<br />
Leading this flight of winged creatures<br />
is the elven princess, Alhana Starbreeze.<br />
Glancing fearfully behind, you can see dark<br />
specks in the sky-pursuing dragons! Yet,<br />
even as you watch, the dragons fall far<br />
behind. Looking ahead, you see a line of<br />
trees stretching to either horizon.<br />
“The borders of my homeland,” Princess<br />
Alhana tells you. “The ancient elven<br />
kingdom of Silvanesti.”<br />
The griffons circle down among the<br />
tree-lined border. The beasts appear nervous<br />
and frightened. They allow you to<br />
dismount on an ancient elven road, then,<br />
the moment you have recovered your<br />
belongings, they leap into the air and fly<br />
to the west, leaving you in the company<br />
of Alhana Starbreeze.<br />
Adventure Start<br />
Read this if you have played DL6 and want to<br />
role-play through the trek across the Plains of<br />
Dust.<br />
You have left the refugees from Pax<br />
Tharkas in the dwarven kingdom of Thorbardin,<br />
the safest place for them until the<br />
wars are over. True safety will be achieved<br />
only when the Dragonarmies are defeated.<br />
Your purpose in coming to the port of Tarsis<br />
was to obtain passage for the refugees<br />
to a safe place far across the sea.<br />
But, in Tarsis, you find only bitter disappointment.<br />
The Cataclysm caused the sea<br />
to recede 40 miles, leaving the port city<br />
landlocked. Beached ships still lie scattered<br />
about the ancient bay.<br />
Events<br />
If using the Quick Start to begin this adventure,<br />
skip to Event 2.<br />
Event 1: Griffons of Alhana<br />
(Whenever any PC drops to 0 hp or with a “1”<br />
on 1d6 rolled each day.)<br />
A great shadow falls over you. A voice as<br />
pure and distant as the stars speaks. “I<br />
desperately need your help. You are fight-<br />
ing a losing battle. Agree to aid me, and I<br />
will save you!”<br />
Four huge griffons alight, their powerful<br />
talons striking the stone near you.<br />
Alhana and her griffons stay for 1d4+2 combat<br />
rounds before leaving again. During this<br />
time, the griffons protect the PCs while they<br />
mount. If the PCs refuse to take Alhana up on<br />
her offer, the griffons leave immediately.<br />
Event 2: Dragonwing<br />
(Check the PCs’ position daily. Ignore this<br />
event if the PCs have gone with Alhana.)<br />
Each day, the Dragon Highlord, Kitiara,<br />
launches a search for the PCs. This search<br />
begins at the PCs’ last known location. From<br />
that area, six flights of dragons take to the<br />
air-three to the east and three to the west.<br />
For each of the dragon flights, roll on the<br />
appropriate part of the table below to determine<br />
which hex that flight patrols. The directions<br />
given are from the PCs’ last known location.<br />
Each flight gets one roll for every day<br />
since the PCs were last spotted. (If it’s been<br />
three days since the PCs were last spotted,<br />
roll 1d6 three times for each flight, checking<br />
on the following table each time.) Continue<br />
rolling until either all the rolls have been<br />
made (the flights return without success) or<br />
the PCs are spotted.<br />
Dragon Search Table<br />
Eastward Dragons<br />
D6 Roll Hex Searched<br />
1-2 Northeast<br />
3-4 East<br />
5-6 Southeast<br />
Westward Dragons<br />
D6 Roll Hex Searched<br />
1-2 Northwest<br />
3-4 West<br />
5-6 Southwest<br />
If a flight of dragons enters the same hex as<br />
the PCs, there is an 80% chance that the PCs<br />
are discovered (then read the following text).<br />
On great soaring wings, the dragons wheel<br />
overhead. Their eyes glint cruelly. After a<br />
time, they turn and fly swiftly west.<br />
As referee, you can press draconian takeover<br />
of lands (see Event 3) toward the last known<br />
location of the PCs. Note that such takeover<br />
does not begin until the third day after the fall<br />
of Tarsis.<br />
Event 3: Draconians<br />
(Each day, starting on Day 4)<br />
The draconian ground forces expand their territory,<br />
occupying three large hexes on the<br />
Wilderness Map per day, thus making En-<br />
6<br />
counter Areas 2 and 3 smaller by three hexes<br />
every day and Encounter Area 7 larger. The<br />
hexes occupied must be adjacent to hexes<br />
that were occupied on the previous day, starting<br />
at the indicated arrows on the Wilderness<br />
Map. The general flow of the occupation<br />
forces should thus start from the west and<br />
move toward the east, pressing the PCs in the<br />
direction of Silvanesti. Use Encounter 7 for<br />
descriptions and options for players.<br />
Event 4: Capture Attempt<br />
(Once per day after Day 10)<br />
In the distance, you see dragons again,<br />
but this time they are coming straight for<br />
you! There seems to be no escape! Draconians<br />
with swords clenched in their<br />
teeth cling to the backs of the dragons.<br />
The draconians leap from their terrible<br />
mounts, gliding on their leathery wings<br />
down on top of you!<br />
These are 1d8+8 Kapak draconians, who<br />
attempt to capture—not kill—the party. Those<br />
captured have all their weapons taken from<br />
them, although they are required to carry<br />
their own armor, equipment, and supplies.<br />
The draconians then try to march the PCs<br />
back to Tarsis. The draconians grumble about<br />
this, since they would prefer to kill the PCs<br />
here and now, but they have strict orders to<br />
bring them back alive.<br />
Eventually Alhana tries to rescue the PCs<br />
with her griffons. The PCs should be allowed<br />
enough time to escape, but not sufficient time<br />
to regain their weapons.<br />
Encounters<br />
1. Tarsis the Beautiful<br />
You sit in the musty common room of the<br />
Red Dragon Inn—not a particularly funny<br />
name, considering what you have been<br />
through these last few months.<br />
Now this! You have traveled long miles<br />
over frost-hardened plains in search of<br />
escape from the dragon forces, only to find<br />
that the great seaport of Tarsis is landlocked!<br />
The ancient maps were wrong<br />
again. The ships of the harbor now lie<br />
frozen in mud. There is no escape this way.<br />
Several of your friends have gone into<br />
the heart of the city, having discovered<br />
knowledge of ancient and marvelous magical<br />
devices called Dragon Orbs. Now<br />
your friends are searching the ancient<br />
libraries located in Tarsis, hunting for the<br />
knowledge of where these Dragon Orbs<br />
might be found and how they can be used<br />
against the Dragonarmies.<br />
You tried asking the townspeople for<br />
help, but everyone stares at you suspiciously.<br />
You have been able to pick up<br />
some news, however.
At this point, give each of the players one of<br />
the following rumors, determined randomly:<br />
1. The elves of Silvanesti passed through<br />
this place a few years ago. There weren’t<br />
many at first, but the numbers increased.<br />
Many believe the elves were leaving their<br />
homeland.<br />
2. Since the Cataclysm, none except the<br />
elves of Silvanesti themselves dare cross the<br />
borders of that elven kingdom with hope of<br />
returning among living men.<br />
3. Dragon Orbs, fabled and magical devices<br />
of great power, still exist. One of them is<br />
located in the Ice Wall far to the south, and<br />
one is said to be located in Silvanesti.<br />
4. Dragon Orbs were said to be able to control<br />
dragons. With these devices, the war now<br />
being waged might well be won in a single<br />
blow!<br />
5. There are draconians, emissaries of the<br />
Dragon Highlords, who daily attend the city<br />
council’s meetings and advise caution and<br />
restraint.<br />
6. Alhana Starbreeze, princess of Silvanesti<br />
and daughter of the Speaker of Stars, has<br />
recently arrived here in search of aid. She is<br />
trying to hire mercenaries to mount an expedition<br />
to her homeland. The city council<br />
turned down her petition. No one has seen<br />
her since.<br />
7. The Silvanesti realms to the east were<br />
the most beautiful in Krynn. Great and marvelous<br />
was their magic and their craft.<br />
8. A gold dragon was seen flying over Silvanesti<br />
just after the elves departed. Some<br />
believe that the gold dragon lives there now.<br />
(FALSE RUMOR)<br />
9. There were many Dragonlances, but only<br />
one had the power to rid the world forever of<br />
evil. This was Huma’s Lance, which was given<br />
to the Speaker of Stars to keep.<br />
10. It is said that he who casts coins from<br />
his purse into the river the elves call Thon-<br />
Thalas will see his own future reflected in its<br />
surface.<br />
7<br />
After distributing the rumors, continue by<br />
reading the following aloud:<br />
Your musings are suddenly shattered. A<br />
distant blast of thunder shakes dust from<br />
the beams above. More explosions follow<br />
in rapid succession, each blast coming<br />
nearer to you. Hurrying to the window, you<br />
see a terrible sight. Driven wild by panic,<br />
people clog the streets. Hundreds of draconians<br />
are gliding into the courtyard beyond.<br />
Suddenly the roof above you explodes!<br />
Within two melee rounds, 1d6+4 Baaz draconians<br />
rush the door of the inn from the outside.<br />
Every five rounds thereafter, an additional<br />
2d6 Bozak draconians join them. The<br />
draconians are hindered in their attacks by<br />
the fires and chaos generated by the dragons.<br />
Therefore, they are limited to a movement of<br />
6 while still in the city.
Several (1d4+4) rounds after the PCs<br />
engage in combat, read the following boxed<br />
text aloud:<br />
Suddenly, amid the carnage, a shadow<br />
falls over you. Fearfully, you look up.<br />
Through the smoke, you see griffons spiraling<br />
down past the flights of dragons in<br />
the sky. Four of the griffons land next to<br />
you. Astride one of them sits a beautiful<br />
elven woman. Her tone is urgent.<br />
“Quickly! I can carry you to safety,<br />
unless you prefer to stay here and die!”<br />
Alhana Starbreeze has arrived with her griffons.<br />
She offers the PCs a chance to escape.<br />
She stays for 1d4+2 rounds before leaving<br />
either with or without the players.<br />
If the PCs accept Alhana’s offer, the griffons<br />
hold the draconians at bay long enough for<br />
the PCs to grab their equipment and mount<br />
the beasts. The griffons then leap into the sky<br />
and fly eastward. The griffons obey only<br />
Alhana. Go to Encounter 2A.<br />
If the PCs choose not to go with Alhana, continue<br />
as follows:<br />
The griffons depart as quickly as they<br />
came. The draconians jeer and close in<br />
battling ferociously, for now they can<br />
smell victory.<br />
The PCs must now fight their way out of the<br />
city. Use the Random Encounter Chart to<br />
determine encounters inside the city after its<br />
fall. PCs discovered by the draconians are<br />
subject to capture or summary execution by<br />
any draconian patrols. You should, of course,<br />
give the PCs a sporting chance of escape<br />
should such an unfortunate event occur.<br />
2. The Plains of Dust<br />
Your footfalls crack the brittle crust of<br />
snow that covers the plains. Here and<br />
there, brown stalks of grass quiver in the<br />
biting wind. There is little shelter to be<br />
found—and less food.<br />
Check the PCs’ provisions. It takes one full<br />
day to cross a hex on the Wilderness Map. For<br />
each day after two days that the PCs do not<br />
have food, subtract 1 point of Constitution.<br />
This loss of Constitution is temporary, and a<br />
player suffering such a loss regains 3 points of<br />
Constitution for each day he eats properly<br />
thereafter, up to his original Constitution. Any<br />
effects of such Constitution loss (i.e., hit point<br />
adjustments, system shock survival, resurrection<br />
survival, etc.) are in effect. When a character<br />
reaches a Constitution of 0, he lapses<br />
into unconsciousness and dies.<br />
Food can be obtained on the plains, but<br />
only in certain areas (see Encounter 3). Ask<br />
the PCs each day the direction in which they<br />
want to travel. Be sure to check for random<br />
encounters and any Events that might be<br />
scheduled to take place.<br />
2A. Griffon Flight<br />
(If the PCs have just left Tarsis with Alhana,<br />
use the first boxed description. Otherwise,<br />
use the second.)<br />
The griffons soar into the bone-chilling<br />
air. The wind rippling over their great<br />
wings cuts through your wrappings and<br />
into your joints.<br />
The plains beneath you seem to be an<br />
unending carpet of blowing snow. In the<br />
distance, you see smoke rising from the<br />
burning city of Tarsis. Heading toward<br />
you from its ruins are three dark specks—<br />
dragons!<br />
You climb onto the backs of the griffons.<br />
The creatures leap into the air again,<br />
barely noticing the burden that they carry.<br />
The griffons cover six hexes on the large map<br />
during one day’s flight. They cannot cover<br />
more ground during that time without rest.<br />
Any dragons following them are pressing as<br />
hard as they can to keep up, yet do not close<br />
or engage. Eventually the dragons fall behind<br />
and disappear from sight.<br />
Each night, the PCs must make camp. It<br />
takes three days to reach the borders of Silvanesti,<br />
and they camp for two nights on the<br />
way. The PCs can use this time to learn from<br />
Alhana something about the fate of her kingdom<br />
and her people. She should also use this<br />
time to convince them that a Dragon Orb and<br />
Dragonlances are in Silvanesti.<br />
For each day spent riding the griffons,<br />
mark one day off the Event Clock and move<br />
the PCs’ position six hexes nearer Silvanesti.<br />
Run appropriate Encounters during that time.<br />
The PCs should be moving toward Encounter<br />
8.<br />
The PCs can leave the griffons if they<br />
choose. Note their positions on the Wilderness<br />
Map and continue running Encounters<br />
and Events as listed.<br />
3. Plainsfruit<br />
Small bushy plants can be seen jutting<br />
from crags in the frozen plain. Thankfully,<br />
you recognize plainsfruit—an edible plant<br />
that tastes delicious when picked fresh.<br />
These plants provide nourishment, as long as<br />
the PCs eat them fresh. Those who eat them<br />
can restore 3 points to their Constitution if<br />
any points were lost due to starvation. This<br />
effect occurs only once per day.<br />
If the PCs pick the fruit and carry it off, the<br />
fruit spoils within one day. At this time, the<br />
fruit gives off a noxious odor and the taste<br />
turns foul. The only creature capable of eating<br />
the spoiled fruit is a gully dwarf!<br />
In addition, the horrible smell attracts randomly<br />
encountered monsters. Add 1 to any<br />
8<br />
random encounter checks on any day the PCs<br />
carry the rotten fruit. It takes a full day for the<br />
smell to leave the PCs’ clothing.<br />
4. River Torath<br />
Winding slowly across the great frozen<br />
plain is the River Torath. Its surface is<br />
crystal white, frozen over from the winter<br />
chill.<br />
Roll dice each time a PC crosses the river.<br />
Shake your head and tell the PC that the ice<br />
crackles under his feet but he manages to<br />
cross safely. Do this for each PC who crosses<br />
the river, then go to Encounter 2.<br />
5. King’s Road<br />
Great pillars of broken stone form a series<br />
of tremendous arches that march eastward<br />
across the plain. Looking above<br />
you, you see that the arches support some<br />
sort of huge platform, now broken and<br />
crumbling. The stone is molded, not cut,<br />
obviously elven work.<br />
This is the ancient King’s Road-an elevated<br />
highway. Once, long ago, the marvelous carriages<br />
of the Silvanesti Elves traveled here.<br />
The Cataclysm destroyed all that, however,<br />
and now all that remains is the skeleton of its<br />
glory. The road is broken and too far above<br />
the ground to be of much use, but it does<br />
serve as a guide to the ancient kingdom of<br />
Silvanesti.<br />
6. Northern Dragonwing<br />
Toward the west, you can see a cloud of<br />
snow blur the horizon. The distant sound<br />
of clashing armor and metal occasionally<br />
pierces through the wail of the chill wind.<br />
These are the armies of the Dragon Highlords,<br />
who are now moving to take over this<br />
land.<br />
Should the PCs remain in this area for over<br />
one hour, begin rolling random encounter<br />
checks every game turn. If an encounter is<br />
indicated, it is with a draconian patrol. The<br />
army is gaining on the PCs.<br />
7. Borders of the Forest<br />
(If the PCs are with Alhana, read the first<br />
boxed section. Otherwise, read the second.)<br />
To the east, a sea of green treetops can be<br />
seen in the distance, extending to the<br />
cloud-shrouded horizon. This is Silvanesti—fabled<br />
and forbidden home of<br />
the elves.<br />
Suddenly, the griffons start to descend.<br />
Within moments, you land on the edges of<br />
the great wood near where the King’s<br />
Road dropped down to enter the land.
A dark line of trees can soon be seen<br />
along the horizon. Silvanesti! According<br />
to legend, only Silvanesti elves return<br />
from beyond the wall of trees.<br />
Soon you stand staring in wonder at the<br />
dark and forbidding forest. A flicker of<br />
light and movement attracts your eye.<br />
Alhana Starbreeze steps from the woods.<br />
“What took you so long?” she asks. “Grow<br />
weary of the way? Come, we have work<br />
to do.”<br />
8. The River Thon-Thalas<br />
A great river flows slowly through the<br />
woods. Huge trees form a vast canopy high<br />
above the 100-foot-wide waterway. Silvery<br />
leaves flutter down to rest on the water’s<br />
tranquil surface. The temperature of the air<br />
is warmer than in the plains. It is, however,<br />
not a pleasant warmth. The air seems stagnant,<br />
as if spring was slowly rotting.<br />
If any elves or half-elves are present in the<br />
party, give them Rumor 10 from Encounter 1<br />
above. You should now give the rumors listed<br />
in Encounter 1 to those present, if you have<br />
not already done so.<br />
If Alhana has not already done so, she<br />
explains her reasons for needing the PCs’<br />
help. She also insists that the PCs perform the<br />
Casting of Coins into the waters before they<br />
proceed.<br />
Casting of Coins: This is a vital part of the<br />
adventure and deals with the goal and final<br />
outcome of this adventure—to free the realm<br />
from this terrible nightmare. To do this, King<br />
Lorac Caladon must either be awakened from<br />
the dream or killed.<br />
When the PCs cast coins, they are determining<br />
the means they will use to awaken<br />
Lorac.<br />
Simulate the casting of coins into the waters<br />
by having three of the players each toss one<br />
coin onto the playing surface. (The party as a<br />
group gets one toss only.) Each coin must be<br />
of a different denomination. Let the coins lie<br />
undisturbed while you read the following<br />
boxed text:<br />
In the ripples of the water below, you see<br />
withered trees bleeding from horrible<br />
cracks in their bark. Dark and loathsome<br />
creatures move in the dense and mangled<br />
brush.<br />
A twisted tower stands among the winding<br />
streets of a tortured city. Within sits<br />
the Elf King upon his throne. His mouth<br />
gapes in a silent scream. Shadows shift<br />
behind him.<br />
Reading the Coins: Heads represents “X” and<br />
tails represents “0.” Read the results from the<br />
highest denomination to the lowest and find<br />
the result in the following paragraphs. Note<br />
the action that will awaken Lorac, as given in<br />
the Epilogue, and then read the proper section<br />
of boxed text below.<br />
0 0 0—Damage by Kin<br />
(Mark goals 1, 5 & 6)<br />
A weeping elfwoman draws her sword and<br />
strikes the king He bleeds yet all around<br />
him fades into mist. The vision ends.<br />
0 0 X—Power of the Gods<br />
(Mark goals 2, 5 & 6)<br />
A woman standing before the king raises<br />
her hands. There is a blinding flash. The<br />
king falls from his throne, and the evil<br />
about him vanishes. The vision ends.<br />
0 X 0—Conscience of the King<br />
(Mark goals 3, 5 & 6)<br />
The king stirs fitfully on his throne, as<br />
though he hears voices trying to awaken<br />
him. A man in tattered robes, chained to a<br />
wall, can barely be seen in the distance.<br />
His voice cannot possibly be heard across<br />
the void, yet his words seem to reach the<br />
sleeping king. Lorac awakens with a cry,<br />
and the evil around him vanishes. The<br />
vision ends.<br />
0 X X—Love of Alhana<br />
Mark goals 4, 5 & 6)<br />
A sobbing elfwoman falls at the feet of the<br />
king. Her tears drop on his robe and her<br />
hand touches his arm with the lightness of<br />
a feather. The king screams as the world<br />
about him crumbles. The vision ends.<br />
X 0 0—Damage by Kin<br />
(Mark goals 1, 5 & 6)<br />
A sobbing elfwoman raises her weapon<br />
above the king, then strikes. Her blow<br />
causes him to bleed. He awakens, and the<br />
world dissolves around him. Suddenly ripples<br />
cross the water. A figure of light<br />
stands over the king. In a blur of motion,<br />
the king falls lifeless, and the walls crumble<br />
slowly about you. The vision ends.<br />
X 0 X—Power of the Gods<br />
(Mark goals 2, 5 & 6)<br />
A woman surrounded by light points her<br />
finger at the king. The air wavers, her light<br />
splits the darkness and awakens the king<br />
as the world about him fades. Suddenly,<br />
ripples cross the water. Beside the king is<br />
seen a glowing orb filled with both darkness<br />
and light. It falls to the floor and<br />
shatters as the hall fills with evil. The king<br />
awakens, and the evil crumbles into dawn.<br />
The vision ends.<br />
9<br />
X X 0—Conscience of the King<br />
(Mark goals 3, 5 & 6)<br />
The king stirs fitfully upon his throne as<br />
though he hears voices trying to awaken<br />
him. A man in tattered robes, chained to a<br />
wall, can barely be seen in the distance.<br />
His voice cannot possibly be heard across<br />
the void, yet his words seem to reach the<br />
sleeping king. Lorac awakens with a cry,<br />
and the evil around him vanishes. Suddenly,<br />
ripples cross the water. A figure of<br />
light stands over the king. In a blur of<br />
motion, the king falls lifeless and the walls<br />
slowly crumble about you. The vision<br />
ends.<br />
X X X—Love of Alhana<br />
(Mark goals 4, 5 & 6)<br />
A weeping elfwoman falls at the feet of<br />
the king. Her tears drop onto his robe and<br />
her hand brushes his arm, her touch light<br />
as a feather. The king screams as the<br />
world around him crumbles. Suddenly,<br />
ripples cross the water. Beside the king is<br />
seen a glowing orb filled with both darkness<br />
and light. It falls to the floor and<br />
shatters as the hall fills with evil. The king<br />
awakens, and the evil crumbles into dawn.<br />
The vision ends.<br />
9. Bridge of Dreams<br />
A great bridge of stones arches over the<br />
still waters of the Thon-Thalas. Dead<br />
leaves spin across its silent surface. Green<br />
vines hang down from the forest canopy<br />
overhead. Beyond lies a road, winding<br />
into the woods.<br />
There appears to be nothing unusual about<br />
the bridge. It can be crossed without incident.<br />
However, the moment the PCs either lose<br />
sight of the bridge or lose sight of someone<br />
who can see the bridge, they find that they<br />
have crossed into the Bleeding Forest (Chapter<br />
2, Encounter 11).
Held in thrall by the Dragon Orb and the green<br />
dragon, Cyan Bloodbane, Lorac is trapped in<br />
an unending dream. It is his nightmare that<br />
shapes the land. Cross the border, and you<br />
enter Lorac’s tortured dreams!<br />
Whenever the PCs lose sight of the Bridge<br />
of Dreams (as explained in Encounter 9),<br />
they have crossed the Borders of Sanity.<br />
Within these borders, the once beautiful land<br />
of Silvanesti has turned into a living nightmare.<br />
Directions are meaningless inside its<br />
borders. Only certain areas are still recognizable<br />
and retain their significance. These are<br />
connected by previously existing roads and<br />
paths that can still be seen in the dream. Following<br />
the paths is dangerous...leaving them<br />
is even more dangerous!<br />
Starting the Chapter: Players crossing the<br />
border enter the lands of Silvanesti at one of<br />
the Encounter 10 areas. Roll 1d6 on the<br />
Dreammap Chart when the PCs cross the<br />
border to determine where the PCs enter.<br />
Conditions in the Land: Layers of noxious<br />
green fog cover Silvanesti. The land itself<br />
seems to be in a perpetual twilight, neither<br />
daylight nor darkness. Once straight and<br />
lovely trees are now twisted into tortured<br />
shapes. Everything that lives here lives in<br />
pain.<br />
Becoming Lost: As long as the PCs can trace<br />
a line of sight back to a numbered Encounter<br />
location, they can leave the paths and roads<br />
and advance into the woods—either singly or<br />
in a group—without becoming lost.<br />
A PC is considered lost if any of the following<br />
happens:<br />
1) PCs who enter the woods and cannot<br />
trace a line of sight back to the last numbered<br />
encounter location, either by their own sight<br />
or by looking at someone who can see the<br />
last location, are lost. The length of this visual<br />
chain of reference is limited only by the number<br />
of PCs available. Note, however, that<br />
visual contact is broken when any PC moves<br />
more than 1d20+30 feet from the PC he is<br />
using as reference. Thus visual chains cannot<br />
be very long before either forcing the PCs to<br />
break visual contact with the last Encounter<br />
area or returning to it,<br />
2) If PCs attempt magical or flying movement<br />
and cannot trace a line of sight back as<br />
indicated above.<br />
10<br />
Effects of Being Lost: Whenever PCs become<br />
lost, use the following procedure:<br />
1) Roll 1d12 and multiply the result × 2.<br />
This is the number of turns the PCs must walk<br />
before they reach another road or Encounter<br />
area.<br />
2) Make the appropriate number of random<br />
encounter checks as required. Run the random<br />
encounter as described.<br />
3) Roll 1d12 on the Dreammap Chart to<br />
determine where the PCs come out of the<br />
woods.<br />
Dreammap Chart<br />
Roll Location Roll Location<br />
1 11A 7 12<br />
2 11B 8 13A<br />
3 11C 9 16A<br />
4 11D 10 15<br />
5 11E 11 14B<br />
6 11F 12 12<br />
Distances Between Encounter Locations: All<br />
distances are distorted in the dream, but the<br />
PCs do retain some perception of motion and<br />
the passing of time. Distances between loca-
tions are expressed in terms of the time it<br />
takes the PCs to wander between locations.<br />
The paths between locations all wind confusingly<br />
through the woods, making it impossible<br />
for the PCs to know which way is north<br />
until they reach their next Encounter location.<br />
It is important to note that, when running<br />
this and later sections of the adventure, the<br />
terrain being described is not the actual terrain<br />
of the area but the terrain as the PCs perceive<br />
it. The PCs might actually travel many<br />
miles in the “real world,” yet only perceive<br />
themselves moving a short distance. The<br />
PCs’ perception of time is equally distorted.<br />
They might believe that only minutes have<br />
passed when, in reality, it has been days. True<br />
perception returns to them only when they<br />
have penetrated the dream and awakened<br />
King Lorac.<br />
Effects of the Dream: There are three levels<br />
of the dream, each successive level being<br />
represented by Chapters 2, 3 and 4.<br />
The first level (Chapter 2) takes place in<br />
the forest lands surrounding the elven capital<br />
city of Silvanost. While in this area, the PCs’<br />
perceptions of space, time, and reality of<br />
things around them are distorted. To survive,<br />
the heroes must continually attempt to find<br />
out what is real and what is illusion.<br />
In the second level of the dream (Chapter<br />
3), it is now the individual PC who must<br />
attempt to distinguish between what is real<br />
and what is illusion.<br />
Finally, in the third level (Chapter 4), the<br />
PC must not only deal with the distortion of<br />
things happening to him, he must deal with<br />
the distortion of his own abilities and what he<br />
perceives about himself!<br />
Primary PCs and Illusory (Secondary) PCs:<br />
In this level of the dream (Level 1), all the<br />
characters who start this adventure as PCs<br />
are Primary PCs. Primary PCs are actually<br />
present at each Event or Encounter being<br />
described. In later levels of the dream, those<br />
PCs who are Primary in an Encounter vary.<br />
Illusory PCs are player characters who are<br />
not actually present for the Encounter but<br />
appear as life-like apparitions of the dream.<br />
In this level of the dream, Laurana, Sturm,<br />
Tasslehoff, and the other Heroes of the Lance<br />
are illusory PCs. Illusory PCs should be played<br />
by their original players.<br />
PCs will also encounter dreamwraith or<br />
dreamshadow PCs (explained more fully in<br />
Level 2 of the dream). Dreamwraith or dreamshadow<br />
PCs are designated by the symbol<br />
Due to the subconscious presence of the<br />
PCs’ minds in the dream, illusory PCs and<br />
PCs cannot be disbelieved into nonexistence.<br />
Disbelief checks against them (see<br />
below) have no effect.<br />
The Basic Rules of Disbelief: For purposes of<br />
this adventure, the following rules should be<br />
used regarding the disbelief of illusions. These<br />
rules apply for Chapters 2, 3, and 4. Always<br />
go through the disbelief procedure and make<br />
the dice rolls even if you know that the target<br />
is real. You must keep the players guessing!<br />
Disbelieving an illusion requires a period of<br />
concentration. If a player states that his PC is<br />
trying to disbelieve an illusion, follow these<br />
steps:<br />
1) Ask the player how long his PC concentrates<br />
on the suspected illusion. This should<br />
be stated in melee rounds.<br />
illusion also works, but only on an individual<br />
illusion. Each group of dreamwraiths and<br />
dreamshadows is counted as a separate illusion.<br />
Since the illusions are generated by<br />
2lst-level magic, they are nearly impossible<br />
for characters of this level to dispel.<br />
2) Determine the modifier for the check. Effects of Disbelief: An illusion that is suc-<br />
Compare the duration of concentration time cessfully disbelieved cannot harm the PC.<br />
indicated by the player to the following chart Illusions most often encountered in this<br />
to determine a concentration modifier for the adventure are illusory PCs, dreamwraiths,<br />
roll. and dreamshadows.<br />
Concentration Modifiers for Illusion<br />
Time<br />
1 round<br />
2 rounds<br />
3 rounds<br />
4-6 rounds<br />
7-9 rounds<br />
1-3 turns<br />
4-6 turns<br />
1+ hours<br />
Modifier<br />
+1<br />
+2<br />
+3<br />
+4<br />
+5<br />
+6<br />
+7<br />
+8<br />
During this period of concentration, the PC<br />
can perform no other actions. It is the unbroken<br />
period of concentration that determines<br />
the modifier. Note that the available concentration<br />
time of any PC is very limited if the<br />
illusion attacks the PC who is trying to con-<br />
centrate.<br />
A PC who has suffered damage from an<br />
illusion cannot try to disbelieve it (see “Physical<br />
Damage” below).<br />
3) Determine the Disbelief Number. Add<br />
the Intelligence of the PC to the concentration<br />
modifier, then subtract the Dream Level Modifier<br />
(see below) as well as any other modifiers<br />
you feel should apply. Add 1 for every<br />
other person present who has made a successful<br />
disbelief against the particular illusion<br />
in question. The result gives you the Disbelief<br />
Number.<br />
Dream Level Modifier Chart<br />
Dream Level Modifier<br />
1 -10<br />
2 -15<br />
3 -20<br />
4) You then secretly roll 1d20. If the result<br />
is higher than the Disbelief Number, then the<br />
PC thinks the object is real. Note: Illusory and<br />
dreamshadow PCs always fail their checks,<br />
regardless of their rolls. Only Primary PCs<br />
can successfully disbelieve.<br />
A disbelief check can be performed only<br />
once by a single character against any one<br />
illusion per hour or whenever another PC in<br />
the group makes a successful check. The illusion<br />
is either discovered by the character or<br />
else it is believed. For purposes of play, the<br />
PC who meets up with a group of draconians<br />
is allowed only one check against the entire<br />
group, not against individual draconians.<br />
Detect illusion spells do work in this dream,<br />
but they must be cast separately for the spellcaster<br />
and for each other person who is to<br />
gain the benefit of the spell’s effect. Dispel<br />
11<br />
Remember that illusory and dreamshadow<br />
PCs never succeed at a disbelief check.<br />
Physical Damage in the Dream: The actual<br />
physical damage that a PC suffers from<br />
attacks during the dream depends upon<br />
whether the creature attacking is real or illusory.<br />
Real creatures strike for real damage. The<br />
damage from these creatures is handled in<br />
the usual way.<br />
Illusory creatures strike for illusory damage.<br />
This damage at the first level of the<br />
dream is equal to 1 hit point of real damage<br />
per 4 hit points of illusory damage.<br />
Note: While in the dream, the PCs believe<br />
illusory damage to be actual and therefore<br />
drop to the ground as though lifeless after<br />
receiving what they believe to be sufficient<br />
damage.<br />
During the adventure, a PC who has<br />
received sufficient hit points of damage<br />
(either real or illusory) is dead. Only after<br />
other PCs successfully end the Nightmare of<br />
Lorac (see the Epilogue) is the illusory damage<br />
apparent for what it is. Illusory damage<br />
cannot be disbelieved after it is counted<br />
against the PC. You should keep track of real<br />
damage and illusory damage for each PC<br />
separately.<br />
Illusory Special Damage: Spells cast by illusory<br />
mages cause illusory damage (see<br />
above), unless the special attack is disbelieved<br />
before the attack in initiated. The same holds<br />
true of monsters that have special attacks,<br />
such as a dragon’s breath weapon. Thus, a<br />
fireball cast by an illusory Fizban causes the<br />
same amount of illusory damage as a real<br />
spell. An illusory cockatrice can turn a PC into<br />
illusory stone until the dream is ended.<br />
Damage to Illusory PCs: These PCs are the<br />
dreamworld manifestations of the subconscious<br />
mind of the PC. Wherever the real PC<br />
is at the time, even though a thousand miles<br />
away, his mind is drawn into the dream while<br />
he sleeps. Therefore, illusory PCs also suffer<br />
damage from the dream but on a much<br />
smaller scale than Primary PCs.<br />
The real characters of Illusory PCs receive<br />
only 1/10th of the real damage received by<br />
their illusory forms in the dream. If an illusory<br />
Laurana suffers 10 real damage points or 40<br />
illusory damage points, the real Laurana<br />
(wherever she is) suffers only 1 point of actual<br />
damage. (Remember, 4 illusory damage<br />
points equal 1 real damage point in the<br />
dream.)
Real PCs who are not Primary PCs (e.g.,<br />
Laurana, Sturm, Tasslehoff, and so on, the<br />
Heroes who are not really in this adventure)<br />
return to the dream each time they sleep until<br />
their illusions die in the dream. When this<br />
occurs, the illusory PC no longer comes back<br />
into the dream. The details of how illusory<br />
PCs enter and participate in the dreamworld<br />
should be kept secret from the players. Keep<br />
them guessing as to whether their PCs are<br />
really there and suffering damage, or not.<br />
Dreamshadows: These are described in the<br />
“Monsters” section of the Appendix. Dreamshadows<br />
take on the forms and characteristics<br />
of the creatures they represent. A dreamshadow<br />
gorgon has the statistics of a real gorgon,<br />
except that the dreamshadow gorgon<br />
inflicts illusory damage rather than real damage,<br />
and its turn-to-stone attack is also illusory<br />
(although just as debilitating until the<br />
dream ends).<br />
Dreamshadows are listed by the name of<br />
the creature they represent in the text but with<br />
a special symbol to tell you that the creature<br />
is illusory. A real gorgon in this adventure<br />
will be listed as “gorgon” while a dreamshadow<br />
gorgon will be listed as “ gorgon.”<br />
Whenever you see a monster, remember<br />
that any damage or special damage done by<br />
the illusory creature is also illusory.<br />
Events<br />
Event 5: Friend or Foe<br />
(10% chance per day; +2% cumulative chance<br />
per day spent in the dream.)<br />
This event happens with increasing frequency<br />
the longer the PCs remain in the dream. Roll<br />
1d12 on the following table to determine who<br />
is encountered in such an event.<br />
1 Laurana 7 Laurana<br />
2 Sturm 8 Sturm<br />
3 Flint 9 Flint<br />
4 Tasslehoff 10 Tasslehoff<br />
5 Gilthanas 11 Gilthanas<br />
6 Elistan 12 Elistan<br />
If an illusory PC is encountered, that PC stays<br />
with the party for as long as he can survive in<br />
the dream. Note: Creatures of the dream usually<br />
concentrate on destroying illusory PCs as<br />
quickly as possible.<br />
Each illusory PC can be seen by the players<br />
only one at a time. Thus, there cannot be two<br />
illusory Lauranas in the same party at the<br />
same time. If a roll would indicate such an<br />
occurrence, reroll. Such is not the case, however,<br />
for dreamcreatures. There can exist as<br />
many dreamcreatures in the dream as rolls<br />
would indicate. (See “Monsters” in the Appendix<br />
for the description of dreamwraiths.)<br />
Bring illusory PCs into the game in a realistic<br />
manner. At the time the encounter is rolled,<br />
the Illusory PC could be sleeping, lost and<br />
wandering, caught in a trap, a prisoner of<br />
those in the next encounter, walking toward<br />
the PCs out of a fog, searching for the PCs, or<br />
already fighting the next encounter.<br />
Event 6: Verminaard<br />
(morning of day 2)<br />
The dim light of dawn filters green through<br />
the pervading fog, outlining a huge man<br />
clad in armor and dragonhelm. His powerful<br />
muscles are drawn taut, his face is<br />
hidden beneath the hideous mask. He<br />
looks familiar.<br />
The dead Dragon Highlord Verminaard has<br />
come to the party for aid. He offers to help<br />
the party because he, too, is trapped in this<br />
great nightmare and wants only to escape.<br />
Verminaard is actually a dreamshadow<br />
emissary of the green dragon, called up from<br />
the memories of the PCs. XVerminaard will, in<br />
fact, lead them along the most direct route to<br />
the Gate of the Citadel (Encounter 19). He<br />
accompanies the party into the city as a secondary<br />
PC, only to turn on them once inside<br />
the gates. As a dreamshadow under direct<br />
control of the dragon, he can discern which of<br />
the PCs in the city are the Primary PCs in<br />
each dream and, unlike most dreamshadow<br />
enemies, he seeks to destroy them himself<br />
once inside.<br />
If the PCs attack Verminaard, he uses all<br />
of his powers to defeat them. His attacks are,<br />
however, illusory. ( Verminaard’s statistics<br />
can be found in the “NPCs” section of the<br />
Appendix).<br />
Event 7: Otherself<br />
(Evening of day 2)<br />
Shadowy forms, vaguely seen in the sickly<br />
green light of the dying day, move out of<br />
the tortured woods.<br />
These forms are horrible dreamshadow manifestations<br />
of the PCs themselves. Roll 2d4 to<br />
determine the number of dreamshadows<br />
encountered in this event. Determine randomly<br />
which dreamshadow PCs are represented.<br />
Each #PC has the face, clothing, and<br />
equipment of the real PC, but he appears to<br />
be near death from starvation and thirst. Each<br />
has 1d4 hp remaining.<br />
The PCs state that they have been fighting<br />
day and night and have gone without food or<br />
good water for weeks. When first encountered,<br />
they beg the PCs for food and water. If<br />
the PCs give them food and water, the PCs<br />
mention that a great tool for good can be<br />
found “in the Ancient Tower that holds the<br />
Woods.” The PCs give specific directions as<br />
to how to reach the Tower (Waylorn’s Tower),<br />
then they leave peacefully.<br />
If the PCs deny the PCs food or water, the<br />
PCs become enraged and attack the real<br />
PCs, claiming that the PCs are actually dream<br />
manifestations of the real characters.<br />
If Verminaard is with the party, the PCs<br />
attack him immediately. They stop their<br />
attack only if the real PCs interpose themselves<br />
between the PCs and Verminaard.<br />
12<br />
Event 8: Waylorn Dream<br />
(Night of day 2)<br />
Only one of the PCs has this dream (choose<br />
randomly). Take him (or her) aside and read<br />
the following aloud quietly:<br />
An ancient tower stands before you. It has<br />
no doors. An old man dressed in glowing<br />
robes walks in front of the tower. He first<br />
takes seven steps to the north, then seven<br />
steps to the west, then seven steps to the<br />
east, then seven more steps north. As he<br />
finishes, the entire tower splits wide open,<br />
revealing trees growing inside and a wealth<br />
of riches amid the trees.<br />
Event 9: Night of Elements<br />
(Afternoon of day 5)<br />
The greenish fog of the land swirls about<br />
you. Leaves rustle in the tortured trees.<br />
As the fog begins to lift, you see rolling<br />
black clouds overhead. Lightning lances<br />
through the thunderheads. They take on a<br />
greenish tinge and then begin to whirl<br />
about in a vortex.<br />
Air, earth, and fire elementals rise up,<br />
one after the other, to hinder the party in their<br />
journey. All these creatures have 16 Hit Dice.<br />
First, an air elemental begins to form in the<br />
darkening clouds overhead. It attacks the<br />
party. Since it is in the wilderness, it is uninhibited<br />
by height or confinement restrictions.<br />
Three rounds after the air elemental<br />
begins to form, a fire elemental tries to<br />
encircle the party with flame by setting the<br />
woods on fire. This blaze rapidly becomes an<br />
inferno fanned by the air elemental. The<br />
blaze reaches its height at about the same<br />
time the air elemental makes its full-strength<br />
attack.<br />
The fire is 1d20+4 yards across and inflicts<br />
1d8+5 points of damage per round to anyone<br />
attempting to cross it, plus any incidental<br />
damage caused as the PCs themselves catch<br />
fire, 1d4+4 points for 1d4 rounds [thereafter<br />
or until the fire is put out. This is also in addition<br />
to any attacks made by the fire elemental,<br />
but the fire elemental does not attack<br />
unless the #earth elemental is defeated.<br />
As soon as the area is ringed by fire, an<br />
earth elemental pushes up through the<br />
ground. It attacks the PCs until the air elemental<br />
makes its full-strength attack, then all<br />
of the elementals subside and retreat, leaving<br />
behind burning embers in the charred<br />
woods.
Event 10: Cyan Sky<br />
(Evening of day 10)<br />
You hear a terrible sound approaching<br />
through the dim green mists. It is the<br />
sound of creaking tendons and huge,<br />
leathery wings. Fear closes a cold hand<br />
around your heart. The horrible sounds<br />
grow louder and louder. Frantically, you<br />
stare up into the treetops, but the mist<br />
obscures everything. Suddenly, a great<br />
darkness forms amid the greenish fog<br />
above.<br />
Cyan Bloodbane, the green dragon of Silvanesti,<br />
decides that it is time he dealt with<br />
these characters directly. His purpose is not to<br />
kill the party, but to inflict damage and slow<br />
them down. Cyan plans for the dreamwraiths<br />
and dreamshadows to trap the PCs in his<br />
dream. He does not use his breath weapon,<br />
but he does cast spells. Cyan’s damage and<br />
attacks are for full damage. He prefers to<br />
attack the PCs from the air. This keeps him<br />
out of reach of the party’s melee weapons.<br />
Event 11: The Brood<br />
(Chance of encounter: 30% + 5% per day after<br />
day 6.)<br />
The greenish fog swirling on the ground<br />
begins to take substance and form! Only<br />
the flash of wet scales or the dim red<br />
glimmer of eyes can be seen as several<br />
creatures crawl quickly beneath the fog<br />
cover toward you.<br />
There are 1d6 dragonbrood per day (i.e.<br />
1d6 on day 7, 2d6 on day 8, etc.). They are<br />
the nightmare creations of Cyan Bloodbane,<br />
who has sent them out to hunt down the PCs.<br />
13<br />
The dragonbrood do not cross rivers or<br />
enter the water. They do not pass the gates of<br />
the city. (See the Combined Monster Statistics<br />
Chart on the cover for their stats.)<br />
Encounters<br />
10. The Winding Road<br />
Dead and brittle thistle vines cross the<br />
road in a tangled pattern. Black leaves<br />
rustle along the roadway that twists and<br />
turns among black and bleeding trees. A<br />
green, noxious light penetrates the fog<br />
overhead, and green fog writhes in layers<br />
on the ground. You can see only a few<br />
yards. The road twists out of sight in either<br />
direction.<br />
The sap oozing from the bark of the trees has<br />
the consistency and appearance of blood.
This is a real condition for these trees, not<br />
illusory. The trees have been shaped by<br />
Lorac’s twisted vision.<br />
These areas are clear and have no set<br />
encounters with monsters. PCs can find rest<br />
here, though they should beware of wandering<br />
creatures.<br />
11. The Bleeding Forest<br />
Note: Several of the Encounter 11 location<br />
points on the Dreammap have letters following<br />
their numbers (e.g., 1 la, 11 b, etc.). These<br />
are used with the Dreammap Chart in determining<br />
where PCs can find the road after<br />
becoming lost, as well as where the PCs first<br />
enter the wood.<br />
All around you are the trees of fabled Silvanesti—hideously<br />
changed. The soul of<br />
every tree appears to be trapped in torment,<br />
imprisoned within the trunk. The<br />
twisted branches of the tree are the limbs<br />
of its spirit, contorted in agony. The grasping<br />
roots claw the ground in hopeless<br />
attempts to flee. The sap of the living tree<br />
flows from huge gashes in the trunk. The<br />
rustling of its leaves is a cry of pain and<br />
terror. The trees of Silvanesti weep blood.<br />
Should the PCs become lost in this wood (see<br />
the earlier “Becoming Lost” section for<br />
details), they might have several random<br />
encounters before they return to the road or<br />
any other set Encounter location. Following<br />
are guidelines for some of the encounters that<br />
the PCs might have while lost in this wood.<br />
Feel free to improvise.<br />
• Dryad: Any encountered dryads are<br />
essentially the same as those detailed in<br />
Encounter 14.<br />
• Elf, Siivanesti: These are most often seen<br />
at a distance. The elves moving through the<br />
forest carry lanterns that look a great deal<br />
like the light of a will-o-wisp. If encountered,<br />
there is a 90% chance that the PCs see the<br />
elves this way first as opposed to stumbling<br />
upon the elves’ hidden encampment in the<br />
forest. If the PCs follow the lights, they are led<br />
to the elves’ encampment within 1d6 turns.<br />
These elves are essentially the same as<br />
those in Encounter 13.<br />
• Groaning Spirit: These are the spirits of<br />
the elven clerics who remained behind in the<br />
mistaken belief that they could gain true<br />
power from the Dragonarmies. Their spirits<br />
are condemned by Cyan to patrol the land,<br />
bringing death to any who now move among<br />
the dream.<br />
• Kech: These creatures were once friends<br />
of the elves. Now, because of the constant<br />
torture of the dream, they have become savage,<br />
attacking all with a ravenous vengeance.<br />
• Will-o-Wisp: These lights dance through<br />
the forest. They lead the PCs to the nearest<br />
deadly Encounter.<br />
12. Tower of Shalost<br />
The tortured wood suddenly ends at the<br />
edge of a huge clearing. This clearing is<br />
not filled with the green fog that covers<br />
the rest of the land. Instead, wild flowers<br />
grow amid tall green grass covering the<br />
hill in the clearing’s center. A great,<br />
strange-looking tower stands atop the<br />
hill. The only ornamentation is the battlement<br />
that runs around the top. The main<br />
tower rises 200 feet into the air, then a<br />
second, thinner tower extends upward an<br />
additional 30 feet. It is capped by a crystal<br />
cone. The base of the tower is 100 feet<br />
across.<br />
There is a feeling of peace here, although<br />
tracks through the glade indicate<br />
that the dark creatures of the surrounding<br />
wood do wander here.<br />
This is the tower that holds the great druid<br />
Waylorn Wyvernsbane. Waylorn was put to<br />
sleep in a magical grove here over a thousand<br />
years ago at the beginning of the Age of<br />
Might. This was, of course, long before the<br />
Cataclysm that changed the face of the world.<br />
The elves, fearing Waylorn might still escape<br />
and cause trouble for them, built the tower<br />
around the grove.<br />
The outside of the tower is smooth. On the<br />
far side of the tower from where the PCs first<br />
enter the glade, a stone ladder is cut into the<br />
outer wall. The ladder leads up to the parapet<br />
at 12A. This can be climbed easily by any of<br />
the PCs, but they must climb single file.<br />
Climbing the exterior of the tower itself<br />
requires a thief using his climb walls ability<br />
(with a check every 10 feet). There are no<br />
windows in the tower. There appears to be<br />
some sort of clear crystal capping the structure.<br />
There are no ground entrances to this tower.<br />
The stone itself is 80% magic resistant.<br />
12A. Top of the Tower<br />
From the walkway that encircles the top<br />
of the tower, you look out over the surrounding<br />
forest. Noxious green mists<br />
hang over the forest; they seem to darken<br />
toward the east. Gray clouds fill the sky.<br />
Peering east through the mists and the<br />
clouds, you can barely make out the dark<br />
outlines of the city of Silvanost—and the<br />
palace of King Lorac.<br />
Looking down at the floor of the tower,<br />
you see that there is a five-foot-diameter<br />
opening in the stone tile at each of the<br />
four compass points. Each of these openings<br />
is sealed by a silver-steel door. There<br />
are no handles. To all appearances, the<br />
door can be opened only by operating<br />
some mechanism that slides the door<br />
back into the stone floor. The only decoration<br />
on the doors are elvish letters. The<br />
letters are identical on each door.<br />
14<br />
The smaller tower rises to a height of 30<br />
feet. It is capped by a crystal dome. There<br />
is no door into this small tower. However,<br />
there is a series of steel rings attached at<br />
eight points around the smaller tower,<br />
about four feet off the floor.<br />
If the players read the elvish inscription, they<br />
find the following, written in ancient Common:<br />
T’ward the Lands of Knighthood<br />
T’ward the Sunset Elves<br />
T’ward the Sunrise Land of Balif<br />
Back to Where lstar Delves<br />
Turn the Tower Round About<br />
Open Doorways Long Held Shut<br />
Pass Them Right and Me You’ll Meet<br />
Else the Baser Natures Greet
First Combination<br />
The only access down into the main tower is<br />
through a large, combination-lock type mechanism<br />
that runs from this level—Level 12A—<br />
down through floors 12B, 12C, 12D and 12E<br />
(see the diagram of the tower).<br />
The central, smaller tower rotates easily.<br />
The large rings that surround the tower serve<br />
as handholds. The referee should roll an Intelligence<br />
Check for anyone who does anything<br />
with the rings. Success means that the PC has<br />
discovered that the tower rotates.<br />
When the tower is rotated, it turns a steel<br />
plate in the floor. The plate has a square<br />
opening cut into it that is exactly the same<br />
shape and size as the compass-point silversteel<br />
doors the PCs see on the floor.<br />
Rotating the central tower turns the steel<br />
plate so that either the northern, southern,<br />
eastern, or western door in the upper floor<br />
opens. The opening in the plate is normally<br />
stationed between two of the openings in the<br />
upper floor, thus all four openings appear<br />
closed.<br />
This locking device is, of course, trapped.<br />
The traps can be deactivated only by dialing<br />
the correct opening on each level. On Level<br />
12A, for example, the opening in the plate<br />
must be turned so that it appears under the<br />
northern door. If it appears under any other<br />
door, the trap is activated (see “Trap,” Level<br />
12B). Roll 1d4 to randomly determine which<br />
door opens first, with 1 = N and 2 = E, etc.<br />
If the opening appears under any door but<br />
the northern one, and the PCs go through that<br />
door, the trap is sprung. The PCs can deactivate<br />
the trap by continuing to move the tower<br />
until the opening appears under the northern<br />
door. This also works to deactivate the traps<br />
on the other levels—if the first door opened<br />
isn’t the correct one, the PCs can continue to<br />
turn until the correct one opens.<br />
There are two ways for the PCs to figure out<br />
which door is the correct one on each level.<br />
They can either correctly decipher the elvish<br />
inscription mentioned earlier, or they can use<br />
the trial-and-error method, trying the doors<br />
as they open and checking to see if the trap is<br />
sprung. The former method is much less dangerous.<br />
If one of the players states that his PC is<br />
trying to figure out the inscription, you could<br />
allow him an Intelligence Check with a -10<br />
penalty. (Or, if your players’ PCs are really<br />
getting chewed up by the traps, you could<br />
allow them each an Intelligence Check out of<br />
the goodness of your heart.) If the check is<br />
successful, the PC realizes that the proper<br />
combination (to avoid the traps and to grant<br />
access to Level 12F) is north, west, east,<br />
north.<br />
All of the doorways, once opened, lead to a<br />
five-foot-deep square shaft. A stone ladder<br />
cut into the outer wall of the shaft allows the<br />
PCs access to the next, lower level of the<br />
tower—Level 12B—25 feet below Level 12A.<br />
The shaft opens into the ceiling of the hall<br />
below.<br />
12B. Second Combination<br />
A 10-foot-wide by 20-foot-high corridor<br />
circles around the inner core of the tower.<br />
Steel rings are set into the inside wall. The<br />
walls and the ceiling are made of roughly<br />
hewn stone, making it seem like a cave.<br />
Here, too, are four openings that lead down to<br />
the next level. All are blocked by a steel plate,<br />
exactly as in the level above.<br />
If the PCs have rotated the steel plate on<br />
Level 12A to the northern door, they have the<br />
correct combination. The PCs can then try to<br />
dial the next door.<br />
Trap: If the PCs have hit the wrong combination,<br />
they are confronted by an elemental<br />
grue—a chaggrin.<br />
The moment a PC touches one of the iron<br />
rings, the chaggrin flashes into existence next<br />
to one of the four openings leading down to<br />
the next level. The chaggrin remains on this<br />
level, even if the PCs climb up or down. Redialing<br />
the previous floor’s combination does<br />
not make the grue disappear.<br />
When the chaggrin appears, the overhead<br />
plate on the previous level suddenly begins to<br />
spin. The plate spins for 10 melee rounds. On<br />
each of these rounds, each PC can attempt to<br />
jump up from the stone ladder through the<br />
nearest opening in order to escape. The<br />
attempt requires a Dexterity Check with a -15<br />
penalty.<br />
Getting into position to jump from the top<br />
of the stone ladder requires one round doing<br />
nothing but climbing the ladder. Only one<br />
person can be on the ladder at a time.<br />
After the plate stops spinning, it comes to<br />
rest with the opening at one of the four exits<br />
leading up. Roll 1d4 with 1 = N, 2 = E, etc., to<br />
determine which door it stops at.<br />
Any failed attempt to jump through the<br />
opening results in 1d6+10 points of damage.<br />
In addition to this damage, a PC who fails the<br />
jump is knocked off the ladder and falls 25<br />
feet to the floor of the corridor.<br />
PCs can try to stop the plate’s rotation with<br />
a sword or other object. Nonmagical objects<br />
have no chance to stop the plate’s rotation,<br />
and there is a 35% chance that they break<br />
when struck by the plate.<br />
Magical items do stop the plate. Unfortunately,<br />
the item jams the plate shut in the<br />
closed position. The plate remains stuck until<br />
the item can be worked loose. If a PC wants to<br />
remove the object, add the PC’s Strength and<br />
Dexterity scores together and then roll percentile<br />
dice against this total. If the percentile<br />
number rolled is less than or equal to this<br />
total, then the item comes loose and the plate<br />
slides to an open position above the PC’s<br />
head. Otherwise, it remains jammed shut.<br />
PCs can dial a combination for the next<br />
floor (it takes one PC one round to dial, doing<br />
nothing else) and escape downward. However,<br />
the chaggrin is still on this level, waiting<br />
for them when they return.<br />
If the chaggrin is killed, its remains vanish<br />
15<br />
from this corridor. It does not reappear at this<br />
time, even if the iron rings are moved again.<br />
Once the chaggrin is dead (or if the PCs<br />
managed not to spring the trap), the PCs can<br />
rotate the wall on this level to try for the correct<br />
door to reach the next level—Level 12C.<br />
The correct door is the western one. Roll 1d4<br />
with 1 = N, 2 = E, etc., to determine which<br />
opening the plate slides to first. If the PCs fail<br />
to get the western door, the chaggrin reappears<br />
on this level the moment the PCs touch<br />
the rings on the next level—Level 12C. The<br />
chaggrin waits for the PCs to return to this<br />
level.<br />
Note: All levels must be turned to the correct<br />
combination or the door at Level 12E does<br />
not open. There is only one grue on a level at<br />
a time.<br />
12C. Third Combination<br />
Another corridor circles around the core<br />
of the tower. Mist fills the corridor, making<br />
it difficult to see.<br />
The general dimensions of this hallway and<br />
the access shaft to it are the same as Level<br />
12B. The mist obstructs vision beyond 20<br />
feet.<br />
Trap: If the PCs missed the correct door on<br />
the level above, an ildriss swirls into existence<br />
next to one of the four lower openings the<br />
moment a PC touches an iron ring. The overhead<br />
access plate spins as described in 12B.<br />
If the chaggrin was killed earlier, it now reappears<br />
on Level 12B.<br />
There are four openings leading down to<br />
the next level—Level 12D. The same type of<br />
rings can be found on the inner wall and can<br />
be used to rotate the plate. The door once<br />
again opens over a five-foot-square shaft at<br />
any of the four locations. The correct door<br />
here is the eastern one. This deactivates the<br />
trap and prevents the monster from appearing<br />
in Level 12D. Roll 1d4 with 1 = N, 2 = E,<br />
etc., to determine which opening the plate<br />
slides to first.<br />
12D. Fourth Combination<br />
A familiar corridor circles the inner wall of<br />
the castle. This one is very dry. Scorch<br />
marks scar the walls and black soot covers<br />
the ceiling.<br />
Black iron rings are bolted to the inner wall<br />
that rotates about its axis just as the other<br />
inner walls do. The same familiar four openings<br />
leading downward are also present, each<br />
blocked by a steel plate.<br />
Trap: Unless the door opened on Level 12C<br />
was the eastern door, a harginn appears randomly<br />
next to one of the four downward openings<br />
on this level as soon as any PC touches
the rings. As in 12B, the plate for the openings<br />
overhead spins. If the ildriss on the level<br />
above was killed earlier, it reappears on Level<br />
12C and waits to attack the PCs.<br />
The plate on this level must be turned to<br />
the north to deactivate the trap below and<br />
correctly open the final door.<br />
12E. Final Combination<br />
If the PCs dialed the proper (north) combination<br />
on the floor above, then use the first<br />
description. Otherwise, use the second.<br />
The cavernous walls glisten with moisture.<br />
The same familiar four openings<br />
leading downward are blocked by wet<br />
steel doors.<br />
The stone ladder leads down to a pool of<br />
shallow water that covers the floor of the<br />
cavern hall.<br />
If the PCs entered this level through the correct<br />
access (north), then they can check the<br />
openings on the floor.<br />
Trap: If the PCs missed the combination on<br />
the level above, a varrdig forms over one of<br />
the exits the moment any PC touches the<br />
water. This also causes all the plates on all<br />
the levels above to spin as described in 12B,<br />
including the floor plates below the feet of the<br />
PCs on this level.<br />
The referee should note which PCs are<br />
standing on the doors when the plate begins<br />
to spin. Any PCs standing on a door that suddenly<br />
opens are tossed to the floor, suffering<br />
the same damage as described in 12B. Those<br />
stepping on a rotating floor plate suffer the<br />
same damage. In addition, the PCs suffer a -2<br />
penalty to all attacks due to the slippery floor.<br />
As in the other levels, once the trap is<br />
sprung, the harginn on Level 12D reappears<br />
(if it was killed earlier) on that level and waits<br />
to attack the PCs when they try to return.<br />
If the varrdig is killed, both it and the water<br />
disappear. The plates continue to spin as in<br />
12B.<br />
There are none of the familiar iron rings on<br />
this level. Four plates are placed in the floor.<br />
Note: The floors above must be set to north<br />
(12A), west (12B), east (12C), and north<br />
(12D) for the PCs to enter Level 12F. If the<br />
PCs have set the first four plates correctly, the<br />
southern door is standing open. There is no<br />
way the PCs can adjust the plates on levels<br />
above from the ground floor. The PCs must<br />
return to the various levels to perform the<br />
adjustments. At this time, they must fight any<br />
grues that have reappeared.<br />
When the southern access opens, the PCs<br />
look down into the top of a leafy green tree. A<br />
cool summer breeze wafts up from the brightly<br />
lit opening below. The PCs can climb down<br />
into the upper boughs of the tree, and from<br />
there down to the floor of Encounter area<br />
12F.<br />
12F. Grove of Waylorn<br />
Perpetual sunlight illuminates the silver<br />
bark and golden leaves on the trees that<br />
grow abundantly here. Brilliant flowers<br />
bloom among them. In the center of the<br />
trees, the soft grass rises slightly. Here<br />
stands a bier of crystal. The body of a<br />
man lies on it. He is dressed in leather<br />
armor of the finest make. His flowing hair<br />
and clean-shaven face show no sign of<br />
the passing of time.<br />
If the players make any noise or touch the<br />
man, he awakens as if from a peaceful slumber.<br />
He identifies himself as Waylorn Wyvernsbane.<br />
If the PCs say anything about dragons,<br />
the man appears startled, and then claims<br />
that he is actually Huma, come back to stop<br />
the terrible dragons.<br />
Waylorn thanks the PCs for freeing him and<br />
presents them with the Diviner of Life (see the<br />
Appendix). As he is instructing them in the<br />
diviner’s use, he gets a faraway look in his<br />
eye and says that he foresees the day when<br />
this instrument will be able to tell them truthfully<br />
how much life they have left to them, for<br />
it never registers illusions.<br />
Waylorn agrees to come with the PCs. As<br />
stated in the “Player Characters” section of<br />
the Appendix, he is eager to fight dragons.<br />
If the PCs do not take Waylorn with them,<br />
he bids them farewell. After they are gone, he<br />
leaves the tower and wanders the land,<br />
undoubtedly meeting the PCs again.<br />
13. Land of the Ancestors<br />
Your path leads you suddenly into a small<br />
community of elves. Their eyes are those<br />
eyes of the haunted.<br />
There are 1d20+5 elves here, 1d6 of them<br />
women. There are no children. Their village is<br />
a collection of crude lean-tos and huts, all<br />
clustered as far from the woods as the small<br />
clearing allows.<br />
These elves refused to leave their homeland<br />
with their brethren. They live with the<br />
nightmare every day. They fight the evil any<br />
way they can, but they believe that only by<br />
entering the gates of the city can the nightmare<br />
be brought to an end.<br />
They have tales about what happens to<br />
those who pass the gates. Each one who<br />
enters the city walks his own path. The nightmare<br />
grows more horrible. Terrors walk the<br />
tortured streets. No two people who have<br />
passed the gate tell the same tale about what<br />
happened within, though they swear they<br />
were never parted.<br />
The elves cannot help the PCs. All of their<br />
warriors are engaged in defending what little<br />
they have left.<br />
16<br />
14. Dryads<br />
A lone woman sits at the base of a tree,<br />
sobbing her heart out.<br />
The woman is a dryad. When she sights the<br />
PCs, she flees into the woods. There are<br />
1d6+5 dryads hidden there.<br />
The dryads lived for many centuries as<br />
caretakers of the trees in the Silvanesti lands.<br />
Dryads are usually kind creatures. Now, how-<br />
ever, their woods are under attack. They con-<br />
sider all intruders to be enemies. They use all<br />
their cunning and charm to capture those<br />
who enter the woods.<br />
The dryads release any PCs they have<br />
charmed if they are persuaded that the PCs<br />
are here to save the forest. The dryads direct<br />
the PCs to the Tower of Shalost (Waylorn’s<br />
Tower), telling them that a great man of<br />
ancient times lives there.<br />
15. Brotherhood of Night<br />
Your path leads you suddenly into a small<br />
community of elves. Their eyes are those<br />
of the haunted.<br />
To all appearances, these elves are similar to<br />
those in Encounter 13. They are, in fact, illusions<br />
of the dream. They are actually mino-<br />
This appears to be a collection of 1d6+6<br />
elves in a small village as described in<br />
Encounter 13. They ask the PCs to stay with<br />
them and to attend their nightly prayers to the<br />
gods<br />
elves<br />
gods.<br />
of good. If the PCs question this, the<br />
claim that they never worshiped false<br />
If the PCs agree, they are taken to what<br />
appears to be a huge, ancient temple. Inside,<br />
the PCs find a gigantic statue of a bull. Within<br />
1d4 rounds, the statue suddenly “comes<br />
alive.” The illusion of the temple and the elves<br />
disappear. The PCs find themselves in the<br />
middle of six minotaurs and a gorgon. The<br />
minotaurs have no idea that their gorgon is<br />
only an illusion. All attack until dead.<br />
16. Swampmire<br />
If the PCs enter this from an Encounter area,<br />
use the first boxed description. If they enter<br />
from a swamp area, use the second.<br />
The ground descends suddenly into brackish,<br />
black water. Gnarled roots twist in the<br />
muck. Bizarre crystal formations jut from<br />
the water. In the far distance, a strange<br />
melody floats on the sickly green fog.<br />
Indistinct voices can be heard singing.<br />
You wade waist deep in the still waters.<br />
You can still hear the song in the distance,<br />
its lyrics sounding maddeningly just beyond<br />
your hearing.
The PCs probably get lost in the swamp.<br />
There is also a 25% chance per turn of<br />
encountering a will-o-wisp in the swamp. The<br />
song seems to come from the lights of the<br />
will-o-wisp.<br />
16A. Catoblepas<br />
A huge, hulking form rises silently up out<br />
of the black, still waters.<br />
This is a catoblepas, an apparition of the<br />
dream. Its gaze does death damage, which is<br />
illusory.<br />
16B. Crystal Death<br />
The area underfoot is covered with three<br />
crystal oozes. A few (1d4) rounds after this<br />
encounter, a crystal rises up out of the water<br />
and attacks the PCs as well.<br />
16C. Fetch<br />
The still water ripples with reflections as<br />
you move through it. You see your own<br />
face. It is drawn with fatigue and filled<br />
with sorrow.<br />
There are 1d6 fetch in the water. Determine<br />
which characters the fetch have come for<br />
randomly.<br />
17. Raging Tears<br />
Black, rotting leaves drift past, each striking<br />
the surface of the river with a sob. The<br />
dark water reflects the tortured trees and<br />
the green, boiling fog overhead.<br />
The Thon-Thalas is a majestic river of wondrous<br />
beauty outside of the dream. Within the<br />
dream’s borders, however, it becomes terrible.<br />
Though the river moves slowly (movement<br />
rate of 3), the current will eventually take the<br />
PCs to the city of Silvanost—if they survive.<br />
The PCs can build a raft. This takes 1d4 hours<br />
for every PC the raft must carry. Thus, a raft for<br />
a party of six requires 6d4 hours to build.<br />
Roll random encounter checks as usual<br />
while on the river. Few of the creatures encountered<br />
can fly. All creatures appear on the<br />
river banks.<br />
The river is roughly 150 yards wide. Every<br />
100 yards, the PCs’ raft is swept 2d20 yards<br />
closer to the nearest shore. A Strength Check<br />
made by a PC controlling the boat halves that<br />
distance.<br />
The river is controlled by the dream; when<br />
a random encounter occurs along the riverbank,<br />
there is a 2 in 6 chance that the current<br />
shifts to carry the PCs into shore, directly<br />
toward the monster. The river can make up to<br />
six such current changes, one per round.<br />
17A. River of Tears<br />
The clear waters of the Thon-Thalas wind<br />
among the trees. A beautiful boat stands<br />
tied to the landing.<br />
The boat is abandoned. The PCs can board it<br />
and take it down the river. As the PCs move<br />
downriver, however, the Thon-Thalas<br />
changes.<br />
The cool waters generate a cold deeper<br />
than the Abyss itself. The silver of the tree<br />
bark glows with an eerie reflection of the<br />
water. The beautiful leaves falling about<br />
you turn black with rot. Even your boat<br />
changes! Its former elegance now appears<br />
cracked and worn, its fittings loose and<br />
leaky. Reddish muck oozes up between<br />
the floorboards like blood oozing from a<br />
wound.<br />
Even though it appears unsafe, this craft is<br />
capable of taking the PCs down the river to<br />
Silvanost.<br />
17B. Crossing of Tears<br />
Here, the thick black waters of the Thon-<br />
Thalas slow. Its stillness mirrors the overhanging<br />
canopy of gray sky and twisted<br />
trees. Strange voices seem to cry in pain<br />
all around you. Dark shapes shift beneath<br />
the water’s mirror-like surface.<br />
In the water are 1d6 fetch. They try to push<br />
or pull the heroes into the water before attacking.<br />
PCs must roll successful Dexterity Checks<br />
or fall in. PCs in the water suffer a -4 penalty<br />
to their attack rolls and a +2 penalty to their<br />
Armor Class.<br />
17C. Tears Meeting<br />
Ahead, the wailing of many elves floats<br />
toward you, mingled with the sound of<br />
rushing waters. As you round a bend, you<br />
see this river joining another. Amid the<br />
swirling froth of the waters, several figures<br />
dance and sing on top of the waves.<br />
These are 1d4+4 groaning spirits. They have<br />
been condemned to dance upon the water<br />
and relive the pain they inflicted on the living.<br />
(Because of the constant twilight condition of<br />
this land, none of the groaning spirits can<br />
keen.)<br />
The current sweeps the players toward<br />
these creatures as detailed above. The banshees<br />
attack any PCs that approach within 20<br />
feet of them.<br />
17<br />
17D. Tears Parting<br />
The chill black waters split here, as they<br />
enter the bleeding woods. The darkness is<br />
even more oppressive beneath the trees.<br />
Wind whistles through the leaves and<br />
seems to whisper from the right-hand passage.<br />
You cannot understand the words,<br />
but they seem to be calling to you.<br />
The words cannot be interpreted. The PCs<br />
must declare which fork-the right or the left<br />
—they take if they are floating down the river.<br />
17E. Terror of Tears<br />
The water begins to move more swiftly<br />
now, boiling and surging around you.<br />
The water now tries to keep the PCs in the<br />
center of the river. The current becomes<br />
stronger; by the end of the next turn, the river<br />
is a froth of rapids. If the PCs are still on the<br />
river, read the following:<br />
Fantastic shapes rise out of the foaming<br />
water, surrounding the boat. Three great<br />
dragons, formed out of the shifting, thundering<br />
water, scream cruelly at you.<br />
Three water elementals in the form of<br />
dragons rise up and attack the boat, easily<br />
upsetting it. The PCs must fight the elementals<br />
and get to shore before drowning.<br />
PCs trying to swim to shore must roll a successful<br />
Strength Check with a -5 penalty. All<br />
PCs should also subtract their natural (nonmagical)<br />
Armor Class from their roll. Those<br />
who fail are swept 100 feet down the river,<br />
suffering 1d12 points of drowning damage.<br />
They then check against Strength again to<br />
reach shore.<br />
18. Silvanost<br />
A sagging pier juts out into the deathly<br />
cold waters of the river. Thrusting up<br />
through the layers of fog are two great pillars,<br />
standing at the corners of the pier.<br />
Beyond, a road of cracked stones leads<br />
toward the silhouette of a large city.<br />
19. The Gate of the Citadel<br />
As the gate swings open, green fog and<br />
smoke pour out down the road. Inside, you<br />
see constantly shifting streets and buildings.<br />
The great blackness of the Tower of Stars<br />
claws its way into the deep gray sky. Welcome<br />
to Elvenhome.
At this level of the dream, each PC must now<br />
try to distinguish between reality and illusion.<br />
It will appear to a PC as if all his friends are<br />
with him, but only a few of the PCs in a given<br />
Encounter are really there. All others are present<br />
as images in the dream. Only the DM<br />
knows which PCs are suffering real damage.<br />
PCs might watch their companions die horribly,<br />
only to see them return in another<br />
Encounter. This takes effect when the players<br />
enter the City Wall of Silvanost (Encounter<br />
20).<br />
From time to time during the dream, characters<br />
who were separated from the PCs<br />
appear. These are illusory PCs. This is the<br />
evidence of King Lorac’s subconscious<br />
attempting to fight the mind-web being spun<br />
by Cyan. Once an illusory PC is killed in the<br />
dream, he or she does not reappear.<br />
The fact that these illusory characters are<br />
not real should be kept from the PCs who are<br />
really present. Let them believe that these<br />
characters were actually here.<br />
There are three types of PCs in the dream.<br />
Primary PCs are the PCs who are actually in a<br />
particular Encounter. Illusory PCs are PCs who<br />
are not physically present in Silvanesti but<br />
who, nevertheless, share the dream (Sturm,<br />
Laurana, Tasslehoff). Dreamshadow PCs are<br />
any of the PCs who appear to be in the Encounter<br />
and who might be playing in the Encounter,<br />
but who are not actually present.<br />
Perceptions in the Dream<br />
The individual PCs now perceive events and<br />
encounters differently.<br />
Randomly divide the PCS (both Primary and<br />
Illusory) into five groups. Number each group<br />
and note which PC is with which group.<br />
You will be running different storylines for<br />
each group. The PCs can be Primary Characters<br />
in one and dreamshadows ( ) in another.<br />
The Citadel Nightmare Chart should be<br />
prepared ahead of time. The chart consists of<br />
five separate tracks for Encounters, all of<br />
which lead the PCs to the final Encounter—<br />
the Tower of the Stars (Chapter 4). All of the<br />
tracks start with Encounter 20. Between that<br />
Encounter, which enters the city of Silvanost,<br />
and the tower (Encounter 25), the PCs must<br />
18<br />
go through four Encounters. This does not<br />
include Encounter 21, which occurs four<br />
times for each group—in between the other<br />
Encounters (they use the streets of Encounter<br />
21 to get from one Encounter to the next).<br />
To prepare the Citadel Nightmare Chart,<br />
determine the sequence of Encounters from<br />
Encounter 22 through Encounter 24 for each<br />
of the groups (Encounter 21 is the same for all<br />
groups). Write these Encounters in the appropriate<br />
column on the Citadel Nightmare Chart.
Each group plays through the Encounters<br />
in the sequence you have selected. The PCs<br />
who are in the group are the Primary PCs for<br />
that Encounter. All of the other PCs (both Primary<br />
and Illusory) are also present but only<br />
as #PCs. Do not tell the players which PCs<br />
are Primary and which are dreamshadows.<br />
There are certain Encounters that all or<br />
several of the groups will play. (You can run<br />
one Encounter several times.) Variations for<br />
these Encounters are given. After determining<br />
which Encounters take place and in what<br />
order, you need to determine which variations<br />
to use.<br />
Each Encounter lists at least five variations,<br />
A through E. For every Encounter listed, write<br />
down one of the letter variations. Thus, the<br />
white stag might be killed by evil creatures for<br />
Group 1, while the same stag is alive and out<br />
to kill Group 2 when they come across the<br />
Encounter.<br />
Make these preparations ahead of time. Be<br />
sure to familiarize yourself with the sequence<br />
of Encounters and how they are to be run.<br />
Running the Level II Dream<br />
Use the following procedure for running the<br />
dream:<br />
1) Determine which track to take the<br />
Encounter from: For each group, roll 1d10,<br />
then take the first Encounter in that column<br />
that has not already been chosen.<br />
2) Recap previous events: Remind the<br />
players of what has occurred previously in<br />
this track to give them some idea of where<br />
they are in the dream. For example, if Raistlin<br />
died during a confrontation with a dragon,<br />
mention that as you recreate the last<br />
Encounter played in this column. You should<br />
also give the players some indication as to<br />
how they perceive their own health in this<br />
track.<br />
3) Run the Encounter: Keep track of the<br />
real and illusory damage to PCs using the<br />
damage form.<br />
4) Go on to the next Encounter: Roll 1d10<br />
to determine the next Encounter played. If all<br />
the Encounters in a column have been played,<br />
roll again to determine which track to use<br />
next. Once all of the Encounters in all<br />
columns have been played, go on to Encounter<br />
25. Keep track of which PCs are with<br />
which group since this is important in the final<br />
chapter.<br />
Damage in the Dream<br />
Only those PCs who are Primary PCs in a<br />
dream track actually suffer damage. The<br />
PCs, being phantoms of the dream, only<br />
appear to receive damage.<br />
Keep True Damage and False Damage<br />
separate by using the PC Damage Form. This<br />
lists spaces down the left hand column where<br />
you can write the names of the characters. To<br />
the right of this are six columns.<br />
The first column is labeled True Damage.<br />
This is where you record any damage inflicted<br />
upon a PC in his own track. The remaining<br />
columns are for recording False Damage that<br />
the PC might appear to sustain as a PC.<br />
Write the name of the PCs in the space at<br />
the left, followed by their current hit points as<br />
they enter this part of the dream. Determine<br />
which track each PC is on in the dream and<br />
place an X in that column next to his name.<br />
This reminds you that damage caused on that<br />
track must be recorded in the True Damage<br />
column.<br />
True Damage applies to all tracks. Thus if a<br />
PC suffers True Damage of 5 points, add that<br />
number to the damage in each of the other<br />
tracks for purposes of determining whether<br />
the PC has fallen unconscious or not.<br />
For example: Raistlin receives 5 points of<br />
damage during an Encounter. This Encounter<br />
was on Raistlin’s own B track and thus the<br />
damage is True Damage. The DM records the<br />
damage in the True Damage column, and in<br />
each of the tracks as well. The next Encounter<br />
takes place on the D track. Raistlin suffers 25<br />
points of damage from a fireball spell. Since<br />
this damage was on the D track, it is recorded<br />
next to his name in the D column. Since 25 +<br />
5 points of damage exceeds Raistlin’s hit<br />
points coming into the dream, Raistlin<br />
appears to die in the D track. He does not<br />
appear in any further encounters in track D.<br />
However, he has suffered only 5 points of<br />
damage in the other tracks and is still “alive”<br />
there.<br />
When a character appears to die in his own<br />
19<br />
track, he immediately disappears from all<br />
tracks.<br />
Healing in the Dream: Characters can be<br />
healed of True Damage in their own tracks.<br />
To continue the example above, Raistlin<br />
might regain the 5 hit points he lost in his<br />
track through healing. This, of course, carries<br />
through all the tracks (he regains 5 hit points<br />
in each). He can also be healed of damage in<br />
track D, but this counts in that track only.<br />
Spell Use: Mages must memorize their<br />
spells before entering this level of the dream.<br />
Once they have selected their spells, tell<br />
them to multiply the number of spells<br />
selected by 6. Thus, if Raistlin chose two<br />
light spells, he now has 12. The same is true<br />
of clerical spells. They can use only their<br />
originally chosen number of spells in each<br />
track, however. Thus, Raistlin can use only<br />
two light spells in his true track (track B).<br />
But he can use two light spells in each of the<br />
other tracks as well.<br />
Note to the DM: Silvanesti is a nightmare.<br />
Dreamwraiths and monsters should attack<br />
the PCs with all the fervor they can muster.<br />
Dreamshadow PCs should appear to die like<br />
flies. This will no doubt distress many of your<br />
players. It’s supposed to! However, if the players<br />
soon get the idea that their characters<br />
might have only died in someone else’s<br />
dream, they will find this to be a bizarre and<br />
challenging place.
Encounters<br />
20. Screaming Gate<br />
(All tracks)<br />
Begin each of the different tracks with the following<br />
text. Read this text the same way each<br />
time so the players get the idea that they are<br />
reliving the same Encounter.<br />
As you enter the gate, the terrible screaming<br />
stops. The gate slams shut behind<br />
you, blocking the way back. Ahead, you<br />
see twisted streets winding into the thick,<br />
green fog. The buildings on either side<br />
seem to lean over, threatening you. A<br />
number of dark figures are approaching<br />
you. They bear a great burden on their<br />
shoulders and sway as they walk.<br />
20A. Prisoners of Silvanost<br />
The dark figures are eight elves, forced to<br />
carry a great chair. On this chair sits a dreamwraith<br />
dressed in ornate robes. The figure’s<br />
hood turns toward the PCs—and they see<br />
there is no head within its folds! The elves<br />
trudge toward the PCs, paying no attention to<br />
them. When they get near the PCs, the dreamwraith<br />
calls out:<br />
“Lorac Caladon, dead king of dead elves,<br />
bids you welcome. None who look upon this<br />
realm shall leave again.” The dreamwraith<br />
resumes his seat and the elves start to carry<br />
him back down the city streets.<br />
If attacked, the dreamwraith frees the<br />
chained elves and orders them to fight the<br />
PCs. The elves do so, but in a slow, dreamlike<br />
manner.<br />
If the PCs kill this dreamwraith and free the<br />
elves, they stare vacantly for a few moments,<br />
then give grateful thanks to the party. The<br />
elves have been living in the dream for so<br />
long that they simply assumed the PCs were<br />
just one more illusion.<br />
The elves have learned about navigating in<br />
the dream. One of them, an elf named<br />
Tarakanthis (or Tarak), volunteers to lead the<br />
PCs to the Tower of Stars but no farther. This<br />
NPC is faithful and true (see the “NPCs” section<br />
of the Appendix). Tarak leads the PCs<br />
down the most direct Encounter path to their<br />
destination. Roll 1d6. If odd, the PCs can skip<br />
one Encounter on their way. If even, they can<br />
skip two.<br />
20B. Elfkiller<br />
Run this as Encounter 20A, except the figures<br />
who carry the chair are elves. An ornate box<br />
covered with jewels and bright platinum fittings<br />
rests on the chair. If attacked, the elves<br />
drop the chair and fight, but they flee into the<br />
ruins after only 1d6 rounds of fighting.<br />
The box is locked. It contains a beholder<br />
that immediately attacks the PCs if they open<br />
the box. An Icon of Truth is also in the box<br />
(see the “Magical Items” section of the<br />
Appendix for details).<br />
20C. Emissaries of the King<br />
Run this as Encounter 20A. The figures are<br />
elven women who are carrying a coffin. The<br />
women drop the coffin at the sight of the<br />
PCs and flee screaming into the ruins. There<br />
is a 30% chance that the coffin breaks open<br />
when it hits the ground.<br />
Inside the coffin is the dead body of one of<br />
the PCs. The eyes are open, staring sightlessly<br />
into the sky. The mouth gapes in a<br />
silent scream. A hollow voice issues from the<br />
unmoving lips, “Despair! For this is the realm<br />
of madness!” The figure inflicts 1d6 points of<br />
damage on anyone who is within three feet of<br />
it.<br />
20D. The Forgotten Elves<br />
Seven elves are discovered carrying the body<br />
of one of their heroes out of the city. These<br />
elves are suspicious of the PCs. They have<br />
lived in the dream a long time and suspect the<br />
PCs of being part of it. Thus, when they first<br />
notice the PCs, they lay down the body and<br />
draw their swords to prepare for an attack.<br />
If the PCs manage to convince the elves<br />
that the PCs are real and have come to help,<br />
then one of the elves gives the following<br />
speech:<br />
Beware, for the dream is like a whirlpool.<br />
The closer you come to the center, the<br />
worse it gets. In the forest, you knew the<br />
friends around you were real. Here, your<br />
best friends might be only shadows cast<br />
by the dreams of your mind.<br />
We come into the city often on missions<br />
such as this. Each time we see our friends<br />
die horribly, only to find them alive when<br />
we emerge from the gates. Yet sometimes<br />
we enter and some of our number actually<br />
die.<br />
Such, apparently, was the fate of the elven<br />
hero whose body they bear. He was discovered<br />
by his fellows outside the locked door to<br />
the tower-dead.<br />
These elves must give proper rites to their<br />
dead and cannot help the PCs. They tell them,<br />
however, that one of their number can be<br />
found somewhere inside the city.<br />
20E. Bearer of Death<br />
The figures of eight elves carrying an ornate<br />
box enter from the PCs’ right and cross to<br />
their left. These elves do not stop for the<br />
PCs unless the PCs attack. If attacked, the<br />
elves fight until dead.<br />
The box is not locked. If no one opens it,<br />
the box opens by itself in 1d4 rounds. A<br />
para-elemental (smoke) emerges, mingling<br />
with the sooty fog as it attacks the PCs.<br />
21. Twisted Streets<br />
Use this Encounter to get PCs from one<br />
Encounter to the next.<br />
20<br />
The street buckles beneath your feet as it<br />
twists its way past sagging buildings.<br />
Each building’s facade has been horribly<br />
transformed into the face of its former<br />
occupant. Every home screams silently at<br />
you from gaping doorways. Each shop<br />
watches you from glassy-eyed windows.<br />
The players must pass through these streets<br />
in order to reach the Tower of Stars. There are<br />
many branching streets, but all lead to the<br />
next Encounter. Each group of PCs now<br />
moves to the Optional Encounters (22<br />
through 24) on the Citadel Nightmare Chart.<br />
This means that each group might or might<br />
not experience each Encounter. Once each of<br />
the groups has passed through two Encounters,<br />
go to Encounter 25 in Chapter 4.<br />
The great silhouette of the Tower of Stars<br />
can be seen in each Optional Encounter from<br />
the streets. After each Encounter, the Tower<br />
seems to grow larger.<br />
Roll 1d12. The result is the number of turns<br />
of street travel on from one Encounter to the<br />
next. Check for random encounters while the<br />
PCs are moving through the ruined streets.<br />
22. Life as Usual<br />
Suddenly, the sound of haunting music is<br />
heard. The sad sound of a lute wails an<br />
ancient children’s song. The sound comes<br />
from the end of the lane.<br />
Any who proceed see the following:<br />
The mist-shrouded courtyard is surrounded<br />
by broken walls of jagged stone.<br />
A wooden gate is set into the wall at the<br />
far end of the courtyard.<br />
The courtyard is filled with elves. Their<br />
clothing is torn and ragged.<br />
In the center of the courtyard stands a<br />
scaffold. A figure, its head shrouded in a<br />
hood, kneels on the scaffold. The prisoner<br />
is bound hand and foot; his head lies on a<br />
great block. Another hooded figure stands<br />
next to the prisoner, a great axe poised<br />
above the prisoner’s neck.<br />
Elven children run and play, their laughter<br />
echoing hollowly against the walls.<br />
Adult elves go about their affairs or stand<br />
in groups talking casually. All seem unaware<br />
of the execution. The melancholy<br />
sound of a lute floats through the mists.<br />
If the PCs make no attempt to stop the execution<br />
or remove the hoods, the execution takes<br />
place. When the prisoner’s head falls from the<br />
body, the hood comes off. The executioner<br />
also removes his hood at that time. This<br />
Encounter has five variations.<br />
The number of elves present in the courtyard<br />
is 1d10+6 in all of this Encounter’s variations.
22A. Sturm’s Justice<br />
The executioner is a crazed apparition of<br />
Sturm Brightblade. His prisoner is Lord<br />
Gunthar. Gunthar is bound hand and foot.<br />
Sturm attacks any PCs who try to stop him.<br />
This causes the elves to attack the party. If<br />
Sturm is defeated, the elves flee into the<br />
mists.<br />
If the PCs free Gunthar, he thanks them.<br />
Then his armor begins to glow and he floats<br />
up into the air, calling down, “In the heart of<br />
the darkness, your strengths become your<br />
weaknesses. Beware lest you fall into the<br />
dream and never awaken.”<br />
22B. The Golden Victim<br />
Run this as Encounter 22A, except the executioner<br />
is tKitiara and the prisoner is Laurana.<br />
22C. Twin Prisoners of the Elves<br />
Run this as Encounter 22A, except the executioner<br />
and the prisoner are both real elves.<br />
They are held prisoner here by elves, who<br />
surround them. The elves allow the PCs to<br />
move into the center of the square, but they<br />
do not allow the PCs to leave.<br />
Only when the PCs are in the square do the<br />
elves reveal their terrible nature, and then<br />
only if the PCs attempt to escape or stop the<br />
execution. The PCs have to fight their way out<br />
of this one.<br />
22D. Slaughterhouse<br />
Run this as Encounter 22A, except that the<br />
elves watching the execution are weeping in<br />
despair.<br />
All of the elves are held in thrall by the<br />
executioner, who is King Lorac. This is discovered<br />
only if his hood is removed. The prisoner<br />
is either Laurana or Wilthanas.<br />
Lorac attacks the PCs on sight and forces<br />
the elves—against their will—to attack as<br />
well. The reluctant elves suffer a –4 penalty<br />
to their attack rolls. This represents their willful<br />
resistance. If the king is killed, all attacks<br />
by the elves stop. In their joy, they open the<br />
gates at the other side of the square.<br />
22E. Death of a King<br />
Run this the same as Encounter 22A, except<br />
that the prisoner is King Lorac Caladon, as<br />
can be readily seen if the hood is taken from<br />
his head. The executioner is the PC who<br />
removes the mask from the executioner.<br />
If the king dies here at the hands of the<br />
executioner, then all of the elves in the<br />
square vanish into the mists, as does the executioner.<br />
If the PCs manage to rescue the<br />
king, he speaks with them, answering three<br />
questions as best he can before disappearing<br />
into the mists.<br />
23. Madmen<br />
The sounds of weeping clash with wild<br />
laughter, all coming from the side alleys.<br />
Suddenly you are set upon by elves gone<br />
insane.<br />
Roll 3d6 every time you run this Encounter to<br />
determine how many of these elves attack.<br />
This makes the Encounter different for each<br />
group.<br />
24. Innocence<br />
A great stone pillar stands in the center of<br />
the street. Carrion birds wheel in the sky<br />
overhead, circling the top of the pillar. A<br />
figure hangs suspended from the top of<br />
the pillar by manacles attached to his<br />
wrists. Tortured cries echo across the city.<br />
The pillar is 100 feet tall and its sides are<br />
smooth, although riddled with cracks. The<br />
birds circle 10 feet from the figure, occasionally<br />
swooping in to brush against it.<br />
24A. Loralon,<br />
the Conscience of the King<br />
The figure is Loralon, the once-great cleric<br />
of Silvanesti, who has been drawn into the<br />
nightmare. The King seeks his cleric’s forgiveness<br />
and help, but at the same time punishes<br />
him for leaving.<br />
Loralon begs the PCs to rescue him. He<br />
hangs just below the top of the pillar. The<br />
manacles around his wrists are steel. He is<br />
suspended from the manacles. If simply<br />
released, he falls 100 feet to the street below,<br />
suffering 10d6 points of damage from the fall.<br />
The pillar itself is slick, requiring a thief’s<br />
climb walls check with a penalty of +20% on<br />
the roll. This check should be made at 25, 50,<br />
and 75 feet off the ground.<br />
Circling the pillar are eight giant vultures.<br />
They attack anyone who gets within 30 feet of<br />
the top.<br />
If the PCs successfully rescue Loralon, he<br />
tells them all that he knows about Lorac Caladon<br />
(see the “NPCs” section of the Appendix<br />
for details). Loralon accompanies the PCs if<br />
they ask.<br />
24B. Pillar of Virtue<br />
The pillar is Loralon. The figure suspended<br />
from the pillar is King Lorac Caladon, who<br />
has been driven mad. Lorac calls a quasielemental<br />
lightning to attack the PCs.<br />
If Lorac is freed, he attacks the players. If<br />
by some chance he is actually brought before<br />
Lorac, he makes every attempt to kill the real<br />
king, though this means destroying himself.<br />
21<br />
The pillar— Loralon—speaks to the mind<br />
of any PC who gets within 10 feet. The only<br />
way he can be freed is for the PCs to end the<br />
dream. He answers questions as best he can<br />
and offers what knowledge he has for the use<br />
of the PCs.<br />
Circling the pillar are eight giant vultures.<br />
They attack anyone who gets within 30 feet of<br />
the top.<br />
24C. Groaning Spirit<br />
The figure chained to the top of the pillar<br />
appears to be an elfmaid at first sight, but it is<br />
actually a groaning spirit. The birds circling<br />
over her head are actually Itdrelbs.<br />
Due to the height of and distance to the pillar,<br />
the true nature of the *groaning spirit can<br />
be discovered only by magic or by a PC coming<br />
within 30 feet of the groaning spirit. The<br />
spirit attacks only if discovered. If she<br />
attacks, the drelbs also attack. There is only<br />
a 20% chance the groaning spirit uses her<br />
keening attack in the twilight.<br />
24D. Siren Song<br />
The figure chained to the top of the pillar is a<br />
sirine named Kiiren, who was pulled from the<br />
Thon-Thalas river by dreamwraiths. She is<br />
chained here and has been tortured. She has<br />
come to know the difference between the<br />
dream and reality, however. She does not<br />
trust the PCs until they convince her that they<br />
are real and not apparitions of the dream.<br />
If Kiiren is released, she accompanies the<br />
PCs on their quest.<br />
24E. Repentant General<br />
The figure on the pillar is an elven general,<br />
who once commanded the armies of Silvanesti.<br />
He has long since forgotten his name<br />
and is now a raving maniac, near death. The<br />
birds flying around him are actually six<br />
guardian spectral minions, all armed with<br />
swords, who attack the party.<br />
If freed, the elven general dies, yet with<br />
his dying breath he relates the story of the<br />
Dark-Night Child (see Lorac’s part of the<br />
“NPCs” section in the Appendix).
This part of the adventure takes place in the<br />
Tower of the Stars, the source of the dream.<br />
At this level, the PCs have to deal with the<br />
distortion of their own reality—their statistics<br />
are inverted. Thus, their strengths become<br />
weaknesses and their weaknesses become<br />
strengths. This effect occurs in addition to the<br />
effects already listed in previous chapters.<br />
This new, effect begins as the PCs enter the<br />
Tower of Stars (Encounter 25).<br />
Shadowweb chart<br />
Keep the PCs in the same groups and tracks<br />
as in Chapter 3. This continues through this<br />
chapter’s Encounters until all the PCs reach<br />
Encounter 34, the conclusion of the adventure.<br />
At that time, all Primary PCs are reunited<br />
in Lorac’s Throne Room for the final<br />
encounter.<br />
Inversion of Statistics<br />
To invert each character’s stats, use the following<br />
simple conversion to dramatize the<br />
effects of Lorac Caladon’s dream upon the<br />
PCs.<br />
THAC0s and Saving Throws: These statistics<br />
are now changed for each PC. A warrior<br />
group character, for example, now uses the<br />
wizard sections for THAC0 and saving throws<br />
(see Table 53 in the Player’s Handbook [PHB]<br />
and Table 46 in the DUNGEON MASTER®<br />
Guide [DMG]).<br />
The various character groups exchange<br />
statistics. Priests switch stats with Rogues,<br />
and Warriors switch stats with Wizards.<br />
Special Adjustments: Due to the magical<br />
nature of this area, the following adjustments<br />
must be made by priests, rogues, and wizards.<br />
Priests: Subtract their Wisdom from 20.<br />
Compare the result against Table 5 on page<br />
17 of the PHB and use the now modified<br />
Chance of Spell Failure for the character. For<br />
example, if a cleric had a wisdom of 16, the<br />
result would be 4. The PCs’ chance of spell<br />
failure in the Tower is 45%. There is now a<br />
45% chance of failure for any spell cast by the<br />
cleric in the tower.<br />
On any roll against the Turning Undead<br />
Table (page 67, DMG), invert the tableskeletons<br />
are now turned on the line for “Spe-<br />
cial” undead (and vice versa), zombies are<br />
now turned on the line for liches (and vice<br />
versa), and so on.<br />
Rogues: On any roll against a thieving ability,<br />
all successes are counted as failures and<br />
all failures are counted as successes. Simple<br />
locks and traps are now become deadly opponents.<br />
Wizards: Wizards now cast spells at one<br />
level higher than normal. This is due to the<br />
magical nature of the Dragon Orb. This could<br />
mean that a mage gains the ability to cast a<br />
spell higher than those he currently knows. If<br />
so, the PC may choose any one spell from<br />
that level. The orb magically communicates<br />
the spell to his mind. The spell, however, does<br />
not remain with the PC once the dream has<br />
ended.<br />
All of these effects disappear when (if) Lorac<br />
is awakened from his dream.<br />
Encounters<br />
25. Locked Door of the Tower<br />
The streets lead into a wide avenue lined<br />
with stone columns. The roof the columns<br />
once supported has long since crumbled.<br />
Here and there amid the rubble lie skeletons<br />
of elves. The end of the avenue is<br />
obscured by layers of thick fog.<br />
At the far end of the avenue, rising out<br />
of the noxious green fog, looms the black<br />
silhouette of the Tower of Stars. Once<br />
beautiful, its now seems twisted and tormented.<br />
22<br />
This avenue leads directly to the great doors<br />
of the tower. As of this moment, all three levels<br />
of the dream come into play. Invert the<br />
character’s abilities. With this Encounter,<br />
most character classes find themselves<br />
unable to perform even the simplest tasks.<br />
All groups come to this Encounter after<br />
they have passed through the city, but each<br />
group should perceive this Encounter in a different<br />
way (use the five variations that follow).<br />
25A. The Columns are Stone Golems<br />
Each of the stone columns is twisted into the<br />
horrible shape of an agonized male elf. Three<br />
of these are actually stone golems (marked<br />
with an “A” on the map). The golems attack<br />
after the PCs have passed the first one.<br />
Once they have fought the golems, the<br />
PCs find the door into the tower is locked but<br />
not trapped. When it is unlocked, the PCs can<br />
go on into the next section.<br />
25B. The Door is a Mimic<br />
The great door to the Tower of Stars animates<br />
when someone attempts to open it. It is a<br />
mimic, blocking the real door. Only when the<br />
mimic is destroyed is the true door discovered<br />
and available to be unlocked.
25C. The Lock is Trapped<br />
The lock is trapped with a poisoned needle<br />
that reduces the PC victim’s remaining hit<br />
points to 0. The trap works only once, then<br />
there is no longer enough poison to harm<br />
anyone else who touches it. The PC affected<br />
is allowed a saving throw vs. poison for half<br />
damage (he retains half his remaining hit<br />
points). The lock remains locked until either a<br />
successful open locks check is rolled or the<br />
proper key is inserted. Only the Primary NPC<br />
Alhana Starbreeze has the correct key (the<br />
Key to Qualinost; the “Magical Items” in the<br />
Appendix). All Alhanas have similar keys,<br />
but those do not work.<br />
25D. Skeletons Rise From the Ruins<br />
The skeletons in the courtyard rise up and<br />
attack the party. All of these creatures hit as if<br />
they were using swords +4 (these become<br />
rusty normal swords once the skeletons are<br />
defeated). There are 1d6+10 skeletons<br />
attacking. If the PCs defeat the skeletons,<br />
they find the door locked but not trapped.<br />
25E. Succession of Doors<br />
Once the door is unlocked, the PCs find that<br />
the door leads into a 30-foot-long corridor<br />
that ends in another locked door. There are a<br />
succession of 1d6+4 such corridors, all ending<br />
in locked doors.<br />
As soon as the PCs open the third door, a<br />
smoky mist inside the corridor takes the<br />
shape of six mihstu. These creatures slam<br />
shut the outer door and lock it, then they seep<br />
through other locked doors to attack the PCs.<br />
Only by passing through all of the doors<br />
can the PCs reach the next Encounter.<br />
Each group must now face three tests<br />
beyond the locked doors of the great tower.<br />
Two of the Encounters are your choice, the<br />
third is mandatory (Encounter 33). As DM,<br />
you should choose those Encounters (from<br />
27 through 33) that will be most difficult for<br />
each group of players.<br />
Use Encounter 26 (following) to move the<br />
groups between Encounters.<br />
26. Twisted Halls<br />
The corridors of molded rock slant and<br />
twist like the bowels of a dragon. The<br />
once beautrfully crafted shapes have been<br />
wrenched into a seemingly endless succession<br />
of agonized stone.<br />
The halls lie between the Encounter areas of<br />
the Tower. Players encounter 1d10+3 corridors<br />
or rooms before coming to the next track<br />
encounter on the Shadowweb Chart.<br />
The sizes and shapes of these corridors and<br />
rooms are completely up to you. Vary the<br />
corridors and rooms (or at least their order)<br />
from one group to the next.<br />
Roll for random encounters every 60 feet.<br />
Use the random encounter chart in this book-<br />
let to determine the type and number of creatures<br />
encountered.<br />
27. Crystal Dragons<br />
No matter what direction the PCs take, the air<br />
in this corridor gets colder and colder. Soon,<br />
ice begins forming on the walls until the walls<br />
themselves can no longer be seen through the<br />
thick, white frost. The PCs then enter the following<br />
area:<br />
The cavern-like walls are lined with elves<br />
who might appear to be sleeping if it<br />
weren’t for the frigid whiteness of their<br />
skin and the frost that coats them. Warriors<br />
dressed in heavy furs and elven<br />
refugees lie huddled together in frozen<br />
death.<br />
The sinuous figure of a white dragon<br />
lurks in the shadows of her lair. Her wings<br />
are tucked back and her neck is arched.<br />
The monster hisses at you from the top of<br />
an imposing pile of gold, jewels, and<br />
strange, glowing devices. A clear crystal<br />
orb is directly in front of the dragon. Standing<br />
next to the orb is the black cloaked figure<br />
of a Dragon Highlord. At the far end of<br />
the ice cave, a waterfall cascades out of a<br />
crack in the wall.<br />
This Encounter has three variations, as outlined<br />
in the following text. In all variations, the<br />
waterfall is an illusion. Any PCs who pass<br />
through it find themselves entering a winding<br />
corridor that takes them to the next<br />
Encounter.<br />
27A. The Dragon is a Polymorphed PC<br />
The Dragon Highlord’s hand rests on an orb<br />
that glows with a brilliant non-light. The<br />
23<br />
Dragon Highlord, if unmasked, is discovered<br />
to be Lorac Caladon. At sight of the PCs, he<br />
commands the dragon to attack.<br />
The dragon is a polymorphed illusory PC,<br />
who talks to the PCs and tries to convince<br />
them that it is really their fellow adventurer,<br />
now being forced to attack them against its<br />
will. The dragon does attack them, however,<br />
forcing them to fight. If the dragon is slain, it<br />
reverts to the form of the PC that was supposedly<br />
polymorphed.<br />
While the dragon is talking, the Dragon<br />
Highlord grabs the orb and tries to escape<br />
beyond the waterfall. If the PCs follow him, he<br />
vanishes.<br />
27B. The Dragon is an Iron Golem<br />
Run this the same as Encounter 27A, except<br />
that the dragon is actually an iron golem. It<br />
is incapable of speech and attacks the PCs<br />
instantly.<br />
27C. The Dragon Highlord is a Lich<br />
Run this the same as Encounter 27A, except<br />
that the dragon is actually dead. The Dragon<br />
Highlord is a lich version of Lorac. The lich<br />
has the following spells:<br />
1st Level: charm person, comprehend languages,<br />
detect magic, feather fall, magic<br />
missile<br />
2nd Level: continual darkness, detect invisibility,<br />
invisibility, mirror image, web<br />
3rd Level: dispel magic, fireball (x2), lightning<br />
bolt, protection from normal missiles<br />
4th Level: dimension door, fire trap, fumble,<br />
polymorph other, wall of fire<br />
5th Level: animate dead, Bigby’s interposing<br />
hand, feeblemind, telekinesis<br />
6th Level: control weather, death fog, legend<br />
lore, repulsion<br />
7th Level: delayed blast fireball, reverse gravity<br />
The lich is capable of destroying the entire<br />
party of PCs in their current weakened condition.<br />
However, Lorac’s subconscious still has<br />
some control of his own mind. He allows the<br />
lich incarnation of himself to fight for only five<br />
rounds or until all of the PCs are killed. Then<br />
he escapes back through the waterfall and<br />
disappears.<br />
28. Evil Elves<br />
A single, bleeding figure drags itself<br />
toward you down the hallway. In the distance,<br />
you can hear harsh shouts and see<br />
the torch lights of pursuers.<br />
28A. The Figure is a Primary NPC Elf<br />
The figure is the elf, Tarak. If he was with the<br />
PCs, he refused to accompany them through<br />
the tower doors. He tells them that he later<br />
changed his mind and entered after them.
Within 1d4 rounds, eight elves arrive with<br />
torches in their hands. They claim that Tarak<br />
is actually a demon in disguise and that he<br />
has already killed many elves. The PCs must<br />
decide who is real.<br />
28B. The Figure is Lord Soth<br />
Run this as Encounter 28A, except that the<br />
figure only appears to be Tarak. In truth, it is<br />
Lord Soth. If discovered, Seth attacks for<br />
1d6 rounds before attempting to flee (see the<br />
“NPCs” section of the Appendix.)<br />
28C. The Pursuing Figures are PCs<br />
Run this the same as Encounter 28A, except<br />
that the pursuing figures are PCs. They<br />
attack the party on sight.<br />
29. Dragonlances<br />
Stairs lead you up to a great platform.<br />
Dim green light comes from what appears<br />
to be a pair of giant glass eyes staring<br />
down at you from the ceiling. You are<br />
amazed to see Dragonlances standing on<br />
either side of a doorway on the far side of<br />
the platform. In the center of the platform<br />
lie the broken remains of a great bronze<br />
statue. Curled upon the floor in the doorway<br />
is a single, dark figure.<br />
29A. The Dragonlances are Cursed<br />
The figure in the doorway is that of Dargent<br />
in her Silvart form. The lances on the wall<br />
appear to be normal Dragonlances, but these<br />
are cursed and sentient. They attack the<br />
party at will, starting by slaying Silvart.<br />
The lances attack as though wielded by a<br />
10th-level warrior (THAC0 11) and cause 40<br />
points of damage against Silvart.<br />
The lances also try to form a barrier at the<br />
exit, preventing the PCs from leaving. The<br />
PCs must spend one full round in combat with<br />
the blocking lances and then gain initiative in<br />
order to jump through them. If the PCs lose<br />
initiative, they can try to jump through again<br />
only if they fight one more round.<br />
29B. The Figure is Silvart Gone Mad<br />
This at first appears to be Silvart. However,<br />
this is a dream manifestation of a crazed<br />
Dargent, who suddenly turns against the<br />
party on a roll of 1 on a d6. Check once per<br />
turn or when any subsequent battle with the<br />
lances ensues. (See the “NPCs” section of the<br />
Appendix for details on Silvart.)<br />
29C. The Figure is Takhisis<br />
The Queen of Darkness grows from the<br />
prostrate form, filling the platform. Her five<br />
heads writhe to the attack.<br />
This is not the actual Queen of Darkness,<br />
but a creation of the tortured mind of King<br />
Lorac. Assume that the PCs’ attack cause<br />
damage to Takhisis but basically have no<br />
24<br />
effect (they cannot hope to defeat her). Takhisis<br />
attacks with her breath weapons (one<br />
breath of each of the evil dragon types) and<br />
magic for 1d6+4 rounds before appearing to<br />
flee back to her demonic plane. This apparition<br />
concentrates her fire on PCs and NPCs, but<br />
she does not leave the Primary PCs untouched!<br />
The queen’s spells are as follows:<br />
1st Level: magic missile, protection from good<br />
2nd Level: darkness 15’ radius, web<br />
3rd Level: fireball, lightning bolt<br />
4th Level: polymorph other, wall of fire<br />
5th Level: contact other plane, cloudkill<br />
30. Towers in Solamnia<br />
You step out into a great courtyard. Dawn’s<br />
light bursts red beneath the clouds. To<br />
your right stands the main portion of what<br />
appears to be the High Clerist’s Tower. To<br />
your left, a great wall looms between you<br />
and the grassy plains beyond.<br />
Two great stone staircases ascend the<br />
battlements of the wall. Beyond the wall,<br />
you can hear familiar harsh trumpets and<br />
the clash of steel. The Dragonarmies!<br />
They have come in full force and are<br />
about to assault the wall! Within moments<br />
they will be pouring into the courtyard!
The courtyard leads up to the battlements.<br />
There are no other figures on the wall. If the<br />
PCs do not mount the wall within five rounds<br />
(it takes one round to climb the stairs), the<br />
attacking army reaches the top of the wall<br />
and begins firing arrows down on the PCs.<br />
If the PCs mount the wall, they look down<br />
over a great plain that is a seething mass of<br />
enemies! The enemy is planting four ladders<br />
against the walls, one per round. Each of<br />
these ladders can be kicked down, but only<br />
after the PCs gain initiative over enemy figures<br />
they encounter on the ladder. Any ladder<br />
kicked down takes two rounds to be replaced.<br />
After 1d4+2 rounds of fighting, a large figure<br />
swoops down and attacks the PCs (what it<br />
is depends on the variation of this Encounter).<br />
This figure first calls on the PCs to surrender,<br />
telling them that the fight here is hopeless.<br />
The figure even lands on the wall, leaving<br />
itself open to attack in its arrogance. If this<br />
figure is defeated, then all the other figures in<br />
the encounter flee in terror and the gates from<br />
the courtyard open. Fog wells up from the<br />
plain and, regardless of which exit is taken by<br />
the PCs, they find themselves back in the corridors<br />
of the Tower of Stars.<br />
30A. The Attacking Figures are Elves<br />
The figures coming up the wall are elves.<br />
The huge figure flying down toward the wall is<br />
a griffon with King Lorac on its back. All of<br />
these elves are armed with bows and arrows<br />
as well as swords.<br />
30B. The Attacking Figures are<br />
Draconians<br />
The figures scaling the wall are draconians.<br />
The large figure is the blue dragon, Skie,<br />
with Kitiara, the Dragon Highlord, on his<br />
back.<br />
30C. The Attacking Figures are<br />
Skeletons<br />
The figures scaling the wall are skeletons.<br />
The large figure is a fantastic skeletal dragon<br />
with a skeleton Dragon Highlord on its back<br />
(use Verminaard’s statistics in the “NPCs”<br />
section of the Appendix).<br />
31. Endless Halls of the Dead Kings<br />
A thick, wooden door blocks the end of<br />
the corridor. The muffled sounds of hoarse<br />
screaming come from the other side.<br />
The door is locked but not trapped. Once the<br />
PCs open the door, read the following:<br />
The door opens on twisting corridors of<br />
obviously dwarven design. Other doors<br />
can be seen at various places along the<br />
corridor, each marked with a distinctive<br />
dwarven rune. Overhead are mirrors,<br />
fixed at intervals in the ceiling directly<br />
above the dwarven runes and above each<br />
door. The sound of screaming stops. You<br />
hear broken sobs and whimpers echoing<br />
through the hallways.<br />
When they enter this door, the PCs find themselves<br />
in a maze of corridors that all have distinctive<br />
dwarven markings and runes carved<br />
deeply into the stone walls (see the diagram).<br />
Anyone in the party who speaks dwarven can<br />
explain that the symbols on the doors are<br />
actually letters in the dwarven alphabet. The<br />
symbols cut on the floor are numbers.<br />
Roll 1d4 to determine which doorway (A<br />
through D, at the cardinal points of the compass)<br />
the PCs use to enter the maze. The<br />
doorway still leads the PCs back to the halls<br />
(Encounter 26) between Encounters as long<br />
as one Primary PC is still on the other side of<br />
the door or can still see through the door. As<br />
soon as all Primary PCs lose sight of that<br />
door, the passage back vanishes.<br />
The actual exit from this maze depends on<br />
which version of this maze is being experienced<br />
by the PCs.<br />
In all versions, be sure to roll for random<br />
encounters.<br />
The continuing sound of sobbing comes<br />
from a groaning spirit, who is trapped in the<br />
maze. The spirit is beautiful and pleads with<br />
the PCs to help her escape the maze. She<br />
promises not to harm them if they help her.<br />
She gives them the clue to escaping the maze<br />
listed under the appropriate maze description<br />
(this depends on which maze a particular<br />
group of PCs is experiencing).<br />
You should make it clear to the PCs that<br />
this is indeed a groaning spirit (albeit a contrite<br />
one). It is up to them whether they believe<br />
her or not. She remains true to her word<br />
unless the PCs attack her first. Roll 1d10 to<br />
determine at which numbered spot in the<br />
maze she is found.<br />
In addition to the groaning spirit, there is<br />
one other encounter in the maze. Roll 1d10<br />
for this encounter; it occurs at the spot given<br />
in the chart below. Which encounter it is<br />
depends on which Encounter variation this<br />
particular PC group is experiencing (see the<br />
descriptions after the chart).<br />
Encounter Location Chart<br />
Roll Location Roll Location<br />
1 A 6 F<br />
2 B 7 G<br />
3 C 8 H<br />
4 D 9 J<br />
5 E 10 K<br />
Note that locations A through F indicate side<br />
doors out of the maze. The encounter occurs<br />
just inside the door. If E or F is rolled, you<br />
choose at which of the two possible locations<br />
the Encounter occurs.<br />
25<br />
31A. Mirrors are the Exit<br />
There is a Primary NPC minotaur wandering<br />
this maze. This minotaur longs for the open<br />
sea. He has worked himself up into such a<br />
frenzy that he attacks anything that moves. If<br />
the PCs calm him down and offer him a way<br />
out, he helps them. He knows the clue to the<br />
riddle of the maze.<br />
One of the mirrors overhead conceals the<br />
exit from this maze. All that is required to find<br />
it is to break that mirror. When this happens,<br />
green fog pours down and the PCs find themselves<br />
again in the halls of the Tower of Stars.<br />
Breaking any other mirror reveals only bare<br />
ceiling. Note that the sound of breaking glass<br />
immediately draws the minotaur!<br />
Determine which mirror is the exit by first<br />
rolling 1d6. If the result is odd, the mirror is<br />
above a side door; if it’s even, the mirror is<br />
above one of the 10 numbered spots in the<br />
maze. Then roll 1d10; the result corresponds<br />
to either a numbered spot in the maze or a<br />
side door (consult the Encounter Location<br />
Chart; reroll results greater than 6). Either the<br />
groaning spirit or the minotaur knows the<br />
following clue to what is happening here, but<br />
neither one can figure it out.<br />
“Seek out the (number or letter)<br />
With downward looks casting<br />
Shatter illusions<br />
While you are reflecting.”<br />
31B. The Right Door is the Exit<br />
The two will-o-wisps in this maze attempt to<br />
mislead the PCs. Failing that, they attack<br />
them.<br />
One side door from this maze allows the<br />
PCs to exit. Roll 1d10, ignoring numbers<br />
greater than 6, and consult the Encounter<br />
Location Chart to determine its location. It is<br />
locked, as are all doors in the maze. Once<br />
opened, green fog pours in, swirling around<br />
the PCs. Moments later it clears, revealing the<br />
hallways of the Tower of Stars. (The other<br />
doorways will not open.)<br />
The groaning spirit knows the following<br />
clue, which can also be found scrawled in<br />
Common language on one of the walls in the<br />
maze (location, your choice):<br />
“Find the (letter location)<br />
Make no delay<br />
Open the one door<br />
That takes you away.”<br />
31C. The Right Symbol is the Exit<br />
At the second Encounter location, the PCs<br />
find duplicates of themselves. These duplicates<br />
are starving to death. With their dying<br />
breaths, they explain that they have been<br />
trapped here for uncounted years. These are<br />
PCs and each has only 1 hit point. They will<br />
not go with the party.<br />
The exit from this maze is found by standing<br />
on the proper number symbol on the floor<br />
of the maze and naming that number aloud.<br />
When this is done, green fog swirls up and
fills the corridor. When it clears, the PCs find<br />
themselves back in the corridors of the Tower<br />
of Stars.<br />
Both the groaning spirit and the dying<br />
PCs know the following clue:<br />
“Find the (number location)<br />
For that is the best<br />
Speak symbol’s name<br />
To continue your quest.”<br />
32. The Arena<br />
You enter a great arena. In the center of<br />
the dirt floor, several dark figures are<br />
taunting and attacking something in their<br />
midst.<br />
The exit from this circular arena is on the far<br />
side. The arena is 160 feet across.<br />
32A. The Evil Stag<br />
The figures are six elves, each of whom is<br />
thrown aside and killed. The creature they<br />
were attacking is the White Stag. This<br />
stag’s eyes burn with red fire. The stag<br />
immediately attacks the PCs.<br />
32B. Figures are Zombies<br />
The figures are 30 zombies that have killed<br />
the White Stag and are devouring it. When<br />
they see the PCs, they turn and attack them.<br />
32C. Minotaur’s Justice<br />
The figure being attacked is an elfmaid who<br />
was caught in the dream as she returned to<br />
her home. She is being attacked by six<br />
minotaurs. The stands of the arena are filled<br />
with cheering minotaurs.<br />
Under no circumstances do the minotaurs<br />
in the stands attack the PCs if they try to rescue<br />
the elfmaid. The minotaurs enjoy a<br />
good fight. The elfmaid comes with the PCs, if<br />
they win. She suffers from amnesia and gives<br />
neither information nor help. Tarak does not<br />
know her.<br />
33. The Gemstone Man<br />
(Mandatory Encounter)<br />
You enter a great rotunda. The warped<br />
glass of the dome overhead casts ripples<br />
of green light on the floor. Two robed men<br />
are locked in combat. Suddenly, there is a<br />
brilliant, blinding flash of light, and one of<br />
the figures slumps to the floor.<br />
The only exit is the door on the far side from<br />
the entrance, 80 feet away. Before the PCs<br />
leave, the dying figure speaks:<br />
“Harken back to the Thon-Thalas. The<br />
river never lies when the coins are cast.<br />
The vision shows how to awaken Lorac<br />
and end the nightmare.”<br />
33A. Fizban of Death<br />
The dying figure on the floor appears to be<br />
Berem, the Gemstone Man (see the “Player<br />
Characters” and “NPCs” sections of the<br />
Appendix). The victorious figure is a crazed<br />
Fizban, who attacks the PCs for 1d4+6<br />
rounds before attempting to escape. For purposes<br />
of this encounter, use the statistics and<br />
spells of the lich in Encounter 27C for Fizban’s<br />
powers.<br />
Once Fizban has fled, Berem tells the PCs<br />
the clue, then he dies.<br />
33B. Fizban Dead<br />
at the Hands of Raistlin<br />
The dying figure is Fizban, apparently murdered<br />
by Raistlin. This Raistlin wears<br />
black robes and attacks the party with all his<br />
power, targeting on Raistlin first.<br />
33C. Madman of the Gem<br />
The dying figure is Fizban, apparently murdered<br />
by Berem. This Berem has all of the<br />
qualities of the real Berem (see the “Player<br />
Characters” and “NPCs” sections of the<br />
Appendix), but he is crazed and attacks the<br />
party. He wields a sword +2, nine lives<br />
stealer.<br />
Berem cannot be destroyed. The PCs<br />
have to find some way to stop him or get past<br />
him.<br />
34. The Throne of the King<br />
Shifting green mist writhes through the<br />
great hall. In the center of the hall, illuminated<br />
from above by a single shaft of<br />
ghastly white light, stands the throne of<br />
King Lorac.<br />
The king’s body is emaciated. His right<br />
hand rests on a great globe of crystal that<br />
glows with swirling colors of light and<br />
dark.<br />
Surrounding Lorac’s throne are the sinuous<br />
bodies of five huge, green dragons.<br />
Each dragon’s head hovers near the tormented<br />
king, murmuring the nightmares.<br />
The dragons’ whispers echo across the<br />
hall.<br />
There is only one dragon. The others are<br />
dragons. The dragons immediately separate<br />
in an apparent attempt to surround the PCs as<br />
they enter.<br />
As if the dragons aren’t shocking enough,<br />
all PCs from all tracks enter the room at the<br />
same time. There are Primary and Illusory<br />
PCs and NPCs, as well as PCs. For example,<br />
Raistlin enters from his true track. He sees<br />
26<br />
another Raistlin enter from track A, another<br />
from track C, etc. (assuming Raistlin’s true<br />
track is B). Any PCs or PCs who died during<br />
the adventure are not present.<br />
The keys to the PCs’ success here lies in<br />
determining which of the PCs are real and<br />
which dragon is real.<br />
Do not tell players which group contains<br />
their PCs. You can give players clues by<br />
recapping previous Encounters. If the player<br />
has been alert, he has already figured out<br />
which group contains his PC.<br />
At this point, turn over control of all incarnations<br />
of any PC (both Primary and PCs) to<br />
the player running that PC. If he has figured<br />
out which one is real, then he can use the illusions<br />
to protect his PC.<br />
Choose one of the green dragons to be<br />
Cyan. The other dragons suffer damage, both<br />
real and illusory. Illusory dragons disappear<br />
when defeated. If the PCs kill Cyan, his body<br />
remains. Note: Cyan suffers damage that is<br />
both illusory and real from PCs and Primary<br />
PCs.<br />
Cyan defends the throne. Since he is the<br />
spinner of the nightmares, the dragon can<br />
distinguish the Primary PCs from the PCs.<br />
The PCs can try to end the dream at the<br />
same time they fight the dragons (see the<br />
Epilogue for how to end the dream). If Lorac<br />
is awakened, the illusory dragons vanish and<br />
Cyan tries to flee by leaping through the large<br />
window behind the throne.
The Long Dawn that the hold of the orb is broken and Lorac<br />
awakens.<br />
No Epilogue is provided for PCs who fail on<br />
this mission. If the PCs fail, they have died<br />
and thus have written their own epilogues!<br />
To succeed, the players must awaken Lorac<br />
Caladon, Speaker of Stars, from his nightmare-ridden<br />
sleep. The ways to draw Lorac<br />
from his dreamstate are listed below. Two of<br />
these always work. The third choice was<br />
determined by the coin toss the PCs made<br />
when they entered Silvanesti.<br />
Damage by Kin<br />
Should Lorac be struck by Alhana for any<br />
kind of actual damage, the king awakens.<br />
This action must have been foretold by the<br />
coin toss to work. If not, the king does not<br />
react. Alhana’s touch does not work either.<br />
(You can use the chart under the “Love of<br />
Alhana” section, below, here if you wish.<br />
Invert the statistics.)<br />
The Power of the Gods<br />
Goldmoon, Loralon, and Waylorn are all true<br />
clerics. Either of the following clerical spells<br />
can be used to awaken Lorac from his dream:<br />
dispel magic (against 21 St-level magic) or<br />
remove curse (saving throws apply; Lorac<br />
saves with a 6+ on 1d20. A successful saving<br />
throw means the orb retains control.)<br />
If this option was not determined by the coin<br />
toss, these spells have no effect on Lorac.<br />
Loralon: The Conscience of the King<br />
Loralon was a cleric from Silvanesti before<br />
the Cataclysm. Loralon’s memory might end<br />
the dream.<br />
If Loralon, or any of the PCs, recites to<br />
Lorac the tale of the Dark-Night Child, then<br />
Lorac awakens from his dream. This action<br />
must have been determined by the coin toss.<br />
The Love of Alhana<br />
If Alhana, beloved daughter of Lorac, simply<br />
touches the king, she has a chance of awakening<br />
him. The more gentle the touch, the<br />
more successful is the attempt. Use the following<br />
to determine success:<br />
Type of Touch Saving Throw<br />
Loving touch/tears 6<br />
Gentle touch 8<br />
Ordinary touch 12<br />
Rough touch/grab 15<br />
Striking blow/slap 18<br />
Weapon damage * 20<br />
* Each time Lorac is damaged, check for a<br />
random encounter.<br />
This action must have been determined by<br />
the coin toss. You must decide into which of<br />
the above categories Alhana’s touch fits,<br />
given the situation. A successful saving<br />
throw on Lorac’s part means, in this case,<br />
Breaking the Orb<br />
If the orb is hurled to the floor, there is the<br />
possibility it shatters. Simply removing the<br />
orb from Lorac’s hand does not break the<br />
bond.<br />
For every 6 points of nonmagical damage<br />
the orb suffers, check to see if it shatters by<br />
rolling 1d20. The orb shatters on a roll of 18+.<br />
Magic cannot harm the orb.<br />
Whenever the orb finds itself under attack,<br />
it reacts through the dream. Check for a random<br />
encounter each round the orb is struck.<br />
Breaking the orb ends the dream.<br />
Death of the King<br />
If Lorac dies, the dream disappears. Thus, the<br />
orb reacts to attacks against Lorac just as it<br />
reacts to attacks against itself. Check for a<br />
random encounter each round that Lorac is<br />
struck.<br />
Killing the king always ends the dream.<br />
In the first chapter, the PCs determined<br />
which of the above actions would work by the<br />
coin toss. The last two always work. Breaking<br />
the orb, however, means that the PCs no<br />
longer have the orb. The death of the king is a<br />
tragic act. Given the situation in the tower,<br />
however, these two are probably going to be<br />
the most difficult to achieve.<br />
When the dream is ended, the throne room<br />
is suddenly plunged into utter darkness. The<br />
PCs have to find their own light. When they<br />
do, they discover that only they themselves—<br />
the Primary PCs—are in the hall. All dreamwraiths,<br />
dreamshadows, and illusory PCs<br />
have disappeared.<br />
Recalculate the True Damage suffered by<br />
the PCs and inform the players of their actual<br />
status.<br />
Note: Any real monsters that were not slain<br />
still remain. Nothing attacks the PCs at this<br />
time, however.<br />
Read the following boxed section aloud to<br />
your players. If Lorac is still alive, he talks to<br />
them. If Lorac has died, insert the words in<br />
parentheses.<br />
Suddenly, the apparitions of the dream<br />
disappear. You find yourself in a vast hall.<br />
Though it is still filled with green mist, the<br />
horror that was here is gone. As you look<br />
around, you see your companions are<br />
also in this room.<br />
(The spirit of) King Lorac Caladon sits<br />
upon his throne in a dazed silence, staring<br />
around the hideously changed throne<br />
room. The scars of the dream are still visible.<br />
He turns to look at you. His eyes<br />
reflect a sorrow deeper than the Abyss.<br />
“My pride, my weakness...” he murmurs.<br />
“I wanted to save my nation. Now<br />
my pride is turned against me, my greatest<br />
fears become reality.<br />
27<br />
“I have taken so much from the land of<br />
my ancestors,” he says softly. “I have<br />
much to return.<br />
“I give myself to the land. Bury my<br />
body in the soil. As my life brought this<br />
curse, so, perhaps, my death will bring a<br />
blessing.”<br />
So passes the spirit of Lorac Caladon,<br />
Speaker of the Stars.<br />
Current State of Silvanesti<br />
The terrible nightmare that the Dragon Orb<br />
inflicted on the realm is now ended. Its effects<br />
on the land and creatures here are not. For<br />
the elves, the nightmare continues.<br />
All structures remain contorted and<br />
deformed. The green mists still cling to the<br />
ground. The trees still bleed from gashes in<br />
their bark. Further adventuring in the tower<br />
and Silvanost profit the PCs little.<br />
Before the PCs leave, Alhana insists they<br />
take the following gifts (refer to the “Magical<br />
Items” section of the Appendix): a brooch of<br />
Imog, a golden circlet, a fIute of wind dancing,<br />
and the swords Redeemer and Mantooth<br />
(Wyrmsbane and Wyrmslayer).<br />
The griffons return when the dream ends.<br />
They take the PCs northward, where they can<br />
hope to find passage home. To the west, the<br />
Dragonarmies are still searching for them.<br />
Impress upon your players the need to go<br />
north. If they decide to go north, the griffons<br />
take the PCs to the entry point of Chapter 5.<br />
Wrapping up the Adventure<br />
Finish by reading this text:<br />
Lorac’s funeral was held the next day.<br />
According to his last wish, he was buried<br />
in the ground outside the gates of the city.<br />
This barbaric custom shocked the elves,<br />
yet Alhana could not deny him his dying<br />
wish.<br />
You journey onward, traveling the only<br />
route open—north, hoping to find passage<br />
back home, hoping once more to<br />
see the friends whose presence in the<br />
dream only made the sting of their<br />
absence sharper.<br />
The land of Silvanesti is still a tortured<br />
nightmare. But one tree’s beautiful green<br />
leaves stand in splendid contrast to the<br />
black desolation of the forest around it. It<br />
sways in the chill wind, singing soft music<br />
as it spreads its limbs to shelter Lorac’s<br />
grave from winter’s darkness, waiting for<br />
spring.<br />
It will be long before the elves can heal<br />
their beloved homeland. Yet that one tree<br />
will ever stand as a symbol of their hope.
The next six chapters (Chapters 5 through<br />
10) take the PCs from Silvanesti to the Blood<br />
Sea of Istar and beyond. The following notes<br />
are provided as aids to the DM in running this<br />
part of the adventure.<br />
Random Events<br />
Tables of random events for these chapters are<br />
in the “Random Events” section of the Appendix.<br />
The DM can use these to add excitement<br />
to the adventure (or you can ignore them if<br />
your party is getting enough excitement without<br />
them). These tables include random<br />
encounters, events, and omens. Omens are<br />
mysterious happenings that might provide<br />
warnings to the PCs. The DM should adapt<br />
each event, encounter, or omen so that it suits<br />
the current situation of the PCs.<br />
Each day you should roll for the chance of<br />
a random event on the table for the locale. If<br />
an event is indicated, you decide whether it<br />
occurs during the day or at night. You can<br />
create your own events to reflect common<br />
occurrences on the road or you can run more<br />
than one event a day.<br />
To create some variation in events, alter an<br />
event if it comes up twice or replace it with an<br />
event you have not used yet.<br />
Synopsis of the Story<br />
This synopsis highlights the key steps of the<br />
adventure. Players can go in any of a number<br />
of directions, so this is provided to insure that<br />
the story progresses toward its climax. If the<br />
PCs stray too far from the course of the adventure,<br />
the DM should get them headed in the<br />
right direction by providing helpful information<br />
from strangers, through omens, by warnings<br />
of places to avoid, or increasing attacks<br />
from Dragonarmy patrols.<br />
1.) The adventure begins with the PCs traveling<br />
the road from Silvanesti by night to<br />
avoid draconian patrols. Their first encounter<br />
has them rescue two new PCs, Kronn and<br />
Serinda, and possibly Waylorn, if he is not<br />
already with the party.<br />
2.) The PCs should be directed toward<br />
Goodlund for information and shelter. This<br />
direction might come from Kronn, from an<br />
encounter with the disguised silver fox and<br />
rebels, or from a stranger or spy.<br />
3.) The PCs should learn of the Oracle’s<br />
prophecy and seek her for advice. Adventures<br />
result from searching for the way to the<br />
Oracle and perhaps being misled to the Dairly<br />
Plains.<br />
4.) Once the PCs learn their ultimate purpose,<br />
they should be directed to Flotsam to<br />
hire a ship. The cost to hire a ship is exorbitant<br />
and PCs should be provided with rumors<br />
about where or how they might acquire the<br />
needed funds. Opportunities include exploring<br />
the Dairly Plains east of Goodlund where<br />
several ruins exist, visiting the dangerous<br />
islands of Elian, said to hold a city of wonders,<br />
raiding the treasury of the Dragon<br />
Highmaster, stealing into the Ogrebond<br />
stronghold, and playing in a high-stakes<br />
card game.<br />
5.) During the journey and while at Flotsam,<br />
the PCs should have the opportunity to<br />
meet possible allies and featured villains,<br />
including Toede, the rebels, Sevil, Gildentongue,<br />
and Kitiara.<br />
6.) At Flotsam the PCs should be concerned<br />
with finding a boat to hire and avoiding<br />
the guards. They should be drawn into<br />
discovering the secret goal of the Dark Queen.<br />
Other activities also occur during this time:<br />
• Toede tries to find and capture the PCs.<br />
• The rebels try to aid the PCs.<br />
• Berem tries to avoid the PCs.<br />
• Sevil aids the PCs if it suits him, or misleads<br />
them if he discovers their identities.<br />
• Kitiara uses spies to sniff out strangers<br />
and then delays them with misdirection.<br />
• Gildentongue seeks to discover the PCs’<br />
purpose and sends them into danger.<br />
7.) If Kitiara’s ruse does not work, or the<br />
PCs return to Flotsam after following the ruse,<br />
Berem is kidnapped by Sevil. Encourage the<br />
PCs to locate and rescue him.<br />
8.) The storm that has been threatening for<br />
weeks arrives with all its elemental fury.<br />
9.) With Berem in tow, the PCs flee and<br />
should reach the Perechon. Under cover of<br />
the storm, they should evade any pursuit.<br />
10.) Direct the PCs toward the maelstrom.<br />
Perhaps Kitiara discovers them and gives<br />
28<br />
chase, or they receive a plea for help in a sea<br />
encounter, or they seek the key to the Dark<br />
Queen’s defeat.<br />
11.) PCs should eventually be called on to<br />
aid the sea elves in defeating the evil forces.<br />
12.) After the battle, word should reach the<br />
PCs about the following: Maquesta and friends<br />
were captured by pirates, Berem was sighted<br />
headed toward Mithas, and the Perechon was<br />
washed ashore on Karthay. PCs should be<br />
encouraged to take appropriate actions. During<br />
this time Lady Lengstrien and the Blue<br />
Wizard should join the party as escaped<br />
slaves. All paths eventually lead to Karthay.<br />
13.) The PCs should explore the gnome<br />
tower, thinking that Berem is there. Here<br />
Kitiara and Skie are unmasked and trap the<br />
PCs in the tower. They then fly north after<br />
Berem. Persuade the PCs to pursue Kitiara if<br />
they do not do so on their own.<br />
14.) The final confrontation between Kitiara<br />
and the PCs should occur after a mad chase.<br />
Victory seems in Kit’s lap, but Berem makes<br />
an unexpected escape.<br />
Note: Many of the maps for Chapters 5<br />
through 10 are on the black and white side of<br />
the large, fold-out mapsheet. The Blood Sea<br />
and Environs map is on the inside cover of<br />
this book.
How to Start<br />
The events chronicled in this chapter begin<br />
about a month after the player characters<br />
awakened Lorac Caledon, the elfking. Leaving<br />
Alhana Starbreeze behind to mourn her<br />
father and to rebuild Silvanesti, the heroes<br />
journeyed north to Balifor. Discovering they<br />
are now in enemy-held lands, they seek passage<br />
on a boat to the free lands. But they<br />
must proceed cautiously, so as not to draw<br />
the attention of the conquerors.<br />
You might want to create a small adventure<br />
to bring them to this point (Encounter Area<br />
40). If they find a boat to cross the Bay of<br />
Balifor, it should wreck in a storm or be<br />
attacked and hulled by a shadowy dragon<br />
(see Event 26).<br />
Note that Serinda and Kronn are met in<br />
Event 1, the start of this adventure. With the<br />
party is the NPC druid, Waylorn Wyvernsbane.<br />
It is important that this character<br />
accompany the party. If he was not with the<br />
PCs at the end of Chapter 4, he joins them<br />
before they leave Silvanesti.<br />
The party starts the adventure in Encounter<br />
Area 40. This is done to move the adventure<br />
swiftly along.<br />
Events<br />
Event 12: Friends in Need<br />
(This event occurs in the early evening on the<br />
first day of the adventure.)<br />
The journey from Silvanesti has been long<br />
and tiresome. You leave that nightmare<br />
land to reawaken to the song of spring.<br />
But it remains shadowed, its king giving<br />
his life to renew the earth.<br />
The land around you has fallen to the<br />
conquering armies of the Highlords and<br />
their draconian minions. <strong>Free</strong>dom is a<br />
thing of the past, safety but a fleeting<br />
shadow. Hard times are at hand, and<br />
every man might sell his brother. Elves<br />
and their kin are hunted and any resistance<br />
seems useless. Your only hope is to<br />
raise sufficient funds to board ship to the<br />
free western lands.<br />
This eve’s journey is interrupted by<br />
sudden shouts and the sound of a battle<br />
ahead.<br />
Some 200 yards down the road, where a cluster<br />
of trees forms a pool of shadow, a struggle<br />
is taking place. If the PCs listen they hear a<br />
voice swearing in Silvanesti Elf.<br />
A hobgoblin patrol of 20, lead by a Bozak,<br />
has discovered Kronn and Serinda hiding in<br />
the trees and is attempting to capture them.<br />
So far each has suffered 1d8 points of damage,<br />
and there are four dead hobgoblins.<br />
This group carries only 2d20 coppers plus<br />
credit vouchers for Port Balifor worth eight<br />
steel. They know little, but are under orders to<br />
stop strangers and capture any who seem<br />
odd.<br />
29<br />
Event 13: Traveling<br />
The Dragonarmy has orders to detain any<br />
who appear odd and to bring them to Flotsam<br />
(area 49) for questioning. They are also hunting<br />
elves and rebels. Most of the army tries to<br />
capture elves and rebels to gain the higher<br />
reward for living criminals.<br />
The heroes have to either travel by night or<br />
assume disguises. If they travel during the day,<br />
they encounter 1d4 patrols (see Event 12) per<br />
day. If the PCs have no disguises, these<br />
encounters automatically turn into battles in<br />
which the patrol tries to capture the PCs. The<br />
following are the chances that the PCs are<br />
allowed to pass if they are in disguises.<br />
Farmer garb = 40%<br />
Merchants = 50%<br />
Entertainers = 60%<br />
Dragon soldier garb = 65%<br />
(PCs are asked for orders)<br />
Soldiers w/prisoners = 75%<br />
Event 14: A Warning<br />
If the PCs are still on the road after three days<br />
and have not turned toward Goodlund, run<br />
this event.<br />
Half a mile ahead, the road runs through<br />
boggy land and a squad of draconians<br />
occupies the road, questioning a small<br />
merchant party.
The patrol consists of 20 Baaz and a human<br />
leader (see Men, Warrior on the Combined<br />
Monster Statistics Chart in the Appendix).<br />
They are consulting with a small weasel-like<br />
fellow as they examine the merchants and<br />
their cargo. Suddenly they haul a man off a<br />
wagon and disarm him, then the merchants<br />
are handed a poster and waved on.<br />
The PCs can remain in hiding or question<br />
the merchants as they pass. The merchants<br />
have no love of draconians and show PCs the<br />
poster or drop it as they pass. These are just<br />
eight common men trading in pelts and pottery.<br />
The poster says the following:<br />
REWARD!<br />
for capture of elves<br />
and their kin<br />
Captured: 15 steel<br />
Dead: 1 steel<br />
If the PCs rescue the captured man, his name<br />
is Erewan, a rebel, and he takes the PCs to<br />
meet the Fox, Encounter 49B.<br />
Event 15: Kender Catch<br />
When the party enters Goodlund (areas 45-<br />
48) for the first time, read the encounter<br />
description and then run this event at nightfall.<br />
This evening is overcast and gray. A chill<br />
wind howls. You move beneath the moonless<br />
sky with dim light by which to pick<br />
out your path.<br />
Shortly after nightfall a dragon is sighted. He<br />
approaches from the northeast, remaining<br />
out of missile range. He wheels in the wind as<br />
if searching the ground and then moves on.<br />
Waylorn counsels that they seek shelter<br />
deeper in the woods. This night the woods<br />
appear black and twisted. The moan of the<br />
wind and the creaking and rustling of the<br />
trees make it difficult for the PCs to hear each<br />
other.<br />
Once in the woods, a small figure breaks<br />
from the brush and runs off down a trail<br />
toward Kendermore (area 46). He seems<br />
injured, for he runs with a limp. He is actually<br />
the bait for an ambush and he tries to get the<br />
PCs to chase.<br />
If the PCs pursue they eventually find him<br />
collapsed, lying face down on the ground.<br />
This is a trap. It’s a straw dummy lying atop a<br />
covered pit. In front of the pit, hidden by<br />
leaves, is a lo-foot-wide net. When someone<br />
falls into the pit (dmg 1d4 – 1), the net is<br />
sprung and snares those standing on it. The<br />
person falling in the pit is tangled in a tarp<br />
and cannot get free.<br />
This is a kender ambush and should be<br />
made to seem ominous. They stay out of the<br />
light, throwing water and dropping cloaks<br />
over light sources from the trees overhead.<br />
Using pikes and throwing rotten squash, they<br />
herd the remaining PCs beneath some<br />
weighted nets and capture them. PCs who are<br />
captured are bound, gagged, and blindfolded.<br />
If the kender are discovered or the PCs do<br />
not follow the bait, but track it later, they find<br />
the kender camp. The kender camp in the<br />
branches of trees, using small hammocks and<br />
fires in clay pots. There are 30 kender and<br />
one leader. They are wary of strangers and<br />
take them to Kendermore (area 46) only if<br />
they surrender their weapons.<br />
Go to Event 16 for the journey to Kendermore.<br />
Event 16: A Tiring Trip<br />
This journey should be run swiftly with no<br />
encounters on the way, unless the party is<br />
free to lend a hand. The kender take the PCs<br />
along a forest track to a small boat on the<br />
Bristle River (area 45). They sail down to the<br />
fork and then pole up the Willow to Kendermore<br />
in one day.<br />
If the PCs were captured, they are thrown<br />
across the backs of some ponies and carried<br />
to the riverboat. This is an unpleasant trip for<br />
the PCs as they are bounced around and<br />
jabbed by branches, or dropped in puddles of<br />
water. The entire trip is made in ominous<br />
silence.<br />
Event 17: A Strange Welcome<br />
This occurs when the PCs enter Kendermore<br />
(area 46). If they came of their own will, they<br />
are led through to a hall escorted by guards.<br />
If they are brought here as prisoners, they<br />
are carried to the hall and dumped on the<br />
floor. When their blindfolds are removed, they<br />
are momentarily blinded by the bright light.<br />
Laughter and applause fill the room.<br />
This room is filled from wall to wall and<br />
floor to ceiling with giggling, nudging<br />
kender. Obviously some sort of feast hall,<br />
there are long tables, benches, and ornate<br />
pillars strewn about. The hall is 30 feet<br />
tall. Despite the gaiety, you notice that<br />
many kender have weapons drawn and<br />
ready. Three grim-looking kender in floorlength<br />
vests approach.<br />
At first the PCs are accused of being mercenaries<br />
or spies of the Highlords and taunted<br />
with dire threats. If Kronn is with them and<br />
speaks for the PCs, the kender swap goodnatured<br />
barbs with him about his choice of<br />
companions. They demand that he prove he<br />
is who he says. The kender are just having<br />
some fun at the party’s expense.<br />
After several minutes, or if it is pointed out<br />
that there are elves with the party, a tall<br />
kender with graying hair leaps down from a<br />
chandelier and shouts, “Enough! Forgive our<br />
poor manners! Welcome to Kendermore! Welcome<br />
back, son!”<br />
This is Kronin Thistleknot, marshall of Kendermore<br />
and Kronn’s father. He orders a feast<br />
of roast pig, wine, bread, cheese, dried fruits,<br />
fish, and vegetables.<br />
30<br />
The PCs’ weapons and gear are returned,<br />
though some items are missing and some<br />
pieces are not theirs. You should inform Kronn<br />
that he can eventually “re-borrow” (i.e., steal<br />
back) all of the PCs’ gear before they leave.<br />
The feast is swiftly set forth and all but the<br />
PCs have a grand time. The feast is very infuriating,<br />
for things keep appearing and disappearing<br />
before the PCs. They find kender children<br />
and women tugging at them and looking<br />
in their pockets while kender males slap them<br />
on the back. This should be played as a comedy<br />
of thefts and returns.<br />
Rumors can be gathered during the feast,<br />
selecting either from the rumor chart or the<br />
following:<br />
• Draconian patrols rarely come here.<br />
• Ogres patrol the area and have killed several<br />
kender.<br />
• The ruins of Kendermore are rich in treasures<br />
and dangers, and are an interesting<br />
place to visit if the PCs would like a guide.<br />
The Prophecy: At some time during the<br />
evening, Kronin casually mentions a warning<br />
he received from the Oracle of the Woods.<br />
She foretold that a band of heroes gifted by<br />
the gods would pass through Kendermore. He<br />
was told to tell them they would be wise to<br />
seek her out. He wonders if the PCs have seen<br />
any such heroes?<br />
The Oracle is said to have the ability to<br />
read the plans of Fate and can show the best<br />
paths to take. Kronin does not remember the<br />
way to the Oracle, nor does anyone else here.<br />
There is one, Master Spry, who might be<br />
sought for directions. He lives atop Springfalls<br />
at the source of the Bristle River.<br />
The Gift: At the end of the feast, a woman,<br />
dangling bare feet from atop a pillar, suggests<br />
their guests be given a gift. All the kender<br />
agree and there is a shouting, giggling discussion.<br />
It is decided the gift is to be a companion<br />
to go along with them and return with the<br />
story of their great adventure.<br />
Kronin chooses Kronn to go. Kronn is both<br />
cheered and jeered. He is tossed about by<br />
several kender, dumped in the punch bowl,<br />
and finally rolled down the carpet to the PCs’<br />
feet. The feast is over.<br />
Event 18: Kronin’s Council<br />
Kronin is a wise kender, as kender go, and<br />
might be sought for advice. Below are his<br />
responses to typical questions:<br />
Where can the heroes hire a ship? The only<br />
port with free ships is Flotsam (area 49). He<br />
has heard of someone known as the Black<br />
Captain, who is said to be fair and close-lipped.<br />
How much might a ship cost? He thinks<br />
several thousand steel in these tough times.<br />
Where might they find such money? He is<br />
unsure. He has heard of two ruins in the Dairly<br />
Plains (Legends 2 and 5; see the “Rumors,<br />
Legends, & Omens” in the Appendix) and of<br />
a valley of gems in the Ogrelands (Legend<br />
19). Or they might try to steal from the Highlord’s<br />
treasury.<br />
How do they reach Flotsam? It is four days<br />
journey overland to the west. Or they can<br />
travel to the coast in one day and hail a ship,
or he offers to help them catch a small pirate<br />
ship.<br />
What should they beware of overland?<br />
Watch out for ogres and the Shirgrenth. He<br />
gives them a ring to identify them to a friend<br />
of his named the Fox.<br />
If they decide to attack the pirates. Kronin<br />
says there is a secret cove that pirates often<br />
use at Norreach (area 50) and gathers 15<br />
kender to go with him and the heroes.<br />
Event 19: An Eerie Feeling<br />
As the PCs prepare to leave Kendermore,<br />
they get the eerie feeling that someone is<br />
watching them. There is an invisible spy,<br />
Gildentongue the Aurak, who is also searching<br />
for the Oracle. He follows at a distance.<br />
Event 20: Searching for Spry<br />
Kronn does not know Master Spry, but he<br />
learns the way to Springfalls (area 47) and<br />
can guide the party there. Kronn recognizes<br />
many of the kender snares and warnings<br />
along the way and knows them to be mostly<br />
harmless. You should take Kronn’s player<br />
aside and explain this to him. Kronn can do<br />
as he wishes with this knowledge, just let the<br />
player know when they are encountered by<br />
nodding at him.<br />
The journey to Springfalls is fairly uneventful,<br />
but run three of the small kender encounters<br />
listed under Goodlund (Encounters 45 &<br />
48).<br />
Event 21: Master Spry<br />
Sitting behind a rock in the clearing is an<br />
elderly kender with spectacles, fishing in a<br />
pool. He is surly and does not like to have his<br />
fishing interrupted, even though there are no<br />
fish in the pool.<br />
If questioned, he answers in a rude and<br />
roundabout fashion: “Yes, the Master’s home<br />
is at the top of the cliff,” “How would I know if<br />
he’s home, I haven’t been there.” This fellow<br />
is Marigold Featherwhistle Spry, but does not<br />
admit it. He wants to be left alone.<br />
The cliff is slick and dangerous. To climb to<br />
the top requires three successful Dexterity<br />
Checks with a -2 penalty. Using a rope eliminates<br />
the penalty. If a check is failed, the<br />
character falls. On a second successful Dexterity<br />
Check with a -4 penalty, he catches<br />
himself on a branch for 1d4 points of damage.<br />
Otherwise he falls into the pool (2d4<br />
points of damage).<br />
The old kender does not appreciate them<br />
scaring the fish, and wonders aloud why they<br />
do not use the ladder behind the waterfall.<br />
This ladder is slick and requires one Dexterity<br />
Check to use. It exits through a tunnel at the<br />
top.<br />
When the PCs return from the house, Spry<br />
admits he is the one they are looking for. “I<br />
would not live up there—too dangerous!” He<br />
tells them the way to the Oracle if they<br />
promise to leave him alone.<br />
The way to the Oracle, he says, is to follow<br />
the river east to a divided tree. Then turn due<br />
north until they come to a dog-headed rock.<br />
Then go southwest until they come to the<br />
stony pointing finger. From there they must<br />
cross the Teeth of Despair, enter the Gap, and<br />
pass the Guardian. There is the Oracle’s<br />
cave.<br />
These directions lead the PCs in a circle,<br />
bringing them back past the pool and a half<br />
mile to the north. It is evening by the time<br />
they return and Spry is gone.<br />
Event 22: The House<br />
The top of the pinnacle is swept by a cold<br />
wind and there are patches of ice and snow.<br />
Spry’s house sits on a spur of rock and is<br />
reached by a rickety old rope bridge.<br />
This house has been abandoned for years<br />
and is now a taer lair, home to two taers.<br />
(Spry lives in a cave.) The house is in disrepair.<br />
Doors are warped and ajar.<br />
PCs studying the house see a shadowy figure<br />
moving about on the first floor. If the PCs<br />
decide to search Spry’s house, the taer<br />
retreats, making sounds as he goes which<br />
should convince the PCs that Spry is here.<br />
The small house has a porch with a rickety<br />
railing in front. Anyone stepping onto the<br />
porch (the only way into the house) has a<br />
10% chance of breaking through the floorboards<br />
and falling into the pool far below<br />
(3d4 points of damage). Inside, the house is a<br />
single room with several pieces of broken furniture<br />
and tattered remnants of decorations.<br />
The two taers wait until at least one character<br />
has stepped into the house before attacking.<br />
Event 23: The Path to the Oracle<br />
The Berries<br />
Before you, an odd rocky formation points<br />
a stony finger to the southwest. At its<br />
base a tired oak grows in the midst of a<br />
stand of briars and weeds near a small<br />
hillock. Large golden berries hang from<br />
vines wound around the oak.<br />
A path through the briars can be discerned<br />
from a tree. If the PCs try to cut their way<br />
through, they encounter four patches of tanglevines<br />
(AC 7; dmg 1 d4+ 1 /round; hp 20).<br />
The berries grow high in the tree and can<br />
be picked by climbing the tree or standing on<br />
the hillock and using a bladed weapon. The<br />
hillock is a giant slug. It attacks when a PC<br />
steps on it or when the PCs have the berries.<br />
The Teeth of Despair<br />
Now it starts to drizzle and the ground<br />
becomes slippery. After 300 yards, have the<br />
PCs make a surprise roll. If not surprised, they<br />
spot a figure behind a tree, unmoving. If surprised,<br />
they stumble face to face with the<br />
corpse of a man pinned against the tree by a<br />
spiked sapling trap. It is the weasel-faced<br />
man from Event 14.<br />
31<br />
The next 100 yards are full of traps every<br />
few feet; if the PCs look for them they can<br />
avoid them. If they do not look, there is a 1 in<br />
4 chance each round that someone blunders<br />
into another spiked sapling (2d6), pungi<br />
stakes (1d4), or spiked pit (2d4). A wolf<br />
howls if a PC is wounded.<br />
The rain starts to fall heavily and the party<br />
is pursued by 20 wolves who close to attack if<br />
the party stops for more than three rounds. If<br />
attacked, the party can lure wolves into the<br />
pits by rolling a successful Dexterity Check to<br />
step out of the way in time, or a Strength<br />
Check to throw a wolf into a trap. The wolves<br />
flee once they have lost half their number.<br />
The Gap<br />
The black maw of a tunnel opens in the cliff<br />
face ahead. This tunnel turns to the left after<br />
100 feet and goes into a boxed valley.<br />
Just around the bend are four weary ogres<br />
and their leader. If they hear the party<br />
approach, they retreat to the valley and set an<br />
ambush for the PCs. If surprised, three ogres<br />
rush the party while two throw darts.<br />
If the ogres hear the party, they use a deadfall<br />
log to surprise the party first (saving throw<br />
vs. petrification or the party’s first rank suffers<br />
2d6 points of damage). Then two ogres use<br />
darts to pin the remainder of the party in the<br />
cave while the other three rush those hit by<br />
the log.<br />
The Guardian<br />
The valley is 100 yards wide. In the opposite<br />
cliff is a cave entrance, 50 feet above the<br />
ground. The valley is barren except for a leafless,<br />
lightning-struck tree 10 yards in front of<br />
the cave. This is really a living black willow.<br />
There is a hollow cavity at its base, shelter<br />
from the storm. The tree waits to attack one<br />
PC when the others are distracted.<br />
A faint glow of a fire can be seen within the<br />
cave. High winds in the valley make it dangerous<br />
to levitate. The cliff imposes a –40%<br />
penalty to climbing attempts.<br />
The Oracle<br />
The cave is filled with an obscuring, shifting<br />
mist. As PCs explore the mists they find the<br />
chambers seem endless, filled with illusions<br />
of danger, such as:<br />
• A dancing light of a man that leads to a<br />
10-foot-deep pit<br />
• Doors that vanish when touched<br />
• Voices of friends calling out<br />
• Dead comrades who seek to harm the<br />
PCs<br />
No harm results from these illusions. After a<br />
while the PCs reach the central chamber.<br />
Before a bubbling cauldron from which mist<br />
pours sits a bulky figure in shadow. This is the<br />
Oracle, an ogress (use Hag stats on the Combined<br />
Monster Chart). She is a hideous old<br />
thing who speaks in riddles and vagaries. If<br />
attacked she can double her size and use a<br />
giant broom to sweep the offenders out the
mouth of the cave, actually only 50 feet away.<br />
Or if she is in real danger she shrinks to the<br />
size of a mouse and escapes.<br />
The Oracle agrees that the PCs are the ones<br />
of whom she spoke, but she casts their fortunes<br />
only for a price. She accepts the golden<br />
berries or a magical item. (Give vague hints<br />
about upcoming events in the adventure.)<br />
At the end of the reading she gives a final<br />
warning that the choice for good or ill is<br />
theirs. Then fear creeps across her face and<br />
she says “Evil comes this way. T’will be my<br />
undoing.” She vanishes and the mists clear.<br />
The PCs find themselves in a bare cave<br />
with the entrance but 50 feet away.<br />
Event 24: Looking Back<br />
As the heroes leave, a PC looks back. He sees<br />
a man standing beneath the devil tree. There<br />
are two flashes of light from within the cave,<br />
and after a moment a hawk flies out.<br />
This was Gildentongue seeking the Oracle.<br />
Failing to get the answers he sought, he<br />
attacked her and then fled as a hawk.<br />
Event 25: Hailing a Ship<br />
When PCs are in a coastal hex, there is a 1 in<br />
4 chance that they sight a ship per day. To<br />
hail the ship, they must build a bonfire or signal<br />
in some manner. On a roll of 1 on 1d6, the<br />
ship does not respond, otherwise it draws<br />
close and puts a longboat ashore. Use the<br />
map of the pirate ship and the descriptions in<br />
the next chapter in Flotsam. The ship’s captain<br />
asks for a fee of 100 steel per person to<br />
take the characters to Flotsam.<br />
Event 26: Dragon Strike<br />
If the PCs take a boat to Flotsam, this event<br />
occurs one hex away from the port.<br />
All day clouds have filled the skies. Now<br />
as the sky darkens to night it looks as if<br />
you are facing a nasty squall.<br />
If the PCs stole a pirate ship, the ship runs<br />
aground on a sandbar, 50 yards from shore.<br />
If the PCs hired a ship, they are betrayed as<br />
the storm closes in. The PCs are outnumbered<br />
and taken by surprise. These pirates<br />
want to steal their valuables and throw them<br />
over the side.<br />
Just as things start to look grim, a shadow<br />
falls across the ship. This is the bronze dragon<br />
Clarion. In the darkness he cannot be identified.<br />
Thinking this to be a pirate ship, he is set<br />
on sinking it. He maneuvers for two rounds.<br />
On the third round he fires a lightning bolt<br />
near the water line, hulling the ship.<br />
The crew panics; the PCs can use a longboat<br />
to escape to shore.<br />
Event 27: Helpful Stranger<br />
On the second day of the overland trek, the<br />
party encounters Gildentongue disguised as<br />
Master Spry. He is as rude as when first<br />
encountered. He is curious about the heroes’<br />
purpose, however.<br />
In return, he notes that if the PCs want to<br />
use his boat to reach Flotsam then they are<br />
welcome to it. The boat is in a sea cave and<br />
he provides directions and leaves.<br />
The cave is at the nearest coast and indeed<br />
there is a rickety old longboat with a sail<br />
there.<br />
Encounters<br />
35. Port Balifor<br />
Nestled beside a sheltered cove with barren<br />
steppes to its back, a low stone wall<br />
and a salty canal protect the town. This<br />
port has grown out onto the pilings of the<br />
many wharfs and piers, and half the town<br />
is built above the tidal flats. Beneath the<br />
pilings is said to be another world.<br />
Port Balifor is a conquered town. Weapons<br />
are forbidden, the penalty for violating this<br />
law is flogging (dmg = half hp + 1d12). Troublemakers<br />
become hunted men. The soldiers<br />
can be bribed.<br />
Strangers in town are welcome at the Pig<br />
and Whistle tavern. The owner, William<br />
Sweetwater, has the face of a pig but is kindhearted.<br />
He recommends that PCs go north to<br />
Flotsam.<br />
The waterfront is under the control of the<br />
Dragonarmy, and only their ships can come<br />
and go freely. Characters wandering in this<br />
area might be forced into work details.<br />
Beneath the wharfs is a maze of pilings and<br />
sewers frequented by thieves, scalawags, and<br />
off-duty hobgoblins. Most anything can be<br />
bought here at 10 times normal price, but<br />
characters must beware discovery and<br />
betrayal.<br />
36. Coast of Balifor<br />
Patrols of draconians prowl this land and<br />
there is a 35% chance of meeting one each<br />
day.<br />
A patrol consists of 15 Baaz and either a<br />
human warrior leader on horseback or a<br />
Bozak with these spells: fight, magic missile,<br />
shield, ESP and web. They question anyone<br />
they meet.<br />
Once the party should witness eight warriors<br />
and 13 Kapaks executing a dozen rebels.<br />
37. Inner Steppes<br />
This country is empty, save for an occasional<br />
huddle of farms. When the PCs first enter this<br />
land, they encounter a rough-looking warrior<br />
sitting on a saddle. He smiles wryly. His horse<br />
was commandeered by some hobgoblins for<br />
dinner. He is a mercenary and, seeing the<br />
party’s weapons, notes that people carrying<br />
weapons had better join the dragons or find<br />
themselves spitted on their own swords. He<br />
might share a rumor or legend.<br />
32<br />
Squads of 15 hobgoblins mounted OI<br />
wolves prowl the plains during the day.<br />
38. Steppe’s Edge<br />
The high plains of the steppes fall off to<br />
grasslands to the east. Rugged bluffs form<br />
a wall. Blind canyons slice through the<br />
bluffs.<br />
This ridge line is mostly abandoned. There is<br />
a 20% chance that the PCs encounter a band<br />
of 10 bandits and a leader (use Slig stats).<br />
The bandits use a decoy of an overturned<br />
wagon and three wounded merchants. Five<br />
Kapak bodies lie on the ground. These draconians<br />
are not really dead. The remaining bandits<br />
are hidden in grass-covered pits.<br />
The bandits lair in a box canyon with 15<br />
others, an ogre, and three watch wolves. They<br />
always post three sentries. Their treasure<br />
includes trade goods, rations, and jewelry<br />
worth a total of 2,356 steel.<br />
There is a 10% chance each day that there<br />
is an earthquake in this area. Roll 1d4 for<br />
intensity: 1 = rumbling; 2 = knocked off feet; 3<br />
= 10-foot-deep crevices open; 4 = 5d6 points<br />
of damage to each, half if successful saving<br />
throw vs. petrification.<br />
39. Mellow Swath<br />
The grasslands stretch for miles. The<br />
spring thaw has turned patches into a<br />
muddy marshland. Flowers and trees bear<br />
garlands of white blossoms.<br />
Occasional farms are encountered here (30%<br />
abandoned). The local folk live in terror of<br />
something they call the Dark Queen’s child, a<br />
giant serpent (use Giant Sea Serpent stats).<br />
The party discovers signs of the creature’s<br />
existence—eight-foot-wide swaths of flattened<br />
grass and crushed bodies.<br />
On the third day, they sight a house. Someone<br />
on the roof is waving a flag. There are<br />
four women, a boy, a girl, and a terrified hobgoblin.<br />
They try to persuade the PCs to stay, fearing<br />
that the horror will catch them in the open.<br />
They have enough food for three days. That<br />
night the serpent comes in the dark and drags<br />
off the hobgoblin. The snake returns each<br />
evening and chases those who try to flee.<br />
40. Verdant Plains<br />
Spring has started to paint the plains of<br />
Balifor green. There are few inhabitants,<br />
but buffalo roam the plains, herded by<br />
men with dogs.<br />
The PCs begin the adventure here. There is a<br />
35% chance that they find their way blocked<br />
by wild buffalo. Herders might be encoun-
tered here, but they avoid strangers. Reward<br />
posters are tacked to trees everywhere.<br />
41. Grimsome Glade<br />
The forest presses close upon itself as if<br />
marshaling to hold back foes. Dim light<br />
and shadows fit beneath the canopy. The<br />
wind sighs through the woods.<br />
There is a 10% chance that the PCs encounter<br />
a fallen log bridge that is really a black willow<br />
with something glinting in the hollow interior.<br />
42. Wendle Woods<br />
The undergrowth of tangled bushes<br />
restricts movement to narrow trails. An<br />
occasional hut is found huddling beneath<br />
the mighty trees.<br />
A band of 18 wild elves lives in the woods.<br />
There are three druidic leaders who can control<br />
the elder elms in the area. These elves<br />
grudgingly give shelter if asked by elfkin. The<br />
night they do, 28 Baaz and three Bozaks<br />
attack.<br />
43. The Break<br />
The forest falls away to the north and<br />
south, leaving a gap of broken grasslands.<br />
A muddy road winds past clumps<br />
of thorny bushes. A mile north of the road<br />
stands a hut on stilts, smoke curling from<br />
its chimney.<br />
An old hag lives in the hut with three hellcats<br />
(use Hellhound stats). She can cast two illusions<br />
a day and usually makes it seem that<br />
her hut can animate. She has cages, shackles,<br />
and stocks in her hut. She does not chase<br />
people, but if someone comes visiting, she<br />
tries to drug them and lock them up. She has<br />
a pouch of 20 gems (50 stl each) stuffed in a<br />
shrunken head.<br />
44. Wendlerithing River<br />
The waters of this river are high. Many<br />
trees stand with their trunks awash. Dogwoods<br />
flower on the banks.<br />
In the weeds beside the bank are two skiffs<br />
that barely hold 10 people and their gear.<br />
Long poles can be cut to travel upriver. Since<br />
the PCs are not sailors, whenever they face a<br />
difficulty, the rudder man must roll a Wisdom<br />
Check. If he fails, anyone who does not roll a<br />
successful Dexterity Check falls overboard.<br />
Difficulties include choppy waters, high<br />
winds, snags, or being attacked while in the<br />
boat. A difficulty occurs once per hexside that<br />
the PCs travel along. A giant eel might (30%)<br />
attack anyone entering the water. This river is<br />
100 yards wide and requires two successful<br />
Dexterity Checks to swim.<br />
45. The Willow & Bristle Rivers<br />
Running swift and darkly, this forest<br />
stream gurgles merrily through wild woodlands.<br />
Time and again the narrow stream<br />
tumbles over shallow falls.<br />
This area has several encounters.<br />
Kender: A patrol of 14 kender and a leader<br />
ambushes the PCs, decoying them with one<br />
kender who acts like a frightened child stuck<br />
in a tree. He is scared of weapons and tries to<br />
get PCs to put them down. If the PCs are<br />
known, the kender taunt them.<br />
Crazed Buffalo: This beast charges after<br />
1d8 rounds.<br />
Log Bridge: This bridge is rotted and has a<br />
20% chance of breaking and dropping the<br />
victim into icy water (1d4 points of damage<br />
per round).<br />
Snare: A piece of bright cloth or a coin lies<br />
beneath a bush. Picking it up triggers a noose<br />
that lifts the victim into the air.<br />
Trap?: In the middle of a 30-foot-diameter<br />
puddle of mud lies a coin pouch with 50 copper.<br />
Those exploring might slip and fall in the<br />
mud. The center of the puddle is an eightfoot-deep<br />
mire, treat as quicksand. The pouch<br />
is on a pole in the mud.<br />
46. Kendermore & the Ruins<br />
Winter squash, grape vines, and fruit trees<br />
are all abloom. The air is filled with the<br />
hum of bees. What first seems wild is discovered<br />
to be carefully cultivated. Suddenly<br />
you are surrounded by armed<br />
kender.<br />
There are 25 kender and two leaders. Unless<br />
they have some business in Goodlund, the<br />
PCs are asked to turn around. If they desire to<br />
see the chief, the kender demand the PCs disarm<br />
first, then escort them to Kendermore. If<br />
the kender are attacked, they blow a horn.<br />
Read the following if the PCs manage to talk<br />
their way into Kendermore.<br />
What first appears to be a tangled forest is<br />
the city of Kendermore.<br />
Its gateway is a simple arbor opening<br />
onto a footbridge over a creek. Vines<br />
grow over the buildings with broad roofs<br />
and courtyards. Twisting stairs, ladders,<br />
and rope-ways link the rooftops.<br />
This town is filled with curious kender. The<br />
PCs gain an audience and are robbed blind if<br />
they are not careful. If a kender is confronted,<br />
he returns one item.<br />
33<br />
The ancient tomb, called the Ruins, is a<br />
mammoth structure carved out of a hill of<br />
rock. Vines drape the ruins. Dark empty<br />
niches bespeak treasures long since pilfered.<br />
There seem to be no entrances.<br />
If the PCs want to explore the Ruins, they need<br />
a kender guide to find an entrance. This ruin<br />
was once the tomb of a king. Anything the<br />
PCs find is stolen and left in the ruin before<br />
they manage to leave. Typical monsters<br />
encountered here include umber hulks and<br />
boring beetles that create more tunnels. Other<br />
creatures include a gargoyle, ochre jelly, and<br />
an ettin. Encounters found here include these:<br />
• Slides and water with leeches<br />
• Floors that collapse<br />
• A semi-intelligent beetle hive<br />
Featured treasures here:<br />
• A diamond (500 stl)<br />
• A golden orb and cupped scepter (1,800<br />
stl)<br />
• A wand of wonder (36 charges)<br />
• A decanter of endless water<br />
• A mirror of opposition<br />
47. Springfalls<br />
The forest climbs a stony hill. Rising<br />
above the woods is a 150-foot-high stone<br />
peak. Built on a spur of rock at the summit<br />
is a small house. A silvery strip of<br />
water cascades down the cliff to an icerimmed<br />
crystal clear pool.<br />
This is similar to the house in Event 22, but<br />
14 goblin deserters from a Dragonarmy live<br />
here. They attack as the PCs reach the summit.<br />
Mountain goats climb the steep rock and<br />
butt climbers (use Wolf stats).<br />
48. The Gaggle Wood<br />
The dark giants of the forest are just budding.<br />
Prickly gooseberry and gray gorse<br />
huddle in the shadows, while songs of<br />
birds are a symphony within the cool<br />
recesses of the wood.<br />
A number of encounters might occur in this<br />
area (DM’s discretion).<br />
Ogres: This group of six ogres and leader is<br />
hunting for rebels. If they spy the PCs, they<br />
try to catch one for questioning.<br />
Slapshot: Here is an obvious pit. Stepping<br />
to either side triggers a branch that knocks<br />
the victim into the pit (2d4 points of damage).<br />
Roots: Tangled roots trip a character (successful<br />
Dexterity Check to avoid). If he fails,<br />
he must roll a successful Wisdom Check or<br />
suffer a sprain (half speed for two days).<br />
Shirgrenth: The land is scorched. In the<br />
shadows is a fearsome shape with glowing
eyes. The beast waits, watching the party.<br />
This is a dummy of hides over wicker. Within<br />
the beast are casks of tar, naphtha, and oil,<br />
which explode if they catch fire (4d6 points of<br />
damage to anyone within 60 feet).<br />
49. Flotsam<br />
The forest has been cruelly cut back from<br />
the path. The trails have been churned<br />
into mud by many clawed feet.<br />
After two hours, a group of five rebels disguised<br />
as merchants meets the PCs and asks<br />
to travel with them. Later, they meet helmed<br />
mercenaries wearing Dragonarmy colors,<br />
actually more rebels. This is a test to see if<br />
the PCs fight the mercenaries when they start<br />
to get rough. If they do, the fight is ended<br />
before anyone is really harmed. The rebels<br />
offer to lead the PCs to their chief. If the PCs<br />
do not help, they are allowed to continue after<br />
the rebels relieve them of their purses.<br />
The rebels’ base is reached via a maze of<br />
brambles. Silver Fox is friendly, though Badger<br />
growls a lot. Besides rebels, there are also<br />
six wolfhounds and a spotted lion trained by<br />
Badger. The rebels offer advice and might<br />
agree to aid the PCs.<br />
The land is hilly and cultivated. A small,<br />
dirty village sits on the edge of a sheltered<br />
bay. This is Flotsam, a collection of the<br />
castoffs of Krynn. Rickety wharfs run out<br />
to the bay. To the east a curving hook of<br />
land forms a stony bluff. The town’s few<br />
respectable buildings are built upon that<br />
rock. This is the capital of the Highmaster<br />
of Balifor.<br />
For more on Flotsam, see Chapter 6.<br />
50. Norreach<br />
This land forms a windy bluff above the<br />
Sea of Istar. Once many villages dotted<br />
the land. Now they are only empty shells,<br />
broken and overgrown.<br />
There is a secret cove on the coast used by<br />
pirates. A pirate ship is here now with 23 pirate<br />
guards and three warriors. If the three leaders<br />
are defeated, the remaining pirates agree to<br />
sail to a destination in return for their lives.<br />
This ship travels one day before worm-ridden<br />
wood causes it to sink. If the kender help capture<br />
the ship, they loot it before leaving. These<br />
pirates have only eight casks of brandy.<br />
51. Wood’s Edge<br />
Here the forest ends. The fields beyond<br />
are dressed with clusters of thorny bushes.<br />
A hunting party of 15 sligs and a leader hides<br />
in the grass. They want to capture characters<br />
to carry off to feast (see Encounter 53).<br />
52. Somber Coast<br />
The rocky bluffs and low hills are carpeted<br />
with yellow grass. Clusters of thorn<br />
trees dot the land. Inland, large piles of<br />
stone sporadically interrupt the flowing<br />
fields.<br />
A pack of 18 ghouls stalks this land at night,<br />
hiding in the ancient cairns by day.<br />
53. The Laughing Land<br />
Here the land is a sea of grass. Valleys are<br />
marshy and thorn bushes crest the hills<br />
The crowns of several hills are bare,<br />
beaten flat by many clawed feet.<br />
Each evening the sound of stone drums beats<br />
across the night sky. A band of 29 sligs and<br />
two chiefs feasts on their latest captives,<br />
building a fire around victims tied to stakes. If<br />
no characters are caught, two human hunters<br />
are staked up. If the PCs rescue the hunters,<br />
the hunters just want to return home and are<br />
abrupt in their leavetaking.<br />
54. Writhingwreck<br />
Tall sea grasses blow in the salt breeze.<br />
When the tide is out, one can walk miles<br />
from shore on the tidal flats. Crabs scuttle<br />
across the marshy ground and gulls circle<br />
above. Clouds of midges gather.<br />
55. The Gullet<br />
Here are muddy, marshy flats narrowing<br />
to the mouth of the Gullet River. When the<br />
tide changes, a 20-foot-high wall of water<br />
rushes across the flats in 30 minutes.<br />
At low tide there are patches of quicksand<br />
that might be blundered into. A character<br />
sinks below the surface in 1d6+1 rounds if not<br />
aided; a sinking character must roll a successful<br />
Constitution Check each round or lose<br />
1d8 hit points.<br />
56. Lifesbreath<br />
Gentle rolling hills are covered by spring<br />
grasses. The river splashes noisily to the<br />
sea. Cottonwoods crowd the banks. The<br />
breeze fills the air with foam and windblown<br />
seeds.<br />
Strangle vines grow on the riverbank.<br />
34<br />
57. Heartsblood<br />
The river is thick and muddy. Across the<br />
southern grasslands the river widens but<br />
remains swift. Only bare trees line the<br />
bank.<br />
Near the source of the river are the three-foottall<br />
entrances to a borer beetle hive. There are<br />
32 beetles and 16 larvae. In the hive are the<br />
remains of a warrior and his shield +1 and<br />
ring of warmth.<br />
58. The Hollow Lands<br />
The wind moans through this land. The<br />
rugged upland plains are shrouded with<br />
gray grasses and barren trees. Bones<br />
thrust up out of the earth.<br />
Packs of 2d4 hell hounds hunt the land. At<br />
night, 2d6 ghouls join the hunt, crawling from<br />
their burrows. A small shrine stands in the<br />
center of each hex, haunted by a wraith who<br />
warns the PCs to turn back, their time is not<br />
on them yet.<br />
59. Bloodwatch Ruins<br />
Here the grasses are withered and the<br />
blossoms have fallen. The land is<br />
windswept rocky hills. Overlooking the<br />
sea sits an abandoned monastery.<br />
The inhabitants of this ruin were spared the<br />
devastation of the Cataclysm, but they were<br />
made to watch the destruction as punishment<br />
for their pious pride. Now they must watch for<br />
all eternity. This ruin includes encounters<br />
such as:<br />
• A maze of broken tombs<br />
• A living altar that animates<br />
• A wall that weeps<br />
Typical monsters include wraiths, ghasts,<br />
ghosts who walk the halls, and a lonely spirit<br />
who desires to talk unto eternity.<br />
Treasures of the ruin include the following:<br />
• The treasury (10,000 pp)<br />
• A scroll of protection from undead<br />
• A clerical scroll: raise dead, speak with<br />
dead, and animate dead<br />
60. Lands End<br />
Short grass covers the low hills and sandy<br />
soil. Gorse and briars twist through the<br />
grass. On a northern spit of land is a large<br />
stone well.<br />
Two spotted lions stalk this land at night;<br />
there is a 20% chance they are encountered.<br />
There are four cubs in the den (HD 3+3; dmg<br />
half; hp 18). There is a battered old helm and
a medallion on a chain with a 600-steel ruby,<br />
which the cubs play with.<br />
The well appears to be bottomless. A spirit<br />
naga lives at its bottom (100 feet down), hidden<br />
by a continual darkness spell. When<br />
someone approaches the well, it claims to be<br />
the spirit of the wishing well. Then it tries to<br />
get the PCs to throw treasure down. If someone<br />
climbs down, there is a secret door into a<br />
tunnel up. The naga’s treasures include 6,000<br />
stl, 21 gems (worth 75 stl each), potions of<br />
clairaudience and cloud giant strength, a<br />
scroll of transmute mud to rock, stone shape,<br />
and stone to flesh, and a bag of holding.<br />
61. Edgewater<br />
Long beaches of sand stretch before stony<br />
cliffs. On the beaches are the rotting hulks<br />
of wrecks. Odd tracks of a beast that<br />
walks upright on two-toed claws can be<br />
found on the beach.<br />
A pair of adult vodyanoi, aquatic umber hulks,<br />
lives just off shore and hunts the beach for<br />
food. In places the hummocks of their tunnels<br />
can be seen. Elsewhere careful pits have been<br />
dug beneath the sand. When someone walks<br />
on one, he falls into the beast’s clutches.<br />
62. Northern Dairly Plains<br />
Stony hills rise from the plains. Rocky<br />
canyons and stream valleys slash through<br />
the hills. The ground is broken and rocky.<br />
There is a feeling of being watched.<br />
A bizarre creature stalks these plains. By day<br />
it is incapable of harming anyone. By night it<br />
gains solid form and hunts for someone to<br />
feed on. (Use Death Statue stats, but its touch<br />
causes paralysis.) In light it is AC -1 but suffers<br />
a -1 penalty to its attack rolls. In its<br />
throat is a pearl worth 2,000 steel that regenerates<br />
the creature if exposed to moonlight.<br />
63. Windpipe Cove<br />
Narrow paths cross cliffs and tumbled<br />
rock. Surf crashes against the cliffs. A<br />
faint hooting sound is heard in rhythm<br />
with the waves.<br />
This land hosts the Maddening Spring. Those<br />
who drink from it once are cured of all ills, but<br />
those who drink again must roll a successful<br />
saving throw vs. poison, with a -2 penalty. If<br />
the roll fails, they are driven mad for 2d6<br />
days. This madness takes many forms:<br />
• Uncontrollable desire to giggle<br />
• Cannot stay awake<br />
• Dazed, confused, and wandering<br />
• Attack any within 30 yards<br />
The spring is in a sea cave that hoots with the<br />
crash of the waves. The cave has various<br />
obstacles that require Ability Checks to cross,<br />
such as the following:<br />
• A slippery wall to climb (Dex)<br />
• Tight space (Dex)<br />
• Poison sea urchins (dmg 1d4)<br />
• Crevice, might get stuck in (Str)<br />
• Crashing surf that knocks one over (Str)<br />
64. Boilers Bay<br />
The sound of crashing waves echoes<br />
across the broken hills. Steep cliffs face<br />
the sea. The shattered stone at its base is<br />
clouded with a mist as waved crash against<br />
the wall. From a distance, the tall spumes<br />
of spray look like clouds of steam.<br />
Fourteen skyfishers lair here.<br />
65. Eastern Coast<br />
The cry of birds fills the air. A narrow<br />
gravel beach edges the shore.<br />
66. Southern Dairly Plains<br />
Spring has begun to paint this land of broken<br />
hills and rugged gorges. The grass is<br />
turning green and thorny plum trees blossom.<br />
The song of crickets fills the air.<br />
You can run one of these encounters.<br />
Swarm: This is an army of fierce velvet<br />
ants. Treat as the swarm in area 14, but they<br />
do not obscure sight. Their venom causes<br />
pain for 2d4 turns (-2 to attack and damage).<br />
Carrion: The evil odor of death is carried on<br />
the wind. The raucous call of a cowbird is<br />
heard as it chases gnats drawn to this grisly<br />
feast, the corpse of a man or a slig.<br />
Tomb: Through a cleft in a rock is the tomb<br />
of an ancient hero. A slig spear lies here.<br />
Beneath webs on the wall are carvings of a<br />
warrior astride a dragon wielding a mighty<br />
lance. In a gully outside is the shriveled form<br />
of a slig. Terror grips its face, for around its<br />
throat are the hands of the dead warrior.<br />
67. Thunderhead<br />
A thundering, booming sound echoes here.<br />
Rocky gorges and canyons split the land<br />
from the sea coast. There is little life here,<br />
and the few animals you see are moving<br />
inland. You feel a tug in that direction.<br />
In the center of this land is a grotesque beast<br />
that spins a magical net. When PCs enter this<br />
land, they feel a desire to travel to the center.<br />
Every hour a successful saving throw vs. spell<br />
(with a -1 penalty for each hour here) must<br />
be rolled by each PC. Any who fail are compelled<br />
to move toward the center. The PC can<br />
35<br />
resist, but at best he finds himself walking<br />
sideways, slowly spiraling in.<br />
The heart of the land is a funnel of sand<br />
with the feaster inside. Any caught in the funnel<br />
slip to the center in three rounds. The<br />
feaster cannot move out of the funnel. (Use<br />
Undead Beast stats, but it has two 20-footlong<br />
flails of bone.) Its maw is many toothed<br />
and acidic (1d8 points of damage per round).<br />
The creature has a treasure of 10,000 stl,<br />
120 gems (10d10 stl each), and a ring of<br />
swimming.<br />
68. Southern Coast<br />
The seashore is edged by rocky bluffs. Off<br />
the shore are many small islands, their<br />
summits covered with trees. Some of<br />
these islands can be reached during low<br />
tide, if one can climb the 50-foot cliffs.<br />
There are six islands the PCs can reach. Each<br />
has a clan of 2d8 taers.<br />
69. Elian Wilds<br />
Lush green forests mantle the island. The<br />
cries of wildlife wings echo beneath the<br />
trees. No paths wend through the woods<br />
and one must cut the trail. There are overgrown<br />
blocks of stone and toppled pillars<br />
here.<br />
A giant black panther stalks the forest island<br />
(use Spotted Lion stats). Its roars can be<br />
heard at night. The clans of forest taer are<br />
often its victims. There is a 20% chance the<br />
panther hunts the PCs.<br />
On the southern tip of the island is a giant<br />
tree hut in which an ettin lives. The ettin is sly<br />
and can imitate the cries of wild animals. The<br />
ettin has nothing of value except eight taer<br />
pelts (1d6 sp each) and 14 wolf hides (2d10<br />
stl each). The roof of his porch is a seaworthy<br />
longboat.<br />
70. llltide Landfall<br />
Tall, broad banyan trees stand on roots<br />
above a black cinder beach. Streams<br />
meander through the roots and cascade in<br />
a 15-foot-high waterfall from the higher<br />
inland. Broken planking and masts are<br />
washed up here beside colorful tidal pools.<br />
71. Claren Elian<br />
As one proceeds north there are more<br />
ruins. The forest falls away to reveal the<br />
ruins of a once-glorious city, now overgrown.<br />
Pillared courtyards crowd manytiered<br />
buildings that tower 60 feet above<br />
you. Friezes of serpents and flowers and<br />
ornate statuary decorate everything. In
the heart of the city is a 150-foot-tall<br />
building. Slender crystal towers capture<br />
and focus the light onto the center palace,<br />
which sparkles like a thousand stars.<br />
This is the ruin of Claren Elian, once known<br />
as the Garden of Wonder. Lost to the ravages<br />
of time, only this ruin of mystery remains.<br />
The types of encounters that can occur here<br />
include the following:<br />
l A reflecting pool that shows your heart’s<br />
desire<br />
• A burning mirror (1d4 points of damage)<br />
• A sweetwater spring<br />
• Moving stones and statues that change<br />
position and shape<br />
• Pollen that makes all seem fair<br />
Creatures that haunt this place include gargoyles,<br />
jade serpents (use giant eels), natives<br />
(use wild elves), and a giant slug.<br />
Treasures of note here:<br />
• A drum of warning that beats when a foe<br />
is within 1 mile<br />
• 800 pearls (20 stl each)<br />
• Living crystal that shines in the dark for<br />
2d8 turns<br />
• An 18-foot-tall pillar of steel (5,000 stl)<br />
• A sash of irresistible dancing<br />
72. Misty Isle<br />
Mist surrounds this isle. Sheer cliffs encircle<br />
it. Forest crowns the plateau. A mournful,<br />
marrrow-chilling cry comes from overhead.<br />
The cliffs are 80 feet tall. Skyfishers attack<br />
those who climb.<br />
The summit of the island is covered by a<br />
forest of giant trees and huge ferns.<br />
Immense insects dance in the air and<br />
lizards abound. A network of gorges and<br />
marshes isolates the center of the island.<br />
Giant bony tracks of some creature are<br />
found.<br />
A great undead beast (see Combined Monster<br />
Statistics Chart) lairs here.<br />
73. Ogrelands<br />
Grassy steppes and dark forest give way<br />
to withered grass and thorny trees. Steep<br />
hills and dusty canyons wend through the<br />
south. To the north are hills and withered<br />
vegetation.<br />
The Ogrelands host the Vale of Vipers far to<br />
the west in a hidden canyon. The valley is<br />
200 feet deep, with groves of fruit trees and a<br />
clear lake with a marsh at one end. The stones<br />
of the vale are diamonds (20d6 stl each), but<br />
they are poisonous to the touch and even<br />
soak through cloth eventually. There are 350<br />
huge snakes (Giant Eel stats), 69 giant<br />
snakes (Giant Slug stats), and a dozen gargantuan<br />
serpents (Giant Sea Serpent stats)<br />
that prowl the vale.<br />
The following encounters occur:<br />
Ogre Grave: Ogres lay their dead out on<br />
ridge lines for the birds of prey to feast upon.<br />
Ogre Justice: A man’s corpse is hung<br />
upside down on a cliff face, his body blistered<br />
by the sun.<br />
Ogre Chat: A group of five ogres trades<br />
weapons and ale with a second group of five<br />
wearing stone necklaces and carrying twohanded<br />
swords. The second group trades furs<br />
and gems. A battle erupts.<br />
74. Ogrebond<br />
This is a broken land with clumps of withered<br />
plants. A squat fortress broods high<br />
on a steep hill; a dusty road snakes its<br />
way up to it. A guard is mounted on the<br />
walls. Patrols prowl the wastes periodically.<br />
There are three patrols of 12 ogres and five<br />
patrols of 12 human guards (use the Men,<br />
Guard stats). The ogre patrols guard the inner<br />
wall, the outer wall, and the gate. The humans<br />
patrol the countryside.<br />
This squat stone structure is 300 feet wide<br />
and 500 feet long. An outer wall stands 50<br />
feet away from the inner keep. Steep hillside<br />
fronts the wall and spikes adorn the top. The<br />
gate house has two large gates and a spiked<br />
portcullis. The inner wall is 30 feet thick. A<br />
five-storey keep is attached to the rear wall. A<br />
deep gully separates the keep from the inner<br />
court, and two giant boars (use Buffalo stats)<br />
lair in the gully.<br />
Special features of the fort include a games<br />
pit that holds three black willows, the commander’s<br />
quarters with his pet wolverine, a<br />
treasury with 20,000 steel, and within a locked<br />
tower room, a gateway to Neraka that can only<br />
be opened by the proper command phrase (no<br />
one in the fortress knows the phrase).<br />
This is the site of a secret meeting between<br />
the two ogre tribes from Kernen and Bloten.<br />
The two chieftains and their guard of nine<br />
ogres each are here. Kern possesses a wicked<br />
cunning and a thirst for power. Blode is a violent<br />
ogre, too stupid to be scared by anything.<br />
He does not trust Kern. His weapon is a huge,<br />
spiked club (3d6 points of damage). Kern’s<br />
ogres wear dragon armor; Blade’s wear<br />
leather hides.<br />
Sevil (see the “NPCs” section of the Appendix)<br />
is here disguised as a guard. He wants to<br />
ruin the alliance. He helps the PCs once he<br />
encounters them, encouraging them to adopt<br />
his plan. He wants to murder some ogre<br />
guards and plant evidence that the deed was<br />
done by the others. Then he wants to loot the<br />
treasury. He is sure to escape if trouble erupts,<br />
deserting the PCs.<br />
36<br />
Also here are a Dragon Highmaster, Ettel,<br />
and an Aurak draconian, Gildentongue. The<br />
first meeting of the ogres is full of accusations.<br />
Gildentongue uses suggestion to<br />
smooth the discussion. A second meeting is<br />
scheduled. If Sevil or the PCs murder some<br />
ogres, accusations and tempers flare, but<br />
Gildentongue investigates the matter. Then he<br />
disguises himself as one of the guards and<br />
spies until he discovers the PCs and reveals<br />
their treachery.<br />
If the PCs are discovered, they have to fight<br />
half of each chieftain’s guard and one patrol<br />
of men. They can escape via Sevil’s route (an<br />
open postern gate) or down a well and out the<br />
sewers. Gildentongue, Kern, and Blade should<br />
escape alive. Once the party has fled, all<br />
Uneventful Trips become Random Encounters<br />
while in the Ogrelands. (See the “Random<br />
Events” section of the Appendix.)<br />
75. Death’s Teeth<br />
Overlooking the bay is a lonely, dark<br />
tower. Across the bay is its twin. A party<br />
of ogres camps on the shore some distance<br />
from the tower and two skiffs bob in<br />
the water.<br />
These abandoned towers were once the<br />
homes of two brothers who hated each other.<br />
Eventually each brother slew the other’s family.<br />
Now they live eternally. Ogres use the<br />
promontory to watch the bay, but they do not<br />
go near the towers.<br />
There is a low wall around each tower; a<br />
graveyard lies to one side. There are eight<br />
ghasts within the graveyard. Each tower is<br />
haunted by five wraiths and the spectre of one<br />
brother.<br />
The towers are four stories tall with a roof<br />
walk and a dungeon. Possible encounters:<br />
• The crypt, where the spectre is unturnable<br />
and gains a +2 bonus to all rolls<br />
• Two animated swords (use Sea Elf stats)<br />
• Exploding dishes (ld4 points of damage<br />
to all within 10 feet)<br />
• Doors that lock themselves<br />
• Manacles that attack to capture (AC 0;<br />
THAC0 16; Dmg 1d6 + 1; hp 20)<br />
This is where Ettel leads the PCs if they follow.<br />
She uses a scroll of protection from<br />
undead and enters the southern tower from<br />
the roof.<br />
The treasure here is 15,000 stl, but it is<br />
cursed. Anyone stealing anything finds that<br />
he cannot speak plainly, he suffers a -2<br />
penalty to all reaction rolls, and hostile creatures<br />
attack him with a +1 bonus to their<br />
attack rolls.<br />
Six ogres, a chieftain, and two skiffs are on<br />
the bank.
This chapter details the environs of the rundown<br />
port of Flotsam, its personalities and<br />
their plots, and the story events that lead the<br />
heroes toward victory. Since many things can<br />
happen in a city, it is important that you read<br />
all of this chapter first to become familiar with<br />
the many facets of Flotsam, before running<br />
this chapter.<br />
Events<br />
Event 28: The Streets of Flotsam<br />
This chapter takes place in and around the<br />
port of Flotsam, capital of Balifor and the<br />
home of Highmaster Toede. Its narrow streets<br />
are filthy and rat-infested. Most of the 4,000<br />
people are sailors, artisans, fishermen, merchants,<br />
and shop or tavern owners. Another<br />
1,500 are troops—draconians, mercenaries,<br />
sligs, hobgoblins, and ogres.<br />
A list of common locales is provided in the<br />
encounter section. You can place the Events<br />
in any of these locations, or you can create<br />
your own.<br />
The guards of Flotsam are as slack and<br />
corruptible as their Highmaster. They can be<br />
bribed to look the other way, unless they are<br />
draconian. However, they detain elves and<br />
any elfkin they discover. The town wall is<br />
fallen into disrepair, but patrols watch the<br />
main roads and ask the PCs their business. A<br />
small boat can slip into the harbor at night<br />
and only has a 30% chance to draw a patrol.<br />
If the party is traveling in disguise, use the<br />
rules in Event 13 for chance of detection.<br />
Captured PCs face the following punishments:<br />
Public Rowdiness = Relieved of weapons,<br />
flogged (lose half hp), placed in public stocks<br />
for 2d6 days, and fed only gruel.<br />
Elves or Rebels = Taken before Toede for<br />
questioning (lose 2d8 hp) and imprisoned.<br />
Toede Recognizes = Interrogation (lose half<br />
hp); held to be dragon food after two days.<br />
For random encounters in Flotsam, use the<br />
Random Events, but most people encountered<br />
mind their own business and avoid the PCs.<br />
Rumors can be gained in town by nosing<br />
about, by frequenting taverns, or by bribing<br />
guards. About half of these rumors are confused<br />
and unreliable. Alternatively, the PCs<br />
can seek out Sevil Rev. Though only here a<br />
month, he is easily the most knowledgeable<br />
person in town. There is a 10% chance each<br />
day that a spy overhears any questioning and<br />
reports back to Gildentongue (Event 36).<br />
There are several important NPCs who<br />
37<br />
might be met in Flotsam. These include the<br />
following:<br />
Highmaster Toede: He is lord of the city<br />
and responsible for stopping rebel activities.<br />
He does not like the Highlord and wants to<br />
show her up with his conquest of the sea.<br />
Highlord Majere: Kitiara has been sent here<br />
by the council of Highlords to act on their<br />
behalf in apprehending a man with a certain<br />
stone that is somehow important. She does<br />
not like Toede.<br />
Ettel Rense: Kitiara’s lieutenant<br />
Beyla Donth: Kitiara’s lieutenant<br />
Blue Dragons: There are three-Skie,<br />
Stroak, and Rumbler.<br />
Gildentongue: A golden draconian (Aurak)<br />
and master spy for the Highlords.<br />
Sevil Draanim Rev: A man with all the<br />
answers for the right fee.<br />
Maquesta Kar-Thon: The black captain of<br />
the Perechon, a freebooter ship.<br />
Fritzon Dorgard: Bodyguard to Maquesta<br />
and a real carouser and womanizer.<br />
Bas Ohn-Koraf: A brutal, brawling minotaur<br />
who is Maquesta’s first mate.<br />
Erewan: The leader of the town rebels.<br />
NPC entries are provided (in the Appendix)<br />
for all but Erewan, who is detailed in the<br />
Prison (F12).
Event 29: Patrols<br />
A patrol might be met when approaching<br />
Flotsam, at the gates to Flotsam, wandering<br />
the streets, or they might respond to trouble.<br />
Here are three sample patrols; you can pick<br />
one or create your own. If the party is disguised,<br />
see Event 13 for the chances of discovery.<br />
Should any PC be caught, see Event<br />
28 for his fate.<br />
Patrol 1: Twelve Baaz march along. If the<br />
PCs hide, there is a 10% chance that they are<br />
spotted and the draconians try to capture<br />
them. If the PCs were walking in the open,<br />
one Baaz walks up and demands that they<br />
state their business. Should the PCs state they<br />
are mercenaries, he sniffs derisively and<br />
directs them to the barracks. If the heroes act<br />
suspiciously, the Baaz send one to follow the<br />
PCs to where they are staying.<br />
Patrol 2: Twelve human guards and a leader<br />
are tramping through the mud, wrapped in<br />
wet cloaks and looking miserable. If the PCs<br />
hide, they are not seen. If the PCs are in the<br />
open, they are splashed as the patrol passes.<br />
Should anyone be carrying a visible weapon,<br />
the soldiers stop and the leader orders the<br />
party to “Drop them blades and get lost!”<br />
Those who refuse are attacked.<br />
Patrol 3: Five human guards huddle in a<br />
muddy intersection or clearing, talking among<br />
themselves. There is no leader. The armor of<br />
the guards might fit the characters. The<br />
guards ignore the party. Two rounds after<br />
meeting the guards, a rumbling croak sounds<br />
and the bulk of Toede’s amphi dragon comes<br />
splashing along behind the characters. Toede<br />
is astride and barks “Make way for Highlord<br />
Toede!” Behind at a quick trot comes his<br />
guard of 18 sligs. The human guards are<br />
quick to leave.<br />
If Toede sees through the heroes’ disguise,<br />
he has his dragon grab one with its tongue<br />
and leap away to interrogate the prisoner<br />
later. Otherwise he continues on splashing all<br />
with mud.<br />
A scroll falls out of his saddlebag as he<br />
leaps away. It contains a message to the<br />
green Highlord in Neraka, written in Goblin. It<br />
read as follows:<br />
“Victory is nearly ours, Commander! The<br />
secret of the spring gives us command over<br />
the watery domain! An alliance has been<br />
forged with my people’s counterparts and the<br />
dragons of the deep. lstar will fall and the<br />
prize in the ancient temple will be ours!<br />
“None can stop us now!<br />
(Signed)<br />
“Highlord Toede”<br />
Event 30: An Odd Aide<br />
This event can occur at any point when the<br />
PCs have a chance to observe Toede from a<br />
safe distance.<br />
The gross little Highmaster paces uneasily<br />
before his inhuman guards. Lying nearby<br />
like a faithful hound, his obese dragon<br />
watches through half-lidded eyes. Then<br />
the waiting ends as a tall draconian wearing<br />
a cloak and combat harness strides<br />
forward. This dragonman is unlike any<br />
you have yet seen, for he bears no wings<br />
and his skin shines golden. The two are<br />
quickly engaged in an intense conversation,<br />
the hobgoblin nodding and rubbing<br />
his hands.<br />
This event should not lead to confrontation. If<br />
it does, Toede and Gildentongue escape. The<br />
guard is comprised of 18 sligs and a leader.<br />
Event 31: Sevil’s Services<br />
The man known by most as Sevil is a shadowy<br />
figure who is said to be willing to sell<br />
anything for the right price and is no friend of<br />
the Highlords. Few find him, but word can be<br />
left in a friendly tavern (F6) and he finds the<br />
PCs. Sevil speaks in a hoarse whisper and<br />
bears the marks of a man who has escaped<br />
the gallows. He acts like an old friend. Sevil<br />
mostly sells information.<br />
Most of Sevil’s information is accurate, but<br />
20-40% of the time it contains flaws that omit<br />
deadly obstacles. His asking price starts at<br />
100 steel and multiplies the more difficult the<br />
item or valuable information. You have to<br />
determine a fair price for his info. Sevil does<br />
not give anything for nothing.<br />
Sevil knows all Rumors and Legends, and<br />
at your discretion might know about other<br />
things that happen near or in Flotsam. He<br />
knows of the Perechon and recommends it<br />
over other ships. He knows of a high-stakes<br />
card game where someone might make some<br />
money (Event 40).<br />
Sevil also has Highmaster Toede believing<br />
in him. He uses this trust to feed Toede false<br />
information laced with enough truth to be<br />
believed.<br />
Use Sevil to motivate the PCs and to nudge<br />
the story along when needed. He can crop up<br />
at any time to propose tasks and keep the<br />
PCs on track.<br />
Event 32: Recruiting Help<br />
If the PCs decide they need help to complete<br />
some task, there are two parties they can<br />
appeal to: the rebels of the land, and Sevil,<br />
who uses mercenaries and the rebels.<br />
To recruit the aid of the rebels, the PCs<br />
need to leave the town or contact Erewan, if<br />
they know him, to get in touch with Renard.<br />
the Silver Fox. They must then persuade him<br />
that it is in the rebels interest to help them.<br />
Sevil charges a fee up front, but he accepts<br />
collateral in the form of magical items or<br />
weapons that are later to be bought back.<br />
The rebels respond one day after they have<br />
been contacted. Sevil responds in 12 hours.<br />
Aid that might be gained from either source<br />
includes information, limited transportation, a<br />
38<br />
breakout (Event 38), and a delay or decoy to<br />
gain the PCs an hour lead.<br />
Event 33: Spying on Toede<br />
Resourceful PCs can attempt to sneak into<br />
Toede’s manor to spy on him, or they might<br />
find him when they attempt to break into the<br />
manor. The first thing to note is that Toede<br />
should always escape death, even groveling<br />
for mercy. Renard is quick to point out that<br />
Toede’s incompetence helps the rebel cause<br />
immensely.<br />
If the heroes manage to spy on Toede, he<br />
should have a strong guard of Baaz or sligs<br />
beside him, or his amphi dragon.<br />
Here are some typical scenes that might be<br />
observed; pick one that suits the situation.<br />
• Sevil selling obviously false information<br />
about the PCs and their location to Toede<br />
• Toede being chastised by Kitiara for letting<br />
the graystone man get away.<br />
Event 34: Crazed Rebel<br />
If a character walks alone through Flotsam in<br />
a stolen uniform, there is a 40% chance he<br />
will encounter a Wild Elf seeking vengeance.<br />
This NPC tries to lure the PC into an alley and<br />
attack him. There is a 30% chance that the elf<br />
tries to throw a bag over the PC’s head and<br />
knock him out with a club. (He must make an<br />
attack roll, with a +4 bonus). A captured PC is<br />
taken to the Jetties (area F5).<br />
Event 35: An Unlikely Encounter<br />
If any single character is moving about Flotsam,<br />
there is a 50% chance that he or she<br />
meets a Highlord (50% of the time it is Kitiara,<br />
25% it is Ettel, and 25% it is Beyla). Their<br />
response depends on the guise of the PC.<br />
If Ettel or Beyla is encountered and the PC<br />
is dressed in a stolen uniform, they demand<br />
the character’s name and rank and his business<br />
in the area. If the answer is unsatisfactory,<br />
the Highlord calls for a patrol and tries to<br />
capture the PC for questioning. If the answer<br />
is satisfactory, the Highlord is taken with the<br />
character and invites the PC back to the Inn of<br />
Saltbreeze to share dinner and speak of<br />
duties. If the PC is of the opposite sex, the<br />
Highlord might demand that the PC spend the<br />
evening. If the PC is not wearing a uniform,<br />
the Highlord is haughty and you should check<br />
to see if she sees through the guise (use<br />
Event 13).<br />
If it is Kitiara, she responds differently to<br />
different characters:<br />
Kronn and Serinda: If she sees through<br />
their guise, she sets Gildentongue to follow<br />
them.<br />
Goldmoon: She might stop and stare, but<br />
will not do anything.<br />
Riverwind: If he is not wearing a uniform,<br />
she bumps into him and glares at him, then<br />
moves on. If he is wearing a uniform, she<br />
smiles and flirts with him, winking and nodding<br />
her head for him to follow. If he responds<br />
she invites him to the Saltbreeze.<br />
Tika: Kitiara frowns and stares at the girl,
chance to remember. She does not recognize<br />
her if she wears a uniform. If Kit does not<br />
remember, she walks away deep in thought. If<br />
she does recognize Tika, she says, “You are<br />
brave to dare come so close to the dragon’s<br />
den! Do not push your luck, for your companions<br />
will not always be there to protect you!”<br />
Kit then leaves.<br />
Tanis, Caramon, or Raistlin: Kitiara seems<br />
surprised and thinks the PC has abandoned<br />
old friends. She tries to persuade him to join<br />
her cause. She invites him to the Saltbreeze.<br />
If a PC threatens violence, Kit points out<br />
that many soldiers walk the street ready to<br />
respond to her shout.<br />
If someone agrees to accompany Kitiara to<br />
the Saltbreeze, she plies the PC with strong<br />
drink, asking many questions to test their loyalties.<br />
If the character is Tanis or Riverwind,<br />
she suggests he stay the night. After a day of<br />
getting to know each other, she is called away<br />
on an important mission, but she tells the<br />
character to await her return. If the PC leaves,<br />
Gildentongue follows him.<br />
Event 36: Uninvited Guest<br />
If the PCs act in a rather conspicuous way<br />
while in Flotsam, Gildentongue is alerted and<br />
tries to follow them for one day to see what<br />
they are up to. He is a master spy and avoids<br />
attacking anyone if he can, preferring to<br />
gather valuable information. His primary mission<br />
has become finding a man with a large<br />
gray gem.<br />
Gildentongue might search the rooms of<br />
the heroes while they are out. He could be<br />
discovered as he searches. Before any can<br />
react he will use dimension door to zip to the<br />
street below. He then waves and flees.<br />
Event 37: A Helpful Hint<br />
Run this event if the players do not think to<br />
search the Highlord’s room for clues.<br />
Sevil Rev sends a message to the PCs that<br />
he possesses valuable information they might<br />
desire. They can meet him at midnight at the<br />
base of the Beacon; they must make sure<br />
they aren’t followed. The information he has<br />
for sale is that the Blue Highlord is staying at<br />
the Saltbreeze Inn and is often out of her<br />
room.<br />
Event 38: The Cavalry<br />
If the PCs get in trouble and need to be helped<br />
out, you can use Sevil and the rebels once<br />
each to help the heroes without being<br />
requested. After that the PCs are on their<br />
own. If Sevil helps, he demands pay or a service<br />
for his efforts.<br />
These two can help break PCs out of prison<br />
using a diversion, rescue them from sure<br />
death, or provide timely help when needed.<br />
Event 39: A Wild Goose Chase<br />
If Gildentongue or the Highlords discover that<br />
someone knows what they are looking for,<br />
they create a decoy to draw the PCs away<br />
from the true goal. The Highlords leak information<br />
that they almost have the goal in their<br />
hands and a Highlord is going to leave that<br />
evening to fly north where the quarry is hiding.<br />
If the PCs know of Berem, he will have<br />
disappeared (see Event 48).<br />
Beyla leads the party north into the Ogrelands<br />
and if possible to Death’s Teeth (75).<br />
Event 40: High-Stakes Card Game<br />
If the PCs are looking to raise a small stake to<br />
buy ship passage, they can play cards. The<br />
game is in the cellar of a friendly tavern. The<br />
PCs stand a 30% chance of winning (1d10 ×<br />
100 stl), a 20% chance of breaking even, and<br />
a 50% chance of losing (1d10 × 100 stl). To<br />
play, the PCs must put up a stake of 1,000 stl.<br />
Their winnings are added to this, their losings<br />
are taken from it.<br />
Event 41: The Highlord’s Mission<br />
This event occurs on the party’s third day in<br />
town or when the party believes that Kitiara is<br />
going elsewhere seeking her prize.<br />
The piercing shriek of a dragon echoes<br />
across the land, and all stop to watch as<br />
two blue dragons and their riders climb<br />
into the graying sky. Their mighty pinions<br />
beat the air as they climb swiftly toward<br />
the clouds and head north.<br />
The Highlord has been called back to lead her<br />
forces in the campaign on the plains of<br />
Solamnia. She and Beyla fly first to Ogrebond<br />
(area 74), where Kitiara uses the teleport<br />
nexus. Ettel remains behind with Gildentongue<br />
to cement the ogre alliance. Kitiara<br />
and Beyla return in four days.<br />
Event 42: Rumor of Hope<br />
Run this event to delay the PCs until Kit’s<br />
return, if they do not follow the decoy.<br />
Sevil Rev sends a message for the PCs to<br />
meet him in the marketplace at the eel vendor’s<br />
booth at midday. He has information the<br />
party might find interesting. Be sure to avoid<br />
suspicion. His information for sale is Rumor<br />
20, only he knows the precise location of the<br />
meeting (Ogrebond, area 74) and that the top<br />
ogre leaders will be present. He encourages<br />
the heroes to help break the alliance and possibly<br />
steal the ogres’ rumored treasure. He<br />
even throws in a leaky fishing boat and an old<br />
captain (use Guard stats) to take them near<br />
Ogrebond. Sevil learned the info from an<br />
overly talkative Toede and doesn’t mind letting<br />
them know his connections pay.<br />
Event 43: Return to Flotsam<br />
If the PCs find themselves stranded on a shore<br />
far from Flotsam, this event can be used to<br />
get them swiftly back. The Perechon shows<br />
up, either as a passing ship that can be hailed,<br />
39<br />
Or as the crew performing a daring raid to<br />
help the party escape. Maquesta is happy to<br />
be of help. However, she’s low on supplies<br />
and must return to Flotsam. Besides, her<br />
helmsman stayed behind and she won’t risk<br />
open water without him.<br />
Event 44: Dark Lady’s Return<br />
This event occurs four days after Event 41, or<br />
just before the PCs return to Flotsam.<br />
The sky is gray and overcast threatening<br />
a storm, but the wind has died to a light<br />
breeze. Overhead is heard the flap of<br />
heavy wings approaching. Appearing<br />
from the cloud bank comes a dark dragon<br />
with rider heading toward Flotsam, the<br />
wind of its passing tossing cloak and hair.<br />
The Highlord has returned!<br />
Event 45: Friendly Help<br />
If the PCs are ever trying to evade the guard,<br />
an event like this might happen. On a dark,<br />
narrow street a door suddenly opens and a<br />
woman’s voice urges the PCs to enter swiftly.<br />
The blond maiden locks and bolts the door<br />
and leads the PCs out a back door. This is<br />
really Gildentongue. In this guise, she claims<br />
that her parents were slain by draconians and<br />
she wants to help.<br />
Event 46: Raid on the Jetties<br />
About the fourth day in town, Gildentongue<br />
discovers the rebel hideout and Toede sends<br />
a squad of guards, hobgoblins, and Baaz, a<br />
dozen each, to raid the Jetties’ cellar in the<br />
middle of the night. Alert the sleeping PCs to<br />
the noise of armor clinking and let them see<br />
the forces marshalled. If the PCs rush to the<br />
cellar, they can escape with the rebels through<br />
the secret tunnel.<br />
If the PCs stay in their rooms, the soldiers<br />
burst into the cellar. After a while there is<br />
knocking on the PCs’ doors. The soldiers are<br />
looking for rebels. If they find the PCs’ weapons,<br />
a young officer tells his men to detain<br />
them for questioning. However, just as the<br />
PCs are about to be arrested, an older officer<br />
with coppery skin enters and whispers to the<br />
young man. After a moment’s discussion, the<br />
soldiers are ordered out of the room and the<br />
characters are left in peace. (The older officer<br />
was Gildentongue, who wanted the PCs free.)<br />
Event 47: The Storm<br />
The day before the party prepares to leave, a<br />
storm unleashes its fury, flooding the streets<br />
and making travel seem impossible. Treat it<br />
as Random Event 19. On the second day the<br />
storm lessens somewhat, but the seas are<br />
choppy and travel is hazardous.<br />
If the PCs try to flee, 24 Baaz and eight<br />
ogres are sent to chase them as they make<br />
their way to the Perechon. Any reasonable<br />
delaying tactic should work.
Event 48: Berem Kidnapped<br />
This event occurs upon the party’s return to<br />
Flotsam or before Kitiara’s return to further<br />
delay the heroes.<br />
Berem, the helmsman of the Perechon, is<br />
missing. Sevil also cannot be contacted. Several<br />
clues can be discovered.<br />
• A message from “S” to Berem is found in<br />
his cabin asking for a meeting on the<br />
wharf.<br />
• Someone saw Sevil meet a sailor and<br />
retire to a friendly tavern.<br />
• Neither Sevil nor Berem has been seen<br />
leaving town.<br />
• Maquesta can verify that Berem has a<br />
strange gray gem attached to his chest, if<br />
persuaded the matter is serious.<br />
Sevil has indeed kidnapped Berem, once he<br />
discovered the man was the key that everyone<br />
was looking for. He is desperate to hold<br />
onto his prize until he can negotiate with the<br />
Queen of Darkness herself.<br />
Sevil is hiding in the sewers. He knocked<br />
Berem out, bound him, and dumped him<br />
down a hidden cistern opening behind one of<br />
the entrances into the sewers. Sevil knows the<br />
sewers very well.<br />
There is a small trail of torn cloth, tracked<br />
slime, and scraped sludge that the party can<br />
follow with a ranger or by rolling two successful<br />
Intelligence Checks (by one PC). The path<br />
leads through streams of sludge, across a<br />
pool of filth, and up into a series of tunnels<br />
that are drier and don’t see much use. The<br />
PCs face three challenges in their search:<br />
The Pool: There are three ochre jellies in<br />
the pool and a 10-foot-high slippery wall to<br />
climb to the drier passages beyond.<br />
Rats: The walls of the passage are riddled<br />
with holes. Three times the PCs encounter<br />
3d4 rats (use Salmon School stats). If any<br />
rats survive the first three encounters, the PCs<br />
face a pack of 4d10 rats as they ascend a<br />
slippery, slanting corridor.<br />
Confrontation: The final chamber is only<br />
10 feet tall. There is an exit on the opposite<br />
side and a rusty chain hangs from the ceiling<br />
there. There are several small alcoves, one of<br />
which is blocked by an old table propped up<br />
with some stone. There are several cots, two<br />
large covered baskets and stores of fresh<br />
water and rations.<br />
Berem is within the blocked alcove. Sevil is<br />
waiting for the heroes and tells them to go<br />
back and leave him his prize. He has five<br />
champion sligs hiding in the other alcoves<br />
and two giant snakes (use Giant Eel statistics)<br />
in the baskets. If the PCs refuse to leave,<br />
Sevil uses spells while his guard attacks the<br />
party. If things look grim, he retreats to the<br />
opposite passage and pulls the chain, which<br />
releases a load of sewage that appears to<br />
block his escape and bury him (it doesn’t).<br />
Event 49: The Perechon<br />
This event details the Perechon and its crew<br />
and personalities. Use this event whenever<br />
the Perechon is encountered with a crew.<br />
The Perechon is a modified two-masted<br />
pentane. As with most ships of war on Ansalon’s<br />
seas, it bears both sails for swift movement<br />
and oar ports for quick maneuvering in<br />
battle. However, the Perechon is special.<br />
The entire crew of the Perechon numbers<br />
22 sailors (use Guard stats), a helmsman, a<br />
minotaur first mate, a warrior second mate, a<br />
gnomish engineer, the captain, and her bodyguard.<br />
The captain of the Perechon is Maquesta<br />
Kar-Thon, a black woman. Her bodyguard is<br />
Fritzon Dorgard and her first mate is the minotaur<br />
Bas Ohn-Koraf. The helmsman is the<br />
mysterious Berem. These four are detailed in<br />
the “NPC” section of the Appendix. The rest<br />
of the crew are typical rogues and scoundrels,<br />
very loyal to Maquesta and the Perechon, but<br />
superstitious and wary of outsiders.<br />
Berem the helmsman avoids people. He is<br />
thought to be a mute, because he refuses to<br />
talk. There is only a 20% chance that a visitor<br />
on the boat notices the gray gem embedded<br />
in his chest. Whenever he leaves the Perechon,<br />
he is careful to hide this feature. He is a<br />
loner, but he is grateful to Maq and will not<br />
betray her.<br />
The other sailors view Berem as their lucky<br />
charm and do not look kindly upon any who<br />
harass him. Any PC can try to get Berem to<br />
speak by rolling equal to or less than his or<br />
her Charisma, plus reaction bonuses, on<br />
1d100.<br />
If confronted before Maquesta, Berem<br />
admits that he is the one the Highlord seeks,<br />
though he does not know why. If pressed he<br />
notes he is from the plains of Neraka, the<br />
heart of the Dragonarmy’s empire.<br />
The gnome is Lendle Chafka, a 5th-level<br />
fighter. Lendle was able to mount an ancient<br />
gnomish engine into the hoId of the Perechon.<br />
Now the war oars of the Perechon are controlled<br />
by a gnomish engine that gives the<br />
Perechon a maneuverability class of C, where<br />
other similar ships only have class D or E<br />
maneuverability. The Perechon can maintain<br />
maximum speed while maneuvering. Only<br />
Lendle is necessary to run the engine, leaving<br />
Maq and her entire crew to fight.<br />
Lendle is very loyal to Maquesta. He also<br />
has a fondness for drink and becomes talkative<br />
when drunk, speaking in long, unbroken<br />
sentences while acting sly and deceiving.<br />
Deckplans: See the diagram of the Perechon<br />
on the fold-out mapsheet. The numbered<br />
locales are described here. A crow’s<br />
nest tops the center mast.<br />
1. Main Deck: The main deck is about 15<br />
feet above the waterline. Most of the daily<br />
activity takes place here. There is one longboat<br />
on the deck.<br />
2. Maquesta’s Room: This captain’s cabin<br />
is fairly austere. Maquesta and Fritz have the<br />
only keys. Fritz’s small hammock hangs by<br />
the door. Charts and maps are stored in a<br />
cabinet divided into a hive of compartments.<br />
Two locked treasure chests hold the Perechon’s<br />
money.<br />
3. Kitchen: This is the ship’s galley and<br />
larder. Stores of freshwater and food are here.<br />
4. Armory: Here are stored the ship’s weap-<br />
40<br />
ons—swords, crossbows, ballista bolts, oil,<br />
armor, and the ship’s supply of brandy. Lendle<br />
has a secret crawlway near the bow.<br />
5. Upper Aft Deck: Here the helmsman and<br />
his aides handle the mighty sweep of the ship.<br />
There are two ballistae that can be fitted with<br />
flaming bolts. They are hidden by tarps.<br />
6. Upper Bow Deck: Here is the anchor<br />
chain and bowsprit. A spare anchor is stored<br />
here.<br />
7. Combat Turret: Mounted on a raised<br />
platform, with walls for protection from enemy<br />
missile fire, is a ballista hidden under a tarp.<br />
8. Lower Deck: Here are 20 oar benches<br />
and the covered oar hatches. The oars are<br />
stored in rafters overhead. Odd metal poles<br />
with sleeves for the oars extend up through<br />
the decking from the hold. There are two trap<br />
doors that lead to the hold.<br />
9. Crews’ Quarters: Hammocks and duffel<br />
bags hang from hooks in here. The crew<br />
sleeps in shifts.<br />
10. Passengers’ Cabin: This cabin has<br />
been taken over by the first and second<br />
mates. Kof claims the majority of the space,<br />
sleeping on a pile of straw on the rolling deck.<br />
11. Passengers’ Cabin: Lendle is many<br />
things to the crew: cook, physician, and<br />
ship’s engineer. He has been allowed to commandeer<br />
this cabin and litter it with diagrams<br />
and drawings, pens and inkwells, and small<br />
gizmos that spin and whir.<br />
12. Passengers’ Cabin: This section is<br />
used as cargo space if there are no passengers.<br />
Only hammocks, four benches, a builtin<br />
window chest, and two tables are in this<br />
room.<br />
13. Cargo Hold: Cargo is stacked to either<br />
side of the center beam and tied down<br />
beneath tarps. An odd array of metal bars<br />
and gears decks the ceiling, forcing the visitor<br />
to stoop to avoid them.<br />
14. Prison Cell: This dank cell can be<br />
bolted.<br />
15. Storage Area: This room holds stacks<br />
of wood and a large metal furnace. It also<br />
holds the gnomish engine Lendle designed.<br />
The engine requires fuel when in use; it burns<br />
a cord of wood in three turns.<br />
Encounters<br />
Flotsam<br />
Flotsam (area 49) is cupped in a valley beside<br />
a sheltered harbor. Only a 10-foot-tall crumbling<br />
wall surrounds the town; open gates<br />
with portcullises cross the main avenues into<br />
town. There are guard towers every 200<br />
yards. The northern section of town along the<br />
coast is mainly occupied by the army’s barracks.<br />
Across the harbor a rocky peninsula<br />
rises 30 feet above the water and many of the<br />
town’s better buildings stand on that “Rock.”<br />
See the map of Flotsam on the fold-out mapsheet.<br />
F1. Town Gates: The town gates are<br />
watched by patrols of 12 human guards or 18<br />
hobgoblins. They can be bribed to gain passage.<br />
If trouble comes, they sound a gong<br />
from the gate house and a second patrol
arrives in 15 rounds. There is a separate gate<br />
in town that must be passed to enter the<br />
Rock, and a patrol of eight ogres and their<br />
leader stands guard there. They demand<br />
twice the normal bribe and close the gate if<br />
attacked.<br />
F2. Guard Towers: These towers are 30<br />
feet tall. Stairs lead up to the second floor<br />
guard room and wall top, and a ladder reaches<br />
the roof. There are small patrols of eight sligs<br />
or 12 hobgoblins posted here with a human<br />
guard leader. They are bored and don’t expect<br />
to be attacked.<br />
F3. The Marketplace: This is a standard<br />
market of canopy covered stalls and open<br />
carts. Most supplies can be bought here, but<br />
the asking price is twice normal. Weapons are<br />
not available, but some thieves or a group of<br />
disguised guards hunting rebels might agree<br />
to sell a weapon in a back alley at five times<br />
normal price.<br />
F4. The Wharves: A fish market lines the<br />
wharf front and nets are laid out to dry. There<br />
are two dozen leaky fishing boats that would<br />
not survive the high seas, 1d6 carracks, plus<br />
1d4+1 warships manned by mercenaries<br />
anchored in the harbor. Most fishermen mind<br />
their own business and don’t like outsiders.<br />
But careful questioning might bring the characters<br />
in contact with a captain who is willing<br />
to hire out. The typical asking price for passage<br />
is 2,000 stl per person, but still might be<br />
bargained down to 1,000 per person. The<br />
captains and ships of note are the Bloodhawk,<br />
Captain Rensill of the Pink Lady, the<br />
SeaFarer, the Hardtimes, the Silver Spear and<br />
the Perechon. The mooring locations of these<br />
ships are labeled BH, PL, SF, HT, SS, and P,<br />
respectively, on the diagram of Flotsam.<br />
The Perechon: There is a 40% chance the<br />
Perechon is not in port and won’t arrive for<br />
2d6 days. If it is, Maquesta agrees to take the<br />
PCs on only if they can pay the price. Maquesta<br />
needs at least a week to prepare the crew<br />
and get enough supplies.<br />
The Bloodhawk: This is really a pirate ship.<br />
Captain Maccaby, called the Scar, is more<br />
than willing to take on passengers and asks<br />
only half the normal rates. It is his intention to<br />
put all passengers over the side once they are<br />
out of sight of land. His crew consists of 25<br />
sailor guards and four ogres. He is a warrior. If<br />
the heroes defeat the pirates, a fire breaks out<br />
on board and the PCs just manage to escape<br />
in a longboat. If the pirates defeat them, they<br />
take all the PCs’ gold, items, and weapons,<br />
and toss the PCs overboard. (They can try to<br />
swim toward land.)<br />
The Pink Lady: This is a rich merchant carrack.<br />
Capt. Rensill is headed for Nordmaar<br />
with his cargo of ore, wood, and ale. Off the<br />
shore of the Ogrelands (area 73), a storm<br />
springs up and wrecks the ship (see Sea<br />
Encounter 22).<br />
The SeaFarer: This ship is ridden with<br />
worm holes and barnacles, its hull is buckled,<br />
and its decks are warped. Capt. Qualoth can<br />
be argued down to 600 steel per person. Each<br />
hex it travels there is a 20% chance that it<br />
sinks. The party has six turns to build some<br />
means of escape, since the longboat is no<br />
better. The captain refuses to leave the ship.<br />
The Hardtimes: Captain Jagger agrees to<br />
take on passengers only if they act as added<br />
guards. His first destination is a small village<br />
on the coast of Ogrebond (area 74). They are<br />
trading a few goods with the local ogre chief;<br />
weapons for the ogres, hidden in barrels of<br />
cider. His crew includes eight human guards<br />
and five human warriors. When he reaches<br />
the village, the 30 ogres and three chiefs<br />
betray him and he flees, abandoning the<br />
party.<br />
The Silver Spear: Lieutenant Poliander<br />
captains this mercenary war galley and works<br />
for the Highmaster. He claims to be willing to<br />
take passengers, but he intends to rendezvous<br />
with a minotaur ship of 18 minotaurs off the<br />
coast of area 58 and sell them into slavery.<br />
His crew consists of 24 human guards and six<br />
human warriors. The galley moves at half<br />
speed in open waters, so it hugs the coast a<br />
lot. The PCs can escape, wreck the ship, or<br />
be rescued by the Perechon.<br />
The pirate ship map gives the deck plans of<br />
a typical pirate ship. Use this for the Bloodhawk<br />
as well.<br />
F5. The Jetties: The first inn the party finds<br />
is called the Jetties, a ramshackle but friendly<br />
41<br />
inn several blocks south of the wharfs. The<br />
price of lodging is fair, the food edible, and<br />
people keep to themselves.<br />
The cellar of the Jetties is a secret hideout<br />
of the rebel bandits acclaimed to be heroes of<br />
the people. This band’s leader is Erewan the<br />
Shaggy, described in the prison (F12). If the<br />
PCs prove their worth to the rebels and ask<br />
for help, Erewan can muster a group of 12<br />
thieves (use Men, Common stats). The cellar<br />
is connected to the harbor via a sewer.<br />
F6. A Friendly Tavern: If the PCs do not<br />
choose to stay at the Jetties, they can find<br />
another tavern where things are not so quiet.<br />
At this inn, the PCs have to watch their gear<br />
jealously or it might be stolen. Every evening<br />
there is some rowdy activity-a brawl, a raid<br />
by guards, thieves in the room, a duel, an<br />
ogre is assigned to the PCs’ room, etc.<br />
F7. Highmaster Toede’s Manor: This building<br />
is built out upon the Rock on the harbor<br />
side. It is two storeys tall with a flat roof and a<br />
small watch tower. The manor ground is surrounded<br />
by a 10-foot-high wall that attaches<br />
to the house. A metal gate is guarded by two<br />
warriors. A small stable holds three medium<br />
horses and a shaggy pony. A 10-foot-tall<br />
wooden platform with a ladder leading up to it<br />
Scale: one square = 200 ft
has been built against the wall.<br />
Toede’s dragon, Hopsloth, lairs on the roof,<br />
leaping there from the platform. The dragon<br />
can enter the room down a wide flight of<br />
stairs in the tower. There is slime all over the<br />
stairs and hall leading to Toede’s audience<br />
chamber.<br />
There are four sligs, a champion slig, two<br />
ogres, two Baaz and eight hobgoblins here.<br />
The ogres command the troops. The sligs<br />
guard the first floor—two on the front door<br />
with the champion and two on the door leading<br />
to the treasury compound. The Baaz<br />
guard Toede’s audience chamber on the second<br />
floor, while the hobgoblins are in the<br />
kitchen and stables.<br />
The first floor holds the staff’s quarters and<br />
the kitchen. The second floor holds Toede’s<br />
quarters. This floor can be reached by a front<br />
stair and a hidden rear set of stairs from the<br />
kitchen. Beyond the audience chamber is a<br />
locked room where PCs’ gear is stored if confiscated.<br />
A rope on the inside of the door rings<br />
a bell on the roof, alerting Hopsloth to intruders<br />
(he comes slithering immediately). Hopsloth’s<br />
tactics are to spit acid once and then<br />
to grab someone with his tongue and attack<br />
others with his claws and acid warts. If he suffers<br />
25 or more points of damage, he crashes<br />
out a window and flees, dropping his prey.<br />
The tower has two cells where prisoners are<br />
kept chained to walls. Also here is a chamber<br />
in which Toede has been drawing up his secret<br />
plan of attack against Sunken Istar.<br />
Sevil Rev knows of, and sometimes uses, a<br />
secret passage into the manor through the<br />
wine cellar. This leads upstairs to the kitchen.<br />
The passage comes from an entrance in the<br />
sewers.<br />
F8. The Highmaster’s Treasury: This treasury<br />
is attached to the back of the Highmaster’s<br />
manor. It is surrounded by a spiked, 10foot-tall<br />
wall. A small guardhouse, manned<br />
by four ogres, watches the gate to the compound.<br />
However, a tall tree grows in the compound<br />
and its branches can be reached by a<br />
leap (Dexterity Check with a –4 penalty) from<br />
the building across the street.<br />
The courtyard is guarded by two hell<br />
hounds that hide in the shadows and attack<br />
silently. The front door to the treasury is triple<br />
locked; there is a window 20 feet overhead<br />
that is barred and opens onto the entrance<br />
hall. A second door down a 30-foot hallway is<br />
locked and trapped. If the door is opened<br />
without turning a nearby torch sconce upside<br />
down, a 10-foot square section of floor opens<br />
onto a 30-foot-deep pit with 10 feet of water<br />
at its bottom (2d6 points of damage). The pit<br />
walls are unclimbable.<br />
The treasury has an odd musky odor. A<br />
giant wolverine guards the room and is hidden<br />
in an overturned chest. There is a large<br />
locked chest that releases a cloud of sleep<br />
gas when it is opened. Anyone who fails a<br />
saving throw vs. breath weapon falls asleep<br />
for 2d6 turns and is captured by Toede’s<br />
guards. The room holds coins worth 25,000<br />
steel, along with gems, jewels, and metalware<br />
worth 15,000 steel. There are also stacks of<br />
grain and cords of cured mahogany.<br />
If the alarm is sounded, the guards from the<br />
manor arrive in eight turns.<br />
F9. Inn of Saltbreeze: This is the best inn in<br />
Flotsam. It is not uncommon to find a blue<br />
dragon perched on the crest of the inn’s<br />
gabled roof. The inn sits on the seaward side<br />
of the Rock and is quarters to many of the<br />
Dragonarmy’s officers, including Kitiara and<br />
her two lieutenants.<br />
Meals here are good but expensive; lodging<br />
costs five times the normal rate. Quartered<br />
here are 15 warriors, 23 guards, seven ogres,<br />
and the three Dragon Highlords. On guard to<br />
protect the quarters are eight Baaz who watch<br />
the tavern, stairs, halls, and kitchen.<br />
The third floor contains private quarters for<br />
Kitiara, her lieutenants, and four warriors. The<br />
second floor hosts the remaining warriors and<br />
ogres and a half dozen guards. The first floor<br />
has a tavern in front and a kitchen, pantries,<br />
and more rooms in back. There is a back<br />
entrance and a trap door to the cellars.<br />
The cellars hold wine and food stored in<br />
three rooms. Behind a locked door in the wine<br />
room, a Bozak stands an invisible guard. The<br />
door leads to a tunnel down to a cave in the<br />
stony cliff where the three blue dragons lair.<br />
The Bozak’s spells include grease, magic missile,<br />
shocking grasp, invisibility, and darkness,<br />
15-foot radius.<br />
Two Baaz mount a guard outside Kitiara’s<br />
room. The room can also be reached by<br />
climbing the wall on the cliff side, but a character<br />
who falls drops 50 feet to the sea (5d6<br />
points of damage).<br />
The table is covered with reports of the battle<br />
in Solamnia, written in Solamnic. There<br />
are several half-filled mugs of wine. Kit’s<br />
travel wear fills the travel chest. A simple<br />
wooden comb lies atop the drawers beside<br />
the wash basin and cracked mirror. The<br />
locked trap on the top drawer has a poisoned<br />
needle in the lock. Inside lie several knives, a<br />
cloak, a pouch of 50 pp and three sapphires<br />
(100 stl each), an alluring, blue velvet gown,<br />
and a locket given her by Tanis.<br />
F10. The Beacon: On a stone jetty is a<br />
beacon tower. Atop the 50-foot tower, a watch<br />
fire is maintained by five sailors who periodically<br />
replenish the supply of fish oil that burns<br />
in the basin.<br />
F11. The Barracks: This area is not well<br />
fortified and is poorly guarded. However, a<br />
separate inner town gate must be crossed to<br />
enter the barracks neighborhood. The prison<br />
(F12) lies to the north.<br />
Any lone character wearing a stolen uniform<br />
might be able to enter the area without<br />
challenge (80%). The chance of success<br />
drops 5% per additional person in the party. If<br />
the PCs are challenged, the guard of 24 Baaz<br />
is alerted. The guards are illiterate; a fake<br />
written order can fool them into releasing a<br />
prisoner. The PCs can neutralize the two ogre<br />
guards, but they have only three turns before<br />
the alarm sounds.<br />
Lost equipment is in Toede’s quarters. The<br />
guard is suspicious if the PCs ask the location<br />
of the Highmaster’s quarters, and an alarm<br />
sounds after the PCs have left the gate. There<br />
is a drunken human warrior in the central bar-<br />
42<br />
racks compound. He might talk to a fellow<br />
officer, giving information about the prison,<br />
the Dragonarmy, or the Highmaster’s alliance<br />
with the beasts of the deep.<br />
F12. The Prison: The prison is a one-storey<br />
stone building with barred windows and a<br />
wide, walled courtyard. It can be reached only<br />
through the barracks. A stone stair leads up<br />
to the wall top, where three gibbets hang over<br />
the court. The cells are small and damp.<br />
Sewage troughs lead out into the corridor and<br />
into a grate-covered pit connected to the sewers.<br />
A barn with stacked hay is attached to<br />
the rear.<br />
A nearly blind ogre jailor stands guard. If<br />
attacked, he retreats into the darkness of the<br />
cellblock where others suffer a -4 penalty to<br />
their attack rolls (but he is not affected).<br />
If a PC is imprisoned here, he shares a cell<br />
with a hairy, insane-looking inmate. This man<br />
chases stray rats, pouncing on them and eating<br />
them. This is Erewan the Shaggy, leader<br />
of the rebels and lieutenant to the Silver Fox.<br />
He is not insane, but he is a survivalist and<br />
does whatever it takes to persevere. (Inmates<br />
are not fed since they are usually quickly executed.)<br />
If the PCs break out and take Erewan<br />
with them, he is deeply in their debt.<br />
The other inmates of this prison include<br />
pirates and an old man who foams at the<br />
mouth.<br />
F13. The Sewers: A network of sewers and<br />
cellars lies beneath the wharf. This might provide<br />
a dangerous hideout. The place is frequented<br />
by ochre jellies, giant scavenger beetles,<br />
and packs of 1dl0 rats (use Salmon<br />
School stats).<br />
F14. A Hiding Place: If the heroes are on<br />
the run from the law, they can find a place to<br />
hide under the wharfs or in the cellar of a<br />
burned-out building. This place is damp and<br />
dark. There is a 10% chance that a spy can<br />
follow a PC back to the hideout and return<br />
with a double-sized patrol.
This chapter provides details of Encounters at<br />
sea. The Events given are for use after the<br />
heroes flee Flotsam aboard the Perechon with<br />
Berem, the Highlords’ prize. You can adapt<br />
one or two of the Exploring events (50) if the<br />
heroes go sailing earlier.<br />
Events<br />
Event 50: Exploring the Blood Sea<br />
You can choose one of these Events to enliven<br />
each voyage of the heroes. You may also create<br />
your own sea Events.<br />
A) The Albatross: A large sea bird takes to<br />
following the ship, circling in the sky and acting<br />
as if spying on the PCs. It circles for days,<br />
veering off just before the characters have an<br />
encounter. If the PCs kill the bird (AC 7; hp<br />
3), the sailors are mortified—it is bad luck to<br />
kill a bird while at sea.<br />
If the bird is slain, the sailors attribute all<br />
their misfortunes to the PCs’ action. You<br />
might wish to add to the paranoia by having<br />
several chance events occur, such as the<br />
main mast developing a crack, the food turning<br />
sour, the wind suddenly dying, an epidemic<br />
spreading on ship (Random Event 15),<br />
a sailor is lost overboard at night, and so<br />
forth.<br />
B) Stranded: The wind dies down and the<br />
vessel is becalmed. The captain sets all ablebodied<br />
men and women to the oars (Maq is<br />
conserving the gnomish machine). Movement<br />
by oar covers two hexes per day. The weather<br />
turns warm and the rowing is very exhausting,<br />
causing a loss of 1d4 hit points per day.<br />
After two days, the crew grows discontent<br />
and there is talk of abandoning ship. The<br />
crew might attribute their bad fortune to the<br />
heroes, using words like “jinx” and “overboard.”<br />
The lack of winds lasts for 2d6 days.<br />
C) Land Ho: As the evening darkens the<br />
sky, the lookout sings out, “Land Ho.” He has<br />
sighted a small, rocky island off the starboard<br />
bow. This is actually the back of an ancient<br />
43<br />
sea dragon. Sea weed and barnacles disguise<br />
the shell. A man’s corpse is tangled among<br />
some of the fronds. If the PCs wait an hour,<br />
they see the “isle” slowly sink. If they go<br />
ashore to explore, they see their ship suddenly<br />
move away (in fact the island is moving).<br />
After 1d6+4 rounds, the dragon raises<br />
its long, sinewy neck to see what there is for<br />
dinner. The corpse bears a magical medallion<br />
that always points north and adds +25% to a<br />
navigator’s chance to avoid becoming lost.<br />
D) Abandoned Dinghy: Early one morning,<br />
the lookout sights an old dinghy adrift off the<br />
starboard bow. The craft is abandoned and<br />
only strands of seaweed decorate the seats.<br />
The gunwales bear claw marks. Stuffed beneath<br />
the rear seat is a blood-stained leather<br />
vest.<br />
E) Sea Race: The lookout sights a piece of<br />
wreckage adrift with an injured creature clinging<br />
to it. This might be a mermaid, a Dimernesti<br />
(in human or otter form), or a Dargonesti.<br />
The creature is in bad shape and dies in
two days if not helped. The creature must be<br />
kept moist or it loses 1d4 hit points an hour.<br />
Communication is difficult; those able to<br />
speak other elven languages can understand<br />
only one-third of what is said.<br />
This event could be played one of several<br />
ways. A growing affection might develop<br />
between a rescuer and the victim. Or the<br />
creature might be a thief desiring to steal<br />
metal tools. It might be a wounded scout of its<br />
people with a dire message about the koalinth<br />
and sea dragon alliance. Or it might lead the<br />
PC to the wreck of a pirate ship, 30 feet down,<br />
and provide the party with three potions of<br />
water breathing. The treasure is 10,000 gold<br />
and metalware worth 1,500 steel. Whichever<br />
scenario is played, the creature leaves after<br />
1d8+2 days or when a port is sighted.<br />
F) Haunted Ship: The sky darkens and the<br />
sea turns an ugly green. The wind moans in<br />
the rigging. A mist creeps out of the sea and<br />
the clang of a distant bell can be heard. Suddenly<br />
a dark ship with torn sails is sighted off<br />
the port bow. A lonely hooded figure stands at<br />
the helm. Three skeletons dangle from the<br />
rigging.<br />
On the ship is an insane sailor, the only survivor<br />
of a voyage into unknown distant lands.<br />
He lives a lonely existence at sea, feeding on<br />
what little he manages to catch. The ship is in<br />
fair repair, but he does a haunted ship act to<br />
keep sailors and pirates away. Also on the<br />
ship are three tamed forest taer, their fur<br />
bleached white. The taer might be mistaken<br />
for ghostly figures. If someone has fallen<br />
overboard in choppy waters, he might have<br />
been rescued by the sailor, who is holding<br />
him as a prisoner against his will. The sailor<br />
has no treasure except for polished bones and<br />
shells and a single beige pearl (50 stl).<br />
G) Choppy Waters: The ship encounters<br />
heaving waters, a storm, or is attacked by a<br />
huge monster. In each of these conditions, it<br />
is possible for a man to become seasick or<br />
fall overboard.<br />
Each time a character takes a voyage, roll<br />
1d20 and add any Constitution bonuses. If the<br />
result is a 5 or less, every time choppy waters<br />
are encountered, the character must roll a<br />
successful Constitution Check or become<br />
seasick for 1d10 hours. Treat the sick PC as<br />
in Random Event 15. Sailors do not become<br />
seasick.<br />
In choppy waters, the chance for PCs to fall<br />
overboard is left to you. If you feel that a<br />
character is too near a railing and not braced,<br />
have him roll a Dexterity Check (using his<br />
Strength bonuses as a bonus to the roll; all<br />
sailors are treated as having a Dexterity of<br />
16). If he fails, he falls overboard. A man<br />
overboard must roll a successful Constitution<br />
Check each turn or suffer 1d10 points of<br />
damage. If he fails three Constitution Checks,<br />
he sinks beneath the waves and drowns. It<br />
takes 1d6+2 turns to bring the ship about; the<br />
man overboard must roll a successful saving<br />
throw vs. breath weapon to be sighted.<br />
If one of the PCs falls overboard, you might<br />
have him rescued and later reunited with his<br />
comrades. Supply him with a harrowing tale<br />
of peril and sudden rescue.<br />
H) The Mire: A thick fog blankets the sea,<br />
obscuring vision. The ship is gripped by a<br />
current, despite any efforts of the crew to<br />
break free. After half a day, a dark mass<br />
looms on the horizon and the ship crashes<br />
into a floating hulk, suffering 10 points of hull<br />
damage.<br />
The ship has been snagged by the Mire, a<br />
mile-wide, floating graveyard of a dozen ships<br />
and a tangle of seaweed and debris. This<br />
event should be played for horror. It takes 1d4<br />
days to repair the ship. Then the party has to<br />
discover some means of escape. This can<br />
either be through the aid of the Dimernesti living<br />
in a wreck, by using remove curses, or by<br />
torching the Mire (the last is a desperate measure).<br />
This ships’ graveyard can be explored<br />
either by climbing from one rotting hulk to the<br />
next or by using a small long boat. Things<br />
that might be met while exploring are as follows:<br />
• Strange noises: creakings, groanings,<br />
and shrieks in the mist<br />
• Slime tracks that cross the wrecks<br />
• Patches of strangle weed<br />
• Falling into kelp (it acts as quicksand,<br />
see Land Encounter 55)<br />
• Falling beams, see Random event 1<br />
• Rotten decking that drops a PC 10 feet<br />
(1d6 points of damage)<br />
The creatures that inhabit this haunted mire<br />
include a giant crayfish, a giant slug, three<br />
wraiths, a ghost, a band of 14 Dimernesti and<br />
their two hippocampi, and 43 lacedons.<br />
The treasure that could be found in various<br />
ships’ holds totals 400,000 copper, 60,000<br />
silver, 100,000 gold, trade goods worth 3,500<br />
stl, and gems and jewelry totaling 8,000 stl.<br />
Event 51: Flight from Flotsam<br />
Moments after clearing the harbor mouth<br />
and reaching the choppy waters of the<br />
bay, the alarm is sounded. Troops and<br />
sailors crowd the decks of their craft.<br />
Already, the lighter galleys are pulling<br />
from their slips, as the fishing boats row<br />
frantically aside.<br />
A fleet of five galleys pursues the players<br />
within two turns, four turns if delayed.<br />
Maquesta orders full sail, despite the storm.<br />
The pursuit lasts for several hours, until the<br />
rain stops and a thick bank of fog rolls in<br />
along the coast. After an hour, the wind dies<br />
and oars must be put into the water. Maquesta<br />
decides to risk the fog in hopes of losing<br />
her pursuers. This game of cat and mouse is<br />
played by rolling 1d12 each turn and consulting<br />
the following paragraphs, after adding<br />
any modifiers from previous rolls (all modifiers<br />
are cumulative).<br />
-2 or Less—SUCCESS! Maquesta has<br />
slipped by the last pursuer and vanished into<br />
the fog. (This cannot occur if the Perechon is<br />
engaged in melee.) The wind gradually rises<br />
and the Perechon escapes!<br />
44<br />
-1 to 4—Treacherous Reef If a PC is at the<br />
bow, have him spot the reef and shout a warning<br />
(roll a Dexterity Check). If successful, he<br />
warns the helmsman and the Perechon veers<br />
away in time. If there is no PC at the bow or<br />
he fails, the Perechon scrapes a reef and suffers<br />
1d4 points of hull damage. On the third<br />
reef, warn the Heroes that the Perechon starts<br />
shipping water. The ship runs aground the<br />
fourth time it hits a reef. If grounded, the crew<br />
might abandon ship or try some other ploy.<br />
They might eventually capture another ship<br />
or the haunted ship if the Perechon is lost.<br />
If the Perechon is grappled to another ship,<br />
either both ships hit the reef or both miss. If<br />
the enemy craft suffers more damage, there<br />
is a 10% chance per point that it ran aground.<br />
5 to 8—Close Encounter One of the pursuers<br />
looms out of the fog and sails past. A<br />
voice hails the ship, “ . . . Ho, on the starboard,<br />
state your name!” If the name of<br />
another ship from Flotsam is shouted, there is<br />
a 50% chance the pursuer veers off (-10% for<br />
each previous Close Encounter). Add +1 to<br />
future rolls.<br />
If the Perechon calls an unknown name, the<br />
ship grapples and a boarding party (see under<br />
number 12 below) is sent across. If already<br />
locked in melee, a boarding party is the automatic<br />
result.<br />
9 to 11—Crashing Sound The sounds of<br />
wood groaning and tearing on a hidden reef<br />
echo in the fog. Then come cries to abandon<br />
ship. One of their pursuers has run aground.<br />
Subtract one ship and add -1 to future rolls.<br />
Once all pursuers are defeated in combat or<br />
have run aground, the Perechon escapes.<br />
12 or more—Boarding Party A pursuer<br />
closes with the Perechon and grapples, binding<br />
the two ships together. The attacker is a<br />
light galley 80% of the time, with a crew of 15<br />
marines (use Guard stats). There is one warship<br />
with a crew of 25 marines (use Guard<br />
stats) and two warriors. If the marines suffer<br />
50% or more casualties, they retreat to their<br />
ship and sail away. Add -1 to future rolls.<br />
The Perechon’s crew fights to the last man,<br />
but its speed is reduced to 4 hexes in 12<br />
hours if the crew is reduced to fewer than half.<br />
If the Perechon is captured, the major NPCs<br />
and PCs are loaded on an enemy ship that<br />
turns toward Flotsam. However, the enemy<br />
vessel tears its hull on another wreck and the<br />
crew abandons ship, leaving the characters<br />
locked up. It is up to the PCs to break free<br />
and construct a crude raft. The ship sinks in<br />
three turns.<br />
The PCs may be allowed to explore the sea<br />
at their leisure, but it is important to the story<br />
that they eventually enter the Maelstrom (Sea<br />
Encounter area 24). The next three Events<br />
offer three ways to get the PCs there.<br />
Event 52: Dragon Flight<br />
A day or two after evading pursuit, one of the<br />
PCs awakens from a dream of being scrutinized<br />
by a dark orb with many eyes high in<br />
the sky. All morning he has a feeling of being<br />
watched. He might imagine he sees eyes in<br />
the water. Around midday, he swears he hears
the baying of hounds and starts to watch the<br />
skies toward Flotsam anxiously. Near<br />
evening, he sights them-a flight of blue<br />
dragons on the horizon winging toward them.<br />
Maquesta orders the ship turned into the<br />
Blood Sea (Sea areas 21-24), where the<br />
storm that constantly broods there might<br />
cover them from pursuit. Undaunted, the<br />
Highlords pursue.<br />
The dragons reach the ship after it travels<br />
two hexes. Kitiara demands the surrender of<br />
the man with the gray gem. If the PCs fail to<br />
comply, the dragon flight attacks the ship.<br />
There are up to three dragons (if Kitiara and<br />
both of her lieutenants are still alive). The<br />
dragons concentrate on sinking the ship. If the<br />
ship has entered the storm, the dragons are at<br />
one maneuverability class worse. They also<br />
suffer a -2 penalty to their attack rolls. The<br />
PCs and their allies gain a +2 bonus to saving<br />
throws vs. the dragons’ breath weapons.<br />
As in the story, Berem should panic and<br />
attempt to escape the dragons. If he is unable<br />
to escape, he is swept overboard by a wave at<br />
the last possible moment.<br />
If the ship is hulled and Berem escapes, it<br />
drifts and is pulled toward the Maelstrom (Sea<br />
area 24). If the ship enters the Blood Sea, it is<br />
caught in a current and swept toward the<br />
Maelstrom.<br />
Event 53: The Reaver<br />
A few days after evading pursuit, the lookout<br />
sights a black sail on the horizon. Maquesta<br />
seems worried, even though she has been<br />
known to fly that sail herself. She paces, waiting<br />
for it to draw closer. “Is it that fatherless<br />
scum Mandracore?” she calls. And yes, indeed<br />
it is the Reaver.<br />
Maquesta, though usually welcome on the<br />
pirate isle of Kothas, is at odds with the chief<br />
of the pirates, Mandracore the Reaver (see<br />
the “NPC” section). She knows that his ship,<br />
the Butcher, has the Perechon outmatched<br />
and that her ship cannot survive an encounter.<br />
She orders the Perechon turned about and<br />
seeks cover in the Blood Sea.<br />
The Reaver knows that now is the time to<br />
eliminate his competition without witnesses.<br />
He pursues with a vengeance. The Butcher<br />
has a crew of 24 sailors (use Guard stats),<br />
nine warriors, and eight ogres with a leader.<br />
He wants to sink the Perechon and fish<br />
Maquesta out of the drink. He does not follow<br />
farther than Sea area 21. By then the Perechon<br />
is caught in the current of the Blood Sea<br />
and drawn to its heart.<br />
Event 54: To Save a Comrade<br />
The PCs receive a cryptic message from a<br />
creature of the sea (see Event 39E). It’s about<br />
a friend they believe has drowned. Their comrade<br />
needs the PCs to come help him and the<br />
sea folk before the evil blot of the dragons<br />
invades the peaceful sunken realms. The PCs<br />
need to sail into the Blood Sea where they will<br />
be met by friends and brought to their lost<br />
companion.<br />
Encounters<br />
Most of the sea Encounters occur in open<br />
water that looks the same as any other openwater<br />
locale. Thus only the types of creatures<br />
in each area, as well as some special areas,<br />
are detailed in the sea Encounters.<br />
If the encounter is in coastal waters, check<br />
the description of the coastal land area. The<br />
PCs should be able to sight land from eight<br />
miles out. Coastal waters are plagued by<br />
reefs, sunken wrecks, and sandbars.<br />
The color of the water varies with the depth<br />
and the presence of seaweed. Several<br />
descriptions and encounters common to sea<br />
voyages are provided in the following paragraphs.<br />
Descriptions A and B occur only in<br />
coastal waters.<br />
A. Sunken Obstacle: A reef or sandbar<br />
blocks approach to the shore. During the day<br />
it is easily avoided, but at night or in fog, a<br />
successful Dexterity Check by the bow man<br />
enables the ship to avoid a collision. If the<br />
ship hits the obstacle, it suffers 1d4 points of<br />
hull damage and has a 10% chance per point<br />
of running aground. Once grounded, they<br />
must wait for the tide to get off.<br />
B. Wreck: Usually a shipwreck indicates the<br />
presence of a reef or sandbar. You may create<br />
your own adventure aboard the wreck.<br />
C. Fog: Movement is reduced to two hexes<br />
per day. There is a 40% chance that the ship<br />
becomes lost (the DM should pick a new<br />
location, up to two hexes distant from the<br />
starting position).<br />
D. Winds & Current: The ship might<br />
encounter a current or strong wind that carries<br />
it along swiftly. The direction of the current<br />
or wind is determined by rolling 1d6.<br />
Count the direction the ship is traveling as 1<br />
and then go clockwise around the hexsides<br />
(thus 2 is to the right and 6 is to the left). If<br />
traveling with the current or wind, the ship<br />
moves one additional hex. If sailing across a<br />
current or wind, the ship loses one hex of<br />
movement. If sailing against the wind or current,<br />
movement is reduced to two hexes.<br />
E. Squalls: Squalls come on suddenly but<br />
last for only 2d4 turns. They create choppy<br />
waters, however-see Event 50G.<br />
There is a 10% chance that a waterspout<br />
accompanies a squall; treat this as in Random<br />
Event 19.<br />
F. Ship Damage: Periodically the ship might<br />
suffer damage due to age or the elements.<br />
This could include a ripped sail, a snapped<br />
rope, cracked spars, or water leaking in from<br />
worm holes or warped timbers. The ship<br />
needs to trim sails and put into port as soon<br />
as possible. Trimming sails reduces speed to<br />
half normal.<br />
Aquatic Creatures<br />
Several of the creatures found on the Monster<br />
Chart have aquatic counterparts. The same<br />
stats can be used for both varieties, except<br />
the aquatic versions can swim.<br />
45<br />
Anemone (Black Willow)-no sleep, attack<br />
paralyzes with a -2 penalty<br />
Bullshark (Buffalo)—only 1 attack, stuns for<br />
1d4 rounds<br />
Ghaggler (Slig)<br />
Koalinth (Hobgoblins)<br />
Kapoacinth (Gargoyle)<br />
Lacedon (Ghoul)<br />
Nudibranch (Giant Slug)<br />
Sea Lion (Spotted Lion)<br />
Vodyanoi (Umber Hulk)<br />
Island Encounters<br />
76. Kalpethis<br />
Hidden in a rocky bay is Kalpethis, the<br />
pirate capital of Kothas. Low stone-walled<br />
outposts flank the harbor entrance, protecting<br />
the bay with catapults. A watch is<br />
always mounted. The town is a collection<br />
of ramshackle wooden buildings clinging to<br />
the side of the cliff. Their odd shapes result<br />
from having been built from the wood of<br />
plundered ships. Long rickety wharfs<br />
extend out into the bay. A network of<br />
wooden stairs, walkways, and rope-ways<br />
connect the buildings. In the harbor, several<br />
small war galleons constantly patrol.<br />
This is the home of Capt. Mandracore, the<br />
Reaver of the Blood Sea. Several hundred<br />
pirates and their families live here when not<br />
out raiding. Outsiders are not welcome, and<br />
Maquesta can visit only when Mandracore is<br />
not here. Justice here lies with the strong and<br />
swift of sword. Constant troublemakers either<br />
become leaders of the pirates or dance a jig<br />
on the gibbet.<br />
77. Kothas<br />
This island is a rugged land with high hills<br />
and simple farms. Sheer bluffs face the<br />
raging sea and small fishing villages cling<br />
to the cliffs. Inland there are small villages<br />
and fortified manor houses. Signal towers<br />
dot the island. A network of dusty roads<br />
and trails links the island’s communities.<br />
This land is frequently visited by chill<br />
rains from the east.<br />
Pirates of lesser repute and their families live on<br />
the highlands. Strong marshals, retired captains,<br />
administer the land from their manors.<br />
There are many minotaurs, but they are relegated<br />
to the role of serfs who work the soil.
78. Mithas<br />
This wind-scoured rock is a barren land<br />
with only occasional shrubs clinging tenaciously.<br />
The eastern mountains are dormant<br />
volcanoes; their heat warms the<br />
land. Everywhere are hot springs, bubbling<br />
mud, and geysers. The rocks are<br />
encrusted with lime. Most of the minotaurs<br />
live in stone homes built in cool<br />
caves or in the shadows of cliffs.<br />
Minotaurs of the inner lands make their living<br />
mining ore and working the metal. Few crops<br />
grow here. Most of the inhabitants live on fish<br />
and the bounty of the pirates. Minotaurs live<br />
in close-knit family units. They accept only<br />
those outsiders who can prove themselves by<br />
defeating one of the minotaurs. They are very<br />
loyal to their family members.<br />
79. Dragon’s Spine<br />
High winds rip through the narrow passes<br />
and mountain peaks here. Several of<br />
these mountains are dormant volcanoes;<br />
steam vents periodically from crevices.<br />
There is some snow cover at higher altitudes,<br />
including a small glacier that<br />
pushes north into the sea. Large winged<br />
creatures that seem vaguely humanoid<br />
ride the winds off the ridges.<br />
Minotaur mines dig ore from the lower slopes of<br />
the mountains. They mine iron, copper, and<br />
gold for weapons, armor, and ornamentation.<br />
High in hidden vales near the mountain<br />
peaks lives an odd race of birdmen called the<br />
kyrie (use Bozak stats). They can cast spells<br />
as 3rd-level druids. The kyrie are the only<br />
ones to have ever escaped from the Arena of<br />
Games (see area 80). They periodically raid<br />
the mining camps.<br />
80. Lacynos<br />
Lacynos is the major port and capitol of<br />
the minotaur land of Mithas. Its squat<br />
stone buildings sprawl along Horned Bay<br />
and rise into the hills. The harbor is large,<br />
protected by two stone jetties and a breakwater<br />
reef made of sunken ships. Many<br />
small galleys and larger marauder ships<br />
find anchorage here. Back in a bowl in the<br />
hills is the Arena of Games.<br />
Lacynos is a cruel place. The only free creatures<br />
are minotaurs and visiting draconians,<br />
who are looked upon as potential allies. Men,<br />
ogres, goblins, and kender serve the bullmen<br />
as slaves or entertain them in the arena.<br />
The leader of the minotaurs is Chot Es-<br />
Kalin; he is detailed in the “NPCs” section of<br />
the Appendix. Chot is as hot-tempered as all<br />
minotaurs, but he has a cruel cunning and is<br />
negotiating alliances with the Highlords.<br />
Chot’s people provide naval expertise and<br />
heavy troops for the Dragonarmy.<br />
The law of the land is the Arena of Games.<br />
Any who break the law are sent to the arena<br />
for short lives as gladiators. Three types of<br />
games are most popular in the arena: battles<br />
with gargantuan serpents, gargoyles, or<br />
trained minotaurs; the Death Maze, an everchanging<br />
maze of deadly traps; and the Pits of<br />
Doom, duels among pits of lava and geysers.<br />
81. Winston’s Tower<br />
The long sandy beach with rocky peninsula<br />
doesn’t appear to be a good harbor.<br />
But a series of sandbars and a narrow reef<br />
make for a quiet anchorage. A mammoth,<br />
130-foot-tall, six-sided tower rises from<br />
the ruins of a fort. A broken wall surrounds<br />
the tower’s base. A ramp spirals<br />
around the tower to a parapet at the top.<br />
No activity is sighted. Large curved metal<br />
plates rest on each side of the parapet.<br />
This mighty beacon was used to shine across<br />
Istar, lighting the way for all travelers. Now it<br />
lies abandoned, avoided because of its reputation<br />
as a place of dread. Of gnomish construction,<br />
the interior of the tower is a series<br />
of stairs, ladders, catwalks, and platforms at<br />
various levels. Dark shafts fall away to dizzying<br />
depths. Some of the special encounters<br />
featured here include the following:<br />
• A clockwork juggernaut (use Undead<br />
Beast stats)<br />
• A treadmill that makes characters run in<br />
place until they drop<br />
• An amazing lift-a network of buckets rising<br />
and descending on an endless chain<br />
• Rubber walls that make one bounce<br />
around crazily<br />
• Trap doors that lead to slides and shafts<br />
• Floating animated crystal spheres<br />
The creatures in this tower include a gargoyle<br />
automaton, huge furry rodents (use Wolf<br />
stats), ochre jellies, mechanical tendrils (use<br />
Strangle Weed stats), and a crazy minotaur<br />
that thinks that everything is a machine.<br />
Treasures of note include thousands of steel<br />
worth of metal gears and bars, dozens of diamond<br />
gear bearings, worth 50-150 stl each, a<br />
ray of light that cures disease, a Lantern of<br />
Everburning, Sand of Silence that muffles<br />
sounds, and the Neverending Ribbon, an<br />
amazing device that forms a temporary road<br />
82. Beakwere<br />
These wind-sheltered plains are littered<br />
with the rubble of broken manors and villages<br />
crushed beneath fallen cliffs. The<br />
stone is scorched black. Near the base of<br />
the mountains is a 300-yard-wide crater<br />
with a bluish boulder at its heart. Slowly<br />
nature is reclaiming the land.<br />
46<br />
This land hosts giant sand lizards (use Aurak<br />
stats without spells) and giant trap door spiders.<br />
Small whirlwinds blow across the barren<br />
landscape. Those who get within 10 yards of<br />
the crater are stricken ill (treat as Random<br />
Event 15 in the Appendix).<br />
83. Silent Plains<br />
The land is a desolate sandy plain. A<br />
gritty wind scours exposed flesh and<br />
stone. Here are broken highroads and<br />
fallen towers. There is little life abroad<br />
save for swarms of locusts grazing on<br />
small patches of grass. Among the ruins<br />
dim shadows flit.<br />
Giant lizards (use Aurak stats without spells)<br />
bask on the ridges and race across the plains.<br />
Swarms of locusts gather in bushes and narrow<br />
patches of vegetation.<br />
Skyfishers wheel in the sky overhead. They<br />
might be drawn to parties moving about during<br />
the day. The land bakes by day and<br />
freezes by night.<br />
Characters might encounter ridges in the<br />
sand; when seen close up, these are clearly<br />
burrows. Giant worms live here. Normally<br />
they hunt lizards, but they’re not above<br />
putting a little variety into their diet (use Sea<br />
Serpent stats).<br />
84. Tailyon<br />
This warm, windy coast is a desert of<br />
shifting sand dunes that constantly<br />
reshape the land. The wreck of an ancient<br />
city is buried on the sandy northern coast.<br />
Giant sand lizards, the undisputed lords of the<br />
land, bask on ridges. Use Aurak stats for the<br />
sand lizards (no spells).<br />
85. Worldscap Mountains<br />
These are snowcapped, windy mountains,<br />
cut by rugged gorges and twisting fjords.<br />
Trees grow to about 1,000 feet above sea<br />
level.<br />
The three highest peaks are Worldscrown,<br />
Cloudpainter, and Shattersky. This is Ansa-<br />
Ion’s highest mountain range.<br />
Deep in caverns to the east is a small clan<br />
of mountain dwarves. They have been isolated<br />
for 200 years. These mountains are<br />
steep and dangerous to climb. Wolverines<br />
and worse prowl the slopes. High winds have<br />
stripped the vegetation away.
86. Ruins of Karthay<br />
Here lies the shattered ruin of the ancient<br />
city of Karthay, buried beneath a collapsed<br />
cliff face. Winds howl among the<br />
canyons of broken stone and sand stings<br />
the flesh. This ruin swelters at midday and<br />
freezes at night. To explore the ruin, one<br />
must climb over rubble and through gullies.<br />
Once built into the side of the mountain,<br />
some of the city’s hidden chambers<br />
and passages are now exposed.<br />
This city once housed a university of great<br />
learning, but the books have long since crumbled<br />
and blown away. Among the ancient ruin<br />
lie many dangers and challenges:<br />
• Sand pits<br />
• Crumbling walls (as Random Event 1 in<br />
the Appendix)<br />
• Deadly gases that explode when a door is<br />
opened (treat as a 4-HD fireball)<br />
• Sand storms (use Random Event 19 in<br />
the Appendix)<br />
• A huge maze stalked by giant lizards<br />
• A library of ashes<br />
• The Hall of Ancestors, through which the<br />
past can be viewed.<br />
Creatures that frequent this ruin include<br />
umber hulks, borer beetles, wolverines, giant<br />
lizards (use Aurak stats without spells), and<br />
giant horned toads (use Amphi Dragon stats<br />
without special abilities).<br />
Treasures reputed to lie here include the<br />
Well of Knowledge (saving throw vs. poisonif<br />
failed, 2d10 points of damage; if successful,<br />
as a legend Lore spell), small quartz spheres<br />
that glow with light, a magical wall with living<br />
paintings that talk to viewers and tell bizarre<br />
stories, magical spelling bees that can each<br />
cast one spell (1st-level wizard spell) and<br />
then die.<br />
87. Sea Reach<br />
This is a safe, sheltered bay. Stone jetties<br />
with watchtowers at their ends protect the<br />
entrance with a battery of catapults. The<br />
wharfs are strong and in good repair.<br />
Stone buildings with wide verandas front<br />
the harbor; tile roofs and colorful awnings<br />
providing protection from the blazing sun.<br />
Many of the buildings are built into the<br />
hills to provide further insulation. To the<br />
west of the cove, terraced farms step up<br />
the cliff face.<br />
Pirates and minotaurs are not welcome here.<br />
Galleys sail out to drive these marauders off.<br />
88. Saifhum<br />
This island is rugged but cultivated. Roads<br />
of stone and terraced farms are built onto<br />
the sides of steep hills. Small stands of<br />
wood and fruit trees grow in valleys along<br />
streams and roads. On the high inland<br />
plains, oats and wheat are grown and<br />
ground in windmills. Wind-driven water<br />
wheels lift water from the valleys to irrigate<br />
the fields. Sheep and goats are the<br />
main livestock here.<br />
An odd road of smooth-fitted stone<br />
zigzags across the land. A wooden rail<br />
runs down the middle of the road. Strange,<br />
sailed wagons periodically travel along<br />
the road, sailing straight from east to west<br />
and tacking back west to east in a zigzag<br />
pattern.<br />
These mariners are no friends of pirates,<br />
minotaurs, or dragonkind. They protect their<br />
own and honor contracts, but they avoid<br />
involvement in the wars of others.<br />
89. Kernen<br />
These ugly, wild plains are blotted by<br />
mires and rocky outcroppings. Muddy<br />
sloughs and dwarf woods line the turgid<br />
streams. Here and there are odd square<br />
hills. The plains show signs of wasteful<br />
hunting. Mangy wolves and small antelope<br />
range this land.<br />
These are ogrelands. Barbaric ogres hunt<br />
these plains, along with wolves and other<br />
vicious predators.<br />
90. Elderglade<br />
This forest is filled with ancient oaks and<br />
elms. Large shelf fungi grow on the trunks,<br />
and moss blankets the ground. The narrow<br />
paths meander and recross so often<br />
that someone following them swiftly<br />
becomes lost. There are sheltered glades<br />
and black pools beneath the blue canopy<br />
of leaves. The sounds of muffled buzzing<br />
and bird songs are interrupted by long<br />
moments of silence.<br />
This is a spooky, eerie wood. There are tales<br />
of those who have slept in these woods and<br />
awakened to find themselves in another time.<br />
91. Sandy Shores<br />
Sandy bluffs line the long strip of beach<br />
that stretches for miles along the coast.<br />
Brambles grow along the bluff’s crest.<br />
Odd driftwood and old bones lie drying on<br />
the beach. Occasionally the remains of<br />
campfires are found.<br />
47<br />
Ogre fishermen scavenge along the shoreline.<br />
92. Nordmaar<br />
This coast is a series of high cliffs and<br />
wide valleys, with stagnant backwaters<br />
along a gravel-strewn beach. There are<br />
marshlands to the south. Great pines<br />
cluster along the verge of the cliffs. Barbarians<br />
on horses can be seen to thunder<br />
south across the inland rocky plains.<br />
They bear dragon banners. These are not<br />
free lands.<br />
This is enemy territory. Squads of Baaz and<br />
horse-mounted warrior barbarians ride south<br />
to the battles. They detain strangers. If these<br />
are determined to be enemies, they are executed<br />
after one day. Spotted lions prowl the<br />
plains, hunting wild boars.<br />
93. Valkinord<br />
The shore here is a salt marsh at the base<br />
of a low cliff. Trails wind up the rocky face<br />
to a magnificent fortress built at the summit.<br />
This stronghold is connected to three<br />
towers by long walls. Upon closer examination,<br />
it appears that the entire structure<br />
is a ruin. The rusty portcullis has fallen<br />
and the drawbridge has burned away.<br />
Ghostly lights can be seen moving in the<br />
towers.<br />
This ruin is desolate and apparently deserted.<br />
Of note are hidden walkways running through<br />
the walls, a Hall of Banners that bears the<br />
crests of the hundred clans of the plains, the<br />
Peaceful Hall from which none awaken (treat<br />
as a permanent sleep spell), the living garden,<br />
where all the plants speak and act on<br />
their own, and a bottomless pit (100 feet<br />
deep).<br />
The ruin is patrolled by a giant whisper spider.<br />
Other creatures found here include giant<br />
beetles and ghostly phantoms whose touch is<br />
poisonous (use Jellyfish stats).<br />
There are no treasures of special note.<br />
Sea Encounters<br />
These Encounter descriptions are keyed to<br />
the circled numbers (in the sea areas) on the<br />
Blood Sea & Environs map.<br />
1. Khurman Sea: This sea is plied by merchant<br />
carracks bound for Khur. Schools of<br />
salmon frequent the waters.<br />
2. Bay of Balifor: Otters play in the waters<br />
off the coast. They are really part of a Dimernesti<br />
colony of 43 members. Gulls circle in<br />
the sky and green wood floats in the waters.<br />
3. The Maw: There is a reddish frothy flow<br />
from the mouth of the Gullet into the Maw. At<br />
low tides a ship might run aground here. A<br />
sea serpent frequents these waters.<br />
4. Habbakuk’s Necklace: The sea here is<br />
rich with salmon and swordfish. Kelp beds
grow a mile out from the shore. Sea otters<br />
and Dimernesti play among the kelp. Barracuda<br />
are occasionally seen.<br />
5. Restless Waters: There is a long line of<br />
breakers here across a deep reef. Vodyanoi<br />
lair there.<br />
6. Churning Reach: There is a long line of<br />
breakers here. Sand bars littered with debris<br />
stand 500 yards out from the beach. A giant<br />
manta ray frequents this stretch.<br />
7. Southern Courrain Ocean: There are<br />
large ocean swells here and abundant fish<br />
and dolphins. This area often has squalls.<br />
8. No Port Stretch: These deep coastal<br />
waters front sheer high cliffs. Koalinth and<br />
barracudas inhabit these waters.<br />
9. The Neck: Beneath the clear water can<br />
be seen colorful reefs and the oddly carved<br />
stone of a sunken ruin. The Neck is dangerous<br />
to navigate because of a swift current and<br />
strong winds. Jellyfish frequent these waters.<br />
10. The Crown: Here are deep-water channels<br />
edged by sharp reefs. Along the reefs in<br />
the shallow anchorage grow giant anemones,<br />
while giant eels hide in the reefs’ crannies.<br />
11. Gnashing Teeth: Here are treacherous<br />
reefs and many sunken wrecks. The current<br />
here often carries the unwary onto the reefs.<br />
12. Mistelstrait: This narrow run is sailed<br />
only by the experienced mariner, for sudden<br />
squalls have been known to dash lesser men<br />
against the island’s cliffs. Jellyfish swim in the<br />
clear waters. A clan of kapoacinth (aquatic<br />
gargoyles) lairs near the cliffs.<br />
13. Rough Water: Whitecaps toss and<br />
dance offshore here. Over 120 lacedons<br />
(aquatic ghouls) dwell in small lairs and<br />
caves along the coast.<br />
14. Last Watch: From here the ancient ruin<br />
of Blood Watch can be seen high on a cliff. At<br />
night 1d4 wraiths can be met.<br />
15. Coast of Goodlund: These waters are a<br />
deep blue. Off the coast lives a clan of 30<br />
sirines. One or two often frequent tidal caves<br />
on the shore to comb their long green locks<br />
and sing songs of those lost at sea. The sirines<br />
are aware of the trouble that is brewing in the<br />
Sunken Realms. If one is especially taken<br />
with a PC (this requires a successful Charisma<br />
Check with a -3 penalty), she might<br />
request that the brave hero journey with her<br />
to the Sunken Realms to help save her world.<br />
She can provide each PC with a quaff of an<br />
elixir of water breathing (see Chapter 8).<br />
16. Bloodbay: This bay is often frequented<br />
by pirate ships with 24 pirates and two warriors.<br />
These marauders are waiting to waylay<br />
fat merchant ships. The waters are frequented<br />
by salmon, dolphins, barracudas, and jellyfish.<br />
17. Rugged Coast: This wind-tossed<br />
stretch of water is often choppy. There are<br />
three villages of 10d6 mermen living off the<br />
coast.<br />
18. Reaver’s Bay: This bay leads into the<br />
heart of the Ogrelands. The waters are often<br />
choppy. Two clans of kapoacinth lair here, as<br />
well as a monstrous undead whale (use<br />
Undead Beast stats).<br />
19. Southern Blood Sea: This deep water<br />
is often frequented by merchant and pirate<br />
ships. Dolphins range the waters, and Dargonesti<br />
live below.<br />
20. Eastern Blood Sea: This deep water is<br />
frequented by warring pirate and minotaur<br />
ships. Dolphins frequent the waters, and deep<br />
water ghagglers (aquatic sligs) waylay 30% of<br />
the ships that pass through here.<br />
21. Blood Sea—The Outer Reach: The<br />
water here heaves in great swells. A strong<br />
current carries ships deeper into the heart of<br />
the crimson sea. Storm clouds marshal in the<br />
sky. The sea is dyed the rusty red of blood<br />
from red sands stirred up from the sea bottom.<br />
Sea dragons have been sighted here.<br />
22. Blood Sea—The Tightening Ring: The<br />
clouds erupt with thunder and lightning, slicing<br />
the sky with icy rain. Treat this as Random<br />
Event 19 in the Appendix. The current<br />
strengthens and the helmsman must roll a<br />
successful saving throw vs. breath weapon<br />
just to hold even, paralleling the heart of the<br />
storm. If he fails, the ship is drawn deeper into<br />
the Blood Sea. An experienced sailor has just<br />
a 30% chance to escape.<br />
23. Blood Sea—The Nightmare Sea: The<br />
storm unleashes its full fury. The helmsman<br />
must roll a successful saving throw vs. rod<br />
every two turns or the ship is struck by lightning,<br />
breaking spars, ripping sails, or causing<br />
1d6 points of hull damage to the ship.<br />
If it is nighttime when the party enters the<br />
Blood Sea, the sounds of moaning, screaming,<br />
and cackling are on the wind. Some crew<br />
members become hysterical, pointing at the<br />
churning water in horror. Any who stare at the<br />
water too long see it transform into a crawling<br />
mass of grinning faces, clawed hands, and<br />
wicked horns pushing at the ferechon, causing<br />
it to pitch and shiver.<br />
An hour after this madness begins, a red<br />
mist swirls up from the sea, flowing through<br />
doorways and oozing in portholes. When the<br />
ship is covered by the mist, small red imps<br />
form from the vapors. Soon red impkins are<br />
swarming up the masts, pulling on the rigging,<br />
and loosening cargo ropes. They ignore<br />
the crew; any blows aimed at them pass<br />
right through without effect. Giggling,<br />
screaming, and grunting, they wreck havoc<br />
upon the ship. Use wraith statistics, but only<br />
magic and magical bonuses hurt them, and<br />
they cannot energy drain. They also cannot<br />
be turned.<br />
If a red imp is bothered by a crew member,<br />
several turn and grapple with the man to<br />
throw him either down the hold, into a cabin,<br />
or overboard. Each impkin has a Strength of<br />
4; they can move a character only if the imps’<br />
total Strength points exceeds those of the<br />
character. The character is dragged one foot<br />
per round for every point the imps’ combined<br />
Strength exceeds his. If a character is thrown<br />
overboard, use the choppy waters encounter<br />
rules (see Encounter 50G), but his Constitution<br />
Checks suffer a -4 penalty. If a PC is<br />
thrown overboard, his comrades think he has<br />
drowned. He is actually rescued by sea elves<br />
in the next chapter.<br />
If it is day and the party has not yet defeated<br />
the King of the Deep, a dark shadow rises<br />
from the waters. The king rises beneath the<br />
48<br />
ship and two horrid black tentacles pluck one<br />
crewman each off the deck. The monster then<br />
sinks back into the depths.<br />
The helmsman must roll a successful saving<br />
throw vs. breath weapon with a -2 penalty<br />
each hour to avoid being dragged farther into<br />
the center of the maelstrom. He has only a<br />
15% chance to escape this ring.<br />
24. Heart of Darkness: The thunder’s rumble<br />
takes on a distant quality. In the middle of<br />
this area, a mighty maelstrom swirls, sucking<br />
all down into the deep through its ferocious<br />
maw.<br />
If a ship still has a rudder, there is a 20%<br />
chance that the helmsman can turn the ship<br />
abroad of the whirlpool and the additional<br />
drag casts the ship up and out. However, one<br />
last encounter awaits the party.<br />
The crash and rumble of lightning become<br />
but a distant chorus to the tumultuous<br />
roar of water ahead. The clouds fall back<br />
to form a mighty canopy, while ahead lies<br />
the maw of terror. Whirling and swirling, a<br />
mighty maelstrom sucks all toward the<br />
dark depths from which there seems to be<br />
no escape. Suddenly a trumpeting bellow<br />
splits the clamor, and someone points in<br />
terror skyward. A shadowy dragon is seen<br />
flying toward the ship!<br />
The dragon looks as though it has come to<br />
gloat. Berem, not to be taken, leaps over the<br />
side. The dragon is really Clarion, who saw<br />
the ship, pursued by the minions of evil, enter<br />
the Blood Sea. He is unable to help more than<br />
a few people. He singles out the captain and<br />
her guard to try to pick off the ship. If Clarion<br />
suffers 30 points of damage, he flees.<br />
The PCs’ actions can only delay the<br />
inevitable. If they have potions of water<br />
breathing, they can save themselves. The<br />
ship is sucked down into the maelstrom and<br />
the characters are thrown into the choking<br />
dark waters. They should feel death come<br />
calling as their lungs burn and all goes black.<br />
Actually a group of sea elves rescues the<br />
party using elixirs of water breathing, but only<br />
after the party has passed out.<br />
25. Razor’s Edge: These waters hide dangerous<br />
reefs and obstacles. Many a ship has<br />
been torn apart on these sunken horrors.<br />
There are two villages of 35 + 1d20 mermen<br />
here.<br />
26. Western Blood Sea: These deep waters<br />
are blotted with patches of azure seaweed.<br />
Dolphins and Dargonesti frequent this water,<br />
as do shy pricklebacks.<br />
27. Northern Blood Sea: These dark waters<br />
roll endlessly onward, often frequented by<br />
pirate and minotaur ships. Swordfish and<br />
bullsharks range the waters. Colonies of lacedons<br />
(aquatic ghouls) have been known to<br />
waylay ships at night in these waters.<br />
28. Firewater: These seas glow with a crimson<br />
hue at sunrise and sunset. They are often<br />
the battlefield for feuding pirates and minotaurs;<br />
it is not uncommon to see a burnt hulk<br />
adrift here.
29. Pirates Run: These coastal waters of<br />
Kothas are frequented by two varieties of barracudas—the<br />
fish type and the pirate type.<br />
Both are voracious and offer no quarter<br />
except to others of their kind.<br />
30. Slim Chance: The rocky coast off<br />
Mithas is patrolled by bullheaded men in<br />
ships and bullsharks in the dark waters.<br />
31. Eye of the Bull: Cruel cliffs crowd these<br />
narrow waters; few are brave enough to risk<br />
the treacherous run. On the coast of Mithas<br />
are five fortifications with two catapults each.<br />
These pepper any ships not flying the Horned<br />
flag. Near the coast of Kothas is a treacherous<br />
current and deadly reefs. Living in these<br />
reefs is a colony of sea hags. The sea hags<br />
usually hunt in groups of 1d4 and prefer not<br />
to kill outright, but to capture prey.<br />
32. The Blade: The sea floor falls away to a<br />
deep trench that is home to a colony of 240<br />
ghagglers. They prowl about in groups of<br />
1d20+20, hunting ships that cross their waters.<br />
33. Eastern Courrain Ocean: The waters<br />
here are rough and white-capped, often visited<br />
by high winds and squalls. The giant<br />
swordfish cavorts here, along with deadly<br />
barracudas.<br />
34. Craklin Coast: A strong current pervades<br />
these waters, carrying ships out from<br />
shore toward the Northern Courrain Ocean.<br />
Only the muscular bullshark seems to resist<br />
the tug to deeper waters.<br />
35. Northern Courrain Ocean: These<br />
waters dance merrily in the sea breeze and<br />
the water moves in slow, fluid swells. The king<br />
of this realm is a solitary sea dragon.<br />
36. False Refuge: There appear to be several<br />
quiet bays here, but the dark waters hide<br />
sunken mountains and ruins of old that are<br />
worse than any known reef (double damage).<br />
A swift current carries all past the land and<br />
out to the open sea of the north. Fierce sea<br />
lions prowl these waters in prides of 2d6.<br />
37. Rocky Shores: No safe harbor here,<br />
though many a mariner has been lured into<br />
the snaking canyons and fjords in hope of<br />
shelter. These waters are the realm of a sea<br />
serpent.<br />
38. Troubled Waters: These waters are<br />
cloudy and gray. A colony of lacedons lives in<br />
the ruins offshore and raids the land at night.<br />
39. Blood Cup: This bay has been the site<br />
of many bloody battles between mjnotaurs<br />
and pirates. This is now usually neutral territory.<br />
It is rumored that the Mire, a graveyard<br />
of ships, can be found here. Jellyfish and<br />
aquatic violet ochre jellies float here.<br />
40. Land Ho: These azure waters are usually<br />
a welcome sight to the voyager weary of<br />
the open sea, for from here Iandfall on<br />
Saifhum and empty Karthay can be seen.<br />
41. Mantle: Deep waters surround<br />
Saifhum’s high cliffs. Skyfishers plague<br />
mariners of these waters; the natives carry<br />
slings and crossbows to drive off the birds.<br />
Two giant sea slugs—nudibranchs—prowl the<br />
cliffs and sea, sometimes climbing aboard<br />
ships at night.<br />
42. The Sheath: These dark waters are<br />
patrolled by the mariners of Saifhum in small<br />
carracks the size of the Perechon. Each ship<br />
has a crew of 12 sailor guards and nine warriors.<br />
Sea lions prowl the waters and Dargonesti<br />
hunt here.<br />
43. Endscape: The water here gets shallow<br />
quickly. Many a ship has run aground on the<br />
local sandbars. Long sea grasses and forests<br />
of fan-shaped seaweed grow in abundance<br />
here. These waters are host to strangle weeds<br />
and giant anemones.<br />
44. Miremier: This water is full of rocks and<br />
clogged by forests of kelp. Low tide uncovers<br />
vast salt marshes. Giant crayfish lair here.<br />
49<br />
45. Last Coast: This rocky coast is the<br />
last landfall before the open seas. Ruins of<br />
ancient stone forts grace the summits of its<br />
stony bluffs. Two coveys of sirines live in<br />
grottos by the seashore; sea lions wallow in<br />
the waves.<br />
46. Deep Reach: These waters run swift<br />
and deep around the northern end of Nordmaar.<br />
The air is clear and a tail wind speeds<br />
the mariner on his way. Giant swordfish and<br />
manta rays leap from the water, the masters<br />
of their domain.
Encounter Setting<br />
After the Cataclysm, lstar sank to the depths<br />
of the Blood Sea. The name of the sea comes<br />
from the thick red sand is suspended in the<br />
water. lstar is now surrounded by high mountains,<br />
and the buildings form a massive conglomerate<br />
of ruins and coral mounds. Sea<br />
elves have taken possession of the fabulous<br />
ruins.<br />
The maelstrom in the center of the Blood<br />
Sea leads down to the center of the city. The<br />
giant vortex is caused by a demonic wind<br />
blowing from a gate to the Abyss located at<br />
the bottom of the Pit of Istar. The pit occupies<br />
the spot where the ancient temple once stood.<br />
Most of the water dragged down through the<br />
maelstrom is expelled above the city, sprawling<br />
outward for miles. Because of the strong<br />
turbulence, the only way to enter the city is<br />
through a few narrow mountain passes<br />
beneath the swift current.<br />
When the PCs were thrown overboard, they<br />
were rapidly dragged down into the vortex<br />
and cast out above the city. The sea elves<br />
knew the fate they would face and were ready<br />
with vials of the elixir of water breathing. The<br />
characters all passed out before they were<br />
rescued. The elves left the heroes in the care<br />
of Zebulah, a human mage who has been living<br />
among the elves for years. His consort,<br />
Apoletta, Lady of the Dargonesti, saw the<br />
mark of the fated on the heroes and kept<br />
them here. Maquesta and her crew were put<br />
on a raft and set adrift in the sea shipping<br />
lanes.<br />
All the party can be together in one room,<br />
or you can separate the most wounded character<br />
and place him in area 9.<br />
This chapter is divided into two sections—<br />
Zebulah’s Refuge and the Pit of Istar. The latter<br />
is the role-playing portion of a mighty sea<br />
battle that is brewing between the sea elves<br />
and the forces of evil. Encounter areas in<br />
Zebulah’s Refuge are designated with a “Z,”<br />
while those in the Pit of lstar begin with a “P.”<br />
Zebulah’s Refuge<br />
Z1. Old Banquet Hall<br />
A dozen small rods fixed in the walls softly<br />
light this room. To the south, the wall<br />
seems to have caved in. A large heap of<br />
broken chairs and tables lies to the northeast,<br />
next to a set of double doors that is<br />
hanging open. On the opposite side grow<br />
large clumps of strange mushrooms.<br />
There is no one else in the room.<br />
This room used to be a banquet hall before<br />
the Cataclysm. Zebulah now uses it to grow<br />
mushrooms for food. The doors are not locked<br />
and can be easily opened. The rods lighting<br />
the area are sticks with continual Light cast<br />
on them.<br />
Should the PCs listen at the door, they hear<br />
the shuffle of somebody walking furtively on<br />
the other side. If a character peeks around the<br />
door, he sees a crouching silhouette, cloaked Anyone walking behind a koalinth out of<br />
and hooded, no more than three feet away. the water has only 1 in 6 chance of being<br />
The individual is moving furtively along the<br />
walls, away from the door, clumsily trying to<br />
heard.<br />
hide in the shadows. It has not seen the PC,<br />
because the door is concealed with an elabo-<br />
22. The Coral Cave<br />
rate illusion of a bare wall. Not even the light<br />
passes through the illusion.<br />
The corridor stops abruptly on a narrow<br />
The creature is one of many koalinth spies ledge overlooking a small underground<br />
sent to assassinate Zebulah. If the party lake. The rods’ soft glow is reflected by<br />
decides to wait, another silhouette is seen, the small waves of the water. Another<br />
following the first. Unless the party attacks, ledge with an opening is located on the far<br />
up to a dozen of these spies walk past. If the side of the lake. A cable stretches from<br />
party acts, each spy remaining in the corridor one ledge to the other. In between, a small<br />
attacks the PCs. The koalinth are coming<br />
from area Z4, seeking area Z2.<br />
boat is hooked to the cable.<br />
50
The boat can be hauled back to the ledge by<br />
pulling on the cable, as with a ferry boat.<br />
Below the surface of the lake are three exits.<br />
They are hard to see from above, because of<br />
the reflection and the cluster of corals. Any<br />
nonaquatic creature has a 20% chance of getting<br />
stuck while attempting to swim through<br />
one of these exits.<br />
23. Flooded Tunnel<br />
The lower part of this corridor is dark and<br />
flooded.<br />
Each PC has a chance of swimming down the<br />
stairs, under the ceiling, and back up on the<br />
other side with a successful Constitution<br />
Check. If the roll fails, the character panics<br />
and suffers 1d6 points of damage per round<br />
until rescued.<br />
The intersection is the lair of a giant crayfish.<br />
The creature tries to grab one character<br />
swimming nearby. To break free, the victim<br />
(or a rescuer) must roll a successful Strength<br />
Check. The crayfish retreats to area 22 if it<br />
suffers more than 50% damage.<br />
24. Old Stairway<br />
A spiral stairway leads down to the bottom<br />
of a trench in the city of Istar, 50 feet<br />
below. The lower 40 feet of the passage is<br />
flooded.<br />
In the event the PCs have a way of breathing<br />
under water, they can reach a large stone door<br />
at the end of the stairs. It opens onto the bottom<br />
of a pitch-dark trench. Twelve koalinths<br />
are waiting below and attack the PCs when the<br />
door is opened. If more than half are killed, the<br />
others flee. If the party captures one of them<br />
and interrogates it, the koalinth menaces the<br />
PCs with a quick doom, revealing that “the<br />
entire army of koalinths is marching toward<br />
Istar, and the elven scum had better prepare to<br />
die.” If interrogated further, the prisoner says<br />
that the koalinths have allied with the King of<br />
the Deep and the Dragonarmy.<br />
25. The Magical Fountain<br />
In the middle of this chamber is a fountain<br />
whose center is a sculpture of a small<br />
whale. Water spouts from its blow hole.<br />
The walls in the chamber are covered in<br />
white marble, carved with scenes of<br />
ancient Istar.<br />
The fountain is magical. Anyone drinking this<br />
elixir can breathe water as long as he does<br />
not come into contact with air for two or more<br />
consecutive turns. This effect cannot be dispelled.<br />
When a creature dries out, he must<br />
roll a successful saving throw vs. poison or he<br />
forgets the last 2d6 days.<br />
A secret panel conceals the access to area<br />
Z6. It opens only if the small whale is rotated<br />
clockwise. It closes if the sculpture is rotated<br />
counterclockwise. In the event the sculpture<br />
is rotated in the wrong direction, 20 crossbow<br />
bolts are fired from a series of hidden slits in<br />
the ceiling (1d4 bolts automatically hit each<br />
character present in the chamber). The tips of<br />
the quarrels bear a mild sleep poison. Each<br />
victim must roll a successful saving throw vs.<br />
poison or lose consciousness for 1d4 turns.<br />
Z6. The Dragonlances<br />
Beyond the secret panel, stairs lead down<br />
to a round and dark pit. The steps narrow<br />
as they descend. From the bottom, a faint<br />
glow seems to flicker.<br />
Ancient ancestors of the sea elves stored 24<br />
footman’s Dragonlances here. These were left<br />
in their keeping after the Third Dragon War.<br />
After the Cataclysm, they brought them here<br />
300 years ago, but have since forgotten them.<br />
The circle of lances supports a plunger of<br />
aged teak that holds up the ceiling block.<br />
For every lance removed, roll 1d20. If the<br />
number rolled is greater than the number of<br />
lances remaining, the plunger sinks down and<br />
the ceiling falls. The ceiling collapse causes<br />
20 points of damage to those beneath it (successful<br />
saving throw vs. petrification for half<br />
damage). The ceiling crumbles and PCs can<br />
dig their way out in 1d4 turns,<br />
27. Zebulah’s Room<br />
In the middle of this room stands a bed<br />
made out of a huge sea shell. In the western<br />
half of the room is a round table with<br />
several golden dishes. On a large plate in<br />
the middle of the table are the remains of<br />
a fish with unusual vegetables and fruit. A<br />
thin crystal flask holds a green liquid.<br />
A door in the western wall is open, and<br />
a pulsating light glows from within. The<br />
sound of crystal being moved is heard.<br />
A koalinth spy has managed to enter this area<br />
and is searching the room for information. If a<br />
PC peeks around the door, the spy is standing<br />
in front of the orb in room 28, perplexed, and<br />
does not notice the party.<br />
The table holds the remains of Zebulah’s<br />
dinner. The green liquid is a magical seaweed<br />
wine. Anyone drinking it recovers 1d4 hit<br />
points of damage.<br />
The southwestern corner of the room is<br />
separated from the rest of the area by a curtain.<br />
Here is Zebulah’s wardrobe. There’s<br />
nothing the PCs can use, unless they need<br />
some drab cloaks and other clothes.<br />
51<br />
28. Zebulah’s Laboratory<br />
This rectangular room contains an incredible<br />
array of flasks, tubes with bubbling<br />
liquids, pots, and other glass containers.<br />
In the middle of the room is a globe of<br />
pale blue, pulsating with light, that rests<br />
on a coral pedestal. Next to it is a large<br />
seat carved of coral.<br />
The sphere is a Dragon Orb. A koalinth stands<br />
motionless in front of the orb, staring dumbly<br />
at the crystal. Because of the sea dragons’<br />
approach (for the upcoming battle), the orb<br />
has started pulsating. Zebulah is unaware of<br />
this new event. If the party warns him, he<br />
understands the menace and immediately<br />
communicates the information to the sea<br />
elves in Istar. Zebulah fears that the King of<br />
the Deep has prepared a full-scale attack on<br />
the city.<br />
Z9. Zebulah’s Lounge<br />
If there are any wounded PCs recovering here,<br />
they awaken weak and dazed. They hear<br />
someone leave as they return to consciousness.<br />
The glistening walls of this octagonal<br />
room softly reflect the light that glows<br />
from a dozen rods. Three large couches<br />
occupy the center of the room, clustered<br />
around a small, lacquered table. A strange<br />
gray growth covers the wall to the west.<br />
On the southern wall is a small waterfall<br />
splashing into a large shell.<br />
If the PCs study the growth on the western<br />
wall, describe it as the lips of some horrible<br />
fungoid creature. Actually, the growth is made<br />
of two huge sponges acting as a doorway.<br />
Anyone can easily squeeze between the two<br />
sponges and enter the corridor outside the<br />
room. Small pipes with running sea water<br />
keep the two huge sponges permanently wet.<br />
The couches in the center of the room are<br />
made of similar sponges. The sponge couches<br />
help keep the sea elves wet when they meet<br />
Zebulah here. The waterfall is used for bathing.<br />
Z10. Meeting Apoletta and Zebulah<br />
When the party approaches this area, warn<br />
the PCs that they hear voices. If they stop to<br />
listen, explain that the voices speak in a<br />
strange elvish language. Any elven character<br />
has a 50% chance of understanding each sentence<br />
spoken in the first boxed entry (see<br />
below). Non-elves speaking elvish have only<br />
a 25% chance. If the party waits and listens,<br />
read the first boxed entry. Otherwise, read the<br />
second entry.
Male voice: “No, I think they’ll be fine, but<br />
I still feel it was unwise to reveal our presence.<br />
You should have let them go on the<br />
raft, like you did the others.”<br />
Female voice: “Perhaps you’re right,<br />
but these were so much unlike the others.<br />
There is something about them that disturbs<br />
me. And this impromptu arrival...I<br />
fear this has something to do with the sea<br />
dragons sighted in the south.”<br />
Male voice: “It must be tied to the recent<br />
aggression of the King of the Deep. Raids<br />
are getting more frequent and no one so<br />
far has managed to enter his lair. We must<br />
find a way to get through the passage....”<br />
Female voice whispering: “Shhh...wait,<br />
I think I heard...KreeaQUEKH!”<br />
Read the next entry if the party enters.<br />
On the opposite side of the room a dozen<br />
steps descend toward a small pool. An<br />
old man wearing red robes is kneeling by<br />
the water, on the last step. He suddenly<br />
stands as a beautiful elven maiden disappears<br />
into the dark water.<br />
The old man is Zebulah. He waits for the PCs<br />
to come down. He greets them and reveals<br />
how they came to Istar. Zebulah does not<br />
know a way out of Istar, but he believes the<br />
answer could be found in the King of the<br />
Deep’s lair (the Pit of lstar).<br />
later during the discussion, Apoletta<br />
emerges from the water and takes part in the<br />
conversation. If she is warned of the war<br />
going on at the surface, and of the party’s<br />
suspicion about a possible war in lstar, she<br />
sends a message to her kin and orders armed<br />
forces to be raised. At the end of the conversation,<br />
another sea elf suddenly emerges into<br />
this area and warns Apoletta that koalinths<br />
allied with the King of the Deep are preparing<br />
to invade the city.<br />
Zebulah and the fair Apoletta are not<br />
schooled in war. They are in desperate need<br />
of assistance in driving back evil’s brood.<br />
They try their best to persuade the PCs that<br />
destiny brought them here to help in this conflict.<br />
They have also heard of a dark-haired<br />
land dweller who rides a dragon. Rumor says<br />
she is after some treasure in the ruins of Istar.<br />
A vague strategy is quickly developed. The<br />
enemy is very chaotic, held together only by<br />
charismatic, powerful leaders. If those leaders<br />
can be eliminated, the forces of the sea elves<br />
can triumph.<br />
Apoletta then leaves the area to organize<br />
the defense of lstar. Zebulah informs the party<br />
that the sea elves will try to lure the King of<br />
the Deep and his minions out of the pit, so<br />
that the party can reach the lair. Zebulah<br />
thinks there must be a way of destroying the<br />
creature’s secret life source in its absence;<br />
here also he believes the PCs can find a way<br />
out of lstar. He begs them to invade the lair<br />
during the battle; it’s lstar’s only hope. If the<br />
PCs refuse, he abandons them in his refuge.<br />
From there, the PCs will have to find a way<br />
out of the city by their own means. (Without<br />
the PCs’ raid on the lair, the sea elves are<br />
defeated in the battle, Istar is overcome, and<br />
the PCs must flee from the victorious legions<br />
of evil.)<br />
If the party accepts, Zebulah mentions the<br />
powers of the magical fountain in area 25. He<br />
also suggests the PCs let a band of dolphins<br />
(one for each character) help them travel<br />
underwater. The dolphins bring the PCs to the<br />
entrance to the King of the Deep’s lair (area<br />
P1).<br />
Z11. The Old Tower<br />
The curtains open onto a large, circular<br />
room. Three huge crystal windows have<br />
been placed in the walls, allowing a most<br />
incredible view. Through the eerie green<br />
light filtering into the room, large silver<br />
fish can be seen swimming on the other<br />
side of the crystal panels, staring at the<br />
party. Suddenly, they dash away into the<br />
darkness of the sea.<br />
In the center of the room is a large<br />
round table, carved of pink marble, with a<br />
tiny city built on it. At the center of the<br />
table is an ornate temple. On the side,<br />
written in common, are the following<br />
words: “Welcome, 0 noble visitor, to our<br />
beautiful city. Welcome to the city beloved<br />
of the gods. Welcome, honored guest, to<br />
Istar.”<br />
This tower is an ancient structure from the old<br />
city. It clings to the side of a cliff, overlooking<br />
a canyon that was once a street in lstar. There<br />
are no other exits. Where the ancient temple<br />
stands in the small city corresponds to the<br />
location of the Pit of Istar.<br />
A rune is engraved at the base of each of<br />
the windows. If the word is spoken by any<br />
spellcaster, the windows fog up and show a<br />
scene occurring at some location around the<br />
city of Istar. Should the PCs ever cause this to<br />
happen, the scene appearing on the windows<br />
shows the arrival of the koalinth army, led by<br />
none other than Highmaster Toede. The scene<br />
vanishes after 1d4 rounds. The rune does not<br />
function again for a week.<br />
As the party is busy observing the room<br />
and the scene, a dozen koalinth spies try to<br />
surprise the party. If more than half of the<br />
koalinths are defeated, the others flee toward<br />
area 22.<br />
52<br />
The Pit of Istar<br />
P1. Coral Cave<br />
If dolphins accompanied the party, they leave<br />
the PCs here.<br />
The brilliant flashes from a multitude of<br />
small silver fish darting in and out of the<br />
weeds rivals the arrays of colors and<br />
shapes of the luxurious corals. Attracted<br />
by the light, tiny fish play around the visitors,<br />
some of them silently staring with<br />
their round eyes, others wildly dancing in<br />
the light and shadows. Two exits open on<br />
the opposite side of the cavern, between<br />
the jagged edges of coral.<br />
The PCs might notice bubbles rising out of the<br />
coral wall to their right. On the other side is a<br />
giant sea slug. It used to be the mount of an<br />
elven lord and can obey simple orders, provided<br />
it is subdued again.<br />
One round after the party enters, the slug<br />
breaks through the wall and attacks with its<br />
acid spit. Each PC has a 10% chance of spotting<br />
a rotting elven saddle on its back. The<br />
slug does not follow if the party leaves<br />
through one of the northern ways, for these<br />
passages smell foul to it. If the party causes<br />
more than 50% damage to the slug, it retreats<br />
to the eastern corner, just below the large<br />
shaft. If the party keeps attacking, it flees up<br />
the shaft. If someone tries to climb into the<br />
saddle, the slug is now subdued and responds<br />
to elvish commands. It can be ridden to flee<br />
this place once the PCs’ quest is complete.<br />
The shaft opens onto the central court of<br />
lstar, only a few hundred feet above the pit.<br />
Once the slug has broken through the coral<br />
wall, the PCs can see a third passage from<br />
this area. This one leads directly to area P3,<br />
bypassing the P2 areas in the other passages.<br />
P2. Caverns of the Hanged Men<br />
These two caverns are filled with seaweed of<br />
various types, including strangle weed. Each<br />
area contains three strangle weeds.<br />
The strangle weeds in the P2 cavern farthest<br />
from area P3 hold the rotting body of a<br />
koalinth. When the PCs enter, they hear delirious<br />
laughter and lamentations. A wraith<br />
appears in 1d4 rounds. It is the undead form<br />
of the koalinth. It tries to flee, hoping to lure<br />
the party away from the secret passage. If the<br />
party does not follow, it attacks the party<br />
from the fronds a few rounds later. The wraith<br />
can be kept at bay by brandishing a noose.<br />
The cavern to the northwest contains a<br />
secret passage to area P10. The secret panel<br />
can be found only if all of the strangle weeds<br />
in this area are destroyed. By pulling away<br />
the dead strangle weeds, the secret panel is<br />
revealed.
P3. Hall of the Black Manta<br />
This large cavern is covered with eerie<br />
vegetation. The large, round plants let<br />
long, purplish tentacles drift in the water.<br />
A fish quietly swims among them and nibbles<br />
at the translucent tentacles. Suddenly,<br />
a plant retracts all of its tentacles in<br />
the blink of an eye.<br />
The plants are poisonous anemones. The fish<br />
swimming among them are immune to their<br />
poison. There are 18 anemones among the<br />
corals in the cavern. They are located in clusters<br />
of three around the six entrances. In the<br />
middle of the cave is a manta ray hidden in<br />
the sand of the floor.<br />
When the party enters this cavern, the three<br />
anemones at the entrance have retracted their<br />
tentacles. Once all the PCs are through the<br />
entrance, these anemones spread out their<br />
tentacles, blocking the entrance. Any character<br />
who gets within 10 feet of an entrance is<br />
attacked. The entrances are not visible unless<br />
a PC forces the anemones to retract their tentacles.<br />
Any attack that causes 8 or more<br />
points of damage to the plants forces the tentacles<br />
back into the plant for 1d4 rounds.<br />
If the manta ray is slain, treasure is found<br />
among the remains of many elves and koalinths<br />
in its nest. This consists of 200 steel<br />
coins and a small map carved on a thin slate<br />
of coral. It depicts the area of the maelstrom<br />
shaft, and the ledge leading to the King of the<br />
Deep’s lair (areas P12 and P13). It is marked<br />
“Pit of Death” in area P12, with an arrow to<br />
area P13, marked “Lair of the 12 Beasts.”<br />
P4. Ochre Jelly Shaft<br />
This bleak cavern is devoid of life. A small<br />
shaft opens in the cavern’s vault leading<br />
up into darkness.<br />
Five ochre jellies dwell in this shaft, which<br />
leads up to Istar. They are 80% undetectable<br />
in the dark waters; PCs suffer -2 penalties to<br />
their attack rolls when trying to hit the jellies.<br />
They do not attack unless characters try to<br />
climb the shaft. It opens no more than 30 feet<br />
from the Pit of Istar.<br />
At the top of the shaft is the King of the<br />
Deep’s lacedon legions. They attack anyone<br />
climbing the shaft, but they do not pursue<br />
down the shaft.<br />
P5. The Invisible Ballet<br />
Light is reflected here in a multitude of<br />
colored beams—a scintillating spectacle<br />
of undersea wonder.<br />
The walls of this cavern are covered with multicolored<br />
crystals that reflect the party’s light<br />
source in all directions. These crystals are<br />
worthless stones. In this cavern dwell three<br />
large jellyfish. They are semi-translucent,<br />
making them 90% undetectable. The creatures<br />
slowly swim toward the party and attack<br />
1d4 rounds after the PCs enter.<br />
P6. Kaal of the Pit’s Quarters<br />
This area has been carved from the stone<br />
of the cavern. In the middle stands a small<br />
altar with two glowing rods. On the opposite<br />
side of the cavern is a large coral<br />
chest.<br />
This place is the lair of spirit naga called Kaal<br />
of the Pit. Kaal is currently above fighting for<br />
the King of the Deep. It returns to this area<br />
within 1d4 rounds if the party tampers with<br />
the coral chest. When Kaal arrives, it casts a<br />
phantasmal force to appear as a water naga,<br />
and then it hails the party. Kaal tries to convince<br />
the party that it is a messenger of the<br />
elves, who are requesting the party’s help on<br />
the battlefield. It claims that a certain Abooleiddah<br />
and Sseipoolah (Apoletta and Zebulah<br />
said with the spies’ hobgoblin accent) have<br />
issued the order.<br />
If they fall for the trick, Kaal escorts the<br />
party to the hall of the black manta (area P3).<br />
It chooses that moment to attack the PCs,<br />
pushing its opponents toward the deadly<br />
plants.<br />
If the party does not fall for the trick, Kaal<br />
casts a lightning bolt and retreats toward the<br />
pit (area P12). If it manages to reach P12<br />
safely, Kaal leaves through the pit and returns<br />
to the battlefield.<br />
The chest has the power of warning its<br />
owner when it is opened. It contains various<br />
unholy symbols and 10 diamonds, each<br />
worth 100 steel coins. At the bottom of the<br />
chest is a thin nacre slate with strange words<br />
engraved on it. This is an aquatic version of a<br />
mage’s scroll, engraved with the runes to the<br />
following spells: darkness, scare, and lightning<br />
bolt.<br />
P7. Lacedons’ Regeneration Chamber<br />
The walls, floor, and vault of this sinister<br />
cavern are covered with a black slime. No<br />
plants thrive here, but horrors that are<br />
vaguely humanoid hang head down from<br />
the vault, shivering and moaning.<br />
The King of the Deep uses this awful place to<br />
reform the bodies of its dead servants. The<br />
shapes, though disgusting, are harmless for<br />
at least four rounds. During that time, they<br />
are AC 10, and each one can be destroyed<br />
with 6 points of damage. On the fifth round,<br />
the slimy black skins around five of the creatures<br />
rip open and a regenerated lacedon falls<br />
out of each of the five cocoons. There are 20<br />
such shapes hanging from the ceiling; five<br />
more break out each round until they’re all<br />
free. If the cavern is empty when the lacedons<br />
53<br />
are revived, they swim out the exit to area P8.<br />
If the PCs are visible when the lacedons are<br />
revived, the creatures immediately charge<br />
and try to paralyze as many of them as possible.<br />
This area is separated from cavern P8<br />
by a thick coral door.<br />
P8. Lacedons’ Den<br />
When the PCs open the door to area P8, they<br />
see a crowd of 96 lacedons, all kneeling<br />
around an ugly altar in the center of the cavern.<br />
All are bowing and groveling at the altar.<br />
A booming voice comes from the altar:<br />
“...now stand, my children, for a new mission<br />
awaits. Now has come the time to leave darkness<br />
and destroy all that lives in Istar. By<br />
right, it has been yours since the Cataclysm!<br />
Come out and gather in the pit.”<br />
All 96 creatures rise and start swimming to<br />
area P11 and out through the pit. If the PCs<br />
intervene, the swarm of undead pursues<br />
them. The chase lasts no more than three<br />
rounds, as the King of the Deep intervenes<br />
and orders the lacedons up into the pit immediately;<br />
he has more urgent uses for his<br />
troops.<br />
P9. Hall of the Mosaics<br />
The center of this circular chamber opens<br />
onto a large, dark pit. The walls of this<br />
strange room seem to belong to a pre-<br />
Cataclysm structure. Hundreds of mosaics<br />
represent scenes of ancient Istar.<br />
If the PCs examine the scenes, they see that<br />
many have been defaced or destroyed. One<br />
particular mosaic, more recent and not as<br />
fine as the others, represents what seem to be<br />
12 minor priests of Istar. At the end of the<br />
mosaic, a gigantic monster seems to leap<br />
from their heads. It has horrible tentacles,<br />
claws, pincers, and a repulsive mane.<br />
The pit in the center of the room contains<br />
thousands of bones, victims of the lacedons<br />
over the centuries of struggle for the city. The<br />
King of the Deep keeps the bones here to<br />
eventually restock his reserves of undead<br />
creatures.<br />
A coral door shuts the exit to area P8. It is<br />
possible to see through this door between<br />
some interstices of coral.<br />
P10. Howwan’s Grave<br />
In the middle of this cavern lies a large stone<br />
sarcophagus. This is the grave of an elven<br />
lord who died while attempting to defeat the<br />
King of the Deep. He was the owner of the<br />
giant slug in area P1. After slaying the lord,<br />
the monster ordered its minions to build the<br />
elf a grave. Then the King of the Deep<br />
enchanted the stones and called the lord’s<br />
spirit from the dead. The elven lord is now a<br />
spectre, under the control of the monster.<br />
When the party enters this area, the spectre<br />
comes out of the grave. It glares at the PCs<br />
and says, “Fools! You have come too far into
the demon’s den; soon you will meet your<br />
deaths. I once undertook your mission, and<br />
now I have been banned from the decency of<br />
a true death. Beware, for he...” Suddenly, the<br />
ghostly form twists, shrivels, and moans in<br />
agony. The spectre now appears as an<br />
impressive monarch, neither a man nor an<br />
elf, glowing in sparkling armor and brandishing<br />
a sword of light. The King of the Deep has<br />
taken control of Howwan and now adds,<br />
“Come now and join me. Your destiny lies not<br />
with the elves, but with the ultimate power.<br />
Abandon your foolish plan to destroy me.<br />
“Come up the pit and lead my hordes forever....”<br />
The figure then heads up the small<br />
shaft in the chamber. Should the PCs be foolish<br />
enough to follow the spectre, they come<br />
up in the middle of the battle and have to fight<br />
the King of the Deep directly.<br />
If the party attacks the spectre, the creature<br />
tries to flee in the direction of the pit (area<br />
P12). Should the party destroy the spectre, it<br />
cries out, “You have destroyed the King of the<br />
Deep! But all is not over yet, for I curse you all<br />
and your descendants. My hordes are now free<br />
and will roam the undersea and torment all life<br />
forever....” The King of the Deep isn’t dead, but<br />
he is trying to fool the PCs into believing they<br />
have succeeded in their mission.<br />
P11. The Sea Hags’ Den<br />
Three green, horrible old women stand<br />
around a table, upon which lies the<br />
remains of a dead elven warrior. On his<br />
face is an expression of terror. His leather<br />
armor has been torn open and his coral<br />
sword lies in a corner of the cavern.<br />
One of the hags utters a blood-chilling<br />
shriek and brandishes a thin wooden rod<br />
in her webbed hand. In a croaking voice<br />
she reads some runes on the side of the<br />
item and the wand produces a small flash<br />
of light followed by a fizz. A few bubbles<br />
float up. The three creatures then burst<br />
out laughing in gut-wrenching shrills.<br />
The three creatures are sea hags. They dragged<br />
a dead elven officer from the battlefield down to<br />
their den. They have found some coral coins<br />
and a wand of fire, which does not work under<br />
water. The creatures do not spot the PCs at the<br />
door. Shortly after the PCs’ arrival, the hags<br />
start fighting for the magical item.<br />
There are two exits to this cavern-one to the<br />
northwest leading to the northwestern pass of<br />
Istar, several miles away (this is the way out).<br />
The second exit opens directly onto the Pit of<br />
lstar. The swirling vortex in area P12 can be<br />
easily seen from the party’s position.<br />
P12. The Pit of lstar<br />
A huge whirlpool roars in the shaft.<br />
Despite the inhuman strength of the vortex,<br />
dark and sinister shapes can be seen<br />
swimming and slithering upward. On the<br />
southern side of the pit is a narrow ledge<br />
that disappears behind the swirling mass<br />
of water. Nothing can be seen beyond<br />
this.<br />
About 120 feet above the pit is the King of the<br />
Deep. The PCs should be barely able to see<br />
its shape from their position. The silhouettes<br />
swimming up the center of the funnel are<br />
lacedons.<br />
The narrow ledge on the southern side of<br />
the pit leads to area P13 (the lair of the King<br />
of the Deep). Each PC stepping onto the<br />
ledge must roll a successful Dexterity Check<br />
to avoid being dragged away by the swirling<br />
currents. Using spikes and ropes should give<br />
the PCs a +2 bonus to their checks. Characters<br />
who lose their footing are pulled into the<br />
vortex (unless held by a rope), with a 90%<br />
chance of being thrown up and out of the pit,<br />
1d100 feet away from the King of the Deep.<br />
The other 10% of the time, the victim is<br />
dragged into the plane of the Abyss and is<br />
considered lost.<br />
P13. Lair of the King of the Deep<br />
Upon leaving the ledge, you enter the<br />
mouth of a huge cavern. On the northern<br />
side are 12 thrones. On each sits the petrified<br />
shape of a man. Each shape has<br />
glowing eyes and seems to be staring<br />
straight ahead. In the middle of the cave<br />
is a large depression. A thick bed of dark<br />
algae grows there.<br />
The petrified statues (see the death statues<br />
entry in the “Monsters” section of the Appendix)<br />
are the creators of the King of the Deep.<br />
The King of the Deep is immediately aware of<br />
the party’s presence in its lair. It can control<br />
the death statues while commanding its<br />
troops on the battlefield. The statues wear<br />
plate mail armor covered with a thin coat of<br />
dust and lime. If the party approaches within<br />
20 feet of a death statue, all 12 stand up and<br />
hurl their maces. The weapons are not hampered<br />
by water resistance because of their<br />
demonic nature. The death statues close in<br />
and try to push the PCs back out of the lair<br />
and into the pit.<br />
To destroy the King of the Deep, the PCs<br />
must destroy all 12 of the death statues.<br />
54<br />
The Battle Above<br />
If the PCs somehow manage to get entangled<br />
in the battle raging above the streets of Istar,<br />
you must give them the feeling of being inside<br />
the swirling, chaotic confusion of a vast,<br />
three-dimensional battle. Everywhere are sea<br />
elves, dolphins, fish of all varieties (fighting<br />
for both sides in the conflict), sea horses,<br />
dragons, draconians, barracudas, lacedons,<br />
koalinths, sea hags, and other creatures that<br />
defy description. Controlling the action is the<br />
vastly evil being known as the King of the<br />
Deep.<br />
If the PCs are in the battle, have Apoletta<br />
swim up after five rounds, with a sea elf<br />
escort, and beg the PCs to raid the King of the<br />
Deep’s lair, or else all will be lost. After delivering<br />
this speech, Apoletta and her escort<br />
speed off to aid in the battle. If the PCs remain<br />
aboveground, or if they go into the lair and<br />
later reappear in the battle, Zebulah finds<br />
them. He angrily urges them to complete their<br />
task, for that is the only way they can help the<br />
sea elves. Then he too swims off or is swept<br />
away in battle.<br />
Everywhere, the PCs should find sea elves<br />
giving ground, falling before the onslaught of<br />
the King of the Deep’s overwhelming forces.<br />
As Zebulah said, the only way for the PCs to<br />
help is to invade the king’s lair and look for a<br />
solution.<br />
Ending Chapter 8<br />
The elves win the Battle of lstar when the<br />
party manages to destroy the King of the<br />
Deep’s life force (in area P13). If the party<br />
fails to destroy the creature, the sea elves<br />
lose the battle and the survivors flee Istar. In<br />
both cases, the party should be able to leave<br />
through the tunnel from area P11.
Event 55: Leave Taking<br />
If the sea elves were victorious in the battle<br />
against the forces of the King of the Deep,<br />
they praise the PCs as heroes and throw a<br />
grand party, feasting on strange dishes of the<br />
deep. The PCs can stay as long as they like,<br />
but rumors (in the Appendix) should motivate<br />
them to move on. The elves help the PCs with<br />
any needed supplies. Apoletta gives them a<br />
carved shell with a pledge of alliance to the<br />
leaders of the free nations of the surface<br />
world.<br />
If the elves lose the battle, scouts find the<br />
fleeing PCs and take them to the sea elf leaders<br />
in exile. These leaders feel the PCs failed<br />
in their task, but they also feel a debt of honor<br />
they will fulfill by helping them to return to the<br />
land.<br />
Elven scouts have learned several things<br />
that might prove of interest to the heroes:<br />
• The body of the master of the koalinths<br />
could not be found after the battle.<br />
• The dolphins report that the PCs’ friends<br />
were captured by the Reaver. The villain<br />
fed the crew to the fish.<br />
• Fish report a strange man with a glowing<br />
stone in his chest who walked beneath<br />
the waves. The fish were frightened by<br />
the strange creature, or else they would<br />
have turned him from his path, which led<br />
straight to the shore of Mithas, isle of the<br />
bullmen!<br />
• The PCs’ craft somehow managed to stay<br />
afloat. It was flung out of the maelstrom<br />
and was last seen drifting toward Karthay.<br />
The heroes must decide where they will go.<br />
There are two ways you can get the PCs to<br />
their goal. First, you can allow them to journey<br />
undersea, crossing volcanic mountain<br />
ranges and mud flats, over trenches, through<br />
kelp jungles, and up coral reefs. You will have<br />
to create any adventures they have on the<br />
way there. Alternatively, several of the Dargonesti<br />
in dolphin form could carry the heroes<br />
to the shore of their desire.<br />
Event 56: Pirate Hold<br />
At the pirate port of Kalpethis (area 76), the<br />
heroes are welcomed with awe at their tales.<br />
They are brought drinks and dry clothes. If<br />
the PCs mention Maquesta or the Perechon,<br />
there is chuckling, and some mention that<br />
she’ll be glad to see them. The pirates escort<br />
the PCs to her.<br />
Maquesta is in a building dug into the cliff<br />
face. With her are Fritz and a badly beaten<br />
Kof (half hit points). Maq looks up in surprise.<br />
Then with a snarl she springs at the PCs and<br />
pushes them aside. With a guffaw, the pirates<br />
slam the door shut, locking everyone into the<br />
room with her.<br />
After some biting remarks, Maq calms<br />
down and explains things. Her rivalry with<br />
Mandracore has come to a head. But he made<br />
the mistake of bringing his prizes back to<br />
Kothas to show them off before he killed<br />
them. She has strong allies in town, and Mandracore<br />
has been forced to agree to a Trial by<br />
Arms, if Maq could find some champions in<br />
seven days. Her time was about up and none<br />
of her allies were willing to commit.<br />
The heroes are pretty much forced into the<br />
role (it’s either fight or die). The rules are simple.<br />
Two equal teams of six or more are<br />
assembled. They enter a nearby ruined town<br />
from opposite sides. The winners are the ones<br />
who walk out alive (only those from one side<br />
can walk out). There is added spice to this<br />
game-if Maquesta wins, she becomes the<br />
new chieftain of the pirates. However, she<br />
expects Mandracore to cheat now that he<br />
must fight. The heroes are allowed any gear<br />
they own, except magical wands.<br />
The Battlefield: Create a battle site with<br />
several blocks of ruined buildings. Next,<br />
place the following encounters somewhere on<br />
the map:<br />
• Six covered pits (10 feet deep; 1d6 points<br />
of damage)<br />
• Two crumbling walls (may push over;<br />
2d6 points of damage, half if a successful<br />
saving throw vs. petrification is rolled)<br />
• One chasm (20 feet deep, bridged by a<br />
log)<br />
• One geyser (erupts every 2nd turn; 2d6<br />
points of damage)<br />
• One dust cloud (10 × 10 yards; explodes<br />
when ignited, 3d6 points of damage)<br />
• One patch of oil (30 × 10 yards, two successful<br />
Dexterity Checks to cross; otherwise<br />
fall in and slip)<br />
Both teams might discover these features<br />
while exploring during the battle.<br />
The Foes: Mandracore’s team seems equal<br />
in size to the party, but he has planted several<br />
reinforcements:<br />
Mandracore—see “NPCs”<br />
Karllung—Illusionist<br />
Slig champion<br />
Two ogres<br />
The rest are pirate warriors (enough to<br />
bring Mandracore’s group to the number in<br />
the PCs’ party)<br />
There are three pirate warriors and a spotted<br />
lion already hiding in the ruins. Also in the<br />
area are four minotaurs, who are fighting<br />
because they fear Mandracore, but they might<br />
be persuaded to betray him.<br />
Foes’ Tactics: Mandracore’s philosophy is<br />
to divide and conquer, using the chasm or a<br />
crumbling wall to split up the party. His team<br />
can use three secret doors, placed before<br />
play. Mandracore uses decoy and ambush<br />
tactics. He might even have Karllung use his<br />
improved phantasmal force to make the PCs<br />
think they have defeated all of their foes.<br />
Special Rules: To climb onto roofs or into<br />
building rafters requires a Dexterity Check. To<br />
hide successfully requires a Wisdom Check.<br />
If the party should win, Maquesta is<br />
awarded the chieftainship and her allies flock<br />
to crew her new ship. Should Maquesta hear<br />
of the Perechon or Berem surviving, she<br />
wants to set out immediately on a rescue mission.<br />
She insists on a raid on Mithas (area 78)<br />
first, as she hears Lendle is there.<br />
55<br />
Event 57: Welcome to Mithas<br />
This event can be played either of two ways:<br />
the first if the PCs travel here directly, and the<br />
second if Maq brings them from Kothas.<br />
It should be clear to the PCs that they are<br />
entering unfriendly territory and cannot<br />
expect to just walk in and have their demands<br />
met. Their best bet is to sneak into town<br />
under the cover of night.<br />
If the PCs try to sneak into town, they can<br />
grab a human slave or a minotaur guard to<br />
try to get information on the whereabouts of<br />
their friends. The character is either terrified<br />
or defiant, but he says that they might find<br />
their friends in the gladiator pits of the arena<br />
(area 80).<br />
The arena is guarded by many minotaurs.<br />
Eventually an alarm is sounded and they face<br />
the minotaur patrols described below.<br />
If the PCs just walk into town, have a patrol<br />
of 10 minotaurs try to arrest them, with eight<br />
more minotaurs arriving each turn after a<br />
fight starts. They use nets to capture characters.<br />
Anyone arrested is stripped of all gear<br />
and taken before Chieftain Chot.<br />
Chot Es-Kalin is the chieftain of the minotaurs<br />
(see his NPC entry in the Appendix). At<br />
his court is a squad of 12 Baaz, eight Bozaks,<br />
and an Aurak leader (Ciildentongue, if he’s<br />
still alive), who is negotiating further details of<br />
an alliance. Also present is Chot’s own bodyguard<br />
of eight minotaurs.<br />
Chot asks the PCs their business. If PCs tell<br />
him, he notes that he usually doesn’t deal<br />
with humans. But he is a sporting sort and<br />
would be willing to give them what they want<br />
if they can succeed at a little contest he has in<br />
mind. If they refuse, he relegates the weaker<br />
PCs to slavery and the stronger ones to the<br />
arena.<br />
The Aurak is smooth-tongued and glib,<br />
chuckling at the heroes’ fate, but whispering<br />
to Chot that he should not underestimate<br />
them.<br />
A patrol of 16 draconians, led by a minotaur,<br />
takes the PCs off to prison for the<br />
evening. As the heroes are herded into their<br />
cell, one of the Bozaks winks at them and<br />
hisses that they never can tell who their<br />
friends might be.
Event 58: Reunited<br />
In the cell already is Lendle Chafka, his nose<br />
red from a bad cold. If Maq did not bring the<br />
PCs, she and Fritzon are also prisoners here.<br />
Maq shares the story of how she, with the<br />
help of some allies, defeated the Reaver. Then<br />
she sailed here with a new crew, Kof, and Fritz<br />
to rescue Lendle and Berem. Unfortunately<br />
she ran into a bit of bad luck. Kof is on the<br />
ship anchored in a hidden cove.<br />
Berem is not in the cell. Lendle tells a long<br />
story of how he was fished out of the sea by<br />
minotaurs and brought here as a slave. Berem<br />
was already here somehow. He seemed to be<br />
friendly with a draconian and concocted<br />
some tale of knowing the way to a fabulous<br />
treasure on ruined Karthay. The minotaurs<br />
bought the tale and hauled Berem off to lead<br />
them to it.<br />
While the party is comparing stories, there<br />
is a commotion at the door. The door opens<br />
and a minotaur guard hauls a veiled lady in as<br />
she hisses, spits, and swears in Solamnia.<br />
Next a tall, quiet man is roughly shoved in.<br />
He goes to the lady and tries to hold her back.<br />
The Aurak peers in the door and hisses, “Your<br />
fate shall be the same as these wretches,<br />
lady.” Then the door is closed.<br />
These two are the Lady Lengstrien and the<br />
Blue Wizard. They are at first haughty and<br />
unapproachable, but as the evening wears on,<br />
the wizard apologizes for the lady and talks<br />
with the PCs. See the NPC entries (in the<br />
Appendix) for these two characters.<br />
The night passes uneventfully. There is no<br />
chance of escape, for the door is triple barred<br />
from the outside.<br />
Event 59: Maze of Death<br />
The next morning, all the prisoners are fed a<br />
breakfast of gruel and then they are led off to<br />
the arena. Lendle is separated from the group.<br />
A haughty Chot explains the rules of the<br />
contest. He shows them Lendle hanging<br />
above a spiked pit by a rope tied around his<br />
hands overhead. Chot holds a snarling rat by<br />
the scruff of its neck. He drips pig blood on<br />
the rope where it is tied to a post and then<br />
sets the rat free. He figures they have about<br />
30 rounds to make it through his little trapped<br />
maze and grab the rope before it is gnawed<br />
through. If the PCs succeed, they gain their<br />
freedom; if they fail, their fate will be the<br />
same as Lendle’s. He starts the contest with a<br />
trumpet blast. Lendle looks desperate.<br />
A squad of draconians leads the PCs down<br />
some stairs and to the start of the hidden<br />
maze. They are handed a half-hour glass.<br />
Just before they are locked in, one Bozak<br />
whispers to a PC that he left them some weapons<br />
inside. The PCs find all their gear piled at<br />
the start of the maze.<br />
The characters have three rounds to get<br />
ready and have an additional 35 rounds to<br />
complete the obstacle course that lies before<br />
them. Lady Lengstrien and the Blue Wizard<br />
help them win or lose with no hint of any ulterior<br />
motives. The course has eight obstacles.<br />
Remember that the PCs have to get just one<br />
character to Lendle to rescue him; if the PCs<br />
wait until everyone is through an obstacle<br />
before moving on to the next one, they’ll<br />
probably be too late.<br />
1. Blades: Three blades scythe across the<br />
corridor ahead (1d8 points of damage). Their<br />
swings are synchronized every two rounds.<br />
PCs can either run past in groups of three,<br />
rolling successful Dexterity Checks to avoid<br />
damage, or they can try to jam the blades<br />
somehow. On the far side is a lever that, when<br />
pulled, stops the blades for one round.<br />
2. Juggernaut: In a 200-yard-long hall is a<br />
bridge over a pool of acid. A living juggernaut<br />
rolls out of a secret room behind the PCs (AC<br />
0; MV 9; HD 20; hp 100; THAC0 5; dmg 3d6).<br />
As the juggernaut chases the PCs, the bridge<br />
slowly raises on their side. To leap the bridge<br />
across the 10-foot-wide pool takes a successful<br />
Dexterity Check. The acid damage is 1d8<br />
points per round. Someone can leap onto the<br />
juggernaut (Dexterity Check with a -2<br />
penalty) and blind the creature, which then<br />
crashes into the pit and can be used as a<br />
bridge.<br />
3. Chimney: Here is a narrow, 50-foot-tall<br />
rock chimney that must be climbed (roll a<br />
successful Dexterity Check; failure means<br />
falling to the bottom for 3d6 points of damage<br />
and having to try again). Only one character<br />
per round can climb the chimney.<br />
4. Shaft: Here is a narrow, 30-foot-deep<br />
shaft. To climb down requires a Dexterity<br />
Check for each character and takes a round<br />
each. The room below holds five feet of water,<br />
which means only 2d6 points of falling damage<br />
if the Dexterity Check fails. If the PCs<br />
want to jump down, four characters can jump<br />
each round, but each suffers 2d6 points of<br />
damage.<br />
56<br />
5. Flooding Room: There is a false door in<br />
the bottom of the shaft. If the door is tried, the<br />
room begins to flood with water. There is a<br />
sealed trap door under the water that can be<br />
opened with a total of 25 Strength points.<br />
Swimming PCs must roll successful Constitution<br />
Checks each round or suffer 1d6 points<br />
of damage.<br />
6. Shark Pool: When the trap door is<br />
opened, everyone is sucked down a chute<br />
into a 50-foot-wide pool. PCs must roll successful<br />
Constitution Checks or they are<br />
stunned for one round. There are two bullsharks<br />
in the pool. A passage leaves the<br />
room from the opposite side.<br />
7. Missiles: Up a flight of stairs is a room<br />
with a checkerboard pattern. There are holes<br />
in the right wall. Each of the black spaces in<br />
the first row triggers six arrows to be fired<br />
(THAC0 12; dmg 1d6). The rest of the spaces<br />
are clear, but every space in the last row also<br />
fires six arrows. The spaces are five feet wide<br />
and can be leaped with a successful Dexterity<br />
Check.<br />
8. Chasm: Time should be almost up. The<br />
party’s path is blocked by a 15-foot-wide<br />
chasm. A rope is tied to the base of a pole on<br />
each side of the chasm. It takes two rounds to<br />
cross the rope.<br />
9. Last Dash: About 100 yards lie between<br />
the edge of the chasm and Lendle; this takes<br />
one round to cross. If the PCs are too slow,<br />
Lendle falls but manages to grab onto the<br />
edge and hold on for three rounds. The pit<br />
damage is 5d6.<br />
Chot is pleased with the heroes’ victory.<br />
With a chortle he informs them, once all have<br />
arrived, that they will make excellent gladiators<br />
for future battles in the arena. He has no<br />
intention of letting them go.<br />
At this point a Bozak steps forward and<br />
protests that this is unfair, the PCs won. Chot<br />
and his guard of eight minotaurs, three Baaz,<br />
and the Aurak are amused, laughing at the<br />
creature’s foolishness. The Bozak seems<br />
indignant and says that he’ll just have to take<br />
actions into his own hands. To everyone’s<br />
amazement, he transforms into the bronze<br />
dragon Clarion and attacks.<br />
In the following chaos, or after the battle,<br />
the heroes can flee to the safety of Maq’s<br />
boat. The lady and her wizard are anxious to<br />
go with them. You can create any encounters<br />
you want them to face in their flight. Clarion<br />
should escape after he makes sure that the<br />
PCs get away.<br />
From here, the heroes’ journey should lead<br />
them to Karthay and the first event of the next<br />
chapter. You may use a sea event on the way<br />
there.
The Events in this chapter take place on the<br />
island of Karthay.<br />
Event 60:<br />
The Wreck of the Perechon<br />
Riding at anchor in the bay is one of the small,<br />
swift galleys used by minotaurs. It appears to<br />
be crewless, and several longboats pulled up<br />
on the shore seem to confirm this.<br />
Resting on a sandbar, listing to one side, is<br />
the Perechon. Its hull is unbreached. Only<br />
shattered shafts remain of its two masts. It<br />
looks salvageable, with a little effort.<br />
If the PCs had the sea elves bring them to<br />
Karthay, they see Maquesta’s borrowed ship<br />
sail into the harbor. With her are Fritz, Kof,<br />
and Lendle, plus Lady Lengstrien and the<br />
Blue Wizard. Maq can share the tale of slaying<br />
Capt. Mandracore and becoming chief of<br />
the pirates. She briefly tells of rescuing Lendle<br />
and his two fellow prisoners from the minotaurs.<br />
If the PCs first visited Mithas and rescued<br />
Lendle, the Lady, and the Wizard, they meet<br />
Maq, Fritz, and Kof here, having followed a<br />
mysterious minotaur galley heading north.<br />
There is no one on the minotaur ship. A<br />
trail seems to lead inland.<br />
Event 61: Night Fires<br />
After a day’s journey, this Event occurs.<br />
About evening of the first day, you sight some<br />
campfires. Approaching cautiously, you find a<br />
minotaur camp. Sailcloth tents have been<br />
built as shelters from the wind; fires are ringed<br />
with stone. The minotaurs become uneasy as<br />
the evening darkens.<br />
This camp has 13 minotaurs, though the full<br />
number is not readily apparent. They do not<br />
like this haunted land and are easily panicked.<br />
This group is waiting for their chieftain<br />
and his guards and Berem to return from the<br />
ruins. There is a 20% chance each round that<br />
anyone sneaking into camp is discovered. If<br />
attacked, the minotaurs rally around the<br />
campfires. If things look grim, they flee.<br />
Should they reach the bay, they sneak out to<br />
the pirate ship. Then they wait for the return<br />
of their leader.<br />
In the camp are three casks of mead, 50<br />
days’ rations, and a sack of 100 steel. One<br />
minotaur has a worthless treasure map to<br />
Misty Island.<br />
If the party attacks, Lady Lengstrien and<br />
the Wizard should help, possibly saving someone<br />
from a sneak attack.<br />
Event 62: Doom from Below<br />
On the second day of travel inland, this Event<br />
occurs.<br />
Sand and locusts have stripped the land bare.<br />
There is only an occasional sand lizard, the<br />
size of a stag, striding across the dunes. You<br />
have just encountered one of these beasts<br />
basking. He stares at you, licking his reptilian<br />
lips. Suddenly, he raises his head and looks<br />
around. In a flurry of sand, he digs into the<br />
ground, burying himself.<br />
The sand lizard was responding to the<br />
approach of a giant sand worm. If the characters<br />
pay attention, they feel the ground tremble.<br />
They might even see the telltale wave of<br />
sand rippling toward them. The sand worm<br />
(use Sea Serpent stats) erupts in the midst of<br />
the group, causing all to roll Dexterity Checks<br />
with a -2 penalty to stay on their feet. Crew<br />
members are treated as having Dexterities of<br />
12.<br />
The lady should appear a likely target of<br />
the worm so she can be saved. She expresses<br />
her thanks and admiration through the wizard.<br />
A mile farther, the characters find the<br />
remains of three minotaurs, earlier victims of<br />
the worm. There is no sign of Berem.<br />
Event 63: Subterfuge<br />
On the evening of the second day, you sight a<br />
tower standing on a steep hill several miles<br />
away. Lendle Chafka, the gnome, is excited<br />
and says that it is of gnomish design. What<br />
treasures might it contain, he wonders.<br />
Camping for the night, Lady Lengstrien goes<br />
off to “meditate” (she actually contacts the<br />
Queen of Darkness to scry Berem’s location).<br />
Later she holds a private council with the wizard.<br />
This is their plan:<br />
The Dark Queen confirms that Berem is<br />
nearby. The lady and the wizard want to delay<br />
the party while they go capture Berem. To<br />
this end, when the party approaches the<br />
tower, the wizard secretly casts improved<br />
phantasmal force, showing Berem entering<br />
the tower. (The wizard asks the others what<br />
Berem looks like before he cast this spell.)<br />
There is a 20% chance that a PC notices<br />
something odd.<br />
The lady stays at the front of the party,<br />
while the wizard moves slowly to maintain the<br />
illusion. They want to lure the party into the<br />
tower and activate its automatic defenses,<br />
trapping the party while they escape.<br />
Event 64: Chafka’s Tower<br />
The tower is five storeys tall (90 feet high).<br />
Each of the first three floors are 20 feet high;<br />
the last two are 15 feet high. Like all gnomish<br />
machines, this tower is full of gears, pulleys,<br />
wheels, bells, and levers without purpose.<br />
Every machine has a chance (on 1d10) to<br />
malfunction, noted as “(M#).” Thus an item<br />
that has “(M3)” has a 30% chance of malfunctioning,<br />
1-3 on 1d10. Whenever an item<br />
is used, roll for a malfunction; if one occurs,<br />
check below for the effect.<br />
57<br />
Roll Effect<br />
1 Mechanism too fast, snaps shut on<br />
PC (Dmg 1d4)<br />
2 Mechanism too slow (crash for dmg<br />
1d6)<br />
3 Mechanism stuck, restarts suddenly<br />
(1 on 1d6, per round)<br />
4 Mechanism too strong, moves twice<br />
as far as needed (dmg 2d6)<br />
5 Repeats action rapidly<br />
6 Smolders & smokes, obscures vision<br />
7 Red hot, treat as heat metal<br />
8 Breaks so it can’t be used<br />
Whenever levers, wheels, or buttons are<br />
toyed with, use the following table for effects:<br />
Roll Effect<br />
1 Jet of steam (dmg 1d6)<br />
2 Noise sounds<br />
3 Something breaks off<br />
4 Clothing is caught by machine<br />
5 Something starts up<br />
6 Something flies across room<br />
7 Sparks<br />
8 Oil pools; might ignite with sparks<br />
Each floor is linked by a series of stairs and<br />
catapult/slidepole shafts. The stairs vanish or<br />
become traps when the alarm is activated.<br />
Each shaft (M2) works only one way, though<br />
a lever can change its direction. To go down,<br />
one slides down a pole. To go up, one grabs<br />
the pole and is launched by a hydraulic catapult.<br />
If a shaft goes two levels, there is a valve<br />
door in between that should slide open when<br />
approached. The poles are greasy and require<br />
the PC to roll a successful Strength Check,<br />
with a -3 penalty, to stop from sliding.<br />
There are several automatons in the tower<br />
that perform various duties. They all have the<br />
same stats (AC 0; MV 15; THAC0 10; hp 50).<br />
The following descriptions are keyed to<br />
areas noted on the Gnome Tower map (on the<br />
next page).<br />
1. Entrance: The tower entrance is on the<br />
third level and is reached by climbing a series<br />
of collapsible stairs up the wall. The door is<br />
featureless metal with no handles. There is a<br />
bell chain hanging to one side. If the chain is<br />
pulled, there is the sound of clanging, snapping<br />
metal and one door opens outward, wide<br />
enough for a kender, and stops. The hinges<br />
are badly rusted and snap if pulled with a total<br />
of 35 Strength points or more. Each PC<br />
pulling must roll a successful Dexterity Check<br />
or suffer 3d6 points of damage when the door<br />
flies open.<br />
2. Entry Hall: This hall is lined with metallic<br />
pillars; a door to the right is ajar. Trumpets,<br />
cymbals, and bells sound whenever anyone<br />
talks. After the alarm is sounded, if a character<br />
gets within 10 feet of a pillar (M3), it<br />
sprouts tentacles and tries to seize an item.<br />
The item is then passed by pillars and<br />
dropped through a slot into the room labeled<br />
“storage.”<br />
3. Moving Stairs: Here is a mechanical<br />
stairway that moves upward (M4). Anyone<br />
stepping on the stairs is swiftly lifted to the<br />
next floor. If the alarm has been sounded,
these stairs move at high speeds and no one<br />
can walk down them. If they break, a mass of<br />
twisted metal blocks the shaft.<br />
4. Cellar Shaft: This shaft leads down to<br />
Level 1. The shaft seems to end in a metal<br />
plate one floor down, but this is a valve. When<br />
the valve snaps shut, it cuts any ropes the<br />
PCs are using.<br />
5. Machinery Room: This room is filled with<br />
a jumble of noisy, shuddering machines.<br />
Shaft “b” leads up to Level 4. These machines<br />
are steam-driven by subterranean heated<br />
waters.<br />
Destroying machines results in scalding<br />
steam (1d8 points of damage) and a +1 bonus<br />
to malfunction chances.<br />
There is a trash chute near shaft “b.” An<br />
automaton appears to pick up anything falling<br />
down the chute; it throws the item into a furnace<br />
(2d6 points of damage per round).<br />
6. Arrow Slits: This hallway is lined with<br />
arrow slits. When the alarm is activated, a<br />
crossbow bolt fires every time someone<br />
passes a slit (THAC0 14).<br />
7. Ramp Stairs: These are stairs up to<br />
Level 5. When the alarm is activated, they<br />
turn into a greased ramp when stepped on.<br />
Characters slide down into a lo-foot-deep pit<br />
of goo (1d6 points of damage).<br />
8. Kitchen: Shaft “b” comes up from Level<br />
1. There is a trash chute here. When the PCs<br />
enter this room, an automaton activates and<br />
starts to throw flour everywhere. After a<br />
while, it chases characters around with a pepper<br />
shaker. There is a fireplace here with a<br />
small chimney.<br />
9. Dormitory: When a door to this room is<br />
opened, an automaton bursts out of the<br />
closet. It tries to catch characters and dump<br />
them down the trash chute in room 8.<br />
10. Study: This room has a small table and<br />
stool of metal, as well as a shaft leading down<br />
to Level 2. Diagrams litter the table. Lendle<br />
finds them particularly interesting and can’t<br />
seem to take enough along. Under one table<br />
is a metal chest with a rusty lock. There is a<br />
note attached saying, “Lost key, but press on<br />
side and will open.” There is a hidden button<br />
on one side, but when pressed, a small spring<br />
breaks out. The lock is AC 0, with 8 hp.<br />
Inside the chest is an iron cobra (AC 0; HD<br />
1; hp 4; THAC0 18; dmg 1d3+poison). The<br />
years have diluted its poison so it causes a<br />
fumble effect for 1d4 days. The chest holds<br />
three pearls worth 250 steel each.<br />
11. Workshop: This room is full of noise. A<br />
conveyor belt feeds through one wall into the<br />
laundry. Shaft “c” leads down from Level 4,<br />
while shaft “d” leads up to Level 5. There is a<br />
valet automaton here. It does one of two<br />
things, either seizing characters and locking<br />
them in a guest room, or throwing characters<br />
onto the conveyor belt.<br />
12. Guest Rooms: Empty; metal doors (hp<br />
30).<br />
13. Laundry: Laundry is fed into a hot pool<br />
and beaten by a water wheel (1d4 points of<br />
damage per round). Then it is lifted out and<br />
dumped into the drying tunnel. PCs thrown<br />
into the pool knock a box of soap in the water,<br />
and suds fill the room.<br />
14. Drying Tunnel: Upon entering this<br />
room, a gust of hot air buffets the PCs. Each<br />
must roll a successful Dexterity Check or else<br />
stumble into the drying tunnel. This tunnel<br />
spins and hot air buffets the character (roll a<br />
successful Constitution Check each round or<br />
suffer 1d4 points of damage). To escape the<br />
tunnel requires a successful Dexterity Check<br />
with a -2 penalty.<br />
15. Quarters: This is a bedroom. Shaft “d”<br />
leads up from Level 2. There is a metal ladder<br />
up to a trap door in the ceiling. A fireplace<br />
with a large chimney rests against one wall.<br />
Behind a curtain is a narrow closet; when<br />
someone steps inside he is instantly drenched<br />
with icy water.<br />
This shaft has a valet function and does<br />
something whenever used. Roll 1d4 for effect.<br />
Roll Effect<br />
1 Metal hands pull off boots and stick a<br />
nightcap on feet, cannot get free without<br />
help<br />
2 Metal hands tear off belt and shove<br />
slippers into mouth<br />
3 Metal hands slide tight shirt over body<br />
4 Metal hands rip off clothes, stick a pipe<br />
and brush in mouth and douse with<br />
cold water. They then throw the victim<br />
onto the broken bed (1d4 points of<br />
damage)<br />
58<br />
All garments pulled off the victim are thrown<br />
down the laundry chute. The chute is too<br />
steep to climb. The ladder becomes red hot if<br />
the alarm rings.<br />
16. Den: There is a draped stone table<br />
here. Beneath the cover a crystal hemisphere<br />
is fastened. It works as a crystal ball when the<br />
command word “Chafka” is spoken. This is<br />
Lendle’s last name and he might talk to him-<br />
self. If so, the PCs see where Berem is.<br />
17. Watchwalk: This place is harmless until<br />
the alarm is activated. Any ropes thrown over<br />
the side are cut. The metal walls are -50% to<br />
climb and strong winds cause anyone flying<br />
or levitating to roll a successful saving throw<br />
vs. petrification each round or crash into the<br />
wall for 3d6 points of damage. The door<br />
causes 1d4 points of shock damage each<br />
time it is touched. It requires a total of 25<br />
Strength points to open.<br />
18. Rooftop: On the rooftop is a garden, a<br />
bell, a flagpole, a chimney, and a trap door.<br />
The garden is overgrown and has strangle<br />
vines and giant puffballs. The puffballs<br />
explode into a stinking cloud for 1d4 rounds<br />
if there is a loud noise.<br />
The bell is the tower alarm. When rung, it<br />
activates the defense mechanisms and locks<br />
all of the doors.<br />
The wood of the flagpole is rotted. If it is<br />
touched, it topples, causing 1d8 points of<br />
damage to one PC within 10 feet.
The chimney is big enough for a kender.<br />
Event 65: Betrayal<br />
When the party reaches the top of the tower,<br />
the lady insists that she sees someone hiding<br />
in the garden. While this is being searched,<br />
she “stumbles” and rings the alarm, activating<br />
the tower’s defenses. While all rush about<br />
to see what is happening, she and the wizard<br />
step away from the PCs.<br />
Alarms ring, bells chime, and horns hoot.<br />
Above it all comes the sound of a mocking<br />
laugh. Lady Lengstrien and her wizard<br />
have retired to one edge of the roof and it<br />
is she who mocks the party. “The time<br />
has come to end this charade,” she says.<br />
“For I know where the gemstone man is,<br />
and I shall get him!” With a gesture from<br />
her dainty hand, the Blue Wizard is suddenly<br />
twisted and deformed. His size doubles,<br />
triples, and more. Wings sprout from<br />
his back as he transforms into a blue<br />
dragon.<br />
Lady Lengstrien doffs her veil and wig and<br />
reveals her true identity (Kitiara) as she<br />
swiftly mounts. She bids farewell to her comrades,<br />
saying that this is for the best, now<br />
none will be harmed. Before the PCs can<br />
react, Skie lifts into the air with the beat of<br />
mighty wings.<br />
Skie and Kitiara head off to the west. If the<br />
PCs follow (after somehow getting down from<br />
the tower), Event 66 occurs after an eighthour<br />
march.<br />
Event 66: Dragon Den<br />
You see the mouth of a cave bored into<br />
the mountain ahead of you. From the size<br />
of the entrance, the chamber inside must<br />
be huge! Dragon claw marks score the<br />
rock outside the cave mouth. There are<br />
brand-new scorch marks, as if from fire or<br />
lightning, blackening the entrance.<br />
The chamber beyond the cave mouth is the<br />
lair of Clarion, the bronze dragon. It is 40 feet<br />
tall and 100 feet in diameter. Water cascades<br />
down the far wall into a pool; side rooms can<br />
be seen behind stony pillars. Coins litter the<br />
floor. A tunnel in back leads out through a<br />
side entrance.<br />
In the center of the chamber, Clarion lies<br />
dying of poison. If he finds the PCs to be<br />
friends, he asks them to bring him the neutralize<br />
poison potion from a side room.<br />
Initially wary, Clarion use his repulsion<br />
breath when two or more characters enter the<br />
cave. He uses his last breath as lightning only<br />
if the PCs attack him. If Clarion is helped, he<br />
offers his treasure for the PCs’ aid. Clarion<br />
also tells the PCs that Kitiara was here minutes<br />
ago. After a sneak attack with a poisoned<br />
knife. Kitiara took Berem and left Clar-<br />
ion to die. She started climbing the mountain<br />
with Berem in tow. The PCs might be able to<br />
stop her, if they hurry (go to Event 67 once<br />
the PCs emerge from the cave).<br />
His treasure includes 10,000 ep, 8,000 stl,<br />
1,000 pp, 4 potions (climbing, extra-healing,<br />
speed, and neutralize poison), boots of striding<br />
and springing, a wand of fire (32<br />
charges), and a scroll of protection from<br />
dragon breath.<br />
Event 67: Desperate Chase<br />
You emerge from the cave and look up<br />
the mountain. A narrow trail winds back<br />
and forth up its flanks. You can see the<br />
Dragon Highlord halfway up the trail,<br />
dragging Berem behind her. At the top of<br />
the mountain, a blue dragon bugles a<br />
warning.<br />
Kitiara is escaping with Berem! The PCs must<br />
stop her before she reaches Skie perched<br />
atop the cliff. High winds in the valley present<br />
a risk that anyone flying or levitating crashes<br />
into the mountain (roll a successful saving<br />
throw vs. petrification each round or suffer<br />
3d6 points of damage).<br />
Kitiara is 300 yards away from Skie; it will<br />
take her 10 rounds to reach the top. If the<br />
characters are unhindered, they can overtake<br />
Kitiara in six rounds, gaining 50 yards each<br />
round. Every round the PCs are delayed,<br />
attacking or crossing an obstacle, is a round<br />
in which they gain no ground on Kitiara.<br />
Skie tries to delay the characters by dropping<br />
boulders (2d8 points of damage, starting<br />
with a -8 penalty to his attack roll, but gaining<br />
a +1 bonus each round the PCs climb). He<br />
casts spells when the party gets within range.<br />
On the third round that the PCs climb, Skie<br />
breathes lightning once on the cliff to cause<br />
an avalanche (3d8 points of damage to each<br />
PC climbing, successful saving throw vs. petrification<br />
for half damage). It takes two rounds<br />
to cross the rock slide.<br />
One character can try to ride Clarion in the<br />
high winds. He can use only one-handed<br />
weapons, and when attacking from dragonback,<br />
he must roll a successful Dexterity<br />
Check after each attack or slip. If a character<br />
slips, he must roll a successful Strength<br />
Check to pull himself back up; failure means<br />
he falls and suffers 3d6 points of damage and<br />
rolls 50 yards down the mountainside. Clarion<br />
has only one breath and 30 hp left. It takes<br />
Clarion four rounds to reach the cliff top. He<br />
does not pursue Skie if the blue dragon and<br />
Kitiara flee.<br />
If Kitiara suffers 45 points of damage, she<br />
staggers and Berem wrenches free. Stumbling,<br />
he pitches off the trail and falls to his<br />
death (or so it seems to the PCs). Kit is rescued<br />
by Skie.<br />
If Kit reaches the top, it takes her two<br />
rounds to mount and fly away. Should Kitiara<br />
escape with Berem, they fly out to sea. Once<br />
they are 500 yards out, Berem wrenches free<br />
and plummets to his “death” in the sea.<br />
59<br />
Event 68: A Farewell, For Now....<br />
Once Berem has died, Kitiara wings far above<br />
the PCs for one last taunt from dragonback.<br />
So fate has turned its back this time?<br />
Well, enough! Be glad that I have no further<br />
quarrel with you. You are worthy<br />
opponents, why not join me? Together, we<br />
would be invincible! I await your answer<br />
when next we meet. Farewell! For now....
If Berem fell to his “death” at the base of the<br />
cliffs, one of the PCs spots him and sees that<br />
he still moves, if but feebly. Encourage the<br />
PCs to believe that if they move swiftly and<br />
cure Berem, he will yet live.<br />
If Berem fell to his “death” in the ocean,<br />
then this event occurs when they return to the<br />
Perechon. Dolphins leap and cavort in the<br />
waves. One is Apoletta, and she tries to get<br />
the PCs to meet her in an isolated place where<br />
the others cannot see her change shape. She<br />
saw Berem fall, and she sent some fish friends<br />
to see if they could help. If the characters<br />
desire, she will have the body brought to<br />
them.<br />
To everyone’s amazement, when Berem is<br />
brought, he is found to be barely alive and<br />
can be saved if the PCs cure him immediately.<br />
If some other ruse was used to save Berem,<br />
then he remains alive and well.<br />
Once Berem is saved, you should give the<br />
PCs a chance to rest and plan what they will<br />
do next. Either Apoletta, Zebulah, or the<br />
bronze dragon Clarion counsels the PCs to<br />
seek out the King of All Good Dragons. Only<br />
he has the wisdom to see the Dark Queen’s<br />
plan in its entirety. If they can find his domain<br />
and prove themselves worthy, he can advise<br />
them on how to bring about Takhisis’s defeat.<br />
The Good Dragon King lives in a place called<br />
the Glitterpalace, which is said to be many<br />
places and yet none. The best starting point is<br />
to seek the Earth Dragon, the keeper of the<br />
secret to the Gate. Legend last mentions his<br />
appearance on an island far to the north.<br />
Whoever is counselling the PCs suggests that<br />
they travel to Port Kalaman, where rumors<br />
from all over Krynn can be heard. Perhaps<br />
someone there has a more recent story of the<br />
Good Dragon King.<br />
The characters can wait for Maquesta to<br />
complete repairs on the Perechon (3d6 days).<br />
Then she transports them as far as Port Kalaman,<br />
where they can hire another ship. Or<br />
they can appeal to the sea elves to let them<br />
drink the elixir of water breathing and have<br />
the sea elves take them to a shore near Kalaman.<br />
The characters have survived their most<br />
difficult ordeal so far. From here, victory is<br />
nearer, if they prove worthy. Proceed on to the<br />
Interlude on the next page.<br />
60
The journey to the final goal and the PCs’<br />
possible sojourn in the Glitterpalace of Paladine<br />
are the subjects of this part of the last<br />
quest. The events that transpire at their goalthe<br />
Empire City of Neraka—are the subject of<br />
the final section of this adventure.<br />
The PCs’ party must include Berem, Fizban,<br />
and Waylorn (as NPCs) before they reach the<br />
Glitterpalace. Fizban is met in Event 75,<br />
unless he is already with the party. Berem and<br />
Waylorn, if not already with the party, should<br />
be met as random encounters within the first<br />
few days of adventure.<br />
The Fates of the Dark Queen<br />
In this section, you can determine your version<br />
of the true manner of the Dark Queen’s<br />
ouster from the world of Krynn.<br />
There are actually several different true histories<br />
of how the Queen of Darkness came to<br />
Krynn and what will throw her back into the<br />
abyss. Only one of these will be the actual<br />
ending to your DRAGONLANCE game campaign.<br />
Each ending has a number. The number<br />
that corresponds to your version is the<br />
fate number for your campaign. In this adventure,<br />
the fate number determines which of the<br />
alternate encounters in the Glitterpalace are<br />
run and which holds the diamond gem<br />
required to escape the Glitterpalace. This<br />
number also determines the ultimate challenge<br />
the PCs face in the grand finale to the<br />
entire DRAGONLANCE saga, which begins<br />
with Chapter 14.<br />
Follow the procedure outlined below to<br />
determine the fate number for your campaign.<br />
Players who skip the Glitterpalace are<br />
at a distinct disadvantage because they do<br />
not have the benefit of the guidance and<br />
knowledge from these adventures. For this<br />
reason, players should be subtly encouraged<br />
to enter the Glitterpalace.<br />
Determining the Fate Number<br />
There are six possible endings. These are<br />
described in the following paragraphs. To<br />
determine which one applies to your campaign,<br />
you can either choose the one you feel<br />
best fits your players and campaign, or you<br />
can roll 1d6. Either way, remember this number.<br />
Do not tell your players the information<br />
revealed here! They should be able to piece it<br />
together as events unfold toward the grand<br />
finale.<br />
The fate number determines which of the<br />
three tests in the Glitterpalace leads to the<br />
diamond gem. This test will have an alternate<br />
encounter where the diamond can be found.<br />
This alternate encounter should clue the PCs<br />
to how to end the DRAGONLANCE epic.<br />
The finale set up for the end of the epic is<br />
one of the following six. Your fate number<br />
determines which of these endings occurs in<br />
the conclusion of the saga (starting with<br />
Chapter 14).<br />
1. Fizban/Paladine vs. the Queen of Darkness:<br />
Fizban is revealed as Paladine and only<br />
his direct intervention can seal shut the gate<br />
to the Abyss. Thus he must make his way into<br />
the depths of the tower with the aid of the<br />
PCs. If he uses his tremendous power too<br />
early, then the Queen of Darkness is alerted<br />
to his presence and has time to prepare her<br />
defenses.<br />
To succeed, Fizban must be brought into<br />
the Council Chamber of the temple and there<br />
defeat the Queen of Darkness. There is a<br />
base 100% chance that he is able to do this.<br />
However, each spell he casts reduces his<br />
chance of success by a percentage equal to<br />
twice the spell’s level.<br />
For example, if Fizban casts a 9th-level<br />
spell to get the PCs out of a terrible fix, his<br />
chance of defeating the Queen of Darkness is<br />
decreased by 18% and is now only 82%. If<br />
Fizban also has to cast a 5th-level spell, the<br />
base chance would be reduced by 10% more<br />
to 72%. Because of the phenomenal energies<br />
required to push the queen back onto her own<br />
plane of existence, Fizban gains back only<br />
10% toward his chance of success for each<br />
day during which he casts no spells.<br />
Continuing with the above example, if<br />
Fizban, now with a 72% chance of success,<br />
casts no spells for an entire day, his chance<br />
goes up to 82%. The nature of this climactic<br />
battle is such that all those present in the<br />
Council Chamber are aware of the outcome.<br />
Should Fizban fail, the troops in the hall rush<br />
the party.<br />
2. Waylorn/Huma Returns from the Past:<br />
Fizban is just a crazy old wizard. Waylorn, on<br />
the other hand, is the resurrected Huma of<br />
legend. He alone possesses the secret needed<br />
to drive the Queen of Darkness back into the<br />
Abyss and seal the gate. Huma must be<br />
brought to the gate and there use a<br />
Dragonlance to drive the Queen of Darkness<br />
into the Abyss and keep her at bay while the<br />
gate is shut behind him. He thus sacrifices<br />
himself for the good of the world.<br />
To succeed, Waylorn must be brought to<br />
the Council Chamber and he must have a<br />
Dragonlance. Waylorn must pass into the<br />
portal with the Dark Queen and seal the portal<br />
from the other side.<br />
3. Sacrifice Self to Seal the Void: This is<br />
essentially the same as ending #2, except<br />
that it is a PC who must drive the queen back<br />
into her lair and keep her at bay while the<br />
gate is shut. Fizban, although Paladine, cannot<br />
interfere directly but can direct those of<br />
the world who can affect the course of history.<br />
To succeed, the character must be in the<br />
Council Chamber with a Dragonlance. The<br />
character must then present the Dragonlance<br />
(as though a cleric performing a turn undead<br />
action) and force the queen back through the<br />
portal. Once on the other side, the PC can<br />
close the portal behind him.<br />
61<br />
The effects of barring Takhisis’s direct presence<br />
from the world are the complete disunity<br />
and dispersal of the Dragonarmy into petty<br />
tribes and wandering groups.<br />
4. Berem/Paladine Seals the Gates: Fizban<br />
is just a crazy old man. Paladine has taken<br />
the form of Berem to reclaim the soul of<br />
Berem’s sister. Once this is done, he can use<br />
his power to seal the gate.<br />
Success in this ending is achieved in the<br />
same way as in ending #1, substituting Berem<br />
for Paladine.<br />
5. Berem and His Sister: This is the ending<br />
of the story given in the novels. In this version,<br />
Berem takes his gemstone down into<br />
the depths of the temple of Takhisis and<br />
replaces it into the foundation stone. This<br />
reunites his soul with that of his sister and<br />
makes the temple once more a holy place. By<br />
this act, the gate through which the Queen of<br />
Darkness came is shut forever and her influence<br />
is much diminished in the world. The<br />
Dragonarmies turn on one another and disperse<br />
to strongholds scattered across Krynn.<br />
To succeed, Berem Everman must be<br />
brought to the foundation stone in the temple<br />
depths to press his bare chest and its gem<br />
into the stone.<br />
6. Death of the Gem: Contrary to the ending<br />
in the books, placing the gem in the foundation<br />
stone does not seal the gate. Rather, it<br />
permanently opens the gate. It is for this reason<br />
that the Queen of Darkness has been<br />
looking for the gemstone man.<br />
To succeed, the PCs must discover the<br />
gem’s true purpose and destroy it. To do this,<br />
the PCs must bring Berem to the Hidden Treasury<br />
and break the gem with the stones there.
Before starting this adventure, you should<br />
bring the players to Kalaman. This you may<br />
wish to run as an overland adventure from<br />
wherever the PCs end up after Chapter 10. Or<br />
they may get to sail into Kalaman on the Perechon.<br />
You may just decide to use a standard<br />
plot device and say, “After many months,<br />
your weary characters at last reach the port<br />
of Kalaman.”<br />
Begin the adventure with Event 1. At the<br />
conclusion of this event, the PCs are at the<br />
front lines (Encounter 1 in Chapter 11). Follow<br />
the directions there and begin the adventure.<br />
Overview of the Adventure<br />
The players’ goal should be to cross the lands<br />
occupied by the Dragon Empire and get to<br />
Neraka. Along the way, however, several<br />
opportunities present themselves for the PCs<br />
to enter the Glitterpalace, famed home of the<br />
god Paladine. A hidden goal for the players is<br />
to enter this mysterious palace, participate in<br />
its tests, and gain the knowledge they need to<br />
defeat the Dark Queen.<br />
Some players may elect not to go to the<br />
Glitterpalace and concentrate too strongly on<br />
the goal of Neraka. Present the players with<br />
chances to go to the Glitterpalace, encourage<br />
them to enter, but do not force them in.<br />
This portion of the adventure ends one of<br />
two ways: either the PCs reach the plains west<br />
of Neraka (the western section of area 121)<br />
without entering the Glitterpalace, or they<br />
endure the tests of Paladine and awaken in<br />
Godshome. (There is, of course, a third ending—the<br />
death of all PCs.)<br />
Adventure Pacing<br />
Start your adventure as explained above. Let<br />
the adventurers take their course, but if the<br />
PCs enter the Glitterpalace, try to end the session<br />
just as they go through one of the doors<br />
in the Nexus Room to their first test (see<br />
Chapter 12, Encounter 135).<br />
Once the PCs start the tests, they should be<br />
able to play through one test in one or two<br />
four-hour sessions of play. The end of each<br />
test is a good place to stop your sessions.<br />
When the PCs end the last test, however, go<br />
to the Epilogue and complete the adventure<br />
there.<br />
It is a good idea to end each session with a<br />
description of the next area the PCs will be<br />
entering. This gives your players something<br />
to look forward to in the next session.<br />
Flow of Events<br />
This section details the Events of this part of<br />
the saga. Read through these Events to get a<br />
feeling for the flow of history within which the<br />
PCs find themselves.<br />
Events occur at certain times within the<br />
adventure, while Encounters occur when the<br />
PCs venture into certain areas. Unlike previous<br />
parts of this adventure, all of the events<br />
that occur in Chapters 11 through 13 are<br />
detailed here rather than within each chapter.<br />
Use the game clock to keep track of time during<br />
the adventure and to determine which<br />
Event is about to take place. Encounters are<br />
listed within each chapter in the usual manner.<br />
Whenever an Event is indicated, use your<br />
best judgment to decide if the PCs can be<br />
affected by (or even know of) the Event. For<br />
example, an Event that has a blue dragon flying<br />
over Neraka on the fourth day would not<br />
be noticed by PCs who were in underground<br />
caverns at the time. If an Event affects the<br />
PCs, then run it as outlined.<br />
Also, an Event’s effect sometimes depends<br />
on the PCs’ position. For example, the explosion<br />
of a volcano would be a bad experience<br />
for someone above ground, but it would be<br />
devastating for anyone under ground where<br />
the magma was flowing.<br />
Event 69: Starting the Adventure<br />
Start by telling the players that after their<br />
characters reached Kalaman, they were summoned<br />
to appear before the renowned Council<br />
of Whitestone. The folk of this council are<br />
charged with somehow rescuing Ansalon<br />
from the grip of the Dragonarmies. Read the<br />
following after getting the PCs to the council’s<br />
meeting place.<br />
The fresh breeze from the bay drifts cool<br />
over the great port city of Kalaman and<br />
across a balcony in the great central<br />
palace. Within, the curtains to the great<br />
round council hall drift lazily with the ebb<br />
and flow of the air. You sit at a large table<br />
in this ornate chamber; facing you across<br />
the table are the gathered wise folk of the<br />
Council of Whitestone.<br />
Lord Gunthar, the lord of the council,<br />
stands to address you.<br />
“Welcome and well met, brave and<br />
mighty Heroes! I, Lord Gunthar, again<br />
greet you and welcome you. If only our<br />
time was less desperate and our need less<br />
great, we....”<br />
“Gunthar, you old windbag,” interrupts<br />
the councilor to Gunthar’s right. “Sit and<br />
let us get on with this. Our problem is<br />
simple, the solution is somewhat more<br />
difficult. The Highlord army was pressed<br />
back into its homeland, but it has just<br />
burst asunder our lines with these great<br />
flying castles. You Heroes may be our last<br />
hope in this struggle.”<br />
A female councilor stands and<br />
addresses you: “The Dark Queen’s forces<br />
will destroy us in a few weeks unless you<br />
somehow manage her overthrow. You<br />
must enter the heart of the evil and bring it<br />
down. We have thought long about how<br />
you might reach the Dark Queen’s base of<br />
Neraka.”<br />
“One means is to disguise good dragons<br />
as evil ones. We have four large, old silver<br />
dragons upon whom we can create the<br />
illusion that they are blue or black<br />
dragons. They might be able to fly you<br />
most of the way to the Dark Queen’s home<br />
city.”<br />
62<br />
The second councilor speaks up:<br />
“Another method is to disguise yourselves<br />
as merchants. There have been many<br />
merchants passing into the Dragon<br />
Empire of late, and this may be a good<br />
disguise for you. We have three merchant<br />
wagons with supplies ready.”<br />
Lord Gunthar adds, “A third possibility<br />
is to disguise yourselves as Dragonarmy<br />
soldiers. We have 12 uniforms captured<br />
from mercenaries, but we do not know to<br />
which units they belonged or how their<br />
command structure works.”<br />
“Ah, nonsense and folly!” sputters an<br />
elderly councilor. “These are great Heroes,<br />
and you wish to risk everything on such<br />
contrivances? I say that stealth is the<br />
answer—soft steps by night into Neraka.<br />
Send our only remaining hope into enemy<br />
lands in creaking wagons or on paintedup<br />
silver dragons? Bah!”<br />
Lord Gunthar sighs. “Well, we have tried<br />
to make what preparations we could. It is<br />
up to you to choose how best to attempt<br />
your journey. But go to Neraka you must,<br />
or 1 fear that all will soon be lost!”<br />
These harsh words of fire and war<br />
seems out of place on so pleasant a spring<br />
day. All eyes turn to you.<br />
Inform the players that they can either adopt<br />
one of the plans presented or they can suggest<br />
a plan of their own. As the referee, you<br />
have to judge the merits of any alternative<br />
plans the PCs suggest. These plans must be<br />
geared to the objective of bringing down the<br />
Dragon Empire. The Lords of the Solamnic<br />
Knights and the Whitestone representatives<br />
grant any reasonable assistance, so long as it<br />
does not involve any resources other than<br />
those listed in the different plans presented to<br />
the PCs.<br />
When a plan has been presented and<br />
agreed to, read the following:<br />
Solamnic Knights guide you as far as the<br />
forward lines of the war. Within days you<br />
arrive there with all your equipment.<br />
“We have arranged to have you teleported<br />
behind the enemy lines with your<br />
equipment. This is as much assistance as<br />
we can give you to cross the front lines of<br />
the Dragon Highlords. We are pressed for<br />
time as we believe the Highlords for<br />
preparing another attack.”<br />
The mages are summoned and you disappear<br />
in a flash of magic and light. You<br />
reappear deep behind the lines of the<br />
Dragonarmy.<br />
Select a hex within the valley shown as<br />
Encounter Area 94 on the Surface Map of the<br />
Taman Busuk. This is the location at which<br />
the PCs reappear. At this point, the PCs are in<br />
Encounter Area 94. Begin normal play.
Event 50: The Watchful Lands<br />
Occurs: Daily<br />
The lands of the Dragon Empire are watched<br />
carefully, especially with the Whitestone<br />
forces pressing so closely to their black temple<br />
at Neraka.<br />
There are two states of readiness on the<br />
Taman Busuk: Patrol and Alarm. Which state<br />
of readiness exists greatly influences the<br />
encounters there. Creatures encountered<br />
while the Alarm is raised are twice as suspicious<br />
and cautious as when the land is merely<br />
in the Patrol state. Also, encounters with<br />
troops increase in frequency as they actively<br />
search for those who caused the alarm.<br />
Two groups patrol this area: Dragon flights<br />
and ground outposts.<br />
Dragon Flights: Flights of dragons of all<br />
evil colors patrol from Neraka and various<br />
outposts from dawn to dusk, while watcher<br />
outposts scan the skies and lands by night. In<br />
the area of this adventure, only the blue<br />
dragons fly and all troops encountered are of<br />
the army of the Blue Lady...Kitiara’s force.<br />
Each flight consists of three huge and<br />
ancient blue dragons and their riders. These<br />
riders are 12th-level fighter mercenaries on<br />
special service for the queen.<br />
The dragons leave Neraka at 6:00 AM each<br />
morning and fly along the route noted on the<br />
Surface Map of the Taman Busuk. The location<br />
of these flights depends on the time of<br />
day. The letters A-M along the route indicate<br />
the dragons’ position each hour from 7:00<br />
AM (letter A) until 7:00 PM (letter M). When<br />
two letters are together, the flight has landed<br />
for lunch.<br />
Any time a flight of dragons comes within<br />
five hexes of the PCs, check to see if either<br />
party spots the other. There is a 5% cumulative<br />
chance per turn that a PC notices the<br />
dragons if they are within five hexes. If the<br />
PCs are actively searching the skies, this<br />
chance is 25% cumulative per turn. Anyone<br />
watching the skies, however, cannot move<br />
more than ½ of their normal movement, as<br />
walking and watching the clouds requires<br />
more caution than just walking.<br />
The dragon flights also check once per turn<br />
while they are within five hexes of the PCs.<br />
There is a base 100% chance that a dragon<br />
flight spots any person or group and sounds<br />
the alarm. This base chance is modified as<br />
foIlows:<br />
Dragon Sighting Modifier Chart<br />
PCs’ Situation Modifier<br />
Terrain –listed modifier *<br />
Disguise –10% to 70% **<br />
Distance –10% per hex<br />
Flying +20%<br />
Dragons’ Situation<br />
On ground –50%<br />
Spotted last turn +30% ***<br />
Before 8 AM –15%<br />
After 6 PM –15%<br />
* This modifier (if applicable) is listed under<br />
the description of the Encounter area.<br />
** This modifier depends on how well the<br />
PCs have disguised themselves.<br />
*** This modifier applies if the PCs were<br />
spotted by the dragons on the previous turn.<br />
Having seen the PCs once, the dragons are<br />
better able to track them.<br />
When the modified base percentage has been<br />
found, roll percentile dice and check the<br />
results against the following to determine the<br />
reaction of the dragon flight.<br />
Dragon Reaction: If the PCs are spotted,<br />
how the dragon flight reacts depends on the<br />
current defensive status of the Taman Busuk.<br />
If the roll by the dragon flight is within 5% of<br />
the modified base, (e.g., if the required percentage<br />
is 30%, then any roll from 25% to<br />
35%), then the dragon flight lands to investigate.<br />
If the check is more than 5% above the<br />
modified base (e.g., if the above roll was<br />
higher than 35%), then the dragons do not yet<br />
spot the PCs.<br />
If the check is more than 5% below the<br />
modified base (e.g., if the above roll was less<br />
than 25%) then the PCs are definitely spotted.<br />
If the Taman Busuk is still under Patrol status,<br />
then the dragon flight tries to fly to Neraka as<br />
quickly as possible with the news. The flight<br />
moves at a speed of four hexes per hour to<br />
Neraka without a break or stop. The moment<br />
they arrive at Neraka, the status of the lands<br />
changes to Alarm.<br />
If the Alarm status is already in effect, then<br />
the dragon flight discharges one lightning<br />
breath into the atmosphere to signal the location<br />
of the PCs to ground troops. It takes 10<br />
turns for a ground patrol to arrive (see the following<br />
section for the composition of the<br />
patrol). The dragons circle overhead out of<br />
missile weapon range until the troops arrive,<br />
and then they join in a combined attack. The<br />
dragons in flight are required to check each<br />
turn to maintain their sighting of the PCs. It is<br />
possible for the PCs to move to better cover<br />
and lose the dragons, but the ground forces<br />
still search the area where the PCs were last<br />
seen.<br />
Ground Patrols and Outposts<br />
These stations watch over the Dark Queen’s<br />
domain from the ground, especially at night<br />
since the dragons prefer not to fly then. The<br />
outposts are based in the hexes labeled 107,<br />
114, and 115.<br />
The outposts have a base 70% chance of<br />
spotting the PCs each turn they are within<br />
three hexes. The ground modifier does not<br />
apply to these outposts. All other modifiers<br />
listed earlier do apply, however.<br />
Determine the results as with the dragon<br />
flights. If the roll is within 5% of the modified<br />
base, then the outpost sends a patrol to investigate.<br />
This patrol consists of one Aurak draconian<br />
and a troop of 20 Kapak draconians, if<br />
the Taman Busuk is only under Patrol status.<br />
(If the PCs are spotted, a runner is sent to<br />
Neraka to put the evil forces on Alarm status.<br />
63<br />
The runner moves four hexes per hour.) If the<br />
area is already under Alarm status, a full<br />
complement of one Aurak, three Sivaks, and<br />
50 Baaz is dispatched to deal with the PCs.<br />
Both types of patrols move at the rate of two<br />
hexes per hour.<br />
If the Taman Busuk is already under Alarm<br />
status, a wand of fire is fired into the air to<br />
attract the attention of any dragon patrols<br />
within 20 miles.<br />
Captured PCs are taken to the caravan<br />
routes (see Chapter 11, Encounter 8) and<br />
placed aboard a slave caravan with their<br />
weapons and armor stored in the rear wagon.<br />
Event 71: Storm Clouds to the South<br />
Occurs: Day 1, 10:00 AM<br />
In the Taman Busuk, dark clouds gather on<br />
the distant horizon to the south in the direction<br />
of Neraka. Their billowing fury is lanced<br />
with flashes of lightning, though the distant<br />
thunder cannot be heard.<br />
Event 72: Wheeling Birds to the North<br />
Occurs: Day 1, 2:00 PM<br />
Wheeling dark specks can be seen to the<br />
north where the armies are engaged. Any PC<br />
rolling a successful Intelligence Check with a<br />
-7 penalty is able to discern these specks as<br />
vultures.<br />
Event 73: The White Stag<br />
Occurs: Day 2, 6:00 PM<br />
The ground here is trampled flat by many<br />
clawed feet. Suddenly your eyes come to<br />
rest on the form of a great white stag<br />
lying in a pool of its own blood. Its dark<br />
eyes seem to be pleading with you.<br />
Have the players roll for surprise. Regardless<br />
of the result, tell them that they see the brush<br />
some 10 feet behind the stag shake. If the<br />
PCs investigate, they find a snow-white baby<br />
deer hiding in the brush. This fawn allows the<br />
PCs to touch and even carry it if they move in<br />
the direction of Godshome (Encounter 122).<br />
If not, then the deer escapes and begins moving<br />
in the direction of Godshome, magically<br />
slipping free regardless of any restraints<br />
placed on it by the PCs.<br />
The stag is dying. It is currently at 0 hit<br />
points and its wounds are so poisonous that it<br />
is swiftly sinking into death.<br />
Anyone who looks into the eyes of the white<br />
stag must roll an Intelligence Check with a -4<br />
penalty. If not successful, the person gets the<br />
feeling that the stag is trying to communicate<br />
with him. Distant words seem to form in his<br />
head, but the meaning of the words is not<br />
clear.<br />
Those who succeed hear words form in<br />
their heads in a deep and beautiful voice:
“My child...take him to Godshome. There<br />
will your efforts be rewarded... and your<br />
path made more clear....”<br />
Event 74:<br />
Dragon Messengers Leave Neraka<br />
Occurs: Day 3, Noon<br />
PCs who are within sight of Neraka see the silhouetted<br />
forms of many dragons rise from the<br />
center of the city and spread out in all directions.<br />
These are not flights of dragons, but single<br />
dragons with highly ornamental harnesses.<br />
Their riders’ armor glints in the morning sun.<br />
One of the dragons flies directly toward the<br />
battle lines. If any PCs are in the path of this<br />
flight, have them roll a Intelligence Checks<br />
with a –4 penalty. If they succeed, they see<br />
that the figure is carrying a baton of some<br />
type. The dragon is blue.<br />
In the hollow of the baton is a message that<br />
reads:<br />
“Her Dark Majesty commands your presence<br />
and those of your personal legion to attend<br />
her. Arrive at the Temple of Neraka within two<br />
weeks or feel her wrath.”<br />
Any PCs near the Dragonarmy camp at the<br />
battle lines note a single blue dragon descend<br />
into the commander’s camp.<br />
Event 75: Fizban the Fabulous<br />
Occurs: Day 3, 4:00 PM<br />
This event takes place only if Fizban is not<br />
with the party to begin this adventure.<br />
Have the players roll for surprise. Regardless<br />
of the result, tell them that they hear a<br />
tremendous snort that seems to come from<br />
just over the other side of a rise.<br />
The hulking form of a great golden dragon<br />
lies basking in the spring sun. Next to him<br />
sits an old man doing the same thing, his<br />
head pillowed on the dragon’s flank.<br />
A battered and shapeless hat rests over<br />
the old man’s face to shield his eyes from<br />
the sun. A long, white beard flows out<br />
from under the hat. Booted feet stick out<br />
from beneath long, mouse-colored robes.<br />
The terrible snorting sound is repeated<br />
as the dragon snores. The old man, snoring<br />
in his own wheezy way, seems not to notice.<br />
The gold dragon and the wizard are Pyrite and<br />
Fizban the Fabulous, respectively. They now<br />
join the party as NPCs (Pyrite takes the form of<br />
a nondescript human in leather armor). Fizban’s<br />
background is explained in the “NPCs” section<br />
of the Appendix; Pyrite is an ancient gold<br />
dragon. Fizban may or may not be a major factor<br />
in the conclusion of this campaign, depending<br />
upon which fate number was chosen at the<br />
start of this portion of the adventure.<br />
Event 76: The Golden Door Event 78: Tremors<br />
Occurs: Every other day after Day 6 Occurs: 1d4 times per day after Day 4<br />
Once per two days (after Day 6), at the discretion<br />
of the DM, a golden door magically<br />
presents itself along the path of the PCs. This<br />
is an entrance to the Glitterpalace. Just how it<br />
presents itself is largely up to you. The follow-<br />
ing are guidelines.<br />
If the PCs are flying: A great white cloud<br />
shines in the sun. It appears to change into a<br />
floating, white palace with a huge golden<br />
door. The door begins to open and bright<br />
white light streams forth.<br />
The PCs can fly up to this door, but their<br />
mounts will not enter.<br />
If the PCs are on the ground: A small, plain<br />
building is off to one side of the path. The<br />
building has a golden door in a casement of<br />
white marble.<br />
If the PCs are in tunnels: A golden door in<br />
a marble frame is built into a wall in the tun-<br />
nel.<br />
These are the doors to the Glitterpalace<br />
(Chapter 13). They do not appear suddenly<br />
(unless required to by circumstances). The<br />
doors have a tendency to appear at opportune<br />
times for the PCs. It is up to you to have<br />
them appear in the path of the PCs when you<br />
think it is time or if you think they need it to<br />
get out of a particularly sticky situation.<br />
The doors open easily onto brilliant white<br />
light. Those who enter this white light go at<br />
once to Chapter 13 and the Glitterpalace.<br />
Event 77: Dragon Messengers Return<br />
If the PCs are in the Taman Busuk, they occasionally<br />
see the messengers returning to the<br />
Temple of Darkness after delivering the message<br />
in Event 74 to all Highlords. They return<br />
singly over a period of four days in the following<br />
order:<br />
Messenger Day<br />
Green 4<br />
Black 5<br />
White 5<br />
Red 6<br />
Blue 7<br />
From<br />
SE<br />
SW<br />
NW<br />
NE<br />
N<br />
Each messenger comes bearing an identical<br />
message, signed by the Highlord of each of<br />
the armies. The message reads:<br />
“We hear and obey the Dark Will. We arrive<br />
within the week. Your servant.”<br />
Each in his turn lands his dragon in the<br />
square that surrounds the Dark Temple.<br />
PCs within sight of Neraka witness the lone<br />
dragons approaching according to the above<br />
schedule. If they are between the battle lines<br />
to the north and Neraka, the blue dragon and<br />
its messenger ride overhead. If this happens,<br />
then allow the PCs an Intelligence Check to<br />
notice the baton carried by the rider.<br />
PCs near the battle lines notice the lone<br />
messenger taking off from the command area<br />
of the blue Dragonarmy.<br />
64<br />
Tremors are caused by the impending eruption<br />
of one of the Lords of Doom, the volcanoes<br />
that surround the Neraka area. Use the<br />
following procedure if the PCs are within<br />
seven hexes of a volcano when this event<br />
occurs. Ignore this event otherwise.<br />
When a tremor is indicated, roll 1d10. The<br />
result is the round in which the tremor reaches<br />
peak intensity. On the Tremor Effects Table,<br />
start with Round 1 on the table and run each<br />
round of the tremor until reaching the number<br />
rolled, then go back down to Round 1. For<br />
example: if you roll a 3, then the PCs experience<br />
Rounds 1 through 3 in order, then back<br />
to Round 1. In other words, this tremor lasts<br />
five rounds, in the order 1,2,3,2,1.<br />
Tremor Effects<br />
Round 1: First rumblings come from afar,<br />
almost too faint to be heard.<br />
Round 2: Rumblings build. PCs feel dizzy.<br />
All attack rolls this round suffer a -1 penalty.<br />
Round 3: Rumbling sounds are more<br />
noticeable and the ground is visibly swaying.<br />
All attack rolls this round suffer a -2 penalty.<br />
If underground or in a building, small chunks<br />
of the ceiling fall. Each character in the area<br />
receives damage equal to his AC minus 7<br />
points. Ignore damage less than 0. A character<br />
who is under a sturdy object (such as a<br />
wooden table) suffers no damage. In streets,<br />
chunks of nearby buildings fall and cause the<br />
same amount of damage. Round 4: Rumbling<br />
sounds are now loud; a successful Intelligence<br />
Check is required to understand anyone<br />
who is yelling. A character underground<br />
or in a building receives damage equal to his<br />
AC minus 5. Ignore damage less than 0. A<br />
character under a sturdy object (such as a<br />
wooden table) receives no damage.<br />
Round 5: Rumbling sounds are louder.<br />
Same checks apply as above to understand<br />
shouted orders. All attack rolls are made with<br />
a -4 penalty. A character underground or in a<br />
building receives damage from falling debris<br />
equal to his AC. Wooden cover now protects<br />
against only half of this damage. Stone and<br />
harder objects offer full protection. In the<br />
wilderness, each character receives 1d6<br />
points of damage from falling trees, rolling<br />
rocks, and sudden upheavals of earth.<br />
Round 6: Rumblings grow louder. Communication<br />
by voice is impossible. Attack rolls<br />
are made with a -8 penalty. A successful<br />
Dexterity Check with a +4 bonus is required<br />
to remain standing. A character underground<br />
or in a building receives damage from falling<br />
debris equal to his AC plus 1d6. Wooden<br />
cover offers no protection and is crushed<br />
under debris. Stone and harder objects offer<br />
full protection. In the wilderness, each character<br />
receives 2d6 points of damage from<br />
falling trees, rolling rocks, and sudden<br />
upheavals of earth.
Round 7: The noise is overwhelming. The<br />
ground bucks and sways. All attack rolls are<br />
made with a -10 penalty. A successful Dexterity<br />
Check is needed to remain standing. A<br />
character underground or in a building<br />
receives damage equal to his AC plus 2d6.<br />
Stone and harder objects protect against only<br />
half of this damage. In the wilderness, each<br />
character receives 2d10 points of damage.<br />
Round 8: The noise is deafening. Rising<br />
dust obscures vision beyond 100 feet. All<br />
attack rolls are made with a –12 penalty. A<br />
successful Dexterity Check with a –4 penalty<br />
is needed to remain standing. Damage from<br />
falling debris is the same as in Round 7. Great<br />
rents in the earth open and crevasses form. A<br />
character who fails a Dexterity Check with a<br />
–4 penalty falls into a crevasse, suffering 1d6<br />
points of damage. Each crevasse is 1d10 feet<br />
deep.<br />
Buildings have a 15% chance of collapsing<br />
in this round. Anyone within a collapsing<br />
building suffers 1d20 points of damage. Each<br />
character must immediately roll a successful<br />
Dexterity Check with a –4 penalty or be buried<br />
in the rubble. A character can dig himself out<br />
of the rubble with three consecutive successful<br />
Strength Checks. Each of these three<br />
checks takes two rounds. Others can help dig<br />
a buried character out. For each person<br />
assisting, the buried character gets a +4<br />
bonus to each of his Strength Checks.<br />
Round 9: The noise remains deafening.<br />
Rising dust obscures vision beyond 50 feet.<br />
All attack rolls are made with a -15 penalty. A<br />
successful Dexterity Check with a -8 penalty<br />
is needed to remain standing. Damage from<br />
falling debris is the same as in Round 7.<br />
Crevasses are now 2d10 feet deep (normal<br />
falling damage). Buildings have a 20% chance<br />
of collapsing (see Round 8 for effects on<br />
characters).<br />
Round 10: The noise remains deafening.<br />
Rising dust obscures vision beyond 10 feet.<br />
Attacks are impossible. A successful Dexterity<br />
Check with a -15 penalty is needed to<br />
remain standing. Damage from falling debris<br />
is the same as in Round 7. Crevasses are now<br />
2d20 feet deep (normal falling damage).<br />
Buildings have a 30% chance of collapsing<br />
(see Round 8 for effects on characters).<br />
Event 79: Lords of Doom Erupt<br />
Occurs: Once per day after Day 4<br />
While the PCs are in the Taman Busuk, the 10<br />
volcanic mountains (areas 102A- 102J)<br />
explode, one per day. Which volcano explodes<br />
is determined randomly (roll whichever die is<br />
appropriate for the number of unerupted volcanoes<br />
left). Once a volcano explodes, it<br />
remains active throughout the adventure.<br />
Roll 1d6 for the strength of the explosion.<br />
This indicates the number of hexes affected<br />
by the blast: 1 = volcano hex only; 2 = volcano<br />
hex and all adjacent hexes; 3 = all hexes<br />
within two of the volcano hex; etc. Those<br />
within the affected area of the exploding volcano<br />
suffer damage. Subtract the PCs’ distance<br />
(in hexes) to the volcano from the blast<br />
strength rolled above. This is the number of<br />
d10s rolled for damage inflicted upon each<br />
character by the explosion. For example, a<br />
volcano explodes with a blast strength of 3.<br />
The PCs are two hexes away from the volcano<br />
when it explodes. Each PC suffers 1d10<br />
(3 – 2 = 1) points of damage from the blast.<br />
The area of the explosion becomes desolate<br />
and covered by a fine gray ash. Each turn<br />
a PC is in the affected area, he must roll a<br />
Constitution Check. Failure means that his<br />
Constitution drops by 1. If his Constitution<br />
drops to 0, he becomes unconscious and<br />
begins suffering damage at the rate of 1d10<br />
points per turn. If the PC is taken out of the<br />
area of the explosion, he recovers 1 Constitution<br />
point per hour. Any hit points lost must<br />
be regained in the usual manner.<br />
65<br />
Following the initial explosion, lava pours<br />
from the mountain and flows down its sides,<br />
creating great lava streams down to the edges<br />
of the blast area. While traversing this area,<br />
there is a 65% chance per turn of encountering<br />
lava streams (–10% per hex away from<br />
the volcano). The streams run straight from<br />
the volcano to the edge of the blast area.<br />
Lava streams are 7d6 feet across (–1d6 per<br />
hex away from the volcano). The lava flow<br />
causes 1d6 points of heat damage per turn to<br />
any character within 20 feet. For every five<br />
feet closer, it inflicts an extra 1d6 points of<br />
damage (e.g., a character within 15 feet<br />
receives 2d6 points of damage per turn).<br />
Those who are in contact with the lava receive<br />
7d6 points of heat damage per turn plus 2d10<br />
points of additional damage per round. Special<br />
fire and heat protections lessen or eliminate<br />
this damage.<br />
Characters on the ancient road (see Encounter<br />
113) experience severe tremors (roll<br />
until a result greater than 4 is obtained) on<br />
the Tremor Effects table in Event 78.
This is a time of great trial. Great Whitestone<br />
armies are gathering around Kalaman. Their<br />
objective now is a desperate one. As the flying<br />
citadels besiege their cities, they feel that<br />
they have but one hope left: if Neraka can be<br />
brought down, then perhaps their command<br />
will be disrupted enough to enable the Whitestone<br />
forces to end the reign of terror.<br />
The PCs, however, can find a different way.<br />
Through the tests of Paladine in this adventure,<br />
they will discover a more subtle way to bring<br />
about the downfall of the Dragon Highlords.<br />
This adventure reveals their wilderness trek<br />
through the devastation of the dragon-captured<br />
lands and towns. Even in these dark<br />
lands, there are both helpers and traitors. Hidden<br />
ways kept secret from the Dragon Highlords<br />
lead to the heart of the Dragon Empire:<br />
the magical roads of the buried past, Godshome<br />
with its Misted Veils, and even the skies<br />
ridden by dragons and citadels.<br />
Encounters<br />
94. Taman Busuk<br />
The sodden plains stretch into the distance.<br />
Pale green shoots of grass struggle<br />
up toward a cold sun. The ground is soft<br />
and spongy beneath your feet.<br />
Run random encounters normally, in addition<br />
to any Dragonarmy patrols that might be<br />
encountered. The locations of these patrols<br />
are listed in Event 70. It is important to keep<br />
these patrols and troop movements in mind<br />
at all times to determine when the PCs might<br />
encounter them.<br />
There is a 10% chance on any given turn<br />
that the PCs find a depression, gully, or rock<br />
large enough to provide cover from searching<br />
eyes. These gullies offer 3d20 percent cover<br />
if something is looking for the PCs. Travel<br />
across these areas is at standard rates.<br />
While traveling on the plains, the PCs find<br />
very little in the way of food. Only those foodstuffs<br />
the PCs have with them, can obtain<br />
from Dragonarmy supplies, or can purchase<br />
in Jelek or Neraka will sustain them.<br />
95. Dragoncamp<br />
Dark banners fly over tents and sheds,<br />
fluttering in the breeze. A constant clatter<br />
and ring of armor can be heard. Rows of<br />
tents extend far into the distance, seeming<br />
to cover the entire floor of the vale.<br />
This is the rear area of the Dragonarmy.<br />
Those approaching within one mile (one hex)<br />
66<br />
of this location have a 30% chance of running<br />
into a patrol. This patrol consists of 15 Sivak<br />
draconians polymorphed to look like lowlevel<br />
human fighters.<br />
They attack viciously and try to capture<br />
any PCs who receive more than 20 points of<br />
damage. These guards are aware of the<br />
search for the gemstone man and try to take<br />
him at all costs, if they notice that he is with<br />
the party.<br />
Captured characters are relieved of all<br />
weapons and armor and taken to the nearest<br />
Dragon Highlord. Bakaris is on the western<br />
battle line, Kitiara is on the central battle line,<br />
and Toede is on the northeastern battle line.<br />
See the “NPCs” section in the Appendix for<br />
their backgrounds and reactions.<br />
Captured PCs are taken to the smithy and<br />
placed in leggings and chains. A successful<br />
Strength Check with a –1 penalty is required<br />
to break these bonds without tools. Berem, if<br />
discovered, is placed separately in a steel<br />
wagon and guarded by six Aurak draconians.<br />
All captives are placed in a slave caravan to<br />
be taken to Neraka as slaves (see Encounter<br />
101 for details).<br />
If the PCs somehow manage to get past the<br />
guards, there is a 10% chance per turn that<br />
someone in the camps questions them. Most<br />
assume that they are mercenaries who are<br />
not yet outfitted with official gear. If the PCs
ask for the commander’s tent, they are<br />
directed to the nearest pavilion as above.<br />
If the PCs search any tent, there is a 20%<br />
chance that they find something. If so, roll on<br />
the following table.<br />
Looting Table<br />
D12<br />
Roll Item Description<br />
1 Slave Rags<br />
2 Rations for Four Days<br />
3 Banner (Blue Army)<br />
4 Dragonarmy Uniforms (1d4 sets) *<br />
5 500 gems (1,500 stl each)<br />
6 Rations for Three Days<br />
7 Writ of Passage **<br />
8 Cursed Plate Mail -2 * * *<br />
9 Plate Mail +2 ***<br />
10 Plate Mail +4 ***<br />
11 Mounted Dragonlance<br />
12 Footman’s Dragonlance<br />
* There is a 30% chance for each PC that one<br />
set fits him.<br />
** This scroll gives passage for a Dragonarmy<br />
soldier to enter Neraka. The writ is out<br />
of date, however, and gives permission to<br />
enter only the inner city of the blue army.<br />
*** There is a 15% chance for each PC that<br />
this exactly fits them. Even if it is not an exact<br />
fit, there is a 25% chance that a PC is able to<br />
get into it.<br />
Remember that the PCs must pass more<br />
guards when they try to leave the camp.<br />
Those attempting to move past the battle<br />
lines (north of area 94 on the map) encounter<br />
the full army in conflict with Whitestone<br />
forces. Each turn the PCs move off the map<br />
past the battle lines increases their chance of<br />
being caught by 10%.<br />
96. No Man’s Land<br />
Trees stretch their dying black limbs into<br />
the cold sky. The grass beneath them is<br />
burned to brittle stubble underfoot. A<br />
thick black soot covers everything.<br />
This land was the site of past battles between<br />
Whitestone and Dragonarmy forces. In the<br />
direction of area 97, faint shouts, cries, and<br />
clashing steel can be heard coming from a<br />
line of dust that stretches across the horizon.<br />
97. Battle Plain<br />
The full fury of pitched battle goes on<br />
before you.<br />
As the PCs enter this area, roll once on the<br />
following table to determine encounters. Roll<br />
again each time the PCs move into another<br />
hex in this area.<br />
Encounters on the Battle Plain<br />
D6<br />
Roll Encountered<br />
1 1d8+5 Baaz vs. 1d4 Knights *<br />
2 1d6+3 Auraks vs. 2 Knights *<br />
3 1d6+5 IOth-level Fighters vs. 3 Knights<br />
4 1d8+6 Sivaks vs. 4 Knights *<br />
5 1d8+8 Bozaks vs. 4 Knights *<br />
6 Dying Whitestone Officer **<br />
* The Knights encountered do not join the<br />
PCs; they insist on returning to their units.<br />
These Knights are 5th- to 8th-level fighters<br />
(1d4+4).<br />
** He begs the PCs to fulfil their mission and<br />
leave the battle area.<br />
It should become obvious to the players that<br />
continuing in this direction is hopeless.<br />
98. Glitterpalace Entrance<br />
There is a Glitterpalace entrance here. See<br />
Event 76 for details. If the PCs enter, go to<br />
Chapter 13, Encounter 134.<br />
99. Guide Cairns<br />
A strange pile of stones stands to one side<br />
of the path. Two notched rocks stand on<br />
top of the pile of stones. One of these<br />
rocks has the symbol of an eye on it.<br />
This cairn acts as a directional sight. By<br />
sighting down the notch with the eye carved<br />
in it, the PCs can see the nearest Glitterpalace<br />
entrance (Event 76).<br />
100. Khalkist Range<br />
The towering peaks of the Khalkist Mountains<br />
jut with a green-tinted gray into the<br />
sky. Their jagged edges cut like a cold<br />
and forbidding slash across the sky.<br />
Passage through these peaks on foot is<br />
impossible.<br />
101. Caravan Routes<br />
Wide, muddy roads wind their way across<br />
the plain. Their surfaces are impressed<br />
with the prints of thousands of travelers.<br />
Caravans pass these roads at regular intervals.<br />
There is a 30% chance per four-hour<br />
period that a caravan is encountered. Each<br />
person, other than slaves or prisoners, who is<br />
going toward Neraka has a writ. This document,<br />
which describes the person bearing it,<br />
grants him access to some part of Neraka.<br />
There is only a 3% chance that a writ discovered<br />
on a person gives him access to the<br />
temple itself; there is a 10% chance that it<br />
67<br />
allows him into the inner city at a specific<br />
color location (the city is divided into sections<br />
by Dragonarmy color). The rest of the writs<br />
grant passage only to the outer city of Neraka.<br />
Roll randomly on the following table to<br />
determine the type of caravan encountered.<br />
Caravan Type Table<br />
D6<br />
Roll Caravan Type<br />
1 Slave Caravan<br />
2 Supply Caravan<br />
3 Supply Caravan<br />
4 Prisoner Caravan<br />
5 Supply Caravan<br />
6 Dragonarmy Reinforcements<br />
After determining the type of caravan, check<br />
the following descriptions for more details.<br />
All caravans make camp at approximately<br />
5:00 PM each day and break camp at 6:30<br />
AM. When encamped, guards are set around<br />
the perimeter.<br />
Slave Caravan: This is made up of three<br />
large wagons: one in the lead position and<br />
two at the rear. Between these are strung<br />
3d10+20 slaves. All of these slaves are emaciated<br />
and barely able to walk. If freed in this<br />
environment without protection, food, and<br />
water, they will almost certainly die.<br />
The lead wagon is a steel cage that holds<br />
prisoners and slaves who are still dangerous<br />
and able to fight. There are 1d4-1 people in<br />
the cage if the caravan is heading toward<br />
Neraka, none if it is heading away (50%<br />
chance of going in either direction). Those<br />
found in the cage are 7th-level fighters, but<br />
they have neither weapons nor armor.<br />
The remaining two wagons at the back of<br />
the caravan contain supplies for the group.<br />
There are food rations and bedding sufficient<br />
to supply the draconians and give pitiful sustenance<br />
to the slaves. If the draconians are<br />
killed or driven off, there are enough supplies<br />
to enable the slaves to return to their homes.<br />
The entire caravan is guarded by 30 Baaz<br />
draconians under the leadership of three<br />
Aurak draconians. If encamped, they build a<br />
large bonfire and run three guard watches of<br />
10 Baaz per shift.<br />
Slaves in the caravan know 1d4 rumors to<br />
tell the PCs (see the Rumors section in the<br />
Appendix).<br />
Supply Caravan: This caravan is made up<br />
of 1d12+5 large wagons pulled by workhorses.<br />
These wagons are filled with foodstuffs<br />
and supplies. Some of the wagons<br />
(1d4) contain 1d6 passengers each. These<br />
are tradesmen, slavers, and concubines.<br />
There is a 10% chance per wagon that one of<br />
these people is friendly to the PCs. Friendly<br />
characters can tell the PCs 1d6 of the rumors<br />
from the Rumors section.<br />
The caravan is guarded by nine Baaz draconians<br />
under the direction of one Kapak draconian.<br />
When encamped there are three<br />
guard watches of three Baaz each throughout<br />
the night. They can be swayed into believing<br />
that the PCs have somehow been separated
from their unit if the caravan is heading<br />
toward the front. They are suspicious, however,<br />
if the PCs are attempting to get to Neraka,<br />
as all traveling in that direction should<br />
have a writ.<br />
Roll 1d6 on the Looting Table from<br />
Encounter 95 for objects that can be found in<br />
these wagons or the encampment.<br />
Prisoner Caravan: This consists of four<br />
large wagons. The last wagon in the caravan<br />
carries supplies. The first three are steel<br />
cages with locked doors. Inside each of these<br />
are 1d4 prisoners. These are Whitestone<br />
army officers of various ranks. All are beaten<br />
and despondent. One of these officers tells<br />
the PCs 1d4 rumors.<br />
This caravan is guarded by 30 Baaz draconians<br />
under the direction of one Aurak draconian,<br />
who carries the keys to the cages.<br />
Three watches of 10 Baaz each are set whenever<br />
the caravan makes camp.<br />
Dragonarmy Reinforcements: Not a pleasant<br />
or welcome sight, this is a brigade of<br />
mixed draconian and human mercenary<br />
troops. There is an advanced guard of 12<br />
Baaz draconians that precedes the rest of the<br />
troops by 100 yards. The commander of the<br />
brigade is a deathknight mounted on a nightmare.<br />
Behind him rides a contingent of 30<br />
banshees on chariots.<br />
One hundred yards behind these are three<br />
units of troops. The first two units are headed<br />
by an Aurak unit commander and the last by<br />
a human commander (8th-level fighter).<br />
The first two units consist of Baaz draconians<br />
while the last unit contains 3rd-level<br />
human fighters. There are 50 members of<br />
each unit.<br />
After these are five supply wagons. These<br />
contain food, smithy and armorer supplies,<br />
and large tents. Use the Looting Chart from<br />
Encounter 95 to decide what the PCs find in<br />
the wagons or in any encampments of this<br />
group.<br />
The rear guard is 100 yards behind the column.<br />
This consists of 10 Baaz draconians<br />
with short bows.<br />
102. Well of Fire<br />
Light, lazy wisps of smoke drift into the<br />
sky from the peak of the fire mountain<br />
now sleeping.<br />
There are 10 volcanoes on this map. Occasionally<br />
one of them explodes into activity.<br />
Which volcano explodes is randomly determined<br />
and is always preceded by an earth<br />
tremor. The effects of these explosions and<br />
tremors were explained earlier in the Events<br />
section.<br />
When dormant, however, a volcano can be<br />
climbed and the interior of the cone entered<br />
down to the lava dome. Climbing a volcano is<br />
hard work (movement slowed to ¼ of normal)<br />
and the cone of the volcano offers only a 10%<br />
chance of finding concealing cover on any<br />
given turn. Each volcano cone is 500 + (1d8<br />
× 100) feet high.<br />
The steaming lava dome is 100 + (1d4 ×<br />
50) below the cone of the volcano. Those<br />
reaching this dome go to Encounter 125 in<br />
Chapter 12.<br />
103. Jelek<br />
A squalid, gray town stands on the dusty<br />
plain Muddy roads run into the town like<br />
worn-out arteries.<br />
This depressed town has been under the<br />
occupation of the Dragon Highlords for many<br />
years. The people are listless and have no<br />
hope of ever being freed of tyranny.<br />
Within the town is a garrison of 50 Kapak<br />
draconian troops under the leadership of one<br />
Sivak. They rule the town; regular patrols of<br />
five Kapaks can be encountered in the streets<br />
at any hour of the day or night.<br />
While the people in this town have no love<br />
for the Dragon Empire, they see no point in<br />
aggravating their sorry situation. They sell<br />
and trade with the PCs but do not offer them<br />
any assistance other than the advice that they<br />
get out of town as quickly as possible. There<br />
is a base 5% chance that any townsperson<br />
tells the draconians if he finds out that the<br />
PCs are not part of the Dragonarmy. If the<br />
PCs try to persuade the villagers to join them,<br />
fight the Dragon Empire, or directly give aid<br />
to the PCs’ quest, the townspeople become<br />
angry or frightened. Each time the PCs do<br />
this, the chance of someone turning them in<br />
to the garrison is increased by 5%.<br />
This is not to say that no one is willing to<br />
help the PCs. There is a member of the Hidden<br />
Light (the underground movement that<br />
aids the Whitestone cause) here in the town.<br />
He is the butcher, Darallan Suebban. He contacts<br />
the heroes two turns after they enter<br />
town. He has been helping prisoners escape<br />
from Neraka, but he can do little for the<br />
heroes here. He can, however, give the PCs<br />
the code name of his counterpart in Neraka, a<br />
person he calls “Maelstrom.” All he knows is<br />
that Maelstrom works in the red inner city and<br />
that he can often be found in the Hair of the<br />
Troll tavern.<br />
Darallan can also supply the PCs with<br />
details of the layout of the city as follows:<br />
Darallan glances about and then quickly<br />
squats down, his finger rapidly tracing in<br />
the dirt as he speaks.<br />
“The city is surrounded by a wall with<br />
the main gate on the north and lesser<br />
gates leading to various sections of the<br />
city. The city is divided into five sections,<br />
one for each Dragonarmy. The white and<br />
black sections are to the northwest and<br />
northeast of the city, respectively. The<br />
green section is in the southwest. the red<br />
section is to the south. This is the section<br />
of Ariakas, the emperor, although he<br />
seems to have abandoned his palace in<br />
favor of the temple. The blue section is to<br />
68<br />
the southeast between the black and red<br />
sections. A lesser gate leads into each<br />
color section, but both the main gate and<br />
the lesser gates are heavily guarded at all<br />
times and access is strictly controlled.<br />
“The main avenue beyond the queen’s<br />
gate spirals in toward the temple at the<br />
center of the city. This avenue is crossed<br />
by gates between each of the city’s sections.<br />
Thus an invading army must either<br />
break through the outer walls or pass<br />
through a series of gates. It is a death<br />
maze.<br />
“The outer city is also divided into sections,<br />
but it is not as strictly controlled.<br />
The Hair of the Troll tavern is located in<br />
the Green Outer City.”<br />
Darallan quickly stands and wipes away<br />
his tracing with his booted foot.<br />
In addition to this, Darallan’s spy network has<br />
given him 1d4 of the rumors from the Rumor<br />
section. He tells the PCs to leave town quickly,<br />
as there are many here who would betray<br />
them to the Dragonarmy.<br />
104. Low Hills<br />
While in these low, rolling hills the PCs can<br />
find 10% cover. Mud and rocky terrain slow<br />
movement to ¾ of normal speed.<br />
105. Grasslands<br />
These are the grasses of the high plains. They<br />
grow at a phenomenal rate and are approximately<br />
six to eight feet high.<br />
These grasses offer excellent cover (40%),<br />
as those in them cannot see farther than three<br />
feet in front of them. The constant waving of<br />
the grass also makes it difficult for an outside<br />
observer to notice movement on the plains.<br />
However, this also makes the grasslands popular<br />
with predators and prey alike. Double the<br />
chance for random encounters. Roll 1d8+27<br />
on Table 2 (in the “Random Encounter” section<br />
of the Appendix) to determine the type of<br />
encounter. Movement is at ½ the normal rate<br />
through the thick grasses.<br />
106. Neraka Forests<br />
There is 50% concealment (-2 to AC) while in<br />
these woods. Movement through these woods<br />
is at ¾ normal rates, except for elves, dwarves,<br />
and kender, who suffer no loss of movement<br />
in this terrain.<br />
107. Guarded Pass<br />
The steep canyon is suddenly blocked by<br />
a curtain wall. Battlements are arranged<br />
atop the wall and a single, open turret<br />
looks down on the arched gate. The wall<br />
itself is 30 feet high. Great spikes six<br />
inches in diameter protrude from the wall<br />
20 feet above the ground, as though to
stop some terrible onslaught. Before the<br />
walls is a moat 10 feet wide and 10 feet<br />
deep across the narrow canyon. A single,<br />
dark figure sits in a great throne in the<br />
open turret, looking down on the drawbridge.<br />
Standing to either side of the lowered<br />
drawbridge before the moat are two creatures<br />
that appear half-man and half-lion.<br />
Each wears black armor and a helm and<br />
carries a spear.<br />
The wall is actually a building 30 feet tall and<br />
30 feet across. The fortifications described<br />
are duplicated on both sides of the wall. The<br />
lich (on the throne) appears on whichever<br />
side is being approached. The gate opening is<br />
10 feet wide and a tunnel runs directly through<br />
to the opposite drawbridge. In the walls at the<br />
center of this tunnel are iron doors that open<br />
into the fortification.<br />
These are the contingents that guard the<br />
direct access to the heart of the empire. The<br />
PCs cannot see the 100 wemics that are<br />
within the structure, nor can they see the 20<br />
wraiths that live in the stone of the wall.<br />
The guard wemics ask any who approach<br />
for their Writ of Passage and inspect all wagons<br />
and effects of anyone entering this way.<br />
There is a base 70% chance that the wemics<br />
find anyone hiding in a wagon or using some<br />
other ruse (disguise, forged papers, etc.).<br />
If the wemics discover something they do<br />
not like, they attempt to detain the PCs in their<br />
dungeon until a slave caravan arrives. There<br />
is a base 20% chance that such a caravan<br />
comes within four hours (+10% cumulative for<br />
each four-hour period that passes). Detained<br />
characters are stripped of their weapons and<br />
armor. If the PCs are put on a slave caravan,<br />
go to Encounter 101.<br />
If the PCs fight the wemics, the lich first<br />
calls out the wraiths and then the rest of the<br />
wemics to back them up. Thirty wemics<br />
charge across the bridge and then the<br />
portcullis is closed and the bridge drawn up.<br />
An additional 50 wemics mount the battlements<br />
and fire down upon the PCs with longbows<br />
(they fire without regard for their comrades<br />
battling the PCs). If necessary, the lich<br />
also uses his considerable magic to aid the<br />
battle. This lich has the following spells for<br />
this day:<br />
1st-Level Spells: burning hands, detect<br />
magic, feather fall, hold portal, magic<br />
missile<br />
2nd-Level Spells: darkness ISfoot radius,<br />
detect good, mirror image, web, wizard<br />
lock<br />
3rd-Level Spells: dispel magic, fireball (x2),<br />
lightning bolt (x2)<br />
4th-Level Spells: dig, dimension door, fumble,<br />
wall of fire, wall of ice<br />
5th-Level Spells: Bigby’s interposing hand,<br />
cloudkill, teleport (x2), wall of force<br />
6th-Level Spells: control weather, globe of<br />
invulnerability, legend lore<br />
7th-Level Spells: mass invisibility, power<br />
word stun, reverse gravity<br />
8th-Level Spells: antipathy, Serten’s spell<br />
immunity<br />
9th-Level Spell: meteor swarm<br />
The large spikes protruding from the wall are<br />
designed to stop large creatures from charging<br />
the wall. They are placed three feet apart<br />
and can be climbed by anyone who can reach<br />
the wall. Characters can attempt to jump over<br />
the spike-filled moat and catch one of these<br />
to climb up the wall. A successful Dexterity<br />
Check must be rolled to catch a spike. Failure<br />
means the character has fallen into the moat<br />
(see following paragraph). While climbing<br />
among the spikes, a character gains a +4<br />
bonus to his Armor Class. He also attacks<br />
with a -4 penalty.<br />
Anyone falling into the moat falls on set<br />
spikes. These are spaced one foot apart. The<br />
spikes are three feet tall. Any character falling<br />
on them suffers 1d8 + his AC in damage. A<br />
character must roll a successful Dexterity<br />
Check in order to pull himself off these spikes.<br />
108. Geysers<br />
When the PCs are outside this hex, use the<br />
first boxed text. When the PCs enter the hex,<br />
use the second boxed text.<br />
In this direction, a perpetual fog seems to<br />
shift across the ground. Every now and<br />
then, puffs of cloud rise from the fog layer,<br />
only to drift back down.<br />
Low cone-shaped mounds are scattered<br />
about the damp ground. Rolling white<br />
clouds billow from the mounds to form<br />
the fog bank that envelopes you.<br />
While in this area, the fog created by the geysers’<br />
heat obscures vision beyond 10 feet. All<br />
missile weapons fired beyond that distance<br />
suffer a -5 penalty to the attack roll.<br />
Each geyser hole is 1d4+2 feet in diameter.<br />
All of the shafts are 100+1d20 feet deep. The<br />
sides of the shafts are smooth and wet. Treat<br />
these as slippery surfaces for climbing. The<br />
bottom of every shaft is a narrow bottleneck<br />
over a pool of boiling water that occasionally<br />
erupts into a geyser. A character immersed in<br />
this water receives 3d8 points of damage<br />
each round.<br />
PCs who climb down these shafts find themselves<br />
in Encounter Area 131 (Chapter 12).<br />
Each geyser follows its own timetable for<br />
eruptions. Some eruptions occur randomly,<br />
while others occur regularly. Each time the<br />
PCs encounter a new geyser, roll on the following<br />
table to determine that geyser’s eruption<br />
schedule.<br />
69<br />
Geyser Eruption Table<br />
D6<br />
Roll Eruptions Duration<br />
1 Regular—Every 4 min 1 Min.<br />
2 Roll 1 on d6 each rd 1d4 Min.<br />
3 Roll 1 on d4 each 2 rds 1 Min.<br />
4 Roll 1 on d8 each rd 1d3 Min.<br />
5 Roll 1 on d4 each rd 1 Min.<br />
6 Regular—every 30 min. 1 Min.<br />
If a character is in the shaft of a geyser when<br />
it erupts, the character is shot out of the<br />
geyser. The PC is thrown into the air to a<br />
height equal to his AC plus 10 feet. The character<br />
suffers 3d8 points of damage from the<br />
boiling water and also receives any falling<br />
damage that applies.<br />
109. Highlord’s Encampment<br />
Use the first boxed text if this occurs before<br />
Event 77. Use the second boxed text if<br />
encountered after Event 77.<br />
In the distance, dark banners flutter<br />
against the sky. Tents sprawl from in a<br />
camp. To one side, four dragons lie resting<br />
on the ground.<br />
This is the camp of a Highlord en route to<br />
Neraka. Which Highlord is here depends on<br />
where the camp is.<br />
Location Highlord Dragons<br />
109A Ariakas Red<br />
109B Lucien White<br />
109c Toede Green<br />
109D Salah-Kahn Black<br />
These dragons are all ancient and huge. One<br />
dragon is the personal mount of the Highlord.<br />
The others are the mounts of the Highlord’s<br />
guards.<br />
There are four tents: one large (30 feet in<br />
diameter) and three smaller (15 feet in diameter).<br />
The larger is occupied by the Highlord.<br />
Use the Looting Table from Encounter 95 to<br />
determine what can be found there.<br />
The ground here is trampled and the<br />
remains of a bonfire can be seen.<br />
If the ground is examined, the claw marks of<br />
dragons are also seen. The encampment is<br />
obviously small, but the presence of dragons<br />
indicates some powerful persons.<br />
110. Griffon’s Aerie<br />
You are at the base of a great cliff. There<br />
is a sudden flurry of movement in the<br />
nearby brush and a squawk.
Behind this brush, the PCs discover a fledgling<br />
griffon. It is obviously too young to be out<br />
of its nest.<br />
Should the PCs look overhead, they see in<br />
the craggy peaks the outlines of a nest some<br />
300 feet overhead.<br />
The climb to the nest is up a rock face that<br />
is almost smooth in many spots. Treat as a<br />
slightly slippery surface for climbing.<br />
Within 1d10 turns, the parent griffons<br />
return. If the griffons get the idea that the PCs<br />
are trying to harm their fledgling, they attack<br />
and fight until dead. If, however, they get the<br />
idea that the PCs are trying to return the<br />
fledgling to its nest, then the griffons are<br />
grateful and offer aid, including their services<br />
as mounts. They know the location of Neraka<br />
but are not familiar with its defenses or the<br />
schedules of its air patrols—they simply avoid<br />
the area.<br />
Should the PCs use these griffons as air<br />
mounts, each griffon can carry up to three<br />
characters. You should plot the griffons’ flight<br />
and note where they can be intercepted by<br />
Dragonarmy air patrols.<br />
111. Glacier<br />
Read the first description at the bottom of the<br />
glacier. Read the second description at the<br />
top.<br />
A lake of crystal blue water lies at the<br />
base of a vast glacier. The ice runs up a<br />
great canyon into the mist-shrouded<br />
Khalkist Mountains.<br />
This water is drinkable and there are fish that<br />
can be caught and eaten.<br />
The glacier face is sheer and 400 feet high.<br />
Climbing it is not a simple matter. Movement<br />
up the glacier face is at ¼ normal climbing<br />
movement. Each PC must check four times<br />
on the climb to see if he slips: at ¼ of the way<br />
up the glacier, halfway up the glacier, ¾ of the<br />
way up the glacier, and just below the glacier<br />
top.<br />
When the party first reaches each of these<br />
points, each PC must roll a Dexterity Check.<br />
A failed check means that the PC slides 20<br />
feet down the face of the glacier (1d6 points<br />
of damage). The PC keeps rolling Dexterity<br />
Checks until he either succeeds or reaches<br />
the bottom. Each failed check means that the<br />
PC slides 20 more feet and receives 1d6 more<br />
points of damage. A successful check halts<br />
the PC’s slide.<br />
Wise PCs rope themselves together for<br />
greater safety during the climb. If they are<br />
roped together, then when a PC slips, the PCs<br />
on either side of him also roll Dexterity<br />
Checks. If both of them succeed, no one falls.<br />
If either fails his check, the PC next to him<br />
rolls a Dexterity Check. This continues until<br />
one PC on either side of the falling PCs succeeds<br />
at a Dexterity Check. A PC who slips<br />
and is caught by a comrade suffers only 1d3<br />
points of damage.<br />
Note that a PC can voluntarily fail this<br />
check to slide down the glacier as a form of<br />
movement (he receives 10d6 points of damage<br />
per 100 feet). If he slides more than 100<br />
feet, he could end up in the glacier lake.<br />
Falling into the glacier lake is mainly just a<br />
very cold bath. However, characters who do<br />
not dry off right away (change into dry<br />
clothes) suffer ld4 points of damage from the<br />
cold for each of the following six rounds.<br />
The clouds drift below the top of the glacier.<br />
Cliffs form a crown around the top of the<br />
glacier bowl. Here, at the cap of the glacier, a<br />
second small lake is formed in the ice.<br />
A stream leads from this lake toward a cave<br />
to the east. Go to Encounter 112 if the PCs<br />
follow this stream.<br />
112. Icefall<br />
The water of the stream trickles into the<br />
mouth of a huge ice cave.<br />
If the PCs enter the cave, they encounter the<br />
following:<br />
Great frozen waves of ice coat the walls,<br />
floors, and ceilings of the room. Huge icicles<br />
hang down from the ceiling like an<br />
inverted forest of pine trees. Their<br />
columns obscure sight beyond a few feet.<br />
Along the ceiling, great fissures rake the<br />
ice as rivulets of water flow along the cavern’s<br />
roof.<br />
Though every indication should be given otherwise,<br />
the ceiling is perfectly safe. It is the<br />
floor that is dangerous. The floor ice has been<br />
undermined by the water from the top of the<br />
glacier. The water runs into holes in the ice<br />
underfoot. If the PCs examine the floor ice,<br />
they find that it is thin and could give way.<br />
While the PCs are in this area, roll ld20<br />
each round. If the result is greater than 10,<br />
the ice floor collapses under a PC (choose<br />
randomly). The PC falls 10 feet and starts to<br />
slide down an ice chute.<br />
This is the entrance to the ice chute<br />
(Encounter 132, Chapter 12). Go to that<br />
encounter if the PCs enter the ice chute.<br />
113. Ancient Road<br />
A cracked and broken cobblestone road<br />
can occasionally be seen under the<br />
grasses of the plain.<br />
Sections of this road appear through the<br />
grass of the plain. The sections are 4d100<br />
feet long and are separated by 1d100 feet of<br />
grassy plain.<br />
These sections of road appear to be just<br />
useless relics unless a PC tries to cross onto<br />
the road from the side. These are roads of the<br />
70<br />
ancients that were given special protection<br />
spells by wizards prior to the Cataclysm. An<br />
invisible tube encases these roads, now<br />
noticeable only over the exposed sections.<br />
These walls act as a combination major globe<br />
of invulnerability and wall of force.<br />
These tubes of magical protection are invisible<br />
and permanent. They stop entry and<br />
attacks only from the sides of the road: the<br />
ends of the broken roadway sections can be<br />
entered normally.<br />
The ends of these road sections dive into<br />
the ground and continue on as tunnels (these<br />
are the tunnels in area 124, Chapter 12).<br />
114. Drunken Camp<br />
The sounds of laughter roll across the<br />
plains from a group of squat, ugly tents.<br />
As you watch, one of the tents fall to the<br />
ground. This is followed by a roar of<br />
laughter.<br />
This is a camp of drunken soldiers of the<br />
queen’s own guard. They are returning from<br />
the front and are starting their revelry early,<br />
having captured three wagons of dwarven<br />
ale.<br />
The camp consists of a single fire with five<br />
tents about it. In addition to 24 horses still<br />
harnessed to the three wagons, there are<br />
eight cavalry horses for the troops. There are<br />
12 regular soldiers (8th-level human fighters)<br />
here in armor and an officer (10th-level<br />
human fighter). All of these soldiers possess<br />
signed and properly sealed authorizations to<br />
enter the blue inner city quarter of Neraka.<br />
The officer has authorization to enter the temple<br />
itself.<br />
Inside the fallen tent is the commander of<br />
this group: a drunken cleric of the Dark<br />
Queen. This man is 10th level and has authorization<br />
to visit the temple of the queen.<br />
Right now the soldiers’ minds are fogged by<br />
the ale. They are so far gone that they would<br />
mistake anyone who entered their camp for<br />
one of their own. These people are willing to<br />
give anything they have to the PCs (including<br />
their passports into the city, weapons, armor,<br />
etc.) in the spirit of good Dragon Empire fellowship,<br />
as long as the PCs are willing to<br />
drink with them. If the PCs refuse to drink with<br />
them, they become more outraged with every<br />
refusal. After the third refusal, they draw<br />
swords and challenge the PCs to a fight.<br />
For every drink the PCs take, they must roll<br />
a successful Constitution Check with a cumulative<br />
-2 penalty to the roll. Each time they<br />
fail, they move from one step of drunkenness<br />
to the next. Refer to the following table for the<br />
effects of drunkenness.<br />
Drunkenness Table<br />
Step Hit AC Give Tell Know<br />
1 -1 +1 1 1 4<br />
2 -2 +2 2 2 3<br />
3 -3 +3 3 3 2<br />
4 -4 +4 4 4 1
Step is the level of drunkenness.<br />
Hit is the penalty to the drunk’s attack rolls.<br />
AC is the penalty to the drunk’s AC when<br />
attacked.<br />
Give, Tell, and Know are all resolved by<br />
rolling 1d6 for the PC/NPC involved. If the<br />
result is the number shown or lower, then the<br />
effect takes place. Give means that the<br />
PC/NPC must give away one piece of equipment<br />
randomly asked for by another PC/NPC.<br />
Tell means that the PC/NPC must tell something<br />
significant about themselves. In the<br />
case of PCs, they say something that might<br />
give away the fact that they are not on the<br />
side of the Dragonarmies. Know is the roll<br />
required to understand the significance of<br />
anything. For example, a dragon soldier<br />
might be told by one of the PCs that they are<br />
actually spies coming to invade the temple of<br />
the queen, but unless the soldier makes a<br />
successful roll, he laughs it off as a very stupid<br />
joke. A successful check, however, means<br />
that the truth has penetrated. If this would<br />
normally cause the soldier to recognize an<br />
enemy, then he attacks immediately. Anyone<br />
shouting that the PCs are enemies causes all<br />
the others to make a check on the Know column<br />
to see if the facts penetrate. Even<br />
drunken and unknowing soldiers fight if they<br />
are attacked.<br />
All the soldiers and the cleric are at Step 4<br />
drunkenness.<br />
The three wagons hold huge casks of spirits.<br />
These are highly valued by the merchants<br />
and lords of Neraka, bringing 100 stl per gallon.<br />
There are 500 gallons in each of the huge<br />
wagons, except the last, which has been<br />
drained of three gallons.<br />
Each wagon is drawn by a team of eight<br />
large horses. In their rush to have a little fun,<br />
the soldiers have not yet unharnessed the<br />
horses. The horses are still hot and cannot<br />
travel more than two hexes before having to<br />
rest. If they are forced to travel more than five<br />
hexes, there is a 30% cumulative chance per<br />
additional hex traveled that they collapse. If<br />
so, there is a 60% chance that they die.<br />
The soldiers sober immediately if they see<br />
their wagons moving off.<br />
115. Citadel Flight<br />
A single grim tower juts from a cliff face.<br />
About its base are several scattered tents<br />
their flaps whipping in the rising wind.<br />
This appears to be a simple tower fortification.<br />
It is, however, much more. This ancient<br />
tower is being converted into a flying citadel<br />
by the Dragon Empire. The process involves<br />
installing magical devices by which the citadel<br />
is controlled.<br />
The remains of an ancient road lead up to<br />
this tower. Tents flank the road near the tower.<br />
There is no movement around the tents, as all<br />
here are working within the tower and they do<br />
not post a guard this far behind the lines. The<br />
remains of the main camp fire smolder. Footprints<br />
dot the area. Rangers have a 65%<br />
chance to determine that these prints are<br />
from both humans and draconians.<br />
The tents contain draconian armor, ration<br />
supplies, weapons (scimitars), and bedrolls.<br />
There are sufficient supplies for the 15 draconians<br />
who work here. Two tents contain the<br />
nonmagical belongings of a human mage and<br />
a human cleric of the Dark Queen.<br />
The approaches to the tower are unguarded.<br />
Read the following if the PCs go to<br />
the gate.<br />
The massive drawbridge crosses a dry<br />
moat. Its chains creak in the wind. From<br />
the tower can be heard a gentle chorus<br />
that seems to beckon you through the<br />
great black gate. The chorus is calming<br />
and seems to bring determination to your<br />
soul.<br />
The gods of good are trying to lead the PCs<br />
into this place. These sounds diminish only<br />
when the PCs leave the tower or capture it<br />
and journey in it over the plains of Neraka.<br />
116. Entry Hall<br />
The drawbridge on the west leads to a<br />
large entry way. Ancient carvings depict<br />
dragons fighting in the skies.<br />
In the center of the entry, a spiral staircase<br />
both rises up into the tower and<br />
down into the earth. Beyond that, to the<br />
east, an alcove leads to a great set of<br />
wooden double doors that exit to the<br />
south.<br />
This is the high tower stair (Encounter 117).<br />
Anyone who successfully listens at the double<br />
doors hears draconians muttering on the<br />
other side. They are speaking in common,<br />
discussing the fact that the banners they are<br />
laying out are essential to getting into Neraka.<br />
The doors lead into area 119.<br />
117. High Tower Stair<br />
The staircase leads up 100 feet to the Wind<br />
Captain’s Chair (Encounter 118) and down<br />
50 feet to the Wings of Stone (Encounter<br />
120).<br />
118. Wind Captain’s Chair<br />
Spiral stairs lead up to the top room of the<br />
tower. An iron ladder leads up to what<br />
appears to be the roof. The circular walls<br />
are without windows.<br />
A raised platform in the center of the<br />
room supports two pedestals three feet<br />
tall and three feet apart. Each highly<br />
ornate pedestal holds a shining black<br />
crystal globe. Between the pedestals are<br />
two circular depressions cut into the platform.<br />
These depressions are of the same<br />
black material as the globes.<br />
71<br />
On the ceiling above the platform is a<br />
glowing circle.<br />
This is the control area for the flying citadel.<br />
To operate it, a character need only stand<br />
with his feet in the circular depressions and<br />
place both hands on the globes. When this is<br />
done, a curtain of light acting as a wall of<br />
force descends with sudden brilliance from<br />
the circle carving in the ceiling. This wall<br />
encompasses the platform, protecting those<br />
within it. The ceiling inside the circle begins to<br />
glow softly and strange symbols appear there.<br />
The character is then in control of the tower’s<br />
flight.<br />
When the PCs enter the room, the magical<br />
levitation device is installed but the tower has<br />
not yet been pulled from the ground. A character<br />
standing in the depressions and touching<br />
the globes must think or speak any direction.<br />
The tower and its environs then begin to<br />
move in the stated direction (including down).<br />
When this first happens, the tower shakes as<br />
though wracked by a tremor. Characters<br />
inside the wall of force are not affected by this<br />
tremor. How long the tremor lasts before the<br />
tower breaks free depends upon the direction<br />
the tower is being told to move.<br />
Tower Breaks <strong>Free</strong><br />
Direction Die Roll Other Effects<br />
Up 1d4 See Flight below<br />
East 1d10 No movement<br />
West 1d6 *<br />
North 1d8 Move 1d10 feet<br />
South 1d8 No movement<br />
Down 1d10 Move 1d10 feet<br />
* The tower moves into its flight mode at<br />
ground level, skimming across the plains, ripping<br />
through the draconians’ encampment<br />
and still shaking from rubbing the ground.<br />
See “Flight” for effects.<br />
Consult the Tremor Effects table (in Event<br />
78) to determine the effects of the tower’s<br />
tremors. For example, if the controlling PC<br />
thought or spoke “west,” and the die roll was<br />
6, then for the next six rounds, increasingly<br />
bad tremors result, starting with Round 1 and<br />
moving up through Round 6 before the tower<br />
breaks free of the surrounding rock and<br />
becomes a flying citadel.<br />
Flight: The flying citadel is reasonably easy<br />
to control. The controlling PC just thinks or<br />
speaks the direction he wishes the citadel to<br />
travel and it does so. The PC need only think<br />
of it once and the citadel continues to move in<br />
that direction until the PC either removes a<br />
hand or foot from its position or commands<br />
another direction. When the controlling PC<br />
removes a hand or foot, the citadel slows to a<br />
halt at its current altitude and stays there until<br />
given another command.<br />
If a flying citadel is taken to ground level<br />
and continues to move, roll 1d6 and consult<br />
the Tremor Effects table. The tremor lasts for<br />
one round. For example, if a 4 is rolled, the<br />
tower (and those occupants not protected by
the wall of force) suffers one round of Round<br />
4 tremors and then stops moving. The tower<br />
can be refloated if commanded to go up. Collisions<br />
with other citadels result in a 1d10 roll<br />
on the Tremor Effects table.<br />
While flying, the character in control suffers<br />
no fatigue, as a special levitate spell supports<br />
him.<br />
The symbols on the ceiling change as the<br />
citadel moves. This is a map of the territory<br />
within five miles. It also registers the location<br />
of any other flying objects or creatures. Additionally,<br />
the PC at the controls can see through<br />
all the walls of the room as if they were transparent.<br />
119. The Great Hall<br />
Dusty air is lit by light from the narrow<br />
windows and from the holes in the ceiling.<br />
Along the floor are blue banners bearing a<br />
lightning symbol.<br />
There are five Sivaks in this room. If the PCs<br />
have been noisy, then the draconians are hiding<br />
in the rafters. They have polymorphed<br />
into the images of escaped slaves. They claim<br />
to be from Neraka and know secret ways into<br />
the city. They agree to go back with the PCs,<br />
but only if the PCs offer them more than<br />
5,000 steel pieces. If the PCs cannot come up<br />
with this amount, they settle for whatever the<br />
PCs have. They bide their time until there is<br />
an opportunity to surprise the PCs and capture<br />
them.<br />
If their disguise is detected, the draconians<br />
return to their natural forms and attack. The<br />
noise alerts 10 draconians working down in<br />
the Wings of Stone (Encounter 120). None of<br />
these draconians are armed and thus use<br />
their claws and teeth to attack.<br />
120. The Wings of Stone<br />
A vast chamber spreads below you.<br />
Dungeon cells appear at intervals all<br />
around the room. You are standing at the<br />
top of a staircase that curves down toward<br />
a light in the center of the floor below. Two<br />
dark figures huddle about this light, while<br />
others move in the shadows.<br />
The source of the light is a large crystal<br />
that sits upon a stone pillar in the center<br />
of the room. From the corners of the ceiling,<br />
four flying buttresses converge atop<br />
the pulsating crystal.<br />
This crystal is the magical device that pulls<br />
the tower from its roots and turns it into a flying<br />
citadel.<br />
The two figures have just finished their<br />
incantations over the device to activate it.<br />
They are a cleric of the Dark Queen and a<br />
wizard.<br />
The creation of citadels requires the combined<br />
spellcasting of a cleric and a mage.<br />
The cleric’s name is Ophar Jolianus. He is<br />
11th level and a loyal minion of the queen.<br />
His home is in Neraka and his assignment is<br />
to assist in the creation of citadels. He has the<br />
following spells:<br />
1st-Level Spells: cause fear curse, cure light<br />
wounds (x2), light<br />
2nd-Level Spells: hold person, know alignment,<br />
silence 15-ft radius, spiritual hammer<br />
3rd-Level Spells: animate dead, cause blindness,<br />
continual light, dispel magic<br />
4th-Level Spells: cure serious wounds, protection<br />
from good 10-ft radius, tongues<br />
5th-Level Spells: flame strike (x2)<br />
6th-Level Spell: flying citadel *<br />
The wizard’s name is Zarapham, a free wizard<br />
of the Blue Army and currently assigned to<br />
citadel creation. He is a mage of 12th level,<br />
more loyal to his own needs than to those of<br />
the Queen of Darkness.<br />
1st-level Spells: burning hands, hold portal,<br />
magic missile (x2)<br />
2nd-Level Spells: after self, darkness 15-ft<br />
radius, detect invisibility, rope trick<br />
3rd-Level Spells: fireball, Leomund’s tiny hut,<br />
lightning bolt (x2)<br />
4th-Level Spells: dimension door, fear, minor<br />
globe of invulnerability, wall of ice<br />
5th-Level Spells: cloudkill, teleport (x2), wall<br />
of force<br />
6th-Level Spell: flying citadel *<br />
* This spell is cast simultaneously by a mage<br />
and a cleric (these spells have just been cast<br />
by Zarapham and Ophar when the PCs enter<br />
area 120). Over six months and no less than<br />
40,000 stl are expended on the required<br />
material components.<br />
In addition, Zarapham has a scroll with a<br />
delayed blast fireball.<br />
Tactics: Zarapham and Ophar combine<br />
their talents to their best mutual advantage<br />
(as long as Zarapham feels it is in his best<br />
interest to do so). Zarapham begins with<br />
lightning bolt, while Ophar casts silence, 15-ft<br />
radius over the party. The following round,<br />
Zarapham casts rope trick, while Ophar keeps<br />
up the attack with flame strike. Should a third<br />
round ensue, Zarapham climbs the rope.<br />
Ophar then either blinds a character or casts<br />
another silence, 15-ft radius if necessary. The<br />
next round Zarapham casts either wall of<br />
force or wall of ice to hinder the PCs while<br />
Ophar climbs the rope. Once both cleric and<br />
mage are up the rope, Zarapham uses the<br />
scroll with delayed blast fireball (delay is one<br />
round) and ducks into the interdimensional<br />
area of the rope trick spell just before the fireball<br />
explodes.<br />
There are 12 cells here. There is one Kapak<br />
in each cell. They leap into battle against any<br />
intruders.<br />
Since the device is activated, anyone in the<br />
Wind Captain’s Chair who causes the tower to<br />
pull from the ground also causes the crystal<br />
to emit great pulses of energy. These pulses<br />
inflict 3d10 points of damage and impose<br />
paralysis on anyone in the room (1d10<br />
rounds, no saving throw).<br />
72<br />
121. Plains of Neraka<br />
Clouds boil darkly over the dread plain of<br />
Neraka. Before you, couched in the encircling<br />
teeth of the volcanic mountains, a<br />
cracked and broken land surrounds a<br />
sprawling, squalid city. A tall, twisted structure<br />
of black sits at the city’s heart. Your<br />
goal is in sight, the heart of the Dark Empire:<br />
Neraka and the Temple of the Queen.<br />
122. Codshome<br />
Pillars of rough-hewn stone stand in a perfect<br />
circle about the polished black floor<br />
of a small valley between the mountains.<br />
The stars of night are reflected from its<br />
surface.<br />
The mirror-like black surface reflects<br />
the night sky. Inexplicably, the stars overhead<br />
shine even in the brightness of the<br />
noonday sun.<br />
There are actually two locations for Godshome:<br />
122A and 122B. The former is a version<br />
of Godshome that has an entrance to the<br />
Glitterpalace in the center of its great circle<br />
(see Event 76 for details). The latter Godshome<br />
has no such doorway. It is at this second<br />
Godshome (122B) that the PCs awaken<br />
after completing the tests of Chapter 13 (see<br />
Epilogue).<br />
Anyone who inspects the mountain bowl<br />
can roll an Intelligence Check. If it succeeds,<br />
he notes that the constellations of the Queen<br />
of Darkness and Paladine are missing. If Paladine<br />
is standing in the bowl (regardless of his<br />
form) then a PC who succeeds at his check<br />
sees Paladine’s constellation in the bowl.<br />
The Glitterpalace exit in the center of the slab<br />
of stone (in area 122A) leads to Encounter 134<br />
in Chapter 13. Encourage the PCs to enter the<br />
Glitterpalace if they have not yet been there.<br />
There are two other exits from Godshome.<br />
One is to the northeast and the other to the<br />
southeast. Both are small openings three feet<br />
wide that run through a wall of rock 100 feet<br />
thick and high. Exits lead to the Misted Vales<br />
(Encounter 123). Do not let the PCs leave<br />
Godshome if they have completed the Tests<br />
of the Gods in the Glitterpalace (the next portion<br />
of the adventure starts here for them; go<br />
to the Epilogue).<br />
123. Misted Vales<br />
Scrubby oak trees claw up into the mists.<br />
Smells of warm earth and sagebrush pervade<br />
the fog as you make your way through the<br />
veiled canyons.<br />
These mists are magical. Only those favored<br />
by the gods can find Godshome. After the last<br />
PC has left Godshome, they cannot go back.<br />
In addition, all good and neutral characters<br />
gain a +2 bonus to any attack rolls made in<br />
the mist and a +2 bonus to their Armor Class.
This chapter details the PCs’ journey on a<br />
treacherous and dangerous path that snakes<br />
through volcanic shafts under the Neraka<br />
Plain. It eventually surfaces in several places<br />
around Neraka. The encounters in this chapter<br />
are shown on the Dark Network map.<br />
In the days before the Cataclysm, the<br />
people who inhabited this region were kind to<br />
the wizards who passed by. Because of this<br />
kindness, the wizards cast spells of protection<br />
upon the roads and buildings. When the Cataclysm<br />
came, these roads and buildings were<br />
buried but the spells continued to protect<br />
them. Though the spells did not hold up in<br />
some places, they nevertheless formed an<br />
underground network that could be traveled<br />
by the brave. This can be used to travel unnoticed<br />
into the heart of the Dragon Empire.<br />
Encounters<br />
124. The Dark Network<br />
Read the following if the players decide to<br />
investigate the broken road sections.<br />
The broken section of road you are on<br />
slopes down beneath the ground ahead.<br />
Ancient cobblestones, cracked and broken,<br />
are underfoot. The roof above you is<br />
smooth dirt, but you cannot seem to touch<br />
it-some force prevents you from feeling<br />
the dirt surface. At irregular intervals in<br />
the distance, the smooth semicircle of the<br />
ceiling is broken by a tumble of jagged<br />
stone as though the invisible supports<br />
holding the roof had given way. The tunnel<br />
continues beyond these broken areas.<br />
As the magical tunnel is only in force so long<br />
as the road remains in good repair, those<br />
places where the road broke down over the<br />
centuries have suffered from some collapse<br />
but are still passable. (Encounter 113<br />
describes identical roads above ground.)<br />
The underground roads are far more intact<br />
than those above ground. Sections of good<br />
tunnel are 1d10 hexes long, at the end of<br />
which is encountered a break in the road.<br />
These breaks are 1d100-foot-long stretches<br />
of jumbled rock.<br />
The underground roads also travel verti-<br />
73<br />
tally. The arrows next to the roads indicate<br />
the direction of slope-a ball dropped on the<br />
road rolls in the direction of the arrow. For<br />
each arrow on the map, that section drops 10<br />
feet. If the characters are moving in the direction<br />
opposite the arrows, then the road climbs<br />
10 feet for every arrow they pass. The more<br />
arrows encountered, the greater the slope and<br />
elevation change.<br />
While on the unbroken sections of road,<br />
nothing can attack into or out of the sides of<br />
the road. At the same time, there is no cover<br />
anywhere along the unbroken sections. The<br />
collapsed areas between offer considerable<br />
cover, but the ceilings in these areas are<br />
unsafe. Roll 1d100 when the PCs first enter an<br />
unsafe area and roll again each turn they<br />
remain there. If the result is less than 25%,<br />
then consult the Rock Slide Table.<br />
Rock Slide Table<br />
D100 Description THAC0 Dmg Passage<br />
1-10 Collapse * 0 5d10 Blocked<br />
11-13 Major Slide 5 4d10 <strong>Free</strong><br />
14-15 Rockfall 10 3d8 <strong>Free</strong><br />
16-20 Minor Slide 13 2d4 <strong>Free</strong><br />
21-25 Small Rocks 15 1d4 <strong>Free</strong>
* If the passage is blocked, the PCs can dig<br />
themselves out. Anyone involved in a collapse<br />
must immediately roll a successful Dexterity<br />
Check to avoid being buried in the rubble.<br />
Anyone buried suffers 1d6 points of damage<br />
for each round they remain buried. The<br />
collapse occurs 1d20-10 feet from the center<br />
of the party (negative numbers are in front of<br />
the center of the party, while positive numbers<br />
are behind the center) and extends for<br />
1d10 feet about this point. For example, if the<br />
1d20 roll is a 6, subtracting 10 leaves -4. The<br />
center of the collapse is four feet forward of<br />
the center of the party. The 1d10 roll is then<br />
made to determine how much of the tunnel<br />
collapses. If the result is a 5, then a total of<br />
five feet of tunnel falls (2 ½ feet on either side<br />
of the center of the collapse).<br />
To move rock and clear a passage, treat<br />
the material blocking the tunnel as very soft<br />
and loose. Each PC can dig out 30 cubic feet<br />
of material in an hour. The passageway is 10<br />
feet high and 10 feet wide. In the example<br />
given above, five feet of tunnel collapsed<br />
and there is 500 cubic feet of very soft material<br />
to dig out (assume that the tunnels are<br />
only 10 feet under ground and thus the collapsed<br />
material is only 10 feet deep). If all<br />
the PCs dig, it would take them about two<br />
hours to clear this tunnel. The time to reach<br />
a buried comrade depends on how deeply<br />
buried he is.<br />
Any rock slide causes rocks and boulders<br />
to fall. The falling rocks attack each PC (use<br />
the listed THAC0). A character who is hit<br />
receives the damage listed.<br />
125. Tunnel Light<br />
These locations are where the tunnels break<br />
onto the surface. The PCs can enter the Dark<br />
Network here.<br />
126. Brimstone<br />
Each area 126 connects to an area 102 in<br />
Chapter 11 (and on the Taman Busuk map).<br />
Read the following if the PCs decide to explore<br />
any of the volcanoes they encounter.<br />
You are on the rim of a volcano, looking<br />
down at the hot, steaming lava dome<br />
inside the volcano’s cone. The air has an<br />
unpleasant sulfur smell. Wisps of smoke<br />
swirl up from the cracks in the dome.<br />
Those who explore the dome must roll a successful<br />
Constitution Check or suffer the loss<br />
of 1 point of Constitution. This check is<br />
repeated each turn. A PC whose Constitution<br />
drops to 0 goes unconscious and receives<br />
ld8 points of damage each turn thereafter.<br />
The Constitution points are regained at a rate<br />
of 1 per turn after leaving the lava dome. Hit<br />
points are regained normally.<br />
The heat makes all warm-blooded creatures<br />
fight with a -2 penalty to their attack<br />
rolls after fighting for three rounds.<br />
Certain of the volcanos (A, C, D, E, F, and<br />
G) contain entrances to magical underground<br />
roads that are visible only from the lava dome<br />
surface. These run back down into the<br />
ground. If the PCs go down to the lava dome<br />
on one of these volcanos, read the following:<br />
To one side of the lava dome, a perfectly<br />
smooth circular tunnel runs down into the<br />
earth. There appears to be a road at the<br />
end of the tunnel.<br />
This is an entrance to the underground network<br />
of tunnels. Use the Dark Network map<br />
to determine what the PCs encounter.<br />
127. Fire Lake<br />
Unless coming from a magma tunnel, those<br />
journeying through this area encounter<br />
increasing heat from the moment they enter.<br />
A great cavern boils with searing heat and<br />
red light. The black ceiling seems to waver<br />
in the heat-charged air. Before you is a<br />
brimstone beach cluttered with many<br />
black rocks. Beyond that, a roiling sea of<br />
magma bubbles and froths in the cavern.<br />
Have the PCs roll Wisdom Checks. Those<br />
who succeed see black rocks floating in the<br />
magma. They are similar to those scattered<br />
about the brimstone beach. They all appear<br />
to be floating in the same direction.<br />
This peculiar lava rock, forged in the underground<br />
furnace of Krynn itself, has the unique<br />
property of being light, brittle to the strike of<br />
steel and very resistant to the transfer of heat.<br />
Indeed, these stones become only warm to<br />
the touch while in the lava lake.<br />
Each character can fashion 10 cubic feet of<br />
this stone per turn. The stone can be worked<br />
into the form of a crude boat or nearly anything<br />
described by the players. It is half as<br />
heavy as a similar construct made from wood<br />
and cannot be fashioned into anything smooth<br />
or refined in any detail smaller than six inches.<br />
While in the magma, 10 cubic inches of the<br />
rock dissolve per turn.<br />
Any rocks pushed out onto the surface of<br />
the magma lake float into the heat-wavering<br />
distance and disappear. Depending on which<br />
area 127 the PCs are in, the rocks either drift<br />
into a lava-filled tunnel (Encounter 128) at<br />
the far end of the lake, or they drift to shore<br />
near a normal tunnel (Encounter 124). Both<br />
driftings take two turns.<br />
The damage caused by proximity to the<br />
magma is as follows:<br />
Near (within five feet): 1d4 points per turn<br />
(successful saving throw vs. breath weapon<br />
for half damage)<br />
Touch: 2d6 per round (successful saving<br />
throw vs. breath weapon for half damage)<br />
In Lava: 8d6 per round (no saving throw)<br />
Two fire resistance spells cast on one character<br />
totally negate the effects of the lava and<br />
the character can even swim in it.<br />
74<br />
128. River of Fire<br />
The current of the lava lake pulls you<br />
toward a tunnel entrance at the far end of<br />
the lake. The roof and walls of the tunnel<br />
appear perfectly smooth. A dull red glow,<br />
punctuated by flashes of white flame,<br />
reflects off the gleaming tunnel walls.<br />
This is a river of magma that is coursing down<br />
an ancient roadway (identical to the roadways<br />
in Encounters 113 and 124). Like the<br />
other underground roadways, there are unsafe<br />
sections where the road has given way to<br />
rock slides and possible collapse (although<br />
the tunnel is not blocked because the material<br />
has melted away). Use the rock slide mechanism<br />
and Rock Slide Table in Encounter 124<br />
to check for rock slides.<br />
The effects of the safe and unsafe areas are<br />
quite different from those in normal tunnels.<br />
The magma in this tunnel flows in the direction<br />
of the arrows indicated on the Dark Network<br />
Map. The lava flows slowly and takes<br />
one turn to travel one hex on the map. The<br />
PCs can double this speed if they think to<br />
make paddles from the lava rock (swords and<br />
other forged weapons melt in the intense heat<br />
if used as paddles).<br />
A Dexterity Check must be rolled under the<br />
following circumstances.<br />
* When there is a rockfall (check for each<br />
character).<br />
* When an unsafe area is first encountered,<br />
the piloting character must roll a Dexterity<br />
Check. If he fails, the craft has struck<br />
an obstacle. Each character (including<br />
the pilot) in the boat then must roll a successful<br />
Dexterity Check to avoid falling<br />
into the magma.<br />
Certain precautions (such as tying oneself<br />
down in the boat), negate the need for a Dexterity<br />
Check. However, if the pilot of the craft<br />
fails his Dexterity Check to avoid an obstacle,<br />
there is a 10% chance that the craft slowly<br />
rolls over. This takes five segments. Those<br />
loose in the boat can roll a Dexterity Check<br />
(no adjustments) to walk around the craft to<br />
the other side without damage, but those tied<br />
to the craft could be in trouble.<br />
Unsafe areas are as subject to collapse and<br />
rock slides here as on the other roadways. In<br />
addition to the damage from falling rocks,<br />
magma is splashed onto each character (2d6<br />
points of damage). The collapse of the cavern<br />
ceiling dams up the flow of the river for 1d8<br />
rounds. The surface of the magma river rises<br />
one foot per round before the magma breaks<br />
through the obstruction and begins to flow<br />
again. The rush of such damned up magma<br />
moves twice as fast as normal for three turns.
129. Fire Storm<br />
The tunnel suddenly opens onto a large<br />
cavern, the top of which is hidden from<br />
your sight by sulphurous smoke. Before<br />
you, the river of heat meets its end...and<br />
you might meet yours as well. Here the<br />
river swirls in a great circle that spins<br />
slowly near the edges, but faster as you<br />
near the center. The center is a white-hot<br />
funnel leading down to certain doom. No<br />
ledges break the smooth walls of the cavern,<br />
but a tunnel can be seen across the<br />
cavern, 10 feet above the surface of the<br />
vortex of lava that is even now drawing<br />
you toward it.<br />
The river of lava has brought the PCs to within<br />
50 feet of the central downspout before they<br />
can react. The tunnel across the cavern is<br />
their only chance of escape. To reach it in<br />
their boats, the PCs must maneuver against<br />
the pull of the vortex. The tunnel is 70 feet out<br />
from the center of the vortex (20 feet farther<br />
than the PCs). The swirling of the vortex<br />
moves the PCs in line with the tunnel in 10<br />
rounds, but it also tries to pull the PCs into the<br />
center (and away from the tunnel).<br />
Each round, the pilot of the craft must roll a<br />
Dexterity Check. If he fails, the craft is pulled<br />
10 feet closer to the center. If he succeeds,<br />
then the craft moves no closer to the center<br />
and he rolls a second Dexterity Check. If the<br />
second check succeeds, the PC has piloted<br />
the craft so skillfully that he has actually<br />
moved it 10 feet farther away from the center<br />
of the vortex. The PCs’ craft must be 70 feet<br />
away from the center in the 10th round in<br />
order for the PCs to jump into the tunnel. The<br />
craft is close enough for jumping for only one<br />
round, and only two PCs can jump in that<br />
round. Anyone who jumps must roll a Dexterity<br />
Check. Success means he is safely in the<br />
tunnel; failure means he has fallen into the<br />
lava, but he is close enough to the boat that<br />
he can be dragged into it after one round (and<br />
8d6 points of damage).<br />
if the PCs have rope, a PC can jump into<br />
the tunnel (while the boat is close enough)<br />
and use the rope to hold the boat steady while<br />
the others jump out. Without rope, the boat<br />
must make several trips around the vortex<br />
before all the PCs can get out. Each trip takes<br />
20 rounds (so PCs can jump out on the 10th,<br />
30th, 50th, etc. rounds). A Dexterity Check is<br />
necessary each round, as outlined above, to<br />
see whether the craft moves closer to the vortex<br />
(keep an accurate, round-by-round record<br />
of the craft’s position).<br />
Neither grappling hooks nor loops of rope<br />
find any purchase on the smooth walls of the<br />
cavern and tunnel. If PCs can fly or employ<br />
other magical means to get to the tunnel,<br />
they can use a rope to pull the craft up to the<br />
tunnel only if each end of the rope has a combined<br />
Strength of 24 pulling on it.<br />
PCs who fall into the lava and try to swim<br />
suffer 8d6 points of damage per round and<br />
are sucked toward the center of the vortex<br />
just as if they were in a boat (but swimmers<br />
can roll Strength Checks to try to reach the<br />
tunnel).<br />
If the boat is pulled into the central funnel, it<br />
capsizes and sinks. Each PC suffers 10d6<br />
points of damage while in magma within 10<br />
feet of the funnel.<br />
130. FirefaII<br />
The slowly moving river of fire suddenly<br />
flows into a great, rough-walled cavern<br />
and fans out quickly over a broad lake of<br />
lava. One hundred feet ahead of you, the<br />
lake seems to end in a glowing crescent.<br />
Beyond the crescent, you see the other<br />
side of the cavern with a tunnel leading<br />
out. The tunnel and the surface of the lava<br />
beyond the glowing crescent are far below<br />
the lava lake you are now on. You realize<br />
that the glowing crescent is the top of a<br />
lavafall and you are being swept toward it.<br />
The lava is flowing 25 feet per round, so the<br />
PCs have about four rounds to react to their<br />
predicament. The walls of the cavern are 30<br />
feet from the PCs and they can reach either<br />
wall if the pilot rolls two successful Dexterity<br />
Checks in the next four rounds. The walls are<br />
rough enough to climb, if the PCs can somehow<br />
reach them.<br />
The falls are 300 feet high. PCs who go<br />
over the falls receive 30d8 points of damage<br />
in the churning, white-hot froth of the magma<br />
and then receive 8d6 points of damage each<br />
round in the lava after landing. PCs who climb<br />
to the bottom of the falls must roll successful<br />
Dexterity Checks at 200 feet and at 100 feet<br />
above the bottom of the falls. A failed Dexterity<br />
Check means the PC slips 20 feet (and<br />
receives 1d6 points of damage) and then rolls<br />
a second check. If the second check is also<br />
failed, the PC plummets to the lava lake<br />
beyond the falls, suffering full falling damage<br />
and 8d6 points of damage per round while in<br />
the lake (but he can swim to the rock wall in<br />
two rounds).<br />
If the PCs’ craft went over the falls, it is out<br />
in the middle of the lava lake, slowly heading<br />
for the tunnel. If the PCs act quickly, they can<br />
catch the boat at the tunnel entrance.<br />
131. Geyser’s Root<br />
The hot pool of a geyser bubbles amid<br />
slimy limestone rock formations that surround<br />
a hole in the ceiling. Warm, moist<br />
air fills your lungs. Stalactites and stalagmites<br />
stick out like bizarre teeth.<br />
Geyser root caverns can be reached from<br />
some of the ancient roads and from the surface.<br />
Use the procedures described in<br />
Encounter 108 to determine when and to<br />
what effect geysers erupt. The water in the<br />
geyser pool is boiling hot and inflicts 3d8<br />
points of damage to anyone falling in it.<br />
75<br />
132. Ice Chute<br />
This underground area can be reached only<br />
from the westernmost area 131 or area 112.<br />
The walls and floor here are very slippery.<br />
Characters who fall into the chute proceed<br />
toward area 133. The speed at which the<br />
characters travel through the ice chute<br />
increases as they slide down the slick surface.<br />
Each turn, have the players roll Dexterity<br />
Checks. A failed Dexterity Check means<br />
that the PC receives 2d4 points of damage<br />
sliding down the chute. If a player says he is<br />
trying to slow his rate of descent, have him<br />
also roll a Strength Check each turn. Success<br />
means that his character suffers only half<br />
damage if he failed the Dexterity Check that<br />
turn.<br />
The PCs careen down the twisting ice chute<br />
for 10 turns before finally catapulting into<br />
area 133 (3d6 points of damage, Dexterity<br />
Check for half damage).<br />
133. Ice Cavern<br />
Your torchlight glances off the icy teeth of<br />
the cavern. Sections of rock near the far<br />
end break through the ice.<br />
There is a tunnel (area 124) in the rocky section<br />
of this cavern opposite the ice chute<br />
(area 132).
This chapter details the adventures the PCs<br />
face inside the Glitterpalace of Paladine, if<br />
they enter it.<br />
Encounters<br />
134. Entrance<br />
Vast cathedral walls of crystal arch overhead.<br />
You stand on a platform at one end<br />
of a huge hall. The floor of the hall is of<br />
translucent white marble. A milky light<br />
pulses beneath its surface. At the far<br />
other end of the hall, twin doors of shining<br />
platinum reach from floor to ceiling.<br />
This hallway is the entrance to the audience<br />
chamber of Paladine. The platinum doors<br />
open into area 135. Each footstep a PC takes<br />
in the hall at a normal walking pace causes a<br />
portion of a song to be heard (only by the<br />
person walking). If all are walking, then all<br />
hear the song.<br />
The first step that they take starts the message-song<br />
given at the end of this Encounter<br />
description. Roll 1d20 to determine the first<br />
phrase that the PCs hear. Immediately ask<br />
each PC how he intends to move down the<br />
hall, offering options such as running, jogging,<br />
or taking a single step.<br />
Assign a value from 1 (slowest) to 14<br />
(fastest) to the player’s movement according<br />
to the guidelines on the table below. The<br />
Phrases per Step is the number of phrases you<br />
read before randomly rolling 1d20 for the<br />
next phrase.<br />
Chamber Song Table<br />
Speed Movement Phrases<br />
Value Equivalent per Step<br />
14 Running 1<br />
13 1<br />
12 1<br />
11 Jogging<br />
2<br />
10<br />
3<br />
9 4<br />
8 Walking All<br />
7 4<br />
6 3<br />
5 Slow Steps 2<br />
4 1<br />
3 1<br />
1 Single Step 1<br />
Example: Kronn the kender thinks that the<br />
floor looks suspicious, but he is anxious to get<br />
on with the adventure. He says he is going to<br />
run down the hall as fast as he can. The DM<br />
assigns a value of 12 to the kender’s speed<br />
(for humans it is 14 but the kender moves<br />
76<br />
slower than the rest of the party). The DM<br />
rolls 1d20 for the first phrase and gets a 7<br />
result. The DM says, “As each of your footfalls<br />
hits the floor a great chorus sings.” Then<br />
the DM reads Phrase 7. Since there is only<br />
one phrase to be read in sequence at this<br />
speed, the referee immediately rolls 1d20<br />
again. The result is a 12 and he then reads<br />
the words of Phrase 12. This continues until<br />
Kronn reaches the end of the hall. If Kronn<br />
says he is going to move a little slower, the<br />
DM might decrease his speed to 11. Now the<br />
DM rolls 1d20 and reads two complete<br />
phrases in a row before rolling randomly<br />
again for another phrase.<br />
Eventually the players should learn by trial<br />
and error just how quickly they should walk.<br />
Only full steps cause the floor to sing; smaller<br />
steps or shuffling feet do not bring on the<br />
music. Use the following chart to determine<br />
how many steps each PC takes before reaching<br />
the end of the 100-foot-long hall.<br />
Number of Steps to Walk the Hall<br />
Rate Steps Max. Messages<br />
Human 34 1 + 14 steps<br />
Dwarf 68 3 + 8 steps<br />
Kender 41 2 + 1 steps<br />
Elf 34 1 + 14 steps<br />
Gnome 68 4 + 8 steps<br />
Half Elf 34 1 + 14 steps
The message-song repeats after the final line,<br />
stopping when the PCs reach the far door.<br />
(1) To those who (2) tread these<br />
(3) hallowed halls,<br />
(4) And walk the ways of warring good,<br />
(5) the tests await (6) the fated ones,<br />
(7) the seven gems (8) of gods to win.<br />
(9) Blue wisdom (10) of the waters’ test,<br />
(11) the opal winds (12) of valor,<br />
(13) red heart, (14) black past,<br />
(15) cold water’s flame,<br />
(16) and future’s cloudy eye<br />
(17) will win.<br />
(18) Clear truth and<br />
(19) blessings grace your<br />
(20) quest then to fulfill.<br />
135. Nexus Chamber<br />
The platinum doors open to reveal a huge<br />
circular room. The domed ceiling glows<br />
with a white light. In the center of the<br />
room, circular steps lead up to a wide<br />
dais. Atop the dais is a railing and a huge,<br />
marble throne, over 100 feet tall. Four<br />
depressions in the shapes of gems are cut<br />
into the base of the throne.<br />
This room is the nexus for all the tests of the<br />
gods. It is here that the PCs must return the<br />
four gems found in the tests and place them<br />
in the throne to complete the tests.<br />
Each depression is shaped differently and<br />
accepts only one of the gems the PCs will find<br />
in the tests. The test that corresponds to the<br />
fate number of your campaign also contains a<br />
second gem—the diamond fate gem (see the<br />
Interlude preceding this portion of the adventure<br />
for how to determine your fate number).<br />
When the PCs place all the gems in their<br />
proper places, they have successfully completed<br />
the tests of the gods. Go to the Epilogue.<br />
The entrance to the first test appears when<br />
a PC mounts the dais for the first time. (Roll<br />
randomly to determine which of the three<br />
tests comes first.) A door shimmers into existence<br />
at floor level along one of the room’s<br />
walls. After the first test is completed, the<br />
door for the next test (roll randomly again)<br />
does not appear until the gem (or gems) from<br />
the previous test is placed into its depression<br />
in the throne.<br />
Refer to the Interlude preceding this portion<br />
of the adventure for how to determine the fate<br />
number. This determines which test (and<br />
which alternate ending to that test) holds the<br />
diamond fate gem, as given below:<br />
Fate Enc.<br />
Number Area<br />
1 136<br />
2 136<br />
3 137<br />
4 137<br />
5 138<br />
6 138<br />
Alt.<br />
Ending<br />
136X<br />
136Y<br />
137X<br />
137Y<br />
138X<br />
138Y<br />
From this central Nexus Chamber, all three<br />
test areas can be visited. In each test area<br />
there is at least one way back to this room.<br />
Each time the PCs successfully complete a<br />
test, they are healed of all wounds upon<br />
returning to this room. PCs who die during a<br />
test are found alive and waiting here when the<br />
rest of the group completes the test.<br />
136. Test of Wisdom<br />
After stepping through the door to this test,<br />
each PC appears in a separate cell (see<br />
Encounter 136A on the map for this test). If<br />
there are more PCs than cells, then some of<br />
the cells have two prisoners.<br />
This building was built in the cone of a volcano<br />
by a renegade gnome. The area has<br />
only one exit—up. Yet the direction of up<br />
might well be a relative term in this building.<br />
There are two strange features of this building:<br />
twisting passages and inverted rooms<br />
and stairs.<br />
The twisted passages are marked with<br />
crosshatchings on the map. These corridors<br />
appear to be normal passages from one end<br />
to the other. Those moving through them<br />
encounter no strange feelings or unusual<br />
experiences. However, a spatial distortion is<br />
taking place in these corridors that twists the<br />
space from one end to the other. Effectively<br />
they allow a person in a normal room to pass<br />
into an inverted room or stair without noticing<br />
any real change in the gravity. This is a natural<br />
phenomenon of this particular area and<br />
is therefore not subject to detect magic, dispel<br />
magic, or like spells.<br />
The inverted rooms and passages seem<br />
perfectly normal to the PCs, but gravity here<br />
functions in reverse.<br />
The floors of this bizarre construction are<br />
covered with water. Due to the strange spatial<br />
relationships between the rooms and the<br />
reversed gravity, water is constantly flowing<br />
down both the normal and the inverted stairs.<br />
The direction of the flow of this water is indicated<br />
by the arrows on the map.<br />
The areas that are shaded on the map of<br />
this test are subject to reverse gravity spells.<br />
136A. Water Cell<br />
A rushing sound fills the 10-foot-square<br />
cell you find yourself in. You are standing<br />
in two-foot-deep water that swirls about<br />
your feet. The iron gates that block your<br />
way are eaten thin by rust. Outside the<br />
cell, dark water moves down the corridor.<br />
The cell gates are brittle; a successful<br />
Strength Check with a +5 bonus breaks the<br />
portcullis bars in a shower of rusting flakes.<br />
In one of the cells (determine randomly)<br />
there is a gnome who says his name is Gniparalanishmarilish...<br />
well, humans call him<br />
Gnip for short. He sits on a sodden wood<br />
stool, holding a dripping wet parchment<br />
clasped to a board as he sketches with a<br />
damp charcoal. His sketch is smudged<br />
77<br />
beyond all recognition although the gnome<br />
insists that it is a highly detailed technical<br />
drawing.<br />
The gnome does not want to be bothered. A<br />
mad wizard put him in this cell months ago<br />
and the gnome decided that he would spend<br />
his time most profitably by designing a much<br />
improved gnomish version of the cell. He is<br />
not yet done with his design and wants to<br />
remain in his cell until finished.<br />
At some point in his discussion with the<br />
PCs, Gnip gives them one piece of advice: “If<br />
you are on a test, then remember that it is a<br />
wise one who can determine the truth when<br />
the very appearance of things lies.”<br />
136B. Guard Post<br />
This guard room is flanked by two raised<br />
platforms on either side of the arch. The<br />
water cascades into the room from a staircase<br />
at one end of the room and runs out<br />
the opposite archway. Three large, muscular<br />
clay statues stand on each of the<br />
raised platforms. There appears to be a<br />
niche behind each statue.<br />
These are six clay golems. They do not allow<br />
the PCs to pass. They attack the PCs from the<br />
platforms, but do not go into the water as it<br />
causes them to dissolve.<br />
Splashed water inflicts 1d10 points of damage<br />
to these golems and they suffer 10 points<br />
of damage every round they stand in the<br />
water. The mere threat of being splashed by<br />
water makes the golems cower. Though they<br />
cannot communicate vocally, they are willing<br />
to give up anything in the area (including the<br />
Gem of Wisdom) if the PCs stop splashing<br />
water on them.<br />
In the niche behind one of the golems<br />
(determine randomly) is the Gem of Wisdom.<br />
This is what the PCs need to get out of this<br />
test. Now they must escape from this dungeon<br />
(only through Encounter 136T).<br />
136C. Circular Stair<br />
Rushing water cascades down the circular<br />
steps in a steady torrent. Mosses drape<br />
the walls, swaying as their tips drag in the<br />
water below.<br />
The stone is slippery and a Dexterity Check<br />
must be rolled during any combat in this area.<br />
A failed check means that the PC has lost his<br />
footing and fallen.<br />
136D. Weapon Locker<br />
The walls of this water-soaked room are<br />
hung with the most bizarre assortment of<br />
weapons imaginable. Swirling water two<br />
feet deep moves through the room and<br />
out an archway.
The weapons in this room are of gnomish<br />
design. They include the following:<br />
Gnomish Weapon Attributes<br />
Name Range Dmg Oops Effect<br />
Netflinger 10 1d4 50% Web<br />
Bolachucker 15 1d6 30% W eb<br />
Flasklobber 25 fire 60% Fire<br />
Range is the range of the weapon in feet.<br />
Dmg is the weapon’s damage.<br />
Oops is the percentage chance of malfunction.<br />
Web is as per a web spell.<br />
Each time a gnomish weapon is used, it<br />
might malfunction. This “Oops” number must<br />
be rolled against before each use. If the PC<br />
rolls below this number, the weapon has malfunctioned<br />
and does not operate. A second<br />
Oops roll is then rolled. If the second roll also<br />
fails, then the weapon discharges against its<br />
wielder with full effect.<br />
136E. Anteroom<br />
Water flows lazily onto this landing from a<br />
side corridor before cascading down the<br />
steps. A low platform opposite the stairs rises<br />
to a doorway inches above the water.<br />
136F. Sitting Rooms<br />
Two ogres are arguing at the other end of<br />
the hall. “I never!” says the one on the left.<br />
“I am always most diligent in my guard<br />
work. Asleep indeed!”<br />
“You were too. You snored and nearly<br />
knocked me over!” says the other.<br />
“Snore! You want to talk about habits?<br />
What about that belching of yours?”<br />
These ogres have been placed here to protect<br />
a treasure. Neither of them knows or cares<br />
what the treasure is. The fact that whoever<br />
put them here did not think that either could<br />
guard the treasure alone has made these two<br />
most quarrelsome.<br />
The ogres notice the PCs if they make any<br />
sudden moves or noise as they pass into the<br />
hall. The ogres immediately wade into melee.<br />
The ogres hesitate one round if the PCs<br />
make a comment about either one of them.<br />
They would rather argue than guard and the<br />
PCs can get past without a fight if they can<br />
keep the argument going.<br />
136G. Bedroom<br />
A carefully made canopied bed sits in the<br />
middle of the room. A map is on a table to<br />
one side, held down by a glass object.<br />
The map is a confused scrawl without meaning<br />
(but the PCs do not know that). The glass<br />
object, however, is a special magical device.<br />
It looks like a water-filled glass egg. Inside it<br />
is a figure of a woman. The figure always<br />
faces up and is unaffected by the reverse<br />
gravity areas.<br />
136H. Dining Room<br />
A long table is laden with delicious fruits<br />
and cooked meats.<br />
This magical food bloats those who eat it. Anyone<br />
who eats this food must roll a successful<br />
saving throw vs. spell at a -10 penalty, or else<br />
he begins to stuff his mouth. An affected PC<br />
fights anyone who tries to stop him from eating<br />
the wonderful meal. Ten minutes later he finds<br />
that he is growing fatter. Each PC eating here<br />
gains 20+1d20 pounds of flab. His armor no<br />
longer fits and he has to remove it. (The PC<br />
returns to normal size after 1d12 turns.)<br />
136I. Trophy Room<br />
Many torches blaze high to light the lofty<br />
ceiling of this room. Their light glances off<br />
the polished surface of a 50-foot-tall<br />
statue of a gnome. The entire surface of<br />
the statue shines with a metallic gleam.<br />
This statue commemorates the gnome who<br />
built this place. The statue is entirely platinum<br />
and 100% magic resistant. It is far too<br />
big to fit through any of the doors. It also has<br />
a curse placed on it so that anyone who tries<br />
to sell it finds the buyer suddenly filled with<br />
suspicion and unwilling to make a deal. You<br />
may inform the PCs that the statue is easily<br />
worth over one million steel pieces. The<br />
statue is also immune to physical attacks.<br />
136J. Throne Room<br />
An ornate throne sits on a dais raised two<br />
feet above the level of the water. The<br />
water rushes into the room from a circular<br />
staircase opposite the throne.<br />
136K. Grand Stair<br />
A 30-foot-wide staircase descends into<br />
the darkness below. Water cascades down<br />
the stairs in a foaming white waterfall.<br />
The stairs connect the throne room (Encounter<br />
136J) to the ballroom (Encounter 136L).<br />
136L. Ballroom<br />
Hip deep in water, 10 dwarves stand panting<br />
in this room. They seem exhausted as<br />
they wade heavily through the water<br />
toward the platform opposite the staircase.<br />
Their progress is barely noticeable.<br />
A large box adorns the platform.<br />
78<br />
This is a magical musical box. It plays the<br />
same tune over and over with a one-meleeround<br />
break between each repetition.<br />
While the musical box is playing, an Otto’s<br />
irresistible dance spell takes effect. This lasts<br />
for five melee rounds. All characters in the<br />
area are affected. The dwarves are exhausted<br />
from the constant dancing.<br />
The dwarves attack the PCs whenever the<br />
musical box is not playing.<br />
136M. Chamber<br />
A small chamber stands at the exit from a<br />
circular staircase. Two exits face each<br />
other across the room. Water cascades<br />
over the floor and exits through both<br />
arches.<br />
The walls here are inlaid with carvings.<br />
The carvings show gnomes and dwarves<br />
walking and conversing. Half of the carvings<br />
seem to be upside-down.<br />
136N. Great Hall<br />
Water rushes down the wide staircase at<br />
the end of the hall. Two doors exit to one<br />
side.<br />
136O. Library<br />
The shelves of this room are lines with<br />
myriads of bound books. Two doors stand<br />
on either side of the entry hall.<br />
All of the books in this library are filled with<br />
symbols with no spaces between them. These<br />
make sense only to those who speak<br />
gnomish. This entire library is needed to write<br />
the full name of the gnome who built this<br />
place. Since gnomish names detail the entire<br />
history of their family, their names do get<br />
rather long.<br />
All of the books are in order except for one<br />
titled Secret Ways of the Gully Dwarves. If this<br />
book is pulled from the shelf, the secret door<br />
opens.<br />
136P. Trap Room<br />
A chest sits at the exact center of the<br />
room. The walls are covered with intricate<br />
patterns that seem to shift as you move.<br />
Ask the players for their PCs’ Intelligences.<br />
Roll some dice. Regardless of the result, tell<br />
one of the players that his character notices<br />
small holes all over the walls. Have everyone<br />
roll Wisdom Checks. Anyone who is successful<br />
realizes that there is a hairline crack on the<br />
ceiling and floor. The crack is in the shape of<br />
a square 20 feet on a side.
This is not a trap, but a gnomish model of a<br />
trap. There is no danger here at all. Inside the<br />
chest is 5,000 gold pieces.<br />
136Q. Picture Room<br />
A life-like portrait of a weeping elven<br />
woman hangs on the wall. A sign below<br />
the painting says, “Do not touch.”<br />
Any who approach the painting find that it<br />
gets more life-like the closer they get. Have<br />
all PCs within five feet of the painting roll a<br />
Wisdom Check to see if they notice that real<br />
tears are running down her cheeks.<br />
Anyone who touches the painting releases<br />
the groaning spirit that has been trapped<br />
there. It attacks immediately.<br />
136R. Great Tower Stair<br />
The dark circular stair leads to regions<br />
both above and below. The sound of thunder<br />
rumbles constantly from above.<br />
The thunder actually comes from a storm<br />
above the magma pool in area 136s. This<br />
stair is guarded by an invisible stalker.<br />
The stair is 100 feet long in both directions<br />
from this point (goes up to Encounter 136s<br />
and down to Encounter 136T).<br />
136S. False Dawn<br />
You step from the long stair onto the top<br />
of a squat tower jutting up five feet from<br />
the surrounding rock. The tower sits at<br />
the bottom of a great lava flue. High overhead<br />
in the throat of the volcano, black<br />
clouds whirl. The sound of thunder rocks<br />
the stones under your feet. The wind from<br />
the storm is tremendously violent, making<br />
it difficult to hear your fellow adventurers.<br />
This is not the way out. The PCs are standing<br />
upside down looking from the base of a lava<br />
dome into the heart of the volcano. The<br />
reverse gravity field stops halfway between<br />
the PCs and the lava bubbling at the base of<br />
the shaft. The turbulent atmosphere is the<br />
result of the heating of the air and moisture<br />
leaking into this area from the surrounding<br />
fissures. These factors combined with the colliding<br />
gravity fields have created a tremendous<br />
storm in the center of this shaft.<br />
The walls of this shaft are cool near the<br />
tower. As the PCs move higher up the wall,<br />
the wall gets hotter and hotter. The wall is too<br />
hot to climb (without magical protection)<br />
beyond 50 feet from the tower.<br />
136T. Depths of <strong>Free</strong>dom<br />
If this is not the fate test as described in<br />
Encounter 135 (for fate numbers 1 or 2), then<br />
use this encounter. If this is the test, then go<br />
to Alternate Encounter 136X or 136Y, as<br />
appropriate to your fate number (X for fate<br />
number 1; Y for fate number 2), instead of<br />
using this encounter.<br />
The staircase ends at a trap door. Wisps<br />
of sulfuric smoke swirl up through the<br />
cracks in the door.<br />
This is actually the way out. The inverted stair<br />
here goes out onto a lava dome and out.<br />
Those opening the trap door, however, might<br />
have a different impression. The sulfuric<br />
smoke boils up into the room and only a dull<br />
red glow can be seen through the trap door.<br />
The glow comes from sunlight shining through<br />
the smoke.<br />
Anyone who lowers himself through this<br />
opening passes into a normal gravity area 10<br />
feet down. Ropes lowered into this area coil<br />
around as they sit suspended between the<br />
normal and reverse gravity fields. Anyone<br />
who jumps down the hole falls back down into<br />
the reverse gravity area, reappearing in the<br />
opening they just jumped through.<br />
The reverse gravity area, however, extends<br />
only below the trap door’s five-foot-square<br />
opening. If the PCs move out of this column,<br />
they land on the lava dome in normal gravity.<br />
Once on the lava dome, the smoke clears and<br />
they can see where they are. The vertical<br />
sides of the volcano throat can be climbed.<br />
Ten feet up the throat, the PCs see a cloud<br />
descend from the sky and envelope them.<br />
When the cloud disappears, they find that<br />
they are 10 feet up the walls of the Nexus<br />
Chamber (Encounter 135).<br />
136X. Fizban is Paladine<br />
Substitute this encounter for 136T above if<br />
this test holds the fate gem of Paladine (i.e., if<br />
the fate number for your campaign is #1).<br />
The bottom of the stair opens suddenly<br />
into a great chamber. A terrible darkness<br />
and evil fill the great portal before you<br />
and hold your attention. From the black<br />
depths, the five-headed form of a dragon<br />
emerges. Takhisis herself blocks your<br />
way!<br />
Takhisis engages the PCs for three rounds of<br />
combat. Then Fizban reveals himself to be<br />
Paladine and attacks the queen as follows:<br />
Suddenly Fizban strides forward, shining<br />
in a brilliant white light. The magical<br />
power from his upraised arms locks with<br />
the queen’s darkness and presses her<br />
back across the portal. Fizban begins to<br />
weaken yet continues. At last the portal is<br />
sealed and the Queen of Darkness leaves<br />
the world. Fizban falls spent to the ground.<br />
79<br />
His body flares with sudden light and disappears.<br />
A gleaming white diamond<br />
appears where his body lay.<br />
After this encounter, any exit through which<br />
they take the diamond and the Gem of Wisdom<br />
leads them to area 135.<br />
136Y. Waylorn is Huma Returned<br />
Use the first section of boxed text from<br />
Encounter 136X. Takhisis again fights for<br />
three rounds before you read the following:<br />
Suddenly the light of knowledge dawns on<br />
Waylorn’s face. He raises his hands above<br />
his head and a beautiful Dragonlance of<br />
ancient work and design appears. Charging<br />
forward, he presses the queen back<br />
and vanishes with her into a black nothingness.<br />
Both are gone, leaving only a<br />
white diamond in their place.<br />
All exits from this room return the PCs to area<br />
135, if they take the diamond and Gem of<br />
Wisdom with them. Upon arriving there, the<br />
PCs find Waylorn well and with a clear memory.<br />
He knows now that he is Huma and that<br />
he alone can drive the Dark Queen back into<br />
the Abyss as he did once so long ago.<br />
137. Test of Valor<br />
The PCs appear at the southwestern door in<br />
area 137A. If they open that door, they see<br />
the hordes of draconians described in that<br />
encounter.<br />
137A. Throne Room<br />
Flickering orange light and a hot wind<br />
wash over the throne room from a broken<br />
window on the west wall. At the far end of<br />
the hall from this window, a raised dais<br />
supports a throne. A blue banner draped<br />
behind the throne is emblazoned with the<br />
kingfisher sign of the Solamnic Knights.<br />
On the throne, in a blue tunic with the<br />
same symbol, a boy sits.<br />
This is the throne room of Dargaard Keep as<br />
it appeared when it fell to the forces of the<br />
Dragon Highlords. The boy claims to be<br />
Sturm Brightblade, heir to the throne of Dargaard.<br />
While the boy certainly looks as Sturm<br />
did years ago, Sturm was not present at the<br />
fall of Dargaard and was well into his manhood<br />
at the time the incident actually took<br />
place. (This is not really Sturm, but merely a<br />
creation of Paladine’s tests. His demeanor is<br />
that of a Knight and he lives up to all the most<br />
important codes of Knighthood.)<br />
The boy appears to be about eight years<br />
old. He is quiet and polite and has an air of<br />
royalty and honor about him. He explains that
all those he knows have gone to defend the<br />
wall. He is the last of his house and heir to this<br />
throne—it is for him that the evil army now<br />
comes. He asks the PCs to aid his escape. If<br />
the PCs do not find the secret door behind the<br />
throne by the time the Dragonarmy breaks<br />
into the room, he leads them to it.<br />
Anyone looking out the broken window<br />
sees the following:<br />
A sea of draconian troops extends as far<br />
as the smoke and fires permit. The wall<br />
below has fallen to the draconians, who<br />
pour over It like rats. They cross the courtyard<br />
and are entering the central keep<br />
In moments these forces are at the doors. The<br />
westernmost doors of this room are held by a<br />
heavy oak bar, yet it will not hold long. The<br />
shouts of human mercenaries in the Dragonarmy<br />
come from the other side of the door.<br />
Axes thud against the strong wood.<br />
The first splintering of the wood takes place<br />
1d4 rounds after the PCs arrive. Through this<br />
two-foot-wide hole, the PCs can see the corridor<br />
beyond filled with evil troops. The splintering<br />
of wood continues for 1d8 rounds, after<br />
which the door sunders.<br />
Once the door is broken, a group of 1d6 + 14<br />
Kapak draconians and 1d8+5 10th-level<br />
human fighters enters the room. Roll 1d6<br />
each round. If the result is a 5 or 6, another<br />
group enters the hall. They try to press the<br />
PCs back against the throne dais area and<br />
block off the obvious exits.<br />
The halls leading from this room are filled<br />
with draconians—the only escape route is the<br />
secret door.<br />
137B. Weapons Room<br />
Twenty oil flasks, a broadsword +3, three<br />
long swords +2, and four battle axes +2 are<br />
here on display.<br />
137C. Treasury<br />
The treasury contains 650 pp, 9,500 sp, and<br />
12,000 cp, found in leather bags. A ring of<br />
protection +2, a wand of wonder, and a staff<br />
of striking are also here.<br />
137D. Drop Sphere<br />
A short corridor leads to a landing that<br />
extends over a 30-foot-diameter shaft. In<br />
the shaft at ground level, a glass bubble<br />
hangs from steel pins. The sides of the<br />
bubble fit perfectly against the smooth<br />
sides of the shaft. A ladder leads to a hole<br />
at the top of the bubble. High overhead,<br />
dim light can be seen.<br />
This is an escape bubble built into the keep. A<br />
group of people climb into the glassteel bubble<br />
through the hole in the top. A lever on one<br />
side of the bubble retracts the pins holding it<br />
and it drops freely down the shaft. The falling<br />
sphere compresses the air under it, creating a<br />
gradually increasing resistance. This slows<br />
the descent until the bubble nears the bottom<br />
of the shaft. There the operator releases the<br />
lever and the pins spring out again and stop<br />
the bubble.<br />
The bubble stops with an exit one foot<br />
above the top of the bubble. The exit is<br />
designed to fit flush with the sides of the shaft.<br />
The door is steel and opens via an inset handle.<br />
The door can be locked from the other<br />
side with three steel rods.<br />
The draconians discover this area 1d6 + 10<br />
rounds after the PCs leave the bubble. They<br />
send 15 Kapak draconians gliding down to<br />
find Sturm. These are followed (in 1d6+10<br />
rounds) by the group detailed in area 137A.<br />
They descend using rope. If the steel door is<br />
locked, however, the evil troops are delayed<br />
for three hours before opening it.<br />
The bubble retains the compressed air<br />
under it. If released, the bubble rises 1d10+15<br />
feet, completely blocking the shaft. It takes<br />
four days to get past this barrier.<br />
137E. Main Tombs<br />
Artistically sculpted stonework blends<br />
with the natural caverns here. Broad steps<br />
descend from a platform to the smooth<br />
dirt floor. A steel door stands at the back<br />
of the platform. Three tunnels go off to<br />
the north, south, and east.<br />
Several large crypts are scattered about<br />
the cavern. Dust lies heavily in the carving<br />
on their lids, obscuring the details.<br />
These tombs are those of ancient Solamnic These statues are normal and the eye move-<br />
Knights who once served in Dargaard Keep. ment is a figment of the PCs’ overactive imag-<br />
The lid carvings, if blown clear of dust,<br />
reveal the names of some of these Knight<br />
inations<br />
families. The following are typical Solamnic<br />
family names:<br />
137H. Argot Brightblade<br />
Strongbow<br />
Coldedge<br />
Ironforge<br />
Truelance<br />
Solanius<br />
Swiftarrow<br />
Firehilt<br />
Justman<br />
Trueheart<br />
Vurtainus<br />
Steele<br />
Oakshield<br />
Mordanus<br />
Corilainus<br />
Palatinius<br />
These are the resting dead. Their bones lie<br />
quiet within their tombs.<br />
137F. Northern Tombs<br />
The cavern extends northward, ending in<br />
an edifice of stone worked directly to the<br />
wall. Letters over the stone proclaim the<br />
name “Brightblade.” Between the southern<br />
opening and this great tomb, four<br />
large crypts intervene.<br />
To the east of the crypts is a tunnel four feet<br />
in diameter that leads to area 137J. The tomb<br />
to the north has a large doorway blocked by a<br />
80<br />
swinging gate of cross-hatched iron bands.<br />
This leads to area 137G.<br />
There are four revenants inside each of the<br />
four crypts. These revenants remain dormant<br />
until the PCs open either their crypts or the<br />
gateway to the Brightblade Tomb.<br />
The revenants were knights destroyed suddenly<br />
by the Cataclysm while protecting their<br />
masters. Their thirst for vengeance against<br />
whoever provoked this death is so great that<br />
they have remained all these years to determine<br />
who is at fault and to exact justice for<br />
these deaths. When encountered, they do not<br />
attack immediately but one of their number<br />
asks the PCs: “Are you the one?”<br />
“Are you the one?” actually means, “Are<br />
you the one who caused our deaths and those<br />
of our masters?” If the PCs answer “yes,” then<br />
the revenants attack until either they are dead<br />
or they have killed the person who answered<br />
in the affirmative. Any other answer causes<br />
the revenant to reply, “Follow me.” The<br />
revenant leads the PCs to area 137s to be<br />
taken before the court of the revenant king.<br />
PCs who refuse to follow are attacked by the<br />
revenants, but these attacks are to subdue.<br />
If the PCs open a crypt, the revenants lay<br />
still until a PC comes close enough to be<br />
touched. A revenant then grabs the PC and<br />
asks its question, “Are you the one?” Once<br />
one of the revenants is thus awakened, all the<br />
revenants here emerge from their crypts.<br />
137G. Brightblade Crypts<br />
Great statues line the walls of this hallway.<br />
The eyes of the statues seem to follow<br />
you.<br />
Faded frescoes cover the walls of this<br />
room. In the frescoes, vast armies collide<br />
and fight wars long since settled. In the<br />
center of the room, a single crypt stands.<br />
The carving on the end of the crypt identifies<br />
the occupant as Argot Brightblade. The crypt<br />
is a transit point to another test. If the PCs<br />
open this tomb, they are engulfed in white<br />
light streaming from the crypt. They can enter<br />
another test by walking into the light. But PCs<br />
who move to another test in this way do not<br />
go through the Nexus Chamber and therefore<br />
do not regain their lost hit points. Additionally,<br />
those who enter the light and subsequently<br />
return to the Test of Valor start here rather<br />
than back at the beginning (area 137A).<br />
Roll 1d6. The result determines which test<br />
the PCs go to. Note that there are two restrictions:<br />
the number rolled cannot be for the Test<br />
of Valor, and it cannot be for a test that the<br />
PCs have already completed.
137I. Morithan Brightblade<br />
Other than the name of the tomb, this location<br />
is identical to that in area 137H.<br />
137J. Junction<br />
The narrow tunnel branches in two directions<br />
here.<br />
This tunnel maintains a 1d3+2 foot diameter<br />
all down its course.<br />
137K. Eastern Crypts<br />
The stalactites on the ceiling stand poised<br />
over the cavern floor like gigantic daggers.<br />
The floor is littered with huge crypts<br />
down its entire length.<br />
Each of these crypts holds four revenants.<br />
They do not awaken unless their crypts are<br />
opened (as in area 137F) or until the caryatids<br />
sound the bells in area 137P. There are<br />
28 revenants here.<br />
first fissure, the tunnel continues onward. Past<br />
the second fissure is a small cavern. In this<br />
cavern stand four figures leaning on spears.<br />
These are revenants who are pretending to<br />
have died standing here. Each PC who passes<br />
them hears a whisper. Have each PC roll an<br />
Intelligence Check. Any who are successful<br />
hear the whisper to say, “Are you the one?”<br />
When the PCs turn around, they find themselves<br />
facing the fully animated revenants<br />
who are demanding an answer to their question.<br />
They react exactly as the revenants in<br />
area 137F. If the PCs run, the revenants pursue<br />
and call their fellows into action in any<br />
area they enter. Thus if the PCs attempt to<br />
retreat into area 137R, the pursuing revenants<br />
awaken all the revenants there.<br />
The tunnel continues on from the cavern to<br />
the next fissure. After this, the tunnel breaks<br />
through a masonry wall to the main crypts in<br />
area 137R.<br />
137M. Howling Caverns<br />
The tunnel emerges from the crypt onto a<br />
great gulf. Two statues at the edge of the<br />
rift hold hands so as to form an arch.<br />
Obscure letters adorn the statues. In the<br />
cold darkness beyond, the vague outlines<br />
of a great mausoleum can be seen carved<br />
into the rock face opposite. A tremendous<br />
landing with columns can barely be made<br />
out at the limit of your torch light. The<br />
wind howls furiously here, making it difficult<br />
for you to hear one another.<br />
The writing on the statues is ancient but easily<br />
readable. It says, “Wherein lies your<br />
life/Therein lies your honor.” Anyone who<br />
utters the words of the Solamnic Creed, “My<br />
Honor is my Life,” causes a great span of<br />
rainbow colors to form a bridge to the landing<br />
across the gap (area 137P).<br />
The young Sturm knows this phrase, but<br />
waits for the PCs to utter it themselves. It<br />
seems painfully obvious to him. If the PCs are<br />
stumped, he provides the phrase, but he<br />
seems suspicious of the PCs henceforth.<br />
137N. Northern Caverns<br />
A wide gap stands between you and a<br />
landing in the distance. The wind screams<br />
in fury through the fissure.<br />
137L. Southern Fissures The distance across the gulf here is 30 feet to<br />
reach the overlook at area 1370.<br />
A howling moan resounds through the<br />
tunnel ahead of you. The tunnel twists<br />
and turns, restricting vision to only a few<br />
feet.<br />
As the PCs venture down this tunnel, they<br />
encounter three successive fissures. These<br />
fissures are 1d6+4 feet across. Across the<br />
137O. Overlook<br />
Raging wind buffets you on the point of an<br />
overlook. Your torch wavers in the wind,<br />
barely illuminating the immediate area.<br />
You can just see what appears to be a<br />
landing off to your right and the vague<br />
outlines of a building to the left.<br />
81<br />
A tunnel runs back from this landing to<br />
another crevasse 30 feet across. This in turn<br />
leads to a tunnel that breaks into the northern<br />
part of area 137P.<br />
137P. Caryatid Colonnade<br />
Rows of 14-foot-tall columns support the<br />
ornate ceiling of this vast room. Hundreds<br />
of bells of all shapes and sizes hang from<br />
this ceiling. Wide halls run off to the south<br />
and north. A thick steel door stands<br />
closed at the eastern end of the colonnade.<br />
These columns are caryatid columns of twice<br />
normal size. There are 16 of them here. They<br />
have twice the normal hit dice and hit points<br />
(see the Combined Monster Statistics Chart)<br />
and have a +4 bonus to all saving throws<br />
against magical attacks.<br />
These columns were placed here to guard<br />
the entrance to the high king’s tomb east of<br />
this location. They take no action until the<br />
PCs come within 30 feet of the entrance to<br />
area 137s. Then they animate and move to<br />
block the entrance.<br />
If the PCs insist on moving toward the<br />
entrance, the caryatid columns then attack to<br />
subdue (see Encounter 137F). If the PCs<br />
approach to within 20 feet of the main doors,<br />
the caryatids strike for damage.<br />
When the caryatids first move from their<br />
bases, their heads brush against the bells tied<br />
to the ceiling. These bells create an avalanche<br />
of sound so loud that the stones of the walls<br />
and ceiling shake. This alarm awakens and<br />
summons the revenants from the other areas.<br />
The revenants from areas 137F and 137K<br />
arrive within 1d4+3 rounds, while those from<br />
area 137R arrive within ld4+5 rounds. They<br />
react as stated in area 137F.<br />
137Q. Processional hall<br />
Iron statues 15 feet tall stand silently in<br />
alcoves, four on each side of you. Their<br />
stern faces gaze down on you; their iron<br />
swords rest against massive chests.<br />
The statues are hollow and contain nothing.<br />
137R. Ancient Crypts<br />
Tall masonry walls rise up to a cavernous<br />
ceiling. Huge stalactites hang over the<br />
roofs of massive mausoleums.<br />
These are the tombs of those close to the<br />
royal house. The central tomb houses the<br />
Duke and Duchess of Heathercleft—an<br />
ancient Duchy northeast of Vingaard.<br />
Eight revenants lie in the four tombs surrounding<br />
the Heathercleft tomb (two revenants<br />
in each tomb). These were the guardi-
ans of the Duke and Duchess who were killed<br />
during the Cataclysm. They are treated as<br />
those in area 137F.<br />
137S. King’s Court<br />
Huge crypts, four to each side of you, lie<br />
in ranks down the hall. Eight pillars of<br />
light shine down on them, draping deep,<br />
stark shadows down their sides. The fitted<br />
stone walls of this room work into and<br />
around the natural stone of the cavern.<br />
The jagged teeth of stalactites hang ominously<br />
overhead.<br />
At the far eastern end of the room,<br />
broad steps climb to a platform lit in stark<br />
brilliant light. Two crypts can be seen on<br />
either side with a pair of thrones between<br />
them. Two figures, draped in shadow, sit<br />
on the thrones. Between them, a large<br />
gem sits atop a pedestal.<br />
This is the King’s Court. It is ruled by Virtus<br />
Brightblade, long-dead Lord of Vingaard<br />
Keep, and his Lady Amalthia Brightblade.<br />
Both are spectres but are of neutral alignment.<br />
Their life force remains because of the<br />
revenants’ burning need for justice. They<br />
pass judgment on those brought here.<br />
PCs who are brought into the hall are ushered<br />
down the center aisle to the base of the<br />
stairs. As they pass the rows of crypts, each<br />
opens slowly. Eight revenants appear from<br />
each crypt they pass (a total of 64 revenants).<br />
These are also joined by the revenants from<br />
area 137R. Once all are in attendance, then<br />
the spectre of Virtus speaks.<br />
“Are you the one?” he asks. But unlike the<br />
revenants, Virtus elaborates on his question.<br />
“Are you the one who brought fire from the<br />
skies and destroyed our lands? Are you the<br />
one who caused such pain and death?”<br />
If the PCs answer yes, then the spectre and<br />
his lady float down to the PCs and attack<br />
them. All the gathered revenants also attack.<br />
If the PCs answer no, then the spectre<br />
Amalthia asks the PCs to relate their deeds to<br />
prove their answer. The players should then<br />
relate why they should not be judged guilty by<br />
this tribunal.<br />
If the tales and explanations given by the<br />
players are sufficient in your judgment to persuade<br />
the dead lord and lady, then Virtus lowers<br />
his head and ponders a moment. Then he<br />
asks the PCs, “Who, then, is the one?”<br />
Listen carefully to the players’ response. If<br />
the PCs give a convincing argument as to<br />
who was responsible for the Cataclysm, the<br />
dead lord listens attentively. If their response<br />
is half hearted or vague, then there is a 30%<br />
chance that Virtus rises up in anger, saying<br />
that he believes the PCs are responsible and<br />
are lying to him. If they continue in this way,<br />
then Virtus judges them guilty and all attack<br />
the PCs.<br />
If the PCs’ response is convincing, and they<br />
mention present-day organizations or beings<br />
(e.g., Kitiara, Dragonarmies, Takhisis, etc.),<br />
the dead lord commands all the revenants to<br />
fight this evil. The revenants march out the<br />
exit toward area 137P and leave the crypts to<br />
search for those connected with “the one.”<br />
Virtus then gives the PCs the Gem of Valor<br />
from the pedestal next to his throne.<br />
If no particular person or organization is<br />
named, then the dead lord again bows his<br />
head and speaks: “So that we might do battle<br />
with those responsible, we shall forever<br />
remain here searching for the justice of our<br />
release. You may go.” With that, he dismisses<br />
the PCs, motioning them toward area<br />
137U.<br />
Any attempt to forcibly take the Gem of<br />
Valor results in the spectres and revenants<br />
attacking the PCs, although this might not<br />
prevent the PCs from taking the gem.<br />
137T. King’s Treasury<br />
In this room there are six pieces of jewelry<br />
(6,400 stl each), 3,300 stl, 5,000 pp, Solamnic<br />
plate armor +2, and a long sword +4.<br />
137U. Southern Exit<br />
Read this only if this test does not hold the<br />
fate gem (i.e., if neither 137X or 137Y is the<br />
fate of your campaign-these correspond to<br />
fate numbers 3 or 4, respectively). If this test<br />
does contain the fate gem, go to 137X or<br />
137Y, whichever is appropriate, instead of<br />
this encounter.<br />
There is a tapestry on the wall of this otherwise<br />
bare room. The tapestry depicts<br />
the great throne you saw when you first<br />
entered the Glitterpalace.<br />
This is the throne of Paladine. If the PCs enter<br />
this room with the Gem of Valor, then the<br />
tapestry glows brighter and brighter until its<br />
light is unbearable. At that point the PCs<br />
appear back in the Nexus Chamber. Without<br />
the gem, the tapestry does nothing. It cannot<br />
be removed or damaged.<br />
137X. Sacrifice Self<br />
Substitute this encounter for 137U if this<br />
alternative is the fate of the PCs’ quest (i.e., if<br />
this alternative corresponds to the fate number<br />
for your campaign).<br />
Use the description from area 136X (changing<br />
the room description to that of 137U). The<br />
Dark Queen fights for three rounds before you<br />
read the following:<br />
Suddenly, the young prince strides forward,<br />
a Dragonlance magically appearing<br />
in his hands. The light streaming from<br />
him is too bright to bear as he presses the<br />
darkness back. The Queen reels back<br />
through the portal. As he reaches the<br />
portal, his last words come back to you:<br />
82<br />
“The gate can be closed only from the<br />
other side. As I do, so must one of you do<br />
also, else the world is lost.”<br />
With that, they both disappear into the<br />
void, leaving a white diamond.<br />
After this encounter, any exit through which<br />
they take the diamond and the Gem of Valor<br />
takes them back to area 135.<br />
137Y. Berem is Paladine<br />
Use the description from area 136X. The<br />
queen fights for three rounds before you read<br />
the following:<br />
Berem calls out. Suddenly his gem shines<br />
brilliantly and his eyes are filled with purpose.<br />
“In this guise have I chosen to come,<br />
Takhisis. Return to your own realms!”<br />
With these words he walks forward, the<br />
Queen of Darkness cowering before him.<br />
Both disappear into the darkness, leaving<br />
a diamond.<br />
After this encounter, any exit through which<br />
the PCs take the diamond and the Gem of<br />
Valor takes them back to area 135. Berem is<br />
waiting there. He claims to remember nothing<br />
of his actions.<br />
138. Test of the Heart<br />
Great moors extend as far as the eye can see.<br />
The city of Kalaman sits on the horizon. Many<br />
familiar NPCs are found as skeletal corpses<br />
on the ground.<br />
This section of the adventure requires some<br />
preparation on the part of the referee. Make a<br />
list of NPCs that the PCs have met during<br />
their adventures. These NPCs should be characters<br />
whom the PCs know are dead, or whose<br />
current locations are unknown to the PCs.<br />
Next to each name, jot down something the<br />
PCs did that might have caused the NPC’s<br />
death (or caused the NPC to be very unhappy<br />
with the PCs). This thing must clearly be the<br />
fault of the PC, even if you have to stretch the<br />
circumstances.<br />
The following is a sample listing of some<br />
NPCs who might fit the above criteria. (Skip<br />
any that you don’t recognize.)
NPC List from the DRAGONLANCE Saga<br />
Fewmaster Toede<br />
Otik Sandath<br />
Forestmaster Unicorn<br />
Phudge Highbulp<br />
Raven-Eye<br />
Sunstar<br />
Eben Shatterstone<br />
Verminaard<br />
Raggart Knug<br />
Harald Haakan<br />
Feal-Thas<br />
Black Boris<br />
Captain Karyzzal<br />
Warren Windsound<br />
Nefarik Gistar<br />
Revered Ancient One<br />
Lord Soth<br />
Alhana Starbreeze<br />
Lorac Caladon<br />
Loralon<br />
Kiiren<br />
Tarak<br />
Maquesta Kar-Thon<br />
Silver Fox<br />
Badger<br />
Lady Lengstrien<br />
Bas Ohn-Koraf<br />
Fritzen Dorgaard<br />
Kitiara<br />
Blue Wizard<br />
Zebulah<br />
Apoletta<br />
As the PCs move through this area, they<br />
encounter the dead spirits of the NPCs. It is<br />
up to the PCs to deal with the deaths of these<br />
people and continue on to their goal despite<br />
the depression and hopelessness presented<br />
here.<br />
138A. Entry<br />
You stand on a high plateau under a velvet<br />
blue night sky with cold stars shining<br />
down on you. In the distance, tall cliffs fall<br />
away from the plateau. A strange purple<br />
glow from below these cliffs shines up and<br />
fades into the night sky.<br />
All the ground lies in shadow. Its<br />
parched surface is cracked but even, broken<br />
occasionally by vast jagged boulders.<br />
There is an unnatural silence here.<br />
A single figure can be seen across a<br />
chasm east of where you appeared. The<br />
figure seems somehow familiar but is<br />
moving quickly out of sight behind boulders.<br />
Two land bridges at the southern end<br />
provide exits to the southeast and west.<br />
The bridge leading southeast seems to<br />
join the plateau where you saw the figure.<br />
Intervening boulders obscure details<br />
beyond the bridges.<br />
Those who approach<br />
see the following:<br />
the cliffs and look down<br />
The cliffs below you disappear into a distant<br />
purple glow. The glow seems to hurt<br />
your eyes as you stare into it. The distance<br />
down is difficult to determine.<br />
The cliffs drop down roughly 1,000 to<br />
1,500 feet before ending in a jagged bottom.<br />
Apparently the entire plateau area is<br />
somehow suspended over the distant glow.<br />
The stars overhead contain the constellations<br />
of the Queen of Darkness and the Celestial<br />
Paladin-constellations long missing from the<br />
skies of Krynn.<br />
The distant purple glow is actually 30 miles<br />
distant. Those falling into it see a surface start<br />
to take shape amid the terrible blankness. They<br />
hit the ground 10 feet away from where they<br />
fell off, suffering 15d6 points of failing damage.<br />
This is a great loop that brings falling objects<br />
almost back to where they started from.<br />
The figure on the bridge is that of someone<br />
the PCs once knew. This is a dreamwraith<br />
manifestation of this person.<br />
The figure is stooped and shuffles through<br />
areas 138E and 138F to 138G. PCs who<br />
hurry after him are able to catch him without<br />
much difficulty. When approached, the figure<br />
has his back turned toward the PCs. When he<br />
turns around, the PCs see that his face is<br />
hideously disfigured—a mask of death. His<br />
skin is white and drawn tightly over his skull.<br />
His eyes are sunken and glazed over.<br />
“Why have you done this to me?” he asks.<br />
He then recites what was done to him by the<br />
PCs, claiming that deed caused this fate. He<br />
speaks bitterly and without hope.<br />
138B. Overlook<br />
The vast rock bridge ends in a gap more<br />
than 400 feet across to the cliffs beyond.<br />
Though boulders atop the cliffs north of<br />
here obscure the details of the plateau in<br />
that direction, a faint white aura seems to<br />
emanate from something in that direction.<br />
The sounds of a slow march drift here<br />
from the west. Looking east, you see that<br />
a crumbling bridge of stone still spans the<br />
distance from a plateau east of you to the<br />
cliff face on the north. There appears to<br />
be no direct route from here to the bridge.<br />
138C. Portal<br />
A single slab of stone 10 feet tall and four<br />
feet wide stands on a dais at the edge of<br />
the plateau.<br />
The slab faces north and south. The northern<br />
side of the slab has a carving that depicts a<br />
place the PCs have never been. On the southern<br />
side is a carving of a female kender with a<br />
scepter standing in ivy.<br />
Those who approach either side of this slab<br />
find that the carvings become transparent,<br />
83<br />
showing objects behind the lines of the drawings.<br />
The northern face shows a test area the<br />
PCs have not seen yet (if the PCs have been to<br />
all three test areas, the carving on the northern<br />
face shows this plateau). The southern<br />
side shows a bog that exists somewhere in this<br />
area. A brightly shining pavilion can be seen<br />
beyond the boulders at the far end of the bog.<br />
Those who attempt to touch the face of the<br />
slab find that it is no longer there. By touching<br />
the slab they are teleported to the area pictured.<br />
The northern face teleports them to<br />
area 138A. The southern face teleports them<br />
to the slab in area 138I.<br />
138D. West Moor<br />
Use the first boxed text if the PCs enter this<br />
area from the southern end; use the second if<br />
the PCs enter from the northern end.<br />
A huge mound of rock in front of you<br />
stands almost 100 feet high. A line of<br />
weary soldiers moves toward this rock<br />
from the northern end of the plateau,<br />
winding its way through the scattered<br />
boulders on the plain. The soldiers disappear<br />
behind the rock mound.<br />
A huge mound of rock disgorges troops<br />
in unkempt armor and ill-used weapons.<br />
About 200 soldiers mill about the edge of<br />
a precipice to the north and stare mournfully<br />
in that direction. Many of them sigh<br />
and, bowing their heads as if under some<br />
great burden, form a line of dejected souls<br />
that winds its way through scattered boulders<br />
and disappears behind another huge<br />
rock mound to the south.<br />
These are the Soldiers of Failure. They are<br />
doomed to move ever in the direction of<br />
home, never leaving the site of their failure.<br />
Included in this march are any PCs who have<br />
died during the course of this epic. All in this<br />
procession appear to be malnourished and<br />
almost skeletal.<br />
If the PCs try to talk with any of these soldiers,<br />
one or two of the warriors stop and<br />
speak with them. There is a 10% cumulative<br />
chance per round they talk that they just sigh<br />
heavily and walk off.<br />
Stopped warriors always say something to<br />
the effect of: “Why do you stop us? Do you<br />
not see that this cause is a hopeless one? We<br />
are beaten. None can win against such darkness<br />
and hate.”<br />
Players must roll a saving throw vs. spell for<br />
each PC who listens to the failed warriors. If<br />
the roll succeeds, then that PC withstands the<br />
effects of the hypnotic words. If the roll fails,<br />
then the PC is overcome with despair, drops<br />
his weapon, and joins the southward procession.<br />
He repeats the litany of hopelessness<br />
when questioned and does not want to go<br />
with the party.<br />
Only a dispel magic or a convincing speech<br />
about hope and courage can break this despair.<br />
This speech must be composed by a player<br />
and must be original (arguments previously
used on other PCs do not work again). There is<br />
a base 30% chance that this works. The DM<br />
can apply modifiers to this base chance if he<br />
thinks the player has earned them. If a player<br />
makes an astounding speech about hope and<br />
faith, then a +70% bonus to the base chance<br />
would not be out of order (but it would have to<br />
be a fantastically inspiring speech).<br />
These warriors maintain their lethargic<br />
state until the PCs try to stop them or attempt<br />
to inspire hope in them. The speeches of faith<br />
and hope that work so well on PCs have an<br />
enraging effect on the NPCs. Those within<br />
hearing (1d10+3 of them) immediately attack<br />
the PCs. On every round after the first, there<br />
is a 30% chance that 1d4 of these enraged<br />
warriors succumbs to apathy, stops fighting,<br />
and rejoins the procession.<br />
The huge mounds at both ends of the<br />
plateau are actually continuous teleportals.<br />
The warriors walk into the southern mound<br />
and walk out of the northern.<br />
138E. East Grove<br />
Gnarled trees claw up into the night sky. The<br />
purple light that shines from below gives a<br />
weird, skeletal appearance to the trees.<br />
138F. Rock Bridge<br />
A jagged span of stone arches into the<br />
distance from where you stand.<br />
138G. Bog<br />
While walking across this bog, the PCs sink to<br />
a depth (in inches) equal to 16 minus twice<br />
their AC. Treat negative results (those with<br />
ACs higher than 8) as not sinking at all. Do<br />
not count the magical bonuses of armor or<br />
Dexterity bonuses in the AC. A PC with plate<br />
armor and shield (AC 2) sinks 12 inches (16-<br />
4=12), while a wizard with no armor (AC 10)<br />
has no trouble keeping up on top of the bog<br />
(16-20=-4).<br />
138H. Night Span<br />
A wide stone bridge, its mortar loosened<br />
and its side rails fallen, spans the gulf<br />
between two tall cliffs. Only the strange<br />
purple light shining from the depths of the<br />
gulf can be seen below.<br />
This bridge is 100 feet long and 20 feet wide<br />
and is perfectly safe to cross.<br />
138I. The Great Moor<br />
This rolling moor is covered in a thick,<br />
green blanket of mist. The mist collects in<br />
watery depressions, weaving amongst the<br />
gently undulating ground. Mosses cover<br />
the landscape and an occasional boulder<br />
stands like a tombstone from the moor.<br />
Shining over the boulders in the distant<br />
north is a pavilion surrounded by brilliant<br />
white light.<br />
The moor seems somewhat spongy to walk<br />
on but easily supports the weight of the PCs.<br />
(The pavilion is in area 138L.) After the PCs<br />
have moved two hexes across this area, read<br />
the following:<br />
You notice motion in the pools of mist<br />
about you. Dark shapes slowly rise from<br />
the watery depths. Their skeletal countenances<br />
grin horribly. Their words rise up<br />
to you, soft at first, but then louder and<br />
more insistent, “Join us! Join us!”<br />
Among these skeletal figures are at least 1d4<br />
NPCs that the PCs recognize as former companions.<br />
There are 1d6+4 of these apparitions.<br />
These figures try to stop the PCs from continuing<br />
on. They mindlessly pull and drag the PCs<br />
toward the shallow pools from which they came.<br />
Each successful attack by one of these<br />
skeletal figures (THAC0 16) temporarily<br />
drains 1 point from the PC’s Constitution. If a<br />
PC’s Constitution reaches 0, then he succumbs<br />
and sinks slowly into the bog (dead<br />
until the PCs reach the Nexus Chamber). All<br />
Constitution losses are completely recovered<br />
in the Nexus Chamber.<br />
Each PC must roll a Constitution Check for<br />
each hex he enters. If he fails the check, he<br />
succumbs to depression and cannot move for<br />
five rounds (the apparitions get their normal<br />
attacks while the PC is motionless).<br />
A slab located at the southern edge of this<br />
area is identical in shape to that found in area<br />
138C, but its faces are blank and it does not<br />
teleport.<br />
138K. Final Gulf<br />
A gulf of 100 feet separates you from the<br />
white pavilion Shining rays bathe it in a<br />
halo of white light.<br />
To get across the chasm, a PC must be able<br />
to fly. If the PCs have no way to cross the<br />
chasm, a shimmering bridge of light appears<br />
after five rounds. This seems to be pretty<br />
unsubstantial, but it is perfectly safe. (Do not<br />
have the bridge appear if the PCs have the<br />
means to cross but the players can’t think of<br />
it. Make them figure it out.)<br />
138L. Citadel<br />
A long, gentle slope of meadow leads up<br />
to a white pavilion. Past the open doorway<br />
are a pedestal and a throne. Upon<br />
the pedestal rests a red gem.<br />
84<br />
This is the Gem of the Heart. Behind the<br />
throne is a golden doorway that leads back to<br />
the Nexus Chamber (Encounter 135). If this<br />
test corresponds to the fate number for your<br />
campaign (either fate number 5 or 6), gc<br />
instead to either Encounter 138X (fate number<br />
5) or Encounter 138Y (fate number 6),<br />
whichever is appropriate for the finale of your<br />
campaign.<br />
138X. Berem and his Sister<br />
Add the following to the description of 138L:<br />
On the opposite side of the throne from<br />
the pedestal, a pillar of rock stands. As<br />
you get closer, the details of this pillar<br />
begin to resemble those of a beautiful<br />
woman.<br />
Berem hangs his head in shame, looking<br />
alternately as if he wants to run to her<br />
or flee. Suddenly the woman speaks:<br />
“Come, Berem. All is forgiven. Let us<br />
walk the heavens together and shut the<br />
door on this world’s misery.”<br />
Berem goes to this woman and holds<br />
her. The dark sky is suddenly ablaze with<br />
dawn. Outside the pavilion, grass grows<br />
and flowers bloom. In the place of Berem<br />
and the woman is a diamond gemstone.<br />
Holding the diamond and the Gem of the<br />
Heart places the PCs back at Encounter 135.<br />
Berem is waiting there. He says he remembers<br />
nothing about the events in 138X.<br />
138Y. Destruction of the Gem<br />
Add the following to the description of 138L:<br />
A brilliant anvil stands opposite the gem<br />
pillar on the other side of the throne. A<br />
woman sits on the throne, weeping.<br />
This is the spirit of Berem’s sister. She<br />
explains that her tears are for her brother.<br />
Should he replace the gem, then the door<br />
might be opened for greater evil. He must<br />
destroy the stone on the anvil to stop the evil.<br />
Berem throws himself chest down upon the<br />
anvil. Then read the following:<br />
Berem suddenly goes limp and dies. As his<br />
last breath escapes, he rolls over to show<br />
the gemstone of his chest crushed on the<br />
anvil. The dark sky is suddenly ablaze with<br />
dawn. Outside the pavilion, grass grows<br />
and flowers bloom. Berem and his sister<br />
disappear with the light of dawn. In the<br />
place of Berem is a diamond gemstone.<br />
Holding both the diamond and the Gem of the<br />
Heart places the PCs back at Encounter Area<br />
135. Berem is waiting there. He says he<br />
remembers nothing about the events in 138Y.
After the PCs have completed all the tests in<br />
Chapter 13 and placed the four gems in the<br />
throne, a mist descends and all the PCs lose<br />
consciousness. Tell the players that their PCs<br />
awaken an indeterminate time later, and read<br />
them the following boxed text.<br />
Awakening<br />
A fresh breeze washes gently over the<br />
mountains as the day dawns. A rosy glow<br />
blankets the encircling peaks to the east<br />
while stars glitter in the deep blue overhead.<br />
The towering mountain crags stop<br />
abruptly at the edge of the polished surface<br />
of a circular stone that mirrors the starstudded<br />
sky. Silent obelisks stand about<br />
its perimeter, surrounding a group of figures<br />
slowly awakening in the center of<br />
this peaceful place.<br />
This is Godshome. The pillars represent the<br />
gods of Krynn. The PCs awaken to find themselves<br />
on the circular stone. Voices address<br />
the PCs from the pillars.<br />
Welcome, heroes of Krynn! The gods of<br />
good greet you and offer words of hope<br />
and caution. Now is the time for all to prepare<br />
for the final assault against the darkness<br />
that oppresses Krynn.<br />
Even now, mighty armies of good converge<br />
on the plains of Neraka. The haughty<br />
armies of the Dragon Highlords will not<br />
allow a siege, so there is to be a titanic battle<br />
on the plains west of that most evil of cities.<br />
Your presence is required at Neraka.<br />
Contact the Whitestone forces and decide<br />
where your talents would be best used:<br />
leading the armies of good or quietly<br />
entering the city and destroying the source<br />
of the evil plaguing Krynn. Each of you<br />
must decide how to aid in this final battle.<br />
Now the gods pronounce a blessing on the<br />
PCs. This blessing enjoins them to ignore the<br />
temptations that they will experience, for the<br />
gods of good will continue to bless them and<br />
guide them so long as they are true to their<br />
mission and calling.<br />
“Hear me now, mortals of Krynn, and<br />
receive the council of the creators. The<br />
end of your journey is now before you, but<br />
the road is uncertain and treacherous.<br />
“Know that good redeems its own. If the<br />
blessed are true, then shall the might of<br />
the gods go with them. Go with the hopes<br />
of many.<br />
“Know that evil consumes its own. If the<br />
temptress entangles you, then you are<br />
lost. Deny all temptations to renounce<br />
your quest.<br />
“Know that the balance must be. If the<br />
darkness hides the lamp, the lamp does<br />
not die. Seek for the good amid the evil.<br />
“Know that man’s will swings the balance.<br />
When you choose your destiny, the<br />
destiny of the world is decided. Choose<br />
your path wisely.”<br />
Read only one of the following sections of<br />
boxed text-the section corresponding to the<br />
fate number for your campaign. Remember<br />
that this fate number determines how the<br />
Dark Queen can be defeated. Only by the<br />
means given under this fate number (as<br />
explained in the Interlude to this part of the<br />
adventure) can Takhisis be finally vanquished.<br />
The speech that you read to your<br />
players hints at the method the PCs must use.<br />
Fate Number 1<br />
Greatness walks among you. If the mage<br />
be no wizard, then his power is of us.<br />
Spend not his strength until he comes<br />
before the Queen.<br />
Fate Number 2<br />
The madman walks the world twice. If the<br />
lance be in his hand, he will again do the<br />
deed. He seals the gates in the council of<br />
evil.<br />
Fate Number 3<br />
The lance can close the gate. If a life is<br />
forfeit to save the world, it is not lost in<br />
vain. With the lance through the portal, a<br />
hero can destroy evil.<br />
Fate Number 4<br />
The stoneman walks in disguise. If taken<br />
before the queen shall his nature be<br />
revealed. In the council of evil shall he<br />
prevail.<br />
85<br />
Fate Number 5<br />
The stone-hearted one holds the key. If<br />
the foundation is found, then the souls<br />
can be one. His fate lies far below evil<br />
councils.<br />
Fate Number 6<br />
The life-giving stone threatens peace. If<br />
the stone is taken whole, then shall the<br />
queen rejoice. An avail on high shall crush<br />
its power.<br />
Read the following to all after reading the<br />
proper section above:<br />
Now our blessing goes with you. Your fate<br />
is in your hands, yet shall our influence<br />
guide your decisions. Choose for yourselves<br />
the paths you take. May your<br />
choices be wise, for the sake of all Krynn.<br />
This blessing, now intoned, gives the players<br />
the following benefits for the rest of the<br />
DRAGONLANCE saga:<br />
• Fortuitous Meetings: In cases where<br />
friendly help might be available (e.g., if a<br />
member of the underground has a chance<br />
of being in the same tavern as the PCs)<br />
and the PCs are in need of help, it is<br />
there.<br />
• Presence: When the PCs are hiding, the<br />
chance of being noticed is halved. In<br />
cases where the PCs do wish to be<br />
noticed, the chance is doubled.<br />
• Sincerity: PCs receive a +10% bonus<br />
when checking to see if an NPC believes<br />
them. This works on both good and evil<br />
NPCs.<br />
• Dragonlances: Two footman’s and two<br />
mounted Dragonlances appear beside<br />
the PCs as the blessing is bestowed. The<br />
PCs might need these to defeat the Dark<br />
Queen.
This is the final adventure in the epic<br />
DRAGONLANCE series. It re-creates the climax<br />
of the epic, perhaps as described in the<br />
DRAGONLANCE Chronicles <strong>Volume</strong> Ill:<br />
Dragons of Spring Dawning, or perhaps with<br />
one of the alternative endings presented<br />
within.<br />
In the previous chapters, the player characters<br />
journeyed to the very edge of the Plains<br />
of Neraka. If they were fortunate, the PCs<br />
passed through the Glitterpalace during that<br />
adventure and gained valuable information<br />
from the gods of good. In any event, the<br />
Heroes have before them a journey across the<br />
twisted and shattered plain to the city of Neraka<br />
itself. Here they must enter the Temple of<br />
the Queen of Darkness, seat of the most<br />
potent evil upon the face of Krynn, and try to<br />
gain ultimate victory for the forces of good.<br />
Adventure Sections<br />
The adventure is divided into a section of<br />
Events plus three chapters of Encounters.<br />
The chapters detail specific areas that the<br />
PCs will probably pass through during the<br />
adventure.<br />
The Events section lists occurrences<br />
designed to take place at specific times during<br />
the adventure. In each chapter are<br />
descriptions of Encounter areas. These are<br />
the significant locations placed throughout<br />
the region described in the chapter. Encounters<br />
occur only if the PCs travel to that particular<br />
location. Events, on the other hand,<br />
occur at certain times during the adventure<br />
(which is why it is important to keep track of<br />
time), regardless of the PCs’ location.<br />
A Note on Play<br />
As you run this portion of the adventure,<br />
remember that the enemies of the Heroes are<br />
neither stupid nor careless. This is the center<br />
of the Dragon Empire, and as such is well and<br />
carefully guarded.<br />
This is one of the most complicated parts of<br />
the saga. It requires that you be fully aware of<br />
the procedures used by the Highlords for the<br />
defense and safeguarding of their citadel.<br />
These precautions are extensive indeed, but<br />
not impossible to overcome if the PCs are<br />
careful.<br />
For the Highlords’ defenses to be convincing,<br />
however, you must keep them in mind at<br />
all times. The disposition of troops within and<br />
without the city, the procedures for entry and<br />
exit, the protocol of troops entering the gates<br />
of the city, and the pattern of watches and<br />
guards set up throughout the city and temple<br />
all affect the actions of the PCs. You must<br />
learn this information and keep it in mind<br />
throughout play. The players should feel that<br />
this obstacle is a challenging and dangerous<br />
one-it is up to you to make sure that they<br />
are not disappointed. Keep in mind, however,<br />
that no situation should ever be truly hopeless<br />
in heroic fantasy role-playing. There<br />
should always be a way out of a jam, if the<br />
players display the ingenuity and spirit to discover<br />
it.<br />
Furthermore, this is the big finish. If you<br />
have been playing the entire series, this is the<br />
culmination of about two years of role-playing<br />
for your players. As the big payoff, it must not<br />
come easily. Make them work for it, and make<br />
it fun! Your players’ memories of the entire<br />
saga will be capped by their experience playing<br />
this adventure. Prepare carefully, play<br />
your best, and pull out all the stops!<br />
Ending the Epic<br />
Takhisis plans to gain her ultimate triumph by<br />
passing from the Abyss to the Council Chamber<br />
in her temple during the Second Council<br />
of the Dragon Highlords. If she is successful,<br />
her armies gain renewed strength, again surging<br />
over the face of Krynn.<br />
If she can be driven back through the gate,<br />
or if the gate can be closed, she returns to the<br />
Abyss and the chaotic alliance of the Dragonarmies<br />
collapses in disorder. Your players<br />
have only one means of accomplishing the<br />
defeat of the Queen. This means was determined<br />
in the Interlude for the previous section;<br />
refer to that Interlude if you need to<br />
remind yourself of how the saga is supposed<br />
to end.<br />
Some of these endings require that a specific<br />
NPC (Fizban, Waylorn, or Berem)<br />
accompanies the PCs during the adventure. If<br />
the NPC relevant to your ending seems to die,<br />
86<br />
invoke the obscure death rule (have the NPC<br />
disappear as he dies) and have the NPC rejoin<br />
the party later in the adventure with a tall tale<br />
of unlikely survival. For Berem, however, no<br />
tale is necessary; when asked how he survived,<br />
he merely shrugs and replies, “Just<br />
lucky, 1 guess.” He refuses to elaborate.<br />
The Band of Heroes<br />
Virtually all of the PCs from previous<br />
DRAGONLANCE adventures could take part<br />
in this conflict. If the group that started this<br />
adventure (back in Chapter 1) has been<br />
depleted by combat, or if players would like<br />
to involve other, favorite player characters for<br />
the saga’s finale, the following device is suggested.<br />
The armies of Whitestone, under the command<br />
of Lord Gunthar, are drawing in upon<br />
Neraka as this adventure begins. All PCs not<br />
with the adventuring group are assumed to<br />
accompany these armies.<br />
The Heroes of this adventure begin at Godshome.<br />
Arrange an encounter between one of<br />
the Whitestone armies and the PCs. This<br />
enables the parties of player characters to at<br />
last reunite.<br />
The players must choose which eight PCs<br />
(from either group) that they wish to make<br />
journey to Neraka and thwart the Dark<br />
Queen’s plans. The other PCs are all assumed<br />
to fight with the armies of good against the<br />
Dragonarmies.<br />
A small party of Heroes must penetrate<br />
Neraka and try to foil the queen’s plans. This<br />
information, furnished by the gods of good<br />
themselves, should provide ample motivation<br />
for holding the party to a manageable size.<br />
(The adventure is designed for eight PCs.)<br />
Certain encounters during the adventure will<br />
prove difficult for larger groups of characters.
The events listed here all occur at the given<br />
times, regardless of the PCs’ location.<br />
Following the timeline below is a listing of<br />
repeating events. These events occur every<br />
day, or almost every day, at the times and<br />
locations listed. You should pay careful attention<br />
to the repeating events to make sure that<br />
their effects on the adventure are included.<br />
For purposes of this adventure, sunset is<br />
assumed to occur at 8:00 PM every day, and<br />
sunrise at 5:00 AM. A condition of twilight<br />
exists for ½ hour before sunrise and after sunset.<br />
Timeline<br />
Day 1<br />
Event 80: The Armies of Gunthar<br />
Event 81: Storm Clouds over Neraka<br />
Day 2<br />
Event 82: The Dead of Neraka Awaken<br />
Day 3<br />
Event 83: The Gates of Neraka Close<br />
Event 84: The Inner City is Cleared<br />
Day 4<br />
Event 85: White and Green Armies Arrive<br />
Day 5<br />
Event 86: Black Army Arrives<br />
Day 6<br />
Event 87: Red and Blue Armies Arrive<br />
Event 88: Armies of Gunthar Close on Neraka<br />
Event 89: First Council of Highlords<br />
Day 7<br />
Event 90: Call to Arms<br />
Event 91: The Armies Gather<br />
Event 92: The Battle of Neraka<br />
Event 93: Second Council of Highlords<br />
Repeating Events<br />
Event 94: Guard Postings<br />
Event 95: Dark Rites<br />
Event 96: Ribaldry<br />
Event 97: Nightwalk<br />
Event 98: Caravans<br />
Event 80: The Armies of Gunthar<br />
This event enables the PCs to reunite so that<br />
the players can decide which PCs go to Neraka<br />
and which remain with the armies.<br />
The event occurs as the Heroes leave Godshome.<br />
Make a normal surprise roll for the PCs<br />
(only). If they are surprised, read the boxed<br />
text; if not, they see the dragon approaching a<br />
half mile away.<br />
A dark shadow suddenly passes over you,<br />
and massive leathery wings creak overhead.<br />
A downblast of air sweeps past. A<br />
massive, serpentine shape comes to rest<br />
on the ground 100 feet away.<br />
Any character looking at the dragon sees that<br />
it is silver in color, and carries one (possibly<br />
two) riders.<br />
This dragon and its rider are outriders for<br />
the armies of good that are converging on<br />
Neraka. The rider is one of the PCs from the<br />
other party of DRAGONLANCE game characters<br />
or perhaps even both Flint and Tasslehoff.<br />
The newly met PC can be turned over to a<br />
player to run. He knows the following pieces<br />
of information:<br />
• Armies of elves, dwarves, kender, and<br />
humans, under the overall command of<br />
Lord Gunthar, approach Neraka from the<br />
west, north, and southwest.<br />
• All of the other (surviving) PCs from previous<br />
adventures can be found nearby, also<br />
serving as dragon-mounted outriders.<br />
• All five evil armies are converging on Neraka,<br />
apparently following orders that were<br />
carried out from Neraka by dragons. They<br />
will reach the city before the armies of<br />
good catch them.<br />
The PCs can arrange a party containing<br />
any eight (or so) PCs from the saga they<br />
would like to include. Inform them that the<br />
armies of good also need experienced Heroes<br />
to command troops and steady the soldiers,<br />
many of whom are raw recruits.<br />
If they wish to take all of the PCs from the<br />
saga, you might want to remind them that a<br />
large group might be discovered where a<br />
small group can pass unnoticed. Leave the<br />
final decision of the size of the party to the<br />
players, however.<br />
Event 81: Storm Clouds over Neraka<br />
As the day progresses, huge gray clouds collect<br />
over Neraka. By late afternoon, they<br />
blacken the sky over the city. Bolts of lightning<br />
flash through the clouds and are visible<br />
miles away.<br />
Beneath the clouds, a torrential downpour<br />
showers the city and its immediate environs<br />
with water. Thunder crashes deafeningly from<br />
the clouds.<br />
The storm continues unabated for 1d6<br />
days. At night, the lightning illuminates the<br />
city so frequently that visibility should be considered<br />
practically daylight.<br />
Event 82: The Dead of Neraka Awaken<br />
On midnight of the first day of the adventure,<br />
all of the dead buried beneath the city awaken<br />
and arise. A horrible mix of wailing, screaming,<br />
and moaning erupts from the sewer<br />
grates and other openings leading to the<br />
Undercity.<br />
The dead gradually make their way to exits<br />
leading to the streets. This begins the first<br />
Nightwalk (see Event 97). The Nightwalk is<br />
repeated each night until the queen is<br />
defeated or achieves her ultimate success.<br />
Event 83: The Gates of Neraka Close<br />
This event occurs 1d6 hours after dawn on<br />
the third day of the adventure. Up until this<br />
point, members of all races and professions<br />
87<br />
(merchants, pilgrims, mercenaries, etc.) are<br />
allowed to pass unmolested through the gates<br />
of the city.<br />
After the gates close, however, no one is<br />
allowed to pass through except those with a<br />
legitimate reason in the service of the Dark<br />
Queen. Characters attempting to do so must<br />
either be officers in the Dragonarmies or they<br />
must possess a signed order by an officer.<br />
Their only other chance is to persuade the<br />
guards that their mission serves the interests<br />
of the evil armies, but they were unable to<br />
obtain a pass because of unusual circumstances.<br />
Event 84: The Inner City is Cleared<br />
This event occurs two hours after Event 83.<br />
All merchants of the Inner City are required to<br />
prepare for the coming armies by stockpiling<br />
as many goods as they can obtain. All private<br />
citizens are warned to remain in their homes<br />
or places of business. No movement into the<br />
streets is allowed unless permission has been<br />
granted by the Area Commander or the Captain<br />
of the Guard. This permission can be<br />
obtained by submitting a written request to<br />
the authorities via one of the guard patrols<br />
that now course through the city at frequent<br />
intervals.<br />
Encounters in this portion of the city occur<br />
with the usual frequency. However, if a random<br />
encounter is indicated, roll 1d6. If the<br />
result is a 1 or 2, make a normal encounter<br />
roll on the Random Encounter Tables. Otherwise,<br />
the encounter is with a draconian guard<br />
patrol of the appropriate color.<br />
Those caught in the streets without the<br />
required permission are taken directly to the<br />
Captain of the Guard (Encounter 176).<br />
At the same time as this event occurs, the<br />
Dark Temple is sealed. No entry is allowed,<br />
for whatever reason, through the main gates.<br />
The Dark Pilgrims within the temple remain<br />
there for the duration of the adventure. The<br />
only legitimate entry and exit from the temple<br />
can occur at the Highlord gates, where each<br />
Highlord, and his or her retinue, is allowed to<br />
enter and leave for each of the Councils of<br />
Highlords.<br />
Event 85:<br />
White and Green Armies Arrive<br />
Each of these armies marches onto the Neraka<br />
Plains during Days 2 and 3. Each army<br />
camps 2d6 miles from Neraka on the night of<br />
Day 3. The White army is due south of the<br />
city, while the Green camps to the southeast.<br />
The following day, the armies organize into<br />
long columns, each following the road leading<br />
to Neraka from the given direction. Each<br />
army reaches the city at an hour equal to 8:00<br />
AM plus one hour for each mile of distance the<br />
army camped away from the city.<br />
As the army draws near to the city, the<br />
troops raise their voices in a throbbing, husky<br />
marching song. The dragonwing of the appropriate<br />
color, numbering about 24 dragons,<br />
soars back and forth over the column. Banners<br />
and pennants flutter, distinguishing each
unit. Only those near the fronts of the columns<br />
are visible, as most of each column vanishes<br />
in a thick cloud of dust.<br />
If the rainstorm still pounds Neraka, the half<br />
mile of roadway extending outward from the<br />
city becomes a sea of mud, slowing the army<br />
down and delaying its arrival at the city’s outskirts<br />
by two hours.<br />
As the army reaches the outskirts of the<br />
city, it splits into individual units, each of<br />
which forms an encampment near the walls<br />
of the outer city. Two hours after this, the<br />
troops are released into the city. They pour<br />
into the taverns and inns of Neraka for a night<br />
of revelry and carousing. Although these<br />
troops are concentrated in the White and<br />
Green sections of the city, they spread out so<br />
that virtually all drinking establishments in<br />
Neraka have some customers this night.<br />
Event 86: The Black Army Arrives<br />
Following the pattern described in Event 85,<br />
the Black army approaches Neraka from the<br />
northeast. The troops of the Black army join<br />
their comrades in revelry on this night.<br />
Event 87: Red and Blue Armies Arrive<br />
The Red army moves toward Neraka from the<br />
west, while the Blue comes down from the<br />
north. Unlike the other evil armies, the distance<br />
these camp from the city is not randomly<br />
determined. Instead, each army<br />
spends the night following Day 5 camped<br />
eight miles from the city.<br />
This would normally put their arrival at<br />
4:00 PM on Day 6 (6:00 if it is still raining).<br />
However, when the two armies, with trumpets<br />
blaring and marching songs thrumming,<br />
reach the intersection 300 yards to the northwest<br />
of the city, a massive traffic jam ensues.<br />
All order vanishes from the march, and<br />
numerous skirmishes erupt.<br />
As the leaders attempt to restore order to<br />
the march, members of both armies surge<br />
through the Emperor’s Gate into the city. For<br />
1d8 turns, this chaotic flow into the city continues<br />
unabated. Anyone passing into the city<br />
in the midst of this formation has only a 10%<br />
chance of being noticed by the gate guards.<br />
These armies are eventually untangled and<br />
directed to their designated encampment<br />
areas. By nightfall, the troops of the Red and<br />
Blue armies join their comrades from the<br />
other three armies in a night of rabble-rousing<br />
that approaches riotous proportions.<br />
Event 88:<br />
Armies of Gunthar Close on Neraka<br />
The armies of Whitestone emerge from the<br />
Khalkist Mountains to the north and west of<br />
Neraka at dawn on Day 6. The advance elements<br />
of these armies have been skirmishing<br />
with the Red and Blue rearguards for over a<br />
week. The commanders of both good and evil<br />
armies have been holding their dragons close<br />
to the main bodies, however, to prevent a<br />
small skirmish from growing into a disastrous<br />
engagement before the army is ready.<br />
Gunthar Uth Wistan, commander in chief of<br />
the Whitestone forces, makes his advance<br />
cautiously but quickly. Light cavalry formations<br />
precede the armies and guard both the<br />
right and left flanks. The heavy cavalrymainly<br />
Knights of Solamnia—lead each formation<br />
of foot soldiers, while the dragons and<br />
their riders bring up the rear. Because of their<br />
excellent mobility, the dragons can quickly<br />
reach any sector on the armies’ flanks that<br />
might be threatened.<br />
The armies close to within about eight<br />
miles of Neraka and encamp in a giant arc to<br />
the north and west of the evil city. The following<br />
morning they give battle (see Event 92:<br />
The Battle of Neraka).<br />
Occasional outriders, such as the PC(s)<br />
encountered in Event 80, range far from the<br />
main body of the army. These outriders are<br />
mounted on large or huge gold or silver<br />
dragons; they have orders to run from any<br />
fight. Their purpose is to scout, and they are<br />
to report any suspicion of enemy activity<br />
wherever they discover it.<br />
Event 89: First Council of Highlords<br />
The First Council of the Dragon Highlords<br />
occurs at sunset of Day 6 in the central chamber<br />
of the Dark Queen’s temple. The intent is<br />
to discuss strategy and to prepare for the<br />
arrival of the queen. The First Council is also<br />
a rehearsal for the Second Council on the following<br />
night, when the queen expects to enter<br />
the world of Krynn in all her glory.<br />
The entry of each regiment and lord, as<br />
well as the performance of each function on<br />
the agenda, is handled with much fanfare.<br />
Trumpets blast and drums pound a deep chorus.<br />
The leader of the entire affair is the Hallkeeper,<br />
who handles the various members<br />
diplomatically, with stilted politeness.<br />
The Council Chamber is divided into six<br />
sections. Five of them have a throne for each<br />
of the five Highlords, while the sixth contains<br />
a raised dais where the Dark Queen’s shadowy<br />
presence is generally visible. Before the<br />
ceremonial entry of the Highlords and their<br />
honor guards, six groups of Dark Pilgrims<br />
enter the chamber. One group enters from<br />
each of the areas between the thrones.<br />
The Dark Pilgrims mutter prayers and blessings<br />
upon the chamber under the watchful<br />
eye of the Hallkeeper. Then they stand rigidly<br />
as if in meditation for the duration of the<br />
council. They do not leave until the Highlords<br />
and their honor guards have filed out.<br />
The Highlord with the highest status is considered<br />
to be emperor of the Dark Queen’s<br />
domain. This is currently Ariakus. The rank of<br />
emperor can be bestowed or removed at the<br />
whim of the Dark Queen during the Council,<br />
however, so the emperor is always eager to<br />
move the proceedings along and get the<br />
council over with.<br />
The council is a very formalized meeting<br />
and follows a detailed ritual. The steps of the<br />
ritual are as follows:<br />
1) Entrance of the Honor Guards: Each<br />
Highlord maintains a regiment of draconians<br />
as a personal bodyguard. These draconians<br />
88<br />
number 77 in each regiment, and are always<br />
of the maximum number of hit points for that<br />
draconian type.<br />
The order of the honor guards’ entry, the<br />
name of the unit, and the type of draconians it<br />
contains, are listed here:<br />
Highlord Honor Guard Regiments<br />
Enters # Name Type<br />
1 White Legion Kapaks<br />
2 Green Regiment Kapaks<br />
3 Black Guards Bozaks<br />
4 Blue Watch Sivaks<br />
5 Red Watch Sivaks<br />
2) Entrance of the Highlords: After the<br />
honor guards have taken up their positions<br />
before the various thrones in the council<br />
chamber, each Highlord enters from the<br />
appropriate gate. The Highlord parades slowly<br />
around the chamber to the enthusiastic<br />
applause of his (or her) own honor guard,<br />
then slowly climbs the stairs to the throne.<br />
The Highlords enter according to status,<br />
lowest ranking first. Their order is Toede<br />
(white), Salah-Khan (green), Lucien (black),<br />
Kitiara (blue), and the Emperor Ariakus (red).<br />
Each Highlord offers polite acknowledgements<br />
to the Highlords entering later.<br />
As usual, Kitiara is accompanied by the<br />
death knight, Lord Soth, who walks one pace<br />
behind his commander. None of the other<br />
Highlords welcomes his presence, but the<br />
queen tolerates it, so they do not protest.<br />
3) The Swearing of Fealty: The Queen of<br />
Darkness cannot fully pass into the world of<br />
Krynn, but she appears on the central throne<br />
of the Council Chamber as a shadowy outline<br />
of her five-headed dragon form.<br />
At this point in the ceremony, the Highlords<br />
and their honor guards turn toward the<br />
queen’s throne and declare their allegiance in<br />
a unified chorus:<br />
“All hail Takhisis, Queen of Darkness, and<br />
mistress of the world!”<br />
Then each Highlord in turn swears his oath<br />
of fealty:<br />
“Takhisis, my Queen, my life is yours to<br />
command! Should you demand it, it is yours!”<br />
4) Spoils for the Empire: Each Highlord, in<br />
the above order, is called upon to present a<br />
gift to the emperor, at the Highlord’s option.<br />
Since the queen is nearly always watching,<br />
the Highlords use this opportunity to try to<br />
outdo each other in the eyes of their leader.<br />
Any Highlord who can embarrass the others<br />
before the queen gains increased status.<br />
The gifts presented by each Highlord in the<br />
First Council are listed below.<br />
Highlord Gift<br />
Toede A chest with 1,800 stl<br />
Salah-Khan The head of a resistance leader<br />
Lucien A huge white warhorse<br />
Kitiara A mounted Dragonlance<br />
5) Dark Justice: This is the point when any<br />
members of the Dragonarmies are brought<br />
forward and tried for crimes against their<br />
Queen or their emperor.
During the first council, several human<br />
sergeants are dragged forth by members of the<br />
Red Watch. The Hallkeeper announces the<br />
charges: “These scum have been accused of<br />
concealing booty from the regimental tally!”<br />
Ariakus then calls out: “Who accuses<br />
them?”<br />
“I, your Excellency!” declares a huge ogre,<br />
striding forward from one of the hallways. The<br />
ogre is the captain of the regiment, and<br />
announces that he himself discovered the<br />
casks of ale that these men had concealed<br />
from their comrades.<br />
Ariakus ignores the protestations of innocence<br />
made by the panic-stricken men. After<br />
listening to the captain, he pronounces sentence:<br />
“Take them to the dungeons! The<br />
Inquisitor shall have his way with them!” The<br />
men are quickly dragged from the chamber.<br />
6) Orders Issued: Ariakus then speaks to<br />
the other Highlords, issuing military orders of<br />
great importance. At the first council, the<br />
orders are as follows:<br />
“Prepare your forces to march at an hour<br />
past the sunrise. The forces of Gunthar draw<br />
close upon the city. All five of our armies will<br />
take the field against him tomorrow, that we<br />
may grant our queen a victory for her arrival<br />
upon Krynn!”<br />
For the first time, the voices of all the occupants<br />
of the hall rise in a combined cheer. The<br />
draconians grunt, “Hail to Takhisis, Queen of<br />
Darkness!”<br />
7) Adjournment: The Hallkeeper announces<br />
the departure of the lords, in reverse<br />
of the order of their arrival. After each Highlord<br />
has left the chamber, the Honor Guards<br />
are dismissed, also in reverse order of their<br />
arrival. The council is over.<br />
Event 90: Call to Arms<br />
At dawn on Day 7, Gunthar’s armies break<br />
camp and organize into battle columns. This<br />
organization is smooth and efficient. Soon,<br />
the columns are marching toward Neraka,<br />
eight miles distant.<br />
At one hour past dawn, the Highlords muster<br />
their drunken, hung-over troops from their<br />
muddy tents. Amid much cursing and shouting,<br />
they form into ragged columns. The Blue<br />
and Red armies are ready within an hour, and<br />
form columns of some straightness. They<br />
have a look of military order about them. The<br />
Green, Black, and White armies mill about in<br />
confusion and disorder, only slowly gathering.<br />
After an hour, they are about half assembled.<br />
The city of Neraka lies still and squalid this<br />
morning. The honor guard regiments of each<br />
Highlord, as well as a few other trustworthy<br />
troops, have been left behind to guard the<br />
walls, so the city is far from defenseless.<br />
The sun beats upon the city, and the surrounding<br />
plain, with merciless intensity.<br />
Steam rises from the fetid sewers of the city<br />
and the many water-filled fissures of the plain.<br />
A stench of death seems to hang in the air<br />
already.<br />
Event 91: The Armies Gather<br />
The differing conditions of the Whitestone<br />
forces and the Dragonarmies is offset by the<br />
fact that Gunthar’s armies must march about<br />
twice as far as the evil troops to reach the<br />
battlefield.<br />
Kitiara and Ariakus have the Blue and Red<br />
armies posted over the two converging roads<br />
from the north and the west, respectively,<br />
after an hour of marching. The two armies<br />
thus have several hours to rest while the<br />
Whitestone forces march to the field, and the<br />
other evil armies straggle out from Neraka.<br />
The advancing Whitestone battle columns<br />
raise huge columns of dust. Dragons of gold,<br />
silver, brass, copper, and bronze swirl among<br />
the columns, while fast-moving units of light<br />
horse spread to either side. By midday, Gunthar’s<br />
army has moved to a point less than a<br />
mile from the two armies deployed before<br />
him, but Lucien’s Black army has nearly<br />
moved into position between the Red and<br />
Blue forces. The Green army straggles up the<br />
road toward the field, while the White army is<br />
only now leaving the city.<br />
Event 92: The Battle of Neraka<br />
At one hour past noon, the brass horns of the<br />
Whitestone armies fill the air with a martial<br />
clamor. Formed into phalanxes of the same<br />
color, the good dragons dive forward in five<br />
death-dealing columns. Bands of red, blue,<br />
and black dragons take to the air to meet the<br />
charges.<br />
The thunder of charging cavalry carries all<br />
the way to the city walls as the Knights of<br />
Solamnia spearhead the assault on the<br />
ground. All across the front of the evil armies,<br />
the veteran troops absorb the shock of the<br />
charging hordes.<br />
Gunthar attempts to break the back of the<br />
enemy resistance with his veteran troops,<br />
holding many of his units in reserve. While<br />
numerous, these reserves include many units<br />
of raw recruits who have never seen combat.<br />
The raging charge of the Knights, coupled<br />
with the overwhelming attacks of gold, brass,<br />
and copper dragons, breaks the Red army<br />
after an hour of fighting.<br />
The Red units flee toward Neraka, and<br />
sweeping charges of Knight cavalry carry the<br />
horsemen into the flank of the Black army,<br />
sending those units scrambling to defend<br />
themselves.<br />
But the Knights have expended themselves<br />
in their glorious charge. The Green army<br />
arrives on the field after the battle has raged<br />
for 90 minutes, and is able to salvage the situation<br />
on the Dragonarmy’s left. The addition<br />
of the green dragons to the fight in the skies<br />
proves enough to halt the rampages of the<br />
good dragons.<br />
Too late, Gunthar sends his reserves forward.<br />
The fresh, but inexperienced, troops<br />
fight bravely for the most part but cannot<br />
penetrate the reinforced defenses. Exhausted,<br />
the Whitestone forces fall back after three<br />
hours of fighting.<br />
Finally, Toede’s White army arrives on the<br />
89<br />
field. The hobgoblin sends his army into a<br />
half-hearted counterattack, supported by the<br />
Green army and what is left of the Blue and<br />
Black forces.<br />
Gunthar’s exhausted legions, too tired to<br />
carry forth an attack, manage to hold the<br />
defensive position and shatter the attacking<br />
evil forces. Lurching back to their original<br />
positions, where they are joined by the remnants<br />
of Ariakus’s rallied Red army, the two<br />
forces end the battle in much the same positions<br />
as they started.<br />
But in the fields and fissures between lie<br />
thousands of soldiers who will never fight<br />
again.<br />
Event 93:<br />
The Second Council of Highlords<br />
The Highlords all leave the battlefield by 4:00<br />
PM in order to return to the temple and prepare<br />
for the Second Council, to be held at<br />
sunset on Day 7.<br />
In general, the course of this council follows<br />
the same pattern described for the First Council.<br />
However, there are a few exceptions to<br />
this.<br />
The Entry of the Honor Guards, Entry of the<br />
Highlords, and Swearing of Fealty all proceed<br />
in due course. At the time of allotting presents<br />
to the Empire, however, the following gifts are<br />
made. The presents tend to be finer than<br />
those bestowed at the previous council,<br />
because each Highlord knows that the<br />
moment of the queen’s arrival is nigh, and<br />
each strives to make a very good impression.<br />
Highlord<br />
Toede<br />
Gift<br />
A steel statue of Her Majesty,<br />
Takhisis<br />
Salah-Khan A string of a dozen elven slaves<br />
Lucien A dozen casks of the finest<br />
Solanthian wine<br />
Kitiara A prisoner taken in battle-ideally<br />
a PC who fought with the<br />
armies; otherwise, use Gunthar<br />
5) Dark Justice: The Highlords accuse Toede<br />
of incompetence for the late arrival of his<br />
army on the field. The worthy hobgoblin<br />
whines that his army had to move around the<br />
entire city before it could march toward the<br />
field of battle.<br />
His defense makes no difference to the<br />
gathered lords. After a few minutes of pleading,<br />
Ariakus pronounces his sentence: “Take<br />
him to the dungeons! The Inquisitor shall<br />
work his magic upon him!”<br />
Groveling and scraping, Toede is led from<br />
the hall.<br />
6) Dark Queen’s Entry: This is the climax<br />
that the entire epic has been leading toward.<br />
All eyes turn to the dais where her throne<br />
stands. The five-headed dragon is visible, as<br />
usual, in a shadowy and unearthly form.<br />
Now, however, a small circle appears in the<br />
air before her, directly over the throne. The<br />
circle swirls in fiery patterns of color, containing<br />
elements of red, blue, green, black, and<br />
white. Over the course of a round, the circle<br />
grows to huge size.
Anyone looking through the circle at the<br />
Dark Queen sees her, not as a shadowy<br />
image, but as a real and terrible five-headed<br />
dragon, with one head of each of the evil<br />
dragon’s colors.<br />
The entrance of the Dark Queen into the<br />
world of Krynn takes place at one hour after<br />
sunset on Day 7 of this adventure, unless the<br />
Heroes of good can somehow prevent Takhisis<br />
from passing through the gate. The procedure<br />
for accomplishing this has already been<br />
determined (when the fate number was chosen).<br />
The success or failure of the PCs in their<br />
mission depends on their play of this adventure.<br />
If the Queen is Blocked from Entering<br />
Krynn: The temple immediately begins to<br />
tremble, shaking to its very roots. Everyone<br />
present, except of course the PCs, is preoccupied<br />
with escaping the doomed building.<br />
Parts of the ceiling and supporting columns<br />
begin to tumble free and fall into the Council<br />
Chamber. Any individual in the temple stands<br />
a 5% chance (1 on 1d20) per round of being<br />
struck by debris. Characters hit by debris<br />
might only be scraped by a small chunk of<br />
stone, or they might be crushed under a falling<br />
column; to determine the amount of damage<br />
sustained, roll 1d12. The result is the number<br />
of d6s of damage the character sustains.<br />
The exodus from the temple carries over<br />
into the streets of Neraka, as the entire city<br />
succumbs to earthquakes and tremors. Characters<br />
inside buildings in Neraka suffer damage<br />
exactly as calculated in the temple, start-<br />
ing one hour after the queen is driven back<br />
through the portal.<br />
Finally, six hours after the queen has been<br />
forced through the portal, the Temple of<br />
Takhisis explodes. Any characters still in the<br />
temple die immediately; characters in the city<br />
suffer 6d6 points of damage from flying<br />
debris.<br />
The flaming pieces of the temple soar skyward,<br />
into the black spaces in the sky left by<br />
the missing constellations at the start of the<br />
DRAGONLANCE epic.<br />
Once again, the Queen of Darkness and the<br />
Great Paladin circle each other warily in the<br />
night skies over Krynn.<br />
If the Dark Queen Successfully Enters<br />
Krynn: Takhisis’s evil presence has a renewing<br />
morale effect upon all of her armies, as<br />
well as serving to end the bickering among<br />
her minions. The morale of each Dragonarmy<br />
unit should be increased by 2; likewise, the<br />
morale of each Whitestone army unit is lowered<br />
by 2.<br />
Shortly after Takhisis enters Krynn, she<br />
summons her consorts, the five huge adult<br />
evil dragons that lair with her. These dragons<br />
lead the rest of the evil dragons in an all-out<br />
attack against the good dragons. Takhisis<br />
herself participates in this attack.<br />
The good dragons are driven from Ansalon<br />
again, and now the forces of evil set out to<br />
annihilate their opposition wherever good<br />
might flourish.<br />
The end of light is near and, perhaps,<br />
inevitable.<br />
90<br />
Event 94: Guard Postings<br />
The guarding of Neraka is a casual affair for<br />
the most part. Guards are encountered as<br />
indicated on the Random Encounter Chart on<br />
the Plains of Neraka, and for a short time in<br />
the city itself. After Event 83, which occurs<br />
during the morning of Day 3, guards are<br />
posted around the clock on all city walls and<br />
in all gatehouses.<br />
Guard postings last for eight-hour shifts,<br />
and all guards are changed at 4:00 AM, noon,<br />
and 8:00 PM every day. The exact makeup of<br />
guard contingents is described under the<br />
appropriate encounter area, either walls<br />
(Encounter 170) or gatehouses (Encounters<br />
168 and 169).<br />
The procedure for the changing of the<br />
guards never varies. The new guard contingent<br />
marches to the post five minutes early.<br />
Both guard contingents remain at the post for<br />
the Dark Rites (Event 95). Then the relieved<br />
guards march away to their barracks.<br />
The individual encounters list the vigilance<br />
of the guards as a percentage chance that<br />
they detect individuals passing their posts. As<br />
the guards tire during their long shifts, the<br />
vigilance rating is modified accordingly:<br />
First 2 hours of Shift = Vigilance Doubled<br />
Middle 4 hours = Vigilance Normal<br />
Last 2 hours of Shift = Vigilance Halved<br />
Event 95: Dark Rites<br />
The Dark Rites involve all residents of Neraka<br />
swearing fealty to their queen at regularly<br />
scheduled intervals. The Dark Rites occur at<br />
4:00 AM, Noon, and 8:00 PM of each day.<br />
The Dark Rites last for five minutes.<br />
The Dark Rites are announced by the banging<br />
of a large gong at the top of the tower<br />
central to the Dark Queen’s Temple. The<br />
gong sounds three times, summoning all residents<br />
of Neraka to the rites. Persons indoors<br />
step out onto the streets or plazas, and everyone<br />
looks at the tower.<br />
Upon the tower, four groups of dark pilgrims<br />
face the directions of the compass. They lead<br />
the populace in an oath of fealty (as described<br />
for the Highlords under Event 89).<br />
The dark pilgrims then proceed through a<br />
ritual sermon in a forgotten tongue. The sermon<br />
never changes, but none other than clerics<br />
of the Dark Queen understand the words.<br />
Although individuals ignoring the summons<br />
to the Dark Rites attract considerable attention,<br />
attendance is not enforced. Those sleeping<br />
or passed out are left unmolested,<br />
although officers in the Dragonarmy and evil<br />
clerics would be ostracized by their comrades<br />
for regular failure to observe the rites.<br />
Neither the guards on the wall nor those in<br />
the streets devote their undivided attention to<br />
the tower during the rites. Vigilance for wall<br />
and gatehouse guards is normal while the<br />
rites go on.
Event 96: Ribaldry Event 98: Caravans<br />
The periods of ribaldry begin with the arrival<br />
of the first Dragonarmies in Neraka. They<br />
continue every night for the duration of the<br />
adventure. The ribaldry begins at 4:00 PM<br />
each day and continues until the following<br />
dawn.<br />
During the periods of ribaldry, each inn in<br />
the district of a Dragonarmy encamped<br />
around Neraka (White and Green the first<br />
night, Black added the next, etc.) is attended<br />
by 4dlO members of the troops of that army,<br />
in addition to all other customers indicated.<br />
There is a chance that a fight might break<br />
out at any time during the periods of ribaldry,<br />
as shown under the Taverns Encounter<br />
(Encounter 154). This chance is modified<br />
according to the hour of night, as follows:<br />
Time Chance of Fight<br />
4:00 to 8:00 Halved<br />
8:00 to 12:00 Normal<br />
12:00 to dawn Doubled<br />
Event 97: Nightwalk<br />
The dead servants of the queen rise from their<br />
uneasy rests and walk the streets of Neraka,<br />
beginning with Event 82. Sensing the nearness<br />
of their release from torment, these spirits<br />
walk the streets of Neraka from midnight<br />
until 2:00 AM every night of the adventure.<br />
The undead gather in each of the five districts<br />
of the city, winding their way slowly<br />
toward the temple. This advance takes one<br />
hour.<br />
At the temple walls, each procession<br />
reverses itself and the undead once again<br />
enter the realms in the Undercity.<br />
The processions are accompanied by a<br />
host of wailings and screamings, as the<br />
undead spirits give vent to their frustrations.<br />
The participants in the Nightwalk do not<br />
disturb anyone inside buildings, nor do they<br />
molest officers of the Dragonarmies who get<br />
out of the way of the procession. Any individuals<br />
of good alignment who are outside when<br />
the procession passes are attacked by the<br />
undead. These undead are subject to normal<br />
turning by a cleric. They do not pursue their<br />
victims into buildings.<br />
Each procession is made up of the following<br />
types of undead, marching in the order<br />
listed: one lich, 11 groaning spirits (banshees),<br />
11 wraiths, 22 wights, 77 zombies,<br />
and 222 skeletons.<br />
The undead of each type emerge from a<br />
different outdoor exit from the Undercity, in<br />
each district. Characters observing the start<br />
of the procession are thus able to discover<br />
one or more of the entrances to the Undercity<br />
in each district. The undead never emerge<br />
from an indoor entrance to the Undercity.<br />
A steady stream of supplies pours into Neraka<br />
from the port of Sanction to the south<br />
and from the fertile growing regions of eastern<br />
Ansalon. During any given hour between<br />
dawn and dusk, there is a 1 in 4 chance that a<br />
caravan arrives in Neraka. Its direction of<br />
travel is determined by a 1d6 roll:<br />
D6 Roll<br />
1-3<br />
4-5<br />
6<br />
Road Traveled<br />
Sanction Road<br />
Khur Road<br />
East Road<br />
The caravans advance at one mile per hour,<br />
so if the PCs move south on the Plains of Neraka<br />
to encounter one of the above roads, roll<br />
to determine how many caravans arrive in<br />
Neraka that day and the following days. Plot<br />
the courses backward along the appropriate<br />
road to determine if the PCs encounter a car-<br />
avan.<br />
The caravans, coming as they do from sections<br />
of the continent that are still securely<br />
under the sway of the Dragonarmies, are<br />
passed into the city of Neraka with little fanfare<br />
or examination. After all, the supplies<br />
they carry are desperately craved by the hungry<br />
and thirsty members of the Dragonarmies<br />
encamped about the city.<br />
To determine the nature of a caravan, roll<br />
d6s against the following tables:<br />
Method of Transport<br />
D6 Roll Method<br />
1 Foot (slaves)<br />
2 Foot (hired bearers)<br />
3 Oxcarts<br />
4 Mules<br />
5 Wagons (horse-drawn)<br />
6 Exotic Animal:<br />
1-2 Llamas<br />
3-5 Camels<br />
6 Elephants<br />
Goods Carried<br />
D6 Roll Goods<br />
1 Ale and beer<br />
2 Wine<br />
3 Grain<br />
4 Fruit<br />
5 Vegetables<br />
6 Unusual goods:<br />
1-2 Dried meat<br />
3-4 Salt<br />
5 Oil<br />
6 Weapons<br />
91<br />
Size of Caravan<br />
D6 Roll Size *<br />
1 2d4<br />
2 2d6<br />
3 3d6<br />
4 3d12<br />
5 4d10<br />
6 4d12<br />
* Size equals number of wagons or oxcarts. If<br />
pack animals are used, double the indicated<br />
number. If slaves or bearers are used, multiply<br />
the number by 10.<br />
Caravan Guards<br />
A caravan has a number of guards equal to<br />
the number rolled on Table 3 (no multipliers).<br />
Use this table to determine the race of the<br />
guards:<br />
D6 Roll Guard Type<br />
1 Baaz draconians<br />
2 Kapak draconians<br />
3 Ogres<br />
4-6 Humans (2nd-level fighters)
A high plains valley lying between two towering<br />
ridges of the Khalkist Mountains, the<br />
Plains of Neraka have provided a home for<br />
the Dark Queen’s Temple since shortly after<br />
the Cataclysm. In the centuries since, a city<br />
has grown around the temple, and roads have<br />
been built that connect the city to other parts<br />
of Ansalon.<br />
Yet most of the plains remain in the same<br />
wild state that the post-Cataclysm years<br />
found them. The Plains of Neraka receive<br />
little water and consequently support few<br />
plants. A brown, scraggly grass covers most<br />
of the land. An occasional bush or stumpy<br />
tree has taken root near one of the infrequent<br />
ponds or waterholes.<br />
Overall, the plains present a drab, yellowbrown<br />
appearance. Looked at from ground<br />
level, the terrain appears to be flat and unbroken.<br />
An observer in the mountains, or one flying<br />
above the land on the back of a dragon,<br />
quickly sees that this is not so.<br />
The Plains of Neraka are broken by hundreds<br />
of fissures—cracks in the ground that<br />
might be 100 feet long and a mere 10 feet<br />
deep and wide, or great crevasses several<br />
miles long that reach a depth of 50 feet or<br />
more. Occasionally these fissures give vent to<br />
gouts of sulfurous smoke, steam, or even<br />
columns of flame. These eruptions combine<br />
to give the plains an unnatural, nightmarish<br />
look.<br />
The roads crossing the plains have been<br />
built at great expense by huge numbers of<br />
slaves. They are fine roads, indeed, with deep<br />
ditches running to either side of them. Any<br />
time a road crosses a crevasse, a sturdy<br />
stone bridge has been built so that the road<br />
does not have to vary from its path. Even<br />
though these roads are of high quality and are<br />
well-maintained, they can become ribbons of<br />
sticky mud during the infrequent rainstorms<br />
that occasionally douse the plains.<br />
The stream flowing onto the plains from the<br />
mountains are shallow and muddy and are<br />
easily crossed. Eventually they soak into the<br />
dusty plain and disappear.<br />
The Surrounding Mountains<br />
The Khalkist Mountains surrounding the<br />
plains are dry and devoid of life. They are<br />
very rough and can be crossed by vehicles<br />
only where roads have been cut through<br />
them. All such roads are shown on the map of<br />
the Neraka Plains.<br />
Horses and other beasts of burden can<br />
move through the mountains wherever passes<br />
are indicated on the map. Although the mountains<br />
are relatively dry, a few streams course<br />
rapidly through gorges and valleys of the<br />
range.<br />
Cliffs and other areas of steep terrain make<br />
travel through the Khalkist Mountains difficult,<br />
even for characters on foot. For each<br />
mountain hex that the PCs try to move<br />
through, roll 1d4 and subtract 1 from the<br />
result. The total is the number of sheer surfaces<br />
that must be climbed (1-3 on 1d6) or<br />
descended (4-6 on 1d6) while crossing that<br />
hex. Each of these is 1d10 x 20 feet high. If<br />
the PCs elect not to climb or descend the<br />
obstacle, they can go off in a direction perpendicular<br />
to their original direction, but any<br />
additional sheer surfaces indicated for that<br />
hex are still encountered.<br />
The Map<br />
The encounters listed in this section are<br />
keyed to the numbers on the Plains of Neraka<br />
map (on the fold-out mapsheet). Each road is<br />
marked off at one-mile intervals, as an aid to<br />
the DM when the progress of an army or caravan<br />
must be calculated.<br />
Concealment<br />
Concealment on the Plains of Neraka is practically<br />
impossible while out in the open. Fortunately<br />
the fissures provide a means of ready<br />
cover for characters willing to enter them.<br />
The base chance of discovery for two parties<br />
or individuals within 1/3 mile of each other<br />
is 100% during daylight. This assumes that<br />
neither party or individual occupies a fissure.<br />
To determine the chance of discovery at<br />
greater distances, subtract 20% from this<br />
chance for each additional 1/3 mile between the<br />
two parties.<br />
If one of the parties is flying, the chance of<br />
discovery is doubled. At night, however,<br />
sighting is only possible within 1/3 mile, and<br />
even then the chance is only half of that during<br />
the day.<br />
If one or both parties involved in a sighting<br />
attempt occupy a fissure, then they are not<br />
seen except by someone in the same fissure,<br />
someone standing at the edge of the fissure,<br />
or someone flying above the fissure.<br />
The base chance of such a discovery is<br />
again 100%. However, the terrain at the bottom<br />
of the fissure (see the Fissure Terrain<br />
Table) can reduce this chance. If the party is<br />
accompanied by a ranger or an elf, a bonus of<br />
+10% is added to all rolls to see another party<br />
or individual.<br />
Each party is rolled for separately, so it is<br />
quite possible to observe someone who does<br />
not observe you. Characters or creatures<br />
traveling together are rolled for as a group,<br />
however, not as individuals.<br />
A check should be made as soon as the two<br />
parties are within two miles of each other.<br />
Each time they get 1/3 mile closer, another<br />
check should be made. If both groups are<br />
moving, only one check is triggered as each<br />
check trigger is passed.<br />
If a party spies another group or individual<br />
and attempts to conceal itself, this cuts in half<br />
the chance that it is discovered.<br />
For every member over eight in a group,<br />
add 10% to the chance of that group being<br />
detected. During daylight, special circumstances<br />
might affect the distance at which<br />
another group can be detected. An army of<br />
thousands, for example, is detectable all the<br />
way across the plains because of the column<br />
of dust that its passing raises.<br />
92<br />
Fissures<br />
The fissures that split the plains are marked on<br />
the map. The width and depth of a fissure can<br />
be estimated by how far the characters are<br />
from the ends of the fissure. (The fissures are<br />
always deepest and widest near the center.)<br />
The fissure begins as a narrow crack in the<br />
ground, like a small ditch, and reaches a<br />
depth and width of 10 to 50 feet, depending<br />
on the size of the fissure.<br />
Fissures do not widen and deepen in a<br />
series of sharply defined steps. The process<br />
of a crack expanding from its original small<br />
end to a 50-foot-wide chasm is a gradual one,<br />
and obvious to characters moving through it.<br />
The bottoms of the fissures vary considerably<br />
in the type of terrain they hold. Check on<br />
the Fissure Terrain Table when the PCs first<br />
encounter a fissure to determine the nature of<br />
the bottom.<br />
Fissure Terrain Table<br />
D12<br />
Roll Terrain Move Conceal<br />
1 Pond Swim 1/4<br />
2 Pools 1/2 1/2<br />
3 Mud 1/3 NA *<br />
4 Damp 1/4 1/4<br />
5 Dirt NA NA<br />
6 Gravel NA NA<br />
7 Rock 1/2 1/2<br />
8 Rough 1/3 1/3<br />
9 Boulder 1/10 1/4<br />
1 0 Steam NA NA<br />
11 Smoke NA NA<br />
12 Flame NA NA<br />
* NA means “Not Applicable.”<br />
Move gives the rate of normal movement that<br />
the group can make while inside of the fissure.<br />
In the case of “swim,” movement should<br />
be calculated at 1/10 the normal rate for all<br />
characters equipped with heavy gear or<br />
lighter equipment. Heavily encumbered characters<br />
find it impossible to swim.<br />
Conceal gives an additional fraction of the<br />
normal concealment chances that the party<br />
gains from in that particular type of crevasse<br />
terrain. All modifiers as explained under Concealment<br />
above have been calculated before<br />
this fraction is added in. Round fractions up to<br />
the nearest whole number when the final percentage<br />
chance is calculated.<br />
Steam, Smoke, and Flame Vents are<br />
caused when the bottom of a fissure stretches<br />
deep into the bowels of the world, giving<br />
release to some of the infernal pressures<br />
developing there. They cannot be moved<br />
through by characters because they are effectively<br />
bottomless.<br />
There is a 10% chance per turn that a given<br />
vent erupts. Eruptions last for a single round,<br />
and can be dangerous to characters standing<br />
at the edge of the fissure at the time of the<br />
eruption.<br />
Steam eruptions inflict 4d6 points of damage<br />
to characters standing at the edge of the<br />
fissure. If a character rolls a successful saving
throw vs. breath weapon, this damage is<br />
reduced to 2d6.<br />
Smoke eruptions belch forth clouds of poisonous<br />
sulfuric smoke. Characters who roll a<br />
successful saving throw vs. breath weapon<br />
are unaffected; characters who fail must roll a<br />
successful saving throw vs. poison or be<br />
reduced to 1 hit point until they can rest and<br />
recover for 24 hours.<br />
Flame eruptions cause columns of fire to<br />
burst 100 feet or more into the sky. Characters<br />
standing at the edge of the crevasse suffer<br />
6d10 points of fire damage, although a<br />
successful saving throw vs. breath weapon<br />
reduces this to half. Characters within 100<br />
feet of the fissure suffer 2d6 points of fire<br />
damage, with no saving throw allowed.<br />
Encounters<br />
139. Godshome<br />
This secluded hollow in the Khalkist Mountains<br />
is a place of great sanctity. Shaped like<br />
a bowl in the center of a region of craggy<br />
granite peaks, Godshome cannot be entered<br />
by those not invited by the gods themselves.<br />
In the center of the bowl lies a circular, polished<br />
black surface. Even in the brightest<br />
daylight, the polished surface reflects the<br />
night sky of Krynn. Star-speckled as usual,<br />
the constellations of Paladine and the Queen<br />
of Darkness are missing from the sky, as they<br />
have been for many years.<br />
The reflections of characters standing upon<br />
or looking into the surface can vaguely be<br />
seen, as if the surface is a mirror. If the god<br />
Paladine is present (as he will be in some fate<br />
number endings), and he stands next to or<br />
upon the surface, his reflection is not visible.<br />
Instead, the constellation of Paladine appears<br />
among the stars seen there.<br />
There are two exits from Godshome, one<br />
leading to the northeast and one to the southeast.<br />
These are narrow tunnels through the<br />
rock cliffs surrounding the place. The tunnels<br />
are three feet in diameter, so most characters<br />
must pass through them on hands and knees.<br />
In both cases, the tunnels exit into the<br />
Misted Vales (Encounter 140).<br />
140. Misted Vales<br />
The tunnel abruptly ends in an area of thick<br />
white fog. The ground here slopes downward,<br />
away from the tunnel exit.<br />
Scraggly oak trees claw upward through<br />
the mists Many paths intertwine all lead<br />
ing downward.<br />
These mists are magical. They allow anyone<br />
to pass into and through them, but only those<br />
commanded by the gods to enter Godshome<br />
are permitted to find the tunnel openings.<br />
After the last PC emerges from the tunnel, the<br />
mists seem to swirl around and close in<br />
thickly. The tunnel opening has vanished and<br />
cannot be discovered again. The misty vales<br />
lead downward over gently descending<br />
ground. Treat them as parts of the Khalkist<br />
Mountains for purposes of random encounter<br />
generation.<br />
Any good or neutral aligned characters in<br />
the mists receive an automatic +2 bonus to<br />
all attack rolls made in the mist, and a -2<br />
bonus to their Armor Class. The mists continue<br />
until the PCs have emerged beyond the<br />
outer extensions of the mountain range.<br />
141. Obvious Tunnel Entrances<br />
A network of tunnels crisscrosses the ground<br />
underneath the Plains of Neraka. These tunnels<br />
are displayed on the map with dotted<br />
lines. Characters walking on the surface who<br />
pass over the location of a tunnel see no clue<br />
of its existence.<br />
All of the tunnel entrances are located in<br />
the bottoms of fissures labeled with a “141”<br />
on the map.<br />
The wall of the fissure is interrupted by a<br />
gaping black hole, about six feet in diameter.<br />
It leads into the ground and disappears<br />
into the darkness.<br />
Whenever the PCs pass an obvious tunnel<br />
entrance, roll 1d6. On a result of 4-6, a randomly<br />
encountered creature is immediately<br />
inside the tunnel entrance. Roll a normal<br />
reaction check to determine if the creature<br />
attacks PCs outside of its den; it will certainly<br />
defend itself against characters who enter.<br />
142. Tunnels and Caverns<br />
Once inside the tunnels, the characters find<br />
themselves in narrow, damp passages. The<br />
tunnels are normally about 10 feet in diameter.<br />
At those locations on the map where the<br />
passage expands into larger chambers, the<br />
regions are natural caves. Many stalactites<br />
hang from the ceiling, while stalagmites strike<br />
upward from the floor.<br />
Water trickles in small amounts through<br />
both the tunnels and the caverns. The caverns<br />
also each host several large, still pools.<br />
Bats are common in all of the caverns, and at<br />
dawn and dusk are actively flying through the<br />
tunnels.<br />
Roll for random encounters normally while<br />
the PCs are in the tunnels. These tunnels are<br />
known to the Dragonarmies, so the PCs might<br />
very well run into draconian patrols down<br />
here.<br />
143. Hidden Tunnel Entrances<br />
Like the obvious tunnel entrances, the hidden<br />
entrances are always discovered in the bottoms<br />
of fissures (those marked with a “143”).<br />
They should be treated as secret doors, however,<br />
when determining whether or not the<br />
characters discover them.<br />
The hidden tunnel entrances are not creature<br />
lairs, so no additional random encounter<br />
check is required when the PCs pass one. The<br />
93<br />
entrance is hidden by whatever type of masking<br />
works best in the terrain type in the fissure.<br />
A brush-filled fissure might have a tunnel<br />
entrance concealed behind tangled<br />
branches, while a fissure lined with boulders<br />
might have the entrance as a narrow crack<br />
between two huge rocks.<br />
144. Gully Dwarf Hideout<br />
This cavern serves as the lair and hideout of a<br />
group of bandit gully dwarves who plan to<br />
embark on a spree of robbery and destruction<br />
across the face of Neraka and the rest of<br />
Krynn.<br />
Any day now....<br />
A low growling sound emerges from<br />
behind a large rock that partially blocks<br />
the passageway. The growling has a<br />
rhythmic quality to it, as if it is keeping<br />
time to a creature’s deep breathing.<br />
Behind the boulder sleeps the gully dwarf<br />
assigned to guard this end of the cavern.<br />
Each of the tunnels leading into the area is<br />
similarly “protected” by an equally watchful<br />
sentry.<br />
The gully dwarf’s name is Barph, and he<br />
does anything to save himself if he is awakened<br />
and threatened—or even if he thinks<br />
that he might be threatened. His confession<br />
goes something like this:<br />
“Great Boofus-it all his fault! I try to stop<br />
him, but they no listen. Drag me along!<br />
“Me no want to be bandit! Soon they go<br />
and rob everybody-me not go, unless<br />
they make me. Boofus so mean, we got to<br />
do what he say!<br />
“You guys look out for Boofus! Him one<br />
mean gully dwarf—him rob you. Boofus is<br />
great bandit—scourge of Krynn, is him!”<br />
The squalid camp of the gully dwarves lies at<br />
the center of this vast cavern, but the scent of<br />
the place is obvious as soon as the PCs enter<br />
the cavern. If the PCs advance a little ways,<br />
they soon hear arguing ahead, followed by a<br />
splash.<br />
Moving forward a little more, they see the<br />
bandit camp in all its glory.<br />
Sputtering torches and a great bonfire<br />
illuminate as ragged a collection of gully<br />
dwarves as might be found on Krynn.<br />
Dirty clothes hang about on an assortment<br />
of lines, and several pairs of worn<br />
leather boots dry by the large fire.<br />
The camp consists of many ragged<br />
tents, most of which seem to have neither<br />
roofs nor much in the way of sides. The<br />
camp is located on the edge of an underground<br />
pool.
A gully dwarf emerges from the water,<br />
sputtering and cursing, while another<br />
stands on what looks like a diving board.<br />
Instead of facing out toward the water, the<br />
gully dwarf faces a larger gully dwarf behind<br />
him.<br />
“Me not sleep on guard duty!” declares<br />
the gully dwarf on the diving board. “Me<br />
just rest eyes!”<br />
“Liar!” cries the bigger one. “You sleep!<br />
Who know what could sneak up on Boofus<br />
while guards sleep?”<br />
With that, the large gully dwarf kicks<br />
the other off the board and into the pool.<br />
The clothes drying near the fire are all from<br />
gully dwarves whom Boofus, the large one,<br />
has disciplined recently. The latest victim<br />
sputters forth from the water, removes his<br />
boots, and sets them by the fire disgustedly.<br />
If the PCs hurry forward, they can catch<br />
Boofus while he is still on the diving board,<br />
staring triumphantly at his handiwork in the<br />
water below. The other gully dwarves, standing<br />
around and watching, quickly dive for<br />
cover at the approach of the PCs, not thinking<br />
to warn their leader.<br />
Blocking Boofus’s exit from the board is a<br />
very commanding position, since the huge<br />
gully dwarf is immensely afraid of water. If<br />
threatened there, he immediately agrees to<br />
any terms in order to get away from the hated<br />
liquid.<br />
Boofus can actually prove to be a valuable<br />
source of information. He knows that the tunnel<br />
to the east leads to the Undercity of Neraka.<br />
He also knows that there is a “blooddrinker”<br />
(vampire) along the way. He knows<br />
that the big bats with the blood-drinker fly out<br />
of the cavern at night. He has recently learned<br />
of the Nightwalk (Event 97), during which the<br />
Undercity is almost deserted.<br />
None of this information is provided willingly,<br />
of course. As soon as Boofus figures<br />
that he has said enough to save his skin, he<br />
clams up. Only additional threats motivate<br />
him to continue.<br />
145. The Waterhole<br />
The tunnel ends abruptly in a large cavern.<br />
The floor is completely covered with<br />
dark, still water.<br />
This large cavern is the converging point of<br />
several corridors. Many of the denizens of the<br />
tunnels come here to drink.<br />
The pool is four feet deep in the center and<br />
only half that at the edges. Dwarves and halflings<br />
have to be carried if the PCs move into<br />
the middle, but all characters can walk if the<br />
party moves around the edge.<br />
In any event, the characters are attacked<br />
by two giant crocodiles when they are midway<br />
between two exits. The stupid reptiles<br />
press their attacks until both have been killed,<br />
since they have never encountered prey that<br />
they could not kill.<br />
94<br />
146. The Cube’s Room<br />
This area is home to a gelatinous cube. The<br />
monster has located itself squarely across the<br />
tunnel, so that nothing can move past without<br />
touching it.<br />
If the PCs approach, roil normally for surprise<br />
to determine if they see the cube. If not,<br />
characters in the front rank of the party discover<br />
the creature by walking into it.<br />
The cube has absorbed a number of valuables<br />
in the course of its scavenging expeditions.<br />
These include 130 stl, 180 sp, five<br />
gems worth 1d6 x 100 stl apiece, and a key<br />
to the darkways, which might prove very<br />
valuable in the Dark Queen’s temple.<br />
147. Caverns of Fungi<br />
The tunnel opens onto a huge, bizarre<br />
cavern. Giant mushrooms, molds, and<br />
other types of fungi grow in profusion.<br />
Green lichens, clinging to the walls, shed<br />
a phosphorescent light, softly illuminating<br />
the vast chamber.<br />
Several pools of still water lie among<br />
the fungi. A trickle of water spills down<br />
the wall, splashing into one of the pools.<br />
A layer of green mold over the floor looks<br />
like a lush carpet.<br />
This pastoral cavern is crowded with fungi.<br />
Many varieties are edible. Scattered among<br />
the innocent fungi are numerous shriekers,<br />
however. As the characters pass through,<br />
these begin howling their piercing alarm.<br />
The true menace of the cavern comes from<br />
the band of trolls living in a small side cavern<br />
in the southwestern wall. The entrance to<br />
their lair is concealed by a clump of giant<br />
mushrooms.<br />
There are six trolls. They attack any characters<br />
discovered trespassing in their cavern.<br />
If the combat goes badly for them (if four of<br />
them are at 0 hit points or less), they try to<br />
retreat from the fungus cavern, leading any<br />
pursuers away from their lair.<br />
The lair is discovered if any characters<br />
search in its general vicinity. A ranger who<br />
makes a successful tracking roll sees the path<br />
leading to the lair with little difficulty. It contains<br />
a number of well-chewed bones, obviously<br />
human, and two officers’ uniforms from<br />
members of the Red Dragonarmy. A small<br />
wooden chest in the lair contains 20 stl, 70<br />
gp, and 130 sp. The key to the chest is carried<br />
on a thong around the neck of the largest<br />
troll.<br />
148. Lair of the Blooddrinker<br />
This chamber looms high overhead, and<br />
the floor falls away quickly, disappearing<br />
down a steep slope into darkness. A row<br />
of stalagmites rises from the floor just<br />
inside the entrance, like the pipes of a<br />
gigantic organ.
Any PCs who announce that they are examining<br />
this cavern closely should be allowed to<br />
roll Wisdom Checks. A successful check<br />
means that the character notices an aura of<br />
death or decay about the place.<br />
The cavern is about 1,000 feet in diameter,<br />
and roughly circular. The ceiling towers 300<br />
feet over the floor in the center of the chamber.<br />
The floor descends steeply to a circular<br />
area, about 300 feet wide, in the center of the<br />
cave. Throughout the area where the floor<br />
descends, many stalagmites jut upward. The<br />
central circle is cleared and smooth, however.<br />
The chamber’s primary occupant is a vampire<br />
that lairs in the center of the cleared area.<br />
The powerful creature is attended by 11<br />
wraiths, also found in the central area. The<br />
other occupants of the chamber are 24 mobats<br />
who are here only during daylight hours. At<br />
night they fly out and circle the plains, looking<br />
for prey.<br />
In the center of the cleared area lies the coffin<br />
of the vampire. No other features mar the<br />
smoothness of the area.<br />
The vampire senses the presence of any<br />
warm-blooded intruders in his lair. If the<br />
mobats are present, he sends them to attack<br />
the player characters until the party is<br />
embroiled in combat. In the meantime, the<br />
vampire and the wraiths spread out and surround<br />
the PCs. Five rounds after the mobats<br />
attack, the undead join in.<br />
If the mobats are not present, the vampire<br />
sends the wraiths to attack the intruders in<br />
groups of two or three. Each attack comes<br />
from a different direction. As the last group of<br />
wraiths attacks, the vampire attacks from the<br />
opposite direction, attempting to slay any<br />
clerics with the group before he can be turned.<br />
The vampire has been ousted from the<br />
Undercity of Neraka by the liches that now<br />
control it. He burns with desire to return to the<br />
Undercity as a ruler. To this end, he has a<br />
map of all of the passages of the Undercity<br />
locked in a small box in his coffin.<br />
The box is buried in the dirt of the coffin<br />
and is only discovered if the dirt is moved<br />
around. It is not locked. It also contains three<br />
vials: a potion of gaseous form, a potion of<br />
invisibility, and a potion of speed.<br />
149. Army Encampment<br />
An army encampment can be encountered<br />
here the night before an evil army enters Neraka.<br />
The location of this encounter varies;<br />
consult the events to determine which road a<br />
given army marches toward Neraka upon,<br />
and how far from the city it is when it stops to<br />
encamp.<br />
The camp is guarded by a ring of pickets<br />
about ¼ mile out from the bulk of the army.<br />
Patrols on dragonback circle the perimeter<br />
every two turns. Roll 1d6 to determine the<br />
composition of the picket outposts: 1-2 =<br />
human mercenaries; 3 = ogres; 4-5 = Baaz<br />
draconians; 6 = Kapak draconians. There are<br />
1d4+1 guards at each outpost, which are<br />
located 100 yards apart.<br />
The heart of the camp is a ring of hundreds<br />
of tents, spread around a central area some<br />
200 yards in diameter. The central area contains<br />
the Highlord’s tent, several other officers’<br />
tents, and a large area where the<br />
dragons sleep.<br />
150. <strong>Free</strong>dom Fighters<br />
There are several bands of freedom fighters<br />
camped on the Plains of Neraka. Each of<br />
these encounters is essentially identical.<br />
The freedom fighters are small bands of<br />
humans (use the Man, Bandit stats) who<br />
resist the might of the Dragonarmies in the<br />
very heart of the evil empire. They live in dirt<br />
caves excavated in the side of the fissure.<br />
Experts at camouflage, the freedom fighters<br />
have only ½ the normal percentage chance of<br />
being detected in these fissures.<br />
The caves are located on both sides of a<br />
fissure and are concealed by dirty cloths<br />
hanging across the entrances. These cloths<br />
look remarkably like the dirt walls of the fissure<br />
and are treated as secret doors. There<br />
are five caves in each side of the fissure.<br />
Alert lookouts are posted above the caves,<br />
watching the plains and the fissure. Each<br />
lookout post is manned by a pair of watchers;<br />
if intruders are discovered, one reports back<br />
to the camp while the other keeps the intruders<br />
in sight, falling back slowly if necessary.<br />
When the camp is aware of the intrusion,<br />
the remaining lookout tries to lure the intruders<br />
into an ambush by allowing himself to be<br />
seen and then running down the base of the<br />
fissure. If the intruders pursue, 30 freedom<br />
fighters burst out of the caves when the<br />
strangers are below and between them. Each<br />
freedom fighter is armed with a short bow and<br />
a short sword.<br />
If the intruders are obviously members of<br />
the Dragonarmies, the freedom fighters attack<br />
instantly. Otherwise the strangers have a<br />
chance to talk their way out of the ambush.<br />
The freedom fighters give no names, but<br />
simply call each other “leader” or “fighter 1,”<br />
etc. They are very interested in the destruction<br />
of the dragon empire and give the PCs<br />
the following bits of information if persuaded<br />
that the characters are sincere:<br />
• Lute’s Loot Pawnshop (red district) and<br />
the Inn of the Broken Shield (white district)<br />
are centers of underground activity<br />
in the outer city.<br />
• A dangerous underground passage leads<br />
from the tunnel entrance (nearest<br />
Encounter 141 or 143) to the Undercity.<br />
• The leader has up-to-date information<br />
about Events in Neraka. He is familiar<br />
with the guard postings, once they have<br />
been made. He knows about the Nightwalk.<br />
151. Ogre Home<br />
As in the freedom fighter encounters, these<br />
encounters are identical wherever they<br />
occur.<br />
Each of these areas is home to 4d6 ogres.<br />
The community is gathered around a small<br />
fissure with a waterhole in the bottom. The<br />
ogres live in crude stone huts (one hut per<br />
95<br />
four ogres). Large racks support strips of<br />
meat drying over smokeless charcoal fires.<br />
The ogres are casual about security as they<br />
do not feel threatened here. They attack<br />
strangers mercilessly unless those strangers<br />
can prove that they are here by permission of<br />
the Highlords or other Dragonarmy officers.<br />
As the ogres occasionally serve in the<br />
Dragonarmies, one of the stone huts contains<br />
enough ogre-sized uniforms to outfit the community<br />
as troops in a Dragonarmy, Roll ld6:<br />
1 = White; 2 = Green; 3 = Black; 4 = Red; 5 =<br />
Blue; 6 = roll again. With some 2d6 turns of<br />
modification, one uniform can be made to fit<br />
a human.<br />
This area is abandoned, and all valuables<br />
removed, if the Whitestone army is within five<br />
miles.<br />
152. Guardpost<br />
A number of guardposts are scattered about<br />
the plains as stations for the patrols that regularly<br />
scour the area. Each is similar: a square<br />
stone building with two sturdy wooden doors,<br />
a tall wooden tower, and a well. Being in a<br />
guardpost lowers a creature’s chance of being<br />
spotted by 25%.<br />
The tower is occupied by two members of<br />
the garrison at all times. They have a horn to<br />
summon their comrades from the blockhouse.<br />
The garrisons of the guardposts vary. Consult<br />
the Garrison Table to determine what<br />
type and how many creatures guard here and<br />
to which Dragonarmy they belong.<br />
Garrison Table<br />
D12<br />
Roll Troops Army<br />
1 Baaz (3d6) White<br />
2 Baaz (3d6) Green<br />
3 Kapaks (2d8) Blue<br />
4 Kapaks (2d8) Red<br />
5 Boza ks (2d6) Black<br />
6 Sivaks (2d6) Red<br />
7 Ogre (2d6) Black<br />
8 Hill Giants (2d4) Green<br />
9 Minotaurs (2d6) White<br />
10 Humans (3d6) Red<br />
11 Humans (3d6) Blue<br />
12 Humans (3d6) White<br />
The humans are 2nd-level fighters led by a<br />
4th-level fighter. The uniforms of humans fit<br />
PCs. Ogre and minotaur uniforms can be<br />
modified to fit.<br />
The buildings contain enough bunks for the<br />
garrison, as well as wooden tables and<br />
benches. Posted to the wall is a Writ of Passage<br />
and a gate pass signed by the proper<br />
Highlord.
This is the religious center of the Dragon<br />
Empire. The Highlords meet at the looming<br />
walls. The only access to the Inner City is<br />
through the Main Gate or the gates in each of<br />
Encounters in the Outer City<br />
Temple of Takhisis in the center of Neraka to the army quarters. Following Event 83, these Encounters 153 through 161 are each<br />
determine policy under the watchful eye of gates are strictly guarded by the most elite repeated in several different locations in the<br />
the Queen of Darkness. All that is terrible and troops the Dragonarmies can muster.<br />
Outer City of Neraka. The descriptions given<br />
vile can be found here, and one must step The Undercity refers to the maze of twisting are general so that they will hold true for all<br />
with confidence and care to avoid trouble. tunnels, caverns, sewers, and catacombs that types of a given establishment or compound.<br />
Yet even among this foulness and decay are spreads like a spider web beneath both the Encounters 162 through 167 represent<br />
folk who are willing to aid the Heroes...if those Outer and Inner Cities, and even connects to specific areas and are only located in one<br />
who are trustworthy can be found.<br />
the dungeons of the Temple itself.<br />
place on the map of Neraka.<br />
The Undercity certainly offers one means of The streets in the Outer City are dirt<br />
The City of Neraka<br />
passing the guards at the gates. It also avenues lined with wooden sidewalks. This<br />
involves the risk of many horrible encounters. allows foot traffic to avoid stepping into the<br />
The city is divided into three sections: the<br />
seas of mud that these streets become during<br />
Outer City, the Inner City, and the Undercity.<br />
The Outer City refers to those streets and<br />
Maps<br />
rainstorms.<br />
buildings that lie outside of the city’s walls. The map of Neraka shows both the Outer and 153. Taverns<br />
Note that one section of the city—the White Inner City portions of the city. Encounter<br />
Quarter next to the Main Gate—would nor- areas are numbered in specific buildings of The taverns in the Outer City are almost all<br />
mally be considered part of the Inner City, the city. Buildings that are not marked are pri- ramshackle wooden buildings with a cheap<br />
except that its wall remains uncompleted. vate residences and boarding houses.<br />
and well-used appearance. (On the City of<br />
Thus, it is treated as part of the Outer City. The map of the Undercity shows the pas- Neraka map, taverns are the buildings marked<br />
There are no restrictions on access to the sages, chambers, and catacombs of that with a dot-see the map key.) Generally the<br />
Outer City. Nor is there any shortage of region as they are located with respect to name of the establishment is displayed on a<br />
trouble when a group with the uniforms of one entrances to the upper city. Certain surface faded sign over the door. The name often<br />
army strays into the quarter of another.<br />
connections are provided as reference points reflects the color of the district in which the<br />
The Inner City refers to those buildings and on the Undercity map.<br />
establishment is located (e.g., the Red Dragon,<br />
streets that lie within the city’s protecting<br />
the White Shield, the Black Boot, etc.).<br />
96
Any windows are broken. Furniture is<br />
invariably sturdy hardwood and is primitive in<br />
nature. The bartenders keep kegs and casks<br />
behind the bar and bottles of hard liquor in<br />
cabinets well out of the reach of thirsty<br />
patrons. Because of the influx of troops,<br />
prices are inflated to about double those listed<br />
in the Players Handbook.<br />
All taverns have front and back entrances,<br />
as well as 1d6+1 windows.<br />
The taverns are open around the clock. To<br />
determine the makeup of the clientele when<br />
the PCs enter, roll 1d6 and subtract 1. The<br />
final result is the number of times to roll on<br />
the Tavern Customer Table to determine how<br />
many of what types of beings occupy the bar.<br />
Note that Ribaldry (Event 96) adds to this<br />
number. If 0 rolls are indicated, no customers<br />
are present.<br />
Tavern Customer Table<br />
D20<br />
Roll Customer Type and Number<br />
1-3 Human Merchants (1d6+1)<br />
4-6 Human Mercenaries * (1d10+1)<br />
7-8 Baaz * (1d10+1)<br />
9-10 Kapaks * (1d8+1)<br />
11 Sivaks * (1d6+1)<br />
12 Bozaks * (1d6+1)<br />
13 Auraks * (1d6+1)<br />
14 Ogres * (1d6+1)<br />
1 5 Minotaurs * (1d6+1)<br />
16-18 Trollops (1d8)<br />
19-20 Human Laborers (2d6)<br />
* These are troops in a Dragonarmy. Roll 1d8<br />
to determine which army:<br />
D8<br />
Roll Dragonarmy<br />
1 White<br />
2 Green<br />
3 Black<br />
4 Blue<br />
5<br />
6-8<br />
Red<br />
The army of the district the tavern<br />
occupies<br />
Brawls: There is a 10% chance per hour that<br />
a fight breaks out in a tavern during the Ribaldry<br />
Event, which lasts from 4:00 PM to 5:00<br />
AM. This chance is increased by 10% for<br />
members of every other Dragonarmy (besides<br />
the one controlling the district) that are present.<br />
If the PCs are not wearing any military<br />
uniforms, their presence increases the chance<br />
of a fight by an additional 10%.<br />
Check one turn after the PCs enter a tavern<br />
and then after each hour that they remain<br />
there. Bar brawls in Neraka are savage affairs,<br />
with weapons, spells, and special abilities all<br />
coming into play. Members of all different factions<br />
present invariably become involved.<br />
Each faction sticks together and all other factions<br />
are considered enemies.<br />
The city guards (of the local quarter) arrive<br />
2d6 rounds after a fight begins, emptying the<br />
bar quickly. Any brawlers apprehended by the<br />
guards are taken to the Pen (Encounter 162).<br />
The guards always arrest members of other<br />
factions first, giving their own comrades time<br />
to escape.<br />
If the PCs are not wearing the uniforms of<br />
the district’s Dragonarmy, each character has<br />
a base 20% chance of being arrested in the<br />
general panic to escape the bar. Fighting with<br />
the guards results in all present members of<br />
the district’s Dragonarmy joining forces to<br />
slay the offender.<br />
154. Inns<br />
Inns are establishments where the PCs might<br />
be able to rent rooms for one night or several<br />
nights. (On the City of Neraka map, the inns<br />
are the buildings marked with Xs—see the<br />
map key.) In many cases, as shown on the<br />
map, an inn and a tavern are adjacent. Consider<br />
these establishments to be large buildings<br />
with both functions addressed.<br />
An inn has a 90% chance of having room<br />
for the PCs before the district’s Dragonarmy<br />
arrives, and a 25% chance thereafter. A room<br />
costs 1d4 stl per night, although the cost can<br />
be cut in half if the customer is willing to sleep<br />
on the floor.<br />
Food is always served, but again at double<br />
the prices listed in the Players Handbook. The<br />
residents of the inns generally try to leave<br />
each other alone.<br />
155. Army Camps<br />
These are established immediately following<br />
the arrival of the district’s army. The camps<br />
are approximately double the size of the<br />
Outer City districts shown on the map and<br />
spread into the plains beyond Neraka.<br />
The camps consist of canvas tents and are<br />
the sleeping quarters for the troops and noncommissioned<br />
officers of the Dragonarmies.<br />
The officers seek more comfortable quarters<br />
in town. Each Dragon Highlord usually has a<br />
large house in the center of the camp in which<br />
he or she resides. During this adventure, however,<br />
the Highlords all stay at their quarters in<br />
the temple.<br />
The camps are crowded with sleeping<br />
troops from 4:00 AM until noon. From noon<br />
until 4:00 PM, the camps are crowded with<br />
grumpy, hung-over troops. Starting at 4:00<br />
PM, the troops move back into town for<br />
another night of carousing.<br />
The camps are guarded with a casual<br />
assortment of pickets placed at 100-yard<br />
intervals about the perimeters. The status of<br />
these guards should be determined by a 1d6<br />
roll: 1-2 = alert; 3-4 = asleep; 5-6 = have<br />
abandoned the post and gone into town.<br />
156. Market Square<br />
These are large, open plazas surrounded by<br />
dozens of little stalls. The stalls are not shown<br />
on the City of Neraka Map, but they are all<br />
around the perimeter of the open area. From<br />
dawn until shortly after noon, these stalls are<br />
locked and guard patrols frequently look in<br />
on the abandoned plazas. Starting at about<br />
1:00 PM, and continuing until dawn, the stalls<br />
are opened and the goods within hawked for<br />
97<br />
sale by the sleaziest collection of hucksters<br />
and salesmen ever gathered on Krynn.<br />
Items for sale in the market squares include<br />
a tremendous variety of meats, fruits, vegetables,<br />
baked goods, candy, and exotic cuisine<br />
from the far corners of the world. Every variety<br />
of liquid refreshment, usually intoxicating,<br />
is available in quantities large or small. Animals<br />
both mundane and exotic are offered for<br />
sale, as are an amazing collection of worthless<br />
trinkets and military souvenirs. Pennants<br />
proudly proclaiming the various Dragonarmies,<br />
or announcing a victory at the yet-tobe-fought<br />
Battle of Neraka can be bought<br />
cheaply.<br />
Herbs, spices, potions, and poisons are all<br />
advertised for sale. Potions generally go for<br />
about 100 stl, and there is a 50% chance that<br />
they do not perform as claimed. The water in<br />
a potion bottle always carries at least a mild<br />
enchantment, so a detect magic does not<br />
reveal the potion to be worthless. If a potion is<br />
determined to be other than what is claimed,<br />
it might be poison (10%), another randomly<br />
determined type of potion (30%), or simply<br />
mildly enchanted water (60%).<br />
Haggling is the name of the game in the<br />
market squares. All merchants start out asking<br />
at least five times what they figure they<br />
can get for their wares; only skillful bargaining<br />
will bring them down to a standard price.<br />
157. Dark Churches<br />
These are small temples devoted to the worship<br />
of the Queen of Darkness. Each is a<br />
small stone building with a courtyard in front<br />
enclosed by a low stone wall. (On the City of<br />
Neraka map, dark churches are the buildings<br />
with circles inside their outlines-see the map<br />
key.) Multicolored tapestries hang outside<br />
and inside the temples, displaying images of<br />
all five types of evil dragons. The banners of<br />
whichever quarter the temple occupies are<br />
given a prominent position.<br />
Each temple is staffed by 2d6 Dark Pilgrims.<br />
The pilgrims do a brisk business in<br />
“prayers for hire.” Troops and officers of the<br />
Dragonarmies frequently visit the temples<br />
and pay one stl for a blessing that supposedly<br />
increases their chances of surviving an<br />
upcoming battle.<br />
Other treatments, such as removing or<br />
placing curses, cure light wounds, and other<br />
small enchantments, are available for a<br />
steeper price. Usually 4d10 stl is asked for<br />
services in this category.<br />
Any visitors who arouse the suspicions of<br />
the Dark Pilgrims are secretly examined with<br />
a detect good spell. If the visitors are of highly<br />
good alignment, the guards arrive 3d6 rounds<br />
later. The Dark Pilgrims attempt to delay the<br />
departure of the good visitors, using force if<br />
necessary, until the guards arrive.<br />
158. Merchant and Craftsman Shops<br />
A vast assortment of merchant shops lines<br />
the streets of Neraka. (On the City of Neraka<br />
map, these shops are the black buildings.) As<br />
with most other costs, the prices of goods and
services is approximately double what might<br />
be expected. Goods purchased in a shop are<br />
much less subject to bargaining than those<br />
found on the Market Square.<br />
To determine the merchandise sold in a<br />
given shop, roll 1d100 on the Merchant Shop<br />
Table.<br />
If the PCs are looking for a specific type of<br />
shop or craftsman, roll 1d100 to determine a<br />
starting place on the table. Then move down<br />
the table, passing one type of merchant or<br />
craftsman for each Encounter 158 that the<br />
Heroes pass, until they reach the type that<br />
they are looking for.<br />
If the PCs ask for directions, simply place a<br />
shop of the type they seek 1d4 blocks away<br />
and allow them to find it if they obtain and follow<br />
the directions.<br />
The size of the shop is determined by the<br />
type of work done there, as a wainwright requires<br />
much more space than a gemcutter,<br />
for example.<br />
Merchant Shop Table<br />
D100<br />
Roll<br />
1-3<br />
4-7<br />
8-10<br />
11-13<br />
14-16<br />
17-21<br />
27-29<br />
30-32<br />
33-35<br />
36-38<br />
39-40<br />
41-42<br />
43-45<br />
46-48<br />
49-50<br />
51-53<br />
54-56<br />
57-60<br />
61-62<br />
63-65<br />
66-67<br />
68-70<br />
71-72<br />
73-75<br />
76-80<br />
81-83<br />
84-85<br />
86-90<br />
91<br />
92-94<br />
95-97<br />
98-00<br />
Shop Type<br />
Moneychanger<br />
Moneylender<br />
Jeweler/Gemcutter<br />
Apothecary/Alchemist<br />
Locksmith<br />
Blacksmith<br />
Embalmer/Undertaker<br />
Musician/Dancer<br />
Physician/Bloodletter<br />
Barber<br />
Scribe<br />
Stonemason/Quarryman<br />
Tailor<br />
Teamster/Mule-skinner<br />
Wainwright/Wheelmaker<br />
Baker<br />
Glassblower/Bottlemaker<br />
Leatherworker/Tanner<br />
Ropemaker<br />
Shoemaker/Bootmaker<br />
Brewer/Distillery<br />
Trinkets/Cheap junk<br />
Weaponsmith<br />
Armorer<br />
Butcher<br />
Caravan Guides/Outfitting<br />
Mapmaker<br />
Pawnshop<br />
Sorcerer<br />
Sage<br />
Architect/Engineer<br />
Harness and Tack<br />
159. Guardhouse<br />
A guardhouse is always garrisoned by the<br />
Dragonarmy in whose district it is located.<br />
(For the number and type of troops in each<br />
detachment, consult the Garrison Table in<br />
Encounter 152, ignoring the “Army” column.<br />
Roll three times.) A Dragonarmy officer is<br />
always present to command the detachment.<br />
Each guardhouse is a sturdy stone building<br />
and contains a waiting room, two interrogation<br />
rooms, four cells, an office (for the officer),<br />
and a ready room for the troops on duty there.<br />
Each guardhouse is staffed by three detachments<br />
of troops, unless a detachment is out in<br />
response to a call. If the Dark Pilgrims at a<br />
Dark Church call for help, a detachment is<br />
sent. Likewise, if a brawl breaks out in a bar,<br />
one of the detachments rushes to arrest the<br />
troublemakers. At least one detachment<br />
always remains in the guardhouse.<br />
The cells are used only to hold prisoners<br />
whom the officers think are worthy of the<br />
attentions of the Inquisitor or an appropriate<br />
Highlord. Troublemakers, drunks, and rowdies<br />
are immediately sent off to the Pen<br />
(Encounter 162).<br />
The first detachment rolled is the one that is<br />
always present at the guardhouse. Roll 1d8 to<br />
determine if either of the others are currently<br />
busy quelling some disorder: 1-5 = all 3 are<br />
present; 6-7 = the third detachment rolled is<br />
absent; 8 = the second and third detachments<br />
are absent. If the PCs have created a diversion<br />
that has drawn a detachment away, then<br />
the third detachment is absent, and on a 6-8<br />
the second is also busy.<br />
160. Entrances to the Undercity<br />
These are of two types: outdoor and indoor<br />
entrances. They are never obvious to passersby.<br />
Outdoor entrances are almost always<br />
through secret trap doors concealed in the<br />
wooden sidewalks of the Outer City.<br />
Outdoor entrances to the Undercity that are<br />
located in Neraka’s Inner City generally use<br />
the sewer grates that line the city streets.<br />
Where these encounter areas are marked on<br />
the map, the grates swing easily upward. The<br />
grates have a locking catch underneath, so<br />
simply pulling up on a grate does not release<br />
it. A successful open locks check by a thief is<br />
required to release the catch.<br />
Indoor entrances are concealed beneath<br />
floorboards, or under rugs, tables, or beds.<br />
Treat these entrances as secret doors for purposes<br />
of discovery.<br />
161. Warehouse and Storage Bins<br />
These buildings contain the vast stockpiles of<br />
supplies that have been gathered to support<br />
the Dragonarmies. The caravans that continue<br />
to arrive in Neraka bring additional<br />
quantities of goods, which are immediately<br />
carried to an empty warehouse for storage.<br />
The buildings are all made of stone block<br />
with heavy wooden doors. Each door is<br />
securely locked, and is so strong that any<br />
attempts to open doors suffer a -3 penalty.<br />
98<br />
To determine the contents of a given warehouse,<br />
roll 1d10 and consult the Warehouse<br />
Table.<br />
Warehouse Table<br />
D10<br />
Roll Contents<br />
1 Uniforms (district color)<br />
2 Beer and ale in casks<br />
3 Liquor and wine<br />
4 Salt (1-3) or Oil (4-6)<br />
5 Weapons of all Dragonarmy types<br />
6 Fodder (hay and oats)<br />
7-8 Grain in bins<br />
9 Hardtack (dried meat)<br />
1 0 Dried fruits and vegetables<br />
Roll percentile dice to determine how full a<br />
given warehouse is if the PCs should enter it.<br />
The dice roll equals the percentage of capacity<br />
currently in use.<br />
162. The Pen<br />
This is the holding tank for troops and citizens<br />
who get too rowdy in Neraka and then make<br />
the ultimate mistake of not outrunning the<br />
guards. Such unfortunates are brought to the<br />
Pen and thrown in.<br />
Food and shelter are not provided in the<br />
Pen, since most prisoners enjoy only brief<br />
stays. Several rusty iron troughs offer what<br />
passes for drinking water.<br />
Prisoners remain here until their unit commanders<br />
arrive to bail them out, which is usually<br />
within a day or two. If the imprisoned is a<br />
private citizen, arrangements for bail must be<br />
made with the Penkeeper. Bail in this case<br />
costs everything the imprisoned character<br />
has upon his or her person (as revealed by a<br />
thorough search), and whatever the Penkeeper<br />
feels he can get for the person’s life. If<br />
money must be fetched from a location in<br />
Neraka, the accused is held and guards from<br />
the Pen venture into town to collect.<br />
The Penkeeper returns weapons and armor<br />
to released prisoners, but he keeps money,<br />
gems, potions, and other valuables.<br />
The Pen is enclosed by a 30-foot-high<br />
wooden fence. The perimeter beyond the<br />
fence is guarded by regular patrols of guard<br />
detachments from the Green Dragonarmy.<br />
A secret door in the southern end of the<br />
fence allows passage to the outside world.<br />
Characters passing through it during daylight<br />
are certainly seen by the perimeter guards. At<br />
night, there is a base 50% chance that<br />
escapees are spotted. Increase this chance by<br />
10% for every individual over eight in the<br />
escaping party.<br />
If the PCs remain in the Pen for two days, or<br />
if it is Day 7 of the adventure, a scruffy-looking<br />
human mercenary approaches them with<br />
an offer to show the way out, for a price. He<br />
negotiates for whatever he thinks he can get<br />
from the Heroes, and then shows them the<br />
secret door.<br />
The Penkeeper’s hut is a small wooden<br />
building near the northern edge of the Pen’s<br />
perimeter.
In here, the Penkeeper has collected 500<br />
stl, four potions of healing, a potion of stone<br />
giant strength, and a potion of invulnerability.<br />
All of these possessions are locked in an iron<br />
strongbox under his bed. The Penkeeper<br />
keeps the key to the box on his belt at all<br />
times, and the box is trapped with a poison<br />
needle that will prick any thief who fails an<br />
open locks attempt (successful saving throw<br />
vs. poison or suffer 5d8 points of damage).<br />
163. Slaver Pens<br />
The occupants of these cells stay here in<br />
abject hopelessness, waiting to be purchased<br />
by officers in the Dragonarmy, wealthy merchants,<br />
or shop owners looking for cheap<br />
labor.<br />
The slaver pens are actually holes in the<br />
ground over which heavy bars have been laid.<br />
Prospective purchasers walk above the cages<br />
on catwalks, looking down at the Slavemaster’s<br />
wares.<br />
Slaves are segregated by sex and age, with<br />
men of various ages kept in a variety of cages,<br />
and likewise with women. The youngest<br />
slaves are about 15 years of age; any older<br />
than 45 years are summarily disposed of, as<br />
their marketability is virtually nil. (Use the<br />
Man, Common stats for slaves.)<br />
A strong young man or attractive young<br />
woman costs about 150 stl, while the less<br />
desirable slaves can be purchased for a third<br />
of that. This is truly a sad and very nearly<br />
hopeless place; perhaps nowhere else is the<br />
evil behind the Dragon Empire so brazenly<br />
displayed.<br />
164. The Pit<br />
This is a deep hole in the ground where the<br />
bodies of dead humans, draconians, ogres,<br />
and creatures of all varieties are unceremoniously<br />
tossed to rot and decay.<br />
The stench is vile. Any character attempting<br />
to approach the pit must pass a Constitution<br />
Check or fall back, gasping and choking.<br />
Characters who do reach the edge of the pit<br />
must roll a successful saving throw vs. poison<br />
or succumb to a disease, as if they had been<br />
affected by a cleric’s cause disease spell.<br />
165. Lute’s Loot—Pawnshop<br />
This little store in the Red Army’s district is<br />
one of the centers of activity for the Hidden<br />
Light—the underground movement that seeks<br />
to undermine the power of the Queen of Darkness.<br />
Lute (see the “NPCs” section of the Appendix)<br />
is a courageous little man who is ready to<br />
sacrifice his life to further his cause. If the PCs<br />
can persuade him of their sincerity, he shows<br />
them the secret trap door in the floor of his<br />
shop leading to the catacombs of the Undercity.<br />
He knows the underground route to the<br />
dungeons below the temple and to the meeting<br />
room under the Inn of the Broken Shield.<br />
He sketches out a crude map of these routes<br />
for the PCs, if they ask him to do so.<br />
166. Inn of the Broken Shield<br />
This inn looks like nearly any other tavern in<br />
the Outer City, except that there are always<br />
2d6 human laborers present in addition to all<br />
other groups. All but a few of its customers<br />
would be surprised to learn that this inn is a<br />
center of underground resistance in Neraka.<br />
Talent Orren, the proprietor, is the leader of<br />
the Hidden Light. The laborers are his most<br />
faithful followers and bodyguards. A secret<br />
trap door behind the bar leads to a large<br />
underground meeting room. During the Nightwalk,<br />
when most of the Undercity is deserted,<br />
Talent can gather 100 freedom fighters here,<br />
mostly through subterranean passages.<br />
Like Lute, Talent willingly supports any<br />
activity of the Heroes if he is persuaded that<br />
they are true enemies of the Dark Queen. For<br />
a major operation, he and his men will risk<br />
their lives to create a diversion or otherwise<br />
aid the PCs’ efforts.<br />
167. Hair of the Troll Tavern<br />
This inn, located in the Green Army district,<br />
resembles other Nerakan inns in all respects<br />
except one: it is the favored watering hole of<br />
Maelstrom, the freedom fighter who serves as<br />
liaison between the Hidden Light forces in<br />
Neraka and those in the countryside.<br />
Maelstrom is a burly human who sits by<br />
himself, drinking an apparently enormous<br />
quantity of ale without being visibly affected.<br />
Other patrons, including ogres and Sivak draconians,<br />
have learned to leave this human<br />
alone.<br />
If approached by the PCs and persuaded of<br />
their sincerity, Maelstrom reveals the significance<br />
of both Lute’s Loot and the Inn of the<br />
Broken Shield. If the Heroes enter either of<br />
the latter establishments with a corny line<br />
such as “Maelstrom sent us,” they are guaranteed<br />
a hearty welcome.<br />
Encounters in the Inner City<br />
Sheltered by the high walls of Neraka, the<br />
Inner City is somewhat different in character<br />
from its counterpart outside the walls.<br />
Although free travel is limited to Dragonarmy<br />
officers and those with passes, the Inner City<br />
districts are nearly as busy as the regions of<br />
the Outer City. The Dragonarmies have many<br />
officers, and they generally visit establishments<br />
in the Inner City to avoid meeting the<br />
rabble that they command.<br />
The quarters of the city, as defined by the<br />
various colors of Dragonarmies, continue<br />
through the Inner City and up to the temple<br />
itself. The streets in the Inner City are all<br />
paved with stone, and each has a drainage<br />
sewer running underneath it. Iron grates,<br />
spaced every 100 feet down the centers of<br />
the streets, drain water from the streets to the<br />
sewers below.<br />
Encounter descriptions 153 through 161,<br />
given for the Outer City, apply to similar<br />
structures in the Inner City as well, with a few<br />
exceptions. Thus the taverns, shops, etc., of<br />
the Inner City are not described separately.<br />
99<br />
Use the Outer City descriptions and apply the<br />
following modifications:<br />
Prices: Because the customers of Inner City<br />
establishments are army officers and wealthy<br />
citizens, the costs of all goods here are<br />
roughly four times the standard AD&D game<br />
rates. This is double the rate of Outer City<br />
establishments.<br />
Clientele: Dragonarmy officers are always<br />
accompanied by a bodyguard of elite troops.<br />
Thus, when determining the customers present<br />
in a tavern, roll on the Tavern Customer<br />
Table in Encounter 153. Each group of troops<br />
is accompanied by an officer. Roll 1d6 to<br />
determine the race of the officer: 1-4 =<br />
human; 5-6 = the same race as the troops.<br />
Note: There are no army camps or market<br />
squares in the Inner City.<br />
The Queen’s Way: This is the main street of<br />
the inner City. It spirals around from its beginning,<br />
at the Main Gate, through two complete<br />
spiraling loops before coming to an end at the<br />
Temple Square. It is flanked by the city walls<br />
on either side. Guard patrols diligently move<br />
through it, checking the papers of all they<br />
encounter.<br />
Double the frequency of random encounter<br />
checks while the PCs are on the Queen’s Way.<br />
168. Main Gate<br />
A huge gatehouse surrounds a pair of<br />
massive, tightly closed iron gates. A<br />
heavy portcullis blocks access to the<br />
gates. A small door into the gatehouse<br />
seems to be the only open passage. Several<br />
guards stand before it, demanding<br />
papers from all who approach.<br />
Neraka’s main gate is a fortress unto itself.<br />
The building towers nearly 100 feet above the<br />
surrounding streets. The small doors next to<br />
the gates open onto a hallway running the<br />
length of the building, leading from the Inner<br />
to the Outer City.<br />
If characters note the gate, they see many<br />
guards posted atop its walls. The area around<br />
the gate is lit by hundreds of torches at night.<br />
There is a 1 in 3 chance per turn that an officer<br />
passes through the door next to the gates.<br />
Observing characters who make a successful<br />
Intelligence Check notice that the officer is<br />
not asked to show papers.<br />
The gatehouse is garrisoned by 100 troops<br />
from each of the five Dragonarmies (500<br />
total). These troops maintain barracks and<br />
mess halls within the gatehouse; they serve<br />
here for one-month shifts. All changes of<br />
guard postings occur within the gatehouse<br />
itself. The vigilance of the guards at the main<br />
gate is never lowered; noninvisible characters<br />
attempting to scale the wall here or sneak<br />
through the door are seen and accosted by<br />
the guards.<br />
Any characters captured here are taken<br />
directly to the Captain of the Guard (Encounter<br />
176).
169. Minor Gates<br />
These gates allow passage from each district<br />
into the Inner City. Each gate is flanked<br />
by twin 60-foot-high towers. The gates are<br />
manned by the army of the respective district.<br />
Like the main gate, the minor gates are<br />
closed after Event 83. Only a small wooden<br />
door allows passage between the Inner and<br />
Outer Cities.<br />
Each minor gate is watched by three<br />
detachments of guards on duty at any given<br />
time. Roll on the Garrison Table in Encounter<br />
152 (ignoring the “Army” column) to determine<br />
the makeup of these detachments. One<br />
detachment guards the wooden door at<br />
ground level, checking the papers of all who<br />
pass (except Dragonarmy officers). An officer<br />
is posted with this detachment. The other<br />
detachments are posted atop the two towers<br />
flanking the gate.<br />
Unlike the main gate guards, these detachments<br />
live in the army camps. The relief<br />
guards march from the camps to the gates at<br />
every shift change. These guards are always<br />
alert enough to detect noninvisible intruders<br />
attempting to slip past their posts.<br />
170. The City Walls<br />
Rising 40 feet above the ground and spiraling<br />
inward like a constricting snake, the<br />
city walls present a smooth, stone surface<br />
to any who would try to reach the Inner<br />
City.<br />
The walls rise to a stone parapet. A 10-footwide<br />
walkway runs along the top of each wall.<br />
A guardhouse is located every 100 yards.<br />
The guards move 50 yards out and back<br />
again from each guardhouse on an irregular<br />
basis.<br />
Characters attempting to slip across the top<br />
of the walls unnoticed stand a base 80%<br />
chance of being observed. This chance is<br />
doubled during daylight. The chance can also<br />
be modified by the vigilance level of the<br />
guards (see Event 94), and whether or not the<br />
PCs received the blessing of the gods in Godshome.<br />
In addition, add 10% to the chances of<br />
detection for each individual above eight in<br />
the party attempting to sneak across.<br />
If the modified chance of discovery is 100%<br />
or more, the party is spotted. If it is less than<br />
100%, roll 1d100 to determine whether or not<br />
the PCs pass unseen.<br />
171. Towers<br />
Each of these towers lies astride the city wall.<br />
The towers are 60 feet tall and 40 feet wide,<br />
with an open platform on top surrounded by a<br />
waist-high parapet.<br />
Each tower is garrisoned by a guard detachment,<br />
as detailed in Encounter 169. The towers<br />
are hollow, with wooden stairways spiraling<br />
upward inside them. Two ground-level<br />
doors lead into each tower and one door<br />
opens onto the wall on either side of the<br />
tower. The stairs end in a trap door that opens<br />
onto the roof of each tower.<br />
172. Emperor’s Court<br />
This huge square directly behind the main<br />
gate is lined with galleries and reviewing<br />
stands. It is used for parades, festivals, and<br />
other pageantry. It sits astride the main street<br />
leading from the main gate to the temple, so<br />
it serves as a thoroughfare when not used for<br />
anything else.<br />
The street begins to snake toward the temple<br />
underneath a huge stone arch in the western<br />
wall of the court. To the south, an iron<br />
gate stands shut, barring passage to the<br />
Queen’s Court. Treat this gate as a minor<br />
gate (Encounter 169).<br />
173. Queen’s Court<br />
The Queen’s Court is a slightly smaller version<br />
of the Emperor’s Court. It sits astride the<br />
main street, which passes through the square<br />
along the east-west axis. At the southern end<br />
of the court, another minor gate provides<br />
direct access to the temple square (treat as in<br />
Encounter 169).<br />
174. Temple Square<br />
Rising like the misshapen spawn of a mad<br />
architect’s nightmare, the Temple of the<br />
Queen of Darkness claws skyward from<br />
the center of a huge plaza. Black, twisted<br />
towers shoot from the structure at odd<br />
angles. The walls seem to bend outward<br />
or inward with no logical pattern.<br />
The huge square surrounding the temple is<br />
the end of the snake-like Queen’s Way. It is<br />
not visited casually. Stationed in here at all<br />
times are honor guard units from each of the<br />
five Dragonarmies. (For each of the five<br />
Dragonarmies, roll six times on the Garrison<br />
Table in Encounter 152. Ignore the “Army”<br />
column on the table.)<br />
The honor guard units march around the<br />
tower at a leisurely pace, but the troops are<br />
alert. Weapons gleam, uniforms and boots<br />
are clean, and officers and sergeants bark<br />
their orders with crisp precision. This is an<br />
opportunity for each army to display its military<br />
might, and each unit strives to outdo the<br />
others in appearance, drill, and discipline.<br />
175. Arena of Death<br />
This vast coliseum is devoted to the entertainment<br />
of the troops and citizens of Neraka.<br />
The usual show consists of many slaves being<br />
forced to fight to the death.<br />
The arena gates are neither closed nor<br />
guarded, so characters have no difficulty<br />
walking onto the arena floor or among the<br />
galleries. Below the floor, however, considerable<br />
activity occurs in preparation for the<br />
queen’s arrival.<br />
100<br />
A huge spectacle has been planned for the<br />
day after the queen enters Krynn. Four units<br />
of slaves are receiving extensive training and<br />
preparation as light infantry. Each unit consists<br />
of 1d20 strong fighters. Two units fight<br />
each other in two separate matches. The victorious<br />
units then face each other in a climactic<br />
battle to the finish. The surviving members<br />
of the winning unit will be given their freedom;<br />
all others will be put to death.<br />
Each unit is quartered in a huge, barren<br />
room under the arena. Their weapons and<br />
armor, of course, are stored separately. Each<br />
unit is guarded by two detachments (for the<br />
size and type of each detachment, consult the<br />
Garrison Table in Encounter 152, ignoring the<br />
“Army” column) of the Blue Dragonarmy.<br />
If these slaves can be freed, they serve their<br />
liberators as elite units during the Battle of<br />
Neraka. They can also create a diversion during<br />
the Second Council or perform any reasonable<br />
request.<br />
176. Captain of the Guard<br />
This hulking blockhouse is the quarters of the<br />
city guard, and the headquarters of the Captain<br />
of that guard (see the “NPCs” section of<br />
the Appendix).<br />
The city guard is the only military organization<br />
in Neraka that does not belong to one of<br />
the five Dragonarmies. Thus, the Captain of<br />
the Guard enjoys a rank very nearly equal to<br />
that of a Dragon Highlord.<br />
The city guard forces consist of 11 squads<br />
of 20 Kapak draconians each and 11 squads<br />
of 20 Baaz draconians each. Each squad is<br />
commanded by an Aurak draconian and two<br />
Bozak subcommanders.<br />
The blockhouse contains barracks and<br />
mess halls for these squads, as well as 100<br />
small cells for temporary storage of prisoners.<br />
The only prisoners kept here are those<br />
deemed too significant for storage in the Pen.<br />
They are generally sent to the Inquisitor<br />
within 1d3 days.<br />
The captain’s office on the second floor is<br />
reached by ascending a long stone stairway.<br />
One Kapak squad is always assigned to protect<br />
the approach to the office.<br />
In the rear of the blockhouse is a small temple<br />
of Dark Worship, tended by a group of<br />
eight Dark Pilgrims.<br />
Encounters in the Undercity<br />
The subterranean region stretching beneath<br />
the city of Neraka is collectively referred to as<br />
the Undercity.<br />
Encounters 177 through 181 are descriptions<br />
of common Undercity locations. These<br />
locations are repeated many times throughout<br />
the Undercity, but they are similar enough<br />
that general descriptions apply to all of them.<br />
Encounters 182 and 183 are unique areas.<br />
The locations referred to in Encounters 177<br />
through 181 are displayed on the Undercity of<br />
Neraka map with symbols rather than<br />
encounter numbers. The upper sewers<br />
(Encounter 177), for example, are displayed<br />
as a double line and are not numbered on the
map. Note that the key to the map lists the<br />
encounter number for each type of terrain, so<br />
that you can quickly find the description during<br />
play.<br />
Iron Grates<br />
In many places marked on the map, a grid of<br />
iron bars blocks passage through the upper<br />
and lower sewers. These grids serve as crude<br />
filters, preventing large objects from flowing<br />
through the tunnels. Although they are very<br />
old, the grates are made of heavy iron bars. A<br />
normal Strength Check is required to spread<br />
them apart. The grid is made of bars spaced<br />
about one foot apart. Kender and gully<br />
dwarves can squeeze through the grates in<br />
one round. Large creatures must bend the<br />
bars to pass through.<br />
Secret Doors<br />
Many routes through the Undercity are<br />
blocked or concealed by secret doors. These<br />
are cleverly designed portals that blend into<br />
the surrounding stonework, down to the molds<br />
and slimes that coat most of the walls down<br />
here.<br />
The secret doors can be discovered via the<br />
normal procedure. Once the door has been<br />
discovered, however, a thief must make a<br />
successful open locks roll to find and release<br />
the catch. A thief can make such a check<br />
after 3d6 rounds of searching; if it fails, the<br />
search can be continued. An unlimited number<br />
of checks can be made at a given secret<br />
door, but 3d6 rounds pass between each<br />
check.<br />
Exits From the Undercity<br />
Exits leading to the streets of the Inner City<br />
are ladders leading up a narrow hole to a<br />
sewer grate in the middle of a street. In the<br />
Outer City, the ladders lead to secret trap<br />
doors in the wooden sidewalks.<br />
Exits leading to the interiors of buildings<br />
anywhere in Neraka are without exception<br />
concealed by secret doors from the tunnels of<br />
the sewers. Generally, the secret door opens<br />
onto a short tunnel leading 10d6 feet to the<br />
side of the sewer. At the end of the tunnel, a<br />
vertical shaft leads upward about 12 feet to<br />
the trap door in the floor of the building.<br />
All exits connecting the Undercity to the surface<br />
lead from the upper sewers (Encounter<br />
177).<br />
Random Encounters<br />
Note that two different sets of random<br />
encounter tables are used for the Undercity<br />
(see “Random Encounters” in the Appendix).<br />
The first set is used at all times except during<br />
the Nightwalk (12:00 AM to 2:00 AM), and<br />
includes the undead that heavily populate the<br />
Undercity. The second set of encounters<br />
applies only during the Nightwalk, when these<br />
undead are walking the streets of Neraka.<br />
If your game clock shows that the Nightwalk<br />
begins or ends while the PCs are in the<br />
Undercity, immediately switch to the appropriate<br />
section of encounters for all checks<br />
during the Nightwalk.<br />
Note also that the upper sewers are not<br />
considered part of the Undercity for purposes<br />
of random encounter checks. All checks for<br />
random encounters while the PCs are in the<br />
upper sewers are made on the second set of<br />
the Undercity encounter table (the Nightwalk/Sewer<br />
random encounters).<br />
177. Upper Sewers<br />
These are the sewer tunnels running underneath<br />
each street of the Inner City. The iron<br />
grates on the streets appear every 100 feet<br />
along the tops of these tunnels.<br />
The tunnels are about eight feet in diameter<br />
and are cylindrical in shape. There is always<br />
at least one foot of water collected in the bottom<br />
of the tunnel. If it has been raining in Neraka,<br />
the water level is higher.<br />
Add one foot of depth for every day of continuous<br />
rainfall, including the present day.<br />
Consult Event 81 to determine the length of<br />
the rainstorm. Beginning the first day after the<br />
storm, the water level falls two feet per day<br />
until it reaches the one-foot depth, where it<br />
levels off.<br />
Even though the upper sewers cross lower<br />
sewers at many locations shown on the map,<br />
most of these areas contain no connections<br />
between the two levels. The two sewer systems<br />
are only joined in those locations where<br />
spillways (Encounter 178) are indicated.<br />
178. Spillways<br />
The spillways are chutes connecting the<br />
upper and lower sewers of Neraka. Some are<br />
screened by iron grates, as shown on the<br />
map. Each spillway is 60 feet long, and<br />
descends 20 feet over that 60-foot length.<br />
The spillways have water flowing down<br />
them if the current water level of the upper<br />
sewers is four feet or greater. The depth of<br />
water in the spillways is three feet lower than<br />
that in the upper sewers.<br />
The spillways are always slick and treacherous<br />
because of the build-up of slime and<br />
mold on the surface of the chute. A character<br />
attempting to move up or down the spillway<br />
must succeed at a Dexterity Check. Failure<br />
means that he slips and falls, sliding all the<br />
way to the bottom and sustaining 1d6 points<br />
of damage. The character’s Dexterity score is<br />
modified by a -5 penalty for every foot of<br />
water flowing down the spillway.<br />
Any time a character slides down a spillway,<br />
roll 1d6. On a 1 or 2, the character has a<br />
random encounter at the bottom of the spillway.<br />
Roll on the Random Encounter Table (in<br />
the “Random Encounters” section of the<br />
Appendix) to determine what creature is<br />
encountered.<br />
A character trying to climb up a spillway<br />
who fails the Dexterity Check is assumed to<br />
slip at the very bottom and does not suffer<br />
damage. A character can make one attempt<br />
to climb the spillway every turn.<br />
101<br />
179. Lower Sewers<br />
The lower sewers of Neraka serve to channel<br />
the water overflow from the upper sewers.<br />
They also serve as connecting passages<br />
between the various catacombs, reservoirs,<br />
and encounter areas down here.<br />
The lower sewers are tunnels 12 feet high<br />
and 12 feet wide. They are square, not circular,<br />
in cross-section. The depth of water in the<br />
lower sewers is half that in the spillways. The<br />
water never flows quickly down here; there is<br />
a stagnant, musty smell throughout the lower<br />
sewers. Even if no water flows down the spillways,<br />
there is a nearly uniform pool of water<br />
four inches deep over the floor of the lower<br />
sewer. Characters attempting to move silently<br />
or to utilize the effects of elven boots must<br />
move at 1/3 their normal movement rate, or the<br />
splashing of their footsteps is audible 120 feet<br />
away.<br />
180. Reservoirs<br />
These large chambers are essentially underground<br />
lakes, collecting the overflow from the<br />
sewer systems until the water evaporates or<br />
seeps into the ground. The water in the reservoirs<br />
is stagnant and foul. Any character<br />
drinking it must roll a successful saving throw<br />
vs. poison or succumb to disease, as in the<br />
clerical cause disease spell. Characters who<br />
so much as swim in the water must roll a successful<br />
saving throw vs. breath weapon. Failure<br />
means that they have inadvertently<br />
ingested some of the water, and must successfully<br />
save vs. poison or suffer the disease<br />
effects.<br />
The water level in the reservoirs is 1d6 feet<br />
below that of the lower sewers. Slime-coated<br />
sheer drops connect the lower sewers to the<br />
reservoirs, with water slowly trickling from the<br />
lower sewers to the surface of the reservoir.<br />
The reservoirs are 11-30 feet (1d20+10)<br />
deep. As indicated on the map, they are several<br />
hundred feet across.<br />
If characters try to cross the reservoirs,<br />
ignore the usual Random Encounter Tables.<br />
Instead, if an encounter is indicated, roll 1d6<br />
on the following table:<br />
Reservoir Encounter Table<br />
D6<br />
Roll Encounter<br />
1 2d6 Giant Frogs<br />
2 2d6 Giant Leeches<br />
3 ld3 Giant Constrictor Snakes<br />
4 ld6 Giant Crayfish<br />
5 1 Froghemoth<br />
6 2d4 Huge Pedipalpi<br />
181. Catacombs<br />
The catacombs are the graveyards of Neraka.<br />
Until recently, the dead of the city were buried<br />
here, with large sections devoted to the families<br />
of prominent army officers and important<br />
figures in the hierarchy of the evil empire.<br />
With the growing activity of undead in the<br />
area, plus the thriving populations of other
assorted monsters, the citizens of the city<br />
rarely venture down here any more. The areas<br />
have been taken over by the foul denizens.<br />
The catacombs are literally teeming with<br />
undead at all times, except during the Nightwalk.<br />
Double the frequency of random<br />
encounter checks while the PCs are in a catacomb,<br />
unless a Nightwalk is in progress.<br />
The catacombs are laid out in a square grid<br />
pattern. A section of coffins is a 20-footsquare<br />
area, surrounded by a 10-foot-wide<br />
corridor on all sides. The entire catacombs<br />
area is simply this grid pattern repeated many<br />
times. Characters walking through this area<br />
have the impression of moving down a 10foot-wide<br />
corridor, with similar corridors<br />
branching to each side at 20-foot intervals.<br />
Each section of coffins has a wooden door<br />
in the middle of one side. Nearly all of the<br />
doors (90%) have been destroyed by the ravenous<br />
ghouls and ghasts. Inside the tier are<br />
the remains of 3d10 corpses. Check for a random<br />
encounter every time the PCs enter a<br />
section.<br />
If the PCs are attacked by a group of undead,<br />
the combat draws additional groups of<br />
undead. Roll on the Random Encounter<br />
Tables (in the Appendix) after 1d6 rounds of<br />
combat to determine what additional types of<br />
undead arrive to join in the fight. The undead<br />
principally seek to slay any PC clerics. If<br />
more than one type of undead is present,<br />
however, they try to capture the rest of the<br />
PCs and take them to the Court of No Resort<br />
(Encounter 182).<br />
182. Court of No Resort<br />
This dreary chamber is the focal point of<br />
undead power below Neraka. It is the lair of<br />
the five liches that control the Nightwalk.<br />
These are the judges that sit at the court,<br />
resolving disputes among the undead of the<br />
Undercity. The court is the reason that the<br />
undead attempt to take PCs prisoner during<br />
encounters in the Undercity.<br />
The courtroom is a vast chamber draped in<br />
huge, tattered sections of rotted black velvet.<br />
The five judges sit upon a raised dais at the<br />
end of the room opposite the entrance. Before<br />
the judges is a long bench. Below this bench<br />
is a pit where prisoners are forced to stand.<br />
Behind the pit are arrayed numerous galleries<br />
that provide seating for hundreds of<br />
interested spectators. They are occupied by<br />
all of the captors, as well as numerous other<br />
undead who gather for the spectacle of a trial.<br />
The entire chamber is illuminated by several<br />
glowing red spheres floating about the<br />
room. These are simply red glass balls upon<br />
which permanency and levitate spells have<br />
been cast by the liches. Inside each ball is a<br />
small stone that has been enchanted with a<br />
continual light spell.<br />
Behind the judge’s bench, a wooden door<br />
leads to a smaller chamber. The judges retire<br />
here after they have heard the case, in order<br />
to confer and render a verdict.<br />
The liches decide which group of undead<br />
can claim the lives of the prisoners. Wights<br />
and wraiths desire that the prisoners be given<br />
over to them for energy draining and to<br />
increase the population of that type of<br />
undead. Ghouls and ghasts have a more<br />
basic desire behind their pleas: hunger for the<br />
corpses of the prisoners. The banshees want<br />
to keep the prisoners alive, but securely<br />
chained, in a nearby section of coffins, torturing<br />
and tormenting the prisoners for the banshees’<br />
entertainment and enjoyment.<br />
A member of each type of undead group<br />
that captured the prisoners steps forward and<br />
presents the case of that creature type.<br />
The liches then retire to their private chamber<br />
and eventually return with the verdict. To<br />
determine what the verdict is, list the types of<br />
undead in the order that they arrived at the<br />
fight. Beginning with the first group, roll ld6.<br />
That group receives the prisoner on a 6 result.<br />
If the result is other than a 6, roll for the next<br />
group. Keep rolling, going through the list<br />
several times if necessary, until a 6 comes up.<br />
The 1d6 roll can be modified by several<br />
factors. In all cases, treat a result greater than<br />
6 as a 6. Modify the die rolls as follows:<br />
Verdict Modifiers<br />
Modifier<br />
+1<br />
+1<br />
–1<br />
Cause<br />
Undead of that type killed a<br />
PC cleric<br />
Undead of that type were<br />
killed in the fight<br />
No undead of that type were<br />
left after the fight<br />
Regardless of what stage the proceedings<br />
have reached, the Court of No Resort<br />
adjourns at 11:30 PM every night so that the<br />
attendees can reach their positions for the<br />
Nightwalk. The prisoners are left under the<br />
watchful eyes of 2d6 ghouls until the session<br />
resumes at 2:30 AM. The prisoners are not<br />
bound, however, nor are their possessions<br />
removed. This mechanic can be used as a<br />
lucky break, allowing the PCs a chance to<br />
escape from an otherwise very difficult situation.<br />
183. Emperor’s Cache<br />
This secret chamber contains some of the<br />
finest treasures from across the face of Krynn.<br />
It is the personal cache of the Highlord Ariakus,<br />
and its contents are known only to him.<br />
The treasure room is guarded by a huge,<br />
ancient red dragon. Ariakus brought the<br />
dragon in here under the influence of a reduce<br />
spell. After the spell wore off, the dragon<br />
became too large to escape, since all of the<br />
entrances are eight-foot-diameter tunnels.<br />
The dragon can speak but cannot use spells.<br />
The treasure is heaped in the center of the<br />
room, and the dragon spends most of its time<br />
curled up atop this pile. Though it appears to<br />
be sleeping, this is just a ruse. It knows the<br />
PCs are there when they get within 100 feet of<br />
its chamber.<br />
This treasure includes a mountain of coins:<br />
80,000 gp, 40,000 ep, 50,000 stl, and 10,000<br />
pp. Scattered among these coins are 10,000<br />
gems, worth 30-300 stl each (1d10 x 30).<br />
102<br />
The room also contains numerous magical<br />
weapons and armor, including: plate mail +4,<br />
shield +4, shield +3, chain mail +4, leather<br />
armor +3, long sword +5 defender, mace +4,<br />
sword +2 (red dragon slayer), plate mail of<br />
etherealness, dwarven thrower hammer +3,<br />
and cursed berserking sword +2.<br />
The room also contains several magical<br />
items, including dust of disappearance, dust<br />
of sneezing and choking, a gem of seeing, a<br />
medallion of ESP, and a talisman of the<br />
sphere.
Within the temple lies the gate through which<br />
Takhisis can now partially pass. If this gate is<br />
sealed, then the Dragon Empire dissolves into<br />
warring factions. If it is opened entirely, then<br />
the doom of the world is nearly assured.<br />
Closing the gate is no easy task. Creatures<br />
of great evil are stationed throughout the temple.<br />
The PCs might find that deception proves<br />
their only means of achieving success and<br />
staying alive. Finding the gate and sealing it<br />
without bringing the guards down on their<br />
heads is the PCs’ primary challenge.<br />
Moreover, it might be difficult to complete<br />
the quest for other reasons. The Dragon Highlords<br />
appreciate skill and cunning. Rather<br />
than death, they might offer the PCs positions<br />
of power if they abandon their quest and turn<br />
toward evil. While this always ends in the PCs’<br />
eventual extermination, the PCs might be<br />
tricked long enough for the Dark Queen to triumph.<br />
About the Temple<br />
The Temple of Takhisis is no doubt the most<br />
bizarre structure upon the face of Krynn. It<br />
was grown rather than constructed.<br />
When the Cataclysm struck Krynn, the<br />
center of annihilation was the temple of the<br />
High Priest of Istar. Yet that temple was not<br />
destroyed, as were the lands and cities around<br />
it. Rather, its parts were scattered among all<br />
the planes of the gods: good, evil, and neutral.<br />
Of all the scattered pieces of the temple,<br />
the most important was the foundation stone.<br />
This pillar of stone was studded with the most<br />
precious gems from all over Ansalon, including<br />
a hallowed piece of the Whitestone itself<br />
from Sancrist Isle. The foundation stone was<br />
the main supporting pillar of the temple, the<br />
focal point of the temple’s power.<br />
As fate would have it, the foundation stone<br />
was cast into the Abyss, the realm of Takhisis,<br />
the Queen of Darkness. After a period of<br />
time, the queen came upon the stone.<br />
Through her cunning and terrible dark powers,<br />
she caused the stone to become her portal<br />
into the physical world. Through this portal<br />
she could circumvent the banishment<br />
imposed by Huma, and she once again set<br />
her dragons upon the world. This time, she<br />
vowed, the forces of darkness would emerge<br />
victorious.<br />
Thus the foundation stone became the<br />
queen’s gateway into Krynn. She entered the<br />
world in a desolate and uninhabited region<br />
called Neraka. After planting her stone on the<br />
dry, flat ground, surrounded by towering<br />
peaks, she walked the world for a time, awak-<br />
103<br />
ening her dragons from their long sleep. She<br />
then returned through the gate to rally her<br />
forces on the Abyssal plane.<br />
The stone she had planted, meanwhile,<br />
began slowly and magically to grow into a<br />
dark version of the temple that once stood in<br />
Istar.<br />
Now fate again played a role in swinging<br />
events of the world, this time back toward the<br />
point of balance. A brother and sister walked<br />
the plain where the foundation stone was<br />
planted. The brother recognized the value of<br />
the gems and eagerly tried to pry one of the<br />
gems loose.<br />
The sister objected, as this place seemed at<br />
once holy and terrible to her. She felt that<br />
they should leave immediately. An argument<br />
and a struggle ensued. The sister, reeling<br />
from her brother’s blow, struck her head<br />
against the foundation stone, knocking loose<br />
a green gem in the same instant that she<br />
died.<br />
Her brother clasped the green gem to his<br />
chest and fled in panic. His name was Berem<br />
and the stone became embedded in his chest.<br />
The green gemstone caused him a magical<br />
torment that denied even the escape of death.<br />
Though the sister, named Jasala, had died,<br />
her good and kindly spirit did not flee to the<br />
realms of Paladine. Instead, she entered the
foundation stone. So convinced was she that<br />
her brother would return to her, she remained<br />
and awaited him.<br />
The temple grew, but not as the Dark Queen<br />
desired. Since the foundation stone was missing<br />
one gem, the temple was doomed to be<br />
distorted and incomplete. It clawed its way<br />
into the sky in twisted agony. Its corridors<br />
writhed in tortured and inexplicable directions.<br />
The grace of the temple at Istar was<br />
perverted.<br />
This in itself presented no problem for the<br />
Queen of Darkness. In fact, such an abode<br />
was more suited to her tastes. But it was the<br />
spirit of Jasala—a spirit of compassion and<br />
goodness that inhabited the stone and thus<br />
blocked the queen’s gate into the physical<br />
world. Takhisis could only project a portion of<br />
her presence through the gate between the<br />
planes until such time as the gate could be<br />
thrown fully open.<br />
In the meantime, the twisted corridors and<br />
bizarre rooms of the temple have been<br />
adapted to the uses of the queen and her generals.<br />
Some additional construction attempted<br />
to make sense of the perverted architecture<br />
and turn the building into a useful structure.<br />
Defensive mechanisms were created. A regiment<br />
from each of the five Dragonarmies<br />
maintains a permanent posting here. Bands<br />
of Dark Pilgrims—the clerics of Takhisis—<br />
roam the temple, constantly performing rites<br />
of darkness and evil.<br />
Distortions of Reality<br />
The temple rests astride the border between<br />
the physical world of Krynn, in the Prime<br />
Material plane, and the Abyssal plane. Thus<br />
much of the original structure is gravitationally<br />
and geometrically unstable.<br />
This is a natural phenomenon, not a magical<br />
one. Therefore, spells such as detect<br />
magic and dispel magic have no effect on the<br />
perspective and gravity distortions in the<br />
temple.<br />
Characters might find themselves climbing<br />
stairs that actually descend to a lower level.<br />
The curved corridors shown on the temple<br />
maps appear straight to all forms of measurement<br />
and detection. This applies to all curved<br />
corridors in the temple, including those that<br />
double back upon themselves in a “U” shape.<br />
Intersections of these curved corridors always<br />
appear to be at right angles.<br />
As mentioned earlier, stairways sometimes<br />
appear to travel in directions opposite to their<br />
true directions. Any time the PCs encounter a<br />
stairway, either spiraling or straight, roll ld6.<br />
On a 1-3, the stairway seems to go in the<br />
opposite direction from that actually moved.<br />
Characters who think they are climbing are<br />
actually descending, and vice versa. Spiraling<br />
stairways are not curved corridors for purposes<br />
of the distortion described above.<br />
Maps<br />
The Temple of Takhisis is depicted in five<br />
separate maps (on the black and white side of<br />
the fold-out mapsheet). These show the<br />
dungeon level, the main level, the upper level,<br />
and the tower levels. Encounter areas are<br />
numbered starting with the dungeon level and<br />
moving upward.<br />
The Objective<br />
The ending you have selected for the epic<br />
requires the PCs to reach a certain location<br />
within the temple. Each key location is in the<br />
center of one of the temple levels, as follows:<br />
Objective Level<br />
Foundation Stone Dungeon Level<br />
Council Chamber Main & Upper Levels<br />
Anvil of Might Upper Tower Level<br />
The Garrison Regiments<br />
An elite unit of draconians from each Dragonarmy<br />
is posted on permanent guard duty in<br />
the temple. The sections of the temple<br />
guarded by each army correspond to the city<br />
districts controlled by the same army. Unlike<br />
those in the city, members of these elite regiments<br />
are never subject to reduced vigilance<br />
because of a long shift on duty.<br />
These regiments are the honor guard when<br />
the Dragon Highlords meet in council. Their<br />
order of entrance is explained in Event 89.<br />
The draconians in each regiment are not<br />
unusual except that they are among the<br />
largest of their type. They therefore have very<br />
nearly the maximum number of hit points.<br />
The Temple Garrison Table lists the name of<br />
each regiment, the type of draconians, and<br />
the hit point spread for these elite draconians.<br />
Temple Garrison Table<br />
Army & Unit Dracs. Hit Pts<br />
White Legion Kapak 18 + 1d6<br />
Green Regiment Kapak 18 + 1d6<br />
Black Guards Bozak * 24 + 1d8<br />
Blue Watch Sivak 32 + 2d8<br />
Red Watch Sivak 32 + 2d8<br />
* The Bozak draconians of the Black Guards<br />
can cast the following spells: detect magic,<br />
magic missile, sleep, detect invisible, web.<br />
Encounters<br />
184. Training Rooms<br />
Each of these five rooms is located beneath<br />
the barracks of one of the Dragonarmy regiments<br />
garrisoning the temple. One is used by<br />
each regiment.<br />
The rooms are so large that all members of<br />
the unit can gather for drill and fighting practice.<br />
Usually only a portion of each regiment<br />
is present while the others are posted on<br />
guard duty or sleeping.<br />
Each training room is simply a large, open<br />
area. The ceiling is 20 feet above the floor,<br />
104<br />
which consists of fine sand covering a base of<br />
rock. The rooms are surrounded by a viewing<br />
gallery, 10 feet higher than the floor of the<br />
training area. Numerous stairways provide<br />
access from the floor to the galleries.<br />
The training areas are used on a fairly regular<br />
schedule. From 6:00 AM until 4:00 PM,<br />
60-90 (50+10d4) members of the regiment<br />
are involved in weapons and drill practice. At<br />
all other times, 3d6 members are present,<br />
practicing on their own.<br />
However, the training areas are abandoned<br />
during (and for four hours before and after)<br />
each council of the Dragon Highlords.<br />
185. Regimental Armories<br />
These rooms are locked and two members of<br />
the regiment stand outside the door at all<br />
times. A warrant signed by an officer of the<br />
regiment, or by the army’s Highlord, is needed<br />
for permission to open the armory. In fact, the<br />
guards do not keep the key to the door; it is<br />
held by the regiment’s commanding officer.<br />
Each armory contains the following supply<br />
of weapons: 800 spears, 240 long swords,<br />
400 shields, 400 suits of (draconian) armor,<br />
80 heavy crossbows, 2,000 quarrels, 40 long<br />
bows, and 1,600 arrows. Locked in a closet<br />
near the back of the room are the officers’<br />
supplies: eight suits of plate armor +1<br />
(human, with masks), eight long swords +1,<br />
and eight potions of speed.<br />
186. Regimental Kitchens<br />
These rooms contain the kitchens used to<br />
cook for the troops and officers while they are<br />
in the temple. As might be expected, the food<br />
is considerably better than that in any of the<br />
army camps around Neraka.<br />
The kitchens are adjacent to storerooms<br />
that are well-stocked. The supply storage<br />
rooms contain enough food for a six-month<br />
siege.<br />
Each kitchen is staffed by 12 human slaves<br />
and two draconians. The slaves sleep in a<br />
small room adjacent to the kitchen. Each<br />
kitchen has four huge ovens, four cooking<br />
fires with large iron kettles suspended over<br />
them, and a large refrigeration room chilled<br />
with ice from the Khalkist Mountains.<br />
The food stockpiled here includes many<br />
bins of grains, dried fruit, and dried vegetables.<br />
The refrigeration rooms contain fresh<br />
fruit, vegetables, and meat.<br />
187. Acid Pools<br />
These devious traps are all similar in effect<br />
and appearance, but they are concealed by a<br />
wide variety of illusions and look quite different.<br />
Each acid pool is a circular room, 60 feet in<br />
diameter, with at least one corridor entering it.<br />
The pool of acid fills the room and is six feet<br />
deep. Characters in the acid sustain 8d6<br />
points of damage per round.<br />
If the PCs approach a pool, roll 1d6 and<br />
compare the result to the following table to<br />
determine which illusion is in effect.
Acid Pool Illusion Table<br />
D6<br />
Roll Effect<br />
1 No illusion<br />
2 Acid is invisible<br />
3 Acid pool appears to be water<br />
4 An illusory bridge connects all corridors<br />
into the room<br />
5 A real bridge connects all corridors<br />
into rooms, but the middle 10 feet<br />
of the bridge is illusory<br />
6 Room is disguised as a corridor<br />
188. Dark Abbey<br />
This chamber is devoted to the worship of the<br />
Queen of Darkness. It is huge and circular,<br />
with rows of benches surrounding the central<br />
altar in concentric rings. The altar contains a<br />
life size and life-like statue of the Queen of<br />
Darkness.<br />
Services are held in the abbey following<br />
each session of the Dark Rites (Event 95).<br />
These services last for two hours. During<br />
these services, 240 Dark Pilgrims are present.<br />
At all other times, eight Dark Pilgrims are<br />
busily sweeping and tidying the chamber or<br />
dusting the statue.<br />
The abbey is deserted during the councils<br />
of the Dragon Highlords.<br />
189. Queen’s Garden<br />
A musty smell pervades these caverns. The<br />
cave floors are covered by a well-irrigated<br />
layer of soft dirt. Small fountains flow into<br />
streams that run through the caves and finally<br />
disappear into the dirt. The place is strangely<br />
idyllic—except for the plants that grow here.<br />
Each of the garden’s six caverns is home to<br />
a vile and deadly form of plant life. Starting<br />
with the first one encountered by the PCs, the<br />
caves contain the following:<br />
First cave: 36 green slimes<br />
Second cave: 24 seven-foot-tall violet fungi<br />
Third cave: 33 yellow musk creepers<br />
Fourth cave: brown mold<br />
Fifth cave: 22 green slimes<br />
Sixth cave: yellow mold<br />
In addition to the plants, each cavern is inhabited<br />
by a shambling mound. There are no<br />
paths through the caverns; visitors to the garden<br />
must step on or over the plants.<br />
190. Queen’s Chamber<br />
This vast cavern has been prepared as the<br />
abode of the Queen of Darkness, after she<br />
enters the world of Krynn. It is simply a vast<br />
and empty cavern. Continual darkness spells<br />
have been cast throughout the room.<br />
191. Arcane Workshop<br />
Although this room is not currently in use, it<br />
has seen some of the most evil mages on<br />
Krynn. Here was discovered the secret of perverting<br />
good dragon eggs into draconians.<br />
The room lies behind a simple, unlocked<br />
wooden door. It is protected with enchantments<br />
that go far beyond the capabilities of a<br />
mere mechanical lock. Beams of light spill<br />
from the room and can be seen around the<br />
door.<br />
All spells that have already been cast in the<br />
room have been cast by a 14th-level mage.<br />
If the door is touched, a magic mouth<br />
appears on the door, saying, “Begone! Your<br />
death awaits within!”<br />
The room within is illuminated by dozens of<br />
continual light spells. It contains eight workbenches<br />
and 16 stools. Each bench holds a<br />
variety of vials and bottles that are filled with<br />
all kinds of foul ingredients. In the center of<br />
each bench rests a book that looks like a fat<br />
spell book. However, each book is simply a<br />
collection of blank pages, with a title written<br />
in explosive runes.<br />
Each bench also contains a drawer. The<br />
drawers are protected by fire trap spells. The<br />
drawers of four of the desks contain only<br />
scribbled notes. Each of the other four contains<br />
something of value, however:<br />
Drawer 5: A deck of many things<br />
Drawer 6: A mage’s scroll, containing polymorph<br />
other, cloudkill, cone of cold, hold<br />
monster<br />
Drawer 7: The following potions (two doses<br />
of each): climbing, extra healing, fire resistance,<br />
polymorph self; each bottle clearly<br />
labeled<br />
Drawer 8: A wand of magic missiles with 27<br />
charges<br />
Roll 1d8 to randomly determine what is in the<br />
desk if the PCs attempt to open one of the<br />
drawers.<br />
192. Temple Dungeon<br />
These corridors are lined with row after row of<br />
tiny cells. A few are actually occupied by<br />
prisoners, although 90% of them are empty.<br />
Each cell is an eight-foot square room<br />
secured by a heavy iron door. A small hole in<br />
the floor of each room serves as a pitiful<br />
latrine. The doors contain six-inch-wide slots<br />
at floor level to allow for passing food and<br />
drink to the occupants.<br />
The prisoners who are here now include<br />
several members of the Hidden Light, but<br />
most are officers or troops of the Dragonarmies.<br />
The latter prisoners have committed<br />
serious infractions, such as murdering a comrade<br />
or attacking a superior officer, or perhaps<br />
taking the queen’s name in vain. Several<br />
formerly prosperous Nerakan businessmen<br />
occupy some of the cells. They were<br />
brought here because they could not control<br />
their greed.<br />
Meals of stale bread and scummy water are<br />
brought to the prisoners around 6:00 PM,<br />
unless the Inquisitor’s guards forget. The<br />
average prisoner has occupied his cell for<br />
1d12 months.<br />
193. Court of the Inquisitor<br />
The Inquisitor interviews prisoners in this garishly<br />
equipped room, before removing them<br />
105<br />
to the torture chamber or the Temple<br />
Dungeon.<br />
The room is a large chamber, well lit by<br />
continual light spells placed upon various<br />
items of torture that are hung from the walls.<br />
Prisoners are always chained hand and foot<br />
before being brought into the presence of the<br />
Inquisitor. Eight Dark Pilgrims toil constantly<br />
in the room, cleaning and sharpening the<br />
decorations (spikes, thumbscrews, torture<br />
racks, bonecrushers, etc.) that hang about<br />
the walls.<br />
Blood-red tapestries flank either side of the<br />
Inquisitor’s bench. Prisoners are led into a pit<br />
in the center of the room, below the bench.<br />
194. Quarters of the Inquisitor<br />
These luxurious apartments house the lnquisitor<br />
and his staff of 40 Dark Pilgrims. The pilgrims<br />
sleep on crude bunks and eat in a<br />
crowded mess hall. The Inquisitor, however,<br />
sleeps on a huge feather bed and eats at a<br />
massive oaken table, spread with the finest<br />
linen, crockery, and silver.<br />
A private kitchen, staffed by the pilgrims,<br />
contains stores of fine meat, fruit, vegetables,<br />
and wines. It has a small refrigeration room to<br />
keep these stores chilled.<br />
The Inquisitor’s apartment includes a bedchamber,<br />
a sitting room, the dining room, a<br />
kitchen, and an office. All of these rooms are<br />
decorated with the same blood-red tapestries<br />
that hang in the court.<br />
The Inquisitor and the pilgrims occupy their<br />
quarters from 6:00 PM until 10:00 AM daily.<br />
195. Torture Chamber<br />
This is the room where the Inquisitor performs<br />
his evil work. Torture devices of every<br />
shape and description, as well as slow-burning<br />
charcoal fires, vats of seething acid, and<br />
cages containing spiders, snakes, leeches,<br />
and other creatures, line the walls of the<br />
room.<br />
Like the court, this room is steadily illuminated<br />
by numerous continual fight spells.<br />
196. The Foundation Stone<br />
This room contains a dozen thick stone<br />
columns, spaced at odd intervals and supporting<br />
the soaring ceiling that towers 60 feet<br />
above the floor in the center of the room.<br />
Each column is studded with hundreds of<br />
huge and brilliant gems. The stones reflect<br />
and magnify light from any source so that the<br />
entire room seems to shimmer and glow with<br />
every spectrum of color if so much as a<br />
candle is brought here.<br />
The foundation stone itself lies at the center<br />
of the room. Unlike the other columns, the<br />
shaft in the center rises twisted and misshapen<br />
to the ceiling. A gaping black hole in<br />
the side of the column shows where the gemstone<br />
has been removed.<br />
Depending on the ending you have selected<br />
for the epic, replacing the gem in the foundation<br />
stone might seal the queen’s fate, permanently<br />
open her way into the world, or do
nothing. In any event, if Berem places his resented; the command word is the same as<br />
chest against the stone, the gem returns to its for that portion of the main gate, All Dragonniche,<br />
and Berem achieves his long-sought army officers stationed in Neraka know the<br />
death. command word for their army.<br />
The gems are impossible to remove from<br />
any of the columns now that the temple has<br />
grown in size and power. Rather than fastening<br />
to a character, as happened with Berem,<br />
the reverse effect now occurs. Any character<br />
making a really determined effort to remove<br />
one of the stones is sucked bodily into the<br />
column. There the character’s soul languishes<br />
until the temple falls. This is caused by godlike<br />
power, and no saving throw is allowed.<br />
No resurrection is possible, unless the temple<br />
is destroyed.<br />
197. The Temple Main Gate<br />
The main temple gate stands ever open,<br />
beckoning to any who dare to pass through.<br />
A pair of huge steel doors flanks the entrance;<br />
these can be closed in an emergency. They<br />
have never yet been shut, however.<br />
A band of eight Dark Pilgrims waits outside<br />
the gates to escort legitimate visitors through<br />
the entrance. The seven apprentices wait with<br />
the visitors while their master moves ahead of<br />
the party, out of earshot. The master disarms<br />
the protective traps in the entry hall.<br />
The gates are guarded by a series of five<br />
traps, beginning 60 feet inside the entrance.<br />
Five alcoves flank the entry hall, and each<br />
delivers a different attack from the Dark<br />
Queen’s arsenal to any who pass them<br />
unaware. The mouths of each alcove resemble<br />
the gaping maws of the dragons they rep-<br />
resent.<br />
The master pilgrim can deactivate each<br />
trap with a single command word, known<br />
only to the masters. The traps can be deactivated<br />
in a single round, and remain thus for<br />
four rounds.<br />
If the appropriate command word is not<br />
spoken, each trap activates when a physical<br />
object passes the mouth of its alcove. (This<br />
includes invisible characters.) The traps and<br />
the damage inflicted, as well as the command<br />
words, are listed here:<br />
Trap<br />
White<br />
Green<br />
Red<br />
Blue<br />
Black<br />
Type Damage Command Word<br />
25 pts Frost Frigius<br />
Poison Gas Toxius<br />
45 pts Fire lncendrius<br />
40 pts Lightning Electrius<br />
30 pts Acid Acerbicus<br />
The pilgrims at the main gate participate in<br />
the Dark Rites. Thus the post is left unattended<br />
for two turns before and after each<br />
reciting of the Dark Rites.<br />
198. Army Gates<br />
Each of these gates is defended by a dozen<br />
draconians of the appropriate regiment. In<br />
addition, a specialized version of the traps at<br />
the main gate protects each army gate.<br />
Immediately within each gate is an alcove<br />
similar to the main gate alcoves. Only the<br />
type of dragon appropriate to the army is rep-<br />
199. Dark Pilgrim Cells<br />
Each of the rooms within these areas is the<br />
home of eight Dark Pilgrims. Between periods<br />
of the Dark Rites, one in three of these chambers<br />
is occupied by eight sleeping pilgrims.<br />
For two turns before and after the rites, the<br />
cells are deserted.<br />
The pilgrims keep only their robes and<br />
weapons with them in their cells.<br />
200. Wine Cellars<br />
These rooms contain many casks of the fine<br />
wines used by the Dark Pilgrims during the<br />
rites. Each room contains a rack of ceremonial<br />
goblets and decanters and three racks of<br />
kegs.<br />
201. Regimental Standards<br />
Each of these locations is devoted to the<br />
exploits of the appropriate temple garrison<br />
unit. The regimental flags are displayed, and<br />
a brief history of the unit’s battles, enclosed in<br />
a massive leather tome, rests on a table<br />
beneath the flags.<br />
Each room is garrisoned by an honor guard<br />
of four draconians from the unit represented.<br />
202. Regimental Barracks<br />
These quarters house the regiments that garrison<br />
the temple. They are empty from 6:00<br />
AM until 8:00 PM. Outside of these hours,<br />
each area holds some 60-90 (50 + 10d4)<br />
members of the regiment.<br />
Draconian troops have few private possessions.<br />
When the troops are not present, a few<br />
gory military trophies from past battles are<br />
the only items of note in the barracks’ rooms.<br />
When the draconians are present, they have<br />
their weapons and armor with them.<br />
203. Council Chamber<br />
This soaring chamber is the very heart of the<br />
Dark Queen’s empire. It is here that she will<br />
enter Krynn, if the gate to the Abyss can be<br />
opened. This is also where the Highlords meet<br />
to plan strategy. This is the only place on<br />
Krynn where Takhisis can even partially man-<br />
ifest her presence.<br />
The ceiling arches nearly 100 feet overhead.<br />
Six tall platforms are spaced evenly<br />
about the perimeter of the room. Four of these<br />
platforms are 30 feet above the floor. The one<br />
to the south is 40 feet up, and the one to the<br />
north rises 50 feet from the floor. Sweeping<br />
semicircular banks of stairs fall away from<br />
each platform to the floor of the chamber.<br />
Huge banners hang from the walls over<br />
each of the Highlords’ stations, emblazoned<br />
with the colors of the army and scenes depicting<br />
the lands of Ansalon conquered by each<br />
army.<br />
106<br />
The entrances on the main level of the temple<br />
are used by Dark Pilgrims and the honor<br />
guard regiments. Characters entering at this<br />
level see the thrones of the Highlords far<br />
above them to all sides.<br />
On the temple upper level, each Highlord<br />
has a private door to his or her throne. Also<br />
on the upper level lies the gate through which<br />
Takhisis will attempt to pass. The gate is<br />
marked 203a on the Temple Upper Level<br />
map. Any characters attempting to drive her<br />
back to the Abyss must push her through the<br />
gate from south to north. In these endings,<br />
the presence of Paladine, or a character bearing<br />
a Dragonlance, on the other side of the<br />
gate closes the aperture permanently.<br />
For details on the councils that occur here,<br />
see Events 89 and 93.<br />
204. Army Officer Quarters<br />
Each of these tiny apartments is the quarters<br />
for an officer in the Dragonarmy controlling<br />
that part of the temple. Half of these apartments<br />
are empty except for furniture, since<br />
the owning officers are camped in the field.<br />
The other half contain the personal effects of<br />
their occupants. In addition, 50% of the occupied<br />
apartments have the occupants present<br />
from 11:00 PM until 9:00 AM. The apartments<br />
are empty at other times.<br />
Each apartment contains a bed, desk,<br />
chair, and footlocker. The footlockers are<br />
locked and 25% of them are guarded with<br />
poison needle traps. Each footlocker contains<br />
a spare uniform (with mask) and 1d6 x 100<br />
stl worth of treasure. If the chest was trapped,<br />
there is a 25% chance that it contains a randomly<br />
determined magical item,<br />
205. Army Council Chambers<br />
These are work chambers with many wooden<br />
benches, a few tables, and maps or charts<br />
hanging upon the wall. The banners of the<br />
owning Dragonarmy are prominently displayed.<br />
The maps on the walls display the route<br />
used by that Dragonarmy to reach Neraka on<br />
Days l-5 of the adventure. On Days 6-7, the<br />
maps show the army’s path to the Battle of<br />
Neraka. From 10:00 AM until noon, each<br />
council room is occupied by a Highlord and<br />
12 + 1d6 officers.<br />
206. Wall and Parapet<br />
These are outdoor areas, 40 feet above the<br />
temple square. Stationed on the platform are<br />
four guards (from the temple regiments) for<br />
each door (or set of double doors) leading<br />
into the temple from the platform.<br />
207. Abbey of Eternal Night<br />
This chapel is the center of worship for the<br />
Dark Pilgrims. Beginning with each session of<br />
Dark Rites, and lasting for a full hour afterward,<br />
80 pilgrims gather here.<br />
The room is entirely blanketed with continual<br />
darkness, permanency, and silence spells.
The pilgrims perform their individual worships<br />
in this soundless, lightless environment.<br />
Each group of eight pilgrims gathers together,<br />
with the master sitting in the center. Like the<br />
others, he sits on a straw mat upon the floor.<br />
Each group of pilgrims is separated from<br />
the others by 10 feet of space.<br />
208. Record Room<br />
This room contains eight desks with a Dark<br />
Pilgrim sitting at each. The pilgrims are writing<br />
the history of Krynn according to Takhisis.<br />
They are striving desperately to finish<br />
before the Second Council of Highlords, but<br />
they will never make it.<br />
Each pilgrim writes diligently on a long<br />
scroll. Some of the scrolls have been bound<br />
into books in one corner of the room, but<br />
many more are stacked carelessly about.<br />
The pilgrims barely notice any distractions,<br />
but object loudly and strenuously if anything<br />
should force them to halt their work.<br />
209. Army Treasuries<br />
Each of these rooms contains the payrolls for<br />
a Dragonarmy. The rooms are double-locked<br />
and guarded by a dozen members of the temple<br />
regiment at all times. Only the Highlords<br />
have the keys to the treasuries.<br />
Each treasury contains three large and one<br />
small locked chest. Each chest is trapped, as<br />
in the entry alcoves by that army’s gate. For<br />
example, if a chest in the Red Army’s treasury<br />
is opened without the key, and the trap<br />
has not been removed, the room fills with<br />
fiery dragon breath. In all cases, the traps<br />
effect everyone in the room.<br />
The large chests contain 20,000 sp, 20,000<br />
gp, and 20,000 stl, respectively. The small<br />
chest contains 600 - 1,100 (500+ 100d6)<br />
gems, worth an average of 50 stl apiece.<br />
210. Ballrooms<br />
These elegant chambers are designed for celebrations.<br />
A raised gallery at one end contains<br />
seats for a small orchestra. The banners<br />
of the appropriate Dragonarmy are draped<br />
ostentatiously about the hall.<br />
The rooms are used by the Dragonarmy<br />
officers for affairs of culture, which quickly<br />
degenerate into drunken brawls. The rivalries<br />
that mark the taverns of Neraka are not<br />
absent from the ballrooms in the palace!<br />
Since cultured ladies are rare in Neraka, the<br />
officers usually make do with trollops from in<br />
the taverns. The chance of a fight during an<br />
officer’s ball is only 25% of the chance in a<br />
tavern during Ribaldry, but the same procedure<br />
applies. The chance is never modified<br />
because of the time of day, however.<br />
Starting at 10:00 PM on Day 4, a ball is<br />
held in one of the ballrooms each night and<br />
lasts until 5:00 AM. Present are 2d6 officers<br />
of each army currently encamped about Neraka,<br />
twice that number for the army hosting<br />
the ball, and 5d6 of the above-mentioned<br />
ladies. A cheap orchestra of drums, trumpets,<br />
pipes, and harps play loud and fast music.<br />
The balls occur at the following ballrooms:<br />
Day 4-White; Day 5-Green; Day 6-Black;<br />
Day 7-Red (if evil wins).<br />
211-215. Dragon Highlord Apartments<br />
All of the Highlords maintain private apartments<br />
here. Each is accessible via the towers<br />
connecting the various levels of the temple.<br />
The apartments have plush armchairs, feather<br />
beds, and fireplaces.<br />
The towers are each manned by six members<br />
of the Highlord’s temple guard at the<br />
same level as the apartments.<br />
The outer room is a combination sitting and<br />
dining room. It is equipped with a fine hardwood<br />
table and chairs, as well as comfortable<br />
couches around the fireplace. The next room<br />
is an office, with a large desk and a heavy<br />
metal strongbox.<br />
Finally, the Highlord’s bedroom, private<br />
lavatory, and bath complete the apartment.<br />
As with the rest of the apartment, these are<br />
furnished in luxurious style.<br />
The Highlord is always present from 5:00<br />
AM until 10:00 AM, and is sleeping during<br />
these times. There is a 50% chance that the<br />
lord returns for a nap from 2:00 PM to 5:00<br />
PM.<br />
211. Toede’s Apartment<br />
Toede’s apartment is filthy and unkempt, with<br />
boots, uniforms, and the like scattered all<br />
over. The desk is piled high with papers, most<br />
of them unread. Spilled bottles of wine add a<br />
sticky aspect to the mess.<br />
212. Lucien’s Apartment<br />
This apartment resembles Toede’s in all<br />
respects.<br />
213. Ariakus’s Apartment<br />
The emperor has decorated his rooms with<br />
the heads of many of the creatures he has<br />
killed. His prize trophy is a small silver dragon<br />
head.<br />
The chambers are much neater than those<br />
of Toede or Lucien. When Ariakus returns<br />
from a ball, he brings ld3 trollops with him.<br />
214. Kitiara’s Apartment<br />
Kitiara’s apartment contains nothing to indicate<br />
that it is the residence of the only female<br />
Highlord, except perhaps her custom-fitted<br />
plate mail uniforms. The rooms are more<br />
practical and military than the other Highlord<br />
apartments. The papers on her desk are well<br />
organized.<br />
Like Ariakus, Kitiara rarely returns from the<br />
ballroom alone. She has company-usually a<br />
Dragonarmy officer—80% of the time.<br />
215. Salah-Khan’s Apartment<br />
The rooms of the Green Dragonarmy commander<br />
are decorated in somber, plain style.<br />
Incense burns constantly in small pots, giving<br />
107<br />
the chambers a sickly sweet smell, and<br />
adding a smoky haze to the air. Small vials<br />
containing a variety of herbs and powders<br />
stand on the mantle; the Highlord uses them<br />
to mix a wide variety of intoxicating concoctions.<br />
216. Long Drop<br />
The floor of this circular room is the ceiling of<br />
the council chamber directly below. It is an<br />
illusory trap, however, since the room actually<br />
has no floor. Although the illusion creates<br />
an appearance of solid tile layered in a multicolored<br />
mosaic pattern, the entire floor is an<br />
illusion. Characters attempting to step onto it<br />
break the illusion and plummet 100 feet to<br />
the base of the Dark Queen’s throne.<br />
217. Chamber of Gorzaug<br />
This room contains the lone minion of Takhisis<br />
to accompany her into Krynn before the<br />
gate was closed. Gorzaug now awaits the<br />
return of her queen in this room high atop the<br />
temple.<br />
She can sense any intrusion into her level<br />
of the temple, and she stealthily emerges to<br />
ambush the intruders. For combat and<br />
descriptive purposes, treat Gorzaug as a lich.<br />
218. Anvil of Might<br />
A massive bronze anvil stands alone in the<br />
center of the room. A huge hammer hangs on<br />
the wall.<br />
This anvil is the only place where Berem’s<br />
gem can be destroyed. If he kneels at the side<br />
of the anvil, the stone rests upon the bronze<br />
surface. A single blow must be delivered with<br />
the hammer by a fighter. The gem shatters<br />
instantly and Berem collapses, freed at last<br />
by death.
The world of Krynn has struggled through a<br />
long winter. It is hoped that the actions of the<br />
Heroes have made it possible for a fresh<br />
spring to arrive, breaking the frosty spell of<br />
evil that has held the land in thrall for so long.<br />
Yet, though the evil is now scattered, it<br />
remains, for the most part, undiminished. The<br />
greatest accomplishment to arise from the<br />
destruction of the Dark Queen’s gate is the<br />
sundering of the evil forces’ unity. Now each<br />
Dragonarmy is a separate force, arrayed<br />
against its former comrades as well as the<br />
forces of good.<br />
But so too are the forces of good scattered<br />
by the news of the Heroes’ success. Elf and<br />
human, dwarf and kender, these are not natural<br />
allies. Without the clear and imminent<br />
danger of complete subjugation before them,<br />
these races and peoples no longer feel compelled<br />
to work together for a common goal.<br />
Thus wars will continue, but they will be<br />
smaller wars. One nation might fight its neighbor<br />
for the right to determine anew the border<br />
between them. Dwarf and ogre will again<br />
clash for the privilege of using a strategic<br />
mountain pass, or the right to excavate a<br />
promising vein of ore. Creatures will die in<br />
these wars, and good and evil will struggle in<br />
balance for the chance to gain a small, local<br />
superiority.<br />
Yet in other lands crops will be planted, and<br />
men and women will again work to create a<br />
better world for their children. Peace will be<br />
made between contentious neighbors, for<br />
many are tired of war and death.<br />
The war against evil will continue through<br />
the acts of the brave and the virtuous. Acts of<br />
cruelty will still mar the beauty of the land.<br />
The Heroes have not failed in their quest<br />
because of these realities, however.<br />
Look on those lands where the crops grow<br />
green, and the arrival of a new child is cause<br />
for celebration and hope. Not long ago, these<br />
things were vanished from the land, and the<br />
hope of their return was gone from the hearts<br />
of the people.<br />
It is in the restoration of these opportunities,<br />
the return of hope, that the Heroes’ success<br />
is seen. The task set for the Heroes was<br />
to end the source of evil that threatened in<br />
their time, not to put an end to evil for all<br />
time.<br />
The success of the Heroes has returned<br />
balance to the world of Krynn.<br />
The End of the Epic<br />
The adventure in this book concludes the<br />
story of the Dragonlance War. It is up to you<br />
and your players to continue playing a campaign<br />
set in Krynn. Whether you continue or<br />
not, the conclusion of an undertaking such as<br />
the DRAGONLANCE saga calls for some celebration,<br />
and perhaps a moment of sitting<br />
back and reviewing the accomplishments of<br />
the player characters’ quest.<br />
Consider throwing a party at the conclusion<br />
of the epic for your gaming group. Gather the<br />
players and celebrate the completion of the<br />
grandest role-playing adventure series ever.<br />
Talk about the adventures, perhaps reliving<br />
some of the more exciting moments in the<br />
time-honored fashion of all old campaigners.<br />
You might wish to ask each player for his or<br />
her most memorable moment in the epic. If it<br />
has taken you a long time to complete the<br />
series (a distinct possibility!) then perhaps<br />
you will want to recap the earlier adventures<br />
to refresh your memories.<br />
Get out the maps and old PC cards, if you<br />
still have them. You can show the players<br />
your maps of some of the areas they explored,<br />
perhaps even pointing out a few of the traps<br />
or tricks that the party managed to avoid.<br />
A Special Note if the Quest Fails<br />
The adventure is designed so that the player<br />
characters should have learned how to succeed<br />
in the quest. They should have been<br />
presented with opportunities to accomplish<br />
the grand objective. If the players were careless<br />
or inattentive, they might not have succeeded<br />
because of their own mistakes.<br />
It is possible, however, that the players<br />
acted intelligently, the game was run fairly,<br />
and things still did not work out. A battle in<br />
which every character fails a saving throw<br />
might have proved an insurmountable setback,<br />
or a similar example of bad luck might<br />
have plagued the group at a key instant during<br />
the adventure. In most cases, especially if<br />
the cause is simply bad luck, a means of<br />
extricating the party should not be too difficult<br />
to arrange. A reasonable explanation of<br />
how the party emerges from such an extremity<br />
should be given. A surprising spell from<br />
Fizban, for example, should be a last-resort<br />
ploy on the DM’s slate for such a predicament.<br />
Be sure, whatever the outcome, to keep the<br />
game in perspective. It is, after all, a game:<br />
real lives are not affected by the outcome.<br />
Make sure that the players know that they<br />
have played well—there is no shame in failure<br />
caused by the fickle rolls of the dice!<br />
Consider the fact that the failed quest might<br />
create additional, albeit desperate, opportunities<br />
for adventure in the world of Krynn. As<br />
the dark forces lash out with renewed vigor,<br />
the PCs will find chaos and evil on all sides.<br />
Yet even then, not every spark of goodness<br />
will be squashed from the planet.<br />
108<br />
As high-level characters of great power and<br />
experience, the PCs might play an important<br />
role in the underground resistances that must<br />
surely arise. Or perhaps they will be the leaders<br />
of a mass exodus, seeking magical or<br />
physical solace on some distant shore,<br />
beyond the borders of Ansalon—perhaps<br />
even beyond Krynn itself!<br />
The Continuing Adventure<br />
Perhaps your players will wish to retire their<br />
characters, now that the saga is concluded.<br />
Seeking treasure in a dungeon with a character<br />
who has just saved the world might seem<br />
a little mundane, after all.<br />
If the players wish to continue playing the<br />
Heroes of Krynn in future gaming sessions,<br />
you have several options. Perhaps the PCs<br />
wish to return for a more leisurely look at the<br />
settings of their previous adventures. Perhaps<br />
they will decide to claim a land as their own,<br />
lending a hand to aid the return of stability<br />
and order, or leading an army to hold the stillactive<br />
Dragonarmies at bay.<br />
Or perhaps you would like to move the PCs<br />
to a different land or world, in a new campaign<br />
setting. With the variety of interplanar<br />
travel opportunities presented by the AD&D<br />
game system, accomplishing this with highlevel<br />
characters should not be an insurmountable<br />
task.<br />
You might decide to keep the campaign in<br />
Krynn, but to retire the powerful PCs into a<br />
benign NPC status. The players can generate<br />
new, lower level characters, and you already<br />
have a detailed campaign setting into which<br />
those characters can be introduced. Or you<br />
could have the Heroes journey to the distant<br />
continent of Taladas, detailed in the Time of<br />
the Dragon boxed set. This land is on the<br />
other side of Krynn and is vastly different<br />
from Ansalon.<br />
In any event, by exercising your creativity<br />
and responding to your players’ desires, you<br />
can arrange it so that the adventure is just<br />
beginning....
109
Rumors, Legends, and Omens<br />
The following section is for use with Chapters<br />
5 through 10. Rumors are used to provide<br />
PCs with important clues and warnings about<br />
the adventure. When to give rumors is<br />
explained in the Prologue before Chapter 5. A<br />
rumor, legend, or omen can be selected based<br />
on the location of the PCs or by rolling 1d20.<br />
Rumors can be learned by talking to someone,<br />
bribing, overhearing, posters, and<br />
reports. You can create your own rumors<br />
about the land or create adventures based on<br />
the legends. (Roll 1d6: 1-3 = Rumor, 4-5 =<br />
Legend, 6 = Omen)<br />
Rumors<br />
1. Posters urge brother to betray brother.<br />
2. The Highlord does not wear a helm.<br />
3. The ogres resist this rule of evil men and<br />
would as soon make war with each other.<br />
4. The dead have been awakened to join<br />
the forces of the Highlords.<br />
5. Squads roam across the land, recruiting<br />
all able-bodied men and killing all who resist.<br />
6. If ever in need of a friend, seek one<br />
known as Pig-faced Willy.<br />
7. The kender who drove the Highmaster<br />
and his army from their woods.<br />
8. The rebels are led by one who can vanish<br />
into the woods.<br />
9. The rebels’ sign is a sash, green as the<br />
leaves and red as a foe’s blood.<br />
10. The rebels can come and go at will<br />
from the Highmaster’s stronghold.<br />
11. The Highmaster is a cowardly sort,<br />
renowned for his girth and atrocious odor.<br />
12. The Highmaster has a mysterious aide<br />
who can go anywhere, see anything.<br />
13. Within the Highlords’ forces are many<br />
spies.<br />
14. Pirates are superstitious, easily spooked<br />
by children’s tales.<br />
15. A visiting Highlord is looking for something<br />
or someone. Since he came, all are<br />
stopped and questioned.<br />
16. Seek Sevil Draanim Rev. He knows all<br />
one could desire and can obtain anything, if<br />
the price is right. He is as loyal as money.<br />
17. Ogres are recruiting men to guard their<br />
caravans.<br />
18. The rebels are learning to summon<br />
lightning to confront the Highlord.<br />
19. Rumors abound of the Highlords betraying<br />
their pirate allies.<br />
20. The Highlords and ogre chiefs plan a<br />
secret meeting to cement their alliance.<br />
Legends<br />
1. A gray stalker haunts the wilds. He cannot<br />
be harmed.<br />
2. On a rocky shore, in a bloodstained ruin,<br />
restless souls mount an eternal vigil, watching<br />
still as they watched at the end of Istar.<br />
3. On moonless nights, the Blood Sea roils<br />
and churns with the torment of the wicked<br />
souls of the lost.<br />
4. There is a mist-shrouded island that<br />
holds the bane of all things.<br />
5. Legend tells that Elian the Fair, lap of<br />
civilization, hosts the Garden of Wonder.<br />
6. By the crystal caves is a creature whose<br />
beauty can blind a man. It sings a sad refrain<br />
of the lost majesty of the land.<br />
7. Grim games of horror and barbarity are<br />
enacted in the arena of the minotaurs.<br />
8. It is said that high within the mountains<br />
of Minas live men who can fly.<br />
9. The Mire, a graveyard of ships, can be<br />
found only when it claims another. A pirate’s<br />
ransom is said to be buried there.<br />
10. Death’s Teeth, twin towers that guard<br />
Reaver’s Bay, were once the homes of two<br />
brothers who kidnapped and slew the other’s<br />
family and swore enmity forever.<br />
11. The very earth rebels against the<br />
oppressors, swallowing entire armies so that<br />
even the Highlords fear the land.<br />
12. A monstrous beast, called Shirgrenth,<br />
haunts the Gaggle Woods. Hunting at night, it<br />
can eat an entire herd. Only fire can harm it.<br />
13. The Oracle of the Woods is able to<br />
unravel the skeins of Fate and see the future.<br />
She has foretold that a band of heroes will<br />
pass this way and should be sent to her. These<br />
heroes hold the key to the Highlords’ defeat.<br />
14. A monstrous child of the Dark Queen<br />
prowls the land, destroying rebels.<br />
15. The trees of Grimsome Glade are as old<br />
as the Age of Dreams. They resent man and<br />
unnatural beasts, slaying all trespassers.<br />
16. As a creature nears his span of years,<br />
he is called to dance the Death Spiral, a final<br />
game with Death that none can win.<br />
17. A spring of life is lost in the Dairly<br />
Plains. It brings health and youth to some,<br />
madness to others.<br />
18. In the Ogrelands, legend tells of the<br />
Valley of Vipers, where plum-sized gems carpet<br />
the earth. None dare seize them, for serpents<br />
coil among them and poison the land.<br />
19. Far to the north dwells the living Beacon,<br />
a guide to lost mariners, and a candle of<br />
hope in dark times.<br />
20. Long ago, there were five Towers of<br />
High Sorcery, but the Priest-king ordered<br />
them sealed for all time. One stood above the<br />
capital of Istar.<br />
110<br />
Omens<br />
1. Ravens circle in the sky, foreshadowing<br />
dangers or carnage.<br />
2. A white stag bounds toward the area of<br />
most hope for the party. Then it disappears.<br />
3. A sudden gust of wind blows, and a cloud<br />
or leaf shadows form a death’s head.<br />
4. A bird struggles in a thorn bush.<br />
5. The clouds or leaves part, and a ray of<br />
sunshine illuminates the path ahead.<br />
6. Where the party treads, the grass does<br />
not spring back, but withers and dies.<br />
7. Storm clouds billow on the horizon.<br />
8. A pale faerie fire dances toward the<br />
party, attracted to metal and wood.<br />
9. A lucky find: a copper coin, a shawl, a<br />
thimble, a button, a buckle, or an empty vial.<br />
10. Bleached white branches stick out of<br />
the earth like the bones of an ancient beast.<br />
11. A feeble screech breaks the silence and<br />
a dead bird falls at the party’s feet.<br />
12. Floating wreckage supports a shadowy<br />
burden: a survivor, body, otter, etc.<br />
13. Racing through the waves, a pair of<br />
dolphins keeps pace with the party’s ship.<br />
14. On the horizon, the sky turns a crimson<br />
hue, boding fair weather or foul.<br />
15. A breeze fills the air with windseed.<br />
16. A green leafed bough floats past.<br />
17. A rainbow appears before the party.<br />
18. A shadow sweeps across the land.<br />
19. Low-flying birds dart about, diving and<br />
turning in a mad dance.<br />
20. A small silver fox yips at the PCs. It<br />
leads them to secret paths, overlooks, and<br />
hidden details before vanishing.
Rumors<br />
These rumors are for use during Chapters 11<br />
through 13. Some of the NPCs encountered<br />
during this part of the adventure know rumors<br />
that relate to the PCs’ quest. These rumors<br />
may or may not be true. (The first 15 are true,<br />
the last five are false!) If an NPC is noted in the<br />
text as one who knows a rumor, roll 1d20 to<br />
determine the rumor he gives the PCs. You can<br />
also roll on the chart if the PCs encounter an<br />
NPC who is favorably disposed toward the PCs<br />
(either because of alignment, similar goals, or<br />
because of a favorable reaction check).<br />
1. The dragon Highlords are up to something<br />
big. Orders have been leaving Neraka<br />
regularly and caravans have been increasing.<br />
2. Sure have been a lot more caravans<br />
moving through these parts. Most head<br />
toward Neraka.<br />
3. No one gets into the Dark Temple without<br />
a special pass. Each is signed by the Highlord’s<br />
own staff and always describes the user.<br />
Game Clocks<br />
Use the following clocks to keep track of time during this adventure.<br />
The clocks will be reused, so mark in pencil.<br />
Adventure Clock<br />
Each [ ] = 1 day<br />
Month 1<br />
Week 1<br />
Week 2<br />
Week 3<br />
Week 4<br />
Month 2<br />
Week 1<br />
Week 2<br />
Week 3<br />
Week 4<br />
Month 3<br />
Week 1<br />
Week 2<br />
Week 3<br />
Week 4<br />
Month 4<br />
Week 1<br />
Week 2<br />
Week 3<br />
Week 4<br />
Su Mo Tu We Th Fr Sa<br />
[1] [2] [3] [4] [5] [6] [7]<br />
[8] [9] [10] [11] [12] [13] [14]<br />
[15] [6] [17] [18] [19] [20] [21]<br />
[22] [23] [24] [25] [26] [27] [28]<br />
Su Mo Tu We Th Fr Sa<br />
[1] [2] [3] [4] [5] [6] [7]<br />
[8]<br />
[15]<br />
[9]<br />
[16]<br />
[10]<br />
[17]<br />
[11]<br />
[18]<br />
[12]<br />
[19]<br />
[3]<br />
[20]<br />
[14]<br />
[21]<br />
[22] [23] [24] [25] [26] [27] [28]<br />
Su Mo Tu We Th Fr Sa<br />
[1] [2] [3] [4] [5] [6] [7]<br />
[8] [9] [10] [11] [12] [13] [14]<br />
[15] [6] [17] [18] [19] [20] [21]<br />
[22] [23] [24] [25] [26] [27] [28]<br />
Su Mo Tu We Th Fr Sa<br />
[1]<br />
[8]<br />
[15]<br />
[2]<br />
[ 9 ]<br />
[16]<br />
[3]<br />
[10]<br />
[17]<br />
[4]<br />
[11]<br />
[18]<br />
[ 5 ]<br />
[12]<br />
[19]<br />
[6]<br />
[13]<br />
[20]<br />
[7]<br />
[14]<br />
[21]<br />
[22] [23] [24] [25] [26] [27] [28]<br />
4. They’ve been doing some work on a new<br />
flying citadel up in the mountains but haven’t<br />
finished yet.<br />
5. Stay away from the heart of the mountains!<br />
That’s Godshome country and no one<br />
needs to disturb the sleep of the gods!<br />
6. A person without proper authority won’t<br />
get far in this territory. There’s a lich guarding<br />
the pass into Neraka.<br />
7. Dragons fly over the entire plain from<br />
their bases. They look down and search for<br />
escaped slaves and spies.<br />
8. Not all the Dragonarmy is sitting right on<br />
the front. There are plenty of patrols that<br />
search the plains day and night.<br />
9. There are strange roads under the plains<br />
—roads the Highlords have not yet explored.<br />
10. Some who have gone into volcanoes<br />
have claimed that there are entrances to<br />
underground roads there.<br />
11. Some who have gone up the glaciers<br />
say that an underground road is there.<br />
12. There are rivers of death and fire under<br />
the Taman Busuk. Where they lead none know.<br />
111<br />
Daily Clock<br />
Each = 1 turn (10 minutes)<br />
13. The Glitterpalace was once said to exist<br />
in this area. Some have seen its strange<br />
entrance in the most unexpected places.<br />
14. Ancient legends say the Tests of the<br />
Gods showed survivors the true path to their<br />
destiny.<br />
15. There are ancient signposts on the<br />
plains of the Taman Busuk, but no one who<br />
follows them is ever seen again.<br />
16. The treasure of the dwarves is hidden<br />
down beneath the ground; it can be found<br />
only by those willing to risk the fiery depths.<br />
17. Those who go to Godshome never<br />
leave.<br />
18. The foggy vale to the south is the home<br />
of good spirits who are now restless.<br />
19. The Queen of Darkness has placed<br />
many cunning traps all about the land. These<br />
traps often lure spies to their deaths.<br />
20. The Queen of Darkness has given her<br />
armies a new magic that will sunder the<br />
Whitestone forces. They await the right time<br />
to unleash this power.<br />
Use this clock to keep track of time within a day.<br />
6:00 am 6:00 pm<br />
7:00 am 7:00 pm<br />
8:00 am<br />
8:00 pm<br />
9:00 am<br />
9:00 pm<br />
10:00 am 10:00 pm<br />
11:00 am 11:00 pm<br />
12:00 pm 12:00 am<br />
1:00 pm 1:00 am<br />
2:00 pm 2:00 am<br />
3:00 pm 3:00 am<br />
4:00 pm 4:00 am<br />
5:00 pm 5:00 am<br />
Turn Clock<br />
Each = 1 combat round<br />
Use this clock to keep track of time within a battle.<br />
1st min.<br />
2nd min.<br />
3rd min.<br />
4th min.<br />
5th min.<br />
6th min.<br />
7th min.<br />
8th min.<br />
9th min.<br />
10th min.
Chapters 1 – 4<br />
In addition to the set Encounters and Events in this adventure, the following<br />
random encounters can occur. You can alter the frequency if<br />
you choose or omit them altogether if the party is seriously weakened.<br />
Use the following charts and tables to set up random encounters.<br />
Table 1 contains a list of all the areas that might be explored during this<br />
part of the adventure. Next to each area is a column labeled “Check.”<br />
This shows how often you should check to see if a random encounter<br />
occurs in that area. For example, “1/3 Turns” means to check once<br />
every three turns. To make a random encounter check, roll 1d10. If the<br />
result is 1, a random encounter takes place.<br />
Next, look at the column marked “Range.” Roll the die listed and add<br />
the modifier beside it. Look up the resulting number on Table 2 to find<br />
the random encounter that takes place. The statistics for the monsters<br />
are given in the Combined Monster Statistics Chart.<br />
Table 1: Random Encounter Checks<br />
Location Check Range<br />
Tarsis 1/3 turns 1d8<br />
Plains of Dust 1/4 hours 1d20<br />
Border Woods 1/3 turns 1d20+9<br />
Dream Forest 1/3 turns 1d30+14 *<br />
Dream City 1/2 turns 1d20+24<br />
Dream Tower 1/turn 1d12+34<br />
* Simulate 1d30 by rolling 1 d6; 1 to 2 = 0; 3 to 4 = 10; 5 to 6 = 20;<br />
then roll 1d10 and add the results.<br />
Table 2: Random Encounters<br />
1. 1 d3 Blue Dragons<br />
2. 1 d6 Kender<br />
3. 1 Blue Dragon (Skie)<br />
4. 1d10 Baaz<br />
5. 1d8 Bozaks<br />
6. 2d4 Kapaks<br />
7. 1d6 Qualinesti Elves<br />
8. 1d4 Dwarves<br />
9. 1d8 Thanoi<br />
10. Blue Dragon (Skie)<br />
11. 3d4 Dire Wolves<br />
12. 2d4 Winter Wolves<br />
13. 1d8 Baaz<br />
14. 1d6 Bozaks<br />
15. 1d4 Bozaks<br />
16. 1d4 Kapaks<br />
17. 1d6 Qualinesti Elves<br />
18. 1d12 Giant Eagles<br />
19. 2d6 Griffons<br />
20. White Stag<br />
21. 4d4 Brownies<br />
22. 1d6 Dryads<br />
23. 1d6 Dryads<br />
24. 2d4 Kech<br />
25. 1d2 Dwarves<br />
26. 1d8 Minotaurs<br />
27. 1d3 Will-o-Wisps<br />
28. 1 Kender<br />
29. 1 Drelb<br />
30. 1d4 Silvanesti Elves<br />
31. 1 Chaggrin (Grue)<br />
32. 1 Harginn (Grue)<br />
33. 1 lldriss (Grue)<br />
34. 1 Varrdig (Grue)<br />
35. 1d4 Kender<br />
36. 1d6 Silvanesti Elves<br />
37. 1 Green Dragon (Cyan)<br />
38. 1d6 Dreamwraiths<br />
39. 1 Groaning Spirit<br />
40. 4d4 Shadow Mastiffs<br />
41. 1d4 Mihstu<br />
42. 1d3 Sirines<br />
112<br />
43. 1 Para-Elemental, Smoke<br />
44. 2d6 Spectral Minions<br />
45. 1 Beholder<br />
46. 1d6 Groaning Spirits<br />
Chapters 5 – 10<br />
Random Events<br />
Random events for this part of the adventure are divided into four<br />
types: A (Uneventful Trips), B (Random Encounters), C (Events), and<br />
D (Omens). To use the following tables, roll 1d20 each day of the<br />
adventure and check Table 3 to see which type of random event<br />
occurs.<br />
There are three types of Uneventful Trips (A):<br />
1-2 = Pleasant journey; no encounter.<br />
3-4 = Tiring trip; X move and -2 penalty to attack rolls, damage, and<br />
saving throws.<br />
5-6 = Hazardous trek; event inflicts 2d8 damage.<br />
If a Random Encounter (B) is indicated, roll 1d8 and add the modifier<br />
given in Table 3 for that area. This total is the random encounter on<br />
Table 4 that occurs.<br />
If an Event (C) is indicated, roll 1d20 again and read that entry on<br />
Table 5. Events must be adapted to the locale of the party; several possibilities<br />
are given.<br />
Omens (D) are listed in the “Rumors, Legends, and Omens” section<br />
of the Appendix. You should select omens that make sense in the PCs’<br />
current situation.<br />
Table 3: Random Event Checks<br />
Type<br />
Area A B C<br />
Ruins 1-4 5-12 13-17<br />
Wildlands 1 - 4 5-11 12-18<br />
Islands 1-4 5-10 11-19<br />
Mountains * 1-5 6-11 12-18<br />
Grasslands * * 1-3 4-12 13-19<br />
Woods 1-3 4-12 13-18<br />
Towns 1-2 3-13 14-19<br />
Coastline 1-2 3-10 11-18<br />
Coastal Waters 1-4 5-13 14-19<br />
Open Waters<br />
* Includes Ogrelands<br />
** Includes steppes<br />
1-6 7-12 13-18<br />
Table 4: Random Encounters<br />
1. 1d2 Wraiths<br />
2. 3d4 Ghasts<br />
3. 1d4 Gargoyles<br />
4. 1 Hag<br />
5. 1d2 Spotted Lions<br />
6. 1d6 + 1 Hell Hounds<br />
7. 1 Spirit Naga<br />
8. 1 Black Willow<br />
9. 5d6 Sligs + Chief<br />
10. 1 Giant Wolverine<br />
12. 1d4 Leucrottas<br />
13. 1d6 + 1 Forest Taers<br />
14. 1d2 Ettins<br />
15. 1d8 Merchants<br />
16. 6d4 Kapaks + Warrior<br />
17. 3d4 Ogres + Chief<br />
18. 4d4 Dire Wolves<br />
19. 2d6 Warriors<br />
20. 10d4 Hobgoblins + Bozak<br />
21. 5d6 Buffalo + 1d6 Men<br />
22. 5d6 Wild Elves<br />
23. 2d4 Kender<br />
24. 1d4 + 1 Boring Beetles<br />
25. 1d4 Dwarves<br />
26. 2d8 Ogres<br />
D Modifier<br />
18-20 +0<br />
19-20 +4<br />
20 +6<br />
19-20 +10<br />
20 +14<br />
19-20 +20<br />
20 +24<br />
19-20 +28<br />
20 +30<br />
19-20 +32
27. 1 Blue Dragon<br />
28. 4d8 Sligs + Leader<br />
29. 3dl2 Baaz + Ogre Chief<br />
30. 1d4 Merchants + 5d4 crew<br />
31. 6d6 Pirates (F3) + Warrior<br />
32. 1d6 Giant Crayfish<br />
33. 1d4 Minotaurs + 1d12 Ogres<br />
34. 1d6 Sea Lions<br />
35. 1 Sea Dragon<br />
36. 1d2 Vodyanoi **<br />
37. 1d20 Sea Elves/Mermen<br />
38. 1 Sea Serpent<br />
39. 1d12 Pricklebacks<br />
40. 5d6 Ghagglers<br />
Table 5: Events<br />
1. Deadfall: Something heavy falls, successful saving throw vs. petrification<br />
or suffer 2d6 points of damage: a) Crumbling ruin, b) Tree/<br />
Mast, c) Rock slide, d) Sudden wave<br />
2. Pitfall: Character falls into a hole: a) Earth collapses (lo-20 ft.),<br />
b) Mud slide, c) Animal pit (10 ft.), d) Rotted flooring<br />
3. Trap: Character stumbles into a snare or booby trap: a) Rope/Net<br />
snare, b) Drugged dart, c) Spiked sapling (1d6), d) Sleep gas<br />
4. Dilemma: Obstacle blocks the way-a) Barracuda/Wolf pack, b)<br />
Quicksand, c) Rapids/Avalanche, d) Hot springs/Fire<br />
5. Warning: PCs find a warning of danger: a) Wanted poster/Rumors,<br />
b) Charred debris, c) Bloodstains, d) Eerie cries<br />
6. Tracks: A monster’s tracks lead to an encounter or another event;<br />
roll for type<br />
7. Wild Animal: A wild beast does the following: a) Steals something,<br />
b) Bites, etc., c) Startles as it flees, d) Feeds nearby<br />
8. Obstacle: Path is blocked by a: a) Cliff, b) Pond, c)Gorge/Stream,<br />
d) Marsh, e) Briar hedge/Reef, f) Snag/Sandbar<br />
9. Dragon Spoor: Signs that a dragon has been here: a) Tracks, b)<br />
Fresh kill with marks, c) Clawed trees, d) Shadow in sky<br />
10. A Find: A special feature: a) Landmark stone or tree, b) Ruins, c)<br />
Grave, d) Wreckage<br />
11. Carnage: There are dead bodies from a battle. Roll two random<br />
encounters to see what fought here.<br />
12. Accident: Misfortune befalls the PCs: a) Injury, b) Supplies damaged,<br />
c) Someone becomes stuck, d) Weapon breaks<br />
13. Stranger: A stranger is encountered: a) Offers advice, b) Asks<br />
for help, c) Plies PCs for information, d) Is rude<br />
14. Shelter: A shelter is found: a) Cave, b) Hut, c) Port/Hollow tree,<br />
d) Wagon/Wreck<br />
15. Illness: As a result of food, air, plants, or insects, a character<br />
becomes ill (1d6 days). Travels at ¼ speed, -4 penalty to attack rolls,<br />
damage, and saving throws<br />
16. Weather Change: The weather changes to: a) Drizzle/sleet, b)<br />
Windy, c) Clear skies and cool, d) Overcast/snow flurries<br />
17. Obscurement: Mist, fog, darkness<br />
18. Sightings: The PCs sight something: a) Shadowy figure, b) Glint<br />
of light, c) Spiral of smoke, d) Birds take wing, e) Cloud of dust/wake,<br />
f) Rustling plants<br />
19. Storm: This storm reduces party to ¼ movement, obscures<br />
vision, causes 1d4 points of damage every turn caught in it; could be a<br />
thunderstorm, a windstorm blowing grit or thorns, or a cyclone (add<br />
Event 1. Deadfall)<br />
20. Special Event: Create some special events. Some examples: a)<br />
Lunar eclipse, b) Illusion, c) Monument, d) Friendly hero<br />
Chapters 11 – 13<br />
Random Encounters<br />
In addition to the set encounters and events in this part of the adventure,<br />
the following random encounters can occur. See the explanation<br />
under the “Chapters 1 - 4” section earlier.<br />
In some areas it is possible to have a random encounter with a major<br />
NPC. When this occurs, select an appropriate NPC from the “NPCs”<br />
section of the Appendix.<br />
113<br />
Table 6: Random Encounter Checks<br />
Location Check Range<br />
Jelek (Enc. 103) 1 /turn 1d20+34<br />
Army (Enc. 95 & 97) 1/turn 1d12+40<br />
Taman Busuk 1/4 hours 1d20+28<br />
Test of Valor 1/3 turns 2d8+10<br />
Test of Wisdom 1/3 turns 1d20+5<br />
Test of Heart 1/3 turns 1d10<br />
Table 7: Random Encounters<br />
1. 1d8+4 Wraiths<br />
2. 1d3 Dreamwraiths<br />
3. 1d4 Dreamwraiths<br />
4. 1d8 Shadows<br />
5. 1d4 Dreamwraiths<br />
6. 1d4+3 Will-o-Wisps<br />
7. 1d8+4 Drelbs<br />
8. 1d10+10 Wraiths<br />
9. 1d8+4 Will-o-Wisps<br />
10. 1d8+8 Wights<br />
11. 1d4 Fetches<br />
12. 1d6+3 Invisible Stalkers<br />
13. 1d8 Bandits<br />
14. 1d4 Beholders<br />
15. 1d4 Gas Spores<br />
16. 1d8+4 Drelbs<br />
17. 1d8 Fetches<br />
18. 1d4 Crimson Deaths<br />
19. 1d6 Groaning Spirits<br />
20. 1d3 Coffer Corpses<br />
21. 1d8 Shadows<br />
22. 1d10 Spectres<br />
23. 1d8+8 Wights<br />
24. 1d10+4 Will-o-Wisps<br />
25. 1d12+8 Wraiths<br />
26. 1d8+4 Piercers<br />
27. 1d8+4 Revenants<br />
28. 1d8+4 Revenants<br />
29. 1d12+4 Baaz<br />
30. 1d10+10 Kapaks<br />
31. 1d6 Bandits<br />
32. 1d6+4 Displacer Beasts<br />
33. 1d4+8 Harpies<br />
34. 1d4+8 Harpies<br />
35. 1d6+2 Nightmares<br />
36. 1d4+2 Griffons<br />
37. 1d6+4 Giant Stags<br />
38. 1 White Stag<br />
39. 1d6+6 Dire Wolves<br />
40. 1d10 Men, Common<br />
41. 1d8+2 Sivaks<br />
42. 1d6+6 Baaz<br />
43. 1d6+8 Bozaks<br />
44. 1d8+4 Kapaks<br />
45. 1d4+2 Bloodsea Minotaurs<br />
46. 1d4+2 Bloodsea Minotaurs<br />
47. 1d12+3 Ogres<br />
48. 2d6 Wemics<br />
49. 2d4 Sivaks<br />
50. Major NPC Encounter<br />
51. 2d6 Bandits (Men)<br />
52. 1d6+1 City Guards (Men)<br />
53. 2d4 Merchants (Men)<br />
54. 2d6 Mercenaries (Men)
Chapters 14 – 16<br />
Random Encounters<br />
In addition to the set encounters and events in<br />
this part of the adventure, the following random<br />
encounters can occur. See the explanation<br />
under the “Chapters 1 – 4” section earlier.<br />
Table 8: Random Encounter Checks<br />
Area Check<br />
Plains of Neraka 1 /hour<br />
Neraka<br />
(Outer City) 1 /turn<br />
Neraka<br />
(Inner City) 1 /turn<br />
Tunnels * 1 /hour<br />
Neraka Undercity 1 /turn<br />
Undercity * * 1/4 turns<br />
* Under the plains<br />
** During the Nightwalk<br />
Table 9: Random Encounters<br />
1. Red Dragon w/Officer<br />
2. Blue Dragon w/Officer<br />
3. Black Dragon w/Officer<br />
4. Green Dragon w/Officer<br />
5. White Dragon w/Officer<br />
6. 2d6 <strong>Free</strong>dom Fighters<br />
7. 2d6 Kapaks<br />
8. 2d6 <strong>Free</strong>dom Fighters<br />
9. 2d4 Ogres<br />
10. 1d8 Sivaks<br />
11. 1d6 Hill Giants<br />
12. 2d6 Minotaurs<br />
13. 1d6 Trollops<br />
14. 1d6 Bozaks<br />
15. 1d6 Auraks<br />
16. 8 Dark Pilgrims<br />
17. 2d6 Gully Dwarves<br />
18. 1 Vampire<br />
19. 1d6 Mobats<br />
20. 3d6 Giant Rats<br />
2 1. 2d6 Carrion Crawlers<br />
22. 1d6x200 Bats<br />
23. 2d6 Ghouls<br />
24. 1d8 Ghasts<br />
25. 2d6 Wights<br />
26. 2d4 Wraiths<br />
27. 1d4x20 Skeletons<br />
28. 1d6x10 Zombies<br />
29. 1d6 Banshees<br />
30. 1 Lich<br />
Magical Items<br />
Brooch of Imog (Mages Only)<br />
Range<br />
1d10<br />
1d10+2<br />
1d10+7<br />
1d6+16<br />
1d8+22<br />
1d6+18<br />
Bequeathed by Alhana, this brooch can be<br />
used once per day to create a minor globe of<br />
inuulnerability that lasts for 10 rounds.<br />
Diviner of Life<br />
This magical artifact was created by Waylorn<br />
Wyvernsbane during the Age of Might.<br />
The staff is four feet long. Each end is<br />
capped with a band of gold and steel that is<br />
six inches long. The staff has a three-foot-<br />
long section of what appears to be clear glass<br />
in the middle. It can withstand 20 points of<br />
damage before breaking. If the glass breaks,<br />
the staff is useless.<br />
There seems to be a swirling white fog<br />
within the glass section. When the keyword is<br />
spoken, this fog clears completely. If the staff<br />
then touches any living being, the life force<br />
(hit points) of that being registers as a bright<br />
green line that extends from the bottom of the<br />
staff, 1 inch per 10 hit points registered. The<br />
staff was used by commanders for determining<br />
the general condition of their troops. It<br />
can determine who is illusory and who is real<br />
in the dream in Chapters 1 through 4.<br />
Dragon Orbs<br />
Three of these powerful artifacts are known to<br />
exist upon Krynn. Each contains the essence<br />
of an evil dragon. These are magical items of<br />
vast and dangerous power.<br />
The Dragon Orbs are fragile, etched crystal<br />
globes that are 20 inches in diameter when in<br />
use. When not in use, the orbs shrink to 10<br />
inches in diameter. They expand when the<br />
command words, carved in their surfaces, are<br />
spoken.<br />
The orbs were employed long before the<br />
Cataclysm for the purpose of destroying evil<br />
dragons—at least, this is the legend. This legend<br />
is common knowledge throughout the<br />
civilized lands of Krynn. What is not known,<br />
unless characters have learned by experience,<br />
is that the orbs were really used (by<br />
very high-level mages) to summon evil<br />
dragons. The mages would then destroy the<br />
dragons with spells.<br />
A character trying to use an orb must gaze<br />
into it and speak the command words. This<br />
character must then roll a successful saving<br />
throw vs. spell or he is charmed by the dragon<br />
within the orb. The DM should secretly roll<br />
this saving throw, not informing the players of<br />
the fact that it was made.<br />
If the character successfully resists the<br />
charm, any evil dragons within 1d4 x 10<br />
miles hasten to the orb. These dragons automatically<br />
attack any non-evil creatures that<br />
they find near the orb. If the current gaming<br />
situation does not specify the location of<br />
nearby dragons, roll 1d6. On a 1 or 2, a<br />
dragon of randomly determined age, size, and<br />
color (evil) shows up.<br />
If the character fails the saving throw, no<br />
dragons are summoned, but the character is<br />
charmed by the evil dragon within the orb.<br />
Inform the player, when you can speak to him<br />
alone without being obvious, that his character<br />
has been charmed. He must act normally<br />
unless told otherwise.<br />
The controlling dragon essence will steer<br />
the charmed character so as to further the<br />
cause of evil. This is done as subtly as possible,<br />
so that the controlled character’s companions<br />
should suspect nothing until a critical<br />
point is reached.<br />
For example, if the PCs are engaged in a<br />
desperate battle with an evenly matched<br />
group of evil characters, the charmed character<br />
might suddenly throw in his lot with the<br />
114<br />
evil group to swing the balance in their favor.<br />
Each orb has the secondary abilities of<br />
cure serious wounds three times per day,<br />
cast continual light at will, and detect magic<br />
at will. Any character who gazes into an orb<br />
and speaks the command word will know all<br />
of these functions. Whenever an orb is used<br />
for any of these things, the character must<br />
roll a saving throw to avoid being charmed. If<br />
the saving throw is successful, check to see if<br />
any evil dragons are within summoning<br />
range.<br />
Detect magic and detect evil spells give<br />
positive results if cast upon either the orb or a<br />
character charmed by the orb. For purposes<br />
of dispelling, treat the charm effect as if it<br />
were cast by an 11th-level mage.<br />
Dragonlances<br />
The knowledge necessary to forge Dragonlances,<br />
potent magical weapons that have<br />
aided the war against evil, was gained through<br />
the PC’s exploits in earlier adventures. Dragonlances—elegant<br />
needles of steel and silver—are<br />
being forged as quickly as possible<br />
and have proven invaluable in combating the<br />
evil dragons.<br />
There are two types of Dragonlances: a<br />
footman’s lance is eight feet long and can be<br />
footman’s lance is eight feet long and can be<br />
wielded by a fighter. The mounted lance is<br />
twice as long and correspondingly heavier. It<br />
can be wielded by a fighter. The mounted lance on<br />
a dragon or other large steed, such as a heavy<br />
warhorse of 21 or more hit points. Mounted<br />
lances often bear an attached shield guard.<br />
These lances are almost always used by a fighters<br />
mounted on dragons, because the awe<br />
power of dragons makes horses and other<br />
steeds relatively useless against them.<br />
A footman’s Dragonlance inflicts 1d6 points<br />
of damage to small or medium foes and 1d8<br />
points of damage to large foes. The weapon<br />
has a +1 bonus to attack rolls if hand held. It<br />
can also be cast as a spear, but with a –2<br />
penalty to the attack roll. When used against<br />
dragons, this Dragonlance inflicts damage<br />
equal to the hit points of the wielder. Thus, a<br />
24-hit-point fighter would inflict 24 points of<br />
damage to a dragon.<br />
The mounted lance inflicts 2d4+1 points of<br />
damage to small or medium foes and 3d6<br />
points of damage to large targets. Against<br />
dragons, it inflicts damage equal to the hit<br />
points of the wielder and the mount. Thus a<br />
24-hit-point fighter mounted on a 64-hit-point<br />
silver dragon would inflict 89 points of damage<br />
to a dragon. If not mounted, the lance<br />
causes 3d6 points of damage against<br />
dragons. The weapon has +2 bonus to<br />
attack rolls, but only when mounted.<br />
Flute of Wind Dancing<br />
This item can be used only by a character<br />
who knows how to play a flute or other type of<br />
wind instrument. While playing this flute, the<br />
user summons and controls small breezes.<br />
After two rounds of playing, the user can<br />
create a zephyr and after three rounds, a gust
of wind. If an entire turn is spent playing the<br />
flute, a dust devil can be created in a 30-footdiameter<br />
area, blowing up dust and leaves<br />
and acting as an obscure spell. The dust devil<br />
dissipates gas and mist in the area of effect.<br />
The winds created start at the player and<br />
move outward (at 10 feet per round) up to 60<br />
feet away. They die down the round after the<br />
playing stops.<br />
Golden Circlet (Clerics Only)<br />
A gift from Alhana, this circlet is worn upon<br />
the head. It has two abilities. Once per turn it<br />
can command up to 8 Hit Dice of creatures.<br />
Also once per turn, as long as the user concentrates,<br />
one creature of up to 4 Hit Dice can<br />
be controlled to act on the user’s behalf. The<br />
creature is not charmed and will not hurt<br />
itself.<br />
Icon of Truth<br />
This icon appears as a white marble rectangle<br />
carved into the shape of a book. It is jewel<br />
encrusted and has a magical aura. The icon<br />
measures 6 inches x 4 inches x 1 inch.<br />
The icon is the Tobril, the book held by the<br />
god, Glean, symbolizing all knowledge held<br />
by all of the gods. it represents the means by<br />
which the truth might be discovered.<br />
The Icon of Truth has the following powers:<br />
once per day, the icon can cast a dispel illusion<br />
at 2lst-level in a 30-foot radius. Within<br />
this area, dreamcreatures and illusions cannot<br />
exist. If this icon is used anywhere in<br />
Chapters 1 through 4, the PCs note that the<br />
trees and buildings do not change.<br />
This spell must be cast on a fixed location<br />
and cannot be moved about. Any wizard or<br />
priest who touches the icon instantly understands<br />
this dispel function and how to operate<br />
it. To activate the spell, the PC must present<br />
the icon in a forceful manner and speak the<br />
word “Tobril” firmly.<br />
Any person who carries this object negates<br />
any penalties for disbelieving illusions due to<br />
the level of the dream.<br />
Key to Qualinost<br />
This key is magically linked to the life force of<br />
the designated user. The only such key available<br />
to the PCs is the key carried by the true<br />
Alhana Starbreeze. This key opens any lock<br />
(door, chest, etc.) in the city of Qualinost.<br />
The key appears to be an ordinary key with<br />
extraordinarily delicate workmanship. It is<br />
made of fused fine crystal twined with strands<br />
of platinum. It is about six inches long, the<br />
handle is one inch wide, extending down to a<br />
¼-inch shaft.<br />
Mantooth (Wyrmslayer)<br />
This mighty blade was the weapon of the<br />
ancient elven hero, Kith-Kanan. It looks very<br />
much like Wyrmsbane, except that it is a little<br />
larger. It normally functions as a two-handed<br />
sword +3.<br />
Wyrmslayer is immune to the imprisoning<br />
effect of a dying Baaz draconian. The sword<br />
inflicts double the usual damage against any<br />
dragon or draconian.<br />
In addition, a character holding Wyrmslayer<br />
by the hilt gains a +3 bonus to all saving<br />
throws against dragon breath attacks or<br />
any spells cast by dragons or draconians.<br />
These abilities need to be discovered by the<br />
PC.<br />
Wyrmslayer does have a disconcerting tendency<br />
to buzz aggressively whenever the<br />
weapon is brought within 30 feet of a true<br />
dragon (not a draconian). This buzzing is loud<br />
enough to be heard clearly, and will always<br />
awaken a sleeping dragon.<br />
Medallion of Faith (Priests Only)<br />
When this relic was first found, it was known<br />
to have but one power: To create another<br />
medallion of faith when a good priest entered<br />
the worship of the true gods.<br />
It has other powers that are unknown to the<br />
PC at first, but the DM can reveal each when<br />
the need arises. Each power can be revealed<br />
through divine guidance, a dream, an omen,<br />
or another method:<br />
Bless-This can be used once per day.<br />
Protection, 10-foot radius— This lasts as<br />
long as the user concentrates, once per day.<br />
Slow Poison— As long as the medallion is<br />
worn, it sustains a poison victim semicomatose<br />
for up to one day.<br />
Detect Evil— The medallion glows a pale<br />
blue and chimes when touched to an evil<br />
object.<br />
Redeemer (Wyrmsbane)<br />
Wyrmsbane is a two-handed sword +2 for<br />
most normal situations. When used against<br />
dragons and draconians, however, it inflicts<br />
double damage. Against black dragons and<br />
sea dragons, it inflicts triple its usual damage.<br />
The sword does not become struck in the<br />
statue when a Baaz draconian dies and petrifies.<br />
Wyrmsbane can also locate objects three<br />
times per day. If the user desires to find something<br />
that he knows well, and the object is<br />
within 180 feet, the DM should steer him in<br />
the right direction.<br />
The sword’s abilities need to be discovered<br />
by the PC.<br />
Staff of Magius<br />
This staff functions as a ring of protection +3.<br />
It strikes as a +2 magical weapon, inflicting<br />
1d8+2 points of damage. Once per day it can<br />
perform a feather fall and a continual light<br />
spell.<br />
In the hands of a mage of 6th level or higher,<br />
this staff doubles the duration of spells that<br />
influence light, air, and minds. It maintains<br />
spells that require concentration for one<br />
round after the wizard stops concentrating. It<br />
also adds 2 points of damage to every die<br />
caused by a spell cast by the holder of the<br />
staff.<br />
115<br />
Staff of Striking/Curing<br />
This combines the powers of a staff of striking<br />
with those of a staff of curing (see the DMG,<br />
pages 154 and 155 for these staves), with the<br />
following differences:<br />
• No charge is expended for a normal<br />
attack.<br />
• Two charges are expended for each cure<br />
function.<br />
• It recharges itself at the rate of five<br />
charges per day when in sunlight, to a<br />
maximum of 50 charges.<br />
Tika’s Ring<br />
To Tika, this ring (worn on a necklace) is but<br />
a memento of her father. She has never discovered<br />
its use. In times of stress, she slips on<br />
the ring, asking for her father’s guidance.<br />
Unbeknownst to Tika, this activates the ring<br />
for the duration of the current problem. The<br />
DM can reveal its powers in other ways.<br />
This is both a ring of protection +2 and a<br />
ring of protection from the elements. In its latter<br />
function, it halves all damage from fire,<br />
cold, lightning, air, and water. It also makes<br />
the wearer immune to the effects of up to<br />
three dice of nonmagical damage from the<br />
natural elements.<br />
Webnet<br />
This item is useful only to a mage, though<br />
any character can wear it as an attractive hair<br />
ornament.<br />
When worn by a mage who knows the command<br />
word, the webnet can be either cast to<br />
the ground before a foe or directly at a foe. It<br />
instantly grows to a 10-foot diameter and acts<br />
as a net of entrapment.<br />
Alternatively, the net can be spun in a glittering<br />
circle, affecting up to 12 Hit Dice of<br />
creatures as if a hypnotize spell had been<br />
cast upon them, although the targeted creatures<br />
receive saving throws vs. spell (success<br />
cancels the effect for that creature).<br />
Monster Descriptions<br />
This section contains notes about some of the<br />
monsters encountered in this adventure. The<br />
statistics for these monsters are in the Combined<br />
Monster Statistics Chart on the inside<br />
cover.<br />
Death Statue<br />
There are 10 of these creatures. They contain<br />
the life force of the King of the Deep. They<br />
appear to be the petrified remains of men,<br />
their flesh turned to slate. But they are still<br />
vessels of life and can be animated by the<br />
minds creating the King.<br />
These 10 were priests of Istar, hurled by the<br />
Cataclysm across the barriers of time and<br />
space to the Abyss. There the Queen of Darkness<br />
welcomed and reshaped them. Now they<br />
serve Her purpose and reach out from the Pit<br />
of Istar to spread the reign of evil.
The death statues can be struck only by +1<br />
or better magical weapons. They suffer only<br />
half damage from cold, electrical, fire, and<br />
gaseous attacks. They are immune to spells<br />
that affect the mind (e.g., charm, hold, and<br />
sleep).<br />
Death statues wield mystical war maces.<br />
Drawing from their link with the Abyss, they<br />
charge their weapons with a demonic energy<br />
that crackles about the maces, giving them a<br />
+2 bonus to the attack and damage rolls.<br />
These creatures can hurl their maces to strike<br />
targets; the maces return to their hands at the<br />
end of the round.<br />
If a character looks into the hollow pits<br />
where the statue’s eyes should be, he sees<br />
into the Abyss and must roll a successful saving<br />
throw vs. death or be blinded for 2d4<br />
rounds. Blinded characters suffer a -4 penalty<br />
to their attack rolls and saving throws; others<br />
gain a +4 bonus to attacks rolled against<br />
blinded characters. If a character tries to<br />
avoid the creature’s gaze, he attacks with a<br />
-2 penalty.<br />
For each statue destroyed, the King of the<br />
Deep loses 8 Hit Dice. If the last statue is<br />
destroyed, the king vanishes forever.<br />
Draconians<br />
Draconians, or dragonmen, are special troops<br />
of the Dragon Highlords. They are more predictable<br />
than human forces and more apt to<br />
follow orders than the ogres and goblins that<br />
make up the bulk of the army. Draconians are<br />
not frightened by dragon awe; indeed they<br />
rally around the evil dragons.<br />
There are five types of draconians: the<br />
stony Baaz, the magic-wielding Bozaks, the<br />
poison-tongued Kapaks, the shape-shifting<br />
Sivaks, and the ultra-powerful Auraks.<br />
The first four types of draconians have<br />
wings, but only Sivaks can truly fly. The three<br />
movement rates given are for walking, running<br />
while flapping wings, and gliding. They<br />
can glide a distance of four times the height<br />
they launch from.<br />
The mind-bending Auraks do not possess<br />
wings and cannot fly or glide, but they do<br />
possess a limited dimension door ability.<br />
Draconians serve many roles for the<br />
Dragon Highlords. Kapaks, wielding poison<br />
blade and arrow, are used as assassins and<br />
archers. The magic-using Bozaks, wielding<br />
short swords, are used as special forces and<br />
to command draconian squads. Sivaks form<br />
the elite forces, wearing heavy armor and<br />
able to swing two-handed swords easily. Baaz<br />
are the common soldiers, the bulk of the<br />
troops. They are often used as scouts since<br />
they can disguise themselves in robes. Finally,<br />
the Auraks are rare and special generals of<br />
the draconian armies. They are also used as<br />
special agents who can pass undetected<br />
among humans.<br />
Draconians are created by corrupting good<br />
dragon eggs. Baaz are derived from brass<br />
eggs, Bozaks from bronze eggs, Kapaks from<br />
copper eggs, Sivaks from silver eggs, and<br />
Auraks from gold eggs. These are the very<br />
eggs that the Queen of Darkness swore to<br />
protect in return for the good dragons’ pledge<br />
not to interfere in her war against the peoples<br />
of Krynn.<br />
The corruption of the eggs is the work of<br />
an evil triad, Wyrllish the cleric, Dracart the<br />
mage, and the ancient red dragon Harkiel,<br />
the Bender. Through arcane spells they cause<br />
the eggs to grow and their occupants to multiply.<br />
Then Wyrllish opens the gate to the<br />
Abyss and souls of the Dark Queen’s minions,<br />
the abishai, rush forth to inhabit the<br />
new bodies.<br />
As draconians are created through vile<br />
magic from the most long-lived of monsters,<br />
they are not susceptible to aging in any<br />
noticeable way. Thus the population shrinks<br />
only through combat and accidents. The<br />
dragonmen are also not subject to any known<br />
diseases. They can subsist for long periods<br />
with little food or water.<br />
If this adventure ends in success for the<br />
PCs, Takhisis is cast from Krynn. Without the<br />
Queen to restrain them, the race of draconians<br />
gradually becomes more chaotic. A<br />
powerful leader, such as Ariakus or Kitiara,<br />
might still be able to hold sway over the draconian<br />
units in a Dragonarmy. Weaker leaders,<br />
such as Toede, find that their dragonmen<br />
slip away to form marauding bands. If a<br />
leader is too forceful in trying to retain his<br />
draconian troops, they almost certainly turn<br />
on him.<br />
The draconians that are not part of any military<br />
formation, such as those that garrison<br />
many of the conquered cities, quickly lose<br />
interest in their posts. It is quite likely that<br />
they turn upon the populace of the city in a<br />
frenzy of pillage, murder, and arson. If the folk<br />
unite and resist, however, the uncoordinated<br />
attacks of the draconians are blunted. Like<br />
their counterparts in the armies, these draconians<br />
soon head for the wilderness.<br />
Draconians of different races never combine<br />
into bands. The antagonism between<br />
Baaz and Kapaks, for example, is as strong<br />
as that between draconian and human. It is<br />
this intense rivalry and hatred that prevents<br />
draconians from ever becoming a dominant<br />
power in their own right.<br />
Aurak: Auraks are the special agents of the<br />
Dragon Highlords. They are the most powerful<br />
of all draconians and the most devious.<br />
In natural form, Auraks appear to be 7foot-tall,<br />
sinewy draconians with short tails<br />
and no wings.<br />
Auraks cannot fly, but move as fast as other<br />
draconians on the ground, moving 15 running<br />
or swimming. Auraks, however, do possess<br />
the ability to dimension door up to 60 feet<br />
away, three times per day at will.<br />
The senses of Auraks are heightened so<br />
that they have infravision good to 60 feet, and<br />
can detect hidden and invisible creatures<br />
within 40 feet. They can also see through all<br />
illusions.<br />
Auraks have several natural defenses that<br />
they can invoke at will. They can turn invisible<br />
once each turn until they attack. They<br />
can polymorph into the shape of any animal<br />
their size, three times per day. But their most<br />
diabolical ability is to change self three times<br />
116<br />
per day to resemble any individual human or<br />
humanoid and to perfectly imitate its voice.<br />
This effect only lasts for 2d6+6 rounds.<br />
Auraks have three modes of attack. They<br />
can generate blasts of energy from each of<br />
their hands (1d8+2 damage with each), striking<br />
targets up to 60 feet away. When disguised<br />
with their change self ability, they<br />
appear to be using the appropriate weapon,<br />
but are really attacking with energy blasts.<br />
They can also attack with claws and fangs<br />
(1d4/1d4/1d6). Three times per day they can<br />
breathe a noxious cloud (five-foot range).<br />
Victims caught in the cloud must roll a successful<br />
saving throw vs. breath weapon for<br />
half damage or suffer 20 points of damage<br />
and be blinded for 1d4 rounds.<br />
Auraks can also cast two spells each of 1stto<br />
4th-level wizard spells. Their preferred<br />
spells include these: enlarge, shocking grasp,<br />
ESP, stinking cloud, blink, lightning bolt, fire<br />
shield, and wall of fire.<br />
The Auraks’ most insidious power is mind<br />
control. They can use suggestion once per<br />
turn at will, but they must concentrate. And<br />
once per day they can mind control one creature<br />
of equal or fewer hit dice for 2d6 rounds<br />
through unbroken concentration. Mind control<br />
lets the caster control the actions of the<br />
target as if it were his own body. The target<br />
gets a saving throw vs. breath weapon to<br />
avoid the effect.<br />
When an Aurak reaches 0 hit points, it does<br />
not die, but immolates itself with eerie green<br />
flames and enters a fighting frenzy (+2 to<br />
attack and damage rolls). Anyone attacking it<br />
suffers 1d6 points of damage each round<br />
from the flames, unless a saving throw vs.<br />
petrification is made for half damage. Six<br />
rounds later, or when the creature reaches<br />
-20 hit points, it transforms into a whizzing<br />
ball of lightning, striking as a 13-HD monster<br />
and causing 2d6 points of damage to those<br />
struck. Three rounds later it explodes with a<br />
thunderous boom, stunning all within 10 feet<br />
for 1d4 rounds (2d4 if underwater) and causing<br />
3d6 points to all within 10 feet (no save<br />
allowed). Any items within range must roll<br />
successful saving throws vs. crushing blow or<br />
be destroyed.<br />
Baaz: Baaz are the smallest of their species<br />
and are the most plentiful of the draconians.<br />
They are the Dragon Highlords’ common<br />
ground troops. These draconians often tend<br />
to be chaotic in nature and self serving when<br />
they can get away with it.<br />
Baaz are often encountered in disguise.<br />
They conceal their wings under robes and,<br />
wearing a large hood and mask, can pass<br />
through civilized lands as spies.<br />
When a Baaz reaches 0 hit points, it turns<br />
into a stone statue. The person who struck<br />
the death blow must roll a successful Dexterity<br />
Check with a -3 penalty or his weapon is<br />
stuck in the statue. The statue crumbles to<br />
dust within 1d4 rounds, freeing the weapon.<br />
Its armor and weapons remain.<br />
Bozak: Bozaks are magic wielders and can<br />
cast spells as 4th-level mages. Very intelligent,<br />
they are cruel and cunning warriors,<br />
sparing a life only if it benefits them.
Their favored spells are burning hands,<br />
enlarge, magic missile, shocking grasp, inoisibility,<br />
levitate, stinking cloud, and web.<br />
When a Bozak reaches 0 hit points, its<br />
scaly flesh shrivels and crumbles from its<br />
bones in a cloud of dust. Then the bones<br />
explode, causing 1d6 points of damage to all<br />
within 10 feet (no saving throw).<br />
Kapak: Kapaks are distinguished by their<br />
venomous saliva, which paralyzes victims for<br />
2d6 turns if they fail saving throws vs. poison.<br />
They often lick their weapons (this takes one<br />
round) before attacking. This venom lasts<br />
three rounds.<br />
Kapaks are larger than Baaz and often bully<br />
and abuse their smaller cousins. Because of<br />
the Kapak’s venomous nature, the Dragon<br />
Highlords employ these draconians as assassins<br />
as well as warriors. Kapaks are sly and<br />
conniving, seeking to lure prey into traps and<br />
tripping foes to gain an advantage.<br />
When a Kapak reaches 0 hit points, its<br />
body instantly dissolves into a 10-foot-wide<br />
pool of acid. All within the acid pool suffer<br />
1d8 points of damage each round they<br />
remain there. The acid evaporates in 1d6<br />
rounds. All items possessed by the Kapak<br />
are useless.<br />
Sivak: Sivaks are used both on the battlefield<br />
and as spies. They normally attack with<br />
both claws (1d6 points of damage each) or a<br />
wicked-edged sword (1d10 points of damage).<br />
They can also attack with their long,<br />
armored tails (2d6 points of damage) when in<br />
draconian form.<br />
Sivaks are shapeshifters, capable of changing<br />
their form under two conditions. When<br />
they slay a humanoid of their size or smaller,<br />
they can take the form of their victim. They<br />
do not gain the memories, experiences, or<br />
spell use of their victim and, like all draconians,<br />
still radiate magic, but their appearance<br />
and voice are exact matches to those of their<br />
victim. Sivaks can change back to their normal<br />
forms, but they cannot polymorph again<br />
until they find more victims.<br />
Sivaks also change shape when slain,<br />
assuming the forms of their slayers. These<br />
death shapes last for three days, then the<br />
bodies decompose into black soot. If the slayers<br />
are not humanoid or are larger than the<br />
Sivaks, the Sivaks burst into flame, causing<br />
2d4 points of damage to all within 10 feet (no<br />
saving throw).<br />
Dragon, Amphi<br />
This creature is a unique crossbreed between<br />
a green dragon and a sea dragon. Though it<br />
bears some of the identifying features of a<br />
green dragon, it looks most like a giant toad<br />
with a tail and small vestigial wings. This<br />
beast can leap a distance of 180 feet or to a<br />
height of 60 feet once every other round. It<br />
is amphibious and can swim and breathe<br />
water.<br />
An amphi dragon possesses all normal<br />
dragon abilities. It can detect hidden and<br />
invisible creatures within 60 feet and has<br />
infravision (60-foot range). It also radiates<br />
dragon awe while charging.<br />
It has the ability to change the color of its<br />
skin to match the surroundings. If it remains<br />
still while camouflaged, it is undetectable 80%<br />
of the time.<br />
An amphi dragon can attack with two fore<br />
claws and a bite. It can also project its tongue<br />
up to 40 feet to capture a foe. To catch a foe,<br />
the dragon must roll a successful attack vs.<br />
AC 10. A creature stuck to the tongue is<br />
pulled into the dragon’s mouth at the end of<br />
the round. If the tongue suffers 12 or more<br />
points of damage that round, it releases its<br />
prey. A victim caught in the dragon’s mouth<br />
is automatically bitten each round. If the victim<br />
reaches 0 hit points, it is swallowed the<br />
next round.<br />
The amphi dragon can spit a stream of acid<br />
up to 60 feet three times a day. The acid<br />
causes damage equal to the dragon’s hit<br />
points. A successful saving throw vs. breath<br />
weapon halves the damage received.<br />
The skin of this creature is covered with<br />
ugly yellow warts containing acid. Each time<br />
a character attacks the dragon in melee, the<br />
attacker must roll a successful Dexterity<br />
Check or suffer 1d6 points of damage from<br />
squirting acid.<br />
Dragon, Sea<br />
The sea dragon of Krynn resembles a giant<br />
sea turtle with a dragon’s head and clawed<br />
flippers. It is awkward on land.<br />
A sea dragon possesses all of the abilities<br />
of normal dragons. It can detect hidden and<br />
invisible creatures within 60 feet. It possesses<br />
sonar that enables it to see up to 360 feet in<br />
the ocean. It causes dragon awe while charging.<br />
A sea dragon attacks with either its two<br />
claws and a vicious bite or it breathes a cloud<br />
of steam (60 feet x 40 feet x 40 feet) three<br />
times a day, even while underwater. The<br />
steam causes damage equal to the hit points<br />
of the dragon. A successful saving throw vs.<br />
breath weapon reduces the damage to half.<br />
A sea dragon can use ESP at will. Also it<br />
can use the ability of scaly command. Once<br />
per day it can command all fish within 300<br />
feet for 2d6 turns. Intelligent fish get saving<br />
throws vs. spell to avoid control, but if successful<br />
they must stay at least 300 feet away<br />
from the dragon.<br />
Dreamshadow<br />
Dreamshadows are the illusory creations of<br />
the Dragon Orb. Dreamshadows are unknown<br />
outside the orb’s influence.<br />
Dreamshadows (noted by the symbol in<br />
the text) take on the shape and appearance<br />
of any real person or creature known to the<br />
dreamer’s mind. The properties of an elf are<br />
mimicked in a #elf in every detail except that<br />
the elf causes only illusory damage. If the<br />
dreamshadow is a mage, then the spells all<br />
have illusory effects.<br />
Dreamshadows can be of any alignment<br />
and can be either harmful or helpful to the<br />
PCs, depending on what dreamshadows they<br />
come across.<br />
117<br />
Dreamwraith<br />
Dreamwraiths are the violent creations of the<br />
subconscious. These creatures can appear in<br />
many forms but, in the dream of Chapters 2<br />
through 4, they take the form of dead, decaying<br />
elves.<br />
Dreamwraiths always attack the PCs with<br />
surprising fury, gaining a +1 bonus on every<br />
initiative check.<br />
Dreamwraiths are not undead and therefore<br />
cannot be turned. They are illusory, however,<br />
and if their illusion is discovered, their blows<br />
cause no harm to the nonbeliever. Because<br />
there are real elves around as well, each new<br />
group of dreamwraiths encountered must be<br />
checked separately to be disbelieved.<br />
Dwarf, Gully (Aghar)<br />
These raggedly clothed dwarves vary in skin<br />
color from parchment to mottled to olive.<br />
Their hair is as unkempt as their clothing.<br />
Their health is generally bad and their bodies<br />
bear sores, scars, and callouses.<br />
Though humans might think that they are<br />
comical, the Aghar are an amoral race whose<br />
motto is “Do anything, no matter how mean,<br />
to survive.” Occasionally, a decent or moral<br />
Aghar is encountered, but these are very rare.<br />
Aghar believe that magic is a sham that<br />
deserves to be exposed.<br />
Gully dwarves generally tend toward a<br />
weak Constitution and low Intelligence, but<br />
they have above-average Dexterity. Despite<br />
their almost total inability to put two thoughts<br />
together, the Aghar have excellent memories<br />
of all that they see and hear. This makes them<br />
a great source of raw, unprocessed information.<br />
The average Aghar cannot count higher<br />
than two.<br />
Elf, Sea<br />
The sea elves of Krynn are divided into two<br />
races—the Dimernesti and the Dargonesti.<br />
Both races have webbed hands and feet, possess<br />
gills, and can breathe either water or air.<br />
Both races are also shapeshifters.<br />
The Dimernesti (Shoal Elves) live in shallow<br />
waters in kelp beds, reefs, and shipwrecks.<br />
They have light blue skin and braided<br />
silver hair. Dimernesti can change shape into<br />
sea otters.<br />
Dimernesti once traded with land dwellers,<br />
but they have rarely been seen since the Cataclysm.<br />
They live in small family groups and<br />
hide by day. By night they sometimes sneak<br />
ashore to raid nearby settlements for tools<br />
and other necessities. They are a cautious<br />
people, wary of strangers.<br />
The Dargonesti (Deep Elves) live in the<br />
depths of the sea in mountain caves, ancient<br />
sunken cities, or huge sea shell citadels. They<br />
are a tall, slender race with deep blue skin<br />
and hair the color of seaweed.<br />
Dargonesti once traded with the Silvanesti<br />
House Mariner for forged weapons and tools.<br />
But quarrels with the haughty Silvanesti severed<br />
the old ties. The Dargonesti have<br />
retreated from the affairs of the surface world,
where madness seems to rule. Even their<br />
term for outsiders, “kreeaQUEKH,” tells of the<br />
degree of revulsion and distaste they feel for<br />
the surface dwellers and their scheming,<br />
betrayals, and wars.<br />
All Dargonesti can change shape into that<br />
of their companion of the sea, the dolphin.<br />
The leaders of the Dargonesti can use spells.<br />
Fetch<br />
Fetch are harbingers of death. Existing on the<br />
fringes of the Abyssal plane, these creatures<br />
can reach into our world only through reflective<br />
surfaces (mirrors, calm pools, etc.) They<br />
appear as pale imitations of the person gazing<br />
into the surface. The fetch seems to be standing<br />
behind the victim.<br />
Fetch attack twice per melee round, using<br />
an exact replica of the weapon of the victim.<br />
Fetch are always invisible to everyone but the<br />
victim, and even that unfortunate individual<br />
can only see the fetch by looking into the<br />
reflective surface. The victim suffers a -2<br />
penalty to attack rolls against the fetch, and<br />
he also suffers a +2 penalty to AC when<br />
attacking the fetch. Others have a -4 penalty<br />
to attack rolls against the fetch since they<br />
cannot see it. The fetch is invisible even to<br />
detect invisibility, although true seeing<br />
reveals it.<br />
Fetch drain two life levels of energy per hit.<br />
A creature drained to 0 levels by the attacks<br />
of a fetch is pulled to the Abyssal plane,<br />
where it is condemned to serve as a fetch at<br />
the whims of the Queen of Darkness.<br />
Fireshadow<br />
A fireshadow is a creature from the Abyss<br />
that can be summoned by an evil cleric of 8th<br />
level or higher with the aid and approval of<br />
the cleric’s deity. It is made of cold, green<br />
flame. It can assume whatever shape the<br />
summoner specifies, but it must appear at its<br />
full height of 30 feet.<br />
The fireshadow’s green fire works much<br />
like green slime: It converts flesh to flame on<br />
contact at a rate of 1d8 hit points per round.<br />
The spread of this dark flame on flesh can be<br />
stopped by a cure spell, which works normally,<br />
or by holy water, which cures 1d6+1<br />
points per round. Unless all of the dark flame<br />
is eliminated, however, it continues to grow<br />
and spread at the rate given above.<br />
If a being is completely converted to a dark<br />
flame, the fireshadow can control it as a<br />
smaller fireshadow with the same HD as the<br />
creature had before death, or the fireshadow<br />
can absorb it. Absorbed creatures restore<br />
1d20 hit points to the fireshadow.<br />
The fireshadow has a special attack form<br />
called the ray of oblivion. Once per turn the<br />
fireshadow can use this ray to inflict 16 points<br />
of damage upon all creatures in its area of<br />
effect. A saving throw vs. breath weapon<br />
reduces this damage to 8 points. The ray is 5<br />
feet wide and 130 feet long. Any creatures<br />
slain by the ray are disintegrated instantly.<br />
The fireshadow cannot be turned by a<br />
cleric, but a mace of disruption affects it as if<br />
it were a vampire. The hammer of Kharas can<br />
destroy it on a successful hit. It is immune to<br />
fire-based and mental attacks. The fireshadow<br />
inflicts 1d6 points of damage per round to all<br />
non-fire resistant creatures within 10 feet.<br />
The fireshadow’s greatest nemesis is the<br />
light of day, which can destroy it in 1d4 rounds<br />
(direct sunlight) or 3d4 rounds (overcast or<br />
shade).<br />
King of the Deep<br />
The King of the Deep is a shadow-like being<br />
created from the life essences of 10 former<br />
priests of Istar. Their wicked minds have<br />
joined together to form this monster, but they<br />
can still animate their petrified forms to protect<br />
themselves. If these forms are destroyed,<br />
the king dissipates into nothing.<br />
The King of the Deep has the body of a fish<br />
covered with a silky tangle of hair, the head of<br />
a squid, and two monstrous pincers.<br />
The creature is immune to all mind-related<br />
spells (e.g., charm, sleep, and hold) and all<br />
cold-based spells. It has 60% magic resistance<br />
to all other spells. The King of the Deep<br />
can regenerate 20 hit points per round. It can<br />
also cast darkness with a five-foot radius,<br />
three times a day. The creature is covered by<br />
a shadowy mane and razor-sharp scales that<br />
can snare attackers and their weapons. Each<br />
time a character strikes the creature, he must<br />
roll a successful Strength Check to retain his<br />
weapon.<br />
Once per day the King of the Deep can produce<br />
a horrendous roar that strikes terror in<br />
the hearts of all who fail a saving throw vs.<br />
spell. This failure causes them to flee for 1d4<br />
rounds.<br />
The King of the Deep’s six tentacles and<br />
two pincers attack with a +3 attack roll bonus.<br />
A tentacle cannot be severed. When a tentacle<br />
hits on a natural roll of 20, it seizes its<br />
prey and pulls it to the creature’s mouth in<br />
two rounds. If 20 points of damage is inflicted<br />
on the tentacle in one round, it drops the prey.<br />
Or a total of 30 points of Strength can pull<br />
against the tentacle and hold it back. The<br />
King’s mouth is a gate directly to the Abyss.<br />
This creature cannot be turned by a cleric.<br />
Minotaur, Bloodsea<br />
The minotaurs of Krynn are a highly organized<br />
warrior race. They are concentrated on<br />
the islands of Mithas and Kothas on the eastern<br />
borders of the Bloodsea of lstar. The<br />
minotaurs believe themselves to be superior<br />
to the other races of Krynn. They feel their<br />
destiny to conquer and enslave the world.<br />
Minotaurs will ally with forces of good, if<br />
persuaded that this best serves their purposes.<br />
The Bloodsea minotaurs are a seafaring<br />
race with many skilled sailors and navigators.<br />
Although they are capable of building fine<br />
ships, they prefer to gain their vessels by<br />
plunder. Piracy is a common practice among<br />
them.<br />
118<br />
Prickleback<br />
The prickleback is an aquatic version of the<br />
manticore. It appears to be a fishy pincushion.<br />
It can shoot up to four spines per round<br />
to a distance of 90 feet. A prickleback has a<br />
total of 32 spines. Once it has fired a spine, a<br />
new one grows in 1d6 weeks.<br />
The spines of a prickleback contain a weak<br />
poison, allowing creatures struck by the<br />
spines saving throws with a +4 bonus. If the<br />
victim fails the saving throw, he suffers an<br />
additional 2 points of damage from the attack<br />
and incurs -2 penalties to attack and damage<br />
rolls and a +2 penalty to Armor Class, for 2d6<br />
hours.<br />
A prickleback also has a weak bite, inflicting<br />
1d2 points of damage. Creatures engaged<br />
in melee combat with the prickleback must<br />
roll a Dexterity Check (with a +2 bonus) each<br />
round. Failure means that the attacker is<br />
impaled upon one of the spikes, with the<br />
same effect as if the spine had been fired.<br />
Revenant<br />
Under exceptional circumstances, some who<br />
die a violent death return from beyond the<br />
grave to wreak vengeance on their killers.<br />
The Cataclysm killed the inhabitants of this<br />
region (see Chapter 13) and now they seek<br />
revenge. The problem is that the revenants do<br />
not know who caused their deaths.<br />
An attacking revenant stares into the eyes<br />
of its victim. This stare requires a successful<br />
saving throw vs. spell or the victim is paralyzed<br />
with terror for 2d4 rounds.<br />
Revenants are immune to being turned or<br />
destroyed by priests; holy symbols, holy<br />
water, and other religious items do not affect<br />
them.<br />
A revenant can regenerate 3 hit points per<br />
round. It can also regenerate these points<br />
after reaching 0 hit points, except in the case<br />
of burn damage. Fire is the only attack that<br />
inflicts irreparable damage to a revenant.<br />
Salmon School<br />
A school of salmon is treated as a single<br />
entity although it can include hundreds of<br />
individual fish. A school of salmon covers a<br />
circular area five feet wide for every 10 fish in<br />
the school. The school is 1/5 as deep as its horizontal<br />
area.<br />
The school is harmless unless there is blood<br />
in the water. Blood brings on a feeding frenzy,<br />
causing the salmon to thrash madly about<br />
and attack anything in their midst that is not<br />
part of the school. Anything caught in the<br />
midst of a frenzied school is treated as if it<br />
were affected by an obscure spell. The victims<br />
automatically suffer 10 points of damage<br />
from the school every round, although the<br />
damage is reduced to 8 points if the victim is<br />
wearing metal armor. The school disperses<br />
when it has lost 1/3 of its original hit points.
Skyfisher<br />
The skyfisher is an aerial predator. It looks<br />
like a cross between a giant bat and a vulture<br />
and has long, dangling hind feet. It attacks<br />
with beak (1d8+2) or talons (1d6/1d6). It can<br />
dive for its first attack, gaining a +2 bonus to<br />
its attack roll and doubling the damage<br />
inflicted.<br />
A skyfisher tries to capture prey, lift it aloft,<br />
and drop it onto rocky ground or impale it on<br />
the branches of a tree. Each time a skyfisher<br />
hits with its claws, the victim must roll a successful<br />
Dexterity Check to avoid the beast’s<br />
grip. If a character fails his check, he is carried<br />
aloft for 1d4 rounds and then dropped.<br />
Damage from the fall is 1d6 for each round<br />
aloft plus 1d6 points of damage from impaling<br />
or smashing on stony ground. A skyfisher<br />
also drops its prey if it suffers 10 or more<br />
points of damage. Although a very powerful<br />
flyer, the skyfisher cannot lift anything weighing<br />
more than 200 pounds.<br />
Slig (Ghaggler)<br />
Sligs are distant cousins of goblins and hobgoblins.<br />
Sligs are six-foot-tall, fanged<br />
humanoids with tough, hairless skin and large<br />
ears. They are very strong. Crafty and sadistic,<br />
they are believed to be flesh eaters.<br />
Slig hides are impervious to flame and they<br />
suffer no damage from normal fire; they suffer<br />
-1 point per die of damage from magical<br />
fire.<br />
Sligs fight with heavy war clubs and large,<br />
bladed polearms, such as bardiches and<br />
voulges. Their strength adds +2 to the damage<br />
they cause. Sligs can also bite with their<br />
fangs for 1d4 points of damage.<br />
All sligs have a caustic spittle that they can<br />
spit into an opponent’s eyes up to three times<br />
a day. The spittle causes 1d6 points of damage<br />
and the victim must rolls a successful<br />
saving throw vs. poison or be blinded for<br />
1d4+1 rounds.<br />
Each party of sligs is led by a slig warrior<br />
with 6 HD and a +3 bonus to damage. A whole<br />
slig tribe is led by four warriors and a champion<br />
with 9 HD, able to attack twice a round<br />
with a +4 bonus to damage.<br />
Sligs lair in grottoes, canyons, and barren<br />
lands. In their lair they might have 1d4+1<br />
giant boars (60% chance) or 1d4 ogres (40%<br />
chance).<br />
Ghagglers are a marine species of sligs.<br />
They live in deep, open water and specialize<br />
in waylaying and sinking ships. They have the<br />
same statistics as sligs, with the exception of<br />
movement, and can remain out of the water<br />
for only 1d3 turns.<br />
Spectral Minion<br />
Spectral minions are the spirits of humans or<br />
demihumans who died before they could fulfill<br />
powerful vows or quests. Like ghosts,<br />
spectral minions do not fully exist on the<br />
Prime Material plane. Even in death, they are<br />
bound to the vows or quests placed upon<br />
them when they were alive. Every day, they<br />
must relive the events leading to their deaths,<br />
trying to fulfill their quests.<br />
Spectral minions must stay within the corridor<br />
or room where they died. On very rare<br />
occasions, where the objective was to perform<br />
an act over an area, they are allowed to<br />
roam within the area.<br />
Spectral minions’ speed grants a +1 bonus<br />
to initiative rolls.<br />
Spectral minions look like the characters<br />
that they were before death, but they are<br />
nearly transparent. They disappear forever if<br />
their vows or quests are fulfilled, or if a remove<br />
curse is cast upon them.<br />
Spectral minions keep the Hit Dice, attack,<br />
and damage ratings they had before death.<br />
Guardian spectral minions were guards<br />
who died at their posts. All are armed. They<br />
are freed if they successfully defend their<br />
posts for 100 years. Occasionally, guardians<br />
respond to a password, allowing characters<br />
knowing it to pass.<br />
Spider, Whisper<br />
The whisper spider is a hunter and trapper.<br />
It weighs no more than a man despite its<br />
size. It moves so quietly that it surprises on<br />
1-5 in 6.<br />
A whisper spider can flatten itself against<br />
the ground and become 80% undetectable. It<br />
can jump 60 feet in any direction.<br />
This breed uses lures and misdirection to<br />
capture prey, spinning its silk into a wide<br />
array of shapes. It might create a false spider,<br />
a flapping banner, a filmy barrier to hide<br />
behind, or other shapes. This spider uses 10foot-wide<br />
web sheets to trap prey. Prey is<br />
snared if it fails a saving throw vs. wand. A<br />
whisper spider can also shoot webs up to 20<br />
feet away to bind foes (treat as if the target is<br />
AC 10).<br />
The spider’s poison causes the victim to fall<br />
into a stupor for 2d4 turns if he fails a saving<br />
throw vs. poison (with a -2 penalty).<br />
Undead Beast<br />
This beast’s origins are unknown. The size of<br />
a small dragon, its bones protrude from rotting<br />
flesh. It has a great horned head. It walks<br />
on all fours, but it can rear on its hind legs,<br />
balancing with its stubby tail, to bring its powerful<br />
forelimbs to bear. Its ribs are bare and<br />
barbed, forming a nasty cage.<br />
This creature seems drawn to destroy the living.<br />
The beast attacks with its sweeping claws<br />
and horned head. Any character struck by a<br />
claw must roll a successful saving throw vs.<br />
death or be flung for 1d20 additional points of<br />
damage. The beast can also charge its victims,<br />
trying to trample them (successful saving<br />
throw vs. death or suffer 3d8 points of damage).<br />
Anyone trampled must also roll a successful<br />
saving throw vs. wand or be snared in<br />
the rib cage and suffer 1d4 points of damage<br />
from the barbs each round the beast moves.<br />
This creature is unaffected by flame and<br />
suffers only minimum damage (1 point plus<br />
bonuses) from edged or pointed weapons.<br />
Blunt weapons affect the beast normally.<br />
119<br />
Wemic<br />
Wemics are large lion-centaurs that roam the<br />
far plains of Nordmaar. They had lived in harmony<br />
with the people there for many years.<br />
However, they are a most pragmatic race and<br />
saw that the victory of the Dragon High<br />
lords was the most likely event. So great<br />
bands of wemics united together under Highlord<br />
rule.<br />
This fierce race has served the Highlords<br />
well, but they might come over to the Whitestone<br />
side now that the war has turned.
120
Apoletta<br />
4th-Level Sea Elf Fighter/6th-Level Mage<br />
Strength 13<br />
Dexterity 16<br />
Constitution 12<br />
THAC0 17<br />
Hit Points 21<br />
Armor Class 6<br />
Intelligence 15<br />
Wisdom 11<br />
Charisma 15<br />
Alignment NG<br />
Movement 9, SW 12<br />
Items: leather armor, trident of warning +2, webnet<br />
Spells: lst—4, 2nd—2, 3rd—2<br />
Apoletta is the leader and spokesperson for the Dargonesti, the Deep<br />
Elves, since the position of Speaker of the Moon has been vacant since<br />
the Shadow Years and none has risen to claim the position. She is more<br />
Zebulah’s counsel than he is hers, but her people look to her and her<br />
surface lover to lead them in times of trouble.<br />
Apoletta is a practical elven woman. Deeply in love with Zebulah,<br />
she is fascinated with surface dwellers and their curious natures. She<br />
doesn’t pretend to understand their ways, however. Apoletta is frightened<br />
by the violence of war, but she accepts her duty to lead and protect<br />
the Dargonesti.<br />
Ariakus (Emperor of Dragons)<br />
23rd-Level Cleric/10th-Level Fighter<br />
Strength 15<br />
Dexterity 12<br />
Constitution 11<br />
THAC0 6<br />
Hit Points 88<br />
Armor Class -2<br />
Intelligence 13<br />
Wisdom 18<br />
Charisma 15<br />
Alignment LE<br />
Movement 9<br />
Items: plate mail +4, mace +3, shield<br />
Ariakus is the personification of ambitious evil. A competent fighter in<br />
his younger days, he cast aside the study of war when he discovered<br />
the pure evil of the Dark Queen. His life has been dedicated to her service,<br />
and he has risen in power correspondingly.<br />
Ariakus is now the highest of the Dragon Highlords, answering only<br />
to Takhisis. His power is immense and has led to the development of<br />
his only weakness: arrogance. Ariakus is so confidant of his supreme<br />
abilities that he tends to underestimate his enemies. He does not give<br />
them credit for their abilities; consequently his plans often contain<br />
weaknesses that clever opponents can capitalize on.<br />
Badger<br />
6th-Level Dwarf Fighter<br />
Strength 18<br />
Dexterity 16<br />
Constitution 17<br />
THAC0 15<br />
Hit Points 54<br />
Armor Class 5<br />
Intelligence 10<br />
Wisdom 11<br />
Charisma 12<br />
Alignment CG<br />
Movement 9<br />
Items: studded leather, war axe +1<br />
Badger is a feisty hill dwarf and lieutenant to Silver Fox’s freedom fighters.<br />
His clan was decimated by the Dragonarmy, who carried many of<br />
his people off to work as slaves, mining ore and crafting weapons.<br />
Badger does not trust strangers. A grim and crafty fighter, he has<br />
sworn to one day personally slit the throat of a Dragon Highlord. He is<br />
terrified of dragons, however.<br />
121<br />
Bakaris (Blue Dragon Lieutenant)<br />
11th-Level Fighter<br />
Strength 16<br />
Dexterity 12<br />
Constitution 15<br />
THAC0 10<br />
Hit Points 58<br />
Armor Class 2<br />
Intelligence 10<br />
Wisdom 14<br />
Charisma 13<br />
Alignment LE<br />
Movement 12<br />
Items: plate mail +1, two-handed sword +2, nine lives stealer, two poisoned<br />
daggers<br />
Bakaris is a handsome, young lieutenant in the service of Kitiara. He is<br />
the second in command of the Blue Dragonarmy, yet he is more<br />
devoted to Kitiara than to the rest of the Dragonarmy.<br />
Bakaris originally came from the area of the Estwilde, where his wild<br />
spirit and fearsome temper caused problems for him. The darkness of<br />
his heart and his constant lust for pleasure are his greatest weaknesses.<br />
Bas Ohn-Koraf<br />
Minotaur<br />
Strength 18/90<br />
Dexterity 10<br />
Constitution 14<br />
THAC0 11<br />
Hit Points 55<br />
Armor Class 6<br />
Intelligence 8<br />
Wisdom 6<br />
Charisma 6<br />
Alignment N(E)<br />
Movement 12<br />
Items: club, also attacks with horns (2d4)<br />
Kof, as Maquesta calls him, is a renegade minotaur and first mate of the<br />
Perechon. He has great respect for Maquesta as a warrior and a leader.<br />
Kof is loyal to Maquesta and would not betray his crewmates. He has<br />
a hot temper and has been known to throw people overboard with little<br />
provocation. He respects anyone who bests him in combat. He distrusts<br />
all strangers and fears magic.<br />
Berem Everman<br />
5th-Level Ranger<br />
Strength 13<br />
Dexterity 13<br />
Constitution 14<br />
THAC0 16<br />
Hit Points 37<br />
Armor Class 10<br />
Item: short sword<br />
Intelligence 15<br />
Wisdom 14<br />
Charisma 13<br />
Alignment N<br />
Movement 12<br />
Special Abilities: Regenerates 1 point per round of any damage; immune<br />
to fire, acid, poison, magic, disease, drowning, and petrification.<br />
Berem Everman is the brother of Jasala, the girl whose spirit inhabits<br />
the foundation stone of the Dark Queen’s Temple. As explained elsewhere,<br />
Berem is responsible for the murder of his sister. Because of<br />
that crime, Berem has been cursed with the inability to die until he frees<br />
his sister from the stone. He is a quiet and despairing man, with little<br />
courage or drive.<br />
Berem is used to being hunted by the Dragonarmies. He seeks only<br />
to remain free and unnoticed. The threat of imminent capture by the<br />
Dark Queen’s forces sends him into a panicked frenzy. He shows little<br />
loyalty to those who try to help him.<br />
Berem knows of his inability to die, but he does not share this knowledge<br />
with the PCs. He feels the pain of his wounds and tries to avoid<br />
getting hurt.<br />
Embedded in Berem’s chest is a dull gray gem. This mysterious<br />
stone cannot be removed; it is the source of his regenerating powers.<br />
When the gem is healing him, it glows green. It is this gem that the<br />
Dark Queen seeks.
Berem figures significantly in several of the endings of the epic. is<br />
important that he begin the adventure with the PCs if one of these endings<br />
is used.<br />
Captain of the Guard<br />
14th-Level Fighter<br />
Strength 16<br />
Dexterity 12<br />
Constitution 14<br />
THAC0 7<br />
Hit Points 72<br />
Armor Class 1<br />
Intelligence 14<br />
Wisdom 15<br />
Charisma 16<br />
Alignment LE<br />
Movement 12<br />
Items: long sword +4 defender, chain mail +3<br />
The Captain is a precise and logical man who likes to run an orderly<br />
office and city. The disorder so rampant in Neraka is a source of great<br />
frustration to him. Obviously, the week of this adventure is a particularly<br />
bad time of the Captain.<br />
He is professional in his dealings, but he loses his temper quickly<br />
when dealing with someone whom he perceives to be obstinate, unreasonable,<br />
or dangerous. Although not particularly religious, he tries to<br />
attend the Dark Rites regularly for form’s sake.<br />
Chot Es-Kalin<br />
Minotaur Chieftain<br />
Strength 18/99<br />
Dexterity 12<br />
Constitution 16<br />
THAC0 11<br />
Hit Points 60<br />
Armor Class 4<br />
Intelligence 9<br />
Wisdom 10<br />
Charisma 8<br />
Alignment NE<br />
Movement I2<br />
Items: battle axe, also attacks with horns (2d4)<br />
Chot Es-Kalin is the chieftain of the minotaurs. He is a cruel leader who<br />
rules by terror. He cannot speak Common; he rarely speaks to lessers.<br />
Chot looks on all other races as inferior, except he has an abiding<br />
respect of dragons and their masters. He has made a pact with the<br />
Dragon Highlords to further his own ambitions, but he does not trust<br />
them. In this light, he has entered into a secret alliance with the pirate<br />
chief Mandracore to protect his interests. Chot does not believe that<br />
lesser creatures can best him; he enslaves lesser races, toying with<br />
their champions in deadly games.<br />
Cyan Bloodbane, Green Dragon<br />
(Statistics are on the Combined Monster Statistics Chart on the inside<br />
cover)<br />
Cyan is one of the largest and most powerful of the evil dragons to reenter<br />
the world of Krynn. Yet, though he could have easily been a<br />
leader among his kind, Cyan had no interest in their petty ambitions.<br />
Thus it was that he was drawn into Silvanesti by the Dragon Orb. For<br />
years now, Cyan has been filling Lorac’s mind with nightmares.<br />
Cyan’s first concern is for himself. He does not hesitate to flee if the<br />
tide of battle turns against him. He is proud but not very brave. His<br />
hatred of what he considers to be the “lesser races” of Krynn is vast.<br />
Dark Pilgrims<br />
3rd- and 8th-Level Clerics<br />
All Dark Pilgrims are human, with an equal mixture of men and women.<br />
122<br />
Apprentices<br />
3rd-Level Clerics<br />
AC 7 Hit Points 17<br />
#AT 1 Damage 1d6<br />
THAC0 20 Movement 9<br />
Alignment: Evil-either Chaotic, Neutral, or Lawful<br />
Spells: detect good, cure light wounds, plus one of augury, find traps,<br />
speak with animals, silence 15-foot radius<br />
The apprentice pilgrims are always encountered in groups of seven,<br />
accompanied by their master. These are the clerics of the Dark Queen,<br />
responsible for the spiritual guidance of the troops and citizens of the<br />
Dragon Empire. Mostly this involves taking the money of the followers<br />
under a variety of guises.<br />
The clerics (both apprentices and masters) wear long black robes<br />
with vast hoods, so their features are never visible. They wear studded<br />
leather armor beneath their robes and carry quarterstaves. They are<br />
eager to do battle for the greater glory of Takhisis.<br />
Masters<br />
8th-Level Clerics<br />
AC 5 Hit Points 45<br />
#AT 1 Damage 1d6+3<br />
THAC0 16 Movement 9<br />
Alignment: As apprentices<br />
Spells:<br />
1st Level: bless, detect magic, remove fear<br />
2nd Level: hold person, know alignment, resist fire<br />
3rd Level: animate dead, cause disease, bestow curse<br />
4th Level: cure serious wounds, protection from good 10-foot radius<br />
Items: ring of protection +2, footman’s mace +2<br />
The masters of the Dark Pilgrims are the most talented members of the<br />
Dark Queen’s flock. Devoted to the cause of evil, each has been<br />
entrusted with the training of seven apprentices. A master never hesitates<br />
to sacrifice the lives of some of his apprentices if he feels that the<br />
others might benefit from the lesson.<br />
Dragonarmy Officers<br />
11th-Level Fighters<br />
Strength 17<br />
Dexterity 10<br />
Constitution 15<br />
THAC0 10<br />
Hit Points 68<br />
Armor Class 0<br />
Intelligence 13<br />
Wisdom 12<br />
Charisma 13<br />
Alignment LE<br />
Movement 9<br />
Items: Dragonarmor plate mail +2, a weapon of +2 enchantment—<br />
either a long sword, mace, hammer, or trident<br />
These are the officers commanding the units of the Dragonarmies.<br />
They are all human, and 80% of them are male. They are, as a rule,<br />
ruthless and cruel, but not stupid or lazy.<br />
The statistics given are average numbers. If your PCs have encounters<br />
with a number of officers, you should vary the numbers slightly so<br />
that the NPCs do not become predictable.<br />
Fizban the Fabulous<br />
Wizard, Madman, or Deity?<br />
Fizban’s actual status during the adventure depends on the ending you<br />
have selected for the epic. He might be Paladine the Great God of<br />
Good, or he might be a senile old mage who accompanies the PCs<br />
because he has nothing better to do. He does not have to accompany<br />
the Heroes unless you are using an ending that requires his presence.<br />
Fizban can be played for comic relief, as his spell-casting attempts
sometimes result in spectacular failures. However, if a PC is in a certain-death<br />
situation, Fizban somehow manages to cast a life-saving<br />
spell. Although the spell might not work as expected, it will be beneficial.<br />
He can cast any wizard spell. He does not, however, use spells to<br />
attack or otherwise obstruct the enemy.<br />
If Fizban is indeed Paladine, at the moment he faces Takhisis his true<br />
power becomes apparent. A white glow surrounds him, and he visibly<br />
grows in stature and strength. His normally befuddled demeanor<br />
changes to deadly seriousness.<br />
Ettel is a military man who believes all problems can be settled by the<br />
sword. He loves the thrill of battle and detests subterfuge. Beyla follows<br />
Kitiara’s orders without question. Aggressive and a bit sadistic, she is a<br />
master of subterfuge.<br />
Both share a strong respect for Kitiara. They are under orders to<br />
bring rebel leaders in alive by whatever means necessary, but they slay<br />
rebels and elves out of hand. With their helms on, either Beyla or Ettel<br />
(with his slight build) might be mistaken for Kitiara. Their mounts are<br />
adult blue dragons.<br />
Fritzen Dorgaard Lorac Caladon, King of Silvanesti<br />
7th-Level Half-Ogre Fighter 15th-Level Fighter/3rd-Level Mage<br />
Strength 18/51<br />
Dexterity 16<br />
Constitution 17<br />
THAC0 14<br />
Hit Points 66<br />
Armor Class 6<br />
intelligence 8<br />
Wisdom 7<br />
Charisma 12<br />
Alignment CN<br />
Movement 9<br />
Strength 13<br />
Dexterity 14<br />
Constitution 7<br />
THAC0 6<br />
Hit Points 18<br />
Armor Class 6<br />
Intelligence 12<br />
Wisdom 7<br />
Charisma 12<br />
Alignment N<br />
Movement 6<br />
Items: leather armor, long sword +1 Items: leather armor +2, long sword +3<br />
Fritz is Maquesta’s personal bodyguard and a sailor on the Perechon.<br />
Fritz is completely loyal to Maquesta and will never betray her. He<br />
enjoys grand adventures and can be lured by tales of legend. He is<br />
flamboyant, boisterous, and loud. Wryly jovial, he enjoys taunting foes.<br />
He has a secret fear of fire, and if attacked with flame he fights with a<br />
-2 penalty to his attack rolls.<br />
Kitiara (Highlord)<br />
15th-Level Fighter<br />
Strength 14<br />
Dexterity 18<br />
Constitution 14<br />
THAC0 6<br />
Hit Points 68<br />
Armor Class –4<br />
Intelligence 13<br />
Wisdom 7<br />
Charisma 14<br />
Alignment LE<br />
Movement 12<br />
Items: Dragonarmor plate mail +2, short sword +2, spear +3, dagger +1<br />
Kitiara is the Blue Lady of the Dragon Highlords. She commands the<br />
Blue Dragonarmy and rules over their conquered territories with a tem-<br />
pestuous hand.<br />
Kitiara is the older sister of Caramon and Raistlin. She has a wild<br />
spirit and often goes through drastic mood swings in a short period of<br />
time. Her keen military mind and her alliance with the blue dragon Skie<br />
have helped her to rise through the Dragonarmy ranks swiftly.<br />
Kitiara made a conscious choice between good and evil, as she judged<br />
that her best chances of gaining the power she craved lay with the Dark<br />
Queen’s forces. She reasons that others might see the logic in this as well.<br />
Since she was once a friend of many of the PCs, she tries to get them to<br />
join her if she has the opportunity. She is not easily fooled by lies.<br />
Kitiara has made an unholy deal with Lord Soth, the death knight.<br />
She has promised him the soul of Laurana in return for his help in seating<br />
her on the Emperor’s Throne.<br />
Kitiara’s Lieutenants<br />
Ettel Rense, 10th-Level Human Fighter<br />
Beyla Donth, 7th-Level Human Cleric<br />
Strength 16<br />
Dexterity 13<br />
Constitution 12<br />
THAC0 11/16<br />
Hit Points 58/43<br />
Armor Class 1<br />
Intelligence 9<br />
Wisdom 14<br />
Charisma 11<br />
Alignment LE<br />
Movement 12<br />
Items: Dragonarmor +1, long sword +2 (Ettel), mace +2 (Beyla)<br />
Beyla’s Spells: lst—5, 2nd—3, 3rd—2, 4th—1<br />
123<br />
Lorac Caladon, King of the Silvanesti elves, is a shattered wreck of a<br />
once-great leader. In his youth, Lorac was strong and robust. Intelligent<br />
and well educated, he was also considered to be one of the most hand-<br />
some men of the royal family. He seemed truly blessed by the gods.<br />
Lorac is now nothing but a shriveled shell. His skin twitches constantly<br />
while he is in the dream state, his closed eyes shift rapidly<br />
beneath their lids. His mouth works open and shut in a silent, terrified<br />
monologue.<br />
One of the few remaining contact points in Lorac’s mind is the tale of<br />
the Dark-Night Child. This elven tale was once a great favorite of his,<br />
and much of his present experience is related to it.<br />
The Tale of the Dark-Night Child:<br />
In the Years of New Stars, the Dark-Night Child wandered heedlessly<br />
among the Silvan Wood. Soon she was lost, far from her home. Night<br />
came upon the Dark-Night Child, bringing terrible powers with it. The<br />
elf-friend trees were tortured by the Night Magic and seemed to turn<br />
against the Child. The gentle forest creatures were suddenly evil and<br />
fearsome. The Dark-Night Child cried in terror, fearing that the Night<br />
Magic would work its evil on her, too.<br />
But, as the Child’s tears fell, she saw them glisten with light. Looking<br />
up, the Child beheld the Sky-Fires burning in the dark realms above.<br />
She knew then that Paladine had no power other than that which her<br />
mind gave it. When she realized this, the Dark-Night Child felt safe. The<br />
Night Magic fled. The Dark-Night Child’s family found her in the brightening<br />
dawn, asleep in the peace of Paladine.<br />
Loralon, Conscience of the King<br />
12th-Level Cleric<br />
Strength 11<br />
Dexterity 14<br />
Constitution 10<br />
THAC0 14<br />
Hit Points 39<br />
Armor Class 2<br />
Intelligence 12<br />
Wisdom 16<br />
Charisma 12<br />
Alignment LG<br />
Movement 12<br />
Items: chain mail +3, mace +2<br />
Loralon was the High Cleric of Silvanesti prior to the Cataclysm.<br />
Loralon disappeared, as did all other true clerics of the time.<br />
Loralon appears here only because his subconscious was drawn here<br />
by the tormented elf king.<br />
Loralon in his natural form appears to be an elderly, balding elf with a<br />
long, well groomed white beard. He gives the party whatever help he<br />
can (including spellcasting) as long as he believes that the PCs are<br />
attempting to awaken Lorac and end the terrible dream.
Lucien (Highlord)<br />
21st-Level Fighter<br />
Strength 18/82<br />
Dexterity 12<br />
Constitution 11<br />
THAC0 0<br />
Hit Points 83<br />
Armor Class -3<br />
Intelligence 13<br />
Wisdom 12<br />
Charisma 15<br />
Alignment LE<br />
Movement 9<br />
Items: Dragonarmor plate +5, long sword, +2 *<br />
* This sword has the ability to cast a cone of cold spell once per day.<br />
The cone extends to a range of 60 and inflicts 12d6 points of damage.<br />
A saving throw vs. breath weapon cuts the damage in half.<br />
Lucien is the commanding general of the Black Dragonarmy. A patient<br />
and competent man, he rose to power mainly through the mistakes,<br />
and subsequent untimely deaths, of his superiors. Now that he controls<br />
his Dragonarmy, he is determined to avoid the mistakes that so often<br />
destroyed previous commanders.<br />
Lucien is a short, swarthy human of indeterminate age. His eyes glitter<br />
with ambition, and his expression is usually curious and not<br />
unfriendly. He rides an average adult black dragon.<br />
Lute the Pawnbroker<br />
13th-Level Thief<br />
Strength 10<br />
Dexterity 17<br />
Constitution 9<br />
THAC0 14<br />
Hit Points 39<br />
Armor Class 5<br />
Intelligence 15<br />
Wisdom 12<br />
Charisma 14<br />
Alignment N<br />
Movement 12<br />
Items: ring of protection +2, short sword +3<br />
Thieving Abilities: PP—50%, OL—90%, F/RT—90%, MS—95%, HS—<br />
95%, DN—55%, CW—95%, RL—25%<br />
Lute is one of the leaders of the Hidden Light resistance movement. He<br />
is short and thin, with an initially surly attitude toward strangers. He is<br />
extremely alert, and is always ready for action. He can be surprised<br />
only on a 1 on 1d6.<br />
Lute hates the Dragon Empire with a passion. He was formerly a<br />
merchant in Khur, and his family was killed during the invasion. He has<br />
since moved to Neraka to be near the source of his hatred. He vigorously<br />
works to shake the roots of evil power.<br />
Although intelligent and usually cautious, his bitter anger occasionally<br />
causes him to take unnecessary risks. The troops that killed his<br />
family were draconians; any time he catches a draconian alone, he<br />
uses his backstab ability to kill the creature.<br />
Maelstrom<br />
9th-Level Fighter<br />
Strength 18/00<br />
Dexterity 9<br />
Constitution 17<br />
THAC0 12<br />
Hit Points 85<br />
Armor Class 4<br />
Intelligence 13<br />
Wisdom 11<br />
Charisma 14<br />
Alignment CG<br />
Movement 12<br />
Items: two-handed sword +3, shield +2, studded leather armor<br />
Maelstrom is the Hidden Light contact who most often communicates<br />
between the resistance forces in the city of Neraka itself and those in<br />
the plains and mountains beyond. Maelstrom travels with impunity<br />
through the city, bearing papers stating that he is a mercenary for each<br />
of the five Dragonarmies. When accosted by guards, he shows them<br />
the papers of an army different from that of the guards who stop him.<br />
124<br />
Maelstrom is over six feet tall and seems to be made of solid muscle.<br />
His black hair runs in a long bundle down his back and thick, busy eyebrows<br />
glower above black eyes that burn with the fire of the true zealot.<br />
Maelstrom has a tremendous love of ale and an enormous capacity<br />
for drinking it. He remains outwardly unaffected by virtually any<br />
amount of drink. He always seeks to persuade his companions to join<br />
him in raising a glass or three.<br />
Mandracore the Reaver<br />
8th-Level Half-Ogre Fighter<br />
Strength 16<br />
Dexterity 14<br />
Constitution 15<br />
THAC0 13<br />
Hit Points 68<br />
Armor Class 4<br />
Intelligence 12<br />
Wisdom 8<br />
Charisma 14<br />
Alignment NE<br />
Movement 9<br />
Items: studded feather +2, shield, long sword +1<br />
The Reaver is the leader of the pirate armada, ruling through fear and<br />
strength. Foes who will not openly fight him disappear mysteriously. By<br />
tradition, anyone pirate who defeats him becomes the pirates’ new leader.<br />
A surly fellow with a great appetite for power, he holds the pirates<br />
together by building on their hatred and fear of the minotaur pirate<br />
fleet. He is crafty and vicious, with a good sense of politics. He maintains<br />
a secret alliance with the minotaur chieftain. He also has an<br />
agreement with the Dragon Highlords to harass free ships and let the<br />
queen’s ships pass.<br />
Maquesta Kar-thon<br />
Gth-Level Half-Elf Fighter<br />
Strength 15<br />
Dexterity 18<br />
Constitution 16<br />
THAC0 15<br />
Hit Points 46<br />
Armor Class 4<br />
Intelligence 11<br />
Wisdom 13<br />
Charisma 13<br />
Alignment N<br />
Movement 12<br />
Items: leather armor, long sword + 1<br />
Maquesta is captain of the Perechon, fastest shop on the Blood Sea,<br />
both a merchant and a pirate. Maquesta is shrewd and cautious, playing<br />
both sides of the fence in the war. She is always careful that none<br />
escape to reveal her duplicity.<br />
Maquesta appears to be of the northern race of black-skinned<br />
mariners, but is really a half-elf. Only Fritz, her bodyguard, knows her<br />
true heritage.<br />
Maquesta’s first loyalty is to her ship and crew, seeking livelihood<br />
and freedom. She has sworn a secret blood oath of vengeance against<br />
those who have massacred the elven people. Maquesta once helped<br />
Fritz flee the governor’s gallows.<br />
Her second loyalty is to paying customers and to those she owes a<br />
debt of honor. She is a leader of men, a tough bargainer, and an honest<br />
merchant. She detests the Dragon Highlords’ cruelty.<br />
Salah-Khan (Highlord)<br />
17th-Level Fighter<br />
Strength 18/27<br />
Dexterity 14<br />
Constitution 12<br />
THAC0 4<br />
Hit Points 62<br />
Armor Class 0<br />
Intelligence 14<br />
Wisdom 10<br />
Charisma 14<br />
Alignment LE<br />
Movement 9<br />
Items: chain mail +5, two-handed sword +3<br />
Salah-Khan is the Highlord of the Green Dragonarmy. A thin and wiry<br />
little man of exceptional cunning and cruelty, he leads his army with
dash and daring. Skie<br />
Salah-Khan has won the respect of green dragonkind by his skilled<br />
battle planning and shrewd tactics. He generally fights in ways that<br />
Very Old/Average Blue Dragon<br />
maximize enemy casualties while minimizing his own. He offers his HD 9<br />
Hit Points 63<br />
dragons the incentive of a free hand with the prisoners if they fight well. THAC0 12 Movement 9/24<br />
Salah-Khan rides an average adult green dragon.<br />
Armor Class 2 Alignment LE<br />
#AT 3<br />
Damage 1d6/1d6/3d8<br />
Sevil Draanim Rev<br />
6th-Level Fighter/9th-level Cleric<br />
Spells:<br />
(plus lightning)<br />
1st Level: audible glamer, darkness, detect magic<br />
2nd Level: blindness, detect invisibility, fog cloud<br />
Strength 14<br />
Dexterity 10<br />
Constitution 15<br />
THAC0 15<br />
Hit Points 46<br />
Armor Class 5<br />
Intelligence 12<br />
Wisdom 16<br />
Charisma 18<br />
Alignment NE(L)<br />
Movement 12<br />
Items: ring mail, ring of protection +2, war hammer + 1<br />
Spells: lst—6, 2nd—6, 3rd—3, 4th—2<br />
Sevil is a man of mystery. He claims to be a warrior, but is secretly a<br />
cleric. No one knows of his clerical abilities.<br />
Sevil’s throat bears the nasty scar of a hanged man, and he speaks<br />
with a hoarse, raspy voice. He is secretive but willing to aid the Dragon<br />
Highlords’ enemies for his own purposes.<br />
Sevil appears to be the ultimate mercenary, selling anything if the<br />
price is right. He mainly sells information and weapons. His information<br />
seems to be at least 60% correct.<br />
Sevil is loyal only to himself. A fallen cleric, he desires to prove his<br />
worth to the Dark Queen and recover his status. He resents Toede’s<br />
rank, and he will betray Toede if given the chance, ideally by breaking<br />
the ogre alliance.<br />
Silver Fox<br />
7th-Level Half-Elf Ranger<br />
Strength 17<br />
Dexterity 10<br />
Constitution 16<br />
THAC0 14<br />
Hit Points 63<br />
Armor Class 4<br />
Intelligence 13<br />
Wisdom 15<br />
Charisma 13<br />
Alignment LG<br />
Movement 12<br />
Skie is Kitiara’s mount and partner. They have struck a pact to mutually<br />
assist and protect each other. Through careful manipulation and a<br />
rigid adherence to their pact, the two have risen through the ranks to<br />
command the Blue Dragonarmy.<br />
Skie is completely evil but extremely loyal to Kitiara. He can be diabolically<br />
cunning and knows how to play on his foe’s strengths and<br />
weaknesses.<br />
Soth, Death Knight<br />
Strength 18/99<br />
Dexterity 12<br />
Constitution 17<br />
THAC0 11<br />
Hit Points 59<br />
Armor Class 0<br />
Magic Resistance: 75% (if the percentage roll is 11 or less, the spell<br />
rebounds against the caster).<br />
Items: plate mail +3, two-handed sword +3<br />
Spell-like abilities: wall of ice at will, generates fear in a five-foot radius,<br />
and has the innate powers of detect magic and detect invisibility. He<br />
can dispel magic twice per day. Once per day he can use any one of<br />
the power word spells, a symbol of pain or fear, and generate a 20-HD<br />
fireball. All his abilities function as if spells cast by a 20th-level mage.<br />
Soth was an ancient Lord Knight of Solamnia at Daargard Keep. A<br />
Knight of the Rose prior to the Cataclysm, Lord Soth committed a long<br />
series of vile crimes before the end of his life.<br />
Items: splint mail, elven cloak, long sword +2 Kitiara has made a contract with him, however, that brought him into<br />
this war of men and dragons on the side of evil.<br />
Silver Fox is the leader of a band of rebels who hide in the Gaggle<br />
Woods. Not strong enough to challenge the entire Dragonarmy, their<br />
knowledge of the land allows them to raid and evade pursuit.<br />
Silver Fox’s ultimate goal is to make the Dragonarmy’s life so<br />
unpleasant that they will eventually leave. Realizing that the inept<br />
Toede is his best ally, the Fox does what he can to help Toede retain his<br />
post. Silver Fox helps enemies of the draconians, but is cautious and<br />
does not risk the lives of his men foolishly. Silver Fox’s band of freedom<br />
fighters include 18 2nd-level Wild Elf fighters, four 7th-level Wild Elf<br />
fighter/druids, eight 2nd-level dwarf fighters, three 5th-level kender<br />
thieves, and 15 4th-level human fighters.<br />
Silvart, Kagonesti Elf<br />
4th-Level Fighter/9th-Level Thief<br />
Strength 13<br />
Dexterity 17<br />
Constitution 15<br />
THAC0 16<br />
Hit Points 34<br />
Armor Class 5<br />
Intelligence 15<br />
Wisdom 13<br />
Charisma 18<br />
Alignment CG<br />
Movement 12<br />
Silvart belongs to the elven race of the Kagonesti. A stunning beauty,<br />
Silvart left the wilderness so that she might follow her companions to<br />
Palanthas and enlist their aid on a mission of the utmost importance.<br />
125<br />
Talent Orren<br />
7th-Level Fighter<br />
Strength 15<br />
Dexterity 16<br />
Constitution 14<br />
THAC0 14<br />
Hit Points 40<br />
Armor Class 3<br />
Intelligence 10<br />
Wisdom 9<br />
Charisma 17<br />
Alignment CE<br />
Movement 12<br />
Intelligence 13<br />
Wisdom 9<br />
Charisma 14<br />
Alignment LG<br />
Movement 12<br />
Items: ring mail +2, short sword +1, tong bow +4<br />
Talent Orren is the high commander of the underground movement in<br />
Neraka. He is a very handsome man, with a thin mustache and long,<br />
flowing brown hair. He moves with a catlike grace, and could easily be<br />
mistaken for a high-level thief because of the silence of his walk and<br />
the natural stealth of his movements.<br />
Talent is a responsible and cautious leader who does not risk the<br />
lives of his men in long-shot missions. If he is persuaded that a blow<br />
can be struck against the Dragon Empire, however, he fully supports<br />
such an attempt. He needs to hear all of the details of such a plan, however.<br />
The loyalty of his men is such that they would willingly follow him<br />
to the Abyss and back.
Tarak, Elf of Silvanesti Waylorn Wyvernsbane<br />
9th-Level Fighter 9th-Level Druid<br />
Strength 14<br />
Dexterity 16<br />
Constitution 17<br />
THAC0 12<br />
Hit Points 62<br />
Armor Class 6<br />
Intelligence 12<br />
Wisdom 9<br />
Charisma 13<br />
Alignment<br />
Movement 12<br />
Strength 8<br />
Dexterity 13<br />
Constitution 14<br />
THAC0 16<br />
Hit Points 40<br />
Armor Class 6<br />
Intelligence 9<br />
Wisdom 16<br />
Charisma 15<br />
Alignment N<br />
Movement 12<br />
Items: leather armor, long sword +2 Items: leather armor +2, staff of the serpent, scimitar +2<br />
The Silvanesti elf known as Tarakanthis (or Tarak) was once a prominent<br />
member of House Protector.<br />
He and his men fought bravely against the invading draconians and<br />
were on the verge of victory when some unknown terror struck at the<br />
heart of the realm. Refusing to flee, Tarak and the few who survive with<br />
him live in the nightmare, trying to destroy the evil.<br />
Tarak is one of the few elves who trusts outsiders. He recognizes and<br />
reveres Alhana Starbreeze, regarding her as his leader.<br />
Toede (Highlord)<br />
9th-Level Hobgoblin Fighter<br />
Strength 16<br />
Dexterity 10<br />
Constitution 16<br />
THAC0 12<br />
Hit Points 49<br />
Armor Class 0<br />
Intelligence 8<br />
Wisdom 11<br />
Charisma 6<br />
Alignment LE<br />
Movement 9<br />
Items: Dragonarmor plate +3, bastard sword +1<br />
Toede is the Dragon Highlord in charge of the White Dragonarmy. He is<br />
a slothful, cowardly bully, full of bluster and threats when he has the<br />
upper hand, but a sniveler and whiner around superiors.<br />
He possesses a crude cunning and is quick to escape when the going<br />
gets tough. He is a backstabber and shamelessly shifts blame to others.<br />
He resents Kitiara greatly and takes risks to outshine her in the eyes of<br />
his superiors.<br />
Toede can leap up to 30 feet horizontally each round instead of his<br />
normal move.<br />
Verminaard (Former Highlord)<br />
8th-Level Cleric<br />
Strength 14<br />
Dexterity 10<br />
Constitution 15<br />
THAC0 16<br />
Hit Points 50<br />
Armor Class 1<br />
Intelligence 12<br />
Wisdom 16<br />
Charisma 18<br />
Alignment LE<br />
Movement 12<br />
Spells:<br />
1st Level: cause fear, cause fight wounds, darkness<br />
2nd Level: hold person, resist fire, spiritual hammer<br />
3rd Level: cause blindness, dispel magic, prayer<br />
4th Level: cause serious wounds (x2)<br />
Verminaard once controlled the lands on the Abanasinian peninsula<br />
from the Seeker kingdoms to the Plains of Dergoth and was working to<br />
extend his power. The heroes cast him to his death in Thorbardin. He<br />
awoke in the dream lands of Silvanesti, from which he can find no<br />
escape.<br />
Verminaard is a dreamshadow only in this adventure, drawn from the<br />
minds of the PCs. As such, the spirit of his malice lives on!<br />
126<br />
Abilities: Identify plant, animal, pure water; pass without trace; immune<br />
to woodland charm; change to bird, mammal, and reptile once per day<br />
Waylorn Wyvernsbane gives that as his name, but he often seems to<br />
think he is somebody else. This other person is an unnamed Knight of<br />
Solamnia.<br />
Waylorn is generally wise and brave, with a keen mind for tactics.<br />
Every once in a while, however, he attacks a tree trunk or a rock,<br />
claiming it to be a dragon in disguise. His powers as a druid are consid-<br />
erable, and he does not hesitate to employ them.<br />
Waylorn usually acts as a druid, but when confronted by dragons,<br />
draconians, or lizards, he throws off his helm, utters a valiant battle cry,<br />
and wades into the fight as if he were a mighty warrior. After the battle,<br />
it might be several hours before he returns to normal. During these<br />
periods, he claims that his name is Huma, the legendary warrior who<br />
defeated the dragons a millennium earlier. He sees the task before the<br />
PCs as the grand quest of the times, and becomes completely serious<br />
about the mission. If pressed about his identity, however, he becomes<br />
confused and quickly returns to normal.<br />
Whitestone Army Officers<br />
11th-Level Fighters<br />
Strength 15<br />
Dexterity 15<br />
Constitution 12<br />
THAC0 10<br />
Hit Points 62<br />
Armor Class 0<br />
Intelligence 14<br />
Wisdom 16<br />
Charisma 13<br />
Alignment LG<br />
Movement 9<br />
Items: plate mail +2, shield, weapon of +2 enchantment—either long<br />
sword, two-handed sword, spear, or long bow<br />
These are the officers who command the units of the Whitestone army.<br />
They are all human, and 60% are male. They are generally brave and<br />
trustworthy. They have earned their positions through their skill and<br />
their determination to stamp out the evil of the Dragonarmies.<br />
Zebulah<br />
9th-Level Human Mage<br />
Strength 8<br />
Dexterity 13<br />
Constitution 11<br />
THAC0 19<br />
Hit Points 27<br />
Armor Class 6<br />
Intelligence 16<br />
Wisdom 12<br />
Charisma 9<br />
Alignment NG<br />
Movement 12<br />
Items: bracers of defense (AC 6), staff of striking, dagger<br />
Spells: 1st—4, 2nd—3, 3rd—3, 4th—2, 5th—1<br />
Zebulah is a human mage who has forsaken the surface world to dwell<br />
with Apoletta, the sea elf. He is familiar with the evils of the world and is<br />
looked to as a leader by the aquatic races once war reaches into the<br />
deep.<br />
Zebulah grimly accepts the role Fate has thrust on him. He is deeply<br />
in love with Apoletta and loyal to her people. He is distrustful of<br />
strangers, but his surface heritage causes him to help those in need.
Tanis 8th-Level Half-Elf Fighter<br />
STR 16 WIS 13 CON 12 THAC0 13<br />
INT 12 DEX 16 CHR 15 AL NG HP 61<br />
AC 4 (Leather armor +2, Dex bonus)<br />
WEAPONS Long sword +2, long bow, daggers<br />
LANGUAGES Common, Qualinesti, Hill Dwarf,<br />
Plainsman<br />
See back of card for more information.<br />
©1994 TSR, Inc. All Rights Reserved.<br />
Caramon 9th-Level Human Fighter<br />
STR 18/63 WIS 10 CON 17 THAC0 12<br />
INT 12 DEX 11 CHR 15 AL LG HP 59<br />
AC 3 (Chain mail +1, small shield)<br />
WEAPONS Long sword +1, spear, dagger<br />
LANGUAGES Common, Plainsman<br />
See back of card for more information.<br />
©1994 TSR, Inc. All Rights Reserved.<br />
Raistlin 6th-Level Human Mage<br />
STR 10 WIS 14 CON 10 THAC0 19<br />
INT 17 DEX 16 CHR 10 AL N HP 18<br />
AC 5 (Staff of Magius, Dex bonus)<br />
EQUIPMENT Staff of Magius<br />
LANGUAGES Common, Qualinesti, Magius<br />
SPELLS 1st—4, 2nd—2, 3rd—2 i<br />
See back of card for more information.<br />
©1994 TSR, Inc. All Rights Reserved.<br />
Goldmoon 8th-Level Human Cleric<br />
STR 12 WIS 16<br />
INT 12 DEX 14<br />
CON 12 THAC0 16<br />
CHR 17 AL LG HP 34<br />
AC 8 (Leather armor)<br />
WEAPONS Staff of striking/curing<br />
LANGUAGES Common, Plainsman, Hill Dwarf,<br />
Qualinesti<br />
SPELLS 1st—5, 2nd—5, 3rd—3, 4th—2<br />
See back of card for more information.<br />
©1994 TSR, Inc. All Rights Reserved.<br />
Riverwind 8th-Level Human Ranger<br />
STR 18/35 WIS 14 CON 14 THAC0 13<br />
INT 13 DEX 16 CHR 13 AL LG HP 47<br />
AC 3 (Leather armor +2, small shield, Dex bonus)<br />
WEAPONS Long sword, short bow, dagger +2<br />
LANGUAGES Common, Plainsman, Qualinesti,<br />
Hill Dwarf<br />
SPELL (Priest) 1st—1<br />
See back of card for more information.<br />
©1994 TSR, Inc. All Rights Reserved.<br />
127<br />
Tika 6th-Level Human Fighter<br />
STR 14 WIS 12 CON 13 THAC0 15<br />
INT 9 DEX 16 CHR 14 AL NG HP 37<br />
AC 1 (Plate armor, Dex bonus)<br />
WEAPONS Short sword +2, dagger<br />
LANGUAGES Common, Plainsman<br />
THIEF SKILLS PP—40%, OL—38%, F/RT—30%,<br />
MS—27%, HS—20%, DN—15%, CW—87%<br />
See back of card for more information.<br />
©1994 TSR, Inc. All Rights Reserved.<br />
Waylorn 7th-Level Human Druid<br />
STR 8 WIS 16 CON 14 THAC0 16<br />
INT 9 DEX 13 CHR 15 AL N HP 28<br />
AC 5 (Leather armor +2, small shield)<br />
WEAPONS Staff of the serpent (python)<br />
LANGUAGES Common, Solamnic, Silvanesti,<br />
Qualinesti, Hill Dwarf<br />
SPELLS 1st—5, 2nd—5, 3rd—2, 4th—1<br />
See back of card for more information.<br />
©1994 TSR, Inc. All Rights Reserved.<br />
Alhana 7th-Level Elf Fighter<br />
STR 9 WIS 15 CON 10 THAC0 14<br />
INT 16 DEX 13 CHR 15 AL LG HP 32<br />
AC -3 (Plate armor +3, shield +2)<br />
WEAPONS Long sword +3, short bow +2<br />
LANGUAGES Qualinesti, Silvanesti, Common, Hill<br />
Dwarf, Kenderspeak, Draconian<br />
See back of card for more information.<br />
©1994 TSR, Inc. All Rights Reserved.<br />
Serinda 5th-Level Elf Fighter/6th-Level Mage<br />
STR 9 WIS 15 CON 10 THAC0 16<br />
INT 16 DEX 13 CHR 15 AL LG HP 22<br />
AC 1 (Splint mail, cloak of protection +3)<br />
WEAPONS Dagger +2, long sword +3, short bow<br />
LANGUAGES Common, Silvanesti, Draconian,<br />
Qualinesti, Kenderspeak<br />
SPELL USE 1st—4, 2nd—2, 3rd—2<br />
See back of card for more information.<br />
©1994 TSR, Inc. All Rights Reserved.<br />
Kronn 4th-Level Kender Fighter/5th-Level Thief<br />
STR 16 WIS 8 CON 16 THAC0 17<br />
INT 10 DEX 15 CHR 12 AL N HP 33<br />
AC 6 (cloak of protection +3; Dex bonus)<br />
WEAPONS Darts (12), chapak +2<br />
LANGUAGES Common, Kenderspeak, Goblin,<br />
Ogre<br />
THIEF SKILLS PP—55%, OL—40%, F/RT—50%,<br />
MS—45%, HS—45%, DN—20%, CW—75%<br />
See back of card for more information.<br />
©1994 TSR, Inc. All Rights Reserved.
Tika Waylan IS THE DAUGHTER OF A THIEF. SHE GREW UP TOUGH AND FAST,<br />
BUT INSIDE REMAINED VULNERABLE. AT THE AGE OF 15, SHE TRIED TO ROB<br />
OTlK SANDATH, PROPRIETOR OF THE INN OF THE LAST HOPE, BUT WAS<br />
CAUGHT IN THE ACT. OTIK’S FIRST INCLINATION WAS TO HAVE HER AR-<br />
RESTED. INSTEAD, HE OFFERED HER A JOB. SHE ACCEPTED TO KEEP OUT OF<br />
JAIL, BUT GREW TO LOVE OTIK AS A FATHER.<br />
TIKA LOOKS OLDER THAN HER 19 YEARS. SHE SEEMS MORE WORLDLY<br />
THAN SHE IS. HER FATHER, WHO ALSO KNEW SOME ILLUSIONIST TRICKS,<br />
LEFT HER A RING THAT SHE WEARS ON A NECKLACE, BUT THE RING DOESN’T<br />
SEEM TO BE MAGICAL. SHE HATES THE DRAGONARMIES FOR DESTROYING<br />
THE ONLY HOME SHE EVER KNEW. SHE IS FOND OF CARAMON, BUT IS AN-<br />
NOYED THAT HE STILL THINKS OF HER AS A KID. SHE IS FASCINATED BY<br />
MAGIC.<br />
Waylorn HAS BEEN ASLEEP FOR AN INCREDIBLY LONG PERIOD OF TIME. THE<br />
TOWER IN WHICH HE IS DISCOVERED GIVES EVIDENCE OF HAVING BEEN BUILT<br />
DURING THE AGE OF MIGHT, OVER 1500 YEARS AGO.<br />
WAYLORN HAS NO MEMORY OR UNDERSTANDING OF HISTORICAL EVENTS<br />
SINCE HUMA DESTROYED THE DRAGONS. INDEED, HE BELIEVES THAT HE IS<br />
HUMA, THE GREAT DRAGONSLAYER. IT IS MUCH MORE LIKELY, HOWEVER,<br />
THAT HE KNEW HUMA (NOT VERY WELL) AND IS SIMPLY USING THE NAME OF<br />
HIS HERO TO ENHANCE HIS OWN REPUTATION.<br />
WAYLORN WANTS TO BE KNOWN AS A DRAGONSLAYER IN HIS OWN RIGHT.<br />
HE WILL, THEREFORE, GO TO ANY LENGTHS TO FIND A DRAGON TO Al-TACK.<br />
HE IS TIRED OF LIVING OFF A BORROWED LEGEND.<br />
Alhana Starbreeze IS THE DAUGHTER OF LORAC CALADON, SPEAKER OF<br />
STARS IN SILVANESTI. ALHANA WAS IN SANCRIST WHEN SHE RECEIVED NEWS<br />
THAT HER HOMELAND HAD FALLEN TO THE DRAGONARMIES. THE REASON<br />
FOR THIS SUDDEN DEFEAT IS A MYSTERY TO HER, SINCE THE ELVES WERE<br />
SUCCESSFULLY HOLDING OFF THE DRAGONARMIES WHEN SHE LEFT. SHE IS<br />
ATTEMPTING TO RETURN TO HER HOMELAND TO FIND OUT WHAT HAPPENED<br />
TO HER FATHER, WHO DID NOT FLEE WEST WITH HIS PEOPLE.<br />
ALHANA IS IMPERIOUS AND COLD. SHE HOLDS THOSE IN THE OUTSIDE<br />
WORLD RESPONSIBLE FOR THE DOWNFALL OF HER ONCE-GREAT NATION.<br />
THUS HER ATTITUDE TOWARD ALL THOSE OF OTHER RACES—HUMANS,<br />
DWARVES, KENDER—IS POLITE, BUT WITH THINLY VEILED HOSTILITY. YET<br />
BENEATH THIS EXTERIOR OF STEEL IS A LOVING, WARM WOMAN. SHE HAS<br />
ONLY ONE GOAL AT THIS POINT-TO RETURN TO HER HOMELAND AND FIND<br />
HER FATHER. ALHANA BECOMES AN NPC AT THE END OF CHAPTER 4.<br />
Serinda Elderwood IS A SILVANESTI ELF. HER FAMILY MET DEATH AT THE<br />
HANDS OF THE DRAGONARMY. ONLY BECAUSE SHE WAS AWAY IN THE SER-<br />
VICE OF A SEA MERCHANT DID SHE ESCAPE THE SAME FATE. ON HER RETURN<br />
SHE FOUND THAT ELVES ARE HUNTED AND THAT SHE MUST ALWAYS BE ON<br />
THE MOVE.<br />
HER RECENT TRAVELS BROUGHT HER INTO THE COMPANY OF KRONN.<br />
KRONN HAD WANDERED FAR FROM HIS HOMELAND. NOW THEY SEEK TO<br />
RETURN TO KRONN’S HOME, BUT THEY ARE UNCERTAIN OF WHERE IT LIES.<br />
SERINDA IS COOL AND AT TIMES ALOOF, BUT SHE HAS PICKED UP SOME OF<br />
THE KENDER’S PUCKISH HUMOR. SERINDA HAS A REGAL BEARING AND<br />
STATURE. SHE DISTRUSTS PIRATES. SERINDA CAN JOIN THE PCS STARTING<br />
IN CHAPTER 5.<br />
Kronin-alin Thistleknot IS THE OLDEST SON OF THE KENDER HERO KRONIN. HE<br />
IS ANXIOUS TO PROVE HIMSELF WORTHY OF HIS FATHER THROUGH GRAND<br />
DEEDS OF DARING. KRONN IS ANXIOUS TO PLEASE, BUT EASILY BORED.<br />
KRONN LEFT HIS HOMELAND YEARS AGO. WHEN THE WAR CAME, HE<br />
DECIDED TO RETURN TO HIS HOMELAND, BUT CANNOT REMEMBER WHERE IT<br />
IS. HE ENCOUNTERED SERINDA IN HIS JOURNEYS. HE ENJOYS HER HUMOR,<br />
AND THE TWO MAKE A DEADLY TEAM WHEN DANGER THREATENS. FOR<br />
SOME REASON, KENDER SEEM AS UNPOPULAR AS ELVES IN THIS LAND.<br />
THE CHAPAK IS A WAR AXE WITH TWO METAL PRONGS FOR USE AS A<br />
SLINGSHOT. THE HILT IS HOLLOW IRONWOOD AND DOUBLES AS A BLOWGUN.<br />
KRONN STORES 50 FEET OF SPIDERSILK LINE IN THE CAPPED HILT AND CAN<br />
USE THE CHAPAK AS A GRAPPLING HOOK. KRONN CAN JOIN THE PCS START-<br />
ING IN CHAPTER 5.<br />
128<br />
Tanis WAS BORN OF AN ELF-MAIDEN WHO WAS TAKEN BY HUMANS IN THE<br />
SHADOW YEARS FOLLOWING THE CATACLYSM. SHE ESCAPED TO QUALI-<br />
NOST, WHERE SHE DIED IN CHILDBIRTH. THE ELVES OF QUALINOST RAISED<br />
THE BOY BUT DID NOT FULLY ACCEPT HIM. TANIS BECAME A WANDERER,<br />
NEVER FEELING QUITE AT HOME UNTIL, AFTER YEARS OF TRAVEL, HE<br />
SETTLED IN SOLACE. THERE HE MET THE PEOPLE WHO WERE TO BECOME<br />
THE INNFELLOWS.<br />
LAURANA HAS LOVED TANIS FOR MANY YEARS, BUT THE HALF-ELF’S<br />
HEART IS TORN BETWEEN THE ELF MAID AND THE HUMAN WOMAN KITIARA,<br />
HALF-SISTER TO CARAMON AND RAISTLIN. KITIARA LEFT SOLACE TO TRAVEL<br />
NORTH, BUT DID NOT RETURN.<br />
TANIS FEELS AT HOME NOWHERE. HE IS A TRUE FRIEND AND A KIND MAN,<br />
BUT DARK MOODS AND DEPRESSIONS AFFLICT HIM. HE IS A NATURAL LEADER,<br />
A DEADLY FIGHTER, AND A HERO IN THE TRUEST SENSE OF THE WORD.<br />
Caramon, A FIGHTER OF GREAT STRENGTH AND COURAGE, IS RAISTLIN’S<br />
TWIN AND KITIARA’S HALF-BROTHER. THE TWINS ARE MIRROR-IMAGES OF<br />
ONE ANOTHER-CARAMON IS CHEERFUL AND PERSONABLE, RAISTLIN IS<br />
DARK, MYSTERIOUS, AND FRAIL.<br />
THE TWINS’ MOTHER WAS SICKLY AND DIED WHEN THEY WERE VERY<br />
YOUNG. KITIARA, SEVERAL YEARS THEIR SENIOR, RAISED THEM. CARAMON<br />
DEVELOPED INTO A FINE FIGHTER, AND A GOOD AND DECENT MAN, AL-<br />
THOUGH SOMETIMES A BIT NAIVE.<br />
HE FEELS RESPONSIBLE FOR HIS FRAIL TWIN, BUT HE DOES NOT UNDER-<br />
STAND RAISTLIN. CARAMON IS FRIENDLY AND TRUSTING AND ENJOYS<br />
PEOPLE VERY MUCH. LATELY HE HAS BEGUN TO NOTICE THAT TIKA WAYLAN<br />
HAS MATURED FROM A FRECKLE-FACED KID INTO A GOOD-LOOKING WOMAN.<br />
Raistlin, A MAGE, IS CARAMON’S MIRROR-IMAGE TWIN AND KITIARA’S HALF-<br />
BROTHER. THE MOTHER OF THE TWINS WAS SICKLY AND DIED WHEN THEY<br />
WERE YOUNG. KITIARA RAISED THEM.<br />
ONE DAY, RAISTLIN SAW A VILLAGE ILLUSIONIST AND CAME HOME ABLE TO<br />
DO THE TRICKS HE SAW. KITIARA, RECOGNIZING HIS GIFT, ENROLLED HIM IN A<br />
MAGIC SCHOOL. HE ASTOUNDED HIS TEACHERS WITH HIS TALENT, BUT THEY<br />
WORRIED THAT HIS PRIDE AND AMBITION WOULD OVERWHELM HIM.<br />
HE LEFT THE SCHOOL TO SEEK OUT A TEACHER. THE TEACHER PUT HIM<br />
TO TERRIBLE TESTS THAT INCREASED HIS ABILITY BUT LEFT HIM WITH<br />
GOLDEN SKIN, A WEAK CONSTITUTION, AND HOURGLASS EYES THAT SEE<br />
DEATH ALL AROUND HIM.<br />
RAISTLIN IS NOT FOND OF PEOPLE AND PREFERS TO KEEP HIS OWN COUN-<br />
SEL. HE HAS A STRONG SENSE OF JUSTICE.<br />
Goldmoon, A PRINCESS OF THE QUE-SHU TRIBE, FELL IN LOVE WITH RIVER-<br />
WIND, A POOR MAN’S SON. HER FATHER DEMANDED THAT RIVERWIND PROVE<br />
HIMSELF BY UNDERTAKING A QUEST.<br />
RIVERWIND RETURNED WITH A CRYSTAL STAFF FROM THE FORBIDDEN<br />
LANDS. GOLDMOON’S FATHER REFUSED TO BELIEVE THE STAFF WAS MAGIC,<br />
AND ORDERED RIVERWIND STONED TO DEATH. GOLDMOON RUSHED TO HIS<br />
SIDE, AND THE STAFF TELEPORTED THEM TO SAFETY. WITH THE AID OF THE<br />
INNFELLOWS, THEY DISCOVERED THE ANCIENT TRUE GODS, AND GOLD-<br />
MOON BECAME A TRUE CLERIC.<br />
GOLDMOON IS PURE OF HEART AND COMPLETELY IN LOVE WITH HER<br />
BETROTHED, RIVERWIND. SHE IS A CLERIC OF MISHAKAL, THE GODDESS OF<br />
HEALING. SHE IS BRAVE, DUTIFUL, AND DEEPLY RELIGIOUS. SHE MOURNS FOR<br />
HER PEOPLE—ALL MURDERED BY VERMINAARD—AND LONGS FOR THE PLACE<br />
OF THE PLAINS SHE ONCE KNEW.<br />
Riverwind, A FAR HUNTER FOR THE QUE-SHU TRIBE, HAS ROAMED FAR<br />
ACROSS THE LAND AND HEARD MANY STRANGE TALES. HE LOVED THE PRIN-<br />
CESS GOLDMOON, BUT SHE WAS BETROTHED TO THE SON OF THE VILLAGE<br />
CLERIC. RIVERWIND GAVE CHALLENGE, AS WAS HIS RIGHT, AND ACCEPTED A<br />
BETROTHAL QUEST. HE FOUND A BLUE CRYSTAL STAFF IN THE CITY OF XAK<br />
TSAROTH, BUT GOLDMOON’S FATHER REFUSED TO ACCEPT IT AND ORDERED<br />
RIVERWIND STONED TO DEATH. GOLDMOON RUSHED TO HIS SIDE, AND BOTH<br />
WERE SAVED BY THE STAFF. NOW THEY ARE THE ONLY SURVIVORS OF THE<br />
QUE-SHU, FOR THE DRAGONARMIES DESTROYED ALL.<br />
RIVERWIND IS A MAN OF FEW WORDS AND QUICK ACTION. AN IMPOSING<br />
FIGURE OF A MAN, HE IS THE SUBJECT OF MUCH ATTENTION WHEREVER HE<br />
GOES. HE IS A BORN LEADER AND SEES HIS ROLE AS SERVICE TO THE CAUSE<br />
OF GOOD. HIS LOVE FOR GOLDMOON IS ABSOLUTE.
Name<br />
Barracuda, Giant<br />
AC<br />
6<br />
MV<br />
Sw30<br />
HD<br />
5<br />
hp<br />
22<br />
#AT<br />
1<br />
Dmg<br />
3d4<br />
SA<br />
N<br />
Bat<br />
8 1,Fl24 1/4 2 1<br />
1<br />
Y<br />
Beetle, Boring<br />
3 6 5 20 1<br />
5d4<br />
N<br />
Beholder<br />
Brownie<br />
Buffalo<br />
Carrion Crawler<br />
0/2/7<br />
3<br />
7<br />
3/7<br />
F13<br />
12<br />
15<br />
12<br />
10<br />
1/2<br />
5<br />
3+1<br />
45<br />
3<br />
28<br />
18<br />
12d4<br />
1<br />
2<br />
8<br />
Y<br />
1d2<br />
1d8/1d8<br />
1d2<br />
Y<br />
Y<br />
Y<br />
Y<br />
Caryatid Column<br />
5 6 5 22 1<br />
2d4<br />
N<br />
Catoblepas<br />
Chaggrin<br />
Coffer Corpse<br />
7<br />
4<br />
8<br />
6<br />
12,Br3<br />
6<br />
6+2<br />
5 + 5<br />
2<br />
31<br />
30<br />
11<br />
1<br />
2<br />
1<br />
1d6<br />
1d4+2/1d4+2<br />
1d6<br />
Y<br />
Y<br />
N<br />
Crayfish, Giant<br />
4 6,Sw12 4 + 4 25<br />
2<br />
2d6/2d6<br />
N<br />
Crocodile, Giant<br />
Crypt Thing<br />
Crysmal<br />
Crystal Ooze<br />
Death, Crimson<br />
Death Statue<br />
Displacer Beast<br />
Dolphin<br />
4<br />
3<br />
-4/0<br />
8<br />
0(4)<br />
5<br />
4<br />
5<br />
6,Sw12<br />
12<br />
6<br />
1,Sw3<br />
F112<br />
6<br />
1<br />
Sw30<br />
7<br />
6<br />
6+6<br />
4<br />
13<br />
9+9<br />
5<br />
2 + 2<br />
35<br />
27<br />
34<br />
17<br />
60<br />
50<br />
6<br />
10<br />
2<br />
1<br />
1<br />
1<br />
1<br />
1<br />
30<br />
1<br />
3d6/2d10<br />
1d8<br />
3d4(2d4)<br />
4d4<br />
3d10<br />
1d6+3<br />
2<br />
2d4<br />
N<br />
Y<br />
Y<br />
Y<br />
Y<br />
Y<br />
2d4/2d4<br />
N<br />
Draconian, Aurak<br />
0 15 8 42 2<br />
1d8+2(x2)<br />
Y<br />
Draconian, Baaz<br />
4 6,15,Gl18 2<br />
12 1;2<br />
1d8;1d41/1d4 N<br />
Draconian, Bozak<br />
Draconian, Kapak<br />
2<br />
4<br />
6,15,Gl18<br />
6,15,Gl18<br />
4<br />
3<br />
22<br />
17<br />
1;2<br />
1<br />
1d8;1d41/1d4<br />
1d4<br />
Y<br />
Y<br />
Draconian, Sivak<br />
1 6,15,Gl18 6 31 3 1d6/1d6/2d6 N<br />
Dragon, Amphi<br />
3 6,Sw24 7 41 3 1d8/1d8/2d10 Y<br />
Dragon, Black<br />
- 1 12,Fl30,Sw12 14 71 3 1d6/1d6/3d6 Y<br />
Dragon, Blue<br />
Dragon, Brass<br />
Dragon, Bronze<br />
- 2<br />
- 2<br />
- 4<br />
9,Fl30,Br4<br />
12,Fl30,Brb<br />
9,Fl30,Sw12<br />
16<br />
14<br />
16<br />
75<br />
64<br />
81<br />
3<br />
3<br />
3<br />
1d8/1d8/3d8<br />
1d6/1d6/4d4<br />
1d8/1d8/4d6<br />
Y<br />
Y<br />
Y<br />
Dragon Brood<br />
2 9,Sw24 3<br />
14 3 1d3/1d3/1d4<br />
Y<br />
Dragon, Copper<br />
Dragon, Gold<br />
Dragon, Green<br />
Dragon, Red<br />
- 3<br />
- 6<br />
- 2<br />
- 5<br />
9,Fl30,Jp3<br />
12,Fl40,Sw12<br />
9,Fl30,Sw9<br />
9,F130,Jp3<br />
15<br />
18<br />
15<br />
15<br />
72<br />
96<br />
69<br />
74<br />
3<br />
3<br />
3<br />
3<br />
1d6/1d6/5d4<br />
1d10/1d10/6d6<br />
1d8/1d8/2d10<br />
1d10/1d10/3d10<br />
Y<br />
Y<br />
Y<br />
Y<br />
Dragon, Sea<br />
Dragon, Silver<br />
-4<br />
- 5<br />
3,Sw12<br />
9,Fl30,Jp3<br />
17<br />
17<br />
85<br />
88<br />
3<br />
3<br />
1d12/1d12/3d12<br />
1d8/1d8/5d6<br />
Y<br />
Y<br />
Dragon, Skeleton<br />
6 9,Fl30 6 32 3 1d4/1d4/1d10 N<br />
Dragon, White<br />
- 1 12,Fl40,Sw12 13 64 3 1d6/1d6/2d8<br />
Y<br />
Dreamshadow—As per the creature it is modeled after-<br />
Dreamwraith<br />
3 12<br />
8 45 1<br />
Drelb<br />
2 6,Fl6<br />
3<br />
15 1<br />
Dryad<br />
9 12<br />
2<br />
10 1<br />
Dwarf<br />
4 6<br />
4<br />
25 1<br />
Dwarf, Gully<br />
7 6 1 5<br />
1<br />
Dwarf, Zakhar<br />
3 6 1<br />
6<br />
1<br />
Eagle, Giant<br />
7 3,Fl48 4<br />
22 3<br />
Eel, Giant<br />
6 Sw9 5<br />
25 1<br />
Elemental, Air<br />
2 F136 16 72 1<br />
Elemental, Earth<br />
2 6<br />
16 72 1<br />
Elemental, Fire<br />
2 12 16 72 1<br />
Elemental, Water<br />
2 6,Sw18 16 72 1<br />
Elf, Sea<br />
8 9,Sw15 2+2 15 1<br />
Elf, Silvanesti<br />
5 12 4 24 1<br />
Elf, Wild<br />
8 12 2+2 11 1<br />
Ettin<br />
3 12 10 55 2<br />
Fawn, White<br />
5 21 3<br />
19 1;2<br />
Fetch<br />
4 6 9<br />
51 2<br />
Fireshadow<br />
0 6 13+3 63 3<br />
Frog, Giant<br />
7 3,Sw9 3<br />
16 1<br />
Froghemoth<br />
4 3,Sw9 16 75 1<br />
Fungi, Violet<br />
7 1 3<br />
17 ld4<br />
Gargoyle<br />
5 9,Fl15 4+4 26 4<br />
Gas Spore<br />
9 3 0<br />
1 1<br />
Gelatmous Cube<br />
8 6 4<br />
21 1<br />
Ghast<br />
4 13 4<br />
23 3<br />
Ghoul<br />
6 9<br />
2<br />
13 3<br />
Giant, Hill<br />
3 12 12+2 61 1<br />
Golem, Clay<br />
7 7<br />
11 50 1<br />
Golem, Iron<br />
3<br />
6<br />
18 80 1<br />
Golem, Stone<br />
5 6<br />
14 60 1<br />
Gorgon<br />
2 12 8 44 1<br />
Green Slime<br />
9<br />
0<br />
2<br />
10 0<br />
Griffon<br />
3 12,Fl30 7 39 3<br />
Griffon, Hatchling<br />
5<br />
2<br />
2 10 3<br />
Groaning Spirit<br />
0 15 7 37<br />
1<br />
SD AL<br />
N N<br />
N N<br />
N N<br />
LE 11<br />
Y LG<br />
Y N<br />
N N<br />
Y N<br />
N N<br />
Y NE<br />
Y CE<br />
N N<br />
N N<br />
Y N<br />
Y N(E)<br />
Y N<br />
Y NE<br />
Y CE<br />
N Y<br />
Y LG<br />
Y LE<br />
N 175<br />
1,400<br />
N LE<br />
Y 2,000<br />
Y NE<br />
9,000<br />
10,000<br />
10,000<br />
10,000<br />
N LE<br />
10,000<br />
13,000<br />
9.000<br />
11,000<br />
N<br />
13,000<br />
N<br />
9,000<br />
1d10 Y Y CE<br />
3d4 Y Y N(E)<br />
1d4 Y Y N<br />
1d8 Y Y LG<br />
1d4 N N CN<br />
1d8 Y Y N<br />
1d6/1d6/2d6 Y Y N<br />
3d6 N N N<br />
2d10 Y Y N<br />
4d8 Y Y N<br />
3d8 Y Y N<br />
5d6 Y Y N<br />
1d10 Y Y CG<br />
1d10 Y Y NG<br />
1d10 Y Y NG<br />
1d10/2d6 N Y CE<br />
1d8;1d4/1d4 Y Y LG<br />
Spc Y Y N<br />
1d6/1d6/3d6 Y Y CE<br />
2d4 Y N N<br />
5d10 N N N<br />
Rot Y N N<br />
1d3(×2)/1d6/1d4 N Y<br />
Spc Y Y N<br />
2d4 Y Y N<br />
1d4/1d4/1d8 Y Y CE<br />
1d3/1d3/1d6 Y Y CE<br />
2d6+7 Y N CE<br />
3d10 Y Y N<br />
4d10 Y Y N<br />
3d8 Y Y N<br />
2d6 Y N N<br />
0 Y Y N<br />
1d4/1d4/2d8 N N N<br />
1/1/1d4 N N N<br />
1d8 Y Y CE<br />
THAC0<br />
15<br />
20<br />
15<br />
14,000<br />
20<br />
15<br />
17<br />
15<br />
15<br />
19<br />
Value<br />
15<br />
175<br />
175<br />
175<br />
420<br />
975<br />
65<br />
15 650<br />
1<br />
17 27<br />
7<br />
11 2<br />
N<br />
19 65<br />
13 2,00<br />
17 175<br />
19 975<br />
17 270<br />
19 15<br />
19 65<br />
15 175<br />
5<br />
5 10<br />
5 10<br />
5<br />
19 1<br />
17<br />
19 120<br />
11 3,000<br />
1<br />
11 3,000<br />
7<br />
17 270<br />
5 6,0<br />
17 175<br />
20 120<br />
17 975<br />
17 650<br />
19 175<br />
9 3<br />
9 8,000<br />
5 15,000<br />
7 10,000<br />
13 1,400<br />
19 120<br />
13<br />
19<br />
13 4
Name<br />
Hag, Sea<br />
Harginn<br />
Harpy<br />
Hell Hound<br />
Ildriss<br />
Invisible Stalker<br />
Jellyfish<br />
Kech<br />
Kender<br />
King of the Deep<br />
Koalinth<br />
Leech, Giant<br />
Leucrotta<br />
Lich<br />
Lion, Spotted<br />
Mastiff, Shadow<br />
Man, Bandit<br />
Man, Common<br />
Man, Guard<br />
Man, Knight<br />
Man, Merchant<br />
Man, Mercenary<br />
Man, Warrior<br />
Mermen<br />
Mihstu<br />
Mimic, Killer<br />
Minotaur, Bloodsea<br />
Mobat<br />
Mold, Brown<br />
Mold, Yellow<br />
Naga, Spirit<br />
Nightmare<br />
Ochre Jelly<br />
Ogre/Chieftain<br />
Para-Elem, Smoke<br />
Pedipalp, Huge<br />
Piercer<br />
Prickleback<br />
Quasi-Elem, Light.<br />
Rat, Giant<br />
Ray, Manta<br />
Revenant<br />
Salmon School<br />
Sea Serpent, Giant<br />
Shadow<br />
Sirme<br />
Skeleton<br />
Skeleton Warrior<br />
Skyfisher<br />
Slig/ Ghaggler<br />
Slug, Giant<br />
Snake, Gi Constr.<br />
Spectral Minion<br />
Spectre<br />
Spider, Whisper<br />
Stag, Giant<br />
Stag, White<br />
Storoper<br />
Taer, Forest<br />
Takhisis (Dream)<br />
Thanoi<br />
Troll<br />
Umber Hulk<br />
Undead Beast<br />
Vampire<br />
Varrdig<br />
Vulture, Giant<br />
Wemic<br />
Wight<br />
Will-o-Wisp<br />
Willow, Black<br />
Wolf, Dire<br />
Wolf, Winter<br />
Wolverme, Giant<br />
Wraith<br />
Yel. Musk Creeper<br />
Zombie<br />
AC<br />
7<br />
3<br />
7<br />
4<br />
2<br />
3<br />
9<br />
4<br />
8<br />
-3<br />
5<br />
9<br />
4<br />
0<br />
5/6<br />
6<br />
4<br />
10<br />
4<br />
2<br />
10<br />
6<br />
2<br />
7<br />
-2<br />
7<br />
6<br />
7<br />
9<br />
9<br />
4<br />
-4<br />
8<br />
5/4<br />
3<br />
4<br />
3<br />
7<br />
2<br />
7<br />
6<br />
10<br />
3<br />
2<br />
7<br />
3<br />
2<br />
3<br />
3<br />
8<br />
5<br />
2<br />
2<br />
4<br />
7<br />
-5<br />
0<br />
4<br />
0<br />
4<br />
4<br />
2<br />
6<br />
1<br />
5<br />
7<br />
6(5)<br />
5<br />
-8<br />
2<br />
6<br />
5<br />
4<br />
4<br />
7<br />
8<br />
MV<br />
Sw15<br />
15<br />
6,Fl15<br />
12<br />
3,Fl24<br />
12,Fl12<br />
Sw14<br />
15,C16<br />
6<br />
3,Sw18<br />
Sw12<br />
3,Sw3<br />
18<br />
6<br />
12<br />
18<br />
12<br />
12<br />
12<br />
9<br />
12<br />
12<br />
9<br />
l,Sw18<br />
6<br />
3<br />
12<br />
3,Fl15<br />
0<br />
0<br />
12<br />
15,Fl36<br />
3<br />
9<br />
6,Fl18<br />
9<br />
1<br />
Sw12<br />
18<br />
12,Sw6<br />
Sw18<br />
9<br />
Sw15<br />
Sw15<br />
12<br />
12,Sw24<br />
12<br />
6<br />
3,Fl24<br />
9/6,Sw15<br />
6<br />
9<br />
30<br />
15,Fl30<br />
9,Wb12<br />
21<br />
24<br />
1<br />
18<br />
6,Fl18<br />
9,Sw15<br />
12<br />
6,Br6<br />
0, Sw9<br />
12,Fl18<br />
6,Swl8<br />
3 ,Fl24<br />
12<br />
12<br />
Fl18<br />
1/4<br />
18<br />
18<br />
15<br />
12,Fl24<br />
0<br />
6<br />
HD<br />
3<br />
4+4<br />
7<br />
7<br />
4<br />
8<br />
2<br />
5<br />
1<br />
80<br />
1+1<br />
4<br />
6+1<br />
11<br />
6+2<br />
4<br />
5<br />
1<br />
3<br />
6<br />
2<br />
4<br />
5<br />
1 + 1<br />
8 + 2<br />
10<br />
6 + 3<br />
4<br />
NA<br />
NA<br />
9<br />
6 + 6<br />
6<br />
4+1/7<br />
16<br />
2 + 2<br />
4<br />
4 + 4<br />
12<br />
1/2<br />
8<br />
8<br />
1 ea<br />
30<br />
3 + 3<br />
7<br />
1<br />
9 + 12<br />
4<br />
3 + 3<br />
12<br />
6+1<br />
10<br />
7+3<br />
8+8<br />
5<br />
10<br />
6<br />
3+6<br />
16<br />
4<br />
6 + 6<br />
8 + 8<br />
12 + 12<br />
8 + 3<br />
0 + 6<br />
2 + 2<br />
5 + 8<br />
4 + 3<br />
9<br />
16<br />
4 + 4<br />
6<br />
4 + 4<br />
5 + 3<br />
3<br />
2<br />
hp<br />
20<br />
22<br />
40<br />
39<br />
18<br />
43<br />
8<br />
30<br />
6<br />
640<br />
7<br />
18<br />
33<br />
50<br />
32<br />
20<br />
26<br />
7<br />
20<br />
35<br />
6<br />
17<br />
30<br />
7<br />
41<br />
49<br />
35<br />
19<br />
NA<br />
NA<br />
53<br />
38<br />
36<br />
20/36<br />
72<br />
14<br />
17<br />
22<br />
60<br />
3<br />
48<br />
42<br />
5 ea<br />
135<br />
21<br />
38<br />
6<br />
67<br />
26<br />
18<br />
69<br />
31<br />
55<br />
39<br />
54<br />
26<br />
77<br />
31<br />
22<br />
128<br />
21<br />
37<br />
51<br />
92<br />
42<br />
35<br />
11<br />
33<br />
25<br />
48<br />
90<br />
22<br />
27<br />
24<br />
31<br />
15<br />
9<br />
#AT<br />
1<br />
1<br />
3<br />
1<br />
1<br />
1<br />
1<br />
3<br />
1<br />
8<br />
1<br />
1<br />
1<br />
1<br />
3<br />
1<br />
1<br />
1<br />
1<br />
3/2<br />
1<br />
1<br />
1<br />
1<br />
4<br />
1<br />
2<br />
1<br />
0<br />
1<br />
1<br />
3<br />
1<br />
1<br />
1<br />
3<br />
1<br />
4<br />
1<br />
1<br />
2<br />
1<br />
10<br />
2<br />
1<br />
1<br />
1<br />
1<br />
1;2<br />
1<br />
1<br />
2<br />
1<br />
1<br />
1<br />
1;2<br />
3<br />
1<br />
3<br />
3<br />
2<br />
3<br />
3<br />
3<br />
1<br />
2(l)<br />
1<br />
3<br />
1<br />
1<br />
10<br />
1<br />
1<br />
3<br />
1<br />
2d6<br />
1<br />
Dmg<br />
1d4 + 6<br />
1d4 + 4<br />
1d3/1d3/ld6<br />
1d10<br />
3d4<br />
4d4<br />
1d10<br />
1d4+1/1d4+1/1d6<br />
1d6<br />
1d6 + 7(× 8)<br />
1d8 + 1<br />
1d4<br />
3d6<br />
1d10<br />
1d4/1d4/1d12<br />
2d4<br />
1d8<br />
1d4<br />
1d8+1<br />
1d8+2<br />
1d4<br />
1d6<br />
1d8+2<br />
1d8<br />
1d6+1(×4)<br />
3d4<br />
2d4/1d4<br />
2d4<br />
0<br />
1d8<br />
1d3<br />
2d4/2d4+2/2d4+2<br />
3d4<br />
1d10/2d6 +2<br />
2d8<br />
1d6/1d6/1d8<br />
4d6<br />
1d6(×4)<br />
1d6, + 1/HD<br />
1d3<br />
3d4/2d10<br />
2d8<br />
1(×10)<br />
1d10/3d12<br />
1d4+1<br />
1d8<br />
1d6<br />
1d8<br />
1d8+2;1d6/1d6<br />
1d6+2<br />
1d12<br />
1d412d4<br />
1d10<br />
1d8<br />
2d6<br />
4d4; 1d4/ 1d4<br />
1d12/1d6/1d6<br />
1d10<br />
1d4/1d4/1d8<br />
2d8/3d6/12d10<br />
1d8/1d8<br />
1d4+1/1d4+1/2d6<br />
3d4/3d4/2d5<br />
1d8+1/1d8+1/3d8<br />
1d6 + 4<br />
1d4/1d4(4d4)<br />
1d4<br />
1d4/1d4/wpn<br />
1d4<br />
2d8<br />
1d4(×10)<br />
2d4<br />
2d4<br />
1d4+1/1d4+1/2d4<br />
1d6<br />
Spc<br />
1d8<br />
Abbreviations<br />
AC = Armor Class, AL = Alignment, #AT = Number of Attacks per round, Br = Move tendencies, Dmg = Damage, E = Evi1, (E) = Evil tendencies,<br />
Ft = Fighter—Level # gliding, HD = Hit Dice, Ho = Move when hopping, hp = Hit Points, L = Lawful, MV tendencies, SA = Special Attacks,<br />
SD = Special Defenses, Spc = Special, SW = Swi Varies, Wb = Move in web<br />
SA<br />
Y<br />
Y<br />
Y<br />
Y<br />
Y<br />
Y<br />
Y<br />
Y<br />
Y<br />
Y<br />
N<br />
Y<br />
N<br />
Y<br />
Y<br />
Y<br />
N<br />
N<br />
N<br />
N<br />
N<br />
N<br />
N<br />
N<br />
Y<br />
Y<br />
N<br />
Y<br />
Y<br />
Y<br />
Y<br />
N<br />
N<br />
N<br />
Y<br />
Y<br />
Y<br />
Y<br />
Y<br />
Y<br />
Y<br />
Y<br />
N<br />
N<br />
Y<br />
Y<br />
N<br />
Y<br />
Y<br />
Y<br />
Y<br />
Y<br />
N<br />
Y<br />
Y<br />
Y<br />
N<br />
Y<br />
Y<br />
Y<br />
N<br />
Y<br />
Y<br />
Y<br />
Y<br />
Y<br />
N<br />
N<br />
Y<br />
Y<br />
Y<br />
N<br />
Y<br />
Y<br />
Y<br />
Y<br />
N<br />
SD<br />
Y<br />
Y<br />
N<br />
Y<br />
Y<br />
Y<br />
Y<br />
Y<br />
Y<br />
71,000<br />
N<br />
N<br />
Y<br />
Y<br />
Y<br />
Y<br />
N<br />
N<br />
N<br />
N<br />
N<br />
N<br />
N<br />
N<br />
Y<br />
Y<br />
Y<br />
Y<br />
Y<br />
Y<br />
N<br />
N<br />
Y<br />
N<br />
Y<br />
N<br />
N<br />
Y<br />
Y<br />
N<br />
N<br />
Y<br />
Y<br />
N<br />
Y<br />
Y<br />
Y<br />
Y<br />
N<br />
Y<br />
Y<br />
N<br />
Y<br />
Y<br />
Y<br />
Y<br />
Y<br />
Y<br />
Y<br />
N<br />
Y<br />
Y<br />
N<br />
Y<br />
Y<br />
Y<br />
N<br />
Y<br />
Y<br />
Y<br />
Y<br />
N<br />
N<br />
N<br />
Y<br />
Y<br />
N<br />
AL<br />
CE<br />
NE<br />
CE<br />
LE<br />
NE<br />
N<br />
N<br />
NE<br />
CN<br />
LE<br />
N<br />
CE<br />
N(E)<br />
N<br />
N(E)<br />
C(E)<br />
Any<br />
Any<br />
LG<br />
C(E)<br />
CE<br />
Any<br />
N<br />
NE<br />
N<br />
CE<br />
NE<br />
N<br />
N<br />
CE<br />
N<br />
17/13<br />
N<br />
N<br />
N<br />
N<br />
N(C)<br />
N<br />
N<br />
N<br />
N<br />
20,000<br />
CE<br />
Any<br />
N<br />
N(E)<br />
N<br />
LE<br />
N<br />
N<br />
Any<br />
LE<br />
CE<br />
N<br />
LG<br />
CE<br />
N<br />
7,000<br />
LE<br />
CE<br />
CE<br />
8,000<br />
CE<br />
NE<br />
N<br />
N<br />
LE<br />
CE<br />
N(E)<br />
NE<br />
NE<br />
LE<br />
N<br />
N<br />
THAC0<br />
17<br />
15<br />
13<br />
11<br />
17<br />
1<br />
17<br />
15<br />
19<br />
19<br />
17<br />
15<br />
9<br />
17<br />
15<br />
10<br />
17<br />
15<br />
19<br />
17<br />
15<br />
19<br />
13<br />
11<br />
17<br />
NA<br />
Spc<br />
11<br />
15<br />
l75/650<br />
5<br />
17<br />
1<br />
20<br />
13<br />
13<br />
17<br />
13<br />
19<br />
11<br />
9<br />
11<br />
13<br />
1<br />
15<br />
15<br />
1<br />
17<br />
13<br />
11<br />
19<br />
15<br />
15<br />
11<br />
15<br />
15<br />
15<br />
17<br />
19<br />
Value<br />
975<br />
420<br />
975<br />
270<br />
270<br />
35<br />
120<br />
27<br />
975<br />
7,000<br />
175<br />
15<br />
65<br />
27<br />
3<br />
12<br />
17<br />
35<br />
3,000<br />
420<br />
v<br />
v<br />
5,000<br />
420<br />
420<br />
15<br />
1,695<br />
650<br />
975<br />
65<br />
15,000<br />
3<br />
650<br />
12<br />
975<br />
175<br />
975<br />
3,000<br />
65
y Grubb, Hickman, and Niles<br />
THIS IS THE FINAL INSTALLMENT IN THIS I28-PAGE BOOK CONTAINS THE<br />
THE <strong>DRAGONLANCE®</strong> MAPS, AND DESCRIPTIONS<br />
CLASSICS SERIES, THE DRA- THAT WILL TAKE THE HE-<br />
MATIC CONCLUSION TO ROES OF LEGEND FROM THE<br />
THE ENTIRE I4-MODULE ANCIENT PORT OF TARSIS<br />
DRAGONLANCE SAGA. TO THE DEPTHS OF THE<br />
WITHIN ARE THE REPRINTS BLOOD SEA AND, FINALLY,<br />
OF DLI0 DRAGONS OF<br />
D REAMS, DLI2 D RAGONS<br />
TO THE CORRUPT CITY OF<br />
NERAKA, THE HEART OF<br />
OF FAITH, DLI3 DRAGONS THE DARK QUEEN’S EM-<br />
OF TRUTH, AND DLI4 PIRE. CAN THE HEROES AT<br />
D RAGONS OF TRIUMPH, LAST FOIL TAKHISIS’S EVIL<br />
FULLY UPDATED TO PLANS FOREVER? THE AN-<br />
AD&D® 2ND EDITION RULES. SWER LIES WITHIN THESE PAGES!