Yur.Photo 1.5" KS - Yuraku.com
Yur.Photo 1.5" KS - Yuraku.com
Yur.Photo 1.5" KS - Yuraku.com

You also want an ePaper? Increase the reach of your titles
YUMPU automatically turns print PDFs into web optimized ePapers that Google loves.
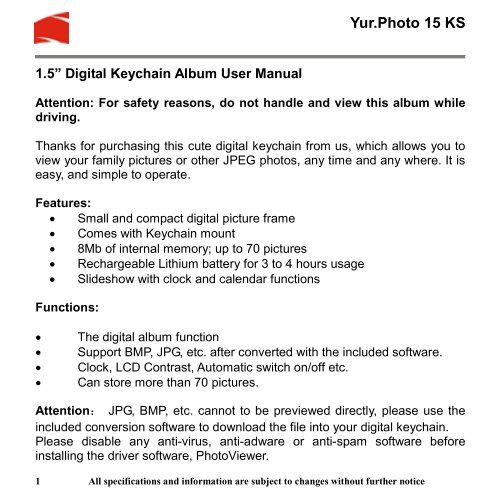
1.5” Digital Keychain Album User Manual<br />
<strong>Yur</strong>.<strong>Photo</strong> 15 <strong>KS</strong><br />
Attention: For safety reasons, do not handle and view this album while<br />
driving.<br />
Thanks for purchasing this cute digital keychain from us, which allows you to<br />
view your family pictures or other JPEG photos, any time and any where. It is<br />
easy, and simple to operate.<br />
Features:<br />
• Small and <strong>com</strong>pact digital picture frame<br />
• Comes with Keychain mount<br />
• 8Mb of internal memory; up to 70 pictures<br />
• Rechargeable Lithium battery for 3 to 4 hours usage<br />
• Slideshow with clock and calendar functions<br />
Functions:<br />
• The digital album function<br />
• Support BMP, JPG, etc. after converted with the included software.<br />
• Clock, LCD Contrast, Automatic switch on/off etc.<br />
• Can store more than 70 pictures.<br />
Attention: JPG, BMP, etc. cannot to be previewed directly, please use the<br />
included conversion software to download the file into your digital keychain.<br />
Please disable any anti-virus, anti-adware or anti-spam software before<br />
installing the driver software, <strong>Photo</strong>Viewer.<br />
1 All specifications and information are subject to changes without further notice
● Button Functions<br />
<strong>Yur</strong>.<strong>Photo</strong> 15 <strong>KS</strong><br />
MENU<br />
1. Press this button to turn on the digital album<br />
2. Depress for several minutes to shut down<br />
3. Access the Control functions<br />
UP<br />
1. Press this button to browse the picture from last or to browse<br />
the picture on forward.<br />
DOWN<br />
2. Press this button to browse the picture from first or to browse<br />
the picture on backward.<br />
USB interface: for picture downloads and battery charging<br />
RESET key: press reset key to restart the digital keychain and restore to<br />
factory setting.<br />
★ When the battery energy is low, the digital album will display "Low Power",<br />
please connect the digital album to the PC USB port to charge the battery<br />
immediately.<br />
2 All specifications and information are subject to changes without further notice
How to Browse pictures.<br />
<strong>Yur</strong>.<strong>Photo</strong> 15 <strong>KS</strong><br />
• Depress MENU button for several seconds to enter Mode menu list.<br />
The menu includes: OFF, Display mode, Clock Set, Automatic switch<br />
ON/OFF, Clock Display, LCD Contrast, Delete, Exit.<br />
• Hold MENU key to start the machine. Up-down button browse the<br />
picture. (Picture)<br />
• You can set manual browse or automatic browse. Automatic browse<br />
can direct browse all pictures individually.<br />
• If no file in the photo frame, it will display it as below:<br />
3 All specifications and information are subject to changes without further notice
MENU Functions:<br />
Press MENU button to access menu setup (picture)<br />
<strong>Yur</strong>.<strong>Photo</strong> 15 <strong>KS</strong><br />
Depress the Up or Down button will scroll the option list. After you<br />
make your choice, press MENU button to confirm this option.<br />
1. Turn off (picture)<br />
a. Press Up or Down buttons and scroll to OFF,<br />
b. Press MENU button to confirm.<br />
2. Display mode:<br />
4 All specifications and information are subject to changes without further notice
<strong>Yur</strong>.<strong>Photo</strong> 15 <strong>KS</strong><br />
a. Operation the Display mode<br />
b. Select the Display mode: press MENU button to access, press<br />
Up or Down to select<br />
c. Choose Automatic mode: press MENU to access, scroll up or<br />
down to adjust time. Press MENU to return to main menu list.<br />
d. Select Automatic mode: you can automatically preview the<br />
picture according to the set up time.<br />
e. Select the Manual mode: press MENU to withdraw. You can<br />
control the preview picture with the Up and Down buttons.<br />
3. Clock set (picture)<br />
a. Clock setup: Go to the main menu<br />
b. Select the Clock Set in the option list.<br />
c. Press MENU to Access<br />
d. You can use MENU button to change the values for YEAR,<br />
MONTH, DAY, SECOND, WEEK. Scroll the Up and Down<br />
buttons to increase or decrease the values.<br />
e. Press MENU button to return to main menu.<br />
5 All specifications and information are subject to changes without further notice
4. Auto on/off<br />
<strong>Yur</strong>.<strong>Photo</strong> 15 <strong>KS</strong><br />
a. Auto on/off setting, this function allows you to turn On and Off<br />
the Digital Album on its own.<br />
b. Press MENU to access main menu<br />
c. Select Auto ON/OFF on the option list<br />
d. You can set the Auto ON/OFF to ON or OFF.<br />
e. When set to ON, the auto on time and the auto off time can be<br />
set. These 2 sets of values cannot be the same.<br />
f. Scroll Up and Down button to adjust the time values<br />
g. Press MENU again to exit the setup and return to main menu<br />
h. You cannot set the time when the Auto ON/OFF mode is set to<br />
off.<br />
5. Clock Disp<br />
a. Setup for the Clock display on the LCD<br />
b. Select Clock Disp, press MENU button to access<br />
c. Set the Disp Clock to Normal. It will display the clock<br />
6 All specifications and information are subject to changes without further notice
information full screen.<br />
<strong>Yur</strong>.<strong>Photo</strong> 15 <strong>KS</strong><br />
d. Set the Disp Clock to Water Mark. The clock information will<br />
display superimpose on the viewed images.<br />
6. Contrast set<br />
a. Brightness adjustment<br />
b. Select Contrast from the main menu, press MENU to access<br />
c. Adjust contrast value with the Up and Down buttons; the<br />
brightness range values from 0 – 9.<br />
d. Press MENU button again to return to main menu.<br />
7 All specifications and information are subject to changes without further notice
7. Exit:<br />
Select Exit, press MENU button to return to display mode<br />
<strong>Yur</strong>.<strong>Photo</strong> 15 <strong>KS</strong><br />
Connect <strong>com</strong>puter<br />
Please disable any anti-virus, anti-adware or anti-spam software before<br />
installing the driver software, <strong>Photo</strong>Viewer. The anti-adware software tend<br />
to wrongly identify the driver as an adware and prevent proper installation.<br />
After installation, you can enable the anti-adware software again.<br />
Install the <strong>Photo</strong> Viewer software into PC<br />
1. Put the CD driver into the PC, go into “My Computer” and double-click<br />
the CD driver, such as D:(like below)<br />
8 All specifications and information are subject to changes without further notice
2. Double-click the <strong>Photo</strong> View Setup<br />
3. Click Next<br />
4. Click Next again<br />
<strong>Yur</strong>.<strong>Photo</strong> 15 <strong>KS</strong><br />
5. Choose the drive which you want to install in, such as C:/, click next<br />
9 All specifications and information are subject to changes without further notice
6. Click Next again to continues the installation<br />
7. If the current setting okay, please click Next<br />
<strong>Yur</strong>.<strong>Photo</strong> 15 <strong>KS</strong><br />
10 All specifications and information are subject to changes without further notice
8. Processing the installation and click Finish<br />
<strong>Yur</strong>.<strong>Photo</strong> 15 <strong>KS</strong><br />
Note: After <strong>com</strong>pletion of the installation, you can enable your<br />
anti-adware software again.<br />
Download the Pictures to <strong>Photo</strong> Display<br />
1. Collect your photo frame to the <strong>com</strong>puter with USB cable correctly.<br />
2. The screen will show out “Power” and “USB Update”, press UP or<br />
DOWM to select “USB Update”.<br />
3. Press MENU to enter “USB Update”<br />
4. Double-click the photo viewer icon on the desktop. After that, the photo<br />
viewer window will <strong>com</strong>e out like below:<br />
11 All specifications and information are subject to changes without further notice
<strong>Yur</strong>.<strong>Photo</strong> 15 <strong>KS</strong><br />
5.<br />
Find the photo which you want to transfer to photo frame, such as<br />
“d:photo”<br />
6. Select the photo file, the red dot line is the maximum size can show in<br />
the photo frame:<br />
12 All specifications and information are subject to changes without further notice
<strong>Yur</strong>.<strong>Photo</strong> 15 <strong>KS</strong><br />
7. Click synchronize to transfer the photo file into the photo frame.<br />
Specifications:<br />
• Display: 1.5" CSTN<br />
• Resolution: 128 x 128 pixel<br />
• Colour: 65K CSTN<br />
• Format supported: JPEG / BMP<br />
• Capacity: 8Mb built-in with up to 70 images<br />
• Functions: Play (display), Slideshow, Clock, and Calendar<br />
• Battery: Rechargeable, Lithium type<br />
• Usage: 3 to 4 hours continuous play<br />
Accessories:<br />
• <strong>Yur</strong>.<strong>Photo</strong> 1.5” <strong>KS</strong><br />
• USB cable<br />
• Driver CD<br />
• User manual<br />
• Keychain<br />
13 All specifications and information are subject to changes without further notice
System requirements:<br />
• Intel Pentium IV or later<br />
• One available USB v1.1 port or higher<br />
• Windows XP or later<br />
• CD-ROM drive for application installation<br />
• <strong>Photo</strong>s in 128 x 128 pixel resolution<br />
- end -<br />
<strong>Yur</strong>.<strong>Photo</strong> 15 <strong>KS</strong><br />
14 All specifications and information are subject to changes without further notice