Integral T3 Compact - LIPINSKI TELEKOM GmbH
Integral T3 Compact - LIPINSKI TELEKOM GmbH
Integral T3 Compact - LIPINSKI TELEKOM GmbH

You also want an ePaper? Increase the reach of your titles
YUMPU automatically turns print PDFs into web optimized ePapers that Google loves.
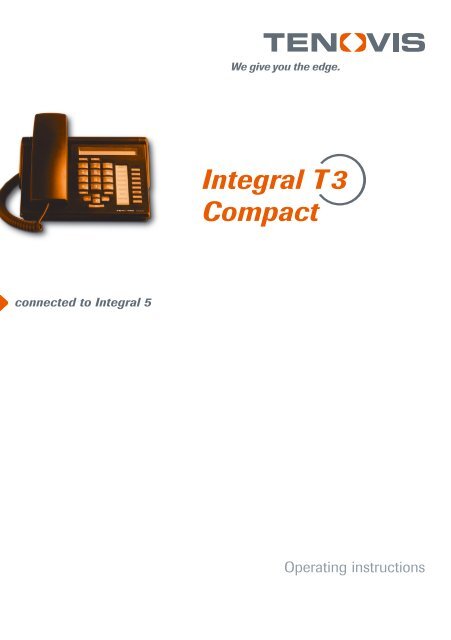
connected to <strong>Integral</strong> 5<br />
<strong>Integral</strong> T 3<br />
<strong>Compact</strong><br />
Operating instructions
Important notes<br />
Important notes<br />
Which systems are suitable for your telephone<br />
This telephone is only intended for connection to Tenovis telecommunication<br />
systems. It may not be directly connected to the public telephone network.<br />
Declaration of Conformity<br />
This telephone is intended for connection to digital interfaces of Tenovis<br />
telecommunication systems and fulfils the basic requirements of<br />
EU directive 1999/5/EU (Radio and telecommunication terminal equipment,<br />
R&TTE).<br />
This telephone is not designed for direct operation on public telephone network<br />
interfaces.<br />
When using link and DSS modules:<br />
This link/DSS module is intended for connection to <strong>T3</strong> telephones and meets the<br />
basic requirements of EU directive 1999/5/EU (Radio and telecommunication<br />
terminal equipment, R&TTE). This link/DSS module is only designed for operation<br />
on <strong>T3</strong> telephones.<br />
If problems occur when operating the device, please consult your dealer or Tenovis<br />
Service.<br />
The Declaration of Conformity can be requested from the following internet address.<br />
www.tenovis.com/deutsch/verzeichnis/conformance.htm or search under Index for<br />
the keyword “Conformity”.<br />
To which telephone system is your telephone connected<br />
You can find out the type of Tenovis system to which your telephone is connected<br />
as follows:<br />
With the handset on the hook, press “+”:<br />
If your telephone is connected to the Tenovis I5 system, Contrast appears as the<br />
first menu item.<br />
If your telephone is connected to the Tenovis I33/I55 system, Loudspeaker appears<br />
as the first menu item.<br />
Tips on phone location<br />
Place the telephone on a non-slip surface, especially if the furniture is new or has<br />
recently been cleaned or polished. Enamels or cleaning agents may contain<br />
substances, which soften the base parts of your telephone, and the softened bases<br />
can leave undesirable marks on the furniture. Tenovis cannot assume liability for<br />
damages of this kind.<br />
2
Important notes<br />
Important notes<br />
Repairs<br />
The equipment may only be opened or repaired by a qualified technician. Do not<br />
open the telephone yourself. Doing so could damage the unit and cause it to<br />
malfunction.<br />
What you should definitely read<br />
You should definitely read the following sections. These sections explain all the<br />
parts of your telephone. You will find out how to use your telephone.<br />
Overview of your telephone (→ Page 6)<br />
Basic operating principles (→ Page 8)<br />
i<br />
You will often find this information line at the bottom of a page. It contains<br />
additional information that will help you to make better use of the functions.<br />
Additional functions<br />
Functions that are marked with a box are not part of the standard scope of<br />
functions of your telephone.<br />
If you want to use these functions, please contact your telephone system<br />
administrator.<br />
cont.<br />
... making your telephone easy to use<br />
You can make the following settings immediately or during your first telephone call:<br />
You can adapt the ringer and handset volumes and the handsfree settings to suit<br />
your environment (→ Page LEERER MERKER).<br />
You can change the display contrast to suit the ambient lighting (→ Page<br />
LEERER MERKER).<br />
You can select the language for all the display messages. The available languages<br />
are English, French and German (→ Page 59).<br />
You can store frequently used numbers in a personal telephone directory<br />
(→ Page 32). You can modify the personal telephone directory entries yourself.<br />
Operating instructions in other languages<br />
Would you like to read these operating instructions in another language? You can<br />
reach our document database from the Tenovis homepage www.tenovis.com. Look<br />
there to find out of the language version you want is available for download.<br />
3
Table of Contents<br />
An introduction to your telephone<br />
Important Notes . . . . . . . . . . . . . . . . . . . . . . . . . . . . . . . . . . . . . . . . . . . . . . . . . . . . . . 2<br />
Overview drawing . . . . . . . . . . . . . . . . . . . . . . . . . . . . . . . . . . . . . . . . . . . . . . . . . . . . 6<br />
All keys at a glance . . . . . . . . . . . . . . . . . . . . . . . . . . . . . . . . . . . . . . . . . . . . . . . . . . . 7<br />
Getting to know your telephone<br />
Basic operating principles . . . . . . . . . . . . . . . . . . . . . . . . . . . . . . . . . . . . . . . . . . . . . . 8<br />
Using your telephone as normal<br />
Accepting calls . . . . . . . . . . . . . . . . . . . . . . . . . . . . . . . . . . . . . . . . . . . . . . . . . . . . . . . 11<br />
Making a call . . . . . . . . . . . . . . . . . . . . . . . . . . . . . . . . . . . . . . . . . . . . . . . . . . . . . . . . . 14<br />
Making several connections simultaneously . . . . . . . . . . . . . . . . . . . . . . . . . . . . . . 19<br />
Three-way telephone calls (conference) . . . . . . . . . . . . . . . . . . . . . . . . . . . . . . . . . 22<br />
Listening to the conversation via the loudspeaker . . . . . . . . . . . . . . . . . . . . . . . . . 24<br />
Telephoning made easy<br />
Call list – who has called? . . . . . . . . . . . . . . . . . . . . . . . . . . . . . . . . . . . . . . . . . . . . . 25<br />
Diverting calls . . . . . . . . . . . . . . . . . . . . . . . . . . . . . . . . . . . . . . . . . . . . . . . . . . . . . . . . 28<br />
Using the telephone book . . . . . . . . . . . . . . . . . . . . . . . . . . . . . . . . . . . . . . . . . . 32<br />
Reminders (Appointments) . . . . . . . . . . . . . . . . . . . . . . . . . . . . . . . . . . . . . . . . . . . . . 37<br />
Viewing charges . . . . . . . . . . . . . . . . . . . . . . . . . . . . . . . . . . . . . . . . . . . . . . . . . . . . . . 43<br />
Locking your telephone . . . . . . . . . . . . . . . . . . . . . . . . . . . . . . . . . . . . . . . . . . . . . . . . 46<br />
Sending and receiving messages . . . . . . . . . . . . . . . . . . . . . . . . . . . . . . . . . . . . . . . 48<br />
Outside business hours (Night service) . . . . . . . . . . . . . . . . . . . . . . . . . . . . . . . . . . 52<br />
Changing call diversion from another phone . . . . . . . . . . . . . . . . . . . . . . . . . . . . . . 53<br />
Using the telephone with partners<br />
Using the telephone with partners . . . . . . . . . . . . . . . . . . . . . . . . . . . . . . . . . . . . . . .<br />
55<br />
4
Table of Contents<br />
Customising your telephone<br />
cont.<br />
Setting audio, contrast and language . . . . . . . . . . . . . . . . . . . . . . . . . . . . . . . . . . . . 56<br />
Setting up function keys . . . . . . . . . . . . . . . . . . . . . . . . . . . . . . . . . . . . . . . . . . . . . . . 60<br />
Changing general settings . . . . . . . . . . . . . . . . . . . . . . . . . . . . . . . . . . . . . . . . . . . . . 66<br />
Settings for your telephone system . . . . . . . . . . . . . . . . . . . . . . . . . . . . . . . . . . . . . . 76<br />
Extras for your telephone<br />
Links . . . . . . . . . . . . . . . . . . . . . . . . . . . . . . . . . . . . . . . . . . . . . . . . . . . . . . . . . . . . . . . 81<br />
DSS module . . . . . . . . . . . . . . . . . . . . . . . . . . . . . . . . . . . . . . . . . . . . . . . . . . . . . . . . . 82<br />
Headset . . . . . . . . . . . . . . . . . . . . . . . . . . . . . . . . . . . . . . . . . . . . . . . . . . . . . . . . . . . . . 83<br />
Hotel functions . . . . . . . . . . . . . . . . . . . . . . . . . . . . . . . . . . . . . . . . . . . . . . . . . . . . . . . 84<br />
Look it up<br />
Overview of telephone functions . . . . . . . . . . . . . . . . . . . . . . . . . . . . . . . . . . . . . . . . 91<br />
Messages in the display . . . . . . . . . . . . . . . . . . . . . . . . . . . . . . . . . . . . . . . . . . . . . . . 94<br />
Symbol table . . . . . . . . . . . . . . . . . . . . . . . . . . . . . . . . . . . . . . . . . . . . . . . . . . . . . . . . . 96<br />
Ringing- and handset tones . . . . . . . . . . . . . . . . . . . . . . . . . . . . . . . . . . . . . . . . . . . 97<br />
Menu overview . . . . . . . . . . . . . . . . . . . . . . . . . . . . . . . . . . . . . . . . . . . . . . . . . . . . . . . 98<br />
If something’s not working . . . . . . . . . . . . . . . . . . . . . . . . . . . . . . . . . . . . . . . . . . . . . 100<br />
Key words . . . . . . . . . . . . . . . . . . . . . . . . . . . . . . . . . . . . . . . . . . . . . . . . . . . . . . . . . . .<br />
101<br />
5
Overview of your telephone<br />
Your <strong>T3</strong> <strong>Compact</strong> at a glance<br />
Number keys with<br />
letters<br />
Loudspeaker<br />
6<br />
Handset<br />
Escape key<br />
Volume /<br />
contrast keys<br />
OK key<br />
Display<br />
Clear key<br />
Call<br />
display<br />
Function keys,<br />
some with LED<br />
Arrow keys for navigation
All keys at a glance<br />
Overview of your telephone<br />
... Number keys with letters: For dialling call numbers and<br />
entering codes and text. The lettered labelling allows you to dial letters (vanity<br />
numbers).<br />
Star and Hash: for special functions<br />
Escape: terminates the current connection during a call. Otherwise this cancels<br />
an entry (exits the menu and returns to the menu level above).<br />
Clear: Deletes the character at the current cursor position. If the cursor is<br />
positioned after the last character, the last character is deleted.<br />
Up/down arrows: moves the cursor up or down in the display.<br />
+/–: Increases or decreases the volume or contrast.<br />
Left/right arrows: moves the cursor to the left or right in the display.<br />
Enter: calls up a selected menu item or confirms an entry.<br />
Function keys:<br />
4 user-definable function keys next to the numeric block, 2 of these with LEDs.<br />
4 fixed function keys: Using the loudspeaker, repeat dialling and refer-back.<br />
i<br />
The default assignment for the function keys is printed on the enclosed insert<br />
strip.<br />
7
Getting to know your telephone<br />
Basic operating principles<br />
Menu and function keys<br />
You can select and use most of the functions from the menu.<br />
To make operation easier, you can assign frequently used functions to the function<br />
keys.<br />
Some keys are already assigned functions in the as-supplied condition.<br />
Selecting functions in the menu<br />
8<br />
Press “Menu” function key.<br />
or scroll to the desired menu item.<br />
Confirm your selection. The selected function is displayed. In many cases, a<br />
sub-menu will appear. You can scroll the sub-menu in the same way as in the menu.<br />
Cancelling or terminating a procedure<br />
If you have pressed a wrong key during an entry or setting:<br />
Press (several times if necessary) to cancel the procedure. You will then return<br />
to the idle display. Your settings will not be saved.<br />
i<br />
An overview of all menu items can be found in the menu overview (→ Page 98).<br />
Functions already assigned to keys no longer appear in the menu.<br />
You cannot use the Escape key to undo the following:<br />
Changes to the assignment of function keys.<br />
Settings that have been changed with the OK key.
Basic operating principles<br />
Getting to know your telephone<br />
cont.<br />
The display helps you<br />
The displays guide you step-by-step through the operation of the phone. The<br />
display contains various information such as the status of your current connection.<br />
The call number of an external ISDN caller will be shown in the display provided the<br />
caller has not disabled call number display. You can therefore see who is calling<br />
you. If the name and call number of the caller are stored in your telephone book, you<br />
will also see the caller’s name.<br />
What does the idle display show?<br />
The idle display contains:<br />
Your name and call number<br />
Date and time<br />
An indicator arrow, if there are any status messages for your telephone<br />
Status messages<br />
4712 24.12. 17.15↓<br />
If there are any specific messages about the status of your telephone, the telephone<br />
will inform you of this with an indicator arrow next to the time. A status message<br />
occurs when<br />
there is important information for you (e.g. new entry in the call list) or<br />
you have activated special functions (e.g. ring tone switched off).<br />
All messages are arranged one below the other in the status menu. You can call the<br />
associated menu item directly from a status message, e.g. to change the setting.<br />
Scroll to the desired status message.<br />
Confirm your selection.<br />
9
Getting to know your telephone<br />
Basic operating principles<br />
Entering text<br />
You can also enter letters and numbers with the numeric keys, e.g. for names in<br />
your personal telephone directory. The letters appear on the numeric keys. Your<br />
telephone switches automatically to entry of letters and numbers when this is<br />
necessary.<br />
Example: Enter name “JOHN”:<br />
Press the JKL key once. J is shown in the display. Wait briefly until the cursor<br />
moves to the right.<br />
Press MNO key three times. The display reads JO. Wait briefly until<br />
the cursor moves to the right.<br />
Press GHI key twice. The display reads JOH. Wait briefly until the cursor<br />
moves to the right.<br />
Press MNO key twice. The display reads JOHN.<br />
Deleting letters:<br />
Deletes the highlighted character. If the cursor is positioned after the last<br />
character, the last character is deleted.<br />
Switching between upper case and lower case letters:<br />
10<br />
cont.<br />
Press key to change between upper case and lower case letters.<br />
Entering special characters:<br />
Not all possible symbols appear on the numeric keys. Look in the character table<br />
(→ Page 96).
Accepting calls<br />
Using your telephone as normal<br />
You can lift the handset and speak with the caller as usual.<br />
If another subscriber in your system receives a call, you can pick up the call from<br />
your phone.<br />
You can also place calls on hold if you do not want to take them immediately. This<br />
allows you to complete a process you have started (e.g. editing a telephone<br />
directory entry).<br />
You can divert any incoming external calls to a preconfigured call forwarding station<br />
(call forwarding).<br />
When you receive a call . . . . . . . . . . . . . . . . . . . . . . . . . . . . . . . . . . . . . . . . . . . . . . . 12<br />
When another telephone receives a call (Pick-up) . . . . . . . . . . . . . . . . . . . . . . . . . 12<br />
Answering a call to a partner . . . . . . . . . . . . . . . . . . . . . . . . . . . . . . . . . . . . . . . . . . . 12<br />
Call during a conversation (second call) . . . . . . . . . . . . . . . . . . . . . . . . . . . . . . . . . . 13<br />
Call during a programming procedure . . . . . . . . . . . . . . . . . . . . . . . . . . . . . . . . . . . . 13<br />
Call forwarding . . . . . . . . . . . . . . . . . . . . . . . . . . . . . . . . . . . . . . . . . . . . . . . . . . . . . . .<br />
13<br />
11
Using your telephone as normal<br />
Accepting calls<br />
When you receive a call<br />
Your telephone rings. The call is shown in the display.<br />
12<br />
Lift the handset.<br />
When another telephone receives a call (Pick-up)<br />
Another telephone rings.<br />
Press “Menu” function key.<br />
Scroll to the Pick-up from menu item.<br />
Confirm your selection.<br />
A list of incoming calls will be shown.<br />
Scroll to the call you want to pick up.<br />
Confirm your selection.<br />
Lift the handset.<br />
Answering a call to a partner<br />
If you have assigned a partner to a function key (→ Page 63):<br />
A partner is being called.<br />
Press the function key for the partner being called. Your telephone rings.<br />
Lift the handset.<br />
cont.
Accepting calls<br />
Using your telephone as normal<br />
Call during a conversation (second call)<br />
You are on the phone. Someone else calls you. You hear a single ringing tone.<br />
Scroll to the Call ... menu item.<br />
Accept call. The first caller is waiting and cannot hear your conversation.<br />
Call during a programming procedure<br />
You receive a call, but you first want to complete what you are doing on your telephone:<br />
You are programming your phone. A call arrives:<br />
Scroll to the Place call on hold menu item.<br />
Confirm your selection. You can continue with your programming. After<br />
completion, the held call will be shown.<br />
Call forwarding<br />
You receive an external call and wish to divert the call to the call forwarding station:<br />
Scroll to the Call forwarding menu item.<br />
Confirm your selection. The call is diverted to the call forwarding station.<br />
i<br />
The call forwarding station must have been set up in the telecommunication<br />
system.<br />
cont.<br />
13
Using your telephone as normal<br />
Making a call<br />
You can use the telephone as usual within and outside your telephone system:<br />
dial the internal extension number or external call number directly.<br />
If you cannot reach an external number, you can have the number redialled<br />
automatically up to 10 times.<br />
If an internal number is engaged or all exchange lines are occupied, you can be<br />
automatically called back when the line is free again.<br />
You can use the function keys to dial the 5 most recently called numbers again<br />
(redial) and to dial frequently needed call numbers.<br />
You can also cut into another call within your system if you have something urgent<br />
to tell one of the participants.<br />
If you do not want the person you are calling to see who is calling, you can call<br />
anonymously.<br />
Calling within your telephone system . . . . . . . . . . . . . . . . . . . . . . . . . . . . . . . . . . . . 15<br />
Calling outside your telephone system . . . . . . . . . . . . . . . . . . . . . . . . . . . . . . . . . . . 15<br />
Making a call with one key stroke . . . . . . . . . . . . . . . . . . . . . . . . . . . . . . . . . . . . . . . 15<br />
Automatic call to engaged external number . . . . . . . . . . . . . . . . . . . . . . . . . . . . . . . 16<br />
Redial last external numbers dialled (redialling) . . . . . . . . . . . . . . . . . . . . . . . . . . . 16<br />
In case of busy signal (Automatic call-back) . . . . . . . . . . . . . . . . . . . . . . . . . . . . . . 17<br />
Deleting automatic call-back . . . . . . . . . . . . . . . . . . . . . . . . . . . . . . . . . . . . . . . . . . . 17<br />
Call back when line free . . . . . . . . . . . . . . . . . . . . . . . . . . . . . . . . . . . . . . . . . . . . . . . 17<br />
Cutting in on another call . . . . . . . . . . . . . . . . . . . . . . . . . . . . . . . . . . . . . . . . . . . . . . 18<br />
Call waiting . . . . . . . . . . . . . . . . . . . . . . . . . . . . . . . . . . . . . . . . . . . . . . . . . . . . . . . . . . 18<br />
Anonymous calling . . . . . . . . . . . . . . . . . . . . . . . . . . . . . . . . . . . . . . . . . . . . . . . . . . . 18<br />
Direct access tone dialling (DTMF) . . . . . . . . . . . . . . . . . . . . . . . . . . . . . . . . . . . . . . 18<br />
i<br />
Some telephone systems require a special code digit to be dialled for external<br />
calls, the so-called external line code. Sometimes a short pause, known as the<br />
dial pause, has to be inserted after this. You can obtain more information from<br />
your telephone system administrator.<br />
14
Making a call<br />
Calling within your phone system<br />
... Enter the call number.<br />
Lift the handset.<br />
Calling outside your telephone system<br />
Press the Line key<br />
... Enter the call number.<br />
Lift the handset.<br />
Making a call with one key stroke<br />
Press the function key for the desired subscriber.<br />
Lift the handset.<br />
Using your telephone as normal<br />
cont.<br />
i<br />
You can, of course, pick up the handset first and then dial the number. However,<br />
mistakes cannot then be corrected.<br />
For external calls, you can enter the exchange code for your system instead of<br />
selecting a line. You can obtain the external line code from your telephone<br />
system administrator.<br />
If you have enabled “Line when dialling”, you only need to dial the external<br />
number when making an external call.<br />
If you have disabled immediate dialling, you can correct entry mistakes before<br />
you dial (→ Page 71).<br />
15
Using your telephone as normal<br />
Making a call<br />
Automatic call to engaged external number<br />
The external number dialled is busy.<br />
16<br />
Scroll to the Autom. redial menu item.<br />
Confirm your selection.<br />
Replace the handset. Dialling is repeated up to ten times at intervals.<br />
Redial last external numbers dialled (redialling)<br />
Press “Redial” function key.<br />
Scroll to the desired number, e.g. 06975051234.<br />
Lift the handset.<br />
i<br />
You can only use “Automatic call to engaged external number” if you are calling<br />
via a digital exchange line.<br />
You can specify the number of automatic redial attempts and the time between<br />
two attempts in the “Dialling settings” menu (→ Page 66).<br />
If you press any key or lift the handset, automatic redialling is terminated.<br />
cont.
Making a call<br />
In case of busy signal (Automatic callback)<br />
The internal number dialled is busy:<br />
Scroll to the Callback menu item.<br />
Confirm your selection.<br />
Using your telephone as normal<br />
Replace the handset. As soon as the other connection is free, your telephone<br />
rings.<br />
Lift the handset when your telephone rings The other number is automatically<br />
called by the telephone system.<br />
Deleting auto callback<br />
In the status menu:<br />
Scroll to the Auto callback menu item.<br />
Delete call-back.<br />
Callback when line free<br />
You want to make an external call but all the exchange lines are busy. You receive<br />
the message “Bundle busy”.<br />
Press the “Call back line” function key.<br />
Replace the handset. A soon as a line becomes free, your telephone rings<br />
and the “Call back line” display appears.<br />
Lift the handset when your telephone rings The other number is automatically<br />
called by the telephone system.<br />
i<br />
You can also invoke “Auto callback” if the number you have called does<br />
not answer.<br />
You must have assigned the “Call back line” function to a function key.<br />
cont.<br />
17
Using your telephone as normal<br />
Making a call<br />
18<br />
cont.<br />
Cutting in on another call<br />
You call an internal extension. The user already has a call. You want to cut in on the<br />
call:<br />
Scroll to the Cut-in menu item.<br />
Confirm your selection. All participants hear a cut-in tone. You are now included<br />
in the conversation and can give the participants your message.<br />
Call waiting<br />
You call an internal extension. The number is busy.<br />
Scroll to the Knocking menu item.<br />
Confirm your selection. Your call will then be re-signalled to the caller.<br />
Anonymous calling<br />
Lift the handset.<br />
Scroll to the Anonymous call menu item.<br />
Confirm anonymous calling. Your number will not be passed to the called<br />
number during your next external call.<br />
Direct access tone dialling (DTMF)<br />
Number key operations are automatically transmitted as tones during an existing<br />
external call. This is necessary, for instance, if you want to interrogate answering<br />
machines or voice mailboxes.<br />
i<br />
Cut-in is only possible within your system.<br />
Ending the cut-in: Replace the handset or press the Escape key.<br />
“Anonymous calling” must be supported by your network operator.<br />
With “Anonymous calling”, you can toggle between the “on” and “off” settings with<br />
the OK-key.
Using your telephone as normal<br />
Making several connections simultaneously<br />
You can also accept another call while you are already on the phone (second call).<br />
You can speak alternately to several participants and switch between these whenever<br />
you want.<br />
You can speak with two callers simultaneously (Three-way conference).<br />
You can include a new participant directly in the conference or call via “Refer-back”<br />
to speak privately beforehand.<br />
Consultation during a call (Refer-back) . . . . . . . . . . . . . . . . . . . . . . . . . . . . . . . . . . . 20<br />
Switching between two external callers (consultation hold) . . . . . . . . . . . . . . . . . . 20<br />
Forwarding . . . . . . . . . . . . . . . . . . . . . . . . . . . . . . . . . . . . . . . . . . . . . . . . . . . . . . . . . . 20<br />
Forwarding additional caller . . . . . . . . . . . . . . . . . . . . . . . . . . . . . . . . . . . . . . . . . . . . 21<br />
Three-way telephone calls (conference) . . . . . . . . . . . . . . . . . . . . . . . . . . . . . . . . . 22<br />
Including conference participant in conversation . . . . . . . . . . . . . . . . . . . . . . . . . . 22<br />
Including conference participant in conversation via Refer-back . . . . . . . . . . . . . 22<br />
Extending conference with another participant . . . . . . . . . . . . . . . . . . . . . . . . . . . . 23<br />
Connecting conference partners together . . . . . . . . . . . . . . . . . . . . . . . . . . . . . . . . 23<br />
Ending the conference . . . . . . . . . . . . . . . . . . . . . . . . . . . . . . . . . . . . . . . . . . . . . . . .<br />
23<br />
19
Using your telephone as normal<br />
Making several connections simultaneously<br />
20<br />
cont.<br />
Consultation during a call (Refer-back)<br />
During a call:<br />
Press “Refer-back” function key. The caller waits and cannot hear what you say.<br />
... Enter the number of the subscriber whom you wish to consult. Carry out<br />
the consultation<br />
Press “Refer-back” function key again. The refer-back call is ended and you can<br />
speak again to the first caller.<br />
Switching between two external callers (mediate)<br />
You want to speak to the waiting caller (e.g. 06975058):<br />
Scroll to the Return to 06975058 menu item.<br />
Confirm your selection. The other caller is now waiting.<br />
Forwarding<br />
You caller wishes to be connected to another extension:<br />
Press “Refer-back” function key. The caller waits and cannot hear what you say.<br />
... Enter the number to which you want to forward the call.<br />
Replace the handset. The refer-back extension will be connected to the first<br />
caller.<br />
i<br />
You can also call the refer-back extension with a function key if it is set up as a<br />
partner key or is assigned to that extension number (Destination key).<br />
You do not need to wait until the refer-back extension picks up the call.
Using your telephone as normal<br />
Making several connections simultaneously<br />
Forwarding additional caller<br />
You are called by someone during a conversation, e.g. by 06975058:<br />
Scroll to the Call 06975058 menu item.<br />
Confirm your selection. You are then connected with the second caller. The<br />
first caller is waiting and cannot hear your conversation.<br />
You now want to forward the second caller to another extension, e.g.<br />
extension 1234:<br />
Press “Refer back” function key.<br />
Enter the number of the extension you want to connect to, in this<br />
example 1234. You can now announce the caller. The first party is waiting.<br />
Scroll to the Transfer 06975058 menu item.<br />
Confirm your selection.<br />
Scroll to the Return to ... menu item.<br />
Confirm your selection. You will now be able to talk to the first party again.<br />
cont.<br />
21
Using your telephone as normal<br />
Three-way telephone calls (conference)<br />
Including conference participant in conversation<br />
During a call:<br />
22<br />
Scroll to the Conference with ... menu item.<br />
Confirm your selection.<br />
... Enter the number of the new conference participant. When you are<br />
connected to the number, all three participants can talk to each other directly.<br />
Including conference participant in conversation via Refer-back<br />
While you are on the phone (e.g. to 06975058):<br />
Press “Refer back” function key. The other party is waiting.<br />
... Enter the number of the new conference participant. You can start the<br />
conference once you are connected to the participants.<br />
Scroll to the Conference with 06975058 menu item.<br />
Confirm your selection.<br />
i<br />
Any participant can switch out of the conference. Replace the handset.<br />
The third number called does not answer:<br />
Select “Cancel” menu item and confirm this to switch back to the first participant<br />
or<br />
press the Escape key to call another number or<br />
use the “Back to ...” menu item to return to the first participant.
Three-way telephone calls (conference)<br />
Extending conference with another participant<br />
While you are carrying out a conference call:<br />
Scroll to the Extend conference menu item.<br />
Confirm your selection.<br />
Using your telephone as normal<br />
... Enter the number of the new participant. When you are connected to<br />
the number, all the parties can talk to each other directly.<br />
Connecting conference partners together<br />
During the conference:<br />
Replace the handset. The other conference partners are then connected to<br />
each other.<br />
Ending the conference<br />
All participants:<br />
Replace the handset.<br />
i<br />
Conferences can be expanded to up to 9 participants.<br />
Conferences with external participants are always limited to three participants.<br />
cont.<br />
23
Using your telephone as normal<br />
Listening to the conversation via the loudspeaker<br />
Hearing the caller through the loudspeaker (call monitoring)<br />
You can activate the loudspeaker of your telephone in order to hear the caller without<br />
having to use the handset.<br />
During a call with the handset:<br />
Press the “Monitoring” function key (LED lights up). You can then hear the<br />
caller through the built-in loudspeaker.<br />
Making a call with the handset on-hook<br />
24<br />
Press the “Monitoring” function key (LED lights up).<br />
... Enter the call number.<br />
When you hear the caller answer on the loudspeaker, you can take the call on the<br />
handset.<br />
i<br />
The desired loudspeaker- volume can be set using the “+” and “-” keys.<br />
Switching loudspeaker off again: Press the “Monitoring” function key again<br />
(LED goes out).
Call list – who called?<br />
Telephoning made easy<br />
If you do not answer an external call, the caller’s number will be stored in the call list<br />
together with the time and date of the call. You can display this list at any time and<br />
return calls to the parties entered in it. The list contains the 10 most recent entries.<br />
Call list – who has called? . . . . . . . . . . . . . . . . . . . . . . . . . . . . . . . . . . . . . . . . . . . . . 25<br />
Dialling a number from the call list . . . . . . . . . . . . . . . . . . . . . . . . . . . . . . . . . . . . . . . 26<br />
Deleting an entry . . . . . . . . . . . . . . . . . . . . . . . . . . . . . . . . . . . . . . . . . . . . . . . . . . . . . 26<br />
Deleting all entries . . . . . . . . . . . . . . . . . . . . . . . . . . . . . . . . . . . . . . . . . . . . . . . . . . . . 27<br />
Symbols in the call list . . . . . . . . . . . . . . . . . . . . . . . . . . . . . . . . . . . . . . . . . . . . . . . . . 27<br />
i<br />
You can also have internal callers entered in the call list. To do this, activate the<br />
function in the menu Settings-Applications-Int. call list.<br />
25
Telephoning made easy<br />
Call list – who called?<br />
Dialling a number from the call list<br />
26<br />
Press “Call list” function key.<br />
Scroll to the desired entry.<br />
Lift the handset.<br />
Deleting an entry<br />
Press “Call list” function key.<br />
Scroll to the entry to be deleted.<br />
Confirm your selection.<br />
Scroll to the Delete menu item.<br />
Confirm your selection.<br />
i<br />
If both the name and number of the caller are stored in the telephone directory,<br />
the name of the caller will be shown in the call list instead of the number.<br />
Once you return a call stored in the call list, that entry is automatically deleted if<br />
the call went through.<br />
cont.
Call list – who called?<br />
Deleting all entries<br />
Press “Call list” function key.<br />
Scroll to the Delete all entries menu item.<br />
Confirm your selection.<br />
Symbols in the call list<br />
Three sample entries in the call list:<br />
!06975056056 12.06. 17:13 2*<br />
i–Smith 12.06. 16:34<br />
i–Jones 11.06. 08:21<br />
Significance of display:<br />
Telephoning made easy<br />
! New entry, which has not yet been<br />
displayed<br />
06975056056 Caller’s number<br />
i- Symbol for an internal call<br />
Smith Caller’s name<br />
11.06. 08:21 Day and time of last call<br />
2* The caller has called you twice<br />
i<br />
Adding a call list entry to the telephone directory (→ Page 35)<br />
You can display the right half of a call list entry with the right arrow key.<br />
cont.<br />
27
Telephoning made easy<br />
Diverting calls<br />
You can divert incoming calls to another extension. You can set this up both for your<br />
own and other telephones.<br />
You can also divert calls to your telephone.<br />
In all these variants, you can choose<br />
whether this should always take place,<br />
only if the telephone is busy<br />
or only if the telephone is not answered within a specified time.<br />
You can also set up and change a call diversion from a telephone outside the telephone<br />
system (→ Page 53).<br />
Diverting calls for your telephone . . . . . . . . . . . . . . . . . . . . . . . . . . . . . . . . . . . . . . . 29<br />
Diverting calls to your telephone . . . . . . . . . . . . . . . . . . . . . . . . . . . . . . . . . . . . . . . . 29<br />
Diverting calls for another telephone . . . . . . . . . . . . . . . . . . . . . . . . . . . . . . . . . . . . . 30<br />
Cut in call diversion . . . . . . . . . . . . . . . . . . . . . . . . . . . . . . . . . . . . . . . . . . . . . . . . . . . 30<br />
Bundle diversion . . . . . . . . . . . . . . . . . . . . . . . . . . . . . . . . . . . . . . . . . . . . . . . . . . . . . 31<br />
Changing bundle diversion . . . . . . . . . . . . . . . . . . . . . . . . . . . . . . . . . . . . . . . . . . . . . 31<br />
i<br />
The “elapsed time” before call diversion takes place is set globally for the system<br />
(0 - 300 seconds).<br />
28
Diverting calls<br />
Diverting calls for your telephone<br />
Press “Call diversion” function key.<br />
Telephoning made easy<br />
Enter the internal or external number to which the calls are to be<br />
diverted, e.g. 1234.<br />
Scroll to the immediately (after time, on busy) menu item.<br />
cont.<br />
Confirm your selection. The status indication divert to 1234- appears in the<br />
display. In addition, a clock symbol is shown for call divert after “after time” or a B for<br />
call diversion “on busy”.<br />
Diverting calls to your telephone<br />
Press “Menu” function key.<br />
Scroll to the Call diversion menu item.<br />
Confirm your selection.<br />
Scroll to the Divert from menu item.<br />
Confirm your selection.<br />
Enter the internal number of the subscriber for whom you want to<br />
set up call diversion to your own telephone, e.g. from 1234.<br />
Scroll to the immediately (after time, on busy) menu item.<br />
Confirm your selection. The status indication divert from 1234- appears<br />
in the display. In addition, a clock symbol is shown for call divert after “elapsed time”<br />
or a B for call diversion “when busy”.<br />
i<br />
If the number entered is stored in the telephone directory as a name, the name<br />
will appear automatically instead of the number.<br />
You can also press an appropriate partner key instead of entering the number.<br />
It may be necessary to enter an external line code and a dial pause before an<br />
external number. You can obtain more information from your telephone system<br />
administrator.<br />
29
Telephoning made easy<br />
Diverting calls<br />
Diverting calls for another telephone<br />
30<br />
Press “Menu” function key.<br />
Scroll to the Call diversion menu item.<br />
Confirm your selection.<br />
Scroll to the Divert for menu item.<br />
Confirm your selection.<br />
cont.<br />
Enter the internal call number of the subscriber for whom you want<br />
to set up call diversion, e.g. 1234.<br />
Accept the entry.<br />
Enter the internal or external number to which the call diversion is<br />
to be made, e.g. 4712.<br />
Scroll to the immediately (afte time, on busy) menu item.<br />
Confirm your selection. The activated call diversion will be displayed.<br />
Exit menu.<br />
The status indication appears in the display for both participating extensions.<br />
divert to 4712- or divert from 1234-. In addition, a clock symbol is shown for<br />
call divert after “elapsed time” or a B for call diversion “when busy”.<br />
Cut in call diversion<br />
In the status menu:<br />
Scroll to the desired call diversion, e.g. call diversion to 4712-.<br />
Delete call diversion.<br />
i<br />
If the numbers entered are stored in the telephone directory as names, the<br />
names will appear automatically instead of the numbers.
Diverting calls<br />
Telephoning made easy<br />
Bundle diversion<br />
The various exchange lines to your telephone system are combined into so-called<br />
bundles. All calls, which arrive via a particular bundle, can be<br />
diverted to an external destination.<br />
Press “Menu” function key.<br />
Scroll to the Call diversion menu item.<br />
Confirm your selection.<br />
Scroll to the Bundle diversion 1 (2,3, ...) menu item.<br />
Confirm your selection.<br />
... Enter the external number to which all calls via this bundle are<br />
to be diverted, e.g. 069392751.<br />
Confirm your selection. The status indication bundle 1 to...<br />
appears in the display.<br />
Changing bundle diversion<br />
In the status menu:<br />
Scroll to the desired call diversion, e.g. bundle 1 to 069392751.<br />
Confirm your selection.<br />
... Enter additional digits and, if necessary, change the call number in the<br />
usual way.<br />
Activate bundle call diversion to new external number.<br />
cont.<br />
i<br />
Call diversion takes place at the exchange. Internal users can telephone without<br />
hindrance.<br />
The cost of the diverted call is borne by the subscriber that activated the<br />
diversion. The caller only pays the costs as far as the exchange.<br />
The call units for the diversion are not logged in the <strong>Integral</strong> telephone system.<br />
31
Telephoning made easy<br />
Using the phone book<br />
The phone book consists of a central and a personal section.<br />
You can store up to 100 individual numbers with names in your personal phone<br />
book; these will only be available from your telephone. You can then dial these<br />
entries quickly and easily. You can modify the personal phone book entries<br />
yourself.<br />
Up to 800 numbers with names can be stored in the central phone book;<br />
these are available to all users. You can also enter and change these entries if you<br />
have appropriate access rights.<br />
Looking up and dialling numbers in the telephone book . . . . . . . . . . . . . . . . 33 .<br />
Adding new numbers in your personal telephone book . . . . . . . . . . . . . . . . . 34 .<br />
Saving redial numbers in the telephone book . . . . . . . . . . . . . . . . . . . . . . . . . 35 .<br />
Adding a call list entry to the telephone book . . . . . . . . . . . . . . . . . . . . . . . . . 35 .<br />
Editing entries in the telephone book . . . . . . . . . . . . . . . . . . . . . . . . . . . . . . . . 36 .<br />
Adding new numbers in the general telephone book . . . . . . . . . . . . . . . . . . . 36 .<br />
32
Using the phone book<br />
Looking up and dialling numbers in the phone book<br />
Press “Phone book” function key.<br />
... Enter one or more of the first letters of the name.<br />
Confirm the letters. The subscriber is displayed.<br />
Lift the handset. The number is dialled.<br />
You can also scroll to the desired number using the arrow keys.<br />
Telephoning made easy<br />
i<br />
cont.<br />
33
Telephoning made easy<br />
Using the phone book<br />
Adding new numbers to your personal telephone directory<br />
34<br />
Press “Phone book” function key.<br />
Scroll to the New indiv. entry menu item.<br />
Confirm your selection. The next free code number will be automatically<br />
entered as the destination.<br />
... Enter the call number.<br />
Confirm the number.<br />
... Enter the name.<br />
Confirm the name and add the complete entry to the personal phone<br />
book.<br />
cont.<br />
i<br />
It may be necessary to enter an external line code and a dial pause before an<br />
external number. You can obtain more information from your telephone system<br />
administrator.<br />
If you want to enter an internal number, you must select and confirm the “Internal<br />
number” menu item before making the entry.
Using the phone book<br />
Saving redial numbers in the phone book<br />
Press “Redial” function key.<br />
Scroll to the desired number, e.g. 06975051234.<br />
Confirm your selection.<br />
Scroll to the Phone book entry menu item.<br />
Confirm your selection.<br />
Save in phone book.<br />
... Enter name for this number if required.<br />
Adding a call list entry to the phone book<br />
Press “Call list” function key.<br />
Scroll to the desired number, e.g. 06975051234.<br />
Confirm your selection.<br />
Scroll to the Phone book entry menu item.<br />
Confirm your selection.<br />
Save in phone book.<br />
... Enter name for this number if required.<br />
Telephoning made easy<br />
i<br />
If you have entered the number without a name. you can edit the entry later and<br />
save it under a name.<br />
cont.<br />
35
Telephoning made easy<br />
Using the phone book<br />
Editing entries in the phone book<br />
36<br />
Press “Phone book” function key.<br />
... Enter the name.<br />
Confirm your selection.<br />
Scroll to the Edit menu item.<br />
Confirm your selection. Edit the number.<br />
Confirm your selection. Edit the name.<br />
Accept new setting.<br />
Adding new numbers in the general phone book<br />
Press “Phone book” function key.<br />
Scroll to the New general entry menu item.<br />
Confirm your selection. The next free general code number will be<br />
automatically entered as the destination.<br />
... Enter the call number.<br />
Confirm the number.<br />
... Enter the name.<br />
Confirm the name and save the complete entry to the general phone<br />
book.<br />
i<br />
It may be necessary to enter an external line code and a dial pause before an<br />
external number. You can obtain more information from your telephone system<br />
administrator.<br />
cont.
Reminders (Appointments)<br />
Telephoning made easy<br />
Your telephone can remind you of important appointments. You can enter and be<br />
reminded of up to 10 appointments. You can select whether you want to be<br />
reminded once or every day.<br />
A signal tone sounds to remind you of the appointment and the text you entered for<br />
this appointment is displayed on screen.<br />
You can selectively delete the stored appointments.<br />
Entering an appointment for today . . . . . . . . . . . . . . . . . . . . . . . . . . . . . . . . . . . . . . 38<br />
Entering a one-time appointment . . . . . . . . . . . . . . . . . . . . . . . . . . . . . . . . . . . . . . . . 39<br />
Entering a recurring appointment . . . . . . . . . . . . . . . . . . . . . . . . . . . . . . . . . . . . . . . 40<br />
Viewing appointments . . . . . . . . . . . . . . . . . . . . . . . . . . . . . . . . . . . . . . . . . . . . . . . . . 41<br />
Disabling appointment signal . . . . . . . . . . . . . . . . . . . . . . . . . . . . . . . . . . . . . . . . . . . 41<br />
Deleting an appointment . . . . . . . . . . . . . . . . . . . . . . . . . . . . . . . . . . . . . . . . . . . . . . . 41<br />
Making an appointment for others . . . . . . . . . . . . . . . . . . . . . . . . . . . . . . . . . . . . . . .<br />
42<br />
37
Telephoning made easy<br />
Reminders (Appointments)<br />
Entering an appointment for today<br />
38<br />
Press “Menu” function key.<br />
Scroll to the Appointments menu item.<br />
Confirm your selection. All the set appointments will be shown.<br />
Scroll to the ––.––. ––:–– menu item.<br />
Confirm your selection.<br />
Scroll to the Today menu item.<br />
Confirm your selection.<br />
Enter the time in the form “hours minutes” with no characters in<br />
between, e.g. “1450” for 14:50.<br />
Scroll to the standard text if required.<br />
Confirm your selection if required.<br />
Entering or expanding any desired text.<br />
cont.<br />
Accept the whole text. At the specified time, a signal tone sounds and the text<br />
you have entered is displayed.<br />
i<br />
The maximum text length is 24 characters.<br />
Appointments that have expired are deleted from the appointments list.<br />
To be able to select from standard texts, these must first have been entered into<br />
the system.
Reminders (Appointments)<br />
Entering a one-time appointment<br />
Press “Menu” function key.<br />
Scroll to the Appointments menu item.<br />
Confirm your selection. All the set appointments will be shown.<br />
Scroll to the ––.––. ––:–– menu item.<br />
Confirm your selection.<br />
Telephoning made easy<br />
Enter the date and time in the form “day month<br />
hours minutes” with no characters in between, e.g. “04081450” for 4 August at<br />
14:50.<br />
Scroll to the standard text if required.<br />
Confirm your selection if required.<br />
... Entering or expanding any desired text.<br />
cont.<br />
Accept the whole text. At the specified time, a signal tone sounds and the text<br />
you have entered is displayed.<br />
39
Telephoning made easy<br />
Reminders (Appointments)<br />
Entering a recurring appointment<br />
40<br />
Press “Menu” function key.<br />
Scroll to the Appointments menu item.<br />
Confirm your selection. All the set appointments will be shown.<br />
Scroll to the ––.––. ––:–– menu item.<br />
Confirm your selection.<br />
Scroll to the Recurring appointment menu item.<br />
Confirm your selection.<br />
If required, enter the day on which you do not want to be reminded.<br />
cont.<br />
Confirm this selection if required. The corresponding day will be deleted in the<br />
display.<br />
If required, enter more days on which you do not want to be reminded.<br />
Confirm this selection if required. The corresponding days will be deleted in<br />
the display.<br />
Enter the time in the form “hours minutes” with no characters in<br />
between, e.g. “1450” for 14:50.<br />
Scroll to the standard text if required.<br />
Confirm your selection if required.<br />
... Entering or expanding any desired text.<br />
Accept the whole text. A signal tone sounds at the specified time on every<br />
day you have set and the text you have entered is displayed.<br />
i<br />
If you want to correct the days selection: select all days again with the daily<br />
selection.<br />
To be able to select from standard texts, these must first have been entered into<br />
the system.
Reminders (Appointments)<br />
Viewing appointments<br />
Press “Menu” function key.<br />
Scroll to the Appointments menu item.<br />
Confirm your selection. All the set appointments will be shown.<br />
Telephoning made easy<br />
Disabling appointment signal<br />
You telephone reminds you with a signal tone at the set appointment time.<br />
cont.<br />
Scroll to the appropriate appointment, e.g. Appt. 1. A message text will appear if<br />
one has been entered.<br />
Confirm the appointment. The signal tone stops and the appointment<br />
reminder will be deleted in the display.<br />
Deleting an appointment<br />
Press “Menu” function key.<br />
Scroll to the Appointments menu item.<br />
Confirm your selection. All the set appointments will be shown.<br />
Scroll to the appointment you want to delete.<br />
Confirm your selection.<br />
Scroll to the Delete menu item.<br />
Confirm your selection. The appointment is deleted.<br />
41
Telephoning made easy<br />
Reminders (Appointments)<br />
Making an appointment for others<br />
42<br />
Press “Menu” function key.<br />
Scroll to the Appointments menu item.<br />
Confirm your selection.<br />
Scroll to the Appointment for others menu item.<br />
Confirm your selection.<br />
cont.<br />
Enter the internal call number of the subscriber for whom you wish<br />
to make an appointment, e.g. “4712”.<br />
Confirm the subscriber. All existing appointments for this subscriber will be<br />
displayed.<br />
Now enter the new appointment just as you would your own appointments.
Viewing Charges<br />
Telephoning made easy<br />
During a call, you can view the currently incurred call charges in local currency or in<br />
Euros.<br />
You can view the charges for the most recent call.<br />
All call charges incurred since the last reset are stored and totalled in your telephone<br />
system for each user. You can examine the call charges for each user and<br />
each line separately.<br />
In addition, your telephone system can record and bill the call charges for individual<br />
projects or for private calls.<br />
Viewing the charges for the last call . . . . . . . . . . . . . . . . . . . . . . . . . . . . . . . . . . . . . 44<br />
Viewing the total of the charges for an extension . . . . . . . . . . . . . . . . . . . . . . . . . . 44<br />
Viewing the total of the charges for a line . . . . . . . . . . . . . . . . . . . . . . . . . . . . . . . . . 44<br />
View total of all charges . . . . . . . . . . . . . . . . . . . . . . . . . . . . . . . . . . . . . . . . . . . . . . . 45<br />
Clear call charges . . . . . . . . . . . . . . . . . . . . . . . . . . . . . . . . . . . . . . . . . . . . . . . . . . . . 45<br />
Changing cost display to Euros . . . . . . . . . . . . . . . . . . . . . . . . . . . . . . . . . . . . . . . . . 45<br />
i<br />
In the case of a conference with two external subscribers, the sum of the charges<br />
for both external connections is shown.<br />
43
Telephoning made easy<br />
Viewing Charges<br />
Viewing the charges for the last call<br />
44<br />
Press “Menu” function key.<br />
Scroll to the Charges menu item.<br />
Confirm your selection.<br />
Call up the charge for last call<br />
Viewing the total charges for an extension<br />
Press “Menu” function key.<br />
Scroll to the Charges menu item.<br />
Confirm your selection.<br />
Scroll to the Total subs. menu item.<br />
Call up the call charge display.<br />
Enter user extension number, e.g. 19.<br />
Viewing the total charges for a line<br />
Press “Menu” function key.<br />
Scroll to the Charges menu item.<br />
Confirm your selection.<br />
Scroll to the Total line menu item.<br />
Confirm your selection.<br />
Enter line, e.g. “01” for line 1.<br />
i<br />
Instead of entering a line number, you can simply press the corresponding line<br />
key.<br />
cont.
Viewing Charges<br />
View total of all charges<br />
Press “Menu” function key.<br />
Scroll to the Charges menu item.<br />
Confirm your selection.<br />
Scroll to the Total charges menu item.<br />
Call up the call charge display.<br />
Clear call charges<br />
Press “Menu” function key.<br />
Scroll to the Charges menu item.<br />
Confirm your selection.<br />
Telephoning made easy<br />
Select the call charge display you want to delete: E.g. scroll to menu item Total<br />
charges.<br />
Call up the call charge display.<br />
Clear call charges.<br />
Changing cost display to Euros<br />
Press “Menu” function key.<br />
Scroll to the Charges menu item.<br />
Confirm your selection.<br />
Scroll to the Local currency –> Euro menu item.<br />
Set call charge display to Euros.<br />
i<br />
Changing call charge display back to local currency: Press OK key again.<br />
cont.<br />
45
Telephoning made easy<br />
Locking your telephone<br />
You can protect your telephone against unauthorised use by “locking” it. The<br />
telephone can then only be unlocked again with a PIN (Personal Identification<br />
Number). You can enter this PIN yourself and also change it at any time. The<br />
following functions are still possible in the locked condition:<br />
Answer all calls<br />
Dial internal numbers<br />
Setting/changing the PIN (Personal Identification Number) . . . . . . . . . . . . . . . . . . 47<br />
Lock telephone – procedure . . . . . . . . . . . . . . . . . . . . . . . . . . . . . . . . . . . . . . . . . . . . 47<br />
Unlocking your telephone . . . . . . . . . . . . . . . . . . . . . . . . . . . . . . . . . . . . . . . . . . . . . .<br />
47<br />
46
Locking your telephone<br />
Setting/changing the PIN (Personal Identification Number)<br />
Press “Menu” function key.<br />
Scroll to the Lock menu item.<br />
Confirm your selection.<br />
Scroll to the Set PIN entry.<br />
Confirm your selection.<br />
... Enter current 4-digit PIN.<br />
... Enter new 4-digit PIN.<br />
Lock telephone – procedure<br />
Press “Menu” function key.<br />
Scroll to the Lock menu item.<br />
Confirm your selection.<br />
Confirm Lock telephone. The telephone is now locked.<br />
Unlocking your telephone<br />
In the idle display:<br />
Scroll to the Phone locked entry.<br />
Confirm your selection.<br />
... Enter current 4-digit PIN.<br />
Telephoning made easy<br />
i<br />
The default setting for the PIN is “0000”.<br />
If you make a mistake when entering your PIN: Press the Escape key and start<br />
again from the beginning.<br />
If your telephone is locked, you will hear a special dialling tone (→ Page 97)<br />
when you lift the handset.<br />
cont.<br />
47
Telephoning made easy<br />
Sending and receiving messages<br />
If a subscriber in your system does not answer the phone or the line is busy, you<br />
can send a text message. Text messages can only be received by telephones<br />
equipped with a display. A maximum of 10 messages can be accepted.<br />
You can also make announcements to subscribers in your telephone system via the<br />
loudspeakers fitted in the telephones. You can address individual subscribers, a<br />
selected group or all subscribers. The announcement can be answered directly if<br />
this function is enabled.<br />
Viewing and deleting received text message . . . . . . . . . . . . . . . . . . . . . . . . . . . . . . 49<br />
Composing and sending your own text message . . . . . . . . . . . . . . . . . . . . . . . . . . 49<br />
Select text message and send to individual subscribers . . . . . . . . . . . . . . . . . . . . 49<br />
Select text message and send to all subscribers . . . . . . . . . . . . . . . . . . . . . . . . . . 50<br />
Writing a text message for an internal caller . . . . . . . . . . . . . . . . . . . . . . . . . . . . . . 50<br />
Announce . . . . . . . . . . . . . . . . . . . . . . . . . . . . . . . . . . . . . . . . . . . . . . . . . . . . . . . . . . . 51<br />
Announce to called subscriber . . . . . . . . . . . . . . . . . . . . . . . . . . . . . . . . . . . . . . . . . . 51<br />
Replying to an announce . . . . . . . . . . . . . . . . . . . . . . . . . . . . . . . . . . . . . . . . . . . . . .<br />
51<br />
48
Sending and receiving messages<br />
Viewing and deleting received text message<br />
Telephoning made easy<br />
Scroll to the message in the status menu. You will be shown the sender and the<br />
message, e.g. Meyer: Coffee.<br />
Deleting the message.<br />
Composing and sending your own text message<br />
Press “Message” function key.<br />
Confirm the text.<br />
... Enter the desired text.<br />
Enter the call number. The message is sent immediately.<br />
Select text message and send to individual subscribers<br />
Press “Message” function key. Pre-prepared messages will be offered if<br />
programmed.<br />
Scroll to the desired entry if required, e.g. Meeting.<br />
Confirm your selection.<br />
...Change or add to the entry in the usual way if required e.g. to<br />
include a name or time.<br />
Confirm the text.<br />
Enter the call number. The message is sent immediately.<br />
i<br />
An attention tone sounds when a message arrives.<br />
You can also send your own text message “to all”.<br />
If you do not want to delete a message, you can quit the message with the<br />
Escape key.<br />
To be able to select texts for a message, these must first have been entered into<br />
the system.<br />
cont.<br />
49
Telephoning made easy<br />
Sending and receiving messages<br />
Select text message and send to all subscribers<br />
Press “Message” function key. Pre-prepared messages will be offered if<br />
programmed.<br />
50<br />
Scroll to the desired entry, e.g. Meeting.<br />
Confirm your selection.<br />
... Change or add to the entry in the usual way if required e.g. to<br />
include a name or time.<br />
Scroll to the Message to all menu item.<br />
Message to all will be sent immediately.<br />
Writing a text message for an internal caller<br />
Press “Message” function key. Pre-prepared messages will be offered if<br />
programmed.<br />
Scroll to the desired entry, e.g. Meeting.<br />
Confirm your selection.<br />
... Change or add to the entry in the usual way if required e.g. to<br />
include a name or time.<br />
Scroll to the Message to caller menu item.<br />
The text message is saved. It appears on the display of any internal caller<br />
who tries to call you.<br />
i<br />
To be able to select texts for a message, these must first have been entered into<br />
the system.<br />
cont.
Sending and receiving messages<br />
Announce<br />
Lift the handset.<br />
Scroll to the Announce menu item.<br />
Confirm your selection.<br />
Select who you want to make the announcement to, e.g. Group 1.<br />
Telephoning made easy<br />
Confirm your selection. You can now make your announcement.<br />
Announce to called subscriber<br />
You call an internal extension. Their telephone rings:<br />
Scroll to the Announce menu item.<br />
Confirm your selection. You can now make your announcement.<br />
Replying to an announce<br />
You have heard an announcement.<br />
Lift the handset.<br />
cont.<br />
Scroll to the Answer announcement menu item.<br />
Confirm your selection. You will be connected to the subscriber who made the<br />
announcement.<br />
i<br />
A single called subscriber can reply to an announcement directly: Lift the<br />
handset.<br />
51
Telephoning made easy<br />
Outside business hours (Night service)<br />
You can activate a desired night service at any time. The system can activate night<br />
service automatically at programmed times.<br />
Press “Menu” function key.<br />
“On”.<br />
52<br />
Scroll to the Night service menu item.<br />
Confirm your selection. Any night service that may be active is indicated by<br />
Scroll to the Night service 1 (or 2, 3, auto.) menu item.<br />
Switch selected night service on or off.<br />
Exit menu. The night service is activated immediately (“auto. night service” only<br />
at the programmed times).<br />
i<br />
Only the last activated night service becomes effective in every case. All night<br />
services that were previously activated are deactivated.<br />
You must program the times when the system should automatically activate a<br />
night service (see I5 manual).<br />
You can set the call numbers for the night service in the “Settings – System<br />
functions” menu (→ Page 78).
Telephoning made easy<br />
Changing call diversion from another phone<br />
You can call from outside your telephone system and set up and change a call<br />
diversion for your handset or another telephone. This is possible from every<br />
telephone with direct access tone dialling (DTMF).<br />
Dial the subscriber whose call diversion is to be changed<br />
phone, e.g. 0697505.<br />
Dial your TK system call number from an external<br />
Enter the call number of the remote control subscriber, e.g. 24. A dialling<br />
tone sounds as confirmation.<br />
Enter the internal call number of the subscriber for whom you<br />
want to change the call diversion.<br />
4- or 6-digit PIN- number of the subscriber must be then entered<br />
e. g. 1234. A dialling tone sounds as confirmation.<br />
Now continue with one of the three options (a - c):<br />
a) Divert calls to another telephone or mailbox (call diversion to)<br />
Press Star, 71.<br />
Enter the code for the call diversion option, e.g. 1.<br />
Code numbers for call diversion options:<br />
1 = immediately – 2 = after time – 3 = on busy<br />
to be diverted, e. g. 0897543.<br />
Enter the external call number to which calls are<br />
Press the Hash key. You hear the acknowledgement tone.<br />
i<br />
“Changing call diversion from another phone” must be activated by the service<br />
department. The service department will also tell you the number to dial to<br />
access the remote control.<br />
For “Call diversion to”: You do not need to enter an external call number if you<br />
are calling from the external telephone, to which you want to divert the calls.<br />
However, call number transmission must be active for that telephone.<br />
53
Telephoning made easy<br />
Changing call diversion from another phone<br />
b) Divert calls from an internal telephone<br />
(Divert call from, Follow me)<br />
54<br />
Press Star, 70.<br />
Enter the code for the call diversion option, e.g. 1.<br />
Code numbers for call diversion options:<br />
1 = immediately – 2 = after time – 3 = on busy<br />
cont.<br />
Enter the internal call number of the subscriber from whom the calls are to<br />
be diverted as a 2 or 4 digit number. You hear the acknowledgement tone.<br />
c) Deactivate call diversion<br />
or<br />
Press Hash key, then 70, for “call diversion from”<br />
Press Hash key, then 71, for “call diversion to”.<br />
You hear the acknowledgement tone. The call diversion is deactivated.
Using the telephone with partners<br />
Using the telephone with partners<br />
If you have set up a function key with LED as a partner key, you will be informed<br />
about the partner’s activity.<br />
Calling a partner<br />
Press the key for the desired partner.<br />
Lift the handset.<br />
Answering a call to a partner<br />
A partner telephone rings and, if fitted, the LED for the assigned function key<br />
flashes:<br />
Press the partner key and wait until your telephone rings.<br />
Lift the handset.<br />
Assigning partners to keys (→ Page 63)<br />
LED displays on partner keys (→ Page 64)<br />
i<br />
55
Customising your telephone<br />
Setting audio, contrast and language<br />
You can modify various acoustic settings and the contrast of the<br />
display according to your own preferences.<br />
You can switch off your telephone ring for internal calls<br />
You can change the language for the text display via the language setting. The<br />
available languages are English, French and German.<br />
Acoustics and contrast . . . . . . . . . . . . . . . . . . . . . . . . . . . . . . . . . . . . . . . . . . . . . . . . 57<br />
Do not disturb . . . . . . . . . . . . . . . . . . . . . . . . . . . . . . . . . . . . . . . . . . . . . . . . . . . . . . . . 58<br />
Specifying the language . . . . . . . . . . . . . . . . . . . . . . . . . . . . . . . . . . . . . . . . . . . . . . .<br />
59<br />
56
Setting audio, contrast and language<br />
Customising your telephone<br />
Acoustics and contrast<br />
You can quickly modify the display and tones of your telephone to suit changing<br />
environmental conditions (e.g. sun dazzle, loud repair work).<br />
Press “Menu” function key.<br />
Scroll to the Settings menu item.<br />
Confirm your selection.<br />
Scroll to the Display/Acoustics menu item.<br />
Confirm your selection.<br />
Scroll to the Acoustics/Contrast menu item.<br />
Confirm your selection.<br />
Scroll to the desired menu item.<br />
Increasing or decreasing the volume setting. New ring settings sound<br />
immediately for checking purposes.<br />
Exit menu. The new setting is then saved.<br />
i<br />
You can access the acoustics and contrast menu directly from your telephone<br />
using the “+” and “–” keys.<br />
You can also change any setting by pressing the numeric key for the desired<br />
setting.<br />
If you want to reset the acoustics and contrast settings to the as-supplied status,<br />
scroll to the “Basic setting” menu item and confirm with the “OK” key.<br />
cont.<br />
57
Customising your telephone<br />
Setting audio, contrast and language<br />
Do not disturb<br />
If you do not wish to be disturbed, you can temporarily deactivate the ringing tone<br />
for internal calls.<br />
Press “Menu” function key.<br />
58<br />
Scroll to the Settings menu item.<br />
Confirm your selection.<br />
Scroll to the Display/Acoustics menu item.<br />
Confirm your selection.<br />
Scroll to the Do not disturb menu item. An indication on the right hand side of<br />
the window shows whether the function is on or off.<br />
Switching the function on or off. The new status is displayed.<br />
Exit menu. The new setting is then saved.<br />
i<br />
The internal caller hears a busy tone.<br />
Incoming external calls will continue to be signalled as normal.<br />
A subscriber who has activated “Do not disturb” can make outgoing internal and<br />
external calls without limitation.<br />
cont.
Setting audio, contrast and language<br />
Specifying the language<br />
Press “Menu” function key.<br />
Scroll to the Settings menu item.<br />
Confirm your selection.<br />
Scroll to the Display/Acoustics menu item.<br />
Confirm your selection.<br />
Scroll to the Language menu item.<br />
Customising your telephone<br />
Confirm your selection. The currently set language is highlighted.<br />
Select the desired language.<br />
Exit menu. Your telephone carries out a reset.<br />
All display indications will now be in the selected language.<br />
cont.<br />
59
Customising your telephone<br />
Setting up function keys<br />
You can assign functions and call numbers that you use frequently to function keys.<br />
You can then execute these functions or call these numbers by simply pressing a<br />
key.<br />
You can assign partners to keys. The LEDs, if fitted, will then inform you about the<br />
telephone status of each partner.<br />
Viewing the function of a key . . . . . . . . . . . . . . . . . . . . . . . . . . . . . . . . . . . . . . . . . . . 61<br />
Assigning functions to keys . . . . . . . . . . . . . . . . . . . . . . . . . . . . . . . . . . . . . . . . . . . . 61<br />
Assigning lines to keys . . . . . . . . . . . . . . . . . . . . . . . . . . . . . . . . . . . . . . . . . . . . . . . . 62<br />
Assigning partners to keys . . . . . . . . . . . . . . . . . . . . . . . . . . . . . . . . . . . . . . . . . . . . . 63<br />
Functions keys with LED . . . . . . . . . . . . . . . . . . . . . . . . . . . . . . . . . . . . . . . . . . . . . . 64<br />
LED display on function keys . . . . . . . . . . . . . . . . . . . . . . . . . . . . . . . . . . . . . . . . . . . 64<br />
LED display on line keys . . . . . . . . . . . . . . . . . . . . . . . . . . . . . . . . . . . . . . . . . . . . . . . 64<br />
LED display on partner keys . . . . . . . . . . . . . . . . . . . . . . . . . . . . . . . . . . . . . . . . . . . 64<br />
Delete key assignments . . . . . . . . . . . . . . . . . . . . . . . . . . . . . . . . . . . . . . . . . . . . . . . 65<br />
Labelling function keys . . . . . . . . . . . . . . . . . . . . . . . . . . . . . . . . . . . . . . . . . . . . . . . . 65<br />
i<br />
All the procedures described in these operating instructions assume standard<br />
assignment of the function keys.<br />
If you reprogram function keys, you should be aware that changed sequences<br />
may result.<br />
Functions already assigned to keys no longer appear in the menu.<br />
60
Setting up function keys<br />
Viewing the function of a key<br />
Press “Menu” function key.<br />
Scroll to the Settings menu item.<br />
Confirm your selection.<br />
Scroll to the Function keys menu item.<br />
Confirm your selection.<br />
Customising your telephone<br />
Press the desired key. The description and current assignment of this key will<br />
be displayed.<br />
Assigning functions to keys<br />
Press “Menu” function key.<br />
Scroll to the Settings menu item.<br />
Confirm your selection.<br />
Scroll to the Function keys menu item.<br />
The description and current assignment of all keys will be displayed.<br />
Scroll to the function key you want to change or assign.<br />
Confirm your key selection.<br />
Scroll to the function you want to assign to the key.<br />
Confirm your selection. You can now call up the set function with this key.<br />
i<br />
You can display the assignment of all the user-programmable function keys<br />
using the arrow keys.<br />
The loudspeaker, menu, redial and refer-back call function keys have fixed<br />
assignments and cannot be changed.<br />
cont.<br />
61
Customising your telephone<br />
Setting up function keys<br />
Assigning lines to keys<br />
62<br />
Press “Menu” function key.<br />
Scroll to the Settings menu item.<br />
Confirm your selection.<br />
Scroll to the Function keys menu item.<br />
The description and current assignment of all keys will be displayed.<br />
Scroll to the function key you want to change or assign.<br />
Confirm your key selection.<br />
Select the line you want to assign to the function key, e.g. Line 2.<br />
Confirm your selection. You can now connect to line 2 with this key.<br />
i<br />
Functions that you have already assigned to function keys are no longer offered<br />
for selection.<br />
cont.
Setting up function keys<br />
Assigning partners to keys<br />
Press “Menu” function key.<br />
Scroll to the Settings menu item.<br />
Confirm your selection.<br />
Scroll to the Function keys menu item.<br />
Customising your telephone<br />
The description and current assignment of all keys will be displayed.<br />
Scroll to the function key you want to change or assign.<br />
Confirm your key selection.<br />
Scroll to the “Partner” menu item.<br />
Confirm your selection. All internal users will be displayed.<br />
Scroll to the user whose number you want to assign to the function key.<br />
Confirm your selection. The user is now set up as a partner and is directly<br />
accessible via this key.<br />
i<br />
You can only set up one partner key for each user. If you assign the user to a<br />
new partner key, the old partner key will be automatically deleted.<br />
cont.<br />
63
Customising your telephone<br />
Setting up function keys<br />
64<br />
cont.<br />
Function keys with LED<br />
Your telephone has 2 user programmable function keys with LED displays. The LED<br />
shows you the current status of the key function, e.g. you can see whether the<br />
corresponding function is turned on or off.<br />
LED display on function keys<br />
Function LED<br />
Call list on: entries; flashing: new entries<br />
Call diversion from (to) on: call diversion is active<br />
Anonymous calling on: active<br />
Appointment on: set; flashing: reminder<br />
Message flashing: receiving message<br />
Night service [auto., 1–3] on: night service active<br />
Lock on: telephone locked<br />
Programming on: telephone in programming mode<br />
Do not disturb on: function on<br />
LED display on line keys<br />
Status of line LED<br />
free off<br />
busy on<br />
calling/redialling fast flashing<br />
waiting slow flashing<br />
allocated slow flashing<br />
LED display on partner keys<br />
Partner status LED<br />
free off<br />
free/call diversion to ... active off<br />
free/destination of a call diversion off<br />
busy on<br />
receiving external call fast flashing<br />
receiving internal call slow flashing
Setting up function keys<br />
Delete key assignments<br />
Press “Menu” function key.<br />
Scroll to the Settings menu item.<br />
Confirm your selection.<br />
Scroll to the Function keys menu item.<br />
Customising your telephone<br />
Confirm your selection. The description and current assignment of all keys<br />
will be displayed.<br />
Scroll to the function key whose assignment you want to delete.<br />
Confirm your selection.<br />
Scroll to the Delete menu item.<br />
Confirm your selection. The key now has no function.<br />
Labelling function keys<br />
All function keys are assigned frequently used functions by default. Next to the row<br />
of function keys you can insert the associated labelling strip. This can be found on<br />
the sheet supplied.<br />
If you have changed the assignment of the function keys, you can use the free<br />
labelling strip on the sheet (for manual entries)<br />
cont.<br />
65
Customising your telephone<br />
Changing general settings<br />
You can specify how your telephone normally establishes a connection. This<br />
includes all settings that help you to telephone more conveniently: For instance,<br />
automatic exchange line connection or number of redial operations.<br />
You can suppress the indication of another call while you are on the telephone.<br />
For external calls, you can specify whether a call number is passed to the<br />
subscriber. You can also specify whether this is your internal extension number or<br />
only the company telephone number.<br />
You can also set up your telephone so that it does not ring for group signalling, e.g.<br />
general call.<br />
You can also select whether you want to use a headset that is connected.<br />
Line when dialling . . . . . . . . . . . . . . . . . . . . . . . . . . . . . . . . . . . . . . . . . . . . . . . . . . . . 67<br />
Line off-hook . . . . . . . . . . . . . . . . . . . . . . . . . . . . . . . . . . . . . . . . . . . . . . . . . . . . . . . . . 67<br />
Number of redial operations . . . . . . . . . . . . . . . . . . . . . . . . . . . . . . . . . . . . . . . . . . . . 68<br />
Redial every x seconds . . . . . . . . . . . . . . . . . . . . . . . . . . . . . . . . . . . . . . . . . . . . . . . . 69<br />
Second call . . . . . . . . . . . . . . . . . . . . . . . . . . . . . . . . . . . . . . . . . . . . . . . . . . . . . . . . . . 70<br />
Call number display for outside calls . . . . . . . . . . . . . . . . . . . . . . . . . . . . . . . . . . . . . 70<br />
Dial immediately . . . . . . . . . . . . . . . . . . . . . . . . . . . . . . . . . . . . . . . . . . . . . . . . . . . . . . 71<br />
Code . . . . . . . . . . . . . . . . . . . . . . . . . . . . . . . . . . . . . . . . . . . . . . . . . . . . . . . . . . . . . . . 72<br />
General call . . . . . . . . . . . . . . . . . . . . . . . . . . . . . . . . . . . . . . . . . . . . . . . . . . . . . . . . . . 73<br />
Hunt group . . . . . . . . . . . . . . . . . . . . . . . . . . . . . . . . . . . . . . . . . . . . . . . . . . . . . . . . . . 74<br />
VIP call . . . . . . . . . . . . . . . . . . . . . . . . . . . . . . . . . . . . . . . . . . . . . . . . . . . . . . . . . . . . . 74<br />
Headset . . . . . . . . . . . . . . . . . . . . . . . . . . . . . . . . . . . . . . . . . . . . . . . . . . . . . . . . . . . . .<br />
75<br />
66
Changing general settings<br />
Customising your telephone<br />
cont.<br />
Line when dialling<br />
You can automatically seize an exchange line every time you dial with the handset<br />
on the hook. You then always save having to dial the number for the exchange line.<br />
Press “Menu” function key.<br />
Scroll to the Settings menu item.<br />
Confirm your selection.<br />
Scroll to the Dial settings menu item.<br />
Confirm your selection.<br />
Scroll to the LN on dialling menu item. An indication on the right hand side<br />
of the window shows whether the function is on or off.<br />
Switching the function on or off. The new status is displayed.<br />
Exit menu. The new setting is then saved.<br />
Line off-hook<br />
You can automatically seize an external line whenever you lift the handset. You then<br />
always save having to dial the number for the exchange line.<br />
Press “Menu” function key.<br />
Scroll to the Settings menu item.<br />
Confirm your selection.<br />
Scroll to the Dial settings menu item.<br />
Confirm your selection.<br />
Scroll to the Line off-hook menu item. An indication on the right hand side of<br />
the window shows whether the function is on or off.<br />
Switching the function on or off. The new status is displayed.<br />
Exit menu. The new setting is then saved.<br />
i<br />
If you have switched on “Line when dialling” or “Line off-hook”, you must first<br />
press the refer back key to make an internal call.<br />
67
Customising your telephone<br />
Changing general settings<br />
Number of redial operations<br />
When you activate automatic redialling (→ Page 16): We set here how often the<br />
dialling is to be repeated automatically.<br />
Press “Menu” function key.<br />
68<br />
Scroll to the Settings menu item.<br />
Confirm your selection.<br />
Scroll to the Dial settings menu item.<br />
Confirm your selection.<br />
Scroll to the Number of redials menu item. The number of redial<br />
operations currently set is shown in brackets.<br />
If necessary, press several times to select the desired number of redial<br />
operations.<br />
Exit menu. The new setting is then saved.<br />
You can select 0, 3, 5 or 10 repeats.<br />
If the setting is “0”, the “Auto redial” menu item is removed.<br />
i<br />
cont.
Changing general settings<br />
Customising your telephone<br />
cont.<br />
Redial every x seconds<br />
When you activate automatic redialling (→ Page 16): Here, you specify the time that<br />
elapses before your telephone redials automatically.<br />
Press “Menu” function key.<br />
Scroll to the Settings menu item.<br />
Confirm your selection.<br />
Scroll to the Dial settings menu item.<br />
Confirm your selection.<br />
Scroll to the Redial every menu item. The currently set time interval until the<br />
next redial operation is shown in brackets.<br />
If necessary, press several times to select the desired time.<br />
Exit menu. The new setting is then saved.<br />
You can select times of 15, 30, 60, 90 or 120 seconds.<br />
i<br />
69
Customising your telephone<br />
Changing general settings<br />
Second call<br />
70<br />
Press “Menu” function key.<br />
Scroll to the Settings menu item.<br />
Confirm your selection.<br />
Scroll to the Dial settings menu item.<br />
Confirm your selection.<br />
Scroll to the Second call menu item. An indication on the right hand side of the<br />
window shows whether the function is on or off.<br />
Modify the setting The new status is displayed.<br />
Exit menu. The new setting is then saved.<br />
Call number display for outside calls<br />
Press “Menu” function key.<br />
Scroll to the Settings menu item.<br />
Confirm your selection.<br />
Scroll to the Dial settings menu item.<br />
Confirm your selection.<br />
Scroll to the Remote no. disp menu item.<br />
Press the key for the desired setting several times if necessary:<br />
off to switch the call number display off completely,<br />
own to send your internal extension number (e.g. 7505–12),<br />
master to send only your company telephone number (e.g. 7505–0).<br />
Exit menu. The new setting is then saved.<br />
i<br />
Busy is signalled to a caller if you are making a call and have set a second call.<br />
You can block sending your telephone number for the next call (“Anonymous<br />
calling”, → Page 18).<br />
cont.
Changing general settings<br />
Customising your telephone<br />
Direct dial<br />
If you have enabled “Direct dial”, each digit you enter will be dialled<br />
immediately. If you set this function to “off”, you can first key in a call number<br />
completely. You can check the call number again and correct it if necessary. You<br />
can then completely dial the call number.<br />
Press “Menu” function key.<br />
Scroll to the Settings menu item.<br />
Confirm your selection.<br />
Scroll to the Dial settings menu item.<br />
Confirm your selection.<br />
Scroll to the Direct dial menu item. An indication on the right hand side of<br />
the window shows whether the function is on or off.<br />
Switching the function on or off. The new status is displayed.<br />
Exit menu. The new setting is then saved.<br />
cont.<br />
71
Customising your telephone<br />
Changing general settings<br />
72<br />
cont.<br />
Code<br />
Every outgoing and incoming call can be assigned a code number. This enables the<br />
call to be assigned to a project or client number.<br />
Press “Menu” function key.<br />
Scroll to the Settings menu item.<br />
Confirm your selection.<br />
Scroll to the Dial settings menu item.<br />
Confirm your selection.<br />
Scroll to the Code menu item. If already set up, the current code number is displayed.<br />
Confirm your selection.<br />
Change code number or delete using .<br />
Exit menu. The new code number is then saved. It will be displayed for every<br />
external call.<br />
The code number can also be called up during an external call.<br />
i
Changing general settings<br />
Customising your telephone<br />
cont.<br />
General call<br />
An incoming external call will be signalled on all the telephones in your system if you<br />
have not set up an answering station (general call). You can set up your telephone<br />
so that it does not ring for a general call.<br />
Press “Menu” function key.<br />
Scroll to the Settings menu item.<br />
Confirm your selection.<br />
Scroll to the Applications menu item.<br />
Confirm your selection.<br />
Scroll to the General call menu item. An on/off indication on the right hand side<br />
of the window shows whether your telephone will ring for a general call (on) or not<br />
(off).<br />
Switching general call on or off. The new status is displayed.<br />
Exit menu. The new setting is saved and is briefly displayed as an information<br />
message.<br />
73
Customising your telephone<br />
Changing general settings<br />
Hunt group<br />
If your telephone is assigned to one or more hunt groups: You can temporarily<br />
remove your telephone from these hunt groups.<br />
Press “Menu” function key.<br />
74<br />
Scroll to the Settings menu item.<br />
Confirm your selection.<br />
Scroll to the Applications menu item.<br />
Confirm your selection.<br />
Scroll to the Hunt group menu item. An on/off indication on the right hand side<br />
of the window shows whether your telephone is currently assigned to a hunt group<br />
(on) or not (off).<br />
Temporarily removing from hunt groups or rejoining (on). The new status is<br />
displayed.<br />
Exit menu. The new setting is saved and is briefly displayed as an information<br />
message.<br />
cont.<br />
VIP call<br />
If a VIP call has been set up for your telephone: you can temporarily remove calls<br />
from the VIP call signalling. Calls are no longer signalled, e.g. on a pager or logged.<br />
Press “Menu” function key.<br />
Scroll to the Settings menu item.<br />
Confirm your selection.<br />
Scroll to the Applications menu item.<br />
Confirm your selection.<br />
Scroll to the VIP call menu item. An on/off indication on the right hand side of the<br />
window shows whether the VIP call is set (on) or not (off) for your telephone.<br />
Temporarily disable or re-enable VIP call. The new status is displayed.<br />
Exit menu. The new setting is then saved.
Changing general settings<br />
Customising your telephone<br />
Headset<br />
You can decide whether or not you want to use a headset connected to the CTI/<br />
audio link.<br />
Press “Menu” function key.<br />
Scroll to the Settings menu item.<br />
Confirm your selection.<br />
Scroll to the Applications menu item.<br />
Confirm your selection.<br />
Scroll to the Headset menu item. An on/off indication on the right hand side of<br />
the window shows whether you can use a connected headset (on) or not (off).<br />
Switch headset use on or off. The new status is displayed.<br />
Exit menu. The new setting is then saved.<br />
Instructions for using the headset can be found on Page 83.<br />
i<br />
cont.<br />
75
Settings for your telephone system<br />
Settings for your telephone system<br />
You can set up many of the options for your telephone system from your <strong>T3</strong> Classic<br />
telephone. The settings apply to all the telephones in your system:<br />
For each exchange line, you can specify which telephones should ring for incoming<br />
calls without direct dialling inward (e.g. 7050–0). These telephones are known as<br />
the answering stations for this exchange line.<br />
You can set these up for normal daytime operation (day service), three different<br />
night variations (night service 1 to 3) and as call forwarding after a delay.<br />
You can change the date and time globally for the whole system.<br />
You can query statistical information for your telephone (traffic statistics).<br />
Answering stations for day service . . . . . . . . . . . . . . . . . . . . . . . . . . . . . . . . . . . . . . 77<br />
Answering stations for night service . . . . . . . . . . . . . . . . . . . . . . . . . . . . . . . . . . . . . 78<br />
Call forwarding . . . . . . . . . . . . . . . . . . . . . . . . . . . . . . . . . . . . . . . . . . . . . . . . . . . . . . . 79<br />
Date/Time . . . . . . . . . . . . . . . . . . . . . . . . . . . . . . . . . . . . . . . . . . . . . . . . . . . . . . . . . . . 80<br />
Traffic statistics . . . . . . . . . . . . . . . . . . . . . . . . . . . . . . . . . . . . . . . . . . . . . . . . . . . . . . .<br />
80<br />
76
Settings for your telephone system<br />
Settings for your telephone system<br />
Answering stations for day service<br />
You can set up an answering station for each external line. The answering station<br />
can consist of up to 3 telephones.<br />
Press “Menu” function key.<br />
Scroll to the Settings menu item.<br />
Confirm your selection.<br />
Scroll to the System functions menu item.<br />
Confirm your selection.<br />
Scroll to the Day service menu item.<br />
Confirm your selection.<br />
Enter the 2-figure number of the line for which you want to set up an<br />
answering station.<br />
Enter the 2-figure number of the extension you want to set up as an<br />
answering station.<br />
If required, enter two more internal numbers of extensions that<br />
are also to be set up as answering stations.<br />
If necessary, scroll to the Next extl. line menu item and set up answering<br />
stations for this line.<br />
Exit menu. The new setting is then saved.<br />
cont.<br />
i<br />
An answering station is not absolutely essential.<br />
If an exchange line is not specified as an answering station, a general call takes<br />
place.<br />
All exchange lines can be assigned to one telephone as the answering station.<br />
Instead of entering the line number, you simply press the corresponding line key.<br />
To change answering stations you have set up: simply enter the new answering<br />
stations.<br />
77
Settings for your telephone system<br />
Settings for your telephone system<br />
78<br />
cont.<br />
Answering stations for night service<br />
There is often a need for a telephone system to handle calls differently at night than<br />
during the day. Here, you can set up special answering stations for night service.<br />
Press “Menu” function key.<br />
Scroll to the Settings menu item.<br />
Confirm your selection.<br />
Scroll to the System functions menu item.<br />
Confirm your selection.<br />
Scroll to the Night service 1 (or 2, 3) menu item.<br />
service.<br />
Confirm your selection.<br />
Enter the 2-figure number of the line for which you want to set up a night<br />
Enter the 2-figure number of the extension you want to set up as an<br />
answering station.<br />
If required, enter two more internal numbers of extensions that<br />
are also to be set up as answering stations for this night service.<br />
If necessary, scroll to the Next extl. line menu item and enter answering stations<br />
for this line.<br />
Exit menu. The new setting is then saved.<br />
i<br />
3 different night service options are possible.<br />
Up to 3 answering stations can be set up for each exchange line.<br />
Switching on night service: “Night service” menu (→ Page 52).<br />
Different exchange line access rights during night service must be specifically<br />
programmed (See <strong>Integral</strong> manual).<br />
You can program times when the system automatically activates a night service<br />
(see <strong>Integral</strong> manual).<br />
To change existing answering stations: simply enter the new answering stations.
Settings for your telephone system<br />
Settings for your telephone system<br />
Call forwarding<br />
Up to 3 call forwarding destinations can be set up for each exchange line. Call<br />
forwarding takes place after a set time when a answering station is called via the<br />
exchange line.<br />
Press “Menu” function key.<br />
Scroll to the Settings menu item.<br />
Confirm your selection.<br />
Scroll to the System functions menu item.<br />
Confirm your selection.<br />
Scroll to the Call forwarding menu item.<br />
Confirm your selection.<br />
Enter the 2-digit number of the line for which you want to set up call<br />
forwarding.<br />
Enter the 2-digit number of the extension to which the call is to be<br />
forwarded.<br />
If required, enter two more internal numbers of extensions that<br />
are also to be set up to receive forwarded calls.<br />
cont.<br />
If necessary, scroll to the Next extl. line menu item and set up call forwarding for<br />
this line.<br />
Exit menu. The new setting is then saved.<br />
i<br />
The time before the call is forwarded can be set globally for the system between<br />
0 and 300 sec.<br />
If call forwarding is set up for the answering station but no forwarding destination<br />
has been specified, the call is forwarded as a general call.<br />
Call forwarding stations you have already set up can be changed by simply<br />
entering the new call forwarding station.<br />
79
Settings for your telephone system<br />
Settings for your telephone system<br />
Date/time<br />
80<br />
Press “Menu” function key.<br />
Scroll to the Settings menu item.<br />
Confirm your selection.<br />
Scroll to the System functions menu item.<br />
Confirm your selection.<br />
Scroll to the Date/time menu item.<br />
Confirm your selection.<br />
Enter 6-figure date: Day Month Year.<br />
Enter 4-figure time: Hours Minutes. The day of the week is set<br />
automatically.<br />
Exit menu. New time/date is saved.<br />
cont.<br />
Traffic statistics<br />
You can retrieve statistical information for your telephone. To do this, you must have<br />
connected a PC with GDV software via the CTI or CTI/audio link.<br />
Press “Menu” function key.<br />
Scroll to the Statistics menu item.<br />
Confirm your selection. Information about calls since the data was last<br />
deleted will be shown.<br />
i<br />
You can reset the counter via the Delete entry menu item. The data will now be<br />
recorded again from the current date.
Links<br />
Extras for your telephone<br />
A special advantage of your telephone is the flexible link concept that allows you to<br />
expand your basic telephone with a wide variety of peripherals. Links are base<br />
inserts for <strong>T3</strong> telephones. You can connect just one link to the <strong>T3</strong> <strong>Compact</strong>. A<br />
choice can be made from the following links:<br />
CTI link (with V.24 interface to connect Tenovis Com4Tel or a PC)<br />
CTI/audio link (with V.24 interface to connect Tenovis Com4Tel or a PC and X/Y<br />
interface to connect a DSS module and a headset, KonfTel, a second earpiece or<br />
a recording device)<br />
DSS link (with Y interface to connect DSS modules)<br />
View of a link View from bottom<br />
i<br />
You can find more information about the individual links in the appropriate<br />
operating instructions.<br />
The configuration of the links for connecting the various equipment is carried out<br />
by Tenovis Service.<br />
81
Extras for your telephone<br />
DSS Module<br />
A DSS module has 36 keys, which the Tenovis service can assign according to your<br />
preferences (DSS = Direct Station Select). The following options are available:<br />
Call numbers of your partners<br />
Individual destinations (frequently used call numbers)<br />
Line keys<br />
Functions, e.g. door opener, call diversion, hotel functions, etc.<br />
Dialling with the DSS module<br />
82<br />
Lift the handset.<br />
Press the DSS key for the desired subscriber.<br />
1: Keys with LEDs<br />
2: Insert strips for labelling<br />
The LED indicates whether the connection is free or busy.<br />
2<br />
Connection LED<br />
free off<br />
call slow flashing<br />
external call fast flashing<br />
busy on<br />
1<br />
i<br />
You can connect up to 3 DSS modules to the DSS link.<br />
Instead of picking up the handset first, you can press the DSS key for the desired<br />
subscriber and then pick up the handset (dialling with handset on hook).
Headset<br />
Extras for your telephone<br />
You can connect a headset or a wireless Comfort headset to the CTI/audio link.<br />
Before you can use the headset to make a call, you must activate it on the<br />
telephone (→ Page 75).<br />
Accepting calls on the headset<br />
Your telephone rings.<br />
Press “Handsfree” function key. You are in a call with the other party using the<br />
headset. The LED next to the function key flashes.<br />
Continuing a headset call using the handset<br />
Lift the handset and use it normally for your call. You can listen to the call using<br />
the headset.<br />
Continuing a handset call using the headset<br />
Press “Handsfree” function key twice. You are in a call with the other party<br />
using the headset. The LED next to the function key flashes.<br />
Ending a headset call and breaking the connection<br />
Press “Handsfree” function key.<br />
Calling with the headset<br />
... Enter the call number.<br />
Press “Handsfree” function key. You are in a call with the other party using the<br />
headset. The LED next to the function key flashes.<br />
i<br />
If you are making calls using the headset, you should have the “Wake-up” tone<br />
set up by Tenovis Service.<br />
With the Comfort headset you can hear the ringing on the headphones of the<br />
headset.<br />
With the Comfort headset, instead of pressing the handsfree key on the<br />
telephone, you can also press the Accept call key on the mobile section.<br />
83
Extras for your telephone<br />
Hotel Functions<br />
You can use the hotel functions in small to medium-sized hotels and guest houses.<br />
The Tenovis Service can connect up to three DSS modules for executing these<br />
functions.<br />
Available functions include checking guests in and out, viewing guest call charges,<br />
disabling direct dial to rooms, waking up guests, etc.<br />
You can also hook up a printer to the telephone system for printing out charge<br />
reports and wake-up requests.<br />
Layout of the hotel functions on the DSS module . . . . . . . . . . . . . . . . . . . . . . . . . . 85<br />
Checking in a guest . . . . . . . . . . . . . . . . . . . . . . . . . . . . . . . . . . . . . . . . . . . . . . . . . . . 86<br />
Viewing guest charges and checking out the guest . . . . . . . . . . . . . . . . . . . . . . . . 86<br />
Message to guest: Message at reception . . . . . . . . . . . . . . . . . . . . . . . . . . . . . . . . . 87<br />
Direct dial to rooms . . . . . . . . . . . . . . . . . . . . . . . . . . . . . . . . . . . . . . . . . . . . . . . . . . . 87<br />
Guest-to-guest connection . . . . . . . . . . . . . . . . . . . . . . . . . . . . . . . . . . . . . . . . . . . . . 88<br />
Determining a call-charge limit . . . . . . . . . . . . . . . . . . . . . . . . . . . . . . . . . . . . . . . . . . 89<br />
Waking up guests . . . . . . . . . . . . . . . . . . . . . . . . . . . . . . . . . . . . . . . . . . . . . . . . . . . .<br />
90<br />
84
Hotel Functions<br />
Layout of the hotel functions on the DSS module<br />
DDD<br />
Message<br />
Disable guest-to-guest<br />
Call-charge limit<br />
Exit<br />
Check in/Check out<br />
Other keys:<br />
Destination keys for guests<br />
Extras for your telephone<br />
cont.<br />
Check in/Check out: For checking guests in and out.<br />
DDD (Disable Direct Dial): An external caller cannot directly dial the guest’s room,<br />
but must be connected via the switchboard.<br />
Message: The switchboard can send a message to a room telephone.<br />
Disable guest-to-guest: Others guests cannot use their room telephones to call<br />
this guest directly, but must be connected via the switchboard.<br />
Call-charge limit: The guest can only incur call charges up to the amount specified<br />
in the telephone system.<br />
Exit: For ending an operating procedure. The DSS module returns to displaying the<br />
calling status of the room telephones.<br />
85
Extras for your telephone<br />
Hotel Functions<br />
Checking in a guest<br />
86<br />
Press the Check-in key.<br />
Press the key for the desired room, e.g. 101.<br />
The guest is checked in.<br />
Viewing guest charges and checking out the guest<br />
Press the Check-out key.<br />
Press the key for the desired room, e.g. 101.<br />
If the key light goes off: No call charges have been incurred.<br />
Check out is complete.<br />
If the key flashes:<br />
Scroll to the Charges menu item.<br />
Confirm your selection.<br />
Press the key for the room again. The call charges are displayed.<br />
Scroll to the Printout menu item (for sum of charges) or Total printout (for<br />
details of individual calls).<br />
Confirm your selection. The call charges for this guest are printed out.<br />
cont.<br />
Scroll to the Call charge meter menu item.<br />
Confirm your selection. The call charges for this guest are deleted.<br />
Press this key.<br />
Press the key for the room again, e.g. 101. The guest is checked out.<br />
Press the “Exit” key. The DSS module returns to displaying the calling status of<br />
the room telephones.<br />
i<br />
The guest acquires the full exchange authorisation upon check-in. The call-charge<br />
memory of the previous guest is erased. The key lights up.<br />
All a guest’s messages, wake-up calls, call diversions and call backs are deleted<br />
upon check-out. Direct dial from other rooms is disabled.<br />
On checking out, an automatic printout of the total is also possible. If you require<br />
this option, consult Tenovis Service.
Hotel Functions<br />
Message to guest: Message at reception<br />
Press the “Message” key.<br />
Press the key for the desired room, e.g. 222.<br />
Extras for your telephone<br />
Press the “Exit” key. The DSS module returns to displaying the calling status of<br />
the room telephones.<br />
To delete the message:<br />
Press the key for the desired room again, e.g. 222.<br />
Direct dial to rooms<br />
Disabling direct dial to rooms<br />
Press the “DDD” (Disable Direct Dial) key.<br />
Press the key for the desired room, e.g. 707. The key lights up.<br />
Press the “Exit” key. The DSS module returns to displaying the calling status of<br />
the room telephones.<br />
cont.<br />
Enabling direct dial to rooms<br />
Press the “DDD” (Disable Direct Dial) key.<br />
The keys of all rooms which cannot be called directly light up.<br />
Press the key for the desired room, e.g. 707. The light on the key goes out.<br />
Press the “Exit” key. The DSS module returns to displaying the calling status of<br />
the room telephones.<br />
i<br />
“Message” appears on the display of the room telephone.<br />
If the room telephone does not have a display, the LED will light up as a signal.<br />
If the guest rings back, the “Message” indication is cancelled or the LED goes<br />
out.<br />
If direct dial to a room is disabled, an external caller cannot reach this guest<br />
directly but must be connected via the switchboard.<br />
87
Extras for your telephone<br />
Hotel Functions<br />
Guest-to-guest connection<br />
Disabling guest-to-guest connection<br />
Press the “Disable guest-to-guest” key.<br />
88<br />
Press the key for the desired room, e.g. 707. The key lights up.<br />
Press the Exit key. The DSS module returns to displaying the calling status of<br />
the room telephones.<br />
Re-enabling guest-to-guest connection<br />
Press the “Disable guest-to-guest” key.<br />
The keys of all rooms which cannot be called directly from other room telephones<br />
light up.<br />
Press the key for the desired room, e.g. 707. The light on the key goes out.<br />
Press the Exit key. The DSS module returns to displaying the calling status of<br />
the room telephones.<br />
i<br />
If a guest-to-guest connection is disabled, this guest cannot be called directly by<br />
other guests and must instead be connected via the switchboard.<br />
cont.
Hotel Functions<br />
Extras for your telephone<br />
Determining the call charge limit<br />
Activating a call-charge limit<br />
Press the Call-charge limit key.<br />
Press the key for the desired room, e.g. 707. The key lights up.<br />
Press the Exit key. The DSS module returns to displaying the calling status of<br />
the room telephones.<br />
Deactivating a call-charge limit<br />
Press the Call-charge limit key.<br />
The keys for all rooms with an activated call-charge limit light up.<br />
Press the key for the desired room, e.g. 707. The light on the key goes out.<br />
Press the Exit key. The DSS module returns to displaying the calling status of<br />
the room telephones.<br />
i<br />
When the call-charge limit for a room is activated, this guest can only incur call<br />
charges up to the specified limit.<br />
As soon as a guest reaches the call-charge limit, he hears a signal tone. He can<br />
still finish the present call, but cannot make any more external calls. A message<br />
that the guest has exceeded the call-charge limit appears on the reception telephone.<br />
The call charge limit is the same for all guests.<br />
cont.<br />
89
Extras for your telephone<br />
Hotel Functions<br />
Waking up guests<br />
90<br />
Press “Menu” function key.<br />
Scroll to the Appointment for others menu item.<br />
Confirm your selection.<br />
Press the key for the desired room, e.g. “605”.<br />
cont.<br />
Confirm the number. All existing appointments for this room will be displayed.<br />
Now enter the desired time for the wake-up call just as if you were making an<br />
appointment.<br />
Deleting a wake-up call:<br />
Press “Menu” function key.<br />
Scroll to the Appointments for others menu item.<br />
Press the key for the desired room, e.g. “605”.<br />
Confirm your selection. All the set appointments will be shown.<br />
Scroll to the appointment you want to delete.<br />
Confirm your selection.<br />
Scroll to the Delete menu item.<br />
Confirm your selection. The appointment is deleted.<br />
i<br />
With the wake-up call, you can send your own text or one prepared by Tenovis<br />
Service. You can change this text or compose one yourself.<br />
If the guest does not react to the wake-up call, a corresponding message<br />
appears on the reception telephone.<br />
Using the printer, a log is kept of when the wake-up call was entered, when it was<br />
executed, and when it was acknowledged or not (after a certain time).<br />
You can find more information on Page 37.
Overview of telephone functions<br />
Look it up<br />
All the functions that you can assign to use programmable function keys are shown<br />
in the table, sorted alphabetically.<br />
Announce<br />
For making an announcement to subscribers in your system.<br />
Announce to associated subscribers<br />
Announce to group<br />
For making an announcement to a group of subscribers within your system.<br />
Anonymous call<br />
When you do not want the other party to see your call number.<br />
Answer to announcement<br />
For replying to a general or group announcement.<br />
Appointment for associated subscriber<br />
Appointment<br />
For having your telephone remind you of an important appointment<br />
Appointment for others<br />
For reminding other subscribers in your system of an appointment.<br />
Automatic night service<br />
For activating the night service automatically. The activation time is set by Tenovis<br />
Service.<br />
Bundle diversion<br />
You can divert all calls received by a certain bundle (main call number) to an<br />
external number.<br />
Call charge printout<br />
Prints details of call charges on the call charge printer. This function must be<br />
enabled by Tenovis Service.<br />
Call charges<br />
For viewing call charges.<br />
Call diversion for other subscribers<br />
For diverting calls for other telephones to internal numbers.<br />
Call diversion from associated subscribers<br />
Call diversion to associated subscribers<br />
Call diversion to<br />
For diverting calls from your telephone to another.<br />
91
Look it up<br />
Overview of telephone functions<br />
92<br />
cont.<br />
Call forwarding<br />
For automatically forwarding calls to another connection if you do not answer within<br />
a certain time.<br />
Call list<br />
The call list contains all calls that you did not answer.<br />
Customer number<br />
For every call resulting in charges, you can enter a three to ten-digit code – such as<br />
a project or job number – for accounting purposes.<br />
Cut out of group<br />
For cutting your telephone out of the group line.<br />
Cutting yourself out of general call<br />
You can cut your telephone out of the general call.<br />
Day service<br />
For deactivating the night service.<br />
Delete self-assignment of other subscribers<br />
You can delete the self-assignment of another subscriber if Tenovis Service has<br />
activated this function on your telephone.<br />
Deleting self-assignment of associated subscribers<br />
Diverting calls from<br />
For diverting calls from another telephone to your own.<br />
Do not disturb<br />
If you do not wish to be disturbed by internal calls.<br />
Door opener<br />
Activates the appropriate switching contact. Should only be used with the<br />
corresponding auxiliary equipment.<br />
Form feed call charge printer<br />
For printing out a page on the charges printer. This function must be enabled by<br />
Tenovis Service.<br />
Internal group call<br />
For simultaneously calling all subscribers of a particular group. You will be<br />
connected to the first subscriber that answers the call.<br />
Line bundles<br />
Seizes a line in the corresponding bundle.<br />
Message<br />
For sending a message to a subscriber within your system.
Overview of telephone functions<br />
Look it up<br />
Night service 1, 2, 3<br />
For activating and deactivating the night service for particular subscriber groups.<br />
Partner or destination<br />
If a partner or destination has been stored with a name, this name will be shown.<br />
Pick-up from associated subscriber/from associated group<br />
Pick-up from<br />
You can use this function to direct calls for other subscribers or groups to your<br />
telephone.<br />
cont.<br />
Refer back 1. Private branch exchange, hold in public exchange<br />
Ringer tone off<br />
Switches off the ringer tone for the next call or for a definite time.<br />
Self-assignment<br />
Audible notification of calls on own telephone that are normally answered by other<br />
subscribers.<br />
Settings<br />
For setting various telephone functions, such as the night service.<br />
Lock<br />
For protecting your telephone against unauthorised use. Others can use your<br />
phone only for emergency or internal calls.<br />
Statistics<br />
Statistical information for your telephone. To do this, a PC with GDV software must<br />
be connected via the CTI or CTI/audio link.<br />
Telephone directory<br />
Calls up the telephone directory.<br />
Temporary DTMF<br />
For enabling tone dialling, e.g. for remote access to an answering machine.<br />
93
Look it up<br />
Messages in the Display<br />
This gives an overview of important display and status messages. Standard displays<br />
and messages are shown in the case of special settings.<br />
Busy<br />
The connection dialled is busy.<br />
Bundle<br />
To seize a line from a particular bundle.<br />
Bundle busy<br />
All lines in the selected bundle are busy.<br />
Bundle ... private<br />
To seize a line in a bundle reserved for you.<br />
Call<br />
The subscriber you are calling is not occupying the line.<br />
Call number<br />
You are connected to the call number displayed.<br />
Code<br />
For every call resulting in charges, you can enter a three to ten-digit code – such as<br />
a project or job number – for accounting purposes.<br />
Cut out of hunt group<br />
You have cut your telephone out of the hunt group.<br />
Dial pause<br />
For storing a dial pause, such as between dialling code and call number.<br />
Earth/flash<br />
Select this menu item if you are connected to another system which requires a flash<br />
key for external access.<br />
Empty<br />
There are no entries stored in the telephone book.<br />
Divert to<br />
For forwarding the call to another subscriber.<br />
Internal call number<br />
For storing the number of a telephone connected to your system.<br />
Invalid<br />
Invalid: You have entered a call number – such as an unknown code – that the telephone<br />
cannot dial.<br />
94
Messages in the Display<br />
Look it up<br />
cont.<br />
K:<br />
All keystrokes are sent as keypad information. Used to program a telephone system<br />
or to use service features in the network.<br />
Malfunction<br />
There is a malfunction e.g. in the line or in a connected printer. The malfunction<br />
message is displayed until the malfunction is corrected.<br />
Other subs.<br />
For storing a call number for another subscriber (only possible if activated by<br />
Tenovis Service).<br />
Phone book entry<br />
To save a call list entry or redial number in your personal telephone directory.<br />
Phone locked<br />
Your telephone is locked. To unlock it, select the “Lock” menu item and enter your<br />
PIN (Personal Identification Number).<br />
PIN<br />
PIN (Personal Identification Number), four digit: for locking and unlocking your<br />
telephone.<br />
PIN code<br />
If you have a PIN (Personal Identification Number), you can lock your own phone<br />
and make external calls from locked phones. PIN code = internal number + PIN.<br />
Prevent general call<br />
Your telephone is cut out of the general call.<br />
Recall<br />
Recall: You have forwarded a caller to an internal subscriber who does not answer.<br />
The call is returned to you.<br />
Refer-back host PABX<br />
For initiating a consultation (Refer-back) to another connected system.<br />
Self-assignment<br />
Audible notification of calls on own telephone that are normally answered by other<br />
subscribers.<br />
Subs.<br />
Subscribers: Enter the call number of the desired subscriber.<br />
Transfer call<br />
For transferring a call.<br />
95
Look it up<br />
Symbol table<br />
The numeric keys can also be used to enter letters and numbers, e.g. for names in<br />
the telephone directory. Your telephone switches automatically to entry of letters and<br />
numbers when this is necessary.<br />
Page 10 explains how to enter characters.<br />
You can switch (toggle) between upper and lower case letters with the # key.<br />
96<br />
Key 1 2 3 4 5 6 7 8 9 10 11<br />
1 ? ! . , 1 ; : ? ’ ¿ ¡<br />
2 A<br />
a<br />
3 D<br />
d<br />
4 G<br />
g<br />
5 J<br />
j<br />
6 M<br />
m<br />
7 P<br />
p<br />
8 T<br />
t<br />
9 W<br />
w<br />
B<br />
b<br />
E<br />
e<br />
H<br />
h<br />
K<br />
k<br />
N<br />
n<br />
Q<br />
q<br />
U<br />
u<br />
X<br />
x<br />
C<br />
c<br />
F<br />
f<br />
I<br />
i<br />
L<br />
l<br />
O<br />
o<br />
R<br />
r<br />
V<br />
v<br />
Y<br />
y<br />
2 Ä<br />
ä<br />
3 É<br />
é<br />
4 Í<br />
í<br />
5<br />
6 Ñ<br />
ñ<br />
S<br />
s<br />
8 Ü<br />
ü<br />
Z<br />
z<br />
Á<br />
á<br />
Ê<br />
ê<br />
Î<br />
î<br />
Ö<br />
ö<br />
7 ß<br />
Ú<br />
ú<br />
9 <br />
<br />
0 Space 0 # @ & % $ € § _<br />
* * + – = ( ) / \ < ><br />
# Shift<br />
Â<br />
â<br />
È<br />
è<br />
Ì<br />
ì<br />
Ó<br />
ó<br />
Û<br />
û<br />
À<br />
à<br />
Ë<br />
ë<br />
Ï<br />
ï<br />
Ô<br />
ô<br />
Ù<br />
ù<br />
Å<br />
å<br />
Ò<br />
ò<br />
Ç<br />
ç
Ringing and handset tones<br />
Look it up<br />
Ringing tones for internal and external calls<br />
Normal ringing tone for external calls.<br />
(Example)<br />
Tones in the handset<br />
Normal ringing tone for internal calls.<br />
(Example)<br />
Recall: You have forwarded a caller to an<br />
internal subscriber who does not answer.<br />
Additional call during a conversation or call<br />
waiting signal.<br />
Appointment signal: Reminder of an<br />
appointment.<br />
Tone during a cut-in connection<br />
(→ Page 18).<br />
Acknowledgement tone: Confirms a new<br />
setting.<br />
Special dialling tone: Sounds instead of a<br />
standard dialling tone if night service or call<br />
diversion is active, or if do not disturb has<br />
been set up.<br />
i<br />
If you do not wish to be disturbed, you can deactivate the ringing tones<br />
(→ Page 58).<br />
97
Look it up<br />
Menu overview<br />
Menu lines in basic<br />
menu<br />
Pick-up<br />
Call list<br />
98<br />
...<br />
down one menu level<br />
Phone book > Search<br />
New indiv. entry<br />
New general entry<br />
Call diversion > Divert from<br />
Divert to<br />
Divert for<br />
Bundle [x]<br />
Appointments > Own appointm.<br />
Appointment for others<br />
Charges > Last call<br />
Total subs.<br />
Total line<br />
Total charges<br />
Local currency –> Euro<br />
Lock<br />
Message<br />
> Lock telephone<br />
Set PIN<br />
Night Service > Night service 1<br />
Night service 2<br />
Night service 3<br />
Autom. Night Service<br />
...<br />
down one menu level
Menu overview<br />
Look it up<br />
Settings > Display / Acoustics > Acoustics / Contrast<br />
Statistics<br />
Function keys<br />
Do not disturb<br />
Language<br />
Dial settings > LN on dialling<br />
Line / off-hook<br />
Number of redials [0]<br />
Redial every: [sec.]<br />
Second call<br />
Remote no. disp<br />
Direct dial<br />
Code<br />
Applications > General call<br />
Hunt group<br />
VIP call<br />
Headset<br />
Int. call list<br />
Slot 1: CTI-Link<br />
Slot 2: CTI-/Audio-Link<br />
System functions > Day service<br />
Night service 1<br />
Night service 2<br />
Night service 3<br />
Call forwarding<br />
Date/time<br />
Customer pswd<br />
cont.<br />
99
Look it up<br />
If something is not working<br />
The incorrect date and time are displayed<br />
Set the correct time in the “System functions” menu (→ Page 80).<br />
Unfamiliar objects in the display<br />
You can look up the meaning of the display in the display indication section.<br />
The call number of a caller is not displayed<br />
Call is transmitted without caller’s number, e.g. an analogue call or the caller has<br />
switched off display of his own number.<br />
Short tones during call<br />
A second call is being signalled. Consult the “Making several connections<br />
simultaneously” section to find out about possible operating steps.<br />
or<br />
You have switched on the loudspeaker.<br />
You and your caller hear a short attention or cut-in tone.<br />
You are participating in a cut-in connection.<br />
Appointment signal<br />
An appointment is being signalled.<br />
A function is not executed<br />
The function may first need to be enabled.<br />
Telephone cancels early while programming<br />
You may not have pressed a key for about 60 seconds. This always terminates any<br />
programming procedure. The programming procedure is also terminated if you take<br />
a call.<br />
A number that you have entered in the telephone directory has a $ sign as the<br />
first character<br />
You have taken a call while entering a call number. The entry has been saved with a<br />
$ as the first character. Edit the entry and replace the $ sign by the correct letter.<br />
100
Key words<br />
Acoustics, 57<br />
Activating day service, 77<br />
Additional functions, 3<br />
Announce, 51<br />
replying, 51<br />
Announcement, to called subscriber, 51<br />
Anonymous calling, 18<br />
Answering stations, 76<br />
Appointment signal, disabling, 41<br />
Appointments, 37<br />
deleting, 41<br />
for others, 42<br />
for today, 38<br />
one-off appointment, 39<br />
recurring, 40<br />
signal tone, 97<br />
viewing, 41<br />
Assigning lines to keys, 62<br />
Assigning partners to keys, 63<br />
Automatic call-back, 17<br />
Automatic redialling, 16<br />
Basic operating principles, 8<br />
Basic status, 9<br />
Call<br />
accepting, 11<br />
answering call for partner, 12<br />
call for partner, 55<br />
diversion, 28<br />
during a programming procedure, 13<br />
forwarding, 21<br />
ringing tones, 97<br />
Call charges<br />
extension, 44<br />
last call, 44<br />
line, 44<br />
reset counter, 45<br />
setting the limit, 89<br />
Key words<br />
total, 45<br />
viewing, 43<br />
Call diversion<br />
after, 29<br />
bundle, 31<br />
changing from another phone, 53<br />
deactivating, 30<br />
for, 30<br />
from, 29<br />
to, 29<br />
Call forwarding, 13, 79<br />
Call list, 25, 35<br />
deleting an entry, 26<br />
internal calls, 25<br />
symbols, 27<br />
Call monitoring, 24<br />
Call number display, 9<br />
for outside calls, 70<br />
Call pick-up, 12<br />
Call waiting, 18<br />
ringing tone, 97<br />
Call-back, 17<br />
line, 17<br />
Calling a partner, 55<br />
Cancel, 8<br />
Cancel entry, 8<br />
Changing cost display to Euros, 45<br />
Checking in, 86<br />
Checking out, 86<br />
Code, 72<br />
Conference, 22<br />
connecting participants together, 23<br />
ending, 23<br />
extend, 23<br />
Consultation, 20<br />
Contrast, 57<br />
Country setting, 59<br />
101
Key words<br />
Key words<br />
Cutting in, 18<br />
Date/time, 80<br />
Declaration of Conformity, 2<br />
Direct dial, 71<br />
Dialling with the DSS module, 82<br />
Direct access tone dialling (DTMF), 18<br />
Direct dial to rooms, 87<br />
Display, 9, 56<br />
Do not disturb, 58<br />
DSS module, 82<br />
Entering text, 10<br />
Euro, 45<br />
External line code, 14<br />
Fault finding, 100<br />
Follow me, 54<br />
Forwarding, 20<br />
Function keys<br />
deleting assignment, 65<br />
labelling, 65<br />
setting up, 60<br />
with LED, 64<br />
Functions<br />
assigning to keys, 61<br />
overview, 91<br />
selecting in the menu, 8<br />
General call, 73<br />
Guest-to-guest connection, 88<br />
Headset, 75, 83<br />
Hearing and speaking accessories, 83<br />
Hotel Functions, 84<br />
on the DSS module, 85<br />
Hunt group, 74<br />
Idle display, 9<br />
102<br />
cont.<br />
If something is not working, 100<br />
Include participant in conversation, 22<br />
Keys, 7<br />
view the function, 61<br />
Language, 59<br />
Language versions of operating<br />
instructions, 3<br />
LED display, 64<br />
line keys, 64<br />
Line off-hook, 67<br />
Line when dialling, 67<br />
Links, 81<br />
Phone location, tips, 2<br />
Making a call, 14<br />
external, 15<br />
from call list, 26<br />
internal, 15<br />
Partners, 55<br />
with handset on hook, 24<br />
with one key stroke, 15<br />
Menu, 8<br />
Menu overview, 98<br />
Message, 48<br />
to guest, 87<br />
Messages, 9<br />
Night Service, 52, 78<br />
Notes, 2<br />
Overview drawing, 6<br />
Personal Identification Number, 47<br />
Pick-up, 12<br />
PIN (Personal Identification<br />
Number), 47<br />
Receiving a call, 12
Key words<br />
Redial, 16<br />
automatic, 16<br />
delayed redial, 16<br />
every x seconds, 69<br />
number, 68<br />
saving number, 35<br />
Refer-back, 20<br />
Repairs, 3<br />
Ringing and handset tones, 97<br />
Ringing Tones, 57<br />
Second call, 13, 70<br />
Second caller, 21<br />
Settings, 3, 66<br />
telephone system, 76<br />
Several connections, 19<br />
Status messages, 9<br />
Symbol table, 96<br />
Symbols in the call list, 27<br />
System, 2<br />
determining, 2<br />
Telephone<br />
connection, 2<br />
locking, 46<br />
locking procedure, 47<br />
unlocking, 47<br />
Key words<br />
cont.<br />
Telephone book, 32<br />
editing entries, 36<br />
general, 36<br />
looking up and dialling numbers, 33<br />
new entry, 34<br />
Telephone system, 76<br />
Telephone systems for your<br />
telephone, 2<br />
Text Message<br />
composing and sending, 49<br />
for caller, 50<br />
reading and deleting, 49<br />
sending, 49<br />
to all, 50<br />
Three-way conference, 19<br />
Tones, 56<br />
Traffic statistics, 80<br />
Using the telephone<br />
easily, 3<br />
three way conference, 22<br />
two callers, 20<br />
with partners, 55<br />
VIP call, 74<br />
Waking up guests, 90<br />
103
Tenovis <strong>GmbH</strong> & Co. KG · Austria<br />
Hüttenbrennergasse 5 · A-1030 Wien<br />
T +43 (0)1 87870-0<br />
F +43 (0)1 87870-7370<br />
N.V. Tenovis S.A. · Belgium<br />
Rue Henri Genesse 1 · B-1070 Bruxelles<br />
T +32-2-5255111<br />
F +32-2-5255000<br />
Tenovis S.A. · France<br />
122, Rue Marcel Hartmann<br />
F-94853 Ivry s/Seine<br />
T +33-1-45156515<br />
F +33-1-45156500<br />
Tenovis S.r.l. · Italy<br />
Via Gadames, 7 · I-20151 Milano<br />
T +39 02 39244-1<br />
F +39 02 39244-805<br />
Tenovis BV · Netherlands<br />
Neptunusstraat 71 · NL-2132 JP<br />
Hoofddorp<br />
T +31-23-5656-410<br />
F +31-23-5656-411<br />
Tenovis <strong>GmbH</strong> · Switzerland<br />
Ifangstrasse 1 · CH-8952 Schlieren<br />
T +41 (0) 1738-7272<br />
F +41 (0) 1738-7218<br />
Telecomunicaciones Tenovis S.L.<br />
Spain<br />
Carretera N-VI, KM 18,150<br />
E-28230 Las Rozas (Madrid)<br />
T +34-91-6312400<br />
F +34-91-6312486<br />
MKS · Bosnia<br />
Kotromanica 48 · BH-Sarajevo<br />
T +3 87 71 27 5825<br />
F +3 87 71 27 5835<br />
Telenorma Colombia S.A.<br />
Av. 13 (aut. Norte) No 118-30 Of. 702<br />
Santafé de Bogotá<br />
T +57 1 600 0400<br />
F +57 1 629 4272<br />
Robert Bosch Odbytova s.r.o.<br />
Czech Republic<br />
Pod visnovkou 25<br />
CZ 142 00 Praha<br />
T +420 2 6130 0612<br />
F +420 2 6130 0638<br />
MTS Modern Telecom System<br />
Egypt<br />
Sheraton Heliopolis Buildings,<br />
Area 1157, Building 12<br />
Nasr City, Cairo<br />
T +20 (2)2682365<br />
F +20 (2)2682371<br />
MTV Telecom Distribution PLC<br />
Great Britain<br />
Sky Business Park<br />
Eversley Way<br />
Thorpe, Egham<br />
Surrey TW20 8RF<br />
T +44 (0)1784 740000<br />
F +44 (0)1784 744030<br />
Telenorm Ltd. · Greece<br />
Ethelonton Aimodonton Str. 3<br />
12131 Peristeri,Athen<br />
T +301 5785220 · F +301 5785227<br />
NORMA Telecom AG · Greece<br />
Polytechniou 6<br />
54626 Saloniki<br />
T +303 1500600<br />
F +303 1555347<br />
INFA Telecom · Hong Kong<br />
38/F Manulife Tower<br />
169 Electric Road, Hong Kong<br />
T +85-2-28066653<br />
F +85-2-25107243<br />
Robert Bosch Kft. · Hungary<br />
Gyömrői út 120 · H-1103 Budapest<br />
T +36-1-4313-700<br />
F +36-1-4313-717<br />
NETCOMM Telephone Systems Ltd.<br />
Mauritius<br />
34, De Courcy Street<br />
Port-Louis<br />
T +230-211-64 00<br />
F +230-211-5226<br />
Computer Telephony S.A. de C.V.<br />
Diagonal No. 27 · Col. Del Valle<br />
03100, México, D. F.<br />
T +525 340-1411<br />
F +525 340-1402<br />
EEI Corporation<br />
Philippines<br />
188 E Rodriguez jr. Avenue<br />
Ortigas Industrial Estate<br />
Quezon City, Metro Manila 1110<br />
T +63-2-63 508 51<br />
F +63-2-63 509 75<br />
C&C Partners Telecom Sp. zo.o.<br />
Poland<br />
Ul. 17Stycznia 119, 121· PL 64-100 Leszno<br />
T +48 65 5255 555<br />
F +48 65 5255 666<br />
VADO Telecom · Russia<br />
Krasnaja Presnja 28<br />
RF 123376 Moscow<br />
T+7- 095-252 00 21<br />
F +7-095-956 70 36<br />
TEHCOM d.o.o · Yugoslavia<br />
Bulevar vojvode Mičića 37<br />
SR-11000 Beograd<br />
T +381 11 3690211<br />
F +381 11 3690211<br />
Procom Inzeniring d.o.o. · Slovenia<br />
Likozarjeva 14 · SI-1000 Ljubljana<br />
T+386130 66 212<br />
F+386130 66 222<br />
ELCyM Telecoms (Pty) Ltd.<br />
South Africa<br />
1, Samrand Avenue · Samrand Industrial<br />
and Commercial Park · P.O. Box 10025,<br />
Centurion 0157<br />
T +27 12 677-6000<br />
F +27 12 677-6677<br />
MTechSA (Pty) Ltd. · South Africa<br />
92, Indaba Lane<br />
P.O. Box 1403<br />
Reitfontein/Honeydew, Krugersdorp<br />
T+2711796 2600<br />
F +2711796 2655<br />
Telenorma C.A. · Venezuela<br />
Avenida Republica Dominicana<br />
Edf. Delcha 1, Boleita Sur<br />
Apartado del Este 61405 · 1060A Caracas<br />
T +58-212-2077511<br />
F +58-212-2398735<br />
reserved<br />
Modifications · gb ·<br />
www.tenovis.com<br />
R1<br />
kundendialog-center@tenovis.com<br />
SW ·<br />
(Germany)<br />
T0800-2661000<br />
1/1001 ·<br />
F 0800-2661219<br />
(International)<br />
T+49 (69) 75 05-28 33<br />
F +49 (69) 75 05-28 41 4.999.057.792