

TABLE OF CONTENTS - Paintball Veckring
TABLE OF CONTENTS - Paintball Veckring
TABLE OF CONTENTS - Paintball Veckring

Create successful ePaper yourself
Turn your PDF publications into a flip-book with our unique Google optimized e-Paper software.
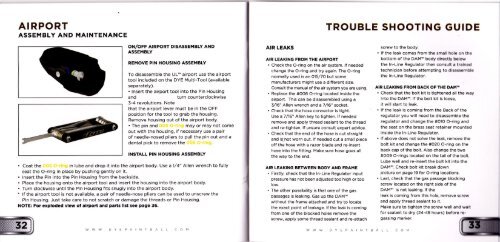
AIRPORT<br />
ASSEMBLY AND MAINTENANCE<br />
ON,/<strong>OF</strong>F AIRPORT DISASSEMBLY AND<br />
ASSEI.lBLY<br />
REMOVE PIN HOUSING ASSEMBLY<br />
To disassemble the UL" airport use the airport<br />
tool included on the DYE Multi-Tool (available<br />
seParately).<br />
. lnsert the airport tool into the Pin Housing<br />
and turn counterclockwise<br />
3-4 revôlutions. Note<br />
that the airport lever must be in the <strong>OF</strong>F<br />
position for the tool to grab the housing.<br />
Remove housing out of the airport body.<br />
. The pin and<br />
out with the housing, if necessary use a pair<br />
of needle-nosed pliers to pull the pin out and a<br />
dental pick to remove the<br />
INSTALL PIN I{OUSING ASSEMBLY<br />
may or may not come<br />
. Coat the in lube and drop it into the airport body. Use a1/4" Allen wrench to fully<br />
seat the O-ring in place by pushing gently on it.<br />
. lnsert the Pin into the Pin Housing from the backside.<br />
. Place the housing onto the airport tool and insert the housing into the airport body.<br />
. Turn clockwise until the Pin Housing fits snugly into the airport body.<br />
* lf the airport tool is not available, a pair of needle-nose pliers can be used to unscrew the<br />
Pin Housing. Just take care to not scratch or damage the threads or Pin Housing.<br />
NOTE: For exploded vlew ol âlrport ând pârts llst soe pag€ 36.<br />
AIR LEAKS<br />
AIR LEAKING FROM THE AIRPORT<br />
. Check the O-ring on the air system. lf needed<br />
change the O-ring and try again. The O-ring<br />
normally used is an O15/7O but some<br />
manufacturers might use a different size.<br />
Consult the manual of the air system you are using.<br />
. Replace the #006 O-ring located inside the<br />
airport. ïhis can be disassembled using a<br />
3/6" Allen wrench and a 7/16" socket.<br />
. Check that the hose connector is tight.<br />
Use a7/16" Allen key to tighten. lf needed<br />
remove and apply thread sealant to the thread<br />
and re-tighten. lf unsure consult expert advice.<br />
. Check that the end of the hose is cut straight<br />
and is'not worn out. lf needed cut a small piece<br />
off the hose with a razor blade and re-insert<br />
hose into the fitting. Make sure hose goes all<br />
the way to the end.<br />
AIR LEAKING BETWEEN BODY AND FRAME<br />
. Firstly, check that the ln-Line Regulator input<br />
pressure has not been adjusted too high or too<br />
low.<br />
. The other possibility is thêt one of the gas<br />
pâssages is leaking. Gas up the DAM'"<br />
without the frame attached and try to locate<br />
the exact point of leakage. lf the leak is coming<br />
from one of the blocked holes remove the<br />
screw, apply some thread sealant and re-ôttach<br />
TROUBLE SHOOTING GUIDE<br />
DYEPAINTBALL COM DYEPAINTBALL COM<br />
screw to the body.<br />
. lf the leak comes from th€ small hola on th.<br />
bottom of the DAM" body dlrectly b.low<br />
the ln-Line Regulator then consult r trrlncd<br />
technician before attemptlng to dlJrrramblc<br />
the ln-Line Regulator.<br />
AIR LEAKING FROM BACK <strong>OF</strong> THE DAM'tr<br />
. Check that the bolt kit is tightened all the way<br />
into the DAM'". lf the bolt kit is loose,<br />
it will start to leak.<br />
. lf the leak is coming from the Back of the<br />
regulator you will need to disassemble the<br />
regulator and change the #O1O O-ring and<br />
the seat on the brass seat retainer mounted<br />
inside the ln-Line Regulator.<br />
. lf above does not solve the leak, remove the<br />
bolt kit and changè the #O2O O-ring on the<br />
back cap of the bolt. Also change the two<br />
#oo9 o-rings located on the tail of the bolt.<br />
Lube well and re-insert the bolt kit into the<br />
DAMrx. Check bolt kit break down<br />
picture on page 19 for O-ring locations.<br />
. Last, check that the gas passage blocklng<br />
screw located on the right side of the<br />
DAM" is not leaking. lf the<br />
leak is coming from this hole, remove screw<br />
and apply thread sealant to it.<br />
Make sure to tighten the screw well rnd walt<br />
for seâlânt to dry (24-48 hours) b€fora ragassing<br />
marker.