

TABLE OF CONTENTS - Paintball Veckring
TABLE OF CONTENTS - Paintball Veckring
TABLE OF CONTENTS - Paintball Veckring

Create successful ePaper yourself
Turn your PDF publications into a flip-book with our unique Google optimized e-Paper software.
TRIGGER<br />
ADJUSTMENT<br />
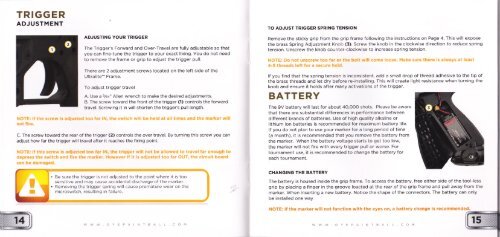
ADJUSTING YOUR TRIGGER<br />
The Trigger's Forward and Over-Travel are fully adjustable so that<br />
you can fine-tune the trigger to your exact liking. You do not need<br />
to remove the frame or grip to adjust the trigger pull.<br />
There are 2 adjustment screws located on the left side of the<br />
Ultralite'" Frame.<br />
To adjust trigger travel<br />
A. Use a s/o+" Allen wrench to make the desired ad.iustments.<br />
B. The screw toward the front of the trigger (l) controls the forward<br />
travel. Screwing it in will shorten the trigger's pull length.<br />
C. The screw toward the rear of the trigger (2) controls the over travel. By turning this screw you can<br />
adjust how far the trigger will travel after it reaches the firing point.<br />
Be sure the trigger is not adlusted to the pornt where rt rs too<br />
sensitive and may cause accidental discharge of the marker.<br />
Removing the trigger spring will cause premature wear on the<br />
microswitch, resulting in failure.<br />
E Pt t'i<br />
TO ADJUST TRIGGER SPRING TENSION<br />
Remove the sticky grip from the grip frame following the instructions on Page 4. This will expose<br />
the brass Spring Adjustment Knob (3). Screw the knob in the clockwise direction to reduce spring<br />
tension. Unscrew the knob counter-clockwise to increase spring tension.<br />
lf you find thôt the spring tension is inconsistent, add a small drop of thread adhesive to the tip of<br />
the brass threads and let dry before re-installing. This will create light resistance when turning the<br />
knob and ensure it holds after many activations of the trigger.<br />
BATTERY<br />
The 9V battery will last for about 4O,OOO shots. Please be aware<br />
that there are substantial differences in performance between<br />
different brands of batteries. Use of high quality alkaline or<br />
lithium ion batteries is recommended for maximum battery life.<br />
lf you do not plan to use your marker for a long period of time<br />
(a month), it is recommended that you remove the battery from<br />
the marker. When the battery voltage starts to get too low,<br />
the marker will not fire with every trigger pull or worse. For<br />
tournâment use, it is recommended to change the battery for<br />
each tournament.<br />
CHANGING THE BATTERY<br />
The battery is housed inside the grip frame. To access the battery, free either side of the tool-less<br />
grip by placing a finger in the groove loacted at the rear of the grip frame and pull away from the<br />
marker. When inserting a new battery. Notice the shape ofthe connectors. The battery can only<br />
be installed one way.<br />
a,\,\/\vDvrP^\fBAtL