Dynamic vario DC - Marantec
Dynamic vario DC - Marantec
Dynamic vario DC - Marantec

Create successful ePaper yourself
Turn your PDF publications into a flip-book with our unique Google optimized e-Paper software.
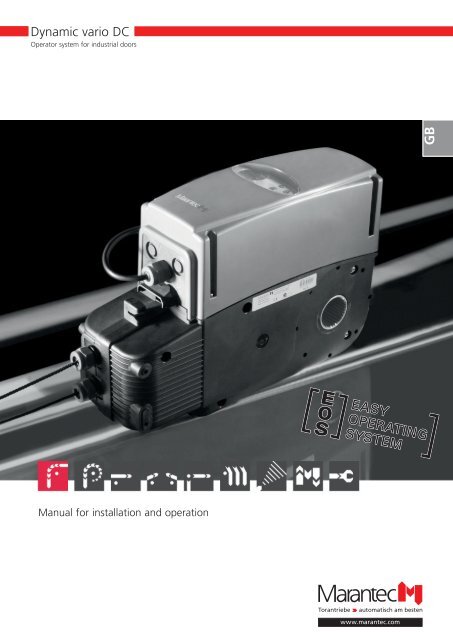
<strong>Dynamic</strong> <strong>vario</strong> <strong>DC</strong><br />
Operator system for industrial doors<br />
Manual for installation and operation<br />
GB
1. Meaning of symbols<br />
Advice<br />
i<br />
Caution!<br />
Danger of personal injury!<br />
The following safety advice must be observed<br />
at all times so as to avoid personal injury!<br />
Attention!<br />
Danger of material damage!<br />
The following safety advice must be observed<br />
at all times so as to avoid material damage!<br />
Advice / Tip<br />
Check<br />
Reference<br />
Control unit identification plate (optional)<br />
Type: ____________________________________________________<br />
Art. No.: _________________________________________________<br />
Product No.: ______________________________________________<br />
Motor unit identification plate<br />
Type: ____________________________________________________<br />
Art. No.: _________________________________________________<br />
Product No.: ______________________________________________<br />
2. Table of contents<br />
1. Meaning of symbols . . . . . . . . . . . . . . . . . . . . . . . . .2<br />
2. Table of contents . . . . . . . . . . . . . . . . . . . . . . . . . . . .2<br />
3. General safety advice . . . . . . . . . . . . . . . . . . . . . . . .3<br />
4. Product overview . . . . . . . . . . . . . . . . . . . . . . . . . . . .4<br />
4.1 <strong>Dynamic</strong> <strong>vario</strong> <strong>DC</strong> supply package . . . . . . . . . . .4<br />
4.2 Mounting options . . . . . . . . . . . . . . . . . . . . . . .6<br />
4.3 Dimensions . . . . . . . . . . . . . . . . . . . . . . . . . . . .6<br />
5. Preparation for mounting . . . . . . . . . . . . . . . . . . . . .7<br />
5.1 General notes . . . . . . . . . . . . . . . . . . . . . . . . . .7<br />
5.2 Checks . . . . . . . . . . . . . . . . . . . . . . . . . . . . . . . .7<br />
5.3 Cabling layout . . . . . . . . . . . . . . . . . . . . . . . . . .8<br />
6. Installation . . . . . . . . . . . . . . . . . . . . . . . . . . . . . . . . .8<br />
6.1 Preparing the door . . . . . . . . . . . . . . . . . . . . . .8<br />
6.2 Mounting the shaft adapter . . . . . . . . . . . . . . .9<br />
6.3 Mounting the motor unit at the door . . . . . . . .9<br />
6.4 Mounting the torque support . . . . . . . . . . . . .10<br />
6.5 Connection of control elements Control x.22 .11<br />
7. Initial operation . . . . . . . . . . . . . . . . . . . . . . . . . . . .14<br />
7.1 Overview of the control unit . . . . . . . . . . . . . .14<br />
7.2 Express programming . . . . . . . . . . . . . . . . . . .14<br />
7.3 Changing the rotational direction . . . . . . . . . .16<br />
7.4 Function test . . . . . . . . . . . . . . . . . . . . . . . . . .16<br />
8. Extended operator functions . . . . . . . . . . . . . . . . .18<br />
8.1 Programming structure for extended operator<br />
functions (Example for Level 2, Menu 2) . . . . .18<br />
8.2 General overview of the programmable<br />
functions . . . . . . . . . . . . . . . . . . . . . . . . . . . . .19<br />
8.3 General overview of the programmable<br />
functions . . . . . . . . . . . . . . . . . . . . . . . . . . . .20<br />
9. Operation . . . . . . . . . . . . . . . . . . . . . . . . . . . . . . . . .30<br />
9.1 Standard operation . . . . . . . . . . . . . . . . . . . . .30<br />
9.2 Emergency operation . . . . . . . . . . . . . . . . . . . .30<br />
10. Messages . . . . . . . . . . . . . . . . . . . . . . . . . . . . . . . . .31<br />
10.1 Overview of the display functions . . . . . . . . . .31<br />
10.2 Status messages . . . . . . . . . . . . . . . . . . . . . . .31<br />
10.3 Fault messages . . . . . . . . . . . . . . . . . . . . . . . .32<br />
10.4 Rectifying faults . . . . . . . . . . . . . . . . . . . . . . . .33<br />
11. Attachment . . . . . . . . . . . . . . . . . . . . . . . . . . . . . . . .35<br />
11.1 Technical data <strong>Dynamic</strong> <strong>vario</strong> <strong>DC</strong> . . . . . . . . . . .35<br />
11.2 Manufacturer’s Declaration . . . . . . . . . . . . . . .36<br />
11.3 EC Declaration of Conformity . . . . . . . . . . . . .36<br />
2 Manual for installation and operation, <strong>Dynamic</strong> <strong>vario</strong> <strong>DC</strong> GB (#96400)
3. General safety advice<br />
Please read carefully!<br />
Target group<br />
This operator system may only be installed, connected and put into<br />
operation by qualified and trained professionals!<br />
Qualified and trained specialist personnel are persons<br />
- who have knowledge of the general and special safety regulations,<br />
- who have knowledge of the relevant electro-technical regulations,<br />
- with training in the use and maintenance of suitable safety equipment,<br />
- who are sufficiently trained and supervised by qualified electricians,<br />
- who are able to recognise the particular hazards involved when working<br />
with electricity,<br />
- with knowledge regarding applications of the EN 12635 standard<br />
(installation and usage requirements).<br />
Warranty<br />
For an operations and safety warranty, the advice in this instruction<br />
manual has to be observed. Disregarding these warnings may lead to<br />
personal injury or material damage. If this advice is disregarded, the<br />
manufacturer will not be liable for damages that might occur.<br />
The warranty does not include batteries, rechargeable batteries, fuses and<br />
bulbs.<br />
To avoid installation errors and damage to the door and operator system,<br />
it is imperative that the installation instructions are followed. The system<br />
may only be used after thoroughly reading the respective mounting and<br />
installation instructions.<br />
The installation and operating instructions are to be given to the door<br />
system user, who must keep them safe.<br />
They contain important advice for operation, checks and maintenance.<br />
This item is produced according to the directives and standards mentioned<br />
in the Manufacturer's Declaration and in the Declaration of Conformity.<br />
The product has left the factory in perfect condition with regard to safety.<br />
Power-operated windows, doors and gates must be checked by an expert<br />
(and this must be documented) before they are put into operation and<br />
thereafter as required, but at least once a year.<br />
Correct use<br />
The operator system is intended exclusively for opening and closing<br />
industrial doors.<br />
The maximum torque must be observed.<br />
Beside the advice in these instructions, please observe the general<br />
safety and accident prevention regulations!<br />
Our sales and supply terms and conditions are effective.<br />
Door requirements<br />
The operator system is suitable for use with spring balanced sectional<br />
doors.<br />
The door fittings must be designed to reliably prevent the door from<br />
jumping out of the rails, particularly in the ceiling area through measures<br />
such as axial securing mechanisms for rollers, cross-bracings for the overhead<br />
ceiling rail brackets and rail connectors.<br />
The bearing springs must be equipped with a spring safety device.<br />
The suspension cables are fitted with a safety catch, which prevents any<br />
further movement of the door in the closing direction. Or the door is<br />
prevented from closing using fall protection by other structural means<br />
that are incorporated in the suspension system, so that operation with a<br />
suspension cable is no longer possible.<br />
Information on installing the operator system<br />
• Ensure that the door is in good mechanical condition.<br />
• Ensure that the door is balanced.<br />
• Ensure that the door opens and closes properly.<br />
• Ensure that there is a suitable mains connection near the door.<br />
• Remove all unnecessary components from the door (e.g. cables, chains,<br />
brackets).<br />
• Render any installations inoperable that will no longer be needed after<br />
the operator system has been installed.<br />
• Before commencing cabling works, you MUST disconnect the operator<br />
system from the mains supply.<br />
Adhere to the safety period of 10 seconds to guarantee that the<br />
operator system is voltage free.<br />
• Adhere to the local protection regulations.<br />
• Use only fixing materials which are approved for the substrate<br />
concerned.<br />
• The electricity supply cables and control cables MUST be laid separately.<br />
• Install the operator system with the door in the CLOSED position.<br />
• Install all the impulse transmitters and control devices (e.g. remote<br />
control buttons) within sight of the door and at a safe distance from<br />
the moving parts of the door. A minimum installation height of 1.5 m<br />
must be observed.<br />
• Permanently fix the warning signs, which advise of the danger of<br />
becoming trapped, at conspicuous locations (if applicable).<br />
• Ensure that no part of the door extends across public footways or roads<br />
when the installation is complete.<br />
Information on commissioning the operator system<br />
After initial operation, the persons responsible for operating the door<br />
system, or their representatives must be familiarised with the use of the<br />
system.<br />
• Make sure that children cannot access the door control unit.<br />
• Before moving the door, make sure that there are neither persons nor<br />
objects in the operating range of the door.<br />
• Test all existing emergency command devices.<br />
• Never insert your hands into a running door or moving parts.<br />
• Pay attention to any parts of the door system that could cause crushing<br />
or shearing damage or accidents.<br />
The EN 13241-1 regulations must be observed.<br />
Manual for installation and operation, <strong>Dynamic</strong> <strong>vario</strong> <strong>DC</strong> GB (#96400) 3
3. General safety advice<br />
Please read carefully!<br />
Information on servicing the operator system<br />
To ensure proper operation, the following items must be checked<br />
regularly and repaired if necessary. Before any works to the door system<br />
are undertaken, the operator system must be disconnected from the<br />
mains.<br />
• Check once a month to ensure that the operator system reverses if the<br />
door encounters an obstacle. To do so, place a 50 mm high/wide<br />
obstacle in its path, depending on the operational direction of the door.<br />
• Perform a check on the OPEN and CLOSE automatic cut-out setting.<br />
• Check all movable parts of the door and operator system.<br />
• Check the door system for signs of wear or damage.<br />
• Check whether the door can be easily moved by hand.<br />
• Inspect the safety devices installed every six months.<br />
Information on cleaning the operator system<br />
Never use water jets, high pressure cleaners, acids or bases for cleaning.<br />
4. Product overview<br />
4.1 <strong>Dynamic</strong> <strong>vario</strong> <strong>DC</strong> supply package<br />
Operator system<br />
4.1 / 1<br />
1<br />
1 <strong>Dynamic</strong> <strong>vario</strong> <strong>DC</strong> motor unit (release cable 3,000 mm)<br />
Torque support<br />
4.1 / 2<br />
11<br />
3<br />
2 Screw B4.8 x 13 (4x)<br />
3 Wood screw 8 x 60 (2x)<br />
4 Plastic wall plug S-10 (2x)<br />
5 Washer 8.4 (2x)<br />
6 Washer 5.3 (2x)<br />
7 Fixing bracket (2x)<br />
8 Nut with shoulder SW13 (4x)<br />
9 Nut, self-locking, SW13 (2x)<br />
10 Screw M8 x 16 (6x)<br />
11 Torque support<br />
i<br />
4<br />
5<br />
7<br />
2 10<br />
6<br />
8 9<br />
Reference:<br />
To ascertain the exact contents of the supply<br />
packages for optional accessories, please refer to<br />
the relevant instructions included.<br />
4 Manual for installation and operation, <strong>Dynamic</strong> <strong>vario</strong> <strong>DC</strong> GB (#96400)
4. Product overview<br />
Safety devices (optional)<br />
Remote control (optional)<br />
Shaft adapter set (optional)<br />
4.1 / 3<br />
13<br />
14<br />
15<br />
16<br />
12<br />
17.8<br />
19.0<br />
27.55<br />
29.4<br />
6.35<br />
6.4<br />
6.4<br />
6.35<br />
12 Feather key 1 (1x)<br />
(only for adapters without integrated feather key)<br />
13 Feather key 2 (3x)<br />
(only for adapters without integrated feather key)<br />
14 Feather key 3 (3x)<br />
(only for adapters without integrated feather key)<br />
15 Shaft adapter (1x)<br />
(Dimensions according to requirements)<br />
16 Adjusting ring (2x)<br />
25.4<br />
25.4<br />
25.4<br />
31.75<br />
SW 32.1<br />
A control element is required to operate the motor unit.<br />
Control elements (optional)<br />
Manual for installation and operation, <strong>Dynamic</strong> <strong>vario</strong> <strong>DC</strong> GB (#96400) 5<br />
4.1 / 4<br />
17 Command 613 control element<br />
17
4. Product overview<br />
4.2 Mounting options<br />
Push-on assembly<br />
4.2 / 1<br />
Assembly with push-on shaft adapter (optional)<br />
4.2 / 2<br />
i<br />
Reference:<br />
The relevant instructions are to be followed if<br />
the motor unit is to be installed according to<br />
other mounting options.<br />
-y<br />
4.3 Dimensions<br />
<strong>Dynamic</strong> <strong>vario</strong> <strong>DC</strong><br />
6 Manual for installation and operation, <strong>Dynamic</strong> <strong>vario</strong> <strong>DC</strong> GB (#96400)<br />
4.3 / 1<br />
Space required for push-on assembly<br />
4.3 / 2<br />
420<br />
298.5<br />
119<br />
129 119<br />
261<br />
≥ 73<br />
≥ 348<br />
77<br />
72.5
5. Preparation for mounting<br />
5.1 General notes<br />
These instructions describe the push-on assembly of motor unit<br />
models with an integrated quick release system (SE):<br />
The pictures in these instructions are not true-to-scale.<br />
Dimensions are always given in millimetres (mm)!<br />
The illustrations in these instructions show the installation on the<br />
inner right hand side, for a door with normal fittings.<br />
For correct mounting you will need the following tools:<br />
5.1 / 1<br />
* Grease<br />
8 / 10 / 13 2 / 2.5 20<br />
2.5 4 ø 9<br />
ø 10 *<br />
5.2 Checks<br />
Attention!<br />
The operator system cannot be disengaged<br />
from the outside.<br />
A separate entrance must be available in order<br />
to gain access to the garage in the event of a<br />
malfunction.<br />
Reference:<br />
The relevant instructions must be observed<br />
when mounting the operator at the door.<br />
The door must be properly installed and must have been checked<br />
to ensure that it functions correctly.<br />
• Ensure that a suitable mains connection and a mains<br />
disconnection facility are available for your door system.<br />
• Check to ensure that the door to be operated fulfils the<br />
following conditions:<br />
- The door must move easily when operated manually.<br />
- The door must always remain stationary in any position<br />
without external restraint.<br />
• Determine on which side of the door system the operator<br />
system should be mounted.<br />
• Check to ensure that there is sufficient space to mount the<br />
operator system.<br />
Manual for installation and operation, <strong>Dynamic</strong> <strong>vario</strong> <strong>DC</strong> GB (#96400) 7<br />
i<br />
i<br />
Attention!<br />
In order to guarantee correct mounting, carry<br />
out the following checks before installing.<br />
Supply package<br />
• Check the package to ensure that all the parts are included.<br />
• Check that you have all the additional components that are<br />
necessary for your particular installation requirements.<br />
Door system<br />
Reference:<br />
When using and installing accessories, always<br />
observe the specific instructions included with<br />
the equipment.
5. Preparation for mounting<br />
5.3 Cabling layout<br />
5.3 / 1<br />
H<br />
I<br />
i<br />
Advice:<br />
This is just an example of a cabling layout; the<br />
layout can vary according to the type of door<br />
and the associated equipment.<br />
F<br />
A <strong>Dynamic</strong> <strong>vario</strong> <strong>DC</strong> motor unit<br />
B Control unit<br />
C Signalling device (e.g. signal light)<br />
D Mains connection<br />
Useable length:<br />
- 1.1 m (230 V)<br />
E Mains isolator switch<br />
F Spring safety device, supplied by customer<br />
G Door sensors for cable slack device<br />
H Optosensors<br />
I Photocell barrier<br />
J Housing, connection unit<br />
K Door sensor for wicket door<br />
L Flat cable, motor unit - control unit<br />
M Control<br />
A<br />
J D<br />
G<br />
K<br />
H<br />
I<br />
J<br />
L<br />
B<br />
M<br />
E<br />
G<br />
C<br />
Reference:<br />
The relevant installation instructions must be<br />
observed when mounting and connecting door<br />
sensors, control elements and signalling devices.<br />
6. Installation<br />
6.1 Preparing the door<br />
• Secure the door.<br />
8 Manual for installation and operation, <strong>Dynamic</strong> <strong>vario</strong> <strong>DC</strong> GB (#96400)<br />
6.1 / 1<br />
Caution!<br />
- To prevent falls, the installation works must be<br />
carried out from a safe standing position.<br />
A lifting platform or scaffold can be used.<br />
- To avoid injury, the door must be secured for<br />
the duration of the installation works to<br />
prevent it from being opened or closed.
6. Installation<br />
6.2 Mounting the shaft adapter<br />
6.2 / 1<br />
Attention!<br />
To ensure proper operation,<br />
- there must be a 3 mm gap between the<br />
frame and the adjusting ring,<br />
- the shaft adapter must fit on the spring shaft<br />
with as little play as possible in the direction<br />
of rotation.<br />
~ 3<br />
A<br />
• Deburr the spring shaft (B) using a file.<br />
C<br />
B<br />
• Push the adapting ring (A) onto the spring shaft (B).<br />
• Tighten the screw of the adjusting ring (A).<br />
• Grease the spring shaft.<br />
• Push the shaft adapter (C) onto the spring shaft (B).<br />
D<br />
Only for shaft adapters without integrated feather keys:<br />
• Insert the feather key (D) into the shaft adapter (B).<br />
6.3 Mounting the motor unit at the door<br />
Manual for installation and operation, <strong>Dynamic</strong> <strong>vario</strong> <strong>DC</strong> GB (#96400) 9<br />
6.3 / 1<br />
• Place the motor unit on the shaft adapter.<br />
6.3 / 2<br />
• Secure the motor unit with an adjusting ring.<br />
.
6. Installation<br />
6.4 Mounting the torque support<br />
Mounting on the wall<br />
6.4 / 1<br />
Advice:<br />
The torque support can be attached to the wall<br />
or to the door frame.<br />
• Fix the torque support (A) to the operator unit.<br />
• Fix the fixing bracket (B) to the torque support (A).<br />
• Mount the fixing bracket (B) on the wall.<br />
Mounting on the door frame<br />
10 Manual for installation and operation, <strong>Dynamic</strong> <strong>vario</strong> <strong>DC</strong> GB (#96400)<br />
6.4 / 2<br />
• Fix the torque support (A) to the operator unit.<br />
• Attach the first fixing bracket (B) to the torque support (A).<br />
• Screw the second fixing bracket (C) to the first fixing<br />
bracket (B).<br />
• Mount the second fixing bracket (C) on the door frame.
6. Installation<br />
6.5 Connection of control elements<br />
Control x.22<br />
6.5 / 1<br />
XN81<br />
XN70<br />
XM70<br />
XH75<br />
Caution!<br />
Danger of electric shock:<br />
Before any cabling works begin, it must be<br />
ensured that the cables are disconnected from<br />
the power supply.<br />
During cabling works, it must be ensured that<br />
the cables remain disconnected from the power<br />
supply at all times (e.g. prevent reconnection).<br />
Attention!<br />
In order to avoid damaging the controls:<br />
- The local safety regulations must be complied<br />
with at all times.<br />
- It is very important that mains cables are laid<br />
separately from control cables.<br />
- The controls voltage must be 24 V <strong>DC</strong>.<br />
- If external voltages are applied at<br />
terminals XW40A, XB10 or XB02, the entire<br />
electronic system will be destroyed.<br />
- Only potential-free contacts may be connected<br />
to terminals 1 and 2 (XB02).<br />
P<br />
1 7 3 2<br />
Connection 6 5 4 of control elements X.22<br />
L N PE 15 16 17<br />
XB10 XB02 XW40B<br />
Label Type / function i<br />
XB70 Connection of modular antenna –<br />
XB02<br />
XV51 XP15 XW40A<br />
Connection for external control<br />
elements without system cabling and<br />
two-wire photocell<br />
XH02<br />
XB70<br />
6.5 / 3,<br />
6.5 / 4,<br />
Level 5<br />
Menu 1<br />
XB10<br />
Connection for external control<br />
elements with system cabling<br />
–<br />
XH02<br />
Connection for programmable output<br />
(e.g. signal light)<br />
6.5 / 5<br />
XM70<br />
Connection for motor<br />
(rotational direction)<br />
7.3<br />
XH75 Connection for door locking 6.5 / 6<br />
XN70 Connection for battery backup –<br />
XN81 Connection for mains cable 6.5 / 2<br />
Label Type / function i<br />
XP15<br />
Connection for<br />
Control safety circuit<br />
6.5 / 7<br />
XV51 Connection for motor rotation speed –<br />
XW40A<br />
MS BUS,<br />
e.g. control unit, modules<br />
–<br />
XW40B Connection for reference cassette –<br />
Reference:<br />
When installing external control elements, or<br />
safety and signal equipment, the relevant<br />
instructions must be observed.<br />
Manual for installation and operation, <strong>Dynamic</strong> <strong>vario</strong> <strong>DC</strong> GB (#96400) 11<br />
i<br />
Terminal XN81<br />
6.5 / 2<br />
M07E039<br />
Advice:<br />
- Before connecting a control element to the<br />
terminals with system sockets, the corresponding<br />
shorting plug must first be removed.<br />
- The <strong>Dynamic</strong> <strong>vario</strong> <strong>DC</strong> operator system is supplied<br />
with integrated controls as a standard<br />
feature. If the controls are extended with<br />
additional modules, the Control <strong>vario</strong> control<br />
unit can also be connected with an MS bus.<br />
- XN81<br />
- X0<br />
- F0<br />
L N PE<br />
L<br />
L N PE<br />
N<br />
PE<br />
Label Type / function<br />
L Phase connection<br />
N Neutral wire connection<br />
PE Earth wire connection
6. Installation<br />
Terminal XB02<br />
6.5 / 3<br />
M10E035<br />
-W1<br />
-W2<br />
1 2<br />
-AP27<br />
-W1<br />
1 2<br />
-XB02<br />
-W2<br />
1 2<br />
2 1 2 1<br />
TX RX<br />
71 70<br />
-Sb1<br />
Label Type / function<br />
1 24 V <strong>DC</strong> (max. 50 mA)<br />
2 Impulse<br />
3 GND<br />
70 GND<br />
70 + 71 Two-wire photocell<br />
RX Receiver for the two-wire photocell<br />
Sb1 External impulse button (if installed)<br />
TX Transmitter for the two-wire photocell<br />
Terminal XB02 (external photocell)<br />
6.5 / 4<br />
M10E040<br />
- XB02 71 70 2 1 3<br />
Label Type / function<br />
1 24 V <strong>DC</strong> (max. 50 mA)<br />
2 Impulse<br />
3 GND<br />
70 GND<br />
70 + 71 Two-wire photocell<br />
S1 Potential-free NC contact of photocell<br />
-X1<br />
71<br />
12 11<br />
-S1<br />
70<br />
+<br />
-<br />
2 1 3<br />
Terminal XH02<br />
M10E010<br />
Advice:<br />
- If a photocell with a standard function or door<br />
frame function is used, it must be disconnected<br />
from the mains before installing it and taking<br />
it into service.<br />
After switching on the mains voltage, the<br />
photocell is only detected automatically by the<br />
controls if the path of the photocell beam<br />
remains uninterrupted for at least 5 seconds.<br />
Otherwise the photocell must be programmed<br />
after installation.<br />
- Safety devices which are automatically incorporated<br />
in the control process after they are<br />
connected to the control unit can only be<br />
deactivated by removing the electrical connection<br />
and then carrying out a reset of the<br />
control (resetting the safety devices).<br />
Label Type / function<br />
-XH02 15 16 17<br />
12 Manual for installation and operation, <strong>Dynamic</strong> <strong>vario</strong> <strong>DC</strong> GB (#96400)<br />
6.5 / 5<br />
Attention!<br />
To avoid damage being caused to the circuit<br />
board, the contact loading (max. 230 V / 2 A)<br />
must be observed.<br />
L<br />
N<br />
-HH14<br />
15 / 16<br />
Connection for programmable output<br />
potential-free NC<br />
16 Connection for command device<br />
16 / 17<br />
Connection for programmable output<br />
potential-free NO<br />
HH14 Signal light
6. Installation<br />
Terminal XH75 (optional)<br />
6.5 / 6<br />
B<br />
XH75<br />
A<br />
• Connect the electric lock (A) to the junction box (B).<br />
• Connect terminal block XH75 to the junction box (B).<br />
Terminal XP15 (optional)<br />
Label Type / function<br />
AP01 Connection unit on one side<br />
R1 Resistor 8K2<br />
XP01 Terminal strip, 6-pole<br />
BP49 Contact edge CLOSED<br />
S1 Slack rope switch<br />
XP15<br />
Strip, 6-pole<br />
Control - safety circuit<br />
Advice:<br />
The closing edge safety device connection is<br />
preset in the factory for a 8.2 kΩ closing edge<br />
safety device. If an OPTO 300 closing edge<br />
safety device is used, a reset must be carried<br />
out after it has been connected.<br />
Manual for installation and operation, <strong>Dynamic</strong> <strong>vario</strong> <strong>DC</strong> GB (#96400) 13<br />
6.5 / 7<br />
M09E042<br />
-AP01<br />
i<br />
-S1<br />
-XP01<br />
Connection example: Operation with contact edge<br />
and slack rope switch<br />
- XP15<br />
-R1<br />
P1 b c d e f<br />
-W1<br />
WH BN GN YE BK<br />
1 2 3 4 5 6<br />
-BP49<br />
Reference:<br />
The reset of the controls is described in<br />
Section 8.3 / Level 1 / Menu 8.
7. Initial operation<br />
7.1 Overview of the control unit<br />
7.1 / 1<br />
Operating elements<br />
1<br />
23<br />
7<br />
6 5 4<br />
8<br />
1 2<br />
Label Type / function i<br />
A Carousel display 10.1<br />
B<br />
C<br />
D<br />
Overview of the integrated controls Control x.22<br />
A B D<br />
OPEN button (+)<br />
(e.g. to drive the door to<br />
the OPEN position or to increase<br />
parameters when programming)<br />
CLOSE button (-)<br />
(e.g. to drive the door to<br />
the CLOSED position or to decrease<br />
parameters when programming)<br />
Button (P)<br />
(e.g. to switch to<br />
programming mode or<br />
to save parameters)<br />
P<br />
C<br />
-<br />
-<br />
-<br />
7.2 Express programming<br />
7.2.1 General notes on express programming<br />
Advice:<br />
For proper initial operation of the operator<br />
system, the express programming procedure<br />
must be carried out. This applies for initial<br />
operation and after a reset.<br />
The basic functions of the operator system are set during the<br />
express programming procedure.<br />
- Door OPEN position<br />
- Door CLOSED position<br />
- Remote control (if installed)<br />
The programming procedure is a consecutive process. It is essential<br />
that this procedure be carried out.<br />
Advice:<br />
- During the programming of the OPEN and<br />
CLOSED door positions, the hollow shaft must<br />
rotate around 360° at least once in order for a<br />
reference point to be programmed.<br />
- If the door starts to move towards the CLO-<br />
SED position when the (+) button is pressed,<br />
the express programming procedure must be<br />
aborted and the rotational direction be<br />
changed first.<br />
The controls are programmed using the plus (+), minus (-) and<br />
(P) buttons.<br />
If no buttons are pressed within 120 seconds while in programming<br />
mode, the controls revert to operating mode.<br />
A corresponding message is displayed.<br />
Reference:<br />
The messages are explained in Section 10.<br />
14 Manual for installation and operation, <strong>Dynamic</strong> <strong>vario</strong> <strong>DC</strong> GB (#96400)<br />
i<br />
7.2.2 Programming buttons<br />
i<br />
Reference:<br />
Changing the rotational direction is described<br />
in Section 7.3.<br />
Starting the express programming (integrated controls)<br />
• Carry out the express programming according to the following<br />
procedure.<br />
Advice:<br />
The express programming can be exited at any<br />
time by pressing the P button 3 times.
7. Initial operation<br />
7.2.3 Express programming sequence<br />
Operating<br />
mode<br />
1.<br />
2.<br />
3.<br />
4.<br />
5.<br />
6.<br />
7.<br />
8.<br />
9.<br />
10.<br />
1x >2s
7. Initial operation<br />
7.3 Changing the rotational direction<br />
7.3 / 1<br />
i<br />
Caution!<br />
Danger of electric shock:<br />
Before cabling works commence, a check must<br />
be carried out to ensure that the cables are at<br />
zero voltage.<br />
Measures must be taken to ensure that the<br />
cables remain dead for the duration of the<br />
works (e.g. prevent the power supply from<br />
being switched back on).<br />
Attention!<br />
- To ensure that the drive system operates<br />
correctly, a reset must be carried out on the<br />
operating controls after changing the<br />
rotational direction (only required if the door<br />
positions have already been programmed).<br />
- Before the OPEN and CLOSED door positions<br />
have been set, the door can be moved<br />
electrically beyond this door position, which<br />
could lead to the door being damaged.<br />
Reference:<br />
- The connection of the mains supply is<br />
described in Section 6.5.<br />
- The reset of the operating controls is<br />
described in Section 8.3 / level 1 / menu 8.<br />
- The express programming is described in<br />
Section 7.2.3.<br />
XM70<br />
• At the motor unit connection (XM70), swap the brown and the<br />
green leads over.<br />
• Carry out a reset of the controls.<br />
• Carry out express programming again.<br />
7.4 Function test<br />
16 Manual for installation and operation, <strong>Dynamic</strong> <strong>vario</strong> <strong>DC</strong> GB (#96400)<br />
1.<br />
2.<br />
3.<br />
4.<br />
5.<br />
Check:<br />
After express programming and after making<br />
changes to the programming menu, the<br />
following learning runs and checks must be<br />
carried out.<br />
The operator system determines the maximum required driving<br />
power during the first two runs after setting the end positions of<br />
the door.<br />
• Operate the operator system (with the door coupled) to drive<br />
the door once from the CLOSED position to the OPEN position<br />
and back to the CLOSED position without interruption.<br />
During this learning run, the operator system determines the<br />
maximum push and pull forces and<br />
the reserve power required to move the door.<br />
Test:<br />
After pressing the (+) button:<br />
The door must open and travel to the saved<br />
OPEN end position.<br />
After pressing the (–) button:<br />
The door must close and travel to the saved<br />
CLOSED end position.<br />
After pressing the hand transmitter button:<br />
The operator system must move the door in<br />
either the “OPEN” or “CLOSE” direction.<br />
After pressing the hand transmitter button<br />
while the operator system is running:<br />
The operator system must stop.<br />
When the button is pressed again,<br />
the operator system moves in the opposite<br />
direction.
7. Initial operation<br />
Door sensors<br />
• Activate each of the door sensors in turn.<br />
Signalling device<br />
• Check that the signalling device functions properly.<br />
Emergency operation<br />
i<br />
Check:<br />
Check the door sensors according to the corresponding<br />
operating instructions. LED 1 lights up<br />
when a safety device is activated.<br />
Reference:<br />
The function of the emergency operation<br />
equipment is described in Section 9.<br />
• Check that the emergency operation equipment functions<br />
properly.<br />
Photocell in the door frame area<br />
• Activate each of the photocells in turn.<br />
Advice:<br />
- The photocell connected in the door frame<br />
area must function above the position in<br />
which it is installed. The function below the<br />
installation position is suppressed by the<br />
control.<br />
- If several photocells are connected, all photocells<br />
react analogue with any photocell in the<br />
door frame area.<br />
Photocell<br />
• Activate each of the photocells in turn.<br />
• Check all photocells that are connected directly before the<br />
CLOSED door position.<br />
Automatic cut-out<br />
Caution!<br />
The automatic cut-out must be correctly programmed<br />
for the CLOSE and OPEN directions<br />
to prevent damage to persons or property.<br />
Automatic cut-out, OPENING<br />
For drive systems where the door has openings in the door wing<br />
(diameter of opening > 50 mm):<br />
• Apply a load of 20 kg to the middle of the lower edge of the<br />
door whilst the door is running.<br />
The door must stop immediately.<br />
Automatic cut-out, CLOSING<br />
• Place a 50 mm high obstacle on the ground.<br />
• Drive the door towards the obstacle.<br />
The operator system must stop and reverse when it hits<br />
the obstacle.<br />
Advice:<br />
The parameter settings are still saved if the<br />
power supply is disconnected.<br />
Only a reset causes the driving power settings<br />
for the OPEN and CLOSE directions to revert to<br />
the factory settings.<br />
Manual for installation and operation, <strong>Dynamic</strong> <strong>vario</strong> <strong>DC</strong> GB (#96400) 17
8. Extended operator functions<br />
8.1 Programming structure for extended operator functions<br />
(Example for Level 2, Menu 2)<br />
Operating<br />
mode<br />
(integrated<br />
controls)<br />
> 10 sec.<br />
+<br />
+<br />
+<br />
+<br />
+<br />
+<br />
+<br />
Levels<br />
-<br />
+<br />
Menu<br />
Parameter<br />
Level 4 Menu 3 Higher value<br />
Level 3<br />
Level 2<br />
Level 1<br />
-<br />
-<br />
-<br />
-<br />
Levels-Exit<br />
Level 8<br />
-<br />
-<br />
+<br />
+<br />
+<br />
End<br />
programming<br />
18 Manual for installation and operation, <strong>Dynamic</strong> <strong>vario</strong> <strong>DC</strong> GB (#96400)<br />
-<br />
-<br />
-<br />
-<br />
Menu-Exit<br />
(Level 2)<br />
-<br />
+<br />
+<br />
Menu 2<br />
Menu 1<br />
Menu 8<br />
-<br />
+<br />
+<br />
+<br />
+<br />
-<br />
-<br />
Parameter<br />
-<br />
Lower value<br />
-<br />
> 5 sec.<br />
> 5 sec.<br />
> 5 sec.
8. Extended operator functions<br />
8.2 General overview of the programmable functions<br />
Level 1 – Basic functions<br />
Level 2 – Operator settings<br />
Level 3 – Automatic closing timer<br />
Level 4 – Remote programming<br />
Level 5 – Special function<br />
Level 6 - Variable speed<br />
Level 7 - Servicing and maintenance<br />
Level 8 – System settings<br />
Level Menu Factory default setting<br />
Menu 3: Intermediate position OPEN –<br />
Menu 4: Intermediate position CLOSE –<br />
Menu 7: Relay output Signal light<br />
Menu 8: RESET No reset<br />
Menu 1: Required driving power OPEN Setting 8<br />
Menu 2: Required driving power CLOSE Setting 8<br />
Menu 3: Automatic cut-out OPEN Setting 8<br />
Menu 4: Automatic cut-out CLOSE Setting 8<br />
Menu 1: Automatic closing timer Deactivated<br />
Menu 3: Door open duration 2 seconds<br />
Menu 4: Warning time 1 seconds<br />
Menu 5: Start-up warning 0 seconds<br />
Menu 7: Signal light<br />
Door movement /<br />
Warning: flashes<br />
Door stoppage: off<br />
Menu 2: Intermediate position OPEN –<br />
Menu 3: Intermediate position CLOSE –<br />
Menu 4: OPEN –<br />
Menu 5: CLOSE –<br />
Menu 8: Relay output –<br />
Menu 1: Programmable impulse input Impulse<br />
Menu 4: Relay output 180 seconds<br />
Menu 1: Speed OPEN Setting 16<br />
Menu 2: Soft run speed OPEN Setting 7<br />
Menu 3: Soft run position OPEN –<br />
Menu 4: Speed CLOSE Setting 16<br />
Menu 5: Smart run speed CLOSE Setting 16<br />
Menu 6: Soft run speed CLOSE Setting 7<br />
Menu 7: Smart run position CLOSE –<br />
Menu 8: Soft run position CLOSE –<br />
Menu 1: Door cycle counter –<br />
Menu 2: Maintenance counter –<br />
Menu 3: Set the maintenance interval OFF<br />
Menu 8: Reset servicing and maintenance No reset<br />
Menu 1: Photocell Operation without photocell<br />
Menu 2: Closing edge safety device<br />
Door reverses a little<br />
(OPEN/CLOSE)<br />
Menu 3: Automatic cut-out<br />
Door stops (OPEN)<br />
Door reverses a little (CLOSE)<br />
Menu 4: Operating modes Press-and-release (OPEN/CLOSE)<br />
Menu 5: Function of the direction command transmitters Not active<br />
Menu 6: Function of the impulse command transmitters<br />
STOP only, then standard<br />
sequence<br />
Legend:<br />
LED off<br />
LED on<br />
LED flashes slowly<br />
LED pulses<br />
LED flashes quickly<br />
Factory default setting<br />
Not possible –<br />
Manual for installation and operation, <strong>Dynamic</strong> <strong>vario</strong> <strong>DC</strong> GB (#96400) 19
8. Extended operator functions<br />
8.3 General overview of the programmable functions<br />
Level 1 – Basic functions<br />
i<br />
1 2 3 4 5 6 7 8 9 10 11 12 13 14 15 16<br />
Menu 3: Intermediate position OPEN<br />
Menu 4: Intermediate position CLOSE<br />
Menu 7: Relay output<br />
Menu 8: RESET<br />
Caution!<br />
Important factory default settings can be changed using the extended functions.<br />
All the parameters must be set correctly to avoid damage to persons or property.<br />
Set using the (+ / OPEN) and (- / CLOSE) buttons<br />
“Intermediate position OPEN” – closing function is possible with automatic closing timer<br />
Set using the (+ / OPEN) and (- / CLOSE) buttons<br />
A7 B7 C7 D7 E7 F7 G7 H7 I7 J7 K7 L7 – – – –<br />
A8 B8 C8 D8 E8 F8 G8 – – – – – – – – –<br />
Attention!<br />
After a reset, all the parameters revert to the factory settings.<br />
In order to ensure that the controls operate properly:<br />
- all the required functions must be re-programmed,<br />
- the remote control unit must be re-programmed,<br />
- the drive system must be driven once to the OPEN and CLOSED door positions.<br />
Advice:<br />
- Only the intermediate position that was programmed last can be used.<br />
- If an automatic closing timer is activated (Level 3 / Menu 1), the relay output (Level 1 / Menu 7) cannot be programmed.<br />
Reference:<br />
If changes are made in Menus 3 and 4 in Level 1, a new performance check must be carried out (Section 7.4).<br />
20 Manual for installation and operation, <strong>Dynamic</strong> <strong>vario</strong> <strong>DC</strong> GB (#96400)
8. Extended operator functions<br />
Menu 7: Relay output<br />
Menu 8: Reset<br />
Setting Function Explanation / Advice i<br />
A7 Signal light Function<br />
Level 3 /<br />
Menu 7<br />
B7 Door position: OPEN - -<br />
C7 Door position: CLOSED - -<br />
D7 Intermediate OPEN position - -<br />
E7 Intermediate CLOSED position - -<br />
F7 Operator system starts running Wiping impulse 1 second -<br />
G7 Malfunction - -<br />
H7 Lighting Lighting duration<br />
Level 5 /<br />
Menu 4<br />
I7 Automatic locking release Operator system is running -<br />
J7 Lock release<br />
Operator system starts running /<br />
wiping impulse 3 seconds<br />
-<br />
K7 Push-open security device - -<br />
L7 Radio remote control Relay switches for the duration of the impulse -<br />
Setting Function Explanation / Advice i<br />
A8 No reset Unmodified -<br />
B8 Reset control unit * Factory default setting -<br />
C8 Reset remote control Telegrams are cleared -<br />
D8 Reset extension automatic closing timer Level 3, Menu 1-7 -<br />
E8 Reset extended operator functions only<br />
except door OPEN/CLOSED positions and<br />
remote control impulse<br />
-<br />
F8 Reset safety devices Photocell -<br />
G8 Reset bus modules The connected bus modules are learned -<br />
* All connected and operational safety devices are recognised automatically after resetting.<br />
Advice:<br />
Depending on the type of reset, this can take up to 30 seconds.<br />
Legend:<br />
LED off<br />
LED on<br />
LED flashes slowly<br />
LED pulses<br />
LED flashes quickly<br />
Factory default setting<br />
Not possible –<br />
Manual for installation and operation, <strong>Dynamic</strong> <strong>vario</strong> <strong>DC</strong> GB (#96400) 21
8. Extended operator functions<br />
Level 2 – Operator settings<br />
1 2 3 4 5 6 7 8 9 10 11 12 13 14 15 16<br />
Menu 1: Required driving power OPEN (sensitivity in increments*)<br />
1 2 3 4 5 6 7 8 9 10 11 12 13 14 15 16<br />
Menu 2: Required driving power CLOSE (sensitivity in increments*)<br />
1 2 3 4 5 6 7 8 9 10 11 12 13 14 15 16<br />
Menu 3: Automatic cut-out OPEN (sensitivity in increments**)<br />
OFF 2 3 4 5 6 7 8 9 10 11 12 13 14 15 16<br />
Menu 4: Automatic cut-out CLOSE (sensitivity in increments**)<br />
OFF 2 3 4 5 6 7 8 9 10 11 12 13 14 15 16<br />
* The higher the setting, the higher the driving power.<br />
** The lower the setting, the more sensitive the automatic cut-out.<br />
Level 3 - Automatic closing timer<br />
1 2 3 4 5 6 7 8 9 10 11 12 13 14 15 16<br />
Menu 1: Automatic closing timer<br />
A1 B1 C1 D1 E1 F1 G1 H1 – – – – – – – –<br />
Menu 3: Door open duration (in seconds)<br />
2 5 10 15 20 25 30 35 40 50 80 100 120 150 180 255<br />
Menu 4: Warning time (in seconds)<br />
1 2 5 10 15 20 25 30 35 40 45 50 55 60 65 70<br />
Menu 5: Start-up warning (in seconds)<br />
0 1 2 3 4 5 6 7 – – – – – – – –<br />
Menu 7: Signal light<br />
Caution!<br />
After increasing the automatic cut-out increments (Menu 3 and 4):<br />
To exclude any risk of injury, the tests specified in EN 12453 and EN 12445 for validating the correct limitation of force<br />
must be performed.<br />
A7 B7 C7 D7 E7 F7 – – – – – – – – – –<br />
Advice:<br />
- The automatic closing timer can only be programmed if a photocell barrier is connected.<br />
- The functions in Menu 1 can be altered as desired via the time settings in Menus 3 and 4.<br />
22 Manual for installation and operation, <strong>Dynamic</strong> <strong>vario</strong> <strong>DC</strong> GB (#96400)
8. Extended operator functions<br />
Menu 1: Automatic closing timer<br />
Setting<br />
Menu 7: Signal light<br />
Level 4 – Remote programming<br />
Door open<br />
duration<br />
(seconds)<br />
Warning time<br />
(seconds)<br />
Automatic<br />
closing timer<br />
other functions<br />
A1 - - deactivated -<br />
B1 15 5 activated<br />
C1 30 5 activated<br />
D1 60 8 activated<br />
E1 15 5 activated<br />
F1 30 5 activated<br />
G1 60 8 activated<br />
H1 unlimited 3 activated<br />
Extension of door OPEN time only through impulse signal<br />
(button, hand transmitter)<br />
Interruption of the door open duration after the photocell<br />
barrier has been driven past<br />
Closes after the photocell barrier has been driven past /<br />
closing prevention<br />
Advice:<br />
Without a connected photocell or closing prevention device, only parameter A1 can be adjusted.<br />
Setting Door movement / Warning Door stoppage<br />
Menu 2: Intermediate OPEN position<br />
Menu 3: Intermediate CLOSE position<br />
Menu 4: OPEN<br />
Menu 5: CLOSE<br />
A7 flashing OFF (Electricity saving)<br />
B7 lighting OFF (Electricity saving)<br />
C7 flashing flashing<br />
D7 lighting lighting<br />
E7 flashing lighting<br />
F7 lighting flashing<br />
i<br />
Menu 8: Relay output (Level 1, Menu 7, L7)<br />
i<br />
Reference:<br />
The signal light connection can be adjusted in level 1, menu 7.<br />
LED 7 flashes slowly -> press the hand transmitter button -> LED 7 flashes quickly<br />
LED 7 flashes slowly -> press the hand transmitter button -> LED 7 flashes quickly<br />
LED 7 flashes slowly -> press the hand transmitter button -> LED 7 flashes quickly<br />
LED 7 flashes slowly -> press the hand transmitter button -> LED 7 flashes quickly<br />
LED 7 flashes slowly -> press the hand transmitter button -> LED 7 flashes quickly<br />
Reference:<br />
To avoid malfunctions, it is not permissible to programme more than one radio signal for each position.<br />
Manual for installation and operation, <strong>Dynamic</strong> <strong>vario</strong> <strong>DC</strong> GB (#96400) 23
8. Extended operator functions<br />
Level 5 – Special function<br />
1 2 3 4 5 6 7 8 9 10 11 12 13 14 15 16<br />
Menu 1: Programmable impulse input (Terminal 1/2)<br />
A1 B1 C1 D1 E1 F1 – – – – – – – – – –<br />
Menu 4: Lighting duration (in seconds)<br />
2 5 10 15 20 25 30 35 40 50 80 100 120 150 180 255<br />
Menu 1: Programmable impulse input<br />
Setting Function Explanation / Advice<br />
A1 Impulse Normally open contact only<br />
B1 Closing prevention device Normally open contact only<br />
C1 Stops and reverses Only in CLOSING direction – normally closed contact only<br />
D1 Stops and reverses Only in CLOSING direction – normally open contact only<br />
E1 Impulse OPEN Induction loop - normally open contact only<br />
F1 Stop (normally closed contact only) Operator system stops<br />
i<br />
Advice:<br />
Stage C1 can only be used if no further MS bus modules with a programmable impulse input are<br />
connected (e.g. external control).<br />
Reference:<br />
- The programming of the special function is dependent on terminal XB02.<br />
Terminal XB02 is described in Section 6.5.<br />
- The lighting duration programmed is only active when the relay output (Level 1 / Menu 7) is<br />
programmed for lighting.<br />
24 Manual for installation and operation, <strong>Dynamic</strong> <strong>vario</strong> <strong>DC</strong> GB (#96400)
8. Extended operator functions<br />
Level 6 - Variable speed<br />
1 2 3 4 5 6 7 8 9 10 11 12 13 14 15 16<br />
Menu 1: Speed OPEN (in increments)<br />
– – – – – – 7 8 9 10 11 12 13 14 15 16<br />
Menu 2: Soft run speed OPEN (in increments)<br />
1 2 3 4 5 6 7 8 9 10 11 12 13 14 15 16<br />
Menu 3: Soft run position OPEN<br />
Menu 4: Speed CLOSE (in increments)<br />
Set using the (+ / OPEN) and (- / CLOSE) buttons<br />
– – – – – – 7 8 9 10 11 12 13 14 15 16<br />
Menu 5: Smart run speed, CLOSE (in increments)<br />
1 2 3 4 5 6 7 8 9 10 11 12 13 14 15 16<br />
Menu 6: Soft run speed CLOSE (in increments)<br />
1 2 3 4 5 6 7 8 9 10 11 12 13 14 15 16<br />
Menu 7: Smart run position, CLOSE<br />
Menu 8: Soft run position CLOSED<br />
i<br />
Set using the (+ / OPEN) and (- / CLOSE) buttons<br />
Set using the (+ / OPEN) and (- / CLOSE) buttons<br />
Reference:<br />
If changes are made in Menus 1, 2, 3, 4, 6 and 8 in Level 6, a new performance check must be carried out (Section 7.4).<br />
Legend:<br />
LED off<br />
LED on<br />
LED flashes slowly<br />
LED pulses<br />
LED flashes quickly<br />
Factory default setting<br />
Not possible –<br />
Manual for installation and operation, <strong>Dynamic</strong> <strong>vario</strong> <strong>DC</strong> GB (#96400) 25
8. Extended operator functions<br />
Level 7 - Servicing and maintenance<br />
1 2 3 4 5 6 7 8 9 10 11 12 13 14 15 16<br />
Menu 1: Door cycle counter<br />
A1 B1 C1 D1 E1 – – – – – – – – – – –<br />
Menu 2: Maintenance counter<br />
A2 B2 C2 D2 E2 – – – – – – – – – – –<br />
Menu 3: Set the maintenance interval<br />
A3 B3 C3 D3 E3 F3 G3 H3 I3 J3 K3 L3 M3 N3 O3 P3<br />
Menu 8: Reset servicing and maintenance<br />
A8 B8 – – – – – – – – – – – – – –<br />
Portrayal of the number of operations:<br />
0 1 2 3 4 5 6 7 8 9<br />
Menu 1: Door cycle counter<br />
The door cycle counter of the controls displays the number of cycles here as a five-digit number (up to 99,999).<br />
The display function is illustrated in the flow chart below.<br />
The number of operations is shown as 1s, 10s, 100s, etc.<br />
Pressing the (+) or (-) button displays the next or the previous digit of the number of operations.<br />
A1 Door cycle counter – number of tens of thousands<br />
B1 Door cycle counter – number of thousands<br />
C1 Door cycle counter – number of hundreds<br />
D1 Door cycle counter – number of tens<br />
E1 Door cycle counter – number of units<br />
Menu 2: Maintenance counter<br />
The maintenance counter of the controls displays the number of operations here as a five-digit number (up to 99,999).<br />
The display function is illustrated in the flow chart below.<br />
The number of operations still required is shown as 1s, 10s, 100s, etc.<br />
The digits are displayed as described for Menu 1.<br />
A2 Maintenance counter – number of tens of thousands<br />
B2 Maintenance counter – number of thousands<br />
C2 Maintenance counter – number of hundreds<br />
D2 Maintenance counter – number of tens<br />
E2 Maintenance counter – number of units<br />
26 Manual for installation and operation, <strong>Dynamic</strong> <strong>vario</strong> <strong>DC</strong> GB (#96400)
8. Extended operator functions<br />
Menu 3 Set the maintenance interval<br />
The number of door operations after which the controls indicate that maintenance is required can be programmed here.<br />
A3 Maintenance interval: OFF<br />
B3 Maintenance interval: every 1,000 door operations<br />
C3 Maintenance interval: every 2,000 door operations<br />
D3 Maintenance interval: every 3,000 door operations<br />
E3 Maintenance interval: every 4,000 door operations<br />
F3 Maintenance interval: every 5,000 door operations<br />
G3 Maintenance interval: every 6,000 door operations<br />
H3 Maintenance interval: every 7,000 door operations<br />
Menu 8: Reset servicing and maintenance<br />
The fault memory for servicing, diagnostics and maintenance works can be reset here.<br />
A8 No reset B8 Reset fault memory<br />
I3 Maintenance interval: every 8,000 door operations<br />
J3 Maintenance interval: every 9,000 door operations<br />
K3 Maintenance interval: every 10,000 door operations<br />
L3 Maintenance interval: every 15,000 door operations<br />
M3 Maintenance interval: every 20,000 door operations<br />
N3 Maintenance interval: every 30,000 door operations<br />
O3 Maintenance interval: every 40,000 door operations<br />
P3 Maintenance interval: every 50,000 door operations<br />
Legend:<br />
LED off<br />
LED on<br />
LED flashes slowly<br />
LED pulses<br />
LED flashes quickly<br />
Factory default setting<br />
Not possible –<br />
Manual for installation and operation, <strong>Dynamic</strong> <strong>vario</strong> <strong>DC</strong> GB (#96400) 27
8. Extended operator functions<br />
Level 8 – System settings<br />
1 2 3 4 5 6 7 8 9 10 11 12 13 14 15 16<br />
Menu 1: Photocell<br />
A1 B1 C1 – – – – – – – – – – – – –<br />
Menu 2: Closing edge safety device<br />
A2 B2 C2 D2 E2 F2 G2 H2 – – – – – – – –<br />
Menu 3: Automatic cut-out<br />
A3 B3 C3 D3 – – – – – – – – – – – –<br />
Menu 4: Operating modes<br />
A4 B4 C4 D4 – – – – – – – – – – – –<br />
Menu 5: Function of the direction command transmitters<br />
A5 B5 – – – – – – – – – – – – – –<br />
Menu 6: Function of the impulse command transmitters<br />
A6 B6 – – – – – – – – – – – – – –<br />
Menu 1: Photocell<br />
Setting<br />
Photocell<br />
(Connection XB02 - terminal 70/71)<br />
Door movement, CLOSE<br />
External photocell<br />
(Connection XB02 - terminal 70/71)<br />
Door movement, CLOSE<br />
A1 Operation without photocell<br />
B1 Door reverses completely 2<br />
Not active<br />
C1 Not active Door reverses completely 2<br />
i<br />
Attention!<br />
If a photocell is connected, it is automatically recognised by the controls after MAINS ON.<br />
The photocell can be reprogrammed later.<br />
Advice:<br />
Photocells and closing edge safety devices that are not required must be disconnected, or the controls<br />
will recognise them.<br />
Reference:<br />
Terminal XB02 is described in Section 6.5.<br />
Legend:<br />
LED off<br />
LED on<br />
LED flashes slowly<br />
LED pulses<br />
LED flashes quickly<br />
Factory default setting<br />
Not possible –<br />
28 Manual for installation and operation, <strong>Dynamic</strong> <strong>vario</strong> <strong>DC</strong> GB (#96400)
8. Extended operator functions<br />
Menu 2: Closing safety edge device<br />
Menu 3: Automatic cut-out<br />
Menu 4: Operating modes<br />
Door movement, OPEN<br />
(only possible with extension module)<br />
Setting Door movement, OPEN Door movement, CLOSE<br />
A3 Door stops Door reverses a little 1<br />
B3 Door reverses a little 1<br />
Door reverses a little 1<br />
C3 Door stops Door reverses completely 2<br />
D3 Door reverses completely 2<br />
Door reverses completely 2<br />
1 Door reverses a little: The drive system moves the door a short distance in the opposite direction in order<br />
to free an obstacle.<br />
2 Door reverses completely: The drive system moves the door to the opposite end position.<br />
OPEN CLOSE<br />
A4 Press and hold Press and hold<br />
B4 Automatic closing Press and hold<br />
C4 Press and hold Automatic closing<br />
D4 Automatic closing Automatic closing<br />
Menu 5: Function of the direction command transmitter<br />
A5 Not active<br />
B5 STOP only<br />
Menu 6: Function of the impulse command transmitter<br />
A6 Not active<br />
Direction command transmitters Explanations<br />
The direction command transmitters only give a<br />
command when the door is stationary.<br />
A moving door is stopped by every direction command<br />
transmitter.<br />
Impulse command transmitters Explanations<br />
B6 STOP only, then standard sequence<br />
Door movement, CLOSE<br />
A2 Door reverses a little 1<br />
Door reverses a little 1<br />
B2 Door reverses a little 1<br />
Door reverses completely 2<br />
C2 Door reverses completely 2<br />
Door reverses a little 1<br />
D2 Door reverses completely 2<br />
Door reverses completely 2<br />
E2 Door reverses slightly1 with airswitch testing Door reverses slightly1 with airswitch testing<br />
F2 Door reverses slightly1 with airswitch testing Door reverses fully2 with airswitch testing<br />
G2 Door reverses fully2 with airswitch testing Door reverses slightly1 with airswitch testing<br />
H2 Door reverses fully2 with airswitch testing Door reverses fully2 with airswitch testing<br />
The impulse command transmitters only give a<br />
command when the door is stationary.<br />
A moving door is stopped by every impulse command<br />
transmitter. The next command starts the drive system<br />
running in the opposite direction<br />
(OPEN - STOP - CLOSE - STOP - OPEN).<br />
Manual for installation and operation, <strong>Dynamic</strong> <strong>vario</strong> <strong>DC</strong> GB (#96400) 29
9. Operation<br />
9.1 Standard operation<br />
Drive the door in the OPEN direction<br />
9.1 / 1<br />
• Press the OPEN button on the control unit.<br />
The door stops automatically when it reaches the “door OPEN”<br />
position.<br />
Drive the door in the CLOSE direction<br />
9.1 / 2<br />
Advice:<br />
The operator system moves the door in pressand-release<br />
mode.<br />
• Press the CLOSE button on the control unit.<br />
The door stops automatically when it reaches the “door CLOSED”<br />
position.<br />
9.2 Emergency operation<br />
Operator system with quick release system<br />
In order to move the door manually, the drive unit can be<br />
disengaged from the spring shaft.<br />
Disengaging the motor unit<br />
Engaging the motor unit<br />
• Pull down on the green release cable handle.<br />
• Lock the door with gentle UP and DOWN movements.<br />
The door can now be opened and closed electrically.<br />
30 Manual for installation and operation, <strong>Dynamic</strong> <strong>vario</strong> <strong>DC</strong> GB (#96400)<br />
9.2 / 1<br />
Attention!<br />
To avoid damaging the door,<br />
- the door must only be released and locked<br />
when closed,<br />
- any existing door locking devices must be<br />
disabled before emergency operation.<br />
• Pull down on the red release cable handle.<br />
Move the door<br />
• Release the door with gentle UP and DOWN movements.<br />
The door can now be moved manually towards the OPEN or<br />
CLOSED position.<br />
Advice:<br />
To ensure correct operation, the hollow shaft<br />
must rotate around 36O° at least once after<br />
locking.
10. Messages<br />
10.1 Overview of the display functions<br />
LED displays in operating mode<br />
Status of safety devices<br />
Door in door position: OPEN<br />
The door is moving in the OPEN direction.<br />
Intermediate OPEN position<br />
Intermediate CLOSE position<br />
Door is at intermediate position<br />
Door in door position: CLOSED<br />
The door is moving in the CLOSE direction.<br />
Reference point (flashes as the reference point is<br />
passed)<br />
Maintenance<br />
Safety circuit, motor unit<br />
Command unit activated<br />
Remote control activated<br />
Ready for operation<br />
Example:<br />
The door is at the OPEN position.<br />
It starts to move towards the CLOSED position as<br />
soon as the warning period/start-up warning<br />
expires.<br />
10.2 Status messages<br />
In addition to messages regarding the door position, status<br />
messages give information regarding the status of the operator<br />
system during operation.<br />
Safety elements:<br />
During operation, LED 1 serves as a status indicator<br />
for the safety elements connected (closing edge safety<br />
device, photocell).<br />
If the safety element in question is triggered, LED 1<br />
lights up whilst it is activated.<br />
Control elements / remote controls:<br />
During operation and when carrying out component<br />
tests, LED 7 serves as a status indicator for the control<br />
elements connected (OPEN, CLOSE, STOP, half OPEN,<br />
etc.).<br />
If the control element in question is triggered, LED 7<br />
lights up whilst it is activated.<br />
If a remote signal is received, LED 7 flashes quickly.<br />
Legend:<br />
LED off<br />
LED on<br />
LED flashes slowly<br />
LED pulses<br />
LED flashes quickly<br />
Factory default setting<br />
Not possible –<br />
Manual for installation and operation, <strong>Dynamic</strong> <strong>vario</strong> <strong>DC</strong> GB (#96400) 31
10. Messages<br />
10.3 Fault messages<br />
Malfunctions in the system are indicated by a corresponding<br />
message number.<br />
The controls switch to message mode.<br />
1.<br />
2.<br />
3.<br />
4.<br />
Message number is displayed for approx.<br />
3 seconds (example: Message 15).<br />
Pause between messages for<br />
approx. 1 second.<br />
Operating mode is displayed for approx.<br />
3 seconds (example: operating voltage).<br />
Pause between messages for<br />
approx. 1 second.<br />
5. Messages 1 to 4 are repeated.<br />
Advice:<br />
- The controls show the message numbers via<br />
one or more rhythmically flashing LEDs.<br />
The message number is found by adding<br />
together the numbers next to the flashing<br />
LEDs.<br />
- During programming, all status messages and<br />
other messages are suppressed. The messages<br />
in programming mode are never ambiguous.<br />
The message numbers serve two purposes:<br />
1. They indicate why the controls were unable to carry out<br />
the drive command given.<br />
2. They indicate which components are faulty.<br />
This facilitates better and faster service on site, and only<br />
the control components identified as being faulty need be<br />
replaced.<br />
The controls remain in message mode until they switch to operating<br />
mode or diagnostic mode.<br />
Switching to operating mode<br />
The controls switch to operating mode as soon as they receive a<br />
movement impulse.<br />
Switching to diagnostic mode (integrated controls)<br />
The controls can be switched to diagnostic mode from either<br />
message mode or operating mode.<br />
Before switching to diagnostic mode, the key switch must be in<br />
position “1”.<br />
• Press the STOP button and keep it pressed.<br />
• Switch the key switch from position “1” to position “2” within<br />
4 seconds and then release the STOP button.<br />
The controls switch to diagnostic mode.<br />
Button functions in diagnostic mode<br />
(+ / OPEN) button The current fault is always shown<br />
when the (+) button is pressed.<br />
(- / CLOSE) button When the (-) button is pressed, up to<br />
5 faults from the fault memory are<br />
shown in succession.<br />
(P / STOP) button Pressing the (P) button ends the<br />
diagnostic mode.<br />
The carousel display runs backwards.<br />
The controls return to operating<br />
mode.<br />
Legend:<br />
LED off<br />
LED on<br />
LED flashes slowly<br />
LED pulses<br />
LED flashes quickly<br />
Factory default setting<br />
Not possible –<br />
32 Manual for installation and operation, <strong>Dynamic</strong> <strong>vario</strong> <strong>DC</strong> GB (#96400)
10. Messages<br />
10.4 Rectifying faults<br />
Malfunctions without error messages<br />
Error Cause Solution<br />
LED 8 does not light up. - No voltage. - Check that the mains power supply is operational.<br />
- Check the connection to the mains power supply.<br />
Malfunctions with error messages<br />
- Thermal overload protection in power<br />
transformer was activated.<br />
Error Cause Solution<br />
Message 1 - Extended message (can only be read<br />
with <strong>Marantec</strong> Diagnostic System).<br />
- Allow the power transformer to cool down.<br />
- Defective control unit. - Have the operator system checked.<br />
No reaction on impulse. - The connection terminals for the<br />
“impulse” button were by-passed, e.g.<br />
due to a short-circuit or flattened<br />
terminals.<br />
No reaction on impulse from<br />
hand transmitter.<br />
Operator reverses when the door<br />
frame photocell is interrupted.<br />
End positions are not reached<br />
correctly.<br />
No reaction to impulse signal.<br />
Door moves towards CLOSED<br />
position in deadman operation<br />
only (message number 1 is displayed).<br />
- Try temporarily disconnecting any key switches or interior push<br />
buttons that are connected to the control unit (Section 6.5):<br />
Remove the cable from socket XB02 or insert the shorting plug in<br />
XB10 and look for cabling errors.<br />
- Module antenna is not plugged in. - Connect the module antenna to the control unit.<br />
- The hand transmitter coding does not<br />
correspond to the receiver coding.<br />
- Activate hand transmitter again.<br />
- Hand transmitter battery is empty. - Insert new battery.<br />
- Defective hand transmitter, control unit<br />
electronics or module antenna.<br />
- Programming was not carried out<br />
correctly.<br />
- Have all 3 components checked.<br />
- Carry out a reset of the safety devices<br />
(Section 8.4, / Level 1 / Menu F8),<br />
carry out express programming again (Section 7.2).<br />
- The door was not moved electrically. - The hollow shaft must rotate around 360° at least once in order for<br />
the reference point to be passed over.<br />
- Electronic broken cable detection device<br />
has been triggered.<br />
- Check the path of the door and ensure that the door moves easily.<br />
- Have the automatic cut-out facility checked by an expert<br />
(Section 8.3 / Level 2 / Menu 3+4).<br />
- Repair door.<br />
- Have the control unit checked.<br />
Message 7 - If no buttons are pressed within 120 seconds, the programming mode terminates automatically.<br />
- OPEN and CLOSED door positions programmed without passing the reference point.<br />
Message 8 - Reference point button defective. - Have the operator system checked.<br />
Manual for installation and operation, <strong>Dynamic</strong> <strong>vario</strong> <strong>DC</strong> GB (#96400) 33
10. Messages<br />
Error Cause Solution<br />
Message 9 - No speed sensor impulses,<br />
drive system is blocked.<br />
Message 10 - Door movement too stiff.<br />
- Door blocked.<br />
- Maximum driving power setting is too<br />
low.<br />
- Have the operator system checked.<br />
- Ensure that the door moves easily.<br />
- Have the max. driving power (Section 8.3 / Level 2 / Menu 1+2)<br />
checked by an expert.<br />
Message 11 - Excess travel stop. - Have the operator system checked.<br />
Message 12 - CESD test in OPEN direction not OK. - Check closing edge safety device.<br />
- Programme out the closing edge safety device if there is no CESD<br />
present (Section 8.3 / Level 8 / Menu 2).<br />
Message 13 - CESD test in CLOSED direction not OK. - Check closing edge safety device.<br />
- Programme out the closing edge safety device if there is no CESD<br />
present (Section 8.3 / Level 8 / Menu 2).<br />
Message 14 - No valid end positions available. - Carry out express programming again (Section 7.2).<br />
Message 15 - External photocell interrupted or<br />
defective.<br />
- Programmed for photocell, but no<br />
photocell is connected.<br />
Message 16 - Power sensor for the automatic<br />
cut-out is defective.<br />
Message 26 - Undervoltage, operator system<br />
overloaded at maximum power setting,<br />
16.<br />
Message 28 - Door movement too stiff or irregular.<br />
- Door blocked.<br />
- Automatic cut-out is set to be too<br />
sensitive.<br />
- Cable torn or fallen off.<br />
- Spring broken.<br />
- Remove obstacle or have the photocell checked.<br />
- Deactivate or connect the photocell.<br />
- Have the motor unit checked.<br />
- Have the external power supply checked.<br />
- Check the path of the door and ensure that the door moves easily.<br />
- Have the automatic cut-out facility checked by an expert<br />
(Section 8.3 / Level 2 / Menu 3+4).<br />
- Repair door.<br />
Message 35 - Electronics are defective. - Have the operator system checked.<br />
Message 36 - Wire jumper removed, but stop button<br />
not connected.<br />
- Operator system disengaged.<br />
- Closed circuit interrupted.<br />
- Connect stop button to XB10 or insert shorting plug (Section 6.5).<br />
- Engage the operator system.<br />
34 Manual for installation and operation, <strong>Dynamic</strong> <strong>vario</strong> <strong>DC</strong> GB (#96400)
11. Attachment<br />
11.1 Technical data <strong>Dynamic</strong> <strong>vario</strong> <strong>DC</strong><br />
Mechanical data / Type 15/30<br />
Driving torque Nm 15<br />
Nominal RPM min -1 30<br />
Max. revolutions, driven shaft 15<br />
Emergency operation Quick release with pull cable<br />
Drive unit disengagement Quick release<br />
Sleeve shaft diameter mm Aluminium hollow shaft / tooth system in acc. with DIN Standard 548 - 42 x 1.25 x 30 x 32<br />
Electrical data / Type 15/30<br />
Mains voltage V 1N~ 230<br />
Rated frequency Hz 50<br />
Input current A 1,1<br />
Power consumption in operation kW 0,25<br />
Motor duty cycle (ED) % 25<br />
Power supply for external<br />
elements<br />
V 24 / 200 mA<br />
Protection category IP 20<br />
Protection class I<br />
Physical and ambient data / Type 15/30<br />
Dimensions mm 119 x 420 x 261<br />
Weight kg 6.70<br />
Temperature range C˚ -20 to +60<br />
Mounting versions Push-on or flange mounting<br />
Legend:<br />
LED off<br />
LED on<br />
LED flashes slowly<br />
LED pulses<br />
LED flashes quickly<br />
Factory default setting<br />
Not possible –<br />
Manual for installation and operation, <strong>Dynamic</strong> <strong>vario</strong> <strong>DC</strong> GB (#96400) 35
11. Attachment<br />
11.2 Manufacturer’s Declaration 11.3 EC Declaration of Conformity<br />
We hereby declare that the product sold by us and mentioned<br />
below corresponds in its design, construction and version to the<br />
relevant and basic health and safety requirements of the following<br />
EC regulations: EMC Directive, Machinery Directive and Low<br />
Voltage Directive.<br />
On request of the authorized inspection authorities,<br />
the documentation is available as hardcopy.<br />
Product changes made without our consent will render this<br />
Declaration void.<br />
Product: Door operator for industrial use <strong>Dynamic</strong> <strong>vario</strong> <strong>DC</strong><br />
Relevant EC Regulations:<br />
- Machinery Directive 2006/42/EC<br />
EN 60204-1:2007<br />
EN ISO 12100-1:2003<br />
EN ISO 13849-1:2008<br />
Cat.2 / PLc for the functions of power limitation, end position<br />
detection and closing edge evaluation<br />
EN 61508:2001<br />
- Electromagnetic compatibility 2004/108/EC<br />
EN 55014-1<br />
EN 61000-3-2:2006 (2008)<br />
EN 61000-3-3:2009<br />
EN 61000-6-2:2006<br />
EN 61000-6-3:2007<br />
- Low Voltage Directive 2006/95/EC<br />
EN 60335-1:2002<br />
EN 60335-2-103:2004<br />
Scope of these installation and operating instructions:<br />
Date of manufacture 01.10.2010 - 30.09.2011<br />
01.10.2010 ppa. K. Goldstein<br />
Management<br />
Manufacturer and document management<br />
<strong>Marantec</strong> Antriebs- und Steuerungstechnik GmbH & Co. KG<br />
Remser Brook 11 · 33428 Marienfeld · Germany<br />
Fon. +49 (5247) 705-0<br />
We hereby declare that the product sold by us and mentioned<br />
below corresponds in its design, construction and version to the<br />
relevant and basic health and safety requirements of the following<br />
EC regulations: EMC Directive, Machinery Directive and Low<br />
Voltage Directive.<br />
Product changes made without our consent will render this<br />
Declaration void.<br />
Product:<br />
Relevant EC Regulations:<br />
- Machinery Directive 2006/42/EC<br />
EN 60204-1:2007<br />
EN ISO 12100-1:2003<br />
EN ISO 13849-1:2008<br />
EN 61508:2001<br />
- Electromagnetic compatibility 2004/108/EC<br />
EN 55014-1<br />
EN 61000-3-2:2006 (2008)<br />
EN 61000-3-3:2009<br />
EN 61000-6-2:2006<br />
EN 61000-6-3:2007<br />
- Low Voltage Directive 2006/95/EC<br />
EN 60335-1:2002<br />
EN 60335-2-103:2004<br />
Date / Signature<br />
36 Manual for installation and operation, <strong>Dynamic</strong> <strong>vario</strong> <strong>DC</strong> GB (#96400)
Manual for installation and operation, <strong>Dynamic</strong> <strong>vario</strong> <strong>DC</strong> GB (#96400) 37
38 Manual for installation and operation, <strong>Dynamic</strong> <strong>vario</strong> <strong>DC</strong> GB (#96400)
Manual for installation and operation, <strong>Dynamic</strong> <strong>vario</strong> <strong>DC</strong> GB (#96400) 39
English Original instructions, Copyright.<br />
No part of this manual may be reproduced without our prior consent.<br />
Subject to changes which are in the interest of technical improvements.<br />
96400<br />
Version: 01.2011<br />
#96400<br />
1 - GB 360319-M-0.5 - 0110