

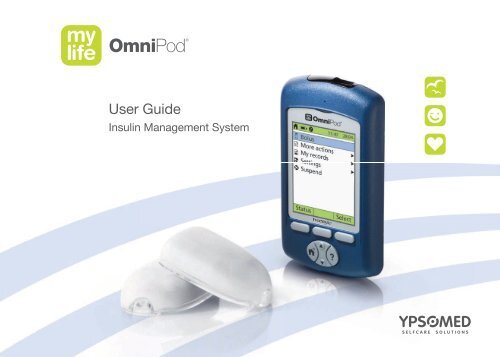
User Guide mylife OmniPod Insulin Management System
User Guide mylife OmniPod Insulin Management System
User Guide mylife OmniPod Insulin Management System

Create successful ePaper yourself
Turn your PDF publications into a flip-book with our unique Google optimized e-Paper software.
<strong>User</strong> <strong>Guide</strong><br />
<strong>Insulin</strong> <strong>Management</strong> <strong>System</strong>
Contacts and Important Information<br />
Use the spaces below to record important health and product information.<br />
Doctor<br />
Name<br />
Address<br />
Telephone and Fax<br />
Email Address<br />
Nurse/Educator<br />
Name<br />
Address<br />
Telephone and Fax<br />
Email Address<br />
o<br />
Health Insurance<br />
Name<br />
Address<br />
Telephone Number(s)<br />
Policy Number<br />
Pharmacy<br />
Name<br />
Address<br />
Telephone and Fax<br />
Email Address<br />
<strong>mylife</strong> <strong>OmniPod</strong> <strong>System</strong> Start Date: ______________________<br />
PDM Model: ENT350 Serial Number: ____________________<br />
Distributor:<br />
Ypsomed Ltd. (UK)<br />
Blackwood Hall Business Park<br />
North Duffield, Selby, N. Yorks. YO8 5DD / United Kingdom<br />
info@ypsomed.co.uk<br />
Customer Care:<br />
Ypsomed Ltd. Service: 0800 092 6787
© 2010 Insulet Corporation. All rights reserved.<br />
<strong>OmniPod</strong> is a registered trademark of Insulet Corporation.<br />
U.S. Patent No. 6,740,059.<br />
FreeStyle is a registered trademark of Abbott Laboratories.<br />
NovoLog and NovoRapid are registered trademarks of Novo Nordisk A/S. Humalog is a registered trademark of Eli Lilly and Company.<br />
Apidra is a registered trademark of Sanofi Aventis. Windows is a registered trademark of Microsoft Corporation.<br />
14303-2C-AW Rev B
Contents<br />
Introduction. . . . . . . . . . . . . . . . . . . . . . . . . . . . . . . . . . . . . . . . . . . . . . ix<br />
Before You Get Started . . . . . . . . . . . . . . . . . . . . . . . . . . . . . . . . . . . . . . ix<br />
Indication. . . . . . . . . . . . . . . . . . . . . . . . . . . . . . . . . . . . . . . . . . . . . . . . . . . . . . ix<br />
Contraindications . . . . . . . . . . . . . . . . . . . . . . . . . . . . . . . . . . . . . . . . . . . . . ix<br />
You and your healthcare provider . . . . . . . . . . . . . . . . . . . . . . . . . . . . . x<br />
Your Role: Safely Using the <strong>mylife</strong> <strong>OmniPod</strong> <strong>System</strong> . . . . . . . . xi<br />
About This <strong>User</strong> <strong>Guide</strong> . . . . . . . . . . . . . . . . . . . . . . . . . . . . . . . . . . . . . xii<br />
Conventions and Terms. . . . . . . . . . . . . . . . . . . . . . . . . . . . . . . . . . . . . . . xii<br />
Symbols . . . . . . . . . . . . . . . . . . . . . . . . . . . . . . . . . . . . . . . . . . . . . . . . . . . . . xii<br />
1 Your New <strong>mylife</strong> <strong>OmniPod</strong> <strong>Insulin</strong> <strong>Management</strong> <strong>System</strong> 1<br />
<strong>Insulin</strong> Delivery with the <strong>mylife</strong> <strong>OmniPod</strong> <strong>System</strong> . . . . . . . . . . . 1<br />
How Does the <strong>mylife</strong> <strong>OmniPod</strong> <strong>System</strong> Work? . . . . . . . . . . . . . . 2<br />
No tubing. . . . . . . . . . . . . . . . . . . . . . . . . . . . . . . . . . . . . . . . . . . . . . . . . . . . . . . 2<br />
Automated cannula insertion. . . . . . . . . . . . . . . . . . . . . . . . . . . . . . . . . . 2<br />
A fully-integrated design with blood glucose monitoring . . . . 2<br />
Suggested bolus calculation . . . . . . . . . . . . . . . . . . . . . . . . . . . . . . . . . . . 3<br />
Carb presets . . . . . . . . . . . . . . . . . . . . . . . . . . . . . . . . . . . . . . . . . . . . . . . . . . . . 3<br />
Record keeping . . . . . . . . . . . . . . . . . . . . . . . . . . . . . . . . . . . . . . . . . . . . . . . . 3<br />
Personalizing your <strong>System</strong> . . . . . . . . . . . . . . . . . . . . . . . . . . . . . . . . . . . . 3<br />
The Pod . . . . . . . . . . . . . . . . . . . . . . . . . . . . . . . . . . . . . . . . . . . . . . . . . . . . . 4<br />
The Personal Diabetes Manager . . . . . . . . . . . . . . . . . . . . . . . . . . . . 4<br />
Buttons that program and control the <strong>mylife</strong> <strong>OmniPod</strong><br />
<strong>System</strong> . . . . . . . . . . . . . . . . . . . . . . . . . . . . . . . . . . . . . . . . . . . . . . . . . . . . . . . . . .5<br />
Primary screens . . . . . . . . . . . . . . . . . . . . . . . . . . . . . . . . . . . . . . . . . . . . . . . . 6<br />
Safety Features . . . . . . . . . . . . . . . . . . . . . . . . . . . . . . . . . . . . . . . . . . . . . 8<br />
Automatic priming, safety checks, and insertion . . . . . . . . . . . . . 8<br />
Rapid occlusion detection. . . . . . . . . . . . . . . . . . . . . . . . . . . . . . . . . . . . . 8<br />
Alerts and alarms . . . . . . . . . . . . . . . . . . . . . . . . . . . . . . . . . . . . . . . . . . . . . . 8<br />
2 Getting Started . . . . . . . . . . . . . . . . . . . . . . . . . . . . . . . . . . . . . . . 9<br />
Set Up the Personal Diabetes Manager (PDM) . . . . . . . . . . . . . . 9<br />
Turn on the PDM . . . . . . . . . . . . . . . . . . . . . . . . . . . . . . . . . . . . . . . . . . . . . . 9<br />
The <strong>mylife</strong> <strong>OmniPod</strong> Setup Wizard. . . . . . . . . . . . . . . . . . . . . . . . . 10<br />
Set date and time . . . . . . . . . . . . . . . . . . . . . . . . . . . . . . . . . . . . . . . . . . . . . 11<br />
Enter basal settings . . . . . . . . . . . . . . . . . . . . . . . . . . . . . . . . . . . . . . . . . . . 11<br />
Enter blood glucose sound setting and BG goal . . . . . . . . . 12<br />
Set the suggested bolus calculator. . . . . . . . . . . . . . . . . . . . . . . 12<br />
Enter target blood glucose value. . . . . . . . . . . . . . . . . . . . . . . . . 12<br />
iii
Contents<br />
Enter minimum BG allowed for use in bolus calculation . . . . 13<br />
Enter insulin-to-carbohydrate ratio . . . . . . . . . . . . . . . . . . . . . . . . . . 13<br />
Enter correction factor . . . . . . . . . . . . . . . . . . . . . . . . . . . . . . . . . . . . . . . 13<br />
Set reverse correction . . . . . . . . . . . . . . . . . . . . . . . . . . . . . . . . . . . . . . . . 14<br />
Enter the duration of insulin action . . . . . . . . . . . . . . . . . . . . . . 14<br />
Select bolus increment and enter maximum bolus . . . . . . 14<br />
Set extended bolus doses. . . . . . . . . . . . . . . . . . . . . . . . . . . . . . . . 14<br />
Set low reservoir advisory. . . . . . . . . . . . . . . . . . . . . . . . . . . . . . . . . . . . 15<br />
Set expiration notification . . . . . . . . . . . . . . . . . . . . . . . . . . . . . . . . . . . 15<br />
3 Understanding and Adjusting Basal Rates . . . . . . . . . . . . 16<br />
What Is a Basal Rate? . . . . . . . . . . . . . . . . . . . . . . . . . . . . . . . . . . . . . . . 16<br />
Personalized Basal Programs . . . . . . . . . . . . . . . . . . . . . . . . . . . . . . 16<br />
Create a basal program . . . . . . . . . . . . . . . . . . . . . . . . . . . . . . . . . . . . . . 17<br />
Enable an existing basal program . . . . . . . . . . . . . . . . . . . . . . . . . . . 19<br />
Change, rename, copy, or delete a basal program . . . . . . . 20<br />
Temporary Basal Rates and Presets . . . . . . . . . . . . . . . . . . . . . . . . 22<br />
What is a temporary basal rate?. . . . . . . . . . . . . . . . . . . . . . . . . . . . . . 22<br />
Enable a one-time temporary basal rate. . . . . . . . . . . . . . . . . . . . . 23<br />
Cancel a one-time temporary basal rate. . . . . . . . . . . . . . . . . . . . . 24<br />
Create a temporary basal preset . . . . . . . . . . . . . . . . . . . . . . . . . . . . . 24<br />
Enable an existing temporary basal preset . . . . . . . . . . . . . . . . . . 25<br />
Cancel an active temporary basal preset . . . . . . . . . . . . . . . . . . . . 26<br />
Change, rename, or delete a temporary basal preset . . . . . . . 26<br />
Maximum Basal Rate. . . . . . . . . . . . . . . . . . . . . . . . . . . . . . . . . . . . . . . 27<br />
iv<br />
What is the maximum basal rate? . . . . . . . . . . . . . . . . . . . . . . . . . . . . 27<br />
Change the maximum basal rate . . . . . . . . . . . . . . . . . . . . . . . . . . . . 27<br />
4 Understanding and Delivering Bolus Doses . . . . . . . . . . . 28<br />
What Is a Bolus? . . . . . . . . . . . . . . . . . . . . . . . . . . . . . . . . . . . . . . . . . . . . 28<br />
Bolus Dose Options . . . . . . . . . . . . . . . . . . . . . . . . . . . . . . . . . . . . . . . . 29<br />
Suggested Bolus Calculator . . . . . . . . . . . . . . . . . . . . . . . . . . . . . . . . 29<br />
How a suggested bolus is calculated. . . . . . . . . . . . . . . . . . . . . . . . . 29<br />
Deliver a Normal Bolus . . . . . . . . . . . . . . . . . . . . . . . . . . . . . . . . . . . . . 30<br />
Deliver a bolus when suggested bolus calculator is On . . . . . 30<br />
Deliver a bolus manually (suggested bolus calc is Off) . . . . . . 33<br />
Deliver an Extended Bolus. . . . . . . . . . . . . . . . . . . . . . . . . . . . . . . . . . 33<br />
Deliver an extended bolus instead of a normal bolus . . . . . . . 33<br />
Cancel Active Boluses . . . . . . . . . . . . . . . . . . . . . . . . . . . . . . . . . . . . . . 35<br />
Replace an Extended Bolus. . . . . . . . . . . . . . . . . . . . . . . . . . . . . . . . . 36<br />
Bolus Presets . . . . . . . . . . . . . . . . . . . . . . . . . . . . . . . . . . . . . . . . . . . . . . . 37<br />
Create a bolus preset . . . . . . . . . . . . . . . . . . . . . . . . . . . . . . . . . . . . . 37<br />
Enable an existing bolus preset . . . . . . . . . . . . . . . . . . . . . . . . . . . . . . 38<br />
Change, rename, or delete a bolus preset . . . . . . . . . . . . . . . . . . . 38<br />
Cancel an active bolus preset . . . . . . . . . . . . . . . . . . . . . . . . . . . . . . . . 39<br />
Carb Presets . . . . . . . . . . . . . . . . . . . . . . . . . . . . . . . . . . . . . . . . . . . . . . . . 39<br />
Create a carb preset . . . . . . . . . . . . . . . . . . . . . . . . . . . . . . . . . . . . . . . . . . 39<br />
Change or edit a carb preset . . . . . . . . . . . . . . . . . . . . . . . . . . . . . . . . . 40<br />
Delete a carb preset . . . . . . . . . . . . . . . . . . . . . . . . . . . . . . . . . . . . . . . . . . 41
5 Using the Pod . . . . . . . . . . . . . . . . . . . . . . . . . . . . . . . . . . . . . . . . 42<br />
The Pod Change Process . . . . . . . . . . . . . . . . . . . . . . . . . . . . . . . . . . . 42<br />
Gather equipment and supplies . . . . . . . . . . . . . . . . . . . . . . . . . . . . . 43<br />
Deactivate the current Pod . . . . . . . . . . . . . . . . . . . . . . . . . . . . . . . 43<br />
Fill a new Pod. . . . . . . . . . . . . . . . . . . . . . . . . . . . . . . . . . . . . . . . . . . . . . . . . 45<br />
Select the infusion site . . . . . . . . . . . . . . . . . . . . . . . . . . . . . . . . . . . . . . . 48<br />
Prepare the infusion site . . . . . . . . . . . . . . . . . . . . . . . . . . . . . . . . . . . . . 49<br />
Apply the new Pod. . . . . . . . . . . . . . . . . . . . . . . . . . . . . . . . . . . . . . . . . . . 50<br />
Insert cannula and begin insulin delivery. . . . . . . . . . . . . . . . . . . . 51<br />
Check Pod Status. . . . . . . . . . . . . . . . . . . . . . . . . . . . . . . . . . . . . . . . . . . 53<br />
Suspend <strong>Insulin</strong> Delivery . . . . . . . . . . . . . . . . . . . . . . . . . . . . . . . . . . . 54<br />
Resume <strong>Insulin</strong> Delivery . . . . . . . . . . . . . . . . . . . . . . . . . . . . . . . . . . . . 55<br />
Avoid Infusion Site Infections . . . . . . . . . . . . . . . . . . . . . . . . . . . . . . 55<br />
Get the Most From Your Pod . . . . . . . . . . . . . . . . . . . . . . . . . . . . . . . 56<br />
Avoid extreme temperatures . . . . . . . . . . . . . . . . . . . . . . . . . . . . . . . . 56<br />
Water and your Pod . . . . . . . . . . . . . . . . . . . . . . . . . . . . . . . . . . . . . . . . . . 56<br />
Safe storage . . . . . . . . . . . . . . . . . . . . . . . . . . . . . . . . . . . . . . . . . . . . . . 56<br />
6 Using the Personal Diabetes Manager . . . . . . . . . . . . . . . . 57<br />
The Status Screen . . . . . . . . . . . . . . . . . . . . . . . . . . . . . . . . . . . . . . . . . . 57<br />
<strong>Insulin</strong> gauge and display . . . . . . . . . . . . . . . . . . . . . . . . . . . . . . . . 58<br />
PDM settings . . . . . . . . . . . . . . . . . . . . . . . . . . . . . . . . . . . . . . . . . . . . . 58<br />
The <strong>System</strong> Setup Menu . . . . . . . . . . . . . . . . . . . . . . . . . . . . . . . . . . . 59<br />
Reset the Date or Time . . . . . . . . . . . . . . . . . . . . . . . . . . . . . . . . . . . . . 59<br />
Reset the time . . . . . . . . . . . . . . . . . . . . . . . . . . . . . . . . . . . . . . . . . . . . . . . . 59<br />
Contents<br />
Reset the date. . . . . . . . . . . . . . . . . . . . . . . . . . . . . . . . . . . . . . . . . . . . . . . . . 60<br />
Change Bolus and Basal Settings. . . . . . . . . . . . . . . . . . . . . . . . . . . 60<br />
Bolus calcs . . . . . . . . . . . . . . . . . . . . . . . . . . . . . . . . . . . . . . . . . . . . . . . 61<br />
Ratios/factors/targets. . . . . . . . . . . . . . . . . . . . . . . . . . . . . . . . . . . . . . . . . 63<br />
Temp basal. . . . . . . . . . . . . . . . . . . . . . . . . . . . . . . . . . . . . . . . . . . . . . . . . . . . 64<br />
Extended. . . . . . . . . . . . . . . . . . . . . . . . . . . . . . . . . . . . . . . . . . . . . . . . . . . . . . 64<br />
Bolus increment . . . . . . . . . . . . . . . . . . . . . . . . . . . . . . . . . . . . . . . . . . . . . . 64<br />
Max bolus . . . . . . . . . . . . . . . . . . . . . . . . . . . . . . . . . . . . . . . . . . . . . . . . . . . . . 64<br />
Max basal rate . . . . . . . . . . . . . . . . . . . . . . . . . . . . . . . . . . . . . . . . . . . . . . . . 64<br />
Alert and Reminder Notifications . . . . . . . . . . . . . . . . . . . . . . . . . . 65<br />
Set alert and reminder notifications. . . . . . . . . . . . . . . . . . . . . . . . . . 66<br />
Change Blood Glucose Meter Settings . . . . . . . . . . . . . . . . . . . . . 68<br />
Change BG goal limits . . . . . . . . . . . . . . . . . . . . . . . . . . . . . . . . . . . . . . . . 68<br />
Manage the blood glucose tags list . . . . . . . . . . . . . . . . . . . . . . . . . . 69<br />
Change BG sound . . . . . . . . . . . . . . . . . . . . . . . . . . . . . . . . . . . . . . . . . . . . 69<br />
Customize the Personal Diabetes Manager . . . . . . . . . . . . . . . . 70<br />
Set PDM options. . . . . . . . . . . . . . . . . . . . . . . . . . . . . . . . . . . . . . . . . . . . . . 70<br />
Set Diagnostic Functions. . . . . . . . . . . . . . . . . . . . . . . . . . . . . . . . . . . 71<br />
Diagnostic options. . . . . . . . . . . . . . . . . . . . . . . . . . . . . . . . . . . . . . . . . . . . 72<br />
Set a Notification to Vibrate . . . . . . . . . . . . . . . . . . . . . . . . . . . . . . . . 73<br />
Get the Most from Your PDM . . . . . . . . . . . . . . . . . . . . . . . . . . . . . . 73<br />
Keep it handy . . . . . . . . . . . . . . . . . . . . . . . . . . . . . . . . . . . . . . . . . . . . . . . . . 73<br />
Communicating with the Pod. . . . . . . . . . . . . . . . . . . . . . . . . . . . . . . . 73<br />
Water and your PDM . . . . . . . . . . . . . . . . . . . . . . . . . . . . . . . . . . . . . . . . . 73<br />
v
Contents<br />
Avoid extreme temperatures . . . . . . . . . . . . . . . . . . . . . . . . . . . . . . . . 74<br />
Electrical interference . . . . . . . . . . . . . . . . . . . . . . . . . . . . . . . . . . . . . . . . 74<br />
7 Checking Your Blood Glucose. . . . . . . . . . . . . . . . . . . . . . . . . 75<br />
The Built-in FreeStyle® Blood Glucose Meter . . . . . . . . . . . . . . . 75<br />
The FreeStyle® Blood Glucose Test Strips . . . . . . . . . . . . . . . . . . 76<br />
Important test strip information . . . . . . . . . . . . . . . . . . . . . . . . . . . . . 76<br />
The FreeStyle® Control Solution . . . . . . . . . . . . . . . . . . . . . . . . . . . 77<br />
When to perform a control solution test . . . . . . . . . . . . . . . . . . . . 77<br />
Check that the meter and test strips are working . . . . . . . . . . . 77<br />
Control solution expiration date. . . . . . . . . . . . . . . . . . . . . . . . . . . . . 77<br />
Ensure accurate control solution results. . . . . . . . . . . . . . . . . . . . . 77<br />
Out-of-range control solution results. . . . . . . . . . . . . . . . . . . . . . . . 78<br />
Performing a Control Solution Test . . . . . . . . . . . . . . . . . . . . . . . . 79<br />
Performing a blood glucose reading. . . . . . . . . . . . . . . . . . . . . . . 82<br />
Prepare the lancing device. . . . . . . . . . . . . . . . . . . . . . . . . . . . . . . . . . . 83<br />
Insert the blood glucose test strip . . . . . . . . . . . . . . . . . . . . . . . . . . . 84<br />
Set the blood glucose test strip code . . . . . . . . . . . . . . . . . . . . 85<br />
Lance your finger . . . . . . . . . . . . . . . . . . . . . . . . . . . . . . . . . . . . . . . . 86<br />
Lance your forearm, upper arm, hand, thigh, or calf . . . . . . . . 87<br />
Fill the blood glucose test strip with blood . . . . . . . . . . . . . . . . . . 88<br />
Wait for the reading . . . . . . . . . . . . . . . . . . . . . . . . . . . . . . . . . . . . . . . . . . 89<br />
Remove the lancet . . . . . . . . . . . . . . . . . . . . . . . . . . . . . . . . . . . . . . . . . . . 90<br />
Blood Glucose Results and the Suggested Bolus Calculator 91<br />
Entering Blood Glucose Readings Manually . . . . . . . . . . . . . . . 92<br />
vi<br />
Editing Tags . . . . . . . . . . . . . . . . . . . . . . . . . . . . . . . . . . . . . . . . . . . . . . . . 92<br />
Low and High Blood Glucose Readings. . . . . . . . . . . . . . . . . . . . . 94<br />
Low readings . . . . . . . . . . . . . . . . . . . . . . . . . . . . . . . . . . . . . . . . . . . . . . . . . 94<br />
High readings. . . . . . . . . . . . . . . . . . . . . . . . . . . . . . . . . . . . . . . . . . . . . . . . . 94<br />
Important Health-Related Information . . . . . . . . . . . . . . . . . . . . . 95<br />
8 Understanding Your Records . . . . . . . . . . . . . . . . . . . . . . . . . 96<br />
Record Keeping . . . . . . . . . . . . . . . . . . . . . . . . . . . . . . . . . . . . . . . . . . . . 96<br />
Special symbols in record screens . . . . . . . . . . . . . . . . . . . . . . . . 96<br />
<strong>Insulin</strong> Delivery Records . . . . . . . . . . . . . . . . . . . . . . . . . . . . . . . . . . . . 97<br />
View insulin delivery records . . . . . . . . . . . . . . . . . . . . . . . . . . . . . . . . . 97<br />
Blood Glucose Records . . . . . . . . . . . . . . . . . . . . . . . . . . . . . . . . . . . . . 99<br />
View single-day trends . . . . . . . . . . . . . . . . . . . . . . . . . . . . . . . . . . . . . . . 99<br />
View multiple-day trends. . . . . . . . . . . . . . . . . . . . . . . . . . . . . . . . . . . . 100<br />
Alarm Records. . . . . . . . . . . . . . . . . . . . . . . . . . . . . . . . . . . . . . . . . . . . 101<br />
Carbohydrate Records. . . . . . . . . . . . . . . . . . . . . . . . . . . . . . . . . . . . 101<br />
All Records . . . . . . . . . . . . . . . . . . . . . . . . . . . . . . . . . . . . . . . . . . . . . . . 102<br />
<strong>User</strong> Information/Support . . . . . . . . . . . . . . . . . . . . . . . . . . . . . . . . 102<br />
Add or change user information . . . . . . . . . . . . . . . . . . . . . . . . . . . . 103<br />
9 Living with Diabetes. . . . . . . . . . . . . . . . . . . . . . . . . . . . . . . . . 104<br />
Your Role: Safely Using the <strong>mylife</strong> <strong>OmniPod</strong> <strong>System</strong> . . . . . 104<br />
Daily Diabetes <strong>Management</strong> Activities . . . . . . . . . . . . . . . . . . . 105<br />
Check your blood glucose frequently. . . . . . . . . . . . . . . . . . . . . . . 105<br />
Inspect the infusion site daily. . . . . . . . . . . . . . . . . . . . . . . . . . . . . . . . 105<br />
Prepare for Emergencies . . . . . . . . . . . . . . . . . . . . . . . . . . . . . . . . . 106
Water and Your Pod. . . . . . . . . . . . . . . . . . . . . . . . . . . . . . . . . . . . . . 106<br />
Traveling and Vacationing . . . . . . . . . . . . . . . . . . . . . . . . . . . . . . . 107<br />
Plan for changing time zones . . . . . . . . . . . . . . . . . . . . . . . . . . . . . . . 107<br />
Take enough supplies. . . . . . . . . . . . . . . . . . . . . . . . . . . . . . . . . . . . . . . 107<br />
Minimize airport security delays . . . . . . . . . . . . . . . . . . . . . . . . 108<br />
Keep supplies accessible . . . . . . . . . . . . . . . . . . . . . . . . . . . . . . . . . . . . 108<br />
Avoid Lows, Highs, and DKA . . . . . . . . . . . . . . . . . . . . . . . . . . . . . 109<br />
General precautions. . . . . . . . . . . . . . . . . . . . . . . . . . . . . . . . . . . . . . . . . 109<br />
Hypoglycemia (low blood glucose). . . . . . . . . . . . . . . . . . . . . . . . . 109<br />
Hyperglycemia (high blood glucose) . . . . . . . . . . . . . . . . . . . . . . . 113<br />
Diabetic ketoacidosis (DKA). . . . . . . . . . . . . . . . . . . . . . . . . . . . . . . . . 117<br />
Handling Special Situations . . . . . . . . . . . . . . . . . . . . . . . . . . . . . . 118<br />
Sick days . . . . . . . . . . . . . . . . . . . . . . . . . . . . . . . . . . . . . . . . . . . . . . . . . . . . . 118<br />
Exercising, playing sports, or working hard. . . . . . . . . . . . . . . . . 118<br />
X-rays, MRIs, and CT scans. . . . . . . . . . . . . . . . . . . . . . . . . . . . . . . . . . . 119<br />
Surgery or hospitalization. . . . . . . . . . . . . . . . . . . . . . . . . . . . . . . . . . . 119<br />
10 Alerts and Alarms . . . . . . . . . . . . . . . . . . . . . . . . . . . . . . . . . . . 120<br />
Safety Checks . . . . . . . . . . . . . . . . . . . . . . . . . . . . . . . . . . . . . . . . . . . . 120<br />
Blood Glucose Meter Alerts . . . . . . . . . . . . . . . . . . . . . . . . . . . . . . 120<br />
Alarms. . . . . . . . . . . . . . . . . . . . . . . . . . . . . . . . . . . . . . . . . . . . . . . . . . . . 123<br />
Advisory Alarms . . . . . . . . . . . . . . . . . . . . . . . . . . . . . . . . . . . . . . . . . . . . . 123<br />
Hazard Alarms. . . . . . . . . . . . . . . . . . . . . . . . . . . . . . . . . . . . . . . . . . . . . . . 123<br />
Manual Shutoff of a Hazard Alarm. . . . . . . . . . . . . . . . . . . . . . . . 130<br />
Contents<br />
11 Communication Failures . . . . . . . . . . . . . . . . . . . . . . . . . . . . 131<br />
The Communication Process . . . . . . . . . . . . . . . . . . . . . . . . . . . . . 131<br />
Failure During Pod Activation or Operation. . . . . . . . . . . . . . . 131<br />
Failure During Pod Deactivation . . . . . . . . . . . . . . . . . . . . . . . . . . 133<br />
Failure During Request for Status . . . . . . . . . . . . . . . . . . . . . . . . . 134<br />
Failure During Bolus Cancellation. . . . . . . . . . . . . . . . . . . . . . . . . 135<br />
Appendix . . . . . . . . . . . . . . . . . . . . . . . . . . . . . . . . . . . . . . . . . . . . . . 137<br />
Pod Care and Maintenance . . . . . . . . . . . . . . . . . . . . . . . . . . . . . . . 137<br />
Storage. . . . . . . . . . . . . . . . . . . . . . . . . . . . . . . . . . . . . . . . . . . . . . . . . . . . . . 137<br />
Cleaning . . . . . . . . . . . . . . . . . . . . . . . . . . . . . . . . . . . . . . . . . . . . . . . . . . . . 137<br />
Personal Diabetes Manager Care and Maintenance. . . . . . . 137<br />
Storage. . . . . . . . . . . . . . . . . . . . . . . . . . . . . . . . . . . . . . . . . . . . . . . . . . . . . . 137<br />
Cleaning . . . . . . . . . . . . . . . . . . . . . . . . . . . . . . . . . . . . . . . . . . . . . . . . . . . . 138<br />
Replacing batteries . . . . . . . . . . . . . . . . . . . . . . . . . . . . . . . . . . . . . . . . . 138<br />
If the PDM becomes submerged in water . . . . . . . . . . . . . . . . . 139<br />
If you drop the PDM . . . . . . . . . . . . . . . . . . . . . . . . . . . . . . . . . . . . . . . . 140<br />
Storage and Supplies . . . . . . . . . . . . . . . . . . . . . . . . . . . . . . . . . . . . . 140<br />
Storage. . . . . . . . . . . . . . . . . . . . . . . . . . . . . . . . . . . . . . . . . . . . . . . . . . . . . . 140<br />
Ordering supplies. . . . . . . . . . . . . . . . . . . . . . . . . . . . . . . . . . . . . . . . . . . 140<br />
Suggested Bolus Calculator Examples and <strong>Guide</strong>lines . . . . 141<br />
Meal bolus calculation. . . . . . . . . . . . . . . . . . . . . . . . . . . . . . . . . . . . . . 141<br />
<strong>Insulin</strong>-on-board (IOB) calculation. . . . . . . . . . . . . . . . . . . . . . . . . . 141<br />
Examples of suggested bolus calculations. . . . . . . . . . . . . . . . . 142<br />
Calculator guidelines . . . . . . . . . . . . . . . . . . . . . . . . . . . . . . . . . . . . . . . 143<br />
vii
Contents<br />
viii<br />
<strong>mylife</strong> <strong>OmniPod</strong> <strong>System</strong> Options and Settings. . . . . . . . . . . . 145<br />
Pod Specifications . . . . . . . . . . . . . . . . . . . . . . . . . . . . . . . . . . . . . . . . 146<br />
Accuracy Test Results . . . . . . . . . . . . . . . . . . . . . . . . . . . . . . . . . . . . . 147<br />
Flow rate from startup . . . . . . . . . . . . . . . . . . . . . . . . . . . . . . . . . . . . . . 147<br />
Flow rate error. . . . . . . . . . . . . . . . . . . . . . . . . . . . . . . . . . . . . . . . . . . . . . . 147<br />
Personal Diabetes Manager Specifications. . . . . . . . . . . . . . . . 148<br />
Blood Glucose Meter Specifications. . . . . . . . . . . . . . . . . . . . . . . 148<br />
<strong>mylife</strong> <strong>OmniPod</strong> <strong>System</strong> Label Symbols . . . . . . . . . . . . . . . . . . 149<br />
Personal Diabetes Manager Icons . . . . . . . . . . . . . . . . . . . . . . . . 149<br />
Medical Device Directive . . . . . . . . . . . . . . . . . . . . . . . . . . . . . . . . . 150<br />
<strong>mylife</strong> <strong>OmniPod</strong> <strong>System</strong> Notice Concerning Interference 150<br />
Electromagnetic Compatibility . . . . . . . . . . . . . . . . . . . . . . . . . . . 151<br />
Glossary. . . . . . . . . . . . . . . . . . . . . . . . . . . . . . . . . . . . . . . . . . . . . . . . 155<br />
Index. . . . . . . . . . . . . . . . . . . . . . . . . . . . . . . . . . . . . . . . . . . . . . . . . . . 161
Introduction<br />
■ Before You Get Started<br />
This device is for prescription use only.<br />
Indication<br />
The <strong>mylife</strong> <strong>OmniPod</strong> <strong>Insulin</strong> <strong>Management</strong> <strong>System</strong> is intended for<br />
subcutaneous (below the skin) delivery of insulin at set and<br />
variable rates for the management of diabetes mellitus in persons<br />
requiring insulin and for the quantitative measurement of<br />
glucose in fresh whole capillary blood (in vitro).<br />
Contraindications<br />
<strong>Insulin</strong> pump therapy is NOT recommended for people who are<br />
either:<br />
• Unable to perform at least four (4) blood glucose tests per day<br />
• Unable to maintain contact with their healthcare provider<br />
• Unable to use the <strong>System</strong> according to instructions<br />
Do not use the integrated FreeStyle® Blood Glucose Monitoring<br />
<strong>System</strong> for:<br />
• Testing on newborns<br />
• Testing arterial blood<br />
• Diagnosing of or screening for diabetes mellitus<br />
This <strong>User</strong> <strong>Guide</strong> is intended for use only with PDM<br />
model ENT350. To learn which version of the PDM<br />
you have, turn it over. On the back of the PDM, look<br />
for “ENT350.” If you see it, this is the correct <strong>User</strong><br />
<strong>Guide</strong>. If you do not see “ENT350” on the back of the<br />
PDM, please call Customer Care.<br />
This device is intended for self-testing by the user.<br />
This <strong>User</strong> <strong>Guide</strong> is periodically updated. Visit<br />
www.<strong>mylife</strong>-omnipod.com to see the most recent<br />
version.<br />
ix
Introduction<br />
x<br />
If you are unable to use the <strong>System</strong> according to<br />
instructions, you may be putting your health and<br />
safety at risk. Talk with your healthcare provider if<br />
you have questions or concerns about using the<br />
<strong>System</strong> properly.<br />
The <strong>mylife</strong> <strong>OmniPod</strong> <strong>System</strong> is designed to use<br />
rapid-acting U-100 insulin. The following U-100<br />
rapid-acting insulin analogs have been tested and<br />
found to be safe for use in the Pod: Novolog®/<br />
NovoRapid®, Humalog®, or Apidra®. Before using a<br />
different insulin with the <strong>mylife</strong> <strong>OmniPod</strong> <strong>System</strong>,<br />
check the insulin drug label to make sure it can be<br />
used with a pump. Refer to the insulin labeling and<br />
follow your healthcare provider’s directions for how<br />
often to replace the Pod.<br />
Please read all the instructions provided in this <strong>User</strong><br />
<strong>Guide</strong> and practice the blood glucose testing procedures<br />
before using the <strong>System</strong>. Monitor your blood<br />
glucose with the guidance of your healthcare provider.<br />
Undetected hyperglycemia or hypoglycemia<br />
can result without proper monitoring.<br />
Screen displays shown in this <strong>User</strong> <strong>Guide</strong> are for<br />
illustrative purposes only and should not be considered<br />
suggestions for user settings. Consult with your<br />
healthcare provider to determine the appropriate<br />
settings for you.<br />
You and your healthcare provider<br />
Work with your healthcare provider to establish diabetes<br />
management guidelines and settings that best fit your needs.<br />
These may include:<br />
<strong>Insulin</strong>-to-Carbohydrate Ratio: Number of grams of<br />
carbohydrate covered by one unit of insulin. For example, if your<br />
insulin-to-carbohydrate ratio is 1:15, then you need to deliver one<br />
unit of insulin to cover every fifteen grams of carbohydrate you<br />
eat.<br />
Correction or Sensitivity Factor: How much one unit of insulin<br />
will lower blood glucose. For example, if your sensitivity factor is<br />
2.8, one unit of insulin will lower your blood glucose by<br />
2.8 mmol/L.<br />
Target Blood Glucose Value: The blood glucose level you want<br />
to achieve. For example, you may want to keep your blood<br />
glucose close to 5.6 mmol/L.<br />
Duration of insulin action: The length of time that insulin<br />
remains active and available in your body after a bolus.
Your individual needs influence the initial settings you and your<br />
healthcare provider will enter into the Personal Diabetes<br />
Manager (PDM) during setup (see Chapter 2, Getting Started).<br />
Your healthcare provider must help you enter these initial<br />
settings. Soon you will enter and change your own settings with<br />
confidence and ease. The <strong>mylife</strong> <strong>OmniPod</strong> <strong>System</strong> is more userfriendly<br />
than most electronic devices you use every day. In fact,<br />
technology is what makes the <strong>mylife</strong> <strong>OmniPod</strong> <strong>System</strong> so easy<br />
to use.<br />
Your healthcare provider is a valuable resource. You will rely on<br />
him or her for a lot of critical information about your <strong>mylife</strong><br />
<strong>OmniPod</strong> <strong>System</strong>, especially during the first few weeks and<br />
months. When you have questions about diabetes management<br />
after starting on the <strong>mylife</strong> <strong>OmniPod</strong> <strong>System</strong>, do not hesitate to<br />
talk with your healthcare provider. For nonmedical emergencies<br />
or for technical questions about your <strong>mylife</strong> <strong>OmniPod</strong> <strong>System</strong><br />
setup or operation, you can call Customer Care 24 hours a day,<br />
7 days a week.<br />
Customer Care:<br />
Ypsomed Ltd. Service: 0800 092 6787<br />
Introduction<br />
■ Your Role: Safely Using the <strong>mylife</strong> <strong>OmniPod</strong><br />
<strong>System</strong><br />
Your healthcare provider will give you all the tools and training<br />
you need to be successful with the <strong>mylife</strong> <strong>OmniPod</strong> <strong>Insulin</strong><br />
<strong>Management</strong> <strong>System</strong>. However, in the end, your success<br />
depends on YOU. You must become actively involved in your<br />
own diabetes management to enjoy the outstanding control,<br />
freedom, and flexibility that is possible with the <strong>mylife</strong><br />
<strong>OmniPod</strong> <strong>System</strong>.<br />
Being actively involved means:<br />
• Frequently monitoring blood glucose levels<br />
• Learning how to operate your <strong>mylife</strong> <strong>OmniPod</strong> <strong>System</strong> and<br />
practicing proper techniques<br />
• Visiting your healthcare provider<br />
If you are having symptoms that are not consistent<br />
with your blood glucose test and you have followed<br />
all instructions described in this <strong>User</strong> <strong>Guide</strong>, call your<br />
healthcare professional.<br />
Do NOT attempt to use the <strong>mylife</strong> <strong>OmniPod</strong> <strong>Insulin</strong><br />
<strong>Management</strong> <strong>System</strong> before you receive training<br />
from your healthcare provider. Inadequate training<br />
could put your health and safety at risk.<br />
xi
Introduction<br />
■ About This <strong>User</strong> <strong>Guide</strong><br />
Conventions and Terms<br />
Convention/Term Meaning<br />
Bold<br />
Italics<br />
Press<br />
Hold<br />
Menu<br />
Screen<br />
Button<br />
Icon<br />
xii<br />
Names of buttons, soft keys, menus, and<br />
screens are in bold.<br />
Words in italics are defined in the<br />
Glossary at the end of this <strong>User</strong> <strong>Guide</strong>.<br />
Press and release a button or soft key.<br />
Keep pressing a button until its function is<br />
complete.<br />
A list of options on the PDM. Options allow<br />
you to perform tasks.<br />
Displays programming, operating, and<br />
alarm/alert information.<br />
A physical button on the PDM, such as the<br />
Home/Power button.<br />
An image on the PDM screen that indicates<br />
a menu option or item of information.<br />
A table of screen icons appears in the<br />
Appendices.<br />
Conventions and Terms (continued)<br />
Convention/Term Meaning<br />
Soft keys<br />
Symbols<br />
Symbol Term Meaning<br />
Warning<br />
Caution<br />
Note<br />
Tip<br />
A row of three unlabeled buttons on the<br />
PDM whose label or function appears on<br />
the screen directly above the button. The<br />
label changes depending on the task you<br />
are performing.<br />
Describes potential serious adverse<br />
reactions, or indicates conditions that<br />
could cause death or serious injury.<br />
Indicates conditions that could cause<br />
minor or moderate injury to you or<br />
damage to the device.<br />
Provides helpful information.<br />
Offers a suggestion for successful use<br />
of the <strong>mylife</strong> <strong>OmniPod</strong> <strong>Insulin</strong><br />
<strong>Management</strong> <strong>System</strong>.
CHAPTER 1<br />
Your New <strong>mylife</strong> <strong>OmniPod</strong> <strong>Insulin</strong> <strong>Management</strong> <strong>System</strong><br />
■ <strong>Insulin</strong> Delivery with the <strong>mylife</strong> <strong>OmniPod</strong> <strong>System</strong><br />
The <strong>mylife</strong> <strong>OmniPod</strong> <strong>Insulin</strong> <strong>Management</strong> <strong>System</strong> is an innovative<br />
continuous insulin delivery system that provides all the<br />
proven benefits of continuous subcutaneous insulin infusion (CSII)<br />
therapy in a way no conventional insulin pump can. The <strong>System</strong>’s<br />
innovative design and features allows you to live your life—and<br />
manage your diabetes—with unprecedented freedom, comfort,<br />
convenience, and ease.<br />
The long-term health benefits of better blood glucose control<br />
are well known. Maintaining near-normal blood glucose levels<br />
can help you live a longer, healthier life with fewer diabetesrelated<br />
complications. The <strong>mylife</strong> <strong>OmniPod</strong> <strong>System</strong> also has<br />
many practical, everyday benefits, including convenience, freedom,<br />
flexibility, and ease of use.<br />
Continuous insulin delivery most closely mimics the insulin<br />
release of a healthy pancreas. Since the landmark 10-year<br />
Diabetes Control and Complications Trial (DCCT), the longterm<br />
health benefits of maintaining near-normal blood<br />
glucose levels have been widely recognized.<br />
Continuous insulin delivery at preset rates eliminates the need<br />
for injections and the interruptions that come with them. In addition,<br />
with the <strong>mylife</strong> <strong>OmniPod</strong> <strong>System</strong>, insulin delivery can be<br />
changed with the press of a button to adapt to snacks or unexpected<br />
changes in daily routine. The <strong>mylife</strong> <strong>OmniPod</strong> <strong>System</strong> is a<br />
great option for people with diabetes who require insulin.<br />
The <strong>mylife</strong> <strong>OmniPod</strong> <strong>System</strong> works much like the pancreas of a<br />
person without diabetes by delivering insulin in two ways:<br />
• A small, constant, background supply of insulin (called a basal<br />
rate) is delivered automatically at a programmed rate, all day<br />
and night.<br />
• An extra dose of insulin (called a bolus) can be delivered<br />
when you need it to match the carbohydrates in a meal or<br />
snack or to correct a high blood glucose.<br />
1
1<br />
2<br />
Your New <strong>mylife</strong> <strong>OmniPod</strong> <strong>Insulin</strong> <strong>Management</strong> <strong>System</strong><br />
■ How Does the <strong>mylife</strong> <strong>OmniPod</strong> <strong>System</strong> Work?<br />
The Pod is a small, lightweight, self-adhesive device that you fill<br />
with insulin and wear directly on your body. The Pod delivers<br />
precise, personalized doses of insulin into your body through a<br />
small flexible tube (called a cannula), based on instructions that<br />
you program into its wireless companion, the Personal Diabetes<br />
Manager. The cannula is inserted only once with each Pod.<br />
The Personal Diabetes Manager (PDM) is a wireless, handheld<br />
device that:<br />
• Programs the Pod with your personalized insulin-delivery<br />
instructions<br />
• Wirelessly monitors the Pod’s operation<br />
• Incorporates a FreeStyle® blood glucose meter<br />
With just two parts, you’ll enjoy all the functionality and benefits<br />
of continuous insulin delivery and blood glucose monitoring.<br />
Plus you’ll enjoy the safety, convenience, and freedom of:<br />
No tubing<br />
There is no tubing connecting the Pod to the PDM. You wear the<br />
Pod comfortably and discreetly under your clothes. You can carry<br />
the PDM separately in a backpack, briefcase, or purse. With the<br />
<strong>mylife</strong> <strong>OmniPod</strong> <strong>Insulin</strong> <strong>Management</strong> <strong>System</strong>, you don’t have to<br />
worry about snagging, tangling, or feeling tethered by tubing.<br />
Automated cannula insertion<br />
With the <strong>mylife</strong> <strong>OmniPod</strong> <strong>System</strong>, you don’t have to insert the<br />
infusion set manually or carry around a separate inserter. You simply<br />
press a button on the PDM and the Pod’s automated<br />
insertion system safely and consistently inserts the cannula<br />
beneath the skin, virtually pain free. It then begins delivering<br />
insulin according to your programmed basal rate.<br />
A fully-integrated design with blood glucose monitoring<br />
With a fully integrated two-part design, there’s no need to carry<br />
separate infusion sets, reservoirs, or inserters. It’s all integrated<br />
into the Pod. With the PDM, you can check your blood glucose<br />
level using FreeStyle® blood glucose test strips, but without the<br />
hassle of carrying a separate blood glucose meter.<br />
If you prefer to use another blood glucose meter, you can enter<br />
the readings manually into the PDM.
Your New <strong>mylife</strong> <strong>OmniPod</strong> <strong>Insulin</strong> <strong>Management</strong> <strong>System</strong><br />
Suggested bolus calculation<br />
Calculating bolus doses has never been easier. After you check<br />
your blood glucose, enter the carbs for your snack or meal. Based<br />
on your individual settings, the <strong>System</strong> displays a suggested<br />
bolus dose. You can accept the suggestion, change it, or cancel it.<br />
Carb presets<br />
To make carbohydrate counting easier, the <strong>mylife</strong> <strong>OmniPod</strong> <strong>System</strong><br />
includes “carb presets.” You can enter your favorite foods,<br />
snacks, or entire meals as “carb presets.” Presets contain the<br />
grams of carbohydrate in the food item or meal. Next time you<br />
eat this same food, you don’t have to count the carbs; just select<br />
your carb preset and the <strong>System</strong> does the calculating for you.<br />
The <strong>System</strong> stores up to 36 carb presets.<br />
Record keeping<br />
Another convenient part of the <strong>mylife</strong> <strong>OmniPod</strong> <strong>System</strong> is record<br />
keeping. Paper charts are useful, but sometimes they can be<br />
inconvenient to carry or use. The data storage system in the<br />
Personal Diabetes Manager (PDM) displays up to 90 days’ worth<br />
of information. This includes blood glucose readings, basal rates<br />
and bolus doses, carbohydrates, and alarms.<br />
Personalizing your <strong>System</strong><br />
You can personalize your <strong>mylife</strong> <strong>OmniPod</strong> <strong>System</strong> in other ways,<br />
too:<br />
• Enter and name basal programs<br />
• Name and save temporary basal presets<br />
• Add your own customized reminders<br />
• Enter your name, phone number, doctor’s names and<br />
numbers, and other emergency information<br />
1<br />
3
1<br />
4<br />
Your New <strong>mylife</strong> <strong>OmniPod</strong> <strong>Insulin</strong> <strong>Management</strong> <strong>System</strong><br />
■ The Pod<br />
The Pod (Figure 1-1) is applied to your skin with an adhesive<br />
backing, similar to an adhesive bandage.<br />
Figure 1-1<br />
Top<br />
Viewing window<br />
Needle cap<br />
Bottom<br />
Fill port<br />
Adhesive<br />
backing<br />
■ The Personal Diabetes Manager<br />
All Pod operations are programmed and controlled through the<br />
palm-sized Personal Diabetes Manager (PDM; Figure 1-2).<br />
Figure 1-2<br />
Soft Key<br />
Label<br />
Soft Keys<br />
Home/<br />
Power<br />
Test Strip Port<br />
USB Port<br />
LCD Screen<br />
<strong>User</strong> Info/<br />
Support<br />
Up/Down<br />
Controller
Your New <strong>mylife</strong> <strong>OmniPod</strong> <strong>Insulin</strong> <strong>Management</strong> <strong>System</strong><br />
Buttons that program and control the <strong>mylife</strong> <strong>OmniPod</strong><br />
<strong>System</strong><br />
Button Action<br />
Home/<br />
Power<br />
Up/Down<br />
Controller<br />
Pressing and holding turns the PDM on and off.<br />
When the PDM is on, pressing this button displays<br />
the Home screen, from which you can<br />
choose a menu item or view the Status screens<br />
(shown later in this chapter).<br />
Pressing scrolls through a list of available menu<br />
options or numbers, so you can pick the one you<br />
want. Holding the button scrolls faster.<br />
Soft Keys Soft key labels and functions depend on the<br />
menu or screen you are viewing. The label<br />
appears on the screen directly above the physical<br />
button you press. Select, Save, and Back are<br />
just three examples of the soft key labels on your<br />
PDM.<br />
Button Action<br />
<strong>User</strong> Info/<br />
Support<br />
Pressing opens a <strong>User</strong> Info/Support screen that<br />
displays additional information about the current<br />
screen you are viewing. The <strong>User</strong> Info/Support<br />
icon appears when additional information<br />
can be viewed. It may be displayed at the top of<br />
the screen, to the right of an event detail (such as<br />
a suggested bolus), or to the right of a record<br />
item (such as a BG history record). (See “Personal<br />
Diabetes Manager Icons” in the Appendix.)<br />
In addition, pressing and holding this button for<br />
2 seconds enables a “bright mode” on the PDM<br />
screen.<br />
1<br />
5
1<br />
6<br />
Your New <strong>mylife</strong> <strong>OmniPod</strong> <strong>Insulin</strong> <strong>Management</strong> <strong>System</strong><br />
Primary screens<br />
Messages on the screen either:<br />
• Tell you how the <strong>System</strong> is operating<br />
• List menu choices<br />
• Explain how to perform certain tasks<br />
The <strong>System</strong>’s primary screens are the Status screen (Figure 1-3)<br />
and the Home screen (Figure 1-4).<br />
Figure 1-3 Figure 1-4<br />
Status screen<br />
Lists the <strong>System</strong>’s current operating status.<br />
From top to bottom, the Status screen displays:<br />
• Time, date, and result of last blood glucose checked or<br />
entered manually<br />
• Time, date, and total amount of last bolus delivered<br />
• Amount of insulin on board, if suggested bolus calculator is in<br />
use<br />
• Name and rate of active basal program or temp basal<br />
program<br />
• “Ext bolus,” the amount of insulin, and the delivery time<br />
remaining if an extended bolus is being delivered<br />
• “INSULIN SUSPENDED” if insulin delivery has been<br />
suspended<br />
• Time and date when the Pod will expire<br />
If a Pod has not yet been activated (as during Pod<br />
changes), the screen displays “No active Pod. Would you<br />
like to activate a Pod now?” (See Chapter 5, Using the Pod,<br />
for details on activating a Pod.)
Your New <strong>mylife</strong> <strong>OmniPod</strong> <strong>Insulin</strong> <strong>Management</strong> <strong>System</strong><br />
Status support screen<br />
From the Status screen, press the <strong>User</strong> Info/Support button to<br />
see details about the current insulin on board (IOB) in your body<br />
(Figure 1-5).<br />
Figure 1-5<br />
Home screen<br />
Lists all the major menus (Figure 1-4 on previous page).<br />
• Bolus menu to deliver bolus doses<br />
• More actions menu to change the Pod, manually enter<br />
blood glucose readings, and assign and edit tags for BG readings<br />
that are less than 2 hours old.<br />
• Temp basal menu to deliver temporary basal rates (This<br />
submenu does not appear if Temp basal is turned Off in<br />
Settings.)<br />
• My records menu to review insulin delivery, blood glucose<br />
history, alarm history, carb history, and personal user information<br />
• Settings menu to edit, enter, and name basal programs,<br />
temp basal, carbohydrate, and bolus presets, and to customize<br />
<strong>System</strong> settings<br />
• Suspend menu to suspend, cancel, or resume insulin<br />
delivery programs<br />
You can go to the Status screen at any time by<br />
pressing Status from the Home screen.<br />
1<br />
7
1<br />
8<br />
Your New <strong>mylife</strong> <strong>OmniPod</strong> <strong>Insulin</strong> <strong>Management</strong> <strong>System</strong><br />
■ Safety Features<br />
The <strong>mylife</strong> <strong>OmniPod</strong> <strong>System</strong>’s state-of-the-art design includes<br />
the latest safety technology. Its built-in safety features include:<br />
Automatic priming, safety checks, and insertion<br />
Every time you activate a new Pod, the <strong>System</strong> automatically<br />
primes and performs a safety check on the Pod, then inserts<br />
and primes the cannula (see Chapter 5, Using the Pod). Microprocessor<br />
technology makes it possible to complete thousands<br />
of safety checks in only a few seconds.<br />
The <strong>mylife</strong> <strong>OmniPod</strong> <strong>System</strong> also performs safety checks on the<br />
PDM. If it detects any problems in the PDM or the Pod—or in<br />
communication between them—it informs you with beeps and<br />
on-screen messages.<br />
Rapid occlusion detection<br />
An occlusion is a blockage or interruption in insulin delivery. If<br />
the <strong>mylife</strong> <strong>OmniPod</strong> <strong>System</strong> detects an occlusion, it sounds a<br />
hazard alarm and prompts you to deactivate and change your<br />
Pod (see Chapter 10, Alerts and Alarms).<br />
Alerts and alarms<br />
For your safety, the <strong>mylife</strong> <strong>OmniPod</strong> <strong>System</strong> provides a range of<br />
alerts and alarms to tell you that your attention is needed, or to<br />
warn you of hazardous situations.<br />
See Chapter 6, Using the Personal Diabetes Manager, for a<br />
description of notifications and how to set them. See Chapter 10,<br />
Alerts and Alarms, for a list of safety alarms built into the <strong>mylife</strong><br />
<strong>OmniPod</strong> <strong>System</strong> and how to respond to them.
CHAPTER 2<br />
Getting Started<br />
■ Set Up the Personal Diabetes Manager (PDM)<br />
If you are a first-time <strong>mylife</strong> <strong>OmniPod</strong> <strong>System</strong> user, you need to<br />
meet with your healthcare provider for training and <strong>System</strong> setup<br />
before using it. To get a head start on learning about your new<br />
<strong>mylife</strong> <strong>OmniPod</strong> <strong>System</strong>, review this <strong>User</strong> <strong>Guide</strong>. If you have a<br />
basic understanding of the <strong>System</strong> in advance, you will get more<br />
out of your training sessions.<br />
Do NOT use the <strong>mylife</strong> <strong>OmniPod</strong> <strong>Insulin</strong><br />
<strong>Management</strong> <strong>System</strong> until you have been trained by<br />
your healthcare provider. He or she will initialize the<br />
<strong>System</strong> based on your individual needs. Inadequate<br />
training or improper setup could put your health and<br />
safety at risk.<br />
Prepare and keep an emergency kit with you at all times<br />
to quickly respond to any diabetes emergency. For<br />
details, see Chapter 9, Living with Diabetes.<br />
Chapter 6 describes the PDM options in detail. The instructions<br />
in this chapter are simplified to help you get started.<br />
Turn on the PDM<br />
1. Open the battery compartment on the back of the PDM<br />
by pushing the compartment latch and lifting upward<br />
(Figure 2-1). No special tools are necessary.<br />
Figure 2-1<br />
9
2<br />
10<br />
Getting Started<br />
2. Insert two (2) new AAA alkaline batteries into the compartment.<br />
The diagram inside the compartment shows you which<br />
direction to insert the batteries (Figure 2-2).<br />
Figure 2-2<br />
Do not use any other type of batteries than AAA<br />
alkaline batteries to power the PDM. Never use old<br />
or used batteries; the PDM may not work properly.<br />
3. Replace the battery door.<br />
4. Turn the PDM face-up. The PDM has begun to power on<br />
automatically.<br />
■ The <strong>mylife</strong> <strong>OmniPod</strong> Setup Wizard<br />
The first time you turn on the Personal Diabetes Manager, the<br />
Setup Wizard comes on automatically. Although setup is easy<br />
with the Wizard, if you are a first-time user, your healthcare provider<br />
must guide you through the process. Setup takes only a<br />
few minutes and is easy to do:<br />
• Use the Up/Down Controller buttons to increase or<br />
decrease a number or to move up or down a list.<br />
Initial settings are “---” [blank] for target blood glucose<br />
value, insulin-to-carbohydrate ratio, correction factor,<br />
and duration of insulin action.<br />
• Press the soft key labeled Next, Select, Done, or Save to continue<br />
to the next screen.<br />
• Press Back to return to the previous screen.<br />
You can adjust these settings later as your needs<br />
change or you fine-tune your <strong>mylife</strong> <strong>OmniPod</strong> <strong>System</strong>.<br />
See “<strong>mylife</strong> <strong>OmniPod</strong> <strong>System</strong> Options and Settings” in<br />
the Appendix.
The Wizard’s Welcome screen (Figure 2-3) gets you started. Press<br />
Next to begin setting up your PDM.<br />
Figure 2-3<br />
Set date and time<br />
1. Use the Up/Down Controller buttons to increase or<br />
decrease the time. (Press 12/24hr if you prefer a different<br />
time format.) Then press Next.<br />
2. Enter the current year, then press Next.<br />
3. Choose the current month, then press Next.<br />
4. Enter the current day of the month, then press Next.<br />
5. Choose the date format you prefer, then press Next.<br />
Getting Started<br />
Enter basal settings<br />
1. Choose a maximum basal rate, then press Next. (The default<br />
maximum basal rate is 3 U/hr.)<br />
2. Choose the initial basal rate to use, then press Next.<br />
The initial basal program created with the Setup Wizard is<br />
named basal 1. You can change the name in the Settings ><br />
Basal programs menu (see Chapter 3, Understanding and<br />
Adjusting Basal Rates).<br />
3. Press Done to confirm the basal program shown on the<br />
screen. To add more basal segments to the program, or to<br />
change the rate shown, see Chapter 3, Understanding and<br />
Adjusting Basal Rates.<br />
4. To see the basal program as a list, press List. To return to the<br />
graphic view, press Graph.<br />
5. Press Save to accept the basal program you have set.<br />
6. Choose a temporary basal feature, then press Next. Choose<br />
% to show temporary basal rates as a percent increase or<br />
decrease of your current basal rate. Choose U/hr to show<br />
temporary basal rates in units per hour. Or choose Off to turn<br />
off the temporary basal feature. For details about setting temporary<br />
basals, see Chapter 3, Understanding and Adjusting<br />
Basal Rates.<br />
You can add up to 7 basal programs and set 24<br />
segments per program<br />
2<br />
11
2<br />
12<br />
Getting Started<br />
Enter blood glucose sound setting and BG goal<br />
1. To set the sound for the blood glucose meter, choose On or<br />
Off, then press Next.<br />
2. Use the Up/Down Controller buttons to enter the lower<br />
limit for your blood glucose (BG) goal, then press Next.<br />
3. Enter the upper limit for your BG goal, then press Next.<br />
The lower and upper BG limits are only used when<br />
viewing BG History (see Chapter 8, Understanding<br />
Your Records).<br />
4. Press Save to accept the BG goal.<br />
Check with your healthcare provider before adjusting<br />
these settings.<br />
Set the suggested bolus calculator<br />
1. To set the suggested bolus calculator feature, choose On or<br />
Off, then press Next.<br />
If the suggested bolus calculator is set to On, perform<br />
the following steps. If set to Off, you will be prompted<br />
to “Select bolus increment” and “Enter maximum<br />
bolus.”<br />
Enter target blood glucose value<br />
1. Use the Up/Down Controller buttons to enter a target blood<br />
glucose (BG) value, then press Next.<br />
2. Use the Up/Down Controller buttons to enter the “correct<br />
above” value or correction threshold (the BG value above<br />
which you want the PDM to suggest a correction bolus), then<br />
press Next.<br />
If the suggested bolus calculator is On, a correction<br />
bolus will be suggested only when your BG is above<br />
the value shown in brackets on the screen.<br />
3. To save the target BG value, press Done. To change these settings,<br />
select the segment you wish to change and press Edit.<br />
You can define up to 4 target BG time segments. To enter<br />
additional segments, choose [add new], then:<br />
a. Press New.<br />
b. Enter a start time for the target BG segment, then press<br />
Enter.<br />
c. Enter an end time for the target BG segment, then press<br />
Next.<br />
d. Enter a target blood glucose value, then press Next.
e. Use the Up/Down Controller buttons to enter the “correct<br />
above” value or correction threshold (the BG value<br />
above which you want the PDM to suggest a correction<br />
bolus), then press Next.<br />
f. When you have finished entering segments, press Done.<br />
4. To see the segments as a list, press List. To return to the<br />
graphic view, press Graph.<br />
5. Press Save to accept the target BG profile you have set.<br />
Enter minimum BG allowed for use in bolus calculation<br />
1. Use the Up/Down Controller buttons to enter a minimum<br />
blood glucose value, below which the <strong>System</strong> will not calculate<br />
a suggested bolus. The values are in 0.1 mmol/L increments<br />
and range from 2.8 to 3.9 mmol/L.<br />
2. Press Next.<br />
Enter insulin-to-carbohydrate ratio<br />
1. Use the Up/Down Controller buttons to enter your insulinto-carbohydrate<br />
ratio, then press Next. (<strong>Insulin</strong>-to-carbohydrate<br />
ratio is the number of carbs covered by 1 unit of insulin.)<br />
Getting Started<br />
2. To save the ratio, press Done. To change the ratio, select the<br />
segment you wish to change and press Edit.<br />
You can define up to 4 insulin-to-carbohydrate time segments.<br />
To enter additional ratios, choose [add new], then:<br />
a. Press New.<br />
b. Enter a start time for the segment, then press Next.<br />
c. Enter an end time for the segment, then press Next.<br />
d. Enter the insulin-to-carb ratio for the new time segment,<br />
then press Next.<br />
e. To save the new ratio, press Done.<br />
3. To see the ratios as a list, press List. To return to the graphic<br />
view, press Graph.<br />
4. Press Save to accept the ratios you have set.<br />
Enter correction factor<br />
1. Use the Up/Down Controller buttons to enter how much<br />
one unit of insulin decreases your blood glucose, then press<br />
Next.<br />
2. To save the correction factor, press Done. To change the<br />
factor, select the segment you wish to change and press Edit.<br />
2<br />
13
2<br />
14<br />
Getting Started<br />
You can define correction factors for up to 4 time segments.<br />
To enter additional correction factors, choose [add new],<br />
then:<br />
a. Press New.<br />
b. Enter a start time for the segment, then press Next.<br />
c. Enter an end time for the segment, then press Next.<br />
d. Enter the correction factor, then press Next.<br />
e. To save the new correction factor segment, press Done.<br />
3. To see the factors as a list, press List. To return to the graphic<br />
view, press Graph.<br />
4. Press Save to accept the correction factors you have set.<br />
Set reverse correction<br />
1. To set reverse correction, use the Up/Down Controller<br />
buttons to choose On or Off, then press Next.<br />
If you enter carbs and reverse corrections are On, the<br />
<strong>System</strong> will subtract insulin from the suggested meal<br />
bolus to compensate for a low blood glucose (below<br />
the BG target you set). With reverse correction Off,<br />
the <strong>System</strong> will not subtract insulin from the suggested<br />
meal bolus dose due to a low BG. Follow your<br />
healthcare provider’s recommendation to set<br />
reverse correction On or Off.<br />
Enter the duration of insulin action<br />
1. Use the Up/Down Controller buttons to enter the duration<br />
of insulin action (how long insulin lasts in your body), then<br />
press Next.<br />
The duration-of-insulin-action setting is used to<br />
calculate the amount of insulin on board (IOB) from a<br />
previous correction bolus or meal bolus, when you<br />
use the suggested bolus calculator.<br />
Select bolus increment and enter maximum bolus<br />
1. Choose a bolus increment (how much each press of the<br />
Up/Down Controller buttons will increase or decrease a<br />
bolus amount)—either 0.05, 0.10, 0.50, or 1.00 units of insulin—then<br />
press Next.<br />
2. Choose the maximum bolus you can give at one time, then<br />
press Next.<br />
The maximum bolus default is 10 units. Check with<br />
your healthcare provider before adjusting these<br />
settings.<br />
Set extended bolus doses<br />
1. To set the units for an extended bolus dose, choose % for percent<br />
of the total bolus, or choose Units for units of insulin. To<br />
turn off the extended bolus feature, choose Off. Then press<br />
Next.
Set low reservoir advisory<br />
1. Choose the level of insulin in the reservoir at which the<br />
PDM should give you an alarm. Choose from 10 to 50 units<br />
in 5-unit increments, then press Next.<br />
Set expiration notification<br />
1. Choose the number of hours before a Pod expires when the<br />
PDM should give you a notification, then press Next. The<br />
values are in 1 hour increments and range from 1 to 24 hours.<br />
(The default is 4 hours.)<br />
The PDM now asks whether you want to activate a Pod<br />
(Figure 2-4).<br />
Figure 2-4<br />
Getting Started<br />
• Press Yes if you are ready to activate a new Pod. See Chapter<br />
5, Using the Pod, to learn how to activate a new Pod.<br />
• Press No if you do not want to activate a Pod at this time.<br />
The PDM displays the Home screen.<br />
You can press and hold the Power button to turn off the<br />
PDM at any time during setup. Otherwise, it turns off<br />
automatically after 5 minutes. If you do not complete the<br />
entire setup within 60 minutes, when you turn on the<br />
PDM again you will return to the beginning of the Setup<br />
Wizard.<br />
Your healthcare provider will help you fill and apply your first<br />
Pod. The process is easy because on-screen messages walk you<br />
through every step. Please refer to Chapter 5, Using the Pod, for<br />
detailed instructions.<br />
You may want to adjust the PDM screen time-out<br />
and backlight time-out. For more information on<br />
how to do this, see Chapter 6, Using the Personal<br />
Diabetes Manager.<br />
2<br />
Use the form at the end of this <strong>User</strong> <strong>Guide</strong> to write<br />
down all your settings from the Setup Wizard. If you<br />
ever need to reset your PDM, having these settings<br />
handy will make setup very easy.<br />
15
CHAPTER 3<br />
Understanding and Adjusting Basal Rates<br />
■ What Is a Basal Rate?<br />
A basal rate is a small base or background amount of insulin that<br />
is delivered, at a preset rate, continuously for a specified period of<br />
time.<br />
Even without eating, our bodies need a small, constant supply<br />
of insulin for normal daily living. In people without diabetes, the<br />
pancreas continuously delivers this basal insulin. For people<br />
using the <strong>mylife</strong> <strong>OmniPod</strong> <strong>Insulin</strong> <strong>Management</strong> <strong>System</strong>, the Pod<br />
mimics a healthy pancreas by delivering insulin at the rate that<br />
you’ve programmed into the Personal Diabetes Manager (PDM).<br />
■ Personalized Basal Programs<br />
<strong>Insulin</strong> needs vary throughout the day. Therefore, most people<br />
set their basal rates to deliver slightly more or less insulin at<br />
16<br />
Approximately 50% of a person’s total daily insulin dose<br />
typically comes from basal insulin delivery; the remaining<br />
50% typically comes from bolus doses (see Chapter 4,<br />
Understanding and Delivering Bolus Doses).<br />
certain times. For example, one person may need to deliver a<br />
higher rate of insulin during the early morning and a lower rate<br />
during the late evening. A basal program describes the amount<br />
of insulin to be delivered during an entire 24-hour period.<br />
A basal program contains at least one basal rate for the 24-hour<br />
period, but for most people it will be broken into several time<br />
segments, or basal segments, each delivering a different rate of<br />
insulin. A sample basal program with three basal segments<br />
might be:<br />
12:00 am–8:00 am 0.60U/hr Between 12:00 am (midnight)<br />
and 8:00 am, the Pod delivers<br />
0.60 units of insulin per hour.<br />
8:00 am–3:00 pm 0.80U/hr Between 8:00 am and 3:00 pm,<br />
the Pod delivers 0.80 units of<br />
insulin per hour.<br />
3:00 pm–12:00 am 0.70U/hr Between 3:00 pm and 12:00 am<br />
(midnight), the Pod delivers 0.70<br />
units of insulin per hour.
In addition to normal daily changes, insulin needs can vary with<br />
different routines or days of the week. For example, regular<br />
school or workday routines may differ from weekend routines,<br />
and insulin needs may differ, too. With your healthcare provider,<br />
you will decide on the basal rates that best match your lifestyle<br />
and insulin needs. You will enter at least one basal program (your<br />
Basal 1 program) into your PDM during the setup process (see<br />
Chapter 2, Getting Started). You can add other programs later as<br />
you fine-tune your <strong>System</strong> settings or when your needs change.<br />
You can also create temporary basal presets to use on occasions<br />
when you need to adjust your basal rate for a short period of<br />
time. See “Temporary Basal Rates and Presets” later in this<br />
chapter.<br />
Create a basal program<br />
The Personal Diabetes Manager can store up to 7 different basal<br />
programs. Each program can contain 24 rates, programmed in<br />
half-hour increments. Once you enter a basal program into the<br />
PDM, you only need to press a few buttons to pick the program<br />
you want. The Pod continues to deliver insulin at those rates until<br />
you change that program or switch to another one.<br />
Check with your healthcare provider before adjusting<br />
these settings.<br />
Understanding and Adjusting Basal Rates<br />
1. On the Home screen, use the Up/Down Controller buttons<br />
to choose Settings; then press Select.<br />
2. Choose Basal programs (Figure 3-1), then press Select.<br />
Figure 3-1 Figure 3-2<br />
3. Choose [add new] (Figure 3-2), then press New.<br />
4. To use the default naming system, simply press Next. The<br />
default naming system automatically assigns program<br />
names in numerical order, such as basal 1, basal 2, basal 3.<br />
If you want to give a different name to the program:<br />
a. Press the Up/Down Controller buttons to scroll through<br />
the list of characters. An up-and-down-arrow symbol on<br />
the screen indicates the character you are changing.<br />
3<br />
17
3<br />
18<br />
Understanding and Adjusting Basal Rates<br />
b. Press the middle soft key (labeled with the right arrow) to<br />
move the underscore to the next character.<br />
c. Enter each character one at a time. For example, if your<br />
weekend schedule is different from your weekday schedule,<br />
you might enter W, e, e, k, e, n, d (Figure 3-3). (A blank<br />
character or space is the first and last option in the scrolling<br />
menu.)<br />
Figure 3-3 Figure 3-4<br />
d. Press Next.<br />
As a safety feature, the words “Invalid basal program<br />
name” (Figure 3-4) appear if the name you entered<br />
does not have at least one character or if the name is<br />
being used for another basal program. Capitals and<br />
lowercase letters are considered the same. Press OK<br />
to return to the previous screen and enter a different<br />
name.<br />
5. Enter the rate, in U/hr, for the first basal segment (from 0.05 to<br />
the maximum you entered during setup), then press Next.<br />
6. Review the list showing your new basal program.<br />
To use the same basal rate for the entire 24-hour program,<br />
press Done and continue with step 7.<br />
Or, to add basal segments and rates (for example, a higher<br />
basal rate between 8:00 am and 3:00 pm):<br />
a. Choose an existing basal segment, then press Edit.<br />
Or, choose [add new], then press New.<br />
b. Enter the start time (for example, 8:00 am), then press<br />
Next. Basal segments are in 30-minute increments.<br />
c. Enter the end time (for example, 3:00 pm), then press<br />
Next.<br />
d. Enter the rate for the new basal segment (for example,<br />
0.80U/hr), then press Next.
Basal rates outside the changed segment do not<br />
change.<br />
e. Repeat steps a–d for each new segment and rate you<br />
want, then press Done.<br />
Press and hold the Power button to turn the screen<br />
back on. In some cases, if it has been less than 5<br />
minutes since the screen timed out, pressing the<br />
Power button returns you to the same screen you<br />
were using. If it has been longer than 5 minutes, the<br />
PDM brings you to the Status screen.<br />
7. Review the graph of the new basal program (Figure 3-5).<br />
8. To see the program as a list, press List (Figure 3-6). To see the<br />
graph again, press Graph.<br />
The total daily basal that will be delivered is shown at the<br />
bottom of each “Basal programs” graph and list.<br />
9. To add the program to the PDM’s memory, press Save.<br />
Repeat steps 1 through 9 above for each basal program (up to 7)<br />
you want to create.<br />
Understanding and Adjusting Basal Rates<br />
Figure 3-5 Figure 3-6<br />
Enable an existing basal program<br />
1. On the Home screen, use the Up/Down Controller buttons<br />
to choose Settings; then press Select.<br />
2. Choose Basal programs, then press Select.<br />
3<br />
19
3<br />
20<br />
Understanding and Adjusting Basal Rates<br />
3. Choose the program you want from the list (Figure 3-7), then<br />
press Enable.<br />
Figure 3-7<br />
A diamond icon (♦) appears next to the program that<br />
is active. You cannot select the active program to<br />
enable it, because it is already running.<br />
4. Press Enable again to start the selected basal program. If a<br />
Pod is active, the PDM beeps to indicate that the chosen<br />
basal program is running.<br />
As a safety feature, you cannot enable a new basal<br />
program while a temporary basal preset is in process<br />
(see “Temporary Basal Rates and Presets” later in this<br />
chapter); you must first cancel the active temporary<br />
basal preset.<br />
Change, rename, copy, or delete a basal program<br />
1. On the Home screen, use the Up/Down Controller buttons<br />
to choose Settings; then press Select.<br />
2. Choose Basal programs, then press Select.<br />
3. Choose a program from the list, then press Select.<br />
To view the segments of the basal program<br />
1. Choose View, then press Select (Figure 3-8).
Figure 3-8 Figure 3-9<br />
To edit or add a segment or rate in the basal program<br />
1. Choose Edit, then press Select.<br />
As a safety feature, you must suspend insulin delivery<br />
before editing an active basal program (see Chapter<br />
5, Using the Pod.) Remember to resume delivery after<br />
the edits are made.<br />
2. Choose the segment to change, then press Edit (Figure 3-9).<br />
Or, choose [add new], then press New.<br />
Understanding and Adjusting Basal Rates<br />
3. Enter a start time for the segment you want to change, then<br />
press Next.<br />
4. Enter an end time for this segment, then press Next.<br />
5. Enter a basal rate for the new segment, then press Enter.<br />
6. To save the newly entered segment into the basal program,<br />
press Save (Figure 3-10). If you want to make additional edits,<br />
repeat steps 2–5.<br />
Figure 3-10<br />
7. To see the program as a list, press List. To see the graph again,<br />
press Graph.<br />
3<br />
21
3<br />
22<br />
Understanding and Adjusting Basal Rates<br />
To rename a basal program<br />
1. After choosing a program from the list, choose Rename, then<br />
press Select.<br />
2. Press the Up/Down Controller buttons to enter the characters<br />
that spell out the new name you want. Press the middle<br />
soft key (labeled with the right arrow) to move the underscore<br />
to the next character, then press Save.<br />
To copy a basal program<br />
1. After choosing a program from the list, choose Copy, then<br />
press Select.<br />
2. Press the Up/Down Controller buttons to enter the characters<br />
that spell out the name you want for the copied file. Press<br />
the middle soft key (labeled with the right arrow) to move the<br />
underscore to the next character, then press Next.<br />
3. To use the same basal program for the entire 24-hour period,<br />
press Save.<br />
To edit or add segments to the newly copied basal program, follow<br />
the steps under “To edit or add a segment or rate in the basal<br />
program” earlier in this chapter.<br />
Instead of suspending, changing, and then resuming<br />
the active basal program, try this: Copy the active<br />
program, rename it, make the changes, save it, then<br />
enable it.<br />
To delete a basal program<br />
1. After choosing a program from the list, choose Delete and<br />
then press Select.<br />
2. Press Delete to permanently delete the program.<br />
As a safety feature, you cannot delete the active basal<br />
program.<br />
■ Temporary Basal Rates and Presets<br />
What is a temporary basal rate?<br />
A temporary basal rate lets you adjust your basal rate for a predetermined<br />
period of time.<br />
On occasion, you may need to change the active basal rate for<br />
only a short time. For example, if you are going cross-country<br />
skiing for several hours, you may want to lower the basal rate<br />
during and after you exercise. This is called a “one-time temporary<br />
basal rate.”<br />
Some temporary changes are easy to predict and respond to.<br />
They happen routinely and you may know from experience how<br />
they affect your insulin needs. For example, you might take the<br />
same exercise class twice a week for a few weeks or months, or
join a summer soccer league. For women, a monthly hormonal<br />
change that affects blood glucose is an example of predictable<br />
change. To easily handle predictable, short-term changes, you<br />
can “preset” a temporary basal rate, so it is ready whenever you<br />
need it. The PDM can remember up to 7 temporary basal presets.<br />
You can set a temporary basal rate for a duration of 30 minutes to<br />
12 hours. Once the time limit is reached, the PDM returns to the<br />
active basal program.<br />
When using units per hour, the <strong>mylife</strong> <strong>OmniPod</strong> <strong>System</strong> allows<br />
you to set temporary basal rates from 0.0 U/hr, up to your max<br />
basal rate. When using percent rate, you can set temporary basal<br />
rates from -100% to +95% of your active rate, as long as the temporary<br />
rate is less than or equal to your max basal rate.<br />
See the sections below on creating, enabling, canceling, and<br />
changing temporary basal presets.<br />
Enable a one-time temporary basal rate<br />
1. On the Home screen, use the Up/Down Controller buttons<br />
to choose Temp basal; then press Select.<br />
2. If you have created temp basal presets, choose [enter manually]<br />
from the list, then press Select.<br />
If you have not created any temp basal presets, the PDM skips<br />
this step.<br />
Understanding and Adjusting Basal Rates<br />
3. Enter the temporary basal rate in either units per hour (Figure<br />
3-11) or percent change (Figure 3-12), depending on how<br />
you chose to show the rates; then press Enter.<br />
Figure 3-11 Figure 3-12<br />
During initial setup, you and your healthcare provider<br />
either turned Off temporary basal rates or chose to<br />
show the rates as % or U/hr. To change this setting, see<br />
Chapter 6, Using the Personal Diabetes Manager.<br />
4. Enter the duration for the temporary rate, then press Enter.<br />
5. Press Confirm to start the temporary basal rate shown on the<br />
screen. The Pod beeps to indicate that the temporary basal<br />
rate is running.<br />
3<br />
23
3<br />
24<br />
Understanding and Adjusting Basal Rates<br />
Cancel a one-time temporary basal rate<br />
1. On the Home screen, use the Up/Down Controller buttons<br />
to choose Suspend/cancel; then press Select.<br />
2. Choose Cancel temp basal (Figure 3-13), then press Select.<br />
Figure 3-13<br />
3. Press Confirm to cancel the temporary basal shown on the<br />
screen.<br />
Create a temporary basal preset<br />
1. On the Home screen, use the Up/Down Controller buttons<br />
to choose Settings; then press Select.<br />
2. Choose Presets, then press Select.<br />
3. Choose Temp basal presets, then press Select.<br />
4. Choose [add new], then press New.<br />
5. To use the <strong>mylife</strong> <strong>OmniPod</strong> <strong>System</strong>’s default naming system,<br />
simply press Next. The default naming system automatically<br />
assigns program names in numerical order, such as temp<br />
basal 1, temp basal 2, temp basal 3.<br />
Or, to give a different name to the program:<br />
a. Press the Up/Down Controller buttons to scroll through<br />
the list of characters. An up-and-down-arrow symbol on<br />
the screen indicates the character you are changing.<br />
b. Press the middle soft key to move the underscore to the<br />
next character.<br />
c. Enter each character one at a time. For example, if you<br />
take an aerobics class two nights a week, you might enter<br />
A, e, r, o, b, i, c, s (Figure 3-14 on the next page). (A blank<br />
character or space is the first and last option in the scrolling<br />
menu.)<br />
Capitals and lowercase letters are considered the<br />
same.
Figure 3-14<br />
d. Press Next.<br />
6. Enter the new temporary basal rate (or percent change), then<br />
press Next.<br />
7. Enter the duration of the temporary basal rate, from 0.5 hours<br />
to 12 hours, then press Next.<br />
8. Review the temporary basal name, rate, and duration, then<br />
press Save to accept it.<br />
Understanding and Adjusting Basal Rates<br />
Enable an existing temporary basal preset<br />
1. On the Home screen, use the Up/Down Controller buttons<br />
to choose Temp basal; then press Select.<br />
2. Choose the temporary basal preset you want to use from the<br />
list (Figure 3-15), then press Select.<br />
Figure 3-15<br />
3. If you want, change the duration for the temporary rate, in<br />
half-hour increments, then press Enter.<br />
4. Press Confirm to begin the temporary basal rate shown on<br />
the screen. The Pod beeps to indicate that the chosen temporary<br />
basal preset is running.<br />
3<br />
25
3<br />
26<br />
Understanding and Adjusting Basal Rates<br />
Cancel an active temporary basal preset<br />
1. On the Home screen, use the Up/Down Controller buttons<br />
to choose Suspend/cancel; then press Select.<br />
2. Choose Cancel temp basal, then press Select.<br />
3. Press Confirm to cancel the actively running temporary basal<br />
preset.<br />
If you suspend insulin delivery while a temp basal is<br />
running, the temp basal will be cancelled when you<br />
resume.<br />
Change, rename, or delete a temporary basal preset<br />
1. On the Home screen, use the Up/Down Controller buttons<br />
to choose Settings; then press Select.<br />
2. Choose Presets, then press Select.<br />
3. Choose Temp basal presets, then press Select.<br />
4. Choose a temporary preset from the list, then press Edit.<br />
You cannot edit, change, or delete a temporary basal<br />
preset that is actively running.<br />
5. Follow the steps below.<br />
To change a temporary basal preset<br />
1. Choose Edit, then press Select (Figure 3-16).<br />
Figure 3-16<br />
2. Enter a new rate (or new percent change), for the preset, then<br />
press Next.<br />
3. Enter a new duration for the preset, then press Save.<br />
4. Press Done.
To rename a temporary basal preset<br />
1. Choose Rename, then press Select.<br />
2. Press the Up/Down Controller buttons to enter the characters<br />
that spell out the name you want; then press Save.<br />
3. Press Done.<br />
To delete a temporary basal preset<br />
1. Choose Delete, then press Select.<br />
2. Press Delete to permanently delete the preset.<br />
Understanding and Adjusting Basal Rates<br />
■ Maximum Basal Rate<br />
What is the maximum basal rate?<br />
The maximum basal rate is a safety feature that limits the basal<br />
rate (U/hr) that the Pod can deliver. Once you enter it into the<br />
PDM memory, the maximum applies to both regular basal programs<br />
and temporary basal rates.<br />
You and your healthcare provider will enter an initial maximum<br />
basal rate into your PDM during the setup process (see Chapter<br />
2, Getting Started). You can change it later as you fine-tune your<br />
<strong>System</strong> settings or when your needs change.<br />
Change the maximum basal rate<br />
1. On the Home screen, use the Up/Down Controller buttons<br />
to choose Settings; then press Select.<br />
2. Choose <strong>System</strong> setup, then press Select.<br />
3. Choose Bolus/basal/calcs, then press Select.<br />
4. Choose Max basal, then press Select.<br />
5. Enter a new maximum basal rate, then press Enter.<br />
3<br />
27
CHAPTER 4<br />
Understanding and Delivering Bolus Doses<br />
■ What Is a Bolus?<br />
A bolus is an extra dose of insulin, delivered when needed to:<br />
• Match the carbohydrates (sugar content) in a meal or<br />
snack—also known as a meal bolus<br />
• Lower blood glucose when it gets too high—also known as a<br />
correction bolus<br />
This extra dose is in addition to the basal rate delivered throughout<br />
the day and night (see Chapter 3, Understanding and<br />
Adjusting Basal Rates).<br />
The size of a bolus dose depends on the factors current at the<br />
time you deliver the bolus:<br />
• Your blood glucose level<br />
• Your insulin-to-carbohydrate ratio<br />
• Your correction factor<br />
• Your target blood glucose<br />
• The amount of insulin on board (active insulin) from previous<br />
meal and correction boluses<br />
28<br />
• Your correction threshold, the BG level above which you<br />
would like to take insulin to reduce an elevated blood<br />
glucose<br />
• Your activity level<br />
• The type and amount of food you eat<br />
With the <strong>mylife</strong> <strong>OmniPod</strong> <strong>System</strong>, it is easy to adapt to any situation.<br />
With just a few button presses, you can adjust to<br />
unexpected or changing insulin needs.<br />
During setup, you entered bolus dose settings in the PDM (see<br />
Chapter 2, Getting Started). You can adjust these settings as you<br />
fine-tune your <strong>System</strong> or when your needs change (see Chapter<br />
6, Using the Personal Diabetes Manager).<br />
Check with your healthcare provider before you adjust<br />
these settings.
■ Bolus Dose Options<br />
So that you can fully enjoy freedom and flexibility in your life, the<br />
<strong>mylife</strong> <strong>OmniPod</strong> <strong>System</strong> offers the following bolus dose options:<br />
Suggested bolus calculator: When you want the <strong>System</strong> to<br />
calculate your suggested bolus, based on your personal settings,<br />
your current blood glucose, the amount of insulin still active in<br />
your body from previous boluses, and the grams of carbohydrate<br />
(“carbs” for short) you are about to eat<br />
Normal bolus: When you need a dose of insulin right away, to<br />
cover a meal or snack you are about to eat or to reduce a high<br />
blood glucose level<br />
Extended bolus: When you are eating high-fat or high-protein<br />
foods (which take longer to digest and are slower to affect blood<br />
glucose) or when you are eating for an extended period (for<br />
example, at a party or during a holiday meal)<br />
The bolus features in the <strong>mylife</strong> <strong>OmniPod</strong> <strong>System</strong> are<br />
designed for flexibility and convenience. You can easily<br />
transition from a normal to an extended bolus with just a<br />
few button presses.<br />
Understanding and Delivering Bolus Doses<br />
■ Suggested Bolus Calculator<br />
The suggested bolus calculator lets the <strong>mylife</strong> <strong>OmniPod</strong> <strong>System</strong><br />
recommend your bolus based on your personal settings. To<br />
review or adjust these settings—including turning the suggested<br />
bolus calculator On or Off—see Chapter 6, Using the<br />
Personal Diabetes Manager.<br />
If the suggested bolus calculator is turned On, the <strong>System</strong><br />
automatically calculates a bolus dose. If the suggested bolus<br />
calculator is turned Off, you must enter a bolus amount<br />
manually.<br />
The suggested bolus calculator will display a suggested<br />
bolus dose based on the settings you have<br />
programmed into the PDM. Check with your healthcare<br />
provider before using this feature or adjusting<br />
these settings.<br />
How a suggested bolus is calculated<br />
The suggested bolus calculator estimates the suggested amount<br />
for each bolus portion based on your personal settings and<br />
inputs.<br />
4<br />
29
4<br />
30<br />
Understanding and Delivering Bolus Doses<br />
The settings used to calculate a suggested bolus are:<br />
• target BG<br />
• insulin-to-carbohydrate (IC) ratio<br />
• correction factor (CF)<br />
• duration of insulin action<br />
The inputs used to calculate a suggested bolus are:<br />
• current BG<br />
• carbs entered<br />
• insulin on board (IOB)<br />
A suggested bolus can have a correction bolus only, a meal bolus<br />
only, or both.<br />
Correction bolus: The correction bolus, as the name suggests,<br />
“corrects” for a blood glucose (BG) level above your target BG<br />
level.<br />
Meal bolus: The meal bolus provides insulin for the carbohydrates<br />
you enter into the <strong>System</strong>.<br />
<strong>Insulin</strong> on board (IOB): IOB is the amount of insulin still working<br />
in your body from previous boluses. The amount of time insulin<br />
remains “on board” or “active” depends on what you set for your<br />
duration of insulin action.<br />
The <strong>mylife</strong> <strong>OmniPod</strong> <strong>System</strong> can only subtract insulin on<br />
board from a suggested bolus when the current BG is<br />
known.<br />
For formulas for each element of the suggested bolus calculation,<br />
detailed examples, and additional guidelines of how the<br />
suggested bolus calculator works, see the Appendix.<br />
■ Deliver a Normal Bolus<br />
Deliver a bolus when suggested bolus calculator is On<br />
1. After you check your blood glucose, the PDM displays the<br />
results (Figure 4-1; see the end of Chapter 7, Checking Your<br />
Blood Glucose). Press Next.<br />
Figure 4-1
A blood glucose value is current for up to 10 minutes<br />
after it is tested. So you can wait up to 10 minutes,<br />
restart the bolus process, and not have to retest your<br />
blood glucose in order to include it in the suggested<br />
bolus calculator.<br />
When your blood glucose result reads “HIGH” or<br />
“LOW,” the suggested bolus calculator will be<br />
disabled.<br />
If you use a separate blood glucose meter—not the<br />
Personal Diabetes Manager (PDM)—you will need to<br />
enter your blood glucose manually. On the Home<br />
screen, choose Bolus, then press Select. Use the Up/<br />
Down Controller buttons to enter your current BG<br />
value, then press Yes if you want this value to be used<br />
by the suggested bolus calculator.<br />
You can also enter a BG manually by choosing the<br />
More actions menu, then choosing Add BG Reading.<br />
See the end of Chapter 7, Checking Your Blood<br />
Glucose.<br />
Understanding and Delivering Bolus Doses<br />
2. If you are not going to eat now, press No (Figure 4-2). The<br />
Suggested Bolus screen appears (Figure 4-3). Press Enter to<br />
accept the suggested bolus.<br />
Or, if you wish, press the Up/Down Controller buttons to<br />
increase or decrease the suggested bolus. Then press Enter<br />
to accept the bolus.<br />
Figure 4-2 Figure 4-3<br />
In the Suggested Bolus screen, “adjusted for IOB”<br />
appears only when IOB is a factor in the calculation.<br />
4<br />
31
4<br />
32<br />
Understanding and Delivering Bolus Doses<br />
To view detailed information about the calculations<br />
used for this suggested bolus, press the <strong>User</strong><br />
Info/Support button and scroll through the information<br />
screens. Press Close to return to the<br />
Suggested Bolus screen.<br />
3. If you are going to eat now:<br />
a. Press Yes (Figure 4-2 on previous page), enter the number<br />
of carbohydrates you are about to eat, then press Enter.<br />
If you’ve previously entered a carb preset, then either:<br />
• Use the Up/Down Controller buttons to choose<br />
[enter manually], then press Select. Enter the number<br />
of carbohydrates that you are going to eat, then<br />
press Enter.<br />
• Use the Up/Down Controller buttons to choose<br />
favorites, snacks, or meals. From there, select a carb<br />
preset you have previously entered (see “Carb Presets”<br />
later in this chapter), then press Select.<br />
b. Press Enter to accept the suggested bolus (Figure 4-4).<br />
Or press the <strong>User</strong> Info/Support button to view calculation<br />
information used for this suggested bolus. Press Close to<br />
return to the Suggested Bolus screen, then press Enter.<br />
Figure 4-4<br />
If the reverse correction feature is turned On and if<br />
your blood glucose level is below your target, the<br />
<strong>System</strong> subtracts a correction amount from the meal<br />
portion of the bolus.<br />
If the reverse correction setting is turned Off, the<br />
<strong>System</strong> does not subtract anything for a blood glucose<br />
level below your target.
4. If you have set the blood glucose reminder option to On and<br />
you want to add a reminder:<br />
a. Press Yes.<br />
b. Enter the time for the reminder, then press OK.<br />
5. Press Confirm to begin the bolus delivery.<br />
Deliver a bolus manually (suggested bolus calc is Off)<br />
1. On the Home screen, use the Up/Down Controller buttons<br />
to choose Bolus; then press Select.<br />
2. Enter the number of units you want to deliver, then press<br />
Enter.<br />
3. If the blood glucose reminders feature is turned On, you can<br />
now set a blood glucose reminder.<br />
4. Press Confirm to begin the bolus delivery.<br />
As a safety feature, the <strong>mylife</strong> <strong>OmniPod</strong> <strong>System</strong> only<br />
allows you to give a bolus at or below the maximum<br />
bolus dose you have set. See Chapter 6, Using the<br />
Personal Diabetes Manager, for information on resetting<br />
your maximum bolus dose. Consult your<br />
healthcare provider before changing this setting.<br />
Once a Pod is activated and communicates with the<br />
PDM, it can only receive commands from that PDM,<br />
not from any other.<br />
Understanding and Delivering Bolus Doses<br />
■ Deliver an Extended Bolus<br />
The extended bolus feature lets the <strong>mylife</strong> <strong>OmniPod</strong> <strong>System</strong><br />
deliver some (or no) insulin now and the remainder over a period<br />
of time you choose.<br />
Deliver an extended bolus instead of a normal bolus<br />
1. After you get your suggested bolus, press Extend instead of<br />
Enter (see Figure 4-5).<br />
Figure 4-5<br />
4<br />
33
4<br />
34<br />
Understanding and Delivering Bolus Doses<br />
If you have set the Extended bolus option to Off,<br />
the PDM will not display the Extend soft key. For<br />
information on turning this feature on and off, see<br />
Chapter 6, Using the Personal Diabetes Manager.<br />
2. Enter the units of insulin or percentage of the bolus that you<br />
want to take immediately (Figure 4-6), then press Enter.<br />
Figure 4-6<br />
To learn how to set extended boluses in percentages<br />
or units, see Chapter 6, Using the Personal Diabetes<br />
Manager.<br />
3. Enter the time (up to 8 hours, in 30-minute increments) over<br />
which to deliver the remainder of the bolus, then press Enter<br />
(Figure 4-7). In Figure 4-8 you can see a detail of the extended<br />
bolus.<br />
Figure 4-7 Figure 4-8<br />
4. If the blood glucose reminders feature is turned On, you<br />
can now set a blood glucose reminder.<br />
5. Press Confirm to begin the bolus delivery.
As a safety feature, the correction bolus is always<br />
delivered first and cannot be extended. Only the<br />
meal bolus can be extended. For example:<br />
Total bolus = 5 units<br />
Correction bolus 1 unit<br />
Meal bolus 4 units<br />
Deliver now = 2 units<br />
100% of correction bolus 1 unit<br />
25% of meal bolus 1 unit<br />
Extend = 3 units<br />
75% of meal portion 3 units<br />
As a safety feature, you cannot deliver two extended<br />
boluses at the same time. You can, however, cancel<br />
the first extended bolus and replace it with another<br />
(see “Replace an Extended Bolus” on page 36). And<br />
you can deliver a normal bolus while an extended<br />
bolus is being delivered.<br />
Understanding and Delivering Bolus Doses<br />
■ Cancel Active Boluses<br />
The <strong>mylife</strong> <strong>OmniPod</strong> <strong>System</strong> is extremely flexible, so you can use<br />
it to respond to your changing insulin needs. It is easy to cancel<br />
an active bolus (one that is currently being delivered), even after<br />
insulin delivery has started.<br />
1. Press and hold the Power button to turn on the PDM, if it is<br />
not already on. An on-screen message appears as long as a<br />
normal bolus is being delivered (Figure 4-9).<br />
Figure 4-9<br />
4<br />
35
4<br />
36<br />
Understanding and Delivering Bolus Doses<br />
If the bolus has already been completely delivered,<br />
the “Delivering bolus” message and Cancel do not<br />
appear, but the Status screen does appear.<br />
2. Press Cancel.<br />
The Pod beeps to confirm the bolus is canceled. An on-screen<br />
message tells you how much insulin was delivered before<br />
you canceled the bolus (Figure 4-10).<br />
Figure 4-10<br />
3. Press OK to return to the Status screen.<br />
If your suggested bolus contains both a correction<br />
bolus and a meal bolus, the correction bolus is always<br />
delivered first.<br />
■ Replace an Extended Bolus<br />
You can replace one extended bolus with another. The <strong>System</strong><br />
tells you how much of the first bolus has not yet been delivered.<br />
1. After you see your suggested bolus, press Extend instead of<br />
Enter (see Figure 4-5 on page 33).<br />
2. Press Yes to cancel the active extended bolus (Figure 4-11).<br />
Or press Back to return to the Suggested Meal Bolus screen.<br />
Figure 4-11
3. Press Confirm (Figure 4-12).<br />
Figure 4-12 Figure 4-13<br />
4. The screen displays the amount of the old extended bolus<br />
that remained to be delivered (Figure 4-13). Press Next to<br />
return to the Suggested Meal Bolus screen.<br />
You can add what remained of the old extended<br />
bolus to the new one.<br />
Understanding and Delivering Bolus Doses<br />
■ Bolus Presets<br />
Bolus presets are bolus amounts that you program for frequent<br />
use. For example, if you often take the same bolus at lunchtime,<br />
you can create a bolus preset for that amount and name it<br />
“Lunch.”<br />
Bolus presets are available only when the suggested<br />
bolus calculator feature is turned Off. (If the suggested<br />
bolus calculator is turned On, you can still use carb presets.<br />
See “Carb Presets” on page 39.)<br />
Create a bolus preset<br />
1. On the Home screen use the Up/Down Controller buttons<br />
to choose Settings; then press Select.<br />
2. Choose Presets, then press Select.<br />
3. Choose Bolus presets, then press Select.<br />
4. Choose [add new], then press New.<br />
5. To use the <strong>mylife</strong> <strong>OmniPod</strong> <strong>System</strong>’s default naming system,<br />
simply press Next. The default naming system automatically<br />
assigns program names in numerical order, such as bolus 1,<br />
bolus 2, bolus 3.<br />
4<br />
37
4<br />
38<br />
Understanding and Delivering Bolus Doses<br />
Or, to give a different name to the program:<br />
a. Press the Up/Down Controller buttons to enter the characters<br />
that spell the name you want. An up- and downarrow<br />
symbol on the screen indicates which character<br />
you are changing.<br />
b. Press the middle soft key (labeled with the right arrow) to<br />
move the underscore to the next character.<br />
c. Enter each character one at a time. For example, if you<br />
frequently take the same bolus at lunchtime, you might<br />
enter L, u, n, c, h (Figure 4-14).<br />
d. Press Next.<br />
Figure 4-14 Figure 4-15<br />
6. Enter the new bolus preset amount, up to the maximum<br />
bolus you entered during setup; then press Next.<br />
7. Review the bolus preset name and amount; press Save to<br />
accept it.<br />
Enable an existing bolus preset<br />
1. On the Home screen, use the Up/Down Controller buttons<br />
to choose Bolus; then press Select.<br />
2. Choose the bolus preset you want to use from the list (Figure<br />
4-15), then press Select.<br />
3. Press Enter to confirm the bolus preset amount, or, if necessary,<br />
use the Up/Down Controller buttons to adjust the<br />
bolus amount.<br />
4. Press Confirm to deliver the bolus shown on the screen.<br />
Change, rename, or delete a bolus preset<br />
1. On the Home screen, use the Up/Down Controller buttons<br />
to choose Settings; then press Select.<br />
2. Choose Presets, then press Select.<br />
3. Choose Bolus presets, then press Select.<br />
4. Choose a preset from the list, then press Edit.
Change a bolus preset<br />
1. Choose Edit, then press Select.<br />
2. Enter a new insulin amount for the bolus, then press Save.<br />
Rename a bolus preset<br />
1. Choose Rename, then press Select.<br />
2. Press the Up/Down Controller buttons to enter the characters<br />
that spell out the name you want; then press Next.<br />
Delete a bolus preset<br />
1. Choose Delete and then press Select.<br />
2. Press Delete to permanently delete the preset.<br />
Cancel an active bolus preset<br />
1. Press and hold the Power button to turn on the PDM, if it is<br />
not already on. An on-screen message appears as long as a<br />
bolus is being delivered.<br />
2. Press Cancel.<br />
The Pod beeps to confirm the bolus is canceled. An on-screen<br />
message tells you how much insulin was delivered before<br />
you canceled the bolus.<br />
3. Press OK to return to the Status screen.<br />
For more details, see “Cancel Active Boluses” earlier in this<br />
chapter.<br />
Understanding and Delivering Bolus Doses<br />
■ Carb Presets<br />
Carb presets are favorite food items, snacks, or meals that you eat<br />
frequently. After you enter these items, you can quickly select<br />
one when entering carbs during the suggested bolus calculator<br />
process.<br />
Create a carb preset<br />
1. On the Home screen, use the Up/Down Controller buttons<br />
to choose Settings; then press Select.<br />
2. Choose Presets, then press Select.<br />
3. Choose Carb presets, then press Select.<br />
4. Choose the category for this carb preset: Favorites, Snacks,<br />
or Meals, then press Select.<br />
5. Choose [add new], then press New.<br />
6. To use the <strong>mylife</strong> <strong>OmniPod</strong> <strong>System</strong>’s default naming system,<br />
simply press Next. The default naming system automatically<br />
assigns program names in numerical order, such as carb preset<br />
1, carb preset 2, carb preset 3.<br />
Or, to give a different name to the program:<br />
a. Press the Up/Down Controller buttons to enter the characters<br />
that spell the name you want. An up-and-downarrow<br />
symbol on the screen indicates the character you<br />
are changing.<br />
4<br />
39
4<br />
40<br />
Understanding and Delivering Bolus Doses<br />
b. Press the middle soft key (the right arrow) to move the<br />
underscore to the next character.<br />
c. Enter each character one at a time. For example, if you<br />
frequently eat a breakfast of plain low-fat yogurt with<br />
blueberries, sweetener, and cinnamon, you might enter<br />
B, l, u, e, [space], Y, o, g, u, r, t (Figure 4-16).<br />
Figure 4-16 Figure 4-17<br />
d. Press Next.<br />
7. Enter the grams of carbohydrate in the meal, then press Next.<br />
8. If you want, enter the grams of fiber, fat, and protein in the<br />
meal, and the total calories. Press Next after each entry.<br />
These additional units are not required. If you prefer not<br />
to enter them, simply press Next repeatedly to step<br />
through the screens.<br />
If you do include grams of fiber in step 8 above, the<br />
suggested bolus calculator uses carbs minus fiber. Alternatively,<br />
in step 7, you can enter the total of carbs minus<br />
fiber yourself. Your healthcare provider can best advise<br />
you how to make this entry.<br />
9. Press Save to add the preset to the category.<br />
Change or edit a carb preset<br />
1. On the Home screen, use the Up/Down Controller buttons<br />
to choose Settings; then press Select.<br />
2. Choose Presets, then press Select.<br />
3. Choose Carb presets, then press Select.<br />
4. Choose the category of the preset you want to change, then<br />
press Select (Figure 4-17).
To change the category for a carb preset<br />
1. Choose the carb preset you want to move to another category,<br />
then press Tag (Figure 4-18).<br />
Figure 4-18<br />
2. Choose a new category, then press Select.<br />
To edit a carb preset<br />
1. Choose the carb preset you want to change, then press Edit.<br />
2. Press Edit again on the next screen.<br />
Understanding and Delivering Bolus Doses<br />
3. To rename the carb preset, press the Up/Down Controller<br />
buttons to enter the characters that spell out the name you<br />
want, then press Next.<br />
To “erase” characters, press either Up or Down until you reach<br />
the end of the characters, which is a blank.<br />
4. Enter the grams of carbohydrate in the meal, then press Next.<br />
5. If you want, enter the grams of fiber, fat, and protein in the<br />
meal, and the total calories. Press Next after each entry.<br />
These additional units are not required. If you prefer<br />
not to enter them, simply press Next repeatedly to<br />
step through the screens.<br />
6. Press Save to update the preset.<br />
Delete a carb preset<br />
1. On the Home screen, use the Up/Down Controller buttons<br />
to choose Settings; then press Select.<br />
2. Choose Presets, then press Select.<br />
3. Choose Carb presets, then press Select.<br />
4. Choose the category of the preset you want to change, then<br />
press Select.<br />
5. Choose the carb preset you want to delete, then press Edit.<br />
6. Press Delete.<br />
7. Press Delete again to permanently delete the preset.<br />
4<br />
41
CHAPTER 5<br />
Using the Pod<br />
■ The Pod Change Process<br />
Refer to the insulin labeling and follow your healthcare provider’s<br />
directions for how often to replace the Pod. If you like, you can<br />
set the PDM to notify you when it is time to replace the Pod (see<br />
Chapter 6, Using the Personal Diabetes Manager).<br />
42<br />
WARNINGS!<br />
• Do NOT apply or use a Pod if its sterile packaging is open or<br />
damaged, as this may increase the risk of infection. Pods are<br />
sterile unless packaging has been opened or damaged.<br />
• Do NOT apply or use a Pod if it is damaged in any way. A damaged<br />
Pod may not work properly.<br />
• To minimize the possibility of site infection, do NOT apply a<br />
Pod without first using aseptic technique. This means to:<br />
• Wash your hands.<br />
• Clean the insulin vial with an alcohol prep swab.<br />
• Clean the infusion site with soap and water.<br />
• Keep sterile materials away from any possible germs.<br />
• Do NOT use a Pod if you are sensitive to or have allergies to<br />
acrylic adhesives or have fragile or easily damaged skin.<br />
• Check often to make sure the Pod and soft cannula are<br />
securely attached and in place. A loose or dislodged cannula<br />
may interrupt insulin delivery.<br />
• Do NOT apply a new Pod until you have deactivated and<br />
removed the old Pod. A Pod that has not been deactivated<br />
properly may continue to deliver insulin as programmed, putting<br />
you at risk of overinfusion and possible hypoglycemia.<br />
• Because insulin Pods use only rapid-acting insulin, users are<br />
at increased risk for developing hyperglycemia (high blood<br />
glucose) if insulin delivery is interrupted. If it is untreated,<br />
severe hyperglycemia can quickly lead to diabetic ketoacidosis<br />
(DKA). DKA can cause breathing difficulties, shock, coma,<br />
or death. If insulin delivery is interrupted for any reason, youmay<br />
need to replace the missing insulin—usually with an<br />
injection of rapid-acting insulin. Ask your healthcare provider<br />
for instructions on handling interrupted insulin delivery.
Gather equipment and supplies<br />
Gather the following before you begin:<br />
• Vial of rapid-acting U-100 insulin (See the warning on page x<br />
of the Introduction for insulins approved for use in the <strong>mylife</strong><br />
<strong>OmniPod</strong> <strong>System</strong>.)<br />
NEVER use insulin that is cloudy; it may be old or inactive.<br />
Failure to use rapid-acting U-100 insulin, or using<br />
insulin that is old or inactive, may lead to hyperglycemia<br />
or diabetic ketoacidosis (DKA).<br />
• An unopened Pod<br />
• Alcohol prep swab<br />
If you are a first-time <strong>mylife</strong> <strong>OmniPod</strong> <strong>System</strong> user,<br />
your healthcare provider will guide you through the<br />
steps for initializing and applying your first Pod. Do<br />
NOT attempt to apply or use a Pod until you have<br />
been trained by your healthcare provider. Use of the<br />
<strong>System</strong> with inadequate training or improper setup<br />
could put your health and safety at risk.<br />
Using the Pod<br />
Deactivate the current Pod<br />
1. On the Home screen, use the Up/Down Controller buttons<br />
to choose More actions, then press Select.<br />
2. Choose Change Pod (Figure 5-1), then press Select.<br />
3. Press Confirm (Figure 5-2) to deactivate the current Pod.<br />
Figure 5-1 Figure 5-2<br />
5<br />
43
5<br />
44<br />
Using the Pod<br />
4. If an extended bolus or temporary basal or both are actively<br />
running, you will see the message in Figure 5-3. Press Confirm<br />
to accept the cancellation.<br />
Or press Back to return to the More actions menu.<br />
Figure 5-3 Figure 5-4<br />
5. After you press Confirm, you will see the message in<br />
Figure 5-4. To remove the old Pod:<br />
a. Gently lift the edges of the adhesive tape from your skin<br />
and remove the entire Pod (Figure 5-5).<br />
Removing the Pod slowly will help to avoid<br />
possible skin irritation.<br />
Figure 5-5 Figure 5-6<br />
b. Use soap and water to remove any adhesive that remains<br />
on the skin or, if necessary, use an adhesive remover.<br />
Check the infusion site for signs of infection.<br />
See “Avoid Infusion Site Infections” later in this<br />
chapter.<br />
c. Pods contain batteries that must not be disposed of with<br />
household waste. To dispose of expired Pods, follow the<br />
instructions you receive from the distributor or from<br />
Customer Care.<br />
6. After removing the old Pod, press Next (Figure 5-4).<br />
7. Press Yes to fill a new Pod (Figure 5-6).
Fill a new Pod<br />
Before filling a Pod with insulin, ensure that the Pod<br />
is above 50° Fahrenheit (10° Celsius). If the Pod has<br />
been exposed to temperatures below 50° F (10° C),<br />
then allow the Pod to be brought back to room temperature<br />
before filling it with insulin.<br />
1. Use an alcohol prep swab to clean the top of the insulin vial,<br />
then discard the prep swab.<br />
2. Securely twist the fill needle onto the syringe (Figure 5-7).<br />
Figure 5-7 Figure 5-8<br />
Using the Pod<br />
3. Pull outward to remove the protective cap from the needle<br />
(Figure 5-8). Save the cap; you will need it later.<br />
Use care after removing the needle cap and<br />
exposing the fill needle.<br />
Only use room temperature insulin when filling<br />
the Pod.<br />
4. Determine the amount of insulin you need to insert into the<br />
Pod. For example, if you will use this Pod for 48 hours, you<br />
need enough insulin to last you 48 hours. Your healthcare<br />
provider will help you determine the correct amount.<br />
The Pod requires a minimum of 85 units of insulin to<br />
begin operation.<br />
The Pod can deliver up to 200 units of insulin.<br />
5. Draw air into the syringe up to the amount of insulin you<br />
want.<br />
6. Insert the needle into the insulin vial and inject the air. This<br />
makes it easier to withdraw insulin from the vial.<br />
5<br />
45
5<br />
46<br />
Using the Pod<br />
7. Turn the vial and syringe upside down. Withdraw insulin from<br />
the vial into the syringe, expelling any air bubbles. Fill at least<br />
to the MIN (minimum) fill line (Figure 5-9).<br />
Figure 5-9 Figure 5-10<br />
Avoid using insulin from more than one vial,<br />
which may introduce air into the syringe.<br />
8. Remove the needle from the vial and insert it straight down<br />
into the insulin fill port on the underside of the Pod<br />
(Figure 5-10).<br />
To ensure proper fill, do not insert fill syringe at an<br />
angle into the fill port.<br />
Do not use any other type of needle or filling<br />
device besides the syringe provided with each<br />
Pod.<br />
9. Depress the syringe plunger to completely empty the insulin<br />
into the Pod. The Pod will beep, indicating that the <strong>System</strong> is<br />
ready to proceed to the next step.<br />
NEVER use a Pod if you hear a crackling noise or<br />
feel resistance when you depress the plunger.<br />
These conditions can result in underdelivery of<br />
insulin.<br />
10. Remove the needle from the insulin fill port. The port is selfsealing;<br />
insulin will not leak after the needle is removed.<br />
Do not insert the fill syringe into the fill port more<br />
than once.<br />
NEVER inject air into the fill port. Doing so may<br />
result in unintended or interrupted insulin delivery.
11. Place the protective cap back on the needle and remove the<br />
needle from the syringe.<br />
12. Place the capped needle in a sharps container. Dispose of<br />
used needles according to local waste disposal regulations.<br />
The fill syringe is intended for single use only and<br />
should be used only with the <strong>mylife</strong> <strong>OmniPod</strong><br />
<strong>System</strong>.<br />
13. After you fill the Pod, it will beep twice. After you hear the<br />
beeps, press Next (Figure 5-11).<br />
The Pod will only beep if you have filled it with at least 85 units<br />
of insulin.<br />
If you have filled the Pod with more than 85 units and still do<br />
not hear the 2 beeps, call Customer Care.<br />
14. The <strong>System</strong> performs a series of safety checks and automatically<br />
primes the Pod (Figure 5-12). Once complete, the PDM<br />
beeps, letting you know that the priming and safety checks<br />
were successful.<br />
After filling the Pod with insulin, you should complete<br />
the Pod-change process within 60 minutes. As a<br />
reminder that the Pod has been filled, it will beep<br />
every 5 minutes to indicate that time is passing. If you<br />
do not set up the Pod within 60 minutes, you must<br />
deactivate and discard it.<br />
Using the Pod<br />
Figure 5-11 Figure 5-12<br />
Once a Pod is activated and communicates with the<br />
PDM, it can only receive commands from that PDM,<br />
not from any other.<br />
5<br />
47
5<br />
48<br />
Using the Pod<br />
Select the infusion site<br />
Before applying a new Pod, you must first select an appropriate<br />
infusion site. Due to ease of access and viewing, the abdomen is<br />
often used. Your healthcare provider may suggest other potential<br />
sites that, like the abdomen, typically have a layer of fatty<br />
tissue, such as the hip, back of upper arm, upper thigh, or lower<br />
back (Figure 5-13, and Figure 5-14 on the following page).<br />
Avoid sites where belts, waistbands, or tight clothing<br />
may rub against, disturb, or dislodge the Pod. Also<br />
avoid sites where the Pod will be affected by folds of<br />
skin.<br />
Change the site each time you apply a new Pod. A<br />
new infusion site should be at least 1" away from the<br />
last site. (Using the same location repeatedly may<br />
reduce insulin absorption.)<br />
Do NOT apply the Pod within 2" of your navel or over<br />
a mole or scar, where insulin absorption may be<br />
reduced.<br />
To help avoid condensation from occurring in the<br />
viewing window, make sure both your Pod and your<br />
insulin are at room temperature.<br />
Figure 5-13: Adult/Youth<br />
Front<br />
Back
Figure 5-14: Toddler<br />
Front<br />
Back<br />
Using the Pod<br />
Prepare the infusion site<br />
You can reduce the risk of infection at the infusion site by following<br />
aseptic technique and disinfecting the infusion site. Before<br />
applying a new Pod, always:<br />
1. Wash hands with soap and water.<br />
2. Use soap to wash the infusion site.<br />
Antibacterial soap may irritate skin, especially at the<br />
infusion site. Ask your healthcare provider how to<br />
treat any skin irritation.<br />
3. Dry the site with a clean towel.<br />
4. Use an alcohol prep swab to disinfect the infusion site. Start at<br />
the center of the site and gently rub outward in a circular<br />
motion.<br />
5. Let the site air-dry thoroughly. Do not blow on the site to dry<br />
it.<br />
5<br />
49
5<br />
50<br />
Using the Pod<br />
Apply the new Pod<br />
Prepare the Pod for applying to your infusion site:<br />
1. To remove the needle cap on the underside of the Pod, pull it<br />
upward (Figure 5-15).<br />
When you remove the needle cap, a few drops of<br />
insulin should be visible at the end of the needle.<br />
Figure 5-15 Figure 5-16<br />
2. Using the pull tabs, remove and discard the white paper<br />
backing from the adhesive tape (Figure 5-16).<br />
3. Apply the Pod to the prepared infusion site. Press firmly to<br />
secure it to your skin.<br />
For the Pod to work best, apply it:<br />
1. Crosswise or at a slight angle on your abdomen,<br />
hip, upper back, or buttocks (see A)<br />
A:<br />
B:<br />
2. Up and down or at a slight angle on your<br />
upper arm or thigh (see B)<br />
3. At least one inch away from the last site<br />
The Pod’s adhesive keeps it securely in place for up to<br />
3 days. However, if necessary, several products are<br />
available to enhance adhesion. Ask your healthcare<br />
provider about these products. Avoid getting body<br />
lotion, creams, or oils near the infusion site; these<br />
products may loosen the adhesive.
4. After you securely apply the Pod, press Next (Figure 5-17).<br />
Figure 5-17<br />
The adhesive is designed for one-time use. Once<br />
removed, a Pod cannot be reapplied.<br />
Using the Pod<br />
Insert cannula and begin insulin delivery<br />
1. To insert the soft cannula, press Start (Figure 5-18).<br />
Figure 5-18 Figure 5-19<br />
If you are applying a Pod in a place that does not have<br />
a lot of fatty tissue or is very lean, pinch the skin<br />
around the Pod (Figure 5-19) after you press Start ,<br />
and hold it until the cannula inserts. Occlusions may<br />
result in lean areas if you do not use this technique.<br />
5<br />
51
5<br />
52<br />
Using the Pod<br />
The Pod automatically inserts the soft cannula below your<br />
skin. It takes a few seconds to complete the insertion process.<br />
Once the cannula is inserted, the Pod delivers a prime bolus to<br />
fill the cannula with insulin (Figure 5-20).<br />
Figure 5-20 Figure 5-21<br />
You will hear a click when the cannula inserts.<br />
Check the infusion site after insertion to ensure<br />
that the cannula was properly inserted. It is also a<br />
good idea to check your blood glucose about<br />
two hours after after each Pod change and to<br />
check the infusion site periodically. If the cannula is<br />
not properly inserted, hyperglycemia may result.<br />
If you observe blood in the cannula, check your<br />
blood glucose more frequently to ensure insulin<br />
delivery has not been affected. If you experience<br />
unexpected elevated blood glucose levels,<br />
change your Pod.<br />
Once the soft cannula is inserted, the PDM indicates that the<br />
Pod is active (Figure 5-21).<br />
Figure 5-21 also displays a reminder to check the infusion site<br />
and cannula. Make sure the Pod is securely attached to your<br />
skin. You can see the cannula through the small viewing<br />
window on the Pod.<br />
To help avoid condensation from occurring in the<br />
viewing window, make sure both your Pod and your<br />
insulin are at room temperature.
2. Press Yes if you can see that the cannula is properly inserted.<br />
The PDM returns to the Status screen.<br />
Or press No if you see a problem with the cannula. The PDM<br />
instructs you to deactivate the new Pod (Figure 5-22). Press<br />
Discard to restart the process with a new Pod.<br />
Figure 5-22<br />
Or press Back to return to the previous screen.<br />
NEVER inject insulin (or anything else) into the<br />
fill port while the Pod is on your body. Doing so may<br />
result in unintended or interrupted insulin delivery.<br />
■ Check Pod Status<br />
Using the Pod<br />
To check Pod status, if the PDM is turned off, press and hold the<br />
Power button to display the Status screen. If the PDM is on,<br />
press Back until you reach the Status screen. (If you press and<br />
hold the Power button, you will turn off the PDM instead.) Or,<br />
from the Home screen, press Status.<br />
The PDM automatically checks the status of the Pod. The PDM<br />
then displays the current reservoir volume, PDM battery level,<br />
last blood glucose, last bolus dose, active basal program, and any<br />
alarm conditions. See Chapter 6, Using the Personal Diabetes<br />
Manager, for details of what you see on the Status screen.<br />
Once a Pod is activated and communicates with the<br />
PDM, it can only receive commands from that PDM,<br />
not from any other.<br />
If the Pod goes into hazard alarm condition and the PDM is<br />
unable to communicate with it to turn off the alarm, you can turn<br />
it off manually. See the end of Chapter 11, Communication Failures,<br />
for instructions.<br />
5<br />
53
5<br />
54<br />
Using the Pod<br />
■ Suspend <strong>Insulin</strong> Delivery<br />
Sometimes you may need to briefly stop insulin delivery (for<br />
example, when editing an active basal program or changing the<br />
time or date). The <strong>mylife</strong> <strong>OmniPod</strong> <strong>System</strong> lets you suspend all<br />
insulin delivery for up to 2 hours. While in suspension, the Pod<br />
beeps once every 15 minutes, reminding you that insulin<br />
delivery is suspended.<br />
At any time during a suspension period, press Resume<br />
to resume the basal program that was running when you<br />
suspended insulin delivery.<br />
Extended boluses and temporary basal rates will be cancelled<br />
when you suspend insulin delivery.<br />
1. On the Home screen, use the Up/Down Controller buttons<br />
to choose Suspend; then press Select.<br />
If a temporary basal or extended bolus is in process, the<br />
menu item is Suspend/cancel instead, and options for<br />
canceling these programs also appear in the menu. If<br />
these options appear, choose Suspend insulin delivery.<br />
2. Enter how long you want to stop all insulin delivery, from 30<br />
minutes to 2 hours in 30-minute increments (Figure 5-23),<br />
then press Enter.<br />
Figure 5-23 Figure 5-24<br />
3. Press Confirm to confirm that you want to halt all insulin<br />
delivery (basal and bolus). The PDM beeps and an on-screen<br />
message lets you know that insulin delivery is indeed suspended<br />
(Figure 5-24).<br />
The Pod beeps every 15 minutes until the end of the suspension<br />
period. The Status screen shows INSULIN SUSPENDED<br />
until you resume insulin delivery (see “Resume <strong>Insulin</strong> Delivery”<br />
below).
At the end of the suspend time, a Pod Advisory alarm occurs<br />
(Figure 5-25).<br />
Figure 5-25 Figure 5-26<br />
4. To resume your programmed basal rate, press OK.<br />
The Advisory alarm repeats every 15 minutes until you<br />
press OK.<br />
<strong>Insulin</strong> delivery will not resume until you press OK. If<br />
you do not press OK to resume insulin delivery, you<br />
could develop hyperglycemia (high blood glucose).<br />
■ Resume <strong>Insulin</strong> Delivery<br />
Using the Pod<br />
1. On the Home screen, use the Up/Down Controller buttons<br />
to choose Resume (Figure 5-26); then press Select.<br />
2. Press Confirm to restart the basal program for that time segment.<br />
■ Avoid Infusion Site Infections<br />
• Always wash your hands and use aseptic technique to prepare<br />
the infusion site before applying a Pod.<br />
• Do not apply a Pod to any area of skin with an active infection.<br />
If you are unsure whether to use a specific site, ask your<br />
healthcare provider.<br />
• At least once a day, use the Pod’s viewing window to check<br />
the site for signs of infection and to confirm that the soft cannula<br />
is securely in place.<br />
• Be aware of the signs of infection, including pain, swelling,<br />
redness, discharge, or heat at the site. If you suspect an infection,<br />
immediately remove the Pod and apply a new one in a<br />
different location. Then call your healthcare provider.<br />
• Change the Pod as instructed by your healthcare provider.<br />
5<br />
55
5<br />
56<br />
Using the Pod<br />
■ Get the Most From Your Pod<br />
Avoid extreme temperatures<br />
The Pod’s operating temperature is between 40° F and 104° F<br />
(between 5° C and 40° C). Under normal circumstances, your<br />
body temperature will keep the Pod well within this range.<br />
Do NOT expose a Pod to direct sunlight for long periods<br />
of time. It is recommended that you remove your<br />
Pod prior to using hot tubs, whirlpools, or saunas.<br />
These conditions could expose the Pod to extreme<br />
temperatures and may also affect the insulin inside<br />
the Pod.<br />
Remember to check your blood glucose levels frequently<br />
before and after removing the Pod. Check with your<br />
healthcare provider for guidelines on removing the Pod<br />
for extended periods.<br />
<strong>Insulin</strong> degrades at high temperatures and will freeze<br />
near 32° F (0° C). Check the insulin manufacturer’s<br />
instructions for use.<br />
Water and your Pod<br />
The Pod is watertight to a depth of 25 feet for up to 60 minutes<br />
(IPX8). After exposure to water, rinse off the Pod with clean water<br />
and gently dry it with a towel.<br />
Do not expose your Pod to water at depths greater<br />
than 25 feet or for more than 60 minutes. Check<br />
often to make sure the Pod and soft cannula are<br />
securely attached and in place. If the cannula is not<br />
properly inserted, hyperglycemia may result.<br />
The PDM is not waterproof. Do not place it in or near<br />
water.<br />
Safe storage<br />
Store unopened Pods in a cool, dry place. Extreme heat or cold<br />
can damage Pods and cause them to malfunction. If Pods are<br />
exposed to extreme temperatures, allow them to return to room<br />
temperature before use.<br />
Pods are sterile unless their packaging is opened or<br />
damaged. Do NOT apply or use a Pod if its sterile<br />
packaging is opened or damaged, as this may<br />
increase the risk of infection or serious injury.
CHAPTER 6<br />
Using the Personal Diabetes Manager<br />
■ The Status Screen<br />
When a Pod is active and the PDM is turned on, the PDM establishes<br />
communication with the Pod to obtain a status check.<br />
During the status check, the PDM collects information from the<br />
Pod about bolus deliveries, active basal programs, and Pod expiration.<br />
The information obtained is then displayed in the status<br />
screen, which shows the <strong>System</strong>’s current operating status.<br />
The Status screen (Figure 6-1) displays:<br />
• Time, date, and result of last blood glucose checked or<br />
entered manually<br />
• Time, date, and total amount of last bolus delivered<br />
• Amount of insulin on board, if suggested bolus calculator is<br />
in use<br />
• Name and rate of active basal program or temp basal<br />
program<br />
• “Ext bolus,” the amount of insulin, and the delivery time<br />
remaining if an extended bolus is being delivered<br />
Figure 6-1<br />
• “INSULIN SUSPENDED” if insulin delivery has been<br />
suspended<br />
• Time and date when the Pod will expire<br />
57
6<br />
58<br />
Using the Personal Diabetes Manager<br />
If a Pod has not yet been activated (as during Pod changes),<br />
the screen displays “No active Pod. Would you like to activate<br />
a Pod now?” (See Chapter 5, Using the Pod, for details<br />
on activating a Pod.)<br />
<strong>Insulin</strong> gauge and display<br />
One of the important icons on the Status screen is the insulin<br />
gauge at the top of the screen. It indicates how much insulin is<br />
left in the Pod’s reservoir. As the reservoir empties, the icon<br />
changes to indicate the amount of insulin remaining.<br />
Next to the insulin gauge, the PDM displays the number of units<br />
remaining in the Pod. As long as more than 50 units remain, the<br />
gauge displays “50+ U.” Once the reservoir volume drops to 50<br />
units, the gauge counts down unit by unit. When the volume<br />
falls below 5 units, the display changes to “LOW.”<br />
Regularly checking the insulin gauge enables you<br />
to plan Pod changes easily. For example, if you<br />
know you will need approximately 20 units during<br />
your work day and the insulin gauge shows only 17<br />
units remaining, you can either take a new Pod with<br />
you or change it before you leave for the day.<br />
PDM settings<br />
You can adjust the PDM settings to meet your individual needs.<br />
1. From the Status screens, press Home.<br />
2. Use the Up/Down Controller buttons to choose Settings;<br />
then press Select.<br />
3. Choose <strong>System</strong> setup, then press Select.<br />
4. Choose an option from the <strong>System</strong> setup list, then press<br />
Select (Figure 6-2). Check with your healthcare provider<br />
before making any changes.<br />
Figure 6-2
■ The <strong>System</strong> Setup Menu<br />
The <strong>System</strong> setup menu lets you personalize the settings that<br />
control the <strong>mylife</strong> <strong>OmniPod</strong> <strong>System</strong>. These include:<br />
• Date and time<br />
• Bolus doses, basal rates, and bolus calculator settings<br />
• Alert and reminder notifications<br />
• Blood glucose meter settings and tags<br />
• PDM options<br />
• Diagnostics<br />
You and your healthcare provider entered initial <strong>System</strong> settings<br />
using the Setup Wizard (see Chapter 2, Getting Started). After<br />
setup, you can use the <strong>System</strong> setup menu to customize or<br />
change those settings, as described in this chapter.<br />
Using the Personal Diabetes Manager<br />
■ Reset the Date or Time<br />
Occasionally, you need to change date and time settings (for<br />
example, to adjust for daylight savings time or after resetting the<br />
PDM). As a safety feature, you can change date and time settings<br />
only when the Pod is deactivated or when insulin delivery is suspended<br />
(see Chapter 5, Using the Pod).<br />
1. Suspend insulin delivery.<br />
If you are changing the Pod, you can reset the date or<br />
time without suspending by changing the date or<br />
time before activating the new Pod.<br />
2. On the Home screen, use the Up/Down Controller buttons<br />
to choose Settings; then press Select.<br />
3. Choose <strong>System</strong> setup, then press Select.<br />
4. Choose Date/time, then press Select.<br />
5. Choose either Time or Date, then press Edit.<br />
Reset the time<br />
1. To enter the current time, press the Up/Down Controller<br />
buttons. Press and hold the button to increase or decrease<br />
the time faster.<br />
6<br />
59
6<br />
60<br />
Using the Personal Diabetes Manager<br />
2. Press 12/24 hr to choose either a 12-hour or 24-hour clock,<br />
then press Enter (Figure 6-3).<br />
Figure 6-3 Figure 6-4<br />
3. Press Confirm to accept the new time (Figure 6-4).<br />
Reset the date<br />
1. Press the Up/Down Controller buttons to choose the current<br />
year, then press Next.<br />
2. Choose the current month, then press Next.<br />
3. Choose the current day, then press Next.<br />
4. Choose the date format to be displayed by the PDM, then<br />
press Select.<br />
5. Press Confirm to accept the new date and format.<br />
If you suspended insulin delivery to change the<br />
time or date, remember to resume insulin delivery.<br />
If you changed the time or date during the<br />
Pod change process, remember to activate a new<br />
Pod.<br />
■ Change Bolus and Basal Settings<br />
You and your healthcare provider entered initial bolus and basal<br />
<strong>System</strong> settings using the Setup Wizard. Using the <strong>System</strong> setup<br />
menu, you can edit all the <strong>mylife</strong> <strong>OmniPod</strong> <strong>System</strong> bolus and<br />
basal settings as your needs change. Check with your healthcare<br />
provider before making any changes.<br />
1. On the Home screen, use the Up/Down Controller buttons<br />
to choose Settings; then press Select.<br />
2. Choose <strong>System</strong> setup, then press Select.<br />
3. Choose Bolus/basal/calcs, then press Select.
4. Choose one of the options (Figure 6-5a and Figure 6-5b), then<br />
press Select. Each option is described below.<br />
Figure 6-5a Figure 6-5b<br />
Using the Personal Diabetes Manager<br />
Bolus calcs<br />
When the suggested bolus calculator is turned Off and you want<br />
to turn it On, press On and follow these steps:<br />
1. Target BG and correct-above value—You can edit existing<br />
time segments and add segments, up to a total of four.<br />
a. To edit an existing target BG time segment, choose the<br />
segment, then press Edit. Use the Up/Down Controller<br />
buttons to choose a new start time, end time, target BG<br />
value, and correct-above value (correction threshold). Press<br />
Next after each entry.<br />
b. To add a segment, choose [add new], then press New.<br />
Use the Up/Down Controller buttons to choose a start<br />
time, end time, target BG value, and correct-above value<br />
(correction threshold). Press Next after each entry.<br />
c. When you have completed all the time segments you<br />
want, press Done, then Save.<br />
2. Min BG for calcs (minimum blood glucose value allowed for<br />
calculating boluses)—Use the Up/Down Controller buttons<br />
to enter a new minimum BG, then press Next.<br />
6<br />
61
6<br />
62<br />
Using the Personal Diabetes Manager<br />
3. <strong>Insulin</strong> to carb (IC) ratio—You can edit existing time segments<br />
and add segments, up to a total of four.<br />
a. To edit an existing IC ratio time segment, choose the segment,<br />
then press Edit (Figure 6-6). Use the Up/Down<br />
Controller buttons to choose a new start time, end time,<br />
and IC ratio. Press Next after each entry.<br />
Figure 6-6<br />
b. To add a segment, choose [add new], then press New.<br />
Use the Up/Down Controller buttons to choose a start<br />
time, end time, and IC ratio. Press Next after each entry.<br />
c. When you have completed all time segments, press<br />
Done, then Save.<br />
4. Correction factor—You can edit existing time segments and<br />
add segments, up to a total of four.<br />
a. To edit an existing correction factor time segment, choose<br />
the segment, then press Edit. Use the Up/Down Controller<br />
buttons to choose a new start time, end time, and correction<br />
factor. Press Next after each entry<br />
b. To add a segment, choose [add new], then press New.<br />
Use the Up/Down Controller buttons to choose a start<br />
time, end time, and correction factor. Press Next after<br />
each entry.<br />
c. When you have completed all time segments, press<br />
Done, then Save.<br />
5. Reverse correction—Choose On or Off, then press Next.<br />
6. <strong>Insulin</strong> action (duration)—Use the Up/Down Controller<br />
buttons to choose a duration of insulin action, then press<br />
Done.<br />
7. Press OK.
Ratios/factors/targets<br />
When the suggested bolus calculator is turned On, you can view<br />
and change all the settings using the Ratios/factors/targets<br />
menu option. Choose Review all settings, then press Select<br />
(Figure 6-7a ). Or choose one setting from the menu, then press<br />
Select (Figure 6-7b). The steps are the same whether you choose<br />
all settings or individual ones.<br />
When the suggested bolus calculator is turned Off, the<br />
Ratios/factors/targets option does not appear in the<br />
Bolus/basal/calcs menu.<br />
Figure 6-7a Figure 6-7b<br />
Using the Personal Diabetes Manager<br />
1. Target BG and correct-above value—You can edit existing<br />
segments and add segments, up to a total of four.<br />
a. To edit an existing target BG time segment, choose the<br />
segment, then press Edit. Use the Up/Down Controller<br />
buttons to choose a new start time, end time, target BG<br />
value, and correct-above value (correction threshold).<br />
Press Next after each entry.<br />
b. To add a segment, choose [add new], then press New.<br />
Use the Up/Down Controller buttons to choose a start<br />
time, end time, target BG value, and correct-above value<br />
(correction threshold). Press Next after each entry.<br />
c. When you have completed all the time segments you<br />
want, press Done, then Save.<br />
2. Min BG for calcs (minimum blood glucose value allowed for<br />
calculating boluses)—Use the Up/Down Controller buttons<br />
to enter a new minimum BG, then press Enter.<br />
3. <strong>Insulin</strong> to carb (IC) ratio—You can edit existing time segments<br />
and add segments, up to a total of four.<br />
a. To edit an existing IC ratio time segment, choose the segment,<br />
then press Edit. Use the Up/Down Controller buttons<br />
to choose a new start time, end time, and IC ratio.<br />
Press Next after each entry.<br />
b. To add a segment, choose [add new], then press New.<br />
Use the Up/Down Controller buttons to choose a start<br />
time, end time, and IC ratio. Press Next after each entry.<br />
6<br />
63
6<br />
64<br />
Using the Personal Diabetes Manager<br />
c. When you have completed all time segments, press<br />
Done, then Save.<br />
4. Correction factor—You can edit existing time segments and<br />
add segments, up to a total of four.<br />
a. To edit an existing correction factor time segment, choose<br />
the segment, then press Edit. Use the Up/Down Controller<br />
buttons to choose a new start time, end time, and correction<br />
factor. Press Next after each entry.<br />
b. To add a segment, choose [add new], then press New.<br />
Use the Up/Down Controller buttons to choose a start<br />
time, end time, and correction factor. Press Next after<br />
each entry.<br />
c. When you have completed all time segments, press<br />
Done, then Save.<br />
5. Reverse correction—Choose On or Off, then press Select.<br />
6. <strong>Insulin</strong> action (duration)—Use the Up/Down Controller<br />
buttons to choose a duration of insulin action, then press<br />
Enter.<br />
Temp basal<br />
Choose %, U/hr , or Off to set the mode for temporary basal<br />
rates and presets, then press Select.<br />
Extended<br />
Choose %, Units, or Off to set the mode for extended boluses,<br />
then press Select.<br />
Bolus increment<br />
Choose 0.05, 0.10, 0.50, or 1.00 units for bolus increments, then<br />
press Select.<br />
Max bolus<br />
Use the Up/Down Controller buttons to enter the maximum<br />
bolus dose you can take, then press Enter.<br />
Max basal rate<br />
Use the Up/Down Controller buttons to enter the maximum<br />
basal rate you can choose, then press Enter.<br />
Some settings have preset defaults, but all settings<br />
are changeable. See the Appendix for a list of <strong>System</strong><br />
specifications, including preset default settings.<br />
For additional details on bolus and basal settings,<br />
see Chapter 3, Understanding and Adjusting Basal<br />
Rates, and Chapter 4, Understanding and Delivering<br />
Bolus Doses.
■ Alert and Reminder Notifications<br />
In addition to automatic safety alarms (see Chapter 10, Alerts and<br />
Alarms), the <strong>mylife</strong> <strong>OmniPod</strong> <strong>System</strong> offers a number of notifications<br />
that you can set to help you manage your diabetes. These<br />
features are optional. You can turn alert or reminder notifications<br />
on or off at any time.<br />
Notifications you can use are:<br />
BG (blood glucose) reminder: Reminds you to check your blood<br />
glucose. Choose from On or Off. The default setting is Off. When<br />
the reminder is on, the PDM asks you each time you enter a bolus<br />
dose whether you want to set a BG reminder, and you can then<br />
choose a time interval, in 1/2-hour increments.<br />
Expiration: Notifies you when the Pod is nearing the 72-hour<br />
expiration time. Choose a period from 1 to 24 hours before<br />
expiration, in 1-hour increments. The default setting is 4 hours.<br />
You will hear 2 sets of beeps every minute for 3 minutes. The<br />
notification will repeat every 15 minutes until you press OK to<br />
acknowledge it.<br />
Low reservoir: Notifies you when insulin in the Pod reaches a<br />
certain level, so you can plan ahead to change the Pod. Choose a<br />
level from 10 to 50 units, in 5-unit increments. The default setting<br />
is 10 units.<br />
Using the Personal Diabetes Manager<br />
Auto-off: Alerts you if the PDM does not receive a Pod status<br />
within a predefined period of time. Obtain Pod status by pressing<br />
and holding the PDM’s Power button. This alert can be<br />
especially reassuring if you are prone to hypoglycemia unawareness.<br />
Choose a time period from 1 to 24 hours, in 1-hour<br />
increments, or choose Off. The default setting is Off.<br />
The Auto-off alert will escalate to a hazard alarm if<br />
ignored and will result in the deactivation of your<br />
active Pod. Be sure to respond to the alert when it<br />
occurs.<br />
Turning the PDM on by inserting a blood glucose<br />
test strip does not send a Pod status to the PDM.<br />
Bolus reminders: Notifies you if you have not delivered a meal<br />
bolus, manually or using the suggested bolus calculator,<br />
between the times you specify. Choose On or Off and choose up<br />
to 6 time segments.<br />
Reminder alerts: Pod beeps when a program is in process (see<br />
Chapter 3, Understanding and Adjusting Basal Rates, and Chapter<br />
4, Understanding and Delivering Bolus Doses, for details).<br />
These include:<br />
• Temporary basal in process<br />
• Extended bolus in process<br />
Choose On or Off. The default setting is On.<br />
6<br />
65
6<br />
66<br />
Using the Personal Diabetes Manager<br />
Confidence alerts: The Pod or PDM beeps in response to your<br />
instructions, so you become familiar with the operation of the<br />
<strong>mylife</strong> <strong>OmniPod</strong> <strong>System</strong> and feel confident that you are getting<br />
the insulin you need. These notifications include:<br />
• Bolus delivery started<br />
• Bolus delivery completed<br />
• Extended bolus started<br />
• Extended bolus completed<br />
• Temporary basal rate started<br />
• Temporary basal completed<br />
Choose On or Off. The default setting is On.<br />
Custom alerts: Displays text reminders that you enter, at times<br />
that you select. You can choose to receive a notification Daily,<br />
One time only, or Off. You can change or delete these notifications<br />
at any time.<br />
Set alert and reminder notifications<br />
1. On the Home screen, use the Up/Down Controller buttons<br />
to choose Settings, then press Select.<br />
2. Choose <strong>System</strong> setup, then press Select.<br />
3. Choose Alerts/reminders, then press Select.<br />
4. Choose the notification you want to set (Figure 6-8), then<br />
press Select.<br />
Figure 6-8<br />
5. For all except Bolus reminders and Custom alerts, choose<br />
the desired option or set the desired value, then press Select<br />
or Enter.
6. For Bolus reminders<br />
• Use the Up/Down Controller buttons to choose On or<br />
Off, then press Select.<br />
• If you chose On, you are taken to a new screen where you<br />
can add, edit or delete reminders:<br />
To add a Bolus reminder<br />
a. Use the Up/Down Controller buttons to choose [add<br />
new], then press New.<br />
b. Choose a start time, then press Next.<br />
c. Choose an end time, then press Save.<br />
To edit a Bolus reminder<br />
a. Choose the bolus reminder you wish to edit, then<br />
press Edit.<br />
b. Choose Edit, then press Select.<br />
c. Enter a new start time, then press Next.<br />
d. Enter a new end time, then press Save.<br />
To delete a Bolus reminder<br />
a. Choose the bolus reminder you wish to delete, then<br />
press Edit.<br />
b. Choose Delete then press Select.<br />
c. Press Delete to remove the bolus reminder.<br />
Using the Personal Diabetes Manager<br />
7. For Custom alerts<br />
• Use the Up/Down Controller buttons to choose [add<br />
new], then press New.<br />
• To use the <strong>mylife</strong> <strong>OmniPod</strong> <strong>System</strong>’s default naming system,<br />
simply press Next. The default naming system<br />
automatically assigns names in numerical order, such as<br />
alert 1, alert 2, alert 3.<br />
If you want to give a different name to the notification:<br />
a. Use the Up/Down Controller buttons to scroll<br />
through the list of characters. An up-and-down-arrow<br />
symbol on the screen indicates the character you are<br />
changing.<br />
b. Press the middle soft key to move the underscore to<br />
the next character.<br />
c. Enter each character one at a time. For example, for a<br />
reminder to pick up a prescription, you might enter<br />
R, x (Figure 6-9 on next page). (A blank character or<br />
space is the first and last option in the scrolling menu.)<br />
6<br />
67
6<br />
68<br />
Using the Personal Diabetes Manager<br />
Figure 6-9 Figure 6-10<br />
d. Press Next.<br />
• Enter the time of day for the notification, in 30-minute<br />
increments, then press Next.<br />
• Choose Daily, One time only, or Off, then press Select.<br />
Custom alerts will repeat every 15 minutes until<br />
acknowledged.<br />
You can change or delete alert and reminder notifications<br />
at any time.<br />
■ Change Blood Glucose Meter Settings<br />
You can adjust blood glucose (BG) meter settings:<br />
• BG goal lower and upper limits (for BG history)<br />
• Manage BG tags list<br />
• BG sound—On or Off<br />
1. On the Home screen, use the Up/Down Controller buttons<br />
to choose Settings; then press Select.<br />
2. Choose <strong>System</strong> setup, then press Select.<br />
3. Choose BG meter, then press Select.<br />
4. Choose the setting you want to change (Figure 6-10), then<br />
press Select.<br />
Change BG goal limits<br />
To change the BG goal limits, press Edit, change either or both<br />
values, then press Save.
Manage the blood glucose tags list<br />
You can create up to 15 custom blood glucose tags and hide any<br />
of the standard tags you do not plan to use. Standard BG tags are<br />
shown first on the screen (Figure 6-11a), followed by custom<br />
tags, then [add new] (Figure 6-11b). For more information about<br />
tagging BG readings, see Chapter 7, Checking Your Blood<br />
Glucose.<br />
Figure 6-11a Figure 6-11b<br />
Using the Personal Diabetes Manager<br />
1. To hide or show a standard BG tag, choose the tag, and press<br />
Show (if it is marked as hidden) or Hide.<br />
Tags you choose to show will be checkmarked; hidden ones<br />
will not be.<br />
2. To add a custom tag, choose [add new] at the end of the list<br />
of custom tags, then press New.<br />
In the Edit name screen, either:<br />
a. Press Save to save the new tag with the default name,<br />
custom tag1, custom tag2, and so on; or<br />
b. Use the Up/Down Controller key to choose letters and<br />
numbers for a name, followed by the middle soft key to<br />
move forward one space. Then press Save.<br />
3. To delete a custom tag, choose the tag, press Delete, then<br />
press Delete again. Or press Cancel to leave the tag<br />
unchanged.<br />
Change BG sound<br />
To change BG sound, choose On or Off, then press Select.<br />
6<br />
69
6<br />
70<br />
Using the Personal Diabetes Manager<br />
■ Customize the Personal Diabetes Manager<br />
Additional options let you customize how the PDM operates:<br />
PDM lock: “Locks” the buttons on the PDM. The default setting is<br />
Off. This safety feature can help avoid accidentally changing<br />
basal rates or giving boluses.<br />
Screen time-out: The screen turns off after a time interval that<br />
you set, which occurs if you have not pressed any buttons on the<br />
PDM. This setting preserves battery power by turning off the<br />
screen when you are not using it. Set it at the lowest setting to<br />
maximize battery life.<br />
Press and hold the Power button to turn the screen back<br />
on. In some cases, if it has been less than 5 minutes since<br />
the screen timed out, pressing the Power button returns<br />
you to the same screen you were using. If it has been longer<br />
than 5 minutes, the PDM brings you to the Status<br />
screen.<br />
Backlight time-out: The backlight is on by default while you are<br />
using the PDM. The time-out setting dims the backlight and<br />
causes the screen to dim when you have not used it within the<br />
time interval that you set. Set at the lowest setting to maximize<br />
battery life.<br />
For extra brightness on the PDM screen, press and<br />
hold the <strong>User</strong> Info/Support button (?) for 2 seconds.<br />
This enables a “bright mode.” The screen will remain<br />
in this mode until the PDM times out or you turn it off.<br />
To preserve battery life, use this feature only when<br />
necessary.<br />
Set PDM options<br />
1. On the Home screen, use the Up/Down Controller buttons<br />
to choose Settings, then press Select.<br />
2. Choose <strong>System</strong> setup, then press Select.<br />
3. Choose PDM options (Figure 6-12 on the following page),<br />
then press Select.
Figure 6-12 Figure 6-13<br />
4. Choose one of the options (Figure 6-13), then press Select.<br />
Set PDM lock<br />
Choose On or Off, then press Select.<br />
If you choose On, other PDM options and most<br />
other soft keys are locked and will not respond to<br />
button presses. To use them, you must first set PDM<br />
lock to Off.<br />
Set the Screen time-out<br />
Choose a time interval, then press Select.<br />
Using the Personal Diabetes Manager<br />
When the screen times out and goes black, turn it on again by<br />
pressing the Home/Power button.<br />
Set the Backlight time-out<br />
Choose a time interval, then press Select.<br />
When the screen dims, turn it on again by pressing any button.<br />
The PDM will ignore the usual command and relight the screen.<br />
The lowest setting will drain the battery the least.<br />
■ Set Diagnostic Functions<br />
The Diagnostics screen allows you to instantly confirm how the<br />
<strong>System</strong> is working or to completely update settings entered during<br />
setup (see Chapter 2, Getting Started). Options include:<br />
Check alarms: Confirms that all alarms work properly when<br />
needed. When you select this function, the PDM beeps and<br />
vibrates, then the Pod beeps.<br />
If the PDM fails to beep, immediately call Customer<br />
Care. If a Pod is active and fails to beep, change the<br />
Pod immediately (see Chapter 5, Using the Pod).<br />
Continuing to use the <strong>System</strong> in these situations<br />
may put your health and safety at risk.<br />
6<br />
71
6<br />
72<br />
Using the Personal Diabetes Manager<br />
Reset PDM (soft reset): Restores all settings in the PDM to the<br />
factory defaults.<br />
Resetting the PDM deletes all basal programs, temp<br />
basal presets, carb presets, bolus presets, and all suggested<br />
bolus settings. Before you use this feature<br />
and delete these settings, be sure you have a written<br />
record of the information you need. History records<br />
will not be deleted.<br />
As a safety feature, you cannot reset the PDM when a<br />
Pod is active. You must first deactivate the Pod.<br />
Diagnostic options<br />
1. On the Home screen, use the Up/Down Controller buttons<br />
to choose Settings, then press Select.<br />
2. Choose <strong>System</strong> setup, then press Select.<br />
3. Choose Diagnostics, then press Select.<br />
To check alarms<br />
1. Choose Check alarms, then press Select.<br />
2. Press OK. The PDM beeps three times and vibrates three<br />
times. If a Pod is active, it then beeps three times.<br />
Check the alarm function at every Pod change.<br />
To reset the PDM<br />
1. Choose Reset PDM, then press Select.<br />
2. If the Pod is deactivated, the PDM asks for confirmation and<br />
reminds you that you will lose all user settings (Figure 6-14).<br />
Press Confirm to reset the PDM.<br />
If the Pod is still active, you will be unable to reset the PDM<br />
(Figure 6-15). Press OK to return to the Diagnostics menu.<br />
Figure 6-14 Figure 6-15
Use the form at the end of this <strong>User</strong> <strong>Guide</strong> to write<br />
down all your settings from the Setup Wizard. If you<br />
ever need to reset your PDM, having these settings<br />
handy will make setup very easy.<br />
■ Set a Notification to Vibrate<br />
For certain notifications, you can choose vibration instead of<br />
beeps or vibration followed by beeps, instead of only beeps. If<br />
you set the vibration alert, the PDM will vibrate for:<br />
• Blood Glucose reminders<br />
• Missed Bolus reminders<br />
• Custom Alerts<br />
• “No active Pod” reminders<br />
The PDM cannot be set to vibrate for hazard or advisory<br />
alarms.<br />
To change the type of alert<br />
1. Use the Up/Down Controller button to choose Settings;<br />
then press Select.<br />
2. Choose Vibration alert, then press Select.<br />
3. Choose Vibrate, Vibrate then beep, or Off (beep only), then<br />
press Select. (Vibrate then beep means the PDM will repeat<br />
the reminder twice using vibration. After that, it uses beeps.)<br />
Using the Personal Diabetes Manager<br />
Or press Back to return to the Settings menu.<br />
■ Get the Most from Your PDM<br />
Keep it handy<br />
Wireless communication technology means you don’t have to<br />
keep the PDM right next to the Pod for the Pod to work. Once<br />
you set your basal program, the Pod continues to deliver your<br />
basal program 24 hours a day, regardless of the location of the<br />
PDM. However, you still need the PDM to deliver a bolus, change<br />
the basal rate, and so on. You can store the PDM conveniently<br />
inside an article of clothing (like a shirt pocket) or put it discreetly<br />
into a drawer, briefcase, or purse.<br />
Communicating with the Pod<br />
When you use the PDM to communicate with the Pod, hold the<br />
PDM within 24'' (61 cm) of the Pod. If you wear the Pod on your<br />
abdomen, holding the PDM in your hands when pressing the<br />
buttons should be close enough.<br />
Water and your PDM<br />
The PDM is not waterproof. Do NOT place it in or near water.<br />
Do NOT use IV Prep wipes, alcohol swabs, soap,<br />
detergent, or solvents to clean the screen or any<br />
other part of the PDM.<br />
6<br />
73
6<br />
74<br />
Using the Personal Diabetes Manager<br />
Avoid extreme temperatures<br />
Extreme operating temperatures can affect PDM batteries and<br />
interfere with <strong>System</strong> operation. Avoid using the PDM in temperatures<br />
below 40°F (5°C) or above 104°F (40°C).<br />
Do not store or leave the PDM where it may be<br />
exposed to extreme temperatures, such as inside a<br />
car. Extreme heat or cold can cause the device to<br />
malfunction.<br />
Never attempt to test your blood glucose while your<br />
PDM is connected via USB cable to a computer.<br />
Doing so could result in electrical shock.<br />
Electrical interference<br />
The PDM is designed to withstand normal radio interference and<br />
electromagnetic fields. However, as with all wireless communication<br />
technology, certain operating conditions can interrupt<br />
communication. For example, electric appliances such as microwave<br />
ovens and electric machinery located in manufacturing<br />
environments may cause interference. In most cases, interruptions<br />
are easy to resolve (see Chapter 11, Communication<br />
Failures).<br />
Only connect a USB cable to your PDM when downloading<br />
data to a computer. Other PDM functions are<br />
disabled while a USB cable is connected, and the<br />
PDM cannot communicate with the Pod.<br />
The PDM is compatible only with Windows®-based<br />
operating systems. Do not connect a USB cable<br />
from your PDM or attempt to download your data to<br />
a computer using a non-Windows®-based operating<br />
system, as the PDM may alarm and require a reset.<br />
When you connect a USB cable to the PDM, only use<br />
a cable that is less than or equal to 9 feet (2.7 meters)<br />
in length.
CHAPTER 7<br />
Checking Your Blood Glucose<br />
■ The Built-in FreeStyle® Blood Glucose Meter<br />
With the FreeStyle® blood glucose<br />
meter, you can check your<br />
blood glucose on your finger,<br />
hand, forearm, upper arm,<br />
thigh, or calf (Figure 7-1).<br />
Checking with the FreeStyle®<br />
blood glucose meter requires a<br />
very small sample size, 0.3<br />
microliter of blood.<br />
Most healthcare providers recommend<br />
checking on your<br />
hand, arm, thigh, or leg when<br />
blood glucose values are stable:<br />
before meals and before bedtime.<br />
However, when blood<br />
glucose is changing, it is best to<br />
test on your fingers. Blood from<br />
Figure 7-1<br />
Illustration of<br />
test areas on<br />
the body<br />
the fingertips may show these changes sooner than blood from<br />
other sites.<br />
We recommend that you test on your fingers if you<br />
are checking for hypoglycemia (low blood glucose) or<br />
if you suffer from hypoglycemia unawareness. Blood<br />
from the fingertips may show changes in blood glucose<br />
sooner than blood from other sites.<br />
You may also want to test for low blood glucose:<br />
• When you feel symptoms such as weakness, sweating,<br />
nervousness, headache, or confusion<br />
• When you have delayed a meal after taking insulin<br />
• When your healthcare provider advises you to do so<br />
This device is intended for self-testing by the user.<br />
The system and the FreeStyle® accessories contain<br />
small parts that may be dangerous if swallowed.<br />
75
7<br />
76<br />
Checking Your Blood Glucose<br />
Only use FreeStyle® test strips and FreeStyle® control<br />
solution with the system. Using other brands of test<br />
strips and control solutions with the system can produce<br />
inaccurate results.<br />
Never attempt to test your blood glucose while your<br />
PDM is connected via USB cable to a computer.<br />
Doing so could result in electrical shock.<br />
Please read all the instructions provided in this <strong>User</strong><br />
<strong>Guide</strong> and practice the testing procedures before<br />
using the system and FreeStyle® accessories. Follow<br />
the guidance of a healthcare professional for proper<br />
blood glucose monitoring.<br />
■ The FreeStyle® Blood Glucose Test Strips<br />
Important test strip information<br />
• Store the blood glucose test strip package in a cool, dry place<br />
between 40° and 86° F (4° and 30° C).<br />
• Use test strips only when the system is within its operating<br />
temperature range, between 40° and 104° F (4° and 40° C).<br />
• Keep test strips away from direct sunlight and heat.<br />
• Store test strips in their original vial only; never transfer them<br />
to another vial or any other container.<br />
• Never store individual test strips outside the vial.<br />
• After removing a blood glucose test strip from the vial, immediately<br />
close the vial cap tightly.<br />
• With clean, dry hands, you can gently touch the test strip anywhere<br />
when removing it from the vial or inserting it into the<br />
test strip port.<br />
• Do not bend, cut, or alter blood glucose tests strips in any<br />
way.<br />
Do not use strips beyond the expiration date printed<br />
on the package, as this may cause inaccurate results.<br />
For detailed storage and usage information, refer to the<br />
package insert in the box containing the test strip vial.<br />
The cap or vial contains drying agents that may be<br />
harmful if inhaled or swallowed and may cause skin<br />
or eye irritation.
■ The FreeStyle® Control Solution<br />
The FreeStyle® control solution (Figure 7-2) is a<br />
liquid that contains a fixed amount of glucose<br />
and has two important uses:<br />
• To ensure that your meter and test strips<br />
are working together properly<br />
• To practice testing without having to use<br />
your own blood<br />
Figure 7-2<br />
When to perform a control solution test<br />
You should perform a control solution test:<br />
• When you suspect that your meter or test<br />
strips are not working properly<br />
• When you think your test results are not accurate, or if your<br />
test results are not consistent with how you feel<br />
• When you drop or damage your PDM or expose it to liquids<br />
• When your healthcare provider advises you to do so<br />
For information on how to obtain control solution, call Customer<br />
Care.<br />
Checking Your Blood Glucose<br />
Check that the meter and test strips are working<br />
A control solution test follows the same procedure as a blood<br />
glucose reading, except that you use a sample of control solution<br />
instead of a drop of blood. (See “Performing a blood glucose<br />
reading” later in this chapter.)<br />
When you perform a control solution test, if the reading is within<br />
the control solution acceptable range, the meter is working<br />
properly.<br />
Control solution expiration date<br />
FreeStyle® control solution is good for 3 months after opening<br />
the bottle, or until the expiration date printed on the label,<br />
whichever comes first. Count forward 3 months from the date<br />
you open a new bottle of control solution. This is your discard<br />
date. Write this date on the side of the control solution bottle. For<br />
example, if you open the control solution on January 15, count<br />
forward 3 months to April 15. This is the discard date to record<br />
on the bottle, and the date to discard it and begin using a new<br />
bottle.<br />
Ensure accurate control solution results<br />
• Replace the cap on the control solution bottle immediately<br />
after using it.<br />
7<br />
77
7<br />
78<br />
Checking Your Blood Glucose<br />
Use only FreeStyle® control solution with the system.<br />
Other brands of control solution may produce<br />
inaccurate results with this system.<br />
Do not use control solution past the expiration<br />
date or you may get inaccurate results.<br />
• Do not add water or any liquid to control solution.<br />
• Control solution tests are specified to be accurate only when<br />
performed between 59° and 104° F (15° and 40° C).<br />
Results from FreeStyle® control solution tests do<br />
not reflect your blood glucose level.<br />
• The control solution test results should fall within the range<br />
printed on the test strip vial label.<br />
The control solution range is a target range for control<br />
solution only. It is not a target range for your blood<br />
glucose.<br />
If control solution results are out of this range, REPEAT THE<br />
TEST.<br />
Out-of-range control solution results<br />
Out-of-range test results may be caused by:<br />
• Expired or bad control solution<br />
• Expired or bad test strip<br />
• Error in performing test<br />
• Code on test strip vial does not match code set in the PDM<br />
• Malfunction of the system<br />
• Control solution test done outside 59° to 104° F (15° to 40° C)<br />
If your control solution test results continue to fall outside the<br />
range printed on the test strip vial:<br />
1. The system may not be working properly.<br />
2. Do not use the system to test your blood glucose.<br />
3. Call Customer Care.
■ Performing a Control Solution Test<br />
1. Grasp the bottom of the test strip with the printed side facing<br />
up (Figure 7-3).<br />
Figure 7-3<br />
Top, to insert into meter<br />
FreeStyle® test strip<br />
Bottom edges, for blood sample<br />
2. Insert the top of the test strip into the test strip port (Figure 7-4)<br />
until it stops. This turns on the PDM and displays the code<br />
number on the screen.<br />
Be ready to adjust the code on the PDM to match the<br />
code number on the test strip vial (Figure 7-5).<br />
Checking Your Blood Glucose<br />
If you need to adjust the code number after the PDM<br />
has moved to the next screen, just press the Up/Down<br />
Controller buttons. The code screen reappears and you<br />
can adjust the number.<br />
The code number remains on the PDM screen for your<br />
reference until you have completed the control test.<br />
Figure 7-4 Figure 7-5<br />
7<br />
79
7<br />
80<br />
Checking Your Blood Glucose<br />
The code number on the screen should match<br />
the code number on the side of your test strip<br />
vial (Figure 7-5 on previous page). They must<br />
always match, or your results will be inaccurate.<br />
(See “Set the blood glucose test strip code” later<br />
in this chapter.)<br />
From some PDM screens, you cannot access the Freestyle®<br />
blood glucose meter. For example, you cannot<br />
use the meter while you are activating a Pod or when<br />
an alert, alarm, or communication error screen is displayed.<br />
In these cases, if you insert a test strip, the<br />
PDM beeps to alert you.<br />
3. To help you see the test strip port in reduced lighting, when<br />
you insert a test strip into the PDM, you can turn on the port<br />
light. Press the middle soft key labeled Light. To turn the light<br />
off, press Light again.<br />
4. Wait for the PDM to display “Apply a blood sample to the<br />
strip” on the screen (Figure 7-6).<br />
Figure 7-6 Figure 7-7<br />
5. Gently touch only ONE EDGE of the test strip to the control<br />
solution. Specifically, apply the control solution to the test<br />
strip edge next to one of the dark-colored half-circles (Figure<br />
7-7). If BG sound is set to On, the PDM beeps when the test<br />
strip is full.<br />
If you do not apply the sample within 10 seconds, the stripport<br />
light turns off. To turn it on again, press Light.
The “Checking” screen appears while the sample is processing<br />
(Figure 7-8). The strip-port light turns off when the sample<br />
is accepted.<br />
Figure 7-8 Figure 7-9<br />
Do not apply control solution to both edges of the<br />
test strip.<br />
If BG sound is set to On, the PDM beeps twice. The result<br />
appears on the screen.<br />
Checking Your Blood Glucose<br />
6. To mark the result as a control solution result rather than a<br />
blood glucose test:<br />
a. Press Tag.<br />
b. Use the Up/Down Controller buttons to select Control<br />
(Figure 7-9), then press Select. You can select a second tag<br />
for the test result in the same way.<br />
You can select a maximum of 2 tags.<br />
c. Press OK.<br />
7. If you do not want to mark the test as a control solution test,<br />
press Next instead of Tag.<br />
If the suggested bolus calculator feature is turned Off,<br />
the Bolus soft key appears instead of Next.<br />
If you mark a test as a control solution test by mistake,<br />
you can unmark it: Press Tag, select Control, then<br />
press Clear.<br />
8. Compare the control solution test result to the range printed<br />
on the test strip vial label. If the result does not fall within the<br />
range, repeat the test. If the result still does not fall within<br />
the range, call Customer Care.<br />
7<br />
81
7<br />
82<br />
Checking Your Blood Glucose<br />
9. Remove the test strip. If the strip-port light was turned on, it<br />
now turns off.<br />
If you remove the test strip before this step, you will still see<br />
the available soft keys.<br />
Be sure to discard used test strips. (You can only use<br />
test strips once.)<br />
■ Performing a blood glucose reading<br />
Figure 7-10 shows the parts of the FreeStyle® lancing device.<br />
To ensure accurate results, wash your hands and the<br />
test site (for example, your forearm) with soap and<br />
water. Do not leave any cream or lotion on the test<br />
site. Thoroughly dry your hands and the test site.<br />
Figure 7-10<br />
Cocking handle<br />
Depth settings dial<br />
Depth indicator window<br />
Release button<br />
Clear cap, for testing sites<br />
other than the finger<br />
Gray cap, for testing on the<br />
fingers
Prepare the lancing device<br />
1. Snap off the cap on the lancing device at an angle<br />
(Figure 7-11).<br />
Figure 7-11 Figure 7-12<br />
2. Insert a new FreeStyle® lancet firmly into the white lancet<br />
holder cup (Figure 7-12). Pushing the device into the cup may<br />
cock the device, which is fine.<br />
3. Hold the lancet firmly in place with one hand. With your other<br />
hand, twist off the rounded top (Figure 7-13).<br />
Checking Your Blood Glucose<br />
4. Replace the cap until it snaps or clicks into place (Figure 7-14).<br />
Be careful not to touch the exposed needle on the lancet.<br />
Figure 7-13 Figure 7-14<br />
Use the clear cap to lance at the following test sites:<br />
forearm, upper arm, hand, thigh, and calf. Use the<br />
gray cap for finger tests only.<br />
7<br />
83
7<br />
84<br />
Checking Your Blood Glucose<br />
5. The lancing device offers four different depth settings. Level 1<br />
is the shallowest depth; level 4 is the deepest. Move the dial<br />
to the desired setting as shown in the depth indicator window<br />
(Figure 7-15). To lance your finger, we recommend that<br />
you start at Level 1. To lance your arm, we recommend that<br />
you start at level 2.<br />
Figure 7-15 Figure 7-16<br />
6. Pull out the dark gray cocking handle until it clicks (Figure 7-<br />
16). (You may have already cocked the handle in step 2. This is<br />
okay.)<br />
You are now ready to perform a blood glucose test.<br />
Insert the blood glucose test strip<br />
1. Insert a new blood glucose test strip into the test strip port<br />
until it stops. The test strip port is at the bottom of the PDM.<br />
From some PDM screens, you cannot access the Freestyle®<br />
blood glucose meter. For example, you cannot<br />
use the meter while you are activating a Pod or when<br />
an alert, alarm, or communication error screen is displayed.<br />
In these cases, if you insert a test strip, the<br />
PDM beeps to alert you.<br />
2. To help you see the test strip port in reduced lighting, press<br />
the middle soft key labeled Light. To turn the light off, press<br />
Light again.
3. Insert only the top end of the strip into the test strip port, with<br />
the dark colored rectangle going into the meter (Figure 7-17<br />
and Figure 7-18).<br />
Figure 7-17<br />
Top<br />
Bottom<br />
Figure 7-18<br />
If you do not start the test within 2 minutes, the PDM<br />
powers off. To restart the PDM, take out the unused strip<br />
and reinsert it, or simply press and hold the Power button<br />
to turn on the PDM.<br />
Checking Your Blood Glucose<br />
Set the blood glucose test strip code<br />
After you insert the strip, the PDM displays a code number<br />
(Figure 7-19). This number must match the code on the side of<br />
the vial.<br />
Figure 7-19 Figure 7-20<br />
To change the code number, press the Up/Down Controller<br />
buttons until the number matches the number on your vial. The<br />
numbers are between 1 and 50.<br />
If you do not adjust the code number within 2 seconds, the next<br />
screen appears automatically (Figure 7-20).<br />
7<br />
85
7<br />
86<br />
Checking Your Blood Glucose<br />
If you need to adjust the code number after the PDM<br />
has moved to the next screen, just press the Up/Down<br />
Controller buttons. The code screen reappears and you<br />
can adjust the number.<br />
The code number remains on the PDM screen for your<br />
reference until you have completed the BG test.<br />
The code number on the screen should match the<br />
code number on the side of your test strip vial (Figure<br />
7-5). They must always match, or your results will<br />
be inaccurate.<br />
Lance your finger<br />
1. To stimulate blood flow, keep your hand warm or lower your<br />
hand to waist level and gently massage your finger.<br />
2. Set the depth setting on the lancing device (Figure 7-21).<br />
3. Lightly touch the lancing device (with the gray cap) against<br />
the side of your fingertip (Figure 7-22).<br />
4. Press the release button.<br />
5. Gently squeeze your finger, if needed, until a blood drop the<br />
size of a pinhead forms.<br />
Figure 7-21 Figure 7-22
Lance your forearm, upper arm, hand, thigh, or calf<br />
1. To bring fresh blood to the surface of the test site, rub the site<br />
vigorously for a few seconds (Figure 7-23) until you feel it getting<br />
warm.<br />
Figure 7-23 Figure 7-24<br />
2. Set the depth setting on the lancing device (Figure 7-24).<br />
3. Hold the lancing device (with the clear cap) against the top of<br />
your test site.<br />
Checking Your Blood Glucose<br />
4. Press the release button. Do not lift up; continue to hold the<br />
button and gradually increase pressure against the site for<br />
several seconds (Figure 7-25).<br />
Figure 7-1 7-25<br />
5. While holding the lancing device on your test site, look<br />
through the clear cap. The blood sample should be about the<br />
size of a pinhead.<br />
6. Lift the lancing device straight up; be careful not to smear the<br />
blood sample on your test site.<br />
7<br />
87
7<br />
88<br />
Checking Your Blood Glucose<br />
Avoid lancing areas with obvious veins or moles,<br />
to avoid excess bleeding. Also avoid lancing<br />
areas where tendons or bones stick out (for<br />
example, hand bones).<br />
Fill the blood glucose test strip with blood<br />
1. Make sure that the strip is in the PDM and the PDM is powered<br />
on. If the PDM has powered off, take out the strip and<br />
reinsert it (Figure 7-26), or simply press and hold the Power<br />
button to turn on the PDM.<br />
Figure 7-26 Figure 7-27<br />
2. Bring the strip to the blood sample at a slight angle<br />
(Figure 7-27).<br />
If you do not apply the sample within 10 seconds, the stripport<br />
light turns off. To turn it on again, press Light.<br />
Use only one edge of the blood glucose test strip per test. Do<br />
not apply blood to both edges (Figure 7-28). Only use strips<br />
once. Discard used strips.<br />
Figure 7-28 Figure 7-29<br />
Edge of<br />
test strip<br />
The strip pulls the blood into the strip through the edge<br />
(Figure 7-29).
Do not:<br />
• Press the strip against the test site<br />
• Scrape the blood onto the strip<br />
• Apply blood to the flat side of the strip<br />
• Apply blood to the strip when it is out of the meter<br />
• Put blood or foreign objects into the test strip port<br />
Wait for the reading<br />
1. Do not pull the test strip away from the sample until you hear<br />
1 beep or see the word “Checking” on the screen (Figure 7-<br />
30). This means you applied enough blood and the meter is<br />
reading your glucose.<br />
2. If after 5 seconds the PDM does not display “Checking,” the<br />
sample may be too small. If needed, add more blood to the<br />
same edge of the strip for up to 60 seconds from the time of<br />
the first application.<br />
The strip-port light turns off when the blood sample is<br />
accepted.<br />
Checking Your Blood Glucose<br />
Figure 7-30 Figure 7-31<br />
3. The reading is complete when you hear 2 beeps (if BG sound<br />
is turned On) and the PDM shows your reading on the screen<br />
(Figure 7-31).<br />
The time the test takes depends on your blood glucose level.<br />
The higher your glucose level, the longer it takes to get a<br />
result.<br />
7<br />
89
7<br />
90<br />
Checking Your Blood Glucose<br />
4. To mark the result as a pre- or post-meal test, to indicate a<br />
level of exercise, or to indicate other situations connected to<br />
this blood glucose reading, press Tag. Then:<br />
a. Use the Up/Down Controller buttons to select a tag,<br />
then press Select (Figure 7-32).You can select a second<br />
tag for the reading in the same way.<br />
To learn how to manage your list of tags and to add<br />
custom tags, see ”Manage the blood glucose tags list” in<br />
Chapter 6, Using the Personal Diabetes Manager.<br />
Figure 7-32 Figure 7-33<br />
b. Press OK to return to the reading screen (Figure 7-31 on<br />
the previous page), then press Next.<br />
5. If you do not want to mark the test, press Next instead of Tag.<br />
If the suggested bolus calculator feature is turned Off,<br />
the Bolus soft key appears instead of Next.<br />
6. Remove the test strip. If the strip-port light was turned on, it<br />
now turns off.<br />
Remove the lancet<br />
When you have finished testing, remove the lancet from the<br />
lancing device (Figure 7-33). Discard the used lancet properly in a<br />
puncture-resistant container.
■ Blood Glucose Results and the Suggested Bolus<br />
Calculator<br />
If the suggested bolus calculator feature is turned On when you<br />
check your blood glucose, the PDM will display the result. From<br />
here, press Next to enter carbs (if eating) and have the <strong>System</strong><br />
calculate a suggested bolus. (See “Suggested Bolus Calculator” in<br />
Chapter 4, Understanding and Delivering Bolus Doses.)<br />
If you use the suggested bolus calculator within<br />
10 minutes after taking a blood glucose reading, or if you<br />
store a BG reading (for example, one you enter manually)<br />
within the same 10 minutes, the BG value will be populated<br />
automatically for use in the suggested bolus<br />
calculator process (Figure 7-34).<br />
If the suggested bolus calculator feature is turned Off, the Next<br />
soft key does not appear. Instead:<br />
Press Bolus to open a screen where you can enter a bolus<br />
manually.<br />
Or press Done to return to the Status screen to see the most<br />
recent BG result.<br />
The BG result, either from the PDM or from manual entry, is<br />
stored in the <strong>System</strong>’s history, whether suggested bolus calculator<br />
is turned On or Off. (See “Blood Glucose Records” in Chapter<br />
8, Understanding Your Records.)<br />
Checking Your Blood Glucose<br />
Figure 7-34<br />
The Bolus Entry screen does not open if:<br />
• A regular bolus is currently in process<br />
• The meter temperature is out of range<br />
• You have tagged this BG reading as a Control<br />
• The BG reading is less than your “Min BG for calcs”<br />
• <strong>Insulin</strong> is suspended<br />
7<br />
91
7<br />
92<br />
Checking Your Blood Glucose<br />
■ Entering Blood Glucose Readings Manually<br />
You can enter blood glucose readings manually into the PDM.<br />
This is particularly helpful if you use a separate blood glucose<br />
meter.<br />
1. On the Home screen, use the Up/Down Controller buttons<br />
to choose More actions; then press Select.<br />
2. Choose Add BG reading, then press Select.<br />
3. Use the Up/Down Controller buttons to enter the BG reading<br />
from your separate meter.<br />
To enter a “LOW” reading, press the Up/Down<br />
Controller buttons down until you reach the minimum<br />
value (1.1); then press down one more time.<br />
To enter a “HIGH” reading, press up until you reach<br />
the maximum value (27.8); then press up one<br />
more time.<br />
4. Press Tag to assign a tag to the reading. Press OK when finished.<br />
(For an explanation of entering tags, see page 90.)<br />
5. Press Save to save the reading.<br />
Or press Cancel to return to the More actions menu without<br />
saving the reading.<br />
■ Editing Tags<br />
Within 2 hours of a blood glucose reading, you can remove or<br />
change a tag or add one. However, you cannot alter a Control tag.<br />
1. On the Home screen, use the Up/Down Controller buttons<br />
to choose More actions; then press Select.<br />
2. Choose Assign/Edit BG tags, then press Select.<br />
3. Use the Up/Down Controller buttons to choose a reading,<br />
then press Tag (Figure 7-35). A <strong>User</strong> Info/Support icon (?) is<br />
shown to the right of any reading to which you have already<br />
assigned one or two tags.<br />
Figure 7-35<br />
Or press Done to return to the More actions menu.
4. Use the Up/Down Controller buttons to choose the first tag<br />
you want, then press Select (Figure 7-36). A diamond icon<br />
appears next to selected tags, as in “Pre-meal” in the figure. You<br />
can select up to two tags for each BG reading.<br />
5. To remove a selected tag, highlight it and press Clear. (The<br />
soft key changes from Select to Clear when you highlight<br />
the tag.)<br />
Figure 7-36 Figure 7-37<br />
Checking Your Blood Glucose<br />
6. Press OK to return to the list of readings.<br />
If no BG readings have been entered into the PDM within the<br />
past 2 hours, you will see the screen in Figure 7-37. Press OK to<br />
return to the More actions menu.<br />
To learn how to manage your list of tags and to add custom tags,<br />
see ”Manage the blood glucose tags list” in Chapter 6, Using the<br />
Personal Diabetes Manager.<br />
7<br />
93
7<br />
94<br />
Checking Your Blood Glucose<br />
■ Low and High Blood Glucose Readings<br />
WARNINGS!<br />
“LOW” or “HIGH” blood glucose readings can indicate a potentially<br />
serious condition requiring immediate medical attention.<br />
If left untreated, this situation can quickly lead to diabetic ketoacidosis<br />
(DKA), shock, coma, or death.<br />
Low readings<br />
If your reading is below 1.1 mmol/L, the PDM displays: “LOW<br />
Treat your low BG!” This indicates severe hypoglycemia (low<br />
blood glucose).<br />
Low reading with symptoms<br />
If you get a “LOW Treat your low BG!” reading and feel symptoms<br />
such as weakness, sweating, nervousness, headache, or confusion,<br />
follow your healthcare provider’s recommendation to treat<br />
hypoglycemia.<br />
Low reading without symptoms<br />
If you get a “LOW Treat your low BG!” reading, but have no symptoms<br />
of low blood glucose, then retest with a new test strip on<br />
your fingers. If you still get a “LOW Treat your low BG!” reading,<br />
perform a control solution test to ensure your system is working<br />
properly. If the system is working properly, follow your healthcare<br />
provider's recommendation to treat hypoglycemia.<br />
High readings<br />
If your reading is above 27.8 mmol/L, the PDM displays “HIGH<br />
Check for ketones!” This indicates severe hyperglycemia (high<br />
blood glucose).<br />
High reading with symptoms<br />
If you get a “HIGH Check for ketones!” reading and feel symptoms<br />
such as fatigue, thirst, excess urination, or blurry vision,<br />
follow your healthcare provider’s recommendation to treat<br />
hyperglycemia.<br />
High reading without symptoms<br />
If you get a “HIGH Check for ketones!” reading, but have no<br />
symptoms of high blood glucose, then retest with a new test<br />
strip on your fingers. If you still get a “HIGH Check for ketones!”<br />
reading, perform a control solution test to ensure your system is<br />
working properly. If the system is working properly, follow your<br />
healthcare provider's recommendation to treat hyperglycemia.<br />
You can add and edit tags for LOW and HIGH BG readings<br />
just as you would to any other reading. To add tags, see<br />
page 90; to edit tags, see page 92.
■ Important Health-Related Information<br />
WARNINGS!<br />
• Severe dehydration and excessive water loss may cause false<br />
low results. If you believe you are suffering from severe dehydration,<br />
consult your healthcare provider immediately.<br />
• Test results below 3.9 mmol/L mean low blood glucose<br />
(hypoglycemia).<br />
• Test results greater than 13.9 mmol/L mean high blood<br />
glucose (hyperglycemia).<br />
• If you get results below 3.9 mmol/L or above 13.9 mmol/L,<br />
but do not have symptoms of hypoglycemia or hyperglycemia<br />
(see Chapter 9, Living with Diabetes), repeat the test. If<br />
you have symptoms or continue to get results that fall below<br />
3.9 mmol/L or above 13.9 mmol/L, follow the treatment<br />
advice of your healthcare provider.<br />
• If you are experiencing symptoms that are not consistent<br />
with your blood glucose test and you have followed all<br />
instructions described in this <strong>User</strong> <strong>Guide</strong>, call your healthcare<br />
provider immediately.<br />
Checking Your Blood Glucose<br />
• Blood circulation is different between the finger and other<br />
test sites like the forearm, upper arm, hand, thigh, and calf.<br />
You may see differences in blood glucose measurements<br />
between the other test sites and your finger after eating, insulin<br />
medication, or exercise.<br />
• You may see changes in blood glucose in blood samples<br />
from the finger sooner than in blood samples from the forearm<br />
and other alternate sites. Vigorous rubbing of the alternate<br />
test sites before lancing helps to minimize these<br />
differences.<br />
• Do not use during xylose-absorption testing.<br />
• The lancing device is for individual use only and must not be<br />
shared.<br />
• For additional information, consult your test strip product<br />
information sheet.<br />
7<br />
95
CHAPTER 8<br />
Understanding Your Records<br />
■ Record Keeping<br />
Record keeping is an important part of successful diabetes management.<br />
The Personal Diabetes Manager (PDM) helps simplify<br />
this task. It automatically stores records of insulin-delivery history,<br />
blood glucose readings, alarms, and carbohydrates. The PDM<br />
can store over 5,000 records or approximately 90 days’ worth of<br />
information. Once the memory is full, new information begins to<br />
replace the oldest information.<br />
96<br />
If the PDM batteries run out, data in the memory is at<br />
risk. Do NOT remove the old batteries until you have<br />
new ones at hand. The PDM protects data in the<br />
memory for up to 2 hours after the batteries run out<br />
or are removed.<br />
Special symbols in record screens<br />
In the record screens, you may encounter several special symbols:<br />
Records with a question-mark symbol next to them have<br />
additional information available. To see this information, use<br />
the Up/Down Controller buttons to highlight the record,<br />
then press the <strong>User</strong> Info/Support button to view details<br />
about that record.<br />
The record for this item has been “lost.”<br />
If the PDM can no longer communicate with an<br />
active Pod, then you must activate a new Pod. The<br />
PDM may not be able to communicate with the<br />
active Pod because of signal interference or because<br />
you have discarded the Pod. If you change the Pod<br />
without getting a Status update, any “unconfirmed”<br />
records will be “lost.” If this occurs, the PDM will not<br />
display insulin totals for any day containing “lost”<br />
records.
✔ The record for this item is “unconfirmed.”<br />
When you power on the PDM, it will request a status<br />
update from the active Pod and then update the<br />
insulin history. If the PDM does not receive a status<br />
update from the Pod, the PDM will update history<br />
with “unconfirmed” records. The next time the PDM<br />
receives a status update, it will update these records.<br />
This insulin delivery item spans midnight. The date given<br />
is the start date.<br />
■ <strong>Insulin</strong> Delivery Records<br />
The PDM stores:<br />
• Basal rates (including any rate changes and temporary basals)<br />
• Bolus doses (both normal and extended)<br />
• Dates, times, and how long insulin delivery was suspended,<br />
and dates and times when it was resumed<br />
• Total daily doses (basal plus boluses) by date<br />
View insulin delivery records<br />
1. On the Home screen, use the Up/Down Controller buttons<br />
to choose My records, then press Select.<br />
2. Choose <strong>Insulin</strong> delivery, then press Select (Figure 8-1).<br />
Understanding Your Records<br />
Figure 8-1 Figure 8-2<br />
The PDM displays a summary of today’s information,<br />
including total boluses delivered, total basal amount delivered,<br />
and total daily dose delivered (Figure 8-2). Press the<br />
Up/Down Controller buttons to view the summary for<br />
previous days.<br />
Wherever you see the ? symbol, press the <strong>User</strong> Info/Support<br />
button to see additional information.<br />
3. To review your basal history by day, press Basal.<br />
The display shows the basal deliveries that have occurred for<br />
the current day, most recent first (Figure 8-3 on the next<br />
page). The active basal rate or program is indicated by a diamond<br />
icon (♦).<br />
8<br />
97
8<br />
98<br />
Understanding Your Records<br />
Figure 8-3 Figure 8-4<br />
For a temporary basal, the display shows the % adjustment to<br />
the default basal. So, in Figure 8-3, “1.10 temp U/hr (+10%)”<br />
means that you delivered a temporary basal of 1.10 units per<br />
hour, which was 10% more than the default basal. (Notice<br />
that two hours later, the basal rate returns to the default.)<br />
Also, the “Pod activated” entry shows what time you applied<br />
a new Pod.<br />
Press the Up/Down Controller buttons for earlier or later<br />
dates.<br />
Press Event to use the Up/Down Controller buttons to scroll<br />
through the list of information on the screen. Choose a<br />
record, then press the <strong>User</strong> Info/Support button to view<br />
details about that record. Record details may include insulin<br />
delivery that was interrupted due to a Pod alarm, Pod deactivation,<br />
or user cancellation. The screen shows the amount of<br />
the bolus or basal that remained undelivered.<br />
4. Press Day to return to dates.<br />
5. To review your bolus history by day, press Bolus.<br />
The display indicates whether the bolus was normal or<br />
extended (marked “e” in Figure 8-4). Normal and extended<br />
boluses are displayed separately even if they were programmed<br />
at the same time. Extended boluses are shown<br />
with time and duration. If an extended bolus is active, a diamond<br />
icon (♦) appears next to it. If a bolus was cancelled,<br />
only the amount delivered before cancellation is shown.<br />
The amount shown after cancellation may be in 0.05<br />
unit increments, even though you may have programmed<br />
the bolus increment to be in 0.10 units.<br />
Press the Up/Down Controller buttons for different dates.<br />
Press Event to use the Up/Down Controller buttons to scroll<br />
through the list of information on the screen. Press Day to<br />
return to dates.
■ Blood Glucose Records<br />
The PDM stores blood glucose records for the past 90 days. You<br />
can choose to view individual readings, single-day trends with<br />
individual readings, or trends for the previous 7, 14, 30, 60, or 90<br />
days.<br />
View single-day trends<br />
1. On the Home screen, use the Up/Down Controller buttons<br />
to choose My records, then press Select.<br />
2. Choose BG history, then press Select.<br />
The PDM displays the current-day trends first (Figure 8-5),<br />
including:<br />
• Number of days and number of blood glucose<br />
readings (n)<br />
• Average blood glucose (Avg BG)<br />
• Lowest and highest blood glucose (Min/max)<br />
• The BG goal you have set<br />
• Percentage of readings within the BG goal<br />
• Percentage of readings above the BG goal<br />
• Percentage of readings below the BG goal.<br />
Understanding Your Records<br />
Figure 8-5 Figure 8-6<br />
3. Press List to see a list of the current day’s readings<br />
(Figure 8-6).<br />
8<br />
LOW and HIGH readings are included in the number<br />
of BG readings (n), but not in calculations or averages.<br />
99
8<br />
100<br />
Understanding Your Records<br />
In the List view, press Event to select individual readings.<br />
Readings with a question-mark icon next to them have additional<br />
information available (Figure 8-7). To see this information,<br />
use the Up/Down Controller buttons to choose the<br />
reading. Then press the <strong>User</strong> Info/Support button to view<br />
details about that reading (Figure 8-8).<br />
Figure 8-7 Figure 8-8<br />
4. Press Close to return to the List view.<br />
5. Press Graph to see a graph of the data (Figure 8-9).<br />
View multiple-day trends<br />
1. On the Home screen, use the Up/Down Controller buttons<br />
to choose My records, then press Select.<br />
2. Choose BG history, then press Select.<br />
3. Press Trends to display blood glucose data for the past 7<br />
days.<br />
4. Continue pressing the middle soft key to view trends for the<br />
previous 14, 30, 60, and 90 days.<br />
The PDM displays the same details for multiple days as for<br />
single days, plus the average number of BG measurements<br />
taken per day (Figure 8-10).<br />
Figure 8-9 Figure 8-10
5. For the 7-, 14-, and 30-day trends, press Graph to see a graph<br />
of the trends (Figure 8-11). (Graphs are not available for 60-, or<br />
90-day trends.) Press Stats to return to the detail view.<br />
Figure 8-11 Figure 8-12<br />
6. Press Back to return to the single-day trends.<br />
Understanding Your Records<br />
■ Alarm Records<br />
The PDM lists the entire alarm history for the <strong>mylife</strong> <strong>OmniPod</strong><br />
<strong>System</strong>. The PDM can store over 90 days’ worth of alarm records.<br />
1. On the Home screen, use the Up/Down Controller buttons<br />
to choose My records, then press Select.<br />
2. Choose Alarm history, then press Select.<br />
The PDM displays the date, time, and type of each alarm<br />
(Figure 8-12).<br />
3. Press the Up/Down Controller buttons to see additional<br />
screens.<br />
4. Choose an alarm record, then press <strong>User</strong> Info/Support to<br />
see more information.<br />
■ Carbohydrate Records<br />
The PDM displays the record of carbohydrates you have entered.<br />
1. On the Home screen, use the Up/Down Controller buttons<br />
to choose My records, then press Select.<br />
2. Choose Carb history, then press Select.<br />
The PDM displays the date, time, and grams of carbohydrate<br />
you have entered (Figure 8-13 on the following page).<br />
8<br />
101
8<br />
102<br />
Understanding Your Records<br />
Figure 8-13 Figure 8-14<br />
3. Press the Up/Down Controller buttons to see additional<br />
days.<br />
Press Event to use the Up/Down Controller buttons to scroll<br />
through the list of information on the screen. Press Day to<br />
use the Up/Down Controller for dates.<br />
■ All Records<br />
The PDM displays the combined insulin delivery, blood glucose,<br />
alarm, and carbohydrate records.<br />
1. On the Home screen, use the Up/Down Controller buttons<br />
to choose My records, then press Select.<br />
2. Choose All history, then press Select.<br />
The PDM displays all history for the most recent date (Figure<br />
8-14).<br />
3. Press the Up/Down Controller buttons to see additional<br />
days.<br />
Press Event to use the Up/Down Controller buttons to scroll<br />
through the list of information on the screen. Press Day to<br />
use the Up/Down Controller for dates.<br />
■ <strong>User</strong> Information/Support<br />
You or your healthcare provider may have entered personal<br />
contact information during your start-up visit. To view this information,<br />
press the <strong>User</strong> Info/Support button (to the right of the<br />
Power button) while on the Home screen. Or follow the steps<br />
below to view the information. You can add or change the user<br />
information at any time.<br />
You may want to include your name, address, phone, email<br />
address, emergency contact and phone, doctor’s or healthcare<br />
provider’s name and phone, prescription numbers, or other<br />
information.<br />
The user information screen also displays product information<br />
for your <strong>mylife</strong> <strong>OmniPod</strong> <strong>System</strong> (make, model, serial number).<br />
You cannot change this information.
The <strong>User</strong> Info/Support icon is also displayed on the<br />
suggested bolus screen. For information about the<br />
support information displayed on these screens,<br />
see Chapter 4, Understanding and Delivering Bolus<br />
Doses.<br />
Add or change user information<br />
1. On the Home screen, use the Up/Down Controller buttons<br />
to choose My records, then press Select.<br />
2. Choose My info, then press Select.<br />
3. Choose [My info] (Figure 8-15), then press Edit.<br />
Figure 8-15 Figure 8-16<br />
Understanding Your Records<br />
4. Press the Up/Down Controller buttons to scroll through the<br />
list of characters. An up-and-down-arrow symbol ( ) on the<br />
screen indicates the character you are changing.<br />
5. Press the middle soft key to move the underscore to the next<br />
character.<br />
6. Enter each character one at a time. For example, if you want<br />
to enter your address, you might enter 5, 6, 5, [space], M, a, i, n,<br />
[space], S, t, [period]. (A blank character or space is the first<br />
and last option in the scrolling menu.)<br />
For your healthcare provider and local phone number, you<br />
might enter J, a, n, e, [space], S, m, i, t, h, [comma], [space], 5, 5,<br />
5, [hyphen], 1, 2, 3, 4 (Figure 8-16).<br />
7. Press Save.<br />
8. Repeat steps 3–7 for each line of personal information you<br />
want to enter or change. Twenty lines are available.<br />
8<br />
103
CHAPTER 9<br />
Living with Diabetes<br />
■ Your Role: Safely Using the <strong>mylife</strong> <strong>OmniPod</strong><br />
<strong>System</strong><br />
Before deciding on the <strong>mylife</strong> <strong>OmniPod</strong> <strong>Insulin</strong> <strong>Management</strong><br />
<strong>System</strong>, you and your healthcare provider discussed the<br />
advantages and benefits of the <strong>mylife</strong> <strong>OmniPod</strong> <strong>System</strong>, as well<br />
as the responsibilities that come with insulin pump therapy.<br />
Remember: safe use begins and ends with you. If you have<br />
questions or doubts about being able to safely use the <strong>mylife</strong><br />
<strong>OmniPod</strong> <strong>System</strong> at any time, consult your healthcare provider<br />
immediately.<br />
Most problems are easily avoided by:<br />
• Learning all you can about successful diabetes management.<br />
• Being actively involved in your treatment.<br />
• Checking your blood glucose levels frequently.<br />
• Washing your hands and disinfecting infusion sites to reduce<br />
the possibility of infection.<br />
104<br />
• Being aware of the signs of hypoglycemia (low blood glucose),<br />
hyperglycemia (high blood glucose), and diabetic ketoacidosis<br />
(DKA). (See “Avoid Lows, Highs, and DKA” later in this<br />
chapter.)<br />
• Keeping a diabetes emergency kit with you at all times. (See<br />
“Prepare for Emergencies” later in this chapter.)<br />
• Knowing how to contact your healthcare provider in case of<br />
an emergency.<br />
If you are unable to use the <strong>mylife</strong> <strong>OmniPod</strong> <strong>Insulin</strong><br />
<strong>Management</strong> <strong>System</strong> according to instructions, you<br />
may be putting your health and safety at risk. Talk<br />
with your healthcare provider if you have questions or<br />
concerns about using the <strong>mylife</strong> <strong>OmniPod</strong> <strong>System</strong>.
■ Daily Diabetes <strong>Management</strong> Activities<br />
To ensure proper <strong>mylife</strong> <strong>OmniPod</strong> <strong>System</strong> operation and your<br />
continued good health:<br />
• Check your blood glucose frequently<br />
• Inspect the infusion site daily<br />
Check your blood glucose frequently<br />
When you routinely check your blood glucose level, you can identify<br />
and treat high or low blood glucose before it becomes a<br />
problem (see “Avoid Lows, Highs, and DKA” later in this chapter).<br />
Check your blood glucose (BG):<br />
• At least 4 to 6 times a day: when you wake up, before every<br />
meal, and before going to bed<br />
• Whenever you feel nauseated or sick<br />
• Before driving a car<br />
• Whenever your blood glucose has been running unusually<br />
high or low<br />
• If you suspect that your blood glucose is high or low<br />
• Before, during, and after exercise<br />
• As directed by your healthcare provider<br />
Living with Diabetes<br />
Inspect the infusion site daily<br />
At least once a day, use the Pod’s viewing window to inspect the<br />
infusion site. Check the site for signs of infection, such as pain,<br />
swelling, redness, discharge, or heat.<br />
9<br />
If an infusion site shows signs of infection:<br />
1. Immediately remove the Pod and apply a new<br />
one at a different site (see Chapter 5, Using<br />
the Pod).<br />
2. Contact your healthcare provider.<br />
3. Treat the infection according to instructions from<br />
your healthcare provider. (Refer to Chapter 5, Using<br />
the Pod, for how to prepare and care for a site.)<br />
Consider making infusion site checks a part of your<br />
regular daily routine (like showering or brushing your<br />
teeth). That way, it’s easy to remember.<br />
If you observe blood in the cannula, check your blood<br />
glucose more frequently to ensure insulin delivery<br />
has not been affected. If you experience unexpected<br />
elevated blood glucose levels, change your Pod.<br />
105
9<br />
106<br />
Living with Diabetes<br />
■ Prepare for Emergencies<br />
Keep an emergency kit with you at all times to<br />
quickly respond to any diabetes emergency. The kit<br />
should include:<br />
• Several new, sealed Pods<br />
• Extra new PDM batteries (at least two AAA alkaline)<br />
• A vial of rapid-acting U-100 insulin (See the warning<br />
on page x of the Introduction for insulins<br />
approved for use in the <strong>mylife</strong> <strong>OmniPod</strong> <strong>System</strong>.)<br />
• Syringes for injecting insulin<br />
• Instructions from your healthcare provider about<br />
how much insulin to inject if delivery from the<br />
Pod is interrupted<br />
• Blood glucose test strips<br />
• Ketone test strips<br />
• Lancing device and lancets<br />
• Glucose tablets or another fast-acting source of<br />
carbohydrate<br />
• Alcohol prep swabs<br />
• A copy of the letter from your healthcare provider<br />
for airline security (see “Minimize airport<br />
security delays” later in this chapter)<br />
• Phone numbers for your healthcare provider<br />
and/or doctor in case of an emergency<br />
• Glucagon kit and written instructions for giving<br />
an injection if you are unconscious (see ”Avoid<br />
Lows, Highs, and DKA” later in this chapter)<br />
Ask your healthcare provider to help you develop<br />
plans for handling emergency situations, including<br />
what to do if you cannot reach your healthcare<br />
provider.<br />
■ Water and Your Pod<br />
The Pod is watertight to a depth of 25 feet for up to 60 minutes<br />
(IPX8). After the Pod gets wet, rinse it off with clean water and dry<br />
it with a towel.<br />
Do NOT expose your Pod to water at depths greater<br />
than 25 feet or for longer than 60 minutes. Check the<br />
infusion site often to make sure the Pod and soft cannula<br />
are securely applied and in place. If the cannula<br />
is not properly inserted, hyperglycemia may result.<br />
The Personal Diabetes Manager (PDM) is not waterproof.<br />
Do NOT place it in or near water.
■ Traveling and Vacationing<br />
Plan for changing time zones<br />
If you’re planning a vacation or business trip to a different time<br />
zone, you may need to adjust your basal rate programs. For<br />
changes of just a few hours, basal rate adjustments are minor<br />
and easy to calculate. For long-distance travel, however, figuring<br />
out the correct program can be more challenging. Your healthcare<br />
provider can help with these adjustments.<br />
Take enough supplies<br />
Keeping your emergency kit with you during trips or vacations<br />
is especially important (see “Prepare for Emergencies” earlier in<br />
this chapter). It may be difficult or impossible to get insulin or<br />
supplies in an unfamiliar place. If traveling by air, be sure to pack<br />
your supplies in your carry-on luggage. When packing for travel,<br />
take more supplies than you think you’ll need. Be sure to include:<br />
• Diabetes emergency kit packed in your carry-on luggage<br />
• Enough Pods for your trip, plus a backup supply<br />
• Extra new PDM batteries<br />
• Additional blood glucose meter<br />
Living with Diabetes<br />
• <strong>Insulin</strong> syringes or pens in case you need injections<br />
• Several vials of insulin or insulin cartridges if you use a pen<br />
• Glucagon kit (Make sure any person you are traveling with<br />
knows how to give the injection.)<br />
• Alcohol prep swabs<br />
• Written prescriptions for all medications and supplies<br />
(Generic medications may be easier to find than brand<br />
names outside the US.)<br />
When you travel, be sure to take extra Pod supplies.<br />
9<br />
107
9<br />
108<br />
Living with Diabetes<br />
Minimize airport security delays<br />
Contact the airlines in advance for information on their current<br />
security requirements. To make airport security checks go<br />
smoothly, be sure you have the following easily accessible:<br />
• A signed letter from your healthcare provider explaining that<br />
you need to carry insulin supplies and <strong>mylife</strong> <strong>OmniPod</strong><br />
<strong>System</strong> equipment<br />
• An emergency kit (see “Prepare for Emergencies” earlier in<br />
this chapter)<br />
• A list of the supplies you must carry, including the contents of<br />
your emergency kit<br />
• Prescriptions for insulin and all supplies, clearly marked with<br />
their original pharmacy labels<br />
If the security detector goes off, tell the security screener that you<br />
have diabetes and wear an insulin Pod (pump).<br />
Pods and PDMs can safely pass through airport X-ray<br />
machines (see the FCC notice in the Appendix).<br />
Keep supplies accessible<br />
On airplanes and trains, keep these items with you, rather than<br />
checking them:<br />
• Personal Diabetes Manager (PDM)<br />
• An emergency kit<br />
• Vials of insulin (cargo area temperatures may affect insulin)<br />
• A copy of your healthcare provider’s letter (see “Minimize airport<br />
security delays”)<br />
• Prescriptions for insulin and supplies<br />
• Snacks, in case food is not available<br />
• Bottled water (especially on planes) to prevent dehydration<br />
• The name and phone number of a physician at your final<br />
destination, in case of emergency
■ Avoid Lows, Highs, and DKA<br />
You can avoid most risks related to using the <strong>mylife</strong> <strong>OmniPod</strong><br />
<strong>System</strong> by practicing proper techniques and by acting promptly<br />
at the first sign of trouble. You can avoid potential problems by<br />
knowing the signs of hypoglycemia (low blood glucose), hyperglycemia<br />
(high blood glucose), and diabetic ketoacidosis (DKA).<br />
The easiest and most reliable way to avoid these conditions is to<br />
check your blood glucose often.<br />
General precautions<br />
• Keep careful records and discuss changes and adjustments<br />
with your healthcare provider.<br />
• Tell your healthcare provider if you have extreme highs or<br />
lows, or if highs or lows are occurring more often than usual.<br />
• If you have technical problems with your <strong>mylife</strong> <strong>OmniPod</strong><br />
<strong>System</strong> and cannot resolve them, do not hesitate to call<br />
Customer Care.<br />
Hypoglycemia (low blood glucose)<br />
Hypoglycemia can occur even when a Pod is working properly.<br />
Never ignore the signs of low blood glucose (no matter how<br />
mild). If left untreated, severe hypoglycemia can cause seizures<br />
or lead to unconsciousness. If you suspect that your blood glucose<br />
level is low, check your BG level to confirm.<br />
Living with Diabetes<br />
Hypoglycemia unawareness is a condition in which<br />
you do not realize when your blood glucose level is<br />
low. If you are prone to hypoglycemia unawareness,<br />
you may want to use the <strong>mylife</strong> <strong>OmniPod</strong> <strong>System</strong>’s<br />
blood glucose reminder and check your blood<br />
glucose more frequently. See “Alert and Reminder<br />
Notifications” in Chapter 6, Using the Personal<br />
Diabetes Manager, for how to set the reminder.<br />
Symptoms of hypoglycemia<br />
Never ignore these symptoms:<br />
• Shakiness<br />
• Fatigue<br />
• Unexplained sweating<br />
• Cold, clammy skin<br />
• Weakness<br />
• Blurred vision or a headache<br />
• Sudden hunger<br />
• Rapid heart rate<br />
• Confusion<br />
• Tingling in the lips or tongue<br />
• Anxiety<br />
9<br />
109
9<br />
110<br />
Living with Diabetes<br />
To avoid hypoglycemia (low blood glucose)<br />
Make sure your blood glucose is at least 5.6 mmol/L<br />
before driving or working with dangerous machinery<br />
or equipment. Hypoglycemia may cause you to lose<br />
control of a car or dangerous equipment. Also, when<br />
you focus intently on a task, you may miss the symptoms<br />
of hypoglycemia.<br />
• Work with your healthcare provider to establish individualized<br />
blood glucose targets and guidelines.<br />
• Keep a fast-acting carbohydrate with you at all times to<br />
respond quickly to low blood glucose. Examples of fastacting<br />
carbs are glucose tablets, hard candies, or juice.<br />
• Teach your friends, family members, and colleagues to<br />
recognize the signs of hypoglycemia, so they can help if you<br />
develop hypoglycemia unawareness or a severe adverse<br />
reaction.<br />
• Keep a glucagon injection kit with your emergency supplies.<br />
Teach friends and family members how to give a glucagon<br />
injection in case you have severe hypoglycemia and become<br />
unconscious.<br />
Periodically check the expiration date of your glucagon<br />
kit to make sure it has not expired.<br />
Always carry medical identification (emergency<br />
wallet card) and wear an emergency medical necklace<br />
or bracelet such as the Medic Alert tag. (See the<br />
end of the Appendix for address, telephone, and<br />
web site information for obtaining these items.)<br />
Again, frequent blood glucose checks are the key to avoiding<br />
potential problems. Detecting low blood glucose early lets you<br />
treat it before it becomes a problem.<br />
Check with your healthcare provider for guidance in any and all<br />
areas listed above.<br />
To treat hypoglycemia (low blood glucose)<br />
Any time your blood glucose is low, treat it immediately. Check it<br />
every 15 minutes while you are treating, to make sure you don’t<br />
overtreat the condition and cause blood glucose levels to rise<br />
too high.<br />
Even if you cannot check your blood glucose, do NOT<br />
wait to treat symptoms of hypoglycemia, especially<br />
if you are alone. Waiting to treat symptoms could<br />
lead to severe hypoglycemia, which can quickly lead<br />
to shock, coma, or death.
1. If blood glucose is below 3.9 mmol/L, eat or drink 15 grams of<br />
fast-acting carbohydrate, such as glucose tablets, juice, or<br />
hard candy (see “How much is 15 grams of carbohydrate?”<br />
below).<br />
Do NOT use chocolate or candy bars to treat low<br />
blood glucose. Their fat content slows down glucose<br />
absorption.<br />
2. Check blood glucose again after 15 minutes.<br />
3. If blood glucose remains low, take another 15 grams of<br />
carbohydrate. Contact your healthcare provider as needed<br />
for guidance.<br />
4. Repeat steps 2 and 3 until blood glucose is within the BG goal.<br />
5. Investigate possible cause for hypoglycemia to avoid similar<br />
problems in the future (see “Possible causes of hypoglycemia<br />
(low blood glucose)” on the next page).<br />
Living with Diabetes<br />
How much is 15 grams of carbohydrate?<br />
Examples of fast-acting foods:<br />
Three 5-gram glucose tablets, or four 4-gram tablets<br />
4 ounces (118 milliliters) of apple or orange juice<br />
6 Lifesavers or similar hard candy<br />
1/2 can of regular (non-diet) soda<br />
2 tablespoons (30 milliliters) of table sugar, honey, or corn syrup<br />
Teach people you trust (like family members and<br />
close friends) how to give a glucagon injection. You<br />
will need to rely on them to give it to you if you have<br />
severe hypoglycemia and become unconscious.<br />
Include a copy of the glucagon instructions in your<br />
emergency kit and periodically review the procedure<br />
with family and friends.<br />
9<br />
111
9<br />
112<br />
Living with Diabetes<br />
Possible causes of hypoglycemia (low blood glucose)<br />
Possible cause of low Suggested action<br />
Incorrect basal<br />
program<br />
Incorrect bolus<br />
timing<br />
Bolus too large<br />
Confirm that correct basal program<br />
is active.<br />
Confirm that PDM time is set correctly.<br />
Consult your healthcare provider<br />
about adjusting your basal programs<br />
or using a temporary (temp)<br />
basal rate.<br />
Take bolus with food.<br />
Check blood glucose before giving<br />
meal bolus; if necessary, adjust<br />
bolus.<br />
Check bolus size and timing.<br />
Do NOT overcorrect for post-meal<br />
glucose levels.<br />
Check carb intake.<br />
Consult healthcare provider for<br />
guidance.<br />
Possible cause of low Suggested action<br />
Incorrect target<br />
blood glucose levels<br />
Incorrect correction<br />
factor (sensitivity<br />
factor)<br />
Incorrect insulin-tocarb<br />
ratio<br />
Prone to severe hypoglycemia<br />
Hypoglycemia<br />
unawareness<br />
Unplanned physical<br />
activity<br />
Consult healthcare provider about<br />
refining these settings as needed.<br />
Consult healthcare provider about<br />
hypoglycemia unawareness and<br />
about raising target blood glucose<br />
levels.<br />
If blood glucose is below 5.6 mmol/<br />
L, eat a snack before activity.<br />
Consult your healthcare provider<br />
about using a temporary (temp)<br />
basal rate.
Possible cause of low Suggested action<br />
Prolonged or intense<br />
exercise<br />
Low carbohydrate<br />
intake prior to<br />
activity<br />
Adjust insulin delivery as instructed<br />
by your healthcare provider.<br />
Check blood glucose before, during,<br />
and after activity and treat as<br />
necessary.<br />
Effects of exercise can last<br />
several hours—even a full<br />
day—after activity ends.<br />
Consult your healthcare provider<br />
about adjusting your basal programs<br />
or using a temporary (temp)<br />
basal rate.<br />
Consume carbohydrate before<br />
activity, especially if you have not<br />
decreased insulin beforehand.<br />
Alcohol consumption Check blood glucose before going<br />
to bed.<br />
Consult healthcare provider for<br />
guidance.<br />
Living with Diabetes<br />
Hyperglycemia (high blood glucose)<br />
<strong>Insulin</strong> Pods use rapid-acting insulin, so you have no long-acting<br />
insulin in your body. If an occlusion (interruption of insulin delivery<br />
from the Pod) occurs, your blood glucose can rise rapidly.<br />
An occlusion may result from a blockage, Pod malfunction,<br />
or from using old or inactive insulin. If<br />
insulin delivery is interrupted by an occlusion, check<br />
your blood glucose level and follow the treatment<br />
guidelines established by your healthcare provider.<br />
Hyperglycemia could result if appropriate actions<br />
are not taken.<br />
Symptoms of hyperglycemia (high blood glucose)<br />
• Fatigue<br />
• Frequent urination, especially during the night<br />
• Unusual thirst or hunger<br />
• Unexplained weight loss<br />
• Blurred vision<br />
• Slow healing of cuts or sores<br />
Hyperglycemia symptoms can be confusing.<br />
Always check your blood glucose before you<br />
treat for hyperglycemia.<br />
9<br />
113
9<br />
114<br />
Living with Diabetes<br />
To avoid hyperglycemia (high blood glucose)<br />
Check your blood glucose at least 4–6 times a day (when you<br />
wake up, before each meal, and before going to bed). In addition,<br />
always check it:<br />
• If you feel nauseated or sick<br />
• Before driving a car<br />
• Whenever your blood glucose has been running unusually<br />
high or low<br />
• If you suspect that your blood glucose is high or low<br />
• Before, during, and after exercise<br />
• As directed by your healthcare provider<br />
To treat hyperglycemia (high blood glucose)<br />
Always check your blood glucose levels frequently while treating<br />
hyperglycemia. You don’t want to over-treat the condition and<br />
cause your BG level to drop too far.<br />
1. Check your blood glucose level. The result will help you to<br />
find out how much insulin is needed to return your blood<br />
glucose to the BG goal.<br />
2. If your blood glucose is 13.9 mmol/L or above, check for<br />
ketones. If ketones are present, follow your healthcare<br />
provider’s guidelines.<br />
3. If ketones are not present, take a correction bolus as prescribed<br />
by your healthcare provider.<br />
4. Check blood glucose again after 2 hours.<br />
5. If blood glucose levels have not decreased, take a second<br />
bolus by injection, using a sterile syringe. Ask your healthcare<br />
provider whether to inject the same amount of insulin as in<br />
step 3.<br />
6. If you feel nauseated at any point, check for ketones and call<br />
your healthcare provider immediately (see “Diabetic ketoacidosis<br />
(DKA)” later in this chapter).<br />
7. If blood glucose remains high after another 2 hours (a total of<br />
4 hours), replace the Pod. Use a new vial of insulin to fill the<br />
new Pod. Then:<br />
• Contact your healthcare provider for guidance.<br />
• Drink eight ounces of water every 30 minutes until blood<br />
glucose is within BG goal.<br />
If you need emergency attention, ask a friend or<br />
family member to take you to the emergency<br />
room or call an ambulance. Do NOT drive yourself.<br />
8. Investigate possible cause for hyperglycemia to avoid similar<br />
problems in the future (see “Possible causes of hyperglycemia<br />
(high blood glucose)” below).
Possible causes of hyperglycemia (high blood glucose)<br />
Possible cause of high Suggested action<br />
Expired insulin Deactivate and remove used Pod.<br />
<strong>Insulin</strong> exposed<br />
to extreme<br />
temperatures<br />
Infusion site in or<br />
near a scar or mole<br />
Apply new Pod filled with insulin<br />
from a new vial.<br />
Deactivate and remove used Pod.<br />
Apply a new Pod in a different<br />
location.<br />
Infected infusion site Deactivate and remove used Pod.<br />
Apply a new Pod in a different location<br />
and consult your healthcare<br />
provider.<br />
Dislodged cannula Deactivate and remove used Pod.<br />
Apply a new Pod in a different<br />
location.<br />
Avoid sites near a waistband,<br />
belt, or other areas where friction<br />
may dislodge the cannula.<br />
Living with Diabetes<br />
Possible cause of high Suggested action<br />
Empty Pod Deactivate and remove used Pod.<br />
Apply a new Pod in a different<br />
location.<br />
Incorrect basal<br />
program<br />
Incorrect bolus<br />
timing<br />
Bolus too small<br />
Confirm that correct basal program<br />
is active.<br />
Confirm that PDM time is set<br />
correctly.<br />
Consult your healthcare provider<br />
about adjusting your basal programs<br />
or using a temporary (temp)<br />
basal rate.<br />
Check carb intake.<br />
Take bolus with food.<br />
Check blood glucose before giving<br />
meal bolus; if necessary, adjust<br />
bolus.<br />
Consult healthcare provider for<br />
guidance.<br />
9<br />
115
9<br />
116<br />
Living with Diabetes<br />
Possible cause of high Suggested action<br />
High-protein or<br />
high-fat meal<br />
Less activity than<br />
normal<br />
Blood glucose value<br />
greater than<br />
13.9 mmol/L (with<br />
ketones present)<br />
before exercise<br />
Calculate protein/fat intake and<br />
account for it in your bolus timing<br />
and bolus type.<br />
Consult healthcare provider about<br />
using the extended bolus option.<br />
Consult your healthcare provider<br />
about adjusting your basal programs<br />
or using a temporary (temp)<br />
basal rate.<br />
Do NOT exercise when ketones are<br />
present. (Blood glucose increases<br />
with exercise when ketones are<br />
present.)<br />
Consult healthcare provider for<br />
guidance.<br />
Infection or illness See “Sick days” later in this chapter.<br />
Medication change<br />
Consult your healthcare provider<br />
about sick-day guidelines and<br />
about medication changes.<br />
Possible cause of high Suggested action<br />
Weight loss or gain Consult your healthcare provider<br />
for guidance.<br />
Menstrual cycle<br />
Pregnancy<br />
Check with your healthcare provider for guidance on any<br />
of the causes or suggested actions above.
Diabetic ketoacidosis (DKA)<br />
<strong>Insulin</strong> Pods use rapid-acting insulin, so you have no long-acting<br />
insulin in your body. If insulin delivery from the Pod is interrupted<br />
(an occlusion), your blood glucose can rise rapidly and lead to<br />
diabetic ketoacidosis (DKA). DKA is a serious—but totally preventable—emergency<br />
that can occur if you ignore high blood<br />
glucose levels.<br />
If left untreated, DKA can cause breathing difficulties,<br />
shock, coma, and eventually death.<br />
Symptoms of DKA<br />
Nausea and vomiting<br />
Abdominal pain<br />
Dehydration<br />
Fruity-smelling breath<br />
Dry skin or tongue<br />
Drowsiness<br />
Rapid pulse<br />
Labored breathing<br />
The symptoms of DKA are much like those of the flu. Before<br />
assuming you have the flu, check your blood glucose and check<br />
for ketones to rule out DKA.<br />
Living with Diabetes<br />
To avoid DKA<br />
The easiest and most reliable way to avoid DKA is by checking<br />
your blood glucose at least 4–6 times a day. Routine checks<br />
allow you to identify and treat high blood glucose before DKA<br />
develops.<br />
To treat DKA<br />
• Once you have begun treatment for high blood glucose,<br />
check for ketones. Check for ketones any time your blood<br />
glucose is 13.9 mmol/L or above.<br />
• If ketones are negative or trace, continue treating for high<br />
blood glucose.<br />
• If ketones are present, and you are feeling nauseated or ill,<br />
immediately call your healthcare provider for guidance.<br />
• If ketones are positive, but you are not feeling nauseated or ill,<br />
replace the Pod, using a new vial of insulin.<br />
• Check blood glucose again after 2 hours. If blood glucose<br />
level has not declined, immediately call your healthcare<br />
provider for guidance.<br />
If you need emergency attention, ask a friend or<br />
family member to take you to the emergency<br />
room or call an ambulance. Do NOT drive yourself.<br />
9<br />
117
9<br />
118<br />
Living with Diabetes<br />
■ Handling Special Situations<br />
Sick days<br />
Any physical stress can cause your blood glucose to rise, and illness<br />
is a physical stress. Your healthcare provider can help you<br />
make a plan for sick days. The following are only general<br />
guidelines.<br />
When you are ill, check your blood glucose more often (at least<br />
once every 2 hours) to avoid DKA. The symptoms of DKA are<br />
much like those of the flu. Before assuming you have the flu,<br />
check your blood glucose to rule out DKA (see ”Diabetic ketoacidosis<br />
(DKA)” earlier in this chapter).<br />
To handle sick days<br />
• Treat the underlying illness to promote faster recovery.<br />
• Eat as normally as you can.<br />
• Adjust bolus doses, if necessary, to match changes in meals<br />
and snacks.<br />
• Always continue your basal insulin, even if you are unable to<br />
eat. Contact your healthcare provider for suggested basal<br />
rate adjustments during sick days.<br />
• Check your blood glucose every 2 hours and keep careful<br />
records of results.<br />
• Check for ketones when blood glucose is 13.9 mmol/L or<br />
higher.<br />
• Follow your healthcare provider’s guidelines for taking additional<br />
insulin on sick days.<br />
• Drink plenty of noncaffeinated fluids to prevent dehydration.<br />
If you are well enough to eat, drink sugar-free beverages.<br />
However, if you are too sick to eat solid foods,<br />
alternate between sugar-free beverages and those<br />
containing sugar.<br />
• Call your healthcare provider immediately if you have:<br />
• Persistent nausea<br />
• Vomiting for more than 2 hours<br />
• High blood glucose or ketones that stay high even<br />
though you take extra insulin<br />
• Low blood glucose with nausea and vomiting<br />
Exercising, playing sports, or working hard<br />
Check your blood glucose levels before, during, and after exercising,<br />
playing sports, or doing unusually hard physical labor.<br />
The Pod’s adhesive keeps it securely in place for up to 3 days.<br />
However, if necessary, several products are available to enhance<br />
adhesion. Ask your healthcare provider about these products.<br />
Avoid getting body lotion, creams, or oils near the infusion site;<br />
these products may loosen the adhesive.<br />
For some contact sports, you may want to remove the Pod.
Be sure to check your blood glucose levels before removing the<br />
Pod and after applying a new one. Pods are designed for onetime<br />
use. Do not attempt to reapply a used Pod.<br />
If possible, avoid wasting Pods by planning removal<br />
times that coincide with a scheduled Pod replacement.<br />
If you will need to remove the Pod for more than 1 hour, ask your<br />
healthcare provider to recommend appropriate guidelines.<br />
X-rays, MRIs, and CT scans<br />
The Pod and PDM may be affected by strong radiation<br />
or magnetic fields. Before having an X-ray, MRI, or<br />
CT scan (or any similar test or procedure), remove<br />
your Pod and put it and the PDM outside the treatment<br />
area. Check with your healthcare provider on<br />
Pod removal guidelines.<br />
The Pod and PDM can tolerate common electromagnetic<br />
and electrostatic fields, including airport security<br />
and cellular phones.<br />
Living with Diabetes<br />
Surgery or hospitalization<br />
For scheduled surgeries or hospitalization, you should tell the<br />
doctor/surgeon or hospital staff about your insulin Pod. It may<br />
be necessary to remove it for certain procedures or treatments.<br />
Remember to replace the basal insulin that was missed while the<br />
Pod was removed. Your healthcare provider can help you prepare<br />
for these situations.<br />
Always carry medical identification and wear an<br />
emergency medical necklace or bracelet such as<br />
the Medic Alert tag.<br />
9<br />
119
CHAPTER 10<br />
Alerts and Alarms<br />
■ Safety Checks<br />
The <strong>mylife</strong> <strong>OmniPod</strong> <strong>System</strong> has a very important safety feature:<br />
It can check its own functions and let you know when something<br />
needs attention. When you turn on the Personal Diabetes<br />
Manager (PDM), the <strong>System</strong> automatically performs a series of<br />
safety checks. To make you aware of a serious or potentially serious<br />
condition, the <strong>System</strong> sounds an alarm and displays an onscreen<br />
message. The message has instructions for taking care of<br />
the alarm condition. Alarm conditions are easy to handle. They<br />
are not a problem if you attend to them promptly.<br />
■ Blood Glucose Meter Alerts<br />
These alerts let you know about an error in the blood glucose<br />
meter, test strip, sample, or results. The PDM beeps and displays<br />
an error message number, as in Figure 10-1.<br />
120<br />
Check your blood glucose level frequently.<br />
Figure 10-1<br />
If you are having symptoms that are not consistent<br />
with your blood glucose test and you have followed<br />
all instructions described in this <strong>User</strong> <strong>Guide</strong>, call your<br />
healthcare professional.<br />
The following table explains what the message could mean and<br />
what you should do.
Alert error message Possible causes Action<br />
Meter Error 1<br />
See user manual for<br />
further instructions.<br />
Meter Error 2<br />
See user manual for<br />
further instructions.<br />
• Blood sample is too small.<br />
• Problem with the test strip.<br />
• Problem with the meter.<br />
• Very low blood glucose: less<br />
than 1.1 mmol/L.<br />
• Problem with the test strip.<br />
• Problem with the meter.<br />
• Very high blood glucose:<br />
above 27.8 mmol/L.<br />
• HIGH control solution<br />
applied when temperature<br />
is too cold. (This applies<br />
only to control solution<br />
labeled HIGH.)<br />
Alerts and Alarms<br />
1. If you have symptoms such as weakness, sweating, nervousness,<br />
headache, or confusion, follow the recommendations of your healthcare<br />
provider for treating hypoglycemia.<br />
2. Conduct a control solution test using a new test strip. If the results of<br />
the control solution test are within the range printed on the side of<br />
the test strip vial, retest using blood and a new test strip.<br />
3. If the control solution test does not work, or the error persists, call<br />
Customer Care.<br />
1. If you have symptoms such as thirst, fatigue, excess urination, or<br />
blurry vision, follow the recommendations of your healthcare provider<br />
for treating hyperglycemia.<br />
2. Conduct a control solution test using a new test strip. If the results of<br />
the control solution test are within the range printed on the side of<br />
the test strip vial, retest using blood and a new test strip.<br />
3. If the control solution test does not work or the error persists, call<br />
Customer Care.<br />
10<br />
121
10<br />
122<br />
Alerts and Alarms<br />
Alert error message Possible causes Action<br />
Meter Error 3<br />
See user manual for<br />
further instructions.<br />
Meter Error 4<br />
See user manual for<br />
further instructions.<br />
Meter Error 6<br />
See user manual for<br />
further instructions.<br />
• Incorrect test procedure.<br />
For example, putting blood<br />
on the test strip before<br />
inserting the test strip into<br />
the meter, or applying<br />
blood before the Blood<br />
Drop and Test Strip symbols<br />
display.<br />
• Problem with the test strip.<br />
• Problem with the meter.<br />
• Problem with the test strip.<br />
• Problem with the meter.<br />
• Blood sample was applied<br />
while the code number was<br />
being changed.<br />
1. Be sure you see the Blood Drop and Test Strip symbols on the display<br />
screen before you apply blood or control solution.<br />
2. Conduct a control solution test using a new test strip. If the results of<br />
the control solution test are within the range printed on the side of<br />
the test strip vial, retest using blood and a new test strip.<br />
3. If the control solution test does not work or the error persists, call<br />
Customer Care.<br />
1. Conduct a control solution test using a new test strip. If the results of<br />
the control solution test are within the range printed on the side of<br />
the test strip vial, retest using blood and a new test strip.<br />
2. If the control solution test does not work or the error persists, call<br />
Customer Care.<br />
1. Retest using a new test strip. Do not press any buttons or soft keys<br />
while applying blood or control solution to the test strip.<br />
2. If the error persists, call Customer Care.
■ Alarms<br />
The <strong>mylife</strong> <strong>OmniPod</strong> <strong>System</strong> provides alarms to make you aware<br />
of serious or potentially serious conditions. When a condition<br />
occurs that requires your attention an Advisory Alarm or a<br />
Hazard Alarm will sound. Advisory alarms beep intermittently<br />
and inform you about a condition that requires your attention.<br />
Hazard alarms are continuous tones and occur when either the<br />
Pod or PDM is in a serious condition. During an alarm the PDM<br />
will display an on screen message with instructions for taking<br />
care of the alarm condition. Be sure to respond to all alarms<br />
when they occur.<br />
Details on how to handle an Advisory or a Hazard Alarm are<br />
below:<br />
Many alarms (such as Auto-off) will escalate and<br />
result in deactivation of the active Pod if ignored. Be<br />
sure to respond to all alarms when they occur.<br />
Advisory Alarms<br />
Advisory alarms tell you about a condition that requires your<br />
attention. Each advisory alarm beeps intermittently. When you<br />
hear an advisory alarm, first turn on the PDM to display the<br />
Status screen. The PDM communicates with the Pod, if<br />
necessary, and the screen displays a message describing the<br />
alarm and how to resolve it. All advisory alarms are time-sensitive<br />
and require a response. Some advisory alarms escalate to hazard<br />
Alerts and Alarms<br />
alarms if you do not respond within a certain time period (as<br />
noted in the following table).<br />
Some advisory alarms are controlled by levels you set in the<br />
Settings screen. One example is the level at which the Low<br />
reservoir volume alarm sounds.<br />
10<br />
Hazard Alarms<br />
Hazard alarms occur either when the Pod is in a very serious condition<br />
or something is wrong with the PDM. Hazard alarms are<br />
continuous tones and each has an on-screen message. Follow<br />
the instructions in the message to fix the alarm situation. For<br />
details, see the following table.<br />
When a hazard alarm occurs in the Pod, all insulin<br />
delivery stops. Failing to address the situation could<br />
result in hyperglycemia. If you had a temp basal or<br />
extended bolus running when the hazard occurred,<br />
the PDM will remind you of this.<br />
Due to the serious nature of hazard alarms, you must<br />
act promptly to resolve them.<br />
1. Acknowledge the alarm condition by pressing<br />
OK, which silences the alarm.<br />
2. Deactivate and remove the active Pod (see<br />
Chapter 5, Using the Pod).<br />
3. Activate and apply a new Pod (see Chapter 5,<br />
Using the Pod).<br />
123
10<br />
124<br />
Alerts and Alarms<br />
If you ever need to return the PDM for repair or<br />
replacement, contact your healthcare provider<br />
for instructions on going back to treatment by<br />
injections.<br />
Alarm Type Source Beep Pattern Action<br />
End of insulin suspend.<br />
Press “Ok” to resume basal<br />
rate delivery.<br />
Advisory<br />
Alarm<br />
Auto-off alert Advisory<br />
Alarm<br />
Pod 2 sets of beeps every minute for 3 minutes.<br />
Repeats every 15 minutes until insulin<br />
delivery is resumed.<br />
Pod<br />
and<br />
PDM<br />
2 sets of beeps every minute for 15 minutes.<br />
Escalates to Auto-off hazard alarm if not<br />
acknowledged within 15 minutes.<br />
Use the form at the end of this <strong>User</strong> <strong>Guide</strong> to write<br />
down all your settings from the Setup Wizard. If you<br />
ever need to reset your PDM, having these settings<br />
handy will make setup very easy.<br />
Press OK to resume insulin delivery<br />
at programmed basal rate.<br />
<strong>Insulin</strong> delivery will not<br />
resume until you press OK. If<br />
you do not press OK to<br />
resume insulin delivery, you<br />
could develop hyperglycemia<br />
(high blood glucose).<br />
Press OK to acknowledge.<br />
Reset clock.<br />
The Auto-off alert will escalate<br />
to a hazard alarm if ignored<br />
and will result in the deactivation<br />
of your active Pod. Be<br />
sure to respond to the alert<br />
when it occurs.
Alarm Type Source Beep Pattern Action<br />
Auto-off.<br />
Remove pod now.<br />
Low reservoir.<br />
Replace pod soon.<br />
(This is based on the volume<br />
level you selected.)<br />
Empty reservoir.<br />
<strong>Insulin</strong> delivery stopped.<br />
Change pod now.<br />
Hazard<br />
Alarm<br />
Advisory<br />
Alarm<br />
Hazard<br />
Alarm<br />
Pod<br />
and<br />
PDM<br />
Pod<br />
and<br />
PDM<br />
Pod<br />
and<br />
PDM<br />
Alerts and Alarms<br />
Continuous tone Pod has been deactived. <strong>Insulin</strong><br />
delivery stopped. Press OK to<br />
acknowledge.<br />
Change Pod.<br />
Check blood glucose.<br />
2 sets of beeps every minute for 3 minutes.<br />
Repeats every 60 minutes until<br />
acknowledged.<br />
Escalates to Empty reservoir hazard<br />
alarm when empty.<br />
Press OK to acknowledge.<br />
Continuous tone This alarm occurs when the Pod's<br />
reservoir is out of insulin. Press OK<br />
to acknowledge.<br />
Change Pod.<br />
Check blood glucose.<br />
10<br />
125
10<br />
126<br />
Alerts and Alarms<br />
Alarm Type Source Beep Pattern Action<br />
Pod expiration advisory.<br />
Change pod now.<br />
Pod expired.<br />
<strong>Insulin</strong> delivery stopped.<br />
Change pod now.<br />
Stuck key detected.<br />
Check Home button to<br />
resolve.<br />
For technical support refer<br />
to your <strong>User</strong> <strong>Guide</strong>.<br />
Advisory<br />
Alarm<br />
Hazard<br />
Alarm<br />
Advisory<br />
Alarm<br />
Pod 2 sets of beeps that repeat periodically.<br />
Repeats every 15 minutes during the<br />
last hour of the Pod’s life and is independent<br />
of the Expiration Notification that<br />
you can set. (See Chapter 6, Using the<br />
Personal Diabetes Manager.)<br />
Escalates to Pod expired hazard alarm.<br />
Press OK to acknowledge.<br />
Change Pod (see Chapter 5, Using<br />
the Pod).<br />
Pod Continuous tone This alarm occurs when the Pod has<br />
reached the end of its operating<br />
life. Press OK to acknowledge.<br />
Change Pod.<br />
Check blood glucose.<br />
PDM 2 sets of beeps every 5 minutes. Check the key described on the<br />
screen. (In this example, the stuck<br />
key is the Home button.) Press the<br />
key to unstick it.<br />
If this does not work, call Customer<br />
Care.
Alarm Type Source Beep Pattern Action<br />
Occlusion detected.<br />
<strong>Insulin</strong> delivery stopped.<br />
Change pod now.<br />
Pod Error.<br />
<strong>Insulin</strong> delivery stopped.<br />
Change pod now.<br />
Hazard<br />
Alarm<br />
Hazard<br />
Alarm<br />
Alerts and Alarms<br />
Pod Continuous tone Press OK to acknowledge.<br />
Change Pod.<br />
Check blood glucose.<br />
Pod<br />
or<br />
PDM<br />
Continuous tone This alarm occurs when the Pod<br />
detects an unexpected error. Press<br />
OK to acknowledge.<br />
Change Pod.<br />
Check blood glucose.<br />
10<br />
An occlusion may result from<br />
a blockage, Pod malfunction,<br />
or from using old or inactive<br />
insulin. If insulin delivery is<br />
interrupted by an occlusion<br />
hazard alarm, check your<br />
blood glucose level and follow<br />
the treatment guidelines<br />
established by your healthcare<br />
provider. Hyperglycemia<br />
could result if appropriate<br />
actions are not taken.<br />
127
10<br />
128<br />
Alerts and Alarms<br />
Alarm Type Source Beep Pattern Action<br />
PDM Error.<br />
Remove pod now.<br />
For customer support,<br />
refer to your <strong>User</strong> <strong>Guide</strong>.<br />
Ref: 05-100-0618-00000<br />
PDM Error.<br />
Memory corruption.<br />
Press “Ok” to reset PDM<br />
and delete all user settings.<br />
History records will<br />
not be deleted.<br />
Hazard<br />
Alarm<br />
Hazard<br />
Alarm<br />
PDM Continuous tone This alarm occurs if an unexpected<br />
error is detected in the PDM. Press<br />
OK to acknowledge.<br />
Remove Pod.<br />
Call Customer Care immediately.<br />
Check blood glucose.<br />
For a hazard alarm caused by<br />
a PDM error that displays “For<br />
customer support, refer to<br />
your <strong>User</strong> <strong>Guide</strong>,” remove the<br />
Pod and call Customer Care<br />
immediately<br />
PDM Continuous tone This alarm occurs after the PDM is<br />
reset and a memory corruption<br />
error occurs. Press OK to acknowledge.<br />
Change Pod.<br />
Check blood glucose.
Alarm Type Source Beep Pattern Action<br />
<strong>System</strong> Error.<br />
Remove pod now.<br />
For customer support,<br />
refer to your <strong>User</strong> <strong>Guide</strong>.<br />
Ref: 05-100-0618-00000<br />
PDM Error.<br />
Press “Ok” to reset clock.<br />
Hazard<br />
Alarm<br />
Hazard<br />
Alarm<br />
PDM<br />
or<br />
Pod<br />
Alerts and Alarms<br />
Continuous tone This alarm occurs if an unexpected<br />
error is detected in the Pod or PDM.<br />
Press OK to acknowledge.<br />
Remove Pod.<br />
Call Customer Care immediately.<br />
Check blood glucose.<br />
PDM Continuous tone This alarm occurs after the PDM is<br />
reset, indicating that the time and<br />
date must be reset. Press OK to<br />
acknowledge.<br />
Reset clock.<br />
Check blood glucose.<br />
10<br />
For a hazard alarm caused by<br />
a <strong>System</strong> error that displays<br />
“For customer support, refer<br />
to your <strong>User</strong> <strong>Guide</strong>,” remove<br />
the Pod and call Customer<br />
Care immediately.<br />
129
10<br />
130<br />
Alerts and Alarms<br />
Alarm Type Source Beep Pattern Action<br />
Pod deactivation required.<br />
Press “Ok” to deactivate.<br />
Hazard<br />
Alarm<br />
■ Manual Shutoff of a Hazard Alarm<br />
If you respond to a hazard alarm but the PDM cannot communicate<br />
with the Pod to acknowledge or shut off the alarm, you can<br />
shut off the alarm manually.<br />
1. Remove the Pod from your body if you have not already<br />
done so.<br />
2. Press the end of a paper clip or similar item straight down into<br />
the manual alarm shut-off port (Figure 10-2) on the top side<br />
of the Pod (Figure 10-3). The port can be found by following<br />
the bright white trail on the top of the Pod. Move the paper<br />
clip back and forth until the alarm stops. Then discard the Pod<br />
according to local waste disposal regulations.<br />
PDM Continuous tone This alarm occurs after a PDM error<br />
occurs that requires the user to<br />
reset the date and time. Press OK to<br />
acknowledge.<br />
Change Pod.<br />
Check blood glucose.<br />
Figure 10-2 Figure 10-3
CHAPTER 11<br />
Communication Failures<br />
■ The Communication Process<br />
When you turn on or use the Personal Diabetes Manager (PDM),<br />
it establishes communication with the active Pod. Usually, communication<br />
occurs quickly. Occasionally, communication takes<br />
longer, and the PDM displays the communication icon during<br />
that time, in the upper left hand corner of the current screen.<br />
However, if communication does not work, the PDM will walk<br />
you through the necessary steps to re-establish communication.<br />
Communication can fail if the PDM is:<br />
• Too far from the Pod—It must be within 24" (61 cm) when<br />
you are entering or changing settings.<br />
• Interrupted by outside interference—See the “<strong>mylife</strong><br />
<strong>OmniPod</strong> <strong>System</strong> Notice Concerning Interference” in<br />
the Appendix.<br />
■ Failure During Pod Activation or Operation<br />
When you send an instruction from the PDM—such as Start to<br />
begin bolus delivery, or Enable to begin using a different basal<br />
program—the Pod usually responds quickly. However, if the<br />
PDM cannot send your instruction within a few seconds, it displays<br />
the “Communication error” screen (Figure 11-1 on the next<br />
page).<br />
1. Move the PDM closer to the Pod. The PDM will try to communicate<br />
with the Pod again. If communication still fails, you will<br />
see the message in Figure 11-2 on the next page.<br />
131
11<br />
132<br />
Communication Failures<br />
Figure 11-1 Figure 11-2 Figure 11-3 Figure 11-4<br />
2. Move across the room or to a different room. Then press<br />
Retry.<br />
a. If you press Retry within 2 minutes, the PDM tries to<br />
communicate with the Pod again. If it cannot communicate,<br />
it displays the same screen as in Figure 11-2, then<br />
finally the “Communication timeout” screen (Figure 11-3).<br />
Press OK to check the Pod status.<br />
b. If the status check fails, you will see Figure 11-4. Press OK<br />
to try checking Pod status again, or press Discard to<br />
begin the deactivation process.
3. If at any point in this process the PDM can communicate<br />
again with the Pod, you will see either:<br />
a. Figure 11-5, indicating that your original instruction or<br />
command was successfully sent to the Pod. When you<br />
press OK, or within 5 seconds, the <strong>System</strong> displays the next<br />
screen in the command sequence you were entering.<br />
b. Figure 11-6, indicating that your last command was not<br />
sent to the Pod. Press OK.<br />
If you were activating a Pod, the <strong>System</strong> returns to the previous<br />
screen, where you can continue activation. If you<br />
were issuing any other command, the <strong>System</strong> returns to<br />
the Status screen, where you can reissue the command.<br />
Figure 11-5 Figure 11-6<br />
Communication Failures<br />
■ Failure During Pod Deactivation<br />
11<br />
To review the deactivation process, see “Deactivate the current<br />
Pod” in Chapter 5, Using the Pod.<br />
If you press Confirm to deactivate the active Pod and the PDM<br />
cannot send your instruction to the Pod, you will see the screen<br />
in Figure 11-7.<br />
Figure 11-7<br />
Either:<br />
1. Press Retry to try deactivating the Pod again. If the PDM still<br />
cannot send the instruction, you will see Figure 11-7 again.<br />
Follow step 2.<br />
133
11<br />
134<br />
Communication Failures<br />
2. Press Discard. The PDM will consider the Pod lost, and ask<br />
whether you want to activate a new Pod.<br />
If you have an unconfirmed correction bolus when you<br />
discard a Pod, then the bolus calculator will be temporarily<br />
disabled. In this situation, the bolus calculator is disabled<br />
until the duration-of-insulin-action period passes<br />
(Figure 11-8). If you have any questions, call Customer<br />
Care.<br />
Figure 11-8<br />
■ Failure During Request for Status<br />
If you turn on the PDM or press Status and the PDM cannot<br />
communicate with the Pod, it displays a communication icon<br />
(Figure 11-9). Below the icon is a soft key labeled Skip.<br />
Either:<br />
1. Wait until you see the “Pod status not available” screen<br />
(Figure 11-10).<br />
Figure 11-9 Figure 11-10<br />
Or press Skip to skip the communication process and immediately<br />
bring up Figure 11-10.
Figure 11-11<br />
If the Pod has expired, you will see the screen in<br />
Figure 11-11 instead.<br />
At either “Pod status not available” screen, press Home to return<br />
to the Home screen, or press Status to send another status<br />
request.<br />
Communication Failures<br />
■ Failure During Bolus Cancellation<br />
11<br />
When you instruct the PDM to cancel a bolus, if the PDM cannot<br />
send your instruction to the Pod within a few seconds, it displays<br />
the “Communication error” screen (Figure 11-12).<br />
Figure 11-12 Figure 11-13<br />
1. Move the PDM close to the Pod. The PDM tries to communicate<br />
with the Pod again.<br />
2. If the PDM still cannot communicate with the Pod, you will<br />
see the “Bolus status unknown” message (Figure 11-13).<br />
135
11<br />
136<br />
Communication Failures<br />
3. Move across the room or to a different room. Then either:<br />
a. Press Discard to begin the deactivation process.<br />
b. Press Retry to repeat the attempts to communicate with<br />
the Pod. The PDM tries to communicate with the Pod<br />
again. If it cannot communicate, it displays the same<br />
screen as in Figure 11-13, then finally a second “Bolus<br />
status unknown” screen (Figure 11-14). Press OK to check<br />
the Pod status or press Discard to begin the deactivation<br />
process.<br />
Figure 11-14<br />
4. If at any point in this process the PDM can communicate<br />
again with the Pod, you will see Figure 11-15. The message<br />
indicates that your original instruction to cancel the bolus<br />
was successful.<br />
a. Press OK. The PDM displays the screen in Figure 11-16,<br />
showing how much insulin was delivered before the<br />
bolus was canceled.<br />
Figure 11-15 Figure 11-16<br />
b. Press OK again to return to the Status screen.
Appendix<br />
The <strong>mylife</strong> <strong>OmniPod</strong> <strong>Insulin</strong> <strong>Management</strong> <strong>System</strong> has no user-serviceable parts. If you require assistance operating or<br />
maintaining the <strong>System</strong>, please contact Customer Care.<br />
■ Pod Care and Maintenance<br />
Storage<br />
Store unopened Pods in a cool, dry place. Extreme heat or cold<br />
can damage Pods and cause them to malfunction. If Pods are<br />
exposed to extreme temperatures, inspect them carefully before<br />
use. Pods are sterile unless packaging is opened or damaged. Do<br />
not apply or use a Pod if its sterile packaging is opened or<br />
damaged.<br />
Cleaning<br />
Pods are watertight. If you need to clean a Pod, you can gently<br />
wash it with a clean, damp cloth. Or you can use mild soap and<br />
water. However, do not use strong detergents or solvents. They<br />
can damage the Pod’s casing or irritate the infusion site.<br />
Hold the Pod securely and take care while cleaning<br />
it, so the cannula doesn’t kink and the Pod doesn’t<br />
become detached from your skin.<br />
■ Personal Diabetes Manager Care and Maintenance<br />
Storage<br />
When you are not actively using the Personal Diabetes Manager<br />
(PDM) to enter or change programs, you can store it in a convenient,<br />
nearby location. The storage location should be cool and<br />
dry.<br />
Do not store or leave the PDM where it may be<br />
exposed to extreme temperatures, such as inside a<br />
car. Extreme heat or cold can cause the device to<br />
malfunction.<br />
If the PDM is not safe from children or others who may press the<br />
buttons by accident, consider using the optional PDM lock<br />
safety feature to prevent accidental program changes (see<br />
Chapter 6, Using the Personal Diabetes Manager).<br />
137
Appendix<br />
Cleaning<br />
You can clean the outside of the PDM with a clean, damp cloth.<br />
If the battery compartment becomes soiled, gently shake out<br />
the debris or use a dry, lint-free cloth to remove it.<br />
Replacing batteries<br />
The PDM uses two (2) AAA alkaline batteries. You can purchase<br />
them at any grocery, hardware, or convenience store.<br />
On average, a pair of batteries powers the PDM for 3 weeks. The<br />
battery life indicator on the PDM shows the battery power level.<br />
See “Personal Diabetes Manager Icons” on page 149 for the various<br />
battery power levels and their respective icons.<br />
138<br />
Do NOT use IV Prep wipes, alcohol wipes, soap,<br />
detergent, or solvents. Never put any liquid into the<br />
battery compartment.<br />
Do not use any other type of batteries than AAA<br />
alkaline batteries to power the PDM. Never use old<br />
or used batteries; the PDM may not work properly.<br />
Using any kind of batteries other than alkaline may<br />
reduce battery life and cause damage to the PDM.<br />
The PDM automatically alerts you when its battery power gets<br />
low (see Figure A-1). When you see the “Low PDM battery” alert,<br />
press OK to turn off the alert. Replace the batteries as soon as<br />
you can.<br />
Figure A-1<br />
When your PDM alerts you that battery power is getting<br />
low, the PDM will maximize remaining battery life by:<br />
• Turning off your vibration alert (if set)<br />
• Disabling bright mode<br />
• Disabling the test strip port light<br />
Once the batteries are replaced, these functions resume.
If the batteries run out, data in the memory is at risk.<br />
DO NOT remove the old batteries until you have<br />
new ones at hand. The PDM protects data in the<br />
memory for up to 2 hours after the batteries run out<br />
or are removed.<br />
To replace batteries<br />
1. Open the battery compartment on the back of the PDM by<br />
pushing the compartment latch inward and then upward<br />
(Figure A-2). No special tools are necessary.<br />
Figure A-2<br />
Appendix<br />
2. Insert 2 new AAA alkaline batteries into the compartment.<br />
The diagram inside the compartment shows you<br />
which direction to insert the batteries.<br />
3. Replace the battery door.<br />
4. Turn the PDM face up. The PDM powers on automatically.<br />
The PDM is now ready to use. Dispose of the old batteries in<br />
accordance with local waste disposal regulations.<br />
If the PDM becomes submerged in water<br />
The PDM is not waterproof. Do not place it in water or leave it<br />
near water where it can accidentally fall in. If it becomes submerged<br />
in water:<br />
1. Dry the outside of the PDM with a clean, lint-free cloth.<br />
2. Open the battery compartment; remove the batteries and<br />
discard them.<br />
3. Use a clean, lint-free cloth to gently absorb any water in the<br />
battery compartment.<br />
4. Leave the battery compartment door open until the PDM is<br />
thoroughly dry.<br />
Never use a blow dryer or hot air to dry the Pod or<br />
PDM. Extreme heat can damage the electronics.<br />
139
Appendix<br />
5. Do not put in fresh batteries or attempt to use the PDM until<br />
it has thoroughly air-dried.<br />
If you drop the PDM<br />
The PDM is built to withstand reasonable amounts of abuse, but<br />
shock or a severe impact can damage it. If you drop the PDM or if<br />
it is otherwise subjected to severe impact:<br />
1. Inspect the outside of the PDM for visible signs of damage.<br />
2. Press and hold the Power button to see whether the PDM<br />
turns on and whether the LCD screen is damaged.<br />
3. Inspect the inside of the battery compartment for visible<br />
signs of damage.<br />
4. Do NOT use the PDM if it appears damaged or is not working<br />
as it should.<br />
140<br />
If you require assistance, contact Customer Care.<br />
■ Storage and Supplies<br />
Storage<br />
Store all <strong>mylife</strong> <strong>OmniPod</strong> <strong>System</strong> products and<br />
supplies (including unopened Pods) in a cool, dry<br />
place. Products or supplies that have been exposed<br />
to extreme temperatures may not function properly.<br />
It is especially important to store your insulin in a wellcontrolled<br />
environment. Inspect insulin before using<br />
it; never use insulin that looks cloudy or discolored.<br />
<strong>Insulin</strong> that is cloudy or discolored may be old, contaminated,<br />
or inactive. Check the insulin manufacturer’s<br />
instructions for use and expiration date.<br />
Ordering supplies<br />
You can order all <strong>mylife</strong> <strong>OmniPod</strong> <strong>System</strong> products and supplies<br />
by contacting Customer Care.
■ Suggested Bolus Calculator Examples and<br />
<strong>Guide</strong>lines<br />
A suggested bolus is equal to the sum of a correction bolus and<br />
meal bolus, then adjusted for insulin on board, if applicable.<br />
Examples of each of these elements are shown below.<br />
Example of correction bolus<br />
Target BG: 5.6 mmol/L<br />
Current BG: 11.2 mmol/L<br />
Correction factor (CF): 2.8<br />
11.2 mmol/L (current) – 5.6 mmol/L (target) = 5.6 mmol/L<br />
5.6 mmol/L ÷ 2.8 (CF) = 2 units correction bolus<br />
If the reverse correction feature is turned On and if your current<br />
BG is below your target BG, the suggested bolus calculator subtracts<br />
a correction amount from the meal bolus.<br />
Example of reverse correction bolus:<br />
Target BG: 5.6 mmol/L<br />
Current BG: 4.2 mmol/L<br />
Correction factor (CF): 2.8<br />
4.2 mmol/L (current) – 5.6 mmol/L (target) = –1.4 mmol/L<br />
–1.4 mmol/L ÷ 2.8 CF = –0.5 units reverse correction bolus<br />
(reduces meal bolus)<br />
Meal bolus calculation<br />
Carbs entered ÷ insulin-to-carb (I/C) ratio<br />
Example of meal bolus<br />
Carbs entered: 45 grams of carb<br />
<strong>Insulin</strong>-to-carb ratio: 15<br />
45 carbs ÷ 15 I/C ratio = 3 units meal bolus<br />
Appendix<br />
<strong>Insulin</strong>-on-board (IOB) calculation<br />
(Duration of insulin action – time since your previous bolus) ÷<br />
(duration of insulin action) ∗ (previous bolus)<br />
IOB from a previous correction bolus is called “correction IOB,”<br />
and IOB from a previous meal bolus is called “meal IOB.”<br />
Example of correction IOB<br />
Duration of insulin action: 3 hours<br />
Time since previous correction bolus: 1 hour<br />
Previous correction bolus: 3 units<br />
3 hours – 1 hour = 2 hours<br />
2 hours ÷ 3 hours = 2/3<br />
2/3 ∗ 3 units = 2 units correction IOB<br />
In other words, one hour after your previous correction bolus,<br />
you have received only 1 unit of insulin from it; 2 units of insulin<br />
are still working to correct your BG. This feature prevents delivering<br />
too much insulin when correcting a high BG.<br />
141
Appendix<br />
Example of meal IOB<br />
Duration of insulin action: 3 hours<br />
Time since previous meal bolus: 2 hours<br />
Previous meal bolus: 4.5 units<br />
3 hours – 2 hours = 1 hour<br />
1 hours ÷ 3 hours = 1/3<br />
1/3 ∗ 4.5 units = 1.5 units meal IOB<br />
In other words, two hours after your previous meal bolus, you<br />
have received 3 units of insulin from it; 1.5 units of insulin are still<br />
working to cover your meal.<br />
Examples of suggested bolus calculations<br />
The examples below use these settings:<br />
• Target BG: 5.6 mmol/L<br />
• I/C ratio: 1:15<br />
• Correction factor (CF): 2.8<br />
• Duration of insulin action: 3 hrs<br />
142<br />
Meal IOB is only used to reduce a correction bolus,<br />
and the correction bolus is only reduced until it<br />
becomes 0 units.<br />
Example 1<br />
Current BG level: 8.4 mmol/L<br />
Carb intake: 0 grams of carbohydrate (carbs)<br />
Meal IOB: 1 units<br />
Correction IOB: 1 units<br />
Correction bolus: 8.4 mmol/L (current) – 5.6 mmol/L (target) = 2.8<br />
2.8 ÷ 2.8 (CF) = 1 unit<br />
Meal bolus: 0 (carbs) ÷ 15 (I/C ratio) = 0 units<br />
Suggested bolus dose = 1 (correction) + 0 (meal) – 2 (IOB) = 0U<br />
Example 2<br />
Current BG level: 8.4 mmol/L<br />
Carb intake: 45 carbs<br />
Meal IOB: 0 units<br />
Correction IOB: 0 units<br />
Correction bolus: 8.4 mmol/L (current) – 5.6 mmol/L (target) = 2.8<br />
2.8 ÷ 2.8 (CF) = 1 unit<br />
Meal bolus: 45 (carbs) ÷ 15 (I/C ratio) = 3 units<br />
Suggested bolus dose = 1 (correction) + 3 (meal) – 0 (IOB) = 4U
Example 3<br />
Current BG level: 5.6 mmol/L<br />
Carb intake: 45 carbs<br />
Meal IOB: 1 units<br />
Correction IOB: 0 units<br />
Correction bolus: 5.6 mmol/L (current) – 5.6 mmol/L (target) = 0<br />
0 ÷ 50 (CF) = 0 units<br />
Meal bolus: 45 (carbs) ÷ 15 (I/C ratio) = 3 units<br />
Suggested bolus dose = 0 (correction) + 3 (meal) – 0 (IOB) = 3U<br />
Meal IOB is never subtracted from another meal<br />
bolus—only from a correction bolus.<br />
Example 4<br />
Current BG level: 8.4 mmol/L<br />
Carb intake: 60 carbs<br />
Meal IOB: 0 units<br />
Correction IOB: 1 unit<br />
Correction bolus: 8.4 mmol/L (current) – 5.6 mmol/L (target) = 2.8<br />
2.8÷ 2.8 (CF) = 1 unit<br />
Meal bolus: 60 (carbs) ÷ 15 (I/C ratio) = 4 units<br />
Suggested bolus dose = 1 (correction) + 4 (meal) – 1 (IOB) = 4U<br />
Appendix<br />
Calculator guidelines<br />
When the suggested bolus calculator is turned On, the <strong>mylife</strong><br />
<strong>OmniPod</strong> <strong>System</strong> applies these guidelines to the suggested<br />
bolus doses:<br />
• Suggested bolus doses are rounded down to the nearest 0.05U.<br />
• If the total of the suggested bolus calculation (correction<br />
bolus plus meal bolus) is less than zero, the suggested bolus<br />
dose is 0.00U.<br />
• The <strong>System</strong> will not suggest a bolus dose if your current<br />
blood glucose (BG) reading is below the minimum BG you<br />
have set for bolus calculation (see Chapter 2, Getting Started,<br />
and Chapter 6, Using the Personal Diabetes Manager).<br />
• The <strong>System</strong> suggests a correction bolus only when your BG<br />
reading is above the correction threshold or correct-above<br />
value you have set (see Chapter 2, Getting Started, and<br />
Chapter 6, Using the Personal Diabetes Manager).<br />
• Meal IOB, which is insulin on board from a previous meal<br />
bolus, is subtracted first from the current correction bolus, if<br />
any, until it is zero. However, any remaining meal IOB is never<br />
subtracted from the current meal bolus.<br />
• Correction IOB, which is insulin on board (active insulin) from<br />
a previous correction bolus, is then subtracted from the current<br />
correction bolus, if any remains, until it is zero. At that<br />
point, any remaining correction IOB is subtracted from the<br />
current meal bolus.<br />
143
Appendix<br />
• The calculated insulin on board is rounded up to the nearest<br />
0.05U.<br />
• A reverse correction only occurs if the meal bolus is greater<br />
than 0.00U.<br />
• If your blood glucose value is below the target blood glucose<br />
value and you have set reverse correction to On, the<br />
suggested correction bolus is subtracted from the suggested<br />
meal bolus. If you have set reverse correction to Off, the<br />
<strong>System</strong> will not subtract insulin from the suggested meal<br />
bolus dose.<br />
144<br />
If you manually increase or decrease the suggested bolus, the<br />
following rules apply:<br />
• If you increase a suggested bolus, the increase is applied to<br />
the meal bolus unless there is no meal bolus, in which case it<br />
is applied to the correction bolus.<br />
• If you decrease a suggested bolus, the decrease is applied to<br />
the meal bolus until it reaches zero; then it is applied to the<br />
correction bolus. If there is no meal bolus, the decrease is<br />
applied to the correction bolus.
■ <strong>mylife</strong> <strong>OmniPod</strong> <strong>System</strong> Options and Settings<br />
Time 12-hour or 24-hour clock<br />
Date MM/DD/YY<br />
DD/MM/YY<br />
MM.DD.YY<br />
DD.MM.YY<br />
Maximum basal rate 30 U/hr<br />
Default is 3.00 U/hr<br />
Basal programs 7<br />
Basal rate segments 24 per program<br />
Basal rate increment 0.05 units<br />
Temp basal presets 7<br />
Temp basal %, Units, or Off<br />
30 minutes to 12 hours in 30minute<br />
increments<br />
Default is Off<br />
Blood glucose (BG) goal for Upper and lower limits; 3.9 to 11.1<br />
BG history<br />
mmol/L in 0.1 mmol/L increments<br />
Blood glucose reminder On or Off; maximum of 4<br />
Reminder time of 1 to 4 hours<br />
after every bolus dose in 30minute<br />
increments<br />
Default is Off<br />
Blood glucose meter sound On or Off<br />
Default is On<br />
Appendix<br />
Suggested bolus calculator On or Off<br />
Default is On<br />
Target BG value and 4 time segments; 3.9 to 11.1<br />
correction threshold mmol/L in 0.1 mmol/L increments<br />
Minimum BG allowed for 2.8 to 3.9 mmol/L in 0.1 mmol/L<br />
use by the suggested bolus<br />
calculator<br />
increments<br />
Default is 3.9 mmol/L<br />
<strong>Insulin</strong>-to-carb (IC) ratio 4 time segments; 1 to 150 g carb/<br />
U in 1g carb/U increments<br />
Correction (sensitivity) 4 time segments; 0.1 to 16.7<br />
factor<br />
mmol/L in 0.1 mmol/L increments<br />
Reverse correction On or Off<br />
Default is On<br />
Duration of insulin action 2 to 6 hours in 30-minute increments<br />
Bolus increment 0.05, 0.1, 0.5, or 1.0 units<br />
Default is 0.1 units<br />
Maximum bolus size 30 units<br />
Default is 10 units<br />
Extended bolus %, Units, or Off<br />
30 minutes to 8 hours in 30minute<br />
increments<br />
Default is Off<br />
Bolus presets 7<br />
Carbohydrate presets 36<br />
145
Appendix<br />
Suspend 30 minutes to 2 hours<br />
Low reservoir volume 10 to 50 units in 5-unit increments<br />
indicator<br />
Default is 10.0 units<br />
Pod expiration alert 1 to 24 hours in 1-hour increments<br />
Default is 4 hours<br />
Auto-off alert 1 to 24 hours or Off in 1-hour<br />
increments<br />
Default is Off<br />
PDM lock On or Off<br />
Default is Off<br />
History storage 5400 records/90 days<br />
Language English<br />
■ Pod Specifications<br />
Size: 1.6" wide x 2.4" long x 0.7" high<br />
(4.1cm x 6.2cm x 1.7cm)<br />
Weight (with full reservoir): 34 grams (1.2 oz)<br />
Operating temperature range: 40° F to 104° F (5° C to 40° C)<br />
Under normal circumstances, your body temperature will keep<br />
the Pod well within this range.<br />
Startup temperature: above 50° F (10° C)<br />
Storage temperature range: 14° F to 122° F (-10° C to 50° C)<br />
Reservoir volume (deliverable): 200 units<br />
Cannula insertion depth: 6.5mm<br />
146<br />
Watertight rating: IPX8 (25 feet for 60 minutes)<br />
<strong>Insulin</strong> concentration: U-100<br />
Alarm type: Audible<br />
Operating relative humidity range: 20–85%, noncondensing<br />
Storage relative humidity range: 20–85%, noncondensing<br />
Operating atmospheric pressure: 700 hPA to 1060 hPA<br />
Storage atmospheric pressure: 700 hPA to 1060 hPA<br />
Flow Capability:<br />
Basal: Programmable by the user in 0.05U pulses<br />
up to 30.0 U per hour<br />
Bolus:<br />
Rate: 1.5 units per minute<br />
Range: 0.05 to 30.0 units<br />
Delivery accuracy (tested per IEC 60601-2-24):<br />
Basal: +/- 5% at rates > 0.1 U/hr<br />
Bolus: +/- 5% for all set values > 0.1 units
■ Accuracy Test Results<br />
The following graphs are designed to show flow accuracy of the<br />
Pod against given time periods.<br />
Flow rate from startup<br />
The following graph shows changes in the flow rate over the<br />
stabilization period. The measurements were made using a Pod<br />
with a basal rate of 1.0 U/h at high operating temperature.<br />
Appendix<br />
Flow rate error<br />
The following trumpet curve shows the accuracy of the delivery<br />
rate in relation to the observation period. The measurements<br />
were made using a Pod with a basal rate of 1.0 U/h at high operating<br />
temperature. The overall mean percentage flow error was<br />
1.94%.<br />
147
Appendix<br />
■ Personal Diabetes Manager Specifications<br />
Size: 2.5" wide x 4.5" long x 1.0" high (6.4cm x 11.4cm x 2.5cm)<br />
Weight (with batteries): 125 grams (4.4 oz)<br />
Screen: 1.4" wide x 1.9" long (3.6cm x 4.8cm); 2.4" diagonal<br />
(6.1cm) LCD<br />
Battery: Powered by 2 AAA alkaline batteries<br />
Battery life: Approximately 3 weeks<br />
Operating temperature range: 40° F to 104° F (5° C to 40° C)<br />
Storage temperature range: 14° F to 122° F (-10° C to 50° C)<br />
Operating relative humidity range: 5% to 90% noncondensing<br />
Storage relative humidity range: 5% to 90% noncondensing<br />
Operating atmospheric pressure: 700 hPA to 1060 hPA<br />
Storage atmospheric pressure: 700 hPA to 1060 hPA<br />
Communication distance: Up to 24" (61cm)<br />
Alarm type: Audible<br />
148<br />
■ Blood Glucose Meter Specifications<br />
Assay method: Coulometric electrochemical sensor<br />
Calibration: Plasma equivalent<br />
Hematocrit: 15% to 65%<br />
Measurement units: mmol/L<br />
Result range: 1.1 to 27.8 mmol/L<br />
Sample: Whole blood, capillary<br />
Sample size: 300 nanoliters (0.3 microliter)<br />
Test time: Results as fast as 7 seconds
■ <strong>mylife</strong> <strong>OmniPod</strong> <strong>System</strong> Label Symbols<br />
Symbol Meaning<br />
Do not reuse this device; single-use only<br />
Caution: Consult accompanying documents<br />
Consult instructions for use<br />
Sterilized by ethylene oxide<br />
Manufacture date: (year–month)<br />
Lot number<br />
Expiration date (use-by date): (year–month)<br />
Reference/reorder number<br />
Device serial number<br />
Type BF medical device<br />
(protection from electrical shock)<br />
Manufacturer<br />
Non-pyrogenic; fluid pathway only<br />
Not MRI-safe<br />
Watertight to 25 feet for 60 minutes<br />
Keep dry<br />
■ Personal Diabetes Manager Icons<br />
Appendix<br />
Symbol Meaning<br />
Storage temperature<br />
Do not use if package is damaged<br />
Authorized Representative in the European<br />
Community<br />
Product is designed and manufactured in accordance<br />
with applicable standards/guidelines and<br />
may be sold in the EU (European Union).<br />
Do not throw away; contains mercury.<br />
Icon Meaning Icon Meaning<br />
Power More actions<br />
Bolus Communication<br />
Pod change Up/Down<br />
Diagnostics/<br />
settings<br />
Up/Down (on color)<br />
149
Appendix<br />
Icon Meaning Icon Meaning<br />
150<br />
Temp basal Status<br />
Suspend/cancel Text entry right<br />
My Records Submenu<br />
Advisory alarm Home screen<br />
(alternating)<br />
Hazard alarm<br />
<strong>Insulin</strong> gauge<br />
Alert<br />
Apply blood sample/<br />
Blood glucose records<br />
PDM lock Setup Wizard<br />
Battery 3/4 full Battery full<br />
Battery 1/4 full Battery half full<br />
Basal program Battery empty<br />
“Lost” history<br />
<strong>User</strong> Information/<br />
record<br />
Support<br />
“Unconfirmed”<br />
Temperature out of<br />
history record<br />
range<br />
“Delivery Spans<br />
Active/default<br />
Midnight”<br />
program or selected<br />
history record<br />
BG tag<br />
■ Medical Device Directive<br />
This device complies with the Medical Device Directive 93/42/EEC.<br />
Contact Person: The Complaints Officer<br />
Address: HealthLink Europe BV, Centaurusweg 123<br />
NL-5015 TC TILBURG, The Netherlands<br />
TEL: +31.13.5479300<br />
FAX: +31.13.5479302<br />
E-mail: complaints@HealthlinkEurope.com<br />
Insulet Corporation complies with EU Directive, HIPAA, and relevant<br />
provisions of PIPEDA.<br />
■ <strong>mylife</strong> <strong>OmniPod</strong> <strong>System</strong> Notice Concerning<br />
Interference<br />
The <strong>mylife</strong> <strong>OmniPod</strong> <strong>Insulin</strong> <strong>Management</strong> <strong>System</strong> (both the Pod<br />
and the Personal Diabetes Manager or PDM) complies with<br />
Part 15 of the FCC Rules. Operation is subject to the following<br />
two conditions:<br />
1. These devices may not cause harmful interference.<br />
2. These devices must accept any interference received, including<br />
interference that may cause undesirable operation.<br />
Changes or modifications not expressly approved by Insulet<br />
could void the user’s authority to operate the equipment.
Both the Pod and the PDM generate, use, and can radiate radio<br />
frequency energy, and may cause harmful interference to radio<br />
communications. There are no guarantees that interference will not<br />
occur in a particular installation. If the <strong>mylife</strong> <strong>OmniPod</strong> <strong>System</strong> does<br />
cause harmful interference to radio and television reception, the<br />
interference may be corrected by one of the following measures:<br />
• Move or relocate the <strong>mylife</strong> <strong>OmniPod</strong> <strong>System</strong>.<br />
• Increase the distance between the <strong>mylife</strong> <strong>OmniPod</strong> <strong>System</strong><br />
and the other device that is emitting or receiving interference.<br />
Insulet Corporation declares that the <strong>mylife</strong> <strong>OmniPod</strong> <strong>System</strong> is<br />
in compliance with the essential requirements and other relevant<br />
provisions of Directive 1999/5/EC. This ISM device complies<br />
with Canadian ICES-003 and IC-RSS-210.<br />
■ Electromagnetic Compatibility<br />
The information contained in this section (such as separation<br />
distances) is, in general, specifically written with regard to the<br />
<strong>mylife</strong> <strong>OmniPod</strong> <strong>System</strong>. The numbers provided will not guarantee<br />
faultless operation but should provide reasonable assurance<br />
of such. This information may not be applicable to other medical<br />
electrical equipment; older equipment may be particularly susceptible<br />
to interference.<br />
General Notes<br />
Medical electrical equipment requires special precautions<br />
regarding electromagnetic compatibility (EMC) and needs to be<br />
Appendix<br />
installed and put into service according to the EMC information<br />
provided in this document and the instructions for use.<br />
Portable and mobile RF communications equipment can affect<br />
medical electrical equipment.<br />
Insulet Corporation declares that the <strong>mylife</strong> <strong>OmniPod</strong> <strong>Insulin</strong><br />
<strong>Management</strong> <strong>System</strong> is in compliance with the essential requirements<br />
and other relevant provisions of Directive 1999/5/EC.<br />
Cables and accessories not specified within the instructions for<br />
use are not authorized. Using other cables and/or accessories<br />
may adversely impact safety, performance, and electromagnetic<br />
compatibility (increased emission and decreased immunity).<br />
Care should be taken if the <strong>System</strong> is used adjacent to other electrical<br />
equipment; if adjacent use is inevitable, such as in work<br />
environments, the <strong>System</strong> should be observed to verify normal<br />
operation in this setting.<br />
The <strong>System</strong> communicates by low level RF energy. As with all RF<br />
receivers, the potential for disturbance exists, even with equipment<br />
that complies with FCC and CISPR emissions requirements.<br />
The <strong>mylife</strong> <strong>OmniPod</strong> <strong>System</strong> communicates with the following<br />
characteristics:<br />
Frequency: 13.56 Mhz, ASK modulation, with an effective<br />
radiated power of 16mW<br />
The <strong>mylife</strong> <strong>OmniPod</strong> <strong>System</strong> greatly exceeds the immunity<br />
requirements of the general standard for electromagnetic compatibility,<br />
IEC 60601-1-2.<br />
151
Appendix<br />
Electromagnetic Emissions<br />
This equipment is intended for use in the electromagnetic environment specified below. The user of this equipment should assure<br />
that is used in such an environment.<br />
Emissions Compliance according to Electromagnetic environment<br />
RF Emissions (CISPR 11) Group 2 The Pod and the PDM emit low level electromagnetic energy (RF) in<br />
order to communicate. Although unlikely, nearby electronic equipment<br />
may be affected.<br />
CISPR B<br />
Emissions Classification<br />
152<br />
Class B The <strong>System</strong> is suitable for use in all establishments including domestic<br />
establishments.<br />
Electromagnetic Immunity<br />
The <strong>System</strong> is intended for use in the electromagnetic environment specified below. You should observe these requirements in the<br />
use of the <strong>System</strong>.<br />
IEC 60601-1-2 Compliance level<br />
Immunity against test level<br />
(of this device) Electromagnetic environment<br />
ElectroStatic Discharge,<br />
ESD (IEC 61000-4-2)<br />
Power Frequency magnetic<br />
fields 50/60 Hz<br />
(IEC 61000-4-8)<br />
contact discharge:<br />
± 6 kV<br />
air discharge: ± 8 kV<br />
± 8 kV<br />
± 15 kV<br />
If floors are covered with synthetic material, try to avoid electrostatic<br />
discharges.<br />
3 A/m 400 A/m Suitable for most environments. Magnetic field strengths in<br />
excess of 400 A/m would be unlikely except in close proximity<br />
to industrial magnetic devices.
Conducted RF<br />
(IEC 61000-4-6)<br />
Radiated RF<br />
(IEC 61000-4-3)<br />
3 Vrms<br />
150 kHz to 80 Mhz<br />
80 MHz–2.5 GHz<br />
Appendix<br />
3 V/m<br />
Portable and mobile RF communications equipment should<br />
be used no closer to any part of the <strong>System</strong> than the recommended<br />
separation distance calculated from the equation<br />
10 V/m<br />
applicable to the frequency of the transmitter as below.<br />
Recommended separation distance:<br />
d=1.17 √P<br />
d=0.35/ √P 80 MHz to 800 MHz<br />
d=0.7 √P 800 MHz to 2.5 GHz<br />
where P is the maximum output power rating of the transmitter<br />
in watts (W) according to the transmitter manufacturer and<br />
d is the recommended separation distance in meters (m).<br />
Field strengths from fixed RF transmitters, as determined by an<br />
electromagnetic site survey, a Electromagnetic Immunity (Continued)<br />
should be less than the compliance<br />
level in each frequency range.<br />
Interference may occur in the vicinity of equipment marked<br />
with the following symbol:<br />
Note 1: At 80 MHz and 800 MHz, the higher frequency range applies.<br />
Note 2: These guidelines may not apply in all situations. Electromagnetic propagation is affected by absorption and reflections from structures,<br />
objects, and people.<br />
a Field strengths from fixed transmitters, such as base stations for radio (cellular/cordless) telephones and land mobile radios, amateur radio,<br />
AM and FM radio broadcast, and TV broadcast, cannot be predicted theoretically with accuracy. To assess the electromagnetic environment<br />
due to fixed RF transmitters, an electromagnetic site survey should be considered. If the measured field strength in the location in which the<br />
equipment is used exceeds the applicable RF compliance level above, the equipment should be observed to verify normal operation. If<br />
abnormal performance is observed, additional measures may be necessary, such as reorienting or relocating the equipment.<br />
153
Appendix<br />
Recommended separation distances between portable and mobile RF communications equipment<br />
and the <strong>System</strong><br />
You can help prevent electromagnetic interference by maintaining a minimum distance between portable and mobile RF communications<br />
equipment (transmitters) and the <strong>System</strong>, as recommended below, according to the maximum output power of the com-<br />
munications equipment.<br />
Rated maximum output power<br />
of transmitter, in watts<br />
154<br />
Separation distance according to frequency of transmitter, in meters<br />
150 kHz to 80 MHz, d = 1.17 √P 80 MHz to 800 MHz, d = 0.35 √P 800 MHz to 2.5 GHz, d = 0.7 √P<br />
0.01 0.12 0.035 0.070<br />
0.1 0.37 0.11 0.22<br />
1 1.17 0.35 0.7<br />
10 3.70 1.11 2.21<br />
100 11.7 3.5 7.0<br />
For transmitters rated at a maximum output power not listed above, the recommended separation distances in meters (m) can be estimated<br />
using the equation applicable to the frequency of the transmitter, where P is the maximum output power rating of the transmitter in watts<br />
(W) according to the transmitter manufacturer.<br />
NOTE 1: At 80 MHz and 800 MHz, the separation distance for the higher frequency range applies.<br />
NOTE 2: These guidelines may not apply in all situations. Electromagnetic propagation is affected by absorption and reflection from structures,<br />
objects, and people.
Glossary<br />
A1c (see Hemoglobin A1c)<br />
Advisory alarm<br />
Notification by the PDM that a serious condition exists.<br />
Aseptic technique<br />
A method for maintaining sterilization and preventing<br />
contamination.<br />
Basal program<br />
One or more basal rates that together cover a 24-hour period<br />
from midnight to midnight.<br />
Basal rate<br />
A small base or background amount of insulin that is delivered, at<br />
a preset rate, continuously for a specified period of time. Basal<br />
rates are measured in units per hour (U/hr).<br />
Basal segment (time segment)<br />
The time period during which a specific basal rate is delivered.<br />
BG goal<br />
A range of blood glucose levels that you are trying to achieve during<br />
a certain period of the day. For example, you may want one<br />
BG goal before meals, a different BG goal two hours after meals,<br />
and yet another BG goal for bedtime.<br />
Blood glucose (see glucose)<br />
Blood glucose level<br />
The amount of glucose, or sugar, in the blood.<br />
Blood glucose meter<br />
A device used to check blood glucose content.<br />
Bolus dose<br />
A dose of insulin taken to correct an elevated blood glucose level<br />
or to cover carbohydrates in a meal or snack.<br />
Bolus preset<br />
A bolus dose of insulin, in units, that can be assigned a custom<br />
name and preprogrammed into the PDM.<br />
155
Glossary<br />
Calorie<br />
A unit of measurement used to express the energy value of food.<br />
Calories come from carbohydrate, protein, fat, and alcohol.<br />
Cannula<br />
A small, thin tube inserted below the skin, which serves to introduce<br />
a liquid medication into the body.<br />
Carbohydrate (carb)<br />
One of the three main nutrients found in food. (The other two<br />
are protein and fat.) Foods that contain carbohydrates include<br />
starches, sugars, vegetables, fruits, and dairy products.<br />
Carbohydrate counting<br />
A method of meal planning based on counting the number of<br />
grams of carbohydrate in a given food.<br />
Carb preset<br />
A favorite food item, snack, or entire meal that can be assigned a<br />
custom name and preprogrammed into the PDM. You set the<br />
carbohydrate value (and, optionally, the fat, protein, fiber, and<br />
total calories) for each carb preset.<br />
Complications (of diabetes)<br />
Harmful effects of diabetes such as damage to the eyes, kidney,<br />
heart, blood vessels, nervous system, teeth and gums, feet, and<br />
skin.<br />
156<br />
Correction bolus<br />
An amount of insulin taken to compensate for high blood glucose<br />
levels. The <strong>mylife</strong> <strong>OmniPod</strong> <strong>System</strong> calculates the correction<br />
bolus by taking the difference between your current blood glucose<br />
level and your target blood glucose value, then dividing the<br />
result by your correction factor.<br />
Correction factor (also known as sensitivity factor)<br />
A value that indicates how much one unit of insulin will lower<br />
your blood glucose. For example, if your correction factor is 2.8,<br />
one unit of insulin will lower your blood glucose by 2.8 mmol/L.<br />
Correction threshold<br />
The blood glucose level above which you would like to take insulin<br />
to reduce an elevated blood glucose.<br />
CSII (continuous subcutaneous insulin infusion)<br />
Delivering insulin continuously under the skin (“subcutaneously”)<br />
on a programmed schedule.<br />
Dawn phenomenon<br />
An early morning rise in blood glucose level caused by the normal<br />
release of hormones that block insulin’s effect.
Diabetes Control and Complications Trial (DCCT)<br />
A study by the National Institute of Diabetes and Digestive and<br />
Kidney Diseases (NIDDK), conducted from 1983 to 1993 in<br />
people with type 1 diabetes, which showed that good blood<br />
glucose control significantly helped prevent or delay diabetes<br />
complications.<br />
Diabetes, diabetes mellitus<br />
A condition characterized by hyperglycemia (high blood glucose)<br />
resulting from the body’s inability to use blood glucose for energy.<br />
In type 1 diabetes, the pancreas no longer makes insulin and<br />
therefore blood glucose cannot enter the cells to be used for<br />
energy. In type 2 diabetes, either the pancreas does not make<br />
enough insulin or the body is unable to use insulin correctly.<br />
Diabetic ketoacidosis (see Ketoacidosis)<br />
Duration of insulin action<br />
The length of time that certain types of insulin remain active and<br />
available in your body after a bolus. This duration can vary greatly<br />
depending on the type of insulin you take. Only use rapid-acting<br />
insulin with the <strong>mylife</strong> <strong>OmniPod</strong> <strong>Insulin</strong> <strong>Management</strong> <strong>System</strong>.<br />
Extended bolus<br />
A feature of the <strong>mylife</strong> <strong>OmniPod</strong> <strong>System</strong> that allows a meal bolus<br />
dose to be given over an extended period of time.<br />
Glossary<br />
Fat<br />
One of the three main energy sources in food (the other two are<br />
carbohydrate and protein). Fat is a concentrated source of energy,<br />
providing 9 calories per gram. Foods high in fat include oils, margarine,<br />
salad dressings, red meat, and whole-milk dairy foods.<br />
Fiber<br />
The indigestible part of plant foods. Foods that are high in fiber<br />
include broccoli, beans, raspberries, squash, whole grain bread,<br />
and bran cereal. Fiber is a type of carbohydrate but does not raise<br />
blood glucose levels as other carbohydrates do.<br />
Glucose<br />
A simple sugar (also known as dextrose) used by the body for<br />
energy. Without insulin, the body cannot use glucose for energy.<br />
Hazard alarm<br />
Notification by the PDM that a dangerous condition exists.<br />
Healthcare provider<br />
A professional who practices medicine or teaches people how to<br />
manage their health. All healthcare providers are a resource for<br />
valuable diabetes management information.<br />
157
Glossary<br />
Hemoglobin A1c (HbA1c)<br />
A test that measures a person’s average blood glucose level over<br />
the past 2 to 3 months. Also called glycosylated hemoglobin, the<br />
test shows the amount of glucose that sticks to the red blood cell,<br />
which is proportional to the amount of glucose in the blood.<br />
Hyperglycemia (high blood glucose)<br />
A higher-than-normal level of glucose in the blood; generally<br />
10.0 mmol/L or higher.<br />
Hypoglycemia (low blood glucose)<br />
A lower-than-normal level of glucose in the blood; generally 3.9<br />
mmol/L or lower.<br />
Hypoglycemia unawareness<br />
A condition in which a person does not feel or recognize the<br />
symptoms of hypoglycemia.<br />
Infusing<br />
Introducing a liquid substance under the skin into the body.<br />
Infusion site<br />
Place on the body where an infusion set or Pod is placed and<br />
cannula is inserted.<br />
<strong>Insulin</strong><br />
A hormone that helps the body use glucose for energy. The beta<br />
cells of a healthy pancreas make insulin.<br />
158<br />
<strong>Insulin</strong> on board (active insulin)<br />
The amount of insulin that is still “active” in the body from a previous<br />
bolus dose. In the <strong>mylife</strong> <strong>OmniPod</strong> <strong>System</strong>, insulin on board<br />
(IOB) is considered in two parts: the IOB from a previous correction<br />
bolus and the IOB from a previous meal bolus.<br />
The amount of time insulin remains “on board” or “active”<br />
depends on each individual’s duration of insulin action. Talk with<br />
your healthcare provider to determine your duration of insulin<br />
action.<br />
The <strong>mylife</strong> <strong>OmniPod</strong> <strong>System</strong> continually calculates the IOB to<br />
help prevent “stacking” of bolus doses, which is a major cause of<br />
hypoglycemia.<br />
<strong>Insulin</strong> reaction (see hypoglycemia)<br />
<strong>Insulin</strong>-to-carbohydrate ratio<br />
Number of grams of carbohydrate covered by one unit of insulin.<br />
For example, if your insulin-to-carbohydrate ratio is 1:15, then<br />
you need to deliver one unit of insulin to cover every fifteen<br />
grams of carbohydrate you eat.<br />
In vitro<br />
Literally, “in glass.” Refers to a biological function taking place in a<br />
laboratory dish rather than in a living organism.
Ketoacidosis (diabetic ketoacidosis or DKA)<br />
A very serious condition in which extremely high blood glucose<br />
levels and a severe lack of insulin cause the body to break down<br />
fat for energy. The breakdown of fat releases ketones into the<br />
blood and urine. DKA can take hours or days to develop, with<br />
symptoms that include stomach pain, nausea, vomiting, fruity<br />
breath odor, and rapid breathing.<br />
It is important to rule out ketoacidosis when you<br />
experience symptoms that might otherwise indicate<br />
the flu.<br />
Ketones<br />
Acidic by-products that result from the breakdown of fat for<br />
energy. The presence of ketones indicates that the body is using<br />
stored fat and muscle (instead of glucose) for energy.<br />
Meal bolus (also known as carbohydrate bolus)<br />
An amount of insulin administered before a meal or snack to<br />
ensure that blood glucose levels stay within the desired BG goal<br />
after a meal. The <strong>mylife</strong> <strong>OmniPod</strong> <strong>System</strong> calculates a meal bolus<br />
by dividing the grams of carbohydrates you are about to eat by<br />
your insulin-to-carbohydrate ratio.<br />
Multiple daily injections (MDIs)<br />
Introducing insulin into the body with a syringe several times a<br />
day.<br />
Occlusion<br />
A blockage or interruption in insulin delivery.<br />
Glossary<br />
Prime bolus<br />
An amount of insulin used to fill the cannula, preparing it to<br />
begin delivering insulin under your skin.<br />
Protein<br />
One of the three main energy sources in food (the other two are<br />
carbohydrate and fat). Protein is necessary for the growth, maintenance,<br />
and repair of body cells and tissues. Protein contains 4<br />
calories per gram. Foods high in protein include meat, poultry,<br />
fish, legumes, and dairy products.<br />
Reverse correction (negative correction)<br />
Using an individual’s correction factor (sensitivity factor), the<br />
reverse correction is a calculation that reduces a portion of a<br />
meal bolus dose when the patient’s blood glucose level is below<br />
their blood glucose target. This feature is an option in the <strong>mylife</strong><br />
<strong>OmniPod</strong> <strong>Insulin</strong> <strong>Management</strong> <strong>System</strong>, which should be turned<br />
on or off according to the advice of a healthcare provider.<br />
Sensitivity factor (see correction factor)<br />
159
Glossary<br />
Sharps<br />
Any medical item that may cause punctures or cuts to those<br />
handling them. Sharps include needles, syringes, scalpel blades,<br />
disposable razors, and broken medical glassware. Dispose of<br />
used sharps according to local waste disposal regulations.<br />
Sharps container<br />
A puncture-proof container used for storage and disposal of<br />
used sharps.<br />
Soft key<br />
A button on the PDM whose label or function appears on the<br />
screen directly above the button. The label changes depending<br />
on the task you are performing.<br />
Subcutaneous<br />
Under the skin.<br />
Suggested bolus calculator<br />
A feature that calculates bolus doses with user-specific settings<br />
and inputs. The settings used to calculate a suggested bolus are<br />
target BG, insulin-to-carbohydrate (IC) ratio, correction factor (CF),<br />
and duration of insulin action. The inputs used to calculate a suggested<br />
bolus are current BG, carbs entered, and insulin on board.<br />
The bolus calculator can be turned Off or On in the PDM.<br />
160<br />
Target blood glucose level<br />
The ideal number at which you would like your blood glucose<br />
level to be. The <strong>mylife</strong> <strong>OmniPod</strong> <strong>System</strong> uses this number in calculating<br />
bolus doses.<br />
Temp basal<br />
A basal rate that is used to cover predictable, short-term changes<br />
in basal insulin need. Temporary rates are often used during exercise<br />
and for sick-day insulin adjustments.<br />
Temporary basal preset<br />
An adjustment in a basal rate, in either % or U/hr, that can be<br />
assigned a custom name and preprogrammed into the PDM.<br />
Time segment (see basal segment)
Index<br />
A<br />
activate a new Pod. . . . . . . . . . . . . . . . .42–56<br />
active insulin . . . . . . . . See insulin on board<br />
add<br />
basal segment or rate . . . . . . . . . .17–21<br />
bolus reminder. . . . . . . . . . . . . . . . . . . . 67<br />
custom alerts. . . . . . . . . . . . . . . . . . . . . . 67<br />
user information . . . . . . . . . . . . . . . . . 103<br />
adhesive . . . . . . . . . . . . . . . . . . . . . . . . . . . . 4, 50<br />
remover . . . . . . . . . . . . . . . . . . . . . . . . . . . 44<br />
advisory alarms . . . . . . . . . . . . 123–126, 155<br />
airport security. . . . . . . . . . . . . . . . . . . . . . . 108<br />
alarms . . . . . . . . . . . . . . . . . . . . . . . .8, 123–130<br />
acknowledge. . . . . . . . . . . . . . . . . . . . . 123<br />
advisory . . . . . . . . . . . . . . . . . . . . . 123–126<br />
hazard. . . . . . . . . . . . . . . . . . . . . . . 123–130<br />
history records . . . . . . . . . . . . . . . 96–102<br />
alert escalation. . . . . . . . . . . . . . . . . . . . . . . 123<br />
alert and reminder notifications . . .65–68<br />
auto-off . . . . . . . . . . . . . . . . . . . . . . . . . . . 65<br />
BG reminder . . . . . . . . . . . . . . . . . . . . . . .65<br />
confidence alerts. . . . . . . . . . . . . . . . . . .66<br />
custom alerts. . . . . . . . . . . . . . . . . . . . . . .66<br />
low reservoir . . . . . . . . . . . . . . . . . . . 15, 65<br />
missed bolus . . . . . . . . . . . . . . . . . . . . . . .65<br />
Pod expiration . . . . . . . . . . . . . . . . . . . . .65<br />
aseptic technique. . . . . . . . . . . . . 42, 55, 155<br />
automated cannula insertion . . . . . . . 2, 51<br />
B<br />
backlight time-out. . . . . . . . . . . . . . . . . . . . .70<br />
set. . . . . . . . . . . . . . . . . . . . . . . . . . . . . . . . . .71<br />
basal history . . . . . . . . . . . . . . . . . . . . . . . . . . .97<br />
basal program . . . . . . . . . . . . 11, 16–22, 155<br />
add segment or rate . . . . . . . . . . . . . . .21<br />
copy . . . . . . . . . . . . . . . . . . . . . . . . . . . . . . .22<br />
create . . . . . . . . . . . . . . . . . . . . . . . . . . . . . .17<br />
delete . . . . . . . . . . . . . . . . . . . . . . . . . . . . . .22<br />
edit segment or rate . . . . . . . . . . . . . . .21<br />
enable . . . . . . . . . . . . . . . . . . . . . . . . . . . . .19<br />
rename . . . . . . . . . . . . . . . . . . . . . . . . . . . . 22<br />
basal rate . . . . . . . . . . . . . . . 1, 11, 16–27, 155<br />
maximum. . . . . . . . . . . . . . . . . . . . . . . . . . 27<br />
temporary . . . . . . . . . . . . . . . . . . . . . . . . . 22<br />
basal segment. . . . . . . . . . . . . . . . . . . . . 11, 16<br />
basal settings. . . . . . . . . . . . . . . . . . . . . . . . . . 11<br />
batteries. . . . . . . . . . . . . . . . . . . . . . 10, 96, 138<br />
BG tag . . . . . . . . . . . . . . . . . . . See tag a BG result<br />
blood glucose<br />
BG goal . . . . . . . . . . . . . . . . . . . 12, 68, 155<br />
BG reminder . . . . . . . . . . . . . . . . . . . . . . . 65<br />
checking . . . . . . . . . . . . . . . . . . x, xi, 75–95<br />
goal limit. . . . . . . . . . . . . . . . . . . . . . . . . . . 68<br />
history . . . . . . . . . . . . . . . . . . . . . . . . . . . . . 99<br />
level . . . . . . . . . . . . . . . . . . . . . . . . . . 28, 155<br />
monitoring . . . . . . . . . . . . . x, xi, 2, 75–95<br />
sound. . . . . . . . . . . . . . . . . . . . . . . . . . 12, 69<br />
test sites . . . . . . . . . . . . . . . . . . . 75, 86–87<br />
test strip . . . . . . . . . . . . . . . . . . . . . . . . . . . 84<br />
161
Index<br />
blood glucose meter . . . . . . . 2, 75–95, 155<br />
error messages . . . . . . . . . . . . . 120–122<br />
readings . . . . . . . . . . . . . . . . . . . . . . . . .3, 89<br />
settings . . . . . . . . . . . . . . . . . . . . . . . . . . . . 68<br />
specifications . . . . . . . . . . . . . . . . . . . . .148<br />
blood glucose readings<br />
enter manually. . . . . . . . . . . . . . . . . . . . . 92<br />
low and high. . . . . . . . . . . . . . . . . . . . . . . 94<br />
bolus . . . . . . . . . . . . . . . . . . . . . . . . . 1, 3, 28–41<br />
cancel. . . . . . . . . . . . . . . . . . . . . . . . . . . . . . 35<br />
dose . . . . . . . . . . . . . . . . . . . . . . . . . . 28, 155<br />
extended . . . . . . . . . . . . . . . . . . . . . . 29, 33<br />
history . . . . . . . . . . . . . . . . . . . . . . . . . . . . . 98<br />
manual delivery. . . . . . . . . . . . . . . . . . . . 33<br />
normal . . . . . . . . . . . . . . . . . . . . . . . . . 29, 30<br />
presets. . . . . . . . . . . . . . . . . . . . 37–39, 155<br />
ratios/factors/targets . . . . . . . . . . . . . . 63<br />
reminders. . . . . . . . . . . . . . . . . . . . . . 65, 67<br />
settings . . . . . . . . . . . . . . . . . . . . . . . . 60–64<br />
suggested bolus calculator . . . .29–33,<br />
141–144<br />
bolus presets . . . . . . . . . . . . . . . . . 37–39, 155<br />
cancel. . . . . . . . . . . . . . . . . . . . . . . . . . . . . . 39<br />
162<br />
change . . . . . . . . . . . . . . . . . . . . . . . . . . . . 39<br />
create. . . . . . . . . . . . . . . . . . . . . . . . . . . . . . 37<br />
delete . . . . . . . . . . . . . . . . . . . . . . . . . . . . . 39<br />
enable . . . . . . . . . . . . . . . . . . . . . . . . . . . . . 38<br />
rename . . . . . . . . . . . . . . . . . . . . . . . . . . . . 39<br />
bolus reminder<br />
add . . . . . . . . . . . . . . . . . . . . . . . . . . . . . . . . 67<br />
Bolus/basal/calcs menu . . . . . . . . . . . . . . . 60<br />
bright mode. . . . . . . . . . . . . . . . . . . . . . . . . 5, 70<br />
buttons<br />
Home/Power . . . . . . . . . . . . . . . . . . . . . . . 5<br />
Up/Down Controller. . . . . . . . . . . . . . . . 5<br />
<strong>User</strong> Info/Support . . . . . . . . . . . . . . . . . . 5<br />
C<br />
calorie. . . . . . . . . . . . . . . . . . . . . . . . . . . . . . . . 156<br />
cancel<br />
bolus . . . . . . . . . . . . . . . . . . . . . . . . . . . . . . 35<br />
bolus preset . . . . . . . . . . . . . . . . . . . . . . . 39<br />
one-time temporary basal rate . . . . 24<br />
temporary basal presets . . . . . . . . . . . 26<br />
cannula . . . . . . . . . . . . . . . . . . . . . . . . . . . .2, 156<br />
automated insertion. . . . . . . . . . . . . 8, 51<br />
carb preset<br />
change category . . . . . . . . . . . . . . . . . . 41<br />
create . . . . . . . . . . . . . . . . . . . . . . . . . . . . . 39<br />
delete . . . . . . . . . . . . . . . . . . . . . . . . . . . . . 41<br />
edit. . . . . . . . . . . . . . . . . . . . . . . . . . . . . . . . 41<br />
rename. . . . . . . . . . . . . . . . . . . . . . . . . . . . 41<br />
carb presets. . . . . . . . . . . . . . . . . . .39–41, 156<br />
carbohydrate . . . . . . . . . . . . . . . . . . . . . .1, 156<br />
counting . . . . . . . . . . . . . . . . . . . . . . . . . 156<br />
history. . . . . . . . . . . . . . . . . . . . . . . . . . . . 101<br />
carbohydrate bolus . . . . . . . See meal bolus<br />
care and maintenance . . . . . . . . . . . . . . . 137<br />
cellular phones. . . . . . . . . . . . . . . . . . . . . . . 119<br />
change<br />
basal programs. . . . . . . . . . . . . . . . . . . . 20<br />
basal settings. . . . . . . . . . . . . . . . . . . . . . 60<br />
bolus presets . . . . . . . . . . . . . . . . . . . . . . 39<br />
bolus settings . . . . . . . . . . . . . . . . . . . . . 60<br />
carb presets . . . . . . . . . . . . . . . . . . . . . . . 40<br />
temporary basal presets. . . . . . . . . . . 26<br />
user information . . . . . . . . . . . . . . . . . 103<br />
check alarms . . . . . . . . . . . . . . . . . . . . . . . . . . 71<br />
check blood glucose . . . . . . . . . . . . . . .75–95
cleaning . . . . . . . . . . . . . . . . . . . . . . . . . . . . . 137<br />
clock<br />
12-hour or 24-hour . . . . . . . . . . . . . . . . 60<br />
code number, test strip vial . . . . . . . . 80, 86<br />
communication<br />
distance to Pod. . . . . . . . . . . . . . . .73, 148<br />
interruption . . . . . . . . . . . . . . . . . . .74, 131<br />
communication failure. . . . . . . . . . 131–136<br />
bolus cancellation . . . . . . . . . . . . . . . . 135<br />
hazard alarm . . . . . . . . . . . . . . . . . . . . . 130<br />
Pod activation. . . . . . . . . . . . . . . . . . . . 131<br />
Pod deactivation . . . . . . . . . . . . . . . . . 133<br />
Pod operation . . . . . . . . . . . . . . . . . . . . 131<br />
request for status. . . . . . . . . . . . . . . . . 134<br />
complications, diabetes-related . . . 1, 156<br />
confidence alerts. . . . . . . . . . . . . . . . . . . . . . 66<br />
contact information. . . . . . . . . . . . . . . . . . 102<br />
continuous subcutaneous insulin<br />
infusion . . . . . . . . . . . . . . . . . . . . . . . . . . 156<br />
control solution . . . . . . . . . . . . . . . . . . . . . . . 77<br />
expiration . . . . . . . . . . . . . . . . . . . . . . . . . 77<br />
results . . . . . . . . . . . . . . . . . . . . . . . . . . . . . 77<br />
test . . . . . . . . . . . . . . . . . . . . . . . . . . . . .79–82<br />
copy basal program . . . . . . . . . . . . . . . . . . .22<br />
correct-above value . . . . . . . See correction<br />
threshold<br />
correction bolus . . . . . . . . . . . . . 30, 141, 156<br />
correction factor . . . . . . . 13, 28, 62, 64, 156<br />
correction IOB . . . . . . . . . . . . . . . . . . . . . . . 141<br />
correction threshold . . . . . . .28, 61, 63, 156<br />
create<br />
basal program . . . . . . . . . . . . . . . . . . . . .17<br />
bolus preset. . . . . . . . . . . . . . . . . . . . . . . .37<br />
carb preset . . . . . . . . . . . . . . . . . . . . . . . . .39<br />
temporary basal presets . . . . . . . . . . .24<br />
CSII . . . . . . . . See continuous subcutaneous<br />
insulin infusion<br />
CT scans . . . . . . . . . . . . . . . . . . . . . . . . . . . . . 119<br />
custom alerts . . . . . . . . . . . . . . . . . . . . . . 66, 67<br />
customize PDM. . . . . . . . . . . . . . . . . . . . . . . .70<br />
D<br />
date and time. . . . . . . . . . . . . . . . . . . . . . 11, 59<br />
dawn phenomenon . . . . . . . . . . . . . . . . . 156<br />
deactivation . . . . . . . . See Pod deactivating<br />
dehydration . . . . . . . . . . . . . . . . . . . . . . . . . . .95<br />
Index<br />
delete<br />
basal program . . . . . . . . . . . . . . . . . . . . . 22<br />
bolus presets . . . . . . . . . . . . . . . . . . . . . . 39<br />
bolus reminder . . . . . . . . . . . . . . . . . . . . 67<br />
carb preset. . . . . . . . . . . . . . . . . . . . . . . . . 41<br />
temporary basal presets . . . . . . . . . . . 27<br />
depth settings, lancing device. . . . . . . . . 84<br />
diabetes . . . . . . . . . . . . . . . . . . . . . . . . . . . . . .157<br />
Diabetes Control and Complications Trial<br />
(DCCT) . . . . . . . . . . . . . . . . . . . . . . . . . . . .157<br />
diabetes emergency kit . . . . . . . . . . . . . .106<br />
diabetes mellitus . . . . . . . . . . . . . . . . . . . . . . .ix<br />
diabetic ketoacidosis . . . . . . . . . . . . . See DKA<br />
diagnostic functions. . . . . . . . . . . . . . . . . . . 71<br />
check alarms. . . . . . . . . . . . . . . . . . . . . . . 71<br />
reset PDM. . . . . . . . . . . . . . . . . . . . . . . . . . 72<br />
DKA . . . . . . . . . . . . . . . . . . . . . . . . . . . . . . . . . .159<br />
avoiding . . . . . . . . . . . . . . . . . . . . . . . . . .117<br />
symptoms . . . . . . . . . . . . . . . . . . . . . . . .117<br />
treating . . . . . . . . . . . . . . . . . . . . . . . . . . .117<br />
duration of insulin action . . x, 14, 30, 141–<br />
142, 157<br />
163
Index<br />
E<br />
edit<br />
basal segment or rate. . . . . . . . . . . . . . 21<br />
bolus reminder . . . . . . . . . . . . . . . . . . . . 67<br />
carb preset. . . . . . . . . . . . . . . . . . . . . . . . . 41<br />
electrical interference . . . . . . . . . . . . . . . . . 74<br />
electrical safety . . . . . . . . . . . . . . . . . 151–154<br />
electromagnetic compatibility . 151–154<br />
electromagnetic fields. . . . . . . . . . . . . . . . . 74<br />
emergency kit . . . . . . . . . . . . . .104, 106, 107<br />
empty reservoir hazard alarm . . . . . . . .125<br />
enable<br />
basal program . . . . . . . . . . . . . . . . . . . . . 19<br />
bolus preset . . . . . . . . . . . . . . . . . . . . . . . 38<br />
one-time temporary basal rate. . . . . 23<br />
temporary basal presets . . . . . . . . . . . 25<br />
enter tags . . . . . . . . . . . . . . . . . . . . . . . . . 69, 90<br />
error messages, BG meter . . . . . . 120–122<br />
exercise. . . . . . . . . . . . . . . . . . . . . . . . . .113, 118<br />
expiration<br />
control solution. . . . . . . . . . . . . . . . . . . . 77<br />
Pod . . . . . . . . . . . . . . . . . . . . . . . . . . . . . . . . 65<br />
test strips . . . . . . . . . . . . . . . . . . . . . . . . . . 76<br />
164<br />
extended bolus . . . . . . . 14, 29, 33–35, 157<br />
Extended option . . . . . . . . . . . . . . . . . . . . . . 64<br />
extreme temperatures . . . . . . . . . . . . . . . . 74<br />
F<br />
failure . . . . . . . . . See communication failure<br />
fat . . . . . . . . . . . . . . . . . . . . . . . . . . . . . . . . . . . . 157<br />
fiber . . . . . . . . . . . . . . . . . . . . . . . . . . . . . . 40, 157<br />
fill syringe . . . . . . . . . . . . . . . . . . . . . . . . . 45–47<br />
Flow accuracy<br />
Pod . . . . . . . . . . . . . . . . . . . . . . . . . . . . . . . 147<br />
Flow rate error . . . . . . . . . . . . . . . . . . . . . . . 147<br />
G<br />
glucagon. . . . . . . . . . . . . . . . . . . . . . . . . . . . . 107<br />
glucose. . . . . . . . . . . . . . . . . . . . . . . . . . . . ix, 157<br />
H<br />
hard work . . . . . . . . . . . . . . . . . . . . . . . . . . . . 118<br />
hazard alarms . . . . . . . . . . . . . .123–130, 157<br />
healthcare provider . . . . . . . . . . . . . . . .x, 157<br />
hemoglobin A1c (HbA1c) . . . . . . . . . . . . 158<br />
high blood glucose . . See hyperglycemia<br />
history<br />
alarms . . . . . . . . . . . . . . . . . . . . . . . . . . . . 101<br />
all. . . . . . . . . . . . . . . . . . . . . . . . . . . . . . . . . 102<br />
basal . . . . . . . . . . . . . . . . . . . . . . . . . . . . . . 97<br />
blood glucose . . . . . . . . . . . . . . . . . . . . . 99<br />
bolus . . . . . . . . . . . . . . . . . . . . . . . . . . . . . . 98<br />
carbohydrates. . . . . . . . . . . . . . . . . . . . 101<br />
insulin delivery . . . . . . . . . . . . . . . . .96, 97<br />
Home screen. . . . . . . . . . . . . . . . . . . . . . . . . 6–7<br />
Home/Power button. . . . . . . . . . . . . . . . . . . .5<br />
hospitalization . . . . . . . . . . . . . . . . . . . . . . . 119<br />
hyperglycemia . . . . .95, 104, 113–116, 158<br />
avoiding. . . . . . . . . . . . . . . . . . . . . . . . . . 114<br />
causes . . . . . . . . . . . . . . . . . . . . . . . . . . . . 115<br />
symptoms. . . . . . . . . . . . . . . . . . . . . . . . 113<br />
treating. . . . . . . . . . . . . . . . . . . . . . . . . . . 114<br />
hypoglycemia. . 75, 95, 104, 109–113, 158<br />
avoiding. . . . . . . . . . . . . . . . . . . . . . . . . . 110<br />
causes . . . . . . . . . . . . . . . . . . . . . . . . . . . . 112<br />
symptoms. . . . . . . . . . . . . . . . . . . . 75, 109<br />
treating. . . . . . . . . . . . . . . . . . . . . . . . . . . 110<br />
hypoglycemia unawareness .75, 110, 158<br />
I<br />
icons . . . . . . . . . . . . . . . . . . . . . . . . . . . . . . . . . 149<br />
insulin gauge. . . . . . . . . . . . . . . . . . . . . . 58
illness . . . . . . . . . . . . . . . . . . . . . . . . . . . . . . . . 118<br />
infection . . . . . . . . . . . . . . . . . . . . . . . . . .55, 105<br />
infusion set, automated insertion . . . . . . .2<br />
infusion site . . . . . . . . . . . . . . 48, 55, 105, 158<br />
infusion site, inspection . . . . . . . . . . . . . . 105<br />
insulin16, 28, 42, 45, 46, 106, 108, 140, 158<br />
insulin action . . . . . . See duration of insulin<br />
action<br />
insulin delivery<br />
resume . . . . . . . . . . . . . . . . . . . . . . . . . . . . 55<br />
suspend . . . . . . . . . . . . . . . . . . . . . . . . . . . 54<br />
insulin delivery records . . . . . . . . . . . .96–98<br />
insulin delivery, continuous. . . . . . . . . . . . .1<br />
insulin gauge icon . . . . . . . . . . . . . . . . . . . . 58<br />
insulin on board (IOB)28, 30, 141–144, 158<br />
insulin reservoir . . . . . . . . . . . . . . . . . . . . . . . 58<br />
insulin, rapid-acting vs. long-acting . . 117<br />
insulin-to-carb (IC) ratio . . x, 13, 28, 62, 63,<br />
158<br />
interruption in communication . . . . . . . 74<br />
IV Prep wipes . . . . . . . . . . . . . . . . . . . . .73, 138<br />
K<br />
ketoacidosis . . . . . . . . . . . . . . . . . . . . . . . . See DKA<br />
ketones . . . . . . . . . . . . . . . . . . . . . . 94, 117, 159<br />
L<br />
lancet. . . . . . . . . . . . . . . . . . . . . . . . . . . . . . . . . .83<br />
lancing<br />
finger . . . . . . . . . . . . . . . . . . . . . . . . . . . . . .86<br />
lancing device . . . . . . . . . . . . . . . . . . . . .82–87<br />
long-acting insulin. . . . . . . . . . . . . . . . . . . 117<br />
low battery alert . . . . . . . . . . . . . . . . . . . . . 138<br />
low blood glucose . . . . .See hypoglycemia<br />
low reservoir advisory . . . . . . . . 15, 65, 125<br />
lows, highs, and DKA, avoid. . . . . . . . . . 109<br />
M<br />
maximum basal rate . . . . . . . . . . . . . . . 27, 64<br />
maximum bolus . . . . . . . . . . . . . . . . . . . 14, 64<br />
meal bolus. . . . . . . . . . . . . .30, 141–144, 159<br />
meal IOB. . . . . . . . . . . . . . . . . . . . . . . . . . . . . 142<br />
Medic Alert tag . . . . . . . . . . . . . . . . . . . . . . 119<br />
medical electrical equipment. . . 151–154<br />
menu<br />
Bolus/basal/calcs. . . . . . . . . . . . . . . . . . .60<br />
More actions . . . . . . . . . . . . . . . . . . . . 7, 31<br />
My records . . . . . . . . . . . . . . . . . . . . . . . . . . 7<br />
Index<br />
Settings. . . . . . . . . . . . . . . . . . . . . . . . . . . . . 7<br />
Suspend/resume . . . . . . . . . . . . . . . . . . . 7<br />
<strong>System</strong> setup . . . . . . . . . . . . . . . . . . . . . . 59<br />
Temp basal . . . . . . . . . . . . . . . . . . . . . . . . . 7<br />
microwave ovens. . . . . . . . . . . . . . . . . . . . . . 74<br />
Min BG for calcs . . . . . . . . . . . . . . . .13, 61, 63<br />
missed bolus reminder . . . . . . . . . . . . 65–67<br />
More actions menu. . . . . . . . . . . . . . . . . . . . 31<br />
MRIs . . . . . . . . . . . . . . . . . . . . . . . . . . . . . . . . . .119<br />
multiple daily injections (MDIs). . . . . . .159<br />
multiple-day trends, BG history. . . . . . .100<br />
<strong>mylife</strong> <strong>OmniPod</strong> label symbols . . . . . . .149<br />
<strong>mylife</strong> <strong>OmniPod</strong> Setup Wizard . . . . . . . . 10<br />
<strong>mylife</strong> <strong>OmniPod</strong> <strong>System</strong>. . . . . . . . . . . . . . . . 2<br />
N<br />
normal bolus . . . . . . . . . . . . . . . . . . . . . . 29, 30<br />
O<br />
occlusion . . . . . . . . . . . . . . . . .8, 113, 117, 159<br />
occlusion detected hazard alarm . . . . .127<br />
one-time temporary basal rate . . . . . . . . 23<br />
cancel. . . . . . . . . . . . . . . . . . . . . . . . . . . . . . 24<br />
enable . . . . . . . . . . . . . . . . . . . . . . . . . . . . . 23<br />
165
Index<br />
operating temperatures . . . . . 74, 146, 148<br />
options<br />
Bolus calcs . . . . . . . . . . . . . . . . . . . . . . . . . 61<br />
Extended . . . . . . . . . . . . . . . . . . . . . . . . . . 64<br />
Max basal rate . . . . . . . . . . . . . . . . . . . . . 64<br />
Max bolus. . . . . . . . . . . . . . . . . . . . . . . . . . 64<br />
Ratios/factors/targets . . . . . . . . . . . . . . 63<br />
Temp basal . . . . . . . . . . . . . . . . . . . . . . . . 64<br />
Options and settings . . . . . . . . . . . . . . . . .145<br />
order supplies . . . . . . . . . . . . . . . . . . . . . . . .140<br />
P<br />
PDM . . . . . . . . . . . . . . . . . . . . . . . . . . . . .4, 57–74<br />
backlight time-out . . . . . . . . . . . . . . . . . 70<br />
batteries . . . . . . . . . . . . . . . . . . . . . . 10, 138<br />
BG goal . . . . . . . . . . . . . . . . . . . . . . . . . . . . 68<br />
blood glucose sound . . . . . . . . . . . . . . 69<br />
cleaning . . . . . . . . . . . . . . . . . . . . . . . . . .138<br />
communication with Pod. . . . 57, 131<br />
customize. . . . . . . . . . . . . . . . . . . . . . 70–71<br />
dropped . . . . . . . . . . . . . . . . . . . . . . . . . .140<br />
icons . . . . . . . . . . . . . . . . . . . . . . . . . . . . . .149<br />
PDM lock . . . . . . . . . . . . . . . . . . . . . . 70–71<br />
repair or replacement. . . . . . . . . . . . .124<br />
166<br />
screen time-out. . . . . . . . . . . . . . . . . . . . 70<br />
settings . . . . . . . . . . . . . . . . . . . . . . . . . . . . 58<br />
setup . . . . . . . . . . . . . . . . . . . . . . . . . . . . . . . 9<br />
specifications . . . . . . . . . . . . . . . . . . . . . 148<br />
storage . . . . . . . . . . . . . . . . . . . . . . . . . . . 137<br />
submerged in water . . . . . . . . . . . . . . . 73<br />
version . . . . . . . . . . . . . . . . . . . . . . . . . . . . . ix<br />
PDM error hazard alarm . . . . . . . . . 128-130<br />
PDM lock . . . . . . . . . . . . . . . . . . . . . . . . . 70, 137<br />
set . . . . . . . . . . . . . . . . . . . . . . . . . . . . . . . . . 71<br />
PDM options, <strong>System</strong> setup . . . . . . . . . . . 70<br />
personal contact information . . . . . . . . 102<br />
Personal Diabetes Manager . . . . .See PDM<br />
physical exertion . . . . . . . . . . . . . . . . . . . . . 118<br />
playing sports . . . . . . . . . . . . . . . . . . . . . . . . 118<br />
Pod. . . . . . . . . . . . . . . . . . . . . . . . . . . . . . 4, 42–56<br />
applying . . . . . . . . . . . . . . . . . . . . . . . . . . . 50<br />
change process. . . . . . . . . . . . . . . . . . . . 42<br />
check status . . . . . . . . . . . . . . . . . . . . . . . 53<br />
cleaning . . . . . . . . . . . . . . . . . . . . . . . . . . 137<br />
deactivating . . . . . . . . . . . . . . . . . . . . . . . 43<br />
expiration . . . . . . . . . . . . . . . . . . . . . . . . . 65<br />
filling . . . . . . . . . . . . . . . . . . . . . . . . . . . . . . 45<br />
flow accuracy. . . . . . . . . . . . . . . . . . . . . 147<br />
flow rate error . . . . . . . . . . . . . . . . . . . . 147<br />
in water . . . . . . . . . . . . . . . . . . . . . . . . . . . 56<br />
inserting cannula. . . . . . . . . . . . . . . . . . 51<br />
priming. . . . . . . . . . . . . . . . . . . . . . . . . . . . 47<br />
removal . . . . . . . . . . . . . . . . . . . . . . . . . . 118<br />
safety checks . . . . . . . . . . . . . . . . . . . . . . 47<br />
specifications. . . . . . . . . . . . . . . . . . . . . 146<br />
storage . . . . . . . . . . . . . . . . . . . . . . . 56, 137<br />
Pod error hazard alarm. . . . . . . . . . 127, 128<br />
Pod expiration advisory. . . . . . . . . . . . . . 126<br />
Pod expired hazard alarm. . . . . . . . . . . . 126<br />
Pod occlusion hazard alarm. . . . . . . . . . 127<br />
prescriptions . . . . . . . . . . . . . . . . . . . . . . . . . 108<br />
for travel. . . . . . . . . . . . . . . . . . . . . . . . . . 107<br />
prime bolus . . . . . . . . . . . . . . . . . . . . . . 52, 159<br />
priming, automatic . . . . . . . . . . . . . . . . . . . . .8<br />
program alerts . . . . . . . .See reminder alerts<br />
program-in-process reminders . . . . . . . 65<br />
protein. . . . . . . . . . . . . . . . . . . . . . . . . . . . . . . 159<br />
R<br />
radio interference . . . . . . . . . . . . . . . . . . . . . 74<br />
rapid-acting insulin . . . . . . . . . . . . . . . . . . 117
Ratios/factors/targets option . . . . . .63–64<br />
record keeping. . . . . . . . . . . . . . . . . 3, 96–103<br />
record screens . . . . . . . . . . . . . . . . . . . 96–103<br />
alarms . . . . . . . . . . . . . . . . . . . . . . . . . . . . 101<br />
all . . . . . . . . . . . . . . . . . . . . . . . . . . . . . . . . 102<br />
blood glucose . . . . . . . . . . . . . . . . . . . . . 99<br />
carbohydrates. . . . . . . . . . . . . . . . . . . . 101<br />
combined records. . . . . . . . . . . . . . . . 102<br />
insulin delivery . . . . . . . . . . . . . . . . . . . . 97<br />
personal contact information . . . . 102<br />
special symbols . . . . . . . . . . . . . . .96, 100<br />
<strong>User</strong> Info/Support . . . . . . . . . . . . . . . . 102<br />
reminder alerts. . . . . . . . . . . . . . . . . . . . . . . . 65<br />
remove a Pod . . . . . . . . . . . . . . . . .43–44, 118<br />
rename<br />
basal program. . . . . . . . . . . . . . . . . . . . . 22<br />
bolus presets . . . . . . . . . . . . . . . . . . . . . . 39<br />
custom alerts. . . . . . . . . . . . . . . . . . . . . . 67<br />
temporary basal presets. . . . . . . . . . . 27<br />
replace batteries . . . . . . . . . . . . . . . . . . . . . 139<br />
reset<br />
date . . . . . . . . . . . . . . . . . . . . . . . . . . . . . . . 60<br />
PDM. . . . . . . . . . . . . . . . . . . . . . . . . . . . . . . 72<br />
time. . . . . . . . . . . . . . . . . . . . . . . . . . . . . . . .59<br />
resume insulin delivery . . . . . . . . . . . . . . . .55<br />
reverse correction 14, 32, 62, 64, 141, 159<br />
S<br />
safety . . . . . . . . . . . . . . . . . . . . . . . . . . . . . . 8, 104<br />
alerts and alarms . . . . . . . . . . . . . . . . . . . . 8<br />
automatic priming . . . . . . . . . . . . . . . . . . 8<br />
automatic safety checks. . . . . . . . . . . . . 8<br />
electrical . . . . . . . . . . . . . . . . . . . . 151–154<br />
occlusion detection . . . . . . . . . . . . . . . . . 8<br />
safety checks . . . . . . . . . . . . . . . . . . . . . . . . 120<br />
screen time-out. . . . . . . . . . . . . . . . . . . . . . . .70<br />
set. . . . . . . . . . . . . . . . . . . . . . . . . . . . . . . . . .71<br />
sensitivity factor . . . . .See correction factor<br />
set<br />
backlight time-out . . . . . . . . . . . . . . . . .71<br />
PDM lock. . . . . . . . . . . . . . . . . . . . . . . . . . .71<br />
screen time-out . . . . . . . . . . . . . . . . . . . .71<br />
settings, BG meter . . . . . . . . . . . . . . . . . . . . .68<br />
Setup Wizard . . . . . . . . . . . . . . . . . . . . . . . . . .10<br />
sharps . . . . . . . . . . . . . . . . . . . . . . . . . . . . . . . 160<br />
sharps container. . . . . . . . . . . . . . . . . . . . . 160<br />
shock . . . . . . . . . . . . . . . . . . . . . . . . . . . . . . . . . .42<br />
Index<br />
sick days. . . . . . . . . . . . . . . . . . . . . . . . . . . . . .118<br />
soap, solvent . . . . . . . . . . . . . . . . 73, 137, 138<br />
soft keys . . . . . . . . . . . . . . . . . . . . . . . . xii, 5, 160<br />
soft reset . . . . . . . . . . . . . . . . . . . . . See reset PDM<br />
special symbols in record screens . . . . . 96<br />
specifications<br />
BG meter . . . . . . . . . . . . . . . . . . . . . . . . .148<br />
PDM . . . . . . . . . . . . . . . . . . . . . . . . . . . . . .148<br />
Pod . . . . . . . . . . . . . . . . . . . . . . . . . . . . . . .146<br />
sports. . . . . . . . . . . . . . . . . . . . . . . . . . . . . . . . .118<br />
Status screen . . . . . . . . . . . . . . . . . 6–7, 57–58<br />
storage temperature . . . . . . . . . . . . . . . . .146<br />
stuck key advisory . . . . . . . . . . . . . . . . . . . .126<br />
suggested bolus calculator . .3, 12, 29–33,<br />
91, 160<br />
examples . . . . . . . . . . . . . . . . . . . 141–143<br />
guidelines . . . . . . . . . . . . . . . . . . . . . . . .143<br />
supplies<br />
ordering . . . . . . . . . . . . . . . . . . . . . . . . . .140<br />
packing for travel . . . . . . . . . . . . . . . . .107<br />
surgery . . . . . . . . . . . . . . . . . . . . . . . . . . . . . . .119<br />
suspend insulin delivery. . . . . . . . . . . . . . . 54<br />
167
Index<br />
symbols<br />
in history records . . . . . . . . . . . . . . . . . . 96<br />
on screen . . . . . . . . . . . . . . . . . . . . . . . . .149<br />
<strong>System</strong> labels . . . . . . . . . . . . . . . . . . . . .149<br />
symptoms<br />
DKA. . . . . . . . . . . . . . . . . . . . . . . . . . . . . . .117<br />
hyperglycemia. . . . . . . . . . . . . . . . . . . .113<br />
hypoglycemia . . . . . . . . . . . . . . . . 75, 109<br />
<strong>System</strong> error hazard alarm. . . . . . . . . . . .129<br />
<strong>System</strong> options and settings . . . . . . . . .145<br />
<strong>System</strong> setup menu . . . . . . . . . . . . . . . . . . . 59<br />
T<br />
tag a BG test result . . . . . . . . . . . . . . . . . . . . 81<br />
tags<br />
enter. . . . . . . . . . . . . . . . . . . . . . . . . . . 69, 90<br />
target BG . . . . . . . . . . . . . . . . . .28, 61, 63, 160<br />
target blood glucose value . . . . . . . . . . . . 12<br />
temperatures<br />
extreme. . . . . . . . . . . . . . . . . . . . . . . . . . . . 74<br />
operating . . . . . . . . . . . . . . . . 74, 146, 148<br />
storage . . . . . . . . . . . . . . . . . . . . . . . . . . .146<br />
temporary basal . . . . . . . . . . . . . . . . . . . 11, 64<br />
168<br />
temporary basal presets. . . . . . 24–27, 160<br />
cancel . . . . . . . . . . . . . . . . . . . . . . . . . . . . . 26<br />
change . . . . . . . . . . . . . . . . . . . . . . . . . . . . 26<br />
create. . . . . . . . . . . . . . . . . . . . . . . . . . . . . . 24<br />
delete . . . . . . . . . . . . . . . . . . . . . . . . . . . . . 27<br />
enable . . . . . . . . . . . . . . . . . . . . . . . . . . . . . 25<br />
rename . . . . . . . . . . . . . . . . . . . . . . . . . . . . 27<br />
temporary basal rate . . . . . . . . . 22–27, 160<br />
temporary basal rate, one-time . . . . . . . 23<br />
test strips. . . . . . . . . . . . . . . . . . . . .2, 76, 78, 84<br />
code . . . . . . . . . . . . . . . . . . . . . . . . . . . . . . . 85<br />
expiration . . . . . . . . . . . . . . . . . . . . . . . . . 76<br />
text, entering and changing17, 22, 24, 27,<br />
38, 39<br />
time . . . . . . . . . . . . . . . . . . . . . . . . . . . . . . . .11, 59<br />
time segment . . . . . . . . . . See basal segment<br />
time zones . . . . . . . . . . . . . . . . . . . . . . . . . . . 107<br />
training. . . . . . . . . . . . . . . . . . . . . . . . . . . . . . . . . 9<br />
travel concerns. . . . . . . . . . . . . . . . . . . . . . . 107<br />
U<br />
Up/Down Controller buttons. . . . . . . . . . . 5<br />
<strong>User</strong> <strong>Guide</strong> symbols . . . . . . . . . . . . . . . . . . . . xii<br />
<strong>User</strong> Info/Support<br />
button. . . . . . . . . . . . . . . . . . . . . . . . . .5, 102<br />
icon . . . . . . . . . . . . . . . . . . . . . . . . . . . . . . . . .5<br />
screen . . . . . . . . . . . . . . . . . . . . . . . . . . . . 103<br />
V<br />
vacation. . . . . . . . . . . . . . . . . . . . . . . . . . . . . . 107<br />
W<br />
water . . . . . . . . . . . . . . . . . . . . . . . .73, 106, 139<br />
wireless communication technology . 74<br />
X<br />
X-rays . . . . . . . . . . . . . . . . . . . . . . . . . . . 108, 119<br />
xylose-absorption testing . . . . . . . . . . . . . 95
My PDM Settings<br />
Use this form to keep track of your important PDM settings. Remember to update your information as you change or add settings.<br />
Basal Program 1<br />
Name _________________________________<br />
12:00 AM to ________<br />
________ to ________<br />
________ to ________<br />
________ to ________<br />
________ to ________<br />
________ to ________<br />
________ to ________<br />
Target BG<br />
Target BG (“correct to” values) for<br />
each time segment defined, starting<br />
at midnight. These values are used<br />
by the suggested bolus calculator.<br />
12:00 AM to ________<br />
________ to ________<br />
________ to ________<br />
________ to ________<br />
Target BG<br />
_________<br />
_________<br />
_________<br />
_________<br />
Rate<br />
___________ U/hr<br />
___________ U/hr<br />
___________ U/hr<br />
___________ U/hr<br />
___________ U/hr<br />
___________ U/hr<br />
___________ U/hr<br />
Suggest correction<br />
when BG is above<br />
__________ mmol/L<br />
__________ mmol/L<br />
__________ mmol/L<br />
__________ mmol/L<br />
Basal Program 2<br />
Name _________________________________<br />
12:00 AM to ________<br />
________ to ________<br />
________ to ________<br />
________ to ________<br />
________ to ________<br />
________ to ________<br />
________ to ________<br />
<strong>Insulin</strong>-to-Carbohydrate Ratio<br />
<strong>Insulin</strong>-to-carbohydrate ratio for each time<br />
segment defined, starting at midnight.<br />
12:00 AM to ________<br />
________ to ________<br />
________ to ________<br />
________ to ________<br />
Rate<br />
___________ U/hr<br />
___________ U/hr<br />
___________ U/hr<br />
___________ U/hr<br />
___________ U/hr<br />
___________ U/hr<br />
___________ U/hr<br />
1 unit of insulin<br />
covers<br />
__________ g carb<br />
__________ g carb<br />
__________ g carb<br />
__________ g carb
My PDM Settings<br />
Duration of <strong>Insulin</strong> Action<br />
Time that insulin will remain “active” in the body<br />
from a previous bolus. ___________ hrs<br />
Correction Factor<br />
Correction factor for each time segment defined,<br />
starting at midnight.<br />
12:00 AM to ________<br />
________ to ________<br />
________ to ________<br />
________ to ________<br />
Temp Basal Presets<br />
Name<br />
________________________________________<br />
________________________________________<br />
________________________________________<br />
________________________________________<br />
________________________________________<br />
________________________________________<br />
________________________________________<br />
1 unit of insulin<br />
decreases BG by<br />
__________ mmol/L<br />
__________ mmol/L<br />
__________ mmol/L<br />
__________ mmol/L<br />
Rate (circle<br />
measurement)<br />
________ U/hr or %<br />
________ U/hr or %<br />
________ U/hr or %<br />
________ U/hr or %<br />
________ U/hr or %<br />
________ U/hr or %<br />
________ U/hr or %<br />
Bolus Presets<br />
Name<br />
________________________________________<br />
________________________________________<br />
________________________________________<br />
________________________________________<br />
________________________________________<br />
________________________________________<br />
________________________________________<br />
Carb Presets<br />
Name<br />
________________________________________<br />
________________________________________<br />
________________________________________<br />
________________________________________<br />
________________________________________<br />
________________________________________<br />
________________________________________<br />
________________________________________<br />
________________________________________<br />
________________________________________<br />
Units<br />
_____________ U<br />
_____________ U<br />
_____________ U<br />
_____________ U<br />
_____________ U<br />
_____________ U<br />
_____________ U<br />
Grams of<br />
carbohydrate<br />
__________ g carb<br />
__________ g carb<br />
__________ g carb<br />
__________ g carb<br />
__________ g carb<br />
__________ g carb<br />
__________ g carb<br />
__________ g carb<br />
__________ g carb<br />
__________ g carb
