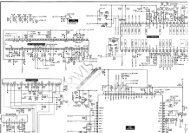
LCD TV SERVICE MANUAL - diagramas.diagram...
LCD TV SERVICE MANUAL - diagramas.diagram...
LCD TV SERVICE MANUAL - diagramas.diagram...

Create successful ePaper yourself
Turn your PDF publications into a flip-book with our unique Google optimized e-Paper software.
4.6. Input Tool-Option, Area Option.<br />
## TOOL Option, Area Option change and AC off<br />
Before PCBA check, you have to change the Tool option,<br />
Area option and have to AC off/on (Plug out and in)<br />
(If missing this process, set can operate abnormally)<br />
4.6.1. Profile<br />
: Must be changed the option value because being different<br />
with some setting value depend on module maker, inch and<br />
market<br />
4.6.2. Equipment : adjustment remote control.<br />
4.6.3. Adjustment method<br />
The input methods are same as other chassis.(Use IN-START<br />
Key on the Adjust Remocon.)<br />
(If not changed the option, the input menu can differ the<br />
model spec.)<br />
* Refer to Job Expression of each main chassis ass’y<br />
(EBTxxxxxxxx) for Option value<br />
* Never push the IN-STOP KEY after completing the function<br />
inspection.<br />
4.7. Check SW Version<br />
(1) Method<br />
1) Push In-star key on Adjust remote-controller.<br />
2) SW Version check<br />
Check “SW VER : V3.xx” – LH20<br />
5. White Balance adjstment<br />
5.1. Overview<br />
(1) Purpose : Adjust the color temperature to reduce the<br />
deviation of the module color temperature.<br />
(2) Principle : To adjust the white balance without the<br />
saturation, Fix the one of R/G/B gain to 192 (default data)<br />
and decrease the others.<br />
(3) Adjustment mode : Three modes – Cool / Medium / Warm<br />
5.2. Required Equipment<br />
(1) Remote controller for adjustment<br />
(2) Color Analyzer : CA100+ or CA-210 or same product -<br />
<strong>LCD</strong> <strong>TV</strong> (ch:9)<br />
(should be used in the calibrated ch by CS-1000)<br />
(3) Auto W/B adjustment instrument(only for Auto adjustment)<br />
Copyright C 2009<br />
LG Electronics. Inc. All right reserved.<br />
Only for training and service purposes<br />
- 14 -<br />
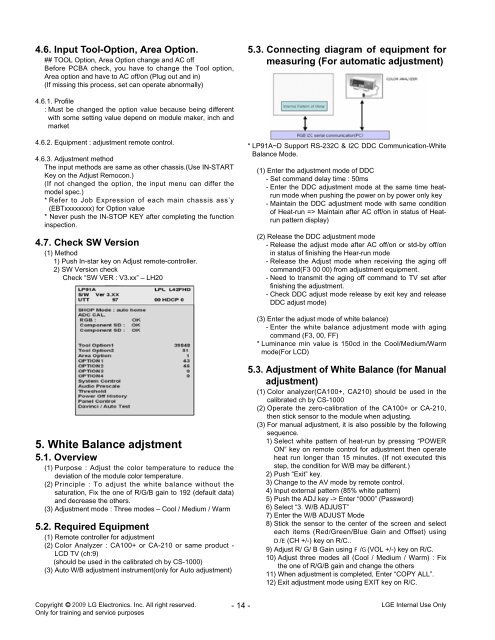
5.3. Connecting <strong>diagram</strong> of equipment for<br />
measuring (For automatic adjustment)<br />
* LP91A~D Support RS-232C & I2C DDC Communication-White<br />
Balance Mode.<br />
(1) Enter the adjustment mode of DDC<br />
- Set command delay time : 50ms<br />
- Enter the DDC adjustment mode at the same time heatrun<br />
mode when pushing the power on by power only key<br />
- Maintain the DDC adjustment mode with same condition<br />
of Heat-run => Maintain after AC off/on in status of Heatrun<br />
pattern display)<br />
(2) Release the DDC adjustment mode<br />
- Release the adjust mode after AC off/on or std-by off/on<br />
in status of finishing the Hear-run mode<br />
- Release the Adjust mode when receiving the aging off<br />
command(F3 00 00) from adjustment equipment.<br />
- Need to transmit the aging off command to <strong>TV</strong> set after<br />
finishing the adjustment.<br />
- Check DDC adjust mode release by exit key and release<br />
DDC adjust mode)<br />
(3) Enter the adjust mode of white balance)<br />
- Enter the white balance adjustment mode with aging<br />
command (F3, 00, FF)<br />
* Luminance min value is 150cd in the Cool/Medium/Warm<br />
mode(For <strong>LCD</strong>)<br />
5.3. Adjustment of White Balance (for Manual<br />
adjustment)<br />
(1) Color analyzer(CA100+, CA210) should be used in the<br />
calibrated ch by CS-1000<br />
(2) Operate the zero-calibration of the CA100+ or CA-210,<br />
then stick sensor to the module when adjusting.<br />
(3) For manual adjustment, it is also possible by the following<br />
sequence.<br />
1) Select white pattern of heat-run by pressing “POWER<br />
ON” key on remote control for adjustment then operate<br />
heat run longer than 15 minutes. (If not executed this<br />
step, the condition for W/B may be different.)<br />
2) Push “Exit” key.<br />
3) Change to the AV mode by remote control.<br />
4) Input external pattern (85% white pattern)<br />
5) Push the ADJ key -> Enter “0000” (Password)<br />
6) Select “3. W/B ADJUST”<br />
7) Enter the W/B ADJUST Mode<br />
8) Stick the sensor to the center of the screen and select<br />
each items (Red/Green/Blue Gain and Offset) using<br />
D/E(CH +/-) key on R/C..<br />
9) Adjust R/ G/ B Gain using F/G(VOL +/-) key on R/C.<br />
10) Adjust three modes all (Cool / Medium / Warm) : Fix<br />
the one of R/G/B gain and change the others<br />
11) When adjustment is completed, Enter “COPY ALL”.<br />
12) Exit adjustment mode using EXIT key on R/C.<br />
LGE Internal Use Only