Rhinegold Education Listening Tests iTunes instructions
Rhinegold Education Listening Tests iTunes instructions
Rhinegold Education Listening Tests iTunes instructions

You also want an ePaper? Increase the reach of your titles
YUMPU automatically turns print PDFs into web optimized ePapers that Google loves.
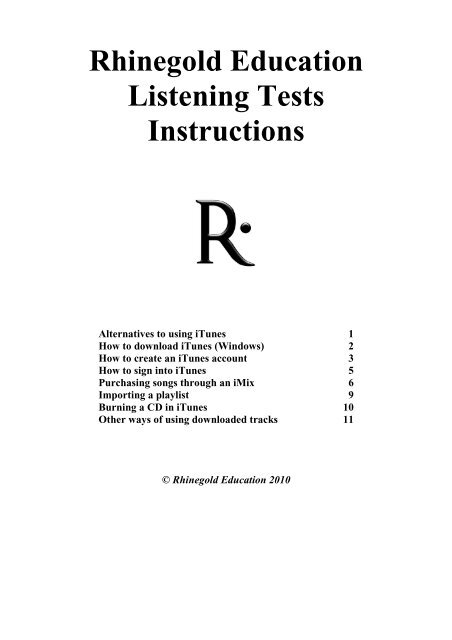
<strong>Rhinegold</strong> <strong>Education</strong><br />
<strong>Listening</strong> <strong>Tests</strong><br />
Instructions<br />
Alternatives to using <strong>iTunes</strong><br />
How to download <strong>iTunes</strong> (Windows)<br />
How to create an <strong>iTunes</strong> account<br />
How to sign into <strong>iTunes</strong><br />
Purchasing songs through an iMix<br />
Importing a playlist<br />
Burning a CD in <strong>iTunes</strong><br />
Other ways of using downloaded tracks<br />
© <strong>Rhinegold</strong> <strong>Education</strong> 2010<br />
1<br />
2<br />
3<br />
5<br />
6<br />
9<br />
10<br />
11
Alternatives to using <strong>iTunes</strong><br />
The tracks to be used for these listening tests are all available to download from <strong>iTunes</strong> as one ‘album’ or iMix. The rest of this<br />
document contains <strong>instructions</strong> on how to use <strong>iTunes</strong> for the listening tests.<br />
The <strong>iTunes</strong> tracks are recommended as the questions have been written with these recordings specifically in mind. Alternative<br />
versions may have slightly different timings or performance details.<br />
However, a full track listing is given at the back of the Teacher’s Guide for the AQA GCSE Music <strong>Listening</strong> <strong>Tests</strong> (second<br />
edition), and you may of course use this to find alternative versions of the tracks needed for the tests, from individual CDs or<br />
online sources.<br />
Two online alternatives to <strong>iTunes</strong> are given here:<br />
1. Spotify. Most of the pieces used in AQA GCSE Music <strong>Listening</strong> <strong>Tests</strong> (second edition) can be found on Spotify, a streaming<br />
music player you can download from www.spotify.com. See their website for more information.<br />
2. eMusic. eMusic is a similar application that allows you to download tracks instead of streaming them from the internet.<br />
Various subscription plans are available that allow you to download a certain amount of tracks each month. See<br />
www.emusic.com for more information.<br />
AQA GCSE Music <strong>Listening</strong> <strong>Tests</strong> (second edition) uses 38 different tracks. You must acquire all of the tracks to complete all of<br />
the questions, but you may of course be selective about which questions (and therefore which tracks) you use.<br />
1
1) To download the latest version of <strong>iTunes</strong>, go to<br />
http://www.apple.com/uk/itunes/download/ in your<br />
browser.<br />
2) Decide which of the e-mails/newsletters offered by<br />
Apple you’d like by leaving the boxes ticked or<br />
unticked.<br />
3) Enter your e-mail address in the box.<br />
4) Click ‘Download now’.<br />
5) You’ll be prompted to run or save the file<br />
‘<strong>iTunes</strong>Setup.exe’ – click ‘Save’ and save it in a<br />
easily-accessible location (e.g. Desktop, My<br />
Documents).<br />
6) Once the download has finished, find and run<br />
the downloaded file, and choose ‘Run’ when<br />
prompted with a security warning.<br />
How to download <strong>iTunes</strong> (Windows)<br />
7) Follow the <strong>instructions</strong> – you can go with the default options supplied, or if you prefer to customise the installation, you can<br />
change the installation options.<br />
8) Once <strong>iTunes</strong> is installed, open it either via the Start menu, or the shortcut on the desktop.<br />
2
How to create an <strong>iTunes</strong> account<br />
1) At the top right of the main window inside <strong>iTunes</strong>, there is a ‘Sign In’ button – click here.<br />
2) Click the ‘Create New Account’ button in the next box.<br />
3) Click ‘Continue’ at the next screen; and, once you’ve read the terms and conditions on the screen after that, tick the check<br />
box underneath and click ‘Continue’.<br />
3
4) Fill in your details on the next screen, and click ‘Continue’.<br />
5) Fill in credit card details on the next screen, and click ‘Continue’. (This is required for registration – you won’t be charged for<br />
anything unless you decide to purchase music. You don’t have to pay anything to create playlists in <strong>iTunes</strong>.)<br />
6) Your account has been created!<br />
4
How to sign into <strong>iTunes</strong><br />
You need to be signed into <strong>iTunes</strong> to buy tracks, using the e-mail address and password you chose when setting up an account.<br />
You normally remain signed into <strong>iTunes</strong> unless you deliberately sign out – when in the <strong>iTunes</strong> Store, check in the top-right<br />
corner of the main window to see if the correct e-mail address is shown:<br />
1a) If the correct e-mail address is displayed, you are signed in already.<br />
1b) If ‘Sign In’ is displayed, click on the button and enter the correct sign-in details at the following screen, then click ‘Sign In’.<br />
1c) If an incorrect e-mail address is displayed, click on the address and then click on the ‘Sign Out’ button in the window that<br />
appears next.<br />
Once signed out, click ‘Sign In’ again and enter the details for the e-mail address you wish to use.<br />
5
Purchasing songs through an iMix<br />
An iMix is an album that a user has created and ‘published’ on the <strong>iTunes</strong> store for other users to buy; <strong>Rhinegold</strong> has published<br />
a specially-created iMix with the audio tracks for the AQA GCSE Music <strong>Listening</strong> <strong>Tests</strong> (second edition).<br />
N.B. To ensure the correct order of tracks for the listening test questions, <strong>Rhinegold</strong> has created an <strong>iTunes</strong> playlist to be used<br />
with the audio tracks purchased from <strong>iTunes</strong>. For <strong>instructions</strong> on how to import an <strong>iTunes</strong> playlist, see page 9 of this guide.<br />
1) Each iMix has an internet URL, which links to the <strong>iTunes</strong> store.<br />
You can find a link for the AQA GCSE Music <strong>Listening</strong> <strong>Tests</strong> on the relevant page at www.listeningtests.co.uk<br />
(http://www.rhinegold.co.uk/education/education_catalogue.asp?css=1&m=2&s=1&id=163).<br />
Click as shown below to be taken directly to the <strong>iTunes</strong> store:<br />
2) The following window will open in your browser, and <strong>iTunes</strong> will open automatically.<br />
6
(You may receive the following notification, asking,<br />
‘Do you want to allow this website to open a<br />
program on your computer?’ – click ‘Allow’ and<br />
then <strong>iTunes</strong> should open.)<br />
3) Once <strong>iTunes</strong> has loaded, the title and contents of the iMix will be displayed.<br />
7
4) To purchase all the songs in the iMix, click on ‘Buy all songs’ underneath the title of the iMix.<br />
Alternatively, you can choose to purchase individual songs by clicking on ‘Buy Song’ in the ‘Price’ column:<br />
5) Enter your sign-in details on the following screen, click ‘Buy’, and follow the <strong>instructions</strong> on-screen.<br />
6) Once purchased, all the tracks will appear in the ‘Purchased’ section of <strong>iTunes</strong>.<br />
To rearrange these tracks into the correct order for the AQA GCSE Music <strong>Listening</strong> <strong>Tests</strong> using the playlist available at<br />
www.listeningtests.co.uk, see the next section of this guide, ‘Importing a playlist’.<br />
8
Importing a playlist<br />
To ensure the audio tracks for the AQA GCSE Music <strong>Listening</strong> <strong>Tests</strong> (second edition) play back in the correct order for the tests,<br />
<strong>Rhinegold</strong> has created an <strong>iTunes</strong> playlist, which will re-order the tracks. You can find this playlist file (which will have a .xml<br />
file extension) in the ‘Supporting material’ section of the AQA GCSE Music <strong>Listening</strong> <strong>Tests</strong> (second edition) page at<br />
www.listeningtests.co.uk:<br />
1) Once you have purchased all the audio tracks, visit the AQA GCSE<br />
Music <strong>Listening</strong> <strong>Tests</strong> (second edition) page at www.listeningtests.co.uk.<br />
In the ‘Supporting material’ section at the bottom of the page, download<br />
the playlist file to your computer from the website, remembering where<br />
you have saved it.<br />
2) In <strong>iTunes</strong>, go to the ‘File’ menu, then ‘Library’, then ‘Import<br />
playlist’.<br />
3) Search for the playlist file that you saved in Step 1,<br />
select it, and click ‘Open’.<br />
4) The playlist will appear on the left-hand side of the<br />
<strong>iTunes</strong> window, and the tracks on the right-hand side.<br />
The tracks will now be in the correct order for the AQA<br />
GCSE Music <strong>Listening</strong> <strong>Tests</strong> (second edition).<br />
(A full track listing is printed at the end of the Teacher’s<br />
Guide for the AQA GCSE Music <strong>Listening</strong> <strong>Tests</strong>.)<br />
9
Once you’ve downloaded the tracks to your computer, you can decide how to distribute them to best suit your needs. If you have<br />
downloaded the tracks to a classroom computer, you can simply play them through your speakers. If you need to carry them<br />
around with you, you can burn them to CD, download them to your iPod or other MP3 player, or transfer them to a USB data<br />
stick. Below are <strong>instructions</strong> on how to burn them to CD.<br />
Burning a CD in <strong>iTunes</strong><br />
1) Once you have arranged your tracks into the desired order, you can burn them to an<br />
audio CD – click on ‘Burn Disc’ at the bottom right-hand corner of the <strong>iTunes</strong> screen.<br />
4) If the playlist is too long to fit on one CD (up to 80 minutes of<br />
music), a warning window will appear.<br />
You can choose to burn more than one CD, with the playlist split<br />
across them, or to cancel the project – you can then either break the<br />
playlist up yourself, or delete tracks in order to make it shorter.<br />
10<br />
2) Insert a blank CD-R into your CD-burner.<br />
3) In the window that appears on-screen, select ‘Audio CD’<br />
and, if you’re happy with the other details, click ‘Burn’.<br />
5) Once the project has started successfully, a progress bar will appear at the top of the <strong>iTunes</strong> screen.<br />
6) When the CD has been finalised, it will appear in the ‘Devices’ section of the left-hand column, with the track details on the<br />
right-hand side of the screen.
Other ways of using downloaded tracks<br />
You will need to check exactly where your downloaded <strong>iTunes</strong> are saved – to do this, go to the ‘Edit’ menu in <strong>iTunes</strong>, and then<br />
select ‘Preferences’.<br />
In the window that opens, click on the ‘Advanced’ tab and remember what’s specified in the ‘<strong>iTunes</strong> Media folder location’ box<br />
at the top:<br />
When you navigate to this location on your computer, you will find two folders, ‘<strong>iTunes</strong>’ and ‘My Playlists’ – open the ‘<strong>iTunes</strong>’<br />
folder, and then the ‘<strong>iTunes</strong> Music’ folder. You will then see a series of folders and sub-folders which contain the files for the<br />
individual tracks:<br />
You can now transfer these files to different media, according to your needs.<br />
Transferring tracks to your iPod<br />
If you are an iPod user and already have your device set up, the tracks you have downloaded and reordered with the <strong>Rhinegold</strong><br />
playlist will be automatically transferred to your iPod.<br />
Transferring tracks to a USB data stick or blank data CD<br />
Once you have located the files for the tracks you want (see above), you can copy them to a USB data stick or burn a data CD<br />
(see the help file in your CD-burning software for more advice on this process).<br />
11