LCD Television Model No. TX-26LX600P TX-32LX600P
LCD Television Model No. TX-26LX600P TX-32LX600P
LCD Television Model No. TX-26LX600P TX-32LX600P

Create successful ePaper yourself
Turn your PDF publications into a flip-book with our unique Google optimized e-Paper software.
ofrecido por www.electromanuales.com<br />
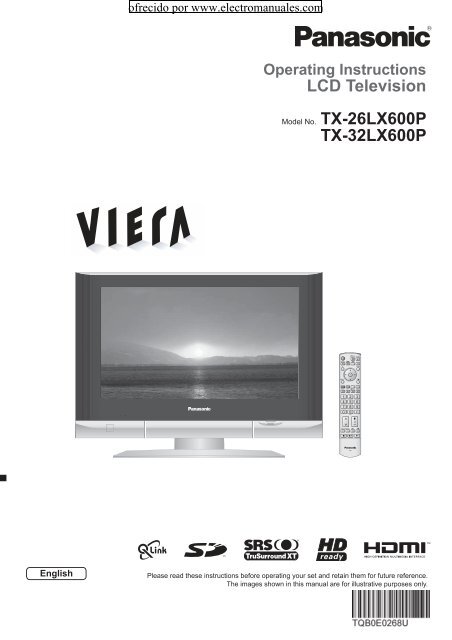
Operating Instructions<br />
<strong>LCD</strong> <strong>Television</strong><br />
<strong>Model</strong> <strong>No</strong>. <strong>TX</strong>-<strong>26LX600P</strong><br />
<strong>TX</strong>-<strong>32LX600P</strong><br />
English Please read these instructions before operating your set and retain them for future reference.<br />
The images shown in this manual are for illustrative purposes only.<br />
N<br />
F.P.<br />
MULTI<br />
WINDOW<br />
TV
2<br />
ofrecido por www.electromanuales.com<br />
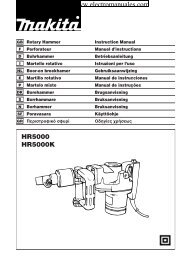
Turn your own living room into a movie theatre!<br />
Experience an amazing level of multi
media excitement<br />
Amplifi er with<br />
Speaker system<br />
Enjoy rich multi-media<br />
ofrecido por www.electromanuales.com<br />
DVD recorder<br />
VCR DVD player<br />
SD memory card<br />
Camcorder<br />
Personal<br />
computer<br />
Set top box<br />
Contents<br />
Be Sure to Read<br />
•Safety Precautions ······································ 4<br />
(Warning / Caution)<br />
• <strong>No</strong>tes<br />
•<br />
··························································· 5<br />
Maintenance················································ 5<br />
Quick Start Guide<br />
Accessories / Options ·········· 6<br />
Identifying Controls ··············· 7<br />
Connection ································ 8<br />
Auto Setup ································· 9<br />
Enjoy your TV!<br />
Basic Features<br />
• Watching<br />
TV ·············································· 10<br />
• Watching<br />
•<br />
Videos and DVDs ······················ 12<br />
Viewing Teletext ········································ 14<br />
Advanced Features<br />
•How to Use Menu Functions ····················· 16<br />
(picture, sound quality, etc.)<br />
• Editing<br />
and Setting Channels ······················ 18<br />
• Displaying<br />
PC Screen on TV ····················· 21<br />
• Watching<br />
SD Card (Videos and photos) ··· 22<br />
• Recording<br />
•<br />
a Programme on SD Card ······· 24<br />
External Equipment ··································· 26<br />
(Q-Link / Control with HDMI / Connections)<br />
FAQs, etc.<br />
• Technical<br />
•<br />
Information ································ 32<br />
•FAQs ························································· 36<br />
•SD Card: On screen messages ················ 38<br />
Specifi<br />
•<br />
cations ············································ 39<br />
Licence ······················································ 40<br />
Quick Start Guide<br />
Viewing Advanced FAQs, etc.<br />
3
4<br />
ofrecido por www.electromanuales.com<br />
Safety Precautions<br />
Handling the mains plug and lead<br />
Insert the mains plug fully into the socket outlet. (If the mains plug is loose, it could generate heat and cause fi re.)<br />
Ensure that the mains plug is easily accessible.<br />
Do not touch the mains plug with a wet hand. (This may cause electrical shock.)<br />
Do not damage the mains lead. (A damaged lead may cause fi re or electrical shock.)<br />
Do not move the TV with the lead plugged in the socket outlet.<br />
Do not place a heavy object on the lead or place the lead near a high-temperature object.<br />
Do not twist the lead, bend it excessively, or stretch it.<br />
Do not pull on the lead. Hold onto the mains plug body when disconnecting lead.<br />
Do not use a damaged mains plug or socket outlet.<br />
If you fi nd any<br />
abnormality, remove<br />
the mains plug immediately!<br />
(such as strange smell or smoke)<br />
Do not remove covers<br />
NEVER modify the TV yourself<br />
(High-voltage components may cause serious<br />
electrical shock.)<br />
Have the TV checked, adjusted, or repaired at your<br />
local Panasonic dealer.<br />
Do not place foreign objects<br />
inside the TV<br />
Do not let metal or fl ammable objects drop into the<br />
TV through the air vents (fi re or electrical shock<br />
may result).<br />
Do not expose to direct sunlight<br />
and other sources of heat<br />
Avoid exposing the TV to direct sunlight and other<br />
sources of heat. To prevent fi re never place any<br />
type of candle or naked fl ame on top or near the TV.<br />
Warning<br />
AC 220-240 V<br />
50 / 60 Hz<br />
Keep liquids away from the TV<br />
To prevent damage which may result in fi re or<br />
shock hazard, do not expose this appliance to<br />
dripping or splashing.<br />
Do not place containers with water (fl ower vase,<br />
cups, cosmetics, etc.) above the TV. (including on<br />
shelves above, etc.)<br />
Do not place the TV on an unstable<br />
surface<br />
Use only the dedicated stands /<br />
mounting equipment<br />
Using an unauthorized stand or other fi xtures may<br />
make the TV shaky, risking injury. Be sure to ask<br />
your local Panasonic dealer to perform setup.<br />
Use optional stands / mounts (p. 6).
When cleaning the TV, remove the<br />
mains plug<br />
(Cleaning an energized TV may cause electrical<br />
shock.)<br />
When TV will not be used for a<br />
long time, remove the mains plug<br />
Allow suffi cient space around the<br />
TV for radiated heat<br />
10<br />
Caution<br />
This TV will still consume some power even<br />
in the Off mode, as long as the mains plug is<br />
still connected to a live socket outlet.<br />
10<br />
Blocked ventilation by<br />
curtains, etc. may cause<br />
overheating, fi re or electrical<br />
shock.<br />
10 10<br />
Do not block the rear air vents<br />
6<br />
ofrecido por www.electromanuales.com<br />
(cm)<br />
Maintenance<br />
First, remove the mains plug from the socket outlet.<br />
<strong>No</strong>tes<br />
Display panel<br />
Daily care: Gently wipe the surface clean of dirt by using a soft cloth.<br />
Major contamination: Wipe the surface clean using a soft cloth dampened with clean water or water containing a<br />
small amount of neutral detergent. Then, using a soft dry cloth, evenly wipe the surface clean until it is dry.<br />
•Caution<br />
The surface of the display panel has been specially treated and may be easily damaged.<br />
•Do not tap or scratch the surface with your fi ngernail or other hard object.<br />
Use care not to subject the surface to bug repellent, solvent, thinner, or other volatile substances<br />
(this may degrade surface quality).<br />
Cabinet<br />
Daily care: Wipe the surface clean using a soft dry cloth.<br />
Major contamination: Dampen a soft cloth with clean water or water containing a small amount of neutral detergent.<br />
Then, wring the cloth and wipe the surface clean with it. Finally, wipe the surface clean with a dry cloth.<br />
•Caution<br />
Use care not to subject the TV's surfaces to detergent.<br />
•(A liquid inside the TV could lead to product failure.)<br />
Use care not to subject surfaces to bug repellent, solvent, thinner, or other volatile substances<br />
•(this may deteriorate the surface by peeling the paint).<br />
Do not allow the cabinet to make contact with a rubber or PVC substance for a long time.<br />
Mains plug<br />
Keep the TV away from these equipment<br />
Electronic equipment<br />
In particular, do not place video equipment near the<br />
TV (electromagnetic interference may distort images<br />
/ sound).<br />
Equipment with an infrared sensor<br />
This TV also emits infrared rays (this may affect<br />
operation of other equipment).<br />
Adjust the <strong>LCD</strong> panel to your desired<br />
angle<br />
(View from the top)<br />
Wipe the mains plug with a dry cloth at regular intervals. (Moisture and dust may lead to fi re or electrical shock.)<br />
5
6<br />
Accessories / Options<br />
Remote Control<br />
Batteries for the Remote<br />
Transmitter<br />
•<br />
•Control Transmitter (2)<br />
R6 (UM3)<br />
N2QAYB000048<br />
Standard accessories Check that you have the accessories and items shown<br />
Operating Instructions<br />
Pan European Guarantee Card<br />
Installing remote's batteries<br />
1<br />
2<br />
<strong>No</strong>te the correct<br />
polarity (+ or -)<br />
TV<br />
Hook<br />
Pull<br />
open<br />
Close<br />
•Caution<br />
Incorrect installation may cause battery<br />
leakage and corrosion, resulting in<br />
•damage to the remote control.<br />
•Do not mix old and new batteries.<br />
Do not mix different battery types (such as<br />
•alkaline and manganese batteries).<br />
•Do not use rechargeable (Ni-Cd) batteries.<br />
Do not burn or breakup batteries.<br />
Optional accessories<br />
Wall-hanging<br />
bracket<br />
TY-WK32LX20W<br />
ofrecido por www.electromanuales.com<br />
Clamper<br />
Rear of the TV<br />
Bundle the cables<br />
To tighten:<br />
Attaching the clamper<br />
To loosen:<br />
Keep the<br />
knob pressed<br />
•Do not bundle the RF cable and mains lead together (could cause<br />
•distorted image).<br />
•Fix cables with clampers as necessary.<br />
When using the optional accessory, follow the option’s assembly<br />
manual to fi x cables.<br />
•Caution<br />
In order to maintain the unit’s performance and safety, be<br />
absolutely sure to ask your dealer or a licenced contractor to<br />
•secure the wall-hanging brackets.<br />
Handle the TV carefully during installation since subjecting it to<br />
impact or other forces may cause product damage.
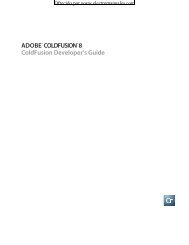
Identifying Controls<br />
Remote control<br />
signal receiver<br />
Power lamp<br />
Switches TV to On or Standby<br />
(On / Off switch in On position)<br />
Changes aspect ratio (p. 11)<br />
<strong>No</strong>rmalizes (p. 16)<br />
(Resets settings)<br />
Select / OK<br />
Teletext (p. 14)<br />
Standby: red<br />
( On: green )<br />
Switches SRS TruSurround XT On / Off<br />
(p. 17)<br />
MENU<br />
Press to access the Picture, Sound and<br />
Setup menus<br />
( )<br />
Viewing a favourite teletext channel (p. 14)<br />
Changes programme / channel (p. 10)<br />
Direct channel access<br />
During normal TV viewing or when in the<br />
Tuning, Programme edit or Manual tuning<br />
menus, press and then enter channel number<br />
using the numeric buttons<br />
Press twice to change to the Cableband mode<br />
( )<br />
Selects programmes in sequence<br />
VCR / DVD operations (p. 13)<br />
ofrecido por www.electromanuales.com<br />
Store setting (p. 20)<br />
Used to store tuning and<br />
other function settings<br />
( )<br />
SD CARD slot (p. 22)<br />
Swing up the door<br />
at "PULL".<br />
On / Off switch<br />
N<br />
F.P.<br />
MULTI<br />
WINDOW<br />
Function<br />
select<br />
( )<br />
Volume / Contrast / Brightness / Colour / Sharpness<br />
/ Tint (NTSC mode) / Bass / Treble / Balance /<br />
Tuning mode (p. 20)<br />
Switches TV/AV AV4 terminals (p. 30)<br />
Increases or decreases the programme position by one.<br />
When a function is already displayed, press to increase<br />
or decrease the selected function.<br />
When in Standby mode, switches TV On.<br />
Backlight Automatic Tracking System sensor<br />
(senses brightness to adjust picture quality in "Auto" Viewing mode) (p. 16)<br />
MULTI WINDOW (p. 11)<br />
SD Recording (p. 24)<br />
SD menu (p. 22 and p. 24)<br />
Sound mute On / Off<br />
Switches TV/AV<br />
(To watch videos or DVDs) (p. 12)<br />
EXIT (Returns to TV screen)<br />
Coloured buttons<br />
(used for various functions)<br />
(for example, see p. 14)<br />
Still Picture (p. 11)<br />
Teletext Index (p. 14)<br />
Programme Information (p. 11)<br />
Volume<br />
Headphones jack (p. 30)<br />
DIRECT TV Recording<br />
To immediately record programme<br />
in VCR / DVD recorder with Q-Link<br />
( connection<br />
)<br />
(p. 26)<br />
Quick Start Guide<br />
• •Identifying Controls<br />
Accessories / Options<br />
7
8<br />
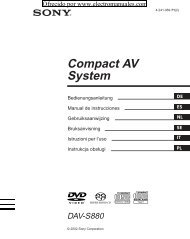
Connection<br />
External equipments and cables shown in this manual are not supplied with this TV.<br />
Please ensure that the unit is disconnected from the mains before attaching or disconnecting any leads.<br />
Cable cover removal and fi tting<br />
Rear of the TV<br />
AV1<br />
RGB<br />
VIDEO<br />
•Connect to<br />
AV2 or AV3<br />
for a unit<br />
supporting<br />
Q-Link<br />
(p. 26).<br />
To record TV<br />
programmes<br />
AV2<br />
(Q-Link)<br />
VIDEO<br />
S VIDEO<br />
DVD Recorder or VCR<br />
SCART cable<br />
(fully wired)<br />
ofrecido por www.electromanuales.com<br />
AV3<br />
(Q-Link)<br />
RGB<br />
VIDEO<br />
S VIDEO<br />
Removal Fitting<br />
1. Push down hooks and pull the<br />
cover slightly towards yourself to<br />
disengage the claws (at 3 points).<br />
2. Slowly pull out in the downward<br />
direction.<br />
Mains lead<br />
(Connect after all the other connections.)<br />
COMPONENT<br />
RF OUT<br />
RF IN<br />
Rear terminal portion<br />
(enlarged view)<br />
1. Insert the claws (at 3 points) at<br />
the bottom end.<br />
2. Push until it clicks.<br />
Watching TV<br />
VHF / UHF aerial<br />
RF cable
Auto Setup<br />
Select<br />
Adjust<br />
Exit<br />
Return<br />
TV<br />
Need help<br />
with operations?<br />
(example: Sound menu)<br />
Sound menu<br />
Bass<br />
Treble<br />
Balance<br />
Headphone volume<br />
MPX<br />
Mode<br />
SRS TruSurround XT<br />
<strong>No</strong> service<br />
Music<br />
Off<br />
On-screen operation<br />
guide will help you.<br />
ofrecido por www.electromanuales.com<br />
Search and store TV channels automatically.<br />
These steps are not necessary if the setup has been completed by your local dealer.<br />
1<br />
2<br />
3<br />
Turn the TV On with the On / Off switch<br />
Select your country<br />
Land<br />
Deutschland<br />
Österreich<br />
France<br />
Italia<br />
España<br />
Portugal<br />
Nederland<br />
Danmark<br />
Sverige<br />
<strong>No</strong>rge<br />
Suomi<br />
Belgien<br />
Schweiz<br />
ELLADA<br />
Polska<br />
Česká republika<br />
Magyarország<br />
E.Eu<br />
Start ATP Suchlauf<br />
Abbruch<br />
CH12<br />
red<br />
AUTO SETUP IN PROGRESS<br />
SEARCHING : PLEASE WAIT<br />
02 78:01 41<br />
Exit<br />
select<br />
Start Auto Setup<br />
DOWNLOAD IN PROGRESS<br />
PLEASE WAIT<br />
Programme : 63<br />
Remote control unavailable<br />
Auto Setup is now<br />
complete and your<br />
TV is ready for viewing.<br />
•You can now use the remote<br />
control to turn On the TV or<br />
turn the TV to standby mode.<br />
(Power lamp: On)<br />
•For Belgium, Switzerland<br />
and E.Eu, select the desired<br />
language<br />
•To set manually<br />
(p. 20)<br />
green<br />
•Auto Setup will start to search<br />
for TV channels and store them.<br />
•If Q-Link (p. 26) equipment is<br />
connected, channel information<br />
is automatically downloaded to<br />
the equipment.<br />
•To edit channels<br />
"Programme edit" (p. 18)<br />
Quick Start Guide<br />
•<br />
Auto Setup<br />
Connection<br />
9
10<br />
Watching TV<br />
MULTI<br />
WINDOW<br />
TV<br />
Volume<br />
ofrecido por www.electromanuales.com<br />
1<br />
2<br />
Turn power on<br />
(for about 1 second)<br />
Select a programme number<br />
up<br />
down<br />
On / Off switch on TV should be On.<br />
To select the two-digit programme number, e.g. 39<br />
<br />
or<br />
(in a short time)<br />
Select from the Programme table<br />
select page<br />
red green yellow blue<br />
(Corresponds to the colour bar)<br />
Prog. Name Chan.<br />
VCR :<br />
1 :<br />
2 :<br />
3 :<br />
4 :<br />
5 :<br />
6 :<br />
7 :<br />
8 :<br />
9 :<br />
10 :<br />
11 :<br />
12 :<br />
CH21<br />
Das Erste CH44<br />
ZDF CH51<br />
RTL CH41<br />
CH47<br />
CH23<br />
CH26<br />
CH58<br />
-<br />
-<br />
-<br />
-<br />
-<br />
Prog. Name Chan.<br />
13 :<br />
14 :<br />
15 :<br />
16 :<br />
17 :<br />
18 :<br />
19 :<br />
20 :<br />
21 :<br />
22 :<br />
23 :<br />
24 :<br />
-<br />
-<br />
-<br />
-<br />
-<br />
-<br />
-<br />
-<br />
-<br />
-<br />
-<br />
-<br />
select<br />
programme<br />
watch
Other Useful Functions (Operate after )<br />
Hold<br />
Display<br />
status<br />
information<br />
Change<br />
aspect<br />
ratio<br />
Watch TV,<br />
DVD, etc.<br />
in multi<br />
window<br />
Freeze / unfreeze picture<br />
Display / hide status information<br />
•Displayed information:<br />
Programme number / Programme name / Channel number / MPX mode<br />
(p. 16) / Sound system (p. 16) / Aspect mode / Colour system (p. 16)<br />
MULTI<br />
WINDOW<br />
ofrecido por www.electromanuales.com<br />
Change the aspect ratio (p. 32)<br />
•Each press changes the mode.<br />
14 : 9<br />
Auto aspect / 16:9 / 14:9 / Just / 4:3 /<br />
4:3 Full (HD signal only) / Zoom1 / Zoom2 / Zoom3<br />
View in multi window (p. 35)<br />
2<br />
AV1<br />
Source<br />
Source<br />
AV1<br />
2<br />
Swap<br />
Swap<br />
( )<br />
While the bar is displayed<br />
red<br />
red green<br />
2 AV1<br />
Source<br />
blue red red<br />
Source<br />
Swap<br />
2 AV1<br />
Colour bar Main Sub<br />
screen screen<br />
•To change the layout, etc. fi rst show the colour bar<br />
•To change the layout<br />
red green<br />
•To swap<br />
blue<br />
change the source of sub screen<br />
•To •<br />
yellow<br />
To return to the normal single-screen view<br />
•Remote control operations apply to the main screen.<br />
Swap<br />
MULTI<br />
WINDOW<br />
MULTI<br />
WINDOW<br />
Viewing<br />
• Watching TV<br />
11
12<br />
Watching Videos and DVDs<br />
It is possible to connect a variety of external equipment to the TV. Once the equipment is connected, use<br />
the following procedure to view the input.<br />
To connect the equipment (p. 30)<br />
To return to TV<br />
ofrecido por www.electromanuales.com<br />
1<br />
2<br />
With the equipment turned On<br />
Select the external input<br />
(AV mode screen)<br />
Select the connector<br />
connected to the equipment<br />
blue<br />
red<br />
HDMI1/2<br />
green<br />
red yellow green yellow blue<br />
AV1 AV2/<br />
S-video<br />
•example: AV1<br />
AV3/<br />
S-video<br />
Displays the selected connector<br />
AV4/<br />
S-video<br />
Component/<br />
PC<br />
HDMI1/<br />
HDMI2<br />
red<br />
PC<br />
blue yellow (twice)<br />
•When colour bar disappears Press any coloured buttons<br />
•You can also select the connector using the TV/AV button on the front panel of the TV.<br />
Press the button repeatedly until you reach the connector to view.<br />
•<br />
<strong>No</strong>te<br />
Automatic Input selection - Input mode is automatically switched from TV to AV<br />
mode when the equipment connected via SCART or HDMI terminal is operated.<br />
•When the equipment is turned off, the TV is set to TV mode.<br />
•If the external equipment has an aspect adjustment function, set to "16:9".<br />
For details, see the manual of the equipment or ask your local dealer.
Panasonic equipment connected to the TV can be directly operated with the remote control.<br />
VCR / DVD switch<br />
Select VCR to operate Panasonic VCR or DVD equipment<br />
Select DVD to operate Panasonic DVD equipment or Player theatre<br />
Standby<br />
Set to Standby mode / Turn on<br />
Play<br />
Playback VCR / DVD<br />
Stop<br />
Stop the operations<br />
Rewind / Skip / Search<br />
VCR: Rewind, review (during playback)<br />
DVD: Skip to the previous track or title<br />
Press and hold to search backward<br />
Fast-forward / Skip / Search<br />
VCR: Fast-forward, cue (during playback)<br />
DVD: Skip to the next track or title<br />
Press and hold to search forward<br />
Pause<br />
Pause / Restart<br />
DVD: Press and hold for slow-motion play<br />
Programme Up / Down<br />
Select programme<br />
Record<br />
Start recording<br />
The remote control will be available for various Panasonic equipment with the following settings.<br />
Switch to select VCR or DVD you want to change<br />
Press and hold while<br />
operating<br />
VCR<br />
Equipment Code<br />
VCR 10 (default)<br />
DVD 11<br />
ofrecido por www.electromanuales.com<br />
Enter the code below<br />
(two digit code)<br />
DVD<br />
Equipment Code<br />
DVD 70 (default)<br />
Player theatre 71<br />
Press<br />
•<br />
<strong>No</strong>te<br />
•After setting, execute operation confi rmation.<br />
•The respective VCR / DVD code is turned to the default when battery has been exchanged. Set it again.<br />
Depending on the model, operation may not be possible.<br />
Viewing<br />
• Watching Videos and DVDs<br />
13
14<br />
Viewing Teletext<br />
You can enjoy teletext broadcasting, including news, weather forecasts and subtitles, if this service is<br />
provided by the broadcasters.<br />
What is FLOF mode?<br />
In FLOF mode, four differently coloured subjects are situated at the bottom of the screen. To access more<br />
information about one of these subjects, press the appropriately coloured button. This facility enables fast access to<br />
information on the subjects shown.<br />
What is List mode?<br />
In List mode, four differently coloured page numbers are situated at the bottom of the screen. Each of these<br />
numbers can be altered and stored in the TV’s memory. ("Store frequently viewed pages", p. 15)<br />
To change mode "Teletext" in Setup menu (p. 16)<br />
F.P.<br />
Switch to Teletext<br />
1<br />
MULTI<br />
•<br />
WINDOW ><br />
Displays Index<br />
17:51 28 Feb<br />
To return to TV<br />
Using teletext conveniently<br />
Reveal<br />
hidden<br />
data<br />
FULL /<br />
TOP /<br />
BOTTOM<br />
ofrecido por www.electromanuales.com<br />
2<br />
Select the page<br />
green<br />
(content varies<br />
depending on the<br />
broadcasters)<br />
or<br />
To adjust contrast<br />
up<br />
down<br />
•<br />
red<br />
Re-hide<br />
Reveal hidden words e.g. quiz page answers<br />
red<br />
Current<br />
page<br />
number<br />
or<br />
Sub page number<br />
TELETEXT<br />
INFORMATION<br />
Colour bar<br />
red green yellow blue<br />
(Corresponds to the colour bar)<br />
As the blue bar is displayed<br />
Time / date<br />
(TOP) (BOTTOM) <strong>No</strong>rmal (FULL)<br />
(Expand the BOTTOM half)
HOLD<br />
INDEX<br />
Call up a<br />
favourite<br />
pages<br />
View in<br />
multi<br />
window<br />
Store<br />
frequently<br />
viewed<br />
pages<br />
View sub<br />
page<br />
Watch<br />
TV while<br />
waiting<br />
for update<br />
If you wish to hold the current page without updating<br />
Stop or resume automatic updating<br />
Return to the •main index page<br />
FLOF mode only<br />
F.P.<br />
MULTI<br />
WINDOW<br />
blue<br />
•Sub pages:<br />
To resume<br />
• •Call up the page stored in "blue".<br />
Factory setting is "P103".<br />
Watch TV and Teletext in two windows at once<br />
Store frequently viewed pages<br />
(only on fi rst 25 channels on Programme Guide)<br />
in the colour bar<br />
As page is<br />
displayed<br />
ofrecido por www.electromanuales.com<br />
Corresponding<br />
colour button<br />
To change stored pages<br />
Colour button you<br />
want to change<br />
To view specifi c sub page<br />
•Operations can be made only in Teletext screen.<br />
hold<br />
down<br />
The number changes to white.<br />
Enter new page number<br />
hold<br />
down<br />
View sub page (Only when teletext is more than one page)<br />
Appears at upper-left<br />
corner of the screen<br />
Enter the<br />
4-digit number<br />
example: P6<br />
(List mode only)<br />
The number of sub pages varies depending on the broadcasters (up to 79 pages).<br />
It may take some time for searching, during which time you can watch TV.<br />
View theTV picture while searching for a teletext page<br />
Teletext automatically updates itself when new information becomes available.<br />
Changes to TV screen temporarily<br />
P108<br />
Appears<br />
when<br />
updating is<br />
View the<br />
yellow<br />
completed<br />
yellow updated<br />
page<br />
•<br />
(You cannot change the channel.)<br />
The news page provides a function that indicates arrival of latest news ("News Flash").<br />
Viewing<br />
• Viewing Teletext<br />
15
16<br />
How to Use Menu Functions<br />
Various menus allow you to make settings for the picture, sound,<br />
and other functions so that you can enjoy watching TV in your own way.<br />
N<br />
TV<br />
To return to TV<br />
To return to the<br />
previous screen<br />
ofrecido por www.electromanuales.com<br />
1<br />
2<br />
3<br />
4<br />
Display menu<br />
Main menu<br />
Picture menu<br />
Sound menu<br />
Setup menu<br />
Picture menu<br />
Viewing mode<br />
Dynamic<br />
Contrast<br />
Brightness<br />
Colour<br />
Sharpness<br />
Tint<br />
Colour balance <strong>No</strong>rmal<br />
Colour management On<br />
P-NR Auto<br />
MPEG NR<br />
Off<br />
3D-COMB On<br />
Picture menu<br />
Viewing mode<br />
Dynamic<br />
Contrast<br />
Brightness<br />
Colour<br />
Sharpness<br />
Tint<br />
Colour balance <strong>No</strong>rmal<br />
Colour management On<br />
P-NR Auto<br />
MPEG NR<br />
Off<br />
3D-COMB On<br />
Number and positions<br />
of alternatives<br />
Colour balance <strong>No</strong>rmal<br />
Sharpness<br />
•Displays the functions that<br />
can be set (varies according<br />
to the input signal)<br />
Select the menu<br />
(example: Picture menu)<br />
Select the item<br />
(example: Picture menu)<br />
Adjust or select<br />
(example: Picture menu)<br />
Choose from among alternatives<br />
Tuning menu<br />
Changed<br />
Adjust using the slide bar<br />
Go to the next screen<br />
To reset the setting<br />
N<br />
Moved<br />
Access<br />
Displays the next<br />
screen<br />
select<br />
next<br />
select<br />
change<br />
store<br />
(Required<br />
by some<br />
functions)<br />
Menu list<br />
Menu Item<br />
Viewing mode<br />
Contrast,<br />
Brightness, Colour,<br />
Sharpness<br />
Tint<br />
Colour balance<br />
Colour management<br />
P-NR<br />
MPEG NR<br />
Picture menu<br />
Sound menu<br />
Setup menu<br />
Adjust by each viewing mode<br />
3D-COMB<br />
Bass<br />
Treble<br />
Balance<br />
Headphone volume<br />
MPX<br />
Mode<br />
SRS TruSurround XT<br />
HDMI1 input<br />
Q-Link<br />
AV2/AV3 out<br />
Control with HDMI<br />
Teletext<br />
Off timer<br />
Text language<br />
Programme edit<br />
Auto setup<br />
Manual tuning<br />
Fine tuning<br />
Colour system<br />
Volume correction<br />
Decoder (AV2 / AV3)<br />
OSD language<br />
Colour system<br />
Volume correction<br />
Tuning menu
Adjustments / Confi gurations (alternatives)<br />
Basic<br />
•<br />
picture mode (Dynamic / <strong>No</strong>rmal / Cinema / Auto)<br />
Set for each input signal<br />
Adjusts colour, brightness, etc. for each picture mode to suit your taste<br />
Viewing mode Dynamic<br />
Contrast<br />
Brightness<br />
Colour<br />
Sharpness<br />
Adjusts<br />
•<br />
tint of image<br />
Tint<br />
For NTSC signal reception only<br />
Chooses the colour balance of the entire image (Cool / <strong>No</strong>rmal / Warm) Colour balance <strong>No</strong>rmal<br />
Automatically adjusts colours to vivid ones (Off / On) Colour management On<br />
Automatically<br />
•<br />
reduces unwanted picture noise (Off / <strong>No</strong>rmal / Dynamic / Auto)<br />
<strong>No</strong>t valid on HDMI, PC, and Analogue component signal<br />
Automatically reduces noise for watching DTV, DVD, VCD and SD Card<br />
(Off / Min / Mid / Max)<br />
MPEG NR Off<br />
Automatically<br />
•<br />
makes still pictures and slow pictures look more vivid (Off / On)<br />
•For PAL or NTSC signal reception only<br />
<strong>No</strong>t valid on RGB, S-Video, components, PC,HDMI and SD Card<br />
Adjusts the output level of deep bass<br />
3D-COMB<br />
Bass<br />
On<br />
Adjusts the output level of high-pitch, shrill sound<br />
Adjusts volume level of right and left speakers<br />
P-NR Auto<br />
Treble<br />
Balance<br />
Adjusts the volume of the headphones<br />
Headphone volume<br />
Select<br />
•<br />
stereo / monaural (Mono / Stereo)<br />
•<strong>No</strong>rmally: Stereo<br />
•Stereo signal cannot be received: Mono<br />
M1 / M2: Available while mono signal is transmitted<br />
Improves sound quality for music and dramas (Music / Speech)<br />
SRS TruSurround XT® creates a high quality surround sound effect using just two<br />
Mode Music<br />
speakers<br />
•<br />
from the source which can output surround encoded signals (Off / On)<br />
Switching is also possible by SRS button on the remote control<br />
Chooses according to the signal when HDMI is connected<br />
(Auto<br />
•<br />
/ Digital / Analogue) (p. 33)<br />
HDMI2 terminal is for digital signal only<br />
Chooses the connector to which a Q-Link compatible equipment is connected<br />
(Off / AV2 / AV3) (p. 30)<br />
Chooses the signal to be transmitted from the TV to Q-Link<br />
SRS TruSurround XT<br />
HDMI1 input<br />
Q-Link<br />
Off<br />
Auto<br />
AV2<br />
(TV<br />
•<br />
/ AV1 / AV2 / AV3 / AV4 / Monitor)<br />
•Monitor: Image displayed on screen<br />
Component, PC and HDMI signals cannot be outputted<br />
Control with HDMI function (Off / On) (p. 27)<br />
AV2 out<br />
Control with HDMI<br />
TV<br />
On<br />
MPX Stereo<br />
Teletext display mode (FLOF / List) (p. 14) Teletext FLOF<br />
Sets the time the TV automatically turns Off. (Off / 15 / 30 / 45 / 60 / 75 / 90) (minutes) Off timer Off<br />
Selects<br />
•<br />
teletext language (West / East1 / East2)<br />
•West: English, French, German, Greek, Italian, Spanish, Swedish, Turkish<br />
•East1: Czech, English, Estonian, Lettish, Rumanian, Russian, Ukrainian<br />
East2: Czech, Hungarian, Lettish, Polish, Rumanian<br />
Edits channels (p. 18)<br />
Text language<br />
Programme edit<br />
West<br />
Access<br />
Sets channels automatically (p. 20)<br />
ofrecido por www.electromanuales.com<br />
Auto setup<br />
Sets channels manually (p. 20) Manual tuning Access<br />
Fine tuning of channels (during rain, etc.)<br />
Fine tuning<br />
Selects optional colour system depending on video signals<br />
(Auto / PAL / SECAM / M.NTSC)<br />
Colour system Auto<br />
Adjusts volume of individual stations<br />
Volume correc.<br />
Set “On” when the decoder is connected to AV2 or AV3 terminal via a Q-Link equipment<br />
(Off / On)<br />
Decoder (AV2) Off<br />
Changes language for on-screen displays OSD language Access<br />
Selects optional colour system based on video signals in AV mode<br />
(Auto / PAL / SECAM / M.NTSC / NTSC)<br />
Colour system Auto<br />
Adjusts volume for AV, PC, HDMI and component mode<br />
Volume correction<br />
• •A different menu will be displayed while PC or SD Card is used. (p. 21 and p. 23)<br />
In AV mode, the Sound menu and Setup menu give a smaller number of options.<br />
Access<br />
• How to Use Menu Functions<br />
(picture, sound quality, etc.)<br />
Advanced<br />
17
18<br />
Editing and Setting Channels<br />
The current channel settings can be changed according to your needs and reception conditions.<br />
TV<br />
To exit<br />
ofrecido por www.electromanuales.com<br />
1<br />
2<br />
3<br />
4<br />
5 Set<br />
Display the menu<br />
Select "Setup menu"<br />
Main menu<br />
Picture menu<br />
Sound menu<br />
Setup menu<br />
Select "Tuning menu"<br />
Setup menu<br />
Q-Link<br />
AV2<br />
AV2 out TV<br />
Control with HDMI On<br />
Teletext FLOF<br />
Off timer<br />
Off<br />
Text language West<br />
Tuning menu<br />
OSD language<br />
Access<br />
Select the function<br />
Tuning menu<br />
Programme edit<br />
Auto setup<br />
Manual tuning<br />
Fine tuning<br />
Colour system<br />
Volume correc.<br />
Decoder (AV2)<br />
Access<br />
Auto<br />
Off<br />
next<br />
select<br />
next<br />
select<br />
next<br />
select<br />
Edit<br />
channels<br />
Programme<br />
edit<br />
Delete<br />
Add<br />
Move<br />
Change<br />
channel<br />
number<br />
Change<br />
name<br />
Lock<br />
Change<br />
sound<br />
system<br />
Download to<br />
equipment
Select the programme number to edit<br />
Programme edit<br />
Prog. Chan. Name Lock Sys<br />
1 :<br />
2 :<br />
3 :<br />
4 :<br />
5 :<br />
Cursor<br />
Edit<br />
CH44<br />
CH51<br />
CH41<br />
CH47<br />
CH37<br />
To delete<br />
To add<br />
To move<br />
ABC<br />
XYZ<br />
FTP<br />
123<br />
456<br />
Off<br />
Off<br />
Off<br />
Off<br />
Off<br />
ABCDEFGHIJKLMNOPQRST<br />
UVWXYZ+-. 0123456789<br />
SC1<br />
SC1<br />
SC1<br />
SC1<br />
SC1<br />
To change channel number<br />
Programme edit<br />
Prog. Chan. Name Lock Sys<br />
1 :<br />
2 :<br />
3 :<br />
4 :<br />
5 :<br />
Programme edit<br />
Prog. Chan. Name Lock Sys<br />
1 :<br />
2 :<br />
3 :<br />
4 :<br />
5 :<br />
CH44<br />
CH51<br />
CH41<br />
CH47<br />
CH37<br />
XYZ<br />
FTP<br />
123<br />
456<br />
Off<br />
Off<br />
Off<br />
Off<br />
Off<br />
SC1<br />
SC1<br />
SC1<br />
SC1<br />
SC1<br />
select<br />
3 FTP<br />
To change the name of the broadcaster displayed when selecting channels<br />
Usable characters<br />
To lock<br />
Programme edit<br />
Prog. Chan. Name Lock Sys<br />
Select the "Name" fi eld<br />
Select the character<br />
To next character<br />
Programme<br />
number<br />
Repeat<br />
Name<br />
Select the "Lock" fi eld<br />
1 : CH44 ABC Off SC1<br />
2 : CH51 XYZ Off SC1<br />
3 : CH41 FTP Off SC1 Select "On"<br />
•4 : CH47 123 Off SC1<br />
5 : CH37 456 Off SC1 ("Off" to unlock)<br />
You cannot select the channel with number buttons or the "C" button when locked.<br />
To change sound system based on signals<br />
Store<br />
CH44<br />
CH51<br />
CH41<br />
CH47<br />
CH37<br />
ABC<br />
XYZ<br />
FTP<br />
123<br />
456<br />
red<br />
green<br />
yellow<br />
Off<br />
Off<br />
Off<br />
Off<br />
Off<br />
After confi rming, press red<br />
After confi rming, press<br />
green<br />
Select destination<br />
yellow<br />
SC1<br />
SC1<br />
SC1<br />
SC1<br />
SC1<br />
Programme edit<br />
Prog. Chan. Name Lock Sys<br />
1 :<br />
2 :<br />
3 :<br />
4 :<br />
5 :<br />
CH44<br />
CH51<br />
CH41<br />
CH47<br />
CH37<br />
ABC<br />
XYZ<br />
FTP<br />
123<br />
456<br />
Off<br />
Off<br />
Off<br />
Off<br />
Off<br />
SC1<br />
SC1<br />
SC1<br />
SC1<br />
SC1<br />
ofrecido por www.electromanuales.com<br />
Select the "Chan." fi eld<br />
Change number<br />
(Can also be changed with "C" and number buttons)<br />
Select the "Sys" fi eld<br />
Select sound system<br />
SC1 : PAL B, G, H / SECAM B, G<br />
SC2 : PAL I<br />
SC3 : PAL D, K / SECAM D, K<br />
F : SECAM L / L’<br />
To download channel information to a Q-Link compatible equipment connected to the TV<br />
Automatically transmitted (for a few sec.)<br />
•<br />
blue<br />
•For details (p. 26)<br />
<strong>No</strong>t available if "Q-Link" is "Off" in the Setup menu. (p. 16)<br />
• Editing and Setting Channels<br />
Advanced<br />
19
20<br />
Set<br />
automatically<br />
Auto setup<br />
Set<br />
manually<br />
Manual<br />
tuning<br />
To freely change settings after Auto setup<br />
Select the programme number<br />
and search through the channel<br />
Programme Channel<br />
number<br />
1<br />
CH12<br />
ofrecido por www.electromanuales.com<br />
Editing and Setting Channels<br />
Automatically set the channels received in the area<br />
Start Auto setup<br />
Select your country<br />
set<br />
WARNING<br />
All current tuning<br />
data will be erased<br />
Start Auto Setup<br />
Exit<br />
Return<br />
•The settings are downloaded to a Q-Link<br />
•compatible equipment connected to the TV.<br />
•All previous settings are erased.<br />
When the sequence is completed,<br />
the broadcast of programme number<br />
"1" will appear.<br />
Manual tuning<br />
02 78:01 41<br />
Search down/up<br />
Store<br />
Exit<br />
Return<br />
C 0 9 Direct entry<br />
Country<br />
Deutschland<br />
Österreich<br />
France<br />
Italia<br />
España<br />
Portugal<br />
Nederland<br />
Danmark<br />
Sverige<br />
<strong>No</strong>rge<br />
Suomi<br />
Belgium<br />
Schweiz<br />
ELLADA<br />
Polska<br />
Česká republika<br />
Magyarország<br />
E.Eu<br />
CH12<br />
AUTO SETUP IN PROGRESS<br />
SEARCHING : PLEASE WAIT<br />
02 78:01 41<br />
Exit<br />
Return<br />
search<br />
Store<br />
For Manual tuning, using the buttons on the TV<br />
("Tuning mode" on p. 7)<br />
(Press repeatedly until "Tuning mode" appears)<br />
or (Access "Manual tuning")<br />
(Search, Change TV system, Change programme)<br />
Settings are made automatically<br />
• The programme<br />
number blinks.<br />
or (Change programme or start searching channels)<br />
(Store)<br />
- (Repeat)<br />
To return to TV<br />
Programme number (fl ash)<br />
Channel number (fl ash)<br />
Sound system (fl ash)<br />
1<br />
CH12<br />
SC1<br />
Repeat<br />
and<br />
•<br />
<strong>No</strong>te<br />
If a VCR is<br />
connected with<br />
only the RF<br />
cable, select<br />
programme<br />
number "0".<br />
STR F TV/AV<br />
Manual tuning<br />
-, + : Search<br />
TV / AV : Move cursor<br />
STR : To store<br />
F : To exit<br />
02 78:01 41<br />
STR F - / + / TV / AV<br />
STR F -<br />
Channel<br />
select<br />
start
Displaying PC Screen on TV<br />
The screen of the PC connected to the TV can be displayed on the TV.<br />
You can also listen to PC sound with the audio cable connected. To connect PC (p. 30)<br />
1<br />
2<br />
Select the external input<br />
Select "PC"<br />
blue<br />
yellow<br />
(To next page)<br />
Press twice<br />
To return to TV<br />
Displays PC screen<br />
•PC menu setting (changed as desired)<br />
Making settings "How to Use Menu Functions" to (p. 16)<br />
Menu Item Adjustments / Confi gurations (options)<br />
Picture menu<br />
Setup menu<br />
Viewing mode, Contrast, Brightness, Sharpness, Colour balance (p. 16)<br />
Advanced<br />
setting<br />
PC<br />
setup<br />
R-Gain Adjusts the white balance for red areas<br />
G-Gain Adjusts the white balance for green areas<br />
B-Gain Adjusts the white balance for blue areas<br />
Gamma (2.0 / 2.2 / 2.5)<br />
Input<br />
resolution<br />
Switches<br />
•<br />
to a wide view<br />
VGA (640 x 480 dots), WVGA (852 x 480 dots),<br />
•XGA (1,024 x 768 dots), WXGA (1,366 x 768 dots)<br />
Options change depending on signals<br />
Clock Set to the minimum level if noise occurs<br />
H-pos<br />
V-pos<br />
Clock phase<br />
Sync<br />
ofrecido por www.electromanuales.com<br />
Adjust horizontal position<br />
Adjust vertical position<br />
•Corresponding signals<br />
•(p. 34)<br />
If "H-freq." or "V-freq."<br />
is shown in red, the<br />
signals may not be<br />
supported.<br />
Eliminate<br />
•<br />
fl icker and distortion<br />
Adjust after Clock adjustment Set to the minimum level if noise occurs<br />
•<br />
Chooses<br />
•<br />
another synchronous signal if the image is distorted (H&V / On G)<br />
H&V : by the horizontal and vertical signals from your PC<br />
On G : by the green signal from your PC (if available)<br />
•<br />
Control with HDMI, Volume correction, OSD language (p. 16)<br />
Sound menu (p. 16)<br />
• Displaying PC Screen on TV<br />
Editing and Setting Channels<br />
Advanced<br />
21
22<br />
Watching SD Card<br />
MPEG4 view : The moving pictures recorded by this TV, DIGA or D-snap will be played back.<br />
Photo view : The still images recorded by the digital camera will be displayed.<br />
TV<br />
To return to TV<br />
To return to<br />
the SD menu<br />
Volume<br />
ofrecido por www.electromanuales.com<br />
1<br />
2<br />
3<br />
4<br />
Selected File<br />
5<br />
Operation<br />
guide<br />
Insert the SD Card<br />
•For details on SD Cards,<br />
see p. 35 and p. 38.<br />
Select “MPEG4 view” or “Photo view”<br />
(SD menu screen)<br />
SD card<br />
MPEG4 view<br />
Photo view<br />
MPEG4<br />
VIEW MODE<br />
Delete<br />
Setup<br />
Memory left<br />
Select<br />
Play<br />
Select<br />
Exit<br />
SD : Return<br />
Lock<br />
Watch<br />
Select the SD mode<br />
00001/00028<br />
Filename : MOL0010<br />
Date : 01/01/2000<br />
Video<br />
Photo<br />
Select the data to be watched<br />
Error display<br />
(images that could not be loaded, etc.)<br />
(Thumbnail screen)<br />
Date<br />
Movie without sound<br />
Movie for which lock has been set<br />
select<br />
next<br />
select<br />
watch<br />
To delete video red<br />
To<br />
•<br />
lock video (Display )<br />
blue<br />
•Press the button again to unlock.<br />
•Cannot be deleted when locked.<br />
Photos cannot be deleted or locked.<br />
• Pause<br />
Playback<br />
Fast forward<br />
(hold down)<br />
To next video<br />
Stop<br />
Exit<br />
Rewind (hold down)<br />
SD : Return<br />
To previous video<br />
Videos<br />
•Photos To display the operation guide<br />
To previous photo<br />
To thumbnail<br />
Rotate 90˚ (clockwise)<br />
To next photo<br />
•<br />
Select List<br />
Operation<br />
guide<br />
ZOOM During zoom mode, you<br />
Exit<br />
Zoom<br />
red<br />
SD : Return<br />
can move the position<br />
Rotate 90˚<br />
Displayed one at a time<br />
by using the cursor<br />
(anti-clockwise)<br />
buttons.<br />
To change the aspect ratio<br />
•Caution<br />
•<br />
During the playback, no signals are output from the monitor output terminals.<br />
“Date” shows the date on which the recording was made by this TV, DIGA or D-snap. Its format is 01/01/2000<br />
when recordings are made without date signal.
(Videos and photos)<br />
SD<br />
Card<br />
To insert<br />
Label surface<br />
Push until a<br />
click is heard<br />
To remove<br />
Press the centre of the card<br />
To change the view (size, repeat, slide show, etc.)<br />
Videos (operate in step )<br />
Display the Select “Viewing setup” Select the functions and access<br />
menu<br />
Main menu<br />
next<br />
Picture menu<br />
Viewing setup<br />
Sound menu<br />
Frame size<br />
Repeat<br />
<strong>No</strong>rmal<br />
O f f<br />
Viewing setup<br />
•During step 5 , you can select:<br />
"Picture menu" (p. 16)<br />
"Sound menu" (p. 16)<br />
select<br />
Menu Item Adjustments / Confi gurations (alternatives)<br />
Viewing<br />
setup<br />
Frame size Video display size (<strong>No</strong>rmal / Large)<br />
Repeat Video is repeated after it ends (Off / One fi le / All)<br />
Photos (operate in step or 5 )<br />
Display the Select “Viewing setup” Select the functions and access<br />
menu<br />
Main menu<br />
next<br />
Picture menu<br />
Viewing setup<br />
Viewing setup<br />
• "Picture menu" (p. 16)<br />
select<br />
Slide show<br />
Interval<br />
Repeat<br />
Access<br />
5sec<br />
O f f<br />
Menu Item Adjustments / Confi gurations (alternatives)<br />
Viewing<br />
setup<br />
Slide show<br />
ofrecido por www.electromanuales.com<br />
•Start slide show<br />
To stop in mid-cycle<br />
Interval Select slide show interval (5 / 10 / 15 / 30 / 60 / 90 / 120sec)<br />
Repeat Slide show repeat (Off / On)<br />
select<br />
set<br />
select<br />
set<br />
• Watching SD Card (Videos and photos)<br />
Advanced<br />
23
24<br />
Recording a Programme on SD Card<br />
TV<br />
ofrecido por www.electromanuales.com<br />
The TV channels and AV1 input signals (PAL / SECAM) can be recorded on the SD card. During<br />
recording, it is possible to watch other terminals input signal.<br />
1<br />
2<br />
3<br />
Insert the SD Card (p. 23)<br />
While watching a programme<br />
•Recordable time is displayed if the<br />
recording time is not set. (p. 25)<br />
•Start recording<br />
•Cancel Should such a message appear<br />
Start recording?<br />
<strong>No</strong>t enough memory<br />
Current setting<br />
Rec time 180min<br />
Rec mode Economy<br />
Recordable at 15min<br />
To stop<br />
Card capacity is not enough.<br />
• Continue<br />
( Recording is stopped when<br />
the card capacity is full.)<br />
• Cancel<br />
(During the confi rmation message appears)<br />
•<br />
<strong>No</strong>te<br />
•You cannot record the copy protected signals.<br />
If the Off timer function is activated or press the Standby On / Off button on the<br />
•remote control during recording, the recording will not stop.<br />
Do not press the MAINS power On / Off switch on the TV during recording.<br />
•Otherwise the fi le will be broken.<br />
Do not remove the SD card while recording. The data being recorded and<br />
•other data stored on the SD card may become unreadable.<br />
SD recording may not be fully compatible or playable in some PC software or<br />
•PDA devices.<br />
When two pictures are shown on the same screen as Multi window functions,<br />
the main window is the one that is recorded. The picture can be switched for<br />
•the sub window (p. 11).<br />
If the signal system is changed during recording, it cannot be recorded<br />
•completely.<br />
•The signals without video (only audio) cannot be recorded completely.<br />
For details (p. 35 and p. 38)<br />
This product is licensed under the MPEG-4 patent portfolio license for the personal and non-commercial<br />
use of a consumer to (i) encode video in compliance with the MPEG-4 Video Standard (“MPEG-4 Video”)<br />
and/or (ii) decode MPEG-4 Video that was encoded by a consumer engaged in a personal and noncommercial<br />
activity and/or was obtained from a licensed video provider. <strong>No</strong> license is granted or implied<br />
for any other use. Additional information may be obtained from MPEG LA. See http://www.mpegla.com.
Select the SD mode<br />
Select "Setup"<br />
SD card<br />
MPEG4 view<br />
Photo view<br />
Setup<br />
Memory left<br />
select<br />
next<br />
Setup<br />
Rec mode<br />
Rec time<br />
Card format<br />
Economy<br />
<strong>No</strong> setting<br />
Access<br />
Menu Item Adjustments / Confi gurations<br />
Setup menu<br />
To set the recording time and mode / To format the card<br />
Rec mode<br />
Rec time<br />
Card format<br />
Amount left<br />
•Recording mode and approximate time<br />
Size Extra fi ne Super fi ne Fine <strong>No</strong>rmal Economy<br />
64MB 7minutes 9minutes 23minutes 34minutes 1hour 21minutes<br />
128MB 14minutes 18minutes 44minutes 1hour 6minutes 2hours 35minutes<br />
256MB 28minutes 37minutes 1hour 32minutes 2hours 17minutes 5hours 20minutes<br />
512MB 55minutes 1hour 10minutes 3hours 4hours 30minutes 10hours 40minutes<br />
1GB 1hour 50minutes 2hours 20minutes 6hours 9hours 21hours 20minutes<br />
Set<br />
select<br />
Select image quality<br />
•(Extra fi ne / Super fi ne / Fine / <strong>No</strong>rmal / Economy)<br />
•The quality of audio is not changed.<br />
Multi Media Cards do not support the Extra fi ne and Super fi ne recording<br />
mode. If the recording is started in these status, recording will automatically<br />
be performed in the Fine mode.<br />
Select<br />
•<br />
recording time (<strong>No</strong> setting / 5 / 10 / 15 / 30 / 60 / 90 / 120 / 180min)<br />
<strong>No</strong> setting : Recorded until the Card capacity is full<br />
Format<br />
•<br />
the card inserted in the SD Card slot (all data is erased)<br />
Do not remove the SD card while formatting. That may cause the card not to<br />
be able to record properly.<br />
To check memory left<br />
You can confi rm the remaining time for recording in each Rec mode.<br />
Select the SD mode<br />
Select "Memory left"<br />
ofrecido por www.electromanuales.com<br />
SD card<br />
MPEG4 view<br />
Photo view<br />
Setup<br />
select<br />
next<br />
Memory left<br />
Recordable time<br />
Economy<br />
<strong>No</strong>rmal<br />
Fine<br />
Super fine<br />
Extra fine Less than<br />
12MB<br />
15min<br />
5min<br />
3min<br />
1min<br />
1min<br />
Memory left<br />
Displays recordable time for each mode<br />
• •Since Multi Media Cards do not support the Extra fi ne and Super fi ne recording mode, "----" appears.<br />
Time is approximate.<br />
Recordable time of SD Card<br />
set<br />
• Recording a Programme on SD Card<br />
Advanced<br />
25
26<br />
Q-Link interlocks the TV and VCR / DVD recorder, enables easy recording and playback.<br />
Condition<br />
•Use the VCR / DVD recorder with the following logos:<br />
•"Q-Link", "NEXTVIEWLINK", "DATA LOGIC", "Easy Link", "Megalogic", or "SMARTLINK"<br />
•Connect the equipment to this TV’s AV2 or AV3 terminal via a "fully-wired" SCART cable. (p. 28)<br />
Q-Link terminal setup in Setup menu (Q-Link, AV2/AV3 out). (p. 16)<br />
Download<br />
•<br />
channel settings<br />
Perform Auto setup. (p. 20)<br />
•When fi rst using this TV, see "Auto Setup". (p. 9)<br />
Perform download to the equipment. (p. 18)<br />
Features available<br />
Some recording equipments are not applicable. Read the manuals of the equipment.<br />
What you<br />
see is<br />
What you<br />
record<br />
Information<br />
/ Message<br />
Power<br />
on link<br />
and Easy<br />
playback<br />
Power off<br />
link<br />
ofrecido por www.electromanuales.com<br />
External Equipment<br />
Direct TV Recording:<br />
Q-Link<br />
Recording the current programme in VCR / DVD recorder immediately.<br />
•When Direct TV Recording is performed, the<br />
recording equipment is automatically turned on if<br />
•it is in Standby mode.<br />
The recording equipment is recording from<br />
its own tuner. You can turn the TV off during<br />
•recording.<br />
Do not turn the TV off during recording AV<br />
source. Otherwise the recording will be stopped.<br />
Recording information or if recording is not possible, a message is displayed.<br />
(Only when the programme number is "0" or "AV mode" for some equipment.)<br />
Insert a videocassette or DVD in the recording equipment and it is operated, TV<br />
is turned on and input mode is switched automatically so that you can view the<br />
content. (Only when TV is in Standby mode.)<br />
When TV is set to Standby mode, the recording equipment is also automatically<br />
set to Standby. (Only when the videocassette or DVD is not active.)<br />
• "DATA LOGIC" (a trademark of Metz Corporation) • "Megalogic" (a trademark of Grundig Corporation)<br />
• "Easy Link" (a trademark of Philips Corporation) • "SMARTLINK" (a trademark of Sony Corporation)<br />
Read the manuals of the equipment too.
Enjoy additional HDMI Inter-Operability with Panasonic products which have "HDAVI Control" function.<br />
HDMI connections to some Panasonic equipments (Panasonic DVD Recorder DIGA, Panasonic Player<br />
theatre, Panasonic Amplifi er, etc.) allow you to enjoy the easy playback or home theatre.<br />
About connections, see "Connections" (p. 29). Read the manuals of the equipment too.<br />
<strong>No</strong>n-HDMI-compliant cables cannot be utilized.<br />
About applicable equipments, consult your local Panasonic dealer.<br />
Easy<br />
playback<br />
Theatre<br />
speaker<br />
Power on<br />
link<br />
Power off<br />
link<br />
Control with HDMI " Control TM "<br />
Preparations<br />
(For the fi rst time / When adding new equipment, reconnecting equipment or changing setup)<br />
After connection turn the equipment on and then switch the TV on.<br />
Select the input mode to HDMI1 or HDMI2 (p. 12), and make sure that an image is displayed<br />
correctly.<br />
1<br />
2<br />
3<br />
4<br />
ofrecido por www.electromanuales.com<br />
Main menu<br />
Home theatre<br />
Picture menu<br />
Sound menu<br />
Setup menu<br />
Display the menu<br />
Select "Setup menu"<br />
Main menu<br />
Home theatre<br />
Picture menu<br />
Sound menu<br />
Setup menu<br />
Select "Control with HDMI"<br />
Setup menu<br />
Q-Link<br />
AV2<br />
AV2 out TV<br />
Control with HDMI On<br />
Teletext<br />
FLOF<br />
Off timer Off<br />
Text language<br />
Tuning menu<br />
OSD language<br />
West<br />
Select "On" (default is On)<br />
next<br />
select<br />
select<br />
select<br />
Automatic Input switching-When the connected Panasonic equipment is operated, input<br />
mode is switched automatically. When it is stopped operating, input mode is returned.<br />
You can control the theatre speaker with TV’s remote control.<br />
This function is available when Panasonic Amplifi er or Player theatre is connected.<br />
Display the menu<br />
Select "Home theatre" or "TV speaker"<br />
set<br />
select<br />
Home theatre:<br />
Adjustment for equipment (automatically<br />
turned on if it is in Standby mode)<br />
Volume up / down<br />
Mute<br />
TV speaker:<br />
•<br />
TV speakers are active.<br />
•When selecting "Home theatre", the sound of TV speakers is mute.<br />
When the equipment is turned off, TV speakers will be active.<br />
When the connected Panasonic equipment is operated, TV is also automatically<br />
turned on and the content is reproduced. (Only when TV is in Standby mode.)<br />
When TV is set to Standby mode, the connected Panasonic equipment is also<br />
automatically set to Standby.<br />
• External Equipment<br />
Advanced<br />
27
28<br />
PC<br />
PC<br />
PC<br />
AUDIO<br />
AUDIO<br />
AUDIO<br />
L<br />
R<br />
L<br />
R<br />
L<br />
R<br />
L<br />
R<br />
AV<br />
1<br />
2<br />
AV 1 AV 2 AV 3<br />
AUDIO RGB VIDEO<br />
VIDEO S VIDEO<br />
L<br />
R<br />
AV<br />
1<br />
2<br />
RGB<br />
VIDEO<br />
S VIDEO<br />
AV 1 AV 2 AV 3<br />
AUDIO RGB VIDEO<br />
VIDEO S VIDEO<br />
L<br />
R<br />
AV<br />
1<br />
2<br />
RGB<br />
VIDEO<br />
S VIDEO<br />
AV 1 AV 2 AV 3<br />
AUDIO RGB VIDEO<br />
VIDEO S VIDEO<br />
RGB<br />
VIDEO<br />
S VIDEO<br />
COMPONENT<br />
Y<br />
PB<br />
PR<br />
VIDEO<br />
COMPONENT<br />
Y<br />
PB<br />
PR<br />
VIDEO<br />
COMPONENT<br />
Y<br />
PB<br />
PR<br />
VIDEO<br />
Connections<br />
•External equipments and cables shown are not supplied with this TV.<br />
Connect VCR / DVD recorder (Recording, Playback)<br />
Rear of the TV<br />
Connect DVD player (Playback)<br />
Rear of the TV<br />
Front of the TV<br />
Connect Set top box (RGB input)<br />
Rear of the TV<br />
Front of the TV<br />
ofrecido por www.electromanuales.com<br />
External Equipment<br />
For Q-Link connection (p. 26)<br />
or<br />
or<br />
or<br />
Connect the S-VIDEO or VIDEO terminal.<br />
or<br />
or<br />
Connect the S-VIDEO or VIDEO terminal.<br />
SCART<br />
HDMI<br />
SCART<br />
Y<br />
PB<br />
PR<br />
L<br />
R<br />
R<br />
L<br />
V<br />
S-V<br />
HDMI<br />
SCART<br />
R<br />
L<br />
V<br />
S-V<br />
VCR / DVD recorder<br />
DVD player<br />
Set top box
Connect VCR / DVD recorder and Set top box (example)<br />
Rear of the TV<br />
PC<br />
PC<br />
AUDIO<br />
AUDIO<br />
L<br />
R<br />
L<br />
R<br />
L<br />
R<br />
AV<br />
1<br />
2<br />
AV 1 AV 2 AV 3<br />
AUDIO RGB VIDEO<br />
VIDEO S VIDEO<br />
L<br />
R<br />
AV<br />
1<br />
2<br />
RGB<br />
VIDEO<br />
S VIDEO<br />
AV 1 AV 2 AV 3<br />
AUDIO RGB VIDEO<br />
VIDEO S VIDEO<br />
AV<br />
1<br />
2<br />
RGB<br />
VIDEO<br />
S VIDEO<br />
AV 1 AV 2 AV 3<br />
AUDIO RGB VIDEO<br />
VIDEO S VIDEO<br />
RGB<br />
VIDEO<br />
S VIDEO<br />
COMPONENT<br />
Y<br />
PB<br />
PR<br />
VIDEO<br />
Connect DVD recorder and VCR (example)<br />
Rear of the TV<br />
Control with HDMI (p. 27)<br />
PC<br />
AUDIO<br />
L<br />
R<br />
L<br />
R<br />
COMPONENT<br />
Y<br />
PB<br />
PR<br />
VIDEO<br />
Easy playback (For connection to HDMI2 terminal, refer to p. 30)<br />
Rear of the TV<br />
Home theatre<br />
This TV<br />
Panasonic<br />
Amplifi er<br />
ofrecido por www.electromanuales.com<br />
COMPONENT<br />
Y<br />
PB<br />
PR<br />
VIDEO<br />
Speaker system<br />
or<br />
This TV<br />
Panasonic<br />
Player theatre<br />
Set top box<br />
Panasonic DVD recorder<br />
DIGA<br />
Panasonic DVD recorder DIGA<br />
Read the manuals of Panasonic Amplifi er or Player theatre for details.<br />
•It is recommended that you use Panasonic’s HDMI cable.<br />
Recommended part number: RP-CDHG15 (1.5 m)<br />
RP-CDHG30 (3.0 m)<br />
RP-CDHG50 (5.0 m)<br />
HDMI<br />
SCART<br />
SCART<br />
SCART<br />
HDMI<br />
SCART<br />
VCR / DVD<br />
recorder<br />
DVD recorder<br />
SCART<br />
VCR<br />
SCART<br />
SCART<br />
Speaker system<br />
• External Equipment<br />
Advanced<br />
29
30<br />
External Equipment<br />
These diagrams show our recommendations for how to connect the TV to your various equipment.<br />
For other connections, consult the instructions of each equipment, the table below, and the specifi cations<br />
(p. 39).<br />
Control with HDMI (p. 27)<br />
DIGA or Panasonic Amplifi er<br />
(M3 stereo<br />
mini plug)<br />
Headphones<br />
To adjust volume<br />
"Headphone volume"<br />
in the Sound menu<br />
(p. 16)<br />
(VIDEO)<br />
or<br />
(S-VIDEO)<br />
(AUDIO)<br />
Types of connectable equipment to each connector<br />
Connector<br />
Recording / Playback (equipment)<br />
To record / playback videocassettes / DVDs<br />
(VCR / DVD recorder)<br />
To watch DVDs (DVD player)<br />
To watch camcorder images (Video camera)<br />
To watch satellite broadcasts (Set top box)<br />
To play games (Game equipment)<br />
Q-Link<br />
Direct TV Recording<br />
Control with HDMI<br />
ofrecido por www.electromanuales.com<br />
Connections (overview)<br />
Camcorder / Game equipment<br />
Conversion adapter (if necessary)<br />
•When using HDMI2 terminal as Control<br />
with HDMI, select the external input to<br />
HDMI2 for the fi rst time (p. 12).<br />
To listen with speakers<br />
Amplifi er with speaker system<br />
PC (Viewing)<br />
Computer<br />
AV1 AV2 AV3
PC<br />
(Listening)<br />
Fully wired HDMI<br />
compliant cable<br />
AUDIO<br />
L<br />
R<br />
AV4<br />
Y<br />
PB<br />
PR<br />
(Listening)<br />
ofrecido por www.electromanuales.com<br />
COMPONENT<br />
L<br />
R<br />
AV<br />
1<br />
2<br />
AV 1 AV 2 AV 3<br />
(Q-Link) (Q-Link)<br />
AUDIO RGB VIDEO<br />
VIDEO S VIDEO<br />
To watch DVDs<br />
DVD player<br />
1 2<br />
To watch satellite broadcasts<br />
SCART<br />
cable<br />
RGB<br />
VIDEO<br />
S VIDEO<br />
COMPONENT<br />
VIDEO<br />
Y<br />
PB<br />
PR<br />
Set top box<br />
DVD Recorder / VCR<br />
: Recommended Connection<br />
SCART<br />
cable<br />
To record / playback<br />
SCART<br />
cable<br />
(Viewing)<br />
RF cable<br />
or<br />
• External Equipment<br />
Advanced<br />
31
32<br />
Technical Information<br />
Aspect Control Signal<br />
Aspect modes<br />
Widescreen signal (WSS)<br />
Control signal through<br />
SCART terminal (pin 8)<br />
Signal name<br />
Auto<br />
aspect<br />
16:9 14:9 Just 4:3<br />
4:3<br />
Full<br />
Zoom1 Zoom2 Zoom3 TV AV1 AV2 AV3 AV4 Component AV1 AV2 AV3<br />
PAL O O O O O - O O O O O O O O - O O O<br />
PAL 525/60 O O O O O - O O O - - - - - - O O O<br />
M.NTSC O O O O O - O O O - - - - - - O O O<br />
NTSC<br />
(AV input only)<br />
O O O O O - O O O - - - - - - O O O<br />
525(480)/60i O O O O O - O O O - - - - - - - - -<br />
525(480)/60p O O O O O - O O O - - - - - - - - -<br />
625(576)/50i O O O O O - O O O - - - - - O - - -<br />
625(576)/50p O O O O O - O O O - - - - - O - - -<br />
750(720)/50p O O O O O O O O O - - - - - - - - -<br />
750(720)/60p O O O O O O O O O - - - - - - - - -<br />
1125(1080)/50i O O O O O O O O O - - - - - - - - -<br />
1125(1080)/60i O O O O O O O O O - - - - - - - - -<br />
PC input - O - - O - - - - - - - - - - - - -<br />
TV/AV1/AV2/<br />
AV3/AV4<br />
Component/HDMI<br />
16 : 9<br />
Just 4 : 3<br />
4 : 3 Full<br />
Zoom2<br />
Aspect Ratio<br />
The optimum size and aspect can be chosen, and you can enjoy fi ner images. (p. 11)<br />
Auto aspect: Auto aspect determines the best aspect ratio to use to fi ll your screen. It does this using a four step<br />
process to determine if the picture being viewed is a widescreen picture.<br />
If Auto aspect detects a widescreen signal it switches into the appropriate 16:9 or 14:9 widescreen mode. If Auto<br />
aspect does not detect a widescreen signal then this advanced TV enhances the picture for optimum viewing<br />
pleasure.<br />
The text shown on the screen indicates how Auto aspect determined which ratio to use:<br />
"WIDE" appears in the top left of the screen if a widescreen identifi cation signal (WSS) is found or a signal found<br />
through a SCART terminal. Auto aspect switches to the appropriate 16:9 or 14:9 widescreen ratio. This function<br />
will also work in any aspect mode. "Auto aspect" appears in the top left of the screen if black stripes above and<br />
below the picture are detected. Auto aspect chooses the best ratio and expands the picture to fi ll the screen. This<br />
process can take several minutes, depending on the darkness of the picture.<br />
•<br />
<strong>No</strong>te<br />
The ratio varies depending on the programme, etc. If the ratio is greater than the standard "16:9", black bands<br />
•may appear at the top and bottom of the screen.<br />
If the screen size looks unusual when a widescreen-recorded programme is played back on a VCR, adjust the<br />
•tracking of the VCR. (See the VCR manual.)<br />
To select the ratio manually: (Only "16:9" or "4:3" in PC mode)<br />
16:9<br />
Just<br />
4:3 Full<br />
Zoom2<br />
ofrecido por www.electromanuales.com<br />
Directly displays the image at "16:9"<br />
without distortion (anamorphic).<br />
Displays a 4:3 image full-screen.<br />
Stretching is only noticeable at the left<br />
and right edges.<br />
Displays a "4:3" image enlarged<br />
horizontally to fi t the screen.<br />
Displays a "16:9" letterbox (anamorphic)<br />
image full-screen without distortion.<br />
14 : 9<br />
Zoom1<br />
Zoom3<br />
14:9<br />
4:3<br />
Zoom1<br />
Zoom3<br />
Displays the image at the standard "14:9"<br />
without enlargement.<br />
Displays the image at the standard "4:3"<br />
without distortion.<br />
Displays a "16:9" letterbox or "4:3" image<br />
without distortion.<br />
Displays a "2.35:1" letterbox (anamorphic)<br />
image full-screen without distortion. At<br />
"16:9", displays the image at its maximum<br />
(with slight enlargement).
ofrecido por www.electromanuales.com<br />
HDMI connection<br />
HDMI (high-defi nition multimedia interface) allows you to enjoy high-defi nition digital images and high-quality sound<br />
by connecting the TV and the equipment.<br />
HDMI-compatible equipment (1) with an HDMI or DVI output terminal, such as a set top box or a DVD player, can<br />
•be connected to the HDMI terminal using an HDMI compliant (fully wired) cable.<br />
•HDMI is the world's fi rst complete digital consumer AV interface complying with a non-compression standard.<br />
•If the external equipment has only a DVI output, connect to the HDMI1 terminal via a DVI to HDMI adapter cable (2).<br />
•When the DVI to HDMI adapter cable is used, connect the audio cable to the audio input terminal.<br />
•Audio settings can be made on the "HDMI1 input" menu screen. (p. 16)<br />
Applicable audio signal sampling frequencies (2ch L.PCM): 48 kHz, 44.1 kHz, 32 kHz<br />
(1): The HDMI logo is displayed on an HDMI-compliant equipment. (2): Enquire at your local digital equipment retailer shop.<br />
•<br />
<strong>No</strong>te<br />
•HDMI2 terminal is for digital signal only.<br />
•Use with a PC is not assumed.<br />
•The 720p/1080i signals will be reformatted before being displayed on the screen.<br />
•If the connected equipment has an aspect adjustment function, set the aspect ratio to "16:9".<br />
•These HDMI connectors are "type A".<br />
An equipment having no digital output terminal may be connected to the input terminal of either "Component", "S-<br />
•VIDEO", or "Video" to receive analogue signals.<br />
The HDMI input terminal can be used with only the following image signals:<br />
•480i, 480p, 576i, 576p, 720p and 1080i. Match the output setting of the digital equipment.<br />
For details of the applicable HDMI signals, see p. 34.<br />
PC connection<br />
A •PC may be connected to this TV so that the PC screen is displayed and sound is heard from the TV.<br />
PC signals that can be inputted: Horizontal scanning frequency 31 to 69 kHz; vertical scanning frequency<br />
•59 to 86 Hz (more than 1,024 signal lines could result in incorrect display of the image).<br />
A PC adapter is not necessary for the DOS/V-compliant D-sub 15-pin connector.<br />
•<br />
<strong>No</strong>te<br />
•Some PC models cannot be connected to this TV.<br />
•For details of the applicable PC signals, see p. 34.<br />
Max. display resolution<br />
Aspect<br />
4:3<br />
16:9<br />
1,024 × 768 pixels<br />
1,366 × 768 pixels<br />
•D-sub 15-pin connector signal<br />
5 4 3 2 1<br />
Pin <strong>No</strong>. Signal Name Pin <strong>No</strong>. Signal Name Pin <strong>No</strong>. Signal Name<br />
10 9 8 7 6<br />
R GND (Ground) NC (not connected)<br />
15 14 13 12 11<br />
G GND (Ground) NC (not connected)<br />
B GND (Ground) HD/SYNC<br />
NC (not connected) NC (not connected) VD<br />
GND (Ground) GND (Ground) NC (not connected)<br />
Control with HDMI<br />
•HDMI connections to some Panasonic equipments allow you to enjoy the easy playback or home theatre.<br />
•Setup the equipment to enable this function. Read the manual of the equipment.<br />
•This function may not work normally depending on the equipment condition.<br />
•This function may not work normally when Panasonic Player theatre is connected.<br />
•The equipment can be operated by TV’s remote control with this function on even if TV is in Standby mode.<br />
•Image or sound may not be available for the fi rst few seconds when the playback starts.<br />
•Image or sound may not be available for the fi rst few seconds when Input mode is switched.<br />
•Volume function will be displayed when adjusting the volume of the equipment.<br />
Easy playback is also available by using the remote control for Amplifi er. Read the manuals of Amplifi er.<br />
• Technical Information<br />
FAQs, etc.<br />
33
34<br />
Technical Information<br />
Socket Earth<br />
CVBS out (video)<br />
CVBS earth<br />
Red in<br />
Red earth<br />
Green in<br />
Green earth<br />
Blue in<br />
Blue earth<br />
Audio out (L)<br />
Audio out (R)<br />
21<br />
19<br />
17<br />
15<br />
13<br />
11<br />
9<br />
7<br />
5<br />
3<br />
1<br />
SCART, S-video and HDMI terminal information<br />
AV1 SCART terminal<br />
(RGB, VIDEO)<br />
Suitable inputs for AV1 include RGB (Red / Green / Blue).<br />
Socket Earth<br />
CVBS out (video)<br />
CVBS earth<br />
Red in, S.C. - in<br />
Red earth<br />
Green in<br />
Green earth<br />
Blue in<br />
Blue earth<br />
Audio out (L)<br />
Audio out (R)<br />
21<br />
19<br />
17<br />
15<br />
13<br />
11<br />
9<br />
7<br />
5<br />
3<br />
1<br />
20<br />
18<br />
16<br />
14<br />
12<br />
10<br />
8<br />
6<br />
4<br />
2<br />
20<br />
18<br />
16<br />
14<br />
12<br />
10<br />
8<br />
6<br />
4<br />
2<br />
CVBS in (video)<br />
RGB status earth<br />
Status RGB<br />
Earth<br />
--<br />
--<br />
Status CVBS<br />
Audio in (L)<br />
Audio earth<br />
Audio in (R)<br />
AV3 SCART terminal<br />
(RGB, VIDEO, S-VIDEO, Q-Link)<br />
AV3 - Pins 15 and 20 are dependent on AV3 S-VHS /<br />
VIDEO switching.<br />
ofrecido por www.electromanuales.com<br />
CVBS in (video)<br />
RGB status earth<br />
Status RGB<br />
Earth<br />
--<br />
Q-Link data<br />
Status CVBS<br />
Audio in (L)<br />
Audio earth<br />
Audio in (R)<br />
AV2 SCART terminal<br />
(VIDEO, S-VIDEO, Q-Link)<br />
AV2 - Pins 15 and 20 are dependent on AV2 S-VHS /<br />
VIDEO switching.<br />
Socket Earth<br />
CVBS out (video)<br />
CVBS earth<br />
S.C. - in<br />
Earth<br />
--<br />
Earth<br />
--<br />
Earth<br />
Audio out (L)<br />
Audio out (R)<br />
Chrominance in<br />
Input signal that can be displayed<br />
Mark: Applicable input signal for Component (Y, PB, PR), HDMI and PC (D-sub 15P)<br />
21<br />
19<br />
17<br />
15<br />
13<br />
11<br />
9<br />
7<br />
5<br />
3<br />
1<br />
20<br />
18<br />
16<br />
14<br />
12<br />
10<br />
8<br />
6<br />
4<br />
2<br />
AV4 S-VIDEO 4 pin terminal<br />
CVBS in (video)<br />
Earth<br />
--<br />
Earth<br />
--<br />
Q-Link data<br />
Status CVBS<br />
Audio in (L)<br />
Audio earth<br />
Audio in (R)<br />
Luminance in<br />
Chrominance earth Luminance earth<br />
HDMI terminal<br />
Hot Plug Detect 19<br />
DDC/CEC Ground 17<br />
SCL<br />
15<br />
CEC<br />
13<br />
TMDS Clock Shield 11<br />
TMDS Data0 9<br />
TMDS Data0+ 7<br />
TMDS Data1 Shield 5<br />
TMDS Data2 3<br />
TMDS Data2+ 1<br />
18<br />
16<br />
14<br />
12<br />
10<br />
8<br />
6<br />
4<br />
2<br />
+5V Power<br />
SDA<br />
Reserved (in cable but N.C. on device)<br />
TMDS Clock<br />
TMDS Clock+<br />
TMDS Data0 Shield<br />
TMDS Data1<br />
TMDS Data1+<br />
TMDS Data2 Shield<br />
Signal name Horizontal frequency (kHz) Vertical frequency (Hz) Component HDMI PC<br />
525 (480) / 60i 15.73 59.94 <br />
525 (480) / 60p 31.47 59.94 <br />
625 (576) / 50i 15.63 50.00 <br />
625 (576) / 50p 31.25 50.00 <br />
750 (720) / 60p 45.00 60.00 <br />
750 (720) / 50p 37.50 50.00 <br />
1,125 (1,080) / 60i 33.75 60.00 <br />
1,125 (1,080) / 50i 28.13 50.00 <br />
640 × 400 @70 Hz 31.46 70.07 <br />
640 × 480 @60 Hz 31.47 59.94 <br />
640 × 480 @75 Hz 37.50 75.00 <br />
852 × 480 @60 Hz 31.47 59.94 <br />
800 × 600 @60 Hz 37.88 60.32 <br />
800 × 600 @75 Hz 46.88 75.00 <br />
800 × 600 @85 Hz 53.67 85.06 <br />
1,024 × 768 @60 Hz 48.36 60.00 <br />
1,024 × 768 @70 Hz 56.48 70.07 <br />
1,024 × 768 @75 Hz 60.02 75.03 <br />
1,024 × 768 @85 Hz 68.68 85.00 <br />
1,280 × 1,024 @60 Hz 63.98 60.02 <br />
1,366 × 768 @60 Hz 48.36 60.00 <br />
Macintosh13” (640 × 480) 35.00 66.67 <br />
Macintosh16” (832 × 624) 49.72 74.54 <br />
Macintosh21” (1,152 × 870) 68.68 75.06 <br />
<strong>No</strong>te Signals other than above may not be displayed properly.<br />
• •The above signals are reformatted for optimal viewing on your display.<br />
•Applicable input signal for PC is basically compatible to VESA Timing Standard.<br />
PC signal is magnifi ed or compressed for display, so that it may not be possible to show fi ne detail<br />
with suffi cient clarity.
•<br />
<strong>No</strong>te<br />
Folder structure viewed in PC<br />
Photo<br />
DCIM<br />
Created automatically<br />
100_PANA<br />
ofrecido por www.electromanuales.com<br />
Multi Window<br />
•You can watch two images at once, such as a TV programme and a DVD. (p. 11)<br />
•The same programmes cannot be displayed at once.<br />
•You cannot select the same input source between Main and Sub screen.<br />
This function cannot be used with a PC, HDMI, SD card, or when progressive signals/1080i signals<br />
(Y, PB, PR) are being inputted.<br />
Data format for Card browsing<br />
Photo : Still images recorded with digital still cameras compatible with JPEG fi les of<br />
DCF and EXIF standards<br />
Video : Videos recorded with this TV, Panasonic DVD recorder or digital camcorder<br />
Data format : FAT12 or FAT16<br />
Number of pixels<br />
for motion picture : 320 x 240 (QVGA) or 176 x 144 (QCIF)<br />
Max. number of fi les : 65,535<br />
Image resolution : 8 x 8 to 5,120 x 3,840<br />
•Sound format : G.726 (32 Kbps, 8-kHz sampling frequency, monaural)<br />
Compliant card type (maximum capacity): SD Card (2 GB), Multi Media Card, miniSD Card (requiring miniSD<br />
•adapter)<br />
Check the latest information on the card type at the following website. (English only)<br />
http://panasonic.co.jp/pavc/global/cs<br />
DCF (Design rule for camera fi le system): Unifi ed standard established by Japan Electronics and Information Technology Industries Association (JEITA).<br />
•Caution<br />
•A JPEG image modifi ed with a PC cannot be displayed.<br />
•Images imported from a PC must be compatible with EXIF (Exchangeable Image File) 2.0, 2.1, and 2.2.<br />
•Partly degraded fi les might be displayed at a reduced resolution.<br />
MPEG4 view can only show moving pictures recorded by this TV, Panasonic DVD recorder DIGA or mobile<br />
•camera D-snap.<br />
When recording in MPEG4, format the SD card with this TV. The card may not operate properly if formatted with<br />
•different equipment.<br />
Memory cards must be formatted with FAT12 or FAT16 in order to be viewed on TV. If the card is not formatted, it<br />
may cause incompatibility with certain memory card adapters. If this happens, reformat the card using your digital<br />
camera.<br />
Reformatting the card will erase the images and pictures stored in it. Refer to your camera manual for more<br />
•information.<br />
•This function cannot display Motion JPEG and still image not DCF formatted (i.e. TIFF, BMP).<br />
The displayed image size depends on the recorded image size.<br />
3-digit folder number + 5-digit arbitrary characters<br />
P1000001.JPG 4-digit<br />
•<br />
arbitrary characters + 4-digit fi le number<br />
P1000002.JPG<br />
P1000003.JPG Usable characters: 1-byte "a to z", "A to Z", "0 to 9," and "_"<br />
P1000004.JPG<br />
Video<br />
SD_VIDEO<br />
Created automatically<br />
PRL001<br />
Created automatically<br />
"PRL" + 3-digit arbitrary characters<br />
MOL001.ASF "MOL"<br />
•<br />
+ 3-digit arbitrary characters<br />
MOL002.ASF<br />
MOL003.ASF Usable characters: 1-byte "a to f", "A to F", and "0 to 9"<br />
•<br />
MOL004.ASF<br />
•The folder and fi le names may be different depending on the digital camera used.<br />
•Do not use two-byte characters or other special codes.<br />
The card may become unusable with this TV if fi le or folder names are changed.<br />
• Technical Information<br />
FAQs, etc.<br />
35
36<br />
FAQs<br />
Before requesting service or assistance, please follow these simple guides to resolve the problem.<br />
If problem still persists, please contact your local Panasonic dealer or Panasonic Customer Care Centre<br />
for assistance.<br />
White spots or<br />
shadow images<br />
(noise)<br />
•Check the position, direction,<br />
and connection of the aerial.<br />
Direct TV record /<br />
Q-Link functions not<br />
recording<br />
•Please confi rm SCART cable and<br />
connection. Also please set "AV2/<br />
AV3 out" in the Setup menu<br />
(p. 16).<br />
There may be red<br />
spots, blue spots,<br />
green spots and<br />
black spots on the<br />
screen<br />
•This is a characteristic of liquid<br />
crystal panels and is not a problem.<br />
The liquid crystal panel is built with<br />
very high precision technology<br />
giving you fi ne picture details.<br />
Occasionally, a few non-active<br />
pixels may appear on the screen<br />
as a fi xed point of red, green, blue<br />
or black.<br />
Please note this does not affect the<br />
performance of your <strong>LCD</strong>.<br />
The <strong>LCD</strong> panel<br />
moves slightly when<br />
it is pushed with a<br />
fi nger.<br />
Clattered sound<br />
might be heard.<br />
•There are some looseness around<br />
the panel to prevent the damage to<br />
the panel.<br />
The panel might move slightly<br />
when it is pushed with a fi nger, and<br />
clattered sound might be heard.<br />
This is not a malfunction.<br />
ofrecido por www.electromanuales.com<br />
TV<br />
Pictures from an<br />
equipment are unusual<br />
when the equipment is<br />
connected via HDMI<br />
•Is the HDMI cable connected properly?<br />
(p. 30)<br />
•Turn Off the TV and equipment, then turn<br />
•them On again.<br />
Check an input signal from the equipment.<br />
•(p. 34)<br />
Use an equipment compliant with<br />
EIA/CEA-861/861B.<br />
The remote control<br />
does not work<br />
•Are the batteries installed correctly?<br />
(p. 6)<br />
•Has the TV been switched On?
Screen Sound HDMI<br />
SD<br />
Other<br />
Problem Actions<br />
Chaotic image, noisy<br />
<strong>No</strong> image can be<br />
displayed<br />
Blurry or<br />
distorted image<br />
(no sound or low volume)<br />
Neither image nor<br />
sound is produced<br />
<strong>No</strong> sound is produced •<br />
Sound level is low<br />
or sound is distorted<br />
Sound is unusual<br />
An error message<br />
appears<br />
Set "P-NR" in the Picture menu (to remove noise).<br />
• •(p. 16)<br />
Check nearby electrical products<br />
(car, motorcycle, fl uorescent lamp).<br />
Is "Colour" or "Contrast" in the Picture menu set to the<br />
•minimum? (p. 16)<br />
Reset channels. (p. 20) •<br />
• •Is the TV in "AV mode"?<br />
•Is the mains lead plugged into the socket outlet?<br />
•Is the TV turned On?<br />
Check Picture menu (p. 16) and volume.<br />
•Is "Sound Mute" active? (p. 7)<br />
Is the volume set to the minimum?<br />
•<br />
•Sound signal reception may be deteriorated.<br />
Set "MPX" (p. 16) in the Sound menu to "Mono".<br />
•Set the sound setting of the connected equipment<br />
•to "2ch L.PCM".<br />
•Check the "HDMI1 input" setting in the Sound menu. (p. 16)<br />
If digital sound connection has a problem, select analogue<br />
sound connection. (p. 33)<br />
An error message appears Contact the authorized Service Centre.<br />
•<br />
“Control with HDMI”<br />
function does not work<br />
The SD card cannot be<br />
used even when it is<br />
formatted<br />
TV goes into<br />
"Standby mode"<br />
ofrecido por www.electromanuales.com<br />
• •Switch the TV on again with the equipment on.<br />
Set “Control with HDMI” to “Off”, then set to “On” again.<br />
(p. 27)<br />
Contact the authorized Service Centre.<br />
•<br />
• •The sleep function is activated.<br />
The TV enters "Standby mode" about 30 min. after<br />
broadcasting ends.<br />
•<br />
•Follow the message's instructions.<br />
If the problem persists, contact the authorized Service Centre.<br />
• Frequently Asked Questions<br />
FAQs, etc.<br />
37
38<br />
SD Card: On screen messages<br />
Message Meaning/Action<br />
Is SD Card in?<br />
•Insert a SD card.<br />
SD Card is locked<br />
Please unlock to operate<br />
Unlock the SD card. •<br />
This fi le is locked<br />
Unlock the fi le in the card.<br />
Please unlock to operate •<br />
This type of format is not<br />
supported<br />
This type of card is not<br />
supported<br />
Cautions in handling SD Card :<br />
•Do not remove the card while the TV is accessing data ("blue" LED<br />
•On) (this can damage card or TV).<br />
•Do not touch the pins on the back of the card.<br />
•Do not subject the card to a high pressure or impact.<br />
Insert the card in the correct direction (otherwise, card may be<br />
•damaged).<br />
Electrical interference, static electricity, or erroneous operation may<br />
•damage the data or card.<br />
Back up the recorded data at regular intervals in case of deteriorated<br />
or damaged data or erratic operation of the TV. (Panasonic is not<br />
liable for any deterioration or damage of recorded data.)<br />
The TV does not support the format.<br />
•(For the applicable formats and data, see p. 35.)<br />
A card not supported by the TV has been inserted.<br />
•(For the supported cards, see p. 35.)<br />
Broken fi le<br />
Cannot display image<br />
The fi le is broken. •<br />
Memory full<br />
•The card memory is full.<br />
<strong>No</strong>t enough memory<br />
•The card does not have enough memory to operate.<br />
Cannot read fi le<br />
Unrecordable source<br />
SD recording is stopped<br />
•The fi le is not readable.<br />
That channel cannot be recorded.<br />
•(Recording is automatically stopped.)<br />
Error<br />
Re-insert the card. If the error persists, format the card. (p. 25)<br />
Check card •<br />
Card recording in progress<br />
Please stop recording to operate<br />
ofrecido por www.electromanuales.com<br />
That operation is not available during recording.<br />
•To continue the operation, stop recording.<br />
(For example, changing channels while recording a TV<br />
programme.)<br />
Delete fi le? Displayed when you press Red colour button to delete a<br />
•MPEG4 fi le. Press OK button to confi rm deleting.<br />
Blue LED<br />
WARNING: As with an small object,<br />
SD card can be swallowed by young<br />
children. Do not allow children to<br />
handle SD card. Please remove SD card<br />
immediately after use.
<strong>TX</strong>-<strong>26LX600P</strong> <strong>TX</strong>-<strong>32LX600P</strong><br />
Power Source AC 220-240 V, 50 / 60 Hz<br />
Power<br />
Consumption<br />
Display<br />
panel<br />
Sound<br />
Average use 118 W 169 W<br />
Standby condition 0.4 W<br />
Aspect Ratio 16:9<br />
Visible screen size<br />
Number of pixels 1,049,088 (1,366 (W) × 768 (H))<br />
66 cm 80 cm<br />
565 mm (W) × 318 mm (H) 697 mm (W) × 392 mm (H)<br />
Speaker Woofer (80 mm) × 2 pcs, Tweeter (16 mm × 73 mm) × 4 pcs<br />
Audio Output 20 W (5 W + 5 W, 5 W + 5 W)<br />
Headphones M3 (3.5 mm) stereo mini Jack × 1<br />
PC signals<br />
Receiving Systems /<br />
Band name<br />
Aerial - Rear VHF / UHF<br />
VGA, SVGA, XGA<br />
SXGA ······ (compressed)<br />
Horizontal scanning frequency 31 - 69 kHz<br />
Vertical scanning frequency 59 - 86 Hz<br />
Operating Conditions Temperature : 0 °C - 35 °C<br />
Connection Terminals<br />
PAL B, G, H, I, SECAM B, G, SECAM L / L’<br />
VHF E2 - E12 VHF H1 - H2 (ITALY)<br />
VHF A - H (ITALY) UHF E21 - E69<br />
CATV (S01 - S05) CATV S1 - S10 (M1 - M10)<br />
CATV S11 - S20 (U1 - U10) CATV S21 - S41 (Hyperband)<br />
PAL D, K, SECAM D, K<br />
VHF R1 - R2 VHF R3 - R5<br />
VHF R6 - R12 UHF E21 - E69<br />
PAL 525/60 Playback of NTSC tape from some PAL Video re corders (VCR)<br />
M.NTSC Playback from M. NTSC Video recorders (VCR)<br />
NTSC (AV input only) Playback from NTSC Video recorders (VCR)<br />
AV1 (Scart terminal) 21 Pin terminal (Audio/Video in, Audio/Video out, RGB in)<br />
AV2 (Scart terminal) 21 Pin terminal (Audio/Video in, Audio/Video out, S-Video in, Q-Link)<br />
AV3 (Scart terminal) 21 Pin terminal (Audio/Video in, Audio/Video out, RGB in, S-Video in, Q-Link)<br />
VIDEO RCA PIN Type × 1 1.0 V[p-p] (75 )<br />
AV4 S-VIDEO Mini DIN 4-pin Y:1.0 V[p-p] (75 ) C:0.286 V[p-p] (75 )<br />
AUDIO L - R RCA PIN Type × 2 0.5 V[rms]<br />
COMPONENT<br />
Y<br />
PB, PR<br />
1.0 V[p-p] (including synchronization)<br />
±0.35 V[p-p]<br />
HDMI1/2 TYPE A Connectors<br />
Others<br />
PC<br />
HIGH-DENSITY D-SUB 15PIN R,G,B/0.7 V[p-p] (75 )<br />
HD, VD/TTL Level 2.0 - 5.0 V[p-p] (high impedance)<br />
AUDIO L - R RCA PIN Type × 2 0.5 V[rms]<br />
Card slot SD CARD slot × 1<br />
Output AUDIO L - R RCA PIN Type × 2 0.5 V[rms] (high impedance)<br />
Dimensions ( W × H × D )<br />
ofrecido por www.electromanuales.com<br />
Specifi cations<br />
724 mm × 549 mm × 300 mm (With TV Stand)<br />
724 mm × 487 mm × 141 mm (TV only)<br />
857 mm × 625 mm × 300 mm (With TV Stand)<br />
857 mm × 563 mm × 141 mm (TV only)<br />
Weight 19.5 k Net 22.5 k Net<br />
•<br />
<strong>No</strong>te<br />
•Design and Specifi cations are subject to change without notice. Weight and Dimensions shown are approximate.<br />
This equipment complies with the EMC standards listed below.<br />
EN55013, EN61000-3-2, EN61000-3-3, EN55020, EN55022, EN55024.<br />
•<br />
•Specifi cations<br />
SD Card: On screen messages<br />
FAQs, etc.<br />
39
Information on Disposal for Users of Waste Electrical & Electronic Equipment<br />
(private households)<br />
This symbol on the products and/or accompanying documents means that used electrical and<br />
electronic products should not be mixed with general household waste.<br />
For proper treatment, recovery and recycling, please take these products to designated collection<br />
points, where they will be accepted on a free of charge basis. Alternatively, in some countries you<br />
may be able to return your products to your local retailer upon the purchase of an equivalent new<br />
product.<br />
Disposing of this product correctly will help to save valuable resources and prevent any potential negative<br />
effects on human health and the environment which could otherwise arise from inappropriate<br />
waste handling. Please contact your local authority for further details of your nearest designated collection point.<br />
Penalties may be applicable for incorrect disposal of this waste, in accordance with national legislation.<br />
For business users in the European Union<br />
If you wish to discard electrical and electronic equipment, please contact your dealer or supplier for further<br />
information.<br />
Information on Disposal in other Countries outside the European Union<br />
This symbol is only valid in the European Union.<br />
If you wish to discard this product, please contact your local authorities or dealer and ask for the correct method of<br />
disposal.<br />
Licence<br />
•VGA ofrecido por www.electromanuales.com<br />
Trademark Credits<br />
•<br />
is a trademark of International Business Machines Corporation.<br />
•Macintosh is a registered trademark of Apple Computer, USA.<br />
S-VGA is a registered trademark of the Video Electronics Standard Association.<br />
Even if no special notation has been made of company or product trademarks, these trademarks have been fully<br />
•respected.<br />
•SD Logo is a trademark.<br />
HDMI, the HDMI Logo and High-Defi nition Multimedia Interface are trademarks or registered trademarks of HDMI<br />
•Licensing LLC.<br />
HDAVI ControlTM •<br />
is a trademark of Matsushita Electric Industrial Co., Ltd.<br />
TruSurround XT, SRS and symbol are trademarks of SRS Labs, Inc.<br />
TruSurround XT technology is incorporated under license from SRS Labs, Inc.<br />
Customer’s Record<br />
The model number and serial number of this product may be found on its rear panel. You should note this serial<br />
number in the space provided below and retain this book, plus your purchase receipt, as a permanent record of your<br />
purchase to aid in identifi cation in the event of theft or loss, and for Warranty Service purposes.<br />
<strong>Model</strong> Number Serial Number<br />
Matsushita Electric Industrial Co., Ltd.<br />
Web Site : http://www.panasonic-europe.com<br />
2006 Matsushita Electric Industrial Co., Ltd. All Rights Reserved.<br />
Printed in Czech Republic