VTR Xchange User Guide - Aja
VTR Xchange User Guide - Aja
VTR Xchange User Guide - Aja

Create successful ePaper yourself
Turn your PDF publications into a flip-book with our unique Google optimized e-Paper software.
Menus and Usage<br />
<strong>VTR</strong> <strong>Xchange</strong> <strong>User</strong>’s <strong>Guide</strong> — Menus and Usage<br />
The easiest way to set the Captured Frame Calibration slider is to capture a<br />
short clip of video that has burn-in timecode. When the capture is complete,<br />
the clip will open up in a <strong>VTR</strong> <strong>Xchange</strong> player window. You should then see<br />
the burn-in timecode in the clip as well as the timecode displayed below the<br />
clip. If the timecode displayed below the clip is less than the burn-in<br />
timecode, decrease the “Captured Frame Calibration” number by moving the<br />
slider to the left. After adjustment, repeat the capture and compare operation<br />
again, repeating this process until the two timecodes agree. Once calibrated,<br />
capturing should remain frame-accurate. If you change video format or<br />
compression, you may have to re-calibrate.<br />
10. The “ Record Frame Calibration”<br />
slider calibrates “edit to tape” in a manner<br />
similar to the Captured Frame Calibration. To calibrate recording, open a<br />
short video clip with burn-in timecode in <strong>VTR</strong> <strong>Xchange</strong>'s player window. Set<br />
an inpoint for the clip that ends in the same frame number as the burn-in<br />
timecode on the first frame of the clip. This will make it easier to compare<br />
timecodes. Press “edit to tape” and wait for the recording to complete. Shuttle<br />
the deck to the location just recorded to. You may have to shuttle the tape a<br />
few frames past the inpoint before the burned-in timecode begins to change.<br />
If the timecode displayed below the decks video is less than the burn-in<br />
timecode, decrease the “Captured Frame Calibration” number by moving the<br />
slider to the left. After adjustment, repeat the compare operation again,<br />
repeating this process until the two timecodes agree.<br />
File…Open: (command + o) Open a clip for playback through <strong>VTR</strong> <strong>Xchange</strong>.<br />
Connect a deck to the KONA's outputs to print clips to tape. Open<br />
recently opened clips under File… Open Recent.<br />
File…Eject Tape: (command + e) If an RS-422 cable is connected from the<br />
deck to the KONA, selecting eject tape or pressing command + e will eject<br />
the tape from your <strong>VTR</strong>.<br />
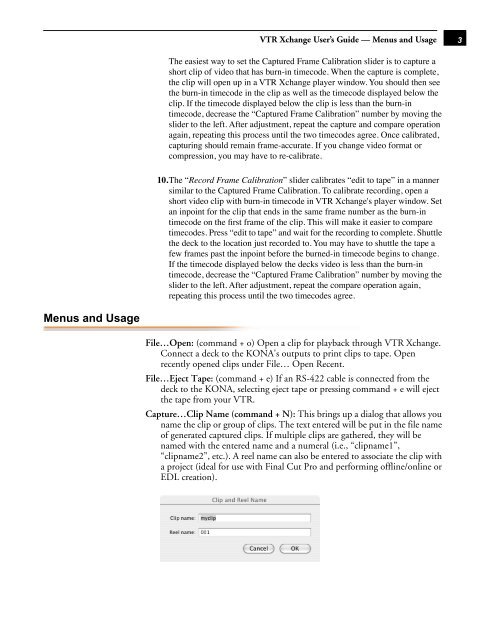
Capture…Clip Name (command + N): This brings up a dialog that allows you<br />
name the clip or group of clips. The text entered will be put in the file name<br />
of generated captured clips. If multiple clips are gathered, they will be<br />
named with the entered name and a numeral (i.e., “clipname1”,<br />
“clipname2”, etc.). A reel name can also be entered to associate the clip with<br />
a project (ideal for use with Final Cut Pro and performing offline/online or<br />
EDL creation).<br />
1<br />
3