ATTIX 40 TYPE 22 - Nilfisk PARTS - Nilfisk-Advance
ATTIX 40 TYPE 22 - Nilfisk PARTS - Nilfisk-Advance
ATTIX 40 TYPE 22 - Nilfisk PARTS - Nilfisk-Advance

Create successful ePaper yourself
Turn your PDF publications into a flip-book with our unique Google optimized e-Paper software.
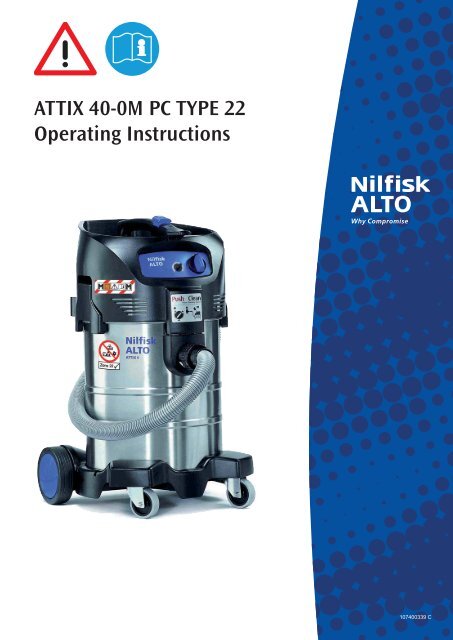
<strong>ATTIX</strong> <strong>40</strong>-0M PC <strong>TYPE</strong> <strong>22</strong><br />
Operating Instructions<br />
107<strong>40</strong>0339 C
Contents<br />
1 Important safety<br />
instructions<br />
2 Description<br />
3 Before starting the<br />
cleaner<br />
4 Control / Operation<br />
5 Applications and<br />
methods<br />
6 After using the cleaner<br />
7 Maintenance<br />
8 Troubleshooting<br />
9 Further information<br />
1) OEL values = Occupational Exposure Limit<br />
*) Optional accessories / Option depending on model<br />
Original instruction<br />
<strong>ATTIX</strong> <strong>40</strong>-0M PC <strong>TYPE</strong> <strong>22</strong><br />
............................................................................................2<br />
2.1 Operating elements ..............................................................7<br />
2.2 Operating panel ....................................................................7<br />
3.1 Assembling the vacuum cleaner...........................................8<br />
3.1.1 Taking accessories out of the packaging *) ...........................8<br />
3.1.2 Attaching the suction pipe holder to the suction pipe *) ........8<br />
3.2 Before starting the cleaner ...................................................8<br />
3.3 Insert the disposal bag .........................................................9<br />
3.4 Inserting the filter bag .........................................................10<br />
4.1 Connections .......................................................................11<br />
4.1.1 Connecting the suction hose ..............................................11<br />
4.1.2 Electrical connection ..........................................................11<br />
4.2 Switching on the vacuum cleaner .......................................11<br />
4.4 Check the volume flow monitor ..........................................12<br />
4.5 Acoustic warning ................................................................12<br />
4.3 Cleaning the filter element " Push&Clean System " ...........12<br />
5.1 Techniques .........................................................................13<br />
5.1.1 Picking up dry substances..................................................13<br />
5.1.2 Picking up liquids ................................................................13<br />
6.1 Switching the vacuum cleaner off and storage ...................14<br />
7.1 Maintenance plan ...............................................................15<br />
7.2 Maintenance work ..............................................................15<br />
7.2.1 Emptying the dirt tank ........................................................15<br />
7.2.2 Replacing the disposal bag ................................................16<br />
7.2.3 Replacing the filter bag .......................................................17<br />
7.2.4 Replacing filter element (Push & Clean System) ...............18<br />
7.2.5 Replacing the motor cooling filter .......................................19<br />
..........................................................................................20<br />
9.1 Recycling the cleaner .........................................................21<br />
9.2 Guarantee ..........................................................................21<br />
9.3 Tests and approvals............................................................21<br />
9.4 EC declaration of conformity ..............................................21<br />
9.5 Technical data ....................................................................<strong>22</strong><br />
9.6 Optional accessories ..........................................................<strong>22</strong><br />
1<br />
GB<br />
DE<br />
FR<br />
NL<br />
IT<br />
NO<br />
SV<br />
DA<br />
FI<br />
ES<br />
PT<br />
EL<br />
TR<br />
SL<br />
HR<br />
SK<br />
CS<br />
PL<br />
HU<br />
RO<br />
BG<br />
RU<br />
ET<br />
LV<br />
LT<br />
ZH<br />
KO
<strong>ATTIX</strong> <strong>40</strong>-0M PC <strong>TYPE</strong> <strong>22</strong><br />
GB<br />
DE<br />
FR<br />
NL<br />
IT<br />
NO<br />
SV<br />
DA<br />
FI<br />
ES<br />
PT<br />
EL<br />
TR<br />
SL<br />
HR<br />
SK<br />
CS<br />
PL<br />
HU<br />
RO<br />
BG<br />
RU<br />
ET<br />
LV<br />
LT<br />
ZH<br />
KO<br />
1 Important safety instructions<br />
Symbols used to mark<br />
instructions<br />
2<br />
Prior to using the appliance for the first time, be sure to read<br />
this document through and keep it ready to hand.<br />
DANGER<br />
Danger that leads directly to serious or irreversible injuries,<br />
or even death.<br />
WARNING<br />
Danger that can lead to serious injuries or even death.<br />
CAUTION<br />
Danger that can lead to minor injuries and damage.<br />
The appliance must<br />
only be used by persons, who have been instructed in its correct<br />
usage and explicitly commissioned with the task of operating it<br />
only be operated under supervision<br />
not be used by children<br />
not be used by mentally or physically disabled persons<br />
Before starting work, the operating staff must be informed on and<br />
trained within:<br />
use of the vacuum cleaner<br />
risks associated with the material to be picked up<br />
safe disposal of the picked up material<br />
1. Do not use any unsafe work techniques.<br />
2. Never use the vacuum cleaner without a filter.<br />
3. Switch off the appliance and disconnect the mains plug in the<br />
following situations:<br />
- Prior to cleaning and servicing<br />
- Prior to replacing components<br />
- Prior to changing over the appliance<br />
- If foam develops or liquid emerges<br />
Besides the operating instructions and the binding accident prevention<br />
regulations valid in the country of use, observe recognised regulations<br />
for safety and proper use.<br />
Purpose and intended use Since 1997, there is a new division of hazardous dusts and their assigned<br />
vacuum machines. These are regulatedby IEC 60335-2-69<br />
(world wide) and by EN 60335-2-69 (European wide).<br />
Dust Class M (medium). The dusts which belong<br />
to this class are: dusts with OEL values 1)<br />
> 0.1 mg/m³ as well as saw dust. The machine is<br />
tested in its entirety by vacuums for this dust class. The maximum<br />
degree of permeability is 0.1% and the disposal must be low dust.<br />
Machines to be used in Zone <strong>22</strong> are marked as Type <strong>22</strong> vacuums.<br />
These machines may be used for picking up dust from dust class<br />
L, M or H.<br />
1) OEL values = Occupational Exposure Limit<br />
*) Optional accessories / Option depending on model<br />
Original instruction
1) OEL values = Occupational Exposure Limit<br />
*) Optional accessories / Option depending on model<br />
Original instruction<br />
<strong>ATTIX</strong> <strong>40</strong>-0M PC <strong>TYPE</strong> <strong>22</strong><br />
Zone <strong>22</strong> is defined as environments where flammable dusts are<br />
present for short periods only (e.g. less than 10 hours per year).<br />
Type <strong>22</strong> machines are suitable for use as dust extractors.<br />
The air flow in Safety Vacuum systems has to be strictly controlled<br />
to achieve a minimum flow rate of V min = 20 m/s in the suction hose.<br />
The vacuum cleaner <strong>ATTIX</strong> <strong>40</strong>-0M PC <strong>TYPE</strong> <strong>22</strong> is suitable for picking<br />
up:<br />
Non flammable liquids (flashpoint 55 °C or higher)<br />
Sawdust and dusts hazardous to health, including dusts with OEL<br />
values 0.1 mg/m³<br />
Flammable, dry dust in Zone <strong>22</strong><br />
Use the cleaner only if it is certain that no active sources of ignition<br />
can be sucked in.<br />
Conductive extraction equipment, e.g. extraction hoods on machines<br />
and conductive parts of machining equipment (e.g. equipment in<br />
protective class II) that are not earthed through the cleaner, must be<br />
earthed in some other way to prevent electrostatic charges.<br />
When picking up flammable dust in Zone <strong>22</strong>, the dirt tank must be<br />
emptied as required, but always after use.<br />
It must be assured that dust not accumulate on the appliance by<br />
regular cleaning.<br />
The vacuum cleaner must be used only, if all filters, as well as the<br />
filter for the motor cooling air, are attached and without damage.<br />
The cleaner is not suitable for extraction on machining equipment in<br />
operation that could produce sources of ignition.<br />
When dust removers are used, the rate at which air is exchanged<br />
in the room must be adequate if the exhaust air from the vacuum<br />
cleaner is blown into the room (please observe regulations valid in<br />
your country).<br />
The appliance is suitable for commercial use, such as e.g. in<br />
Hotels, Schools, Hospitals, Factories, Shops, Offices, Hire shops<br />
Any other use is considered as improper use. The manufacturer accepts<br />
no liability for any damage resulting from such use. The risk for<br />
such use is borne solely by the user.<br />
Proper use also includes proper operation, servicing and repairs as<br />
specified by the manufacturer.<br />
Transport 1. Before transporting the dirt tank, close all the locks.<br />
2. Do not tilt the cleaner if there is liquid in the dirt tank.<br />
3. Do not use a crane hook to lift the cleaner.<br />
Storage 1. Store the appliance in a dry place, protected from frost.<br />
3<br />
GB<br />
DE<br />
FR<br />
NL<br />
IT<br />
NO<br />
SV<br />
DA<br />
FI<br />
ES<br />
PT<br />
EL<br />
TR<br />
SL<br />
HR<br />
SK<br />
CS<br />
PL<br />
HU<br />
RO<br />
BG<br />
RU<br />
ET<br />
LV<br />
LT<br />
ZH<br />
KO
<strong>ATTIX</strong> <strong>40</strong>-0M PC <strong>TYPE</strong> <strong>22</strong><br />
GB<br />
DE<br />
FR<br />
NL<br />
IT<br />
NO<br />
SV<br />
DA<br />
FI<br />
ES<br />
PT<br />
EL<br />
TR<br />
SL<br />
HR<br />
SK<br />
CS<br />
PL<br />
HU<br />
RO<br />
BG<br />
RU<br />
ET<br />
LV<br />
LT<br />
ZH<br />
KO<br />
Electrical connection 1. It is recommended that the vacuum cleaner should be connected<br />
via a residual current circuit breaker.<br />
2. When picking up flammable dust in zone <strong>22</strong>, extension lines,<br />
couplings and adapters must not be used.<br />
3. Arrange the electrical parts (sockets, plugs and couplings) and<br />
lay down the extension lead so that the protection class is maintained.<br />
4. Connectors and couplings of power supply cords and extension<br />
leads must be watertight.<br />
Extension lead 1. As an extension lead, only use the version specified by the manufacturer<br />
or one of a higher quality. See operating instructions.<br />
2. When using an extension lead, check the minimum cross-sections<br />
of the cable:<br />
Cable length Cross section<br />
< 16 A < 25 A<br />
up to 20 m 1.5 mm2 2.5 mm2 20 to 50 m 2.5 mm2 4.0 mm2 Maintenance, cleaning and<br />
repair<br />
4<br />
During the following work, ensure that dust is not unnecessarily<br />
spread around. Wear a P2 breathing mask.<br />
Only carry out maintenance work described in the operating instructions.<br />
Always pull out the mains plug before cleaning and maintenance of<br />
the vacuum cleaner.<br />
During maintenance and cleaning, handle the vacuum cleaner in<br />
such a manner that there is no danger for maintenance staff or other<br />
persons.<br />
In the maintenance area<br />
1. Use filtered compulsory ventilation<br />
2. Wear protective clothing<br />
3. Clean the maintenance are so that no harmful substances get<br />
into the surroundings.<br />
Before removing the vacuum cleaner from the area contaminated<br />
with harmful substances:<br />
1. Clean the outside of the vacuum cleaner, wipe it clean or pack<br />
the vacuum cleaner in well sealed packaging<br />
2. and avoid spreading deposited harmful dust.<br />
During maintenance and repair work all contaminated parts that<br />
could not be cleaned satisfactorily must be:<br />
1. packed in well sealed bags<br />
2. disposed of in a manner that complies with valid regulations for<br />
such waste removal.<br />
A dust test must be performed at least once every year by <strong>Nilfisk</strong>-Alto<br />
service or a trained person. This test includes, for example, whether<br />
there is damage to the filter, the vacuum cleaner is sealed to the air<br />
and the control equipment works properly.<br />
1) OEL values = Occupational Exposure Limit<br />
*) Optional accessories / Option depending on model<br />
Original instruction
Risks<br />
Electrical components<br />
Picking up liquids<br />
Hazardous materials<br />
1) OEL values = Occupational Exposure Limit<br />
*) Optional accessories / Option depending on model<br />
Original instruction<br />
<strong>ATTIX</strong> <strong>40</strong>-0M PC <strong>TYPE</strong> <strong>22</strong><br />
DANGER<br />
Electric shock due to faulty mains connecting lead.<br />
Touching a faulty mains connecting lead can result in<br />
serious or even fatal injuries.<br />
1. Do not damage the mains power lead (e.g. by driving<br />
over it, pulling or crushing it).<br />
2. Regularly check whether the power cord is damaged or<br />
shows signs of ageing.<br />
3. Have the faulty mains connecting lead replaced by your<br />
<strong>Nilfisk</strong>-Alto service representative or a qualified electrician<br />
prior to using the appliance again.<br />
DANGER<br />
The upper section of the vacuum cleaner contains live<br />
components.<br />
Contact with live components leads to serious or even fatal<br />
injuries.<br />
1. Never spray water on to the upper section of the vacuum<br />
cleaner.<br />
CAUTION<br />
Damage due to unsuitable mains voltage.<br />
The appliance can be damaged as a result of being connected<br />
to an unsuitable mains voltage.<br />
1. Ensure that the voltage shown on the rating plate corresponds<br />
to the voltage of the local mains power supply.<br />
CAUTION<br />
Picking up liquids.<br />
Do not pick up flammable liquids.<br />
1. Before liquids are picked up, always remove the filter bag/<br />
waste bag and check that the float or the water level limit<br />
works properly.<br />
2. The use of a separate filter element or filter screen is recommended.<br />
3. If foam appears, stop work immediately and empty the<br />
tank.<br />
WARNING<br />
Hazardous materials.<br />
Picking up hazardous materials can lead to serious or even<br />
fatal injuries.<br />
1. The following materials must not be picked up by the vacuum<br />
cleaner:<br />
- hot materials (burning cigarettes, hot ash, etc.)<br />
- flammable, explosive, aggressive liquids (e.g. petrol, solvents,<br />
acids, alkalis, etc.)<br />
- mixtures of flammable dusts with liquids<br />
- explosive substances or substances considered to be similar<br />
in §1 of the law on explosives<br />
- flammable dusts with an extremely low minimum ignition<br />
energy
<strong>ATTIX</strong> <strong>40</strong>-0M PC <strong>TYPE</strong> <strong>22</strong><br />
GB<br />
DE<br />
FR<br />
NL<br />
IT<br />
NO<br />
SV<br />
DA<br />
FI<br />
ES<br />
PT<br />
EL<br />
TR<br />
SL<br />
HR<br />
SK<br />
CS<br />
PL<br />
HU<br />
RO<br />
BG<br />
RU<br />
ET<br />
LV<br />
LT<br />
ZH<br />
KO<br />
Spare parts and accessories<br />
Inserting the disposal bag<br />
Emptying dirt tank<br />
6<br />
WARNING<br />
For dusts like titanium and magnesium additional<br />
requirements apply, consult your national labour authorities<br />
or the manufacturer of the vacuum cleaner.<br />
CAUTION<br />
Spare parts and accessories.<br />
For picking up flammable dust in Zone <strong>22</strong>: Only use<br />
accessories which are certified by the manufacturer of the<br />
Type <strong>22</strong> machine. The use of other accessories can cause<br />
danger of explosion.<br />
The use of non-genuine spare parts and accessories can<br />
impair the safety of the appliance.<br />
1. Only use spare parts and accessories from <strong>Nilfisk</strong>-Alto.<br />
2. Use only the brushes supplied with the vacuum cleaner<br />
or specified in the operating manual.<br />
WARNING<br />
On a Type <strong>22</strong> machine the earth connection between the<br />
head and the container should be kept at any times to<br />
prevent static build up.<br />
The earth connection is kept through a brass clamp on<br />
the machine head when touching the inlet fitting on the<br />
container.<br />
When inserting the disposal bag make sure the bag is<br />
placed so it does not interfere with the antistatic clamp.<br />
CAUTION<br />
Picking up environmentally hazardous materials.<br />
Materials picked up can present a hazard to the<br />
environment.<br />
1. Dispose of the dirt in accordance with legal regulations.<br />
1) OEL values = Occupational Exposure Limit<br />
*) Optional accessories / Option depending on model<br />
Original instruction
2 Description<br />
2.1 Operating elements 1 Handle with receptacle for electrical lead<br />
2 Fixing point for suction pipe holder<br />
3 Retaining clamp<br />
4 Castor<br />
5 Dirt tank<br />
6 Inlet fitting<br />
7 Applicance switch<br />
8 Hose diameter setting<br />
9 Operating knob for filter cleaning<br />
2.2 Operating panel<br />
1) OEL values = Occupational Exposure Limit<br />
*) Optional accessories / Option depending on model<br />
Original instruction<br />
9<br />
8<br />
7<br />
6<br />
5<br />
4<br />
<strong>ATTIX</strong> <strong>40</strong>-0M PC <strong>TYPE</strong> <strong>22</strong><br />
1<br />
2<br />
3<br />
7<br />
GB<br />
DE<br />
FR<br />
NL<br />
IT<br />
NO<br />
SV<br />
DA<br />
FI<br />
ES<br />
PT<br />
EL<br />
TR<br />
SL<br />
HR<br />
SK<br />
CS<br />
PL<br />
HU<br />
RO<br />
BG<br />
RU<br />
ET<br />
LV<br />
LT<br />
ZH<br />
KO
<strong>ATTIX</strong> <strong>40</strong>-0M PC <strong>TYPE</strong> <strong>22</strong><br />
GB<br />
DE<br />
FR<br />
NL<br />
IT<br />
NO<br />
SV<br />
DA<br />
FI<br />
ES<br />
PT<br />
EL<br />
TR<br />
SL<br />
HR<br />
SK<br />
CS<br />
PL<br />
HU<br />
RO<br />
BG<br />
RU<br />
ET<br />
LV<br />
LT<br />
ZH<br />
KO<br />
3 Before starting the cleaner<br />
3.1 Assembling the<br />
vacuum cleaner<br />
3.1.1 Taking accessories out<br />
of the packaging *)<br />
3.1.2 Attaching the suction<br />
pipe holder to the<br />
suction pipe *)<br />
3.2 Before starting the<br />
cleaner<br />
8<br />
A A<br />
27<br />
ø<br />
ø<br />
32<br />
ø<br />
36<br />
ø<br />
38<br />
1. Take vacuum cleaner and<br />
accessories out of the packaging.<br />
2. The mains plug should not<br />
yet be inserted into a socket.<br />
3. Open the retaining clamps<br />
(A) and remove the upper<br />
section of the vacuum<br />
cleaner.<br />
4. Take the accessories *) out<br />
of the dirt tank and the packaging.<br />
1. Attach the suction pipe holder<br />
to the suction pipe.<br />
Depending on how hazardous the dust is, the cleaner must be fitted<br />
with appropriate fiters.<br />
Type of dust Filter bag/waste bag/<br />
filter element<br />
Dusts with OEL values > 0.1 mg/m³ (observe<br />
any additional national regulations)<br />
Explosive dust, dust explosion class St1,<br />
St2, St3 in Zone <strong>22</strong><br />
Wood dusts & concrete dusts<br />
Dusts with OEL values > 0.1 mg/m³ (observe<br />
any additional national regulations)<br />
Explosive dust, dust explosion class St1,<br />
St2, St3 in Zone <strong>22</strong><br />
Wood dusts & concrete dusts<br />
Dusts with OEL values > 0.1 mg/m³ (observe<br />
any additional national regulations)<br />
Explosive dust, dust explosion class St1,<br />
St2, St3 in Zone <strong>22</strong><br />
Wood dusts & concrete dusts<br />
Dusts with OEL values > 0.1 mg/m³ (observe<br />
any additional national regulations)<br />
Explosive dust, dust explosion class St1,<br />
St2, St3 in Zone <strong>22</strong><br />
Wood dusts & concrete dusts<br />
Waste bag<br />
(5 pcs.)<br />
Order No.<br />
30200804<br />
Filter bag<br />
Order No.<br />
30200<strong>40</strong>04<br />
Filter element<br />
“M”:<br />
Order No.<br />
302000490<br />
Motor cooling<br />
filter “<strong>TYPE</strong> <strong>22</strong>”<br />
Bestell-Nr.<br />
107<strong>40</strong>0453<br />
1) OEL values = Occupational Exposure Limit<br />
*) Optional accessories / Option depending on model<br />
Original instruction
3.3 Insert the disposal bag<br />
1) OEL values = Occupational Exposure Limit<br />
*) Optional accessories / Option depending on model<br />
Original instruction<br />
<strong>ATTIX</strong> <strong>40</strong>-0M PC <strong>TYPE</strong> <strong>22</strong><br />
Before picking up dust with occupational exposure limit values:<br />
1. Check that all the filters are present and properly fitted.<br />
2. Do not use the cleaner with damaged or missing antistatic clamp.<br />
Risk of explosion due to static discharge in explosive atmospheres.<br />
3. The hose diameter and the setting for the suction hose diameter<br />
must be the same.<br />
4. When the motor is running, hold the suction hose shut. For safety<br />
reasons, an acoustic warning sounds if the air speed in the suction<br />
hose drops to below 20 m/s.<br />
A A<br />
27<br />
ø<br />
ø<br />
27<br />
ø<br />
ø<br />
32<br />
32<br />
ø<br />
36<br />
ø<br />
38<br />
36<br />
ø<br />
ø<br />
38<br />
B<br />
A A<br />
1. The mains plug should<br />
not yet be inserted into a<br />
socket.<br />
2. Open the retaining clamps<br />
(A) and remove the upper<br />
section of the vacuum<br />
cleaner.<br />
3. Insert the disposal bag into<br />
the dirt tank.<br />
4. Check that the ventilation<br />
holes (B) remain inside the<br />
dirt tank.<br />
5. Press the bush of the new<br />
filter bag firmly on to the<br />
inlet fitting.<br />
6. Fold the top edge of the<br />
disposal bag over the rim of<br />
the dirt tank.<br />
7. When inserting the disposal<br />
bag make sure the bag is<br />
placed so it does not interfere<br />
with the antistatic<br />
clamp.<br />
8. Attach the upper section of<br />
the vacuum cleaner.<br />
9. Close the retaining clamps<br />
(A). Ensure that the retaining<br />
clamps fit properly.<br />
9<br />
GB<br />
DE<br />
FR<br />
NL<br />
IT<br />
NO<br />
SV<br />
DA<br />
FI<br />
ES<br />
PT<br />
EL<br />
TR<br />
SL<br />
HR<br />
SK<br />
CS<br />
PL<br />
HU<br />
RO<br />
BG<br />
RU<br />
ET<br />
LV<br />
LT<br />
ZH<br />
KO
<strong>ATTIX</strong> <strong>40</strong>-0M PC <strong>TYPE</strong> <strong>22</strong><br />
GB<br />
DE<br />
FR<br />
NL<br />
IT<br />
NO<br />
SV<br />
DA<br />
FI<br />
ES<br />
PT<br />
EL<br />
TR<br />
SL<br />
HR<br />
SK<br />
CS<br />
PL<br />
HU<br />
RO<br />
BG<br />
RU<br />
ET<br />
LV<br />
LT<br />
ZH<br />
KO<br />
3.4 Inserting the filter bag 1. The mains plug should not<br />
yet be inserted into a socket.<br />
2. Open the retaining clamps<br />
(A) and remove the upper<br />
section of the vacuum<br />
cleaner.<br />
10<br />
A A<br />
27<br />
ø<br />
ø<br />
32<br />
A A<br />
27<br />
ø<br />
ø<br />
32<br />
ø<br />
36<br />
ø<br />
ø<br />
38<br />
36<br />
ø<br />
38<br />
3. Insert the filter bag into the<br />
dirt tank.<br />
4. Press the filter bag connection<br />
firmly on to the inlet<br />
fitting.<br />
5. Attach the upper section of<br />
the vacuum cleaner.<br />
6. Close the retaining clamps<br />
(A ). Ensure that the retaining<br />
clamps fit properly.<br />
1) OEL values = Occupational Exposure Limit<br />
*) Optional accessories / Option depending on model<br />
Original instruction
4 Control / Operation<br />
4.1 Connections<br />
4.1.1 Connecting the suction<br />
hose<br />
4.1.2 Electrical connection<br />
The operating voltage shown on the<br />
rating plate must corres pond to the<br />
voltage of the mains power supply.<br />
4.2 Switching on the<br />
vacuum cleaner<br />
The hose diameter and the setting<br />
for suction hose diameter must be<br />
the same.<br />
ø27 ø27<br />
ø32 ø32<br />
ø36 ø36<br />
ø38 ø38<br />
1) OEL values = Occupational Exposure Limit<br />
*) Optional accessories / Option depending on model<br />
Original instruction<br />
1. Connect the suction hose.<br />
<strong>ATTIX</strong> <strong>40</strong>-0M PC <strong>TYPE</strong> <strong>22</strong><br />
1. Ensure that the cleaner is<br />
switched off.<br />
2. Insert the power cord into a<br />
properly installed and fused<br />
socket with earthing contact.<br />
Switch<br />
Function<br />
position<br />
0 Off<br />
I On<br />
11<br />
GB<br />
DE<br />
FR<br />
NL<br />
IT<br />
NO<br />
SV<br />
DA<br />
FI<br />
ES<br />
PT<br />
EL<br />
TR<br />
SL<br />
HR<br />
SK<br />
CS<br />
PL<br />
HU<br />
RO<br />
BG<br />
RU<br />
ET<br />
LV<br />
LT<br />
ZH<br />
KO
<strong>ATTIX</strong> <strong>40</strong>-0M PC <strong>TYPE</strong> <strong>22</strong><br />
GB<br />
DE<br />
FR<br />
NL<br />
IT<br />
NO<br />
SV<br />
DA<br />
FI<br />
ES<br />
PT<br />
EL<br />
TR<br />
SL<br />
HR<br />
SK<br />
CS<br />
PL<br />
HU<br />
RO<br />
BG<br />
RU<br />
ET<br />
LV<br />
LT<br />
ZH<br />
KO<br />
4.3 Cleaning the filter<br />
element " Push&Clean<br />
System "<br />
Only for vacuum cleaning without a<br />
filter bag and without a cloth insert<br />
filter.<br />
4.4 Check the volume flow<br />
monitor<br />
Before picking up dust with maximum<br />
room concentration values:<br />
4.5 Acoustic warning<br />
12<br />
If suction performance drops:<br />
1. Turn switch to position "I"<br />
(maximum suction power).<br />
2. Close the nozzles or suction<br />
hose opening with the palm<br />
of your hand.<br />
1. Check that all the filters are<br />
present and properly fitted.<br />
For safety reasons, an acoustic<br />
warning sounds if the air speed<br />
in the suction hose drops to below<br />
20 m/s. See section "Troubleshooting"<br />
Filter Cleaning System<br />
3. Press the button to start filter<br />
cleaning three times. The resulting<br />
stream of air removes<br />
attached dust from the slats<br />
of the filter elements.<br />
2. When the motor is running,<br />
hold the suction hose<br />
shut. An acoustic warning<br />
sounds after approx. 1 second.<br />
1) OEL values = Occupational Exposure Limit<br />
*) Optional accessories / Option depending on model<br />
Original instruction
5 Applications and techniques<br />
1) OEL values = Occupational Exposure Limit<br />
*) Optional accessories / Option depending on model<br />
Original instruction<br />
<strong>ATTIX</strong> <strong>40</strong>-0M PC <strong>TYPE</strong> <strong>22</strong><br />
5.1 Techniques If used correctly, additional accessories, suction nozzles and suction<br />
hoses can enhance the cleaning action and reduce the cleaning<br />
effort.<br />
Effective cleaning is achieved if you follow just a few guidelines in<br />
combination with your own practical experience in special fields.<br />
5.1.1 Picking up dry<br />
substances<br />
Here are some basic tips.<br />
5.1.2 Picking up liquids CAUTION!<br />
Do not pick up flammable liquids.<br />
There must always be a filter bag in the tank before dry substances<br />
with OEL values are picked up. See section"Accessories" for ordering<br />
number.<br />
To pick up harmless dust we recommend the use of a waste bag.<br />
See section "Accessories" for ordering number. Disposal of the<br />
picked up material is then simple and hygenic.<br />
After picking up liquids the filter element is wet. A damp filter element<br />
clogs more quickly when dry substances are picked up. For this reason<br />
the filter element should be washed and dried or replaced by a<br />
dry element before dry substances are picked up.<br />
Before liquids are picked up, always remove the filter bag/disposal<br />
bag.<br />
The use of a seperate filter element or filter screen is recommended.<br />
Does not apply to XC machines.<br />
If foam appears, stop work immediately and empty the tank.<br />
To reduce the amount of foam, use foam killer <strong>Nilfisk</strong>-ALTO Foam<br />
Stop (see section "Accessories" for order number).<br />
13<br />
GB<br />
DE<br />
FR<br />
NL<br />
IT<br />
NO<br />
SV<br />
DA<br />
FI<br />
ES<br />
PT<br />
EL<br />
TR<br />
SL<br />
HR<br />
SK<br />
CS<br />
PL<br />
HU<br />
RO<br />
BG<br />
RU<br />
ET<br />
LV<br />
LT<br />
ZH<br />
KO
<strong>ATTIX</strong> <strong>40</strong>-0M PC <strong>TYPE</strong> <strong>22</strong><br />
GB<br />
DE<br />
FR<br />
NL<br />
IT<br />
NO<br />
SV<br />
DA<br />
FI<br />
ES<br />
PT<br />
EL<br />
TR<br />
SL<br />
HR<br />
SK<br />
CS<br />
PL<br />
HU<br />
RO<br />
BG<br />
RU<br />
ET<br />
LV<br />
LT<br />
ZH<br />
KO<br />
6 After finishing work<br />
6.1 Switching the vacuum<br />
cleaner off and storage<br />
14<br />
A<br />
C<br />
B<br />
1. After picking up hazardous<br />
dust, vacuum clean the outside<br />
of the cleaner.<br />
2. Switch off the cleaner and<br />
pull the mains plug out of<br />
the socket.<br />
3. Wind up the power cord<br />
onto the handle (A). Begin<br />
winding up the cord at<br />
the cleaner end and not the<br />
plug end to prevent the power<br />
cord from tangling up.<br />
4. Empty the dirt tank and<br />
clean the vacuum cleaner.<br />
5. After picking up liquids:<br />
Store the upper section of<br />
the vacuum cleaner separately<br />
so that the filter element<br />
can dry.<br />
6. Hang the suction hose with<br />
the floor nozzle (B) in the<br />
brackets and pack the accessories<br />
(C) away.<br />
7. Store the cleaner in a dry<br />
room where it is protected<br />
from unauthorized use.<br />
1) OEL values = Occupational Exposure Limit<br />
*) Optional accessories / Option depending on model<br />
Original instruction
7 Maintenance<br />
7.1 Maintenance plan<br />
After finishing work When required<br />
7.2.1 Emptying dirt tank <br />
7.2.2 Replacing the disposal bag <br />
7.2.3 Replacing the filter bag <br />
7.2.4 Replacing filter element (Push&Clean) <br />
7.2.5 Replacing motor cooling filter <br />
7.2 Maintenance work<br />
7.2.1 Emptying the dirt tank<br />
After emptying the tank: clean the<br />
rim of the tank and the seals in the<br />
intermediate ring and the upper<br />
section of cleaner before refitting<br />
them.<br />
If the seal or groove is dirty or damaged,<br />
the suction performance will<br />
be reduced.<br />
Before reinserting the suction hose:<br />
clean the inlet fitting and hose collar.<br />
1) OEL values = Occupational Exposure Limit<br />
*) Optional accessories / Option depending on model<br />
Original instruction<br />
A A<br />
27<br />
ø<br />
ø<br />
32<br />
ø<br />
36<br />
A A<br />
27<br />
ø<br />
ø<br />
32<br />
ø<br />
38<br />
36<br />
ø<br />
ø<br />
38<br />
<strong>ATTIX</strong> <strong>40</strong>-0M PC <strong>TYPE</strong> <strong>22</strong><br />
1. Switch off the vacuum cleaner<br />
and pull the mains plug<br />
out of the socket.<br />
2. Open the retaining clamps (A)<br />
and remove the upper section<br />
of the vacuum cleaner.<br />
3. Tip out the collected dirt.<br />
4. Dispose of the dirt in accordance<br />
with legal regulations.<br />
5. Attach the upper section of<br />
the vacuum cleaner.<br />
6. Close the retaining clamps<br />
(A). Ensure that the retaining<br />
clamps fit properly.<br />
15<br />
GB<br />
DE<br />
FR<br />
NL<br />
IT<br />
NO<br />
SV<br />
DA<br />
FI<br />
ES<br />
PT<br />
EL<br />
TR<br />
SL<br />
HR<br />
SK<br />
CS<br />
PL<br />
HU<br />
RO<br />
BG<br />
RU<br />
ET<br />
LV<br />
LT<br />
ZH<br />
KO
<strong>ATTIX</strong> <strong>40</strong>-0M PC <strong>TYPE</strong> <strong>22</strong><br />
GB<br />
DE<br />
FR<br />
NL<br />
IT<br />
NO<br />
SV<br />
DA<br />
FI<br />
ES<br />
PT<br />
EL<br />
TR<br />
SL<br />
HR<br />
SK<br />
CS<br />
PL<br />
HU<br />
RO<br />
BG<br />
RU<br />
ET<br />
LV<br />
LT<br />
ZH<br />
KO<br />
7.2.2 Replacing the disposal<br />
bag<br />
During the following work, ensure<br />
that dust is not unnecessarily<br />
spread around. Wear a P2 breathing<br />
mask.<br />
Never use the vacuum clean er without<br />
a filter.<br />
16<br />
A A<br />
C<br />
B<br />
27<br />
ø<br />
ø<br />
27<br />
ø<br />
ø<br />
32<br />
32<br />
ø<br />
36<br />
ø<br />
38<br />
D<br />
ø<br />
36<br />
ø<br />
38<br />
E<br />
A A<br />
1. Switch off the vacuum<br />
cleaner and pull the mains<br />
plug out of the socket.<br />
2. Open the retaining<br />
clamps (A) and remove<br />
the upper section<br />
of the vacuum cleaner.<br />
Removing the disposal bag:<br />
3. Close the disposal bag with<br />
string (B).<br />
4. Carefully remove the filter<br />
bag connection from the inlet<br />
fitting (C).<br />
5. Close the disposal bag connection<br />
(D) with the slider.<br />
6. Dispose of the disposal bag<br />
in accordance with legal<br />
regulations.<br />
Inserting the disposal bag:<br />
7. Clean the dirt tank.<br />
8. Insert the disposal bag into<br />
the dirt tank.<br />
9. Check that the ventilation<br />
holes (E) remain inside the<br />
dirt tank.<br />
10. Press the bush of the new<br />
filter bag firmly on to the inlet<br />
fitting.<br />
11. Fold the top edge of the<br />
disposal bag over the rim of<br />
the dirt tank.<br />
12. Attach the upper section of<br />
the vacuum cleaner.<br />
13. Close the retaining clamps<br />
(A). Ensure that the retaining<br />
clamps fit properly.<br />
1) OEL values = Occupational Exposure Limit<br />
*) Optional accessories / Option depending on model<br />
Original instruction
7.2.3 Replacing the filter bag<br />
During the following work, ensure<br />
that dust is not unnecessarily<br />
spread around. Wear a P2 breathing<br />
mask.<br />
Never use the vacuum clean er without<br />
a filter.<br />
1) OEL values = Occupational Exposure Limit<br />
*) Optional accessories / Option depending on model<br />
Original instruction<br />
A A<br />
B<br />
D<br />
27<br />
ø<br />
ø<br />
27<br />
ø<br />
32<br />
ø<br />
32<br />
ø<br />
36<br />
ø<br />
38<br />
ø<br />
36<br />
C<br />
A A<br />
ø<br />
38<br />
<strong>ATTIX</strong> <strong>40</strong>-0M PC <strong>TYPE</strong> <strong>22</strong><br />
1. Switch off the vacuum cleaner<br />
and pull the mains plug<br />
out of the socket.<br />
2. Open the retaining clamps<br />
(A) and remove the upper<br />
section of the vacuum cleaner.<br />
Removing the filter bag:<br />
3. Carefully remove the filter<br />
bag connection from the inlet<br />
fitting (B).<br />
4. Close the filter bag connection<br />
(C) with the slider.<br />
5. Dispose of the filter bag in<br />
accordance with legal regulations.<br />
Inserting the filter bag:<br />
6. Clean the dirt tank.<br />
7. Insert the filter bag in the dirt<br />
tank.<br />
8. Press the bush of the new filter<br />
bag firmly on to the inlet<br />
fitting (D).<br />
9. Attach the upper section of<br />
the vacuum cleaner.<br />
10. Close the retaining clamps<br />
(A). Ensure that the retaining<br />
clamps fit properly.<br />
17<br />
GB<br />
DE<br />
FR<br />
NL<br />
IT<br />
NO<br />
SV<br />
DA<br />
FI<br />
ES<br />
PT<br />
EL<br />
TR<br />
SL<br />
HR<br />
SK<br />
CS<br />
PL<br />
HU<br />
RO<br />
BG<br />
RU<br />
ET<br />
LV<br />
LT<br />
ZH<br />
KO
<strong>ATTIX</strong> <strong>40</strong>-0M PC <strong>TYPE</strong> <strong>22</strong><br />
GB<br />
DE<br />
FR<br />
NL<br />
IT<br />
NO<br />
SV<br />
DA<br />
FI<br />
ES<br />
PT<br />
EL<br />
TR<br />
SL<br />
HR<br />
SK<br />
CS<br />
PL<br />
HU<br />
RO<br />
BG<br />
RU<br />
ET<br />
LV<br />
LT<br />
ZH<br />
KO<br />
7.2.4 Replacing filter element<br />
(Push & Clean System)<br />
During the following work, ensure<br />
that dust is not unnecessarily<br />
spread around. Wear a P2 breathing<br />
mask.<br />
Never use the vacuum clean er without<br />
a filter.<br />
18<br />
A A<br />
B<br />
27<br />
ø<br />
ø<br />
27<br />
ø<br />
32<br />
ø<br />
32<br />
ø<br />
A A<br />
36<br />
ø<br />
38<br />
ø<br />
36<br />
ø<br />
38<br />
1. Switch off the vacuum<br />
cleaner and pull the mains<br />
plug out of the socket.<br />
2. Open the retaining clamps<br />
(A) and remove the upper<br />
section of the vacuum<br />
cleaner.<br />
Removing the filter element:<br />
3. Turn the filter holder anticlockwise<br />
and remove it .<br />
4. Carefully remove the filter<br />
element.<br />
5. Clean the filter seal (B).<br />
Check it for damage and replace<br />
it if necessary.<br />
Inserting the filter element:<br />
6. Fit the filter holder and turn<br />
it clockwise to secure it.<br />
7. Dispose of the used fi lter<br />
element in accordance<br />
with legal regulations.<br />
8. Attach the upper section of<br />
the vacuum cleaner.<br />
9. Close the retaining clamps<br />
(A). Ensure that the retaining<br />
clamps fit properly.<br />
1) OEL values = Occupational Exposure Limit<br />
*) Optional accessories / Option depending on model<br />
Original instruction
7.2.5 Replacing the motor<br />
cooling filter<br />
During the following work, ensure<br />
that dust is not unnecessarily<br />
spread around. Wear a P2 breathing<br />
mask.<br />
Never use the vacuum cleaner without<br />
a filter.<br />
1) OEL values = Occupational Exposure Limit<br />
*) Optional accessories / Option depending on model<br />
Original instruction<br />
1. Remove filter cartridge.<br />
<strong>ATTIX</strong> <strong>40</strong>-0M PC <strong>TYPE</strong> <strong>22</strong><br />
2. Dispose of the used filter<br />
cartridge in accordance with<br />
legal regulations.<br />
3. Fit a new filter cartridge.<br />
19<br />
GB<br />
DE<br />
FR<br />
NL<br />
IT<br />
NO<br />
SV<br />
DA<br />
FI<br />
ES<br />
PT<br />
EL<br />
TR<br />
SL<br />
HR<br />
SK<br />
CS<br />
PL<br />
HU<br />
RO<br />
BG<br />
RU<br />
ET<br />
LV<br />
LT<br />
ZH<br />
KO
<strong>ATTIX</strong> <strong>40</strong>-0M PC <strong>TYPE</strong> <strong>22</strong><br />
GB<br />
DE<br />
FR<br />
NL<br />
IT<br />
NO<br />
SV<br />
DA<br />
FI<br />
ES<br />
PT<br />
EL<br />
TR<br />
SL<br />
HR<br />
SK<br />
CS<br />
PL<br />
HU<br />
RO<br />
BG<br />
RU<br />
ET<br />
LV<br />
LT<br />
ZH<br />
KO<br />
8 Troubleshooting<br />
Fault Cause Remedy<br />
‡ Motor does not start > Fuse of the mains socket has<br />
blown<br />
Connect mains fuse<br />
‡ The acoustic warning<br />
sounds. (Reduced suction<br />
power)<br />
‡ No suction power during<br />
wet cleaning<br />
20<br />
> Overload protection switch<br />
has tripped<br />
Switch off the vacuum cleaner<br />
and allow it to cool for approx.<br />
5 minutes. If the cleaner<br />
cannot be started again,<br />
contact the <strong>Nilfisk</strong>-Alto service<br />
department<br />
> Motor is faulty Have motor changed by<br />
<strong>Nilfisk</strong>-Alto Service<br />
> Hose diameter does not<br />
correspond with switch<br />
position<br />
Set correct switch position for<br />
hose diameter<br />
> Clogged suction hose/nozzle Clean suction hose/nozzle<br />
> Tank, disposal bag or filter<br />
bag is full<br />
See "Emptying tank" or<br />
"Replacing disposal bag, filter<br />
bag" sections<br />
> Filter element is clogged See section „Cleaning filter<br />
element“ and „Replacing filter<br />
element“<br />
> Seal between tank and upper<br />
section of vacuum cleaner is<br />
faulty or missing<br />
Replace seal<br />
> Cleaning mechanism is<br />
defective<br />
Contact <strong>Nilfisk</strong>-Alto Service<br />
> Tank is full Switch off the cleaner. Empty<br />
the tank<br />
‡ Voltage fluctuations > Impedance of power supply is<br />
too high<br />
Connect the cleaner to another<br />
socket closer to the fuse box.<br />
Voltage fluctuations over<br />
7% should not occur if the<br />
impedance at the transfer point<br />
is 0.15 <br />
1) OEL values = Occupational Exposure Limit<br />
*) Optional accessories / Option depending on model<br />
Original instruction
9 Further information<br />
1) OEL values = Occupational Exposure Limit<br />
*) Optional accessories / Option depending on model<br />
Original instruction<br />
<strong>ATTIX</strong> <strong>40</strong>-0M PC <strong>TYPE</strong> <strong>22</strong><br />
9.1 Recycling the cleaner Make the old cleaner unusable immediately.<br />
1. Unplug the cleaner.<br />
2. Cut the power cord.<br />
3. Do not discard of electrical appliances with household waste.<br />
As specified in European Directive 2002/96/EC on old electrical<br />
and electronic appliances, used electrical goods must<br />
be collected separately and recycled ecologically. Contact<br />
your local authorities or your nearest dealer for further information.<br />
9.2 Guarantee Our general conditions of business are applicable with regard to the<br />
guarantee.<br />
Unauthorised modifications to the appliance, the use of incorrect<br />
brushes in addition to using the appliance in a way other than for the<br />
intended purpose exempt the manufacturer from any liability for the<br />
resulting damage.<br />
9.3 Tests and approvals Electrical tests must be performed in accordance with the provisions<br />
of safety regulations (BGV A3) and to DIN VDE 0701 Part 1 and Part<br />
3. In accordance with DIN VDE 0702 these tests must be performed<br />
at regular intervals and after repairs or modifications.<br />
9.4 EC declaration of<br />
conformity<br />
The vacuum cleaner has been approved in accordance with IEC/EN<br />
60335-2-69.<br />
EC declaration of<br />
conformity<br />
NILFISK-ADVANCE A/S<br />
Sognevej 25<br />
DK-2605 Brøndby<br />
Product: Vacuum cleaner for wet and dry operation<br />
Model: <strong>ATTIX</strong> <strong>40</strong>-0M PC <strong>TYPE</strong> <strong>22</strong><br />
Description: 230-2<strong>40</strong>V~, 50-60Hz<br />
Dust Class M, ATEX Zone <strong>22</strong>,<br />
II 3D Ex tD A<strong>22</strong> T135 °C IP54<br />
The design of the appliance<br />
corresponds to the following<br />
pertinent regulations:<br />
EC - Machine directive 2006/42/EC<br />
EC - Directive EMC 2004/108/EC<br />
EC - Explosive Atmosphere directive 94/9/<br />
EC „ATEX“<br />
Applied harmonized standards: EN ISO 12100-1 (2004), EN ISO 12100-2<br />
(2004), EN 55014-1 (2006), EN 55014-2<br />
(2001), EN 61000-3-2 (2006), EN 1127-1<br />
(2007), EN 61241-10 (2004)<br />
Applied national standards and<br />
technical specifi cations:<br />
EN 60335-2-69 (2009)<br />
IEC 60335-2-69 (2008)<br />
Anton Sørensen<br />
General Manager EAPC<br />
Technical Operations Brøndby, 02.10.2009<br />
21<br />
GB<br />
DE<br />
FR<br />
NL<br />
IT<br />
NO<br />
SV<br />
DA<br />
FI<br />
ES<br />
PT<br />
EL<br />
TR<br />
SL<br />
HR<br />
SK<br />
CS<br />
PL<br />
HU<br />
RO<br />
BG<br />
RU<br />
ET<br />
LV<br />
LT<br />
ZH<br />
KO
<strong>ATTIX</strong> <strong>40</strong>-0M PC <strong>TYPE</strong> <strong>22</strong><br />
GB<br />
DE<br />
FR<br />
NL<br />
IT<br />
NO<br />
SV<br />
DA<br />
FI<br />
ES<br />
PT<br />
EL<br />
TR<br />
SL<br />
HR<br />
SK<br />
CS<br />
PL<br />
HU<br />
RO<br />
BG<br />
RU<br />
ET<br />
LV<br />
LT<br />
ZH<br />
KO<br />
9.5 Technical data<br />
Voltage V<br />
<strong>ATTIX</strong> <strong>40</strong>-0M PC <strong>TYPE</strong> <strong>22</strong> - EU -<br />
230<br />
Mains frequency Hz 50<br />
Fuse A 16<br />
Power consumptionIEC W 1100<br />
Total connected load W<br />
<strong>ATTIX</strong> <strong>40</strong>-0M PC <strong>TYPE</strong> <strong>22</strong><br />
1100<br />
Air flow rate<br />
Vacuum<br />
<strong>22</strong><br />
m ³ /h<br />
l/min<br />
hPa/mbar<br />
kPa<br />
192<br />
3200<br />
Sound pressure level at a distance of 1 m, EN<br />
60704-1<br />
dB(A) 63 ± 2<br />
Working sound level dB(A) 60 ± 2<br />
Power cord: Type H07RN-F 3G1,5<br />
Protection class I<br />
Type of protection IP 54<br />
Radio interference level EN 55014-1<br />
Tank volume l 36<br />
Width mm 4<strong>40</strong><br />
Depth mm 450<br />
Height mm 735<br />
Weight kg 13<br />
CAUTION! Only use the cables mentioned<br />
9.6 Optional accessories<br />
Description Order No.<br />
Waste bag (5 pcs.) 302000804<br />
Filter bag (5 pcs.) 30200<strong>40</strong>04<br />
Zylindrical M-filter element PC 302000490<br />
Motor Cooling air filter 107<strong>40</strong>0453<br />
<strong>Nilfisk</strong>-Alto-Foam-Stop (6x1l) 8469<br />
230<br />
23<br />
1) OEL values = Occupational Exposure Limit<br />
*) Optional accessories / Option depending on model<br />
Original instruction
<strong>Nilfisk</strong>-ALTO<br />
www.nilfisk-alto.com