Amiga Computing - Commodore Is Awesome
Amiga Computing - Commodore Is Awesome
Amiga Computing - Commodore Is Awesome

You also want an ePaper? Increase the reach of your titles
YUMPU automatically turns print PDFs into web optimized ePapers that Google loves.
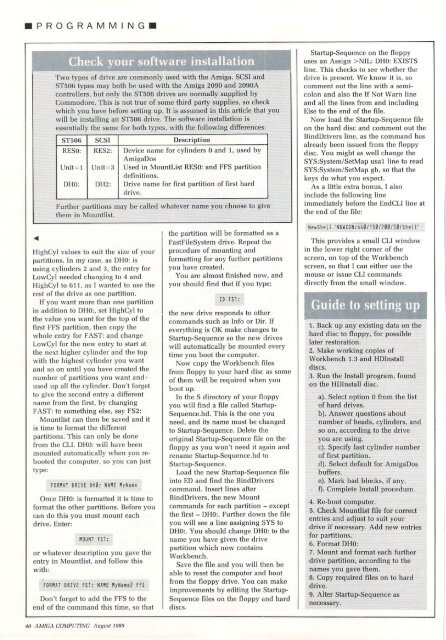
• P R O G R A M M I N G •<br />
4<br />
Two types of drive are commonly used with the <strong>Amiga</strong>. SCSI and<br />
ST506 types may both he used with the <strong>Amiga</strong> 2090 and 2090A<br />
controllers, but only the ST506 drives are normally supplied by<br />
<strong>Commodore</strong>. This is not true of some third party supplies, so check<br />
which you have before setting up. It is assumed in this article that you<br />
will be installing an ST506 drive. The software installation is<br />
essentially the same for both types, with the following differences:<br />
ST506 SCSI Description<br />
RESO:<br />
Unit=1<br />
DUO:<br />
RES2:<br />
Itnit=3<br />
1)I-12:<br />
Device name for cylinders 0 and I, used by<br />
A migaDos<br />
Used in MountList RESO: and FFS partition<br />
definitions.<br />
Drive name for first partition of first hard<br />
drive.<br />
Further partitions may be called whatever name you choose to give<br />
them in Mountlist.<br />
IlighCyl values to suit the size of your<br />
partitions. In my case, as DHO: is<br />
using cylinders 2 and 3, the entry for<br />
LowCyl needed changing to 4 and<br />
I lighCvl to 611. as I wanted to use the<br />
rest of the drive as one partition.<br />
If you want more than one partition<br />
in addition to DHO:, set HighCyl to<br />
the value you want for the top of the<br />
first H.'S partition, then copy the<br />
whole entry for FAST: and change<br />
LowCyl for the new entry to start at<br />
the next higher cylinder and the top<br />
with the highest cylinder you want<br />
iind so on until you have created the<br />
number of partitions you want and •<br />
used up all the cylinder. Don't forget<br />
to give the second entry a different<br />
name from the first, by changing<br />
FAST: to something else, say FS2:<br />
Mountlist can then be saved and it<br />
is time to format the different<br />
partitions. This can only be done<br />
from the CU. DHO: will have been<br />
mounted automatically when you rebooted<br />
the computer, so you can just<br />
type:<br />
FORMAT DRIVE OHO: NAME MyName<br />
Once DUO: is formatted it is time to<br />
format the other partitions. Before you<br />
can do this you must mount each<br />
d ri ve. Enter:<br />
MOUNT FS1:<br />
or whatever description you gave the<br />
entry in Mounthst, and follow this<br />
FORMAT DRIVE FS1: NAME MyName2 FFS<br />
Don't forget to add the FFS to the<br />
end of the command this time, so that<br />
40 AAWACOMP/J71VG August1989<br />
the partition will be formatted as a<br />
FastFileSystem drive. Repeat the<br />
procedure of mounting and<br />
formatting for any further partitions<br />
you have created.<br />
You are almost finished now, and<br />
you should find that if you type:<br />
CD FS1:<br />
the new drive responds to other<br />
commands such as Info or Dir. If<br />
everything is OK make changes to<br />
Startup-Sequence so the new drives<br />
will automatically be mounted every<br />
time you boot the computer.<br />
Now copy the Workbench files<br />
from floppy to your hard disc as some<br />
of them xvill be required when you<br />
boot up.<br />
In the S directory of your floppy<br />
you will find a file called Startup-<br />
Sequence.hd. This is the one you<br />
need, and its name must be changed<br />
to Startup-Sequence. Delete the<br />
original Startup-Sequence file on the<br />
floppy as you won't need it again and<br />
rename Startup-Sequence.hd to<br />
Startup-Sequence.<br />
Load the new Startup-Sequence file<br />
into ED and find the BindDrivers<br />
command. Insert lines after<br />
BindDrivers, the new Mount<br />
commands for each partition - except<br />
the first - DHO:. Further down the file<br />
you will see a line assigning SYS to<br />
DHO:. You should change DHO: to the<br />
name you have given the drive<br />
partition which now contains<br />
Workbench.<br />
Save the file and you will then be<br />
able to reset the computer and boot<br />
from the floppy drive. You can make<br />
improvements by editing the Startup-<br />
Sequence files on the floppy and hard<br />
discs.<br />
Startup-Sequence on the floppy<br />
uses an Assign >NIL: DHO: EXISTS<br />
line. This checks to see whether the<br />
drive is present. We know it is, so<br />
comment out the line with a semicolon<br />
and also the If Not Warn line<br />
and all the lines from and including<br />
Else to the end of the file.<br />
Now load the Startup-Sequence file<br />
on the hard disc and comment out the<br />
BindDrivers line, as the command has<br />
already been issued from the floppy<br />
disc. You might as well change the<br />
SYS:System/SetMap usal line to read<br />
SYS:System/SetMap gb, so that the<br />
keys do what you expect.<br />
As a little extra bonus. I also<br />
include the following line<br />
immediately before the EndCLI line at<br />
the end of the file:<br />
NewShell -<br />
NEWC<br />
ON:<br />
This provides a small CLI window<br />
in<br />
440/1<br />
the lower right corner of the<br />
screen,<br />
50/20<br />
on top of the Workbench<br />
screen, so that I can either use the<br />
0/50/<br />
mouse or issue CLI commands<br />
Shell•<br />
directly from the small window.<br />
Guide to setting up<br />
1. Back up any existing data on the<br />
hard disc to floppy, for possible<br />
later restoration.<br />
2. Make working copies of<br />
Workbench 1.3 and HDInstall<br />
discs.<br />
3. Run the Install program, found<br />
on the HDInstall disc.<br />
a). Select option 0 from the list<br />
of hard drives.<br />
b). Answer questions about<br />
number of heads, cylinders, and<br />
so on, according to the drive<br />
you are using.<br />
c). Specify last cylinder number<br />
of first partition.<br />
d). Select default for <strong>Amiga</strong>Dos<br />
buffers.<br />
e). Mark bad blocks, if any.<br />
• fl. Complete Install procedure.<br />
4. Re-boot computer.<br />
5. Check Mountlist file for correct<br />
entries and adjust to suit your<br />
drive if necessary. Add new entries<br />
for partitions.<br />
6. Format DHO:<br />
7. Mount and format each further<br />
drive partition, according to the<br />
names you gave them.<br />
8, Copy required files on to hard<br />
drive.<br />
9. Alter Startup-Sequence as<br />
necessary.