Nettop PC VOT550 User Guide, English - ViewSonic
Nettop PC VOT550 User Guide, English - ViewSonic
Nettop PC VOT550 User Guide, English - ViewSonic

You also want an ePaper? Increase the reach of your titles
YUMPU automatically turns print PDFs into web optimized ePapers that Google loves.
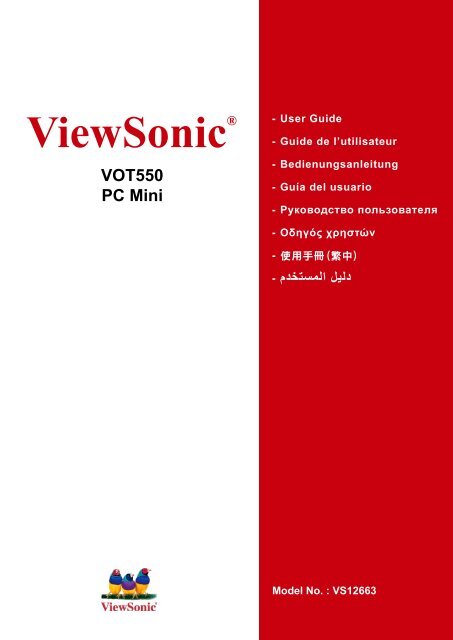
<strong>ViewSonic</strong> ®<br />
<strong>VOT550</strong><br />
<strong>PC</strong> Mini<br />
- <strong>User</strong> <strong>Guide</strong><br />
- <strong>Guide</strong> de l’utilisateur<br />
- Bedienungsanleitung<br />
- Guía del usuario<br />
- Pyководство пользователя<br />
- Οδηγός χρηστών<br />
- 使用手冊(繁中)<br />
- ﻢﺪﺨﺘﺴﻤﻠﺍ ﻞﻴﻠﺪ<br />
Model No. : VS12663
Preface<br />
Compliance Information<br />
For U.S.A.<br />
Th s dev ce compl es w th part 15 of FCC Rules. Operat on s subject to the follow ng<br />
two cond t ons: (1) th s dev ce may not cause harmful nterference, and (2) th s<br />
dev ce must accept any nterference rece ved, nclud ng nterference that may cause<br />
undes red operat on.<br />
Th s equ pment has been tested and found to comply w th the l m ts for a Class<br />
B d g tal dev ce, pursuant to part 15 of the FCC Rules. These l m ts are des gned<br />
to prov de reasonable protect on aga nst harmful nterference n a res dent al<br />
nstallat on. Th s equ pment generates, uses, and can rad ate rad o frequency<br />
energy, and f not nstalled and used n accordance w th the nstruct ons, may cause<br />
harmful nterference to rad o commun cat ons. However, there s no guarantee that<br />
nterference w ll not occur n a part cular nstallat on. If th s equ pment does cause<br />
harmful nterference to rad o or telev s on recept on, wh ch can be determ ned<br />
by turn ng the equ pment off and on, the user s encouraged to try to correct the<br />
nterference by one or more of the follow ng measures:<br />
•<br />
•<br />
•<br />
•<br />
Reor ent or relocate the rece v ng antenna.<br />
Increase the separat on between the equ pment and rece ver.<br />
Connect the equ pment nto an outlet on a c rcu t d fferent from that to wh ch the<br />
rece ver s connected.<br />
Consult the dealer or an exper enced rad o/TV techn c an for help.<br />
Warning: You are cautioned that changes or modifications not expressly approved<br />
by the party respons ble for compl ance could vo d your author ty to operate the<br />
equ pment.<br />
For Canada<br />
Th s Class B d g tal apparatus compl es w th Canad an ICES-003.<br />
Cet appare l numér que de la classe B est conforme à la norme NMB-003 du<br />
Canada.<br />
CE Conformity for European Countries<br />
The dev ce compl es w th the EMC D rect ve 2004/108/EC and Low Voltage<br />
D rect ve 2006/95/EC.<br />
Following information is only for EU-member states:<br />
The mark shown to the r ght s n compl ance w th the Waste Electr cal and<br />
Electron c Equ pment D rect ve 2002/96/EC (WEEE).<br />
The mark nd cates the requ rement NOT to d spose the equ pment as<br />
unsorted mun c pal waste, but use the return and collect on systems<br />
accord ng to local law.<br />
If the batter es, accumulators and button cells ncluded w th th s equ pment,<br />
d splay the chem cal symbol Hg, Cd, or Pb, then t means that the battery has<br />
a heavy metal content of more than 0.0005% Mercury or more than, 0.002%<br />
Cadm um, or more than 0.004% Lead.<br />
<strong>ViewSonic</strong> <strong>VOT550</strong>
FCC Radiation Exposure Statement<br />
Th s equ pment should be nstalled and operated w th m n mum d stance 20cm<br />
between the rad ator & your body.<br />
Th s w reless module dev ce compl es w th part 15 of FCC Rules. Operat on s<br />
subject to the follow ng two cond t ons: (1) th s dev ce may not cause harmful<br />
nterference, and (2) th s dev ce must accept any nterference rece ved, nclud ng<br />
nterference that may cause undes red operat on.<br />
Industry Canada Notice<br />
Th s w reless module dev ce compl es w th Canad an RSS-210.To prevent<br />
rad o nterference to the l censed serv ce, th s dev ce s ntended to be operated<br />
ndoors and away from w ndows to prov de max mum sh eld ng. Equ pment (or ts<br />
transm tt ng antenna) that s nstalled outdoors s subject to l cens ng. The nstaller of<br />
th s rad o equ pment must ensure that the antenna s located or po nted such that t<br />
does not emit RF field in excess of Health Canada limits for the general population;<br />
consult Safety Code 6, obta nable from Health Canada’s web s te www.hc-sc.gc.<br />
ca/rpb.<br />
R&TTE Compliance Statement<br />
Th s w reless module dev ce compl es w th the Essent al Requ rements of the R&TTE<br />
D rect ve of the European Un on (1999/5/EC). Th s equ pment meets the follow ng<br />
conformance standards:<br />
ETSI EN 300 328<br />
EN 301 489-01<br />
EN 301 489-17<br />
Notified Countries: Germany, UK, Netherlands, Belg um, Sweden, Denmark,<br />
F nland, France, Italy, Spa n, Austr a, Ireland, Portugal, Greece, Luxembourg,<br />
Eston a, Latv a, L thuan a, Czech Republ c, Slovak a, Sloven a, Hungary, Poland and<br />
Malta.<br />
<strong>ViewSonic</strong> <strong>VOT550</strong>
Important Safety Instructions<br />
1. Read these nstruct ons completely before us ng the equ pment.<br />
2. Keep these nstruct ons n a safe place.<br />
3. Heed all warn ngs.<br />
4. Follow all nstruct ons.<br />
5. Do not use this equipment near water. Warning: To reduce the risk of fire or<br />
electr c shock, do not expose th s apparatus to ra n or mo sture.<br />
6. Do not block any vent lat on open ngs. Install the equ pment n accordance w th<br />
the manufacturer’s nstruct ons.<br />
7. Do not nstall near any heat sources such as rad ators, heat reg sters, stoves, or<br />
other devices (including amplifiers) that produce heat.<br />
8. Do not attempt to c rcumvent the safety prov s ons of the polar zed or ground ngtype<br />
plug. A polar zed plug has two blades w th one w der than the other. A<br />
ground ng type plug has two blades and a th rd ground ng prong. The w de blade<br />
and the third prong are provided for your safety. If the plug does not fit into your<br />
outlet, consult an electr c an for replacement of the outlet.<br />
9. Protect the power cord from be ng tread upon or p nched, part cularly at the plug,<br />
and the po nt where f emerges from the equ pment. Be sure that the power outlet<br />
s located near the equ pment so that t s eas ly access ble.<br />
10. Only use attachments/accessories specified by the manufacturer.<br />
11. Use only with the cart, stand, tripod, bracket, or table specified by the<br />
manufacturer, or sold w th the equ pment. When a cart s used, use<br />
caut on when mov ng the cart/equ pment comb nat on to avo d njury<br />
from t pp ng over.<br />
12. Unplug th s equ pment when t w ll be unused for long per ods of t me.<br />
13. Refer all servicing to qualified service personnel. Service is required when the<br />
un t has been damaged n any way, such as: f the power-supply cord or plug s<br />
damaged, f l qu d s sp lled onto or objects fall nto the un t, f the un t s exposed<br />
to ra n or mo sture, or f the un t does not operate normally or has been dropped.<br />
<strong>ViewSonic</strong> <strong>VOT550</strong>
Declaration of RoHS Compliance<br />
Th s product has been des gned and manufactured n compl ance w th D rect ve<br />
2002/95/EC of the European Parl ament and the Counc l on restr ct on of the use<br />
of certa n hazardous substances n electr cal and electron c equ pment (RoHS<br />
D rect ve) and s deemed to comply w th the max mum concentrat on values ssued<br />
by the European Techn cal Adaptat on Comm ttee (TAC) as shown below:<br />
Substance Proposed Maximum Concentration Actual Concentration<br />
Lead (Pb) 0,1% < 0,1%<br />
Mercury (Hg) 0,1% < 0,1%<br />
Cadm um (Cd) 0,01% < 0,01%<br />
Hexavalent Chrom um (Cr6+) 0,1% < 0,1%<br />
Polybrom nated b phenyls (PBB) 0,1% < 0,1%<br />
Polybrom nated d phenyl ethers<br />
(PBDE)<br />
0,1% < 0,1%<br />
Certa n components of products as stated above are exempted under the Annex of<br />
the RoHS D rect ves as noted below:<br />
Examples of exempted components are:<br />
1. Mercury in compact fluorescent lamps not exceeding 5 mg per lamp and in other<br />
lamps not specifically mentioned in the Annex of RoHS Directive.<br />
2. Lead in glass of cathode ray tubes, electronic components, fluorescent tubes,<br />
and electron c ceram c parts (e.g. p ezoelectron c dev ces).<br />
3. Lead n h gh temperature type solders ( .e. lead-based alloys conta n ng 85% by<br />
we ght or more lead).<br />
4. Lead as an allott ng element n steel conta n ng up to 0.35% lead by we ght,<br />
alum n um conta n ng up to 0.4% lead by we ght and as a cooper alloy conta n ng<br />
up to 4% lead by we ght.<br />
<strong>ViewSonic</strong> <strong>VOT550</strong> v
Copyright Information<br />
Copyright © <strong>ViewSonic</strong> ® Corporation, 2010. All rights reserved.<br />
Microsoft ® , Windows ® , Windows NT ® , and the Windows ® logo are registered<br />
trademarks of Microsoft ® Corporation in the United States and other countries.<br />
<strong>ViewSonic</strong> ® , the three birds logo, OnView ® , ViewMatch , and ViewMeter ® are<br />
registered trademarks of <strong>ViewSonic</strong> ® Corporation.<br />
Intel ® , Pentium ® , and Atom are registered trademarks of Intel Corporation.<br />
Award ® is a registered trademark of Phoenix Technologies Ltd.<br />
AMI ® is a registered trademark of American Megatrends Inc.<br />
Disclaimer: <strong>ViewSonic</strong> ® Corporation shall not be liable for technical or editorial errors<br />
or omissions contained herein; nor for incidental or consequential damages resulting<br />
from furnishing this material, or the performance or use of this product.<br />
In the interest of continuing product improvement, <strong>ViewSonic</strong> ® Corporation reserves<br />
the right to change product specifications without notice. Information in this<br />
document may change without notice.<br />
No part of this document may be copied, reproduced, or transmitted by any means,<br />
for any purpose without prior written permission from <strong>ViewSonic</strong> ® Corporation.<br />
Product Registration<br />
To meet your future needs, and to receive any additional product information as it<br />
becomes available, please register your product on the Internet at: www.viewsonic.<br />
com. The <strong>ViewSonic</strong> ® Wizard CD-ROM also provides an opportunity for you to print<br />
the registration form, which you may mail or fax to <strong>ViewSonic</strong> ® .<br />
Product Name:<br />
Model Number:<br />
Document Number:<br />
Serial Number:<br />
Purchase Date:<br />
For Your Records<br />
<strong>VOT550</strong><br />
<strong>ViewSonic</strong> <strong>PC</strong> Mini<br />
VS12663<br />
<strong>VOT550</strong>-1_UG_ENG Rev. 1B 08-30-10<br />
Product disposal at end of product life<br />
<strong>ViewSonic</strong> respects the environment and is committed to working and living green.<br />
Thank you for being part of Smarter, Greener Computing. Please visit <strong>ViewSonic</strong><br />
website to learn more.<br />
USA: http://www.viewsonic.com/company/green/<br />
Europe: http://www.viewsoniceurope.com/uk/support/recycling-information/<br />
Taiwan: http://recycle.epa.gov.tw/recycle/index2.aspx<br />
<strong>ViewSonic</strong> <strong>VOT550</strong> v
Chapter 1<br />
Getting Started<br />
System Overview<br />
The <strong>PC</strong> M n <strong>VOT550</strong>, w th ts compact des gn, s one<br />
of the smallest Intel powered personal computers n the<br />
world. Powered by an Intel Core Two Duo processor<br />
t features a M crosoft W ndows 7 operat ng system.<br />
Connect to an LCD or large format TV to grab your<br />
v deos from the Web or from a CD. It s equ pped<br />
w th Opt onal BluRay Dr ve and 2.5” 320GB/500GB<br />
SATA hard d sk dr ve, perfect for down load ng mov es,<br />
manag ng your content or creat ng an enterta nment<br />
hub.<br />
Ach eve connect v ty w th opt onal 802.11/g/n for<br />
w reless ready nterface w th all your dev ces such<br />
as smart phones, pr nters, PDAs, etc. The <strong>VOT550</strong><br />
optom zes your total enterta nment exper ence w th<br />
prec s on and ease.<br />
<strong>ViewSonic</strong> <strong>VOT550</strong> 1
Packing Content<br />
<strong>VOT550</strong> <strong>PC</strong> M n W zard CD<br />
Power cord<br />
DVI to VGA<br />
Converter<br />
(Select Model)<br />
Antenna Remote Control<br />
Getting Started<br />
Recovery and<br />
Dr ver D sk<br />
S/PDIF Converter<br />
Qu ck Start Gu de<br />
90W DC 20V<br />
Power Adapter<br />
<strong>ViewSonic</strong> <strong>VOT550</strong> 2
Application Scenarios<br />
Living Room Scenario<br />
You can connect the system n your l v ng room<br />
to an HDTV, speakers, DVD/VCD players, DSL<br />
(cable) modem, or other per pheral dev ces to<br />
bu ld a d g tal home center.<br />
Home Office Scenario<br />
You can place your system together w th an LCD<br />
v deo d splay, speakers, pr nter/scanner/fax, DSL<br />
(cable) modem, or other per pheral dev ces n your<br />
study.<br />
Professional Scenario<br />
You can connect the system n a bus ness<br />
conference room to a projector n order to make<br />
presentat ons.<br />
Mobile Scenario<br />
Because the system comes n very compact s ze,<br />
you can carry it from your home to the office, or<br />
to a bus ness meet ng conven ently n a carry ng<br />
case.<br />
Getting Started<br />
<strong>ViewSonic</strong> <strong>VOT550</strong> 3
The Front View<br />
Getting Started<br />
The power button s located n the center of the front panel. The opt onal opt cal d sc<br />
dr ve s also located near the top of the front panel. You can place a DVD or CD<br />
opt cal d sc nto the open ng near the top of the front cover. The d sc eject button s<br />
located to the left of the front panel when you face the front of the system. 2 USB<br />
ports are also located on the left hand s de of the power button, and both of power<br />
nd cator and HDD nd cator w ll locate on the r ght hand s de. The front v ew of the<br />
system s llustrated below:<br />
1<br />
2<br />
3<br />
4<br />
5<br />
6<br />
7<br />
1 CD/DVD Eject Button<br />
2 BluRay Dr ve<br />
3 USB 2.0 Port<br />
4<br />
Power Button<br />
CD/DVD Eject Button Use to eject ODD d sk.<br />
BluRay Drive BluRay Dr ve.<br />
USB 2.0 Port Connects USB dev ces such as a mouse, keyboard, pr nter, scanner,<br />
and other per pherals.<br />
Power Button Press to power on/off the <strong>PC</strong> M n .<br />
IR indicator When the IR nd cator bl nks t means the remote s work ng.<br />
HDD indicator When the HDD nd cator bl nks t means the HDD s work ng.<br />
Power indicator The power LED turns blue when the system s turned on.<br />
Note: Please push the center power button to boot up the <strong>VOT550</strong>.<br />
IR nd cator<br />
HDD nd cator<br />
Power nd cator<br />
<strong>ViewSonic</strong> <strong>VOT550</strong> 4<br />
5<br />
6<br />
7
The Rear View<br />
Getting Started<br />
You can fi nd the connectors for the power source, DVI, network, USB 2.0, eSATA,<br />
L ne n (S/PDIF out), L ne out, and MIC as llustrated below.<br />
S/PDIF cable connector<br />
DVI e-SATA<br />
There s one S/PDIF cable connector n your package box. To connect to the back<br />
panel of your mach ne correctly, please refer to the d agram as shown below:<br />
DVI e-SATA<br />
<strong>ViewSonic</strong> <strong>VOT550</strong> 5<br />
+<br />
+
Rear panel I/O port Indicator<br />
1<br />
2<br />
3<br />
4<br />
5<br />
6<br />
7<br />
8<br />
9<br />
10<br />
11<br />
12<br />
1<br />
Secur ty lock<br />
Projector CRT Mon tor LCD Mon tor HDMI TV<br />
DVI to VGA &<br />
DVI Adapter<br />
12 Wall Outlet<br />
2<br />
Internet<br />
DVI e-SATA<br />
11 ADSL (Cable) Modem<br />
Fax/Scanner/Pr nter<br />
Bluetooth Dongo<br />
W reless Lan Card<br />
USB TV Tuner Box<br />
USB HDD<br />
Getting Started<br />
<strong>ViewSonic</strong> <strong>VOT550</strong> 6<br />
+<br />
DVI to HDMI Adapter<br />
W reless 802.11 Antenna<br />
eSATA Port<br />
S/PDIF out<br />
L ne out<br />
M crophone (MIC)<br />
10 USB 2.0 Port Expander (USB HUB)<br />
PDA<br />
Card reader/Flash memory<br />
Webcam<br />
Joyst ck<br />
Mouse/Keyboard<br />
Kensington Use th s to securely lock the <strong>PC</strong> M n .<br />
DVI Port Use to connect to a d splay w th DVI to VGA & DVI Adapter.<br />
LCD Monitor Connect to LCD Mon tor.<br />
DVI Port Use to connect to a d splay w th DVI port, or HDMI w th DVI to<br />
HDMI converter.<br />
Antenna Connector Use for connect ng the W F w reless antenna.<br />
S/PDIF out Jack Connect opt cal 5.1 d g t al s gnal out to decode.<br />
Line-out jack Output the aud o s gnal to an external aud o dev ce.<br />
Microphone Jack Use for chatt ng and other nteract ve appl cat ons.<br />
e-SATA Port Use to connect to a e-SATA dev ce, such external HDD w th eSATA cable.<br />
USB 2.0 Port Connects USB dev ces such as a mouse, keyboard, pr nter, scanner, and other<br />
per pherals.<br />
RJ45 Connects to a local area network (LAN) us ng a network cable.<br />
DC Jack Use to connect the power adapter.<br />
3<br />
4<br />
5<br />
9<br />
6<br />
7<br />
8
Chapter 2<br />
Connecting Your System<br />
Th s chapter w ll gu de you n nstall ng<br />
necessary and add t onal components to<br />
max m m ze the system performance of your<br />
<strong>PC</strong> M n . The follow ng top cs are covered:<br />
• Connect ng to V deo D splay<br />
• Connect ng the LCD or CRT Mon tor<br />
• Connect ng to HDTV Set<br />
• Connect ng to Projector<br />
• Connect ng to Keyboard and Mouse<br />
• Connect ng to USB Hub<br />
• Connect ng to Fax/Pr nter/Scanner<br />
• Connect ng to Speaker<br />
• Connect ng to the Internet and Network<br />
• Connect ng to Webcam<br />
• Connect ng to Memory St cks, Card<br />
Readers, Memory Cards<br />
• Connect ng Power Source<br />
<strong>ViewSonic</strong> <strong>VOT550</strong> 7
Connecting Power Source<br />
Connecting Your System<br />
The system comes w th a power cable and adapter. Plug the output of the power<br />
adapter to the power connector on the back panel of the system un t. Then, connect<br />
the power plug to the wall outlet. Once the system s connected to the power source,<br />
the power nd cator n the m ddle of the front panel w ll l ght up. You should press the<br />
power button on the front panel to start the system.<br />
<strong>ViewSonic</strong> <strong>VOT550</strong> 8<br />
+<br />
+
Connecting to Video Display<br />
Connecting Your System<br />
You can connect the system to many types of v deo d splay dev ces, nclud ng<br />
projector, LCD or LCD TVs.<br />
Connecting to a LCD<br />
You can connect the system to an LCD mon tor. The v deo s gnal connector from<br />
the LCD mon tor connects to the DVI connector through a DVI cable. If you want to<br />
connect the system to VGA nput mon tor, you have to use a DVI to VGA converter.<br />
The <strong>VOT550</strong> has 3 options to connect to a LCD monitor.<br />
• DVI cable d rectly connect to DVI nput (LCD mon tor)<br />
• DVI jack add DVI-to-HDMI adapter/ cable to HDMI nput (LCD mon tor)<br />
• DVI jack add DVI-to VGA adapter/ cable to VGA nput (LCD mon tor)<br />
or or<br />
HDMI Cable<br />
DVI Cable<br />
+<br />
VGA Cable<br />
+<br />
LCD<br />
Mon tor<br />
<strong>ViewSonic</strong> <strong>VOT550</strong> 9
Connecting to a HDTV<br />
Connecting Your System<br />
You can connect the <strong>PC</strong> M n to a HDTV w th HDMI connect ons. You w ll need to use<br />
the DVI to HDMI adapter along w th your HDMI cable.<br />
<strong>VOT550</strong> to HDTV:<br />
• Add the DVI-to-HDMI adapter to the DVI jack and then connect the HDMI cable<br />
to the HDTV.<br />
HDMI Cable<br />
+<br />
+<br />
HDTV<br />
<strong>ViewSonic</strong> <strong>VOT550</strong> 10
Connecting to a Projector<br />
Connecting Your System<br />
More and more people have the need to connect a <strong>PC</strong> to a projector n order to make<br />
presentat ons. The system s des gned w th the connector for outputt ng content to a<br />
projector us ng the DVI to VGA adapter.<br />
<strong>VOT550</strong> to Projector:<br />
• DVI to DVI: D rect cable connect on<br />
• DVI to HDMI: Use the DVI to HDMI Adapter<br />
• DVI to VGA: Use the DVI to VGA adapter<br />
or or<br />
HDMI Cable<br />
DVI Cable<br />
+<br />
VGA Cable<br />
+<br />
<strong>ViewSonic</strong> <strong>VOT550</strong> 11
Connecting to Keyboard and Mouse<br />
Connecting Your System<br />
You can connect the keyboard and mouse to the USB connectors.<br />
Connecting to a USB Hub<br />
The system s des gned to connect a USB<br />
hub wh ch allows a user to nstall mult ple<br />
USB dev ces to the system by s mply<br />
connect ng the USB connector to the<br />
system.<br />
+<br />
+<br />
<strong>ViewSonic</strong> <strong>VOT550</strong> 12<br />
+<br />
+
Connecting Your System<br />
Connecting to a Multi Function Printer (Fax/Printer/<br />
Scanner)<br />
Currently, many manufacturers bu ld the funct ons of pr nter, scanner, and fax nto<br />
one un t. You can connect the system to a mult funct on un t thru an USB connector.<br />
Connecting to External Speakers<br />
Use the S/PDIF or earphone jack as nd cated n the llustrat on.<br />
+<br />
+<br />
<strong>ViewSonic</strong> <strong>VOT550</strong> 13
Connecting Your System<br />
Connecting to the Internet and Network<br />
Your system s bu lt w th a network connector on the back panel as llustrated n<br />
Chapter 1. The connector allows you to connect your system to the Internet through a<br />
DSL (or ADSL), cable modem, or to an Ethernet network.<br />
If you want to connect to the Internet through DSL (or ADSL) modem, you should<br />
contact your local network serv ce prov der for serv ce. DSL prov des faster data<br />
transm ss on speed rather than convent onal telephone l nes. Your local network<br />
serv ce prov der w ll help you nstall and set up the DSL (or ADSL) modem.<br />
To ensure proper connect on, check the LAN<br />
jack’s LED status nd cators.<br />
Act v ty LED<br />
L nk LED<br />
You can also access the nternet thru a cable modem. Your local cable prov der w ll<br />
help you nstall and set up the cable modem.<br />
The same connector allows you to connect the system to an Ethernet LAN (local area<br />
network).<br />
You can also connect the system to a standard modem for access ng the nternet.<br />
Contact your local serv ce prov der for more nformat on.<br />
<strong>ViewSonic</strong> <strong>VOT550</strong> 14<br />
+<br />
+
Connecting to a Webcam<br />
Connecting Your System<br />
More and more people are us ng nstant messag ng software or free nternat onal<br />
Internet phone calls to commun cate over the Internet w th fr ends. The effects can<br />
be enr ched by nstall ng a webcam to the system. The webcam nstallat on gu de<br />
w ll prov de the nformat on on how to nstall t onto your system. After you have<br />
connected the webcam, nstalled the software dr ver for the webcam, and set up<br />
your nstant messag ng account properly, you w ll be able to see the person who s<br />
chatt ng w th you through the Internet.<br />
Connecting to Memory Sticks, Card Readers and<br />
Memory Cards<br />
There are a wide variety of memory devices which can be used for copying files from<br />
one <strong>PC</strong> to another. These include memory sticks (flash memory), smart memory,<br />
memory cards, portable hard d sk dr ves, etc. Most of these dev ces can connect to<br />
the USB ports on the <strong>VOT550</strong>. Flash memory cards have become one of the most<br />
conven ent and popular methods of med a storage for d g tal cameras, MP3 players,<br />
PDAs, and mob le phones.<br />
Once you insert a memory device to your system, a notification will appear at the<br />
lower r ght corner of your screen tell ng you the system has detected new hardware<br />
in your system. The notification will also show the icon which is associated with the<br />
hardware dev ce.<br />
To copy files from a memory stick to your system, simply plug the memory stick into<br />
one of the USB ports on the rear panel of your system or USB hub.<br />
Notes:<br />
1. To prevent damag ng your memory st ck nadvertently, you are suggested to<br />
“un nstall” the memory st ck by cl ck ng on the “safely remove hardware” con at<br />
the lower r ght corner of the W ndows task bar.<br />
2. Never remove the memory st ck wh le your system s formatt ng, read ng or wr t ng<br />
data to the dev ce.<br />
3. Never turn off the power abruptly wh le your system s formatt ng, read ng or wr t ng<br />
data to the dev ce.<br />
4. Read the operat ng nstruct ons wh ch come w th your memory dev ce carefully<br />
before us ng t.<br />
<strong>ViewSonic</strong> <strong>VOT550</strong> 15
Connecting Your System<br />
Once you nsert a memory dev ce to your system, a balloon w ll appear at the lower<br />
r ght corner of your screen, tell ng you that the system has detected that a new<br />
hardware was nstalled to the system. The balloon w ll also show the con wh ch s<br />
assoc ated w th the hardware dev ce (memory). You should cl ck that con after you<br />
have finished copying files to or from the memory device.<br />
After detect on of the new memory dev ce, the W ndows operat ng system w ll prompt<br />
you to nstall the software dr ver for that dev ce. S mply follow the nstruct ons to<br />
complete the nstallat on process. After the software dr ver has been nstalled, you<br />
can copy files from the system hard disk drive to the memory device, or from the<br />
memory dev ce to the system hard d sk dr ve.<br />
<strong>ViewSonic</strong> <strong>VOT550</strong> 16
Chapter 3<br />
Optical Disk Drive<br />
How to operate the BluRay Dr ve.<br />
<strong>ViewSonic</strong> <strong>VOT550</strong> 17
Inserting a Disc in the ODD<br />
ODD Operating<br />
1. W th the label s de fac ng up, place the d sc n the center of the ODD slot.<br />
2. Gently push the d sc back nto the d sk slot.<br />
3. The BluRay dr ver nd cator LED w ll turn on and the computer w ll start to read the<br />
d sc you just nserted.<br />
Reading a Disc<br />
1. Follow the steps n the “Insert ng a d sc” sect on.<br />
2. -When prompted, choose the des red program to play or read the d sc you just<br />
nserted.<br />
Note: If no w ndows appears on the desktop, cl ck “Start”, select “Programs”, and<br />
then select the des red software to play the nserted d sc. For more nstruct ons<br />
about the selected software, please see ts manual or onl ne help.<br />
<strong>ViewSonic</strong> <strong>VOT550</strong> 18
Writing to a Disc<br />
Ensure that the d scs you create do not v olate copyr ght laws.<br />
1. Follow the steps n the “Insert ng a d sc” sect on.<br />
ODD Operating<br />
2. When prompted, choose the desired program to record files to the inserted<br />
rewr table (RW) d sc.<br />
3. Follow the on screen nstruct ons to complete the copy ng process.<br />
Note: If no w ndows appears on the desktop, cl ck “Start”, select “Programs”,<br />
and then select the des red software to wr te to the nserted d sc. For more<br />
nstruct ons about the selected software, please see ts manual or onl ne help.<br />
Removing a disc<br />
1. Ensure the opt cal d sc dr ver nd cator s off.<br />
2. Press the Eject button on front panel.<br />
3. Remove the d sc.<br />
Note: Alternat vely, you may double-cl ck My Computer, r ght-cl ck the d sc dr ve con,<br />
and then select “Eject” from the menu.<br />
<strong>ViewSonic</strong> <strong>VOT550</strong> 19
Remote Control<br />
1<br />
2<br />
3<br />
4<br />
5<br />
6<br />
7<br />
8<br />
9<br />
10<br />
11<br />
12<br />
13<br />
14<br />
15<br />
16<br />
17<br />
18<br />
19<br />
20<br />
21<br />
Power button On/Off (sleep)<br />
PAUSE button Pauses playback.<br />
STOP button Stops playback.<br />
Record button Record a selected TV program.<br />
PLAY Play the selected med a.<br />
ODD Operating<br />
REV/FWD Plays aud o or v deo backwards or fast forward at 2X, 4X, 8X, or 20X normal speed.<br />
PREV/NEXT Selects the prev ous or next chapter/t tle or menu screen.<br />
I (information) Informat on d splay<br />
Back Returns to the last selected status.<br />
OK/4 way ARROW buttons Used for nav gat ng around the menu system. Enter button to start playback.<br />
VOLUME +/- Changes the volume.<br />
CH +/- Changes the TV channels<br />
Start Open the W ndows Med a Center<br />
MUTE D sables the sound dur ng playback.<br />
Recorded TV Opens the recorded TV w ndow<br />
<strong>Guide</strong> Opens the Telev s on Program Gu de.<br />
Live TV D splays the full-screen v ew of l ve TV.<br />
DVD Opens the DVD player<br />
Numeric button Enter text and numbers nto a W ndows Med a Center search or text box.<br />
Enter Confirm the selected action.<br />
CLEAR Deletes the last entered select on.<br />
4<br />
5<br />
6<br />
7<br />
9<br />
10<br />
11<br />
14<br />
15<br />
16<br />
19<br />
21<br />
<strong>ViewSonic</strong> <strong>VOT550</strong> 20<br />
1<br />
2<br />
3<br />
8<br />
12<br />
13<br />
18<br />
17<br />
20
Loading a Battery<br />
ODD Operating<br />
1. Remove the back cover of the remote control and nsert two AA batter es n the<br />
remote control.<br />
2. Make sure the batter es are nserted n the correct d rect on w th the + and –<br />
symbols on the batter es match ng the ones on the remote control.<br />
Using the remote control<br />
Po nt the remote control at the remote control sensor at the front of the <strong>PC</strong>, and press<br />
a button. Press ng the Power button turns the <strong>PC</strong> on or puts t n Standby (sleep)<br />
mode.<br />
<strong>ViewSonic</strong> <strong>VOT550</strong> 21
Media Center Entertainment<br />
ODD Operating<br />
To use the remote control w th your computer, push the green button to start<br />
W ndows Med a Center.<br />
What does the remote control do?<br />
• Telev s on<br />
• Watch DVDS<br />
• Record TV<br />
• Record a TV ser es<br />
• Play record TV<br />
• Watch TV n other places<br />
• Watch, pause, rew nd TV<br />
• Burn TV to a CD or DVD<br />
• Transfer to your portable player<br />
• Schedule a Record ng Remotely<br />
Med a Center Enterta nment support funt on as below:<br />
• Music Enjoy your mus c, L sten to rad o.<br />
• Video Watch your home mov es<br />
• Online Spotlight Exclus ve onl ne content<br />
• Pictures V ew your photos<br />
Download p ctures from your d g tal camera.<br />
• Other Programs Use other programs w th your MCE<br />
<strong>ViewSonic</strong> <strong>VOT550</strong> 22
Chapter 4<br />
System Recovery<br />
Your <strong>PC</strong> M n bundle system recovery d sc<br />
enables users to restore the system to ts<br />
default sett ngs. Th s funct on s useful n the<br />
event of a system fa lure or f you forget the<br />
system passwords.<br />
Th s chapter covers the follow ng top cs:<br />
• When to use the System Recovery D sc<br />
• Runn ng System Recovery Manager<br />
<strong>ViewSonic</strong> <strong>VOT550</strong> 23
When to use the System Recovery Disc<br />
You need to run system recovery:<br />
• In the event of a system or hardware fa lure.<br />
System Recovery<br />
• You need to restore the system back to ts default factory sett ngs<br />
• You forgot the system password.<br />
System recovery w ll format the hard d sk and restore the system to ts default<br />
sett ngs.<br />
Note: All files and other data on drive C: will be deleted.<br />
Running System Recovery Manager<br />
Your <strong>PC</strong> m n uses Acron s Recovery Manager for system recovery funct ons. Insert<br />
the System Recovery d sc nto slot- n ODD to run System Recovery Manager.<br />
Follow the step as below:<br />
1. Turn on the <strong>PC</strong> m n . The system w ll boot up and the vendor logo w ll appear.<br />
2. When the screen d splays shows “Start ng Acron s Loader ...”, press the F11 button<br />
on the keyboard.<br />
<strong>ViewSonic</strong> <strong>VOT550</strong> 24
System Recovery<br />
3. Now you w ll see a w ndow as p cture, cho ce Restore button to cont nue.<br />
4. System will ask you to confirmation, restoring your computer to the original state<br />
will remove all files that were created on your computer. Do you want to proceed with<br />
restor ng? Press “Yes” button to cont nue.<br />
5. Wa t ng for the nstall progress, the system w ll restore operat on completed<br />
successfully. Start us ng your <strong>PC</strong> m n .<br />
Note: If W ndows operat ng system starts up before you press F11 and you st ll w sh<br />
to run System Recovery.<br />
Restart the <strong>PC</strong> m n then follow the same procedures above.<br />
<strong>ViewSonic</strong> <strong>VOT550</strong> 25
Chapter 5<br />
Setting the BIOS<br />
BIOS Setup Ut l ty s a program for conf gur ng<br />
the BIOS (Bas c Input/Output System) sett ngs<br />
of the computer.<br />
BIOS s a layer of software called f rmware<br />
that translates nstruct ons from other layers of<br />
software nto nstruct ons so that the computer<br />
hardware dev ces can understand them. The<br />
BIOS sett ngs are needed by your computer<br />
to dent fy the types of nstalled dev ces and<br />
establ sh spec al features.<br />
Th s chapter tells you how to use the BIOS<br />
Setup Ut l ty.<br />
<strong>ViewSonic</strong> <strong>VOT550</strong> 26
Setting the BIOS<br />
Not long after act vat ng the power, you w ll see the follow ng screen.<br />
Please press “Delete” button to get nto BIOS screen.<br />
Setting BIOS<br />
If you would l ke to see the POST screen, you may just press “Tab” button.<br />
<strong>ViewSonic</strong> <strong>VOT550</strong> 27
Setting BIOS<br />
After press ng “Delete” button, you w ll see the follow ng BIOS setup menu:<br />
How to Use Phoenix-Award BIOS Setup Program<br />
Generally, you can use arrow keys to h ghl ght the opt ons that you want to choose,<br />
press key to select, and use and keys to<br />
change sett ng values. You can press key to qu t the BIOS setup program.<br />
The follow ng table prov des deta ls about how to use keyboard wh le chang ng the<br />
sett ngs n the BIOS.<br />
Key Descr pt on<br />
Page Up or + Change sett ng to next value or ncrease the value.<br />
Page Down or - Change sett ng to prev ous value or decrease value.<br />
Enter Select the tem.<br />
Esc In ma n menu: Qu t w thout sav ng any changes.<br />
In sub menu: Ex t current menu to ma n menu.<br />
Up Arrow H ghl ght prev ous tem.<br />
Down Arrow H ghl ght next tem.<br />
Left Arrow Move the h ghl ght to left s de of menu.<br />
R ght Arrow Move the h ghl ght to r ght s de of menu.<br />
F6 Load Setup Default sett ng value from CMOS.<br />
F7 Load turbo sett ng value from CMOS.<br />
F10 Save changed sett ngs and ex t setup program.<br />
Note: Because BIOS code has been updated from t me to t me to meet the latest<br />
customers requ rements the BIOS nformat on conta ned n th s manual may<br />
look sl ghtly d fferent from the BIOS messages, wh ch comes w th your system.<br />
<strong>ViewSonic</strong> <strong>VOT550</strong> 28
Standard CMOS Features<br />
Setting BIOS<br />
The “Standard CMOS Setup” sets the bas c system parameters such as the date,<br />
t me, and the hard d sk type. Use the arrow keys to h ghl ght an tem and or<br />
to make your select on.<br />
Standard CMOS Features > Date<br />
To set the date, h ghl ght the Date parameter. Press or to set the<br />
current date. The date format s month, date, and year.<br />
<strong>ViewSonic</strong> <strong>VOT550</strong> 29
Advanced BIOS Features<br />
Setting BIOS<br />
From the first BIOS setup page illustrated below, you can select “Advanced BIOS<br />
Features” from the BIOS ma n menu.<br />
The follow ng screen appears when you select the opt on “Advanced BIOS Features”<br />
from the ma n menu.<br />
<strong>ViewSonic</strong> <strong>VOT550</strong> 30
Advanced Chipset Features<br />
Setting BIOS<br />
The “Advanced Ch pset Features” ncludes sett ngs for the ch pset dependent features.<br />
These features are related to system performance. You can select “Advanced<br />
Chipset Features” on the first page of the BIOS setup program.<br />
Warning:<br />
Make sure you fully understand the tems conta ned n th s menu before you try<br />
to change anyth ng. You may change the parameter sett ngs to mprove system<br />
performance. However, t may cause your system to be unstable f the sett ng s not<br />
correct for your system configuration.<br />
<strong>ViewSonic</strong> <strong>VOT550</strong> 31
Integrated Peripherals Features<br />
Setting BIOS<br />
The “Integrated Per pherals Features” ncludes sett ngs for the OnCh p IDE Dev ce<br />
and Onboard Device. You can select “Integrated Peripherals” on the first page of the<br />
BIOS setup program.<br />
<strong>ViewSonic</strong> <strong>VOT550</strong> 32
Power Management Setup<br />
Setting BIOS<br />
The Power Management Setup screen enables you to control the motherboard green<br />
features. See the follow ng screen. You can select “Power Management Setup” on<br />
the first page of the BIOS setup program.<br />
<strong>ViewSonic</strong> <strong>VOT550</strong> 33
Load Setup Defaults<br />
Setting BIOS<br />
The “Load Setup Defaults” opt on loads opt m zed sett ngs for opt mum system<br />
performance. Opt mal sett ngs are relat vely safer than the Turbo sett ngs. All the<br />
product verification, compatibility/reliability test report and manufacture quality control<br />
are based on “Load Setup Defaults”. We recommend us ng these sett ngs for normal<br />
operat on. “Load Setup Defaults” s not the slowest sett ng for th s motherboard. If<br />
you need to ver fy an unstable problem, you may manually set the parameter n the<br />
“Advanced BIOS Features” and “Advanced Ch pset Features” to get slowest and<br />
safer sett ng.<br />
Now you can move the cursor by us ng d rect on keys on the keyboard. Move the<br />
cursor to the opt on tem“Load Opt m zed Defaults”and press“Enter” button.<br />
<strong>ViewSonic</strong> <strong>VOT550</strong> 34
Setting BIOS<br />
Then the following dialogue screen will pop up to confirm the default BIOS values.<br />
Please press “Y” to confirm and then press “Enter” button.<br />
Setting a Password<br />
Password prevents unauthor zed use of your computer. If you set a password, the<br />
system prompts for the correct password before boot or access to Setup.<br />
To set a password:<br />
1. At the prompt, type your password. Your password can be up to 8 alphanumer c<br />
characters. When you type the characters, they appear as aster sks on the<br />
password screen box.<br />
2. After typ ng the password, press.<br />
3. At the next prompt, re-type your password and press again to confirm the new<br />
password. After the password entry, the screen automat cally reverts to the ma n<br />
screen. To d sable the password, press “Enter” when be ng prompted to enter the<br />
password. The screen displays a message confirming that the password has been<br />
d sabled.<br />
<strong>ViewSonic</strong> <strong>VOT550</strong> 35
Save & Exit Setup<br />
Setting BIOS<br />
F nally, move the cursor to“Save & Ex t Setup”and press “Enter” to save the<br />
parameter and ex t BIOS setup. Th s funct on automat cally saves all CMOS values<br />
before leav ng Setup.<br />
<strong>ViewSonic</strong> <strong>VOT550</strong> 36
Exit without Saving<br />
Setting BIOS<br />
Use th s funct on to ex t Setup w thout sav ng the CMOS value changes. Do not use<br />
this option if you want to save the new configuration. At the same time, type “Y” in the<br />
d alogue box and press “Enter” to ex t.<br />
<strong>ViewSonic</strong> <strong>VOT550</strong> 37
Chapter 6<br />
Troubleshooting<br />
Th s chapter l sts some common problems that<br />
you may encounter when us ng your <strong>PC</strong> M n<br />
and descr bes solut ons on how to solve<br />
them.<br />
Th s chapter covers the follow ng top cs:<br />
• Troubleshoot ng<br />
• Spec f cat ons<br />
<strong>ViewSonic</strong> <strong>VOT550</strong> 38
Troubleshooting<br />
Troubleshooting<br />
Q: After connect ng per pherals to the <strong>PC</strong> M n , the keyboard, mouse and speakers do<br />
not work and the d splay does not show any content.<br />
A: Check to make sure you followed the correct nstallat on procedures and<br />
connect ons. Check to see f the per pherals are connected correctly and they are<br />
not loose. After check ng connect ons, power up the system aga n to see f the<br />
system works as expected.<br />
If the speakers or v deo mon tor st ll does not cont nue to funct on, refer to the<br />
manuals that came w th those dev ces for further troubleshoot ng.<br />
Q: After mak ng sure the mon tor s connected correctly to the system, the mon tor<br />
st ll shows noth ng. What should I do?<br />
A: The computer’s power management funct on may blank the screen to save power,<br />
move the mouse sl ghtly or press any key on the keyboard to turn the d splay<br />
back on. You can also adjust the br ghtness or contrast controls on the mon tor for<br />
des red d splay effects.<br />
Q: The cursor moves unstead ly across the screen. What should I do?<br />
A: If you are us ng an opt cal mouse t may not perform correctly on a glossy surface.<br />
Put the mouse on a non-reflective surface.<br />
Q: The system hangs or does not respond to any key strokes.<br />
A: When the system s process ng mult ple tasks the system may hang up. Press<br />
CTRL + ALT + DEL to br ng up the Task Manager Menu. Th s w ll allow you to<br />
cancel an appl cat on or do a warm reset of the system. If th s happens mult ple<br />
t mes you may have to re nstall that appl cat on.<br />
<strong>ViewSonic</strong> <strong>VOT550</strong> 39
Troubleshooting<br />
Q: I have followed the nstallat on processes ment oned n th s manual, the system<br />
st ll does not work.<br />
A: Consult your dealer or authorized maintenance service personnel. Do not try to fix<br />
the system by yourself for t may cause add t onal damage to your system.<br />
Q: There s no sound.<br />
A: 1. Check f the speaker s correctly connected to SPK jack, and make sure the<br />
speaker s also powered on.<br />
2. Make sure the master volume control s not on mute.<br />
3. Make sure you have the latest sound dr ver nstalled.<br />
Q: The M crophone does not work or record.<br />
A: 1. Ver fy f the m crophone s correctly connected to MIC jack of sound card.<br />
2. Inspect that the volume control of “M c” hasn`t been muted.<br />
3. Make sure that the “Record ng” sett ng under “Propert es” of “Volume control"<br />
was correctly selected.<br />
Q: Our Telev s on does not have HDMI port but t does have DVI, can I use t on my<br />
V ewSon c VOT ser es?<br />
A: Yes, but you w ll also have to use aud o cables connected s nce DVI to DVI only<br />
transm ts a v deo s gnal.<br />
Q: How do I download a specific driver for my <strong>ViewSonic</strong> products?<br />
A: Make sure you know the exact model of your V ewSon c products. Go to our ma n<br />
home page and click on the Download tab under support. Click on the specific<br />
model of V ewSon c product you have for the latest dr vers.<br />
<strong>ViewSonic</strong> <strong>VOT550</strong> 40
Q: Can V ewSon c VOT ser es support SO-DIMM DDR3 memory?<br />
A: No, th s model w ll only support SO-DIMM DDRII.<br />
Troubleshooting<br />
Q: Can V ewSon c VOT ser es model support DDR2-533 memory module?<br />
A: No, th s model requ res a m n mum of DDR2-667 or h gher.<br />
Q: My <strong>PC</strong> M n has trouble connect ng to the nternet.<br />
A: Check the DSL/ADSL modem sett ngs and connect ons and make sure your <strong>PC</strong> s<br />
properly configured for internet access.<br />
The w reless LAN data transfer speed s affected by d stance and obstruct ons<br />
between dev ces and access po nts. To max m ze data transfer speed select the<br />
closes access po nt.<br />
<strong>ViewSonic</strong> <strong>VOT550</strong> 41
Specifications<br />
Specification<br />
Dimension WxHxD(mm) 165(W) x 50(H) x 165(D)<br />
WxHxD( nch) 6.5(W) x 1.97(H) x 6.5(D)<br />
Volume(liters) 1.36L<br />
Weight(Kg/Pound) 1.45kg / 2.4 pound (N.W.)<br />
Housing Color Black<br />
Power Solutions Two-phase voltage stab l zat on<br />
Socket Socket P<br />
CPU<br />
Type Intel® Core 2 Duo T6500/T6600<br />
FSB 667/800/1066<br />
Chipset<br />
NB<br />
SB<br />
Intel GM45<br />
ICH9M<br />
Dual Channel Dual Channel Model<br />
Memory<br />
Type<br />
DDR<br />
DDRII SO-DIMM x 2<br />
667/800<br />
Memory s ze 4GB<br />
Ch p Intel® GM45 on D e Intel® GMA X4500<br />
(Support M crosoft D rect10X)<br />
Graphics<br />
DVI Port x 1<br />
VGA Port x 1 v a DVI to VGA Adapter<br />
HDMI nterface x 1 v a DVI to HDMI Adapter<br />
Expansion Slot m n Card Slot WLN WN6600R-F4<br />
Audio<br />
Type<br />
Channel<br />
Realtek ALC888 HD Aud o<br />
5.1CH<br />
LAN Intel 10/100/1000 Ethernet<br />
USB 2.0 x 6, 2 (Front), 4 (Rear)<br />
Storage<br />
SATA Connector<br />
S-ATA Connector<br />
Blu-ray ODD<br />
320GB/500GB<br />
Storage Device<br />
Slot- n Sl m ODD (Opt cal Dr ve)<br />
2.5” HDD Bay<br />
x 1 (P-ATA)<br />
x 1 (S-ATA)<br />
Power Button x 1<br />
HDD nd cator x 1<br />
Front Panel I/O Power nd cator x 1<br />
IR nd cator x 1<br />
USB 2.0 Port x 2<br />
DC Jack x 1 (20V)<br />
DVI Port x 1<br />
e-SATA Port x 1<br />
USB 2.0 Port x 4<br />
Rear Panel I/O<br />
RJ45 LAN Jack<br />
L ne-In Jack<br />
x 1<br />
x 1<br />
S/PDIF Out Jack x 1<br />
M crophone Jack x 1<br />
Upgrade for Antenna hole x 2<br />
Kens ngton Lock Hole x 1<br />
CPU Thermal<br />
Module<br />
No se<br />
V ewSon c Thermal Module<br />
27db<br />
Adapter 90W (20V, 4.5A) AC Adapter<br />
Input Voltage AC 100 ~ 240V<br />
Operating Temperature 0 °C - 40 °C<br />
Note: <strong>ViewSonic</strong> reserves the right to revise the specifications contained in this<br />
document, wh ch are subject to change w thout not ce.<br />
<strong>ViewSonic</strong> <strong>VOT550</strong> 42
Chapter 6<br />
Other Information<br />
Customer Support<br />
For technical support or product service, see the table below or contact your reseller.<br />
NOTE: You will need the product serial number.<br />
Country/Region Website<br />
Australia/New<br />
Zealand<br />
www.viewsonic.com.au<br />
Canada www.viewsonic.com<br />
T = Telephone<br />
F = FAX<br />
AUS= 1800 880 818<br />
NZ= 0800 008 822<br />
T (Toll-Free)= 1-866-463-4775<br />
T (Toll)= 1-424-233-2533<br />
F= 1-909-468-3757<br />
<strong>ViewSonic</strong> <strong>VOT550</strong> 43<br />
Email<br />
service@au.viewsonic.com<br />
service.ca@viewsonic.com<br />
Europe<br />
www.viewsoniceurope.<br />
com<br />
www.viewsoniceurope.com/uk/Support/Calldesk.htm<br />
Hong Kong www.hk.viewsonic.com T= 852 3102 2900 service@hk.viewsonic.com<br />
India www.in.viewsonic.com T= 1800 11 9999 service@in.viewsonic.com<br />
Ireland (Eire)<br />
www.viewsoniceurope.<br />
com/uk/<br />
www.viewsoniceurope.com/uk/support/<br />
call-desk/<br />
service_ie@viewsoniceurope.<br />
com<br />
Korea www.kr.viewsonic.com T= 080 333 2131 service@kr.viewsonic.com<br />
Latin America<br />
(Argentina)<br />
www.viewsonic.com/la/ T= 0800-4441185 soporte@viewsonic.com<br />
Latin America (Chile) www.viewsonic.com/la/ T= 1230-020-7975 soporte@viewsonic.com<br />
Latin America<br />
(Columbia)<br />
www.viewsonic.com/la/ T= 01800-9-157235 soporte@viewsonic.com<br />
Latin America<br />
(Mexico)<br />
www.viewsonic.com/la/ T= 001-8882328722 soporte@viewsonic.com<br />
Renta y Datos, 29 SUR 721, COL. LA PAZ, 72160 PUEBLA, PUE. Tel: 01.222.891.55.77 CON 10 LINEAS<br />
Electroser, Av Reforma No. 403Gx39 y 41, 97000 Mérida, Yucatán. Tel: 01.999.925.19.16<br />
Other places please refer to http://www.viewsonic.com/la/soporte/index.htm#Mexico<br />
Latin America (Peru) www.viewsonic.com/la/ T= 0800-54565 soporte@viewsonic.com<br />
Macau www.hk.viewsonic.com T= 853 2870 0303 service@hk.viewsonic.com<br />
Middle East ap.viewsonic.com/me/ Contact your reseller service@ap.viewsonic.com<br />
Puerto Rico & Virgin<br />
Islands<br />
www.viewsonic.com<br />
T= 1-800-688-6688 (<strong>English</strong>)<br />
T= 1-866-379-1304 (Spanish)<br />
F= 1-909-468-3757<br />
service.us@viewsonic.com<br />
soporte@viewsonic.com<br />
Singapore/Malaysia/<br />
Thailand<br />
www.ap.viewsonic.com T= 65 6461 6044 service@sg.viewsonic.com<br />
South Africa ap.viewsonic.com/za/ Contact your reseller service@ap.viewsonic.com<br />
United Kingdom<br />
www.viewsoniceurope.<br />
com/uk/<br />
www.viewsoniceurope.com/uk/support/<br />
call-desk/<br />
T (Toll-Free)= 1-800-688-6688<br />
service_gb@viewsoniceurope.<br />
com<br />
United States www.viewsonic.com T (Toll)= 1-424-233-2530<br />
F= 1-909-468-3757<br />
service.us@viewsonic.com<br />
United States www.viewsonic.com<br />
T (Toll-Free)= 1-800-688-6688<br />
T (Toll)= 1-424-233-2530<br />
F= 1-909-468-1202<br />
service.us@viewsonic.com
Limited Warranty<br />
VIEWSONIC ® <strong>PC</strong> MINI<br />
What the warranty covers:<br />
<strong>ViewSonic</strong> warrants its products to be free from defects in material and workmanship during<br />
the warranty period. If a product proves to be defective in material or workmanship during<br />
the warranty period, <strong>ViewSonic</strong> will, at its sole option, repair or replace the product with a<br />
similar product. Replacement Product or parts may include remanufactured or refurbished<br />
parts or components. The replacement unit will be covered by the balance of the time<br />
remaining on the customer’s original limited warranty. <strong>ViewSonic</strong> provides no warranty for<br />
the third-party software included with the product or installed by the customer.<br />
How long the warranty is effective:<br />
<strong>ViewSonic</strong> <strong>PC</strong> products are warranted for (1) year for parts and labor from the first consumer<br />
purchase; Germany, Spain, and Portugal are warranted for (2) years for parts and labor from<br />
the first consumer purchase.<br />
<strong>User</strong> is responsible for the back up of any data before returning the unit for service.<br />
<strong>ViewSonic</strong> is not responsible for any data lost.<br />
Who the warranty protects:<br />
This warranty is valid only for the first consumer purchaser.<br />
What the warranty does not cover:<br />
1. Any product on which the serial number has been defaced, modified or removed.<br />
2. Damage, deterioration or malfunction resulting from:<br />
a. Accident, misuse, neglect, fire, water, lightning, or other acts of nature, unauthorized<br />
product modification, or failure to follow instructions supplied with the product.<br />
b. Any damage of the product due to shipment.<br />
c. Removal or installation of the product.<br />
d. Causes external to the product, such as electrical power fluctuations or failure.<br />
e. Use of supplies or parts not meeting <strong>ViewSonic</strong>’s specifications.<br />
f. Normal wear and tear.<br />
g. Any other cause which does not relate to a product defect.<br />
3. Removal, installation, one way transportation, insurance, and set-up service charges.<br />
How to get service:<br />
1. For information about receiving service under warranty, contact <strong>ViewSonic</strong> Customer<br />
Support (Please refer to Customer Support page). You will need to provide your product’s<br />
serial number.<br />
2. To obtain warranty service, you will be required to provide (a) the original dated sales<br />
slip, (b) your name, (c) your address, (d) a description of the problem, and (e) the serial<br />
number of the product.<br />
3. Take or ship the product freight prepaid in the original container to an authorized<br />
<strong>ViewSonic</strong> service center or <strong>ViewSonic</strong>.<br />
4. For additional information or the name of the nearest <strong>ViewSonic</strong> service center, contact<br />
<strong>ViewSonic</strong>.<br />
4.3: <strong>ViewSonic</strong> <strong>PC</strong> Mini Warranty Page 1 of 2 <strong>PC</strong> Mini_LW01 Rev. 1a 07-02-09<br />
<strong>ViewSonic</strong> <strong>VOT550</strong> 44
Limitation of implied warranties:<br />
There are no warrant es, express or mpl ed, wh ch extend beyond the descr pt on conta ned<br />
herein including the implied warranty of merchantability and fitness for a particular purpose.<br />
Exclusion of damages:<br />
V ewSon c’s l ab l ty s l m ted to the cost of repa r or replacement of the product. V ewSon c<br />
shall not be l able for:<br />
1. Damage to other property caused by any defects n the product, damages based upon<br />
inconvenience, loss of use of the product, loss of time, loss of profits, loss of business<br />
opportun ty, loss of goodw ll, nterference w th bus ness relat onsh ps, or other commerc al<br />
loss, even f adv sed of the poss b l ty of such damages.<br />
2. Any other damages, whether nc dental, consequent al or otherw se.<br />
3. Any cla m aga nst the customer by any other party.<br />
4. Repa r or attempted repa r by anyone not author zed by V ewSon c.<br />
Effect of state law:<br />
This warranty gives you specific legal rights, and you may also have other rights which vary<br />
from state to state. Some states do not allow l m tat ons on mpl ed warrant es and/or do not<br />
allow the exclus on of nc dental or consequent al damages, so the above l m tat ons and<br />
exclus ons may not apply to you.<br />
Sales outside the U.S.A. and Canada:<br />
For warranty nformat on and serv ce on V ewSon c products sold outs de of the U.S.A. and<br />
Canada, contact V ewSon c or your local V ewSon c dealer.<br />
The warranty per od for th s product n ma nland Ch na (Hong Kong, Macao and Ta wan<br />
Excluded) s subject to the terms and cond t ons of the Ma ntenance Guarantee Card.<br />
For users n Europe and Russ a, full deta ls of warranty prov ded can be found n www.<br />
v ewson ceurope.com under Support/Warranty Informat on.<br />
4.3: V ewSon c <strong>PC</strong> M n Warranty Page 2 of 2 <strong>PC</strong> M n _LW01 Rev. 1a 07-02-09<br />
<strong>ViewSonic</strong> <strong>VOT550</strong> 45