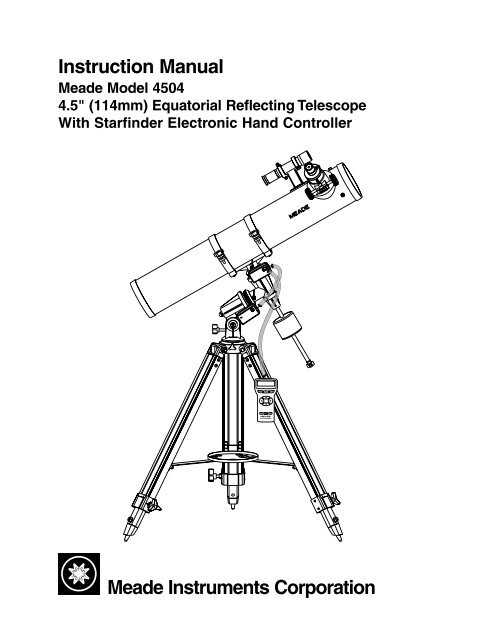
Instruction Manual Meade Model 4504
Instruction Manual Meade Model 4504
Instruction Manual Meade Model 4504

Create successful ePaper yourself
Turn your PDF publications into a flip-book with our unique Google optimized e-Paper software.
<strong>Instruction</strong> <strong>Manual</strong><br />
<strong>Meade</strong> <strong>Model</strong> <strong>4504</strong><br />
4.5" (114mm) Equatorial Reflecting Telescope<br />
With Starfinder Electronic Hand Controller<br />
<strong>Meade</strong> Instruments Corporation<br />
ENTER ENTER<br />
MODE MODE<br />
SPEED<br />
?<br />
MEADE<br />
STARFINDER<br />
GO GO TO TO
WARNING<br />
NEVER USE A MEADE ® TELESCOPE TO LOOK AT THE SUN!<br />
LOOKING AT OR NEAR THE SUN WILL CAUSE INSTANT AND<br />
IRREVERSIBLE DAMAGE TO YOUR EYE. EYE DAMAGE IS OFTEN<br />
PAINLESS, SO THERE IS NO WARNING TO THE OBSERVER THAT<br />
DAMAGE HAS OCCURRED UNTIL IT IS TOO LATE. DO NOT POINT<br />
THE TELESCOPE OR ITS VIEWFINDER AT OR NEAR THE SUN. DO<br />
NOT LOOK THROUGH THE TELESCOPE OR ITS VIEWFINDER AS IT<br />
IS MOVING. CHILDREN SHOULD ALWAYS HAVE ADULT<br />
SUPERVISION WHILE OBSERVING.<br />
How This <strong>Manual</strong> is Organized<br />
This manual is divided into three major sections.<br />
Part One, "The Basics," presents several "Lessons" that will teach you how to<br />
assemble and use your telescope and Starfinder. If you follow all the Lessons in this<br />
section, you will become familiar with the basic operation of your telescope and the<br />
Starfinder handbox by the end of Part One. This section covers the following procedures:<br />
Lesson 1: Unpacking and Assembly.<br />
How to unpack and assemble the basic telescope and tripod unit.<br />
Lesson 2: Balancing the Telescope.<br />
How to balance the telescope.<br />
Lesson 3: Aligning the Viewfinder.<br />
How to align the viewfinder and insert the eyepiece into the focuser.<br />
Lesson 4: Observing by Moving the Telescope <strong>Manual</strong>ly.<br />
How to focus an eyepiece. How to move your telescope manually to make<br />
observations.<br />
Lesson 5: Observing using Starfinder's Arrow keys.<br />
How to install the motor drives. How to change the slew speeds. How to<br />
observe using Starfinder's Arrow keys.<br />
Lesson 6: Tracking Objects.<br />
How to Polar align your telescope. How to observe using automatic tracking.<br />
Lesson 7: Observing using Starfinder's Go To Capabilities.<br />
How to initialize Starfinder and train the drive. How to move around in<br />
Starfinder's menus. How to observe using Starfinder and how to take a<br />
Guided Tour of the night sky.<br />
Part Two, "Starfinder's Controls and Menus," provides more information about<br />
Starfinder's databases and menus.<br />
Part Three, "Caring for Your Telescope," provides information that explains how to<br />
properly maintain your telescope.<br />
The Appendices provide advanced information about your telescope, explain how<br />
objects move through the skies, and teach how to locate objects not listed in the<br />
Starfinder database.<br />
® The name "<strong>Meade</strong>" and the <strong>Meade</strong> logo are trademarks registered with the U.S. Patent Office and in principal countries<br />
throughout the world. All rights reserved.<br />
© 2000 <strong>Meade</strong> Instruments Corporation
TABLE OF CONTENTS<br />
PART ONE: The Basics<br />
Lesson 1: Unpacking and Assembly ....................................................................5<br />
How to Assemble Your Telescope......................................................................8<br />
Lesson 2: Balancing the Telescope ....................................................................10<br />
Lesson 3: Aligning the Viewfinder ......................................................................10<br />
Lesson 4: Observing by Moving the Telescope <strong>Manual</strong>ly ..................................11<br />
Observe the World Around You........................................................................13<br />
Lesson 5: Using Starfinder's Arrow Keys ............................................................13<br />
Motor Drive System and Starfinder Handbox Installation ................................13<br />
Activate the Arrow Keys ..................................................................................14<br />
Slew Speeds ....................................................................................................14<br />
Observe the Moon............................................................................................15<br />
Lesson 6: Tracking Objects ................................................................................15<br />
To Polar Align the Telescope............................................................................15<br />
Observe a Star Using the Automatic Tracking Feature....................................16<br />
Lesson 7: Using Starfinder's GO TO Capabilities ..............................................16<br />
Moving Through Starfinder's Menus ................................................................16<br />
Initializing Starfinder ........................................................................................17<br />
Training the Drive ............................................................................................19<br />
Align Your Telescope Using Starfinder ............................................................20<br />
Check Mount ....................................................................................................20<br />
Go To Saturn ....................................................................................................21<br />
Using the Guided Tour ....................................................................................21<br />
Some Observation Tips....................................................................................22<br />
PART TWO: Starfinder Controls and Menus<br />
Starfinder Controls ..............................................................................................23<br />
How Starfinder's Menus Work ............................................................................26<br />
Starfinder Navigation Exercise ............................................................................26<br />
Starfinder Menus..................................................................................................28<br />
Object Menu ....................................................................................................28<br />
Event Menu ......................................................................................................29<br />
Glossary Menu ................................................................................................29<br />
Utilities Menu....................................................................................................30<br />
Setup Menu......................................................................................................31<br />
PART THREE: Caring for Your Telescope<br />
Cleaning ..............................................................................................................33<br />
Mount and Tripod Adjustments............................................................................33<br />
Collimation (Alignment) of the Optics..................................................................34<br />
Specifications ....................................................................................................37<br />
Appendix A: Calculating Eyepiece Power ..........................................................38<br />
Appendix B:Terrestrial Viewing, Celestial Movement, & Polar Alignment ..........39<br />
Appendix C: Using Starfinder to Enter Celestial Coordinates ............................42<br />
Appendix D: Helpful Charts ................................................................................43<br />
Appendix E: Basic Astronomy ............................................................................44<br />
Objects in Space ............................................................................................44<br />
A Roadmap to the Stars..................................................................................46<br />
Star Locator ....................................................................................................46<br />
page 3
1<br />
2<br />
4<br />
5<br />
6 9 10 11<br />
12<br />
13 14<br />
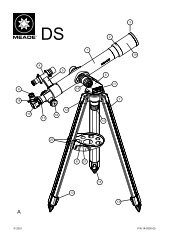
Fig. 1: Parts included in the <strong>Meade</strong> <strong>Model</strong> <strong>4504</strong> Giftbox.<br />
page 4<br />
8<br />
7<br />
3<br />
15<br />
16
PART ONE: The Basics<br />
LESSON 1: Unpacking and Assembly<br />
As you unpack your telescope, carefully note the following parts. The bolded numbers<br />
in parentheses on this page refer to the photos on page 4.<br />
Telescope Assembly<br />
• Equatorial mount (1) with a pre-attached heavy duty, continuously<br />
adjustable aluminum tripod with leg braces<br />
• 3 tripod leg lock knobs (7)<br />
• Complete optical tube assembly (2) including a 4.5" (114mm) diameter<br />
primary mirror with dust cover and a 0.965" rack-and-pinion focuser with<br />
dust cap<br />
• 2 Cradle rings (3) with attached lock knobs<br />
• Counterweight (8) and counterweight shaft (9)<br />
• 5 x 24 viewfinder with rubber eyecup (5) and viewfinder bracket (10)<br />
Motor Assembly<br />
• Dual electronic motor drive assembly: The Right Ascension (R.A.)<br />
electronic motor drive (12) has a connector for the battery pack, marked<br />
"15v." The Declination (Dec) electronic motor drive (13) has a connector<br />
for the Starfinder handbox, marked "HBX." The motors are connected<br />
with a coiled cord.<br />
• Starfinder handbox (14)<br />
• Battery pack (16) and battery pack case (15) with adhesive backing<br />
Accessories<br />
• 3 Eyepieces (11) (0.965" optical diameter): SR 4mm, H 12.5mm,<br />
H 25mm<br />
• 3x Barlow lens (4)<br />
• Accessory shelf with mounting knob (6)<br />
• 2 Hex Keys, 1.5mm, 5mm (not depicted)<br />
• Astronomical software (not depicted)<br />
You will need a #1 or #2 Phillips screwdriver to assemble this telescope.<br />
Key to the photos, Fig. 1, page 4.<br />
1. Tripod assembly with equatorial mount<br />
2. Optical tube<br />
3. Cradle rings<br />
4. 3x Barlow lens<br />
5. Viewfinder tube<br />
6. Accessory shelf<br />
7. Tripod leg adjustment knobs<br />
8. Counterweight<br />
9. Counterweight shaft<br />
10. Viewfinder bracket<br />
11. Eyepieces<br />
12. R.A. motor drive<br />
13. Dec motor drive<br />
14. Starfinder handbox<br />
15. Battery pack case<br />
16. Battery pack<br />
page 5
8<br />
12<br />
11<br />
10<br />
Fig. 2a: The <strong>Meade</strong> <strong>Model</strong> <strong>4504</strong> 4.5" Equatorial Reflecting Telescope.<br />
7<br />
13<br />
Key to Figures 2a, 2b, and 2c<br />
1. Equatorial mount<br />
2. Optical tube assembly<br />
3. Cradle rings<br />
4. Viewfinder bracket<br />
5. Viewfinder rubber eyepiece<br />
6. 5 x 24 viewfinder<br />
7. Viewfinder bracket thumbscrews<br />
8. Telescope front dust cover<br />
9. Dec setting circle<br />
10. Counterweight<br />
11. Counterweight shaft<br />
12. Safety washer/thumbscrew<br />
13. Counterweight lock<br />
14. Latitude dial<br />
15. R.A. setting circle<br />
page 6<br />
4<br />
6<br />
14<br />
5<br />
9<br />
15<br />
3<br />
16<br />
1<br />
16. Latitude adjustment knob<br />
17. Focuser, Focus knobs<br />
18. Eyepiece thumbscrew<br />
19. Eyepiece<br />
20. Cradle ring lock knobs<br />
21. Optical tube saddle plate<br />
22. Dec motor drive assembly<br />
23. Latitude lock<br />
24. Azimuth lock<br />
25. R.A. motor drive assembly<br />
26. R.A. lock<br />
27. Dec lock<br />
28. Tripod legs brace support<br />
29. Tripod legs lock knobs<br />
30. Accessory shelf<br />
2
NOTE: The coiled cord that<br />
connects to the two motor<br />
drives has been omitted<br />
from the illustration for the<br />
sake of clarity.<br />
20<br />
23<br />
21<br />
22<br />
Fig. 2b: The <strong>Meade</strong> <strong>Model</strong> <strong>4504</strong> 4.5" Equatorial Reflecting Telescope.<br />
29<br />
28<br />
Fig. 2c: The <strong>Meade</strong> <strong>Model</strong> <strong>4504</strong> 4.5" Equatorial Reflecting Telescope.<br />
page 7<br />
24<br />
20<br />
25<br />
28<br />
30<br />
27<br />
26<br />
19<br />
18<br />
29<br />
17
Leg lock<br />
knob<br />
Threaded<br />
hole<br />
Fig. 3: Tripod leg lock<br />
knob.<br />
Pin<br />
Sliding<br />
inner leg<br />
Fig. 4: Accessory<br />
shelf installation.<br />
Lock<br />
knob<br />
Fig. 5: Counterweight<br />
and pin.<br />
Fig. 6: Attach<br />
counterweight<br />
assembly to the<br />
mount.<br />
Thread shaft<br />
into base<br />
How to Assemble Your Telescope<br />
The giftbox contains the optical tube assembly and the tripod with the equatorial<br />
mount. The accessories are located within compartments custom-cut into the styrofoam<br />
block inserts. Refer to Figures 1, 2a, 2b, and 2c for images of the parts and the<br />
overall assembly of the <strong>4504</strong> telescope.<br />
1. Remove the components from the giftbox: Remove and identify the telescope’s<br />
standard equipment. For a listing of parts that are included in the giftbox, see<br />
pages 4 and 5. When removing the tripod from the giftbox, hold the assembly<br />
parallel (horizontal) to the ground or the inner tripod leg extensions will slide out<br />
as they are not locked in place.<br />
2. Install the lock knobs on the tripod: Place the tripod in a horizontal position on<br />
the floor before performing this step. The three tripod lock knobs (7, Fig. 1) have<br />
been removed from the bottom section of each tripod leg to insure safe arrival of<br />
the tripod assembly. To install, thread each tripod lock knob into the threaded hole<br />
located at the right side of each of the three gray-colored castings at the bottom<br />
of each tripod leg. See Fig. 3, and 29, Fig. 2c. Tighten the tripod lock knob to a<br />
"firm feel" only to avoid damage to the tripod caused by overtightening.<br />
3. Stand the tripod: Hold the mount for support (the mount will be loose) and stand<br />
the tripod in a vertical position. Slide the cardboard sheath upward to allow it to<br />
come free when the tripod legs are spread out during the next step.<br />
4. Adjust the tripod legs. Spread the tripod legs as far as they will open, so that the<br />
leg braces (28, Fig. 2c) are taut. Should one of the leg braces slip out of the center<br />
triangle fastener, reposition the brace and slide it back into the triangle fastener.<br />
5. Attach the accessory shelf to the tripod: Remove the mounting knob from the<br />
round accessory shelf (6, Fig. 1). Place the accessory shelf on top of the center<br />
triangle leg brace fastener so that the threaded stud protruding from the bottom of<br />
the shelf (Fig. 4) passes through the hole in the center of the triangle fastener.<br />
Next, thread the mounting knob shaft into the threaded stud. Tighten to a firm feel.<br />
6. Attach the counterweight to the counterweight shaft: Look through the hole in<br />
the counterweight and note the pin blocking the hole (Fig. 5). Tilt the<br />
counterweight slightly and the pin moves out of position, clearing the hole. If the<br />
pin does not move, slightly unscrew the counterweight lock knob (Fig. 5) until the<br />
pin moves. Holding the counterweight (8, Fig. 1) firmly in one hand, tilt the<br />
counterweight to move the pin from the hole and slip the counterweight onto the<br />
counterweight shaft (9, Fig. 1). Tighten the counterweight lock knob (Fig. 5) to a<br />
firm feel.<br />
7. Attach the counterweight assembly to the mount: Attach the counterweight<br />
shaft assembly by supporting the counterweight firmly in one hand, while<br />
threading the counterweight shaft into the base (Fig. 6) of the Declination axis of<br />
the telescope’s equatorial mount with the other. Once firmly attached, loosen the<br />
counterweight lock knob, slide the counterweight to the midpoint of the<br />
counterweight shaft, and re-tighten the lock knob firmly in place (Fig. 5).<br />
NOTE: If the counterweight ever slips, the secured threaded safety<br />
washer/knob (12, Fig. 2a) prevents the counterweight from sliding entirely<br />
off the shaft. The safety washer/knob is pre-attached at the factory. Make<br />
sure that this safety washer/knob always remains in place.<br />
page 8
1 2 1<br />
Fig. 7: Attach cradle<br />
rings to the saddle plate<br />
with attachment screws.<br />
1. Threaded screw hole<br />
(saddle plate)<br />
2. Saddle plate<br />
3. Cradle ring<br />
4. Threaded screw hole<br />
(cradle ring)<br />
5. Attachment screw<br />
Focuser<br />
3<br />
4<br />
5<br />
Eyepiece<br />
Thumbscrew<br />
Fig. 8: Insert eyepiece<br />
into the focuser<br />
assembly.<br />
8. Tilt the assembly: Unlock the R.A. lock (26, Fig. 2b) and the Dec lock (27, Fig.<br />
2b) so that the telescope turns freely on both axes. Tilting these axes makes it<br />
easier for you to perform the following steps. Turn the latitude adjustment knob<br />
(16, Fig. 2a) until approximately 1 1/2 inches of thread is showing. This will adjust<br />
the equatorial mount (1, Fig. 2a) to a comfortable angle for tube attachment.<br />
9. Attach the cradle rings to the saddle plate: Remove the attachment screws<br />
from the saddle plate (these screws come attached in the threaded screw holes of<br />
the saddle plate, 1, Fig. 7). Position the threaded screw hole of a cradle ring (4,<br />
Fig. 7) under one of the threaded screw holes of the saddle plate (1, Fig. 7).<br />
Thread one of the attachment screws (5, Fig. 7) through the bottom side of the<br />
cradle ring and through the saddle plate, tightening it with the provided 5mm hex<br />
wrench (so that it is only "fingertight," that is, just loose). Repeat for the second<br />
cradle ring. Remove the cradle ring lock knobs (20, Fig. 2b) and open the cradle<br />
rings.<br />
10. Position optical tube: While firmly holding the optical tube (2, Fig. 2a), position it<br />
onto the cradle rings (3, Fig. 2a) with the mid-point of the optical tube’s length lying<br />
roughly in the center of the saddle plate. Point the tube so that the front end (this<br />
end comes shipped with the dust cover (8, Fig. 2a) over it) is oriented as depicted<br />
in Fig. 2a. Then close the cradle rings (3, Fig. 2a) over the optical tube and loosely<br />
tighten one of the cradle ring lock knobs (20, Fig. 2b) just to hold the tube in place<br />
so you can perform the next step of this procedure.<br />
11. Secure the optical tube: Tighten the cradle ring attachment hex screws to a firm<br />
feel. Then tighten both cradle ring lock knobs (20, Fig. 2b) to a firm feel; do not<br />
overtighten these knobs as you may wish loosen them frequently in order to rotate<br />
the optical tube and position the eyepiece (19, Fig. 2b) in a more comfortable<br />
observing position. This adjustment may be performed several times in one<br />
observing session, if so desired.<br />
12. Attach viewfinder: The viewfinder holder has two restrained screws, i.e., they<br />
cannot be removed from the holder. Position the two screws over the threaded<br />
holes in the viewfinder mounting plate and tighten the screws using a #1 or #2<br />
Phillips screwdriver. It does not matter which way you orient the holder lengthwise.<br />
Loosen the viewfinder's thumbscrews (7, Fig. 2a), but do not remove them.<br />
Remove the viewfinder tube's rubber eyecup (5, Fig. 2a) and slide the tube (6, Fig.<br />
2a) through the bracket rings of the holder. Then center the tube by adjusting the<br />
thumbscrews (7, Fig. 2a) on each bracket ring. Re-attach the eyecup. Make sure<br />
that the viewfinder is oriented so that the rubber eyecup is pointing away from front<br />
end of the optical tube (5, Fig. 2a).<br />
13. Insert the eyepiece: Lift to remove the dust cap from the focuser assembly (17,<br />
Fig. 2b). Put the dust cap aside in a safe place and replace it when you have<br />
finished observing to protect the eyepiece assembly. Loosen the eyepiece<br />
thumbscrews (18, Fig. 2b) and insert the H 25mm eyepiece (Fig. 8) into the<br />
focuser. Tighten the focuser thumbscrews to secure the eyepiece.<br />
14. Adjust the height of the tripod: Adjust the height of the tripod by loosening the<br />
tripod lock knobs (29, Fig. 2c) and extending the sliding inner section of each<br />
tripod leg to the desired length; then tighten each knob. Adjust the tripod to a<br />
height that is comfortable for viewing.<br />
Lesson 5 presents a procedure that explains how to attach the motor drive<br />
assemblies. However, that procedure is not necessary at this time. The following<br />
lesson demonstrates how to balance your telescope.<br />
page 9
Fig. 9a: Balancing<br />
the telescope: the<br />
axes locks.<br />
Counterweight shaft<br />
parallel to floor<br />
Fig. 9b: Balancing<br />
the telescope.<br />
Dec<br />
Lock<br />
R.A.<br />
Lock<br />
LESSON 2: Balancing the Telescope<br />
In order for the telescope to be stable on the tripod and also for it to move smoothly,<br />
it must be balanced. To balance the telescope, you will unlock the Right Ascension or<br />
R.A. lock (26, Fig. 2b and Fig. 9a). When this axis is unlocked, the telescope pivots<br />
more or less horizontally on the mount. This is called the R.A. axis. Later in the procedure,<br />
you will also unlock the Declination or Dec lock (27, Fig. 2b and Fig. 9a).<br />
When unlocked, the telescope pivots more or less vertically on the mount. This is<br />
called the Dec axis. Most of the motion of the telescope takes place by moving about<br />
these two axes, separately or simultaneously. To obtain a fine balance of the telescope,<br />
follow the method below:<br />
1. Firmly hold the optical tube secure so that it cannot accidentally swing freely.<br />
Loosen the R.A. lock (26, Fig. 2b). The optical tube now turns freely about the<br />
R.A. axis. Rotate the telescope so that the counterweight shaft (11, Fig. 2a) is<br />
parallel (horizontal) to the ground (Fig. 9b).<br />
2. Unlock the counterweight lock knob (13, Fig. 2a) and slide the counterweight (10,<br />
Fig. 2a) along the counterweight shaft until the telescope remains in one position<br />
without tending to drift down in either direction. Then re-tighten the counterweight<br />
lock knob (13, Fig. 2a), locking the counterweight in position.<br />
3. Again, hold onto the optical tube so that it cannot accidentally swing freely. Lock<br />
the R.A. lock (26, Fig. 2b), and unlock the Dec lock (27, Fig. 2b). The telescope<br />
now is able to move freely about the Dec axis. Loosen the cradle ring lock knobs<br />
(20, Fig. 2b) so that the main tube slides easily back and forth in the cradle rings.<br />
Move the main tube in the cradle rings until the telescope remains in one position<br />
without tending to drift down in either direction. Re-lock the Dec lock (27, Fig. 2b).<br />
The telescope is now properly balanced on both axes. Next, the viewfinder must be<br />
aligned.<br />
LESSON 3: Aligning the Viewfinder<br />
The wide field of view of the 5 x 24mm viewfinder provides an easier way to initially<br />
sight objects than the main telescope's eyepiece, which has a much narrower field of<br />
view. If the 5 x 24 mm viewfinder (6, Fig. 2a) is not already attached to the telescope<br />
tube assembly, follow the procedure described in Lesson 1, step 7.<br />
In order for the viewfinder to be functional, it must be aligned to the main telescope,<br />
so that both the viewfinder and main telescope point at the same position in the sky.<br />
This alignment makes it easier to find objects – first locate an object in the wide-field<br />
viewfinder, then look into the eyepiece of the main telescope for a detailed view.<br />
To align the viewfinder, follow these steps. Perform steps 1 through 4 during the daytime;<br />
perform step 5 at night.<br />
1. Remove the telescope front dust cover (8, Fig. 2a).<br />
2. If you have not already done so, insert the low-power H 25mm eyepiece (19, Fig.<br />
2b) into the focuser of the main telescope. See Lesson 1, step #11.<br />
3. Unlock the R.A. lock (26, Fig. 2b) and the Dec lock (27, Fig. 2b) so that the<br />
telescope turns freely on both axes. Then point the main telescope at some welldefined<br />
and stationary land object (e.g., the top of a telephone pole) at least 200<br />
yards distant and center the object in the telescope's eyepiece. Re-tighten the R.A<br />
and Dec locks.<br />
4. Look through the viewfinder and loosen or tighten, as appropriate, one or more of<br />
the viewfinder bracket ring thumbscrews (7, Fig. 2a) until the viewfinder’s<br />
crosshairs are precisely centered on the object you previously centered in the<br />
main telescope's eyepiece.<br />
page 10
IMPORTANT<br />
NOTE:<br />
Whenever you<br />
move your telescope,<br />
either manually<br />
or with<br />
Starfinder, position<br />
the levers of the<br />
R.A. and Dec locks<br />
so that they point<br />
upwards (see Fig.<br />
10). An incorrectly<br />
positioned lever<br />
may strike and<br />
damage another<br />
piece of the telescope<br />
assembly<br />
while the telescope<br />
is moving.<br />
Point<br />
lever<br />
upwards<br />
Fig. 10: Correctly<br />
positioned lever.<br />
NEVER point the telescope directly at or near the Sun at any time!<br />
Observing the Sun, even for the smallest fraction of a second, will<br />
result in instant and irreversible eye damage, as well as physical<br />
damage to the telescope itself.<br />
5. Check this alignment on a celestial object, such as a bright star or the Moon, and<br />
make any necessary refinements, using the method outlined above in steps 3 and 4.<br />
With this alignment performed, objects first located in the wide-field viewfinder will also<br />
be centered in the main telescope’s field of view. You are now ready to make your first<br />
observations with your telescope.<br />
NOTE: The viewfinder and telescope present an upside-down image.<br />
LESSON 4: Observing by Moving the Telescope <strong>Manual</strong>ly<br />
This method describes how to make observations by manually moving the telescope.<br />
After the telescope is assembled and balanced as described previously, you are ready<br />
to begin manual observations. View easy-to-find terrestrial objects such as street<br />
signs or traffic lights to become accustomed to the functions and operations of the telescope.<br />
For the best results during observations, follow the suggestions below:<br />
• When you wish to locate an object to observe, first loosen the telescope’s R.A.<br />
lock (26, Fig. 2b) and Dec lock (27, Fig. 2b). The telescope can now turn freely on<br />
its axes. Also unlock the Azimuth lock (24, Fig. 2b). Unlock each axis separately<br />
and practice moving your telescope. Then practice with two or more unlocked<br />
axes at the same time. It is very important to practice this step to understand<br />
how your telescope moves, as the movement of an equatorial mount is not<br />
intuitive.<br />
• Use the aligned viewfinder to sight-in on the object you wish to observe. When the<br />
object is centered in the viewfinder’s crosshairs, re-tighten the R.A. and Dec locks.<br />
• A telescope’s eyepiece magnifies the image formed by the telescope’s main<br />
optics. Each eyepiece has a focal length, expressed in millimeters, or “mm.” The<br />
smaller the focal length, the higher the magnification. For example, an eyepiece<br />
with a focal length of 4mm has a higher magnification than an eyepiece with a<br />
focal length of 25mm. See "APPENDIX A," page 38 for more information.<br />
Low-power magnification eyepieces offer a wide field of view, bright, high-contrast<br />
images, and relief of eye strain during long observing sessions. To observe an object<br />
with a telescope, always start with a low power eyepiece such as the H 25mm<br />
supplied with the <strong>4504</strong>. When the object is centered and focused in the eyepiece,<br />
switch to a higher power eyepiece to enlarge the image as much as practical for<br />
prevailing viewing conditions.<br />
NOTE: Viewing conditions vary widely from night-to-night and site-to-site.<br />
Turbulence in the air, even on an apparently clear night, can distort images.<br />
If an image appears fuzzy and ill-defined, back off to a low-power eyepiece<br />
for a more well-resolved image.<br />
• The Barlow lens included with your telescope triples the eyepiece magnification.<br />
See "APPENDIX A," page 38 for more information.<br />
• Once centered, an object can be focused by turning one of the knobs of the<br />
focusing mechanism (17, Fig. 2b). Notice that when observing astronomical<br />
objects, the field of view begins to slowly drift across the eyepiece field. This<br />
motion is caused by the rotation of the Earth on its axis. Objects appear to move<br />
through the field more rapidly at higher powers. See "APPENDIX B," page 39, for<br />
detailed information. Lesson 6 will explain how you can counteract the drift in the<br />
field of view.<br />
page 11
7<br />
6<br />
8<br />
5<br />
9<br />
4<br />
10<br />
Fig. 11: Motor drive system assembly.<br />
1. R.A. Worm Shaft<br />
2. (R.A. Axis) Plastic Adapter<br />
3. Aluminum Shaft<br />
4. Set Screw<br />
5. Circular Housing containing<br />
notched plastic shaft<br />
6. Battery Pack Connector<br />
page 12<br />
11<br />
3<br />
Key to Figure 11<br />
2<br />
1<br />
13<br />
12<br />
7. LED<br />
8. R.A. Motor Drive<br />
9. Handbox (HBX) Port<br />
10. Dec Motor Drive<br />
11. R.A. Lock<br />
12. Dec Worm Shaft<br />
13. Set Screws
2<br />
3<br />
Fig. 12a: Plastic adapter<br />
assembly.<br />
1. Plastic adapter<br />
2. Protrusions<br />
3. Aluminum shaft<br />
5<br />
6<br />
Fig. 12b: Motor drive<br />
assembly.<br />
4. Motor drive<br />
5. Recesses<br />
6. Notched shaft<br />
5<br />
2<br />
1<br />
4<br />
Observe the World Around You<br />
Practice observing during the day, when it is easier to become familiar with the controls<br />
of your telescope.<br />
1. Loosen the telescope’s R.A. lock (26, Fig. 2b) and Dec lock (27, Fig. 2b).<br />
2. Move your telescope to observe distant street signs, mountains, trees, and other<br />
structures. Use your viewfinder to to help site-in an object.<br />
3. When the object is centered in the viewfinder’s crosshairs, remember to re-tighten<br />
the R.A. and Dec locks.<br />
4. Center the object in your eyepiece. Practice focusing with your eyepieces.<br />
5. Once you get a feel for how your telescope moves and focuses, try to view<br />
something more challenging, like a bird or a distant moving train.<br />
LESSON 5: Observing Using Starfinder's Arrow Keys<br />
Before you can observe using Starfinder's Arrow keys, the motor drive assemblies<br />
and the Starfinder handbox must be attached to the telescope.<br />
Motor Drive System and Starfinder Handbox Installation<br />
To attach the Electronic Motor Drive System to the telescope, follow this procedure:<br />
1. Locate the plastic adapter (2, Fig. 11) on the R.A. axis (1, Fig. 11). Note the<br />
aluminum shaft (3, Fig. 12a) inside the adapter and the four small protrusions (2,<br />
Fig. 12a) on the adapter's circular edge.<br />
2. Locate the components of the R.A. motor drive (8, Fig. 11). Note the notched<br />
plastic shaft (6, Fig. 12b) inside the circular housing on the side of the motor drive.<br />
Also note the four small recesses (5, Fig. 12b) inside this housing.<br />
NOTE: The R.A. motor drive has a connector for the battery pack that is<br />
marked "15v."<br />
3. Attach the R.A. motor drive to the R.A. axis: Align and slide the notch (6, Fig.<br />
12b) of the plastic shaft of the R.A. motor drive over the aluminum shaft (3, Fig.<br />
12a) inside the plastic adapter on the R.A. axis. Orient the R.A. motor drive box<br />
as depicted in 8, Fig. 11.<br />
4. Rotate the R.A. motor drive until you feel the four protrusions (2, Fig. 12a) on the<br />
plastic adapter slide into the four matching recesses (5, Fig. 12b) inside the motor<br />
drive.<br />
5. Tighten the set screws: Tighten the two set screws (4, Fig. 11) to a firm feel only<br />
with the supplied 1.5mm hex key. The set screws come attached to the motor<br />
drive.<br />
6. Repeat the process to attach the Dec electronic motor drive to the Dec axis (10,<br />
Fig. 11). Orient the Dec motor drive box as depicted in 10, Fig. 11.<br />
7. Attach Starfinder: Plug Starfinder’s coiled cord into the connector (9, Fig. 11) on<br />
the Dec motor box.<br />
8. Install batteries: Install ten (user-supplied) AA-size batteries into the separate<br />
battery pack and plug the battery pack into the connector (16, Fig. 1) on the R.A.<br />
motor box (6, Fig. 11). The battery pack case has a strip of adhesive attached to<br />
it. Remove the protective covering from the adhesive and attach the case to the<br />
tripod, if so desired.<br />
The Electronic Motor Drive System is now ready for operation.<br />
page 13
NOTE:<br />
Press and hold the<br />
Up Arrow key to<br />
speed up the scroll<br />
speed of the display<br />
or press and hold the<br />
Down Arrow key to<br />
slow down the scroll<br />
speed. When the<br />
display is scrolling at<br />
a speed that is<br />
comfortable for<br />
reading, release the<br />
key.<br />
NOTE: Starfinder<br />
only prompts you to<br />
enter Country (or<br />
State) and City as<br />
described in steps 3,<br />
4, and 5, the first time<br />
it is activated. These<br />
prompts do not<br />
appear again, unless<br />
you reset Starfinder<br />
(see "RESET," page<br />
32).<br />
However, if you need<br />
to enter this<br />
information (e.g., you<br />
change your<br />
geographic location),<br />
you need not perform<br />
a Reset, which<br />
erases user entered<br />
data, such as<br />
Landmarks and User<br />
Objects. You can<br />
change the location<br />
information by using<br />
the Site option of the<br />
Setup menu. See<br />
"SITE," page 32, for<br />
detailed information.<br />
Activate the Arrow Keys<br />
This procedure describes how to activate<br />
Starfinder's Arrow keys:<br />
1<br />
1. After Starfinder's cord is plugged in and the<br />
batteries are installed, a copyright message<br />
lights on the Starfinder LCD display (1, Fig.<br />
2<br />
4<br />
13).<br />
3<br />
2. A message warning not to look at the Sun<br />
5<br />
scrolls across the display. Press the key<br />
prompted by Starfinder to acknowledge that<br />
8<br />
the Sun warning has been read and<br />
understood.<br />
6<br />
7<br />
3. Press the ENTER (2, Fig. 13) key repeatedly<br />
until "Country/State" appears on the display.<br />
(Ignore the prompts requesting Date and<br />
Time – these functions will be explained in<br />
Lesson 7, but are not necessary for the<br />
current lesson.)<br />
9<br />
Fig. 13: The Starfinder handbox.<br />
4. Use the Scroll keys (6 and 7, Fig. 13) to cycle through the database of countries,<br />
states, and provinces. Press ENTER when the correct location displays.<br />
5. Starfinder then prompts you to enter the nearest city (listed alphabetically) to the<br />
observing site. Use the Scroll keys to cycle through the database of cities. Press<br />
ENTER when the correct city appears on screen. The display then reads "Align:<br />
One Star." You now can use Starfinder's Arrow keys to move the telescope to<br />
observe.<br />
NOTE: If you go past the "Align: One Star" (or any other menu display you<br />
wish to select), press MODE to return to the previous display(s).<br />
6. Press the Arrow keys (5, Fig. 13) to slew (move) the telescope up, down, right, or<br />
left. You can slew (move) the telescope at different speeds.<br />
Slew Speeds<br />
Starfinder has seven slew (move) speeds. Each speed has been calculated to accomplish<br />
specific functions. Pressing the Speed/? key (8, Fig. 13) briefly changes the slew<br />
speed, which is shown briefly on Starfinder’s display as the key is pressed. Each press<br />
decreases the slew speed down one level and then cycles back to the fastest speed.<br />
NOTE: Pressing the Speed/? key briefly changes the slew speed. Holding<br />
down the Speed/? key longer (one to two seconds) accesses the Help<br />
function.<br />
The seven available speeds are:<br />
Speed 1 Max = 240 x sidereal (60 arc-min/sec or 1°/sec)<br />
Speed 2 0.5° = 120 x sidereal (30 arc-min/sec or 0.5°/sec)<br />
Speed 3 64X = 64 x sidereal (16 arc-min/sec or 0.27°/sec)<br />
Speed 4 32X = 32 x sidereal (8 arc-min/sec or 0.13°/sec)<br />
Speed 5 16X = 16 x sidereal (4 arc-min/sec or 0.067°/sec)<br />
Speed 6 8X = 8 x sidereal (2 arc-min/sec or 0.033°/sec)<br />
Speed 7 2X = 2 x sidereal (0.5 arc-min/sec or 0.008°/sec)<br />
page 14
Fig. 14: Latitude dial.<br />
Fig. 15: Dec setting<br />
circle.<br />
Speed 1: Fastest speed to move the telescope from one point in the sky to another.<br />
Speeds 2 or 3: Best used for the rough centering of an object in the eyepiece.<br />
Speeds 4 or 5: Enables the centering an object in the field of a low-to-moderate power<br />
eyepiece such as the standard H 25mm<br />
Speeds 6 or 7: Best used for the fine centering of an object in the field of view of a<br />
high-power eyepiece such as the standard SR 4mm.<br />
Observe the Moon<br />
Point your telescope at the Moon (note that the Moon is not visible every night) and<br />
practice using the Arrow keys and the slew speeds to view different features. The<br />
Moon contains many interesting features, including craters, mountain ranges, and<br />
fault lines. The best time to view the Moon is during its crescent or half phase. Sunlight<br />
strikes the Moon at an angle during these periods and adds a depth to the view. No<br />
shadows are seen during a full Moon, causing the overly bright surface to appear flat<br />
and rather uninteresting. Consider the use a neutral density Moon filter when observing<br />
the Moon. Not only does it cut down the Moon's bright glare, but it also enhances<br />
contrast, providing a more dramatic image.<br />
NOTE: Do not look through the telescope's eyepiece or viewfinder while it<br />
is rapidly moving. Children should always have adult supervision while<br />
observing.<br />
LESSON 6: Tracking Objects<br />
As the Earth rotates beneath the night sky, the stars appear to move from East to<br />
West. The speed at which the stars move is called the sidereal rate. You can setup<br />
your telescope to move at the sidereal rate so that it automatically tracks the stars and<br />
other objects in the night sky. The tracking function automatically keeps an object<br />
more or less centered in the telescope’s eyepiece.<br />
To automatically track objects, you must first Polar align the telescope and then select<br />
"Targets: Astronomical" from the Starfinder Setup menu.<br />
To Polar Align the Telescope:<br />
1. Level the mount, if necessary, by adjusting the length of the three tripod legs.<br />
2. Release the Azimuth lock (24, Fig. 2b) of the tripod, so that the entire telescope<br />
may be rotated in a horizontal direction. Rotate the telescope until it points due<br />
North. Then re-tighten the lock. Use a compass or locate Polaris, the North Star<br />
(see Fig. 31, page 40), as an accurate reference for due North.<br />
3. Determine the latitude of your observing location. See "APPENDIX D: HELPFUL<br />
CHARTS," page 43, for a list of latitudes of major cities around the world. Release<br />
the latitude lock (23, Fig. 2b) and tilt the telescope mount with the latitude<br />
adjustment knob (16, Fig. 2a) so that the pointer indicates the correct latitude of<br />
your viewing location on the latitude scale (Fig. 14). Re-tighten the latitude lock<br />
(23, Fig. 2b).<br />
4 Unlock the Dec Lock (27, Fig. 2b). Rotate the Optical Tube Assembly until the Dec<br />
setting circle pointer (Fig. 15) points at 90°.<br />
5. If steps 1 through 4 above were performed with reasonable accuracy, your<br />
telescope is now sufficiently well-aligned to Polaris, the North Star, for you to begin<br />
making observations.<br />
Once the mount has been Polar-aligned as described above, the latitude angle need<br />
not be adjusted again, unless you move to a different geographical location (i.e., a different<br />
latitude). The only Polar Alignment procedure that needs to be performed each<br />
time you observe is to point the telescope due North, as described in step 2 above.<br />
IMPORTANT NOTE: For almost all astronomical observing requirements,<br />
approximate settings of the telescope’s latitude and azimuth axis are<br />
acceptable. Do not allow undue attention to precise Polar Alignment of the<br />
telescope to interfere with your basic enjoyment of the instrument.<br />
page 15
Observe a Star using the Automatic Tracking Feature<br />
In this example, Starfinder's Arrow keys are used to find a star, and then Starfinder's<br />
tracking capability automatically keeps the star centered in your telescope's eyepiece.<br />
1. If you have just completed Lesson 5, Starfinder's display now reads "Align: One<br />
Star." Go to Step 2.<br />
If you have not used Starfinder yet or have just plugged it into the HBX port,<br />
perform the procedure described in "ACTIVATE THE ARROW KEYS," page 14.<br />
Then go to Step 2 of this procedure.<br />
If you have been using Starfinder to perform other functions and the display does<br />
not read "Align: One Star," follow these steps:<br />
a. Press MODE (3, Fig. 13) repeatedly until "Select Item: Object" displays.<br />
b. Press the Scroll Up key (6, Fig. 13) once. "Select Item: Setup" displays.<br />
c. Press ENTER (2, Fig. 13). "Setup: Align" displays. Go to Step 3.<br />
2. Press MODE (3, Fig. 13). "Setup: Align" displays.<br />
3. Press the Scroll Down key repeatedly until "Setup: Targets" displays. Press<br />
ENTER (2, Fig. 13).<br />
4. "Targets: Terrestrial" displays. Press one of the Scroll keys once (6 or 7, Fig. 13).<br />
"Targets: Astronomical" now displays.<br />
5. If you have not already done so, Polar align your telescope as described on page<br />
15.<br />
6. Use the Arrow keys (5, Fig. 13) to locate a bright star in the night sky. Use the<br />
viewfinder to help line up on the star. You may choose any unobstructed, bright<br />
star for the purposes of this example. Use Starfinder's Arrow keys to center the<br />
star in the eyepiece. Once the star is centered, press ENTER to select<br />
"Astronomical." The telescope's tracking motors then engage. It may take the<br />
tracking motors several seconds to begin tracking. When they do, it may be<br />
necessary to once again center the star in the eyepiece. The tracking motors will<br />
then keep the star you have chosen in the center of the eyepiece.<br />
7. Press and hold the ENTER key for a few seconds and then release to stop<br />
tracking. You may repeat the procedure, if so desired, to locate another star or<br />
object using the Arrow keys. Then press ENTER to re-engage the tracking motors.<br />
LESSON 7: Using Starfinder's GO TO Capabilities<br />
This lesson describes how to make observations using various Starfinder features and<br />
menus. But before you can use Starfinder's GO TO capabilities, you must first:<br />
• Learn how Starfinder's keys move through the menus<br />
• Initialize Starfinder<br />
• Train the drive<br />
• Polar align the telescope, if you have not already done so (see Lesson 6)<br />
• Select "Align: One Star" from Starfinder's menus<br />
Moving Through Starfinder’s Menus<br />
Starfinder's menus are organized for quick and easy navigation.<br />
• Press ENTER to go deeper into Starfinder menu levels.<br />
• Press MODE to move back toward the top menu level.<br />
• Press the Scroll keys to move up and down through the options available for each<br />
level.<br />
• Press the Arrow keys to enter characters and digits.<br />
page 16
Initializing Starfinder<br />
This exercise describes how to initialize Starfinder.<br />
Initialization is a procedure that enables Starfinder to operate correctly. When you first<br />
use Starfinder, it doesn't yet "know" the location of the observing site or the time or<br />
date of the observation session. During the Initialization procedure, you will enter this<br />
information. Starfinder then uses the information to calculate the location of celestial<br />
objects (such as stars and planets) and to move your telescope correctly for various<br />
operations.<br />
NOTE: Normally, you will enter the Time and Date at the beginning of each<br />
observing session, but you will only perform the full Initialization procedure<br />
(i.e., entering the Location information as well as the Time and Date) the<br />
first time you use Starfinder or after performing a Reset. Fig. 16 depicts an<br />
example of Starfinder Initialization procedure.<br />
NOTE: See "STARFINDER CONTROLS," page 23, for a detailed<br />
description of Starfinder's Keys.<br />
1. Make sure that the telescope is assembled correctly, and that the batteries and the<br />
motor drives are installed as described previously.<br />
2. Plug Starfinder's cord into the HBX port, as previously described, or if Starfinder<br />
is already plugged in, unplug it briefly and then plug it back in again.<br />
3. A copyright message lights on Starfinder’s LCD display and a message warning<br />
not to look at the Sun scrolls across the display. Press the key prompted by<br />
Starfinder to acknowledge the message has been read and understood.<br />
4. The Getting Started menu displays a scrolling message with two choices:<br />
a. Press and hold down the Speed/? key (8, Fig. 13) for about 2 seconds for<br />
information on Starfinder functions and controls. When finished, press MODE<br />
(3, Fig. 13) to exit Help, or,<br />
b. Press ENTER (2, Fig. 13) to bypass the Help tutorial and continue with<br />
Initialization.<br />
5. Starfinder then prompts you to enter the current date:<br />
a. To enter numbers, press either the Up or Down Arrow key (5, Fig. 13) to scroll<br />
through numbers 0 through 9. After the desired number is displayed, use the<br />
Right Arrow key (5, Fig. 13) to move the cursor from one number to the next<br />
in the day display (or use to Left Arrow key to move in the other direction<br />
across the display, if necessary).<br />
b. Use the Right Arrow key (5, Fig. 13) to move the cursor to the month. Use the<br />
Scroll keys (8, 9, Fig. 13) to cycle through the list of months. When the current<br />
month is displayed, use the Right Arrow (5, Fig. 13 to move the cursor to the<br />
year.<br />
c. Use the Up and Down Arrow keys to enter all four digits of the current year.<br />
Use the Right Arrow key to move the cursor from one number to the next.<br />
d. Press ENTER (2, Fig. 13) when the entire date has been entered.<br />
6. Starfinder then prompts you to enter the current time. Use the Up and Down Arrow<br />
keys to enter digits and the Right and Left Arrow keys move the cursor across the<br />
screen as described in the previous step. Enter the current time (use a "0" for the<br />
first digit if less than 10). Use the Up Arrow key (7, Fig. 13) to scroll through "AM,"<br />
"PM,'" or "blank." The "blank" option selects the 24-hour (i.e., military time) clock.<br />
Then press ENTER to start the clock.<br />
NOTE: When multiple choices are available within a menu option, the<br />
option that is currently selected is usually displayed first and highlighted by<br />
a right pointing arrow (>).<br />
page 17
Note:<br />
The following parameters<br />
are used in the example<br />
depicted in Fig. 16:<br />
Date: March 26, 2001<br />
Time: 11:47 PM<br />
Location: Irvine,<br />
California<br />
In this example, it is<br />
assumed that the<br />
Country/State and City<br />
data has not yet been<br />
entered into Starfinder.<br />
7. Starfinder then prompts you to enter the status of Daylight Savings Time. Press<br />
one of the Scroll keys to toggle between the YES/NO settings. Select the desired<br />
setting by pressing ENTER.<br />
NOTE: Daylight Savings Time may be referred to by a different name in<br />
various areas of the world.<br />
8. If you have previously entered the Country/State and City of your observing site<br />
(as described in "ACTIVATE THE ARROW KEYS," page 14), go to step 9. If you<br />
have not entered this information, perform the following steps:<br />
a. Starfinder prompts you to enter the Country or State (listed alphabetically) of<br />
the observing site. Use the Scroll keys to cycle through the database of<br />
countries, states, and provinces. Press ENTER when the correct location<br />
displays.<br />
b. Starfinder then prompts you to enter the nearest city (listed alphabetically) to<br />
the observing site. Use the Scroll keys to cycle through the database of cities.<br />
Press ENTER when the correct city appears on screen.<br />
NOTE: Starfinder only prompts you to enter Country/State and City the first<br />
time it is activated. These prompts do not appear again, unless you reset<br />
Starfinder (see "RESET," page 32). However, if you change your<br />
geographic location, you can change the location information by using the<br />
Site option of the Setup menu. See "SITE," page 32, for detailed<br />
information.<br />
9. System Initialization is complete and the display reads "Align: One Star." After<br />
performing the Initialization procedure, you MUST train your drive. Continue to<br />
page 19.<br />
(00) <strong>Meade</strong> (1.0)<br />
S T A R F I N D E R<br />
Initializing. . .<br />
WARNING<br />
LOOKING AT . . .<br />
Press the<br />
appropriate<br />
key<br />
Getting Started<br />
For a Detailed...<br />
ENTER<br />
Enter Date:<br />
01-Jan-2000<br />
Enter Date:<br />
26-Mar-2001<br />
2 (2X)<br />
(1X)<br />
6 (5X)<br />
(1X)<br />
Mar (2X)<br />
2000 (4X)<br />
2001 (1X)<br />
page 18<br />
ENTER<br />
Enter Time:<br />
08:00:00PM (default)<br />
1 (1X)<br />
Enter Time:<br />
11:47:00PM<br />
ENTER<br />
(1X)<br />
1 (3X)<br />
(1X)<br />
4 (4X)<br />
7 (7X)<br />
Daylight Savings<br />
>NO<br />
Fig. 16: Example of the Initialization procedure.<br />
PM (default)<br />
ENTER<br />
Country/State<br />
AFGHANISTAN<br />
Country/State<br />
CALIFORNIA<br />
Nearest City<br />
ALAMEDA NAS<br />
Nearest City<br />
IRVINE<br />
Setup<br />
Align<br />
ENTER<br />
ENTER<br />
Multiple<br />
Presses<br />
Multiple<br />
Presses
Training the Drive<br />
Next, train the drive using Starfinder. Perform this procedure the first time you use<br />
Starfinder with your telescope, after a Reset, or if you are experiencing any pointing<br />
accuracy problems. Training the drive gives your telescope a higher degree of pointing<br />
accuracy.<br />
NOTE: Use a terrestrial object, such as a telephone pole or lamp post, to<br />
train the drive. It is best to perform this procedure during the daytime.<br />
Complete this exercise once every 3 to 6 months to maintain the highest<br />
level of telescope pointing accuracy.<br />
1. If you have just performed "INITIALIZING STARFINDER," go to step 2.<br />
If you have not yet initialized Starfinder, go to page 17 and follow the procedure<br />
described in "INITIALIZING STARFINDER." Then go to to step 2 of this procedure.<br />
2. Keep pressing MODE until "Select Item: Object" displays.<br />
3. Press the Scroll Up key once. "Select: Item: Setup" displays.<br />
4. Press ENTER to access the Setup menu. "Setup: Align" displays.<br />
5. Keep pressing the Scroll Up key until "Setup: Telescope" displays.<br />
6. Press ENTER to access the Telescope menu. "Telescope: Focal Length" displays.<br />
7. Keep pressing the Scroll Down key until "Telescope: Train Drive" displays.<br />
8. Press ENTER to choose the Train Drive option. "Train Drive: RA Train" displays.<br />
9. Press ENTER to begin RA (Right Ascension or horizontal) training.<br />
10. "Drive Setup: For this...." begins to scroll across the display. This is a reminder to<br />
point your telescope at a terrestrial object. Press ENTER when the telescope is<br />
pointing at the desired terrestrial object.<br />
11. "Center reference object" displays. Center your target object using the Arrow keys.<br />
When centered, press ENTER.<br />
12. The telescope slews and "Press > until it is centered" displays. Press the Right<br />
Arrow key until the target is centered again. Then press ENTER.<br />
NOTE: If you pass the object when pressing the Arrow key, you cannot slew<br />
the telescope back in the other direction. Press MODE until "Train Drive: RA<br />
Train" displays and begin the procedure over again.<br />
13. The telescope slews and "Press < until it is centered" displays. Press the Left<br />
Arrow key until the target is centered again. Then press ENTER.<br />
14. "Train Drive: RA Train" displays again. Press the Scroll Down key and "Train Drive:<br />
Dec Train" displays. Press ENTER to begin Dec (Declination or vertical) training.<br />
15. "Drive Setup: For this...." begins to scroll across the display. This is another<br />
reminder to point your telescope at a terrestrial object. Press ENTER when the<br />
telescope is pointing at the desired terrestrial object.<br />
16. "Center reference object" displays. Center your target object using the Arrow keys.<br />
When centered, press ENTER.<br />
17. The telescope slews and "Press until it is centered" displays. Press the Up Arrow<br />
key until the target is centered again. Then press ENTER.<br />
18. The telescope slews and "Press until it is centered" displays. Press the Down<br />
Arrow key until the target is centered again. Then press ENTER. "Train Drive: Dec<br />
Train" displays again. You have now completed this procedure. Continue onto the<br />
next procedure, "Align Your Telescope Using Starfinder."<br />
page 19<br />
><br />
>
Align Your Telescope Using Starfinder<br />
After completing the "Train the Drive" procedure, align your telescope using Starfinder.<br />
The fastest and easiest way to start observing with Starfinder's Go To capabilities is to<br />
align your telescope using One-Star (Polar) Alignment. An alternate method, Two-Star<br />
alignment, is described later in this manual.<br />
1. With "Train Drive: Dec Train" displayed (or scroll to this menu, if necessary), keep<br />
pressing MODE until "Select Item: Setup" is displayed. Press ENTER.<br />
2. "Setup: Align" displays. Press ENTER. "Align: One Star" displays. Press ENTER.<br />
3. "German North" displays and a scrolling message prompts you to Polar align your<br />
telescope. See "TO POLAR ALIGN THE TELESCOPE," page 15, for a description<br />
of how to Polar align your telescope. Press ENTER after you finish the alignment<br />
procedure.<br />
4. "Ctr. Polaris" displays and the telescope begins to slew. Starfinder beeps and<br />
"Adjust Mount" displays after the telescope finishes slewing.<br />
5. A scrolling message prompts you to unlock both the Latitude Lock (23, Fig. 2b)<br />
and the Azimuth Lock (24, Fig. 2b).<br />
6. <strong>Manual</strong>ly rotate (do NOT use Starfinder's Arrow keys!) the telescope until Polaris<br />
is centered once again in the eyepiece. Then re-lock both the Latitude and<br />
Azimuth Locks and press ENTER.<br />
7. Starfinder then chooses another star from its database and the telescope slews to<br />
the star for alignment. It may not appear in the field of view in the eyepiece. The<br />
alignment star should be easily recognized and be the brightest star in the area of<br />
the sky where the telescope is pointing. Use the Arrow keys to move the telescope<br />
until the star is visible and centered in the eyepiece. When the star is centered,<br />
press ENTER.<br />
Another method to find the alignment star if it does not appear in the eyepiece is<br />
to perform a "spiral search." If the alignment star is not visible in the eyepiece<br />
when the telescope finishes its search, press GO TO and the telescope starts<br />
slewing in a spiral pattern at a very slow speed around the search area. Look<br />
through the eyepiece and when the object does become visible, press MODE to<br />
stop the spiral search. Then use the Arrow keys to center the object and press<br />
ENTER to complete the alignment procedure.<br />
NOTE: Starfinder locates alignment stars based on the date, time, and<br />
location entered. The alignment stars may change from night to night. All<br />
that is required is for the observer to center the selected star in the eyepiece<br />
when prompted.<br />
Check Mount<br />
It is possible for the <strong>4504</strong> telescope to move in such a way that the telescope tube<br />
might interfere with the mount while slewing. Starfinder has a feature called "Check<br />
Mount" to alert you of this possibility.<br />
If "Check Mount" displays, inspect the assembly to see if it's moving in such a way that<br />
the mount, tube, levers, motors, etc., might catch on or collide with each other. Also<br />
inspect the cable to see if it might become tangled. If any of these possibilities seem<br />
likely to occur, press MODE to abort the current operation of the telescope. If they do<br />
not seem likely, press GO TO to continue with the current operation. Press any key<br />
during slewing to stop the telescope.<br />
If "Check Mount" displays during alignment, and interference seems likely, press MODE.<br />
Select another alignment star by pressing one of the Scroll keys to select the next alignment<br />
star in the database. Repeat this procedure as necessary to align the telescope.<br />
To abort the alignment procedure, press and hold MODE for about two seconds.<br />
page 20
Which One’s the Alignment Star?<br />
If Starfinder has chosen an alignment star that you are unfamiliar with, how can you<br />
be sure if the star in your eyepiece is really the alignment star?<br />
The rule of thumb is that an alignment star is usually the brightest star in that area of<br />
the sky. When you view an alignment star in an eyepiece, it will standout dramatically<br />
from the rest of the stars in that portion of the sky.<br />
If you have an obstruction, such as a tree or a building blocking your view of the alignment<br />
star, or if you have any doubts at all about the star that has been chosen, no<br />
problem. Just press the Scroll Down key and Starfinder will find another star to align<br />
upon.<br />
Go To Saturn<br />
After performing the Train the Drive and the One-Star alignment procedures, the motor<br />
drive begins operating and the telescope is aligned for a night of viewing. Objects in<br />
the eyepiece should maintain their position even though the Earth is rotating beneath<br />
the stars.<br />
IMPORTANT NOTE: Once aligned, only use the Starfinder menus or Arrow<br />
keys to move the telescope. Do not loosen the telescope locks, or move the<br />
base manually, or alignment will be lost.<br />
This exercise demonstrates how to select an object for viewing from Starfinder’s database,<br />
i.e., Saturn. Note that Saturn is not visible all year long and it may be necessary<br />
for you to choose another object from Starfinder's database. However, the procedure<br />
is identical to the one used for observing Saturn.<br />
1. After the telescope is aligned, “Select Item: Object” displays. Press ENTER. If<br />
“Select Item: Object” is not currently displayed, press MODE repeatedly until it<br />
displays, then press ENTER.<br />
2. “Object: Solar System” displays. Press ENTER.<br />
3. “Solar System: Mercury” displays. Use the Scroll Down key until “Solar System:<br />
Saturn” displays.<br />
4. Press ENTER. “Calculating” displays. Then “Saturn” and a set of coordinates<br />
displays. Saturn’s (and other planets’) coordinates change throughout the year.<br />
5. Press GO TO. “Saturn: Slewing...” displays and the telescope slews until it finds<br />
Saturn. You may need to use the Arrow keys to center Saturn precisely in the<br />
eyepiece. Starfinder then automatically slews (moves) the telescope so that it<br />
tracks Saturn (or whatever other object you may have chosen). Saturn remains<br />
centered in the eyepiece.<br />
Using the Guided Tour<br />
This example demonstrates using “Tonight’s Best” Guided Tour.<br />
1. After observing Saturn, press MODE twice so that “Select Item: Object” displays<br />
again. If “Select Item: Object” is not currently displayed, press MODE repeatedly<br />
until it displays.<br />
2. Press the Scroll Down key twice. “Select Item: Guided Tour” displays.<br />
3. Press ENTER. “Guided Tour: Tonight’s Best” displays. Press ENTER to select this<br />
tour.<br />
NOTE: If you wish to try out other Guided Tours, press the Scroll Down key<br />
to scroll through other tour choices. When the tour you wish to select<br />
displays, press ENTER.<br />
page 21
4. “Tonight’s Best: Searching...” displays. After calculating, “Tonight’s Best: Jupiter”<br />
displays.<br />
NOTE: Different objects may be displayed on a tour list on any given night.<br />
Press ENTER and then use the Scroll keys to display information about the object.<br />
Press Mode to exit the information display. Press GO TO to move the telescope<br />
to the object.<br />
5. Press MODE to return to the Tour list. Press the Scroll keys to scroll through the<br />
list. Press ENTER when you find the next object you wish to observe.<br />
6. Press MODE and hold for about two seconds to leave the Guided Tour menu.<br />
Some Observation Tips<br />
• Avoid touching the eyepiece while observing through the telescope. Vibrations<br />
resulting from such contact will cause the image to move. Likewise, avoid<br />
observing sites where ground-based vibrations may resonate the tripod. Viewing<br />
from the upper floors of a building may also introduce image movement.<br />
• Allow your eyes a few minutes to become adapted to the dark before attempting<br />
any serious astronomical observations. Use a red filtered flashlight to protect your<br />
night vision when reading star maps or inspecting the components of the<br />
telescope.<br />
• Avoid setting up the telescope inside a room and observing through an open<br />
window (or worse yet, a closed window). Images viewed in such a manner may<br />
appear blurred or distorted due to temperature differences between inside and<br />
outside air. Also, it is a good idea to allow your telescope a chance to reach the<br />
ambient (surrounding) outside temperature before starting an observing session.<br />
• Avoid viewing objects low on the horizon. Objects will appear better resolved with<br />
far greater contrast when viewed higher in the sky. If images appear to “shimmer”<br />
in the eyepiece, reduce eyepiece power until the image steadies. This condition is<br />
caused by air turbulence in the upper atmosphere.<br />
You have now completed all the Lessons for the basic operation of your <strong>4504</strong><br />
telescope. All of Starfinder's features perform in the same way as the features<br />
covered in Part 1. Practice these procedures so you can apply them to the<br />
more advanced Starfinder menu features presented in Part 2 of this manual.<br />
page 22
PART TWO: Starfinder Controls and Menus<br />
This section describes how Starfinder operates, including:<br />
• Starfinder's controls<br />
• How to move through Starfinder's menus<br />
• Alignment setups<br />
• Starfinder's Menus<br />
Control of the <strong>4504</strong> is through the operation of the standard-equipment Starfinder<br />
handbox (Fig. 17). Nearly all functions of the telescope are accomplished with just a<br />
few pushes of Starfinder’s buttons. Some of the major features of Starfinder are:<br />
• Automatically move the telescope to<br />
any of the more than 1400 objects<br />
stored in its database, or manually<br />
enter coordinates of any celestial<br />
object.<br />
1<br />
• Take a guided tour of the best celestial<br />
4<br />
objects to view on any given night of<br />
the year.<br />
2<br />
• Access a glossary of astronomical<br />
terms.<br />
5<br />
3<br />
• Calculate which eyepiece to use for<br />
optimal viewing of a celestial object.<br />
Starfinder provides control of virtually every<br />
8<br />
telescope function within a compact hand-<br />
6<br />
7<br />
box. Starfinder has soft-touch keys<br />
designed to have a positive feel. The LCD<br />
(Liquid Crystal Display) is backlit with a red<br />
LED (Light Emitting Diode) for easy viewing<br />
in the dark. The backlit display, key<br />
arrangement, and sequential database<br />
9<br />
make Starfinder extremely user-friendly. Fig. 17: Starfinder controls.<br />
NOTE: Starfinder does not require batteries; the telescope’s battery pack<br />
supplies power to Starfinder.<br />
Starfinder Controls<br />
1 2-Line LCD Display: Provides an interface between Starfinder and the telescope.<br />
Top line: lists the primary category or menu item.<br />
Bottom line: contains a menu option or information about an object or subject,<br />
depending on which function is being performed.<br />
2<br />
ENTER Key: Accesses, in a sequential manner, the next menu or data level in the<br />
Starfinder database (see “HOW STARFINDER’S MENUS WORK,” page 26).<br />
NOTE: If ENTER is pressed for two seconds or more and then released,<br />
Starfinder emits a beep and “ENTER to Sync” is displayed. "ENTER to<br />
Sync" is relevant only after the telescope has been aligned and is pointing<br />
at an object. If the "ENTER to Sync" feature is accessed by mistake, press<br />
MODE to return to the previous screen. See “HIGH PRECISION,” page 32<br />
for more details about this feature.<br />
page 23
6<br />
3<br />
4<br />
5<br />
7<br />
MODE Key: Returns to the previous menu or data level in the Starfinder database<br />
until the top level, “Select Item," is reached. The MODE key is similar to the<br />
ESCAPE key on a computer.<br />
NOTE: Pressing MODE while in the Select Item level moves Starfinder to<br />
the topmost screen: "Select Item: Object."<br />
NOTE: If MODE is pressed and held for two seconds or more, the following<br />
information is then available using the Scroll keys (6 and 7, Fig. 17):<br />
• Right Ascension and Declination coordinates<br />
• Altitude and Azimuth coordinates<br />
• Local Time and Local Sidereal Time (LST)<br />
• Timer and Alarm Status<br />
Press MODE again to return to the previous menu.<br />
GO TO Key: Slews the telescope to the coordinates of the currently selected<br />
object. While the telescope is slewing, the operation may be aborted at any time<br />
by pressing any key except GO TO. Pressing GO TO again resumes the slew to<br />
the object.<br />
The GO TO key also allows you to perform a "spiral search." A spiral search is<br />
useful when the telescope slews to an object, but that object is not visible in the<br />
eyepiece after the telescope finishes it search. (This sometimes occurs during an<br />
alignment procedure. See "ALIGN YOUR TELESCOPE USING STARFINDER,"<br />
page 20.) Press GO TO when the slew is finished and the telescope starts slewing<br />
in a spiral pattern at a very slow speed around the search area. Look through the<br />
eyepiece and when the object does become visible, press MODE to stop the spiral<br />
search. Then use the Arrow keys to center the object.<br />
Arrow Keys: Slew the telescope in a specific direction (up, down, left, and right),<br />
at any one of seven different speeds (speed selection is explained in “SLEW<br />
SPEEDS,” page 14). The following functions are also available with the Arrow<br />
keys:<br />
• Data Entry: Use the Up and Down Arrow keys to Scroll through the letters of<br />
the alphabet and numerical digits. The Down Arrow key starts with the letter "A"<br />
and the Up Arrow key starts with the digit "9." Use the Left and Right Arrow keys<br />
to move the blinking cursor left and right across the LCD display.<br />
• Polar Alignment: Use the Left and Right Arrow keys to move the telescope.<br />
The Left Arrow key rotates the telescope counterclockwise on the Right<br />
Ascension axis, while the Right Arrow key rotates it clockwise.<br />
Scroll Keys: Access database options within a selected menu. The menu is<br />
displayed on the first line of the screen. Options within the menu are displayed,<br />
one at a time, on the second line. Press the Scroll keys to move through the<br />
options. Press and hold a Scroll key to move quickly through the options.<br />
The Scroll keys also scroll through the letters of the alphabet and numerical digits.<br />
NOTE: The Scroll Down key and the Down Arrow key move forward through<br />
the alphabet & digits (A to Z, 0-9) and the Scroll Up key and the Up Arrow<br />
key move backward (Z to A, 9-0).<br />
Press and hold the Up Arrow key to speed up the rate at which a message scrolls<br />
across the display. Press and hold the Down Arrow key to slow down the scrolling<br />
speed. When the display is scrolling at a speed that is comfortable for reading,<br />
release the Scroll key.<br />
page 24
8<br />
9<br />
Speed/? Key: Briefly pressing the Speed/? key cycles through the seven slew<br />
speeds that move the telescope (see “Slew Speeds,” page 14).<br />
NOTE: Pressing the Speed/? key briefly changes the slew speed. Holding<br />
down the Speed/? key longer (one to two seconds) accesses the Help<br />
function.<br />
The Speed/? key also accesses the "Help" file. "Help" provides on-screen<br />
information on how to accomplish whatever task is currently active.<br />
Hold down the Speed/? key and then follow the prompts on the display to access<br />
details of Starfinder functions in the Help feature. The Help system is essentially<br />
an on-screen instruction manual.<br />
If you have a question about a Starfinder operation (i.e., INITIALIZATION,<br />
ALIGNMENT, etc.), hold down the Speed/? key and follow the directions that scroll<br />
on the second line of the LCD screen. When a word appears in [brackets], press<br />
ENTER to access the word in the Starfinder Glossary. A definition or more detailed<br />
information is displayed. Press MODE to return to the scrolling Starfinder Help<br />
display.<br />
When satisfied with the Help provided, press MODE to return to the original<br />
screen and continue with the chosen procedure.<br />
Coil Cord: To operate, the Starfinder coil cord must be plugged into the HBX port<br />
(9, Fig. 11) of the Dec motor box.<br />
page 25
Select Item:<br />
Setup<br />
UTILITIES<br />
Calculate eyepiece<br />
magnifications; set the<br />
timer for an observing<br />
session; or survey user<br />
landmarks in 30-second<br />
intervals.<br />
SETUP<br />
Quick, easy alignment<br />
permits all telescope<br />
operations with only<br />
a 2-minute setup.<br />
Select Item:<br />
Utilities<br />
GLOSSARY<br />
Discover the world of astronomy<br />
by alphabetically accessing<br />
astronomical terms.<br />
Fig. 18: The Starfinder universe.<br />
OBJECT<br />
Select from over 1400 database objects and<br />
press GO TO to move the telescope automatically to the<br />
object and place it in the telescopic field of view.<br />
How Starfinder's Menus Work<br />
It is important to understand that Starfinder's menu selections are set in a loop. This<br />
means that pressing the Scroll Down key cycles down through all the available options<br />
within a given category and then returns to the first option. The Scroll Up key cycles<br />
up through the options in the opposite order. Note that this capability is a quick way to<br />
get to an option that is near the bottom of the list. The following example demonstrates<br />
this capability.<br />
To navigate to the "Select Item: Setup" menu option when the "Select Item:<br />
Object" menu is displayed:<br />
1. Press the Scroll Down key four times or the Scroll Up key once.<br />
The screen in Fig. 19 displays two lines of information.<br />
The top line shows the current menu level. The second<br />
line displays an option which may be selected within<br />
that menu level. Some options are choices that select<br />
the next menu level down. The Scroll keys move up and<br />
down within the list of available options, showing one<br />
option at a time.<br />
When the desired option is displayed on the second line, press the ENTER key to<br />
choose that option and move down one menu level.<br />
To leave a level (e.g., the wrong menu option is chosen), press the MODE key.<br />
IMPORTANT NOTE: No matter how many menu levels of Starfinder are<br />
traveled, each press of the MODE key moves up a level, until the top menu<br />
level, "Select Item," is reached. Once in the Select Item level, press MODE<br />
to return to the topmost available screen: "Select Item: Object."<br />
Starfinder Navigation Exercise<br />
To demonstrate how the Starfinder menu structure works, the following exercise calculates<br />
the Sunset time so an evening observing session can be planned.<br />
page 26<br />
Select Item:<br />
Object<br />
The Universe of<br />
Starfinder<br />
Select Item:<br />
Glossary<br />
Select Item:<br />
Event<br />
EVENT<br />
Access the time of<br />
an astronomical<br />
event, such as the<br />
rising or setting<br />
times of the Moon.<br />
Select Item:<br />
Guided Tour<br />
GUIDED TOUR<br />
Journey through the<br />
universe as Starfinder<br />
escorts you to the<br />
best celestial objects<br />
at your location.<br />
ENTER<br />
Select Item<br />
Object Select Item<br />
Solar System<br />
Fig. 19: Starfinder levels.
Select Item:<br />
Object<br />
Solar System<br />
Mercury<br />
Etc.<br />
Moon<br />
Asteroids<br />
Comets<br />
Constellations<br />
Andromeda<br />
Etc.<br />
Deep Sky<br />
Named Object<br />
Galaxies<br />
Nebulae<br />
Planetary Neb.<br />
Etc.<br />
Star<br />
Named<br />
SAO Catalog<br />
Double<br />
Etc.<br />
Satellite<br />
Select<br />
Add<br />
Delete<br />
Edit<br />
User Objects<br />
Select<br />
Add<br />
Delete<br />
Edit<br />
Landmarks<br />
Select<br />
Add<br />
Delete<br />
Identify<br />
NOTE: To perform an accurate calculation, Starfinder must be properly<br />
initialized with the current date, time, and location of the observing site.<br />
To enter the current date, time, and location information of your observing<br />
site, see “ INITIALIZE STARFINDER” page 17, before proceeding with this<br />
exercise.<br />
To Calculate Sunset time:<br />
1. Press the MODE key several times, until "Select Item: Object" displays.<br />
2. Press the Scroll Down key once to display the Event option in the Select Item<br />
menu.<br />
3. Press the ENTER key to choose the Event option and move down a menu level.<br />
"Event: Sunrise" displays.<br />
4. Press the Scroll Down key once to display the Sunset option in the Event menu.<br />
5. Press the ENTER key to choose the Sunset option and move down another menu<br />
level.<br />
6. Starfinder calculates the Sunset time based on the current date, time, and<br />
location. Starfinder then displays the time of Sunset.<br />
7. Press MODE once to start moving back up through the Starfinder menu levels.<br />
The first menu level up is Event.<br />
8. Press MODE again to move up another menu level. This is the top menu level,<br />
Select Item.<br />
9. Press MODE again to return to the starting point of "Select Item: Object."<br />
Select Item:<br />
Event<br />
Sunrise<br />
Sunset<br />
Moonrise<br />
Moonset<br />
Moon Phases<br />
Next Full Moon<br />
Next New Moon<br />
Next 1st Qtr<br />
Next 3rd Qtr<br />
Meteor Showers<br />
Quadrantids<br />
Lyrids<br />
Eta Aquarids<br />
Delta Aquarids<br />
Perseids<br />
Orionids<br />
Taurids<br />
Leonids<br />
Geminids<br />
Ursids<br />
Solar Eclipses<br />
Lunar Eclipses<br />
Min. of Algol<br />
Autumn Equinox<br />
Vernal Equinox<br />
Winter Solstice<br />
Summer Solstice<br />
Select Item:<br />
Guided Tour<br />
Tour Objects A...<br />
Tonight's Best<br />
How Far is Far<br />
A Star's Life<br />
Fig. 20: The complete Starfinder menu structure.<br />
page 27<br />
Select Item:<br />
Glossary<br />
Accretion Disk<br />
Etc.<br />
B...<br />
C...<br />
D...<br />
E...<br />
F...<br />
G...<br />
H...<br />
I...<br />
J...<br />
K...<br />
L...<br />
M...<br />
N...<br />
O...<br />
P...<br />
Q...<br />
R...<br />
S...<br />
T...<br />
U...<br />
V...<br />
W...<br />
X...<br />
Y...<br />
Z...<br />
Select Item:<br />
Utilities<br />
Timer<br />
Set<br />
Start & Stop<br />
Alarm<br />
Set<br />
On & Off<br />
Eyepiece Calc.<br />
Field of View<br />
Magnification<br />
Suggest<br />
Display Options<br />
Sun Warning<br />
Getting Started<br />
Brightness Adj.<br />
Contrast Adj.<br />
Battery Alarm<br />
Landmark Survey<br />
Sleep Scope<br />
Park Scope<br />
Select Item:<br />
Setup<br />
Align<br />
One Star<br />
Two Star<br />
Date<br />
Time<br />
Daylight Saving<br />
Telescope<br />
Focal Length<br />
Az/Alt Ratio<br />
Train Drive<br />
Tracking Rate<br />
Reverse L/R<br />
Reverse Up/Dn<br />
Calibrate Motor<br />
High Precision<br />
Targets<br />
Astronomical<br />
Terrestrial<br />
Site<br />
Select<br />
Add<br />
Delete<br />
Edit<br />
Owner Info<br />
Download<br />
Statistics<br />
Reset
Starfinder Menus<br />
Object Menu<br />
Almost all observing with Starfinder is performed using the Object menu. (Note:<br />
Exceptions include Guided Tour and Landmark Survey.) See “GO TO SATURN,” page<br />
20, for an example of observing using the Object menu. Also see “USING THE<br />
GUIDED TOUR,” page 21.<br />
Many Starfinder menu categories contain databases. A Starfinder database is a list of<br />
viewable objects. When one of these objects is selected, Starfinder moves your telescope<br />
(if properly aligned) and points it at the selected object.<br />
Object Menu Options:<br />
Solar System is a database of the eight planets (Earth is not included) in order out<br />
from the Sun, followed by the Moon, asteroids, and comets.<br />
Constellation is a database of all 88 Northern and Southern Hemisphere constellations.<br />
When this menu option is chosen and a constellation name appears on the first<br />
line of the screen, press GO TO once to change the second line to the name of the<br />
brightest star in the constellation. Press GO TO a second time to slew the telescope<br />
to that star. Use the Scroll keys to cycle through the list of stars in the constellation,<br />
from brightest to dimmest.<br />
Deep Sky is a database of objects outside our Solar System such as nebulae, star<br />
clusters, galaxies, and quasars.<br />
Star is a database of stars listed in different categories such as named, double, variable,<br />
or nearby.<br />
User Objects allows the user to define deep-sky objects of specific interest that are<br />
not currently in the Starfinder database. See "APPENDIX C," page 42, for detailed<br />
information.<br />
Landmarks stores the location of terrestrial points of interest in the permanent<br />
Starfinder database.<br />
IMPORTANT NOTE: To use the Landmark function, the telescope must be<br />
located and aligned exactly as when the landmark was added to the<br />
database.<br />
• Select: To select a landmark already in the database, choose the Select option<br />
and scroll through the list. Press ENTER to select a landmark, then press GO TO<br />
and the telescope slews to the object.<br />
• Add: To add a landmark, choose the Add option. Enter the name of the landmark.<br />
Locate the object with the Arrow keys (the telescope must be aligned) and center<br />
the landmark. Press ENTER.<br />
Use the Landmark Survey option in the Utilities menu to sequentially view all landmarks<br />
entered into Starfinder. See "LANDMARK SURVEY," page 32.<br />
Identify is an exciting feature for an observer who wants to scan the night sky and<br />
start exploring.<br />
After the telescope has been properly aligned, use the Starfinder Arrow keys to move<br />
about in the sky, and then follow this procedure:<br />
IMPORTANT NOTE: Only use the Arrow keys to move the telescope during<br />
the Identify procedure. Do not loosen the telescope locks, or move the base,<br />
or alignment will be lost.<br />
page 28
NEVER point the<br />
telescope directly<br />
at or near the<br />
Sun at any time!<br />
Observing the<br />
Sun or an eclipse<br />
of the Sun, even<br />
for the smallest<br />
fraction of a second,<br />
will result in<br />
instant and irreversible<br />
eye damage,<br />
as well as<br />
physical damage<br />
to the telescope<br />
itself.<br />
1. When a desired object is visible in the eyepiece, press MODE until the "Select<br />
Item: Object" menu is displayed.<br />
2. Scroll through the Object menu options until "Object: Identify" displays.<br />
3. Press ENTER to search the database for the identity of the object being observed.<br />
4. If the telescope is not directly on a Starfinder database object, the nearest<br />
database object is located and displayed on the screen. Press GO TO and the<br />
telescope slews to that object.<br />
Event Menu<br />
The Event menu provides access to dates and times of astronomical events. The<br />
Event database includes:<br />
Sunrise and Sunset calculates the time that the Sun rises or sets on the current date.<br />
Find rise and set times for other dates (e.g., a date three months in the past or future)<br />
by entering the new date into the "Setup: Date" menu.<br />
Moonrise and Moonset calculates the time that the Moon rises or sets on the current<br />
date. Find rise and set times for other dates by entering a new date into the "Setup:<br />
Date" menu.<br />
Moon Phases displays the date and time of the next Full, New, 1st Quarter, and 3rd<br />
Quarter Moon.<br />
Meteor Showers provides information on upcoming meteor showers (e.g., the<br />
Perseids, the Leonids, etc.), the dates of the showers, and when they reach maximum.<br />
NOTE: Meteors are fast moving objects that cover large areas of the sky<br />
and are usually best observed with the naked eye.<br />
Solar Eclipse lists upcoming Solar Eclipses, including the date and type (total, annular,<br />
or partial) of eclipse, and the location and time of the first and last contacts of the<br />
Moon's shadow. Use the Scroll Up and Down keys to display the available data.<br />
Lunar Eclipse lists upcoming Lunar Eclipses, including the date and type (total, partial,<br />
penumbral) of eclipse. Use the Scroll Up and Down keys to display the available data.<br />
Min. (Minimum) of Algol is the minimum brightness of the dramatic eclipsing binary<br />
star system, Algol. It is relatively close at a distance of 100 light years. Every 2.8 days<br />
during a 10-hour period, Algol undergoes a major change in apparent magnitude as<br />
one of the two stars passes behind the other. The combined magnitude of the two<br />
stars thus dips from +2.1 to a minimum of +3.4 halfway through the eclipse as the second<br />
star is hidden. Starfinder calculates minimum magnitude time at mid-eclipse.<br />
Autumn and Vernal Equinox calculates the time and date of the fall or spring equinox<br />
of the current year.<br />
Winter and Summer Solstice calculates the time and date of the winter or summer<br />
solstice of the current year.<br />
Glossary Menu<br />
The Glossary menu provides an alphabetical listing of definitions and descriptions for<br />
common astronomical terms and Starfinder functions. Access directly through the<br />
Glossary menu or through hypertext words embedded in Starfinder.<br />
A hypertext word is any word in [brackets], usually found when in the Starfinder Help<br />
function or in a scrolling message such as a description of a planet or star. Press<br />
ENTER whenever a hypertext word is displayed and Starfinder links directly to the<br />
glossary entry for that word.<br />
page 29
To access a hypertext word directly from the Glossary menu, use the Scroll keys to<br />
scroll through the alphabet. Press ENTER on the desired letter. Scroll to the desired<br />
entry, then press ENTER to read the description.<br />
Utilities Menu<br />
The Utilities menu provides access to several extra features within Starfinder, including<br />
a countdown timer and an alarm. The Utilities functions include:<br />
Timer selects a countdown timer. This feature is useful for functions such as astrophotography.<br />
To use the Timer, press ENTER, then choose "Set" or "Start/Stop."<br />
• Set: Enter the time to be counted down (in hours, minutes, and seconds), then<br />
press ENTER.<br />
• Start/Stop: Activates the timer set previously. Use the Scroll keys to toggle<br />
between ON and OFF. When ON is displayed, press ENTER to activate the timer.<br />
When the timer runs out, four beeps sound and the timer is deactivated.<br />
Alarm selects a time for an alarm signal as a reminder. To use the Alarm, press<br />
ENTER, then choose "Set" or "Start/Stop."<br />
• Set: Enter the time of day for the alarm to sound (in hours, minutes, and seconds),<br />
then press ENTER.<br />
• Start/Stop: Activates the alarm set previously. Use the Scroll keys to toggle<br />
between ON and OFF. When ON is displayed, press ENTER to activate the alarm.<br />
When the alarm time arrives, Starfinder beeps. Press ENTER to deactivate the<br />
alarm.<br />
Eyepiece Calc calculates information about an eyepiece for the specific telescope to<br />
which Starfinder is connected:<br />
• Field of View: Scroll through a list of available eyepieces. When an eyepiece is<br />
selected, the field of view is calculated.<br />
• Magnification: Scroll through a list of available eyepieces. When an eyepiece is<br />
selected, the magnification is calculated.<br />
• Suggest: Starfinder calculates and suggests the best eyepiece for viewing, based<br />
on the telescope and the object being viewed.<br />
Display Options enables or disables Starfinder’s two initial displays. If both displays<br />
are disabled, Starfinder begins with the Date display.<br />
• Sun Warning: Turns the Sun warning message on or off.<br />
• Getting Started: Turns the “Getting Started” message on or off.<br />
Brightness Adj: Adjusts the brightness of the display using the Scroll keys. When<br />
complete, press ENTER.<br />
Contrast Adj: Adjusts the contrast of the display using the Scroll keys. When complete,<br />
press ENTER.<br />
NOTE: This feature is usually only required in very cold weather.<br />
Landmark Survey automatically slews the telescope to all user-defined landmarks<br />
with a short pause at each location. Press ENTER to start the survey. While a slew is<br />
in progress, press any key to skip that object and go to the next landmark on the list.<br />
To observe a landmark for a longer period, press MODE when paused on the object<br />
to stop the survey. Press ENTER to restart the survey at the first object on the list.<br />
Sleep Scope is a power saving option that shuts down Starfinder and the telescope<br />
without forgetting its alignment. Press ENTER to activate the Sleep function.<br />
Starfinder goes dark, but the internal clock keeps running. Press any key, except<br />
ENTER, to re-activate Starfinder and the telescope.<br />
page 30
Park Scope is designed for a telescope that is not moved between observing sessions.<br />
Align the telescope one time, then use this function to park the telescope. Next<br />
time it is powered up, enter the correct date and time – and no alignment is required.<br />
Pressing ENTER causes the telescope to move to its pre-determined Park position.<br />
Once parked, the screen prompts you to turn off the power (i.e., unplugging the battery<br />
pack).<br />
IMPORTANT NOTE: When the Park Scope option is chosen and the<br />
display prompts to turn off the telescope power, Starfinder is unable to be<br />
returned to operation without unplugging the battery pack and then<br />
plugging it back in.<br />
Setup Menu<br />
The Setup menu’s primary function is to align the telescope (see "ALIGN YOUR TELE-<br />
SCOPE USING STARFINDER," page 20). However, there are numerous other features<br />
available within Setup. These options include:<br />
Date changes the date used by Starfinder. This function is useful to check events in<br />
the past or future. Example: set the Date for a day three months in the future and then<br />
check the" Select Item: Event" menu for the Sunset time or Moon phase on that date.<br />
See “EVENT MENU,” page 29.<br />
Time changes the time entered into Starfinder. Setting the correct time is critical for<br />
Starfinder to properly calculate locations and events.<br />
Daylight Saving is used to set the status of Daylight Savings time.<br />
NOTE: Daylight Savings Time may be referred to by a different name in<br />
various areas of the world. Check local time to verify.<br />
Telescope accesses the following options:<br />
• Focal Length: Displays the focal length of the selected telescope.<br />
• Az Ratio and Alt Ratio: The Az (Azimuth or horizontal) ratio and Alt (Altitude or<br />
vertical) ratio refers to the gears installed in the telescope motors. Do not alter<br />
these numbers.<br />
• Train Drive: Trains the motors to locate objects with more precision.<br />
NOTE: If you are experiencing any problems with pointing accuracy, follow<br />
the procedure described in “TRAINING THE DRIVE,” page 19, to insure<br />
accurate pointing and tracking.<br />
Tracking Rate: Changes the speed at which the telescope tracks targets in the sky.<br />
a. Sidereal: The default setting for Starfinder; sidereal rate is the standard rate<br />
at which stars move from East to West across the sky due to the rotation of<br />
the Earth.<br />
b. Lunar: Choose this option to properly track the Moon over long observing<br />
sessions.<br />
c. Custom: Allows entry of user-defined tracking rates.<br />
• Reverse L/R: Reverses the functions of the Left and Right Arrow keys (i.e., the<br />
Right key moves the telescope to the left).<br />
• Reverse UP/DOWN: Reverses the functions of the Up and Down Arrow keys (i.e.,<br />
the Up key moves the telescope down).<br />
page 31
Time Zone Shift<br />
Atlantic -4 Hours<br />
Eastern -5 Hours<br />
Central -6 Hours<br />
Mountain -7 Hours<br />
Pacific -8 Hours<br />
Hawaii -10 Hours<br />
Table 1: Time Zone Shift.<br />
• Calibrate Motor: If the telescope motors appear to have a problem, use this<br />
option to retest the motors before doing a Reset. This option is also used if a<br />
Starfinder unit is moved between telescopes to match Starfinder to the telescope.<br />
• High Precision: If High Precision is turned on when looking for a faint celestial<br />
object (i.e., a nebula or galaxy), Starfinder first slews to a nearby bright star and<br />
requests "ENTER to Sync." Center the star in the eyepiece, then press ENTER.<br />
At that point the telescope has a high precision alignment to that part of the sky<br />
and it then slews to the object that was originally requested.<br />
Targets switches between astronomical targets and terrestrial targets. If<br />
"Astronomical" is selected, the telescope tracking motor is activated. If "Terrestrial" is<br />
selected, the tracking motor is turned off. See "OBSERVE A STAR USING THE<br />
AUTOMATIC TRACKING FEATURE," page 16, for more information.<br />
Site provides access to the following options:<br />
• Select: Displays the currently selected observing site and also allows you to<br />
select other sites you have entered into a user-defined database (see "Add"<br />
below). Use the Scroll keys to cycle through all available sites in this database.<br />
Press ENTER when the site you wish to select displays. Use this option when you<br />
move to a different geographic location.<br />
NOTE: Only the site that is entered during Initialization (see page 17) will be<br />
displayed in this database until other sites are entered with the "Add" option.<br />
• Add: Allows you to add new observing sites to the database (up to six sites may<br />
be stored). Scroll through the list of Countries/States. Press ENTER when the site<br />
you wish to add displays. Then choose the desired city in the same manner.<br />
• Delete: Deletes a stored site from the database.<br />
• Edit: Edits a selected site, including: the name, latitude, longitude, and time zone.<br />
Time zone refers to the Greenwich Mean Time (GMT) time zone shift. Users West<br />
of Greenwich, England, use “-” hours, East of Greenwich use “+” hours. For the<br />
United States, look up the time zone shift in Table 1.<br />
NOTE: Starfinder compensates for daylight savings time, if selected (see<br />
"DAYLIGHT SAVING," page 31).<br />
Owner Info accesses the owner information menu options, including:<br />
• Name: A user may enter both his or her first and last names using the Up and<br />
Down Arrow keys to cycle through the alphabet. Use the Right and Left Arrow keys<br />
to move across the text. Press ENTER when the entry is complete.<br />
• Address: Use the Up and Down Arrow keys to enter your street address, city,<br />
state, and zip code. Press ENTER when the entry is complete.<br />
Download transfers information from a personal computer or another Starfinder.<br />
NOTE: The Download function requires the optional Cable Set. See the<br />
instruction sheet for the optional cable set for more information on how to<br />
download.<br />
Statistics provides basic statistical data about Starfinder, including:<br />
• Characters Free: Shows how much room is available in user-defined object<br />
memory.<br />
• Version: Shows the current version of the Starfinder software.<br />
Reset completely resets Starfinder. Starfinder requires initialization again after a<br />
Reset before proceeding with observations. See “ INITIALIZING STARFINDER,” page<br />
17. You will also need to perform “TRAINING THE DRIVE,” page 19, after a Reset.<br />
page 32
PART 3: Caring for Your Telescope<br />
Cleaning<br />
The lens or mirror surfaces should be cleaned as infrequently as possible. Front surface<br />
aluminized mirrors, in particular, should be cleaned only when absolutely necessary.<br />
In all cases, avoid touching any mirror surface. A little dust on the surface of a<br />
mirror or lens causes negligible loss of performance and should not be considered reason<br />
to clean the surface. When lens or mirror cleaning does become necessary, use<br />
a camel’s hair brush or compressed air gently to remove dust. If the telescope’s dust<br />
cover is replaced after each observing session, cleaning of the optics will rarely be<br />
required.<br />
Mount and Tripod Adjustments<br />
Every <strong>Meade</strong> <strong>4504</strong> Telescope equatorial mount and tripod is factory inspected for<br />
proper fit and function prior to shipment. It is unlikely that you will need to adjust or<br />
tighten these parts after receipt of the telescope. However, if the instrument received<br />
unusually rough handling in shipment, it is possible that some of these assemblies can<br />
be loose. To make adjustments you will need a 1/2" or 11/16" socket or adjustable end<br />
wrench, a 5/64" hex wrench, and a Phillips-head screwdriver.<br />
The equatorial mount has four main areas that<br />
can be adjusted: A loose polar shaft can be tightened<br />
by releasing a 5/64" hex set-screw that is 3<br />
on the side of the 11/16" polar shaft acorn cap<br />
nut (3, Fig. 21), and then turning the 11/16"<br />
acorn cap nut clockwise to a firm feel, and then<br />
4<br />
tightening the 5/64" hex set-screw. A loose<br />
Azimuth base (4, Fig. 21), can be tightened by<br />
2 2<br />
turning the 11/16" Azimuth shaft bolt, located<br />
underneath the mount and in between the three<br />
tripod legs, clockwise to a firm feel. The R.A. (1,<br />
Fig. 11), and Dec (12, Fig. 11) worm block<br />
1<br />
assemblies can have backlash removed by<br />
releasing the two Phillips-head screws on each<br />
Fig. 21: Maintenance adjustments.<br />
assembly, applying pressure to the worm block against the worm gear, and then tightening<br />
the Phillips-head screws. Note that overtightening of any of the nuts, bolts, or<br />
screws can inhibit the smooth rotating action of the axes and gears, and may result in<br />
stripping the threads.<br />
The tripod legs have 1/2" nuts (1, Fig. 21), and Phillips-head screws (2, Fig. 21) that<br />
may have backed off. Tighten to a firm feel for the most sturdy performance of the telescope.<br />
Diagonal<br />
Assembly<br />
Diagonal Mirror<br />
Focused Image<br />
Fig. 22: The Newtonian reflecting telescope.<br />
page 33<br />
Primary Mirror<br />
Primary Mirror-Tilt<br />
Screws
2<br />
Fig. 23: Diagonal assembly.<br />
1<br />
Collimation (Alignment) of the Optics<br />
Your telescope is optically aligned at the factory prior to shipment. It is unlikely that you<br />
will need to align, or collimate, the optics after receipt of the instrument. However, if<br />
the telescope received unusually rough handling in shipment, it is possible that the<br />
optics must be re-aligned for best optical performance. Take the time to familiarize<br />
yourself with the following collimation procedure, so that you will recognize a properly<br />
collimated instrument and can adjust the collimation yourself, if necessary.<br />
Correct collimation<br />
The properly collimated (aligned) mirror system in the <strong>Meade</strong> <strong>4504</strong> Telescope assures<br />
the sharpest images possible. This occurs when the primary mirror and diagonal mirror<br />
are tilted so that the focused image (Fig. 22) falls directly through the center of the<br />
focuser drawtube. These mirror tilt adjustments are made with the diagonal assembly<br />
(Fig. 22) and the primary mirror cell (Fig. 22), and will be discussed later.<br />
To inspect the view of the mirror collimation, look down the focuser drawtube with the<br />
eyepiece removed. The edge of the focuser drawtube will frame the reflections of the<br />
primary mirror with the 3 mirror clips (2, Fig. 25), the diagonal mirror (3, Fig. 25), the<br />
spider vanes (4, Fig. 25), and your eye (5, Fig. 25). Properly aligned, all of these<br />
reflections will appear concentric (i.e. centered) as illustrated in Fig. 25. Any deviation<br />
from the concentric reflections will require adjustments to the diagonal assembly (Fig.<br />
23), and/or the primary mirror cell (Fig. 24).<br />
Spider vane adjustments<br />
If the diagonal mirror (1, Fig. 26) is left or right of center within the drawtube (2, Fig.<br />
26), loosen the spider vane adjustment/lock knobs (1, Fig. 23) located on the outside<br />
surface of the main tube and slide the entire diagonal assembly up or down the tube<br />
along the slotted holes, until the diagonal mirror is centered in the drawtube. If the<br />
diagonal mirror (1, Fig. 26) is above or below of center within the drawtube, thread in<br />
one of the spider vane adjustment/ lock knobs while unthreading the other. Only make<br />
adjustments to two knobs at a time until the diagonal mirror is in the drawtube. When<br />
the spider vane is correctly positioned, it will look like Fig. 27 (the diagonal mirror is<br />
misaligned).<br />
Diagonal holder adjustments<br />
If the diagonal mirror (1, Fig. 27) is centered in the drawtube (2, Fig. 27), but the primary<br />
mirror is only partially visible in the reflection (3, Fig. 27), the three Phillips-head<br />
diagonal tilt screws (2, Fig. 23) must be unthreaded slightly to the point of where you<br />
can rotate the diagonal holder (3, Fig. 23) from side-to-side by grasping the diagonal<br />
holder with your hand and rotating until you see the primary mirror become as centered<br />
in the reflection of the diagonal mirror as possible. Once you are at the best position,<br />
thread in the three Phillips-head diagonal tilt screws to lock the rotational position.<br />
Then, if necessary, make adjustments to these three Phillips-head screws to<br />
page 34<br />
3<br />
3 2<br />
Fig. 24: Primary mirror cell.
efine the tilt-angle of the diagonal mirror until the entire primary mirror can be seen<br />
centered within the diagonal mirror reflection. When the diagonal mirror is correctly<br />
aligned, it will look like Fig. 28 (the primary mirror is shown out of alignment).<br />
Primary mirror adjustments<br />
If the diagonal mirror (1, Fig. 28) and the reflection of the primary mirror (2, Fig. 28)<br />
appear centered within the drawtube (3, Fig. 28), but the reflection of your eye and the<br />
reflection of the diagonal mirror (4, Fig. 28) appear off-center, you will need to adjust<br />
the primary mirror tilt Phillips-head screws of the primary mirror cell (3, Fig. 24). These<br />
primary tilt screws are located behind the primary mirror, at the lower end of the main<br />
tube (Fig. 22). To adjust the primary mirror tilt screws, first unscrew several turns the<br />
three hex-head primary mirror cell locking screws (2, Fig. 24) that are next to each primary<br />
mirror tilt Phillips-head screw. Then by trial-and-error, turn the primary mirror tilt<br />
Phillips-head screws (3, Fig. 24) until you develop a feel for which way to turn each<br />
screw to center the reflection of your eye. Once centered, as in Fig. 25, turn the three<br />
hex-head primary mirror cell locking screws (2, Fig. 24) to relock the tilt-angle adjustment.<br />
4<br />
1<br />
2<br />
2<br />
5<br />
page 35<br />
1<br />
3<br />
2<br />
3<br />
Fig. 25: Correct collimation. Fig. 26: Spider vane misalignment.<br />
Fig. 27: Diagonal mirror misalignment. Fig. 28: Primary mirror misalignment.<br />
4<br />
1<br />
1<br />
3<br />
2<br />
2
Star testing the collimation<br />
With the collimation performed, you will want to test the accuracy of the alignment on<br />
a star. Use the H 25mm eyepiece and point the telescope at a moderately bright (second<br />
or third magnitude) star, then center the star image in the telescope’s field-of-view.<br />
With the star centered, follow the method below:<br />
• Bring the star image slowly out of focus until one or more rings are visible around<br />
the central disc. If the collimation was performed correctly, the central star disk and<br />
rings will be concentric circles, with a dark spot dead center within the out-of-focus<br />
star disk (this is the shadow of the secondary mirror), as shown in C, Fig. 29. (An<br />
improperly aligned telescope will reveal elongated circles (A, Fig. 29), with an offcenter<br />
dark shadow.)<br />
• If the out-of-focus star disk appears elongated (B, Fig. 29), you will need to adjust<br />
the primary mirror Phillips-head tilt screws of the primary mirror cell (3, Fig. 24).<br />
• To adjust the primary mirror tilt screws (3, Fig. 24), first unscrew several turns the<br />
three hex-head primary mirror cell locking screws (2, Fig. 24), to allow free turning<br />
movement of the tilt knobs.<br />
• As you make adjustments to the primary mirror tilt screws (3, Fig. 24), you will<br />
notice that the out-of-focus star disk image will move across the eyepiece field.<br />
Choose one of the three primary mirror tilt screws that will move the star disk<br />
image to the center of the eyepiece field.<br />
• Repeat this process as many times as necessary until the out-of-focus star disk<br />
appears as in C, Fig. 29, when the star disk image is in the center of the eyepiece<br />
field.<br />
• With the star testing of the collimation complete, tighten the three hex-head<br />
primary mirror locking screws (2, Fig. 24).<br />
A B C<br />
Fig. 29: Collimation.<br />
page 36
MODEL <strong>4504</strong> TELESCOPE SPECIFICATIONS<br />
Optical design ................................................................Newtonian Reflector<br />
Clear aperture ..............................................................114mm (4.5”)<br />
Focal length ....................................................................910mm<br />
Focal ratio (photographic speed) ..................................f/8<br />
Resolving power ............................................................1.0 arc secs<br />
Multi-coatings on objective lens ....................................Standard<br />
Limiting visual stellar magnitude (approx.) ....................12.4<br />
Image scale ..................................................................1.6°/inch<br />
Maximum practical visual power ..................................325X<br />
Optical tube dimensions<br />
(dia. x length) ..........................................................14cm x 86.4cm (5.5” x 34”)<br />
Eyepieces<br />
Modified Achromatic ..............................................H 25mm (0.965” O.D.)<br />
Modified Achromatic ..............................................H 12.5mm (0.965” O.D.)<br />
Modified Achromatic ..............................................SR 4mm (0.965” O.D.)<br />
Barlow ....................................................................3x magnification<br />
Telescope mounting........................................................German equatorial mount<br />
Setting circle diameters ..........................................6.2cm (2.45")<br />
Input voltage ..........................................................12-volts DC<br />
Motor Drive System ................................................DC servo motors with encoders, both axes<br />
Slow-Motion Controls ....................................................Electric, 7 speeds, both axes<br />
Hemispheres of operation ..............................................North and South, switchable<br />
Materials<br />
Tube body ..............................................................Aluminum<br />
Mounting ................................................................Die-cast aluminum<br />
Telescope net weight:<br />
(telescope only, without batteries, eyepieces)................10.5 kg (23 lbs.)<br />
Telescope shipping weight<br />
(telescope, accessories, instruction manual, packing) ..14 kg (31 lbs.)<br />
Battery Life (approx.)<br />
with Starfinder ........................................................20 hrs.<br />
STARFINDER SPECIFICATIONS<br />
Processor ......................................................................68HC11, 8MHz<br />
Flash Memory ................................................................512KB, reloadable<br />
Keypad ..........................................................................10 key<br />
Display............................................................................2 line, 16 character LCD<br />
Backlight ........................................................................Red LED<br />
Coil Cord ........................................................................24"<br />
STARFINDER DIMENSIONS<br />
Length ............................................................................14.2cm (5.60")<br />
Width (LCD end) ............................................................78.0cm (3.08")<br />
Width (Connector end) ..................................................53.5cm (2.10")<br />
Depth ..............................................................................23.5cm (0.93")<br />
page 37
APPENDIX A: Calculating Eyepiece Power<br />
The power, or magnification of the telescope depends on two optical characteristics:<br />
the focal length of the main telescope and the focal length of the eyepiece used during<br />
a particular observation. The focal length of the <strong>4504</strong> telescope is fixed at 910mm.<br />
To calculate the power in use with a particular eyepiece, divide the focal length of the<br />
eyepiece into the focal length of the main telescope. E.g., using the H 25mm eyepiece<br />
supplied with the telescope, the power is calculated as follows:<br />
Power = telescope focal length 910mm = = 36x<br />
eyepiece focal length 25mm<br />
The maximum practical magnification is determined by the nature of the object being<br />
observed and, most importantly, by the prevailing atmospheric conditions. Generally<br />
powers of perhaps 35x to 175x will be useful most often, consistent with high image<br />
resolution. When unsteady air conditions prevail (as witnessed by rapid “twinkling” of<br />
the stars), extreme high-power results in “empty magnification,” where the object detail<br />
observed is actually diminished by the excessive power.<br />
The 3x Barlow lens included with your telescope triples the eyepiece magnification. To<br />
calculate the power of an eyepiece used with a Barlow lens, multiply the eyepiece<br />
power by the Barlow value. E.g., using the H 25mm eyepiece, the power or magnification<br />
of the <strong>4504</strong> telescope (as calculated in the example above) is 36x and the<br />
Barlow value is 3x. The total power using the Barlow lens is:<br />
Total power = eyepiece power x Barlow value = 36 x 3 = 108x<br />
To install the Barlow lens, first place the Barlow lens into the focuser assembly<br />
(remove the focuser dustcap, if necessary), followed by the eyepiece (Fig. 30).<br />
Tighten the Barlow thumbscrews and the focuser thumbscrews to a firm feel only.<br />
Focuser<br />
Assembly<br />
Fig. 30: Insert Barlow into focuser<br />
assembly.<br />
page 38<br />
Eyepiece<br />
Thumbscrew<br />
Barlow<br />
Thumbscrew<br />
Focus knob
APPENDIX B: Terrestrial Viewing, Celestial Movement,<br />
and Polar Alignment<br />
Terrestrial Viewing<br />
The <strong>4504</strong> is an excellent, high-resolution terrestrial (land) telescope. Viewing terrestrial<br />
objects requires looking along the Earth's surface through heat waves. These heat<br />
waves often cause degradation of image quality. Low power eyepieces, like the H 25mm<br />
eyepiece, magnify these heat waves less than higher power eyepieces. Therefore, low<br />
power eyepieces provide a steadier, higher quality image. If the image is fuzzy or illdefined,<br />
reduce to a low-power, where the heat waves do not have such an effect on<br />
image quality. Observing in early morning hours, before the ground has built up internal<br />
heat, produces better viewing conditions than during late-afternoon hours.<br />
Astronomical Observing<br />
Used as an astronomical instrument, your telescope has many optical and electromechanical<br />
capabilities. It is in astronomical applications where the high level of optical<br />
performance is readily visible. The range of observable astronomical objects is,<br />
with minor qualification, limited only by the observer’s motivation.<br />
Polar Alignment<br />
Lunar or planetary photography requires that the telescope be Polar aligned. In Polar<br />
Alignment, the telescope is oriented so that the horizontal and vertical axes of the telescope<br />
are lined up with the celestial coordinate system.<br />
In order to understand Polar Alignment, it is essential to have an understanding of how<br />
and where to locate celestial objects as they move across the sky. This section provides<br />
a basic introduction to the terminology of Polar-aligned astronomy, and includes<br />
instructions for finding the celestial pole and for finding objects in the night sky using<br />
Declination and Right Ascension.<br />
Understanding Celestial Movements and Coordinates<br />
Understanding where to locate celestial objects and how those objects move across<br />
the sky is fundamental to enjoying the hobby of astronomy. Most amateur astronomers<br />
adopt the simple practice of “star-hopping” to locate celestial objects by using star<br />
charts or astronomical software which identify bright stars and star patterns (constellations)<br />
that serve as “road maps” and “landmarks” in the sky. These visual reference<br />
points guide amateur astronomers in their search for astronomical objects.<br />
Understanding How Astronomical Objects Move<br />
Due to the Earth’s rotation, celestial bodies appear to move from East to West in a<br />
curved path through the sky. The path they follow is known as their line of Right<br />
Ascension (R.A.). The angle of the path that they follow is known as their line of<br />
Declination (Dec). The system of R.A. and Dec is analogous to the Earth-based coordinate<br />
system of latitude and longitude. Like Earth, imaginary lines have been drawn<br />
on the celestial sphere to form a coordinate grid. Celestial object positions on the<br />
Earth's surface are specified by their latitude and longitude.<br />
Understanding Celestial Coordinates<br />
Celestial objects are mapped according to the R.A. and Dec coordinate system on the<br />
“celestial sphere” (Fig. 31), the imaginary sphere on which all stars appear to be<br />
placed. The Poles of the celestial coordinate system are defined as those two points<br />
where the Earth's rotational axis, if extended to infinity, North and South, intersect the<br />
celestial sphere. Thus, the North Celestial Pole is that point in the sky where an extension<br />
of the Earth's axis through the North Pole intersects the celestial sphere. In fact,<br />
this point in the sky is located near the North Star, or Polaris.<br />
page 39
On the surface of the Earth,<br />
“lines of longitude” are drawn<br />
between the North and South<br />
Poles. Similarly, “lines of latitude”<br />
are drawn in an East-West direction,<br />
parallel to the Earth's equator.<br />
The celestial equator is simply<br />
a projection of the Earth's<br />
equator onto the celestial<br />
sphere. Just as on the surface of<br />
the The celestial equivalent to<br />
Earth latitude is called<br />
“Declination,” or simply “Dec.” It<br />
is measured in degrees, minutes<br />
or seconds north ("+") or south<br />
("-") of the celestial equator. Thus<br />
any point on the celestial equator<br />
(which passes, for example,<br />
through the constellations Orion, Virgo and Aquarius) is specified as having 0°0'0"<br />
Dec. The Dec of the star Polaris, located very near the North Celestial Pole, is +89.2°.<br />
The celestial equivalent to Earth longitude is called “Right Ascension,” or “R.A.” It is<br />
measured in hours, minutes, and seconds from an arbitrarily defined “zero” line of R.A.<br />
passing through the constellation Pegasus. R.A. coordinates range from 0hr0min0sec<br />
up to (but not including) 24hr0min0sec. Thus there are 24 primary lines of R.A., located<br />
at 15 degree intervals along the celestial equator. Objects located further and further<br />
east of the prime (0h0m0s) R. A. grid line carry increasing R.A. coordinates.<br />
With all celestial objects therefore capable of being specified in position by their celestial<br />
coordinates of R.A. and Dec, the task of finding objects (in particular, faint objects)<br />
in the telescope is vastly simplified. The setting circles, R.A. (15, Fig. 2a) and Dec (9,<br />
Fig. 2a)of the <strong>Meade</strong> <strong>4504</strong> Telescope may be dialed, in effect, to read the object coordinates,<br />
and the object can be found without resorting to visual location techniques.<br />
However, these setting circles may be used to advantage only if the telescope is first<br />
properly aligned with the Celestial Pole.<br />
Lining Up with the Celestial Pole<br />
Objects in the sky appear to revolve around the Celestial Pole (actually, celestial objects<br />
are essentially “fixed,” and their apparent motion is caused by the Earth’s axial rotation).<br />
During any 24 hour period, stars make one complete revolution about the pole, making<br />
concentric circles with the pole at the center. By lining up the telescope’s polar axis with<br />
the North Celestial Pole (or, for observers located in Earth’s Southern Hemisphere, with<br />
the South Celestial Pole), astronomical objects may be followed, or tracked, by moving<br />
the telescope about one axis, the polar axis.<br />
Virtually all of the required telescope<br />
tracking will be in R.A. (if<br />
Little Dipper<br />
the telescope were perfectly<br />
Polaris<br />
aligned with the pole, no Dec<br />
tracking of stellar objects would<br />
be required). For the purposes of<br />
casual visual telescopic obser- Big Dipper<br />
vations, lining up the telescope’s<br />
Cassiopeia<br />
polar axis to within a degree or<br />
two of the pole is more than suf- Fig. 32: Locating Polaris.<br />
ficient.<br />
page 40<br />
North<br />
Celestial<br />
Pole<br />
(Vicinity<br />
of Polaris)<br />
1<br />
+90 Dec.<br />
Declination<br />
Star<br />
15<br />
14 12<br />
16<br />
17<br />
18<br />
19<br />
20<br />
21<br />
22 23 0<br />
11<br />
1<br />
10<br />
9<br />
8<br />
7<br />
5 6<br />
13<br />
Earth’s<br />
Rotation<br />
Right Ascension<br />
South<br />
2<br />
3<br />
4<br />
Celestial<br />
Equator<br />
0 Dec.<br />
2<br />
Celestial<br />
Pole<br />
-90 Dec.<br />
Fig. 31: Celestial sphere.
Using Setting Circles<br />
The setting circles of the Polar aligned equatorial mount can be used to locate faint<br />
celestial objects not easily found by direct visual observation. To use the setting circles,<br />
follow this procedure:<br />
• Use a star chart or star atlas, and look up the celestial coordinates, Right<br />
Ascension and Declination (R.A. and Dec), of an easy-to-find bright star that is<br />
within the general vicinity of the faint object you wish to locate.<br />
• Center the determined bright star in the telescope’s field of view.<br />
• <strong>Manual</strong>ly turn the R.A. setting circle (15, Fig. 2a) to read the R.A. of the object now<br />
in the telescope’s eyepiece.<br />
• The setting circles are now calibrated (the Dec setting circle (9, Fig. 2a) is factory<br />
calibrated). To locate a nearby faint object using the setting circles, determine the<br />
faint object’s celestial coordinates from a star chart and move the telescope in<br />
R.A. and Dec until the setting circles read the R.A. and Dec of the object you are<br />
attempting to locate. If the above procedure has been carefully performed, the<br />
faint object will now be in the field of a low power eyepiece.<br />
• The R.A. setting circle must be manually re-calibrated on the current R. A. of a star<br />
every time the telescope is set up, and reset to the centered object’s R.A.<br />
coordinate before moving to a new R.A. coordinate setting. The R.A. setting circle<br />
has two sets of numbers. The inner set is for Southern hemisphere use while the<br />
outer set (the set closest to the R.A. gear) is for use by observers located North<br />
of the Earth’s equator (e.g., in North America and Europe).<br />
Two-Star Polar Alignment<br />
Besides One-Star Polar Alignment which was covered earlier in this manual (see<br />
"ALIGNING YOUR TELESCOPE USING STARFINDER," page 20), another type of<br />
alignment, Two-Star Polar Alignment, is also available.<br />
Two-Star Polar Alignment requires some knowledge of the night sky. Starfinder provides<br />
a database of bright stars and two stars from this database are chosen by the<br />
observer for alignment. The rest of the alignment procedure is identical to One-Star<br />
Polar Alignment.<br />
1. Perform steps 1 through 4 as described in the "ALIGN YOUR TELESCOPE<br />
USING STARFINDER," page 20.<br />
2 . Starfinder displays a database of stars for the observer to choose from. Use the<br />
Scroll keys to scroll to a star that you wish to align upon. Select a star that you can<br />
easily locate in the night sky.<br />
3. Press ENTER. The telescope slews to the star for alignment. Use the Arrow keys<br />
to move the telescope until the star is visible and centered in the eyepiece.<br />
4. Press ENTER. Repeat the procedure for the second alignment star. The telescope<br />
is aligned and you are now ready to use Starfinder's GO TO capabilities for a night<br />
of observing.<br />
page 41
APPENDIX C: Using Starfinder to Enter Celestial<br />
Coordinates<br />
Although Starfinder's database contains more than 1400 objects (stars, nebulae,<br />
planets, etc.) that you can observe, you may eventually want to view objects that are<br />
not part of the database. Starfinder provides a feature that allows you to enter an<br />
object's R.A and Dec coordinates in the "User: Objects" option of Starfinder's Object<br />
menu, and then will automatically slew the telescope to the user-entered coordinates.<br />
In order to use this menu option, you first need to look up the R.A and Dec coordinates<br />
of the object or objects you wish to observe. Check out your local library, computer<br />
store, or bookstore for astronomy books, CD Roms, or magazines (such as Sky<br />
& Telescope or Astronomy), to find coordinates of celestial objects. A list of the coordinates<br />
of 14 common stars are printed at the end of this manual; see "STAR LOCA-<br />
TOR," page 46.<br />
The objects/coordinates you enter become part of your own permanent database,<br />
called "User Objects." You may use this menu to view these object as often as you<br />
like, but the objects' coordinates just need to be entered once.<br />
To enter coordinates of an object into the "User: Objects" option of the Object<br />
menu:<br />
1. Make sure Starfinder has been initialized (see "INITIALIZING STARFINDER,"<br />
page 17) and the telescope has been aligned (see "ALIGN YOUR TELESCOPE<br />
USING STARFINDER," page 20).<br />
2. After the telescope is aligned, "Select Item: Object" displays. (If necessary, use<br />
the Scroll keys to scroll through the menus, as previously described, to find this<br />
option.) Press ENTER.<br />
3. "Object: Solar System" displays. Keep pressing the Scroll Up key until "Object:<br />
User Object" displays and press ENTER.<br />
4. "User Object: Select" displays. Press the Scroll Down key once. "User Object:<br />
Add" displays. Press ENTER.<br />
5. "Name" displays on the top line and a blinking cursor on the second line. Use the<br />
Arrow keys (as previously described) to enter the name of the object you wish to<br />
add to the database. When you are finished, press ENTER.<br />
6. "Right Asc.: +00.00.0" displays. Use the Arrow keys to enter the digits for the<br />
Right Ascension (R.A.) coordinate of your object. If necessary, use the Scroll Keys<br />
to change "+" to "-." When you are finished, press ENTER.<br />
7. "Declination: +00°.00'" displays. Use the Arrow keys to enter the digits for the<br />
Declination (Dec) coordinate of your object. If necessary, use the Scroll Keys to<br />
change "+" to "-." When you are finished, press ENTER.<br />
8. Starfinder then prompts you to enter the Size of the object. This step is optional.<br />
Use the Arrow keys to enter this information, if so desired, and press ENTER to<br />
go to the next display. If you do not wish to enter this information, simply press<br />
ENTER.<br />
9. Starfinder then prompts you to enter the Magnitude of the object. This step is also<br />
optional. Use the Arrow keys to enter this information, if so desired, and press<br />
ENTER to go to the next display. "User Object: Add" displays again.<br />
To GO TO a user-entered object:<br />
1. With "User Object: Add" displayed, press the Scroll Up key once. "User Object:<br />
Select" displays. Press ENTER.<br />
2. Use the Scroll keys (if necessary) to scroll to the desired object. Press ENTER.<br />
3. The name of the object and the R.A. and Dec coordinates display.<br />
4. Press GO TO and the telescope slews to the object.<br />
page 42
APPENDIX D: Helpful Charts<br />
Latitude Chart for Major Cities of the World<br />
To aid in the Polar Alignment procedure (see "TO POLAR ALIGN THE TELESCOPE," page 15), latitudes<br />
of major cities around the world are listed below. To determine the latitude of an observing site not listed<br />
on the chart, locate the city closest to your site. Then follow the procedure below:<br />
Northern Hemisphere observers (N): If the site is over 70 miles (110 km) North of the listed city, add one<br />
degree for every 70 miles. If the site is over 70 miles South of the listed city, subtract one degree per 70<br />
miles.<br />
Southern Hemisphere observers (S): If the site is over 70 miles North of the listed city, subtract one<br />
degree for every 70 miles. If the site is over 70 miles South of the listed city, add one degree per 70 miles.<br />
UNITED STATES<br />
City State Latitude<br />
Albuquerque New Mexico 35° N<br />
Anchorage Alaska 61° N<br />
Atlanta Georgia 34° N<br />
Boston Massachusetts 42° N<br />
Chicago Illinois 42° N<br />
Cleveland Ohio 41° N<br />
Dallas Texas 33° N<br />
Denver Colorado 40° N<br />
Detroit Michigan 42° N<br />
Honolulu Hawaii 21° N<br />
Jackson Mississippi 32° N<br />
Kansas City Missouri 39° N<br />
Las Vegas Nevada 36° N<br />
Little Rock Arkansas 35° N<br />
Los Angeles California 34° N<br />
Miami Florida 26° N<br />
Milwaukee Wisconsin 46° N<br />
Nashville Tennessee 36° N<br />
New Orleans Louisiana 30° N<br />
New York New York 41° N<br />
Oklahoma City Oklahoma 35° N<br />
Philadelphia Pennsylvania 40° N<br />
Phoenix Arizona 33° N<br />
Portland Oregon 46° N<br />
Richmond Virginia 37° N<br />
Salt Lake City Utah 41° N<br />
San Antonio Texas 29° N<br />
San Diego California 33° N<br />
San Francisco California 38° N<br />
Seattle Washington 47° N<br />
Washington District of Columbia 39° N<br />
Wichita Kansas 38° N<br />
EUROPE<br />
City Country Latitude<br />
Amsterdam Netherlands 52° N<br />
Athens Greece 38° N<br />
Bern Switzerland 47° N<br />
Copenhagen Denmark 56° N<br />
Dublin Ireland 53° N<br />
Frankfurt Germany 50° N<br />
Glasgow Scotland 56° N<br />
Helsinki Finland 60° N<br />
Lisbon Portugal 39° N<br />
page 43<br />
EUROPE (cont'd)<br />
City Country Latitude<br />
London England 51° N<br />
Madrid Spain 40° N<br />
Oslo Norway 60° N<br />
Paris France 49° N<br />
Rome Italy 42° N<br />
Stockholm Sweden 59° N<br />
Vienna Austria 48° N<br />
Warsaw Poland 52° N<br />
SOUTH AMERICA<br />
City Country Latitude<br />
Asuncion Paraguay 25° S<br />
Brasilia Brazil 24° S<br />
Buenos Aires Argentina 35° S<br />
Montevideo Uruguay 35° S<br />
Santiago Chile 34° S<br />
ASIA<br />
City Country Latitude<br />
Beijing China 40° N<br />
Seoul South Korea 37° N<br />
Taipei Taiwan 25° N<br />
Tokyo Japan 36° N<br />
Victoria Hong Kong 23° N<br />
AFRICA<br />
City Country Latitude<br />
Cairo Egypt 30° N<br />
Cape Town South Africa 34° S<br />
Rabat Morocco 34° N<br />
Tunis Tunisia 37° N<br />
Windhoek<br />
AUSTRALIA<br />
Namibia 23° S<br />
City State Latitude<br />
Adelaide South Australia 35° S<br />
Brisbane Queensland 27° S<br />
Canberra New South Wales 35° S<br />
Alice Springs Northern Territory 24° S<br />
Hobart Tasmania 43° S<br />
Perth Western Australia 32° S<br />
Sydney New South Wales 34° S<br />
Melbourne Victoria 38° S
Fig. 33: The Moon.<br />
Note the deep<br />
shadows in the craters.<br />
APPENDIX E: Basic Astronomy<br />
In the early 17th century, an Italian Scientist named Galileo, using a crude telescope<br />
considerably smaller than your <strong>4504</strong>, turned it to look towards the sky instead of<br />
distant trees and mountains. What he saw, and what he realized about what he saw,<br />
forever changed the way mankind thought of the universe. Imagine what it must have<br />
been like being the first human to see moons revolve around the planet Jupiter or to<br />
see the changing phases of Venus! Because of his observations, Galileo correctly<br />
realized Earth's movement and position around the Sun, and in doing so, gave birth<br />
to modern astronomy. Yet Galileo's telescope was so crude, he could not clearly make<br />
out the rings of Saturn.<br />
Galileo's discoveries laid the foundation for understanding the motion and nature of<br />
the planets, stars, and galaxies. Building on his foundation, Henrietta Leavitt<br />
determined how to measure the distance to stars; Edwin Hubble proposed a glimpse<br />
into the origin of the universe; Albert Einstein unraveled the relationship of time and<br />
light. Almost daily, using sophisticated successors to Galileo's crude telescope, such<br />
as the Hubble Space Telescope, more and more mysteries of the universe are being<br />
solved and understood. We are living in a golden age of astronomy.<br />
Unlike other sciences, astronomy welcomes contributions from amateurs. Much of the<br />
knowledge we have on subjects such as comets, meteor showers, variable stars, the<br />
Moon, and our solar system comes from observations made by amateur astronomers.<br />
So as you look through your <strong>Meade</strong> telescope, keep in mind Galileo. To him, a<br />
telescope was not a mere machine of glass and metal, but something far more – a<br />
window through which the beating heart of the universe might be glimpsed, a fuse to<br />
set fire to mind and imagination.<br />
Starfinder Glossary<br />
Be sure to make use of Starfinder’s Glossary feature. The Glossary menu provides<br />
an alphabetical listing of definitions and descriptions of common astronomical terms.<br />
Access these directly through the Glossary menu or through hypertext words<br />
embedded in Starfinder. See “GLOSSARY MENU," page 29, for more information.<br />
Objects in Space<br />
Listed below are some of the many astronomical objects that can be seen with the <strong>4504</strong>:<br />
The Moon<br />
The Moon is, on average, a distance of 239,000 miles (380,000km) from Earth and is<br />
best observed during its crescent or half phase when Sunlight strikes the Moon’s<br />
surface at an angle. It casts shadows and adds a sense of depth to the view (Fig. 33).<br />
No shadows are seen during a full Moon, causing the overly bright Moon to appear<br />
flat and rather uninteresting through the telescope. Purchase a neutral Moon filter for<br />
use when observing the Moon. Not only does it protect your eyes from the bright glare<br />
of the Moon, but it also helps enhance contrast, providing a more dramatic image.<br />
Using the <strong>4504</strong>, brilliant detail can be observed on the Moon, including hundreds of<br />
lunar craters and maria, described below.<br />
Craters are round meteor impact sites covering most of the Moon’s surface. With no<br />
atmosphere on the Moon, no weather conditions exist, so the only erosive force is<br />
meteor strikes. Under these conditions, lunar craters can last for millions of years.<br />
Maria (plural for mare) are smooth, dark areas scattered across the lunar surface.<br />
These dark areas are large ancient impact basins that were filled with lava from the<br />
interior of the Moon by the depth and force of a meteor or comet impact.<br />
Twelve Apollo astronauts left their bootprints on the Moon in the late 1960's and early<br />
1970's. However, no telescope on Earth is able to see these footprints or any other<br />
artifacts. In fact, the smallest lunar features that may be seen with the largest<br />
telescope on Earth are about one-half mile across.<br />
page 44
Fig. 34: Jupiter and<br />
its four largest<br />
moons. The moons<br />
can be observed in<br />
a different position<br />
every night.<br />
Fig. 35: Saturn has<br />
the most extensive<br />
ring structure in our<br />
Solar System.<br />
Fig. 36: The<br />
Pleiades is one of<br />
the most beautiful<br />
open clusters.<br />
Planets<br />
Planets change positions in the sky as they orbit around the Sun. To locate the planets<br />
on a given day or month, consult a monthly astronomy magazine, such as Sky and<br />
Telescope or Astronomy. Listed below are the best planets for viewing through the<br />
<strong>4504</strong>.<br />
Venus is about nine-tenths the diameter of Earth. As Venus orbits the Sun, observers<br />
can see it go through phases (crescent, half, and full) much like those of the Moon.<br />
The disk of Venus appears white as Sunlight is reflected off the thick cloud cover that<br />
completely obscures any surface detail.<br />
Mars is about half the diameter of Earth, and appears through the telescope as a tiny<br />
reddish-orange disk. It may be possible to see a hint of white at one of the planet’s<br />
Polar ice caps. Approximately every two years, when Mars is closest to Earth in its<br />
orbit, additional detail and coloring on the planet's surface may be visible.<br />
Jupiter is the largest planet in our solar system and is 11 times the diameter of Earth.<br />
The planet appears as a disk with dark lines stretching across the surface. These lines<br />
are cloud bands in the atmosphere. Four of Jupiter’s 16 moons (Io, Europa,<br />
Ganymede, and Callisto) can be seen as “star-like” points of light when using even<br />
the lowest magnification. These moons orbit Jupiter so that the number of moons<br />
visible on any given night changes as they circle around the giant planet.<br />
Saturn is nine times the diameter of Earth and appears as a small, round disk with<br />
rings extending out from either side. In 1610, Galileo, the first person to observe<br />
Saturn through a telescope, did not understand that what he was seeing were rings.<br />
Instead, he believed that Saturn had “ears.” Saturn’s rings are composed of billions of<br />
ice particles ranging in size from a speck of dust to the size of a house. The major<br />
division in Saturn's rings, called the Cassini Division, is occasionally visible through<br />
the <strong>4504</strong>. Titan, the largest of Saturn’s 18 moons can also be seen as a bright, starlike<br />
object near the planet.<br />
Deep-Sky Objects<br />
Star charts can be used to locate constellations, individual stars and deep-sky<br />
objects. Examples of various deep-sky objects are given below:<br />
Stars are large gaseous objects that are self-illuminated by nuclear fusion in their<br />
core. Because of their vast distances from our solar system, all stars appear as<br />
pinpoints of light, irrespective of the size of the telescope used.<br />
Nebulae are vast interstellar clouds of gas and dust where stars are formed. Most<br />
impressive of these is the Great Nebula in Orion (M42), a diffuse nebula that appears<br />
as a faint wispy gray cloud. M42 is 1600 light years from Earth.<br />
Open Clusters are loose groupings of young stars, all recently formed from the same<br />
diffuse nebula. The Pleiades is an open cluster 410 light years away. Through the<br />
<strong>4504</strong>, numerous stars are visible.<br />
Constellations are large, imaginary patterns of stars believed by ancient civilizations<br />
to be the celestial equivalent of objects, animals, people, or gods. These patterns are<br />
too large to be seen through a telescope. To learn the constellations, start with an<br />
easy grouping of stars, such as the Big Dipper in Ursa Major. Then, use a star chart<br />
to explore across the sky.<br />
Galaxies are large assemblies of stars, nebulae, and star clusters that are bound by<br />
gravity. The most common shape is spiral (such as our own Milky Way), but galaxies<br />
can also be elliptical, or even irregular blobs. The Andromeda Galaxy (M31) is the<br />
closest spiral-type galaxy to our own. This galaxy appears fuzzy and cigar-shaped. It<br />
is 2.2 million light years away in the constellation Andromeda, located between the<br />
large “W” of Cassiopeia and the great square of Pegasus.<br />
page 45
A Roadmap to the Stars<br />
The night sky is filled with wonder and<br />
intrigue. You too can enjoy exploring<br />
the universe simply by following a few<br />
pointers on a roadmap to the stars.<br />
First, find the Big Dipper which is part of<br />
the constellation Ursa Major. The Big<br />
Dipper is usually easy to locate year<br />
round in North America.<br />
Extending directly out from the far side<br />
of the Big Dipper’s cup is the<br />
constellation Orion. One of the most<br />
exquisite areas of the winter sky, Orion<br />
is distinguished by Orion’s belt, which is<br />
marked by three stars in a row. The<br />
Orion Nebula is located South of the<br />
belt and is one of the most observed<br />
deep-sky objects by amateur<br />
astronomers.<br />
Extending from the “pointer stars” of the<br />
Big Dipper’s cup is Polaris, the North Star. Extending from Polaris is the Great Square<br />
shared by the constellations Pegasus and Andromeda.<br />
The Summer Triangle is a notable region in the sky to the left of the handle of the Big<br />
Dipper. The triangle is made up of three very bright stars: Vega, Deneb, and Altair.<br />
By drawing an imaginary line outward from the handle of the Big Dipper, you reach<br />
the southern constellation “Scorpius.” Scorpius curves to the left like the tail of a<br />
scorpion in the sky, or like letter “J.”<br />
Amateur astronomers commonly use the phrase “Arc to Arcturus and spike to Spica”<br />
to refer to the area directly off the arc in the handle of the Big Dipper. Follow the arc<br />
to Arcturus, the second brightest star in the Northern Hemisphere, then spike down to<br />
Spica, the 16th brightest star in the sky.<br />
Star Locator<br />
The chart below lists bright stars with their R.A. and Dec coordinates, along with the<br />
Northern Hemisphere season when these stars are prominent in the night sky. This<br />
list aids the observer to find alignment stars at various times of the year. For example,<br />
if it is a midsummer evening in the Northern Hemisphere, Deneb in the constellation<br />
Cygnus would be an excellent alignment star, while Betelgeuse could not be used<br />
because it is in the winter constellation Orion and thus, below the horizon.<br />
Season Star Name Constellation R.A. Dec<br />
Spring Arcturus Bootes 14h16m 19° 11"<br />
Spring Regulus Leo 10h09m 11° 58"<br />
Spring Spica Virgo 13h25m -11° 10"<br />
Summer Vega Lyra 18h37m 38° 47"<br />
Summer Deneb Cygnus 20h41m 45° 17"<br />
Summer Altair Aquila 19h51m 08° 52"<br />
Summer Antares Scorpius 16h30m -26° 26"<br />
Fall Markab Pegasus 23h05m 15° 12"<br />
Fall Fomalhaut Pisces Austrinus s22h58m -29° 38"<br />
Fall Mira Cetus 02h19m -02° 58"<br />
Winter Rigel Orion 05h15m -08° 12"<br />
Winter Betelgeuse Orion 05h55m 07° 25"<br />
Winter Sirius Canis Major 06h45m -16° 43"<br />
Winter Aldebaran Taurus 04h35m 16° 31"<br />
page 46<br />
Andromeda<br />
Pegasus<br />
“Summer<br />
Triangle”<br />
Altair<br />
Aquila<br />
Deneb<br />
Cygnus<br />
Vega<br />
Lyra<br />
Polaris<br />
Antares<br />
Rigel<br />
Scorpius<br />
Orion<br />
Betelgeuse<br />
Castor<br />
Gemini<br />
“Big Dipper”<br />
Boötes<br />
Arcturus<br />
Fig. 37: Roadmap to the stars.<br />
Spica<br />
Pollux<br />
Virgo<br />
Leo<br />
“Sickle”<br />
Regulus
<strong>Meade</strong> Limited Warranty<br />
Every <strong>Meade</strong> telescope, spotting scope, and binocular is warranted by <strong>Meade</strong> Instruments Corp. (MIC) to<br />
be free of defects in materials and workmanship for a period of ONE YEAR from date of original retail<br />
purchase in the U.S.A. MIC will repair or replace the product, or part thereof, found upon inspection by MIC<br />
to be defective, provided the defective part or product is returned to MIC, freight prepaid, with proof of<br />
purchase. This warranty applies to the original purchaser only and is non-transferable. <strong>Meade</strong> products<br />
purchased outside North America are not included in this warranty, but are covered under separate<br />
warranties issued by <strong>Meade</strong> International Distributors.<br />
RGA Number Required: Prior to the return of any product or part, a Return Goods Authorization (RGA)<br />
number must be obtained by writing to MIC or by calling 949-451-1450. Each returned part or product must<br />
include a written statement detailing the nature of the claimed defect, as well as the owner’s name, address,<br />
phone number, and a copy of the original sales invoice.<br />
This warranty is not valid in cases where the product has been abused or mishandled, where unauthorized<br />
repairs have been attempted or performed, or where depreciation of the product is due to normal wear-andtear.<br />
MIC specifically disclaims special, indirect, or consequential damages or lost profit, which may result<br />
from a breach of this warranty. Any implied warranties which cannot be disclaimed are hereby limited to a<br />
term of one year from the date of purchase by the original retail purchaser.<br />
This warranty gives you specific rights. You may have other rights which vary from state to state.<br />
MIC reserves the right to change product specifications or to discontinue products without prior notice.<br />
This warranty supersedes all previous <strong>Meade</strong> product warranties.
ADVANCED PRODUCTS DIVISION<br />
<strong>Meade</strong> Instruments Corporation<br />
World’s Leading Manufacturer of Astronomical Telescopes for the Serious Amateur<br />
6001 Oak Canyon, Irvine, California 92618 ■ (949) 451-1450<br />
FAX: (949) 451-1460 ■ www.meade.com © 2000<br />
0600 14-7010-04