DOSIFAST - Bad Request
DOSIFAST - Bad Request
DOSIFAST - Bad Request

You also want an ePaper? Increase the reach of your titles
YUMPU automatically turns print PDFs into web optimized ePapers that Google loves.
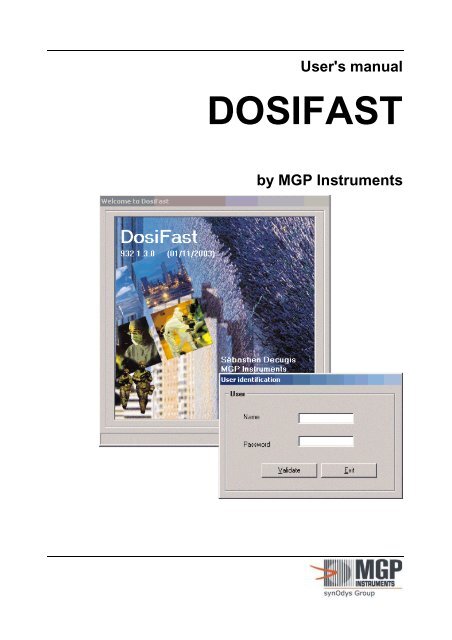
User's manual<br />
<strong>DOSIFAST</strong><br />
by MGP Instruments
Table of Revisions DosiFast<br />
Table of Revisions<br />
Index /Date<br />
Written By<br />
A 12/12/2002<br />
S. DECUGIS<br />
A 20/10/2003<br />
S.DECUGIS<br />
D 10/05/2004<br />
M.GUERIN<br />
Modified Pages Origin and description of modification<br />
Creation of document<br />
Most of the pages.<br />
First Edition<br />
New number 128115A,<br />
replacing 126713AA<br />
Software version 1.3.0<br />
• Addition of LDM210 and 220<br />
medium<br />
• Addition of secondary dose<br />
medium<br />
• Addition of legal personnel<br />
categories<br />
• Various corrections.<br />
Software version 1.4.0<br />
• Addition of LDM230 reader<br />
• Addition of default thresholds<br />
• Addition of LdmMgr<br />
configuration<br />
Various corrections.<br />
126713EN-C III
Table of Contents DosiFast<br />
Table of Contents<br />
1 Overview 1<br />
1.1 Purpose of this document 1<br />
1.2 Contents 2<br />
1.3 Reference documents 3<br />
1.4 Direct access to the information 3<br />
1.5 Conv entions<br />
3<br />
1.5.1 Typographical symbols 3<br />
1.5.2 Screen copies 3<br />
1.5.3 Selecting the functions from the menu 4<br />
1.5.4 Terminology 4<br />
1.5.5 Advise, reminder, Note 4<br />
1.6 Description 5<br />
1.6.1 Features 6<br />
2 Installation and setup 7<br />
2.1 Introduction 7<br />
2.2 Hardware required configuration 7<br />
2.3 Installing the software 8<br />
2.3.1 Startup of the installation 9<br />
2.4 Installing the hardware 11<br />
2.4.1 Hardware configuration for use with a LDM101 12<br />
2.4.2 Hardware configuration for use with an LDM210 reader 12<br />
2.4.3 Hardware configuration for use with an LDM220 reader 13<br />
2.4.4 Hardware configuration for use with an LDM230 reader 13<br />
2.5 Exitin g the application<br />
13<br />
2.5.1 Stopping <strong>DOSIFAST</strong> 13<br />
2.5.2 Stopping LdmMgr 14<br />
3 General presentation 15<br />
3.1 Introduction 15<br />
3.2 Access levels 15<br />
3.2.1 User profile 15<br />
3.2.2 Supervisor profile 16<br />
3.2.3 Medical level 16<br />
126713EN-C V
DosiFast Table of Contents<br />
3.2.4 Administrator level 16<br />
3.3 Main screen 17<br />
3.3.1 Supervisor mode 17<br />
3.3.2 User mode 18<br />
3.3.3 Administrator mode 18<br />
3.4 Accessible function from the main menu bar 19<br />
3.4.1 File menu (Alt+F) 19<br />
3.4.2 Worker menu (Alt + W) 19<br />
3.4.3 Companies menu (Alt + C) 19<br />
3.4.4 Doctors menu (Alt + t) 20<br />
3.4.5 Dosimetry menu (Alt + D) 20<br />
3.4.6 Configuration menu (Alt + o) 20<br />
3.5 Keyboard definition 21<br />
3.5.1 Conventions 21<br />
3.5.2 Starting the software 21<br />
3.5.3 Select a function from the main menu 21<br />
3.5.4 In a screen 22<br />
4 Initialization of the data 23<br />
4.1 Introduction 23<br />
4.2 Access to the configuration window 23<br />
4.3 Access to the company screen 25<br />
4.3.1 How to access an existing company? 26<br />
4.3.2 How to create a new company? 30<br />
4.4 Access to the doctor screen 31<br />
4.4.1 How to access to an existing doctor? 32<br />
4.4.2 How to create a new doctor? 34<br />
4.5 Access to the work codes window 35<br />
4.5.1 How to add/change a work code? 36<br />
4.6 Access to the worker screen 37<br />
4.6.1 How to access to an existing worker? 38<br />
4.6.2 How to create a new worker? 41<br />
5 Assigning a dosimeter 47<br />
5.1 Introduction 47<br />
5.2 Assignment 47<br />
5.2.1 Definitive assignment 47<br />
5.2.2 Temporary assignment 48<br />
5.2.3 Anonymous assignment 49<br />
5.3 List of prepared dosimeters 49<br />
5.4 Deactivate 49<br />
6 Displaying, editing the dosimetric<br />
summaries 51<br />
6.1 Presentation 51<br />
6.2 Displaying of the dosimetry summary 52<br />
VI 126713EN-C
Table of Contents DosiFast<br />
6.3 Displaying the daily dose cumulations 53<br />
6.3.1 Editing worker data sheet 58<br />
6.3.2 Editing the dose cumulations 60<br />
6.3.3 Editing the summary by task 65<br />
6.3.4 Editing cumulations by task code 67<br />
6.3.5 Editing alarms summary 71<br />
7 Watching the system 73<br />
7.1 Presentation 73<br />
7.2 Checking that the LDM Reader is working<br />
adequately 73<br />
7.3 Checking access authorization 74<br />
8 Preparation/deactivation 75<br />
8.1 Presentation 75<br />
8.2 Dosimeter preparation 75<br />
8.3 Dosimeter deactivation 77<br />
8.4 Reader configuration 78<br />
9 Tips and tricks 81<br />
9.1 Presentation 81<br />
9.2 Changing the units 81<br />
9.3 Changing the language 81<br />
9.4 Audible alerts 83<br />
9.5 Reader name 85<br />
9.6 Picture used for reports 86<br />
9.7 Checking a communication problem with the<br />
reader. 86<br />
10 Extension 87<br />
10.1 Introduction 87<br />
10.2 Several LDM connected to the same PC 87<br />
10.3 Several PC/LDM pairs in the same installation 90<br />
11 Glossary 93<br />
126713EN-C VII
DosiFast Overview<br />
1 Overview<br />
1.1 Purpose of this document<br />
This document provides the necessary information for the optimal use of the<br />
individual dosimetry software <strong>DOSIFAST</strong>:<br />
with DMC 2000 dosimeters and LDM101, LDM210, LDM220 or LDM230<br />
readers,<br />
in a windows environment.<br />
For any use of this software on other platforms, please consult an MGP<br />
Instruments representative.<br />
For more information on the dosimeters and readers, please refer to the respective<br />
manuals (see §1.3 Reference documents, page 3).<br />
Note: the present document is applicable for a user that already has some basic<br />
knowledge of the windows SOFTWARE environment. I.e. mouse manipulation,<br />
menus, open, save a file. If necessary refer to the operating system’s<br />
documentation.<br />
126713EN-C 1
Overview DosiFast<br />
1.2 Contents<br />
The present document contains the following chapters:<br />
Installation and start up<br />
The chapter describes the necessary operation in order to install and start the<br />
<strong>DOSIFAST</strong> software. It also describes the use of the LDM101, LDM210, LDM220<br />
or LDM230 reader.<br />
General presentation<br />
The chapter describes all the <strong>DOSIFAST</strong> features in order to have an easy access<br />
to the program functions.<br />
Initializing the data<br />
The chapter provides a detailed procedure to create and maintain the required<br />
data in order to manage the individual dosimetry.<br />
(Categories, Alarms thresholds, dose limits, company’s data, doctor data, and<br />
worker data).<br />
Assignment of a dosimeter<br />
The chapter describes the methods to assign temporarily or permanently<br />
(definitively) a dosimeter to a worker, to prepare the dosimeter, to consult the list<br />
of prepared dosimeters, or start-up the dosimeter.<br />
Displaying, editing dosimetric reports<br />
The chapter describes all the reports that can be printed.<br />
Watch the system (System supervision)<br />
This chapter describes what the user needs to know to check that the system<br />
(LDM101; LDM210 or LDM 220 readers) is working correctly (readers correctly<br />
connected and pooled).<br />
Trick (System preferences)<br />
The chapter explains how, to change the software warnings change the units, or<br />
change the language.<br />
Extension<br />
The chapter describes how to extend the system: multiple readers on the same<br />
PC, multiple readers on other PC’s.<br />
An appendix at the end of the document provides further information.<br />
2 126713EN-C
DosiFast Overview<br />
1.3 Reference documents<br />
For any further information on associated equipment used by the <strong>DOSIFAST</strong><br />
software, please refer to the following documents:<br />
DMC2000 users manual: 128104<br />
LDM101 users manual: 122 865 (French, 15-0001 and 15-0002 in English)<br />
LDM210/220 users manual: 127 356 (French) et 128 569 (English)<br />
1.4 Direct access to the information<br />
The document is designed to provide quick access to any information; including:<br />
A detailed Table of Contents located at the beginning of the present<br />
document.<br />
A Glossary located at the end describes all the acronyms, abbreviations and<br />
terminology.<br />
1.5 Conventions<br />
1.5.1 Typographical symbols<br />
The and symbols are used to describes enumerations.<br />
The symbol is to indicate the first level of the enumeration.<br />
The symbol is to indicate the second level of the enumeration.<br />
1.5.2 Screen copies<br />
This document includes many screen copies.<br />
All the screen copies may slightly differ with the OS version used.<br />
Note: All the screen copies are done with the “USER” level, if it is not the case, the<br />
level will be mentioned.<br />
126713EN-C 3
Overview DosiFast<br />
1.5.3 Selecting the functions from the menu<br />
For clarification, the selection of a function from the menu will be described as<br />
follows:<br />
From the main menu select menu’s function /menus sub-function / etc.<br />
Example: “To print the document select File / Print”<br />
1.5.4 Terminology<br />
The present manual refers to menu terms that are specific to the dosimetry. For<br />
clarity, the entire dosimetry specific vocabulary is explained in the glossary located<br />
at the end of the document.<br />
1.5.5 Advise, reminder, Note<br />
The user will find in the manual some text zones named advise, reminder, Notes.<br />
Advice: the advice promotes improved work efficiency and offers shortcuts or<br />
actions that will help save time.<br />
Reminder: the “reminder” reminds some information seen to prevent additional<br />
investigations.<br />
Notes: the Notes indicate important points, exceptions and specific points.<br />
4 126713EN-C
DosiFast Overview<br />
1.6 Description<br />
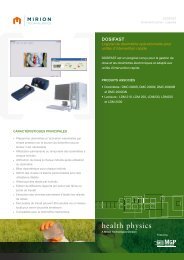
<strong>DOSIFAST</strong> is as simple/easy to use personal dosimetry<br />
This software is especially designed for fast responder crews who need to activate<br />
the dosimeter instantaneously.<br />
DosiFast allows to prepare the dosimeters (set alarms and assign the dosimeter if<br />
the wearer is known) and to set them in “fast entry” mode. This mode allows to<br />
quickly activating the dosimeter without using any reader but simply pressing its<br />
push button.<br />
DosiFast records daily cumulated dose per wearer and per work code.<br />
These team may also not know who will carry the dosimeter, therefore, DosiFast<br />
allows to assign the dose afterwards, when reading the dosimeter.<br />
The <strong>DOSIFAST</strong> software is delivered on a CD-ROM disk, including the on line<br />
documentation.<br />
This software must be installed on PC-type machines featuring an operating<br />
system: Windows 95, Windows 98, Windows Me, Windows NT (take care to USB<br />
peripheral management if you have an LDM220), Windows 2000 (Service Pack 3<br />
or higher mandatory), XP (Service Pack 1 or higher highly recommended), and is<br />
used with DMC2000S, DMC2000X, DMC2000XB dosimeters and one or more<br />
LDM101, LDM210, LDM220 readers. It should be noted that it is also possible to<br />
use an LDM2000 type serial or Ethernet reader. Contact MGP for further<br />
information.<br />
126713EN-C 5
Overview DosiFast<br />
1.6.1 Features<br />
<strong>DOSIFAST</strong> offers the following functions:<br />
Configuration of the pre installed data<br />
Definition of the common data (Category, alarm threshold, pre alarm threshold,<br />
dose limits, unit)<br />
Basic data creation<br />
company’s data creation<br />
Doctor’s data creation<br />
wearer’s data creation<br />
Assignment of a dosimeter<br />
Permanent assignment<br />
Temporary assignment<br />
Dosimeter reading<br />
After use dose assignment<br />
Alarm cases sorting<br />
Displaying, editing dosimetric reports<br />
Dose export in as text file for specific statistics or reports.<br />
Survey of the system<br />
6 126713EN-C
DosiFast Installation and setup<br />
2 Installation and setup<br />
2.1 Introduction<br />
The installation and the setup of <strong>DOSIFAST</strong> consists in:<br />
Installing the software on the PC<br />
Installing the hardware configuration (linking the PC to the DMC reader)<br />
Setting up the link between the PC and the reader<br />
2.2 Hardware required configuration<br />
The minimum requirements for a pc to run the <strong>DOSIFAST</strong> software are specified<br />
as follows:<br />
PC compatible (INTEL Pentium II >= 400 MHz)<br />
Hard drive >= 2 Gbytes<br />
RAM memory >= 32 Mbytes<br />
1 serial RS232 (or USB) port available and recognized by the operating<br />
system.<br />
Microsoft Windows (95, 98,Me, NT, 2000-SP3 or XP-SP1)<br />
Color screen SVGA resolution 800 x 600 minimum<br />
Printer<br />
Mouse<br />
The CD-ROM, MGP Instruments number 932 containing the <strong>DOSIFAST</strong><br />
software.<br />
126713EN-C 7
Installation and setup DosiFast<br />
2.3 Installing the software<br />
Advice: before starting the installation software, we recommend that you quit all<br />
other running applications on the PC.<br />
The <strong>DOSIFAST</strong> software is delivered on a CD-ROM containing the <strong>DOSIFAST</strong><br />
and LdmMgr modules.<br />
Note: LdmMgr is the software module that manages the reader.<br />
Insert the CD-ROM, launch the "setup.exe" program and follow the instructions.<br />
Notes:<br />
The installation is valid:<br />
- only for LDM101, LDM 210, LDM 220 and LDM230 readers<br />
- only for one language (English or French)<br />
Any further change (changing the reader type, the language or the dosimeter type)<br />
requires a new installation.<br />
Consult MGP Instruments whenever the <strong>DOSIFAST</strong> software is desired to be used<br />
with another type of reader.<br />
The installation procedure allows for selection of the type of reader on the<br />
following screen:<br />
8 126713EN-C
DosiFast Installation and setup<br />
If you have chosen an LDM220, you will have to install an additional driver (the<br />
option will be proposed to you further on in the installation procedure).<br />
Some precautions shall be taken with this driver. For further details, please refer to<br />
the LDM220 reader user's manual (provided on the Dosifast CD), specially when<br />
you use Windows XP.<br />
When installing the USB drive for the first time, please give the first number<br />
available on your PC as COM port number. For example, if you have two serial<br />
ports, COM1 and COM2, you must answer « 3 » (most usual case). Once the<br />
software is installed, if you see that you have not given the correct port number,<br />
you can change it in the Ldm1.ini file, as indicated hereafter in the manual.<br />
It should be noted that it is advisable to install Dosifast BEFORE connecting your<br />
USB drive for the first time for the latter to directly acknowledge the proper driver.<br />
2.3.1 Startup of the installation<br />
When installing, a folder called “ <strong>DOSIFAST</strong> ” is created on the desktop.<br />
Open this folder by double clicking the folder icon.<br />
Double click on the “LdmMgr” icon to launch the module that manages the<br />
communications with the LDM reader.<br />
Note: If you have connected more than one reader to your PC, please refer to<br />
§10.3 Several PC/LDM pairs in the same installation, page 90.<br />
Double click on the “<strong>DOSIFAST</strong>” icon.<br />
Due to the fact the Dosifast manages individual dosimetry information, it has to<br />
provide protection to some of the information by a password access.<br />
When the program loads, the user is requested to enter a user name and a<br />
password.<br />
The user and password (in lower case) have to be declared in the database. This<br />
is performed in the “add user” function.<br />
Note: Please connect your LDM reader prior to proceeding. The procedure is<br />
described in the next chapter.<br />
Warning:<br />
For the very first use of the software the user can connect as user “mgpa”,<br />
password “mgpa”<br />
It is the only defined user.<br />
126713EN-C 9
Installation and setup DosiFast<br />
To be able to continue, the user must define other users that will be able to log in<br />
to use <strong>DOSIFAST</strong>.<br />
Use Configuration/users function.<br />
Example: declare the user “user”, as a supervisor of the system (do not forget the<br />
fill the “profile” field that can be acceded by user up or down arrows)<br />
10 126713EN-C
DosiFast Installation and setup<br />
If the user and password are known by the system the main screen appears. The<br />
accessible functions are listed in the main menu on top of the screen.<br />
Check the link with the reader:<br />
The state is indicated by a symbol at the bottom right of the task bar (systray).<br />
If the symbol has a red cross on it, it means that the LdmMgr software is not<br />
communicating with the reader. (See §7.2 Checking that the LDM Reader is<br />
working adequately, page 73).<br />
If the symbol appears not crossed, then the system is operational and ready for<br />
use.<br />
2.4 Installing the hardware<br />
This operation consists in physically connecting the PC and the LDM101 and set<br />
up the link.<br />
The procedures related to the installation of the LDM101, LDM210, LDM220 and<br />
LDM230 readers are covered hereafter.<br />
126713EN-C 11
Installation and setup DosiFast<br />
2.4.1 Hardware configuration for use with a LDM101<br />
2.4.1.1 Connecting the LDM101 to the PC<br />
Connect the cable provided with the reader between the serial port # (for<br />
example) 1 of the PC and the LDM101. This cable is a DB 9 serial cable with a<br />
male connector for the LDM101 and a female connector on the PC side.<br />
Connect the power cable to the LDM101 - the cable is a DIN 5 male connector<br />
on the LDM side.<br />
Connect the other side (AC Power Adapter) of the cable to a power source.<br />
Note: In case of use with a different serial port you must configure the software in<br />
order to use a different port. (See §8.4 Reader configuration, page 78).<br />
2.4.1.2 Selection the LDM101’s address<br />
Every LDM101 is identified with an address that can be set from 0 to 7.<br />
For a use with <strong>DOSIFAST</strong> this address should be set to ”0”.<br />
A new LDM reader is pre-configured from the factory with address 0.<br />
If problems are encountered with reader configuration, refer to the appendix of this<br />
manual or contact an MGP Instruments representative.<br />
2.4.2 Hardware configuration for use with an LDM210<br />
reader<br />
2.4.2.1 Connecting the LDM210 to the PC<br />
Connect PC serial port COM1 (for instance) to the LDM210 serial port using the<br />
serial cable supplied in standard version with the reader. This cable is provided<br />
with a 9-pin contact connector (DB9) and a 9-socket contact connector (DB9).<br />
Connect the mains adapter power supply cord fitted with a connector at the<br />
rear of the LDM210 (DCin input)<br />
Connect the transformer to the mains.<br />
Note: In case of use of a serial port other than COM1, a software configuration is<br />
required (See §8.4 Reader configuration, page 78).<br />
2.4.2.2 Selecting the LDM210's address<br />
The LDM210, LDM220 and LDM230 readers are ALWAYS at address 01. Take<br />
care not to change this address in the LdmMgr configuration unless the reader<br />
would no longer reply.<br />
12 126713EN-C
DosiFast Installation and setup<br />
2.4.3 Hardware configuration for use with an LDM220<br />
reader<br />
2.4.3.1 Connecting the LDM220 to the PC<br />
Connect the USB cable of your reader to a free USB input of your PC.<br />
Note: If no more USB ports are available, HUBs are provided to increase the<br />
capacity of your computer.<br />
It is highly recommended to always connect your reader to the same USB<br />
connector unless an LdmMgr software configuration would be required upon each<br />
connector change (change of the virtual COM port number).<br />
2.4.3.2 Selecting the LDM220's address<br />
The LDM210, LDM220 and LDM230 readers are ALWAYS at address 01. Take<br />
care not to change this address in the LdmMgr configuration unless the reader<br />
would no longer reply.<br />
2.4.4 Hardware configuration for use with an LDM230<br />
reader<br />
2.4.4.1 Connecting the LDM230 to the PC<br />
Insert the LDM230 reader into the PCMCIA slot of the computer.<br />
2.4.4.2 Sélection de l’adresse du LDM230<br />
The LDM210, LDM220 and LDM230 readers are ALWAYS at address 01. Take<br />
care not to change this address in the LdmMgr configuration unless the reader<br />
would no longer reply.<br />
2.5 Exiting the application<br />
The following procedure describes the process for successfully exiting <strong>DOSIFAST</strong><br />
and LdmMgr module.<br />
2.5.1 Stopping <strong>DOSIFAST</strong><br />
From the main menu select File/Quit<br />
126713EN-C 13
Installation and setup DosiFast<br />
Confirm by clicking “Yes”<br />
2.5.2 Stopping LdmMgr<br />
On the bottom right of the screen is the LdmMgr icon.<br />
Click on the right button of the mouse, the following menu pops up.<br />
Confirm your choice<br />
14 126713EN-C
DosiFast General presentation<br />
3 General presentation<br />
3.1 Introduction<br />
This chapter describes all the <strong>DOSIFAST</strong> features in order to have an easy access<br />
to the software functions.<br />
The following features are detailed:<br />
Access level to information<br />
Main screen presentation<br />
General description off all the functions accessible from the main menu.<br />
Using the software with the keyboard only.<br />
3.2 Access levels<br />
Some of the functions are only accessible if the user has been configured with the<br />
correct access level.<br />
An access level is selected by entering the following information:<br />
the user name<br />
the associated password<br />
The default values of these parameters are covered hereafter for each access<br />
level.<br />
3.2.1 User profile<br />
This access level allows a user to manage worker database, company database<br />
and doctors database (add, modify, suppress). It is the lowest level of the system.<br />
Therefore, this user cannot have access to the dosimetry information of the<br />
workers.<br />
3.2.1.1 Default user pre installed with this profile<br />
User name « mgpu »<br />
Password: « mgpu »<br />
126713EN-C 15
General presentation DosiFast<br />
3.2.2 Supervisor profile<br />
This user can access any function of the software, with exception to the following:<br />
The user will not be able to access the user management function (adding new<br />
user into the system, or deleting an existing user).<br />
3.2.2.1 Default user pre installed with this profile<br />
User name « mgps »<br />
Password: « mgps »<br />
3.2.3 Medical level<br />
This level is similar to the supervisor level except that the medical profile allows to:<br />
look backward 5 years of dose accumulation (supervisor can only look back 1 year<br />
of dose accumulation).<br />
3.2.3.1 Default user pre installed with this profile<br />
User name « mgpm »<br />
Password: « mgpm »<br />
Advice:<br />
When using the software for the very first time, only these 3 users can log on. Use<br />
mgpa and create the actual users that will use the software.<br />
3.2.4 Administrator level<br />
This level only gives the access to the user management function.<br />
In other words, it only gives access to the « Configuration » menu.<br />
This is the only level which can be used to perform the Configuration function of<br />
the main menu. This function is intended to manage the users and associated<br />
access levels.<br />
3.2.4.1 Default user pre installed with this profile<br />
User name « mgpa »<br />
Password: « mgpa »<br />
Important warning:<br />
For the very first use of the system, only the access levels preconfigured upon<br />
installation can be used (user name and associated password). It is advisable to<br />
modify these access levels and configure the accesses for the persons who will<br />
use the system.<br />
16 126713EN-C
DosiFast General presentation<br />
3.3 Main screen<br />
The main screen appears after login (<strong>DOSIFAST</strong> icon).<br />
The main screen is made on a main window shown after.<br />
On top of the screen is the main menu bar.<br />
At the bottom, is displayed the current time.<br />
3.3.1 Supervisor mode<br />
All the functions are accessible.<br />
126713EN-C 17
General presentation DosiFast<br />
3.3.2 User mode<br />
The dosimetry function is not accessible.<br />
3.3.3 Administrator mode<br />
In this mode only Configuration/users are accessible.<br />
18 126713EN-C
DosiFast General presentation<br />
3.4 Accessible function from the main menu<br />
bar<br />
All the functions can be accessed through the main menu bar, using the mouse or<br />
using shortcuts.<br />
Pressing simultaneously «Alt» and the underlined letter of the menu can activate<br />
the shortcuts.<br />
Note: some functions depend on the user profile/access level (for more<br />
information see §3.2 Access levels, page 15)<br />
The main functions are listed bellow:<br />
Exiting the application (File menu),<br />
3.4.1 File menu (Alt+F)<br />
The menu allows you to exit <strong>DOSIFAST</strong>.<br />
To quit the software:<br />
From the main menu choose File<br />
Click on Exit<br />
Or type ALT + “F” and “E”<br />
3.4.2 Worker menu (Alt + W)<br />
This menu gives access to the following functions:<br />
Access to the workers data sheets<br />
View of the worker list<br />
View of the dosimetric report of the workers (daily doses)<br />
View the workers with a dosimeter prepared or activated<br />
3.4.3 Companies menu (Alt + C)<br />
This menu gives access to the following functions:<br />
View of the company list<br />
Access to the company data sheets<br />
126713EN-C 19
General presentation DosiFast<br />
3.4.4 Doctors menu (Alt + t)<br />
This menu gives access to the following functions:<br />
View of the doctor’s list<br />
Access to the doctor’s data sheets<br />
3.4.5 Dosimetry menu (Alt + D)<br />
This menu gives access to the following functions:<br />
Edition of the individual data sheet for a worker. This window contains general<br />
information on the worker and also the dosimetric accumulations.<br />
Edition, for a worker or a group of workers or all of them, of the daily doses<br />
between the selected dates.<br />
The edition can be made with more or less details.<br />
Edition of a daily dose summary for a worker or a group of workers or all sorted<br />
by work codes.<br />
Edition for one (several) work codes, over a given period.<br />
Edition of dosimeter alarms (according to the user's choice) over a given<br />
period.<br />
3.4.6 Configuration menu (Alt + o)<br />
This menu gives access to the following functions:<br />
Definition of categories of workers, and for every threshold for dose, rate<br />
alarms and pre alarms, definition of all the default dosimetric limits.<br />
Creation/administration of the list of users that can use the software.<br />
Administration of the list of the work codes.<br />
20 126713EN-C
DosiFast General presentation<br />
3.5 Keyboard definition<br />
The software can be used with the keyboard only.<br />
3.5.1 Conventions<br />
The following section provides a key definition for the following:<br />
DOWN : down arrow,<br />
RIGHT : right arrow,<br />
ENTER : validation key “ENTER”<br />
LEFT : left arrow,<br />
UP : up arrow,<br />
SHIFT : shift key,<br />
TAB : tab key,<br />
ALT : alt key,<br />
ESC : escape key.<br />
3.5.2 Starting the software<br />
3.5.2.1 Starting <strong>DOSIFAST</strong><br />
Access the start menu using menu key or CTRL+ESC<br />
Type UP to reach “Program” menu<br />
Type RIGHT to open the “Program” folder<br />
Type UP or DOWN to reach <strong>DOSIFAST</strong> folder<br />
Type RIGHT to open the “<strong>DOSIFAST</strong>” folder.<br />
Type UP or DOWN to reach “<strong>DOSIFAST</strong>” program<br />
3.5.2.2 Starting LdmMgr<br />
Perform the same sequence as but tab to the LdmMgr program and press ENTER.<br />
3.5.3 Select a function from the main menu<br />
Press simultaneously ALT and the letter underlined to open a menu<br />
Press the underlined letter of the function you want to activate<br />
126713EN-C 21
General presentation DosiFast<br />
3.5.4 In a screen<br />
3.5.4.1 Moving<br />
To move from one field to another in a screen:<br />
Press TAB to move forward from a field to the next one,<br />
press SHIFT + TAB to move backward.<br />
Press ALT + the underlined letter of any button to highlight it, enter to active the<br />
button.<br />
Note: pressing ALT+letter sometimes activates the function<br />
3.5.4.2 Activating an item<br />
To activate the function corresponding to the selected item, press SPACE.<br />
3.5.4.3 Entering a numerical value<br />
Directly enter the numerical value at the keyboard<br />
(for example:.001 or 1E-3)<br />
or<br />
Press UP to increment the current value,<br />
or<br />
Press DOWN to decrement the current value.<br />
3.5.4.4 Entering an on/off type value<br />
Press SPACE to change from on to off and vice versa.<br />
3.5.4.5 Choosing an item in a list<br />
Press DOWN to display the next item of the list<br />
Press UP to display the previous item of the list.<br />
22 126713EN-C
DosiFast Initialization of the data<br />
4 Initialization of the data<br />
4.1 Introduction<br />
This section describes how the minimum required data is initialized in order to start<br />
the system.<br />
This chapter describes the following:<br />
Access to the configuration window<br />
Description of the configuration window<br />
Access to the company window<br />
Description of the company window<br />
Access to the doctor windows<br />
Description of the doctor windows<br />
Access to the worker window<br />
Description of the worker window<br />
Note : DosiFast is given with example data, it is necessary to create new ones<br />
before deleting them.<br />
4.2 Access to the configuration window<br />
After starting <strong>DOSIFAST</strong>, the user should define, for each personnel category the<br />
following:<br />
Dose, dose rate and duration alarm thresholds used for the dosimeter current<br />
use (when the dosimeter is started-up)<br />
The dose and rate pre alarm threshold<br />
Dose limits for all the managed period of time<br />
All these values are grouped in the same screen.<br />
Proceed as follows.<br />
From the main menu select Configuration/Threshold<br />
The following screen appears..<br />
126713EN-C 23
Initialization of the data DosiFast<br />
This window is divided into three zones.<br />
The first top zone allows to select the thresholds used by default during a post<br />
allocation (anonymous DMC).<br />
The second zone allows for changing from one category to another using the tabs.<br />
The frame below is used to delete one personnel category (possible only when the<br />
number of workers of this category is zero), or create a new one. For the latter<br />
operation, enter the name of the new category as well as the values in the second<br />
zone.<br />
The third zone contains the primary and secondary alarm and warning threshold<br />
values which will be programmed in the dosimeters. It also contains the limit<br />
values of periodic cumulations used to perform access control upon area entry.<br />
It should be noted that, as regards use of DMC2000Xb dosimeter, the primary<br />
measurement corresponds to the dose termed deep Hp(10) and the secondary<br />
measurement corresponds to the dose termed superficial Hp(0.007)<br />
Finally, the screen bottom portion contains the configuration parameters which are<br />
not dependent on the personnel category.<br />
Terminate the keyboarding by pressing Validate<br />
Use the « Tab » key to move in the mask.<br />
Once on the desired highlighted field, type the numerical value in the form of an<br />
integer and move from one field to another using « Tab ».<br />
Terminate the keyboarding by clicking the « Validate » button.<br />
Important warning:<br />
The values of the different limits will be decisive upon assignment of a dosimeter<br />
24 126713EN-C
DosiFast Initialization of the data<br />
to a person and upon startup of the dosimeter since the software will check that<br />
the dose cumulations do not exceed the limits entered at this stage.<br />
the values shown in this screen are only the default values that will be assigned to<br />
any new worker.<br />
These values can then be customized in the worker sheet:<br />
Move to the field to be modified and enter the new value,<br />
Click the « Validate » button.<br />
4.3 Access to the company screen<br />
It is recommended to create the company data prior to creating worker data<br />
because the user will have to set the worker’s company into the worker sheet.<br />
The user can access this function from the main Company menu<br />
126713EN-C 25
Initialization of the data DosiFast<br />
4.3.1 How to access an existing company?<br />
4.3.1.1 1 st method: Select Company/list<br />
The following list appears<br />
Select a company:<br />
Double click on the company’s name or simply click to highlight followed by<br />
clicking ENTER.<br />
26 126713EN-C
DosiFast Initialization of the data<br />
The selected company’s data sheet appears on the screen.<br />
Click on “Modify” in order to add or change any of the data.<br />
“Delete” allows the user to suppress the displayed company.<br />
Modification:<br />
Click on the ”Modify” button<br />
TAB allows you to move to reach the field you want to change (or use the<br />
mouse)<br />
Commit the changes by pressing the “Validate” button.<br />
126713EN-C 27
Initialization of the data DosiFast<br />
“Validate” button to commit the changes.<br />
Suppression:<br />
Click on the “Delete” button<br />
The user will be asked to confirm the suppression.<br />
Click on “YES” to confirm.<br />
Click on “NO” to go back.<br />
28 126713EN-C
DosiFast Initialization of the data<br />
4.3.1.2 2nd method: Select in the main menu Company/data<br />
Click on the binoculars to start a search on the all the companies.<br />
Field Name: type in any part of the name of the company to search<br />
Click Find: the first company containing a part of the typed name will appear.<br />
Other companies with the same portion of name can be accessed by PG<br />
DOWN or by clicking one of the arrows.<br />
126713EN-C 29
Initialization of the data DosiFast<br />
4.3.2 How to create a new company?<br />
Select the Company/data menu<br />
The last modified company appears on the screen<br />
Click on “Add” to obtain blank entry fields<br />
A new blank data sheet appears on the screen:<br />
30 126713EN-C
DosiFast Initialization of the data<br />
In this new blank data sheet, the bold fields are mandatory (here, only the Name<br />
field is mandatory).<br />
When complete, click on “Validate” to save the new company data.<br />
4.4 Access to the doctor screen<br />
It is recommended that the user create the company data prior to creating worker<br />
data. this allows the user to select the worker’s doctor on the worker data sheet.<br />
The user can access this function from the main Doctor menu<br />
126713EN-C 31
Initialization of the data DosiFast<br />
4.4.1 How to access to an existing doctor?<br />
4.4.1.1 1 st method: Select Doctor/list<br />
The following list appears…<br />
Select a doctor:<br />
Double click on the doctor’s name or simply click (highlight) followed by ENTER.<br />
The selected doctor’s data sheet appears on the screen.<br />
Click on “Modify” in order to add or change any of the data.<br />
“Delete” allows THE USER to suppress the displayed company<br />
32 126713EN-C
DosiFast Initialization of the data<br />
Modification:<br />
Click on the ”Modify” button<br />
TAB allows you to move to reach the field you want to change (or use the<br />
mouse)<br />
Commit the changes by pressing the “Validate” button.<br />
Suppression:<br />
Click on the “Delete” button<br />
The user will be asked to confirm the suppression.<br />
Click on “YES” to confirm.<br />
Click on “NO” to go back.<br />
4.4.1.2 2nd method: Select in the main menu Doctor/data<br />
Click on the binoculars to start a search on the all the companies.<br />
126713EN-C 33
Initialization of the data DosiFast<br />
Field Name: type in any part of the name of the doctor to search<br />
Click Find: the first doctor containing a part of the typed name will appear.<br />
Other doctors with the same portion of name can be accessed by PG DOWN or<br />
by clicking one of the arrows.<br />
4.4.2 How to create a new doctor?<br />
Select the Doctor/data menu<br />
The last modified doctor appears on the screen<br />
Click on “Add” to obtain a blank doctor sheet.<br />
34 126713EN-C
DosiFast Initialization of the data<br />
In this new blank data sheet, the bold fields are mandatory.<br />
When done, click on “Validate” to save the new company data.<br />
4.5 Access to the work codes window<br />
From the configuration menu, the user can add new work codes or change the<br />
pre-defined work codes in the <strong>DOSIFAST</strong> database.<br />
Access to this screen using the Configuration menu.<br />
126713EN-C 35
Initialization of the data DosiFast<br />
4.5.1 How to add/change a work code?<br />
Select Configuration/Work Code, from the main menu, the following screen will<br />
appear.<br />
Using the mouse pointer, double click a work code. The selected entry will appear<br />
in the field at the bottom of the screen.<br />
The user can then add or change the work code by clicking the add, modify or<br />
delete buttons.<br />
36 126713EN-C
DosiFast Initialization of the data<br />
4.6 Access to the worker screen<br />
The available functions from the Worker menu are:<br />
List<br />
Data<br />
Dosimetry<br />
Worker in the RCA (or at least with a prepared dosimeter)<br />
126713EN-C 37
Initialization of the data DosiFast<br />
4.6.1 How to access to an existing worker?<br />
4.6.1.1 1 st method: Select Worker/list<br />
Select a worker:<br />
Double-click upon selection or « RETURN » after selection, the window<br />
associated with the worker sheet appears.<br />
38 126713EN-C
DosiFast Initialization of the data<br />
Click on “Modify” in order to change any of the data.<br />
“Delete” allows the user to (suppress) remove the displayed worker from the<br />
database.<br />
Modification:<br />
Click on the ”Modify” button<br />
TAB allows the user to move to reach the desired field for changes (or use the<br />
mouse)<br />
Commit the changes by pressing the “Validate” button.<br />
Suppression:<br />
Click on the “Delete” button<br />
You will, of course be asked to confirm the suppression.<br />
Click on “YES” to confirm.<br />
Click on “NO” to go back.<br />
Note: deleting a worker will also delete ALL its dosimetric information.<br />
126713EN-C 39
Initialization of the data DosiFast<br />
4.6.1.2 2nd method: Select in the main menu Worker/data<br />
The last used worker data sheet will appear on the screen.<br />
Click on the binoculars to start a search on the all the workers.<br />
Find the worker.<br />
Enter the name of the worker to be found and his dosimeter number if<br />
applicable (Dosimeter no. field).<br />
Click on "Find" to obtain the worker data.<br />
40 126713EN-C
DosiFast Initialization of the data<br />
4.6.2 How to create a new worker?<br />
Advise: make sure that the company and the doctor for this newly created worker<br />
already exists in the database. Create them otherwise (see Access to companies<br />
and Access to doctors).<br />
Select the Worker/data menu<br />
The last modified worker appears on the screen<br />
Click on “Add” to obtain a blank worker sheet.<br />
126713EN-C 41
Initialization of the data DosiFast<br />
The button allows the user to access to more information on the worker.<br />
Note: the bold fields are mandatory.<br />
After typing the data sheet should appear as follows:<br />
42 126713EN-C
DosiFast Initialization of the data<br />
Zone Identification:<br />
Field NAME:<br />
This field is mandatory. The name is forced in uppercases; maximum length is<br />
30 characters.<br />
Field First name:<br />
This field is mandatory. Maximum length is 30 characters.<br />
Field Dosimeter No.:<br />
Numeric field, 6 characters. This is the dosimeter serial number used by the<br />
worker. This field is not mandatory. However, if used, then the “allocated DMC”<br />
can be checked.<br />
If the dosimeter is inserted in the LDM reader, the worker will not have to<br />
identify himself on the screen to enter the zone.<br />
Field Com. name (Common name):<br />
Not mandatory, it can be used to distinguish between two namesakes.<br />
Field other names: This field is not mandatory.<br />
Field Attributed DMC:<br />
If the box is checked, the worker still works with the same dosimeter.<br />
Field DMC's display:<br />
In the case of an attributed DMC, this is the text which is on the screen of the<br />
dosimeter when the latter is at "pause" (outside area).<br />
Field Category:<br />
This field is mandatory. Worker category to which the worker belongs. This<br />
information gives the threshold and limit values for the worker. These default<br />
values can be modified by clicking the Dosimetry button.<br />
126713EN-C 43
Initialization of the data DosiFast<br />
For example, on this screen capture, the primary and secondary dose prealarm<br />
thresholds are modified for this worker.<br />
Note: the default values are those of the category of the worker.<br />
Zone Personal information:<br />
Field Social security number:<br />
Mandatory, this field will by printed in the dosimetric reports;<br />
Check box Sex:<br />
Male if checked, female if not.<br />
Date of birth:<br />
Mandatory, format is MM/DD/YY.<br />
Place of birth<br />
Not mandatory.<br />
Doctor:<br />
Not mandatory field, this field identifies the doctor that monitors the worker. It<br />
has to be chosen in the doctor list of the system. Press the « Delete » button to<br />
remove this information.<br />
Nationality:<br />
Not mandatory 20 characters maximum.<br />
44 126713EN-C
DosiFast Initialization of the data<br />
Zone Occupation:<br />
Field Company:<br />
Mandatory field - it has to be selected in the company list of the system.<br />
Field Function:<br />
Not mandatory.<br />
Field Type of contract:<br />
Not mandatory - Press the « Delete » button to remove this information. The<br />
tab on the right part of the field allows for access to the list of contract types.<br />
Field Section:<br />
Not mandatory field with a name of 50 characters maximum.<br />
Field Work code:<br />
Not mandatory - Press the « Delete » button to remove this information. IF the<br />
work code is NOT SELECTED there, then the worker will have to choose a<br />
work code prior to use the dosimeter.<br />
Zone Access control: Les champs de cette zone permettent d’interdire<br />
l’affectation d’un dosimètre.<br />
The fields of this zone are used to forbid the dosimeter assignment/activation.<br />
This forbidding can be unconditional by checking the « Forbidden access »<br />
box (a 50-character comment zone is used to specify the reason for denial<br />
which appears when the person attempts to activate his dosimeter), it can be<br />
conditional with reference to an end validity med. exam. date (in the form:<br />
DD/MM/YY).<br />
Beyond the specified date, the dosimeter activation will be denied.<br />
Note: in Dosifast, there is no absolute forbidding for use of the dosimeter. It should<br />
be understood by « denial » the fact that, upon assignment of the dosimeter to a<br />
person, the system will display alerts dependent on this area. It will always be<br />
possible to acknowledge these alerts and proceed with the dosimeter assignment<br />
procedure.<br />
126713EN-C 45
Initialization of the data DosiFast<br />
Additional data screen<br />
Zone "Additional data": allows the user to type in the address of the worker.<br />
Comments: 255-character zone.<br />
When all data entries are completed, click on the “validate” button to commit the<br />
changes<br />
Note: At his point the worker can begin to use his dosimeter (it is turned on and<br />
the dose will be recorded when it will be again deactivated).<br />
46 126713EN-C
DosiFast Assigning a dosimeter<br />
5 Assigning a dosimeter<br />
5.1 Introduction<br />
This chapter describes the necessary operations in order to assign a dosimeter to<br />
a worker. It also describes how to view the list of activated dosimeters. It finally<br />
describes the operation mode to deactivate (go to “pause”) a dosimeter.<br />
5.2 Assignment<br />
The dosimeter’s assignment can performed at the time of preparation. This<br />
assignment can be temporary or definitively.<br />
There are 3 types of assignment: definitive, temporary or anonymous if we don’t<br />
know who will use the dosimeter at preparation time.<br />
5.2.1 Definitive assignment<br />
If the worker always wears the same dosimeter, it will not be necessary for the<br />
worker to identify himself when preparing the dosimeter.<br />
To permanently allocate a dosimeter to a worker, the user will have to check the<br />
“Allocated DMC” check box and to fill the “Dosimeter no.” Field with the serial<br />
number of the dosimeter. The dosimeter will always be reset in “Fast entry” mode<br />
automatically.<br />
126713EN-C 47
Assigning a dosimeter DosiFast<br />
“Allocated DMC”: if checked this particular dosimeter is always used by this<br />
worker. When deactivating (reading the dose) For example Dosimeter 154123<br />
the system will considers that the dose is to be allocated to Mr Beades.<br />
5.2.2 Temporary assignment<br />
If a worker chooses any dosimeter for preparation, the worker will have to identify<br />
himself at preparation time. LdmMgr will make the assignment at this time. The<br />
link between dosimeter and worker will be broken at exit time (after allocating the<br />
dose to the worker).<br />
When the dosimeter is inserted in the LDM reader, a list of workers appears on the<br />
PC’s screen.<br />
The button « Workers management » will enable the user to start <strong>DOSIFAST</strong> (if<br />
not yet started), in order to update this list by adding or suppressing workers.<br />
Once all the modification has been recorded in the database, click on « Reload<br />
list » before selecting a worker, to prevent any bad results.<br />
A double click on a worker in the list will allocate temporary the dosimeter to this<br />
worker. Subsequently, the user can then permanently allocate this dosimeter to<br />
this worker by modifying his data sheet and checking the « Allocated DMC » check<br />
box.<br />
When completed, the dosimeter will be put in “Fast entry” mode if the criteria are<br />
fulfilled.<br />
48 126713EN-C
DosiFast Assigning a dosimeter<br />
No access forbidden in the “access control” zone of the worker data sheet.<br />
No dose limit exceeded<br />
The PC’s user can bypass a warning THAT will appear if one of the access control<br />
condition is not fulfilled, AND the answer given will be logged.<br />
When being activated, the alarm defined in the zone “threshold” of the worker data<br />
sheet will be programmed into the dosimeter.<br />
5.2.3 Anonymous assignment<br />
The worker who will use the dosimeter is not already known. This information will<br />
be given at the time of the return of mission, at deactivation time.<br />
To do that, proceed as for temporary assignment and select the first element of<br />
the list: « (the dose value will be allocated to the worker at deactivation time) ».<br />
The dosimeter is then programmed with default software of the category « Public »<br />
alarm thresholds.<br />
5.3 List of prepared dosimeters<br />
The list of the worker currently having an assigned/activated dosimeter (with the<br />
exception of dosimeters with anonymous assignment) can be seen. This list<br />
includes workers who wear a dosimeter prepared or turned on. This list can be<br />
accessed from Workers menu / Workers in area.<br />
5.4 Deactivate<br />
Deactivate a dosimeter consists in reading the dose once a mission is finished, in<br />
order to:<br />
Record the dose and alarms into the database; allocate the dose to the worker<br />
whom to the dosimeter was assigned.<br />
enable access to the on-controlled area stay histogram, when alarms have<br />
been triggered;<br />
Put the dosimeter in “pause” mode and/or prepare again it for a new use.<br />
This operation is done by by simply presenting the dosimeter switched on at the<br />
reader. If the dosimeter is allocated, a message asks the user confirmation of the<br />
worker to whom the dose has to be affected. Otherwise, the user can also select<br />
the worker who has worn the dosimeter, so that the work he has accomplished, if<br />
this information is not in his data sheet.<br />
In the case of permanently assigned dosimeters, the dosimeter is immediately<br />
prepared for a new use.<br />
126713EN-C 49
Assigning a dosimeter DosiFast<br />
Otherwise, a message is displayed to let the user choose if the dosimeter has to<br />
be prepared again. If the answer is “yes”, proceed as for temporary or anonymous<br />
assignment. If the answer is “no”, the dosimeter is put in “pause” mode and it will<br />
not be possible to use it again without preparing it again.<br />
Notes: Activation/deactivation is made when the dosimeter is presented at the<br />
reader. This is performed by the LdmMgr software which must be run on the PC<br />
(see Chapter 7 Watching the system page 73)<br />
50 126713EN-C
DosiFast Displaying, editing the dosimetric summaries<br />
6 Displaying, editing the<br />
dosimetric summaries<br />
6.1 Presentation<br />
This chapter describes all the available functions in order to view/print dosimetry<br />
summaries/reports.<br />
These functions are:<br />
Display of the dosimetry summary of any worker.<br />
Display of all the daily doses for a worker.<br />
Edition of a dosimetry summary sorted by task codes, grouping together for<br />
each task code, daily doses of each worker over a given period. Detailed<br />
information concerning workers and days can be hided<br />
Edition of the daily dose cumulations between 2 dates for one, several or all the<br />
workers.<br />
Edition of a dosimetry summary sorted by task.<br />
Edition of an individual worker data sheet including the dosimetry data.<br />
Edition of alarms summary<br />
Notes: in the paper prints, the primary and secondary doses are separated by<br />
character « / . A zero means a dose equal to zero whereas «-» means that the<br />
dose has not been measured. This is a typical case of use of the software with<br />
X-dosimeters which do not measure the secondary dose.<br />
126713EN-C 51
Displaying, editing the dosimetric summaries DosiFast<br />
6.2 Displaying of the dosimetry summary<br />
It is possible from the worker data sheet to display the worker’s dosimetric<br />
summary.<br />
A click on the “Dosimetry” button displays the summary<br />
In the above case, call for the dosimetric summary screen of worker BEADES<br />
The sub screen displays for each period on time:<br />
in the « Dosimetric summary » zone, for each managed period, the following<br />
information:<br />
primary and secondary dose cumulations (primary = HP(10) and secondary =<br />
HP(0.007))<br />
limites définies pour l’intervenant<br />
percentage of the limit reached at the present moment.<br />
If a limit is exceeded the<br />
warning will be displayed on the period’s line.<br />
in the « Thresholds » zone, the values of the primary and secondary alarm<br />
thresholds loaded in the dosimeter upon area entry.<br />
52 126713EN-C
DosiFast Displaying, editing the dosimetric summaries<br />
6.3 Displaying the daily dose cumulations<br />
In order to view the daily doses, use the Worker/Dosimetry item from the main<br />
menu. The Worker list appears.<br />
Select by a double click the worker<br />
In the above case, selection of worker: BEADES<br />
126713EN-C 53
Displaying, editing the dosimetric summaries DosiFast<br />
All the daily doses will appear.<br />
This window will allow the user to:<br />
See the accumulated dose for all the days and all the tasks<br />
Change (modify, add or delete records) one day’s dose cumulation for the<br />
worker and the task.<br />
Change the transmission indicator.<br />
54 126713EN-C
DosiFast Displaying, editing the dosimetric summaries<br />
See the accumulated dose for all the days and all the tasks<br />
Date, Dose, Sec Dose: Date and cumulation of primary and secondary doses<br />
for this day and this work code.<br />
Work code: The work code mentioned in the worker’s data sheet, or the one<br />
chosen when using the dosimeter (when entering the RCA).<br />
Transmitted: this record has been printed/transmitted<br />
Change one day’s dose cumulation for the worker and the task.<br />
Note: Use the « Up», « Down » or page skip arrows to move in the records.<br />
Change a record:<br />
Select the record by clicking with the arrow on the very left column. An arrow<br />
will display the selected record.<br />
An other click will transfer records information's into the “changes” area.<br />
Enter in the changes.<br />
Click on "validate" to commit the modifications.<br />
Note: All the record fields can be modified.<br />
126713EN-C 55
Displaying, editing the dosimetric summaries DosiFast<br />
Changes: Modification zone for a record. In this example, the new secondary<br />
dose will be 30 for the 08/01/2002<br />
Terminate by clicking the « Validate » button<br />
Deletions: When a record has been selected, it can be deleted by pressing the<br />
Delete button to the right of the window.<br />
Additions: The addition of a new record is possible only when no line is being<br />
edited. Click the Add button, enter the data for the new line and validate.<br />
Notes: If you enter a date or work code corresponding to an existing record, the<br />
new data will be cumulated.<br />
A validation of the transmission will be indicated by « OK » opposite each record.<br />
56 126713EN-C
DosiFast Displaying, editing the dosimetric summaries<br />
126713EN-C 57
Displaying, editing the dosimetric summaries DosiFast<br />
6.3.1 Editing worker data sheet<br />
From the main menu by using Dosimetry/Summary the following window appears.<br />
The worker data sheet report summarizes all the administrative information about<br />
the worker, and also its dosimetry information.<br />
The data sheet can be printed for one worker or for a group of workers.<br />
Worker: Same type of selection (one or more) as the previous report.<br />
Select all: Check to select all the workers.<br />
58 126713EN-C
DosiFast Displaying, editing the dosimetric summaries<br />
INDIVIDUAL REPORT: administrative data area<br />
DOSIMETRIC SUMMARY: dosimetry data<br />
Note: Indication (P/S) means: Primary / Secondary.<br />
126713EN-C 59
Displaying, editing the dosimetric summaries DosiFast<br />
6.3.2 Editing the dose cumulations<br />
From the main menu by using Dosimetry/Summary the following window appears.<br />
Selections:<br />
Select one Worker:<br />
Use the arrows or page UP and Down keys to navigate in the list.<br />
Click on the desired worker.<br />
Select several workers:<br />
Use the arrows or page UP and Down keys to navigate in the list.<br />
Click on each worker you want to select and press the CTRL key<br />
simultaneously.<br />
Select all the workers:<br />
Check the “select all” check box<br />
60 126713EN-C
DosiFast Displaying, editing the dosimetric summaries<br />
Selection the period of time:<br />
In the “From” and “To” zones indicate the selected dates by typing the desired<br />
dates or use the “…” box to view the calendar.<br />
Selection of the detail level:<br />
If no box is checked, the printed information's for each worker will be:<br />
- Days with doses for the days.<br />
- Monthly cumulations.<br />
- Cumulation for all the selected period of time.<br />
If “hide date” is checked, the printed information's for each worker will be:<br />
- Monthly cumulations.<br />
- Cumulation for all the selected period of time.<br />
If “hide monthly sub-totals is checked, the printed information's for each<br />
worker will be:<br />
- Cumulation for all the selected period of time.<br />
126713EN-C 61
Displaying, editing the dosimetric summaries DosiFast<br />
6.3.2.1 Detailed dosimetric summary<br />
1. Reminder of the selected period of time<br />
2. For each row the daily dose cumulation<br />
3. Monthly dose cumulations<br />
4. Month number<br />
5. Cumulation for the year<br />
6. Cumulation for the selected period of time<br />
62 126713EN-C
DosiFast Displaying, editing the dosimetric summaries<br />
6.3.2.2 Hide date<br />
Total dose for month of: Monthly dose cumulations of the month included in<br />
the selected period of time.<br />
Total dose for year: Annually dose cumulation for the year included in the<br />
selected period of time.<br />
Total dose for requested tine: Total amount of dose for the worker and for the<br />
selected period of time.<br />
126713EN-C 63
Displaying, editing the dosimetric summaries DosiFast<br />
6.3.2.3 Hide monthly sub-totals<br />
Note: If the entered period of time does not cover the year the dose for the year<br />
may not be exact.<br />
64 126713EN-C
DosiFast Displaying, editing the dosimetric summaries<br />
6.3.3 Editing the summary by task<br />
The dosimetric summary by Worker/day/task can be called from the main menu<br />
using “Dosimetry/Task summary” option.<br />
Worker: Same type of selection (one or more) as the previous report.<br />
Select all: Check to select all the workers.<br />
From … to … : date for daily doses selection. The default is from the last “not<br />
transmitted” dose to “Yesterday”.<br />
Notes: The system authorizes only one daily dose cumulation per task code.<br />
If a worker has entered an area several times in a day with the same work code,<br />
the daily accumulated dose is assigned to this work code.<br />
126713EN-C 65
Displaying, editing the dosimetric summaries DosiFast<br />
Total dose for work code: Total amount of dose for the work code for the<br />
selected period of time.<br />
Total dose for requested time: Total amount dose for the worker for the<br />
selected period of time for all the work codes the worker has used.<br />
At the end of editing/printing, <strong>DOSIFAST</strong> will ask the user to mark the dose that<br />
has been “transmitted”.<br />
This will enable the system, upon the next request for this summary, to propose<br />
the date of the last daily dose cumulation not transmitted yet as the default start<br />
date.<br />
66 126713EN-C
DosiFast Displaying, editing the dosimetric summaries<br />
6.3.4 Editing cumulations by task code<br />
In order to edit the cumulations by task code, use the Worker/Task dosimetric<br />
report item from the <strong>DOSIFAST</strong> main menu.<br />
Task: Selection of one or several task codes<br />
Note: only task codes used by a worker during missions are listed<br />
Select all: Selection of all the task codes<br />
From… to …: Selection of the corresponding period.<br />
Hide workers doses: workers detailed information does not appear.<br />
Hide daily sub-totals: daily detailed information does not appear.<br />
126713EN-C 67
Displaying, editing the dosimetric summaries DosiFast<br />
6.3.4.1 Complete summary:<br />
68 126713EN-C
DosiFast Displaying, editing the dosimetric summaries<br />
6.3.4.2 Summary without workers details:<br />
126713EN-C 69
Displaying, editing the dosimetric summaries DosiFast<br />
6.3.4.3 Summary without daily sub-totals:<br />
70 126713EN-C
DosiFast Displaying, editing the dosimetric summaries<br />
6.3.5 Editing alarms summary<br />
The alarms summary edition can be called from the main menu using<br />
“Dosimetry/Alarms summary” option.<br />
From … to …: Selection of the period during which alarms have to be taken<br />
into account.<br />
Alarms: Selection of alarms to display in the summary<br />
Note: This choice enables the user to select workers passages to display in the<br />
summary. If the same passage includes several alarms, they all will be displayed,<br />
even if these alarms were not selected. The summary head includes alarms<br />
selected.<br />
126713EN-C 71
DosiFast Watching the system<br />
7 Watching the system<br />
7.1 Presentation<br />
Watching the system consists in:<br />
Checking that the LDM101, LDM210, LDM220 or LDM230 Readers are<br />
working adequately<br />
Checking access authorization when activating a dosimeter.<br />
The process that is performing the TASK is « LdmMgr » ("LdmMgr" stands for<br />
LDM Manager).<br />
7.2 Checking that the LDM Reader is<br />
working adequately<br />
LDM’s state (communication) is shown by LdmMgr’s icon located on the bottom<br />
right part of the screen .<br />
When the reader is not communicating with the PC, the LdmMgr symbol is red<br />
crossed.<br />
126713EN-C 73
Watching the system DosiFast<br />
7.3 Checking access authorization<br />
When a user double clicks on LDMMgr’s symbol, the following window is displayed<br />
on the screen.<br />
A dosimeter is present in the reader, the check operation is in progress.<br />
1. The communication is ok (not crossed).<br />
2. The reader is busy.<br />
3. The reader is currently reading a dosimeter.<br />
4. The access transaction is not yet completed, or access is not granted.<br />
5. Configuration menu.<br />
The system authorizes activation of the dosimeter.<br />
74 126713EN-C
DosiFast Preparation/deactivation<br />
8 Preparation/deactivation<br />
8.1 Presentation<br />
The chapter summarizes the procedure to quickly configure a dosimeter for use.<br />
8.2 Dosimeter preparation<br />
This function allows to:<br />
Put the dosimeter in “Fast entry” mode.<br />
Configure the dosimeter with new alarms:<br />
Dose alarm<br />
Rate alarm<br />
Time alarm<br />
The procedure is described bellow.<br />
Present the dosimeter at the reader<br />
The following window appears on the PC’s screen:<br />
Select the name of the worker who will wear the dosimeter, if he is known,<br />
otherwise check the « (the dose value will be allocated to the worker at<br />
deactivation time) » check box. The system will put the dosimeter in “Fast<br />
entry” mode.<br />
If the dosimeter is allocated, the system put it in “Fast entry” mode without<br />
displaying the previous screen.<br />
If <strong>DOSIFAST</strong> is installed on the PC, "Workers management " button will be<br />
active. A click on this button will allow the user to access to the <strong>DOSIFAST</strong><br />
workers management function (see § 4.6.1.2 2nd method: Select in the main<br />
126713EN-C 75
Preparation/deactivation DosiFast<br />
menu Worker/data, page 40). Once all the modifications have been done quit<br />
<strong>DOSIFAST</strong> software and return to the screen enabling to choose the worker<br />
who will use the dosimeter. Click on "Reload list" before to go on.<br />
The LDM will activate the dosimeter, the green led will illuminate, indicating that<br />
the dosimeter is activated.<br />
The system will allocate the dosimeter to the chosen worker.<br />
Note: If the SELECTED worker has no work code in its data sheet, the system will<br />
then prompt the user to select a work code.<br />
76 126713EN-C
DosiFast Preparation/deactivation<br />
8.3 Dosimeter deactivation<br />
This function allows a worker, when exiting the zone, to:<br />
Confirmation or selection of the worker who will wear the dosimeter<br />
Turning off (deactivation) or preparation of the dosimeter,<br />
Consult the on-area stay histogram, when an alarm has been triggered.<br />
Save the alarms related to his on-area stay:<br />
dose alarm<br />
rate alarm<br />
duration alarm<br />
Save the values of the main measurements related to his on-area stay:<br />
dose equivalent<br />
dose equivalent rate<br />
duration<br />
The procedure is described below.<br />
Present the dosimeter at the reader.<br />
Wait for the green « ACCESS » light at the reader and then remove the dosimeter:<br />
the dose has been recorded and the dosimeter is set to pause.<br />
If an alarm has been triggered during the on-area stay, the software prompts you<br />
to consult the stay histogram.<br />
Select ‘Oui’ (Yes) to reach to the next screen.<br />
Note: if you select ‘Non’ (No), you can no longer consult this histogram with the<br />
Dosifast software. Another software (not supplied) will then be required.<br />
126713EN-C 77
Preparation/deactivation DosiFast<br />
Save: Used to save this histogram in a file for later use.<br />
Reload: Used to query the DMC again.<br />
Quit: Closes this screen and completes the area exit.<br />
Note: The histogram period, i.e., the maximum time between two events can be<br />
configured in the threshold configuration screen. The possible values allowed by<br />
the dosimeters are: 10 seconds ; 1 minute ; 10 minutes ; 1 hour, 24 hours.<br />
8.4 Reader configuration<br />
This function allows to:<br />
select the RS232 communication port,<br />
check the dialog with the reader,<br />
detect the readers connected to the PC,<br />
modify the reader name.<br />
The procedure is described below.<br />
Select the Configuration\Configuration Reader menu.<br />
Wait for the configuration window opening.<br />
78 126713EN-C
DosiFast Preparation/deactivation<br />
Serial port # : Allows to select the RS232 port used. Only the ports available<br />
on the computer are displayed in the list. (Ports over #16 are not usable by the<br />
software).<br />
Reader name: Allows to modify the reader name.<br />
Reload available ports # : Allows to search and display in the list all available<br />
computer ports.<br />
Auto Detection : Allows to detect automatically the readers connected to the<br />
computer. At the end of the automatic detection, the list of ports #, where<br />
readers have been detected, is displayed.<br />
Check : Allows to check, on the selected port #, the communication with the<br />
reader.<br />
Ok : Save changes.<br />
Cancel : Cancel changes.<br />
126713EN-C 79
DosiFast Tips and tricks<br />
9 Tips and tricks<br />
9.1 Presentation<br />
This chapter describes other specific operations:<br />
Changing the radiological units of the system.<br />
Changing the language.<br />
Changing audible alerts.<br />
Checking a communication error with the reader<br />
9.2 Changing the units<br />
The default unit is the microSievert.<br />
To change the displayed units, perform the following:<br />
ATTENTION: The user must change the unit BEFORE starting to use the system.<br />
Edit the « dosimed.ini » file:<br />
This file can be found into the <strong>DOSIFAST</strong> default directory.<br />
(Usually « C:\Program Files\Dosifast)<br />
9.3 Changing the language<br />
It’s possible to change the display language<br />
Perform as for changing unit:<br />
Edit the « dosimed.ini » file:<br />
This file can be found into the DOSIMED default directory.<br />
(Usually « C:\Program Files\Dosimed)<br />
The user can see « 0 => French » et « 1 = > English ».<br />
According to the wanted language, modify the label value « Langue= x ».<br />
« Langue= 0 » the software will be in French, « Langue= 1 » the software will be in<br />
English, after the next start.<br />
126713EN-C 81
Tips and tricks DosiFast<br />
Double click on file in order to edit it:<br />
The user can see the units « Unite=µSv » and it conversion factor « Coeff=10 »<br />
There are 2 commented examples for mSv and mrem.<br />
The conversion factor for mrem is 1: the user can enter any desired unit and<br />
evaluate the conversion factor to type in.<br />
The sample values are preceded by “;” ‘(semicolon) that express a comment.<br />
To change the sample value for use (mrem for example), delete the semicolon for<br />
that value and insert a new semicolon in front of the microSievert line.<br />
82 126713EN-C
DosiFast Tips and tricks<br />
9.4 Audible alerts<br />
There are 5 different audible alarms in LdmMgr. They are:<br />
Display of the worker list when a dosimeter is inserted (field<br />
”SelectIntervenant”).<br />
Dosimeter turned on, the user can remove the dosimeter from the reader (field<br />
“EntreeZone”).<br />
Dosimeter turned off when ending a mission, the user can remove the<br />
dosimeter from the reader (field “SortieZone”).<br />
The user forgot to remove the dosimeter out of the reader field<br />
(“AttendreDM”).<br />
Possible consultation of the histogram upon exit from an area where alarms<br />
have been triggered (« Alarm » field value)<br />
These fields can be found in the “ldm1.ini” file.<br />
This file is installed in the default directory of Dosifast:<br />
(Usually « C:\Program Files\Dosifast »).<br />
Double click on file in order to edit it:<br />
126713EN-C 83
Tips and tricks DosiFast<br />
Double click on file in order to edit it:<br />
To change the audible alarms, change the file indicated after the “=” sign (do not<br />
forget to put file name between inverted commas).<br />
The file has to be a “.wav” file;<br />
This can be useful if there are several readers in the system, a different sound can<br />
be used for each reader.<br />
84 126713EN-C
DosiFast Tips and tricks<br />
9.5 Reader name<br />
When selecting the worker’s name in the list at entry time (when allocating the<br />
dosimeter), LdmMgr changes the title of the list to indicate the managed reader. It<br />
allows to the PC’s user to know the reader where the dosimeter was inserted (in<br />
case of a multiple reader configuration).<br />
Here, the entry chapter “Radiological ctrl area entry lab 1” is used as title for the<br />
worker list.<br />
You change this by changing the “LOC” value (do not forget to use inverted<br />
commas)<br />
(On this screen capture, the field has been modified for « Entrée sale radio 1 »)<br />
(« Labo Dosi »))<br />
126713EN-C 85
Tips and tricks DosiFast<br />
9.6 Picture used for reports<br />
In the proposed written reports, a picture can be found on the top left of the image.<br />
It is possible to modify this figure to insert the company logo for example.<br />
This image is contained in the « LogoReport.bmp » file in the installation directory<br />
of <strong>DOSIFAST</strong>.<br />
9.7 Checking a communication problem<br />
with the reader.<br />
:<br />
When the link with the reader is not operational (symbol blocked marked in red in<br />
the lower right), perform the following verifications:<br />
Check the connection cable between the PC and the reader,<br />
Check the serial port parameters are correct (See §8.4 Reader configuration,<br />
page 78),<br />
Check that the power cable to the reader is connected,<br />
Check that the reader is turned ON<br />
86 126713EN-C
DosiFast Extension<br />
10 Extension<br />
10.1 Introduction<br />
This chapter describes the operations to be performed in the case of a system with<br />
several readers on the same PC or the case of a system of several PC with a<br />
reader and even a combination connected to each PC.<br />
10.2 Several LDM connected to the same PC<br />
In a standard mode, the system is installed with one reader connected to one<br />
serial port specified during the installation.<br />
To be able to connect a second reader it is necessary to perform the following<br />
steps:<br />
Copy the Ldmmgr short cut in the installed directory<br />
Rename the new shortcut<br />
126713EN-C 87
Extension DosiFast<br />
Modify the properties of the shortcut to launch the program with the parameter<br />
2 instead of 1.<br />
88 126713EN-C
DosiFast Extension<br />
When starting « LdmMgr Reader 2 », it will now use the new configuration file<br />
« ldm2.ini » instead of « ldm1.ini ».<br />
It is necessary, by copying the « ldm1.ini » file, to create the « ldm2.ini » (see<br />
previous paragraph).<br />
126713EN-C 89
Extension DosiFast<br />
10.3 Several PC/LDM pairs in the same<br />
installation<br />
On the second PC where the reader is going to be connected, it is required to<br />
make a customized installation of DosiFast and do not install LdmMgr.<br />
It is well understood that the main PC where the complete software is installed<br />
(LdmMgr + DosiFast) and the PC where only LdmMgr is installed for the second<br />
reader are connected through the network.<br />
ATTENTION: The remote LdmMgr will not correctly operate if the network is<br />
unavailable, even intermittently!<br />
It is then necessary to modify the ldm1.ini file to identify the connection to the<br />
database as follows:<br />
This is done in the fields « Datasource » and « SystemDatabase » of the<br />
« [Connection] » section.<br />
Note it is necessary to designate a name for the complete file Dosimed.mde and<br />
system.mdw.<br />
For example:<br />
« DataSource= \\PC_SECRETARIAT2\c\Program Files\Dosifast\Dosimed.mde »<br />
« SystemDatabase = \\PC_SECRETARIAT2\c\Program<br />
Files\Dosifast\system.mdw »<br />
90 126713EN-C
DosiFast Extension<br />
To recognize the complete path name, it is recommended to use Windows<br />
Explorer and to browse the network to the directory where <strong>DOSIFAST</strong> is installed<br />
in the main PC.<br />
Another solution is to split the main PC directory and to make reference to each<br />
partition.<br />
Example:<br />
On the main PC, click the right button over the <strong>DOSIFAST</strong> installation directory:<br />
In this case it could be:<br />
« DataSource= \\Mih\Dosifast\Dosimed.mde. »<br />
« SystemDatabase = \\Mih\Dosifast\system.mdw »<br />
(The main PC is called, on the network, « Mih »)<br />
126713EN-C 91
DosiFast Glossary<br />
11 Glossary<br />
365 days dose cumulations<br />
Dose cumulations calculated over the last 365 days.<br />
Activating a dosimeter<br />
All the operations enabling a dosimeter to change its operation mode from deactivated<br />
(quiet status) to run mode (measurement operation mode).<br />
Allocating a dosimeter<br />
Procedure consisting in associating permanently or temporarily a specific<br />
dosimeter (identified by its serial number) to a worker in order to allow him to begin<br />
a mission with a dosimeter in measurement state.<br />
Calendar dose cumulations<br />
Database<br />
Dose cumulations calculated over a number of entire months (1 month, 3 months,<br />
civil year, 60 months; goes from the 1st of each month to the last day of the<br />
month, to include the exact number of days in each month).<br />
A database is all the data stored on the hard drive related to the operation of a<br />
complete dosimetry system.<br />
Deactivating a dosimeter<br />
DMC2000<br />
All the operations enabling a dosimeter to change its operation mode from run<br />
mode (measurement operation mode) to de-activated mode (quiet status).<br />
Compact dosimeter, model 2000: new-generation electronic dosimeter, very<br />
compact and lightweight<br />
126713EN-C 93
Glossary DosiFast<br />
Dosimetric limits<br />
Field<br />
Item<br />
The dosimetric limits are dosimetric cumulation thresholds (sliding or calendar)<br />
used by the dosimetry system. These thresholds are associated with time intervals<br />
(1 month, 3 months, Civil year, 365 days, 5 years).<br />
A field is a category of information; it allows information of the same type to be<br />
grouped in a table (for example, “first name” and “last name” are fields in the<br />
worker table).<br />
By item we mean the data related to a subject in a table (for example, in the table<br />
of workers, all the contents of the different fields of the table corresponding to a<br />
given worker are items: last name, first name, date of birth, sex, category, etc.).<br />
Operational dose<br />
Dose measured by an operational dosimeter (DMC2000 for instance)<br />
Operational dosimetry<br />
Period<br />
The operational dosimetry consists in using electronic dosimeters specially<br />
intended to obtain real-time dosimetric measurements.<br />
In the dosimetry system managed by the <strong>DOSIFAST</strong> software, the time is broken<br />
down into periods. By default, each period has a standard duration which<br />
corresponds to a calendar month.<br />
Do not mistake this period for the time intervals of 1 month, 3 months, Civil year,<br />
365 days, 5 years associated with the dosimetric limits.<br />
Regulatory dose<br />
Dose obtained from a regulatory dosimeter (dosimeter film badges, pen-type<br />
dosimeters, etc.)<br />
94 126713EN-C
DosiFast Glossary<br />
Primary dose<br />
Dose termed « deep » HP(10) as opposed to the secondary dose termed<br />
« superficial » HP(0.007) measured by a DMC2000 XB type dosimeter which<br />
measures both of these values.<br />
Secondary dose<br />
Table<br />
Dose termed « superficial » HP(0.007) as opposed to the primary dose termed<br />
« deep » HP(10) measured by a DMC2000 XB type dosimeter which measures<br />
both of these values.<br />
A table is a grouping by subject of data from the database (for example, the<br />
worker table, company table, task table, etc.).<br />
126713EN-C 95
MGP Instruments<br />
BP 1<br />
F 13113 Lamanon<br />
Tél. : + 33 (0)4 90 59 59 59<br />
Fax : + 33 (0)4 90 59 55 18<br />
www.mgpi.com<br />
126713EN-C<br />
Dosifast software<br />
© MGP Instruments 2000-2002. All rights reserved.<br />
Warning: this software is protected by international copyright law and by<br />
international convention. Any and all reproduction, by any and all means, in any<br />
form or format, either partial or total, is an infringement of these laws and<br />
conventions and is strictly forbidden. Any person involved in the illicit reproduction<br />
of this material will be charged with counterfeiting and the violation of copyright<br />
laws and will be prosecuted to the fullest extent allowed by law.<br />
Windows and Windows NT are registered trademarks of Microsoft Corporation and<br />
are protected under United States and International law.<br />
MGP Instruments<br />
5000 Highlands Parkway,<br />
Suite 150<br />
Smyrna, Georgia 30082<br />
Tel: (770) 432 2744<br />
Fax: (770) 432 9179<br />
Due to the evolution in standards and<br />
hardware, the information provided in<br />
this User’s Manual will not bind MGP<br />
Instruments until after confirmation by<br />
our services.