Ubuntu 8.10 Installation Guide - NComputing
Ubuntu 8.10 Installation Guide - NComputing
Ubuntu 8.10 Installation Guide - NComputing

You also want an ePaper? Increase the reach of your titles
YUMPU automatically turns print PDFs into web optimized ePapers that Google loves.
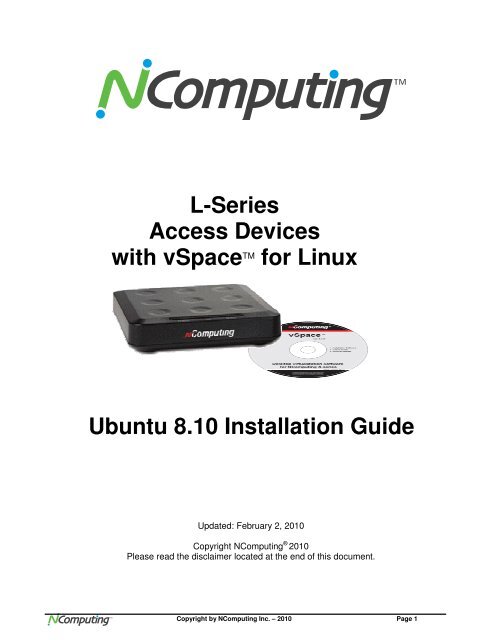
L-Series<br />
Access Devices<br />
with vSpace TM for Linux<br />
<strong>Ubuntu</strong> <strong>8.10</strong> <strong>Installation</strong> <strong>Guide</strong><br />
Updated: February 2, 2010<br />
Copyright <strong>NComputing</strong> ® 2010<br />
Please read the disclaimer located at the end of this document.<br />
Copyright by <strong>NComputing</strong> Inc. – 2010 Page 1
Table Of Contents<br />
Overview .........................................................................................................................................3<br />
Prerequisites...................................................................................................................................3<br />
Installing <strong>Ubuntu</strong> <strong>8.10</strong> ....................................................................................................................4<br />
Installing the L-series vSpace Software Software Package ........................................................5<br />
Using the vSpace Administration Console Window ....................................................................9<br />
Registering Your Product ............................................................................................................11<br />
Online Registration ............................................................................................................................................14<br />
Offline Registration ............................................................................................................................................16<br />
Adding new users.........................................................................................................................22<br />
The L-series Admin Console for Linux .......................................................................................22<br />
USB Port Assignment ..................................................................................................................23<br />
Uninstalling vSpace .....................................................................................................................25<br />
Table Of Figures<br />
Figure 1 – File Browser Window .............................................................................................................................5<br />
Figure 2 – L-series Package Installer Window........................................................................................................5<br />
Figure 3 – L-series Package Install Status Window................................................................................................6<br />
Figure 4 – End user license agreement ..................................................................................................................6<br />
Figure 5 – Terms of Use Statement ........................................................................................................................7<br />
Figure 6 – vSpace Post-Configuration Message.....................................................................................................7<br />
Figure 7 – <strong>Installation</strong> Finished Message................................................................................................................8<br />
Figure 8 – Package Installer window after vspace installation completes ..............................................................8<br />
Figure 9 – <strong>Ubuntu</strong> login screen following vSpace install and system reboot ..........................................................9<br />
Figure 10 – Launch the vSpace Administration Console ........................................................................................9<br />
Figure 11 – Verify that you have rights to modify system configuration................................................................10<br />
Figure 12 – Administration Console window .........................................................................................................10<br />
Figure 13 – Launching the Registration Wizard ....................................................................................................11<br />
Figure 14 – L-series Registration Wizard initial screen.........................................................................................11<br />
Figure 15 – vSpace End User License Agreement Screen...................................................................................12<br />
Figure 16 – Type of Registration Screen...............................................................................................................12<br />
Figure 17 – Registration Customer Data Window – w/ no data entered...............................................................13<br />
Figure 18 – Registration Customer Data Window – with data filled in ..................................................................13<br />
Figure 19 – List of Connected Devices Screen.....................................................................................................13<br />
Figure 20 – Select Registration Type Screen........................................................................................................14<br />
Figure 21 – Registration Progress Window...........................................................................................................15<br />
Figure 22 – Registration Results Screen...............................................................................................................15<br />
Figure 23 – Activation process complete screen...................................................................................................16<br />
Figure 24 – Select registration Type Screen.........................................................................................................16<br />
Figure 25 – Select where to store offline activation file.........................................................................................17<br />
Figure 26 – Offline registration “Save File“ dialog box ..........................................................................................17<br />
Figure 27 – Register Offline file save screen ........................................................................................................18<br />
Figure 28 – Registration Summary screen............................................................................................................18<br />
Figure 29 – Registration results screen showing “offline registration file created“................................................18<br />
Figure 30 – Type of Registrataion screen .............................................................................................................19<br />
Figure 31 – Load Activation File screen................................................................................................................19<br />
Figure 32 – Navigation screen to select returned license file................................................................................20<br />
Figure 33 – Load Activation File screen after locating license file ........................................................................20<br />
Figure 34 – Offline registration results screen – showing successful and unsuccessful registration examples...21<br />
Figure 35 – Activation Precess Complete screen .................................................................................................21<br />
Figure 37 – Product Information screen ................................................................................................................22<br />
Figure 43 – USB assignment screen.....................................................................................................................24<br />
Figure 47 – Uninstalling vSpace for Linux.............................................................................................................25<br />
Page 2 Copyright by <strong>NComputing</strong> Inc. - 2010
Overview<br />
NOTE: The beta program for L-series vSpace for Linux supported OpenSUSE 10.2, but<br />
this released version supports <strong>Ubuntu</strong> <strong>8.10</strong> – not OpenSUSE.<br />
This document is a supplement to the L-series User <strong>Guide</strong>.<br />
For basic common information such as safety and regulatory compliance, product overview<br />
and other features of the L-series access devices please see the L-series User <strong>Guide</strong>.<br />
This supplement provides the installation process for the <strong>NComputing</strong> L-series vSpace<br />
Software for Linux for the <strong>Ubuntu</strong> <strong>8.10</strong> distribution and includes instructions for:<br />
o vSpace Software installation for L-series<br />
o Instructions for On-line and off-line registration<br />
o Configuring audio<br />
o USB to user station assignment<br />
o Console functionality<br />
o Uninstall of the Linux vSpace software<br />
This document assumes the user will be starting from a clean install of <strong>Ubuntu</strong> <strong>8.10</strong><br />
Prerequisites<br />
The following items are needed to begin the installation process:<br />
<strong>Ubuntu</strong> <strong>8.10</strong> installation image (It’s critical that only a clean install be used,<br />
modified images may not operate correctly)<br />
Current <strong>NComputing</strong> L-series vSpace Software Software<br />
(Lseries_3.0.2511_i386.deb or newer) and readme document<br />
Sound card (or device) on host system that’s supported by <strong>Ubuntu</strong> <strong>8.10</strong> and has<br />
been enabled<br />
Internet Connection<br />
Fully review the Readme supplied for the vSpace release you are installing<br />
Note: An Internet connection must be available during the installation to allow download and install<br />
of any dependant packages located in the <strong>Ubuntu</strong> package repository maintained by the<br />
<strong>Ubuntu</strong> community.<br />
Copyright by <strong>NComputing</strong> Inc. – 2010 Page 3
Installing <strong>Ubuntu</strong> <strong>8.10</strong><br />
You can locate and download <strong>Ubuntu</strong> <strong>8.10</strong> from: http://releases.ubuntu.com/<strong>8.10</strong>/ Please use only a<br />
clean image from one of the <strong>Ubuntu</strong> ftp sites as vSpace is designed to work with the kernel, desktop<br />
and packages that are included in the released <strong>8.10</strong> version.<br />
1. Download Desktop Edition; <strong>Ubuntu</strong> <strong>8.10</strong> install CD image<br />
2. Create <strong>Ubuntu</strong> <strong>8.10</strong> System CD-R<br />
3. Insert <strong>Ubuntu</strong> <strong>8.10</strong> Disk into System and Power-on/boot the system<br />
4. <strong>Ubuntu</strong> Install screen opens with option(s) for running the installation program and also<br />
has function key selectible setting at the bottom of the screen<br />
5. Use keyboard arrow keys to highlight “Install <strong>Ubuntu</strong>“ and press Enter<br />
6. At the appropriate install screens, Select<br />
a. Language<br />
b. Time Zone Setting<br />
c. Keyboard Layout Setting (select appropriate Country)<br />
d. Disk Preparation: Select “<strong>Guide</strong>d Option; Use Entire Disk“<br />
e. System Administrator Set-up: Enter “User Name“ and “Password“ Information<br />
7. Ready to Install: Press Enter to Proceed<br />
8. <strong>Installation</strong> Completes<br />
9. Now Restart/Reboot System<br />
10. After the system reboot, the <strong>Ubuntu</strong> Desktop should come up and present Username login<br />
prompts<br />
11. Log into the system with appropriate “username and password.” The “User” must have<br />
system “administrative rights” to continue the installation; however, the Username and<br />
password supplied during the initial system install of <strong>Ubuntu</strong> <strong>8.10</strong> are recognized to have<br />
administrative rights.<br />
********* Even if prompted following this login, DO NOT INSTALL <strong>Ubuntu</strong> UPDATES *********<br />
12. Now, copy the L-series <strong>Ubuntu</strong> <strong>8.10</strong> <strong>NComputing</strong> vSpace installation file to the desktop.<br />
Lseries_3.0.2511_i386.deb ( or the most recent version of L-series vSpace for <strong>Ubuntu</strong> )<br />
Page 4 Copyright by <strong>NComputing</strong> Inc. - 2010
Installing the L-series vSpace Software Software Package<br />
13. Click the “Places” pull-down on the <strong>Ubuntu</strong> Desktop Menu to locate and open the folder<br />
containing the <strong>Ubuntu</strong> <strong>8.10</strong> vSpace software installation file:<br />
Example file = Lseries_3.0.2511_i386.deb<br />
Figure 1 – File Browser Window<br />
14. Double-click on the installation file name and the package installer will open and start to<br />
install the package. If prompted, enter password of user with system administrative<br />
rights, then click the “Install Package“ button, and installation begins.<br />
Figure 2 – L-series Package Installer Window<br />
You can track the installation progress via the package install status window.<br />
Copyright by <strong>NComputing</strong> Inc. – 2010 Page 5
Figure 3 – L-series Package Install Status Window<br />
15. When prompted, click the check box, and Accept the: “vSpace End User License Agreement”<br />
(EULA).<br />
Figure 4 – End user license agreement<br />
Page 6 Copyright by <strong>NComputing</strong> Inc. - 2010
16. Then when prompted, click the check box, and Accept the “vSpace Terms of use<br />
Statement”:<br />
Figure 5 – Terms of Use Statement<br />
:<br />
If the “vpace post-configuration: Additional steps required “ message window appears,<br />
simply click the “Forward“ button to continue.<br />
Figure 6 – vSpace Post-Configuration Message<br />
Copyright by <strong>NComputing</strong> Inc. – 2010 Page 7
After the L-series vSpace software installation completes, close any window(s) and reboot the<br />
system. Following system reboot, the host desktop will display the <strong>Ubuntu</strong> login screen.<br />
Figure 7 – <strong>Installation</strong> Finished Message<br />
Figure 8 – Package Installer window after vspace installation completes<br />
Once the installation is complete, dismiss the “Package Installer” window and restart the<br />
system.<br />
Page 8 Copyright by <strong>NComputing</strong> Inc. - 2010
Using the vSpace Administration Console Window<br />
Figure 9 – <strong>Ubuntu</strong> login screen following vSpace install and system reboot<br />
After reboot, type-in or click-on a username with administrative rights and enter its password<br />
into the login screen, to bring up the <strong>Ubuntu</strong> Desktop.<br />
Then on the menu taskbar, click on:<br />
“System > Administration > <strong>NComputing</strong> Console”<br />
Figure 10 – Launch the vSpace Administration Console<br />
This starts the vSpace Administration Console launch, and then you will be required to enter<br />
the “administration rights” password – to verify that you have appropriate permissions to<br />
modify the system configuration.<br />
Copyright by <strong>NComputing</strong> Inc. – 2010 Page 9
Figure 11 – Verify that you have rights to modify system configuration<br />
When vSpace is initially installed, it starts an automatic a “30-day Trial Period.” During this<br />
trial period, the user has complete access to all features of the software to allow evaluation of<br />
the product. To use the product beyond this “30 day trial period”, the software must be<br />
registered.<br />
Also during the trial period, an L-series connected user session will only operate for a 1 hour<br />
period. At the end of the hour, the session will be terminated. A new session can be started<br />
by the user logging in again from their L-series access device.<br />
Figure 12 – Administration Console window<br />
Page 10 Copyright by <strong>NComputing</strong> Inc. - 2010
Registering Your Product<br />
An Internet connection is required for on-line registration.<br />
To start the registration process for your L-series access devices and the vSpace for Linux on<br />
this system, click on the “Manage Registration” icon in the upper left-hand side of the admin<br />
console window. The vSpace Registration Wizard will then walk you through the product<br />
registration process.<br />
Figure 13 – Launching the Registration Wizard<br />
Figure 14 – L-series Registration Wizard initial screen<br />
Click “Next” to proceed<br />
Copyright by <strong>NComputing</strong> Inc. – 2010 Page 11
The wizard presents the “End User License Agreement” window, and you must click on the “I<br />
agree” box to proceed to the next step.<br />
Figure 15 – vSpace End User License Agreement Screen<br />
Check the “I agree” box – then click “Next” to proceed<br />
The wizard then takes you to the “Type of Registration” screen.<br />
Figure 16 – Type of Registration Screen<br />
Regardless of whether you want to register your vSpace software and L-series access devices<br />
online or off-line, make sure the “Register vSpace server software” radio button is selected,<br />
and click “Next.”<br />
The wizard then takes you to the “Customer Information” window, and you must fill in all the<br />
fields provided to continue to the next step.<br />
At the "Customer Data" screen, if the data fields are not already populated, enter the<br />
registered user's relevant information. Each field in this window must be filled in. (Fields still<br />
needing data entry are highlighted in light red.)<br />
Page 12 Copyright by <strong>NComputing</strong> Inc. - 2010
Figure 17 – Registration Customer Data Window – w/ no data entered<br />
Once all customer data has been entered, click on the "Next" button.<br />
Figure 18 – Registration Customer Data Window – with data filled in<br />
The registration wizard then shows a list of all registered and unregistered L-series access devices<br />
that currently have virtual desktop connections to this vSpace host. You cannot select which devices<br />
will be registered – all unregistered devices shown in this list will be registered<br />
Online Registration<br />
.<br />
Figure 19 – List of Connected Devices Screen<br />
Copyright by <strong>NComputing</strong> Inc. – 2010 Page 13
Online Registration<br />
In the case of Online Registration, follow the instructions below. Otherwise skip to the section<br />
titled “Offline Registration”.<br />
If you want to register your vSpace software and L-series access devices online, make sure<br />
the “Register online, using your internet connection” radio button is selected, and click “Next.”<br />
Click on the “Use tunnel connection through local HTTPS proxy server” box if you<br />
normally access the internet at your location through a proxy server. Clicking the box<br />
enables you to fill in the proxy server IP address and the port number to use.<br />
Figure 20 – Select Registration Type Screen<br />
Before the registration wizard communicates with the registration server, you will get the<br />
following “Summary” screen showing all user information that will be registered with the<br />
vSpace software. Also, any connected but unregistered L-series access devices will be listed<br />
for registration. .<br />
If the data is correct, click on the “Next” button or click “Back” if you wish to change any of the<br />
information<br />
Page 14 Copyright by <strong>NComputing</strong> Inc. - 2010
Figure 21 – Registration Progress Window<br />
Clicking “Next” tells the registration wizard to go ahead and contact the online registration<br />
server. Then the “Progress of activation” status screen is displayed.<br />
Once the installation wizard completes its communications with the online registration server,<br />
the “registration results” window is displayed. If the registration was successful, you’ll get<br />
“Registered customer data and Software and device license information” – the “Trial Period”<br />
status is removed from the vSpace software, and it is replaced with a standard software<br />
license. (License number provided on this screen.)<br />
Be sure to click the check box for the “Register future L-series devices in the background”<br />
option, if you want vSpace to automatically register any unregistered L-series access devices<br />
that connect to this system in the future. Use of this “background registration” feature requires<br />
standard internet connectivity.<br />
Figure 22 – Registration Results Screen<br />
If you can get the “Customer data was not registered” message in the Registration Results<br />
screen, then the registration process failed, and the vSpace software stays in “Trial Mode.”<br />
Copyright by <strong>NComputing</strong> Inc. – 2010 Page 15
Clicking “Next“ on the Registration Results screen takes you to the Activation Process Complete<br />
Screen.<br />
Offline Registration<br />
Figure 23 – Activation process complete screen<br />
In the case of Offline Registration, follow the instructions below. If you have completed the online<br />
registration section, skip to “Using the access device”.<br />
If you do not have standard internet connectivity, you can use standard email to register your vSpace<br />
software and L-series access devices.<br />
To use offline registration, select the “Create off line registration file” option, and click “Next.”<br />
Figure 24 – Select registration Type Screen<br />
Page 16 Copyright by <strong>NComputing</strong> Inc. - 2010
Figure 25 – Select where to store offline activation file<br />
Click on the “Select file“ button to define where you wish to store the activation file that will then be emailed to<br />
registration@ncomputing.com . This brings up the “Save File“ dialog box and you can select the location for<br />
storing the file, and you can change the file name as well – but the filetype must not be changed from “txt“<br />
Figure 26 – Offline registration “Save File“ dialog box<br />
Once you’ve selected where to save the file and the filename, click the “Save“ button, and the “Register<br />
Offline – Create the registration file“ screen is again displayed showing the fully qualified filename<br />
you’ve selected.<br />
Copyright by <strong>NComputing</strong> Inc. – 2010 Page 17
Figure 27 – Register Offline file save screen<br />
Now click the“Next“ button to create and save the registration file.<br />
Figure 28 – Registration Summary screen<br />
The registration summary information is then displayed. Click ”Next” to continue.<br />
Figure 29 – Registration results screen showing “offline registration file created“<br />
Page 18 Copyright by <strong>NComputing</strong> Inc. - 2010
Now that the “Offline Registration file“ has been created, email that file to registration@ncomputing.com<br />
Once you have recieved a returned license file (filetype = .lic) from Ncomputing’s automated offline<br />
email registration system, save the file onto the Linux host, launch the <strong>NComputing</strong> Admin Console, and<br />
once again launch the Registratin Wizard.<br />
Click “Next“ until you again reach to the “Type of Registration“ screen.<br />
Figure 30 – Type of Registrataion screen<br />
To complete the offline registration process, this time select the “Continue offline registration“ radio<br />
button and click “Next.“<br />
Figure 31 – Load Activation File screen<br />
Now, you’re presented with a screen where you enter the location of the license file that was returned to<br />
you by email.<br />
Click on the “Select the activation file“ button to bring up a dialog box to allow naviating to the license<br />
file location.<br />
Copyright by <strong>NComputing</strong> Inc. – 2010 Page 19
Figure 32 – Navigation screen to select returned license file<br />
Use this dialog screen to located the license file, and click “Open.“<br />
Then the “Load Activation File“ screen is redisplayed showing the fully qualified licence filename.<br />
Figure 33 – Load Activation File screen after locating license file<br />
Now click “Next“ to complete the activation process.<br />
Page 20 Copyright by <strong>NComputing</strong> Inc. - 2010
Figure 34 – Offline registration results screen – showing successful and unsuccessful registration examples<br />
You can click the check box for the “Register future L-series devices in the background,” but it<br />
will have no effect because you have used offline registration. The “background registration”<br />
feature requires an active standard internet connection.<br />
Click on “Next,” to complete the offline registration process.<br />
Figure 35 – Activation Precess Complete screen<br />
Copyright by <strong>NComputing</strong> Inc. – 2010 Page 21
Adding new users<br />
If you have not yet created Users for this Linux installation, now is a good time to do so using<br />
the Linux GUI.<br />
Or<br />
You can launch a Terminal console with sufficient rights to create new users<br />
Enter the command “sudo adduser ” (The variable username refers to the<br />
userid or name of the user which should be created, and you will be prompted for the<br />
administrative password before the “adduser” command is executed.)<br />
(sudo is the “superuser do” command, and in this context it executes a single<br />
“adduser”.command as the “superuser”)<br />
For example: sudo adduser user2<br />
For each new user, the system asks a series of questions needed to create the account. After<br />
all questions have been answered, the new user will be active on the system and he/she can<br />
login at any <strong>NComputing</strong> L-series access device with network access to this system.<br />
The L-series Admin Console for Linux<br />
The Ncomputing System console provides current data on the L-series sessions and USB assignment. The<br />
product information screen shown below provides vSpace version information and contact information.<br />
Figure 36 – Product Information screen<br />
Page 22 Copyright by <strong>NComputing</strong> Inc. - 2010
USB Port Assignment<br />
“Assigning” USB devices (i.e., associating them with a particular station or access device), is<br />
started by clicking on the “USB assignment” icon in the left-hand-pane of the <strong>NComputing</strong><br />
vSpace Administration Console. This function permits assigning a host USB port (or USB<br />
devices attached to a host port) to be accessible to specific virtual desktop sessions, all<br />
sessions associated with L-series access devices, or to the host console session.<br />
In the current implementation, users can manage USB devices that mount automatically<br />
through the Gnome Volume Manager (USB memory stick, HDD, etc.).<br />
Please note that assignment cannot be changed for devices previously present and mounted<br />
with a different user's rights. Therefore, to ensure your USB port assignment configuration<br />
works as intended, please disconnect all non-essential USB devices and re-boot the machine<br />
BEFORE attempting to assign USB ports to L-series device connected stations.<br />
After the reboot, please Login as user “root” to define the USB port assignments.<br />
To prevent un-authorized access by other non-root system users, some multi-user <strong>Ubuntu</strong><br />
deployments may need to require USB removable storage to be mounted with specific security<br />
attributes. The following options are available:<br />
• Assign the device just to the Host console:<br />
o Only the console session can see or have any access to the USB device when it gets<br />
attached to the system.<br />
• Assign the device as Shared read-write:<br />
o All sessions/stations will see the device when it is plugged in, all sessions are allowed to<br />
read/write associated contents.<br />
• Assign it as Shared read-only:<br />
o All sessions/stations can read from the storage device, but they cannot write or delete<br />
files. Example: when a teacher wants to share pictures or media with students logged on<br />
other stations but do not want them to alter the storage device files in any way.<br />
• Assign it to one particular Station associated with a specific L-series station for the duration<br />
of the current session:<br />
o With this attribute, the removable USB storage device will only be seen at that particular<br />
station, and that station is the only one with permissions to read/write/delete files on the<br />
USB device.<br />
Copyright by <strong>NComputing</strong> Inc. – 2010 Page 23
Figure 37 – USB assignment screen<br />
To identify the Linux port that you wish to assign to a particular Access Device or Station,<br />
insert a USB memory device into the physical USB port you wish to use for that station and<br />
click the Refresh button on the USB assignment toolbar. (The refresh button is denoted with<br />
curved arrow, and the button is located to the left of the toolbar’s Question Mark button.)<br />
Clicking “Refresh” updates the USB connectivity information list and causes the new device to<br />
appear in the list.<br />
Double click on the “ Default” item corresponding to the USB port you’ve just<br />
identified and select the “Session” to which you wish to assign the port.<br />
Note: The definition for the “ Default” setting for this <strong>Ubuntu</strong> installation is stored in the<br />
“vspace.com” file located at:<br />
/etc/ncomputing/vspace.com<br />
Port defaults are specified by the following numeric convention:<br />
0 None (device will not be mounted)<br />
-2 Mount device to Host station/session<br />
-3 Mount device Shared read-write<br />
-4 Mount device Shared read-only<br />
After all specific USB assignments have been made using the <strong>NComputing</strong><br />
Administration Console, those device specific assignments are then stored in the<br />
“usb.com” file located at:<br />
/etc/ncomputing/usb.com<br />
USB 1.1 devices and USB 2.0 devices show up in the assignment screen under two different<br />
device types. USB 1.1 devices will be shown under a “UHCI Controller” designation in the<br />
Product column, and USB 2.0 devices show with the “EHCI Controller” designation in that<br />
same Product column. To ensure a device plugged-in to a physical USB port gets assigned to<br />
the correct session/station – regardless of whether the device is USB 1.1 or USB 2.0 – the<br />
physical port must be double logically identified using a USB 1.1 device and then using a USB<br />
2.0 device. Then the physical port must be logically “double assigned” under both the “UHCI”<br />
and the “EHCI” controller designations.<br />
Page 24 Copyright by <strong>NComputing</strong> Inc. - 2010
Uninstalling vSpace<br />
Uninstalling <strong>NComputing</strong>’s vSpace software can be done using the standard <strong>Ubuntu</strong> tools. The Synaptic<br />
Package Manager will remove the software. vSpace software is identified with the name “xseries”.<br />
Figure 38 – Uninstalling vSpace for Linux<br />
Copyright by <strong>NComputing</strong> Inc. – 2010 Page 25