Eldningsinstruktion och bruksanvisning Cronspisen 100, 200, 500 ...
Eldningsinstruktion och bruksanvisning Cronspisen 100, 200, 500 ...
Eldningsinstruktion och bruksanvisning Cronspisen 100, 200, 500 ...

Create successful ePaper yourself
Turn your PDF publications into a flip-book with our unique Google optimized e-Paper software.
SE<br />
NO<br />
DE<br />
GB<br />
FI<br />
FR<br />
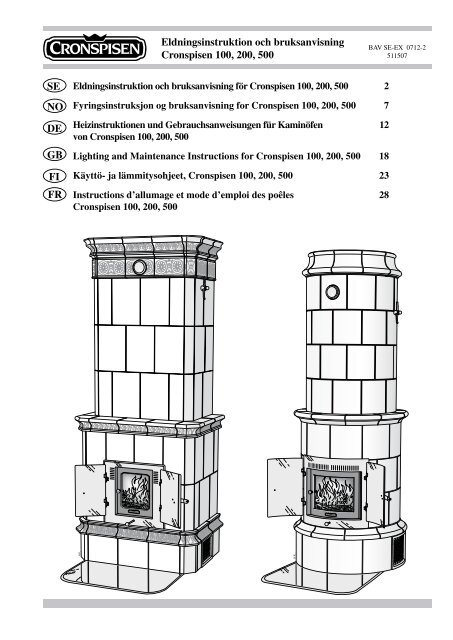
<strong>Eldningsinstruktion</strong> <strong>och</strong> <strong>bruksanvisning</strong><br />
<strong>Cronspisen</strong> <strong>100</strong>, <strong>200</strong>, <strong>500</strong><br />
<strong>Eldningsinstruktion</strong> <strong>och</strong> <strong>bruksanvisning</strong> för <strong>Cronspisen</strong> <strong>100</strong>, <strong>200</strong>, <strong>500</strong> 2<br />
Fyringsinstruksjon og <strong>bruksanvisning</strong> for <strong>Cronspisen</strong> <strong>100</strong>, <strong>200</strong>, <strong>500</strong> 7<br />
Heizinstruktionen und Gebrauchsanweisungen für Kaminöfen 12<br />
von <strong>Cronspisen</strong> <strong>100</strong>, <strong>200</strong>, <strong>500</strong><br />
Lighting and Maintenance Instructions for <strong>Cronspisen</strong> <strong>100</strong>, <strong>200</strong>, <strong>500</strong> 18<br />
Käyttö- ja lämmitysohjeet, <strong>Cronspisen</strong> <strong>100</strong>, <strong>200</strong>, <strong>500</strong> 23<br />
Instructions d’allumage et mode d’emploi des poêles 28<br />
<strong>Cronspisen</strong> <strong>100</strong>, <strong>200</strong>, <strong>500</strong><br />
BAV SE-EX 0712-2<br />
511507
GB<br />
CHOICE OF FUEL<br />
All sorts of logs, such as birch, beech, oak, elm, ash, conifers<br />
and fruit trees can be used as fuel in the tiled stove.<br />
Different types of wood have different density, the higher<br />
the density the higher the energy value. Oak, beech and<br />
birch have the highest density.<br />
Fresh wood is about 50 per cent water. Some of the water<br />
circulates freely between the fibres and some of the water<br />
is bound in the cells. The wood must always be dried so<br />
that the free water evaporates. The timber is ready for use<br />
when the moisture content has fallen below 20 %. If wood<br />
with a higher moisture content is lit, a large part of the<br />
energy content of the wood is used boiling off the water.<br />
If the wood is damp, the combustion is also poor, layers of<br />
soot and tar build up in the chimney and could, at worst,<br />
lead to a chimney fire. In addition, it causes the glass of<br />
the tiled stove to soot and may cause discomfort to those<br />
living nearby.<br />
To ensure thoroughly dry wood, the wood should be cut in<br />
the winter and stored, well aired, under a roof. Never cover<br />
the wood pile with a tarpaulin to the ground. The tarpaulin<br />
will then act as a sealed cover and the wood will be prevented<br />
from drying.<br />
Always store a small amount of wood indoors for several<br />
days before use, so that the surface moisture has time to<br />
evaporate.<br />
The moisture content can be easily checked by weighing a<br />
small test piece of wood before and after it has been dried<br />
at an oven temperature of 80° C for 24 hours. Calculate<br />
the moisture content by dividing the weight of evaporated<br />
water by the total weight of wood including water.<br />
m -m<br />
Moisture content in %: before after<br />
m x <strong>100</strong><br />
before<br />
Warning! Under no circumstances may pressure impregnated<br />
wood, painted or glued wood, chipboard, plastic or<br />
colour br<strong>och</strong>ures be used as fuel in a tiled stove. All these<br />
materials can create hydr<strong>och</strong>loric acid and heavy metals<br />
that are damaging both to the environment and the tiled<br />
stove. Hydr<strong>och</strong>loric acid can also attack the steel in the<br />
chimney or the mortar in a stone built chimney.<br />
The correct size of wood is also important for combustion.<br />
The size of the wood should be:<br />
Kindling wood: Finely chopped wood<br />
Length: 25 -35 cm<br />
Diameter: 2 - 5 cm<br />
Weight per lighting: 2.5 kg (approx. 10 - 12 finely chopped<br />
pieces)<br />
Wood: Chopped wood<br />
Length: 25 - 35 cm<br />
Diameter: 7 - 9 cm<br />
Normal weight: 2.0 kg (2-3 logs per load)<br />
Max weight: 3.0 kg (3-4 logs per load)<br />
12 kg per lighting<br />
(followed by at least 9 hours cooling)<br />
24 kg per 24 hours<br />
18<br />
LIGHT THE FIRE AS FOLLOWS:<br />
It is important that the correct amount of wood is used, especially<br />
when lighting. If you are lighting the fire for the first time<br />
you should use a set of scales to see how much 2.5 kg kindling<br />
is. Also check what the normal and maximum weights<br />
look like.<br />
The tiled stove is only intended for use with the door closed.<br />
Always open the door carefully and slowly to prevent blow<br />
back because of the changing pressure in the stove.<br />
The function of tiled stoves differs depending on the draft<br />
conditions in the chimney. Achieving the correct setting for<br />
the combustion air damper and start damper and the appropriate<br />
amount and size of wood usually takes a few attempts.<br />
Lighting<br />
Important!<br />
Note that if too little kindling is used when lighting, or if<br />
the wood is too thickly cut, the fire box will not reach the<br />
correct operating temperature. Incorrect lighting can lead<br />
to poor combustion with heavy sooting and may result in<br />
the fire going out when the door is shut.<br />
If your house has mechanical exhaust air ventilation you will<br />
need to open a window near the tiled stove before lighting the<br />
fire. Leave the window open for a few minutes until the fire<br />
has caught.<br />
In order to obtain a good bed of embers, there should always<br />
be a thin layer of ash and charred pieces in the tiled stove.<br />
1. Open the combustion air damper, flue damper and start<br />
damper to the fully open position.<br />
2. Place some newspaper or a fire lighter block, and approximately<br />
2.5 kg kindling in the middle of the tiled stove.<br />
The wood should be piled alternately across and lengthways.<br />
3. Light the fire. Leave the door ajar with an opening of<br />
about 10 mm to the holder.<br />
4. When the fire has caught fully after approx 10-15 minutes,<br />
close the doors completely. With good draft in the<br />
chimney the start damper is moved to approx 1⁄4 of the<br />
fully open position.<br />
5. When the first wood refill is made and has caught, the<br />
start damper can be closed.<br />
How early the start damper can be closed varies. This depends<br />
on how hot the tiled stove is regarding lighting and on the<br />
draft conditions in the chimney.<br />
Wood loading<br />
Just before the fire has burnt down and the flames have gone<br />
out it is time to add more wood.<br />
1. Open the door handle slightly and let the vacuum in the<br />
firebox equalise for a few seconds before opening the<br />
door completely.<br />
2. Add 2-3 logs of a combined weight of approx 2-2.5 kg.<br />
Lay the logs so that there is space between them. This is<br />
to achieve the correct air mixture. Then close the door.<br />
3. The combustion damper must be completely open for 2-<br />
3 minutes until the logs turn black and catch fire. If you<br />
wish for slower combustion, the supply of combustion air<br />
can now be reduced. The conditions for controlling combustion<br />
vary depending on the temperature in the tiled
stove and the draft in the chimney. Remember that the<br />
fire must always burn with bright clear flames.<br />
4. Add two more loads of wood of 2-2.5 kg each. Then<br />
allow the tiled stove to give off the accumulated heat<br />
for 9-12 hours before repeating the lighting procedure.<br />
Do not exceed the permitted amount of wood of 12 kg<br />
per lighting instance with a following cooling period of<br />
at least 9 hours. Maximum permitted weight of wood<br />
is 24kg over 24 hours.<br />
5. When the glow has gone out the combustion damper<br />
and the flue damper can be shut. This is to prevent<br />
heat leakage through the chimney during the cooling<br />
period.<br />
Important!<br />
It is important that the wood catches fire quickly. Quick<br />
lighting is achieved by opening the combustion air damper<br />
fully or by leaving the door ajar for a moment. Pyre<br />
lighting causes thick smoke and can cause quick gas<br />
ignition with the risk of damage to property and personal<br />
injury.<br />
It is important that the flue damper is not closed until<br />
the glow in the tiled stove has gone out.<br />
DAMPER<br />
Below the door of the tiled stove there is a control for the<br />
combustion damper. The control is open when it is pulled<br />
out. The combustion air damper must be fully out during<br />
lighting and at the start of the first loading. The supply air<br />
can first be controlled when the tiled stove and chimney are<br />
hot. How much the supply air can be controlled depends<br />
on how hot the stove is and the strength of the draft in the<br />
chimney. When the glow has gone out, the combustion<br />
damper can be shut completely.<br />
There are two damper controls on the side of the upper<br />
section of the tiled stove. The damper control that moves<br />
in and out controls the start damper. The start control is<br />
open when it is pulled out. The twist control controls the<br />
flue damper. When the control is vertical the flue damper is<br />
open, when it is horizontal it is closed.<br />
A label with three positions of<br />
the flue damper and the start<br />
damper is supplied with the<br />
tiled stove. The label is static<br />
adhesive and is applied to the<br />
side of the tiled stove next to<br />
the flue damper by moistening<br />
the surfaces with water.<br />
• START. When starting, the start control must be open and<br />
pulled out. The flue damper must be vertical and open.<br />
• NORMAL FIRE. For normal burning the start damper<br />
must be closed and pushed in. The flue damper must be<br />
vertical and open.<br />
• CLOSED. After completed burning, the start damper<br />
must be closed and pushed in. The flue damper must be<br />
horizontal and closed.<br />
1<br />
GB<br />
GENERAL<br />
A correctly lit tiled stove gives good heating economy and<br />
warmth for a long period of time. The tiled stove should be<br />
lit regularly with cooling down periods of 9-12 hours. It is<br />
therefore recommended that fires are lit twice a day, which<br />
gives even heating for a long time. The fire should not be<br />
too big. Normal fires require about 2 kg of wood per load.<br />
The recommended amounts are 2.5 kg of kindling followed<br />
by three loads of wood, which totals approximately 9<br />
kg per fire. Externally, the tiled stove should never be hotter<br />
than one can touch without getting burnt, which is about<br />
65°C. The largest permitted weight of wood is 3 kg per<br />
wood load and maximum 12 kg per lighting followed by a<br />
cooling period of at least 9 hours. The maximum weight of<br />
wood per 24 hours is 24 kg and refers to cut birch or other<br />
broadleaf wood with 18 % moisture content. When lighting<br />
the same weight of conifer wood, significantly higher<br />
stove temperatures are reached. Exceeding the largest permitted<br />
weight of wood can cause the tiled stove and nearby<br />
building parts to overheat. The service life is shortened and<br />
parts of the tiled stove may be damaged and the warranty<br />
will no longer apply<br />
WHEN THE TILED STOVE IS NEW<br />
Allow the tiled stove to rest for a week or so before lighting<br />
for the first time to give the adhesive time to harden. Only<br />
light the stove for a max 2 hours the first few times. When<br />
the tiled stove is lit for the first time a particular smell may<br />
be detected, which indicates an oil coating and excess paint<br />
on the panels. After a number of fires the smell will disappear.<br />
MAINTENANCE OF TILED STOVE<br />
During burning the glass can become sooty, even when burning<br />
dry wood with a moisture content of 15 - 20%. Wiping<br />
with dry paper is often sufficient when cleaning regularly. If<br />
the soot has been on the glass for longer it can be removed<br />
using cleaning agent or a specific soot removal agent. These<br />
cleaning agents can be purchased at your local supermarket<br />
or your local tiled stove dealer.<br />
● Never use cleaning agents that contain any abrasives,<br />
these can damage the glass.<br />
● Ensure that the no embers remain when removing ash<br />
from the stove. The ash must be stored in a fireproof container<br />
with a lid for at least least a week before being disposed of.<br />
● The tiling is cleaned using soapy water, dry using dry<br />
cloths.<br />
● Checking the gaskets is important from a combustion<br />
point of view, because worn gaskets reduce combustion<br />
efficiency when the tiled stove burns leaked air.<br />
● Painted parts of the tiled stove can be cleaned with a damp<br />
cloth and, if necessary, a little washing-up liquid. Brass<br />
components must be polished regularly to retain their shine.<br />
Damage, such as scratches, to painted parts can be repaired<br />
using <strong>Cronspisen</strong> touch up paint. Contact your dealer.
GB<br />
● Because there is a constant flow of air though the tiled<br />
stove, cold room air is drawn in and hot air released, dust<br />
can gather inside the grille under the tiled stove. Therefore,<br />
one should regularly clean under the tile stove.<br />
● Components close to the centre of the fire may need to<br />
be replaced. An example of such a component is the stove<br />
cladding. The life of these components depends on how<br />
much and in what way the tiled stove has been used.<br />
SWEEPING<br />
Sweeping the tiled stove, chimney ducts and chimney<br />
connections should be carried out by a chimney sweep.<br />
In order to access the flue damper and rear connection<br />
the start damper is opened and the soot hatch is removed.<br />
Remove the smoke baffle and remove the vermiculite<br />
panels from the sides of the stove. There are guide baffles<br />
hanging from the edges of the insert in the smoke channels<br />
on both sides of the stove. Unhook the guide baffles<br />
from the insert and remove them. All the ducts inside the<br />
stove can now be accessed. A soot vacuum cleaner is the<br />
best way to remove soot from the bottom of the tiled stove.<br />
Reinstalling the parts is described in the next section.<br />
If a chimney fire occurs or is suspected, the combustion<br />
damper and the door must be closed. If necessary, contact<br />
the fire brigade to extinguish it. The chimney must always<br />
be inspected by a chimney sweep after a chimney fire.<br />
Components in the firebox<br />
<strong>Cronspisen</strong> <strong>100</strong>, <strong>200</strong><br />
The baffles have the task of guiding the smoke gases down<br />
at the sides. Insert the baffle in the front left side flue.<br />
When the baffle is inserted it is angled slightly and pressed<br />
against the front flue wall so that the spring bends. Insert<br />
the baffle so that the notch is level with the edge of the<br />
hole in the side of the insert. Angle the baffle back so that<br />
it is parallel with the front side and hook it into place on<br />
the edge of the insert.<br />
The baffle must hang from the edge of the insert and lie<br />
against the intermediate wall between the front and rear<br />
flues. The same procedure is used to install the right hand<br />
baffle.<br />
20<br />
Insert the rear smoke baffle and position it on the upper<br />
side of the insert. Move it backwards so that it is against<br />
the intermediate wall between the front and rear flues.<br />
Insert the front smoke baffle in the same way and move it<br />
against the front intermediate wall.<br />
Fix the holders to the vermiculite sheets and install the<br />
sheets on the sides. Slid the sheets as far forward as possible<br />
to the front side of the insert so that the air intake at<br />
the rear is not blocked. Insert the rear vermiculite sheet in<br />
the U profile furthest in. Then stand it vertically on the cast<br />
iron bottom.
Components in the firebox<br />
<strong>Cronspisen</strong> <strong>500</strong><br />
The baffles have the task of guiding the smoke gases down<br />
at the sides. Insert the baffle in the front left side flue.<br />
When the baffle is inserted it is angled slightly to the right<br />
so that the curved part is parallel to the insert. Insert the<br />
baffle so that the notch is level with the edge of the hole<br />
in the side of the insert. Hook it into place on the edge of<br />
the insert. Insert a hand into the middle and feel on the<br />
upper side of the insert that both hooks on the curved part<br />
are on the edge. Move the guide baffle backwards until it is<br />
against the curved intermediate wall.<br />
The baffle must hang from the edge of the insert and lie<br />
against the intermediate wall between the front and rear<br />
flues. The same procedure is used to install the right hand<br />
baffle.<br />
21<br />
GB<br />
Insert the smoke baffle and position it on the upper side<br />
of the insert. Move it backwards against the rear wall of<br />
the insert. If it is tight between the upper side of the insert<br />
and the intermediate wall in the body, compress the smoke<br />
baffle a little so that it is lower.<br />
Fix the holders to the vermiculite sheets and install the<br />
sheets on the sides. Slid the sheets as far forward as possible<br />
to the front side of the insert so that the air intake at<br />
the rear is not blocked. Insert the rear vermiculite sheet in<br />
the U profile furthest in. Then stand it vertically on the cast<br />
iron bottom.<br />
HK
GB<br />
POSSIBLE CAUSES OF OPERATIONAL INTERFERENCE AND HOW TO RECTIFY THEM<br />
Poor draft in the tiled stove after new installation.<br />
● Check the length of the chimney so that it meets the<br />
requirements, that is, one metre above the ridge, and a<br />
total length of at least 3.5 metres.<br />
● Check that there is nothing in the chimney to restrict<br />
the smoke and that no nearby buildings or trees affect<br />
the winds around the chimney.<br />
● Check the area of the chimney (applies to existing<br />
stone built chimneys), which should be 150-<strong>200</strong> cm².<br />
It is difficult to light the fire and the fire dies after a<br />
short time.<br />
● The wood may not be dry enough, check the wood.<br />
● Another reason is that there may be negative pressure<br />
in the house, for example when using a kitchen<br />
extractor fan or other mechanical ventilation. Open a<br />
window near the tiled stove before lighting the fire.<br />
Also try lighting some newspaper and holding it up<br />
inside the tiled stove to get the draft going.<br />
● The air supply duct from the outside may be completely<br />
or partially blocked. Disconnect the hose and try<br />
lighting the fire with combustion air from the room.<br />
● Perhaps the combustion air damper is not open.<br />
● The smoke outlet of the tiled stove may be blocked<br />
with soot, which can occur after sweeping. Check by<br />
removing the soot hatch, firebox cladding and smoke<br />
baffle.<br />
Warning!<br />
22<br />
● Finally go through the lighting instructions again.<br />
Perhaps the amount of kindling was too small and therefore<br />
the base embers were too weak and cold to light<br />
the next load of wood.<br />
Abnormal amounts of soot form on the glass<br />
There is always a certain amount of soot on the glass and<br />
this is added to with each lighting. Soot on the glass is caused<br />
by three things:<br />
● The wood is damp, which causes poor combustion<br />
resulting in smoke.<br />
● Too low temperature in the firebox, which causes<br />
incomplete combustion and poor draft in the chimney.<br />
● Incorrect procedure, the door was not in the lighting<br />
position for approximately 15 minutes.<br />
Check the moisture content of the wood, ensure that you<br />
have good base embers and go through the lighting instructions<br />
once again.<br />
Smoke odour around the tiled stoves for periods.<br />
This can occur when wind blows down the chimney and<br />
most often occurs when the wind is from a particular<br />
direction. Another cause is the door was opened when it<br />
is burning hard. If a problem occurs that you cannot rectify<br />
yourself, contact the dealer or a chimney sweep.<br />
We hope that these words of advice will help you to enjoy<br />
pleasant, economic and problem free use of your tiled stove.<br />
During operation, certain surfaces of the tiled stove become very hot and can cause burn injury if touched.<br />
Be aware of the strong heat radiated through the hatch glass.<br />
Placing flammable material closer than the safe distance indicated may cause a fire.<br />
Pyre lighting can cause quick gas ignition with the risk of damage to property and personal injury.
NIBE AB/NIBE Brasvärme • Box 134 • SE-285 23 Markaryd, Sweden<br />
www.cronspisen.se