Bricks & Pavers Technical Manual - Boral
Bricks & Pavers Technical Manual - Boral
Bricks & Pavers Technical Manual - Boral

You also want an ePaper? Increase the reach of your titles
YUMPU automatically turns print PDFs into web optimized ePapers that Google loves.
<strong>Bricks</strong> & <strong>Pavers</strong> <strong>Technical</strong> <strong>Manual</strong><br />
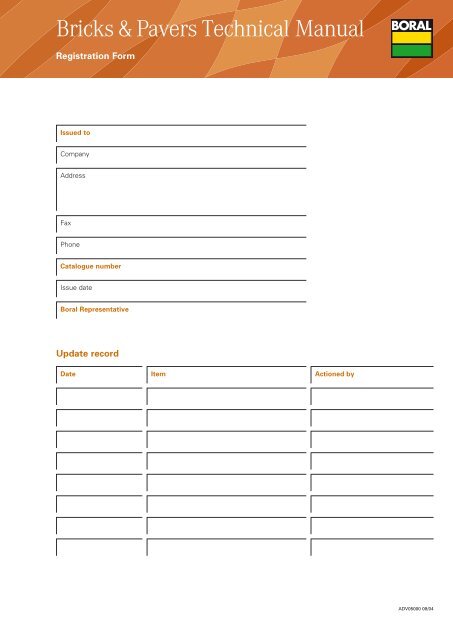
Registration Form<br />
Issued to<br />
Company<br />
Address<br />
Fax<br />
Phone<br />
Catalogue number<br />
Issue date<br />
<strong>Boral</strong> Representative<br />
Update record<br />
Date Item Actioned by<br />
ADV05000 08/04
<strong>Bricks</strong> & <strong>Pavers</strong> <strong>Technical</strong> <strong>Manual</strong><br />
Contents 1 of 2<br />
1.0 <strong>Bricks</strong><br />
1.1 Brick Properties<br />
1.101 Brick Dimensions<br />
1.102 Brick Strength<br />
1.103 Water Absorption<br />
1.104 Durability<br />
1.2 Brick Masonry Design<br />
1.201 Robustness<br />
1.205 Masonry Strength<br />
1.206 Durability of Masonry<br />
1.208 Brick Ties<br />
1.209 Movement in Masonry Walls<br />
1.211 Thermal Properties<br />
1.213 Masonry Design for Fire Resistance<br />
1.214 Masonry Design for Structural Adequacy<br />
FRL<br />
1.222 Masonry Design for Integrity FRL<br />
1.222 Masonry Design for Insulation FRL<br />
1.222 Effect of Recesses for Services on FRL’s<br />
1.223 Effect of Chases on Fire Rated Masonry<br />
1.224 Options for Increasing FRL’s<br />
1.225 Acoustic Performance Rating<br />
1.3 Brick Masonry Construction<br />
1.301 Mortar<br />
1.304 Joint Types<br />
1.305 Joint Sizes<br />
1.305 Weepholes<br />
1.306 Brick Estimator<br />
1.307 Brick Bonds<br />
1.310 Brick Coursing Height<br />
1.4 Property Tables<br />
1.105 Moisture Expansion<br />
1.105 Efflorescence<br />
1.105 Pitting due to Lime<br />
1.227 Weighted Sound Reduction Index (Rw)<br />
1.227 Impact Sound Resistance<br />
1.227 BCA Deemed to Satisfy Walls<br />
1.230 Solid v Cavity Walls<br />
1.230 Brick Walls with Render<br />
1.230 Brick Walls with Plasterboard<br />
1.231 Points to Consider When Designing<br />
Walls for Acoustic Performance<br />
1.231 Acoustic Performance On-Site<br />
1.232 Perimeter Acoustical Sealing<br />
1.232 Doors<br />
1.233 Lightweight Panels Above Doors<br />
1.233 Air Paths Through Gaps, Cracks or Holes<br />
1.233 Appliances<br />
1.233 Electrical Outlets & Service Pipes<br />
1.311 Brick Gauge<br />
1.313 Blending<br />
1.313 Brick Storage<br />
1.314 Laying Practices<br />
1.315 Control Joints<br />
1.315 Damp Courses and Flashing<br />
1.316 Cleaning of Clay Masonry<br />
ADV05004 (1/2) 10/08
<strong>Bricks</strong> & <strong>Pavers</strong> <strong>Technical</strong> <strong>Manual</strong><br />
Contents 2 of 2<br />
2.0 <strong>Pavers</strong><br />
3.0 Face Brick Range<br />
2.1 Paver Properties<br />
2.101 Paver Dimensions<br />
2.102 Paving Strength<br />
2.103 Durability<br />
2.103 Slip Resistance<br />
2.104 Abrasion Resistance<br />
2.2 Pavement Design<br />
2.201 Pavement Types<br />
2.203 Description of Layers & Basic<br />
Engineering Design Requirements<br />
2.203 Subgrade<br />
2.204 Base Course<br />
2.205 Bedding Course<br />
2.206 Surface Course<br />
2.3 Pavement Construction<br />
2.301 Paver Estimator<br />
2.301 Subgrade Preparation<br />
2.302 Base course Preparation for Flexible<br />
Pavements<br />
2.302 Edge Restraints for Flexible Pavements<br />
2.303 Bedding Course for Flexible Pavements<br />
2.305 Paver Storage<br />
2.4 Property Tables<br />
4.0 Engineered Utility Brick Range<br />
5.0 Paver Range<br />
6.0 Projects In View<br />
7.0 Reference Material<br />
Product Data Sheets<br />
2.104 Moisture Expansion<br />
2.104 Efflorescence<br />
2.105 Pitting due to Lime<br />
2.105 Cold Water Absorption<br />
2.207 Edge Restraints<br />
2.209 Drainage<br />
2.210 Paver Laying Patterns<br />
2.212 Joints Between <strong>Pavers</strong><br />
2.213 Tolerance on Course Levels<br />
2.213 Crossfalls<br />
2.214 Steep Gradients<br />
2.305 Blending<br />
2.306 Laying Practices<br />
2.311 Sand Filled Joints<br />
2.311 Mortar Filled Joints<br />
2.311 Compaction<br />
2.312 Trafficking After Construction<br />
2.312 Cleaning<br />
CHIPexpress ® Homestyle Brochures<br />
ADV05004 (2/2) 10/08
1 <strong>Bricks</strong><br />
1. <strong>Bricks</strong>
1.1 Brick Properties
<strong>Bricks</strong> & <strong>Pavers</strong> <strong>Technical</strong> <strong>Manual</strong><br />
Section 1.1 Brick Properties 1.101<br />
Section 1.1 relates to the properties of bricks made to meet the requirements of Australian Standard AS4455<br />
Part 1 Masonry Units. This information is provided as a guide only to the properties of interest to a masonry<br />
designer or builder.<br />
Brick Dimensions<br />
The work size of a standard brick is: 76 mm high x 230 mm long x 110 mm wide.<br />
Some bricks are made with different work sizes. For example brick heights of 119 mm and 162 mm to match 1.5<br />
and 2 standard size brick heights, including mortar joint, respectively. 50 mm and 90 mm high bricks, 90 mm wide<br />
bricks and 290 mm long bricks are made for different structural and aesthetic effect. Larger bricks are often used<br />
for more economical laying and as a design feature either on their own or combined with smaller bricks.<br />
In cyclonic areas larger (140 mm wide x 90 mm high x 290 mm long) hollow bricks are used to allow for<br />
reinforcement and grouting in the wall. Wider (150 mm wide) bricks can also be used in walls requiring lower<br />
sound transmission, higher fire resistance levels and higher load bearing capacity depending on the specific brick<br />
properties.<br />
Clay brick sizes may vary after they are fired but size variation between units averages out when blended<br />
properly during laying. Brick dimensions are measured by dry stacking 20 units, measuring the total length, width<br />
and height and comparing that measurement to 20 times the work size.<br />
<strong>Bricks</strong> are classified according to how much 20 bricks together deviate from 20 times the work size.<br />
• For standard bricks, Dimensional Category DW1 means the height and width will differ by less than plus or<br />
minus 50 mm from 20 times the work size, and the length will differ less than plus or minus 90 mm.<br />
• For standard bricks, Dimensional Category DW2 means the height and width will differ by less than plus or<br />
minus 40 mm from 20 times the work size, and the length will differ less than plus or minus 60 mm.<br />
• Dimensional Category, DW0 means there are no requirements. This is usually reserved for non-standard<br />
shaped bricks and bricks that have been rumbled or otherwise distorted during the manufacturing process<br />
for aesthetic reasons. ■<br />
ADV03743
<strong>Bricks</strong> & <strong>Pavers</strong> <strong>Technical</strong> <strong>Manual</strong><br />
Section 1.1 Brick Properties 1.102<br />
Brick Strength<br />
Brick strength is defined as resistance to load per unit area and is expressed in mega Pascals (MPa).<br />
Characteristic Unconfined Compressive Strength (f’uc)<br />
The characteristic unconfined compressive strength is used by engineers in the design of masonry to calculate<br />
the strength of a wall. <strong>Bricks</strong> in any one batch have a range of strengths that would usually follow a normal<br />
distribution. In a wall the different strength bricks contribute to the strength of the whole and the weakest brick<br />
does not determine the strength of the wall. For safety, engineering practice has been to use characteristic<br />
unconfined compressive strength. This is the strength 95% of the bricks will exceed and is typically 0.86 times<br />
the lowest unconfined compressive strength found when measuring the compressive strengths of 10 samples.<br />
<strong>Boral</strong> bricks usually have characteristic unconfined compressive strengths in the range 15 to 35 MPa.<br />
Unconfined Compressive Strength<br />
The unconfined compressive strength is a calculated number based on the compressive strength. To measure the<br />
compressive strength of a brick, steel platens are used above and below. This constrains the surface and where<br />
all other factors are equal, a shorter brick will have a higher compressive strength than a taller brick. To remove<br />
this test effect, the compressive strength is multiplied by a factor, which varies with the height of the brick. The<br />
resulting number is called the unconfined compressive strength and reflects the performance of the brick in a<br />
wall. Theoretically, bricks which are identical except for their height should produce the same unconfined<br />
compressive strength. This figure is not now used in masonry design, but is used to calculate Characteristic<br />
Unconfined Compressive Strength.<br />
Compressive Strength of <strong>Bricks</strong><br />
Brick strength is measured according to AS4456.4 Determining Compressive Strength of Masonry Units.<br />
Individually crushing 10 bricks gives the compressive strength of each brick and the mean compressive strength<br />
of the lot. These figures are not used in masonry design, but are used to calculate Unconfined Compressive<br />
Strength. ■<br />
ADV03744
<strong>Bricks</strong> & <strong>Pavers</strong> <strong>Technical</strong> <strong>Manual</strong><br />
Section 1.1 Brick Properties 1.103<br />
Water Absorption<br />
Cold Water Absorption<br />
The amount of water that a brick can absorb is measured by the cold water absorption test. There is no distinct<br />
relationship between water absorption and the water-tightness of walls. The results of water absorption tests<br />
are used by the brick manufacturer for quality assurance.<br />
Initial Rate of Absorption<br />
The initial rate of absorption (IRA) is the amount of water absorbed in one minute through the bed face of the<br />
brick. It is a measure of the brick’s ‘suction’ and can be used as a factor in the design of mortars that will bond<br />
strongly with units. As mortars other than the ‘deemed to comply’ mortars are rarely used, the impact of the IRA<br />
is primarily on the bricklayer. Bricklayers, through practical experience, adjust the mortar, the height of a wall<br />
built in a day and the length of time before ironing the joints, according to the suction.<br />
The bond between the masonry unit and mortar is largely influenced by the capacity of the brick to absorb water<br />
and the ability of the mortar to retain the water that is needed for the proper hydration of cement. If the brick<br />
sucks the water too quickly from the mortar, the next course may not be properly bedded. If the mortar retains<br />
too much water, the units tend to float on the mortar bed, making it difficult to lay plumb walls at a reasonable<br />
rate. In either case there will be poor bond.<br />
The optimum value of IRA is considered to be between 0.5 and 1.5 kg/m2 /min. However, IRAs can exceed<br />
these limits. The mortar’s water retentivity should be matched to the brick type where good bond strength is<br />
critical. ■<br />
ADV03745
<strong>Bricks</strong> & <strong>Pavers</strong> <strong>Technical</strong> <strong>Manual</strong><br />
Section 1.1 Brick Properties 1.104<br />
Durability<br />
Salt attack is the most common durability problem affecting bricks. In the form of a solution, salt can be<br />
absorbed into masonry. As the water evaporates, the salt is drawn towards the outside face. The evaporating<br />
water leaves the solution super-saturated so salt crystals begin to form. The salt crystals grow in the pores just<br />
below the surface and depending on the texture of the brick, the amount of salt, the rate of drying and the<br />
temperature, the salt may fill the pores, exerting very high pressures on the matrix. The energy in the constrained<br />
salt crystal increases and if sufficient ‘pops’ a piece of the outer surface off and salt attack has begun.<br />
<strong>Bricks</strong> are assessed and classed into three grades according to AS/NZS4456.10 Resistance to Salt Attack. In<br />
summary the three grades of brick that can be used are as follows:<br />
• Protected Grade (PRO)<br />
Suitable for use in elements above the damp-proof course in non-marine exterior environments. Elements<br />
above the damp-proof course in all exterior environments, with a waterproof coating, properly flashed<br />
junctions with other building elements and a top covering (roof or coping) protecting the masonry.<br />
• General Purpose Grade (GP)<br />
Suitable for use in an external wall, excluding walls in severe marine environments or in contact with<br />
aggressive soils and environments (see AS3700 Appendix E). General purpose grade bricks can also be used<br />
in PRO applications.<br />
• Exposure Grade (EXP)<br />
Suitable for use in external walls exposed to severe marine environments, i.e. up to one kilometre from a<br />
surf coast or up to 100 metres from a non-surf coast or in contact with aggressive soils and environments.<br />
The distances are specified from mean high water mark. Exposure grade bricks can also be used in PRO and<br />
GP applications.<br />
<strong>Boral</strong> bricks are classified as either EXP or GP. ■<br />
ADV03746
<strong>Bricks</strong> & <strong>Pavers</strong> <strong>Technical</strong> <strong>Manual</strong><br />
Section 1.1 Brick Properties 1.105<br />
Moisture Expansion<br />
Clay products expand over time as they absorb water into their structure. This is well known and documented<br />
and must be consider when designing brickwork. The expansion is not uniform (it is logarithmic) over time. In<br />
the first six months one quarter of the expansion occurs, one half in the first two years and three quarters in the<br />
first 5 years. The Characteristic Expansion is estimated from an accelerated test and expressed as a coefficient<br />
of expansion (em) that for <strong>Boral</strong> bricks is usually between 0.8 and 1.2 mm/m/15 years. ■<br />
Efflorescence<br />
<strong>Bricks</strong> may contain soluble salts that come to the surface when the brick dries. The source of these soluble salts<br />
is the raw materials used in the brick production process.<br />
Brick efflorescence should not be confused with the efflorescence that is seen on masonry walls after<br />
construction. This form of efflorescence is caused mainly from the raw materials and water used in the wall<br />
construction process (eg. Mortar).<br />
Brick efflorescence is usually white but there is a special form of efflorescence (known as vanadium staining)<br />
that is coloured yellow, green or reddish-brown and is therefore particularly visible on light coloured bricks.<br />
All efflorescence is more or less visible depending on the colour and surface texture of the brick.<br />
<strong>Boral</strong> bricks have a nil to slight efflorescence. ■<br />
Pitting due to Lime<br />
If brickmaking raw materials contain particles of calcium carbonate, these will be converted into quicklime in<br />
the kiln. Water subsequently combines with the quicklime to form hydrated lime and in the process expands.<br />
If lime particles are sufficiently large and sufficiently near the surface they ‘pop’ off a piece of the brick, leaving<br />
a generally circular pit.<br />
<strong>Boral</strong> <strong>Bricks</strong> rarely show lime pitting. ■<br />
ADV03747
1.2 Brick Masonry Design
<strong>Bricks</strong> & <strong>Pavers</strong> <strong>Technical</strong> <strong>Manual</strong><br />
Section 1.2. Brick Masonry Design 1.201<br />
The following design information is based on Australian Standard AS3700: 2001 Masonry Structures. Reference<br />
to ‘Clauses’ and ‘Formulae’ are those used in AS3700. This information is provided as a guide only to the<br />
processes involved in designing masonry. All masonry should be designed by a suitably qualified structural<br />
engineer.<br />
Robustness<br />
AS3700, Clause 4.6.1 requires walls to have an adequate degree of ‘Robustness’. Robustness is a minimum<br />
design requirement, and may be overridden by fire, wind, snow, earthquake or live and dead load requirements.<br />
In robustness calculations (AS3700 Clause 4.6.2), there are height, length, and panel action formulae. By reworking<br />
the standard formulae and inserting known data, it is possible to determine whether a chosen design and <strong>Boral</strong> brick<br />
will provide adequate robustness, as in the tables below and the charts on pages 1.202 to 1.204.<br />
Table 1. Maximum Height of Isolated Piers<br />
Pier Thickness (mm) Maximum Height (m)<br />
230 x 230 3.105<br />
350 x 350 4.725<br />
Table 2. Maximum Height of Walls with Free Ends<br />
Table 3. Maximum Wall Length where One or Both Ends are Laterally Restrained<br />
Maximum Wall Length (m)<br />
Maximum Wall Height (m)<br />
Wall Thickness (mm) No Lateral Support at Top Lateral Support at Top Concrete Slab on Top<br />
90 0.54 2.43 3.24<br />
110 0.66 2.97 3.96<br />
150 0.90 4.05 5.40<br />
230 1.38 6.21 8.28<br />
Wall Thickness (mm) Lateral Support One End Lateral Support Both Ends<br />
90 1.08 3.24<br />
110 1.32 3.96<br />
150 1.80 5.40<br />
230 2.76 8.28<br />
In the situation depicted in Table 3 above, height is not limited although length is. This typically applies to lift<br />
shafts and stairwells. Control joints and openings greater than one fifth of the wall height are treated as free<br />
ends unless specific measures are taken to provide adequate lateral support.<br />
Where wall lengths exceed those in Table 3 above, AS 3700 Equation 4.6.2 (4) must be used to determine the maximum<br />
height for a wall of the required length. Should the initial choice of product not provide a suitable solution, then a thicker<br />
<strong>Boral</strong> brick or increased masonry width or extra restraints should be evaluated. t<br />
ADV03749
<strong>Bricks</strong> & <strong>Pavers</strong> <strong>Technical</strong> <strong>Manual</strong><br />
Section 1.2. Brick Masonry Design 1.202<br />
Robustness (continued)<br />
How to Use the <strong>Boral</strong> Robustness Graphs<br />
These charts determine the minimum brick thickness for a known wall height, length and restraint criteria.<br />
W A L L H E I G H T ( m )<br />
Laterally supported one end<br />
and top laterally supported<br />
by other than concrete slab<br />
8<br />
7<br />
6<br />
5<br />
4<br />
3<br />
2<br />
1<br />
0<br />
1 2 3 4 5 6 7 8<br />
W A L L L E N G T H ( m )<br />
R<br />
S<br />
R<br />
F<br />
230mm<br />
150mm<br />
110x110mm<br />
90x90mm<br />
110mm<br />
90mm<br />
1. Select the graph for the chosen wall restraint<br />
(support) criteria. In this example there is support<br />
on one side and the top is supported by other<br />
than a concrete slab. Typically this would be a<br />
wall supporting roof frames, joined into another<br />
wall at one end and with a door at the other<br />
end.<br />
2. Plot the intersection of the design Wall Height<br />
and the Wall Length on the graph. (For this<br />
example 3 m height x 5 m length).<br />
3. The lines ABOVE the intersection point indicate<br />
wall thickness that are acceptable. In this<br />
example, the intersection point is just below the<br />
line for 110 mm bricks. Therefore a single leaf of<br />
110 mm bricks would be suitable and the most<br />
economical.<br />
ADV03750
<strong>Bricks</strong> & <strong>Pavers</strong> <strong>Technical</strong> <strong>Manual</strong><br />
Section 1.2. Brick Masonry Design 1.203<br />
Robustness Limits<br />
W A L L H E I G H T ( m )<br />
W A L L H E I G H T ( m )<br />
Laterally supported both ends<br />
and top laterally supported<br />
by a concrete slab<br />
8<br />
7<br />
6<br />
5<br />
4<br />
3<br />
2<br />
1<br />
0<br />
1 2 3 4 5 6 7 8<br />
W A L L L E N G T H ( m )<br />
Laterally supported<br />
both ends and<br />
top unsupported<br />
8<br />
7<br />
6<br />
5<br />
4<br />
3<br />
2<br />
1<br />
0<br />
1 2 3 4 5 6 7 8<br />
W A L L L E N G T H ( m )<br />
R<br />
R<br />
R<br />
R<br />
F<br />
R<br />
R<br />
150mm<br />
110x110mm<br />
90x90mm<br />
110mm<br />
R<br />
90mm<br />
150mm<br />
110x110mm<br />
90x90mm<br />
110mm<br />
90mm<br />
W A L L H E I G H T ( m )<br />
W A L L H E I G H T ( m )<br />
Laterally supported both ends<br />
and top laterally supported<br />
by other than concrete slab<br />
8<br />
7<br />
6<br />
5<br />
4<br />
3<br />
2<br />
1<br />
0<br />
1 2 3 4 5 6 7 8<br />
W A L L L E N G T H ( m )<br />
Laterally supported<br />
one end and<br />
top unsupported<br />
8<br />
7<br />
6<br />
5<br />
4<br />
3<br />
2<br />
1<br />
0<br />
R<br />
S<br />
R<br />
R<br />
150mm<br />
110x110mm<br />
90x90mm<br />
110mm<br />
90mm<br />
230mm<br />
150mm<br />
110x110mm<br />
90x90mm<br />
110mm<br />
90mm<br />
1 2 3 4 5 6 7 8<br />
W A L L L E N G T H ( m )<br />
R<br />
F<br />
R<br />
F<br />
ADV03751
<strong>Bricks</strong> & <strong>Pavers</strong> <strong>Technical</strong> <strong>Manual</strong><br />
Section 1.2. Brick Masonry Design<br />
Robustness Limits<br />
W A L L H E I G H T ( m )<br />
Laterally supported one end<br />
and top laterally supported<br />
by other than a concrete slab<br />
8<br />
7<br />
6<br />
5<br />
4<br />
3<br />
2<br />
1<br />
0<br />
1 2 3 4 5 6 7 8<br />
W A L L L E N G T H ( m )<br />
R<br />
S<br />
R<br />
F<br />
230mm<br />
150mm<br />
110x110mm<br />
90x90mm<br />
110mm<br />
90mm<br />
W A L L H E I G H T ( m )<br />
Laterally supported one end<br />
and top laterally supported<br />
by a concrete slab<br />
8<br />
7<br />
6<br />
5<br />
4<br />
3<br />
2<br />
1<br />
0<br />
1 2 3 4 5 6 7 8<br />
W A L L L E N G T H ( m )<br />
R<br />
1.204<br />
R<br />
R<br />
F<br />
150mm<br />
110x110mm<br />
90x90mm<br />
110mm<br />
90mm<br />
ADV03752
<strong>Bricks</strong> & <strong>Pavers</strong> <strong>Technical</strong> <strong>Manual</strong><br />
Section 1.2. Brick Masonry Design 1.205<br />
Masonry Strength<br />
Masonry Strength is defined as resistance to load per unit area. It must be remembered that thicker masonry<br />
will support more load than thinner masonry of the same strength.<br />
Characteristic Compressive Strength of Masonry – f’m<br />
f’m = km kh √f‘uc<br />
km is a mortar strength factor and kh is a factor for the amount of mortar joints.<br />
km is 1.4 for M3 mortar and 1.5 for the stronger M4 mortar (see AS 3700 Table 3.1 for a full list of factors).<br />
kh is 1 for 76 mm high units with 10 mm mortar beds and is 1.24 for 162 mm high bricks with 10 mm mortar<br />
beds (see AS 3700 Table 3.2 to derive factors for other unit and joint heights). In other words, a wall of<br />
double height bricks is more than 20% stronger than a wall of 76 mm high bricks of the same f‘uc.<br />
f’uc is the characteristic unconfined compressive strength of bricks.<br />
Characteristic Flexural Tensile Strength of Masonry – f’mt<br />
In flexing, the top of the arc is in tension and the bottom of the arc is in compression. Masonry is good in<br />
compression but poor in tension. Flexural strength depends on the mortar/brick bond and for design purposes is<br />
generally taken to be zero. Using up to 0.2 MPa is permitted when designing for transient loads such as wind,<br />
earthquake, etc. Higher bending forces may be used for design but these require site testing to verify construction<br />
meets the stated values.<br />
Characteristic Shear Strength of Masonry – f‘ms<br />
Shear strength, like flexural strength, is related to the mortar/brick bond. For design purposes, at the damp<br />
course, it is taken to be zero unless testing shows another value. Elsewhere, mortar joints have f’ms values of<br />
between 0.15 and 0.35 MPa. ■<br />
ADV03753
<strong>Bricks</strong> & <strong>Pavers</strong> <strong>Technical</strong> <strong>Manual</strong><br />
Section 1.2. Brick Masonry Design 1.206<br />
Durability of Masonry<br />
AS3700 requires masonry to be designed to continue functioning satisfactorily throughout its design life without<br />
undue maintenance. That is, all masonry materials, including bricks, mortar and all built-in components, must be<br />
sufficiently durable for the exposure classification of the site (see AS3700 Appendix E). Masonry designed to<br />
meet the requirements of AS3700 Section 5, is deemed to comply with the durability requirements and Table 5.1<br />
defines the durability requirements for bricks, built-in components and mortar in different environments.<br />
Salt attack is the most common durability problem. In the form of a solution, salt can be absorbed into masonry.<br />
As the water evaporates, the salt is drawn towards the outside face. The evaporating water leaves the solution<br />
super-saturated so salt crystals begin to form. The salt crystals grow in the pores just below the surface and<br />
depending on the texture of the brick, the amount of salt, the rate of drying and the temperature, the salt may<br />
fill the pores, exerting very high pressures on the matrix. The energy in the constrained salt crystal increases and<br />
if sufficient ‘pops’ a piece of the outer surface off and salt attack has begun.<br />
<strong>Boral</strong> bricks graded ‘General Purpose’ (GP) are suitable for use in all walls, excluding external walls in severe<br />
marine environments or in all walls in contact with aggressive soils and environments.<br />
<strong>Boral</strong> bricks graded ‘Exposure Grade’ (EXP) are suitable for use in all walls including external walls exposed to<br />
severe marine environments, i.e. up to 1 km from a surf coast or up to 100 m from a non surf coast or walls in<br />
contact with aggressive soils and environments. The distances are specified from mean high water mark.<br />
Walls below damp proof course often require greater durability, even if they are well away from the coast, as<br />
they may be subjected to saline, acidic or alkaline soils. If unsure of the corrosive nature of the site, an<br />
inexpensive total soluble salt content test for soil is available in most areas. Remember it is the designer’s<br />
responsibility to specify the appropriate durability grade of bricks, mortar and built-in components and it is the<br />
builder’s responsibility to order bricks, etc. of appropriate durability grade specified by the designer. Brick<br />
manufacturers cannot take any responsibility in this decision as they are not aware of the design requirements<br />
of each site. t<br />
ADV03754
<strong>Bricks</strong> & <strong>Pavers</strong> <strong>Technical</strong> <strong>Manual</strong><br />
Section 1.2. Brick Masonry Design 1.207<br />
Durability of Masonry (continued)<br />
Refer to Section 1.4 Property Tables for tabulated properties of individual brick types for their salt attack<br />
resistance category.<br />
Mortar mix requirements for durability are referred in Table 11, page 1.301 of this manual and are detailed in<br />
AS3700 Table 10.1.<br />
M4 mortars are required and mortar joints must be tooled in all situations requiring exposure grade materials.<br />
Concrete floors, paths and steps are a source of sulfate salts that if dissolved in water may enter the brickwork and<br />
cause salt attack. Exposed slabs supported on external brickwork should clear the brickwork by 50 mm and<br />
incorporate a drip groove to prevent the run-off from the slab running down the brickwork. A damp proof course<br />
(usually a double layer) is also used under the slab on top of the bricks to prevent water passing through the slab<br />
into the bricks and as a slip joint to prevent a build up of forces as the concrete shrinks and the bricks expand<br />
over time.<br />
Landscaping and gardening practices are also possible sources of salt attack. Care must be taken to not bridge<br />
the damp proof course when landscaping at the base of walls. Watering gardens and lawns, against walls, may<br />
cause salts (fertilisers) to splash up on to the wall where they are absorbed and may cause salt attack. ■<br />
ADV03755
<strong>Bricks</strong> & <strong>Pavers</strong> <strong>Technical</strong> <strong>Manual</strong><br />
Section 1.2. Brick Masonry Design 1.208<br />
Brick Ties<br />
In brick veneer construction, ties are used to pass all the lateral out-of-plane loads and forces (such as from<br />
wind) to the structural backing. In cavity brick construction ties either pass the lateral out-of-plane loads and<br />
forces to the stronger leaf or share them between the leaves.<br />
The design of ties in masonry for structural purposes must comply with AS3700 Clause 7.7 for veneer or Clause<br />
7.8 for cavity construction. For small buildings the tie requirements are covered in AS3700 Clause 12.3.4 for brick<br />
veneer construction and Clause 12.3.3.2 for cavity brick construction.<br />
Type A ties are those that have no specific seismic design characteristics. It is difficult to find brick ties other<br />
than Type A in Australia. Ties are available in heavy, medium and light duty in galvanised steel, stainless steel<br />
and plastic. Plastic ties are usually reserved for acoustic applications. Stainless steel ties are used in situations<br />
requiring exposure grade materials or very long life. Galvanised steel ties are those most commonly used.<br />
The Newcastle (NSW) earthquake which occurred in 1989 showed masonry survived well except where the ties<br />
were deficient. Problems found included:<br />
• galvanised ties rusted through;<br />
• ties only built into one leaf during construction;<br />
• loose ties;<br />
• absent ties; and,<br />
• incorrect duty ties used.<br />
Ties are required to meet the durability requirement of the site for the design life of the building. Should the<br />
design life of the building be exceeded and the ties begin to fail, they can be replaced with remedial ties but<br />
this is a very expensive process and as ties are hidden it is unlikely they will be seen until a catastrophic failure<br />
occurs. As sustainability considerations become more important, the life of buildings is likely to be extended.<br />
Properly maintained, brick buildings may last for centuries. It should be remembered that stainless steel brick<br />
ties offer a longer service life and, although more expensive as a proportion of the overall building cost, the<br />
difference is trivial. ■<br />
ADV03756
<strong>Bricks</strong> & <strong>Pavers</strong> <strong>Technical</strong> <strong>Manual</strong><br />
Section 1.2. Brick Masonry Design 1.209<br />
Movement in Masonry Walls<br />
To allow for movements in masonry (expansion and contraction and footing movement) control joints are<br />
required. These can usually be constructed so that the expansion joint and the articulation joint are one and<br />
the same.<br />
Expansion Joints<br />
Expansion and contraction must be allowed for in masonry design by inserting control joints at spacings<br />
designed to suit the magnitude of the movement.<br />
Clay products expand permanently over time. This is the opposite of cement-based products, which permanently<br />
shrink. For this reason it is unwise to use clay and concrete units in the same band in a wall. If clay bricks are<br />
used in concrete framed buildings, control joint spacing and workmanship are critical, as the bricks will expand<br />
as the concrete frame shrinks.<br />
The magnitude of thermal changes varies from brick to brick depending on the many factors, however, allowing<br />
0.008 mm/m/°C is usually recommended. Expansion and contraction from wetting and drying of clay bricks is<br />
less than for concrete and calcium silicate products and usually can be ignored in brick masonry design.<br />
AS3700, Clause 4.8 requires expansion joints to be spaced to limit panel movement so that movement from both<br />
sides closes joints by less than 15 mm and joints are at least 5 mm wide when closed. This means the gap, when<br />
constructed, should be 20-25 mm. However, in most buildings articulation joints are used and these are closer<br />
than required for expansion making separate expansion joints unnecessary.<br />
Articulation Joints<br />
Articulation joints are vertical gaps that allow for minor footing movements, to prevent distress or significant<br />
wall cracking. Articulation joints provide the flexibility needed when building on reactive clay soils and usually<br />
are not required for masonry on stable sites (classified according to AS2870). Spacing of articulation joints<br />
depends on the site classification and the slab or footing design, but where used must be placed no closer than<br />
0.5 metres and no further than 3 metres from all corners. The width of articulation joints depends on the height<br />
of the masonry: 10 mm for masonry up to 3 metres and 15 mm for masonry up to 6 metres high. t<br />
ADV03757
<strong>Bricks</strong> & <strong>Pavers</strong> <strong>Technical</strong> <strong>Manual</strong><br />
Section 1.2. Brick Masonry Design 1.210<br />
Movement in Masonry Walls (continued)<br />
Control Joints (General)<br />
Control joints should be used beside large openings, where wall thickness changes (except where this is for<br />
support eg. engaged piers), where wall height changes by more than 20%, at changes of level in footings and<br />
at other points of potential cracking. Control joints must not continue through bond beams.<br />
Ideally, control joints are located near a corner and concealed behind a down pipe. The bricklayer and renderer<br />
must keep the control joint clean, otherwise, bridging mortar or render will induce cracks as the masonry moves.<br />
External control joints should be finished with a soft flexible sealant to prevent moisture penetration.<br />
The design and construction of control gaps in the external leaf of a full brick wall is identical to that in brick<br />
veneer. In internal masonry, control gaps are not usually required, except at re-entrant angles in long walls.<br />
However, where an internal control joint is required the design is as for external leaves but the thermal<br />
component may be ignored in calculations. Internal control joints can usually be located at a full-height opening<br />
such as a door or window.<br />
Ties are required on both sides of a control joint, but where it is not possible to use them masonry flexible<br />
anchors (MFAs) must be used across the joint. Where MFAs are used in walls over 3 metres or in walls exposed<br />
to high winds, MFAs must be built in at half height and every seventh course (600 mm) above. MFAs are ties that<br />
are of a type that only allows movement in one plane. Unless ties are used, control joints create a ‘free end’ in<br />
terms of Robustness and Fire Resistance Level calculations for structural adequacy, so their positioning is critical<br />
to the overall design of the structure. In<br />
portal frame construction, the control<br />
joint is positioned at a column so that<br />
both ends can be tied to the column’s<br />
flanges.<br />
The principles of control joint<br />
construction are illustrated in the<br />
adjacent figure. ■<br />
Articulation joints with<br />
compressible backing<br />
and mastic sealant<br />
Dividing wall with<br />
articulation joint and<br />
M F A's at intersection<br />
with cavity wall<br />
Brick ties on each side<br />
of articulation joint<br />
Articulation<br />
joint<br />
ADV03758
<strong>Bricks</strong> & <strong>Pavers</strong> <strong>Technical</strong> <strong>Manual</strong><br />
Section 1.2. Brick Masonry Design 1.211a<br />
Thermal Properties<br />
The initial aims of the Building Code of Australia (BCA) were to safeguard people from illness and injury and to<br />
safeguard adjacent property from building failures. Legislators subsequently determined to use the BCA for other<br />
purposes and have now added requirements for energy efficiency performance of buildings. ‘Energy efficiency’<br />
consists of three main aspects, thermal performance, hot and cold water provision and lighting. Thermal<br />
performance is the only aspect impacting on brick masonry construction.<br />
Australia is divided into 8 climatic zones. (Eastern Sydney and Perth are in Zone 5, Adelaide, Melbourne and<br />
Western Sydney are in Zone 6, Brisbane is in Zone 2 and Canberra is in Zone 7). The zones and Local Government<br />
boundaries are detailed on a map, which is available from the Australian Building Codes Board (www.abcb.gov.<br />
au) but the Local Council is able to provide the information where there is any doubt. In most cases the<br />
boundaries between zones are those between council areas.<br />
BCA Volume 1 divides buildings into three groups with different minimum energy efficiency requirements:<br />
1. Each sole occupancy unit of a Class 2 building or Class 4 part of a building must achieve not less than 3 stars<br />
and the average for all of the sole occupancies in the building must be at least 3.5 stars for Zones 1-3 and<br />
4 stars for Zones 4-8. Energy efficiency of buildings expressed as a ‘Star Rating’ is determined using thermal<br />
calculation software that complies with the ABCB Protocol for House Energy Rating Software.<br />
2. Class 3 and Class 5 buildings, Class 6 shops, shopping centres, restaurants and cafes, Class 8 laboratories,<br />
Class 9a clinic, day surgery or procedure unit or ward area in a health care building, Class 9b theatres,<br />
cinemas or schools and Class 9c aged care facilities must have a calculated annual energy consumption less<br />
than or equal to that calculated for a reference building.<br />
3. Certain buildings which are designed to not have conditioned (heated or cooled) spaces such as unenclosed<br />
car parks or ambient temperature warehouses are excluded from the requirements.<br />
BCA Volume 2 requires a minimum energy efficiency for Class 1 buildings and the whole of Class 1 and attached<br />
enclosed Class 10a parts of buildings. The energy efficiency requirement is met by achieving a rating of 5 stars<br />
or by showing that heating and/or cooling loads are equal to or less than those of a reference building in the<br />
same zone. A ‘Star Rating’ is determined using thermal calculation software complying with the ABCB Protocol<br />
for House Energy Rating Software.<br />
While the BCA sets these minimum requirements, State Governments may adopt these minimums or may opt for<br />
different requirements. Local authorities may adopt higher star ratings but may not opt for lower ratings than<br />
the State adopts. t<br />
ADV1211A
<strong>Bricks</strong> & <strong>Pavers</strong> <strong>Technical</strong> <strong>Manual</strong><br />
Section 1.2. Brick Masonry Design<br />
Thermal Properties (continued)<br />
Variations to the BCA Requirements in brief are:<br />
1.211b<br />
In the Northern Territory, Queensland and Tasmania BCA2008 Volume 2, Energy Efficiency provisions do not<br />
apply, however those of BCA 2005 Volume 2 do apply.<br />
In the Northern Territory the BCA 2008, Volume 1 Energy Efficiency provisions do not apply.<br />
In Victoria, New Class 1 buildings must have either a rainwater tank connected to all sanitary flushing systems<br />
or a solar water heater system.<br />
Sole occupancy units of a Class 2 building must achieve not less than 3 stars and the average for all of the sole<br />
occupancies in the building must be at least 5 stars.<br />
Class 4 parts of a building must achieve not less than 4 stars.<br />
In NSW the Energy Efficiency provisions of the BCA do not apply to Class 1 and 2 buildings, Class 4 parts of<br />
buildings and certain Class 10 buildings. Developments (including additions and alterations) in these classes are<br />
subject to the Building Sustainability Index (BASIX) requirements. BASIX is a piece of comprehensive<br />
sustainability rating software, which initially incorporated energy and water efficiency. It is a web-based system<br />
in which data about the development is entered and the whole has to meet targets to get Development<br />
Application (DA) approval. BASIX is aimed at achieving energy reductions and potable water savings. The<br />
reductions are on a base developed by the NSW Department of Planning before the scheme came into effect<br />
and they vary from place to place. The thermal comfort aspects of BASIX can be satisfied by following either the<br />
‘simplified’, ‘DIY’ or ‘assessor’ routes. The ‘simplified’ is rigid and very conservative. The ‘DIY’ is conservative<br />
but allows a little more freedom. Both require direct entry of building design information into the web based<br />
forms to meet the thermal comfort targets. The ‘assessor’ route is flexible but requires the services of an<br />
accredited assessor. The assessor is required to provide heating and cooling load figures for the design.<br />
Whether expressed as an energy load number or a star rating, the requirements are complex because the ratings<br />
are based on the total building design for a given site. It is important to remember that roof insulation, shading,<br />
orientation and window size and placement have a much greater impact on energy efficiency than the walls.<br />
Heat enters and leaves buildings more readily through the windows and roof and greater insulation in the roof<br />
space is usually the most cost-effective measure to increase comfort. There is no exact relationship between<br />
the walls’ performance and the energy ratings. The deemed to satisfy requirements in the BCA or BASIX are<br />
conservative because they consider the walls in isolation. Designs using only deemed to satisfy solutions will<br />
generally be very conservative and except for very small buildings, in most cases a professional energy rating<br />
assessor can provide cheaper building solutions, more than off-setting the cost of their services. t<br />
ADV1211B
<strong>Bricks</strong> & <strong>Pavers</strong> <strong>Technical</strong> <strong>Manual</strong><br />
Section 1.2. Brick Masonry Design<br />
Thermal Properties (continued)<br />
1.212a<br />
The clay brick industry through Think Brick Australia (formerly the Clay Brick and Paver Institute) sponsored a<br />
program of research at the University of Newcastle, focussed on the actual performance of clay brick masonry<br />
in buildings. The published results of this research were used by the ABCB to include heavy masonry in the<br />
deemed to satisfy provisions. The research clearly shows that heavy masonry walling has a high thermal inertia<br />
(thermal lag). That is, the effect of cavity clay masonry is to slow the transmission of heat through the wall<br />
reducing peaks and troughs in the temperature profile, ensuring a more comfortable temperature is maintained<br />
longer than would be the case otherwise. With heavy mass walling, heat is slowly absorbed during the day and<br />
slowly lost during the cool night. Most thermal requirements focus on thermal insulation, denoted as ‘R’ value.<br />
When dealing with heavy mass walling ‘R’ value is misleading as it assumes a steady state (constant<br />
temperature difference across the wall) which is not the case because of the day-night temperature cycle. Cavity<br />
brick houses are well known to have lower temperature fluctuation than lighter weight construction particularly<br />
when combined with a concrete slab coupled to the ground or with internal brick walls.<br />
Decoding the BCA Deemed to Satisfy provisions<br />
Volumes 1&2:<br />
• ‘Achieve a surface density of not less than 220 kg per square meter’<br />
Two leaves of 90 mm or thicker bricks or a single leaf of 150 mm wide clay bricks or 140 mm wide clay bricks<br />
with vertical cores filled with grout at minimum 1000 mm centres with render or plasterboard and a grouted<br />
horizontal bond beam.<br />
• ‘Incorporate a cavity of 20 to 35 mm’<br />
BCA Volume 1 has no deemed to satisfy provisions related to the cavity width for weatherproofing masonry.<br />
BCA Volume 2 requires masonry to have a cavity (a void between two leaves of masonry) between 35 and<br />
65 mm for weatherproofing. Insulation in the cavity of brick masonry must provide a minimum cavity of 35<br />
mm in Class 1 and attached Class 10a parts of buildings and 20 mm in other classes of building and<br />
prevention of moisture penetration must be maintained.<br />
• ‘Masonry that has a thermal conductivity of less than 0.8’<br />
BCA Volume 1, Specification J1.2 ‘Materials Properties’, Table 2a ‘Thermal Conductivity of Typical Wall,<br />
Roof/Ceiling and Floor Materials’, lists the thermal conductivity of 110 mm wide bricks weighing less than<br />
3.75 kg as less than 0.78 W/m.K. All bricks manufactured by <strong>Boral</strong>, other than solid bricks, meet the<br />
requirements for the thermal conductivity to be less than 0.78 W/m.K. t<br />
ADV1212A
<strong>Bricks</strong> & <strong>Pavers</strong> <strong>Technical</strong> <strong>Manual</strong><br />
Section 1.2. Brick Masonry Design 1.212b<br />
Thermal Properties (continued)<br />
• Volume 2: Tables J1.5a and J1.5b R-value requirements<br />
R-values depend on the total wall construction and are determined by adding the R-values for the individual<br />
components through the wall as shown in Specification J1.5 Wall Construction, Figure 2.<br />
Outdoor air film, indoor air film, cavities & plasterboard have the values shown in the tables. The R-values for<br />
bricks were determined long ago and a linear relationship with the density was shown. This relationship is<br />
shown in the Note 4d. Knowing the weight and the dimensions of the brick allows the density to be calculated<br />
and using the numbers given the R-value can be extrapolated for any brick. Brick weights may change over time<br />
and vary depending on the place of manufacture so it is advisable to ask your <strong>Boral</strong> Sales Representative for the<br />
latest weight of any particular brick.<br />
Note: For proper performance of walls it is critical that moisture penetration be prevented and in masonry this<br />
is best achieved by having cavities. It is critical that the cavities are not bridged and they allow moisture to drain<br />
away. For cavity (double) brick construction the insulation should hang in the cavity and should not touch either<br />
brick leaf. The insulation should also be of a closed cell type, non absorbent or be of hydrophobic material so<br />
that it does not absorb water and become saturated when the mortar droppings are flushed from the cavity<br />
during brick laying. There are types of thin reflective insulation suitable hanging in cavities and there are rigid<br />
board insulations. <strong>Boral</strong> <strong>Bricks</strong> makes no claims for or about any of the various types of insulation available.<br />
Different R-values are required of different walls in different situations and it is recommended that you consult<br />
insulation providers for their recommended types of insulation, the installation methods and techniques and the<br />
appropriate R-values for the calculations. ■<br />
ADV1212B
<strong>Bricks</strong> & <strong>Pavers</strong> <strong>Technical</strong> <strong>Manual</strong><br />
Section 1.2. Brick Masonry Design 1.213<br />
Masonry Design for Fire Resistance<br />
Fire Resistance Levels (FRL)<br />
FRLs come from the Building Code of Australia’s (BCA) Volume 1 tables for Type A, B or C construction. The Type of<br />
construction depends on the Class of building and the number of stories or floors. FRLs for housing come from BCA<br />
Volume 2.<br />
There are three figures in the Fire Resistance Level.<br />
Eg: FRL 120/60/90 means that the wall must achieve Structural Adequacy for 120 minutes / Integrity for 60 minutes /<br />
Insulation for 90 minutes.<br />
Structural Adequacy<br />
This governs the wall’s height, length, thickness and restraints. Brick suppliers do not control the wall height,<br />
length or restraints so therefore do not control Structural Adequacy.<br />
Integrity<br />
This is the resistance to the passage of flame or gas. To provide ‘integrity’, walls must be structurally adequate<br />
and they must maintain insulation. Extensive fire testing of masonry has shown integrity to be closely related to<br />
structural adequacy or insulation. AS 3700 therefore allows Integrity to be equal to the lesser of the Structural<br />
Adequacy or the Insulation periods.<br />
Insulation<br />
This is resistance to the passage of heat through the wall. Insulation is a function of the thickness of the brick<br />
as shown in Table 5, page 1.222 of this manual. ■<br />
ADV03761
<strong>Bricks</strong> & <strong>Pavers</strong> <strong>Technical</strong> <strong>Manual</strong><br />
Section 1.2. Brick Masonry Design 1.214<br />
Masonry Design for Structural Adequacy FRL<br />
Structural Adequacy is a minimum provision and may be over ridden by design for robustness, wind, live or<br />
earthquake loads.<br />
A fire on one side of a wall will heat that side, making it expand and lean towards the fire. When the lean or<br />
bow reaches half the thickness of the original wall, the wall becomes structurally inadequate. The formulae in<br />
AS3700, Clause 6.3.2.2 limits the panel size, depending on its restraints and thickness.<br />
The Slenderness ratio (Srf) of a proposed wall is calculated according to AS 3700 Clause 6.3.2.2. If this value is<br />
less than the maximum Srf in Table 6.1 of the Standard [or the Srf calculated from Fire Tests and AS 3700 Clause<br />
6.3.3(b)(ii)], then the wall complies. If the Srf of the wall is greater than the maximum permissible, it must be<br />
recalculated for an increased thickness and/or extra restraints.<br />
There are 3 formulae for calculating Srf.<br />
AS 3700 Formula 6.3.2.2 (1) and (2) are the formulae for vertically spanning walls (with no support along either<br />
vertical edge).<br />
Formula (1) and (2) always govern where there is no end restraint, and often govern where walls are long,<br />
relative to their height. Projects with multiple wall lengths (eg: home units) can use this formula as a ‘one size<br />
fits all’ method of calculating the wall thickness.<br />
AS 3700 Formula 6.3.2.2 (3) allows a wall to exceed the height given by formula (1) and (2) provided the top and<br />
at least one end is supported.<br />
AS 3700 Formula 6.3.2.2 (4) allows a wall to exceed the height given in formula (3) where walls are short,<br />
relative to their height (eg: a lift well or vent shaft). Short walls with no top restraint often occur in situations<br />
like portal frame factories.<br />
For cavity walls where both leaves are equally loaded (within 10 per cent of each other, including where there<br />
is no load on either leaf) the thickness is equal to two-thirds of the sum of the thicknesses of both leaves and<br />
the edge restraint condition is that for the leaf not exposed to the fire. Where one leaf is more heavily loaded<br />
than the other, the thickness and edge restraint condition is that of the more heavily loaded leaf. Where cavity<br />
walls are constructed with leaves of different masonry unit types, the structural adequacy is based on the less<br />
fire resistant material. t<br />
ADV03762
<strong>Bricks</strong> & <strong>Pavers</strong> <strong>Technical</strong> <strong>Manual</strong><br />
Section 1.2. Brick Masonry Design 1.215<br />
Masonry Design for Structural Adequacy FRL (continued)<br />
Refer to the Structural Adequacy Graphs on the following pages for maximum height and length values for walls<br />
of different thicknesses and restraint conditions.<br />
An appropriately qualified engineer should check all calculations. Other loads may supersede Structural<br />
Adequacy requirements.<br />
How to Use the <strong>Boral</strong> Structural Adequacy FRL Graphs<br />
H E I G H T B E T W E E N S U P P O R T S ( m )<br />
Laterally supported<br />
on all sides<br />
15<br />
14<br />
13<br />
12<br />
11<br />
10<br />
9<br />
8<br />
7<br />
6<br />
5<br />
4<br />
3<br />
2<br />
1<br />
0<br />
1 2 3 4 5 6 7 8 9 10 11 12<br />
L E N G T H B E T W E E N S U P P O R T S ( m )<br />
S<br />
S<br />
S<br />
S<br />
230mm<br />
150mm<br />
110mm<br />
90mm<br />
1. Select the graph with Structural Adequacy for<br />
the required minutes. (240 minutes for this<br />
example).<br />
2. Select the graph for the chosen wall restraint<br />
(support) criteria. (Support on both vertical<br />
edges, top and bottom for this example).<br />
3. Plot the intersection of the design Wall Height<br />
and the Wall Length on the graph. (For this<br />
example 3 m height x 5 m length).<br />
4. The line ABOVE the intersection indicates the<br />
minimum brick thickness required for the wall.<br />
In this example, 150 mm bricks would be<br />
suitable and the most economical.<br />
ADV03763
<strong>Bricks</strong> & <strong>Pavers</strong> <strong>Technical</strong> <strong>Manual</strong><br />
Section 1.2. Brick Masonry Design<br />
Structural Adequacy for 60 Minutes FRL<br />
H E I G H T B E T W E E N S U P P O R T S ( m )<br />
H E I G H T B E T W E E N S U P P O R T S ( m )<br />
Laterally supported<br />
on all sides<br />
15<br />
14<br />
13<br />
12<br />
11<br />
10<br />
9<br />
8<br />
7<br />
6<br />
5<br />
4<br />
3<br />
2<br />
1<br />
0<br />
15<br />
14<br />
13<br />
12<br />
11<br />
10<br />
9<br />
8<br />
7<br />
6<br />
5<br />
4<br />
3<br />
2<br />
1<br />
0<br />
1 2 3 4 5 6 7 8 9 10 11 12<br />
L E N G T H B E T W E E N S U P P O R T S ( m )<br />
Laterally supported<br />
on three sides,<br />
top unsupported<br />
1 2 3 4 5 6 7 8 9 10 11 12<br />
L E N G T H B E T W E E N S U P P O R T S ( m )<br />
S<br />
S<br />
S<br />
S<br />
F<br />
S<br />
S<br />
230mm<br />
150mm<br />
110mm<br />
90mm<br />
S<br />
230mm<br />
150mm<br />
110mm<br />
90mm<br />
H E I G H T B E T W E E N S U P P O R T S ( m )<br />
H E I G H T B E T W E E N S U P P O R T S ( m )<br />
Laterally supported<br />
on three sides,<br />
one end unsupported<br />
15<br />
14<br />
13<br />
12<br />
11<br />
10<br />
9<br />
8<br />
7<br />
6<br />
5<br />
4<br />
3<br />
2<br />
1<br />
0<br />
15<br />
14<br />
13<br />
12<br />
11<br />
10<br />
9<br />
8<br />
7<br />
6<br />
5<br />
4<br />
3<br />
2<br />
1<br />
0<br />
1.216<br />
1 2 3 4 5 6 7 8 9 10 11 12<br />
L E N G T H B E T W E E N S U P P O R T S ( m )<br />
Laterally supported<br />
one end and bottom,<br />
one end and top unsupported<br />
S<br />
S<br />
S<br />
F<br />
230mm<br />
150mm<br />
110mm<br />
90mm<br />
230mm<br />
150mm<br />
110mm<br />
90mm<br />
1 2 3 4 5 6 7 8 9 10 11 12<br />
L E N G T H B E T W E E N S U P P O R T S ( m )<br />
S<br />
F<br />
S<br />
F<br />
ADV03764
<strong>Bricks</strong> & <strong>Pavers</strong> <strong>Technical</strong> <strong>Manual</strong><br />
Section 1.2. Brick Masonry Design<br />
Structural Adequacy for 90 Minutes FRL<br />
H E I G H T B E T W E E N S U P P O R T S ( m )<br />
H E I G H T B E T W E E N S U P P O R T S ( m )<br />
Laterally supported<br />
on all sides<br />
15<br />
14<br />
13<br />
12<br />
11<br />
10<br />
9<br />
8<br />
7<br />
6<br />
5<br />
4<br />
3<br />
2<br />
1<br />
0<br />
15<br />
14<br />
13<br />
12<br />
11<br />
10<br />
9<br />
8<br />
7<br />
6<br />
5<br />
4<br />
3<br />
2<br />
1<br />
0<br />
1 2 3 4 5 6 7 8 9 10 11 12<br />
L E N G T H B E T W E E N S U P P O R T S ( m )<br />
Laterally supported<br />
on three sides,<br />
top unsupported<br />
S<br />
S<br />
S<br />
S<br />
230mm<br />
150mm<br />
110mm<br />
90mm<br />
230mm<br />
150mm<br />
110mm<br />
90mm<br />
1 2 3 4 5 6 7 8 9 10 11 12<br />
L E N G T H B E T W E E N S U P P O R T S ( m )<br />
S<br />
F<br />
S<br />
S<br />
H E I G H T B E T W E E N S U P P O R T S ( m )<br />
H E I G H T B E T W E E N S U P P O R T S ( m )<br />
Laterally supported<br />
on three sides,<br />
one end unsupported<br />
15<br />
14<br />
13<br />
12<br />
11<br />
10<br />
9<br />
8<br />
7<br />
6<br />
5<br />
4<br />
3<br />
2<br />
1<br />
0<br />
15<br />
14<br />
13<br />
12<br />
11<br />
10<br />
9<br />
8<br />
7<br />
6<br />
5<br />
4<br />
3<br />
2<br />
1<br />
0<br />
1.217<br />
1 2 3 4 5 6 7 8 9 10 11 12<br />
L E N G T H B E T W E E N S U P P O R T S ( m )<br />
Laterally supported<br />
one end and bottom,<br />
one end and top unsupported<br />
S<br />
S<br />
S<br />
F<br />
230mm<br />
150mm<br />
110mm<br />
90mm<br />
230mm<br />
150mm<br />
110mm<br />
90mm<br />
1 2 3 4 5 6 7 8 9 10 11 12<br />
L E N G T H B E T W E E N S U P P O R T S ( m )<br />
S<br />
F<br />
S<br />
F<br />
ADV03765
<strong>Bricks</strong> & <strong>Pavers</strong> <strong>Technical</strong> <strong>Manual</strong><br />
Section 1.2. Brick Masonry Design<br />
Structural Adequacy for 120 Minutes FRL<br />
H E I G H T B E T W E E N S U P P O R T S ( m )<br />
H E I G H T B E T W E E N S U P P O R T S ( m )<br />
Laterally supported<br />
on all sides<br />
15<br />
14<br />
13<br />
12<br />
11<br />
10<br />
9<br />
8<br />
7<br />
6<br />
5<br />
4<br />
3<br />
2<br />
1<br />
0<br />
15<br />
14<br />
13<br />
12<br />
11<br />
10<br />
9<br />
8<br />
7<br />
6<br />
5<br />
4<br />
3<br />
2<br />
1<br />
0<br />
1 2 3 4 5 6 7 8 9 10 11 12<br />
L E N G T H B E T W E E N S U P P O R T S ( m )<br />
Laterally supported<br />
on three sides,<br />
top unsupported<br />
S<br />
S<br />
S<br />
S<br />
230mm<br />
150mm<br />
110mm<br />
90mm<br />
230mm<br />
150mm<br />
110mm<br />
90mm<br />
1 2 3 4 5 6 7 8 9 10 11 12<br />
L E N G T H B E T W E E N S U P P O R T S ( m )<br />
S<br />
F<br />
S<br />
S<br />
H E I G H T B E T W E E N S U P P O R T S ( m )<br />
H E I G H T B E T W E E N S U P P O R T S ( m )<br />
Laterally supported<br />
on three sides,<br />
one end unsupported<br />
15<br />
14<br />
13<br />
12<br />
11<br />
10<br />
9<br />
8<br />
7<br />
6<br />
5<br />
4<br />
3<br />
2<br />
1<br />
0<br />
15<br />
14<br />
13<br />
12<br />
11<br />
10<br />
9<br />
8<br />
7<br />
6<br />
5<br />
4<br />
3<br />
2<br />
1<br />
0<br />
1.218<br />
1 2 3 4 5 6 7 8 9 10 11 12<br />
L E N G T H B E T W E E N S U P P O R T S ( m )<br />
Laterally supported<br />
one end and bottom,<br />
one end and top unsupported<br />
S<br />
S<br />
S<br />
F<br />
230mm<br />
150mm<br />
110mm<br />
90mm<br />
230mm<br />
150mm<br />
110mm<br />
90mm<br />
1 2 3 4 5 6 7 8 9 10 11 12<br />
L E N G T H B E T W E E N S U P P O R T S ( m )<br />
S<br />
F<br />
S<br />
F<br />
ADV03766
<strong>Bricks</strong> & <strong>Pavers</strong> <strong>Technical</strong> <strong>Manual</strong><br />
Section 1.2. Brick Masonry Design<br />
Structural Adequacy for 180 Minutes FRL<br />
H E I G H T B E T W E E N S U P P O R T S ( m )<br />
H E I G H T B E T W E E N S U P P O R T S ( m )<br />
Laterally supported<br />
on all sides<br />
15<br />
14<br />
13<br />
12<br />
11<br />
10<br />
9<br />
8<br />
7<br />
6<br />
5<br />
4<br />
3<br />
2<br />
1<br />
0<br />
15<br />
14<br />
13<br />
12<br />
11<br />
10<br />
9<br />
8<br />
7<br />
6<br />
5<br />
4<br />
3<br />
2<br />
1<br />
0<br />
1 2 3 4 5 6 7 8 9 10 11 12<br />
L E N G T H B E T W E E N S U P P O R T S ( m )<br />
Laterally supported<br />
on three sides,<br />
top unsupported<br />
S<br />
S<br />
S<br />
S<br />
230mm<br />
150mm<br />
110mm<br />
90mm<br />
230mm<br />
150mm<br />
110mm<br />
90mm<br />
1 2 3 4 5 6 7 8 9 10 11 12<br />
L E N G T H B E T W E E N S U P P O R T S ( m )<br />
S<br />
F<br />
S<br />
S<br />
H E I G H T B E T W E E N S U P P O R T S ( m )<br />
H E I G H T B E T W E E N S U P P O R T S ( m )<br />
Laterally supported<br />
on three sides,<br />
one end unsupported<br />
15<br />
14<br />
13<br />
12<br />
11<br />
10<br />
9<br />
8<br />
7<br />
6<br />
5<br />
4<br />
3<br />
2<br />
1<br />
0<br />
15<br />
14<br />
13<br />
12<br />
11<br />
10<br />
9<br />
8<br />
7<br />
6<br />
5<br />
4<br />
3<br />
2<br />
1<br />
0<br />
1.219<br />
1 2 3 4 5 6 7 8 9 10 11 12<br />
L E N G T H B E T W E E N S U P P O R T S ( m )<br />
Laterally supported<br />
one end and bottom,<br />
one end and top unsupported<br />
S<br />
S<br />
S<br />
F<br />
230mm<br />
150mm<br />
110mm<br />
90mm<br />
230mm<br />
150mm<br />
110mm<br />
90mm<br />
1 2 3 4 5 6 7 8 9 10 11 12<br />
L E N G T H B E T W E E N S U P P O R T S ( m )<br />
S<br />
F<br />
S<br />
F<br />
ADV03767
<strong>Bricks</strong> & <strong>Pavers</strong> <strong>Technical</strong> <strong>Manual</strong><br />
Section 1.2. Brick Masonry Design<br />
Structural Adequacy for 240 Minutes FRL<br />
H E I G H T B E T W E E N S U P P O R T S ( m )<br />
H E I G H T B E T W E E N S U P P O R T S ( m )<br />
Laterally supported<br />
on all sides<br />
15<br />
14<br />
13<br />
12<br />
11<br />
10<br />
9<br />
8<br />
7<br />
6<br />
5<br />
4<br />
3<br />
2<br />
1<br />
0<br />
15<br />
14<br />
13<br />
12<br />
11<br />
10<br />
9<br />
8<br />
7<br />
6<br />
5<br />
4<br />
3<br />
2<br />
1<br />
0<br />
1 2 3 4 5 6 7 8 9 10 11 12<br />
L E N G T H B E T W E E N S U P P O R T S ( m )<br />
Laterally supported<br />
on three sides,<br />
top unsupported<br />
S<br />
S<br />
S<br />
S<br />
230mm<br />
150mm<br />
110mm<br />
90mm<br />
230mm<br />
150mm<br />
110mm<br />
90mm<br />
1 2 3 4 5 6 7 8 9 10 11 12<br />
L E N G T H B E T W E E N S U P P O R T S ( m )<br />
S<br />
F<br />
S<br />
S<br />
H E I G H T B E T W E E N S U P P O R T S ( m )<br />
H E I G H T B E T W E E N S U P P O R T S ( m )<br />
Laterally supported<br />
on three sides,<br />
one end unsupported<br />
15<br />
14<br />
13<br />
12<br />
11<br />
10<br />
9<br />
8<br />
7<br />
6<br />
5<br />
4<br />
3<br />
2<br />
1<br />
0<br />
15<br />
14<br />
13<br />
12<br />
11<br />
10<br />
9<br />
8<br />
7<br />
6<br />
5<br />
4<br />
3<br />
2<br />
1<br />
0<br />
1.220<br />
1 2 3 4 5 6 7 8 9 10 11 12<br />
L E N G T H B E T W E E N S U P P O R T S ( m )<br />
Laterally supported<br />
one end and bottom,<br />
one end and top unsupported<br />
S<br />
S<br />
S<br />
F<br />
230mm<br />
150mm<br />
110mm<br />
90mm<br />
230mm<br />
150mm<br />
110mm<br />
90mm<br />
1 2 3 4 5 6 7 8 9 10 11 12<br />
L E N G T H B E T W E E N S U P P O R T S ( m )<br />
S<br />
F<br />
S<br />
F<br />
ADV03768
<strong>Bricks</strong> & <strong>Pavers</strong> <strong>Technical</strong> <strong>Manual</strong><br />
Section 1.2. Brick Masonry Design 1.221<br />
Structural Adequacy for Panels with Unsupported Ends<br />
This figure shows the situation where there is support top and bottom but none on the sides. This applies<br />
where there are control joints, large openings, long walls, etc. To use this graph select the desired FRL in<br />
minutes and the height of the wall. The line above the intersection shows the brick thickness required.<br />
Maximum Wall Heights for Structural Adequacy for any Wall Length<br />
M A X I M U M W A L L H E I G H T ( m )<br />
Top and bottom supported,<br />
ends not supported.<br />
7<br />
6<br />
5<br />
4<br />
3<br />
2<br />
1<br />
0<br />
60 90 120 180 240<br />
F R L F O R S T R U C T U R A L A D E Q U A C Y<br />
( m i n u t e s )<br />
F<br />
S<br />
S<br />
F<br />
230mm<br />
150mm<br />
110mm<br />
90mm<br />
ADV03769
<strong>Bricks</strong> & <strong>Pavers</strong> <strong>Technical</strong> <strong>Manual</strong><br />
Section 1.2. Brick Masonry Design 1.222<br />
Masonry Design for Integrity FRL<br />
It is impractical to provide test results for all possible wall designs, and therefore ‘Integrity’ must be proved in<br />
some other way. The most practical way to prove ‘Integrity’ is to prove ‘Structural Adequacy’ and ‘Insulation’<br />
equal to or better than the ‘Integrity’ requirement. Logically, if the wall is designed to minimise ‘bowing’ it will<br />
not crack and therefore resist the passage of flame and gas for the specified time.<br />
This method is also the best way to prove ‘Integrity’ even when a wall may not be required to comply with a<br />
‘Structural Adequacy’ FRL value, such as is the case with non-load bearing walls. Eg. If the BCA requires an FRL<br />
of -/90/90, the wall has no actual ‘Structural Adequacy’ requirement, but to prove Integrity of 90 minutes, the<br />
wall must be structurally adequate for at least 90 minutes. ■<br />
Masonry Design for Insulation FRL<br />
Insulation is the one FRL component that a brick manufacturer does control. It is governed by the ‘type of<br />
material’ and ‘material thickness’.<br />
‘Material thickness’ (t) is defined in AS3700, Clause 6.5.2 as the overall thickness for bricks with cores not more<br />
than 30% of the brick’s overall volume.<br />
For cavity walls, t = the sum of material thicknesses in both leaves.<br />
Table 5. Insulation periods for standard bricks (minutes)<br />
Wall thickness (mm)<br />
90<br />
110<br />
140 or 150 160 (150 plus 10 mm 180 220<br />
230<br />
render on both sides) (90/90 cavity) (110/110 cavity)<br />
Insulation period (minutes) 60 90 120 180 240 240 240<br />
Note: Wall thickness excludes render on side of wall exposed to fire. ■<br />
Effect of Recesses for Services on FRLs<br />
Recesses that are less than half of the masonry thickness and are less than 10,000 mm2 (0.01 m2 ) for both sides<br />
within any 5 m2 of the wall area do not have an effect on fire ratings.<br />
If these limits are exceeded, the masonry design thickness must be reduced by the depth of the recess. ■<br />
ADV03770
<strong>Bricks</strong> & <strong>Pavers</strong> <strong>Technical</strong> <strong>Manual</strong><br />
Section 1.2. Brick Masonry Design 1.223<br />
Effect of Chases on Fire Rated Masonry<br />
Structural Adequacy FRL<br />
To assess the effect of chases on Structural Adequacy FRLs, the direction in which the wall spans must be taken<br />
into account.<br />
• Walls spanning vertically may be chased vertically to full height but horizontal chases are limited in length<br />
to 4 times the wall’s thickness.<br />
• Walls spanning vertically and horizontally may be chased either horizontally up to half the wall’s length or<br />
vertically up to half the wall’s height.<br />
If these limits are exceeded, the masonry design thickness must be reduced by the depth of the chase or, in the<br />
case of vertical chases, designed as 2 walls with unsupported ends at the chase. Horizontal chases in all walls<br />
should be kept to a bare minimum.<br />
Note: Chases affect the sound reduction capacity of walls. See ‘Acoustic Design’ page 1.225 of this manual.<br />
Integrity and Insulation FRLs<br />
AS3700 limits the maximum depth of chase to 30 mm and the maximum area of chase to 1,000 mm2 . The<br />
maximum total area of chases on both sides of any 5 m2 of wall is limited to 100,000 mm2 (0.1 m2 ). If these limits<br />
are exceeded, the masonry design thickness must be reduced by the depth of the chase. ■<br />
ADV03771
<strong>Bricks</strong> & <strong>Pavers</strong> <strong>Technical</strong> <strong>Manual</strong><br />
Section 1.2. Brick Masonry Design 1.224<br />
Options for Increasing FRLs<br />
Structural Adequacy FRLs can be increased by adding wall stiffeners, by increasing the overall thickness, by<br />
adding reinforcement or by protecting the wall, e.g. with <strong>Boral</strong> Plasterboard’s ‘FireStop’ board, fixed to furring<br />
channels (on both sides of the wall if a fire rating is required from both sides). Note: Be careful of the effect of<br />
plasterboard on sound reduction in party walls. See ‘Acoustic Design’ page 1.225 of this manual.<br />
Integrity FRLs are increased by increasing the other two FRL values to the required Integrity FRL.<br />
Insulation FRLs can be increased by adding another leaf of masonry, by rendering both sides of the wall if the<br />
fire can come from either side. Note: Only ONE thickness of render is added to the material thickness and that<br />
must be on the ‘cold’ side because the render on the exposed face will drop off early in a fire. ■<br />
ADV03772
<strong>Bricks</strong> & <strong>Pavers</strong> <strong>Technical</strong> <strong>Manual</strong><br />
Section 1.2. Brick Masonry Design 1.225<br />
ACOUSTIC DESIGn<br />
Acoustic Performance Rating<br />
The BCA requirements are met by:<br />
1. Testing a sample of constructed walls to verify that they meet the Weighted Standardised Level Difference<br />
(Dnt,w – explained further in “Acoustic Performance On-Site’ on page 1.231 of this manual) requirements;<br />
or<br />
2. Constructing walls using the same materials and techniques as walls that have been constructed and tested<br />
in a laboratory and shown to meet the Weighted Sound Reduction Index (Rw) requirements; or,<br />
3. Constructing walls using the materials and techniques in the ‘Acceptable Construction Practice’ section of<br />
the BCA; and,<br />
4. Where impact sound reduction is required, it is to be achieved by discontinuous construction, except for<br />
Class 9c buildings where there is a test; and,<br />
5. Except where the requirements are verified by on-site testing, chasing of services into masonry walls is not<br />
allowed and electrical outlets on either side of the wall must be offset by no less than 100 mm.<br />
The BCA acoustic performance requirements in Class 1, 2, 3 and 9c buildings are shown below in the tables.<br />
Table 6. BCA Volume 2 Requirements for walls separating (Class 1) sole occupancy units<br />
Sole occupancy unit- all areas except<br />
those below<br />
Sole occupancy unit- bathroom,<br />
sanitary compartment, laundry or<br />
kitchen<br />
Wall separating Wall Rating<br />
Sole occupancy unit- all areas except<br />
those below<br />
Sole occupancy unit- habitable room<br />
except a kitchen<br />
Rw+Ctr ≥50<br />
Rw+Ctr ≥50<br />
and<br />
discontinuous construction<br />
Northern Territory and Queensland have different requirements for acoustic performance of walls separating<br />
Class 1 buildings. The differences are; in the table above, in Row 1 the wall rating required is Rw ≥45 and in<br />
bottom row the rating required is Rw ≥50 with impact sound resistance, which may be determined by a tapping<br />
test comparing to a deemed-to-satisfy wall. t<br />
ADV1225
<strong>Bricks</strong> & <strong>Pavers</strong> <strong>Technical</strong> <strong>Manual</strong><br />
Section 1.2. Brick Masonry Design<br />
Acoustic Performance Rating (continued)<br />
1.226<br />
Table 7. BCA Volume 1 Requirements for walls separating sole occupancy units from other parts of the<br />
building in Class 2 & 3 Buildings.<br />
Sole occupancy unit- all areas except<br />
those below<br />
Sole occupancy unit- bathroom, sanitary<br />
compartment, laundry or kitchen<br />
Wall separating Wall Rating<br />
Sole occupancy unit- all areas except<br />
those below<br />
Sole occupancy unit- habitable room<br />
except a kitchen<br />
Sole occupancy unit- all areas Plant room or lift shaft<br />
Sole occupancy unit- all areas<br />
Stairway, public corridor, public lobby or<br />
areas of different classification<br />
Rw+Ctr ≥50<br />
Rw+Ctr ≥50<br />
and<br />
discontinuous construction<br />
Rw ≥50<br />
and<br />
discontinuous construction<br />
Rw ≥50<br />
Northern Territory and Queensland have different requirements for Class 2 and 3 buildings. The requirements<br />
simply stated are that all separating walls shown in Table 7 have a rating of Rw ≥45, except those in row 2<br />
where the walls must have a rating of Rw ≥50 and discontinuous construction or test to be no less resistant to<br />
impact noise than a deemed-to-satisfy wall (by a tapping test).<br />
Table 8. BCA Volume 1 Requirements for walls separating sole occupancy units and other parts of the<br />
building in Class 9c Buildings (aged care facilities).<br />
Wall separating Wall Rating<br />
Sole occupancy unit- all areas<br />
Sole occupancy unit- all areas except<br />
those below<br />
Rw ≥45<br />
Rw ≥45<br />
and<br />
Sole occupancy unit- all areas Laundry, kitchen<br />
Bathroom, sanitary compartment (but<br />
discontinuous construction<br />
or<br />
No less resistant to impact noise than<br />
a deemed-to-satisfy wall<br />
Sole occupancy unit- all areas<br />
not an associated ensuite), plant room,<br />
utilities room<br />
Rw ≥45<br />
Table 9. BCA Service separation* in Class 1, 2, 3 & 9c buildings.<br />
Building service Adjacent room Barrier rating<br />
A duct, soil, waste, water supply or<br />
stormwater pipe that serves or passes<br />
through more than one unit.<br />
Sole occupancy unit habitable room<br />
other than a kitchen.<br />
Sole occupancy unit kitchen or non<br />
habitable room<br />
Rw+Ctr ≥40<br />
Rw+Ctr ≥25<br />
*In Class 1 buildings the requirements apply to those services that pass through more than one Dwelling. In Class 2, 3 & 9c<br />
requirements apply to all stormwater pipes and other services that pass through more than one sole occupancy unit.<br />
Northern Territory and Queensland have different requirements for separation of services in the table above; the<br />
requirements are respectively Rw ≥45 and Rw ≥30, which for masonry construction are roughly equivalent to the<br />
figures in the table.<br />
ADV1226
<strong>Bricks</strong> & <strong>Pavers</strong> <strong>Technical</strong> <strong>Manual</strong><br />
Section 1.2. Brick Masonry Design 1.227<br />
Weighted Sound Reduction Index (Rw)<br />
Rw is a single-number rating of the sound reduction through a wall or other building element. Since the sound<br />
reduction may be different at different frequencies, test measurements are subjected to a standard procedure<br />
that yields a single number that is about equal to the average sound reduction in the middle of the human<br />
hearing range. Two spectral corrections can be applied to Rw: “C” and “Ctr”. C compensates for medium to high<br />
frequency noise and Ctr compensates for low frequency noise. “C” and “Ctr” are both negative numbers. ■<br />
Impact Sound Resistance<br />
The BCA Amendment 14 says there is no appropriate test for impact sound reduction in walls. However, in the<br />
case of Class 9c buildings the BCA allows impact sound reduction to be demonstrated by showing a wall<br />
performs no worse than a deemed-to-satisfy wall. To achieve impact sound resistance, the BCA requires walls<br />
consist of two leaves with at least a 20 mm cavity between them and if ties are needed in masonry walls they<br />
must be of the resilient type. Except for the resilient ties in masonry walls there are to be no mechanical linkages<br />
between the walls, except at the periphery (i.e. through walls, floors and ceilings). ■<br />
BCA Deemed-to-Satisfy Walls<br />
BCA Volume 1 Amendment 14 Specification F5.2 Table 2 gives deemed-to-satisfy walls for sound insulation for<br />
walls separating sole occupancy units.<br />
BCA Volume 2 Amendment 14 Table 3.8.6.2 gives deemed-to-satisfy walls for sound insulation for walls<br />
separating two or more Class 1 Buildings. These walls are the same as those in Volume 1 except only walls<br />
achieving Rw+Ctr ≥50 are allowed.<br />
Deemed-to-satisfy clay brick walls are detailed on the following pages. t<br />
ADV03775
<strong>Bricks</strong> & <strong>Pavers</strong> <strong>Technical</strong> <strong>Manual</strong><br />
Section 1.2. Brick Masonry Design<br />
BCA Deemed-to-Satisfy Walls (continued)<br />
Table 10. BCA Volume 1 Amendment 14 Deemed-to-Satisfy Brick Walls<br />
Two leaves of 110 mm clay brick masonry with:<br />
(a) A cavity not less than 50 mm between leaves; and<br />
(b) 50 mm thick glass wool insulation with a density of 11<br />
kg/m3 or 50 mm thick polyester insulation with a density<br />
of 20 kg/m3 in the cavity.<br />
1.228<br />
Construction Rating<br />
Two leaves of 110 mm clay brick masonry with:<br />
(a) A cavity not less than 50 mm between leaves;<br />
and<br />
(b) 13 mm cement render on each outside face.<br />
Single leaf of 110 mm clay brick masonry with:<br />
(a) A row of 70 mm x 35 mm timber studs or 64 mm steel studs<br />
at 600 mm centres, spaced 20 mm from the masonry wall;<br />
and<br />
(b) 50 mm thick mineral insulation or glass wool insulation with<br />
a density of 11 kg/m 3 positioned between studs; and,<br />
(c) one layer of 13 mm plasterboard fixed to outside face of<br />
studs and outside face of masonry.<br />
Single leaf of 90 mm clay brick masonry with:<br />
(a) A row of 70 mm x 35 mm timber studs or 64 mm steels studs<br />
at 600 mm centres, spaced 20 mm from each face of the<br />
masonry wall; and<br />
(b) 50 mm thick mineral insulation or glass wool insulation with<br />
a density of 11 kg/m 3 positioned between studs in each row;<br />
and<br />
(c) one layer of 13 mm plasterboard fixed to studs on each<br />
outside face.<br />
Rw+Ctr≥50<br />
Rw+Ctr≥50<br />
Rw+Ctr≥50<br />
Rw+Ctr≥50<br />
ADV03776
<strong>Bricks</strong> & <strong>Pavers</strong> <strong>Technical</strong> <strong>Manual</strong><br />
Section 1.2. Brick Masonry Design<br />
BCA Deemed-to-Satisfy Walls (continued)<br />
Table 10. BCA Volume 1 Amendment 14 Deemed-to-Satisfy Brick Walls (continued)<br />
Single leaf of 150 mm brick masonry with<br />
13 mm cement render on each face.<br />
1.229<br />
Construction Rating<br />
Single leaf of 220 mm brick masonry with<br />
13 mm cement render on each face.<br />
Single leaf of 110 mm brick masonry with<br />
13 mm cement render on each face.<br />
Rw≥50<br />
Rw≥50<br />
Rw≥45<br />
ADV03777
<strong>Bricks</strong> & <strong>Pavers</strong> <strong>Technical</strong> <strong>Manual</strong><br />
Section 1.2. Brick Masonry Design 1.230<br />
Solid v. Cavity Walls<br />
Acoustic performance with single leaf masonry follows the ‘Mass Law’. The acoustic performance of these walls<br />
depends on their mass. More mass gives better performance, however, the relationship is logarithmic: If a 110<br />
mm wall gives Rw = 45, a 230 mm wall of the same brick may give Rw = 57.<br />
Cavity walls behave differently because sound waves can resonate in cavities. The narrower the cavity becomes,<br />
the more resonance occurs. Insulation in the cavity helps absorb resonating sound and narrow cavities should<br />
have bond breaker board, to prevent mortar from providing a bridge for sound to travel between the leaves. ■<br />
Brick Walls with Render<br />
Render on one side of a brick wall adds 2 or 3 to the wall’s Rw but adding render to the second side only adds<br />
1 to the wall’s Rw. The render appears to fill defects in the wall surface reducing the sound transmission, but<br />
this is a one-off benefit. ■<br />
Brick Walls with Plasterboard<br />
Cornice cement daubs, used to fix plasterboard directly to brick walls, create a small cavity in which resonance<br />
occurs. Brick walls with daub fixed plasterboard on both sides stop less noise than the same walls, bare.<br />
Adding extra daubs (halving spacing) gives lower performances, presumably due to extra ‘bridges’ through the<br />
daubs.<br />
Plasterboard on furring channel is marginally better than daub fixed. A bigger cavity between the wall and the<br />
plasterboard makes it harder for resonating energy to build up pressure on the board. When standard furring<br />
channel clips are used, this system transfers vibrations to the plasterboard via the channels and clips. <strong>Boral</strong><br />
Impact Clips (BICs) have a rubber shank on their masonry anchor that isolates the vibrations from the masonry.<br />
The use of BIC mounts can add 3 or 4 dB to the wall’s Rw. Polyester and glass wool in the cavity helps prevent<br />
resonance and further decreases the sound transmission. Denser grades of plasterboard and additional layers<br />
of plasterboard (fixed with grab screws and leaving no cavities) also decrease sound transmission. ■<br />
ADV03778
<strong>Bricks</strong> & <strong>Pavers</strong> <strong>Technical</strong> <strong>Manual</strong><br />
Section 1.2. Brick Masonry Design 1.231<br />
Points to Consider When Designing Walls<br />
for Acoustic Performance<br />
The BCA specifies minimum levels for sound isolation but experience shows that achieving the minimum<br />
standards is not always sufficient to satisfy occupants. In view of this it is recommended that architects,<br />
developers, builders, etc., consider a higher level of sound insulation, commensurate with the expectations of<br />
the end user. End user expectations are frequently related to the cost of occupying the unit.<br />
Wall design is a balance between acoustical performance, thickness, weight and cost. Frequently it is not<br />
possible to optimise one factor without seriously compromising the others. ■<br />
Acoustic Performance On-Site<br />
The Rw ratings on walling systems are obtained from tests carried out in accredited laboratories, under<br />
controlled conditions. When identical partitions in buildings are tested in-situ, it is often found that the actual<br />
result obtained, called the Weighted Standardised Level Difference (Dnt,w), is lower than the laboratory Rw. This<br />
reduction in performance can be due to rooms being too small, varying size of the element being tested, flanking<br />
paths (noise passing through other parts of the building) or background noise. The allowance in the BCA for a<br />
difference of 5 between the laboratory test and the field test is not to allow for poor construction practice. To<br />
repeat the performance in the field, attention to detail in the design and construction of the partition and its<br />
adjoining floor/ceiling and associated structure is of prime importance. Even the most basic elements, if ignored,<br />
can seriously downgrade the sound insulation performance.<br />
The most common field faults include bricklayers not completely filling all mortar joints, poor sealing between<br />
walls and other building elements, electrical power outlets being placed back to back, chasing masonry and<br />
concrete walls, leaving gaps in insulation, screwing into insulation and winding it around the screw when<br />
attaching sheet materials, not staggering joints in sheet materials and poor sealing of penetrations.<br />
<strong>Boral</strong> <strong>Bricks</strong> cannot guarantee that field performance ratings will match laboratory performance. However, with<br />
careful attention during construction of the wall, correct installation to specification and proper caulking/<br />
sealing, the assembly should produce a field performance close to and comparable with tested values. The<br />
following items can also affect the acoustic performance on site. ■<br />
ADV03779
<strong>Bricks</strong> & <strong>Pavers</strong> <strong>Technical</strong> <strong>Manual</strong><br />
Section 1.2. Brick Masonry Design 1.232<br />
Perimeter Acoustical Sealing<br />
As the Rw of a wall increases, the control of flanking paths becomes more critical. Consequently, the perimeter<br />
sealing requirements for a low sound rating wall, such as Rw = 45, are much less than for a high sound rating<br />
wall, such as Rw = 60. Note: it is neither necessary, nor is it cost effective, to provide very high perimeter<br />
acoustic sealing for a low Rw wall.<br />
Effective sealants have the following properties:<br />
• Good flexibility, (elastic set);<br />
• Low hardness;<br />
• Excellent adhesion, usually to concrete, timber, plaster and galvanised steel;<br />
• Minimal shrinkage (less than 5%);<br />
• Moderate density (greater than 800 kg/m 3 ); and are,<br />
• Fire rated where required (All walls required by the BCA to be sound rated also have fire ratings).<br />
All of the above properties must be maintained over the useful life of the building, that is, greater than 20<br />
years.<br />
Note: Use of expanding foam sealants is not acceptable.<br />
Refer to the manufacturer to ensure the particular type or grade of sealant is suitable for the purpose. ■<br />
Doors<br />
Hollow, cored and even solid doors generally provide unsatisfactory sound insulation. Doors can provide direct<br />
air leaks between rooms lowering the overall Rw of the wall in which they are inserted. Where sound insulation<br />
is important, specialised heavyweight doors or, preferably, two doors separated by an absorbent lined airspace<br />
or lobby should be used. ■<br />
ADV03780
<strong>Bricks</strong> & <strong>Pavers</strong> <strong>Technical</strong> <strong>Manual</strong><br />
Section 1.2. Brick Masonry Design 1.233<br />
Lightweight Panels Above Doors<br />
Panels are often incorporated for aesthetic reasons, however, they should not be used unless they have an Rw<br />
equal to or better than the wall’s requirement. ■<br />
Air Paths Through Gaps, Cracks or Holes<br />
Seal all gaps, cracks or openings, however small, with an acoustic sealant. Holes readily conduct airborne<br />
sounds and can considerably reduce the Rw of a wall. ■<br />
Appliances<br />
Noise producing fixtures or appliances such as water closets, cisterns, water storage tanks, sluices, dishwashers,<br />
washing machines and pumps should be isolated from the structure with resilient mountings and flexible service<br />
leads and connections. ■<br />
Electrical Outlets & Service Pipes<br />
Penetrations of all sorts should be avoided but if unavoidable, seal around them effectively. If possible introduce<br />
a discontinuity in pipe work between fittings, such as a flexible connection within or on the line of a partition.<br />
Use acoustically rated boxes for all general power outlets, light switches, telephone connections, television<br />
outlets, etc. Seal the sides of electrical boxes and the perimeter of all penetrations with acoustic sealant. Offset<br />
all power outlets on either side of a wall by at least 100 mm. ■<br />
ADV03781
1.3 Brick Masonry Construction
<strong>Bricks</strong> & <strong>Pavers</strong> <strong>Technical</strong> <strong>Manual</strong><br />
Section 1.3. Brick Masonry Construction 1.301<br />
The following information relates to the construction of brick walls to meet AS3700, the design and aesthetic<br />
requirements.<br />
Mortar<br />
AS3700: 2001, Table 10.1 gives the options for mortar mixes classified as M1 to M4. M1 mortars are for<br />
restoration applications. M2 mortars are for use in interior walls above dampcourse or in exterior walls above<br />
dampcourse if more than one km from a body of salt water and 10 km from a surf coast and the wall has protection<br />
from water ingress above. M3 and M4 mortars are those most commonly used in construction. Table 11 gives the<br />
proportions of the most commonly used mortars. Other deemed-to-satisfy compositions are given in AS3700.<br />
Special mortars that are tested and shown to meet requirements are allowed with verification on site.<br />
Note: Proportions are by volume and should be measured with a bucket or gauge box, NOT A SHOVEL.<br />
Table 11. Typical Mortar Mixes<br />
Mix proportions by volume<br />
Mortar Durability<br />
Type Class<br />
Portland or Hydrated Water<br />
Blended Cement Lime Sand Thickener*<br />
M1 PRO 0 1 3 No<br />
M2 PRO 1 2 9 No<br />
M3 GP 1 1 6 No<br />
M3 GP 1 0 5 Yes<br />
M4 EXP 1 1 ⁄2 4 1 ⁄2 No<br />
M4 EXP 1 0 4 Yes<br />
Refer to page 1.104 for description of Durability Class. *Methylcellulose type, not air entrainers such as detergent.<br />
Where masonry strength is crucial, trial walls should be constructed with the bricks and mortar to be used on<br />
the job, then tested before construction commences. Masonry bond strength is related to the suction of the<br />
bricks, the particle size distribution of the sand, cement content, additive contents, etc. For many jobs these<br />
panels can also be used as physical samples of the required quality of the bricklaying and cleaning.<br />
Note: AS 3700 allows the use of:<br />
• Cements complying with AS 3972 or AS 1316<br />
• Lime complying with AS 1672.1<br />
• Sand that is free of any deleterious materials<br />
• Water that is free from deleterious materials and<br />
• Admixtures including plasticisers, air entraining agents and set retarders complying with AS1478.1,<br />
cellulose-type water thickeners, colouring pigments complying with BS EN 12878 and bonding polymers.<br />
t<br />
ADV03783
<strong>Bricks</strong> & <strong>Pavers</strong> <strong>Technical</strong> <strong>Manual</strong><br />
Section 1.3. Brick Masonry Construction 1.302<br />
Mortar (continued)<br />
No other material may be used until tests on masonry constructed with the mortar, made with the material or<br />
admixture shows the masonry complies with the standard’s requirements for compressive strength, flexural<br />
strength and durability.<br />
Deleterious materials are those reducing the strength or durability of the masonry and including anything that<br />
attacks the built-in components. This means the use of fire clay, detergent, sugar, soft drink, etc., are banned.<br />
Most of these materials severely reduce mortar strength and durability. Water thickener must be used only<br />
according to the manufacturer’s directions because overuse severely reduces mortar strength.<br />
Mortar Estimator<br />
Table 12. Estimated Material Requirements to Lay 1,000 Standard <strong>Bricks</strong><br />
Mix Composition 40 kg bags 25 kg bags Cubic metres Tonnes of<br />
(C:L:S) of cement of lime of sand damp sand<br />
M3 1 : 1 : 6 4 2.4 0.64 1.2<br />
M3 1 : 0 : 5 4 0 0.64 1.2<br />
M4 1 : 0 : 4 6.5 0 0.64 1.2<br />
M4 1 : 1 ⁄2 : 4 1 ⁄2 5.3 1.6 0.64 1.2<br />
This table assumes partial filling of cores and typical site wastage.<br />
Only make sufficient mortar for immediate use. If mortar starts to set, it may be re-tempered once only.<br />
Where bricklaying is interrupted, the mortar should be covered to prevent evaporation and mixed with the trowel<br />
before continuing. t<br />
ADV03784
<strong>Bricks</strong> & <strong>Pavers</strong> <strong>Technical</strong> <strong>Manual</strong><br />
Section 1.3. Brick Masonry Construction 1.303<br />
Mortar (continued)<br />
Mortar Colour<br />
The mortar colour can dramatically affect the overall look. The colour of mortar is influenced by the colour of the<br />
cement and the aggregates (sand). Many pigments are also available ranging in colour through red, yellow,<br />
brown, green, blue and black (mainly oxides but carbon black can be used to give black mortar). The cheapest<br />
way of colouring mortar is to use coloured sand. White and yellow sands are commonly available but red and<br />
brown sands are also available. Sands are normally natural materials which vary considerably even in the one<br />
deposit. To ensure colour consistency, sufficient sand from the one batch should be set aside for the whole job.<br />
Where colour is crucial to the look of the masonry, before accepting the sand, a trial wall should be built (4 bricks<br />
x 10 courses). After the mortar dries assess the colour. Where oxides or carbon black are used as colours never<br />
use more than 10% by weight of the cement content.<br />
Colours are additive in their effect and it is possible to get different shades and tones of mortar using different<br />
combinations of cement, sands and oxides.<br />
Table 13: Typical Coloured Mortar Components<br />
Mortar Colour Cement Sand Oxide<br />
Red Grey White or Yellow or Red Red<br />
Yellow Off-white or Grey Yellow Yellow & Brown<br />
Cream Off-white Yellow None<br />
Tan Grey White or Yellow Brown<br />
Black Grey Yellow Black<br />
Note: The colour of mortar can be severely degraded by incorrect or poor brick cleaning. ■<br />
ADV03785
<strong>Bricks</strong> & <strong>Pavers</strong> <strong>Technical</strong> <strong>Manual</strong><br />
Section 1.3. Brick Masonry Construction 1.304<br />
Joint Types<br />
The type of joint can dramatically affect the overall look of brick masonry. Joints can be used to create a casual,<br />
rustic or formal look to brickwork. There are many different joints; the most common ones used in Australia are<br />
shown below.<br />
Flush Joint Raked Joint Ironed Joint Struck Joint<br />
Weathered Joint<br />
Terminology and joint preference differs in different countries and within Australia. Where there is any<br />
confusion, always use a drawing or physical sample to avoid misunderstandings.<br />
Shallow ironed joints are recommended in areas requiring exposure grade bricks and mortar. Tooling the joint to<br />
produce ironed and struck joints is equivalent to steel trowelling concrete and produces a dense smooth surface<br />
which sheds water and dirt better than other types of joint. Ironed and struck joints should always be used for<br />
bricks with straight sharp edges such as Smooth Face and Velour bricks.<br />
Raked joints may be used with any type of brick but they tend to retain dirt and may lead to streaks down the<br />
masonry in dirty environments. Raking must not come closer than 5 mm to any core. This usually limits raking to<br />
less than 10 mm, however it is best to check the bricks that are being used before raking. AS3700 specifies that<br />
joints in walls in marine, severe marine or aggressive environments or on aggressive soils must be tooled to a<br />
dense smooth surface. This precludes raking and in practice ironed joints are the only ones that consistently<br />
meet the requirement.<br />
Flush joints may be used with any type of brick. However, flush joints are particularly effective with rumbled<br />
bricks as flush joints make the joints look to be of variable thickness that gives a pleasing rustic look. ■<br />
ADV03786
<strong>Bricks</strong> & <strong>Pavers</strong> <strong>Technical</strong> <strong>Manual</strong><br />
Section 1.3. Brick Masonry Construction 1.305<br />
Joint Sizes<br />
Mortar bed joints are required to be less than 10 mm unless the design specifies another thickness. A different<br />
thickness may only be specified after the designer considers the effect on compressive and flexural strength of<br />
the masonry. During construction mortar bed joints are allowed to deviate by ± 3mm. Because of poor practice<br />
or lack of proper direction some slabs and footings are finished at the wrong height. Mortar joints up to 50 mm<br />
thick have been used to get the correct coursing, however, this is not allowed under AS3700.<br />
Perpends are to have a minimum design thickness of 5 mm. In structural brickwork perpends may be up to 10<br />
mm thicker than the specified thickness but no thinner. In face brickwork perpends may deviate by ± 5 mm from<br />
the average width but in any one wall the maximum difference allowable between any two perpends is 8 mm.<br />
The preceding tolerances do not apply in the case of thin bed mortars and perpend tolerances do not apply where<br />
perpends are not filled with mortar. ■<br />
Weepholes<br />
Weepholes are to allow moisture that collects in the cavity to escape. Weepholes should be spaced at less than<br />
1200 mm centres wherever flashing is built into the masonry to shed water from the cavity. Weepholes are<br />
usually empty perpends (10 mm wide) but proprietary products are available to prevent the entry of insects. In<br />
high wind areas it has been known for water to be blown up the cavity onto the inner wall and as this is very<br />
undesirable, more, narrower weepholes are usually built into the wall. It is essential that weepholes remain<br />
open and render and other applied coatings, where used, must be raked out of the joint. ■<br />
ADV03787
<strong>Bricks</strong> & <strong>Pavers</strong> <strong>Technical</strong> <strong>Manual</strong><br />
Section 1.3. Brick Masonry Construction 1.306<br />
Brick Estimator<br />
Brickwork is based on the 600 mm unit, (seven courses high and two and a half bricks long). This unit fits in with<br />
doors, windows and other building materials. The number of bricks required for a wall can be determined from<br />
the Brick Coursing Height and Brick Gauge tables on pages 1.310-1.312 of this manual. Select the height of the<br />
wall and from the following page for the brick height chosen determine the number of courses. From the next<br />
page for 230 mm long bricks or the one after for 290 mm bricks, determine the number of bricks for the length<br />
of your wall. A half brick should be calculated as 1 whole brick, due to site wastage. Multiply the number of<br />
bricks by the number of courses to give the number of bricks for the wall. Saw cutting bricks may mean getting<br />
two halves from a brick but this is not usual practice because of the cost of cutting. ■<br />
ADV03788
<strong>Bricks</strong> & <strong>Pavers</strong> <strong>Technical</strong> <strong>Manual</strong><br />
Section 1.3. Brick Masonry Construction 1.307<br />
Brick bonds and other decorative effects<br />
A bond is the pattern in which bricks are laid. The most common bond is Stretcher Bond which consists of<br />
courses of full bricks where every course is offset half a brick from the course below. When following the mortar<br />
joint, stretcher bond has the longest vertical pathway and therefore the best bend strength.<br />
Stretcher bond is used in walls one brick wide. Where walls are two or more bricks wide then stretcher bond<br />
needs ties to hold the leaves together to give it a monolithic action. To avoid the use of ties traditional practice<br />
has been to lay some of the bricks sideways. This has usually been either full courses of headers with full<br />
courses of stretcher (English) or courses of alternating header and stretcher (Flemish). A variation of Flemish<br />
Bond is Garden Wall Bond where courses are made of a header and three stretchers alternating.<br />
Corner treatment can be different in these bonds. English corners end in full stretchers or full headers, and any<br />
part brick required to make up the course is set inside the corner. Dutch corners end in the part bricks.<br />
Variations on these bonds are common in particular a header course every three or six courses with stretcher<br />
courses between.<br />
Although these bonds have traditionally been developed for thick walls, they can be used in single leaf walls as<br />
a decorative effect using cut bricks for the headers. Such walls are usually non-load bearing. Cutting costs are<br />
high but not excessive as the headers have the cut side turned in and the bricks can be bolstered.<br />
Other decorative bonds may be used in non-load bearing applications, particularly in the form of panels. The<br />
limitations are strengths lower than Stretcher Bond and the cost of cutting and slower brick laying. The<br />
decorative effect of bonds is highlighted by using a mortar in a contrasting colour to the brick.<br />
Other bonds include:<br />
• Stack Bond – <strong>Bricks</strong> laid horizontally in vertical columns so all vertical joints align.<br />
• Soldier Stack Bond – <strong>Bricks</strong> laid vertically in vertical columns so all vertical joints align.<br />
• 1/3 Bond – Every course is offset by 1/3 of a brick.<br />
• Zigzag Bond, Vertical Zigzag Bond, 45˚ Stretcher Bond, Chevron Bond, Basket Weave Bond, 45˚ Basket<br />
Weave Bond and virtually any pattern that tessellates. t<br />
ADV03789
<strong>Bricks</strong> & <strong>Pavers</strong> <strong>Technical</strong> <strong>Manual</strong><br />
Section 1.3. Brick Masonry Construction 1.308<br />
Brick bonds and other decorative effects (continued)<br />
Other decorative effects are available such as:<br />
• Laying bands of bricks of the same colour with different textures eg smooth faced and rock faced;<br />
• Laying bands of bricks with different (contrasting or complimentary) colours;<br />
• Corbelling (bricks set out from the wall);<br />
• Racking (bricks set back into the wall);<br />
• Quoining (corner bricks in different colours or set out from the wall);<br />
• Soldiers above openings or as a single course;<br />
• Copings on piers and parapet walls;<br />
• Sills in different colours or textures, using sill bricks, etc.; or,<br />
In the late 1800’s bricks of contrasting colours were laid in patterns such as diamonds or crosses. A more subtle<br />
effect can be made by laying bricks with different textures or corbelling the bricks in these patterns.<br />
Combinations of the above effects can be used. Eg. An American Architect specified a corbelled course with the<br />
course below to be laid in the darkest bricks selected from the packs delivered. The darker band accentuated<br />
the shadowing effect from the corbelled course. t<br />
ADV03790
<strong>Bricks</strong> & <strong>Pavers</strong> <strong>Technical</strong> <strong>Manual</strong><br />
Section 1.3. Brick Masonry Construction 1.309<br />
Brick bonds and other decorative effects (continued)<br />
Stretcher Bond Common Bond (Full Headers every 6th Course)<br />
Flemish Bond Common Bond (Flemish every 6th Course)<br />
English Cross or Dutch Bond Garden Wall Bond<br />
Stack Bond Soldier Course (With Stretcher Bond)<br />
ADV03791
ADV03792<br />
1.310<br />
<strong>Bricks</strong> & <strong>Pavers</strong> <strong>Technical</strong> <strong>Manual</strong><br />
Section 1.3. Brick Masonry Construction<br />
76mm 119mm 162mm 50mm 90mm<br />
3000<br />
2700<br />
2400<br />
2100<br />
1800<br />
1500<br />
1200<br />
900<br />
600<br />
300<br />
3000mm<br />
2700mm<br />
2400mm<br />
2100mm<br />
1800mm<br />
1500mm<br />
1200mm<br />
900mm<br />
600mm<br />
300mm<br />
24<br />
23<br />
22<br />
21<br />
20<br />
19<br />
18<br />
17<br />
16<br />
15<br />
14<br />
13<br />
12<br />
11<br />
10<br />
9<br />
8<br />
7<br />
6<br />
5<br />
4<br />
3<br />
2<br />
1<br />
18<br />
17<br />
16<br />
15<br />
14<br />
13<br />
12<br />
11<br />
10<br />
9<br />
8<br />
7<br />
6<br />
5<br />
4<br />
3<br />
2<br />
1<br />
50<br />
49<br />
48<br />
47<br />
46<br />
45<br />
44<br />
43<br />
42<br />
41<br />
40<br />
39<br />
38<br />
37<br />
36<br />
35<br />
34<br />
33<br />
32<br />
31<br />
30<br />
29<br />
28<br />
27<br />
26<br />
25<br />
24<br />
23<br />
22<br />
21<br />
20<br />
19<br />
18<br />
17<br />
16<br />
15<br />
14<br />
13<br />
12<br />
11<br />
10<br />
9<br />
8<br />
7<br />
6<br />
5<br />
4<br />
3<br />
2<br />
1<br />
30<br />
29<br />
28<br />
27<br />
26<br />
25<br />
24<br />
23<br />
22<br />
21<br />
20<br />
19<br />
18<br />
17<br />
16<br />
15<br />
14<br />
13<br />
12<br />
11<br />
10<br />
9<br />
8<br />
7<br />
6<br />
5<br />
4<br />
3<br />
2<br />
1<br />
Brick Coursing Height
<strong>Bricks</strong> & <strong>Pavers</strong> <strong>Technical</strong> <strong>Manual</strong><br />
Section 1.3. Brick Masonry Construction 1.311<br />
Brick Gauge<br />
230 mm Long <strong>Bricks</strong><br />
No. of Length Opening<br />
<strong>Bricks</strong> (mm) (mm)<br />
1 230 250<br />
1 1 ⁄2 350 370<br />
2 470 490<br />
2 1 ⁄2 590 610<br />
3 710 730<br />
3 1 ⁄2 830 850<br />
4 950 970<br />
4 1 ⁄2 1070 1090<br />
5 1190 1210<br />
5 1 ⁄2 1310 1330<br />
6 1430 1450<br />
6 1 ⁄2 1550 1570<br />
7 1670 1690<br />
7 1 ⁄2 1790 1810<br />
8 1910 1930<br />
8 1 ⁄2 2030 2050<br />
9 2150 2170<br />
9 1 ⁄2 2270 2290<br />
10 2390 2410<br />
10 1 ⁄2 2510 2530<br />
11 2630 2650<br />
11 1 ⁄2 2750 2770<br />
12 2870 2890<br />
12 1 ⁄2 2990 3010<br />
13 3110 3130<br />
No. of Length Opening<br />
<strong>Bricks</strong> (mm) (mm)<br />
13 1 ⁄2 3230 3250<br />
14 3350 3370<br />
14 1 ⁄2 3470 3490<br />
15 3590 3610<br />
15 1 ⁄2 3710 3730<br />
16 3830 3850<br />
16 1 ⁄2 3950 3970<br />
17 4070 4090<br />
17 1 ⁄2 4190 4210<br />
18 4310 4330<br />
18 1 ⁄2 4430 4450<br />
19 4550 4570<br />
19 1 ⁄2 4670 4690<br />
20 4790 4810<br />
20 1 ⁄2 4910 4930<br />
21 5030 5050<br />
21 1 ⁄2 5150 5170<br />
22 5270 5290<br />
22 1 ⁄2 5390 5410<br />
23 5510 5530<br />
23 1 ⁄2 5630 5650<br />
24 5750 5770<br />
24 1 ⁄2 5870 5890<br />
25 5990 6010<br />
25 1 ⁄2 6110 6130<br />
No. of Length Opening<br />
<strong>Bricks</strong> (mm) (mm)<br />
26 6230 6250<br />
26 1 ⁄2 6350 6370<br />
27 6470 6490<br />
27 1 ⁄2 6590 6610<br />
28 6710 6730<br />
28 1 ⁄2 6830 6850<br />
29 6950 6970<br />
29 1 ⁄2 7070 7090<br />
30 7190 7210<br />
30 1 ⁄2 7310 7330<br />
31 7430 7450<br />
31 1 ⁄2 7550 7570<br />
32 7670 7690<br />
32 1 ⁄2 7790 7810<br />
33 7910 7930<br />
33 1 ⁄2 8030 8050<br />
34 8150 8170<br />
34 1 ⁄2 8270 8290<br />
35 8390 8410<br />
35 1 ⁄2 8510 8530<br />
36 8630 8650<br />
36 1 ⁄2 8750 8770<br />
37 8870 8890<br />
37 1 ⁄2 8990 9010<br />
38 9110 9130<br />
No. of Length<br />
<strong>Bricks</strong> (mm)<br />
38 1 ⁄2 9230<br />
39 9350<br />
39 1 ⁄2 9470<br />
40 9590<br />
40 1 ⁄2 9710<br />
41 9830<br />
41 1 ⁄2 9950<br />
42 10070<br />
42 1 ⁄2 10190<br />
43 10310<br />
43 1 ⁄2 10430<br />
44 10550<br />
44 1 ⁄2 10670<br />
45 10790<br />
45 1 ⁄2 10910<br />
46 11030<br />
46 1 ⁄2 11150<br />
47 11270<br />
47 1 ⁄2 11390<br />
48 11510<br />
48 1 ⁄2 11630<br />
49 11750<br />
49 1 ⁄2 11870<br />
50 11990<br />
100 23990<br />
ADV03793
<strong>Bricks</strong> & <strong>Pavers</strong> <strong>Technical</strong> <strong>Manual</strong><br />
Section 1.3. Brick Masonry Construction<br />
Brick Gauge<br />
290 mm Long <strong>Bricks</strong><br />
No. of Length Opening<br />
<strong>Bricks</strong> (mm) (mm)<br />
1 290 310<br />
1 1 ⁄3 390 410<br />
1 2 ⁄3 490 510<br />
2 590 610<br />
2 1 ⁄3 690 710<br />
2 2 ⁄3 790 810<br />
3 890 910<br />
3 1 ⁄3 990 1010<br />
3 2 ⁄3 1090 1110<br />
4 1190 1210<br />
4 1 ⁄3 1290 1310<br />
4 2 ⁄3 1390 1410<br />
5 1490 1510<br />
5 1 ⁄3 1590 1610<br />
5 2 ⁄3 1690 1710<br />
6 1790 1810<br />
6 1 ⁄3 1890 1910<br />
6 2 ⁄3 1990 2010<br />
7 2090 2110<br />
7 1 ⁄3 2190 2210<br />
7 2 ⁄3 2290 2310<br />
8 2390 2410<br />
8 1 ⁄3 2490 2510<br />
8 2 ⁄3 2590 2610<br />
9 2690 2710<br />
9 1 ⁄3 2790 2810<br />
9 2 ⁄3 2890 2910<br />
10 2990 3010<br />
10 1 ⁄3 3090 3110<br />
10 2 ⁄3 3190 3210<br />
11 3290 3310<br />
11 1 ⁄3 3390 3410<br />
11 2 ⁄3 3490 3510<br />
12 3590 3610<br />
12 1 ⁄3 3690 3710<br />
12 2 ⁄3 3790 3810<br />
13 3890 3910<br />
13 1 ⁄3 3990 4010<br />
No. of Length Opening<br />
<strong>Bricks</strong> (mm) (mm)<br />
13 2 ⁄3 4090 4110<br />
14 4190 4210<br />
14 1 ⁄3 4290 4310<br />
14 2 ⁄3 4390 4410<br />
15 4490 4510<br />
15 1 ⁄3 4590 4610<br />
15 2 ⁄3 4690 4710<br />
16 4790 4810<br />
16 1 ⁄3 4890 4910<br />
16 2 ⁄3 4990 5010<br />
17 5090 5110<br />
17 1 ⁄3 5190 5210<br />
17 2 ⁄3 5290 5310<br />
18 5390 5410<br />
18 1 ⁄3 5490 5510<br />
18 2 ⁄3 5590 5610<br />
19 5690 5710<br />
19 1 ⁄3 5790 5810<br />
19 2 ⁄3 5890 5910<br />
20 5990 6010<br />
20 1 ⁄3 6090 6110<br />
20 2 ⁄3 6190 6210<br />
21 6290 6310<br />
21 1 ⁄3 6390 6410<br />
21 2 ⁄3 6490 6510<br />
22 6590 6610<br />
22 1 ⁄3 6690 6710<br />
22 2 ⁄3 6790 6810<br />
23 6890 6910<br />
23 1 ⁄3 6990 7010<br />
23 2 ⁄3 7090 7110<br />
24 7190 7210<br />
24 1 ⁄3 7290 7310<br />
24 2 ⁄3 7390 7410<br />
25 7490 7510<br />
25 1 ⁄3 7590 7610<br />
25 2 ⁄3 7690 7710<br />
26 7790 7810<br />
No. of Length<br />
<strong>Bricks</strong> (mm)<br />
26 1 ⁄3 7890<br />
26 2 ⁄3 7990<br />
27 8090<br />
27 1 ⁄3 8190<br />
27 2 ⁄3 8290<br />
28 8390<br />
28 1 ⁄3 8490<br />
28 2 ⁄3 8590<br />
29 8690<br />
29 1 ⁄3 8790<br />
29 2 ⁄3 8890<br />
30 8990<br />
30 1 ⁄3 9090<br />
30 2 ⁄3 9190<br />
31 9290<br />
31 1 ⁄3 9390<br />
31 2 ⁄3 9490<br />
32 9590<br />
32 1 ⁄3 9690<br />
32 2 ⁄3 9790<br />
33 9890<br />
33 1 ⁄3 9990<br />
33 2 ⁄3 10090<br />
34 10190<br />
34 1 ⁄3 10290<br />
34 2 ⁄3 10390<br />
35 10490<br />
35 1 ⁄3 10590<br />
35 2 ⁄3 10690<br />
36 10790<br />
36 1 ⁄3 10890<br />
36 2 ⁄3 10990<br />
37 11090<br />
37 1 ⁄3 11190<br />
37 2 ⁄3 11290<br />
38 11390<br />
38 1 ⁄3 11490<br />
38 2 ⁄3 11590<br />
No. of Length<br />
<strong>Bricks</strong> (mm)<br />
39 11690<br />
39 1 ⁄3 11790<br />
39 2 ⁄3 11890<br />
40 11990<br />
40 1 ⁄3 12090<br />
40 2 ⁄3 12190<br />
41 12290<br />
41 1 ⁄3 12390<br />
41 2 ⁄3 12490<br />
42 12590<br />
42 1 ⁄3 12690<br />
42 2 ⁄3 12790<br />
43 12890<br />
43 1 ⁄3 12990<br />
43 2 ⁄3 13090<br />
44 13190<br />
44 1 ⁄3 13290<br />
44 2 ⁄3 13390<br />
45 13490<br />
45 1 ⁄3 13590<br />
45 2 ⁄3 13690<br />
46 13790<br />
46 1 ⁄3 13890<br />
46 2 ⁄3 13990<br />
47 14090<br />
47 1 ⁄3 14190<br />
47 2 ⁄3 14290<br />
48 14390<br />
48 1 ⁄3 14490<br />
48 2 ⁄3 14590<br />
49 14690<br />
49 1 ⁄3 14790<br />
49 2 ⁄3 14890<br />
50 14990<br />
100 29990<br />
1.312<br />
ADV03794
<strong>Bricks</strong> & <strong>Pavers</strong> <strong>Technical</strong> <strong>Manual</strong><br />
Section 1.3. Brick Masonry Construction 1.313<br />
Blending<br />
Raw materials for brick making are from natural sources and these vary in colour within any one deposit. Brick<br />
makers blend materials to moderate the colour variation but it still occurs. Colour variation may be caused by<br />
different conditions across the kiln. No matter how well made, bricks delivered to site will have some degree of<br />
colour variation.<br />
Poorly blended bricks may show unwanted patches, streaks and bands of colour in the finished masonry.<br />
To avoid this:<br />
• All bricks required for the project, or as many packs as will fit, should be delivered at one time and stored<br />
on site; and,<br />
• <strong>Bricks</strong> should be drawn from at least four packs simultaneously, working down from the corners of each<br />
pack. ■<br />
Brick Storage<br />
<strong>Bricks</strong> stored on site should be covered and kept off the ground. <strong>Bricks</strong> may absorb ground water containing salts<br />
or coloured minerals creating subsequent problems with staining. <strong>Bricks</strong> when laid saturated usually produce<br />
excessive efflorescence as the masonry dries. Saturated bricks may also adversely affect the mortar bond<br />
strength.<br />
Moving bricks around the site may cause chipping and excessive movement of packs should be avoided. ■<br />
ADV03795
<strong>Bricks</strong> & <strong>Pavers</strong> <strong>Technical</strong> <strong>Manual</strong><br />
Section 1.3. Brick Masonry Construction 1.314<br />
Laying Practices<br />
The following practices are recommended:<br />
• Mortar, extruded from tapping the brick down to the string line, should be cut off with an upward stroke of<br />
the trowel. In this manner, a clean cut is made, without smearing the face of the brick.<br />
• Joints should be tooled progressively as the bricks are laid, when the mortar is firm to thumb pressure. High<br />
suction bricks require joints to be tooled more frequently than low suction bricks. Tooling too late produces<br />
a ‘burned’ joint, where the surface may not be smooth and dense.<br />
• After allowing the mortar to undergo initial set, within a day, dry brush mortar smears, to remove any dags,<br />
and then wet brush any remaining mortar stains. Mortar that is allowed to set on the masonry face may<br />
require high-pressure water jet cleaning or more costly, risky methods of cleaning.<br />
• Cavities should be kept as clear as possible from mortar droppings. Flushing out the cavity removes<br />
inadvertently dropped mortar and ensures ties are clean and flashing and damp proof courses are not<br />
bridged. It is poor practice and usually ineffective to flush large quantities of dropped mortar from cavities.<br />
Usual practice is for the bricklayer to leave out one or more bricks at the base of the wall above a flashing<br />
or the damp proof course for the washings to come out. Washings can cause serious staining where they<br />
run down over lower brickwork and should be rinsed off thoroughly each day.<br />
• Scaffolding should be kept at least 150 mm from the face of the brickwork to prevent a build up of mortar<br />
droppings against the masonry.<br />
• When bricklaying is interrupted by rain or rain is expected overnight, masonry should be protected by<br />
covering it. Saturated masonry will produce excessive efflorescence and may lead to staining with some<br />
bricks.<br />
• Face bricks are supplied with one face and one header suitable for exposing (i.e. to be seen after laying).<br />
Face bricks with unwanted marks, chips or cracks on a header should be laid with that header inside a<br />
mortared joint. Face bricks with unwanted marks, chips or cracks on the face should be set aside by the<br />
bricklayer (or labourer) for use as commons. <strong>Boral</strong> will not be responsible for replacing bricks with unwanted<br />
marks, chips or cracks that have been laid. ■<br />
ADV03796
<strong>Bricks</strong> & <strong>Pavers</strong> <strong>Technical</strong> <strong>Manual</strong><br />
Section 1.3. Brick Masonry Construction 1.315<br />
Control Joints<br />
Control joints must not be bridged by mortar or render. After laying the bricks or rendering, the joint must be<br />
cleaned. Lumps of mortar or render can transfer forces across the closing joint and will cause the bricks to crack<br />
(or spall). Control joints are usually constructed with a highly compressible material (in the form of a sheet or<br />
rod) inserted to keep dirt and moisture from penetrating to the cavity. For aesthetic reasons a compressible<br />
caulking material, matched to the mortar colour, is usually applied on the outside. As the joint closes,<br />
compressible caulking compounds may be extruded from the joint but incompressible ones may damage the<br />
bricks. If extruded caulking compound is considered unsightly, it can be cut out and replaced or the compound<br />
can be recessed during construction. Care must be taken when choosing a caulking compound to ensure it is a<br />
highly compressible type that will survive for the design life of the building and not discolour significantly. There<br />
are numerous suitable materials available and manufacturer’s recommendations should be sought.<br />
Where a control joint has flexible masonry ties built in, a piece of the compressible material must be removed<br />
to accommodate the tie. ■<br />
Damp Courses and Flashing<br />
Membrane type damp proof courses (DPC) must be laid across the full width of the wall or leaf and must project<br />
through the mortar on either side and be completely visible after laying and cleaning is complete. Recessing DPC<br />
below the edge of the brickwork so that the mortar bridges the DPC invalidates its use and is therefore entirely<br />
unacceptable. Bridged DPC may lead to rising damp, salt attack and or accelerated corrosion of the built-in<br />
components that may lead to structural failure. Recessing flashing below the mortar although common is not<br />
good practice as it allows the water that should be shed to soak into the wall below the flashing.<br />
DPC and flashing at the base of a wall may be combined. Lengths should be as long as possible but where not<br />
continuous, two adjacent pieces should overlap by at least 150 mm and if possible be sealed together. If a<br />
termite shield is used in the same joint as the DPC, the DPC material must be compatible with the termite shield<br />
or corrosion may destroy the DPC.<br />
General practice has been to recommend that flashings and DPCs be sandwiched between the mortar. There is<br />
some evidence that the common practice of laying flashings and DPC directly on the lower course of bricks and<br />
placing the mortar on top may be superior in some instances. ■<br />
ADV03797
<strong>Bricks</strong> & <strong>Pavers</strong> <strong>Technical</strong> <strong>Manual</strong><br />
Section 1.3. Brick Masonry Construction 1.316<br />
Cleaning of Clay Masonry<br />
The Basics of Brick Cleaning<br />
The cleaner the bricklayer leaves the wall, the easier will be the cleaning task. The majority of the mortar<br />
residues and smears should be cleaned before they set hard. However, in most cases some additional cleaning<br />
will be required to completely remove the mortar residue.<br />
Cleaning techniques may involve high-pressure water jet equipment or hand methods. Whatever technique is<br />
used, the following requirements must be observed to ensure additional staining problems are avoided.<br />
Test Areas<br />
Testing in one or more small areas is the safest way to determine the correct technique and chemical solution<br />
to remove mortar residues. This must occur well before final cleaning, as it will usually not be possible to assess<br />
the effectiveness of the test clean until the masonry dries.<br />
Clean Soluble Salt Deposits First<br />
Efflorescence, a white ‘fluffy’ deposit, cannot be removed by water or acid. Dry brushing to remove the<br />
efflorescence before washing is recommended. If efflorescence is wetted, the salts go into solution and are<br />
drawn back into the brickwork and will reappear as the masonry dries. Efflorescence will eventually disappear<br />
through natural weathering.<br />
Vanadium salts produce a green or yellow efflorescence or stain (mainly seen on cream and light coloured clay<br />
bricks). Hydrochloric acid will make these stains much worse and may make them impossible to clean. Mild<br />
vanadium stains may be treated with sodium hypochlorite (household bleach). Spray or brush on dry brickwork<br />
and leave until the stain disappears, then rinse off. Proprietary mould cleaners containing sodium hypochlorite<br />
and sodium hydroxide can be used as above and have been found very effective. Proprietary brick cleaners may<br />
also be effective and should be used only according to the manufacturer’s instructions. Proprietary cleaners<br />
usually contain acids that must be neutralised after use with a solution of 15 grams of washing soda<br />
per litre of water.<br />
More than one chemical application may be required and the walls should be rinsed thoroughly after each<br />
treatment. t<br />
ADV03798
<strong>Bricks</strong> & <strong>Pavers</strong> <strong>Technical</strong> <strong>Manual</strong><br />
Section 1.3. Brick Masonry Construction 1.317<br />
Cleaning of Clay Masonry (continued)<br />
High Pressure Cleaning<br />
High-pressure water washing is now common for cleaning brickwork. If used the pressure must be kept below<br />
1000 psi (7000 kPa), the nozzle must be kept 500 mm from the brick face and the nozzle must be a wide fan jet<br />
type with an angle of 15 degrees.<br />
The following practices must be observed:<br />
• Cleaning should not start until the mortar has hardened.<br />
• Hard lumps or persistent smears should be removed by hand.<br />
• Mask adjacent materials.<br />
• Do not apply the acid with the high-pressure sprayer. Use a low-pressure spray or broom it on.<br />
• Clean from top to bottom in small sections.<br />
• Work in the shade, ahead of the sun, if possible.<br />
• DO NOT USE EXCESSIVE PRESSURE OR GET TOO CLOSE, as this will damage the face of the brick and the<br />
mortar joint. Mortar joints that are no longer smooth with sharp edges is a clear sign of excessive pressure.<br />
Excessive pressure is used to make cleaning faster; it does not do a better job of cleaning. t<br />
ADV03799
<strong>Bricks</strong> & <strong>Pavers</strong> <strong>Technical</strong> <strong>Manual</strong><br />
Section 1.3. Brick Masonry Construction 1.318<br />
Cleaning of Clay Masonry (continued)<br />
Saturate the Wall Surface<br />
Failure to completely saturate the surface of the wall is in itself a major cause of cleaning stains. Cleaning<br />
solutions containing dissolved mortar particles and acids will be drawn into a dry masonry wall, causing<br />
staining. Furthermore, saturating the surface of the wall keeps the acid solution on the face of the masonry<br />
where the mortar smears are present. It is not true that face saturation weakens the acid and slows the<br />
cleaning.<br />
Water should be trained on the wall until the brick suction is exhausted. The area to be cleaned must be<br />
saturated as well as all brickwork areas below. If the wall appears to be drying on the surface, reapply water<br />
until ready to apply the cleaning solution.<br />
Recommended acid strengths are based on application to a surface saturated wall.<br />
Note: This point must be strictly adhered to for bricks manufactured in Queensland. Their raw materials contain<br />
large amounts of iron oxide and failure to saturate the surface of the wall allows acid solutions to react<br />
with the iron oxide and create severe iron oxide staining. Failure to saturate the surface of the bricks<br />
manufactured in other parts of Australia can also lead to the acid reacting with iron oxide but to a much<br />
lesser degree. This form of staining is known as acid burn and is particularly visible on light coloured<br />
bricks. Acid absorption into bricks can also lead to vanadium and manganese staining. t<br />
ADV03800
<strong>Bricks</strong> & <strong>Pavers</strong> <strong>Technical</strong> <strong>Manual</strong><br />
Section 1.3. Brick Masonry Construction 1.319<br />
Cleaning of Clay Masonry (continued)<br />
Acids – The Basics<br />
The traditional masonry-cleaning chemical is hydrochloric acid, (also known as muriatic acid or spirits of salts).<br />
Its main function is to dissolve the cement in the mortar mix. It has few other uses and in many stain situations<br />
should not be used.<br />
Hydrochloric acid is a corrosive S6 poison and care must be taken when using it. If acid is splashed onto the skin<br />
it should be immediately swabbed with clean water, or more effectively, with a solution of bicarbonate of soda<br />
in water, which will neutralise the acid.<br />
The recommended acid strength for light coloured clay bricks is 1 part acid to 20 parts water and for other bricks<br />
is 1 part acid to 10 parts water. Acid takes time to dissolve the cement and should be left on for 4-6 minutes (or<br />
longer if needed) before washing off. After washing a solution of 15 g per litre of washing soda or 24 g per litre<br />
of sodium bicarbonate should be sprayed on to neutralise any remaining acid. Excess hydrochloric acid will<br />
eventually evaporate from the brickwork, however, it is likely to cause staining of the bricks and damage to<br />
built-in components. Other acids such as sulfuric acid or nitric acid will not evaporate and are not used in<br />
brick cleaning.<br />
Note: The recommended strength must be strictly adhered to. <strong>Bricks</strong> manufactured in Queensland may contain<br />
large amounts of iron oxide and the use of acid solutions stronger than 1 part acid to 20 parts water can<br />
dissolve these particles and create iron oxide staining. For light coloured bricks manufactured elsewhere<br />
the use of solutions stronger than 1 part acid to 20 parts water can lead to acid burn.<br />
Proprietary masonry cleaning solutions containing a mixture of acids are available. If used, the manufacturer’s<br />
recommendations must be strictly adhered to. Excessive and incorrect use of some proprietary cleaning solutions<br />
has in the past, produced very bad staining. t<br />
ADV03801
<strong>Bricks</strong> & <strong>Pavers</strong> <strong>Technical</strong> <strong>Manual</strong><br />
Section 1.3. Brick Masonry Construction 1.320<br />
Cleaning of Clay Masonry (continued)<br />
Safety Precautions<br />
All masonry-cleaning acids are dangerous. Acids that do not dissolve cement as quickly as hydrochloric acid are<br />
not necessarily safer and can be very much more dangerous to human health. To avoid personal injury:<br />
• Wear goggles, gloves and protective clothing.<br />
• Always pour acids into water – this avoids splashes of highly concentrated acid onto the operator.<br />
• If splashed onto the body, wash with clean water and if possible, neutralise with a mixture of bicarbonate<br />
of soda and water.<br />
• The manufacturer’s instructions and safety precautions must be strictly adhered to if proprietary cleaning<br />
products are used. ■<br />
ADV03802
1.4<br />
Clay Brick Property Tables
<strong>Bricks</strong> & <strong>Pavers</strong> <strong>Technical</strong> <strong>Manual</strong><br />
Section 1.4 Clay Brick Property Tables<br />
Escura ® Smooth Face Brown Choc Tan Cinnamon Cream Flame Red Hemp Jute<br />
Nevada<br />
Cream<br />
Work size (mm) 230x110x76 230x110x76 230x110x76 230x110x76 230x110x76 230x110x76 230x110x76 230x110x76<br />
Dimensional category DW1 DW1 DW1 DW1 DW1 DW1 DW1 DW1<br />
Perforation (%) 15<br />
Strengths of masonry (MPa)<br />
– Characteristic compressive strength (f’m) M3* mortar (GP) >6.6 >5.4 >5.4 >6.6 >5.4 >6.6 >5.4 >5.4<br />
– Characteristic compressive strength (f’m) M4* mortar (EXP) >7.0 >5.8 >5.8 >7.0 >5.8 >7.0 >5.8 >5.8<br />
Co-efficient of growth ‘em’ (mm/m/15yrs) 9.0 >5.8 >7.0 >5.8 >7.0 >7.0 >9.0<br />
Co-efficient of growth ‘em’ (mm/m/15yrs)
<strong>Bricks</strong> & <strong>Pavers</strong> <strong>Technical</strong> <strong>Manual</strong><br />
Section 1.4 Clay Brick Property Tables<br />
Escura ® – Smooth Face Slimline Brown Cream Red<br />
Work size (mm) 230x110x50 230x110x50 230x110x50<br />
Dimensional category DW1 DW1 DW1<br />
Perforation (%) 30 30 30<br />
Ave unit weight (kg) 2 2 2<br />
Approx number per m2 70 70 70<br />
Wall surface density (kg/m2 ) 200 200 200<br />
Characteristic unconfined compressive strength of the unit (f’uc) MPa >22 >22 >22<br />
Strengths of masonry (MPa)<br />
– Characteristic compressive strength (f’m) M3* mortar (GP) >6.6 >6.6 >6.6<br />
– Characteristic compressive strength (f’m) M4* mortar (EXP) >7.0 >7.0 >7.0<br />
Co-efficient of growth ‘em’ (mm/m/15yrs) 5.4 >5.4 >5.4 >6.6 >5.4 >6.6 >6.6<br />
– Characteristic compressive strength (f’m) M4* mortar (EXP) >7.0 >7.0 >5.8 >5.8 >5.8 >7.0 >5.8 >7.0 >7.0<br />
Co-efficient of growth ‘em’ (mm/m/15yrs)
<strong>Bricks</strong> & <strong>Pavers</strong> <strong>Technical</strong> <strong>Manual</strong><br />
Section 1.4 Clay Brick Property Tables<br />
Typical data for all other <strong>Boral</strong> face bricks can be found<br />
using the Reference Guides on the following pages. Look<br />
up your required product by Brick Name (page 1.404) or<br />
Range Name (page 1.405), and match the code to the<br />
corresponding Property Table Legend on page 1.406.<br />
For typical data relating to <strong>Boral</strong> clay pavers, refer to<br />
Section 2.4 – Paver Property Tables – page 2.401.<br />
Escura ® – Pressed Cream Red<br />
Work size (mm) 230x110x76 230x110x76<br />
Dimensional category DW1 DW1<br />
Perforation (%) Frog Frog<br />
Ave unit weight (kg) 4.1 4.1<br />
Approx number per m2 49 49<br />
Wall surface density (kg/m2 ) 240 240<br />
Characteristic unconfined compressive strength of the unit (f’uc) MPa >22 >22<br />
Strengths of masonry (MPa)<br />
– Characteristic compressive strength (f’m) M3* mortar (GP) >6.6 >6.6<br />
– Characteristic compressive strength (f’m) M4* mortar (EXP) >7.0 >7.0<br />
Co-efficient of growth ‘em’ (mm/m/15yrs) 15 >15 >15<br />
Strengths of masonry (MPa)<br />
– Characteristic compressive strength (f’m) M3* mortar (GP) 5.2 5.2 5.2 5.2<br />
– Characteristic compressive strength (f’m) M4* mortar (EXP) 5.6 5.6 5.6 5.6<br />
Co-efficient of growth ‘em’ (mm/m/15yrs)
<strong>Bricks</strong> & <strong>Pavers</strong> <strong>Technical</strong> <strong>Manual</strong><br />
Section 1.4 Clay Brick Property Tables<br />
LEGEND – Listed Alphabetically by Brick Name<br />
1.404<br />
Range Name Brick Name Code<br />
REVIVE Red Texture – No Arris M<br />
REVIVE Red Texture – Smooth Arris M<br />
ELAN Ripponlea C<br />
OASIS Riverclay K<br />
WOODSTOCK Rose K<br />
OASIS Rose Cove J<br />
WOODSTOCK Rose Double Height L<br />
ELAN Rouge A<br />
HORIZON NSW Rubellite J<br />
OASIS Sable J<br />
HORIZON VIC Sandalwood B<br />
WOODSTOCK Sandhurst M<br />
WOODSTOCK Sandstone Gold K<br />
WOODSTOCK Sandstone Gold Double Height L<br />
HORIZON NSW Sandy Bay H<br />
HORIZON VIC Sandy Beach C<br />
WOODSTOCK Settler G<br />
HORIZON VIC Sienna C<br />
OASIS Sirius Cove J<br />
NUVO Slate K<br />
NUVO Soft Suede G<br />
OASIS Sorrell K<br />
HORIZON QLD St George K<br />
OASIS Stonewash K<br />
OASIS Stonewash Double Height L<br />
NUVO Storm G<br />
HORIZON VIC Sunburst G<br />
WOODSTOCK Sydney Town G<br />
HORIZON VIC Tanami C<br />
OASIS Tundra J<br />
NUVO Vanilla G<br />
NUVO Victorian Blue D<br />
NUVO Victorian Blue 50mm F<br />
HORIZON QLD Windorah K<br />
HORIZON VIC Windsor C<br />
WOODSTOCK Winter Gold K<br />
WOODSTOCK Winter Gold Double Height L<br />
Range Name Brick Name Code<br />
WOODSTOCK Kingsley Double Height L<br />
HORIZON VIC Kurrajong A<br />
ELAN La Mesa C<br />
ELAN La Mesa 50mm E<br />
ELAN Labassa C<br />
ELAN Labassa 50mm E<br />
HORIZON VIC Lachlan A<br />
WOODSTOCK Latrobe K<br />
WOODSTOCK Latrobe Double Height L<br />
HORIZON NSW Leura I<br />
WOODSTOCK Lexington K<br />
WOODSTOCK Lexington Double Height L<br />
OASIS Limestone Hue J<br />
HORIZON NSW Lindeman J<br />
OASIS Linden M<br />
HORIZON QLD Longreach K<br />
NUVO Mangrove G<br />
HORIZON NSW Megalong H<br />
NUVO Merlot D<br />
NUVO Mist G<br />
HORIZON VIC Mocha A<br />
ELAN Mocha 50mm E<br />
NUVO Moss G<br />
WOODSTOCK Mowbray K<br />
WOODSTOCK Mowbray Double Height L<br />
HORIZON NSW Murray River H<br />
OASIS Nelson Cove J<br />
HORIZON VIC Old Woodville C<br />
ELAN Opal Blush N<br />
OASIS Opal Cove J<br />
HORIZON VIC Orient A<br />
NUVO Panama K<br />
HORIZON NSW Pewter Sands M<br />
WOODSTOCK Port Phillip G<br />
WOODSTOCK Potters Gold K<br />
WOODSTOCK Potters Gold Double Height L<br />
ELAN Raheen C<br />
ELAN Rattan C<br />
HORIZON NSW Red Cove H<br />
Range Name Brick Name Code<br />
WOODSTOCK Colonial G<br />
HORIZON VIC Colony Rose G<br />
OASIS Coral Mist J<br />
HORIZON NSW Coral Sands M<br />
OASIS Coralstone K<br />
WOODSTOCK Country Rose M<br />
REVIVE Cream Rockface G<br />
REVIVE Cream Texture G<br />
WOODSTOCK Crestwood M<br />
HORIZON NSW Delta Sands M<br />
OASIS Desert Sage J<br />
NUVO Domino D<br />
WOODSTOCK Drysdale M<br />
ELAN Duchess C<br />
WOODSTOCK Dusk M<br />
HORIZON VIC Eldorado G<br />
HORIZON VIC Ember Glow C<br />
NUVO Espresso D<br />
NUVO Eucalypt K<br />
WOODSTOCK Eureka G<br />
ELAN Florentine Limestone N<br />
WOODSTOCK Fresco M<br />
HORIZON QLD Girraween K<br />
HORIZON NSW Graphite J<br />
ELAN Grey Nuance C<br />
ELAN Grey Nuance 50mm E<br />
HORIZON VIC Gypsy Rose C<br />
OASIS Haze J<br />
OASIS Hendra K<br />
WOODSTOCK Heritage G<br />
WOODSTOCK Hillview M<br />
HORIZON VIC Historic Red G<br />
WOODSTOCK Honeycombe M<br />
HORIZON VIC Ironbark A<br />
NUVO Ivory K<br />
HORIZON NSW Jarosite J<br />
HORIZON VIC Jarrah A<br />
HORIZON VIC Kimberley C<br />
WOODSTOCK Kingsley K<br />
Range Name Brick Name Code<br />
NUVO Adobe K<br />
HORIZON NSW Alabaster J<br />
NUVO Alloy K<br />
OASIS Alpine K<br />
HORIZON VIC Amber Blaze C<br />
ELAN NSW Amber Blaze C<br />
ELAN Amber Blaze 50mm E<br />
HORIZON NSW Amethyst J<br />
HORIZON NSW Antique Cream J<br />
HORIZON NSW Antique Grey J<br />
HORIZON NSW Antique Natural J<br />
HORIZON NSW Antique Pink J<br />
HORIZON VIC Argyle C<br />
HORIZON NSW Arnhem Sands M<br />
OASIS Ascot K<br />
NUVO Bamboo K<br />
OASIS Bantry Cove J<br />
OASIS Beach K<br />
OASIS Beach Double Height L<br />
HORIZON VIC Beaumonde C<br />
WOODSTOCK Bentley K<br />
WOODSTOCK Bentley Double Height L<br />
HORIZON VIC Berwick Rustic C<br />
OASIS Bianca K<br />
OASIS Bisque K<br />
OASIS Bisque Double Height L<br />
HORIZON NSW Blackheath H<br />
NUVO Blue Rio K<br />
NUVO Boulder G<br />
HORIZON VIC Brown Terrain A<br />
HORIZON VIC Brushwood C<br />
OASIS Cameo J<br />
WOODSTOCK Cascade M<br />
NUVO Chestnut K<br />
NUVO Chino G<br />
OASIS Classic Limestone Hue J<br />
ELAN Cleveland C<br />
ELAN Cleveland 50mm E<br />
NUVO Coco G<br />
ADV03806
<strong>Bricks</strong> & <strong>Pavers</strong> <strong>Technical</strong> <strong>Manual</strong><br />
Section 1.4 Clay Brick Property Tables<br />
LEGEND – Listed Alphabetically by Range Name<br />
Range Name Brick Name Code<br />
REVIVE Cream Rockface G<br />
REVIVE Cream Texture G<br />
REVIVE Red Texture – No Arris M<br />
REVIVE Red Texture – Smooth Arris M<br />
Range Name Brick Name Code<br />
HORIZON QLD Girraween K<br />
HORIZON QLD Longreach K<br />
HORIZON QLD St George K<br />
HORIZON QLD Windorah K<br />
WOODSTOCK Bentley K<br />
WOODSTOCK Bentley Double Height L<br />
WOODSTOCK Cascade M<br />
WOODSTOCK Colonial G<br />
WOODSTOCK Country Rose M<br />
WOODSTOCK Crestwood M<br />
WOODSTOCK Drysdale M<br />
WOODSTOCK Dusk M<br />
WOODSTOCK Eureka G<br />
WOODSTOCK Fresco M<br />
WOODSTOCK Heritage G<br />
WOODSTOCK Hillview M<br />
WOODSTOCK Honeycombe M<br />
WOODSTOCK Kingsley K<br />
WOODSTOCK Kingsley Double Height L<br />
WOODSTOCK Latrobe K<br />
WOODSTOCK Latrobe Double Height L<br />
WOODSTOCK Lexington K<br />
WOODSTOCK Lexington Double Height L<br />
WOODSTOCK Mowbray K<br />
WOODSTOCK Mowbray Double Height L<br />
WOODSTOCK Port Phillip G<br />
WOODSTOCK Potters Gold K<br />
WOODSTOCK Potters Gold Double Height L<br />
WOODSTOCK Rose K<br />
WOODSTOCK Rose Double Height L<br />
WOODSTOCK Sandhurst M<br />
WOODSTOCK Sandstone Gold K<br />
WOODSTOCK Sandstone Gold Double Height L<br />
WOODSTOCK Settler G<br />
WOODSTOCK Sydney Town G<br />
WOODSTOCK Winter Gold K<br />
WOODSTOCK Winter Gold Double Height L<br />
Range Name Brick Name Code<br />
NUVO Eucalypt K<br />
NUVO Ivory K<br />
NUVO Mangrove G<br />
NUVO Merlot D<br />
NUVO Mist G<br />
NUVO Moss G<br />
NUVO Panama K<br />
NUVO Slate K<br />
NUVO Soft Suede G<br />
NUVO Storm G<br />
NUVO Vanilla G<br />
NUVO Victorian Blue D<br />
NUVO Victorian Blue 50mm F<br />
HORIZON VIC Amber Blaze C<br />
HORIZON VIC Argyle C<br />
HORIZON VIC Beaumonde C<br />
HORIZON VIC Berwick Rustic C<br />
HORIZON VIC Brown Terrain A<br />
HORIZON VIC Brushwood C<br />
HORIZON VIC Colony Rose G<br />
HORIZON VIC Eldorado G<br />
HORIZON VIC Ember Glow C<br />
HORIZON VIC Gypsy Rose C<br />
HORIZON VIC Historic Red G<br />
HORIZON VIC Ironbark A<br />
HORIZON VIC Jarrah A<br />
HORIZON VIC Kimberley C<br />
HORIZON VIC Kurrajong A<br />
HORIZON VIC Lachlan A<br />
HORIZON VIC Mocha A<br />
HORIZON VIC Old Woodville C<br />
HORIZON VIC Orient A<br />
HORIZON VIC Sandalwood B<br />
HORIZON VIC Sandy Beach C<br />
HORIZON VIC Sienna C<br />
HORIZON VIC Sunburst G<br />
HORIZON VIC Tanami C<br />
HORIZON VIC Windsor C<br />
Range Name Brick Name Code<br />
ELAN Amber Blaze (NSW) C<br />
ELAN Amber Blaze 50mm E<br />
ELAN Cleveland C<br />
ELAN Cleveland 50mm E<br />
ELAN Duchess C<br />
ELAN Florentine Limestone N<br />
ELAN Grey Nuance C<br />
ELAN Grey Nuance 50mm E<br />
ELAN La Mesa C<br />
ELAN La Mesa 50mm E<br />
ELAN Labassa C<br />
ELAN Labassa 50mm E<br />
ELAN Mocha 50mm E<br />
ELAN Opal Blush N<br />
ELAN Raheen C<br />
ELAN Rattan C<br />
ELAN Ripponlea C<br />
ELAN Rouge A<br />
1.405<br />
OASIS Alpine K<br />
OASIS Ascot K<br />
OASIS Bantry Cove J<br />
OASIS Beach K<br />
OASIS Beach Double Height L<br />
OASIS Bianca K<br />
OASIS Bisque K<br />
OASIS Bisque Double Height L<br />
OASIS Cameo J<br />
OASIS Classic Limestone Hue J<br />
OASIS Coral Mist J<br />
OASIS Coralstone K<br />
OASIS Desert Sage J<br />
OASIS Haze J<br />
OASIS Hendra K<br />
OASIS Limestone Hue J<br />
OASIS Linden M<br />
OASIS Nelson Cove J<br />
OASIS Opal Cove J<br />
OASIS Riverclay K<br />
OASIS Rose Cove J<br />
OASIS Sable J<br />
OASIS Sirius Cove J<br />
OASIS Sorrell K<br />
OASIS Stonewash K<br />
OASIS Stonewash Double Height L<br />
OASIS Tundra J<br />
NUVO Adobe K<br />
NUVO Alloy K<br />
NUVO Bamboo K<br />
NUVO Blue Rio K<br />
NUVO Boulder G<br />
NUVO Chestnut K<br />
NUVO Chino G<br />
NUVO Coco G<br />
NUVO Domino D<br />
NUVO Espresso D<br />
HORIZON NSW Alabaster J<br />
HORIZON NSW Amethyst J<br />
HORIZON NSW Antique Cream J<br />
HORIZON NSW Antique Grey J<br />
HORIZON NSW Antique Natural J<br />
HORIZON NSW Antique Pink J<br />
HORIZON NSW Arnhem Sands M<br />
HORIZON NSW Blackheath H<br />
HORIZON NSW Coral Sands M<br />
HORIZON NSW Delta Sands M<br />
HORIZON NSW Graphite J<br />
HORIZON NSW Jarosite J<br />
HORIZON NSW Leura I<br />
HORIZON NSW Lindeman J<br />
HORIZON NSW Megalong H<br />
HORIZON NSW Murray River H<br />
HORIZON NSW Pewter Sands M<br />
HORIZON NSW Red Cove H<br />
HORIZON NSW Rubellite J<br />
HORIZON NSW Sandy Bay H<br />
ADV03807
<strong>Bricks</strong> & <strong>Pavers</strong> <strong>Technical</strong> <strong>Manual</strong><br />
Section 1.4 Clay Brick Property Tables<br />
For the product & range name relating to the reference codes shown below refer to the following alphabetical legend<br />
Legend<br />
A B C D E F G<br />
Work size (mm) 230x110x76 230x110x76 230x110x76 230x110x76 230x110x50 230x110x50 230x110x76<br />
Dimensional category DW1 DW1 DW1 DW1 DW1 DW1 DW1<br />
Perforation (%) 15<br />
Strengths of masonry (MPa)<br />
– Characteristic compressive strength (f’m) M3* mortar (GP) >6.6 >6.6 >8.5 >6.6 >5.1 >6.6 >5.4<br />
– Characteristic compressive strength (f’m) M4* mortar (EXP) >7.0 >7.0 >9.0 >7.0 >5.4 >7.0 >5.8<br />
Co-efficient of growth ‘em’ (mm/m/15yrs) 5.4<br />
– Characteristic compressive strength (f’m) M4* mortar (EXP) >7.0 >7.0 >7.0 >4.7 >5.9 >6.4 >5.8<br />
Co-efficient of growth ‘em’ (mm/m/15yrs)
<strong>Bricks</strong> & <strong>Pavers</strong> <strong>Technical</strong> <strong>Manual</strong><br />
Section 1.4 Clay Brick Property Tables<br />
1.407<br />
<strong>Boral</strong> <strong>Bricks</strong> Blends<br />
Brand Blend Name Blend Mix Ratio<br />
Horizon Brighton Sands 1Coral Sands/1Delta Sands 50% / 50%<br />
Horizon Capes Lagoon 2Sandy Bay/1Murray River 66% / 33%<br />
Horizon Carrington 2Pink/1Cream/1Natural 50% / 25% / 25%<br />
Horizon Castlemaine 1Pink/1Cream/1Natural/1Grey 25% / 25% 25% / 25%<br />
Horizon Chalcedony 2Rubellite/1Jarosite/1Graphite 50% / 25% / 25%<br />
Horizon Copeland 2Cream/1Grey 66% / 33%<br />
Horizon Echo Point 1Sandy Bay/1Red Cove/1Murray River 33% / 33% / 33%<br />
Horizon Galena 2Jarosite/1Graphite 66% / 33%<br />
Horizon Georges Basin 1Sandy Bay/1Red Cove 50% / 50%<br />
Horizon Hawkesbury 1Pink/1Cream 50% / 50%<br />
Horizon Hunter 2Pink/1Cream/1Grey 50% / 25% / 25%<br />
Horizon Manning 3Pink/1Natural 75% / 25%<br />
Horizon Outback 5Windorah/1St George 83% / 17%<br />
Horizon Patterson 3Cream/1Natural 75% / 25%<br />
Horizon Reef 1Coral Sands/1Pewter Sands/1Delta 33% / 33% / 33%<br />
Oasis Barclay 1Sorrell/1Alpine/1Riverclay 33% / 33% / 33%<br />
Oasis Bendemeer 1Linden/1Albion 50% / 50%<br />
Oasis Grange 1Hendra/1Ascot 50% / 50%<br />
Oasis Raffia 5Sorrell/1Alpine 85% / 15%<br />
Oasis Sandstone Blush 5Cameo/2Limestone Hue 70% / 30%<br />
Oasis Tambo 5Alpine/1Sorrell 85% / 15%<br />
Woodstock Apsley 1Sandhurst/1Drysdale/1Hillview/1Crestwood 25% / 25% 25% / 25%<br />
Woodstock Bakehouse Gold 1Lexington /1Potters Gold/1Sandstone Gold 33% / 33% / 33%<br />
Woodstock Barweave 1Lexington /2 Mowbray 33% / 66%<br />
Woodstock Boyd 1Country Rose/1Cascade 50% / 50%<br />
Woodstock Brunswick 5Mowbray/1Kingsley 85% / 15%<br />
Woodstock Carbrook 4Bentley/1Kingsley 80% / 20%<br />
Woodstock Clarence 1Honeycombe/1Dusk 50% / 50%<br />
Woodstock Daintree 1Sandhurst/1Crestwood 50% / 50%<br />
Woodstock Diggers Gold 1Potters Gold/1Sandstone Gold/1Winter Gold 33% / 33% / 33%<br />
Woodstock Dustwood 5Lexington/1Potters Gold 85% / 15%<br />
Woodstock Glenayr 1Sandhurst/1Drysdale 50% / 50%<br />
Woodstock Hastings 1Honeycombe/1Dusk/1Cascade 33% / 33% / 33%<br />
Woodstock Highland 5Sandstone Gold/1Winter Gold 85% / 15%<br />
Woodstock Homestead Gold 1Potters Gold/1Sandstone Gold 50% / 50%<br />
Woodstock Macleay 1Honeycombe/1Cascade 50% / 50%<br />
Woodstock Mt Cotton 2Bentley/2Mowbray/1Kingsley 40% / 40% / 20%<br />
Woodstock Rywood 5Winter Gold/1Sandstone Gold 85% / 15%<br />
Woodstock Stockmans 1Sandhurst/1Crestwood/2Hillview 25% / 25% / 50%<br />
Woodstock Wickham 1Bentley/1Mowbray 50% / 50%<br />
Woodstock Wilson 1Dusk/1Country Rose/1Cascade 33% / 33% / 33%<br />
Woodstock Woodland 1Sandhurst/1Drysdale/1Crestwood 33% / 33% / 33%<br />
ADV03809
2 <strong>Pavers</strong><br />
2. <strong>Pavers</strong>
2.1<br />
Paver Properties
<strong>Bricks</strong> & <strong>Pavers</strong> <strong>Technical</strong> <strong>Manual</strong><br />
Section 2.1 Paver Properties 2.101<br />
Section 2.1 relates to the properties of pavers made to meet the requirements of Australian Standard AS4455 Part<br />
2 <strong>Pavers</strong> and Flags. This information is provided as a guide only to the properties of interest to a pavement designer<br />
or layer and does not constitute a recommendation for any type of pavement or any technique for paving. Typical<br />
properties for individual pavers can be found on the data sheets.<br />
Paver Dimensions<br />
<strong>Pavers</strong> can be made in any shape that tessellates but for manufacturing reasons they are usually restricted to<br />
rectangles or squares. Rectangular pavers are usually made so that two laid together with a 2-5 mm gap in<br />
between, form a square. AS4455.2 differentiates between pavers and flags in that a paver has a plan area less<br />
than 0.08 m2 (i.e. less than 280 mm x 280 mm square). <strong>Pavers</strong> being smaller than flags allow changing of levels more<br />
easily. <strong>Pavers</strong> are also easier to cut than flags to fit complex geometries such as tight re-entrant angles or curves.<br />
<strong>Pavers</strong> can be any size; however, the common work size has plan dimensions of 230 mm long x 115 wide. This size<br />
was chosen for the practical reason that pavers tend to be made in the same plants as bricks and the manufacturing<br />
machinery is designed for this size. Commonly pavers are made in 40 mm, 50 mm and 65 mm heights and because<br />
flexible pavements rely on pavers interlocking and sharing forces, a minimum thickness is required for different<br />
applications. Manufacturers specify the work size of the pavers they sell.<br />
Clay paver sizes vary when they are fired but over and undersized units average each other out when blended<br />
properly during laying. Paver dimensions are measured by dry stacking 20 units, measuring the total length and<br />
comparing that measurement to twenty times the work size.<br />
<strong>Pavers</strong> are classified according to how much they deviate from twenty times the work size.<br />
• Dimensional Category, DPA1 means, for typical pavers, the height and width will differ by less than 50 mm<br />
from twenty times the work size and the length will differ less than 60 mm.<br />
• Dimensional Category, DPA2 means, for typical pavers, the height and width will differ by less than 40 mm<br />
from twenty times the work size and the length will differ less than 50 mm.<br />
• Dimensional Category, DP0 means there are no requirements. This is usually reserved for non-standard pavers<br />
that have been rumbled or otherwise distorted in manufacture for aesthetic reasons.<br />
DPO pavers are reserved for residential pathways. DPA1 and DPA2 pavers are specified in applications requiring<br />
tighter tolerances to share loads more effectively. This is specifically those areas where there is a higher volume of<br />
traffic or heavier loads. ■<br />
ADV2101
<strong>Bricks</strong> & <strong>Pavers</strong> <strong>Technical</strong> <strong>Manual</strong><br />
Section 2.1 Paver Properties 2.102<br />
Paving Strength<br />
Minimum Breaking Load<br />
The most important strength for pavers is their resistance to breaking under a bending load. This is because pavers<br />
are mainly supported from below and they are loaded from above. Bend strength is measured according to<br />
AS4456.5, where a load is applied across the middle of a paver, supported across its width 25 mm in from both<br />
ends. The test imitates the extreme case of the possible field loading, where there is no support from the sides and<br />
the bedding course has failed.<br />
<strong>Pavers</strong> in any one batch have a range of strengths that would usually follow a normal distribution. Normal practice<br />
has been to use the Minimum Breaking Load in pavement design. This is the lowest breaking load found when<br />
measuring 10 samples.<br />
Compressive Strength of <strong>Pavers</strong><br />
Paver compressive strength is measured by individually crushing 10 pavers in the same way it is for bricks. This<br />
gives the compressive strength of each paver and the mean compressive strength of the lot. A factor can be applied<br />
to eliminate the test constraints to give the unconfined compressive strength of each paver, which by further<br />
mathematical treatment can give the Characteristic Unconfined Compressive Strength. While the compressive<br />
strength is critical in masonry design, it is almost never relevant in pavement design. ■<br />
ADV2102
<strong>Bricks</strong> & <strong>Pavers</strong> <strong>Technical</strong> <strong>Manual</strong><br />
Section 2.1 Paver Properties 2.103<br />
Durability<br />
Salt attack is the most common durability problem. Salt can be absorbed into pavers in the form of a solution. As<br />
the water evaporates, the salt is drawn towards the outside face. The evaporating water leaves the solution supersaturated<br />
so salt crystals begin to form. The salt crystals grow in the pores just below the surface and depending<br />
on the texture of the paver, the amount of salt, the rate of drying and the temperature, the salt may fill the pores,<br />
exerting very high pressures on the matrix. The energy in the constrained salt crystal is large, and when a sufficient<br />
number of constrained salt crystals of large enough size are present, the energy is converted to new surface energy<br />
and movement, i.e. it ‘pops’ a piece of the outer surface off, and salt attack has begun.<br />
<strong>Pavers</strong> are assessed according to AS/NZS4456.10 Resistance to Salt Attack and classed into grades. In summary<br />
the grades of paver can be used as follows:<br />
• General Purpose Grade (GP)<br />
Suitable for use in all pavements not requiring Exposure Grade pavers.<br />
• Exposure Grade (EXP)<br />
Suitable for use: around salt water pools; within 100 metres of a non-surf coast; within 1 kilometre of a surf coast;<br />
and in contact with aggressive soils or environments. Exposure grade pavers can also be used in GP applications.<br />
<strong>Boral</strong> provides pavers in both EXP and GP grades.<br />
Freeze-thaw is an uncommon durability problem in Australia, affecting only alpine areas. As water freezes it<br />
expands and if sufficient pressure is generated, pieces break off. Freeze-thaw resistance is determined according<br />
to an ASTM test, which is done mainly on pavers exported to Northern Asia. Although failure is due to a constrained<br />
particle in both cases, the mechanism is different and pavers that pass the salt attack test do not necessarily pass<br />
the freeze thaw test and vice versa. Should freeze-thaw resistant pavers be needed, contact your <strong>Boral</strong> sales<br />
representative so they can nominate those available. ■<br />
Slip Resistance<br />
The slip resistance of a pavement is obviously important. AS/NZS 4586:1999 Appendix A. Slip Resistance<br />
Classification of New Pedestrian Surface Materials: Wet Pendulum Test Method is used to determine paver slip/<br />
skid resistance. The test simulates a rubber soled shoe on a wet pavement. A classification of ‘W’ (low contribution<br />
of the paver to the risk of slipping when wet) is the minimum requirement for pavers, the only other acceptable<br />
classification is ‘V’ (very low contribution of the paver to the risk of slipping when wet). ■<br />
ADV2103
<strong>Bricks</strong> & <strong>Pavers</strong> <strong>Technical</strong> <strong>Manual</strong><br />
Section 2.1 Paver Properties 2.104<br />
Abrasion Resistance<br />
The abrasion resistance gives an indication of the paver’s ability to withstand wear. AS/NZS 4456.9:1997<br />
Determining Abrasion Resistance is used for testing the abrasion resistance of clay pavers. The test consists of<br />
fixing pavers over holes in the side of a rotating box filled with ball bearings. The test was designed to simulate the<br />
action of high-heeled (stiletto) shoes on pavers, which is known to be highly aggressive because of the high point<br />
loads. Abrasion resistance is only required for public area pavements and the Mean Abrasion Resistance required<br />
depends on the volume of traffic. ■<br />
Moisture Expansion<br />
Clay products expand over time as they absorb water into their structure. The expansion is not uniform and one<br />
quarter of the expansion occurs in the first six months, one half in the first two years and three-quarters in the first<br />
5 years. The Characteristic Expansion is estimated from an accelerated test and expressed as a coefficient of<br />
expansion (em). For <strong>Boral</strong> pavers the characteristic expansion is usually between 0.8 and 1.2 mm/m. Moisture<br />
expansion is taken up in the gaps between pavers in flexible pavements however, in rigid pavements (including<br />
copers around pools) stresses are usually relieved by creep in the adhesive and it is essential the correct adhesive<br />
is used. Reducing the residual moisture expansion by storing the pavers in ambient or moist atmosphere is known<br />
as ‘grassing’ the pavers. For pavers with a high moisture expansion this should be considered if using the pavers for<br />
rigid pavements where there are opposite movements in concrete shrinkage and paver expansion. ■<br />
Efflorescence<br />
<strong>Pavers</strong> may contain soluble salts that come to the surface when the paver dries. The source of the soluble salts is<br />
the raw materials used in the production process.<br />
Paver efflorescence is usually white but there is a special form of efflorescence (known as vanadium staining) that<br />
is coloured yellow, green or reddish-brown and is therefore particularly visible on light coloured pavers.<br />
<strong>Boral</strong> pavers have little to no efflorescence and paver efflorescence should not be confused with the efflorescence<br />
that is seen on pavements in some areas after laying. This form of efflorescence mainly comes from the subgrade<br />
or the base course materials used in the construction process. Frequently efflorescence comes from poorly graded<br />
bedding sand not acting as a capillary break, allowing salt laden water to be drawn up from below. ■<br />
ADV2104
<strong>Bricks</strong> & <strong>Pavers</strong> <strong>Technical</strong> <strong>Manual</strong><br />
Section 2.1 Paver Properties 2.105<br />
Pitting due to Lime<br />
If paver making raw materials contain particles of calcium carbonate, these will be converted into quicklime in the<br />
kiln. Water subsequently combines with the quicklime to form hydrated lime and in the process it expands. If lime<br />
particles are sufficiently large and sufficiently near the surface they ‘pop’ off a piece of the paver, leaving a<br />
generally circular pit with a white spot in the bottom.<br />
<strong>Boral</strong> pavers rarely show lime pitting. ■<br />
Cold Water Absorption<br />
While pavers absorb water and the joints in segmental pavements allow some water to pass through the pavement,<br />
these surfaces are usually classed as ‘impermeable’ in landscape design. Some special pavers are made to allow<br />
water to drain through but such permeable pavers are uncommon in Australia. Most permeable pavements are<br />
designed to allow water to penetrate through the gaps between pavers not through the paver.<br />
The amount of water that a paver can absorb is measured by the 24 hour cold-water absorption (CWA) test. The<br />
results of water absorption tests are of use to the paver manufacturer for quality assurance but are rarely of any<br />
value to anyone else. With proper drainage of the base course and attention to levels, pavers should not look<br />
continually wet in a pavement, regardless of the CWA. Sealing pavers with silicones, siliconates, urethanes,<br />
polyesters or acrylics may lower the CWA or seal the surface giving a lower test result. Sealing can be done at the<br />
manufacturing stage but the benefit to the user is hard to quantify. Sealing can give a false result in a salt attack or<br />
freeze thaw test and is specifically banned by some test methods. Sealing after the pavers are laid is generally not<br />
advised as only the top surface is sealed and water rising from below will generally bring up salts, to be deposited<br />
under the coating. If this happens it cannot be rectified in most cases. Where it is expected that grease and oil may<br />
be dropped on paving then sealing will make it easier to keep the pavement clean. Remember, no coating lasts for<br />
ever and some coatings darken over time. ■<br />
ADV2105
2.2 Pavement Design
<strong>Bricks</strong> & <strong>Pavers</strong> <strong>Technical</strong> <strong>Manual</strong><br />
Section 2.2 Pavement Design<br />
2.201<br />
This section contains recommendations for typical pavement systems. Local experience may support departures<br />
from these recommendations where satisfactory in-situ performance has been demonstrated over a period of time.<br />
The recommendations are not applicable for pavements on poorly drained sites and sites classified as highly<br />
reactive clay sites, extremely reactive clay sites or problem sites according to AS2870.1; engineering design is<br />
required for such sites. While rigid pavements are described below and some minor recommendations are made,<br />
both rigid pavements and water permeable pavements are beyond the scope of this manual.<br />
Pavement Types<br />
<strong>Pavers</strong> are used to make segmental pavements. Segmental pavements are divided into two major sub-groups,<br />
flexible and rigid. A rigid pavement relies on having a rigid layer (usually a concrete slab) to distribute the imposed<br />
loads to the subgrade, a flexible pavement does not. Pavements can be further sub-divided on their use.<br />
1. Pedestrian traffic only<br />
2. Pedestrian traffic and light vehicles (axle loads less than 3 tonnes)<br />
3. Pedestrian traffic and commercial vehicles (axle loads greater than 3 tonnes)<br />
4. Primarily vehicular traffic<br />
Flexible Pavements are constructed in layers; subgrade, base course, bedding course and surface course. In<br />
situations where heavy vehicular traffic is expected or the subgrade is of marginal strength, an additional layer, the<br />
sub-base, may be inserted between the subgrade and the base course. On rare occasions, where the subgrade is<br />
strong rock and it is sufficiently level, the bedding course may be laid directly on the subgrade.<br />
Rigid Pavements are also constructed in layers; subgrade, rigid base course, bedding course and a surface course.<br />
The bedding course is omitted in some situations where the pavers are adhered directly to the rigid course. Rigid<br />
pavements become more common as loads increase and are usually not constructed to carry only pedestrian traffic.<br />
In some parts of Australia a significant proportion of domestic driveways are rigid segmental pavements and this<br />
trend is growing elsewhere. The decision to use a flexible or rigid pavement depends on specific site conditions and<br />
a comparative cost analysis. <strong>Boral</strong> does not recommend rigid pavements over flexible pavements or one system of<br />
rigid paving over another. Rigid pavements will not be discussed in detail in this manual. t<br />
ADV2201
<strong>Bricks</strong> & <strong>Pavers</strong> <strong>Technical</strong> <strong>Manual</strong><br />
Section 2.2 Pavement Design<br />
Pavement Types (continued)<br />
2.202<br />
• The ‘Pedestrian traffic only’ category is typically residential paths and hard landscaped areas, paths in public<br />
gardens and parks, pedestrian areas around buildings such as offices, schools, etc. and pedestrian areas<br />
around entertainment or sporting facilities. These pavements are usually closed to all vehicles.<br />
• The ‘Pedestrian traffic and occasional light vehicles’ category is typically residential driveways and areas<br />
around buildings, used occasionally by light vans and utilities for deliveries or for access for maintenance work.<br />
Heavier vehicles such as those picking up full rubbish skips or delivering concrete, bricks, etc are likely to cause<br />
some damage.<br />
• The ‘Pedestrian traffic and commercial vehicles’ category is typically public malls, crossovers, driveways that<br />
carry occasional commercial vehicles and lightly trafficked streets. Commercial vehicles are classified as those<br />
having a gross weight equal to or greater than 3 tonnes.<br />
• The ‘Primarily vehicular traffic’ category is roads. Few segmentally paved roads are now constructed however;<br />
this form of construction was widespread in the past as can be seen with many surviving examples of cobbled<br />
streets. Detailed engineering design is required for roads, due to the high superimposed loads and the<br />
consequence of failure. Construction of segmentally paved roads is generally the same as for asphalt roads up<br />
to the bedding course. The bedding course and surface course construction is then generally the same as for<br />
other pavements but 65 mm or thicker pavers are used and a herringbone laying pattern is mandatory. ■<br />
ADV2202
<strong>Bricks</strong> & <strong>Pavers</strong> <strong>Technical</strong> <strong>Manual</strong><br />
Section 2.2 Pavement Design<br />
2.203<br />
Description of Layers and Basic Engineering Design<br />
Requirements<br />
Figure 1. Typical elements of flexible pavements<br />
Concrete<br />
Edge Strip<br />
Subgrade<br />
Jointing sand<br />
Clay pavers<br />
Surface course<br />
Bedding course<br />
Base course<br />
Subgrade<br />
The subgrade is the natural ground or constructed soil which supports the loads transmitted by the overlying<br />
pavement layers. The natural ground may be rock or soil that is sufficiently strong for the purpose. Where the<br />
natural soil is not strong enough to bear the loads, the natural soil or imported fill may be compacted to produce the<br />
desired strength. Compaction is the most cost effective measure for increasing the strength of soil.<br />
Soil strength is assessed using the Californian Bearing Ratio (CBR) test (AS 1289.6.1. Parts 1, 2 or 3). The CBR test<br />
measures the shear strength of the soil and the result is expressed as a percentage of the shear strength of a<br />
sample composed of Californian marble (or limestone) chips. The most common CBR test is the remoulded<br />
laboratory test where the sample may be tested immediately after compaction or it may be soaked to fill all pores<br />
with water before testing. Soaking represents the worst case in the field i.e. a saturated subgrade. The decision to<br />
use a soaked or un-soaked CBR in the design should reflect the expected in-service conditions.<br />
For pavements carrying only pedestrian and occasional light vehicular traffic it is usual practice to estimate the CBR<br />
from soil classification data or local knowledge. Measuring the CBR is usually restricted to situations where the<br />
potential savings from using lower grade materials or thinner layers outweighs the cost of the test.<br />
If the materials in the subgrade have a soaked CBR value less than 5% and are to carry vehicular traffic, stabilisation<br />
with cement, lime, ground granulated blast-furnace slag or the use of geotextiles or lean mix concrete should be<br />
considered.<br />
The top of the finished subgrade is calculated from the top of the pavement (minus the thickness of the pavers,<br />
bedding course and base course). The level of the top of the pavement is governed by aesthetics and practical<br />
matters such as positioning of damp-proof courses and physical termite barriers in adjacent masonry, step heights,<br />
and whether the pavement is to be flush with, above or below the surrounding landscape, etc. ■<br />
ADV2203
<strong>Bricks</strong> & <strong>Pavers</strong> <strong>Technical</strong> <strong>Manual</strong><br />
Section 2.2 Pavement Design<br />
Base Course<br />
2.204<br />
The base course is a constructed layer which transfers the loads from the surface course to the subgrade. The<br />
thickness of the base course varies depending on the subgrade classification and the intended use. For pavements<br />
carrying loads in excess of domestic driveways, the base course should be designed on sound engineering<br />
principles. The thickness of the base course increases for lower CBR subgrades but thinner base courses may be<br />
used where the base course materials are stabilised or where a geotextile is used appropriately.<br />
The base course in a flexible pavement is made from granular material compacted in layers. Particularly for large<br />
projects, where traffic volumes and loads are expected to be high, field density testing should be used to verify that<br />
the required soil density has been achieved.<br />
The material used in the base course should conform to local requirements for base course materials for asphalt<br />
roads. Base course materials are natural or manufactured granular material which interlocks on compaction, usually<br />
being a nominal 20 mm aggregate with less than 6% clay. The top surface of the base course should be close-knit<br />
to prevent bedding course materials falling down leaving cavities under the pavers, but where such material is not<br />
available or where subgrade movement is likely a geotextile should be used.<br />
Table 1. Typical Grading for Base Course Materials<br />
Sieve Size Percent Passing<br />
26.5 mm 100<br />
19.0 mm 95-100<br />
13.2 mm 78-92<br />
9.5 mm 63-83<br />
4.75 mm 44-64<br />
2.36 mm 30-50<br />
425 µm 14-22<br />
75 µm 4-12<br />
Stabilisation of base course materials is recommended in areas of very high rainfall, as stabilised materials are less<br />
susceptible to the effects of saturation.<br />
When resurfacing existing pavements, if the pavement is stable, then no further preparation is required as the<br />
existing pavement can usually be regarded as a suitable subgrade and base course.<br />
In rigid pavements the base course is usually a nominal 20 MPa reinforced concrete slab designed to AS 3600<br />
Concrete Structures requirements. ■<br />
ADV2204
<strong>Bricks</strong> & <strong>Pavers</strong> <strong>Technical</strong> <strong>Manual</strong><br />
Section 2.2 Pavement Design<br />
Bedding Course<br />
2.205<br />
The bedding course passes the loads from the pavers to the base course. It also acts as a capillary break to prevent<br />
(possibly salt laden) moisture being drawn up to the pavers and in the laying process allows pavers to settle more<br />
or less so that pavers of slightly different heights finish with the top surfaces aligned. Bedding course material<br />
should be well-graded, coarse, sharp sand (typical of a concrete sand) with less than 3% clay. Bricklaying sands,<br />
loams and fatty sands do not consolidate as do sharp sands and because of their fines content, do not provide a<br />
capillary break and so should not be used. Manufactured sands with excessive fines, (eg crusher dust or quarry<br />
fines), should not be used as they do not provide a capillary break and this results in efflorescence caused by saline<br />
ground waters.<br />
Table 2. Typical Grading for Bedding Course Materials<br />
Sieve Size Percent Passing<br />
9.5 mm 100<br />
4.75 mm 90-100<br />
2.36 mm 75-100<br />
1.18 mm 55-90<br />
600 µm 35-59<br />
300 µm 8-30<br />
150 µm s 0-10<br />
75 µm 0-5<br />
The bedding course should be screeded to a nominal 25-30 mm thickness and the base course should be finished<br />
accurately enough not to need to vary this thickness. However in the event of poor workmanship, the bedding<br />
course may be varied but it must never be less than 20 mm thick and should not be more than 40 mm thick. It is<br />
most important that the bedding course is of uniform thickness.<br />
Geotextiles may be laid on top of the base course under the bedding sand. They act as a separation layer and are<br />
particularly effective in preventing the loss of bedding sand due to cracking in the base course caused by movement<br />
in subgrades. Should there be a loss of bedding sand, the pavers may subside and possibly chip or break. Geotextiles<br />
may also be effective as a drainage layer.<br />
Stabilisation of bedding course materials should be considered where the pavement is constructed on a steep<br />
slope. Stabilisation reduces the likelihood of bedding course material being flushed out leaving cavities under the<br />
pavement. In most other instances stabilisation of the base course is not recommended as it increases the cost for<br />
no commensurate benefit and in some instances leads to increased efflorescence on the laid pavement. ■<br />
ADV2205
<strong>Bricks</strong> & <strong>Pavers</strong> <strong>Technical</strong> <strong>Manual</strong><br />
Section 2.2 Pavement Design<br />
Surface Course<br />
2.206<br />
The surface course comprises pavers. Paver thickness should be specified for all pavements. Paver durability grade<br />
should be specified only where salt attack or freeze/thaw is an issue. Paver bend strength should be specified for<br />
pavements carrying vehicles. Paver abrasion resistance should be specified for pavers in public area pavements (i.e.<br />
those with high levels of pedestrian traffic). Paver slip resistance should be specified for pavers in public areas.<br />
Table 3. Recommended Specifications for Clay <strong>Pavers</strong><br />
Application<br />
Minimum<br />
thickness<br />
(mm)<br />
Minimum<br />
characteristic<br />
breaking load (kN)<br />
Dimensional<br />
deviation<br />
Slip resistance<br />
classification<br />
Mean abrasion<br />
resistance (cm 2 )<br />
Residential (domestic) pavements<br />
Pedestrian traffic only 40 2 DP0 W N/A<br />
Driveway, light vehicles only 40 3 DPA1 W N/A<br />
Driveway, including commercial<br />
vehicles<br />
Public area pavements<br />
60 5 DPA1 W N/A<br />
Pedestrian traffic only 40 2 DPA1 W Low volume: 7<br />
Pedestrian traffic and light vehicles<br />
(axle loads < 3 tonnes)<br />
Pedestrian traffic and commercial<br />
vehicles (axle loads > 3 tonnes)<br />
Roads<br />
50<br />
60<br />
3<br />
5<br />
DPA2<br />
DPA2<br />
W<br />
W<br />
Medium volume: 5.5<br />
High volume: 3.5<br />
(See Note 1)<br />
General vehicular traffic on minor<br />
or local roads<br />
60 6 DPA2 W<br />
N/A<br />
(See Note 2)<br />
Note 1: Typical low volume pedestrian traffic is up to the level found in schools and public areas of residential<br />
complexes. Typical medium volume pedestrian traffic is found in suburban shopping precincts or sports venues.<br />
Typical high volume pedestrian traffic is found in inner city and major suburban malls and transport hubs (often over<br />
30 000 passes per day).<br />
Note 2: Minor and local roads are those carrying up to 1000 vehicles per day (i.e. excludes collector roads). ■<br />
ADV2206
<strong>Bricks</strong> & <strong>Pavers</strong> <strong>Technical</strong> <strong>Manual</strong><br />
Section 2.2 Pavement Design<br />
Edge Restraints<br />
2.207<br />
Edge restraints are existing structures or constructed features, which are sometimes seen as decorative features<br />
but in reality are of great structural importance. Edge restraints as the name suggests constrain lateral movement<br />
of pavers at the edge of the pavement. This combined with sand in the joints is critical in producing rotational and<br />
horizontal interlock. Failure of the edge restraint will lead to failure of the pavement. As the design load and traffic<br />
volume increase the edge restraint should be upgraded. For pavements carrying pedestrian traffic only, pavers on<br />
edge, timber on edge or mortar haunching of the edges is usually sufficient. For a driveway carrying commercial<br />
vehicles a reinforced concrete strip (beam or slab) forms a suitable edge restraint. (Such strips may be hidden by the<br />
edge pavers being bonded to it or it may be left visible as part of the pavement’s aesthetic). Concrete restraints<br />
should meet AS3600 requirements and should be constructed from ready mixed concrete with a minimum strength<br />
of 20 MPa. ■<br />
Figure 2. Typical edge restraint systems<br />
Paver on edge (or treated timber) set in mortar or concrete.<br />
Hardwood on edge supported by hardwood stakes<br />
Mortar haunch<br />
ADV2207
<strong>Bricks</strong> & <strong>Pavers</strong> <strong>Technical</strong> <strong>Manual</strong><br />
Section 2.2 Pavement Design<br />
Figure 2. Typical edge restraint systems (continued)<br />
Preformed concrete<br />
Concrete poured on site (driveways mainly).<br />
Concrete poured on site (driveways mainly)<br />
Figure 3. Using an existing structure as an edge restraint<br />
150mm<br />
Damp Proof Course<br />
Mortar Bed<br />
The edge paver is set on a mortar bed (shown as grey).<br />
2.208<br />
Jointing sand<br />
Clay pavers<br />
Surface course<br />
Bedding course<br />
Base course<br />
Subgrade<br />
ADV2208
<strong>Bricks</strong> & <strong>Pavers</strong> <strong>Technical</strong> <strong>Manual</strong><br />
Section 2.2 Pavement Design<br />
Drainage<br />
2.209<br />
The most common reason for the failure of pavements is inadequate sub-surface drainage. So where it is necessary,<br />
during construction install sufficient stormwater and sub-soil drainage to prevent the accumulation of water in any<br />
area excavated for the pavement. All trenches should be backfilled to ensure they perform similarly to the<br />
undisturbed ground around them. However, even where this is done effectively, after completion of the paving,<br />
water pooling on the surface may penetrate through the pavement and cause softening of the subgrade. Although<br />
pavers do not allow large amounts of water to drain through them the joints do allow water to penetrate,<br />
particularly in the early life of the pavement.<br />
Water infiltration due to poor drainage may also cause the growth of moss, mould, fungus and lichen which looks<br />
unsightly and may be slippery. Pavement design should ensure that surface water is directed to collection points<br />
where it can be discharged safely.<br />
Figure 4. Typical drainage systems in flexible pavement<br />
PVC Pipe<br />
Clay pavers<br />
Surface course<br />
Bedding course<br />
Base course<br />
Subgrade<br />
Figure 4 shows a typical drainage arrangement in a sloping flexible pavement at a concrete, edge restraint or<br />
transverse beam. A slotted PVC pipe with a filter sock, drains water from the base course to the side and out of the<br />
pavement. A smaller PVC pipe with a filter cap drains water from the bedding course out of the pavement. ■<br />
ADV2209
<strong>Bricks</strong> & <strong>Pavers</strong> <strong>Technical</strong> <strong>Manual</strong><br />
Section 2.2 Pavement Design<br />
Paver Laying Patterns<br />
2.210<br />
Various paving patterns can be formed and some of these are illustrated on the next page. For pavements carrying<br />
vehicles herringbone pattern (either 90˚ or 45˚) should be specified. For pavements carrying pedestrians only, the<br />
choice of pattern is a matter of personal preference. It must be remembered that some patterns require significantly<br />
more cutting than others and this may affect the cost of laying. For example, tracery pattern is developed from a<br />
unit consisting of four whole pavers and a half a paver whereas running pattern only has part pavers at each end of<br />
the pavement.<br />
When specifying the pattern it is best to remember the function, setting and size of the pavement. Pavements laid<br />
on a granular bedding course, carrying vehicular traffic must use a herringbone pattern. Herringbone patterns have<br />
contiguous pavers over the shortest distance of any pattern (i.e. no straight joint extends for more than 1½ pavers)<br />
and therefore resist shunting best. Simple patterns should always be used in small spaces while large spaces can<br />
use patterns with large repeat distances to advantage.<br />
A major advantage of pavers over flags is that pavers can be formed into more complex patterns. By using different<br />
laying patterns and colours, many effects can be created. As with a carpet the effect can be a solid uniform colour,<br />
a mottle producing an overall colour impression, random coloured highlights, a polychrome patchwork, geometric<br />
patterns, etc. Some designers have used pavers to create pictures on a grand scale. Effects may also be much more<br />
subtle such as using regular arrays of similar coloured pavers to produce textural effects. t<br />
ADV2210
<strong>Bricks</strong> & <strong>Pavers</strong> <strong>Technical</strong> <strong>Manual</strong><br />
Section 2.2 Pavement Design<br />
Paver Laying Patterns (continued)<br />
45° Herringbone 90° Herringbone Zig Zag<br />
Basket weave 2 x 2 Basket weave 2 x 1 45° Basket weave<br />
(¾ Basket weave or Basket weave variant)<br />
Stack Stretcher or running Off-set stretcher or running<br />
45° Stack Mixed stack and running Tracery<br />
Off-set stack<br />
2.211<br />
ADV2211
<strong>Bricks</strong> & <strong>Pavers</strong> <strong>Technical</strong> <strong>Manual</strong><br />
Section 2.2 Pavement Design<br />
Joints Between <strong>Pavers</strong><br />
2.212<br />
<strong>Pavers</strong> laid on bedding sand should have gaps of 2-3 mm left between them for the jointing sand. To be effective,<br />
gaps should never be less than 1 mm nor more than 5 mm. After laying the pavers jointing sand is spread over and<br />
broomed into the gaps. A plate vibrator is then passed over the surface, levelling the pavers and vibrating sand<br />
down into the gaps while settling and compressing the pavers into the bedding sand. At the same time some of the<br />
bedding sand is forced up into the joints.<br />
Sand filled joints are essential as the sand interlocks the pavers so that imposed forces are shared between<br />
adjacent pavers. Interlock is of three types; vertical, horizontal and rotational.<br />
• Vertical interlock ensures a paver does not slide down relative to its neighbours by sharing loads between<br />
neighbouring pavers.<br />
• Rotational interlock ensures that a paver loaded at one side does not rotate. <strong>Pavers</strong> need space to rotate so edge<br />
restraints and proper filling of the joints prevent movement that would otherwise allow pavers to rotate. The sand<br />
moves the point at which the pavers would rotate (i.e. the hinge) to the top of the joint and prevents the top edges<br />
of adjacent pavers coming into contact. <strong>Pavers</strong> contacting their neighbours are very likely to chip when loaded.<br />
• Horizontal interlock is provided by the laying pattern. Wheeled traffic pushes the pavers and where straight<br />
lines occur in the laying pattern the pavers can move past each other (this is called shunting). Where the<br />
pavement carries wheeled traffic a herringbone pattern (either 45˚ or 90˚) is recommended. There seems to be<br />
no difference in the performance of the different styles of herringbone or in orientation relative to the traffic.<br />
For pavements only carrying pedestrian traffic, horizontal interlock is required to a much lower degree and a<br />
wide range of decorative laying patterns may be used. Gaps between pavers that are too narrow (
<strong>Bricks</strong> & <strong>Pavers</strong> <strong>Technical</strong> <strong>Manual</strong><br />
Section 2.2 Pavement Design<br />
Tolerance on Course Levels<br />
Subgrade should be finished to +0, -25 mm of the design level.<br />
2.213<br />
Where the pavers are laid on bedding sand the base course (and where used the sub-base) should be finished to<br />
+0, -25 mm except where it abuts existing structures where +0, -10 mm is appropriate and in any 3 metre length the<br />
surface should not be higher or lower than 10 mm from the average (taking into account any falls).<br />
Bedding courses should be finished to the thickness required to bring the surface course to the design level, taking<br />
into account the thickness of the surface course and compaction as the pavers are vibrated to settle them into the<br />
bedding course. This will depend on the bedding course materials and its moisture content. Where local experience<br />
is not available the required thickness should be established by trial.<br />
Surface courses should be finished to ±6 mm of the design level, except where it abuts a kerb or drainage<br />
channel where it should be finished to +6, -0 mm. In all cases there should be less than 3 mm difference between<br />
adjoining pavers. ■<br />
Crossfalls<br />
A 1:60 crossfall is normally satisfactory for drainage. Crossfalls should not be less than 1% (1:100) unless specific<br />
measures have been taken to ensure water does not build up on the pavement e.g. covering it with a roof. The<br />
general rule is that the broader the paved area the greater the crossfall. Crossfalls are sometimes restricted by the<br />
site’s landform and some pooling of water in heavy rain may be acceptable. ■<br />
ADV2213
<strong>Bricks</strong> & <strong>Pavers</strong> <strong>Technical</strong> <strong>Manual</strong><br />
Section 2.2 Pavement Design<br />
Steep Gradients<br />
2.214<br />
Even on the best constructed pavements, water running over or dripping or splashing onto steeply sloping<br />
pavements may wash out the jointing sand, particularly early in the life of the pavement. Localised rutting (usually<br />
from inadequate subgrade or base course preparation), loss of bedding sand (usually from poor sub-surface<br />
drainage), and localised movement (usually at or near poor edge restraints) can also lead to loss of the jointing sand.<br />
For pavements carrying wheeled traffic (such as driveways) this is a particular problem as it may result in the<br />
pavers chipping or shunting (moving laterally). To avoid shunting and chipping pavers, maintaining the jointing sand<br />
and using a restraint system are essential. Rigid pavement with the pavers adhered directly to a concrete slab and<br />
the joints filled with mortar or grout has been used successfully as an alternative.<br />
Maintaining the jointing sand is as simple as sweeping more sand over when needed. Proprietary jointing sands are<br />
available containing cement, mineral and polymeric binders. The additives bond the sand together and this has<br />
been shown to be beneficial on steeply sloping pavements because the sand does not wash out as easily, but<br />
beware of potential staining problems. Use only as directed by the manufacturer and construct a small trial area to<br />
test if there are any problems in use.<br />
The principle of restraint systems is to subdivide the pavement into (typically 5 metre) sections restrained at the<br />
periphery. Because the section length is short the potential for movement is reduced. A typical restraint system<br />
uses a plain concrete transverse beam. Concrete beams should be designed to AS3600 requirements and be<br />
constructed from ready mixed concrete with a minimum strength of 20 MPa.<br />
Figure 5. Typical plain concrete transverse beam for a steep single residence driveway<br />
PVC Pipe<br />
Clay pavers<br />
Surface course<br />
Bedding course<br />
Base course<br />
Subgrade<br />
The depth of the concrete beam depends on the soil type. Typically for a single residence driveway on clay, the<br />
beam is 250 – 300 mm deep. The pavers are adhered to the beam typically with a 1:4 cement to sand mortar with<br />
additives to enhance bonding or the pavers are pressed into wet low slump concrete. An exposed plain or exposed<br />
aggregate concrete beam can be used instead of having pavers bonded to it. ■<br />
ADV2214
2.3 Pavement Construction
<strong>Bricks</strong> & <strong>Pavers</strong> <strong>Technical</strong> <strong>Manual</strong><br />
Section 2.3 Pavement Construction<br />
2.301<br />
Each job is different and the descriptions below may or may not be suitable in any particular instance. The steps in<br />
the construction of the pavement may vary in their order. For example, edge restraints for a heavy duty driveway<br />
will usually be constructed between the preparation of the subgrade and the base course but may be constructed<br />
between the preparation of the base course and the bedding course. However, for light duty driveways edge<br />
restraints may be put in after preparation of the base course and for domestic pathways professional paviours<br />
almost always put in edge restraints after laying the surface course. For an amateur it is best to construct the edge<br />
restraints early.<br />
Paver Estimator<br />
<strong>Pavers</strong> can be different sizes and shapes and pavements can be any size and shape. The more complex the<br />
pavement’s shape usually the more cutting and therefore the more pavers required. For regular pavements,<br />
determine the number of pavers for the length of the pavement and the number of rows for the width of the<br />
pavement. Half pavers should be calculated as a whole paver, due to site wastage. Multiply the number of pavers<br />
by the number of rows to give the number of pavers for the pavement. Saw cutting pavers is usual practice but that<br />
does not mean two pieces will be obtained from any paver. For complex pavements, draw the pavement accurately<br />
to scale on squared paper and work out the approximate area and multiply this area by the factor in the relevant<br />
paver property table. Always allow some excess pavers for site wastage. ■<br />
Subgrade Preparation<br />
The subgrade should be prepared to the design profile. The prepared area should be wider than the pavement,<br />
extending beyond the rear edge of the edge restraints or up to existing structures. Unsuitable material including the<br />
topsoil, roots and other organic matter should be removed from the subgrade. Proof rolling may be used to identify<br />
areas of unstable subgrade, which should be removed or compacted to achieve the desired strength. Observing a<br />
loaded truck slowly crossing the area will generally show areas of unstable subgrade. The subgrade should be<br />
excavated, compacted, trimmed or built up with compacted base course material as necessary to within +0mm, -25<br />
mm of the design level.<br />
The most common reason for the failure of pavements is inadequate subsurface drainage and so, where necessary,<br />
install sufficient stormwater and subsoil drainage to prevent the accumulation of water in any area excavated for<br />
the pavement. Water accumulating in this location could reduce the stability of the whole structure or bring<br />
efflorescing salts to the pavement surface and detract from appearance or durability. All trenches should be<br />
backfilled to ensure they perform similarly to the undisturbed ground around them. ■<br />
ADV2301
<strong>Bricks</strong> & <strong>Pavers</strong> <strong>Technical</strong> <strong>Manual</strong><br />
Section 2.3 Pavement Construction<br />
Base course Preparation for Flexible Pavements<br />
2.302<br />
The base course is made from granular material (usually called road base) compacted in layers. The thickness of the<br />
layers and the number of passes of the compactor should be matched to the capability of the compaction device.<br />
For large machinery it is usual to compact in 150 mm layers but for a vibrating plate compactor layers less than 100<br />
mm are usual. The number of passes of the compactor varies but for a vibrating plate compactor three passes is<br />
usually satisfactory for domestic pavements carrying only pedestrian traffic. In typical domestic pavements 100<br />
mm of compacted base course is usually sufficient.<br />
The base course should be screeded and compacted to the design profile (+0, -25 mm except where it abuts existing<br />
structures where +0, -10 mm is appropriate). The top surface should be closed after compaction but if holes are<br />
apparent because of the nature of the material used, fines can be screeded on and compacted into the surface to<br />
fill any voids.<br />
Where stabilised base course is required, in most circumstances it is best to purchase it ready mixed, just before<br />
use. Cement stabilised materials may set if not used within a few hours and if a delay is expected slower setting<br />
materials and retarders are available. Mixing on site should only be done in a concrete mixer as it is difficult to get<br />
an even distribution of the binder by hand mixing. ■<br />
Edge Restraints for Flexible Pavements<br />
All edges of all pavements must be restrained to prevent lateral movement of the pavers and consequent loss of<br />
interlock. The size and strength of the restraints must be adequate to support the intended loads. The shape and<br />
style of the restraints must prevent the escape of bedding course material from beneath the pavers and must be<br />
aesthetically pleasing.<br />
Edge restraints should be formed before compacting adjacent pavement layers. However, adjacent layers may first<br />
be compacted then some compacted material may be carefully cut and removed for the haunch1 if the haunch<br />
material is initially fluid e.g. concrete or mortar. Concrete and mortar haunching, and concrete beams and slabs<br />
should be mature before vibration and compaction of the surface course is undertaken.<br />
As a minimum, haunching must continue down to the underside of the bedding course. As haunching is usually a<br />
barrier to water movement, drainage should be provided through the haunching to prevent the build up of water in<br />
the bedding course. ■<br />
1 A ‘haunch’ is that part of an arch between the crown and the springing line, in effect, a half an arch. Because of<br />
its shape, in paving ‘haunch’ has come to mean the material supporting the side of the pavement. ‘Haunching’ is<br />
an alternate form of ‘haunch’.<br />
ADV2302
<strong>Bricks</strong> & <strong>Pavers</strong> <strong>Technical</strong> <strong>Manual</strong><br />
Section 2.3 Pavement Construction<br />
Bedding Course for Flexible Pavements<br />
2.303<br />
Bedding course material should be well-graded, coarse, sharp sand (typical of a concrete sand). Bricklaying sands,<br />
loams and fatty sands do not consolidate as do sharp sands and because of their fines content do not provide a<br />
capillary break and thus should not be used. Manufactured sands with excessive fines, (crusher dust), should not be<br />
used as they do not provide a capillary break and this results in efflorescence on the pavers.<br />
The moisture content of the bedding course should be uniform, so stockpiled material should be covered before<br />
use.<br />
Waterproof membranes beneath the bedding course are not advised except where the paving is completely under<br />
cover. A waterproof membrane will prevent salt laden water being drawn up to the surface limiting efflorescence<br />
but it is unnecessary with a properly chosen base course material. The reason for not using a waterproof membrane<br />
is that it traps water causing the base course to become saturated and this can lead to pumping, the loss of fines<br />
and the eventual breakdown of the pavement. Where the surface of the base course is not densely compacted or<br />
where movement may occur in the sub-grade opening up cracks in the base course (i.e. where bedding sand may be<br />
lost), the use of geotextiles is usually beneficial. Geotextiles are tough, polymeric felts with holes small enough to<br />
prevent the sand penetrating. Other cloths are generally not suitable.<br />
Cement-stabilised bedding sands are not recommended where well-graded bedding sand is available. If poor<br />
quality bedding sands must be used very lean cement stabilisation may be appropriate. Adding two to four per cent<br />
cement (by volume) to the bedding sand is usually satisfactory. Where the slope of a pavement exceeds 1:15 cement<br />
stabilising the bedding sand is practical and should prevent water scouring out the sand. For driveways with a<br />
sloping pavement having a length greater than 5 metres, a transverse concrete beam running between edge<br />
restraints should also be used. A capping course of pavers is bonded onto the top surface of the beam and the<br />
pavers, up slope from the beam, are then laid on cement-stabilised sand. (See Section 2.214 for more information<br />
on flexibly paved sloping driveways.)<br />
The bedding course should be screeded to 25 -30 mm thick. The base course should be finished accurately enough<br />
to not need to vary this thickness, however, the bedding course may not be less than 20 mm thick and not more than<br />
40 mm thick. t<br />
ADV2303
<strong>Bricks</strong> & <strong>Pavers</strong> <strong>Technical</strong> <strong>Manual</strong><br />
Section 2.3 Pavement Construction<br />
Bedding Course for Flexible Pavements (continued)<br />
Either of the following installation procedures is acceptable:<br />
2.304<br />
• Spread the material loose and screed to the final level plus an amount to accommodate the reduction in<br />
thickness that will occur when the pavers are vibrated; or,<br />
• Spread the material loose and screed to the final level. Vibrate and compact this sand using the same vibrating<br />
plate compactor as that used for vibrating the pavers. Finally spread and screed a thin layer to form a loose<br />
surface onto which the pavers can be laid.<br />
In either method the sand should be disturbed as little as possible before laying the pavers. Any disturbance may<br />
lead to final surface undulations. Gaps between edge restraints or at the intersection with other pavements should<br />
be sealed to avoid loss of bedding sand.<br />
Screeding is usually done by placing rails (sometimes called trammels) made of pieces of timber or pipe at the right<br />
level and dragging a piece of straight timber or aluminium over them levelling the sand. After removing the rails<br />
there is a depression in the sand and that is usually filled by the paviour trowelling on some sand as the pavers are<br />
laid. Where the edge restraints are in place and sufficiently close together, a screed can be made from a piece of<br />
timber notched to fit within the restraints or a piece cut to fit between the restraints then a second, longer piece of<br />
wood is nailed to the top of the first piece of timber. The timber is drawn along the restraints levelling the sand<br />
between them.<br />
Figure 6. Screeding bedding sand<br />
Screed Bed<br />
Trammel<br />
Edge restraint set to<br />
concrete level<br />
Where the slope of the pavement changes direction, screed to an apex or ‘v’ then flatten the apex with a trowel or<br />
fill and smooth the depression so the directional change is over as many pavers as possible and the height<br />
difference between neighbouring pavers is minimised. ■<br />
ADV2304
<strong>Bricks</strong> & <strong>Pavers</strong> <strong>Technical</strong> <strong>Manual</strong><br />
Section 2.3 Pavement Construction<br />
Paver Storage<br />
2.305<br />
<strong>Pavers</strong> stored on site should be covered and kept off the ground. Saturated pavers may adversely affect the bond<br />
strength in rigid pavements or where pavers are adhered to cross beams.<br />
Store pavers away from where saw cutting of bricks and pavers is being conducted, and away from cement and<br />
other materials which may stain them.<br />
Moving pavers around the site may cause chipping, so excessive movement of packs should be avoided. ■<br />
Blending<br />
Some colour variation is inevitable in clay pavers. Colour variation when poorly handled may lead to unwanted<br />
patches, streaks and bands of colour in the finished pavement. The raw materials for paver making are natural clays<br />
and shales and these vary in colour within any one deposit. Paver makers blend materials to moderate the colour<br />
variation and tightly control the conditions in the kiln but no matter how well made, pavers delivered to site will<br />
have some degree of colour variation.<br />
To minimise colour variation and the visible effects of it, the following is recommended:<br />
• All pavers of the one colour required to complete a pavement should be ordered at the one time;<br />
• All pavers required for the project, but in any case as many packs as will fit, should be delivered at one time<br />
and stored on site;<br />
• <strong>Pavers</strong> should be drawn from as many packs as possible, simultaneously, working down from the corners of<br />
each pack; and,<br />
• Edge pavers of the same colour as the bulk of the pavement should be selected at the same time as those in<br />
the adjacent pavement. Those requiring cutting should then be marked up, cut and positioned. Selecting all<br />
edge pavers separately for cutting may produce an undesirable effect.<br />
<strong>Pavers</strong> are supplied with one face suitable for exposing (i.e. to be seen after laying). On some pavers both faces are<br />
suitable for exposing but they may look different. The paviour should ensure where two sides are different the<br />
pavers are laid to produce the aesthetic required. Two faced pavers that have unwanted marks, chips or cracks on<br />
one face should be turned over, exposing the good face in the pavement. Single sided pavers that have unwanted<br />
marks, chips or cracks on the face or any paver with significant edge damage should be set aside by the paviour (or<br />
labourer) for cutting pieces. <strong>Boral</strong> will not be responsible for replacing pavers with unwanted marks, chips or cracks<br />
that have been laid. ■<br />
ADV2305
<strong>Bricks</strong> & <strong>Pavers</strong> <strong>Technical</strong> <strong>Manual</strong><br />
Section 2.3 Pavement Construction<br />
Laying Practices<br />
2.306<br />
<strong>Pavers</strong> being a regular form are usually laid in regular patterns containing straight lines. These lines are critical to<br />
the look of the pavement and are marked out with stringlines which are used to set out the pavers. Judging the<br />
line(s) to use requires an assessment of the pattern and the site. Where there is a strong central line in the<br />
pavement this is usually critical and a stringline would be placed on that line and set out would be from that line.<br />
Pavements abutting existing structures usually follow their lines and gauging should be done from them. Edges or<br />
ends of pavers are usually aligned with the stringline but in the case of 45˚ herringbone corners are aligned to it.<br />
While experienced paviours gauge by eye it is usual practice to place stringlines at regular intervals (10 rows in<br />
pavements on sand bedding courses) to check the pattern is regular. If the line of the pavers has deviated from the<br />
stringline it is usually necessary to remove a few rows of pavers and relay them making adjustments to the joint<br />
width to return to the correct alignment. Depending on the magnitude of the misalignment, realigning may need the<br />
removal and relaying of three or four rows.<br />
<strong>Pavers</strong> are usually laid from one side or from the centreline. 90˚ herringbone is usually laid from a corner or<br />
sometimes from the centre of one side advancing out in the shape of a triangle. Whole pavers are laid first followed<br />
by part pavers.<br />
<strong>Pavers</strong> on Sand Bedding Courses<br />
<strong>Pavers</strong> must be laid so that there is a joint of 2 to 5 mm between them. <strong>Pavers</strong> should never be butted up against each<br />
other. Where joints are too narrow insufficient sand will fill them and it is likely the pavers will contact each other<br />
which will lead to chipping of corners and edges and may lead to rutting, shunting and the failure of the pavement.<br />
Laying is usually forward from the laid pavers and not from the sand in front. Where laying from the front must be<br />
done the bedding sand should be compacted and only a thin screed layer left loose on top and where possible<br />
boards should be used to minimise the disturbance and prevent the need to re-screed the sand. <strong>Pavers</strong> should be<br />
placed in the correct position without regard to their neighbours, leaving gaps where a full paver will not fit. Small<br />
amounts of sand may be trowelled on to adjust the level if needed. This is particularly the case where two or more<br />
different types of paver are used in the one pavement.<br />
<strong>Pavers</strong> with Mortared Joints<br />
Mortared joints in pavements are usually 10 mm and laying is from the side or front of the pavers. Good brick laying<br />
techniques should be used including laying to stringlines or using levels to ensure pavers are to the required level. It<br />
is usually easier to lay part pavers at the same time as laying whole pavers. Careful mortar preparation, clean<br />
working and fully bedding and filling all joints are important. t<br />
ADV2306
<strong>Bricks</strong> & <strong>Pavers</strong> <strong>Technical</strong> <strong>Manual</strong><br />
Section 2.3 Pavement Construction<br />
Laying Practices (continued)<br />
Laying Part <strong>Pavers</strong><br />
2.307<br />
Whole (and damaged or part) pavers are held over the holes left after laying the whole pavers and the piece<br />
required to fill that hole is marked directly on the paver. Where this is not possible carefully measure the piece<br />
required and transfer the measurements to a paver. Note: Do not forget the gap for the jointing sand. <strong>Pavers</strong> should<br />
always be cut using a masonry saw as this is the only way to get an accurate cut. For small jobs done by nonprofessional<br />
paviours, because of the cost of hiring a masonry saw, masonry wheels or blades on angle grinders<br />
and bolsters are frequently used but the accuracy of the cut suffers. It must be remembered that many pavers are<br />
very dense and may break into many pieces if hit with a bolster. It is always better to have two larger cut pavers<br />
than one whole paver and one small piece. Cut pavers should always be greater than one third of the area of the<br />
paver when cut across the paver or greater than one quarter of the area of the paver when cut diagonally.<br />
For cutting dense hard materials, masonry saw blades without teeth are preferred. For cutting softer materials<br />
toothed masonry saw blades are preferred. Obviously a professional paviour will require two blades if they lay<br />
concrete and clay pavers. Toothed blades used to cut hard pavers usually wear faster than smooth blades.<br />
Laying <strong>Pavers</strong> on Curves and Around Obstacles<br />
The smaller rectangular or square objects are the tighter the curve they can follow. If you do not mind the look of ‘v’<br />
shaped joints, with no gap at the base and a 20 mm gap at the top, standard pavers can form a circle 3.5 metres in<br />
diameter. Few people want such wide ‘v’ shaped joints (which also have to be mortar filled because sand will wash<br />
out) and so it is common practice to cut pavers to suit the curve.<br />
Figure 7:<br />
Curve formed without cutting pavers Curves formed by cutting one or two sides of the pavers.<br />
To minimise cutting some paviours cut only one side of the paver or cut every second paver. If only one side of each<br />
paver is cut, the joints do not point to a common centre so the curve has a skewed appearance. Curves formed of<br />
alternating uncut and double-cut pavers also have an unusual appearance. It is a matter for each individual to<br />
decide if they find the aesthetic acceptable, particularly around tight curves such as manhole covers or trees. t<br />
ADV2307
<strong>Bricks</strong> & <strong>Pavers</strong> <strong>Technical</strong> <strong>Manual</strong><br />
Section 2.3 Pavement Construction<br />
Laying Practices (continued)<br />
Figure 8. Manhole cover detail<br />
2.308<br />
Figure 8 shows a soldier course of double-cut, tapered pavers in a circle around a manhole cover, set in a 45°<br />
herringbone pavement. Note the small pieces of paver needed to maintain the pattern and fit the circular inclusion.<br />
It is almost impossible to eliminate these smaller pieces but judicious use of half pavers will allow an increase in<br />
the size of the smaller cuts giving the pavement greater stability in this area.<br />
Corners in Header Courses<br />
A soldier course or a single or double stretcher course is often used around paving as a border. For corners that are<br />
not right angles a properly cut mitre is essential to avoid an overhang. At right angled corners in a soldier course a<br />
mitred joint is recommended. t<br />
Figure 9. Non-right angle corners<br />
Unmitred 45° angle Mitred 45° angle<br />
Figure 10. Right angle corners in double stretcher course<br />
ADV2308
<strong>Bricks</strong> & <strong>Pavers</strong> <strong>Technical</strong> <strong>Manual</strong><br />
Section 2.3 Pavement Construction<br />
Laying Practices (continued)<br />
Figure 11. Corners in soldier course<br />
Figure 12. Treatment of right angled service covers<br />
2.309<br />
In Figure 12, note on the left hand cover the use of two larger cut pavers in the top, bottom and left hand sides to<br />
replace the one thin sliver in the soldier course as shown on the right hand side. Around both edge courses in the<br />
body of the paving, note the use of half pavers (dark brown) to avoid the use of a small triangular piece at the edge<br />
of the soldier or stretcher course. Small pieces of paver as shown on the right hand side of the right hand cover<br />
should be avoided. This half paver technique should also be used adjacent to borders around any 45° pattern. t<br />
ADV2309
<strong>Bricks</strong> & <strong>Pavers</strong> <strong>Technical</strong> <strong>Manual</strong><br />
Section 2.3 Pavement Construction<br />
Laying Practices (continued)<br />
Figure 13. Treatment of recessed covers<br />
2.310<br />
For recessed covers, pavers should be cut and fitted to maintain the pattern. Small pieces inside the recess are not<br />
a problem as they are restrained by the edge and the pieces are normally glued to the cover. To maintain the pattern<br />
outside the cover it can be necessary to use small pieces of paver. It is usual to remove the bedding sand under<br />
these pieces and replace it with mortar for stability.<br />
Warnings:<br />
1. Cutting pavers produces a very fine dust (becoming a mud when using a proper water cooled masonry saw).<br />
<strong>Pavers</strong> contain crystalline silica and dust from dry cutting is hazardous to your health if breathed in.<br />
2. The residue from cutting forms a hard, solid mud which in sufficient quantities will block drains. It is advisable<br />
to have a container under the drain on a brick saw bench to act as a sediment trap. The sediment should be<br />
removed periodically throughout the cutting and disposed of properly. Allowing this sediment to flow into<br />
drains or water courses attracts a fine in most jurisdictions.<br />
3. The residue from cutting and the spray from the saw can get into the pores of bricks, pavers and other<br />
materials leaving a permanent stain. This should be prevented by careful placement of the saw but should this<br />
happen the only technique known to have been successful in removing the stain from bricks and pavers is to<br />
rub the stain with a firm cloth with a paste of sand blasting grit (glass fragments). This is very time-consuming,<br />
physically hard work and not guaranteed to work. It may harm the bricks or pavers and should always be tried<br />
on a small inconspicuous area first to test the effect. ■<br />
ADV2310
<strong>Bricks</strong> & <strong>Pavers</strong> <strong>Technical</strong> <strong>Manual</strong><br />
Section 2.3 Pavement Construction<br />
Sand Filled Joints<br />
2.311<br />
Joint-filling sand should be spread over the surface of the pavers and swept into the joints. Sand should be dry to<br />
flow into and fill joints effectively. Damp sand should not be used as the joints will not be filled effectively. Sands<br />
containing clay should not be used as they are likely to stain the surface of the pavers.<br />
Commercially prepared stabilised, jointing sands are available and although more costly than bulk sand may be<br />
better in some instances. The manufacturer’s advice should be sought on the proper use of these sands as improper<br />
use may lead to staining of the pavers. ■<br />
Mortar Filled Joints<br />
Mortared joints are now rare in large pavements, however where mortared joints are used they should be finished<br />
as an ‘ironed’ joint. Mortar smears on such pavements will usually require cleaning and the same precautions and<br />
techniques as used to clean bricks apply. Mortar composition must be carefully controlled to achieve good bonding<br />
and prevent excessive shrinkage. ■<br />
Compaction<br />
Compaction is necessary for all pavements laid on sand base courses and should follow laying and joint filling as<br />
soon as possible but should not occur closer than one metre to the unrestrained working edge of the pavement<br />
under construction. No area of paving should be left uncompacted at the completion of the day’s work, apart from<br />
the edge strip of the laying face.<br />
Compaction should be carried out using a vibrating plate compactor with a plan area of not less than 0.25 m2 or a<br />
rubber-rolled mechanical vibrator. Vibrating plate compactors should be fitted with a glider attachment but where<br />
not available the plate may be wrapped in carpet or a carpet square or a sheet of plywood can be laid over the<br />
pavers to protect them from damage during compaction.<br />
The area to be compacted should be swept clean of joint filling sand and then receive at least two passes of the<br />
vibrating plate compactor. The joints should then be topped up by sweeping joint filling sand over the area prior to a<br />
final compaction consisting of at least two more passes of the vibrating plate compactor. Compaction should<br />
continue until the tops of all pavers are in the same plane. No paver should be more than 3 mm out of plane with its<br />
neighbours.<br />
The jointing sand will continue to settle over the ensuing weeks, and should be topped-up by brooming sand over<br />
empty joints until they are filled. Vibration for this topping up is not required. ■<br />
ADV2311
<strong>Bricks</strong> & <strong>Pavers</strong> <strong>Technical</strong> <strong>Manual</strong><br />
Section 2.3 Pavement Construction<br />
Trafficking After Construction<br />
2.312<br />
Flexible pavements may be trafficked immediately after construction depending on the nature and age of the edge<br />
restraints. Where edge restraints are constructed with cement, traffic should be restricted until they gain<br />
sufficient strength. ■<br />
Cleaning<br />
In most cases cleaning pavements after construction is as simple as picking up and sweeping off the sand, paver<br />
pieces etc. In some instances there is mortar to clean up. Cleaning mortar off pavers is best done when fresh as it<br />
is easier and less likely to create problems.<br />
Hosing, vacuuming or blowing of any pavement with sand filled joints is not recommended for the first three months<br />
of its life. Hand brooming is recommended in this time. If jointing sand is removed broom more on to top up the<br />
joints. High pressure water or steam cleaning is not recommended for householders and should only be done by<br />
trained professionals. High pressure water is the basis of a cutting technique, used for cutting stone, glass,<br />
concrete, tiles, pavers, and some metals. Incorrect use of high pressure will damage the face of the pavers. Small,<br />
cheap, high pressure cleaners, capable of exceeding 15 MPa (2200 PSI), are now commonly available and incorrectly<br />
used they will damage pavements.<br />
Clay pavers do not change colour in service. Changes in colour are usually related to the build-up of dirt, coloured<br />
materials on the surface (red wine, tannins, grease, food, tyre marks, etc.), growths (lichen, moss and algae), salts<br />
(efflorescence) or physical damage. Colour change in one area and not another is usually an indicator of the source<br />
of the problem.<br />
All pavements are subject to spillages and soiling and a build-up of dirt and grime. Frequent sweeping and washing<br />
reduces the effect of dirt and grime and maintains the attractiveness of a pavement. Washing with detergents and<br />
liquid household bleach (sodium hypochlorite) will not damage the pavers but remember incorrect use of these<br />
chemicals has severe environmental consequences and in some areas there are penalties for putting them into the<br />
stormwater system.<br />
Where grease or oil (including greasy food) will be spilled on the pavement, such as around barbecues, outside<br />
take-away food shops, around public eating places, driveways, etc., using dark coloured pavers makes the problem<br />
less noticeable. Sealers can be used to prevent or minimise absorption into the pavers and make removal by<br />
washing with detergent easier. Prevention is the only 100% cure but it should be remembered that weathering and<br />
bacterial action will eventually remove the residue once the cause is removed. t<br />
ADV2312
<strong>Bricks</strong> & <strong>Pavers</strong> <strong>Technical</strong> <strong>Manual</strong><br />
Section 2.3 Pavement Construction<br />
Cleaning (continued)<br />
Efflorescence<br />
2.313<br />
This is a powdery deposit of salts (usually white or yellow), often found on the surface of clay pavers after rain. The<br />
source of this stain could be the pavers but almost always it comes from the soil under the pavement, or from<br />
cement (if the soil was stabilised), or both. Dry brushing to remove the efflorescence before washing is<br />
recommended. If efflorescence is wetted, the salts go into solution and are drawn back into the pavers and will<br />
reappear as the pavement dries. Efflorescence will eventually disappear through natural weathering.<br />
White scum<br />
Do not confuse white scum with efflorescence. White scum is a thin white film on the surface of pavers. This film is<br />
invisible when the pavers are wet but shows up as the surface begins to dry. Scum often appears after an<br />
attempted removal of mortar stains or after the sanding of the joints with sand that has a high clay content.<br />
White scum is particularly difficult to remove. Water, detergents or hydrochloric acid often do not have any effect<br />
on it. However scrubbing with a proprietary brick cleaner will often improve the appearance of pavements affected<br />
by this stain.<br />
Dirt and grime<br />
Frequent sweeping and hosing will usually ensure a clean pavement. It this is not enough, washing with a detergent<br />
or a proprietary cleaner may be required.<br />
Vanadium stains<br />
Vanadium salts produce a green or yellow efflorescence which is mainly seen on cream and light coloured clay<br />
pavers. Hydrochloric acid will make these stains much worse and may make them impossible to clean. Vanadium<br />
stains will disappear in time but in most cases they are easy to clean. Mild vanadium stains may be treated with<br />
sodium hypochlorite (household bleach). Spray or brush it on the dry pavers and leave until the stain disappears,<br />
then rinse off. Proprietary mould cleaners containing sodium hypochlorite and sodium hydroxide can be used as<br />
above and have been found very effective. Proprietary brick cleaners may also be effective and should only be used<br />
according to the manufacturer’s instructions. t<br />
ADV2313
<strong>Bricks</strong> & <strong>Pavers</strong> <strong>Technical</strong> <strong>Manual</strong><br />
Section 2.3 Pavement Construction<br />
Cleaning (continued)<br />
Fresh mortar stains<br />
2.314<br />
While the mortar is soft, lightly cover it with damp clean sand. Dune sand is best but it is very important that the<br />
sand has no clay in it. Sweep the sand towards the edge of the pavement. Repeat if needed. Follow this with a light<br />
covering of dry clean sand and sweep towards the edge. Any sticky wet mortar residues that escaped the wet<br />
sanding will be removed by the dry sand. The next day after the pavement has dried, some mortar residue may still<br />
be visible as a faint white film. Smooth pavers may be carefully wiped with a cloth to take off most of the remaining<br />
film but the film will generally weather away if left untouched. Some efflorescence will appear as the pavement<br />
dries but it is not damaging to the pavers. Follow the instructions above to deal with the efflorescence.<br />
Oil and bitumen<br />
These stains usually need two treatments with a commercial emulsifying agent. First, mix the emulsifier with<br />
kerosene to remove the stain. Then clean the kerosene off with the emulsifier mixed only with water. When dealing<br />
with petroleum, asphalt and bituminous emulsion, scrape off the excess material and scrub the surface with<br />
scouring powder and water. Chilling the surface with ice or solid carbon dioxide can cause brittleness in the asphalt<br />
and assist removal.<br />
For petrol or lubricating oil stains, free oil must be mopped up immediately with an absorbent material such as<br />
paper towelling. Wiping should be avoided as it spreads the stain and tends to force the oil into the pavement.<br />
Hardened oil must be scraped off. The area affected should then be covered with a dry absorbent material such as<br />
diatomaceous earth, fine white clay, kaolin or whiting and the procedure repeated until there is no further<br />
improvement. Subsequently use detergent to clean up, and rinse well with clean water.<br />
Food stains and tyre marks<br />
Scrub with a full-strength commercial detergent and rinse well. t<br />
ADV2314
<strong>Bricks</strong> & <strong>Pavers</strong> <strong>Technical</strong> <strong>Manual</strong><br />
Section 2.3 Pavement Construction<br />
Cleaning (continued)<br />
Hardened mortar stains<br />
2.315<br />
In mortar the cement binds the sand particles to each other and to other surfaces. Cleaning starts with breaking<br />
down these bonds and in general this requires the use of hydrochloric acid.<br />
Recommended acid strengths are based on application to a surface saturated paver. The recommended acid<br />
strength for light coloured clay pavers is 1 part acid to 20 parts water and for other pavers is 1 part acid to 10 parts<br />
water. Stronger acid solutions do not work more effectively and will cause staining.<br />
Hydrochloric acid is a corrosive S6 poison and care must be taken when using it. To avoid personal injury:<br />
• Wear goggles, gloves and protective clothing.<br />
• Always pour acids into water – this avoids splashes of highly concentrated acid onto the operator.<br />
• If splashed onto the body, wash with clean water and if possible, neutralise with a mixture of bicarbonate of<br />
soda and water.<br />
Before attempting to clean off mortar, make sure any efflorescence and particularly any vanadium stains are<br />
removed, then using a piece of wood or paver, knock off any mortar lumps.<br />
The next step is to fully saturate the pavers with water. This does not dilute the acid, rather it keeps it on the<br />
surface where the mortar is. Failure to completely saturate the surface of the pavers allows cleaning solutions,<br />
containing dissolved mortar and acids, to be drawn into the pavers, causing staining.<br />
Note: Saturating pavers and using the correct strength of hydrochloric acid solution must be strictly adhered to for<br />
pavers manufactured in Queensland. Their raw materials contain large amounts of iron oxide and failure to saturate<br />
the surface or using strong acid solutions allows acid to react with the iron oxide and create severe iron oxide<br />
staining. Failure to do this with pavers manufactured in other parts of Australia may lead to the acid reacting with<br />
iron oxide but to a much lesser degree. This form of staining is known as acid burn and is particularly visible on light<br />
coloured pavers. Acid absorption into bricks can also lead to vanadium and manganese staining.<br />
Next apply the acid solution with a stiff bristled (not wire) brush and scrub vigorously. Acid takes time to dissolve<br />
the cement and scrubbing may take 4-6 minutes (or longer). Work at an area no larger than one square metre at a<br />
time and as soon as the pavers are clean wash down thoroughly. After washing, a solution of 15 g per litre of<br />
washing soda or 24 g per litre of sodium bicarbonate should be sprayed on to neutralise any remaining acid.<br />
(Continue spraying until no bubbling occurs). Excess hydrochloric acid will eventually evaporate; however, it is likely<br />
to cause staining. Other acids such as sulfuric acid or nitric acid will not evaporate and are not used in cleaning.<br />
High-pressure water jet cleaning is not recommended for pavements with sanded joints as it will remove the sand.<br />
If a high-pressure water jet cleaner is used on pavers, with mortared or grouted joints, be careful not to damage the<br />
pavers. Keep the pressure below 1200 psi (8000 kPa), use a wide fan jet nozzle, keeping it at least 500 mm from the<br />
surface and work at an angle not vertically. t<br />
ADV2315
<strong>Bricks</strong> & <strong>Pavers</strong> <strong>Technical</strong> <strong>Manual</strong><br />
Section 2.3 Pavement Construction<br />
Cleaning (continued)<br />
Fungi, moulds, moss and lichens<br />
2.316<br />
These are common, particularly in shady or damp parts of the pavement. They sometimes appear as localised dark<br />
stains or patches of green, giving a dirty and unsightly appearance.<br />
Alternatively these growths may add to the appearance of the pavement. They will not damage the pavement but<br />
may cause it to become slippery. To remove these growths, vigorously brush the effected area when it is dry. Highpressure<br />
water may also be used following the precautions above. Although the problem may appear to be gone,<br />
the cause is still present and it is recommended that a poison be applied. Copper sulphate solution or sodium<br />
hypochlorite (liquid household bleach) generally work well if used as directed on the container. Proprietary<br />
herbicides and fungicides are available from plant nurseries, however, some of these may discolour the pavement.<br />
Check their effect on a small part of the pavement before proceeding to clean the whole area. Follow the<br />
manufacturer’s directions and avoid nearby garden plants or lawn, especially on the lower side of the paved area<br />
being treated.<br />
Chewing gum<br />
In large areas, wire brushes free from rust should remove the majority of chewing gum. This may require several<br />
attempts and the wire may leave traces of steel on the paver which in time will rust leaving a stain. Careful<br />
application of high-pressure water jets can also be successful. For smaller areas freeze each piece of chewing gum<br />
with a carbon dioxide aerosol or dry ice. The chewing gum can then be chipped off with a scraper. ■<br />
ADV2316
2.4<br />
Clay Paver Property Tables
<strong>Bricks</strong> & <strong>Pavers</strong> <strong>Technical</strong> <strong>Manual</strong><br />
Section 2.4 Clay Paver Property Tables<br />
PAVESCAPE ® SUMMERSET ®<br />
Autumn<br />
Cream<br />
Birch Coffee Morocco Merino Rumba Tan Garnet Onyx Opal Zircon<br />
Work size (mm) 228x113x40 228x113x40 228x113x40 228x113x40 228x113x40 228x113x40 228x113x40 228x113x40 228x113x40 228x113x40 228x113x40<br />
Dimensional category DPA1 DPA1 DPA1 DPA1 DPA1 DPA1 DPA1 DPA1 DPA1 DPA1 DPA1<br />
Ave unit weight (kg) 2.0 2.0 2.0 2.0 2.0 2.0 2.0 2.0 2.0 2.0 2.0<br />
Approx number per m2 38 38 38 38 38 38 38 38 38 38 38<br />
Co-efficient of growth ‘em’ (mm/m/15yrs) 3.5<br />
Mean Abrasion Index (cm3 )
3<br />
Face Brick Range<br />
3. Face Brick Range
4<br />
Engineered Utility Brick Range<br />
4. Engineered Utility<br />
Brick Range
<strong>Bricks</strong> & <strong>Pavers</strong> <strong>Technical</strong> <strong>Manual</strong><br />
Section 4. Product Data Sheet<br />
Standard<br />
Commercial<br />
Common<br />
NSW<br />
TYPICAL PROPERTIES BADGERYS CREEK BRINGELLY KEMPSEY<br />
Dimensions – Work Size (LxWxH – mm) 230x110x76<br />
Dimensional Category DW1<br />
Average Unit Weight (kg) 3.0<br />
Approximate number per m2 49<br />
Lime Pitting Nil to Slight<br />
No. per pack # 320 400<br />
Pack Weight (kg) # 928 1200<br />
Pack Dimensions (LxWxH – mm) # 920x920x880 1150x770x912<br />
Wall Surface Density (kg/m2 ) 182<br />
Characteristic Unconfined Compressive Strength (f’uc MPa) >22 >18<br />
Coefficient of Expansion (mm/m/15 years)
<strong>Bricks</strong> & <strong>Pavers</strong> <strong>Technical</strong> <strong>Manual</strong><br />
Section 4. Product Data Sheet<br />
Standard Commercial Common<br />
FIRE RESISTANCE & SOUND TRANSMISSION FOR TYPICAL WALL APPLICATIONS<br />
Fire Resistance Levels (FRL)<br />
The Building Code (BCA) Section C defines the type and class of buildings and designates three fire resistance levels.<br />
These levels are structural adequacy, integrity and insulation, and are written in the form 60/60/60. Information on how to<br />
calculate these is provided in the Clay Brick and Paver Institute (CBPI) publication, “<strong>Manual</strong> 5: Fire Resistance Levels for<br />
Clay Brick Walls” available at www.thinkbrick.com.au The figures below provide typical wall examples.<br />
Weighted Sound Reduction Index (Rw)<br />
The Rw has two reduction figures to account for high range noise (C) and low range noise (Ctr).<br />
The reduction figures are added to the Rw and are written Rw (C,Ctr).<br />
Note: S = Supported. Indicating moment is passed to a transverse structure such as a concrete slab,<br />
braced roofing trusses, a perpendicular wall, etc.<br />
S<br />
S<br />
S<br />
S<br />
S<br />
S<br />
All masonry walls should be designed by a qualified structural engineer. Variation in colour, texture and size is a natural characteristic of clay products.<br />
© Copyright <strong>Boral</strong> <strong>Bricks</strong> Pty Ltd – all rights reserved 2008. <strong>Boral</strong> <strong>Bricks</strong> Pty Ltd ABN 66 082 448 342.<br />
<strong>Boral</strong> Clay <strong>Bricks</strong> and <strong>Pavers</strong><br />
Phone 13 30 35<br />
Fax 1300 363 035<br />
Email bricks@boral.com.au<br />
www.boral.com.au<br />
S<br />
110mm<br />
110mm<br />
110mm<br />
S<br />
FRL for Insulation 90 minutes<br />
FRL for wall height up to 3.0 metres 90/90/90<br />
FRL for Insulation 240 minutes<br />
FRL for Integrity is the lower of the FRLs<br />
for Insulation or Structural Adequacy<br />
For both leaves equally loaded (±10%)<br />
FRL for Structural Adequacy<br />
– wall height up to 3.3 metres 240 minutes<br />
– wall height up to 4.1 metres 90 minutes<br />
For both leaves unequally loaded (i.e. >10% variance)<br />
FRL for Structural Adequacy<br />
– wall height up to 2.5 metres 240 minutes<br />
– wall height up to 3.0 metres 90 minutes<br />
Sound reduction of a wall consisting of<br />
two leaves 110mm brick with a 50mm cavity<br />
– Rendered both sides Rw + Ctr ≥ 50 & impact attenuation<br />
– Unrendered with 50mm<br />
glass wool insulation with<br />
a density of 11 kg/m3 Rw + Ctr ≥ 50 & impact attenuation<br />
– Unrendered with 50mm<br />
polyester insulation with<br />
a density of 20 kg/m3 Rw + Ctr ≥ 50 & impact attenuation<br />
ADV03813NSW
<strong>Bricks</strong> & <strong>Pavers</strong> <strong>Technical</strong> <strong>Manual</strong><br />
Section 4. Product Data Sheet<br />
Jumbo<br />
Common<br />
NSW<br />
TYPICAL PROPERTIES BADGERYS CREEK BRINGELLY<br />
Dimensions – Work Size (LxWxH – mm) 230x110x119<br />
Dimensional Category DW2<br />
Average Unit Weight (kg) 4.3 4.5<br />
Approximate number per m2 32.5<br />
Lime Pitting Nil to Slight<br />
No. per pack 192 245<br />
Pack Weight (kg) 864 1152<br />
Pack Dimensions (LxWxH – mm) 920x920x880 1150x770x833<br />
Wall Surface Density (kg/m2 ) 180<br />
Characteristic Unconfined Compressive Strength (f’uc MPa) >22<br />
Coefficient of Expansion (mm/m/15 years)
<strong>Bricks</strong> & <strong>Pavers</strong> <strong>Technical</strong> <strong>Manual</strong><br />
Section 4. Product Data Sheet<br />
Jumbo Common<br />
FIRE RESISTANCE & SOUND TRANSMISSION FOR TYPICAL WALL APPLICATIONS<br />
Fire Resistance Levels (FRL)<br />
The Building Code (BCA) Section C defines the type and class of buildings and designates three fire resistance levels.<br />
These levels are structural adequacy, integrity and insulation, and are written in the form 60/60/60. Information on how to<br />
calculate these is provided in the Clay Brick and Paver Institute (CBPI) publication, “<strong>Manual</strong> 5: Fire Resistance Levels for<br />
Clay Brick Walls” available at www.thinkbrick.com.au The figures below provide typical wall examples.<br />
Weighted Sound Reduction Index (Rw)<br />
The Rw has two reduction figures to account for high range noise (C) and low range noise (Ctr).<br />
The reduction figures are added to the Rw and are written Rw (C,Ctr).<br />
Note: S = Supported. Indicating moment is passed to a transverse structure such as a concrete slab,<br />
braced roofing trusses, a perpendicular wall, etc.<br />
S<br />
S<br />
S<br />
S<br />
S<br />
S<br />
All masonry walls should be designed by a qualified structural engineer. Variation in colour, texture and size is a natural characteristic of clay products.<br />
© Copyright <strong>Boral</strong> <strong>Bricks</strong> Pty Ltd – all rights reserved 2008. <strong>Boral</strong> <strong>Bricks</strong> Pty Ltd ABN 66 082 448 342.<br />
<strong>Boral</strong> Clay <strong>Bricks</strong> and <strong>Pavers</strong><br />
Phone 13 30 35<br />
Fax 1300 363 035<br />
Email bricks@boral.com.au<br />
www.boral.com.au<br />
S<br />
110mm<br />
110mm<br />
S<br />
110mm<br />
FRL for Insulation 90 minutes<br />
FRL for wall height up to 3.0 metres 90/90/90<br />
FRL for Insulation 240 minutes<br />
FRL for Integrity is the lower of the FRLs<br />
for Insulation or Structural Adequacy<br />
For both leaves equally loaded (±10%)<br />
FRL for Structural Adequacy<br />
– wall height up to 3.3 metres 240 minutes<br />
– wall height up to 4.1 metres 90 minutes<br />
For both leaves unequally loaded (i.e. >10% variance)<br />
FRL for Structural Adequacy<br />
– wall height up to 2.5 metres 240 minutes<br />
– wall height up to 3.0 metres 90 minutes<br />
Sound reduction of a wall consisting of<br />
two leaves 110mm brick with a 50mm cavity<br />
– Rendered both sides Rw + Ctr ≥ 50 & impact attenuation<br />
– Unrendered with 50mm<br />
glass wool insulation with<br />
a density of 11 kg/m3 Rw + Ctr ≥ 50 & impact attenuation<br />
– Unrendered with 50mm<br />
polyester insulation with<br />
a density of 20 kg/m3 Rw + Ctr ≥ 50 & impact attenuation<br />
ADV03815NSW
<strong>Bricks</strong> & <strong>Pavers</strong> <strong>Technical</strong> <strong>Manual</strong><br />
Section 4. Product Data Sheet<br />
Double<br />
Height<br />
Common<br />
NSW<br />
TYPICAL PROPERTIES BADGERYS CREEK BRINGELLY KEMPSEY<br />
Dimensions – Work Size (LxWxH – mm) 230x110x162<br />
Dimensional Category DW1<br />
Average Unit Weight (kg) 5.7 6.0<br />
Approximate number per m2 24.5<br />
Lime Pitting Nil to Slight<br />
No. per pack 160 172 200<br />
Pack Weight (kg) 992 1100 1200<br />
Pack Dimensions (LxWxH – mm) 920x920x880 935x830x995 1150x972x770<br />
Wall Surface Density (kg/m2 ) 180<br />
Characteristic Unconfined Compressive Strength (f’uc MPa) >22 >18<br />
Coefficient of Expansion (mm/m/15 years)
<strong>Bricks</strong> & <strong>Pavers</strong> <strong>Technical</strong> <strong>Manual</strong><br />
Section 4. Product Data Sheet<br />
Double Height Common<br />
FIRE RESISTANCE & SOUND TRANSMISSION FOR TYPICAL WALL APPLICATIONS<br />
Fire Resistance Levels (FRL)<br />
The Building Code (BCA) Section C defines the type and class of buildings and designates three fire resistance levels.<br />
These levels are structural adequacy, integrity and insulation, and are written in the form 60/60/60. Information on how to<br />
calculate these is provided in the Clay Brick and Paver Institute (CBPI) publication, “<strong>Manual</strong> 5: Fire Resistance Levels for<br />
Clay Brick Walls” available at www.thinkbrick.com.au The figures below provide typical wall examples.<br />
Weighted Sound Reduction Index (Rw)<br />
The Rw has two reduction figures to account for high range noise (C) and low range noise (Ctr).<br />
The reduction figures are added to the Rw and are written Rw (C,Ctr).<br />
Note: S = Supported. Indicating moment is passed to a transverse structure such as a concrete slab,<br />
braced roofing trusses, a perpendicular wall, etc.<br />
S<br />
S<br />
S<br />
S<br />
S<br />
S<br />
All masonry walls should be designed by a qualified structural engineer. Variation in colour, texture and size is a natural characteristic of clay products.<br />
© Copyright <strong>Boral</strong> <strong>Bricks</strong> Pty Ltd – all rights reserved 2008. <strong>Boral</strong> <strong>Bricks</strong> Pty Ltd ABN 66 082 448 342.<br />
<strong>Boral</strong> Clay <strong>Bricks</strong> and <strong>Pavers</strong><br />
Phone 13 30 35<br />
Fax 1300 363 035<br />
Email bricks@boral.com.au<br />
www.boral.com.au<br />
S<br />
110mm<br />
110mm<br />
S<br />
110mm<br />
FRL for Insulation 90 minutes<br />
FRL for wall height up to 3.0 metres 90/90/90<br />
FRL for Insulation 240 minutes<br />
FRL for Integrity is the lower of the FRLs<br />
for Insulation or Structural Adequacy<br />
For both leaves equally loaded (±10%)<br />
FRL for Structural Adequacy<br />
– wall height up to 3.3 metres 240 minutes<br />
– wall height up to 4.1 metres 90 minutes<br />
For both leaves unequally loaded (i.e. >10% variance)<br />
FRL for Structural Adequacy<br />
– wall height up to 2.5 metres 240 minutes<br />
– wall height up to 3.0 metres 90 minutes<br />
Sound reduction of a wall consisting of<br />
two leaves 110mm brick with a 50mm cavity<br />
– Rendered both sides Rw + Ctr ≥ 50 & impact attenuation<br />
– Unrendered with 50mm<br />
glass wool insulation with<br />
a density of 11 kg/m3 Rw + Ctr ≥ 50 & impact attenuation<br />
– Unrendered with 50mm<br />
polyester insulation with<br />
a density of 20 kg/m3 Rw + Ctr ≥ 50 & impact attenuation<br />
ADV03817NSW
<strong>Bricks</strong> & <strong>Pavers</strong> <strong>Technical</strong> <strong>Manual</strong><br />
Section 4. Product Data Sheet<br />
Scratch Face<br />
Common<br />
NSW<br />
TYPICAL PROPERTIES<br />
Dimensions – Work Size (LxWxH – mm) 230x110x76<br />
Dimensional Category DW1<br />
Average Unit Weight (kg) 2.9<br />
Approximate number per m2 49<br />
Lime Pitting Nil to Slight<br />
No. per pack 320<br />
Pack Weight (kg) 928<br />
Pack Dimensions (LxWxH – mm) 920x920x880<br />
Wall Surface Density (kg/m2 ) 180<br />
Characteristic Unconfined Compressive Strength (f’uc MPa) >22<br />
Coefficient of Expansion (mm/m/15 years)
<strong>Bricks</strong> & <strong>Pavers</strong> <strong>Technical</strong> <strong>Manual</strong><br />
Section 4. Product Data Sheet<br />
Scratch Face Common<br />
FIRE RESISTANCE & SOUND TRANSMISSION FOR TYPICAL WALL APPLICATIONS<br />
Fire Resistance Levels (FRL)<br />
The Building Code (BCA) Section C defines the type and class of buildings and designates three fire resistance levels.<br />
These levels are structural adequacy, integrity and insulation, and are written in the form 60/60/60. Information on how to<br />
calculate these is provided in the Clay Brick and Paver Institute (CBPI) publication, “<strong>Manual</strong> 5: Fire Resistance Levels for<br />
Clay Brick Walls” available at www.thinkbrick.com.au The figures below provide typical wall examples.<br />
Weighted Sound Reduction Index (Rw)<br />
The Rw has two reduction figures to account for high range noise (C) and low range noise (Ctr).<br />
The reduction figures are added to the Rw and are written Rw (C,Ctr).<br />
Note: S = Supported. Indicating moment is passed to a transverse structure such as a concrete slab,<br />
braced roofing trusses, a perpendicular wall, etc.<br />
S<br />
S<br />
S<br />
S<br />
S<br />
S<br />
All masonry walls should be designed by a qualified structural engineer. Variation in colour, texture and size is a natural characteristic of clay products.<br />
© Copyright <strong>Boral</strong> <strong>Bricks</strong> Pty Ltd – all rights reserved 2008. <strong>Boral</strong> <strong>Bricks</strong> Pty Ltd ABN 66 082 448 342.<br />
<strong>Boral</strong> Clay <strong>Bricks</strong> and <strong>Pavers</strong><br />
Phone 13 30 35<br />
Fax 1300 363 035<br />
Email bricks@boral.com.au<br />
www.boral.com.au<br />
S<br />
110mm<br />
110mm<br />
110mm<br />
S<br />
FRL for Insulation 90 minutes<br />
FRL for wall height up to 3.0 metres 90/90/90<br />
FRL for Insulation 240 minutes<br />
FRL for Integrity is the lower of the FRLs<br />
for Insulation or Structural Adequacy<br />
For both leaves equally loaded (±10%)<br />
FRL for Structural Adequacy<br />
– wall height up to 3.3 metres 240 minutes<br />
– wall height up to 4.1 metres 90 minutes<br />
For both leaves unequally loaded (i.e. >10% variance)<br />
FRL for Structural Adequacy<br />
– wall height up to 2.5 metres 240 minutes<br />
– wall height up to 3.0 metres 90 minutes<br />
Sound reduction of a wall consisting of<br />
two leaves 110mm brick with a 50mm cavity<br />
– Rendered both sides Rw + Ctr ≥ 50 & impact attenuation<br />
– Unrendered with 50mm<br />
glass wool insulation with<br />
a density of 11 kg/m3 Rw + Ctr ≥ 50 & impact attenuation<br />
– Unrendered with 50mm<br />
polyester insulation with<br />
a density of 20 kg/m3 Rw + Ctr ≥ 50 & impact attenuation<br />
ADV05177NSW
<strong>Bricks</strong> & <strong>Pavers</strong> <strong>Technical</strong> <strong>Manual</strong><br />
Section 4. Product Data Sheet<br />
PartyWall<br />
Brick<br />
NSW<br />
TYPICAL PROPERTIES PW76 PW119<br />
Dimensions – Work Size (LxWxH – mm) 230x150x76 230x150x119<br />
Dimensional Category DW2<br />
Average Unit Weight (kg) 4.0 6.0<br />
Approximate number per m2 49 32.5<br />
Lime Pitting Nil to Slight<br />
No. per pack 280 180<br />
Pack Weight (kg) 1120 1080<br />
Pack Dimensions (LxWxH – mm) 1450x1080x810 1150x750x952<br />
Wall Surface Density (kg/m2 ) 240<br />
Characteristic Unconfined Compressive Strength (f’uc MPa) >22<br />
Coefficient of Expansion (mm/m/15 years)
<strong>Bricks</strong> & <strong>Pavers</strong> <strong>Technical</strong> <strong>Manual</strong><br />
Section 4. Product Data Sheet<br />
PartyWall Brick<br />
FIRE RESISTANCE & SOUND TRANSMISSION FOR TYPICAL WALL APPLICATIONS<br />
Fire Resistance Levels (FRL)<br />
The Building Code (BCA) Section C defines the type and class of buildings and designates three fire resistance levels.<br />
These levels are structural adequacy, integrity and insulation, and are written in the form 60/60/60. Information on how to<br />
calculate these is provided in the Clay Brick and Paver Institute (CBPI) publication, “<strong>Manual</strong> 5: Fire Resistance Levels for<br />
Clay Brick Walls” available at www.thinkbrick.com.au The figures below provide typical wall examples.<br />
Weighted Sound Reduction Index (Rw)<br />
The Rw has two reduction figures to account for high range noise (C) and low range noise (Ctr).<br />
The reduction figures are added to the Rw and are written Rw (C,Ctr).<br />
Note: S = Supported. Indicating moment is passed to a transverse structure such as a concrete slab,<br />
braced roofing trusses, a perpendicular wall, etc.<br />
PartyWall PW76<br />
S<br />
PartyWall PW119<br />
S<br />
S<br />
S<br />
S<br />
S<br />
All masonry walls should be designed by a qualified structural engineer. Variation in colour, texture and size is a natural characteristic of clay products.<br />
© Copyright <strong>Boral</strong> <strong>Bricks</strong> Pty Ltd – all rights reserved 2008. <strong>Boral</strong> <strong>Bricks</strong> Pty Ltd ABN 66 082 448 342.<br />
<strong>Boral</strong> Clay <strong>Bricks</strong> and <strong>Pavers</strong><br />
Phone 13 30 35<br />
Fax 1300 363 035<br />
Email bricks@boral.com.au<br />
www.boral.com.au<br />
S<br />
S<br />
150mm<br />
150mm<br />
FRL for Insulation 120 minutes<br />
FRL for wall height up to 3.0 metres 120/120/120<br />
FRL for Insulation 120 minutes<br />
FRL for wall height up to 3.0 metres 120/120/120<br />
ADV03819
<strong>Bricks</strong> & <strong>Pavers</strong> <strong>Technical</strong> <strong>Manual</strong><br />
Section 4. Product Data Sheet<br />
Special<br />
Paint Grade<br />
Brick<br />
NSW<br />
TYPICAL PROPERTIES BRINGELLY KEMPSEY<br />
Dimensions – Work Size (LxWxH – mm) 230x110x76<br />
Dimensional Category DW2<br />
Average Unit Weight (kg) 3<br />
Approximate number per m2 49<br />
Lime Pitting Nil to Slight<br />
No. per pack 400<br />
Pack Weight (kg) 1240<br />
Pack Dimensions (LxWxH – mm) 1150x770x912<br />
Wall Surface Density (kg/m2 ) 180<br />
Characteristic Unconfined Compressive Strength (f’uc MPa) >22 >18<br />
Coefficient of Expansion (mm/m/15 years)
<strong>Bricks</strong> & <strong>Pavers</strong> <strong>Technical</strong> <strong>Manual</strong><br />
Section 4. Product Data Sheet<br />
Special Paint Grade Brick<br />
FIRE RESISTANCE & SOUND TRANSMISSION FOR TYPICAL WALL APPLICATIONS<br />
Fire Resistance Levels (FRL)<br />
The Building Code (BCA) Section C defines the type and class of buildings and designates three fire resistance levels.<br />
These levels are structural adequacy, integrity and insulation, and are written in the form 60/60/60. Information on how to<br />
calculate these is provided in the Clay Brick and Paver Institute (CBPI) publication, “<strong>Manual</strong> 5: Fire Resistance Levels for<br />
Clay Brick Walls” available at www.thinkbrick.com.au The figures below provide typical wall examples.<br />
Weighted Sound Reduction Index (Rw)<br />
The Rw has two reduction figures to account for high range noise (C) and low range noise (Ctr).<br />
The reduction figures are added to the Rw and are written Rw (C,Ctr).<br />
Note: S = Supported. Indicating moment is passed to a transverse structure such as a concrete slab,<br />
braced roofing trusses, a perpendicular wall, etc.<br />
S<br />
S<br />
S<br />
S<br />
S<br />
S<br />
All masonry walls should be designed by a qualified structural engineer. Variation in colour, texture and size is a natural characteristic of clay products.<br />
© Copyright <strong>Boral</strong> <strong>Bricks</strong> Pty Ltd – all rights reserved 2008. <strong>Boral</strong> <strong>Bricks</strong> Pty Ltd ABN 66 082 448 342.<br />
<strong>Boral</strong> Clay <strong>Bricks</strong> and <strong>Pavers</strong><br />
Phone 13 30 35<br />
Fax 1300 363 035<br />
Email bricks@boral.com.au<br />
www.boral.com.au<br />
S<br />
110mm<br />
110mm<br />
110mm<br />
S<br />
FRL for Insulation 90 minutes<br />
FRL for wall height up to 3.0 metres 90/90/90<br />
FRL for Insulation 240 minutes<br />
FRL for Integrity is the lower of the FRLs<br />
for Insulation or Structural Adequacy<br />
For both leaves equally loaded (±10%)<br />
FRL for Structural Adequacy<br />
– wall height up to 3.3 metres 240 minutes<br />
– wall height up to 4.1 metres 90 minutes<br />
For both leaves unequally loaded (i.e. >10% variance)<br />
FRL for Structural Adequacy<br />
– wall height up to 2.5 metres 240 minutes<br />
– wall height up to 3.0 metres 90 minutes<br />
Sound reduction of a wall consisting of<br />
two leaves 110mm brick with a 50mm cavity<br />
– Rendered both sides Rw + Ctr ≥ 50 & impact attenuation<br />
– Unrendered with 50mm<br />
glass wool insulation with<br />
a density of 11 kg/m3 Rw + Ctr ≥ 50 & impact attenuation<br />
– Unrendered with 50mm<br />
polyester insulation with<br />
a density of 20 kg/m3 Rw + Ctr ≥ 50 & impact attenuation<br />
ADV03821NSW
<strong>Bricks</strong> & <strong>Pavers</strong> <strong>Technical</strong> <strong>Manual</strong><br />
Section 4. Product Data Sheet<br />
Coastal<br />
Common<br />
NSW<br />
TYPICAL PROPERTIES BRINGELLY KEMPSEY<br />
Dimensions – Work Size (LxWxH – mm) 230x110x76<br />
Dimensional Category DW1<br />
Average Unit Weight (kg) 2.9<br />
Approximate number per m2 49<br />
Lime Pitting Nil to Slight<br />
No. per pack 400<br />
Pack Weight (kg) 1200<br />
Pack Dimensions (LxWxH – mm) 1150x912x770<br />
Wall Surface Density (kg/m2 ) 180<br />
Characteristic Unconfined Compressive Strength (f’uc MPa) >22 >18<br />
Coefficient of Expansion (mm/m/15 years)
<strong>Bricks</strong> & <strong>Pavers</strong> <strong>Technical</strong> <strong>Manual</strong><br />
Section 4. Product Data Sheet<br />
Coastal Common<br />
FIRE RESISTANCE & SOUND TRANSMISSION FOR TYPICAL WALL APPLICATIONS<br />
Fire Resistance Levels (FRL)<br />
The Building Code (BCA) Section C defines the type and class of buildings and designates three fire resistance levels.<br />
These levels are structural adequacy, integrity and insulation, and are written in the form 60/60/60. Information on how to<br />
calculate these is provided in the Clay Brick and Paver Institute (CBPI) publication, “<strong>Manual</strong> 5: Fire Resistance Levels for<br />
Clay Brick Walls” available at www.thinkbrick.com.au The figures below provide typical wall examples.<br />
Weighted Sound Reduction Index (Rw)<br />
The Rw has two reduction figures to account for high range noise (C) and low range noise (Ctr).<br />
The reduction figures are added to the Rw and are written Rw (C,Ctr).<br />
Note: S = Supported. Indicating moment is passed to a transverse structure such as a concrete slab,<br />
braced roofing trusses, a perpendicular wall, etc.<br />
S<br />
S<br />
S<br />
S<br />
S<br />
S<br />
All masonry walls should be designed by a qualified structural engineer. Variation in colour, texture and size is a natural characteristic of clay products.<br />
© Copyright <strong>Boral</strong> <strong>Bricks</strong> Pty Ltd – all rights reserved 2008. <strong>Boral</strong> <strong>Bricks</strong> Pty Ltd ABN 66 082 448 342.<br />
<strong>Boral</strong> Clay <strong>Bricks</strong> and <strong>Pavers</strong><br />
Phone 13 30 35<br />
Fax 1300 363 035<br />
Email bricks@boral.com.au<br />
www.boral.com.au<br />
S<br />
110mm<br />
110mm<br />
110mm<br />
S<br />
FRL for Insulation 90 minutes<br />
FRL for wall height up to 3.0 metres 90/90/90<br />
FRL for Insulation 240 minutes<br />
FRL for Integrity is the lower of the FRLs<br />
for Insulation or Structural Adequacy<br />
For both leaves equally loaded (±10%)<br />
FRL for Structural Adequacy<br />
– wall height up to 3.3 metres 240 minutes<br />
– wall height up to 4.1 metres 90 minutes<br />
For both leaves unequally loaded (i.e. >10% variance)<br />
FRL for Structural Adequacy<br />
– wall height up to 2.5 metres 240 minutes<br />
– wall height up to 3.0 metres 90 minutes<br />
Sound reduction of a wall consisting of<br />
two leaves 110mm brick with a 50mm cavity<br />
– Rendered both sides Rw + Ctr ≥ 50 & impact attenuation<br />
– Unrendered with 50mm<br />
glass wool insulation with<br />
a density of 11 kg/m3 Rw + Ctr ≥ 50 & impact attenuation<br />
– Unrendered with 50mm<br />
polyester insulation with<br />
a density of 20 kg/m3 Rw + Ctr ≥ 50 & impact attenuation<br />
ADV03823NSW
<strong>Bricks</strong> & <strong>Pavers</strong> <strong>Technical</strong> <strong>Manual</strong><br />
Section 4. Product Data Sheet<br />
Coastal<br />
Jumbo<br />
Common<br />
NSW<br />
TYPICAL PROPERTIES<br />
Dimensions – Work Size (LxWxH – mm) 230x110x119<br />
Dimensional Category DW1<br />
Average Unit Weight (kg) 4.5<br />
Approximate number per m2 32.5<br />
Lime Pitting Nil to Slight<br />
No. per pack 235<br />
Pack Weight (kg) 1100<br />
Pack Dimensions (LxWxH – mm) 1150x833x770<br />
Wall Surface Density (kg/m2 ) 180<br />
Characteristic Unconfined Compressive Strength (f’uc MPa) >18<br />
Coefficient of Expansion (mm/m/15 years)
<strong>Bricks</strong> & <strong>Pavers</strong> <strong>Technical</strong> <strong>Manual</strong><br />
Section 4. Product Data Sheet<br />
Coastal Jumbo Common<br />
FIRE RESISTANCE & SOUND TRANSMISSION FOR TYPICAL WALL APPLICATIONS<br />
Fire Resistance Levels (FRL)<br />
The Building Code (BCA) Section C defines the type and class of buildings and designates three fire resistance levels.<br />
These levels are structural adequacy, integrity and insulation, and are written in the form 60/60/60. Information on how to<br />
calculate these is provided in the Clay Brick and Paver Institute (CBPI) publication, “<strong>Manual</strong> 5: Fire Resistance Levels for<br />
Clay Brick Walls” available at www.thinkbrick.com.au The figures below provide typical wall examples.<br />
Weighted Sound Reduction Index (Rw)<br />
The Rw has two reduction figures to account for high range noise (C) and low range noise (Ctr).<br />
The reduction figures are added to the Rw and are written Rw (C,Ctr).<br />
Note: S = Supported. Indicating moment is passed to a transverse structure such as a concrete slab,<br />
braced roofing trusses, a perpendicular wall, etc.<br />
S<br />
S<br />
S<br />
S<br />
S<br />
S<br />
All masonry walls should be designed by a qualified structural engineer. Variation in colour, texture and size is a natural characteristic of clay products.<br />
© Copyright <strong>Boral</strong> <strong>Bricks</strong> Pty Ltd – all rights reserved 2008. <strong>Boral</strong> <strong>Bricks</strong> Pty Ltd ABN 66 082 448 342.<br />
<strong>Boral</strong> Clay <strong>Bricks</strong> and <strong>Pavers</strong><br />
Phone 13 30 35<br />
Fax 1300 363 035<br />
Email bricks@boral.com.au<br />
www.boral.com.au<br />
S<br />
110mm<br />
110mm<br />
S<br />
110mm<br />
FRL for Insulation 90 minutes<br />
FRL for wall height up to 3.0 metres 90/90/90<br />
FRL for Insulation 240 minutes<br />
FRL for Integrity is the lower of the FRLs<br />
for Insulation or Structural Adequacy<br />
For both leaves equally loaded (±10%)<br />
FRL for Structural Adequacy<br />
– wall height up to 3.3 metres 240 minutes<br />
– wall height up to 4.1 metres 90 minutes<br />
For both leaves unequally loaded (i.e. >10% variance)<br />
FRL for Structural Adequacy<br />
– wall height up to 2.5 metres 240 minutes<br />
– wall height up to 3.0 metres 90 minutes<br />
Sound reduction of a wall consisting of<br />
two leaves 110mm brick with a 50mm cavity<br />
– Rendered both sides Rw + Ctr ≥ 50 & impact attenuation<br />
– Unrendered with 50mm<br />
glass wool insulation with<br />
a density of 11 kg/m3 Rw + Ctr ≥ 50 & impact attenuation<br />
– Unrendered with 50mm<br />
polyester insulation with<br />
a density of 20 kg/m3 Rw + Ctr ≥ 50 & impact attenuation<br />
ADV03825NSW
<strong>Bricks</strong> & <strong>Pavers</strong> <strong>Technical</strong> <strong>Manual</strong><br />
Section 4. Product Data Sheet<br />
Coastal<br />
Double Height<br />
Common<br />
NSW<br />
TYPICAL PROPERTIES<br />
Dimensions – Work Size (LxWxH – mm) 230x110x162<br />
Dimensional Category DW1<br />
Average Unit Weight (kg) 6.0<br />
Approximate number per m2 24.5<br />
Lime Pitting Nil to Slight<br />
No. per pack 172<br />
Pack Weight (kg) 1200<br />
Pack Dimensions (LxWxH – mm) 1150x972x770<br />
Wall Surface Density (kg/m2 ) 180<br />
Characteristic Unconfined Compressive Strength (f’uc MPa) >18<br />
Coefficient of Expansion (mm/m/15 years)
<strong>Bricks</strong> & <strong>Pavers</strong> <strong>Technical</strong> <strong>Manual</strong><br />
Section 4. Product Data Sheet<br />
Coastal Double Height Common<br />
FIRE RESISTANCE & SOUND TRANSMISSION FOR TYPICAL WALL APPLICATIONS<br />
Fire Resistance Levels (FRL)<br />
The Building Code (BCA) Section C defines the type and class of buildings and designates three fire resistance levels.<br />
These levels are structural adequacy, integrity and insulation, and are written in the form 60/60/60. Information on how to<br />
calculate these is provided in the Clay Brick and Paver Institute (CBPI) publication, “<strong>Manual</strong> 5: Fire Resistance Levels for<br />
Clay Brick Walls” available at www.thinkbrick.com.au The figures below provide typical wall examples.<br />
Weighted Sound Reduction Index (Rw)<br />
The Rw has two reduction figures to account for high range noise (C) and low range noise (Ctr).<br />
The reduction figures are added to the Rw and are written Rw (C,Ctr).<br />
Note: S = Supported. Indicating moment is passed to a transverse structure such as a concrete slab,<br />
braced roofing trusses, a perpendicular wall, etc.<br />
S<br />
S<br />
S<br />
S<br />
S<br />
S<br />
All masonry walls should be designed by a qualified structural engineer. Variation in colour, texture and size is a natural characteristic of clay products.<br />
© Copyright <strong>Boral</strong> <strong>Bricks</strong> Pty Ltd – all rights reserved 2008. <strong>Boral</strong> <strong>Bricks</strong> Pty Ltd ABN 66 082 448 342.<br />
<strong>Boral</strong> Clay <strong>Bricks</strong> and <strong>Pavers</strong><br />
Phone 13 30 35<br />
Fax 1300 363 035<br />
Email bricks@boral.com.au<br />
www.boral.com.au<br />
S<br />
110mm<br />
110mm<br />
S<br />
110mm<br />
FRL for Insulation 90 minutes<br />
FRL for wall height up to 3.0 metres 90/90/90<br />
FRL for Insulation 240 minutes<br />
FRL for Integrity is the lower of the FRLs<br />
for Insulation or Structural Adequacy<br />
For both leaves equally loaded (±10%)<br />
FRL for Structural Adequacy<br />
– wall height up to 3.3 metres 240 minutes<br />
– wall height up to 4.1 metres 90 minutes<br />
For both leaves unequally loaded (i.e. >10% variance)<br />
FRL for Structural Adequacy<br />
– wall height up to 2.5 metres 240 minutes<br />
– wall height up to 3.0 metres 90 minutes<br />
Sound reduction of a wall consisting of<br />
two leaves 110mm brick with a 50mm cavity<br />
– Rendered both sides Rw + Ctr ≥ 50 & impact attenuation<br />
– Unrendered with 50mm<br />
glass wool insulation with<br />
a density of 11 kg/m3 Rw + Ctr ≥ 50 & impact attenuation<br />
– Unrendered with 50mm<br />
polyester insulation with<br />
a density of 20 kg/m3 Rw + Ctr ≥ 50 & impact attenuation<br />
ADV03827NSW
<strong>Bricks</strong> & <strong>Pavers</strong> <strong>Technical</strong> <strong>Manual</strong><br />
Section 4. Product Data Sheet<br />
Standard<br />
Commercial<br />
Common<br />
VIC<br />
TYPICAL PROPERTIES ALbuRY SCORESbY ThOmASTOwn<br />
Dimensions – Work Size (LxWxH – mm) 230x110x76<br />
Dimensional Category DW1<br />
Average Unit Weight (kg) 2.9 3.2 3.3<br />
Approximate number per m2 49<br />
Lime Pitting Nil to Slight Nil<br />
No. per pack # 340 460 272<br />
Wall Surface Density (kg/m2 ) 190 205 210<br />
Characteristic Unconfined Compressive Strength (f’uc MPa) >15 >22<br />
Coefficient of Expansion (mm/m/15 years)
<strong>Bricks</strong> & <strong>Pavers</strong> <strong>Technical</strong> <strong>Manual</strong><br />
Section 4. Product Data Sheet<br />
Standard Commercial Common<br />
FIRE RESISTAnCE & SOunD TRAnSmISSIOn FOR TYPICAL wALL APPLICATIOnS<br />
Fire Resistance Levels (FRL)<br />
The Building Code (BCA) Section C defines the type and class of buildings and designates three fire resistance levels.<br />
These levels are structural adequacy, integrity and insulation, and are written in the form 60/60/60. Information on how to<br />
calculate these is provided in the Clay Brick and Paver Institute (CBPI) publication, “<strong>Manual</strong> 5: Fire Resistance Levels for<br />
Clay Brick Walls” available at www.thinkbrick.com.au The figures below provide typical wall examples.<br />
weighted Sound Reduction Index (Rw)<br />
The Rw has two reduction figures to account for high range noise (C) and low range noise (Ctr).<br />
The reduction figures are added to the Rw and are written Rw (C,Ctr).<br />
note: S = Supported. Indicating moment is passed to a transverse structure such as a concrete slab,<br />
braced roofing trusses, a perpendicular wall, etc.<br />
S<br />
S<br />
S<br />
S<br />
S<br />
S<br />
All masonry walls should be designed by a qualified structural engineer. Variation in colour, texture and size is a natural characteristic of clay products.<br />
© Copyright <strong>Boral</strong> <strong>Bricks</strong> Pty Ltd – all rights reserved 2008. <strong>Boral</strong> <strong>Bricks</strong> Pty Ltd ABN 66 082 448 342.<br />
<strong>Boral</strong> Clay <strong>Bricks</strong> and <strong>Pavers</strong><br />
Phone 13 30 35<br />
Fax 1300 363 035<br />
Email bricks@boral.com.au<br />
www.boral.com.au<br />
S<br />
110mm<br />
110mm<br />
110mm<br />
S<br />
FRL for Insulation 90 minutes<br />
FRL for wall height up to 3.0 metres 90/90/90<br />
FRL for Insulation 240 minutes<br />
FRL for Integrity is the lower of the FRLs<br />
for Insulation or Structural Adequacy<br />
For both leaves equally loaded (±10%)<br />
FRL for Structural Adequacy<br />
– wall height up to 3.3 metres 240 minutes<br />
– wall height up to 4.1 metres 90 minutes<br />
For both leaves unequally loaded (i.e. >10% variance)<br />
FRL for Structural Adequacy<br />
– wall height up to 2.5 metres 240 minutes<br />
– wall height up to 3.0 metres 90 minutes<br />
Sound reduction of a wall consisting of<br />
two leaves 110mm brick with a 50mm cavity<br />
– Rendered both sides Rw + Ctr ≥ 50 & impact attenuation<br />
– Unrendered with 50mm<br />
glass wool insulation with<br />
a density of 11 kg/m3 Rw + Ctr ≥ 50 & impact attenuation<br />
– Unrendered with 50mm<br />
polyester insulation with<br />
a density of 20 kg/m3 Rw + Ctr ≥ 50 & impact attenuation<br />
ADV03812VIC
<strong>Bricks</strong> & <strong>Pavers</strong> <strong>Technical</strong> <strong>Manual</strong><br />
Section 4. Product Data Sheet<br />
Jumbo<br />
Common<br />
VIC<br />
TYPICAL PROPERTIES ALbuRY SCORESbY<br />
Dimensions – Work Size (LxWxH – mm) 230x110x119<br />
Dimensional Category DW2<br />
Average Unit Weight (kg) 4.5<br />
Approximate number per m2 32.5<br />
Lime Pitting Nil to Slight<br />
No. per pack 230 305<br />
Wall Surface Density (kg/m2 ) 180<br />
Characteristic Unconfined Compressive Strength (f’uc MPa) >22<br />
Coefficient of Expansion (mm/m/15 years)
<strong>Bricks</strong> & <strong>Pavers</strong> <strong>Technical</strong> <strong>Manual</strong><br />
Section 4. Product Data Sheet<br />
Jumbo Common<br />
FIRE RESISTAnCE & SOunD TRAnSmISSIOn FOR TYPICAL wALL APPLICATIOnS<br />
Fire Resistance Levels (FRL)<br />
The Building Code (BCA) Section C defines the type and class of buildings and designates three fire resistance levels.<br />
These levels are structural adequacy, integrity and insulation, and are written in the form 60/60/60. Information on how to<br />
calculate these is provided in the Clay Brick and Paver Institute (CBPI) publication, “<strong>Manual</strong> 5: Fire Resistance Levels for<br />
Clay Brick Walls” available at www.thinkbrick.com.au The figures below provide typical wall examples.<br />
weighted Sound Reduction Index (Rw)<br />
The Rw has two reduction figures to account for high range noise (C) and low range noise (Ctr).<br />
The reduction figures are added to the Rw and are written Rw (C,Ctr).<br />
note: S = Supported. Indicating moment is passed to a transverse structure such as a concrete slab,<br />
braced roofing trusses, a perpendicular wall, etc.<br />
S<br />
S<br />
S<br />
S<br />
S<br />
S<br />
All masonry walls should be designed by a qualified structural engineer. Variation in colour, texture and size is a natural characteristic of clay products.<br />
© Copyright <strong>Boral</strong> <strong>Bricks</strong> Pty Ltd – all rights reserved 2008. <strong>Boral</strong> <strong>Bricks</strong> Pty Ltd ABN 66 082 448 342.<br />
<strong>Boral</strong> Clay <strong>Bricks</strong> and <strong>Pavers</strong><br />
Phone 13 30 35<br />
Fax 1300 363 035<br />
Email bricks@boral.com.au<br />
www.boral.com.au<br />
S<br />
110mm<br />
110mm<br />
S<br />
110mm<br />
FRL for Insulation 90 minutes<br />
FRL for wall height up to 3.0 metres 90/90/90<br />
FRL for Insulation 240 minutes<br />
FRL for Integrity is the lower of the FRLs<br />
for Insulation or Structural Adequacy<br />
For both leaves equally loaded (±10%)<br />
FRL for Structural Adequacy<br />
– wall height up to 3.3 metres 240 minutes<br />
– wall height up to 4.1 metres 90 minutes<br />
For both leaves unequally loaded (i.e. >10% variance)<br />
FRL for Structural Adequacy<br />
– wall height up to 2.5 metres 240 minutes<br />
– wall height up to 3.0 metres 90 minutes<br />
Sound reduction of a wall consisting of<br />
two leaves 110mm brick with a 50mm cavity<br />
– Rendered both sides Rw + Ctr ≥ 50 & impact attenuation<br />
– Unrendered with 50mm<br />
glass wool insulation with<br />
a density of 11 kg/m3 Rw + Ctr ≥ 50 & impact attenuation<br />
– Unrendered with 50mm<br />
polyester insulation with<br />
a density of 20 kg/m3 Rw + Ctr ≥ 50 & impact attenuation<br />
ADV03814VIC
<strong>Bricks</strong> & <strong>Pavers</strong> <strong>Technical</strong> <strong>Manual</strong><br />
Section 4. Product Data Sheet<br />
Purpose<br />
Made<br />
Common<br />
QLD<br />
TYPICAL PROPERTIES<br />
Dimensions – Work Size (LxWxH – mm) 230x110x76<br />
Dimensional Category DW1<br />
Average Unit Weight (kg) 2.8<br />
Approximate number per m2 49<br />
Lime Pitting Nil to Slight<br />
No. per pack 380<br />
Pack Weight (kg) 1100<br />
Pack Dimensions (LxWxH – mm) 930x840x1000<br />
Wall Surface Density (kg/m2 ) 180<br />
Characteristic Unconfined Compressive Strength (f'uc MPa) >10<br />
Coefficient of Expansion (mm/m/15 years)
<strong>Bricks</strong> & <strong>Pavers</strong> <strong>Technical</strong> <strong>Manual</strong><br />
Section 4. Product Data Sheet<br />
Purpose Made Common<br />
FIRE RESISTANCE & SOUND TRANSMISSION FOR TYPICAL WALL APPLICATIONS<br />
Fire Resistance Levels (FRL)<br />
The Building Code (BCA) Section C defines the type and class of buildings and designates three fire resistance levels.<br />
These levels are structural adequacy, integrity and insulation, and are written in the form 60/60/60. Information on how to<br />
calculate these is provided in the Clay Brick and Paver Institute (CBPI) publication, “<strong>Manual</strong> 5: Fire Resistance Levels for<br />
Clay Brick Walls” available at www.thinkbrick.com.au The figures below provide typical wall examples.<br />
Weighted Sound Reduction Index (Rw)<br />
The Rw has two reduction figures to account for high range noise (C) and low range noise (Ctr).<br />
The reduction figures are added to the Rw and are written Rw (C,Ctr).<br />
Note: S = Supported. Indicating moment is passed to a transverse structure such as a concrete slab,<br />
braced roofing trusses, a perpendicular wall, etc.<br />
S<br />
S<br />
S<br />
S<br />
S<br />
S<br />
All masonry walls should be designed by a qualified structural engineer. Variation in colour, texture and size is a natural characteristic of clay products.<br />
© Copyright <strong>Boral</strong> <strong>Bricks</strong> Pty Ltd – all rights reserved 2008. <strong>Boral</strong> <strong>Bricks</strong> Pty Ltd ABN 66 082 448 342.<br />
<strong>Boral</strong> Clay <strong>Bricks</strong> and <strong>Pavers</strong><br />
Phone 13 30 35<br />
Fax 1300 363 035<br />
Email bricks@boral.com.au<br />
www.boral.com.au<br />
S<br />
110mm<br />
110mm<br />
110mm<br />
S<br />
FRL for Insulation 90 minutes<br />
FRL for wall height up to 3.0 metres 90/90/90<br />
FRL for Insulation 240 minutes<br />
FRL for Integrity is the lower of the FRLs<br />
for Insulation or Structural Adequacy<br />
For both leaves equally loaded (±10%)<br />
FRL for Structural Adequacy<br />
– wall height up to 3.3 metres 240 minutes<br />
– wall height up to 4.1 metres 90 minutes<br />
For both leaves unequally loaded (i.e. >10% variance)<br />
FRL for Structural Adequacy<br />
– wall height up to 2.5 metres 240 minutes<br />
– wall height up to 3.0 metres 90 minutes<br />
Sound reduction of a wall consisting of<br />
two leaves 110mm brick with a 50mm cavity<br />
– Rendered both sides Rw + Ctr ≥ 50 & impact attenuation<br />
– Unrendered with 50mm<br />
glass wool insulation with<br />
a density of 11 kg/m3 Rw + Ctr ≥ 50 & impact attenuation<br />
– Unrendered with 50mm<br />
polyester insulation with<br />
a density of 20 kg/m3 Rw + Ctr ≥ 50 & impact attenuation<br />
ADV03813QLD
<strong>Bricks</strong> & <strong>Pavers</strong> <strong>Technical</strong> <strong>Manual</strong><br />
Section 4. Product Data Sheet<br />
Double Height<br />
Common<br />
QLD<br />
TYPICAL PROPERTIES<br />
Dimensions – Work Size (LxWxH – mm) 230x110x162<br />
Dimensional Category DW1<br />
Average Unit Weight (kg) 5.8<br />
Approximate number per m2 24.5<br />
Lime Pitting Nil to Slight<br />
No. per pack 172<br />
Pack Weight (kg) 1050<br />
Pack Dimensions (LxWxH – mm) 930x820x1000<br />
Wall Surface Density (kg/m2 ) 180<br />
Characteristic Unconfined Compressive Strength (f'uc MPa) >10<br />
Coefficient of Expansion (mm/m/15 years)
<strong>Bricks</strong> & <strong>Pavers</strong> <strong>Technical</strong> <strong>Manual</strong><br />
Section 4. Product Data Sheet<br />
Double Height Common<br />
FIRE RESISTANCE & SOUND TRANSMISSION FOR TYPICAL WALL APPLICATIONS<br />
Fire Resistance Levels (FRL)<br />
The Building Code (BCA) Section C defines the type and class of buildings and designates three fire resistance levels.<br />
These levels are structural adequacy, integrity and insulation, and are written in the form 60/60/60. Information on how to<br />
calculate these is provided in the Clay Brick and Paver Institute (CBPI) publication, “<strong>Manual</strong> 5: Fire Resistance Levels for<br />
Clay Brick Walls” available at www.thinkbrick.com.au The figures below provide typical wall examples.<br />
Weighted Sound Reduction Index (Rw)<br />
The Rw has two reduction figures to account for high range noise (C) and low range noise (Ctr).<br />
The reduction figures are added to the Rw and are written Rw (C,Ctr).<br />
Note: S = Supported. Indicating moment is passed to a transverse structure such as a concrete slab,<br />
braced roofing trusses, a perpendicular wall, etc.<br />
S<br />
S<br />
S<br />
S<br />
S<br />
S<br />
All masonry walls should be designed by a qualified structural engineer. Variation in colour, texture and size is a natural characteristic of clay products.<br />
© Copyright <strong>Boral</strong> <strong>Bricks</strong> Pty Ltd – all rights reserved 2008. <strong>Boral</strong> <strong>Bricks</strong> Pty Ltd ABN 66 082 448 342.<br />
<strong>Boral</strong> Clay <strong>Bricks</strong> and <strong>Pavers</strong><br />
Phone 13 30 35<br />
Fax 1300 363 035<br />
Email bricks@boral.com.au<br />
www.boral.com.au<br />
S<br />
110mm<br />
110mm<br />
S<br />
110mm<br />
FRL for Insulation 90 minutes<br />
FRL for wall height up to 3.0 metres 90/90/90<br />
FRL for Insulation 240 minutes<br />
FRL for Integrity is the lower of the FRLs<br />
for Insulation or Structural Adequacy<br />
For both leaves equally loaded (±10%)<br />
FRL for Structural Adequacy<br />
– wall height up to 3.3 metres 240 minutes<br />
– wall height up to 4.1 metres 90 minutes<br />
For both leaves unequally loaded (i.e. >10% variance)<br />
FRL for Structural Adequacy<br />
– wall height up to 2.5 metres 240 minutes<br />
– wall height up to 3.0 metres 90 minutes<br />
Sound reduction of a wall consisting of<br />
two leaves 110mm brick with a 50mm cavity<br />
– Rendered both sides Rw + Ctr ≥ 50 & impact attenuation<br />
– Unrendered with 50mm<br />
glass wool insulation with<br />
a density of 11 kg/m3 Rw + Ctr ≥ 50 & impact attenuation<br />
– Unrendered with 50mm<br />
polyester insulation with<br />
a density of 20 kg/m3 Rw + Ctr ≥ 50 & impact attenuation<br />
ADV03827QLD
5<br />
Paver Range<br />
5. Paver Range
6<br />
Projects in View<br />
6. Projects in View
Projects In View<br />
PIV, <strong>Boral</strong>’s publication profiling a range of architecturally-inspired projects featuring<br />
<strong>Boral</strong>’s bricks, blocks, pavers and retaining walls, is full of the latest public and<br />
private sector commercial projects, designs, and ideas. PIV also features industry<br />
news, events and more, to keep you constantly up to date.<br />
Subscription to PIV is FREE. Subscribe on-line, and you will ensure that PIV is<br />
emailed directly to you. There are benefits to subscribing – you not only have the<br />
latest information delivered direct to your desktop, but as a PIV subscriber, you will<br />
also have access to additional ‘un-published’ photography and direct links to<br />
product information.<br />
Visit www.boral.com.au/piv to subscribe and access previous editions.<br />
Subscribe by registering online at:<br />
www.boral.com.au/piv<br />
If you have a project that you would<br />
like us to consider for inclusion in PIV<br />
please call your <strong>Boral</strong> Clay <strong>Bricks</strong> &<br />
<strong>Pavers</strong> sales representative, or phone<br />
our contact centre on<br />
13 30 35<br />
Issue 12 November 07<br />
A walk on the style side<br />
Civic qualities at the forefront<br />
of Police Station design<br />
PIV PIV<br />
12: PROJECTS IN VIEW<br />
Centre Centre attracts attracts more more than than admiration admiration<br />
Contents<br />
01 Wally’s Walkway, Macquarie University, North Ryde NSW<br />
02 Vermont Sports Pavilion Extension, Vermont VIC<br />
03 Warehouse Distribution Centre, Minto NSW<br />
04 Police Station, Cranbourne VIC<br />
PROJECTS IN VIEW<br />
Wally’s Walkway, Macquarie University, North Ryde NSW<br />
Vermont Sports Pavilion Extension, Vermont VIC<br />
Warehouse Distribution Centre, Minto NSW<br />
Issue 13 March 08<br />
Wall design delivers<br />
benefits galore<br />
A shining star in Jamisontown<br />
High quality housing that’s affordable, too<br />
Carpark honours local heritage A Renaissance Renaissance in retirement retirement living living<br />
Contents<br />
Green Green estate estate chooses chooses choc choc tan tan bricks bricks<br />
Welcome to the twelvth<br />
edition of PIV featuring<br />
<strong>Boral</strong> Clay <strong>Bricks</strong> and Masonry.<br />
05 Apartment Complex, Pyrmont NSW<br />
06 Cardinia Life, Pakenham VIC<br />
07 Springvale Police Station, Springvale VIC<br />
08 Nelsons Grove Retirement Village, Pemulwuy NSW<br />
01 Carlisle Homes Display Village, Tarneit, VIC<br />
02 Bingara Gorge Sales & Information Centre, Wilton, NSW<br />
03 Renaissance Victoria Point Retirement Village, Moreton Bay, QLD<br />
04 Concord Hospital Mental Health Precinct, Concord, NSW<br />
Bingara Gorge Sales & Information Centre, Wilton, NSW<br />
Renaissance Victoria Point Retirement Village, Moreton Bay, QLD<br />
Concord Hospital Mental Health Precinct, Concord, NSW<br />
PIV PIV<br />
13: 13:<br />
PROJECTS PROJECTS IN IN VIEW VIEW<br />
Contents<br />
Issue 14 July 08<br />
Wall-to-wall<br />
Wall-to-wall<br />
opportunities opportunities at<br />
Interchange Interchange Park Park<br />
<strong>Bricks</strong> and Masonry team up at Oakleigh Centre<br />
A honey of a project Rousing interest in Rouse Hill<br />
Discovering Masonry<br />
05 05 Shaula Shaula Apartments, Apartments, Jamisontown, Jamisontown, NSW NSW<br />
06 06 Esplanade Esplanade Carpark, Carpark, Port Port Willunga, Willunga, SA SA<br />
07 07 Interchange Interchange Park, Park, Eastern Eastern Creek, Creek, NSW NSW<br />
08 08 Harmony Harmony Village Village Retirement Retirement Complex, Complex, Shepparton, Shepparton, VIC VIC<br />
Welcome Welcome to to the the thirteenth thirteenth<br />
edition edition of PIV PIV featuring featuring<br />
<strong>Boral</strong> <strong>Boral</strong> Clay Clay <strong>Bricks</strong> <strong>Bricks</strong> and and Masonry. Masonry.<br />
01 Altona Performing Arts Centre & Primary School<br />
04 Rouse Hill Town Centre<br />
02 Beekeepers Inn<br />
05 Discovery House<br />
03 Oakleigh Centre for Intellectually Disabled Citizens<br />
06 Logistics Building, Caulfield Medical Centre<br />
PIV<br />
14: PROJECTS IN VIEW<br />
Combining kids<br />
with culture<br />
Welcome to the fourteenth<br />
edition of PIV featuring<br />
<strong>Boral</strong> Clay <strong>Bricks</strong> and Masonry.<br />
07 <strong>Boral</strong> Timber Woodhead Project, Pernod Ricard Head Office<br />
08 Lightening the load on energy and water at Kempsey<br />
09 Harrison School<br />
ADV05003 10/08
7<br />
Reference Material<br />
7. Reference Material
Free Clay Brick and Paver Samples<br />
Free face samples<br />
Professionally present your project concept to your client with actual clay<br />
brick and paver colour and texture samples. This special service enables<br />
you to select and receive facing samples by express courier to your door.<br />
NSW and Queensland chip sizes<br />
<strong>Bricks</strong><br />
<strong>Pavers</strong><br />
<strong>Bricks</strong><br />
115mm x 76mm x 10mm<br />
115mm x 114mm x 10mm<br />
Victoria chip sizes<br />
<strong>Pavers</strong><br />
230mm x 76mm x 10mm<br />
230mm x 114mm x 40mm/50mm (full size)<br />
Contact the <strong>Boral</strong> CHIPexpress ® service<br />
Phone 13 30 35<br />
Fax 1300 36 30 35 Using fax order forms provided<br />
Email bricks@boral.com.au<br />
Web www.boral.com.au/bricks<br />
10mm<br />
10mm<br />
230mm<br />
115mm<br />
76mm<br />
115mm<br />
<strong>Bricks</strong> <strong>Pavers</strong><br />
76mm<br />
230mm<br />
<strong>Bricks</strong> <strong>Pavers</strong><br />
114mm<br />
114mm<br />
10mm<br />
40mm/ 50mm<br />
ADV05001 10/08
Clay <strong>Bricks</strong> & <strong>Pavers</strong><br />
Name<br />
Project<br />
Company<br />
Address<br />
Phone<br />
Fax<br />
Email<br />
Detached home Villa/townhouses<br />
Commercial (provide description below)<br />
Special delivery instructions<br />
Clay brick and paver samples required<br />
Brochures required<br />
1.<br />
2.<br />
3.<br />
4.<br />
5.<br />
1.<br />
2.<br />
3.<br />
4.<br />
5.<br />
Fax Order Form<br />
High rise med. density<br />
Fax this form to<br />
<strong>Boral</strong> <strong>Bricks</strong> CHIPexpress ®<br />
1300 36 30 35<br />
CHIPexpress ® samples can<br />
also be ordered by calling<br />
13 30 35<br />
or emailing your request to<br />
bricks@boral.com.au<br />
Please send more order forms<br />
ADV05002 08/04