ResinLite and DuraStone - MX Group
ResinLite and DuraStone - MX Group
ResinLite and DuraStone - MX Group

Create successful ePaper yourself
Turn your PDF publications into a flip-book with our unique Google optimized e-Paper software.
<strong>ResinLite</strong> <strong>and</strong> <strong>DuraStone</strong><br />
Installation Instructions<br />
Parts Supplied<br />
Before You Start:<br />
• Please note that although these instructions are comprehensive we always recommend that a technically<br />
competent installer undertakes the installation.<br />
• For raised installations, please use a Universal Panel <strong>and</strong> Easy Plumb kit.<br />
• When h<strong>and</strong>ling your shower tray take care not to damage the bottom edges <strong>and</strong> when installing take<br />
particular care to protect the visible surfaces from impact damage or abrasions.<br />
• Caution: Care should be taken when drilling into walls or floors to avoid hidden pipes or electrical cables.<br />
• Check that the shower tray is the colour, size, shape <strong>and</strong> type you require.<br />
• Unpack <strong>and</strong> check for any damage. Do not install if not satisfied <strong>and</strong> contact your local supplier.<br />
• Check that the top surface of the shower tray is compatible with your intended shower enclosure, taking into<br />
account the reduced area that will result after tiles etc have been fitted.<br />
• The Compatibility of the top surface of the tray <strong>and</strong> an enclosure is especially important if using a<br />
shower tray with a built in tiling upst<strong>and</strong>.<br />
• If you install this shower tray in conjunction with a steam unit, you must ensure the steam outlet is at a<br />
minimum of 350mm from the top of the tray.<br />
• When considering your installation method, you should be able to attach or repair your waste or waste outlet<br />
in situ.<br />
Tools <strong>and</strong> Materials Required (not supplied)<br />
•<br />
•<br />
•<br />
•<br />
•<br />
•<br />
•<br />
•<br />
•<br />
•<br />
•<br />
•<br />
•<br />
•<br />
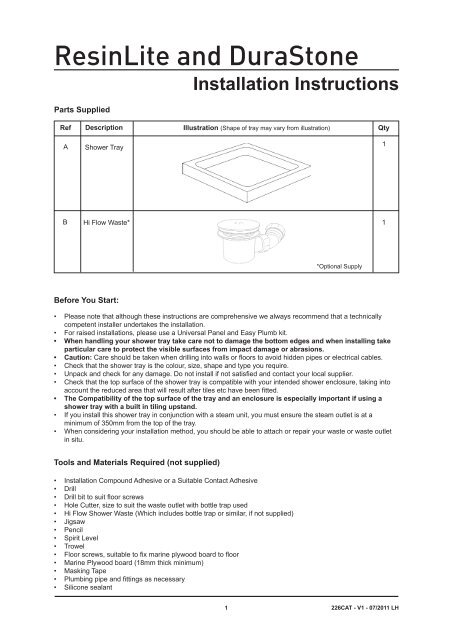
Ref Description Illustration (Shape of tray may vary from illustration)<br />
Qty<br />
A Shower Tray<br />
B Hi Flow Waste* 1<br />
Installation Compound Adhesive or a Suitable Contact Adhesive<br />
Drill<br />
Drill bit to suit floor screws<br />
Hole Cutter, size to suit the waste outlet with bottle trap used<br />
Hi Flow Shower Waste (Which includes bottle trap or similar, if not supplied)<br />
Jigsaw<br />
Pencil<br />
Spirit Level<br />
Trowel<br />
Floor screws, suitable to fix marine plywood board to floor<br />
Marine Plywood board (18mm thick minimum)<br />
Masking Tape<br />
Plumbing pipe <strong>and</strong> fittings as necessary<br />
Silicone sealant<br />
1<br />
*Optional Supply<br />
1<br />
226CAT - V1 - 07/2011 LH
Installation for Concrete or Other Solid Floors<br />
1 Place the shower tray (A) in position on the floor (ensuring surface is level) <strong>and</strong> mark the perimeter <strong>and</strong><br />
waste hole on the floor including an area outside the perimeter for access to connect plumbing after the<br />
shower tray has been installed (See Fig 1).<br />
2 Form a trench in the floor to hold the waste pipe <strong>and</strong> the Hi Flow Shower Waste (B) <strong>and</strong> extend to<br />
include the access area.<br />
3 Install the waste pipe <strong>and</strong> Hi Flow Shower Waste (B) in accordance with building regulations<br />
(protecting any exposed threads with masking tape) in the trench then blank off the trench so it<br />
remains clear (to enable plumbing connection) after laying an adhesive bed on the area to support<br />
the shower tray.<br />
Note! Some shower trays have a protective film (indicated by a label on the surface) which must now<br />
be removed, undertake a final inspection of the shower tray at this stage.<br />
4 If fitting the optional Versatile Seal Strip (Flat Top shower trays only) follow the instructions supplied with<br />
the seal strip <strong>and</strong> attach the strip now.<br />
Note! Before proceeding dry fit all items in situ to ensure compatibility.<br />
Note! It is normal for the tray to appear elastic when undertaking a test dry fitting.<br />
5 Use Installation compound adhesive or a suitable contact adhesive to cover the full area under the<br />
shower tray. Apply or trowel to a thickness suitable to allow levelling <strong>and</strong> full support of the shower<br />
tray (See Fig 2).<br />
Note! Always follow the instructions supplied with the adhesive.<br />
6 Place the shower tray (A) onto the wet adhesive ensuring that it is fully supported by the mix. Level the<br />
top rims only as the shower tray has a built in fall for adequate drainage (See Fig 3).<br />
Note! Ensure tray is fully stuck down, weight down if necessary.<br />
7 When the adhesive has set, remove any excess mix <strong>and</strong> masking tape then make connection between<br />
the shower tray <strong>and</strong> waste pipe. The shower tray <strong>and</strong> all connections MUST now be checked for water<br />
tightness flow <strong>and</strong> adequate drainage over the entire area.<br />
8 After all checks <strong>and</strong> adjustments, seal along the tiling line with silicone sealant (See Fig 4).<br />
Note! When fitting a shower enclosure refer to the manufacturers installation instructions<br />
9 Fill in the access area <strong>and</strong> the waste pipe trench beneath the shower tray (A) with cement to give full<br />
support to the shower tray in service.<br />
1<br />
2 3<br />
4<br />
2<br />
226CAT - V1 - 07/2011 LH
Installation for Suspended Floors<br />
1 Place the shower tray (A) in position on the floor <strong>and</strong> mark the perimeter on the floor including an area<br />
outside the perimeter for access to connect plumbing after the shower tray has been installed<br />
(See Fig 5).<br />
2 The floor area (or larger) covered by the shower tray must be removed <strong>and</strong> replaced with a single<br />
level piece of marine plywood (min 18mm thick) <strong>and</strong> also access for the Hi Flow Shower Waste<br />
(B) should be constructed.<br />
3 Put the plywood in position, place the shower tray (A) on the plywood <strong>and</strong> mark the waste hole location<br />
(See Fig 5).<br />
4 Remove the shower tray (A), then use the hole cutter to drill a hole in the plywood large enough for the<br />
entire Hi Flow Shower Waste (B), which may need to be extended with the jigsaw to form a keyhole<br />
shaped cut-out for some types of shower waste. Keep all holes to the minimum (See Fig 6).<br />
5 Remove the plywood <strong>and</strong> install the waste outlet pipe in accordance with building regulation<br />
Note! Some shower trays have a protective film (indicated by a label on the surface) which must now<br />
be removed, undertake a final inspection of the shower tray at this stage.<br />
6 If fitting the optional Versatile Seal Strip (Flat Top shower trays only) follow the instructions supplied with<br />
the seal strip <strong>and</strong> attach the strip now.<br />
7 Fit the Hi Flow Shower Waste (B) to the shower tray following the instructions supplied <strong>and</strong> protect<br />
exposed threads with masking tape. Before proceeding dry fit all items in situ to ensure compatibility <strong>and</strong><br />
screw the plywood into position.<br />
Note! It is normal for the tray to appear elastic when undertaking a test dry fitting.<br />
8 Use installation compound adhesive or a suitable adhesive to cover the full area under the shower tray.<br />
Apply or trowel to a thickness suitable to allow levelling <strong>and</strong> full support of the shower tray (A)<br />
(See Fig 7).<br />
Note! Always follow the instructions supplied with the adhesive.<br />
9 Place the shower tray (A) onto the wet adhesive ensuring that it is fully supported by the mix. Level<br />
the top rims only as the shower tray has a built in fall for adequate drainage (See Fig 8).<br />
Note! Ensure tray is fully stuck down, weight down if necessary.<br />
10 When the adhesive has set, remove any excess mix <strong>and</strong> masking tape then make connection between<br />
the shower tray <strong>and</strong> waste pipe. The shower tray <strong>and</strong> all connections MUST now be checked for water<br />
tightness flow <strong>and</strong> adequate drainage over the entire area.<br />
11 After all checks <strong>and</strong> adjustments, seal along the tiling line with silicone sealant (See Fig 4 page 2).<br />
Note! When fitting a shower enclosure refer to the manufacturers installation instructions.<br />
5 6<br />
3<br />
7<br />
8<br />
226CAT - V1 - 07/2011 LH
Care & Use of Your Shower Tray<br />
Water feeds where possible should not be connected to a water softener system as salts used with some types of<br />
units may discolour the surface.<br />
It is normal for small amounts of localized water to be retained in the shower tray after use which should be wiped<br />
dry immediately to prevent build up of mineral sediments.<br />
The shower tray should be cleaned with warm, soapy water only. Do not use scourers, abrasives or chemical<br />
cleaners.<br />
Troubleshooting<br />
Q The Hi Flow Shower Waste in the tray is directly over an obstruction at floor level.<br />
A Consider switching to a ‘Raised Installation’ or re-locating shower tray.<br />
Q The Hi Flow Shower Waste will not fit through the plywood <strong>and</strong> connect with the pipe run.<br />
A Cut a slightly larger hole with a key hole section over the connection point.<br />
Q Tray appears slightly springy when walked on.<br />
A Tray has not been fully stuck down or support is not rigid. Reinstall if necessary.<br />
Q There is water retaining in the base of tray.<br />
A Check that the tray is level (top rims) as it is normal for small amounts of localized water to be retained.<br />
Technical Service Line 01684 293311<br />
Monday - Friday, 9am - 5pm<br />
4 226CAT - V1 - 07/2011 LH