You also want an ePaper? Increase the reach of your titles
YUMPU automatically turns print PDFs into web optimized ePapers that Google loves.
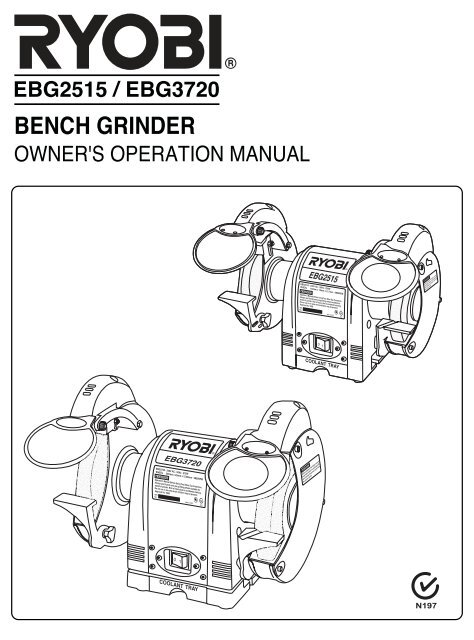
<strong>EBG2515</strong> / <strong>EBG3720</strong><br />
BENCH GRINDER<br />
OWNER'S OPERATION MANUAL<br />
0 1<br />
N197
Table of Contents 1<br />
Product Specifications<br />
1<br />
Rules for Safe Operation 2-4<br />
Unpacking<br />
5<br />
Loose Parts List<br />
5<br />
Tools Needed<br />
6<br />
Features<br />
6<br />
Assembly<br />
7-8<br />
Operation<br />
9<br />
Maintenance<br />
10<br />
Trouble Shooting<br />
11<br />
Parts Ordering / Service<br />
13<br />
Wheels:<br />
- Diameter<br />
-Width<br />
- Arbor Hole<br />
No Load Speed<br />
Rating<br />
Power input<br />
Net Weight<br />
TABLE OF CONTENTS<br />
PRODUCT SPECIFICATIONS<br />
<strong>EBG2515</strong><br />
6 in. ( 150 mm )<br />
3/4 in. (19mm)<br />
1/2 in. (13mm)<br />
2850 RPM<br />
240V, AC, 50Hz Only<br />
250W<br />
10.2 Kg<br />
<strong>EBG3720</strong><br />
8in.(200 mm )<br />
1in.(25mm)<br />
5/8 in. ( 16 mm )<br />
2850 RPM<br />
240V, AC, 50Hz Only<br />
375W<br />
16.5 Kg<br />
Look for this symbol to point out important safety precautions.<br />
It means attention!!! Your safety is involved.<br />
Page 1
S afe operation of this power tool requires that you read and<br />
understand this operator's manual and all labels affixed to<br />
the tool. Safety is a combination of common sense, staying<br />
alert, and knowing how your bench grinder works.<br />
READ ALL INSTRUCTIONS<br />
KNOW YOUR POWER TOOL. Read the operator's manual<br />
carefully. Learn the applications and limitations as well<br />
as specific potential hazards related to this tool.<br />
GUARD AGAINST ELECTRICAL SHOCK by preventing<br />
body contact with grounded surfaces. For example:pipes,<br />
radiators, ranges, refriqerator enclosures.<br />
KEEP GUARDS IN PLACE and in working order. Never<br />
operate the tool with any guard or cover removed. Make<br />
sure all guards are operating properly before each use.<br />
REMOVE ADJUSTING KEYS AND WRENCHES. Form habit<br />
of checking to see keys and adjusting wrenches are<br />
removed from tool before turning it on.<br />
KEEP THE WORK AREA CLEAN. Cluttered work areas<br />
and work benches invite accidents.<br />
AVOID DANGEROUS ENVIRONMENTS. Do not use power<br />
tools near gasoline or other flammable liquids, in damp<br />
or wet locations or expose them to rain. Keep work area<br />
well lighted.<br />
KEEP CHILDREN AND VISITORS AWAY. All visitors should<br />
wear safety glasses and be kept a safe distance from<br />
work area.<br />
MAKE WORKSHOP CHILD PROOF with padlocks, master<br />
switches, or by removing starter keys.<br />
DON'T FORCE THE TOOL. It will do the job better and safer<br />
at the rate for which it was designed.<br />
USE THE RIGHT TOOL. Do not force the tool or attachment<br />
to do a job for which it was not designed.<br />
USE THE PROPER EXTENSION CORD. Make sure your<br />
extension cord is in good condition. When using an<br />
extension cord, be sure to use one heavy enough to<br />
carry the current your product will draw. An undersized<br />
cord will cause a drop in line voltage resulting in loss of<br />
power and overheating . A wire gauge size (A.W.G.) of at<br />
least 16 is recommended for an extension cord 8 metres<br />
or less in length. If in doubt, use the next heavier gauge.<br />
The smaller the gauge number, the heavier the cord.<br />
INSPECT EXTENSION CORDS PERIODICALLY and<br />
replace if damaged.<br />
WEAR PROPER APPAREL. Do not wear loose clothing,<br />
neckties, or jewelry that can get caught in the tool's<br />
moving parts and cause personal injury, Nonslip footwear<br />
is recommended when working outdoors. Wear<br />
protective hair covering to contain long hair.<br />
ALWAYS WEAR SAFETY GLASSES WITH SIDE<br />
SHIELDS. Everyday eyeglasses have only impactresistant<br />
lenses; they are NOT safety glasses.<br />
PROTECT YOUR LUNGS. Wear a face or dust mask<br />
if the cutting operation is dusty.<br />
RULES FOR SAFE OPERATION<br />
Page 2<br />
PROTECT YOUR HEARING. Wear hearing protection during<br />
extended periods of operation.<br />
DON'T ABUSE CORD. Never carry tool by the cord or yank<br />
it to disconnect from receptacle. Keep cord away from<br />
heat, oil, and sharp edges.<br />
DO NOT OVERREACH. Keep proper footing and balance<br />
at all times.<br />
MAINTAIN TOOLS WITH CARE. Keep tools sharp and clean<br />
for best and safest performance.Follow instructions for<br />
lubricating and changing accessories.<br />
NEVER LEAVE TOOL RUNNING UNATTENDED.TURN POWER<br />
OFF. Disconnect all tools when not in use, before<br />
servicing, or when changing attachments, wheels, etc.<br />
AVOID ACCIDENTAL STARTING. Be sure switch is off when<br />
plugging in.<br />
USE RECOMMENDED ACCESSORIES. The use of improper<br />
accessories may cause risk of injury.<br />
USE ONLY GRINDING WHEELS that comply with SAA and<br />
rated greater than 2850 RPM.<br />
DO NOT use wheels with incorrect size bore. NEVER<br />
use wheel washers or wheel screws that are defective<br />
or incorrect and NEVER touch grinding wheel or other<br />
moving parts.<br />
NEVER STAND ON TOOL. Serious injury could occur if<br />
the tool is tipped or if the wheel is unintentionally contacted.<br />
DIRECTION OF FEED. Be aware of wheel rotation direction;<br />
never grind without the workrest being properly set.<br />
NEVER grind more than one workpiece at a time.<br />
WARNING: Wheel coasts after turn off.<br />
CHECK DAMAGED PARTS. Before further use of the<br />
tool, a guard or other part that is damaged should be<br />
carefully checked to determine that it will operate properly<br />
and perform its intended function. Check for alignment of<br />
moving parts, binding of moving parts, breakage of parts,<br />
mounting and any other conditions that may affect its<br />
operation. A guard or other part that is damaged must be<br />
properly repaired or replaced by an authorised service<br />
centre to avoid risk of personal injury.<br />
KEEP TOOL DRY, CLEAN, AND FREE FROM OIL AND<br />
GREASE. Always use a clean cloth when cleaning. Never<br />
use brake fluids, gasoline, petroleum-based products, or<br />
any solvents to clean tool.<br />
INSPECT TOOL CORDS AND EXTENSION CORDS<br />
PERIODICALLY and, if damaged, have repaired by a<br />
qualified service technician. Stay constantly aware of cord<br />
location and keep it well away from the rotating wheel.<br />
NEVER USE IN AN EXPLOSIVE ATMOSPHERE. Normal<br />
sparking of the motor or sparking from grinding metal<br />
could ignite fumes.
USE OUTDOOR EXTENSION CORDS. Use only extension<br />
cords with approved ground connection that are intended<br />
for use outdoors and so marked.<br />
NEVER reach to pick up a workpiece, a piece of scrap,<br />
or anything else that is in or near the grinding path of the<br />
wheel.<br />
AVOID AWKWARD OPERATIONS AND HAND POSITIONS<br />
where a sudden slip could cause your hand to move<br />
into the wheel. ALWAYS make sure you have good balance.<br />
NEVER stand or have any part of your body in line with<br />
the path of the wheel.<br />
DO NOT USE TOOL IF SWITCH DOES NOT TURN IT ON AND<br />
OFF. Have defective switches replaced by an authorised<br />
service centre.<br />
DO NOT TURN THE MOTOR SWITCH ON AND OFF RAPIDLY.<br />
This could cause the wheel to loosen and could create<br />
ahazard. Should this ever occur, stand clear and allow<br />
the wheel to come to a complete stop. Disconnect your<br />
grinder from the power supply and securely retighten<br />
the wheel nut.<br />
WARNING:<br />
When servicing use only identical <strong>Ryobi</strong> replacement<br />
parts. Use of any other parts may create a hazard<br />
or cause product damage.<br />
USE ONLY FLANGES furnished with this bench grinder.<br />
IF ANY PART OF THIS GRINDER IS MISSING or should<br />
break, bend, or fail in any way, or should any electrical<br />
component fail to perform properly, shut off the power<br />
switch, remove the machine plug from the power source<br />
and have damaged, missing, or failed parts replaced<br />
before resuming operation.<br />
MAKE SURE THE GRINDER IS SECURELY MOUNTED as<br />
described in the operating instructions before connecting<br />
the tool to apowersupply.<br />
DO NOT OVERTIGHTEN THE WHEEL NUT. Excessive<br />
tightening can cause the wheel to crack during operation.<br />
INSPECT GRINDING WHEEL for visible defects. Check<br />
the wheel for fissures and cracks, and test for normal<br />
operation prior to use.<br />
ADJUST distance between wheel and work rest to<br />
maintain 1.6mm. or less separation as the diameter<br />
of the wheel decreases with use. The value of<br />
separation used in the marking is to be the separation<br />
recommended by the manufacturer but shall not be<br />
more than 3.2mm.<br />
ALWAYS EASE THE WORKPIECE AGAINST THE<br />
ABRASIVE WHEEL when starting to grind. A harsh<br />
impact can break the wheel. Use light pressure<br />
when starting to grind; toomuchpressureonacold<br />
wheel can cause the wheel to crack.<br />
RULES FOR SAFE OPERATION<br />
Page 3<br />
RISK OF INJURY DUE TO ACCIDENTAL STARTING. Do not<br />
use in an area where children may be present.<br />
NEVER START THE GRINDER when the wheel is in contact<br />
with the workpiece.<br />
SECURE WORK. Always hold workpiece firmly against<br />
the work rest.<br />
DO NOT USE THE BENCH GRINDER if the flange nut or<br />
clamp nut is missing or if the spindle shaft is bent.<br />
FREQUENTLY clean grinding dust from beneath grinder.<br />
DO NOT OPERATE THIS TOOL WHILE UNDER THE<br />
INFLUENCE OF DRUGS, ALCOHOL, OR ANY MEDICATION.<br />
ALWAYS STAY ALERT. Do not allow familiarity (gained<br />
from frequent use of your grinder) to cause a careless<br />
fraction of a second is sufficient to inflict severe injury.<br />
STAY ALERT AND EXERCISE CONTROL. Watch what you<br />
are doing and use common sense. Do not operate tool<br />
when you are tired. Do not rush.<br />
SAVE THESE INSTRUCTIONS. Refer to them frequently<br />
and use them to instruct other users, If you loan someone<br />
this tool, loan them these instructions also.<br />
WARNING:<br />
Some dust created by power sanding, sawing, grinding,<br />
drilling, and other construction activities contains<br />
chemicals know to cause cancer, birth defects or<br />
other reproductive harm. Some examples of these<br />
chemicals are:<br />
. lead from lead-based paints.<br />
. crystalline silica from bricks and cement and other<br />
masonry products, and<br />
. arsenic and chromium from chemically-treated timber.<br />
Your risk from these exposures varies, depending on<br />
how often you do this type of work. To reduce your<br />
exposure to these chemicals: work in a well ventilated<br />
area, and work with approved safety equipment, such<br />
as those dust masks that are specially designed to filter<br />
out microscopic particles.<br />
DOT NOT EXPOSE<br />
TO RAIN OR USE IN<br />
DAMP LOCATIONS
RULES FOR SAFE OPERATION<br />
The purpose of safety symbols is to attract your attention to possible dangers. The safety symbols, and the<br />
explanations with them, deserve your careful attention and understanding. The safety warnings do not by<br />
themselves eliminate any danger. The instructions or warnings they give are not substitutes for proper<br />
accident prevention measures.<br />
SYMBOL MEANING<br />
SAFETY ALERT SYMBOL:<br />
Indicates danger, warning, or caution. May be used in conjunction with other symbols or pictographs.<br />
DANGER: Failure to obey a safety warning will result in serious injury to yourself to others. Always<br />
follow the safety precautions to reduce the risk of fire, electric shock and personal injury.<br />
WARNING: Failure to obey a safety warning may result in property damage or personal injury to<br />
yourself or to others. Always follow the safety precautions to reduce the risk of fire, electric shock and<br />
personal injury.<br />
CAUTION: Failure to obey a safety warning may result in property damage or personal injury to<br />
yourself ro to others. Always follow the safety precautions to reduce the risk of fire, electric shock and<br />
personal injury.<br />
NOTE: Advises you of information or instructions vital to the operation or maintenance of the equipment.<br />
IMPORTANT<br />
Servicing requires extreme care and knowledge and should<br />
be performed only by a qualified service technician. For<br />
service we suggest you return the tool to your nearest RYOBI<br />
AUTHORISED SERVICE CENTRE for repair. When servicing,<br />
use only identical <strong>Ryobi</strong> replacement parts.<br />
WARNING:<br />
Do not attempt to operate this tool until you have read<br />
thoroughly and understand completely all instructions,<br />
safety rules, etc. contained in this manual. Failure to<br />
comply can result in accidents involving fire, electric<br />
shock, or serious personal injury. Save this operator's<br />
manual and review frequently for continuing safe<br />
operation and instructing others who may use this tool.<br />
WARNING:<br />
The operation of any grinder can result in foreign objects being thrown into your eyes, which can<br />
result in severe eye damage. Before beginning power tool operation,always wear safety goggles<br />
or safety glasses with side shields and a full face shield when needed. We recommend Wide<br />
Vision Safety Mask for use over eyeglasses or standard safety glasses with side shields.<br />
Page 4
Carefully remove all parts from the shipping carton.<br />
Lift the bench grinder from the carton and place it on a<br />
level work surface.<br />
Do not discard the packing materials until you have<br />
carefully inspected the machine, identified all loose parts,<br />
and satifactorily operated your bench grinder.<br />
Examine all parts to make sure no breakage or damage<br />
has occurred during shipping.<br />
If all parts have been included, proceed to assembly.<br />
If any parts are damaged or missing, do not attempt to<br />
LOOSE PARTS LIST - <strong>EBG2515</strong><br />
The following items are included with your Bench Grinder:<br />
Left Work Rest<br />
1<br />
Right Work Rest<br />
Plain Eyeshield<br />
Magnifying Eyeshield<br />
1<br />
Eyshield Fixing Knob (M4x12)<br />
2<br />
Hex Socket Spanner S=4 (Blacked)<br />
1<br />
Eyeshield Mounting Rod - one left, one right 2<br />
UNPACKING<br />
LOOSE PARTS LIST<br />
LOOSE PARTS LIST - <strong>EBG3720</strong><br />
The following items are included with your Bench Grinder:<br />
Left Work Rest 1<br />
Right Work Rest<br />
1<br />
Plain Eyeshield<br />
1<br />
Magnifying Eyeshield<br />
1<br />
Eyshield Fixing Knob (M4x12)<br />
2<br />
Hex Socket Spanner S=4 (Blacked)<br />
1<br />
Eyeshield Mounting Rod - one left, one right 2<br />
1<br />
1<br />
Page 5<br />
plug in this tool or turn it on until the damaged or<br />
missing parts are obtained and installed correctly.<br />
Contact your nearest <strong>Ryobi</strong> dealer for assistance if an parts<br />
are missing or damage.<br />
WARNING:<br />
If any parts are missing do not operate this machine<br />
until the missing parts are replaced. Failure to do<br />
so could result in possible serious injury.<br />
Eyeshield Assy. Mounting Bolt M6 x 30 (Zinc-Plated)<br />
Eyeshield Assy. Mounting Washer D6 (Blacked)<br />
Eyeshield Assy. Mounting Lock Washer D6 (Blacked)<br />
Wheel Dresser w/ Handle<br />
Adjustable Knob<br />
Washer (D5)<br />
Eyeshield Assy. Mounting Bolt M6 x 30 (Zinc-Plated)<br />
Eyeshield Assy. Mounting Washer D6 (Blacked)<br />
Eyeshield Assy. Mounting Lock Washer D6 (Blacked)<br />
Wheel Dresser w/ Handle<br />
Adjustable Knob<br />
Washer (D5)<br />
2<br />
2<br />
2<br />
1<br />
2<br />
2<br />
2<br />
2<br />
2<br />
1<br />
2<br />
2
TOOLS NEEDED<br />
The following tools (not included) are needed for assembly and alignment:<br />
7mm, 10mm, and 12mm<br />
COMBINATION WRENCH<br />
ADJUSTABLE WRENCH<br />
KNOW YOUR BENCH GRINDER<br />
See Figure. 3<br />
Before attempting to use your new tool, familiarise yourself<br />
with all operating features and safety requirements.<br />
Carefully read this operator's manual before using your<br />
grinder.<br />
POWER SWITCH<br />
Your <strong>EBG2515</strong> / <strong>EBG3720</strong> Bench Grinder features<br />
an easy access On/Off switch for convenience and safety.<br />
MOTOR<br />
Powered by a precision-built electric induction motor, your<br />
bench grinder has sufficient power to handle tough<br />
grinding jobs.<br />
GRINDING WHEEL<br />
Equipped with coarse and fine grinding wheels to suit most<br />
applications.<br />
NOTE: New wheels sometimes require dressing to true<br />
up the face of the wheel.<br />
SAFETY EYE SHIELD AND SPARK DEFLECTOR<br />
The safety shields and spark deflectors are adjustable<br />
for operator convenience. Operating the grinder without<br />
these features attached could result in serious injury.<br />
Do not grind with the safety shield raised ; always wear<br />
safety glasses for personal protection.<br />
PHILLIPS SCREWDRIVER<br />
FEATURES - <strong>EBG2515</strong> / <strong>EBG3720</strong><br />
Page 6<br />
WORK REST<br />
The work rests are independently adjustable to compensate for<br />
wheel wear. Before grinding, make certain the work rests<br />
are adjusted properly. Generally the object being ground<br />
is done slightly above centre of the grinding wheel.<br />
Adjust the distance between the wheel and the work rest to<br />
maintain 1.6mm. or less separation as the diameter of the<br />
wheel decreases with use.<br />
WHEEL DRESSING TOOL<br />
Abuildup of metals, dirt, rust, etc. will become embedded<br />
in the grinding wheel as it wears. Using the Wheel Dressing<br />
Tool to clean the wheel of these ground-in particles will help<br />
improve the grinder's performance.<br />
AUTO-ON WORKLIGHT<br />
Your <strong>EBG2515</strong>/<strong>EBG3720</strong> Bench Grinder comes equipped<br />
with a permanently mounted worklight that automatically<br />
lights the work area for safer, more accurate grinding and<br />
sharpening.<br />
COOLANT TRAY<br />
When grinding, metal objects become heated quickly. It<br />
is important to keep moving the object back and forth across<br />
the grinding wheel and to cool the object frequently using the<br />
grinder's Cooltant Tray.
ADJUSTABLE<br />
KNOB<br />
SAFETY<br />
EYE SHIELD<br />
WORK REST<br />
(LEFT)<br />
ADJUSTMENT<br />
KNOB<br />
MOUNTING SAFETY EYE SHIELDS<br />
See Figure. 4~5.<br />
Mount the left and right eye shield mounting arm to the inside<br />
of the wheel guards using the clamp brackets, hex bolts<br />
(M6 x 30 mm), and washers (6mm).<br />
Use the illustration as a guide to determine which eye shield<br />
mounting arm is mounted on the left and which eye shield<br />
mounting arm is mounted on the right of the grinder.<br />
Once eye shield mounting arms are firmly in place, slide the<br />
shield bracket onto the eye shield mounting arm. Tighten<br />
the adjustable knob leaving it loose enough to allow the<br />
safety eye shield to be raised and lowered easily.<br />
WARNING:<br />
To prevent personal injury, never operate the bench<br />
grinder unless the safety eye shields and spark deflectors<br />
are properly installed and in place.<br />
FEATURES - <strong>EBG2515</strong> / <strong>EBG3720</strong><br />
SPARK<br />
DEFLECTOR<br />
(LEFT)<br />
AUTO-ON<br />
WORKLIGHT<br />
COOLANT<br />
TRAY<br />
0 1<br />
MODEL <strong>EBG2515</strong>/ <strong>EBG3720</strong><br />
ASSEMBLY<br />
Page 7<br />
SAFETY<br />
EYE SHIELD<br />
SAFETY<br />
EYE SHIELD<br />
SPARK<br />
DEFLECTOR<br />
(RIGHT)<br />
SAFETY EYE SHIELD<br />
WITH MAGNIFYING GLASS<br />
WHEEL<br />
GUARD<br />
WORK REST<br />
(RIGHT)<br />
OFF ON<br />
ADJUSTABLE<br />
KNOB<br />
POWER<br />
SWITCH<br />
EYE SHIELD<br />
MOUNTING ARM<br />
SHIELD ROD<br />
ADJUSTABLE KNOB<br />
WASHER<br />
HEX BOLT<br />
0 1<br />
Fig.3<br />
WASHER<br />
HEX BOLT<br />
Fig.4<br />
Fig. 5
WORK REST-<strong>EBG2515</strong>/<strong>EBG3720</strong><br />
See Figure. 6<br />
Mount the work rests to the work rest bracket using the<br />
knob, washer, and one hex nut.<br />
Before tightening the bolts, adjust the gap between the<br />
grinding wheel and the work rest to a maximum of 1.6mm.<br />
Tighten securely.<br />
BASIC OPERATION<br />
WARNING:<br />
Always wear safety goggles or safety glasses with side<br />
shields during power tool operation or when blowing dust.<br />
If operation is dusty, wear a dust mask.<br />
To be efficient and work as designed, your tools should<br />
be kept sharp. Dull tools can and will cause accidents.<br />
Bench Grinders are ideal for sharpening tools such as<br />
chisels, planer blades, scissors, etc., and for removing<br />
rust or corrosion.<br />
WARNING:<br />
Never sharpen or grind anything made of aluminium.<br />
Grinders remove material rapidly so pressure is the key<br />
to efficient grinding.<br />
The proper way to sharpen a tool and avoid overheating is:<br />
Keep the object in constant motion, moving it at an<br />
even pace.<br />
Never force a tool against the grinding wheel.<br />
Keep the tool cool by using either a cooling tray, or a<br />
pan of water.<br />
The grinding wheel should rotate "into" the object being<br />
sharpened.<br />
Note: Excessive pressure may damage the tool, cause<br />
the motor to overheat, and prematurely wear down the<br />
grinding wheel.<br />
ASSEMBLY<br />
OPERATION<br />
Page 8<br />
WORK REST<br />
BRACKET<br />
HEX NUT<br />
WASHER<br />
KNOB<br />
Fig. 6<br />
WARNING:<br />
Excessive pressure on a cold wheel may cause the wheel<br />
to crack.<br />
The following recommendations will help you sharpen<br />
specific tools:<br />
TWIST DRILL BITS<br />
see Figure 7.<br />
Drill bits are best sharpened on a sharpening jig ( available<br />
at most hardware stores). Begin on one side of the point<br />
at the existing angle, then twist the bit while maintaining<br />
contact with the grinding surface. Sharpen only the tip.<br />
This technique requires considerable practice, so take your<br />
time and make a few " dry runs" first with the grinder off.<br />
Be sure to maintain the original cutting edge angle as this<br />
is important to the efficiency of your bits. One work rest<br />
has a V-groove angled to fit most drill bits.<br />
0 1<br />
BIT SHARPENING<br />
V-GROOVE<br />
Fig. 7
LAWN MOWER<br />
BLADE<br />
LAWN MOWER BLADES<br />
See Figure 8.<br />
Lawn mower blades are usually sharpened on only one<br />
edge and dressed up slightly on the other. Perform this<br />
sharpening process on both cutting ends of the blade.<br />
After sharpening, be sure to balance the blade by<br />
removing additional material.<br />
CAUTION<br />
An unbalanced lawn mower blade may cause excessive<br />
vibration which will damage the lawn mower<br />
CHISELS AND SCREWDRIVER BLADES<br />
See Figure 9.<br />
When sharpening chisels and screwdrivers, work rest should<br />
support the chisel at the correct angle against the wheel.<br />
0 1<br />
SCREW DRIVER<br />
OPERATION<br />
Fig. 8<br />
STAR<br />
WASHER(S) HEX NUT(S)<br />
page 9<br />
CHISEL SHARPENING<br />
Fig. 9<br />
WARNING:<br />
Always disconnect the bench grinder from the power<br />
source before performing any assembly or adjustment.<br />
Failure to do so could result in accidental starting resulting<br />
in possible serious personal injury.<br />
WHEEL REPLACEMENT<br />
See Figure 10.<br />
If you must replace a grinding wheel, be sure to obtain<br />
one with a safe rated speed at least as high as the "no<br />
load speed" RPM marked on the data plate of the grinder<br />
and which is marked to comply with SAA.<br />
To replace the grinding wheel, remove the wheel cover<br />
by loosening the screws, Loosen the wheel nut in a<br />
clockwise direction for the left side and a counterclockwise<br />
direction for the right side. Remove the outer flange and<br />
grinding wheel. To install a new grinding wheel. reverse<br />
the above procedure. Be sure the grinding wheel and outer<br />
flange are properly seated on the spindle shaft.<br />
SPINDLE<br />
SHAFT<br />
INNER<br />
FLANGE<br />
GRINDING<br />
WHEEL<br />
0 1<br />
WHEEL<br />
GUARD COVER<br />
SCREW(S)<br />
WHEEL<br />
NUT<br />
OUTER<br />
FLANGE Fig. 10
WARNING:<br />
When servicing, use only identical <strong>Ryobi</strong> replacement<br />
parts. Use of any other part may create a hazard of cause<br />
product damage.<br />
GENERAL<br />
Keep the bench grinder clean. Remove dust from working<br />
parts and beneath the grinder frequently.<br />
Make sure the bench grinder operates properly. Check<br />
screws, nuts, and bolts for tightness.<br />
EXTENSION CORDS<br />
The use of any extension cord will cause some loss of<br />
power. To keep the loss to a minimum and to prevent tool<br />
overheating, use an extension cord that is heavy enough<br />
to carry the current the tool will draw.<br />
Awire gauge size (A.W.G.) of at least 16 is recommended<br />
for an extension cord 8 metres or less in length. When<br />
working outdoors, use an extension cord that is suitable<br />
for outdoor use. The cord's jacket will be marked WA.<br />
WARNING:<br />
Check extension cords before each use. If damaged,<br />
replace immediately. Never use tool with a damaged<br />
cord since touching the damaged area could cause<br />
electrical shock resulting in serious injury.<br />
WORKLIGHT BULB REPLACEMENT<br />
When the light bulb is worn out and will no longer work,<br />
unfasten the screws which fix the lamp cover, then gently<br />
remove the bulb from the holder by pushing in and turning<br />
anticlockwise. Contact your dealer for replacement part.<br />
To replace, gently push the light bulb into the insert and<br />
turn clockwise, then fix the lamp cover in the revise order.<br />
WARNING:<br />
Do not use excess force as this could lead to the<br />
globe breaking and serious injury.<br />
MAINTENANCE<br />
Page 10<br />
WHEEL DRESSING TOOL<br />
Dressing a wheel is done to renew sharpness or to true<br />
up the face of the wheel.<br />
Set the work rest of the bench grinder at a slight angle and<br />
brace the wheel dressing tool against it. Do not make<br />
contact with the grinding wheel until after you have turned<br />
on the motor and the wheel is rotating at full speed. Press<br />
the dressing tool slightly against the rotating wheel until<br />
you get a bite, then move slowly from side to side across<br />
the wheel. A small bite and many passes is better than a<br />
big bite and one pass. Work cautiously, hold the dresser<br />
with force on the work rest. Do not use excessive pressure<br />
against the grinding wheel. Proceed slowly until you master<br />
the technique.
3, Incorrect fuses or circuit breakers<br />
in power line.<br />
n 1, Short circuit in motor or loose<br />
connections<br />
2, Low voltage.<br />
3, Incorrect fuses or circuit breakers<br />
in power line.<br />
4, Motor overloaded.<br />
of 1, Machine virbrating<br />
2, Workpiece not being held firmly.<br />
3, Wheel face uneven.<br />
4, Wheel is too hard.<br />
e. 1, Impurity on wheel surface.<br />
2, Workpiece not being held tightly.<br />
e 1, Improper type of grinding wheel<br />
2, Improper feed rate.<br />
3, Coolant required.<br />
shorted terminals or wo<br />
3, Install correct fuses<br />
1, Motor overloaded. 1, Reduce load on mot<br />
1, Inspect connections o<br />
terminals or worn insul<br />
2, Correct the low volta<br />
3, Install correct fuses<br />
4. Reduce load on mot<br />
ing 1, Depth of cut too great. 1, Slow down the rate of<br />
into wheel.<br />
1, Make sure machine<br />
a solid surface.<br />
2, Useaholding device to<br />
3, Dress the grinding w<br />
4. Use softer wheel, or<br />
1, Dress the grinding w<br />
2. Use a holding device t<br />
1, Try a wheel which is s<br />
2, Slow down the rate of<br />
into wheel.<br />
3, Add optional coolant<br />
by hand.
NOTES<br />
Page 12
RYOBI TECHNOLOGIES AUSTRALIA PTY. LTD.<br />
GUARANTEE<br />
Subject to the guarantee condition below, this <strong>Ryobi</strong> tool<br />
(hereinafter called “the product”) is guaranteed by <strong>Ryobi</strong><br />
(hereinafter called “the Company”) to be free from<br />
defects in material or workmanship for a period of 24<br />
months from the date of original purchase covering<br />
both parts and labour. Under the terms of this<br />
guarantee, the replacement shall be the opinion of<br />
the Company or its authorised agent. Should service<br />
become necessary during the warranty period, the<br />
owner should contact the <strong>Ryobi</strong> helpline 1300 361505,<br />
or the <strong>Ryobi</strong> retailer from where the product was<br />
purchased. In order to obtain guarantee service, the<br />
owner must present the sales docket and Guarantee<br />
Certif cate to confirm date of purchase. This product<br />
is sold by the dealer or agent as principal and the<br />
dealer has no authority from the company to give any<br />
additional guarantee on the Company's behalf except<br />
as herein contained or herein referred to.<br />
This guarantee only applies provided that the Product<br />
has been used in accordance with the manufacturer’s<br />
recommendations under normal use and reasonable<br />
care (in the opinion of the Company) and such<br />
guarantee does not cover damage, malfunction or<br />
BRISBANE:<br />
All enquiries Tel : 1300 361 505<br />
TOWNSVILLE: All enquiries Tel : 1300 361 505<br />
MELBOURNE: 960 Stud Road, Rowville,Vic. 3178<br />
Tel:(03) 9764 8656<br />
failure resulting from misuse, neglect, abuse, or<br />
used for a purpose for which it was not designed<br />
or is not suited and no repairs, alterations or<br />
modif cations have been attempted by other than<br />
an Authorised Service Agent. This guarantee will not<br />
apply if the tool is damaged by accident or if repairs<br />
arise from normal wear and tear.<br />
The Company accepts no additional liability pursuant to<br />
this guarantee for the costs of travelling or<br />
transportation of the Product or parts to and from the<br />
service dealer or agent-such costs are not included<br />
in this guarantee.<br />
Certain legislation, including the Trade Practices Act,<br />
1974 (as amended) and other state and territorial laws<br />
give rights to the buyer and impose liability on the seller<br />
in certain circumstances. Nothing herein shall have the<br />
effect of excluding, restricting or modifying any<br />
condition, guarantee, right or liability imposed, to the<br />
extent only that such exclusion, restriction or<br />
modification ould render any term herein void.<br />
RYOBI TECHNOLOGIES AUSTRALIA PTY. LTD.<br />
A.B.N. 98 002 277 509<br />
SYDNEY: 359-361 Horsley Road, Milperra, N.S.W. 2214.<br />
Contact during normal business hours.<br />
Tel: (02) 9792 9800 - Fax: 1800 807 993 - www.ryobi.com.au<br />
HOBART: All enquiries Tel : 1300 361 505<br />
ADELAIDE: All enquiries Tel : 1300 361 505<br />
PERTH: 33-35 Sorbonne Cres., Canning Vale,W.A. 6155.<br />
Tel:(08) 9455 7775<br />
RYOBI NEW ZEALAND PTY. LTD.<br />
AUCKLAND: 27 Clemow Drive, Mt Wellington, N.Z.<br />
Tel: (09) 573 0230 - Free Call: 0800 279 624 - Fax: (09) 573 0231 - www.ryobi.co.nz<br />
Contact during normal business hours.<br />
This Guarantee Form Should Be Retained By The Customer At All Times<br />
For your record and to assist in establishing date of purchase (necessary for in-guarantee service)<br />
please keep your purchase docket and this form completed with the following particulars.<br />
Purchased From<br />
Address Of Dealer<br />
Date Model No Serial No<br />
Present This Form With Your Purchase Docket When Guarantee Service Is Required.


