CG-7000D.pdf 222KB
CG-7000D.pdf 222KB
CG-7000D.pdf 222KB

You also want an ePaper? Increase the reach of your titles
YUMPU automatically turns print PDFs into web optimized ePapers that Google loves.
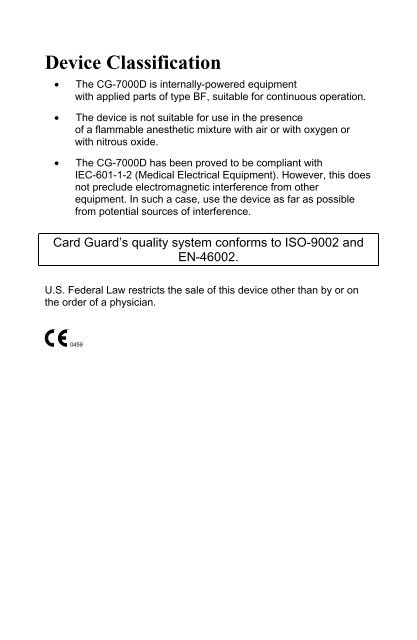
Device Classification<br />
• The <strong>CG</strong>-<strong>7000D</strong> is internally-powered equipment<br />
with applied parts of type BF, suitable for continuous operation.<br />
• The device is not suitable for use in the presence<br />
of a flammable anesthetic mixture with air or with oxygen or<br />
with nitrous oxide.<br />
• The <strong>CG</strong>-<strong>7000D</strong> has been proved to be compliant with<br />
IEC-601-1-2 (Medical Electrical Equipment). However, this does<br />
not preclude electromagnetic interference from other<br />
equipment. In such a case, use the device as far as possible<br />
from potential sources of interference.<br />
Card Guard’s quality system conforms to ISO-9002 and<br />
EN-46002.<br />
U.S. Federal Law restricts the sale of this device other than by or on<br />
the order of a physician.<br />
0459
Table of Contents:<br />
Introduction.....................................................................1<br />
<strong>CG</strong>-<strong>7000D</strong> User’s Kit .....................................................2<br />
Physical Features ..........................................................3<br />
Using the <strong>CG</strong>-<strong>7000D</strong> .....................................................5<br />
• Preparing the skin and placing the electrodes .......................5<br />
• Insert Batteries........................................................................8<br />
• Performing the test .................................................................9<br />
• Reviewing the recording (optional) .......................................10<br />
• Transmitting the E<strong>CG</strong> to the receiving station......................11<br />
• Storing the <strong>CG</strong>-<strong>7000D</strong> ..........................................................12<br />
Maintenance.................................................................13<br />
• Battery maintenance.............................................................13<br />
• Preventive maintenance .......................................................14<br />
Troubleshooting ...........................................................15<br />
Technical Specifications ..............................................16
Introduction<br />
The <strong>CG</strong>-<strong>7000D</strong> is a Trans-Telephonic 12-Lead<br />
Electrocardiogram (E<strong>CG</strong>) Transmitter, intended for diagnostic<br />
evaluation of cardiac symptoms. This easy-to-use portable<br />
device allows you to record a patient’s E<strong>CG</strong> waveform data,<br />
and store it in memory for later transmission. To assess the<br />
quality of the recorded data, you can view the E<strong>CG</strong> waveform<br />
on the <strong>CG</strong>-<strong>7000D</strong>’s graphic display (not for diagnostic<br />
purposes), one lead at a time. At your convenience, transmit<br />
the data over the telephone to a remote receiving station for<br />
analysis by a specialist.<br />
Note: The <strong>CG</strong>-<strong>7000D</strong> is fully compatible with the Card Guard<br />
Receiving Center equipment. The physician is<br />
responsible for ascertaining the compatibility of the<br />
device with other receiving equipment used.<br />
1
<strong>CG</strong>-<strong>7000D</strong> User’s Kit<br />
1. The <strong>CG</strong>-<strong>7000D</strong> unit<br />
2. Patient’s Cable<br />
3. User’s Guide<br />
4. Battery (9 V Alkaline ) – optional<br />
DISPLAY<br />
ON/OFF<br />
2
Physical Features<br />
Parts:<br />
1. <strong>CG</strong>-<strong>7000D</strong> Unit<br />
2. Patient’s Cable (USA: C/G 321315 or<br />
C/G 322602; Europe: C/G 321307<br />
or C/G 322595)<br />
3. Patient’s Cable Connector<br />
(on the <strong>CG</strong>-<strong>7000D</strong> Unit)<br />
4. Patient’s Cable Terminator<br />
5. Display Screen<br />
6. Speaker Outlet<br />
7. Battery Compartment with cover<br />
8. Disposable pregelled electrodes<br />
biocompatible in accordance<br />
with ISO 10993-1 (not supplied by<br />
manufacturer)<br />
Control Panel:<br />
9. RECORD/PLAY pad<br />
10. CLEAR MEMORY pad<br />
11. LOW BATTERY indicator light<br />
Display buttons<br />
12. SCROLL FORWARDS button<br />
13. SCROLL BACKWARDS button<br />
14. ON/OFF button<br />
3<br />
13<br />
14<br />
3<br />
DISPLAY<br />
ON/OFF<br />
1<br />
5<br />
12<br />
6<br />
7<br />
LOW BAT<br />
CLEAR<br />
MEMORY<br />
RECORD<br />
PLAY<br />
11<br />
10<br />
9<br />
2<br />
4
Symbols<br />
Indicates that the button is used for data recording and<br />
playback.<br />
Indicates that the button is used for clearing the memory.<br />
Indicates that the button is used for scrolling forwards.<br />
Indicates that the button is used for scrolling backwards.<br />
ON/OFF Indicates that the button is used for turning the LCD display<br />
on/off<br />
Indicates the Speaker Outlet.<br />
Indicates that the device contains applied parts of type BF.<br />
Indicates low voltage of the battery.<br />
0459 CE conformity marking.<br />
4
Using the <strong>CG</strong>-<strong>7000D</strong><br />
Preparing the skin and placing the electrodes<br />
Before attaching the electrodes, it is important to prepare the patient’s<br />
skin, to ensure obtaining a stable base line and high-quality E<strong>CG</strong><br />
signals.<br />
To prepare the skin<br />
• Apply E<strong>CG</strong> gel or water where the electrodes will be attached.<br />
To place the electrodes<br />
IMPORTANT:<br />
• When in use, there should be no contact between the<br />
device or cable and any metallic surface.<br />
• Perform the following steps in the specified sequence!<br />
5
1. Attach 10 disposable pregelled electrodes to the patient’s chest at<br />
the standard locations.<br />
The electrodes are labeled as follows:<br />
Europe US<br />
C1, C2,<br />
C3, C4,<br />
C5, C6<br />
V1, V2,<br />
V3, V4,<br />
V5, V6<br />
R RA<br />
L LA<br />
N RL<br />
F LL<br />
RA(R)<br />
6<br />
1<br />
2 3 4 6<br />
5<br />
RL(N) LL(F)<br />
Electrode 1: 4 th intercostal space – right of sternum<br />
Electrode 2: 4 th intercostal space – left of sternum<br />
Electrode 3: Halfway between electrodes 2 and 4<br />
Electrode 4: Left midclavicular line in 5 th intercostal space<br />
Electrode 5: left anterior axillary line in 5 th intercostal space<br />
Electrode 6: left midaxillary line in 5 th intercostal space<br />
LA(L)
2. Insert the<br />
serrated silver ring at<br />
the end of the<br />
Patient’s Cable into<br />
the Patient’s Cable<br />
Connector, and<br />
rotate it until it falls<br />
into place.<br />
3. Gently snap<br />
the Patient’s Cable<br />
into the Patient’s<br />
Cable Connector (on<br />
the <strong>CG</strong><strong>7000D</strong> unit).<br />
4. Attach the<br />
lead wires to the<br />
disposable<br />
electrodes according<br />
to the markings on<br />
the Patient’s Cable<br />
Terminator.<br />
7<br />
Patient’s cable connector<br />
Patient’s cable
Insert Batteries<br />
Insert the battery by removing the battery compartment cover, lifting<br />
out the battery connection from within the battery compartment and<br />
firmly snapping the battery to its connector. Place the battery in the<br />
battery compartment and close the battery compartment cover.<br />
4 2<br />
Note:<br />
8<br />
1<br />
3<br />
1) Battery compartment<br />
2) Battery<br />
3) Battery compartment<br />
cover<br />
4) Battery connector<br />
Note:<br />
Ensure the proper<br />
connection of the battery<br />
with regard to the polarity.<br />
• To conserve the battery, the display shuts off automatically<br />
after one minute of disuse. The display is reactivated by<br />
pressing the Power Key.<br />
Press the Power Key for at least one second to activate the device.<br />
The Power Key is set to prevent accidental activation by contact of<br />
less than one second.
Performing the test<br />
Performing the test involves two stages – clearing the memory of<br />
previous data, and actual recording.<br />
Note: To record the E<strong>CG</strong> data you do not have to press the ON/OFF<br />
button – this button controls the graphic display screen only.<br />
E<strong>CG</strong> recording must be performed with the graphic<br />
display OFF.<br />
1. Press the CLEAR MEMORY pad and hold it down<br />
for at least one second.<br />
9<br />
CLEAR<br />
MEMORY<br />
• The <strong>CG</strong>-<strong>7000D</strong> emits a six-tone audio signal,<br />
indicating that its memory is now clear and ready to record new<br />
data.<br />
Note: To prevent you from losing data by accidentally pressing the<br />
CLEAR MEMORY pad, the memory is not cleared unless you<br />
hold the pad down for at least one second.<br />
2. Press the RECORD/PLAY pad to start the<br />
recording.<br />
• The <strong>CG</strong>-<strong>7000D</strong> emits a cycling audio signal while<br />
it initializes (about 12 seconds).<br />
x<br />
RECORD<br />
PLAY<br />
• During the recording period that follows, the <strong>CG</strong>-<strong>7000D</strong> emits<br />
recording sounds (about 15 seconds).<br />
• The end of the recording sounds indicates that the recording is<br />
done.<br />
Note: If the LOW BATTERY indicator light comes ON<br />
during the recording, stop the operation, replace<br />
the battery, and start the recording from the<br />
beginning.<br />
LOW BAT<br />
3. Disconnect the Patient’s Cable from the disposable electrodes.<br />
4. Remove the electrodes from the patient’s body and dispose of<br />
them.
Reviewing the recording (optional)<br />
Reviewing the recording allows you to assess the quality of the E<strong>CG</strong><br />
trace, and to get a general impression of its form (not for diagnostic<br />
puposes).<br />
Note:<br />
• The graphic display is not intended for measuring the E<strong>CG</strong><br />
waveform.<br />
• It is recommended that the Patient Cable be disconnected<br />
when you view the E<strong>CG</strong>.<br />
To view the E<strong>CG</strong> trace<br />
1. Press the ON/OFF button to turn ON the graphic display screen.<br />
I Page-1<br />
• The recording is displayed on the screen, one lead at a time.<br />
For each lead, the recording consists of two pages. The lead<br />
name and page appear at the bottom of the screen.<br />
2. Use the SCROLL FORWARDS and SCROLL BACKWARDS<br />
buttons to scroll through the E<strong>CG</strong> trace.<br />
3. When you have finished examining the waveform, press the<br />
ON/OFF button to turn OFF the graphic display.<br />
10
Transmitting the E<strong>CG</strong> to the receiving station<br />
After recording the E<strong>CG</strong>, you can transmit the data over the phone to<br />
the Receiving Station for analysis by a specialist.<br />
Note: Before transmission, make sure that the graphic display<br />
is OFF. If you accidentally turn the graphic display ON during<br />
transmission, turn it back OFF and re-transmit.<br />
To transmit the data<br />
1. Dial the Receiving Station.<br />
2. Follow the instructions of the Receiving<br />
Station operator.<br />
3. When instructed to do so, place the<br />
telephone mouthpiece firmly over the<br />
speaker outlet at the front of the <strong>CG</strong>-<br />
<strong>7000D</strong>.<br />
Note: It is recommended that you place<br />
both the <strong>CG</strong>-<strong>7000D</strong> and the<br />
telephone on a desk during<br />
transmission.<br />
4. Press the RECORD/PLAY button to start the transmission.<br />
• The <strong>CG</strong>-<strong>7000D</strong> emits a brief whining tone, followed by<br />
transmission signals (about 30 seconds).<br />
• The end of the transmission signals indicates that the<br />
transmission is done.<br />
5. When the transmission signals stop, resume the conversation with<br />
the operator.<br />
Note:<br />
• After the transmission, the data remain stored in memory,<br />
available for re-transmission, until the CLEAR MEMORY button<br />
is pressed.<br />
• If the LOW BATTERY indicator light comes ON during<br />
transmission, complete the transmission and replace the<br />
battery.<br />
11
Storing the <strong>CG</strong>-<strong>7000D</strong><br />
When not in use, always store the <strong>CG</strong>-<strong>7000D</strong> and the Patient’s Cable<br />
in the pouch.<br />
To re-pack the <strong>CG</strong>-<strong>7000D</strong><br />
1. Pull back the serrated silver ring at the end of the Patient’s Cable,<br />
and gently pull the Patient’s Cable out of the Patient’s Cable<br />
Connector.<br />
2. Return the <strong>CG</strong>-<strong>7000D</strong> and Patient’s Cable to the pouch.<br />
12
Maintenance<br />
Battery maintenance<br />
Battery<br />
• Use only a 9V Alkaline battery.<br />
• Check the battery at least once a month by pressing the<br />
RECORD/PLAY button. If the LOW BATTERY light comes ON<br />
(and stays ON), replace the battery immediately.<br />
• If the <strong>CG</strong>-<strong>7000D</strong> is not likely to be used for 3 months, remove<br />
the battery.<br />
• Dispose of used batteries at designated battery-disposal<br />
locations only.<br />
! CAUTION:<br />
• If the LOW BATTERY light comes ON while you record an E<strong>CG</strong><br />
trace, complete the test, transmit the data, and replace the<br />
battery.<br />
• Data stored in the memory are lost when the battery is<br />
replaced, —start the procedure once more from the beginning..<br />
13
Preventive maintenance<br />
Perform the following preventive maintenance tasks monthly to ensure<br />
that the <strong>CG</strong>-<strong>7000D</strong> continue to perform at maximum capacity, and to<br />
reduce the possibility of a failure.<br />
Mechanical inspection of the <strong>CG</strong>-<strong>7000D</strong><br />
• Check the lead wires for splits or cracks. If you have any<br />
questions or doubts, contact your service provider.<br />
Cleaning the <strong>CG</strong>-<strong>7000D</strong><br />
• Wipe the outside surface of the <strong>CG</strong>-<strong>7000D</strong> and the snaps at the<br />
ends of the lead wires with an alcohol-soaked pad (95%).<br />
Caution:<br />
• Do not allow any liquid to enter the <strong>CG</strong>-<strong>7000D</strong> casing, and<br />
avoid pouring water or other liquid onto the <strong>CG</strong>-<strong>7000D</strong> while<br />
cleaning (IPX0 equipment).<br />
• Never use abrasive materials such as wire wool or metal polish.<br />
• During cleaning, make sure you do not expose the <strong>CG</strong>-<strong>7000D</strong><br />
to temperatures in excess of 45°C.<br />
14
Troubleshooting<br />
Problem Possible Causes Solutions<br />
No sound is<br />
heard when the<br />
RECORD/PLAY<br />
or CLEAR<br />
MEMORY<br />
buttons are<br />
pressed.<br />
When the<br />
RECORD/PLAY<br />
or CLEAR<br />
MEMORY<br />
buttons are<br />
pressed, the <strong>CG</strong>-<br />
<strong>7000D</strong> keeps<br />
repeating the<br />
same audio<br />
signal over and<br />
over.<br />
The battery is very low. Replace the battery.<br />
The <strong>CG</strong>-<strong>7000D</strong> has gone<br />
into a loop and needs<br />
resetting.<br />
Problems detected by the Receiving Station:<br />
The base line is<br />
unstable.<br />
The E<strong>CG</strong> signal<br />
is very noisy.<br />
No data is<br />
received at the<br />
Receiving<br />
Station.<br />
• The resistance of the<br />
electrode contacts is high.<br />
• The skin is not prepared<br />
properly.<br />
• There is a communications<br />
problem.<br />
• The <strong>CG</strong>-<strong>7000D</strong> may be<br />
damaged.<br />
NOTE: If the problem persists, call the service provider.<br />
15<br />
Take the batteries out to<br />
stop the <strong>CG</strong>-<strong>7000D</strong>. Put<br />
the battery back in, and try<br />
again.<br />
Repeat the skin<br />
preparation procedure.<br />
Repeat the skin<br />
preparation procedure.<br />
Repeat the test and<br />
transmission procedure.
Technical Specifications<br />
Parameter Value<br />
Input impedance 100 Mohm<br />
Input current (max) 0.2 μA<br />
CMRR 60 dB<br />
Input dynamic range 5 mV p-p<br />
Band width 0.05 - 100 Hz<br />
Carrier frequency 1700 Hz<br />
Frequency deviation 100 Hz/mV<br />
A-to-D sampling rate 500 samples/sec<br />
Resolution 8 bit<br />
Display:<br />
View area 49×49 mm<br />
Number of dots 128×128<br />
Dot size 0.32×0.32 mm<br />
Operating temperature 0 to +45°C<br />
Storing temperature -20 to +65°C<br />
Relative humidity 5 to 95%<br />
Dimensions 160×80×40 mm<br />
Weight 450 gr<br />
Current consumption (max) 70 mA<br />
16