Stabilis™ Surgical Technique (PDF) - Tornier DX
Stabilis™ Surgical Technique (PDF) - Tornier DX
Stabilis™ Surgical Technique (PDF) - Tornier DX

You also want an ePaper? Increase the reach of your titles
YUMPU automatically turns print PDFs into web optimized ePapers that Google loves.
6<br />
T O r N i E r ® S t a b i l i S a n k l e a r t h r o d e S i S P l a t i n g S y S t e m<br />
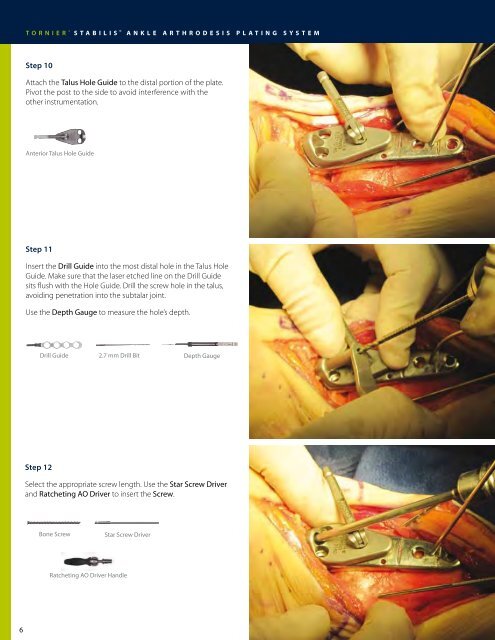
Step 10<br />
Attach the Talus Hole Guide to the distal portion of the plate.<br />
Pivot the post to the side to avoid interference with the<br />
other instrumentation.<br />
Anterior Talus Hole Guide<br />
Step 11<br />
Insert the Drill Guide into the most distal hole in the Talus Hole<br />
Guide. Make sure that the laser etched line on the Drill Guide<br />
sits flush with the Hole Guide. Drill the screw hole in the talus,<br />
avoiding penetration into the subtalar joint.<br />
Use the Depth Gauge to measure the hole’s depth.<br />
Step 12<br />
Drill Guide 2.7 mm Drill Bit Depth Gauge<br />
Select the appropriate screw length. Use the Star Screw Driver<br />
and Ratcheting AO Driver to insert the Screw.<br />
Bone Screw<br />
Star Screw Driver<br />
Ratcheting AO Driver Handle