

Volar Distal Radius Locking Plate - Wheeless' Textbook of ...
Volar Distal Radius Locking Plate - Wheeless' Textbook of ...
Volar Distal Radius Locking Plate - Wheeless' Textbook of ...

You also want an ePaper? Increase the reach of your titles
YUMPU automatically turns print PDFs into web optimized ePapers that Google loves.
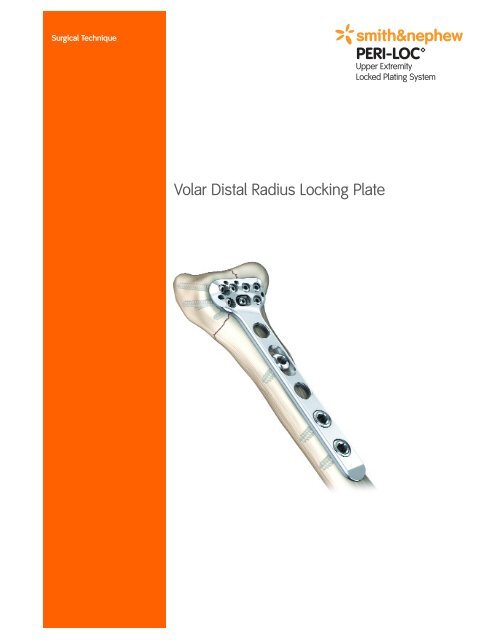
Surgical Technique<br />
<strong>Volar</strong> <strong>Distal</strong> <strong>Radius</strong> <strong>Locking</strong> <strong>Plate</strong>
PERI-LOC Upper Extremity<br />
Locked Plating System<br />
<strong>Volar</strong> <strong>Distal</strong> <strong>Radius</strong> Surgical TechniqueCatalog Infor<br />
Table <strong>of</strong> Contents<br />
Introduction . . . . . . . . . . . . . . . . . . . . . . . . . . . . . . . . . . . . . . . . . . . . . . . . . . . . . . . .2<br />
PERI-LOC Locked Plating System Overview . . . . . . . . . . . . . . . . . . . . . . . . . . . . . . . .2<br />
Implant Features . . . . . . . . . . . . . . . . . . . . . . . . . . . . . . . . . . . . . . . . . . . . . . . . . . . . . .4<br />
Indications . . . . . . . . . . . . . . . . . . . . . . . . . . . . . . . . . . . . . . . . . . . . . . . . . . . . . . . . . .6<br />
<strong>Volar</strong> <strong>Distal</strong> <strong>Radius</strong> Case Examples . . . . . . . . . . . . . . . . . . . . . . . . . . . . . . . . . . . . . . .7<br />
Surgical Technique . . . . . . . . . . . . . . . . . . . . . . . . . . . . . . . . . . . . . . . . . . . . . . . . . . .8<br />
Patient Positioning . . . . . . . . . . . . . . . . . . . . . . . . . . . . . . . . . . . . . . . . . . . . . . . . . . . .8<br />
Incision . . . . . . . . . . . . . . . . . . . . . . . . . . . . . . . . . . . . . . . . . . . . . . . . . . . . . . . . . . . . .9<br />
Fracture Reduction and Provisional Fixation . . . . . . . . . . . . . . . . . . . . . . . . . . . . . . . .10<br />
<strong>Plate</strong> Selection . . . . . . . . . . . . . . . . . . . . . . . . . . . . . . . . . . . . . . . . . . . . . . . . . . . . . . .11<br />
<strong>Plate</strong> Positioning . . . . . . . . . . . . . . . . . . . . . . . . . . . . . . . . . . . . . . . . . . . . . . . . . . . . .12<br />
Screw Insertion . . . . . . . . . . . . . . . . . . . . . . . . . . . . . . . . . . . . . . . . . . . . . . . . . . . . . .13<br />
• Option #1: Shaft-first Method . . . . . . . . . . . . . . . . . . . . . . . . . . . . . . . . . . . . . . . . . . .13<br />
• Option #2: <strong>Distal</strong>-first Method . . . . . . . . . . . . . . . . . . . . . . . . . . . . . . . . . . . . . . . . . . .13<br />
• 3.5mm Cortex/<strong>Locking</strong> Screw Technique . . . . . . . . . . . . . . . . . . . . . . . . . . . . . . . . . .15<br />
• 2.5mm Cortex/<strong>Locking</strong> Screw Technique . . . . . . . . . . . . . . . . . . . . . . . . . . . . . . . . . .17<br />
Incision Closure . . . . . . . . . . . . . . . . . . . . . . . . . . . . . . . . . . . . . . . . . . . . . . . . . . . . . .19<br />
Catalog Information . . . . . . . . . . . . . . . . . . . . . . . . . . . . . . . . . . . . . . . . . . . . . . . . . .20<br />
Nota Bene<br />
The technique description herein is made available to the healthcare pr<strong>of</strong>essional<br />
to illustrate the author's suggested treatment for the uncomplicated procedure.<br />
In the final analysis, the preferred treatment is that which addresses the needs <strong>of</strong><br />
the specific patient.<br />
1
Introduction<br />
PERI-LOC Locked Plating System<br />
Overview<br />
The PERI-LOC Locked Plating System combines<br />
the advantages <strong>of</strong> locked plating with the flexibility<br />
and benefits <strong>of</strong> traditional plates and<br />
screws. Utilizing both locking and non-locking<br />
screws, the PERI-LOC system allows for the creation<br />
<strong>of</strong> a construct that resists angular collapse<br />
and also functions as an effective fracture<br />
reduction aid. A simple, intuitive instrument set<br />
featuring standardized drill bits, screwdrivers,<br />
and color coded drill guides helps make the<br />
PERI-LOC system efficient and easy to use.<br />
The precise screw trajectories, anatomic<br />
contour, and locking capabilities <strong>of</strong> the<br />
PERI-LOC <strong>Volar</strong> <strong>Distal</strong> <strong>Radius</strong> <strong>Plate</strong>s provide a<br />
stable construct for predictable reconstruction<br />
<strong>of</strong> complex fractures <strong>of</strong> the radius.<br />
2
• Low pr<strong>of</strong>ile plate and screws reduce the<br />
potential for s<strong>of</strong>t tissue and tendon irritation<br />
• Twenty-six degree distal volar tilt allows for<br />
optimal anatomic fracture reduction and<br />
restoration <strong>of</strong> radial inclination<br />
• Pre-contoured standard and wide plates<br />
available in lefts and rights and a variety <strong>of</strong><br />
lengths<br />
• <strong>Locking</strong> and non-locking option in every<br />
threaded hole for custom screw configurations<br />
• Five points <strong>of</strong> distal articular fixation<br />
• Two points <strong>of</strong> radial styloid fixation<br />
• K-wire holes for provisional fixation and joint<br />
surface reconstruction<br />
• 316L stainless steel for strength<br />
• Elongated holes in the plate shaft and head<br />
facilitate plate translation<br />
• Beveled plate tip for percutaneous insertion<br />
3
Implant Features<br />
Standard <strong>Volar</strong> <strong>Distal</strong> <strong>Radius</strong> <strong>Plate</strong><br />
Two points <strong>of</strong><br />
radial styloid<br />
fixation<br />
Oblong head<br />
hole allows for<br />
radial ulnar<br />
translation<br />
Oblong shaft hole<br />
allows for plate<br />
translation<br />
Beveled tip<br />
facilitates<br />
percutaneous<br />
insertion<br />
4<br />
26º volar tilt<br />
Low plate pr<strong>of</strong>ile
Implant Features<br />
Wide <strong>Volar</strong> <strong>Distal</strong> <strong>Radius</strong> <strong>Plate</strong><br />
Two points <strong>of</strong><br />
radial styloid<br />
fixation<br />
Oblong head<br />
hole allows for<br />
radial ulnar<br />
translation<br />
Beveled tip<br />
facilitates<br />
percutaneous<br />
insertion<br />
Wide <strong>Volar</strong><br />
<strong>Distal</strong> <strong>Radius</strong><br />
<strong>Plate</strong>s <strong>of</strong>fer an<br />
additional point<br />
<strong>of</strong> fixation in<br />
the head<br />
Oblong shaft<br />
hole allows for<br />
proximal/distal<br />
translation<br />
Every threaded hole can accept a locking or non-locking screw:<br />
2.5mm Cortex Screw<br />
Cat. No. 7182-25XX<br />
3.5mm Cortex Screw<br />
Cat. No. 7182-40XX<br />
2.5mm <strong>Locking</strong> Screw<br />
Cat. No. 7182-24XX<br />
3.5mm <strong>Locking</strong> Screw<br />
Cat. No. 7182-50XX<br />
5
Indications<br />
The PERI-LOC <strong>Volar</strong> <strong>Distal</strong> <strong>Radius</strong> <strong>Plate</strong>s are<br />
indicated for fixation <strong>of</strong> fractures, non-unions<br />
and osteotomies <strong>of</strong> the radius.<br />
6
<strong>Volar</strong> <strong>Distal</strong> <strong>Radius</strong> Case Examples<br />
Case 1<br />
Case 2<br />
7
Surgical Technique<br />
Patient Positioning<br />
The patient should be placed in the supine<br />
position with the affected limb positioned to<br />
expose the surgical site. A radiolucent arm<br />
board is preferable so as not to impede<br />
fluoroscopy.<br />
8
Incision<br />
The incision for volar fixation <strong>of</strong> the distal<br />
radius is typically performed through the distal<br />
extent <strong>of</strong> the Henry approach. An incision is<br />
made between the flexor carpi radialis (FCR)<br />
tendon and the radial artery. This interval is<br />
developed, revealing the flexor pollicis longus<br />
(FPL) muscle at the proximal extent <strong>of</strong> the<br />
wound and the pronator quadratus muscle<br />
more distally. The radial artery is carefully<br />
retracted radially, while the tendons <strong>of</strong><br />
the FCR and FPL are retracted ulnarly.<br />
The pronator quadratus is divided at its<br />
most radial aspect, leaving a small cuff<br />
<strong>of</strong> muscle for later reattachment. Any<br />
elevation <strong>of</strong> the muscle <strong>of</strong> the FPL should<br />
be performed at its most radial aspect,<br />
as it receives its innervation from the<br />
anterior interosseous nerve on its ulnar<br />
side. After the pronator quadratus has<br />
been divided and elevated, the fracture<br />
is readily visualized, and reduction<br />
maneuvers can be accomplished under<br />
direct vision.<br />
9
Fracture Reduction and Provisional<br />
Fixation<br />
After exposure and debridement <strong>of</strong> the<br />
fracture site, the fracture is reduced and<br />
provisionally fixed under fluoroscopy with<br />
K-wires, reduction forceps or suture fixation.<br />
Reduction aids should be placed so as not to<br />
interfere with placement <strong>of</strong> the plate. The<br />
PERI-LOC <strong>Volar</strong> <strong>Distal</strong> <strong>Radius</strong> <strong>Plate</strong> itself may<br />
also be used as a reduction tool due to its<br />
anatomical contour and locking/non-locking<br />
screw options.<br />
10
<strong>Plate</strong> Selection<br />
The appropriate plate is selected following<br />
fracture reduction. <strong>Plate</strong> options include<br />
standard and wide distal configurations in lefts<br />
and rights and varying lengths. The standard<br />
wide plate allows for an additional point <strong>of</strong><br />
fixation distally. Correct plate selection is<br />
determined by the fracture pattern and how the<br />
plate conforms to the volar surface <strong>of</strong> the distal<br />
radius. The plate features 26º <strong>of</strong> volar tilt to help<br />
achieve optimal plate positioning along the<br />
distal aspect <strong>of</strong> the volar surface and anatomic<br />
reduction <strong>of</strong> the fracture.<br />
11
The standard and wide plates utilize different<br />
Drill Guide Blocks that are colored “lime” for left<br />
and “rose” for right to provide easy identification.<br />
Following plate selection, the Guide Block is<br />
either attached to the plate prior to insertion or<br />
may be attached following provisional fixation <strong>of</strong><br />
the plate to the bone. Alternatively, the Guide<br />
Block may be excluded altogether and the 2.0mm<br />
<strong>Locking</strong> Drill Guide threaded into the locking<br />
holes individually to drill for the 2.5mm locking<br />
screws. For the non-locking screws use the<br />
2.0mm Drill Guide with Handle.<br />
Note: Applying the Guide Block following<br />
provisional fixation <strong>of</strong> the plate to bone may<br />
allow for enhanced visualization <strong>of</strong> the fracture<br />
and plate placement.<br />
Tip:<br />
When using the 2.0mm <strong>Locking</strong> Drill Guide without<br />
the Guide Block, care must be taken when threading<br />
it into the plate. If it is not properly threaded into<br />
the plate, the intended screw trajectory may not<br />
match the thread <strong>of</strong> the locking hole, causing the<br />
screw to cross thread. Cross threaded screws may<br />
still lock, but at suboptimal angles.<br />
<strong>Plate</strong> Positioning<br />
<strong>Plate</strong> position and the order <strong>of</strong> screw insertion<br />
will be determined by fracture pattern and/or<br />
patient anatomy. The plate is designed to sit<br />
along the distal aspect <strong>of</strong> the volar surface <strong>of</strong><br />
the distal radius where its 26° <strong>of</strong> volar tilt will<br />
provide optimal buttressing <strong>of</strong> the articular<br />
surface.<br />
Standard<br />
Drill Guide Block<br />
Left<br />
Cat. No. 7117-3489<br />
12<br />
Standard<br />
Drill Guide Block<br />
Right<br />
Cat. No. 7117-3490<br />
Wide<br />
Drill Guide Block<br />
Left<br />
Cat. No. 7117-3457<br />
Wide<br />
Drill Guide Block<br />
Right<br />
Cat. No. 7117-3458
Screw Insertion<br />
The PERI-LOC <strong>Volar</strong> <strong>Distal</strong> <strong>Radius</strong> <strong>Plate</strong> may<br />
be implanted using either a “Shaft-first” or<br />
“<strong>Distal</strong>-first” fixation method.<br />
Option #1: Shaft-first Method<br />
Apply the plate to bone and insert a 3.5mm<br />
Cortex Screw into the oblong hole in the<br />
shaft following the technique described<br />
below. Prior to fully seating the screw, the<br />
plate may be translated up to 5mm distally or<br />
proximally as needed. Once optimal plate<br />
position has been achieved, fully seat the<br />
screw. For the remaining screws, determine<br />
whether locking or cortex screws will be<br />
used and insert these screws according to<br />
the relevant screw insertion technique as<br />
described below.<br />
Option #2: <strong>Distal</strong>-first Method<br />
Apply the plate to bone and insert a 2.5mm<br />
Cortex Screw into the oblong hole in the distal<br />
aspect <strong>of</strong> the plate following the technique<br />
described below. Prior to fully seating<br />
the screw, perform radial or ulnar translation<br />
as needed. Once optimal plate position has<br />
been achieved fully seat the screw. For the<br />
remaining screws, determine whether locking<br />
or cortex screws will be used and insert<br />
these screws according to the relevant screw<br />
insertion technique as described below.<br />
Tip:<br />
If the <strong>Distal</strong>-first method is used the Guide<br />
Block cannot be attached to the plate until<br />
after the 2.5mm Cortex Screw is fully seated<br />
in the oblong hole.<br />
13
Tips:<br />
• If non-locking screws are to be inserted into a<br />
plate to gain compression, it is preferred that<br />
they be inserted prior to any locking screws.<br />
• For a pre-determined screw trajectory when<br />
inserting Cortex Screws, either the 2.7mm<br />
<strong>Locking</strong> Drill Guide or 2.0mm <strong>Locking</strong> Drill Guide<br />
should be used.<br />
• The 3.5mm <strong>Locking</strong> Drill Guide-One Piece may<br />
be substituted for the <strong>Locking</strong> Drill Guide with<br />
Insert.<br />
• <strong>Locking</strong> screws may be inserted on power, but<br />
should always be tightened by hand. Tightening<br />
screws on power may cause loss <strong>of</strong> reduction,<br />
exposure <strong>of</strong> the screw head to excessive torque<br />
or damage to the drill.<br />
14
3.5mm Cortex Screw Insertion<br />
• Drill with the Short 2.7mm Drill bit through the<br />
2.7mm Drill Guide with Handle. Screw length<br />
may be determined by reading the calibrations<br />
on the Drill Bit or by using the 3.5mm Depth<br />
Gauge. If using the Depth Gauge, remove the<br />
Drill Guide for accurate measurement. Insert<br />
the appropriate length cortex screw with the<br />
3.5mm Hexdriver.<br />
2.7mm Drill Guide/<br />
2.0mm Drill Guide<br />
Handle<br />
Cat. No. 7117-3462<br />
2.7mm<br />
Short Drill Bit<br />
Cat. No. 7117-3362<br />
Short 3.5mm<br />
Screw Depth<br />
Gauge<br />
Cat. No. 7117-3523<br />
Teardrop<br />
Screwdriver Handle<br />
Cat. No. 7117-3543<br />
3.5mm<br />
Self Retaining<br />
Hexdriver Shaft<br />
Cat. No. 7117-3488<br />
15
3.5mm <strong>Locking</strong> Screw Technique<br />
• Thread the 2.7mm <strong>Locking</strong> Drill Guide into<br />
the screw hole. Drill with the Short 2.7mm<br />
Drill Bit and measure for screw length by<br />
reading the calibrations on the Drill Bit or by<br />
using the 3.5mm Depth Gauge. If using<br />
Depth Gauge, the <strong>Locking</strong> Drill Guide must<br />
be removed for accurate measurement.<br />
Insert the appropriate length screw using the<br />
3.5mm Hexdriver.<br />
2.7mm<br />
Short <strong>Locking</strong><br />
Drill Guide<br />
Cat. No. 7117-3464<br />
16<br />
2.7mm<br />
Short Drill Bit<br />
Cat. No. 7117-3362<br />
Short 3.5mm<br />
Screw Depth<br />
Gauge<br />
Cat. No. 7117-3523<br />
3.5mm<br />
Self Retaining<br />
Hexdriver Shaft<br />
Cat. No. 7117-3488<br />
Teardrop<br />
Screwdriver Handle<br />
Cat. No. 7117-3543
2.5mm Cortex Screw Technique<br />
• Drill with the Short 2.0mm Drill Bit through the<br />
2.0mm Drill Guide with Handle. Screw length<br />
may be determined by reading the calibrations<br />
on the Drill Bit or by using the 2.5mm Depth<br />
Gauge. If using the Depth Gauge, remove the<br />
Drill Guide for accurate measurement. Insert<br />
the appropriate length 2.5mm Cortex Screw<br />
using the 1.5mm Hexdriver.<br />
Tip:<br />
The Drill Guide Block does not need to be<br />
removed for screw insertion.<br />
2.0mm Short<br />
Drill Bit<br />
Cat. No. 7117-3555<br />
2.5mm Short Screw<br />
Depth Gauge<br />
Cat. No. 7117-3463<br />
1.5mm Hexdriver<br />
Shaft<br />
Cat. No. 7117-0036<br />
Mini Quick<br />
Coupling Bulb<br />
Handle<br />
Cat. No. 7117-0014<br />
Holding Sleeve<br />
Cat. No. 7117-0034<br />
17
2.5mm <strong>Locking</strong> Screw Technique<br />
• Thread the 2.0mm <strong>Locking</strong> Screw Guide into<br />
the screw hole and drill with the Short 2.0mm<br />
Drill Bit. The <strong>Locking</strong> Drill Guide can either be<br />
threaded directly into the plate itself or placed<br />
through the Drill Guide Block. Screw length<br />
may be determined by reading the calibrations<br />
on the Drill Bit or by using the 2.5mm Depth<br />
Gauge. If using the Depth Gauge, remove the<br />
<strong>Locking</strong> Drill Guide for accurate measurement.<br />
Insert the appropriate length 2.5mm <strong>Locking</strong><br />
Screw using the 1.5mm Hexdriver.<br />
Once optimal fracture fixation is achieved,<br />
attach the plate to the radial shaft and apply<br />
cortex screws and/or locking screws as<br />
needed.<br />
2.5mm Short Screw<br />
Depth Gauge<br />
Cat. No. 7117-3463<br />
18<br />
1.5mm Hexdriver<br />
Shaft<br />
Cat. No. 7117-0036<br />
Mini Quick<br />
Coupling Bulb<br />
Handle<br />
Cat. No. 7117-0014<br />
Holding Sleeve<br />
Cat. No. 7117-0034<br />
2.0mm <strong>Locking</strong> Drill<br />
Guide<br />
Cat. No. 7117-3459
Incision Closure<br />
Verify fracture reduction under fluoroscopy and<br />
use the appropriate method for surgical closure<br />
<strong>of</strong> the incision.<br />
19
Catalog Information – <strong>Volar</strong> <strong>Distal</strong> <strong>Radius</strong> Implants<br />
2.5mm <strong>Volar</strong> <strong>Distal</strong> <strong>Radius</strong> <strong>Locking</strong> <strong>Plate</strong>s<br />
Standard<br />
Minimum Maximum<br />
Cat. No. Length Suggested Qty Tray Qty<br />
7182-3110 3H Left 62mm 1 2<br />
7182-3112 5H Left 86mm 1 2<br />
7180-3126 * 9H Left 135mm 0 2<br />
7182-3114 3H Right 62mm 1 2<br />
7182-3116 5H Right 86mm 1 2<br />
7180-3128 * 9H Right 135mm 0 2<br />
Wide<br />
Minimum Maximum<br />
Cat. No. Length Suggested Qty Tray Qty<br />
7182-3118 3H Left 62mm 1 2<br />
7182-3120 5H Left 86mm 1 2<br />
7182-3122 3H Right 62mm 1 2<br />
7182-3124 5H Right 86mm 1 2<br />
* Sterile Only<br />
20
Catalog Information – <strong>Volar</strong> <strong>Distal</strong> <strong>Radius</strong> Screws<br />
2.5mm Self-Tapping Cortex Screws<br />
(Non-<strong>Locking</strong>)<br />
Minimum Maximum<br />
Cat. No. Length Suggested Qty Tray Qty<br />
7182-2510 10mm 0 8<br />
7182-2512 12mm 0 8<br />
7182-2514 14mm 2 8<br />
7182-2516 16mm 2 8<br />
7182-2518 18mm 2 16<br />
7182-2520 20mm 4 16<br />
7182-2522 22mm 4 16<br />
7182-2524 24mm 2 16<br />
7182-2526 26mm 2 8<br />
7182-2528 28mm 2 8<br />
7182-2530 30mm 0 8<br />
2.5mm <strong>Locking</strong> Self-Tapping Cortex Screws<br />
Minimum Maximum<br />
Cat. No. Length Suggested Qty Tray Qty<br />
7182-2410 10mm 0 8<br />
7182-2412 12mm 0 8<br />
7182-2414 14mm 2 8<br />
7182-2416 16mm 2 8<br />
7182-2418 18mm 4 16<br />
7182-2420 20mm 4 16<br />
7182-2422 22mm 4 16<br />
7182-2424 24mm 4 16<br />
7182-2426 26mm 4 8<br />
7182-2428 28mm 4 8<br />
7182-2430 30mm 0 8<br />
3.5mm Self-Tapping Cortex Screws<br />
(Non-<strong>Locking</strong>)<br />
Minimum Maximum<br />
Cat. No. Length Suggested Qty Tray Qty<br />
7182-4010A 10mm 2 8<br />
7182-4012A 12mm 4 16<br />
7182-4014A 14mm 4 16<br />
7182-4016A 16mm 4 16<br />
7182-4018A 18mm 4 8<br />
7182-4020A 20mm 2 8<br />
3.5mm <strong>Locking</strong> Self-Tapping Cortex Screws<br />
Minimum Maximum<br />
Cat. No. Length Suggested Qty Tray Qty<br />
7182-5010 10mm 2 8<br />
7182-5012 12mm 4 16<br />
7182-5014 14mm 4 16<br />
7182-5016 16mm 4 16<br />
7182-5018 18mm 4 8<br />
7182-5020 20mm 2 8<br />
21
Catalog Information – <strong>Volar</strong> <strong>Distal</strong> <strong>Radius</strong> Instruments<br />
Sharp Hook<br />
Cat. No. 7117-0043<br />
Hohmann Retractor, 8mm Width<br />
Cat. No. 7117-0057<br />
Periosteal Elevator 6mm, Rounded<br />
Cat. No. 7117-0097<br />
Bending Iron, Left<br />
Cat. No. 7117-0101<br />
Bending Iron, Right<br />
Cat. No. 7117-0103<br />
Reduction Forceps w/Serrated Jaw<br />
Cat. No. 7117-3378<br />
PERI-LOC Wide Drill Guide Block w/Set Screw – Left<br />
Cat. No. 7117-3457<br />
PERI-LOC Wide Drill Guide Block w/Set Screw – Right<br />
Cat. No. 7117-3458<br />
PERI-LOC 2.0mm <strong>Locking</strong> Drill Guide<br />
Cat. No. 7117-3459<br />
Cannulated AO to Trinkle Adaptor<br />
Cat. No. 7117-3528<br />
Tear Drop Handle Screwdriver w/Quick Connect<br />
Cat. No. 7117-3543<br />
Mini Quick Coupling Bulb Handle<br />
Cat. No. 7117-0014<br />
22
Holding Sleeve<br />
Cat. No. 7117-0034<br />
1.5mm Hexdriver Shaft 64mm<br />
Cat. No. 7117-0036<br />
PERI-LOC 2.7mm Drill Guide/2.0mm Drill Guide w/Handle<br />
Cat. No. 7117-3462<br />
PERI-LOC 2.5mm Short Screw Depth Gauge<br />
Cat. No. 7117-3463<br />
PERI-LOC 2.7mm Short <strong>Locking</strong> Drill Guide – 1 Piece<br />
Cat. No. 7117-3464<br />
Short 3.5mm Screw Depth Gauge<br />
Cat. No. 7117-3523<br />
PERI-LOC 3.5mm Self-Retracting Hexdriver Shaft 78mm<br />
Cat. No. 7117-3488<br />
PERI-LOC Standard Drill Guide Block w/Set Screw – Left<br />
Cat. No. 7117-3489<br />
PERI-LOC Standard Drill Guide Block w/Set Screw – Right<br />
Cat. No. 7117-3490<br />
23
Catalog Information – <strong>Volar</strong> <strong>Distal</strong> <strong>Radius</strong> System Trays<br />
PERI-LOC <strong>Volar</strong> <strong>Distal</strong> <strong>Radius</strong> Implant/Instrument Tray<br />
Cat. No. 7117-0391<br />
PERI-LOC <strong>Volar</strong> <strong>Distal</strong> <strong>Radius</strong> Implant/Instrument Tray Lid<br />
Cat. No. 7117-0401<br />
PERI-LOC <strong>Volar</strong> <strong>Distal</strong> <strong>Radius</strong> Screw Caddy<br />
Cat. No. 7117-0393<br />
Catalog Information – <strong>Volar</strong> <strong>Distal</strong> <strong>Radius</strong> Disposables<br />
K-Wires with Trocar Point and Threaded Pins<br />
Cat. No. Description Qty<br />
7116-1016 1.6mm x 150mm 6<br />
Taps with Quick Connect<br />
Cat. No. Description Qty<br />
7117-3318 3.5mm 1<br />
Drill Bit<br />
Cat. No. Description Qty<br />
7117-3555 2.0mm 2<br />
24
Orthopaedic Trauma &<br />
Clinical Therapies<br />
Smith & Nephew, Inc.<br />
1450 Brooks Road<br />
Memphis, TN 38116<br />
USA<br />
Telephone: 1-901-396-2121<br />
Information: 1-800-821-5700<br />
Orders/inquiries: 1-800-238-7538<br />
Trademark <strong>of</strong> Smith & Nephew. Reg. US Pat. & TM Off.<br />
www.smith-nephew.com<br />
30023403024 7118-1096 09/06