Create successful ePaper yourself
Turn your PDF publications into a flip-book with our unique Google optimized e-Paper software.
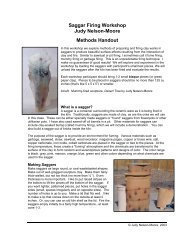
<strong>Fume</strong> <strong>Firing</strong> <strong>Methods</strong> <strong>Handout</strong><br />
Fuel<br />
Page 4 of 8<br />
If you are firing in a chamber without gas, you need to add fuel at the bottom and top of the stack. For gas<br />
or electric firing, leave out the fuel. See Sumi von Dassow Pit firing notes below for discussion of fuel.<br />
Stacking the Kiln, Pit or Saggar<br />
General<br />
Decide if you want color, overall light affects, dark effects, patterning.<br />
For light effects, use less carbon stuff.<br />
If you want dark effects, put in more carbon stuff.<br />
For color, use the salt/copper/iron mix described above. Paint on the<br />
inside of the saggar walls and on shards laid up next to each piece.<br />
For lines, wrap the piece in wire. Prepare a slab to fit the piece for<br />
white (resist) lines.<br />
For patterns, put different size/shape of shards, carbon stuff, and<br />
salt/copper/iron mix. See special effects below.<br />
Special Effects<br />
Black lines. Wrap with copper or brass wire. Thin for thin lines (too<br />
thin and it disappears). Thick for big, thick black stuff on your piece. No<br />
plastic on the wire, please...that produces unpleasant black sticky stuff.<br />
Resist effects. Create a shaped slab. Be careful that the slab around the piece will not break your piece<br />
as it shrinks and contracts around the shape. Put grass, wire, paper patterns, tape, or other items next to<br />
the piece. Paint the shard inside with salt/copper/iron mixture and LET DRY. Carefully place slab next to<br />
the piece in the saggar. If the slab is not quite dry, probably OK for the workshop as the firing will not<br />
commence immediately and they will have time to dry out after loading. Don’t use plastic stuff...it makes a<br />
gummy black mess.<br />
White lines. Put grass next to piece and shard or shaped slab next to the piece.<br />
All black: If you don’t want color, stack the piece totally smothered with lots of carbon stuff (see list above)<br />
in a very tight saggar (no holes, tight lid). Sawdust is best for this.<br />
Colors. Use salt and oxides or sulfates.<br />
Specific patterns. Cut pattern out of paper, tape, form in wire. See resist effects. Wrap wire or shape wire<br />
and hold next to piece.<br />
Slip resist. Paint entire piece with thick slip. When it cracks, the fuming will go into the cracks and where<br />
the slip was solid will resist the fuming. Scrape off the slip after firing to reveal the pattern underneath<br />
Mummy <strong>Firing</strong><br />
How to prepare a mummy<br />
• Prepare a slip of any clay. Add paper-pulp for a stronger mummy.<br />
• Put a big plastic sheet on the tabletop.<br />
• Dip a piece of burlap big enough to wrap around the piece into the slip<br />
(completely saturate) and lay out on the table. Alternately, put the burlap on<br />
the table and butter the slip onto the burlap.<br />
• Cover the burlap with paper to keep slip off the piece.<br />
• Put carbon stuff, chemicals on the paper.<br />
• If desired, put chemical-painted, shaped slab or shard around piece .<br />
• Put the piece in the middle of the pile. Cover with stuff to fume the top<br />
and paper to keep the slip from getting on the piece.<br />
• Pull the burlap up around...make sure stuff is on all sides. Butter more<br />
slip on outside if needed.<br />
• Wrap with string.<br />
• Let set until firm enough to load into kiln without getting slip on other<br />
stuff in the kiln. Wait until completely dry before firing.<br />
• Stack into kiln carefully. The mummy will partially fall off during the firing, depending on how much slip<br />
you use, the composition of the slip, and how well it is wrapped.<br />
© Judy Nelson-Moore, 2010