

installation & maintenance manual for scoop coupling - Elecon
installation & maintenance manual for scoop coupling - Elecon
installation & maintenance manual for scoop coupling - Elecon

You also want an ePaper? Increase the reach of your titles
YUMPU automatically turns print PDFs into web optimized ePapers that Google loves.
INSTALLATION & MAINTENANCE MANUAL<br />
FOR<br />
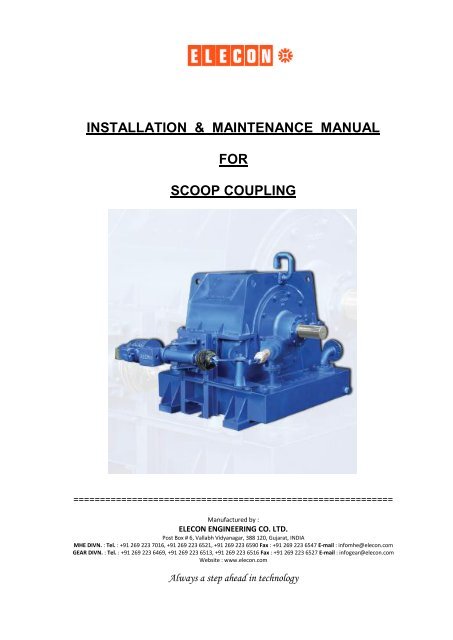
SCOOP COUPLING<br />
============================================================<br />
Manufactured by :<br />
ELECON ENGINEERING CO. LTD.<br />
Post Box # 6, Vallabh Vidyanagar, 388 120, Gujarat, INDIA<br />
MHE DIVN. : Tel. : +91 269 223 7016, +91 269 223 6521, +91 269 223 6590 Fax : +91 269 223 6547 E-mail : infomhe@elecon.com<br />
GEAR DIVN. : Tel. : +91 269 223 6469, +91 269 223 6513, +91 269 223 6516 Fax : +91 269 223 6527 E-mail : infogear@elecon.com<br />
Website : www.elecon.com<br />
Always a step ahead in technology
Client Name :<br />
Project / Site :<br />
W.O. No. :<br />
Coupling Size :<br />
Coupling Sr. No. :<br />
Motor Power :<br />
Application :<br />
Drawing / Document (#) Drawing No. / Document Ref.<br />
G.A. Drawing of Scoop Coupling<br />
P & I Diagram<br />
Logic Diagram<br />
Torque-Speed Curve<br />
Technical Data Sheet<br />
(#) – Please refer the latest issue / revision <strong>for</strong> Drawing No. / Document Ref.<br />
N.B. : These instructions are intended primarily <strong>for</strong> staff carrying out <strong>installation</strong> and<br />
<strong>maintenance</strong> of the <strong>coupling</strong> unit.<br />
It is imperative there<strong>for</strong>e to provide each mechanic with a copy.<br />
Further copies can be supplied on request.<br />
Should any questions remain outstanding after consultation of this brochure,<br />
please contact us immediately and one of our specialists will provide you with<br />
further in<strong>for</strong>mation.<br />
1
(01) WORKING PRINCIPLE<br />
There are mainly two parts called Impeller and Runner, both have a large number<br />
of straight radial vanes. The motor drives the impeller. The runner is connected to<br />
the driven machine. In running condition, the working circuit of the <strong>scoop</strong> <strong>coupling</strong><br />
is filled with the oil and the impeller acts as a centrifugal pump, creating oil flow<br />
radially outward, which crosses the gap to the runner, which acts as a turbine.<br />
The oil flow given up power as it return to the impeller again and thus the cycle is<br />
repeated.<br />
As the fluid flow from impeller to runner is an essential feature of this power<br />
transmission, there is slip between these two parts. Due to the slip, there is<br />
heating of oil, which requires external cooling system <strong>for</strong> oil. The oil pump<br />
continuously supplies oil to the <strong>coupling</strong>.<br />
The output speed of <strong>coupling</strong> can be changed by varying the slip, which depends<br />
upon the oil quantity maintained in the working circuit by changing the position of<br />
the <strong>scoop</strong> tube.<br />
If the <strong>scoop</strong> tube is moved into the rotating ring of oil, it progressively removes<br />
the oil from the chamber and working circuit and discharges it into the sump.<br />
Inversely, moving the <strong>scoop</strong> tube from the oil ring allows retaining more oil in the<br />
working circuit.<br />
(02) SPEED REGULATION<br />
The <strong>scoop</strong> tube position can be changed from 0% to 100% to regulate the output<br />
speed of the <strong>coupling</strong>. In 0% position, the <strong>scoop</strong> tube is at FULL IN position and<br />
does not allow oil level to build up in the <strong>coupling</strong>. At this position of <strong>scoop</strong> tube,<br />
there is maximum slip and minimum torque transmission. In 100% position, the<br />
<strong>scoop</strong> tube is at FULL OUT position at which maximum oil is in the working<br />
circuit. This gives maximum torque transmission at minimum slip. For<br />
intermediate position of the <strong>scoop</strong> tube, intermediate value of slip and torque<br />
transmission is obtained.<br />
For centrifugal machines the torque demand of machine reduced by square of<br />
speed of machine and power reduced by cube of speed of machine. The speed<br />
variation is obtained by varying the <strong>scoop</strong> tube position.<br />
The torque v/s slip characteristic curve of <strong>scoop</strong> <strong>coupling</strong> is shown in Fig. No.-(A)<br />
The torque v/s speed characteristic of driven machine is plotted on this curve <strong>for</strong><br />
constant torque machine and centrifugal machine. This curve shows how the<br />
speed variation is obtained by varying <strong>scoop</strong> tube position in ELECON <strong>scoop</strong><br />
<strong>coupling</strong>.<br />
2
(03) OIL CIRCUIT<br />
Fig. No.-(B) shows the basic oil circuit diagram.<br />
The oil pump delivers oil from the sump (oil tank) to the oil cooler through oil filter.<br />
From oil cooler oil goes into working circuit of the Scoop Coupling. A small lube<br />
line is taken out from the main oil line that provides oil to bearing.<br />
After transmitting power, the <strong>scoop</strong> tube collects oil from working circuit and<br />
delivers back to the oil tank. Also, some splashed oil in the <strong>coupling</strong> is returned to<br />
the oil tank.<br />
The pressure switch, temperature switch, pressure gauge and temperature<br />
gauge are provided to monitor the pressure and temperature of oil.<br />
The pressure switch and temperature switch give an electrical trip signal to the<br />
control panel in case of oil flow failure and temperature rise respectively.<br />
The <strong>manual</strong>ly operated by-pass valve may be used to adjust the oil flow in the<br />
working circuit with care that its position is not disturbed once set. This valve<br />
allows either oil to flow into the working circuit or totally bypasses back to the oil<br />
tank.<br />
(04) COUPLING CONSTRUCTION<br />
The various parts of ELECON Scoop Coupling are mentioned in the PART LIST<br />
and shown in Fig. No.-(C) & (D). The basic assembly of Scoop Coupling includes<br />
mainly impeller, runner, primary casing, secondary casing, oil retaining ring,<br />
impeller side housing, <strong>scoop</strong> tube housing, input shaft, output shaft, shell, <strong>scoop</strong><br />
tube, various bearings, seals, breather plug, fasteners, etc.<br />
The <strong>scoop</strong> tube is linked with the electric actuator mounted on the <strong>scoop</strong> <strong>coupling</strong><br />
through base frame.<br />
The FLS which includes set of oil pump & motor, filter, oil cooler, switches,<br />
gauges, pipes, etc. is provided separately <strong>for</strong> oil cooling system.<br />
For backup safety, the fusible plug is provided in the Scoop Coupling that blows<br />
off the oil from working circuit in case the oil temperature increased up 140 0 C.<br />
The oil is drained into oil tank.<br />
4.1 Input & Output Couplings<br />
The suitable sizes of gear <strong>coupling</strong>s are mounted on input and output shaft of<br />
Scoop Coupling <strong>for</strong> connection with driving and driven equipments.<br />
4.2 Scoop Tube<br />
The position of <strong>scoop</strong> tube must be such that the opening of the <strong>scoop</strong> tube is<br />
facing the direction of rotation of oil. If it is so then only oil will be collected by the<br />
<strong>scoop</strong> tube otherwise, it will not collect oil resulting into abnormal per<strong>for</strong>mance of<br />
the Scoop Coupling.<br />
3
4.3 Actuator <strong>for</strong> Scoop Tube<br />
The electric actuator is linked with the <strong>scoop</strong> tube <strong>for</strong> IN and OUT movement of<br />
the <strong>scoop</strong> tube. If required, this actuator can be operated by hand lever.<br />
The electric limit switches may be used at suitable position of <strong>scoop</strong> tube<br />
depending on control scheme and load of the equipment.<br />
4.4 Set of Oil Pump and Motor<br />
A set of oil pump and motor is provided to deliver oil into the working circuit<br />
through oil filter and oil cooler.<br />
4.5 Oil Filter<br />
The suitable oil filter is provided in main oil flow line.<br />
4.6 Oil Cooler<br />
The suitable size of oil cooler (either water cooled or air cooled) is provided in<br />
main oil flow line.<br />
4.7 Safety Devices<br />
As a requirement of minimum safety devices, the pressure switch and<br />
temperature switch are provided in oil flow circuit which will give an electrical trip<br />
signal to the control panel in case of oil flow failure and temperature rise<br />
respectively. Additional safety / sensing instruments are provided, if ordered and<br />
mutually agreed.<br />
4.8 Control Panel<br />
If ordered, the suitable control panel is provided. This is mounted separately and<br />
electrically linked with various instruments and safety devices.<br />
(05) INSTALLATION<br />
5.1 Mounting of Scoop Coupling<br />
The suitable concrete / steel foundation to be prepared <strong>for</strong> mounting of <strong>scoop</strong><br />
<strong>coupling</strong>. The foundation bolts should be suitable to the mounting holes provided<br />
in the <strong>scoop</strong> <strong>coupling</strong>. The <strong>scoop</strong> <strong>coupling</strong> should be tightened securely on<br />
foundation bolts.<br />
5.2 Alignment<br />
There must be proper alignment between motor, <strong>scoop</strong> <strong>coupling</strong> and driven<br />
machine during <strong>installation</strong> and running. The thermal expansion of each<br />
equipment should be considered during alignment.<br />
4
5.3 Arrangement of Oil Cooler and Piping<br />
Oil cooler should be mounted as per the G.A. Drawing approved by client.<br />
The piping should be designed properly to avoid air locks. Site fabricated oil<br />
pipes must be cleaned internally and should be rescaled. Proper Joints, bends &<br />
holdings and supporting of pipes must be ensured so those are free from<br />
stresses.<br />
5.4 Position of Scoop Tube<br />
The opening of <strong>scoop</strong> tube must face the oil rotation.<br />
If the DOR of runner shaft is clockwise (see from output side of <strong>scoop</strong> <strong>coupling</strong>)<br />
then marked position TOP (T) must be vertically upward.<br />
If the DOR of runner shaft is anticlockwise (see from output side of <strong>scoop</strong><br />
<strong>coupling</strong>) then marked position TOP (T) must be vertically downward.<br />
5.5 Lubrication<br />
Lubrication of various parts is recommended during <strong>installation</strong> as well as<br />
periodically. The gear <strong>coupling</strong>s (if provided) must be greased regularly.<br />
5.6 Guards<br />
Guards must be provided on input & output <strong>coupling</strong>s of <strong>scoop</strong> <strong>coupling</strong>.<br />
(06) COMMISSIONING<br />
Following schedule to be followed <strong>for</strong> commissioning of the <strong>scoop</strong> <strong>coupling</strong>.<br />
(a) Operation sequence and checkpoints.<br />
(b) Check proper <strong>installation</strong> of <strong>scoop</strong> <strong>coupling</strong>, tightening of foundation bolts<br />
and alignment.<br />
6.1 Oil Filling<br />
During normal operating conditions, the oil used (usually mineral oil) should meet<br />
the following requirements. The oil used should be antioxidant and antifoaming.<br />
Density at 15 0 C. : 0.873 to 0.879<br />
Engler viscosity at 50 0 C. : 2.9 to 3<br />
Flash point : 210 0 C.<br />
Aniline point : 105 to 108<br />
Pour point : -30 0 C.<br />
Viscosity index : 105<br />
Recommended Oil Grades (viscosities as per ISO 3448) :<br />
Servo System HLP-46 of Indian Oil Company<br />
OR Castrol Hyspin VG-46 of Castrol<br />
OR Bharat Hydrol-46 of Bharat Petroleum<br />
OR HP Enklo HLP-46 of Hindustan Petroleum<br />
5
Fill oil in the bottom oil tank of <strong>scoop</strong> <strong>coupling</strong>.<br />
Fill oil by opening one of the plugs provided on top of the oil tank.<br />
Do not fill oil from breather plug provided on <strong>scoop</strong> <strong>coupling</strong>.<br />
Oil level should be checked by the dipstick or level gauge if provided.<br />
The oil tank should not be over-filled.<br />
CAUTION: Great care should be taken to ensure that a mixture of oil is never<br />
used. Absolute cleanliness of all containers used <strong>for</strong> handling the<br />
oil is essential. Oil must be free from dirt & moisture.<br />
6.2 Electrical Equipment<br />
Connect various motor, equipments and instruments to the panel through proper<br />
cables. Check and confirm satisfactory operation of these electrical part and<br />
panel functioning. Check all motors <strong>for</strong> direction of rotation, smooth operation and<br />
power consumption.<br />
6.3 Oil Cooler<br />
Ensure proper mounting of oil cooler and connection of oil line & water line (in<br />
case of water-cooled oil cooler). Check <strong>for</strong> desired water flow through the watercooled<br />
oil cooler.<br />
In case of air-cooled oil cooler, check the direction of fan motor and its operation.<br />
Ensure that it is mounted securely on its base.<br />
6.4 Oil Filter<br />
Ensure that the oil filter must be clean and it is not clogged due to any reason at<br />
the time of commissioning.<br />
(07) OPERATING INSTRUCTION<br />
7.1 Starting of Scoop Coupling<br />
After all checks during commissioning stage, keep drive motor and machine<br />
ready <strong>for</strong> operation. Start the motor of oil pump, keep the <strong>scoop</strong> tube at FULL IN<br />
position and check all instruments & equipments are working satisfactorily. Start<br />
the main motor and ensure that there is not any abnormal noise and vibrations.<br />
Now, pull out the <strong>scoop</strong> tube either by the control circuit or by hand lever up to<br />
FULL OUT position.<br />
Check again various parameters and ensure smooth running of <strong>scoop</strong> <strong>coupling</strong>. If<br />
everything is found OK, then continue the running of <strong>scoop</strong> <strong>coupling</strong>. For<br />
subsequent starting and running, the <strong>scoop</strong> tube must be at its respective<br />
position.<br />
6
7.2 Oil Level<br />
The oil level in the oil tank of <strong>scoop</strong> <strong>coupling</strong> should be checked periodically.<br />
If possible, this check should be made with the set shut down and preferable<br />
when the oil is cold.<br />
If required, oil of the correct grade should be added in the oil tank to bring the oil<br />
level to the ‘MAXIMUM STATIC’ position.<br />
7.3 Working Oil Temperature<br />
The most favorable characteristics <strong>for</strong> the <strong>scoop</strong> <strong>coupling</strong> are obtained when the<br />
temperature of oil leaving the <strong>scoop</strong> <strong>coupling</strong> to the cooler is within the<br />
temperature limits specified in the approved drawing.<br />
The temperature switch should be set <strong>for</strong> the trip value mentioned in the<br />
approved drawing. Finally, it depends upon the application / load condition.<br />
7.4 Interlocks<br />
The main drive motor should be interlocked with the following.<br />
(a) Oil temperature : If oil temperature is higher than the pre-set value then the<br />
main motor cannot be started. Also during running condition, If oil temperature<br />
exceeds the pre-set value then the main motor will be tripped.<br />
(b) Oil flow : If oil flow is not established then the main motor can not be started.<br />
Also during running condition, if oil flow fails then the main motor will be tripped.<br />
(c) Scoop tube initialization (optional) : If this interlocking is done then the<br />
<strong>scoop</strong> tube will travel automatically from FULL OUT position to FULL IN position<br />
on each starting. The main motor can be started only when the <strong>scoop</strong> tube is at<br />
FULL IN position.<br />
(08) LONG STAND-STILL PERIOD<br />
If the plant is shutdown <strong>for</strong> long period, protect the <strong>coupling</strong> against moisture,<br />
water and dust. Preserve the unpainted surfaces against corrosion.<br />
The oil pump should be run <strong>for</strong> few minutes once a week to wet the inner parts. If<br />
possible, run the <strong>coupling</strong> <strong>for</strong> short period once a month.<br />
(09) PERIODIC CHECKS<br />
After long stand-still period :<br />
Check all instruments, equipments and operations as per point (06) & (07).<br />
After first 250 working hours :<br />
Check alignment of <strong>coupling</strong> and re-tighten various foundation bolts. Check<br />
current drawn by various motors <strong>for</strong> oil pump, actuator and air-cooled oil cooler.<br />
Clean oil filter.<br />
7
After every 600 working hours :<br />
Do greasing of input and output gear <strong>coupling</strong>s. Check oil level in the oil tank.<br />
Check normal working of the electrical actuator. Check alignment of <strong>coupling</strong>.<br />
Clean oil filter.<br />
Subsequently after every 5000 working hours or once in a year :<br />
(For dusty / humid atmospheres this frequency should be 2500 hours)<br />
Check oil <strong>for</strong> any impurity and sludge<br />
Clean oil filter.<br />
Check alignment of <strong>coupling</strong> with drive motor and machine.<br />
Check all <strong>coupling</strong>s and rubber parts of various drives.<br />
Check flanged pipe connection, oil leakages, vibration in pipes etc.<br />
Check all instruments and equipments.<br />
Clean oil cooler, if necessary as per manufacturer’s instruction.<br />
After every 8000 working hours or two years:<br />
Oil must be changed after every 8000 working hours of the <strong>coupling</strong>.<br />
After 20000 working hours or five years: (whichever is earlier)<br />
Coupling should be serviced. All rubber parts should be changed.<br />
Check all bearings and change complete set of bearings, if required.<br />
(10) PRESERVATION OF COUPLING<br />
(a) Store the <strong>coupling</strong> in a covered warehouse and it should not be<br />
exposed to rain water, dripping water, dust and sun light.<br />
(b) The <strong>coupling</strong> should be covered with plastic sheet.<br />
(c) All unpainted surfaces, bolts and working surfaces must be protected<br />
with proper coating and covered in plastic films.<br />
(d) All electrical items and panels must be fully wrapped in plastic film.<br />
The cables, wires etc. should be protected from rodents, rats, etc.<br />
(e) The oil must be stored in sealed airtight containers / drum.<br />
Moisture & dust should not be entered in the container / drum.<br />
Safety against fire hazard must be ensured.<br />
8
CHARACTERISTIC CURVE OF SCOOP COUPLING<br />
Operating Ranges :<br />
I & IV : Starting Range<br />
II : Control Range<br />
III : Overload Range<br />
Parameters :<br />
Scoop tube position in % of the full <strong>scoop</strong> tube stroke.<br />
M min : Minimum torque required <strong>for</strong> minimum speed adjustment.<br />
S min : Minimum slip required <strong>for</strong> torque transmission.<br />
Mk : Coupling torque in % of the normal torque.<br />
n1 : Input speed.<br />
n2 : Output speed.<br />
Fig. No. : (A)<br />
9
OIL CIRCUIT DIAGRAM<br />
Fig. No. : (B)<br />
10
46 45<br />
41<br />
10<br />
40 39<br />
66<br />
15<br />
34<br />
16<br />
01<br />
62<br />
77<br />
35<br />
37 36<br />
38<br />
76<br />
44 43<br />
65<br />
PART DETAILS OF SCOOP COUPLING<br />
07 03 19 02 57 06<br />
08<br />
12<br />
42<br />
64<br />
60<br />
27<br />
04<br />
37<br />
47 44<br />
28<br />
49 46<br />
11<br />
51<br />
29<br />
67<br />
69<br />
Fig. No. : (C)<br />
49 46<br />
68 70<br />
30<br />
49<br />
46<br />
31<br />
38<br />
41<br />
39 40<br />
13<br />
15<br />
34<br />
16<br />
33<br />
32<br />
72<br />
05<br />
36 37<br />
71<br />
09<br />
73<br />
66<br />
62
SCOOP TUBE ASSEMBLY<br />
03 04 07 08 07 02 04<br />
06<br />
OILTO<br />
SUMP<br />
09<br />
Fig. No. : (D)<br />
12<br />
05<br />
01
PART LIST<br />
PART NO. PART DESCRIPTION<br />
01 Impeller Shaft<br />
02 Impeller<br />
03 Impeller Bush<br />
04 Nut Plate<br />
05 Runner Shaft<br />
06 Runner<br />
07 Oil retaining ring<br />
08 Casing – Secondary<br />
09 Casing – Primary<br />
10 Housing – Impeller Side<br />
12 Breather Plug<br />
13 Scoop Tube Housing<br />
15 Oil Seal Sleeve<br />
16 Shaft Sleeve<br />
17 Scoop Tube Assembly<br />
17-01 Scoop Tube<br />
17-02 Bush (<strong>for</strong> <strong>scoop</strong> tube assembly)<br />
17-03 Support Bush (<strong>for</strong> <strong>scoop</strong> tube assembly)<br />
17-04 Guide Bush (<strong>for</strong> <strong>scoop</strong> tube assembly)<br />
17-05 U-seal (<strong>for</strong> <strong>scoop</strong> tube assembly)<br />
17-06 Internal Circlip (<strong>for</strong> <strong>scoop</strong> tube assembly)<br />
17-07 Bolts / Screws (<strong>for</strong> joining part no. 17-02 & 17-03 and 17-02 & 13)<br />
17-08 Gasket (between part no. 17-02 & 17-03)<br />
17-09 Gasket (between part no. 17-02 & 13)<br />
19 Fusible Plug<br />
27 Cylindrical Roller Bearing (NU)<br />
28 Angular Contact Double Row Ball Bearing<br />
13
PART LIST<br />
PART NO. PART DESCRIPTION<br />
29 Cylindrical Roller Bearing (NU)<br />
30 Deep Groove Single Row Ball Bearing<br />
31 Angular Contact Single Row Ball Bearing<br />
32 Lock Washer<br />
33 Lock nut<br />
34 Oil seal<br />
35 External Circlip<br />
36 Bolts / Screws (<strong>for</strong> joining part no. 10 & 15 and 13 & 15)<br />
37 Spring Washers<br />
38 Gasket (between part no. 10 & 15 and 13 & 15)<br />
39 Bolts / Screws (<strong>for</strong> joining part no. 10 & 61 and 13 & 61)<br />
40 Spring Washers<br />
41 Gasket (between part no. 10 & 61 and 13 & 61)<br />
42 Bolts / Screws (<strong>for</strong> joining part no. 02 & 03 & 04)<br />
43 Bolts / Screws (<strong>for</strong> joining part no. 01 & 03)<br />
44 Spring Washers<br />
45 Bolts / Screws (<strong>for</strong> joining part no. 07 & 02)<br />
46 Spring Washers<br />
47 Bolts / Screws (<strong>for</strong> joining part no. 06 & 05)<br />
49 Bolts / Screws (<strong>for</strong> joining part no. 08 & 09)<br />
51 Bolts / Screws (<strong>for</strong> joining part no. 08 & 67 )<br />
57 Bolts / Screws (<strong>for</strong> joining part no. 02 & 09 )<br />
60 Bolts / Screws (<strong>for</strong> joining part no. 64 & 03)<br />
61 Housing Assembly<br />
62 Key<br />
64 Abutment Plate – Imp. Side<br />
65 Abutment Sleeve – Imp. Side<br />
66 Labyrinth sealing plate<br />
14
PART LIST<br />
PART NO. PART DESCRIPTION<br />
67 Bearing Housing – Runner Side<br />
68 Abutment Sleeve – Runner Side<br />
69 Abutment Plate – Runner Side<br />
70 Abutment Plate – Scoop Housing<br />
71 Abutment Sleeve – Scoop Housing<br />
72 Abutment Sleeve – Scoop Housing<br />
73 Abutment Ring – Scoop Housing<br />
76 Abutment Spacer – Housing Imp. Side<br />
77 Abutment Spacer – Shaft – Imp. Side<br />
15