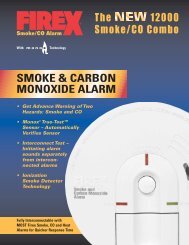
SMOKE/CARBON MONOXIDE ALARM MODEL FADCQ - FireX
SMOKE/CARBON MONOXIDE ALARM MODEL FADCQ - FireX
SMOKE/CARBON MONOXIDE ALARM MODEL FADCQ - FireX

Create successful ePaper yourself
Turn your PDF publications into a flip-book with our unique Google optimized e-Paper software.
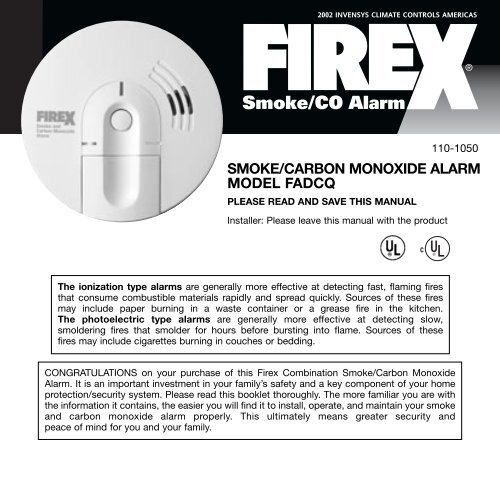
2002 INVENSYS CLIMATE CONTROLS AMERICAS<br />
<strong>SMOKE</strong>/<strong>CARBON</strong> <strong>MONOXIDE</strong> <strong>ALARM</strong><br />
<strong>MODEL</strong> <strong>FADCQ</strong><br />
PLEASE READ AND SAVE THIS MANUAL<br />
Installer: Please leave this manual with the product<br />
The ionization type alarms are generally more effective at detecting fast, flaming fires<br />
that consume combustible materials rapidly and spread quickly. Sources of these fires<br />
may include paper burning in a waste container or a grease fire in the kitchen.<br />
The photoelectric type alarms are generally more effective at detecting slow,<br />
smoldering fires that smolder for hours before bursting into flame. Sources of these<br />
fires may include cigarettes burning in couches or bedding.<br />
110-1050<br />
CONGRATULATIONS on your purchase of this Firex Combination Smoke/Carbon Monoxide<br />
Alarm. It is an important investment in your family’s safety and a key component of your home<br />
protection/security system. Please read this booklet thoroughly. The more familiar you are with<br />
the information it contains, the easier you will find it to install, operate, and maintain your smoke<br />
and carbon monoxide alarm properly. This ultimately means greater security and<br />
peace of mind for you and your family.
I. Quick Reference Guides . . . . . . . . . . . . . .4<br />
General Information and Features . . . . .4<br />
Important Safety Information . . . . . . . . .6<br />
The Dangers of Fire . . . . . . . . . . . . . . . .7<br />
The Dangers of CO . . . . . . . . . . . . . . . .7<br />
Where To Install This Alarm . . . . . . . . . .8<br />
II. How To Install This Smoke/CO Alarm . . .9<br />
1. Battery Power (DC)<br />
& DC Interconnect . . . . . . . . . . . . . . .9<br />
2. AC/DC . . . . . . . . . . . . . . . . . . . . . . .10<br />
3. AC & AC/DC Interconnect . . . . . . . .12<br />
4. Installing as Replacements with<br />
Interconnected Legacy Firex Alarms .12<br />
III. If the Alarm Sounds . . . . . . . . . . . . . . .13<br />
If the Smoke Alarm Sounds . . . . . . . . .13<br />
If the CO Alarm Sounds . . . . . . . . . . . .13<br />
Quick Quiet False Alarm Control . .14<br />
Quick Quiet (CO) . . . . . . . . . . . . . . .15<br />
Smart Quiet . . . . . . . . . . . . . . . . . . .15<br />
DANGER<br />
When you see this symbol, be aware that if the<br />
message is ignored, the hazard WILL result in<br />
SEVERE bodily injury or death.<br />
WARNING<br />
When you see this symbol, be aware that if the<br />
message is ignored, the hazard CAN cause<br />
SEVERE bodily injury or death.<br />
TABLE OF CONTENTS<br />
3<br />
IV. Understanding the LED Indicators . . . .16<br />
Smoke/CO Alarm Chart (Light & Horn) .17<br />
V. Testing and Maintenance<br />
Testing the Smoke/CO Alarm . . . . . . . .18<br />
Maintenance and Care . . . . . . . . . . . . .19<br />
VI. Troubleshooting the Smoke/CO Alarm 21<br />
VII. Important Safety Information . . . . . . .23<br />
Fire Safety Tips . . . . . . . . . . . . . . . . . .23<br />
CO Home Safety Tips . . . . . . . . . . . . .23<br />
Symptoms of CO Poisoning . . . . . . . . .24<br />
Conditions That Can Cause<br />
CO Levels to Change . . . . . . . . . . . . . .25<br />
Limitations of This Smoke/CO Alarm . .25<br />
Important Information<br />
About This Smoke/CO Alarm . . . . . . . .26<br />
VIII. Agency Recommendations<br />
For Alarm Placement . . . . . . . . . . . . . . . . .28<br />
Suggested Alarm Placement . . . . . . . .28<br />
Smoke Alarm Placement & Exceptions .30<br />
IX. Warranty . . . . . . . . . . . . . . . . . . . . . . . .32<br />
The following symbols identify the most important safety messages in this manual.<br />
CAUTION<br />
When you see this symbol, be aware that if the<br />
message is ignored, the hazard CAN or<br />
WILL cause MINOR bodily injury.
I. QUICK REFERENCE GUIDES<br />
IMPORTANT: ALL Quick Reference Guides in this manual are designed to introduce you to the basic<br />
features, operations, and safety considerations of the 7000 Combination Smoke/CO Alarm. You MUST<br />
read this entire manual before installing and using the alarm.<br />
About this Alarm<br />
This combination alarm has separate sensors to<br />
detect smoke and carbon monoxide (CO). The<br />
smoke alarm has priority over the CO alarm.<br />
This alarm can be powered two ways: Battery<br />
(DC) only, or 120V AC with a 9-volt battery<br />
back-up source.<br />
This alarm can be interconnected in a series of<br />
up to 18 compatible devices (maximum of 12<br />
can be Firex smoke alarms and 6 CO alarms or<br />
heat detectors).<br />
Features/Benefits:<br />
• Quick Quiet False Alarm Control Helps you evaluate and respond more calmly<br />
to alarm situations by quieting the alarm<br />
horn(s) without disrupting protection.<br />
• Smart Quiet One feature, two functions.<br />
1) Smart Quiet Trigger Alarm Locator:<br />
Improves safety by identifying areas of<br />
immediate danger, and helps residents<br />
calmly evacuate without the distraction<br />
of all alarm horn(s) sounding. All but the<br />
trigger alarm(s) will be silenced for up to<br />
10 minutes.<br />
2) Smart Quiet General Information and Features<br />
Low Battery Alert:<br />
Residents can silence alarm and sleep<br />
without losing protection for up to 8<br />
hours, and replace the battery in the<br />
morning.<br />
4<br />
• Ramp-up Horn: Protects your hearing when<br />
testing the alarm. Ramp-up horn gives you<br />
time to move away from the horn before the<br />
full alarm horn sequence begins.<br />
• Alarm Horn: Separate and distinct horn patterns<br />
for smoke and CO alarms. Sounds a<br />
minimum of 85dB at 10 feet. Meets or<br />
exceeds UL and ULC standards for audible<br />
horn. Listed for use in US or Canada.<br />
• Three Indicator Lights With Five<br />
Communication Colors: Improves safety.<br />
BLUE/CO: Blue light flashes rapidly when<br />
sensor detects elevated CO levels. Horn<br />
alarms 4 times, pauses, repeats.<br />
RED-YELLOW-ORANGE/<strong>SMOKE</strong>:<br />
Patented Red-Yellow-Orange light flashes<br />
rapidly when sensor detects elevated<br />
smoke levels. Horn alarms three times,<br />
pauses, repeats.<br />
GREEN/AC POWER: Improves safety by<br />
giving visual indication that 120V AC is<br />
powering the alarm. Meets UL/ULC agency<br />
compliance regulations for visual AC power<br />
notification.<br />
• Low Battery Warning: (Audible and Visual)<br />
Increases protection with visual and audible<br />
alert of low battery before protection is lost.<br />
In an interconnected series, helps you quickly<br />
identify the unit with low battery.
• Latching LED: After the alarm condition is<br />
over, helps identify which unit in a linked<br />
series triggered an alarm. The Latching LED<br />
continues to identify the trigger alarm until it is<br />
manually reset by pressing the Smart Button.<br />
Can also help you identify a malfunctioning<br />
alarm in a series.<br />
• Dual Ionization Smoke Chamber:<br />
Meets or exceeds UL/ULC standards.<br />
Generally faster at detecting fast-burning fires.<br />
• Firex CO Sensor System: Improves safety.<br />
Sensor system reacts to CO most like the<br />
human body. Effectively simulates the gradual<br />
poisoning (accumulation) and detoxification of<br />
COHb in the blood stream.<br />
• Smart Button: This one button is all you need<br />
to test the unit and operate features like Quick<br />
Quiet , Smart Quiet , and reset the Latching<br />
LED. It automatically activates the proper<br />
response to the alarm condition at the time<br />
you press it.<br />
• Replacement: This combination Smoke/CO<br />
Alarm can be used as a replacement for all<br />
Firex Smoke and CO* alarms without additional<br />
wiring. Lets you easily upgrade from individual<br />
smoke or CO alarm to a combination unit.<br />
*(Existing CO alarms may need to be replaced<br />
in interconnected systems.)<br />
• Product Family Styling: All Firex alarms have<br />
a clean, consistent look in the home.<br />
Installation Features/Benefits:<br />
• Front Load Battery Compartment: Fast,<br />
safe and convenient! Change the battery without<br />
removing the alarm from the mounting<br />
bracket. Saves installation time, too.<br />
5<br />
• 9V Alkaline Battery: Included with the alarm.<br />
UL/ULC Listed to provide a minimum of one<br />
year battery back-up and battery operation.<br />
With AC power applied, battery can be<br />
expected to last up to five years.<br />
• Powerlink Tab: Keeps battery power from<br />
draining between alarm installation and<br />
homeowner move-in.<br />
• Dust Cover: Protects the sensors from dust,<br />
dirt, fumes, or other common construction<br />
contaminants—which can contribute to false<br />
alarms—until the job is complete.<br />
• Shared Bracket and Wire Leads: Lets you<br />
replace or move alarms around quickly and<br />
easily using the standard Firex smoke<br />
connector and mounting bracket.<br />
Interconnect Features/Benefits:<br />
• Interconnect: Linking units in a series broadens<br />
the coverage in a home, and can give residents<br />
extra time to respond to the alert.<br />
• Smart Interconnect: Saves cost of additional<br />
wiring by allowing smoke and CO alarms to<br />
share a single, smart interconnect wire.<br />
Installations can be done using just three<br />
wires: hot, neutral, and interconnect.<br />
• DC Interconnect: Where allowed by code,<br />
lets you interconnect units which operate on<br />
battery power only in a cost-effective way.<br />
Interconnected units can provide earlier<br />
warning of a dangerous situation.
Important Safety Information<br />
Required Power Supply<br />
• This combination smoke-CO alarm requires<br />
constant 120V AC power AND/OR a working<br />
9-volt battery to operate properly.<br />
Recommended Coverage<br />
• Because smoke in one area may not reach a<br />
smoke alarm in another, smoke alarms are<br />
recommended in every room and on every<br />
level of the home. Interconnected alarms can<br />
provide better whole-home protection than<br />
stand-alone alarms.<br />
• CO alarms are recommended near bedrooms<br />
and sleeping areas where they can wake<br />
sleeping residents. Additional CO alarms are<br />
recommended 5-20 feet from sources of CO<br />
like a furnace, water heater, or fireplace.<br />
Installation/Interconnect<br />
• This combination alarm should be installed<br />
only by a licensed qualified electrician.<br />
Observe and follow all local and national electrical<br />
and building codes for installation.<br />
• Connect this combination alarm ONLY to<br />
compatible devices listed in this manual.<br />
Compliance<br />
• This combination alarm is designed to be used<br />
in ordinary indoor locations of single-family<br />
households only.<br />
• The sensitivity of both the smoke and CO<br />
sensors, and the horn patterns for both warnings,<br />
comply with UL/ULC standards.<br />
6<br />
General Limitations<br />
• This alarm cannot alert every household member<br />
every time if it cannot be heard because of<br />
location, obstructions, ambient noise, condition<br />
of residents, etc. It is not intended to alert<br />
residents who are hard of hearing.<br />
• ALL alarms have limitations. This combination<br />
smoke-CO alarm is not foolproof and is not<br />
warranted to protect lives or property. It is not<br />
a substitute for insurance.<br />
• Because it is possible for the alarm to fail at<br />
any time, you must test the alarm weekly and<br />
replace it every 5 years.<br />
• Smoke alarms can sound an alarm only when<br />
smoke reaches their sensors. Smoke may not<br />
reach the smoke alarm QUICKLY ENOUGH to<br />
ensure safe escape. They do not sense heat,<br />
flame, or gas.<br />
• CO Alarms are designed to detect carbon<br />
monoxide gas from any source of combustion<br />
that reach their sensor. They are NOT<br />
designed to detect smoke, fire, or any other<br />
type of gas.<br />
IMPORTANT: Please see Chapter VII<br />
“Important Safety Information” for detailed<br />
safety considerations and alarm limitations<br />
before installing or using this alarm.
The Dangers of Fire<br />
Fire is Unpredictable<br />
• Fire can burn a two-story home to the ground<br />
in minutes.<br />
• Fire can elevate air temperatures at eye-level<br />
to over 1200˚F (650˚C)!<br />
• In a typical home fire you have just minutes to<br />
escape, which is why it is so important to<br />
have at least one smoke alarm on every level<br />
of your home and in every bedroom or sleeping<br />
area.<br />
Depending on the source, materials involved,<br />
and environment, fire can spread rapidly or<br />
smolder slowly for hours.<br />
Different Types of Smoke Alarms<br />
Ionization smoke alarms are generally more<br />
effective at detecting fast, flaming fires which<br />
consume combustible materials rapidly and<br />
spread quickly. Sources of these fires include<br />
paper burning in a waste container or a<br />
grease fire in the kitchen. Photoelectric<br />
smoke alarms are generally more effective at<br />
detecting slow, smoldering fires which smolder<br />
for hours before bursting into flame.<br />
Sources of these fires may include cigarettes<br />
burning in couches or bedding.<br />
NOTE - This <strong>FADCQ</strong> alarm uses only an ionization<br />
type detector for sensing smoke.<br />
You may wish to consider installing<br />
other photoelectric alarms or combination<br />
ionization/photoelectric dual<br />
sensor alarms in your home for<br />
increased protection.<br />
7<br />
The Dangers of CO<br />
Carbon Monoxide (CO) is a Toxic Gas<br />
Carbon monoxide poisoning is a serious issue.<br />
Many families suffer daily, and over one thousand<br />
lives are lost each year because of this<br />
deadly household gas.<br />
• You cannot see, smell, or taste CO.<br />
• The effects of CO poisoning can cause household<br />
members to become extremely ill or even<br />
cause death.<br />
• CO poisoning can happen almost anywhere.<br />
Many appliances like furnaces, ovens, fireplaces,<br />
kerosene heaters, and grills may<br />
silently emit CO because of damage, poor<br />
maintenance, or defects.<br />
Understanding How CO Forms<br />
Appliance Malfunction: CO forms when<br />
fuel burns without sufficient oxygen (incomplete<br />
combustion). This type of malfunction<br />
can happen to any fuel-burning appliance<br />
at any time.<br />
Environmental Conditions: Example:<br />
Fireplace chimneys can fill with leaves during<br />
the fall season. If enough leaves, dirt, and<br />
soot are accumulated in the chimney, proper<br />
ventilation will be interrupted. This can cause<br />
a backdraft of CO into the home. The result<br />
can be fatal. With proper maintenance and<br />
cleaning, however, the potential for CO build<br />
up can be reduced.<br />
WARNING<br />
BE AWARE OF COMMON SOURCES OF<br />
<strong>CARBON</strong> <strong>MONOXIDE</strong>. See Chapter VII for<br />
details.
Where to Install This Alarm<br />
Before installing your combination Smoke/CO<br />
Alarm, it is important to choose the best locations<br />
in your home. Placement can affect how<br />
well the alarm performs and how well residents<br />
hear the alarm if it sounds.<br />
IMPORTANT!<br />
The following are general guidelines for<br />
choosing where to install your alarms.<br />
For more details and Agency Placement<br />
information, please read “Chapter 8: Agency<br />
Recommendations for Alarm Placement”<br />
before installing this alarm.<br />
Install the Recommended Number of Alarms<br />
• Fire safety professionals recommend at least<br />
one smoke alarm on every level of your home,<br />
in each bedroom hallway, and inside each<br />
bedroom or sleeping area.<br />
• At least one CO alarm should be placed where<br />
it will wake all sleeping residents. For additional<br />
protection, place additional CO alarms<br />
between 5 and 20 feet from potential sources<br />
of CO, like a furnace, water heater or fireplace.<br />
This combination Smoke/CO Alarm makes it<br />
easy to provide both types of protection<br />
throughout the home.<br />
Choose Appropriate Locations<br />
• Alarms can alert you to a problem only after<br />
smoke or CO reach their sensors. Choose<br />
locations free of obstructions, where the alarm<br />
will stay clean and protected from adverse<br />
environmental conditions.<br />
• Make sure the alarms can be easily heard from<br />
multiple locations throughout the home.<br />
8<br />
Check Your Local Building Codes<br />
• This combination Smoke/CO Alarm is<br />
designed to be used in single-family homes.<br />
It alone may not meet requirements for multiple-resident<br />
dwellings (apartment buildings,<br />
boarding houses, hotels or motels).<br />
• Some codes may require that smoke alarms<br />
be interconnected in new construction.<br />
Placement Guidelines
II. HOW TO INSTALL THIS <strong>SMOKE</strong>/CO <strong>ALARM</strong><br />
One of the features of this combination smoke<br />
and CO alarm is that it can be mounted and<br />
operated as follows:<br />
1. Battery (DC) Only Stand Alone<br />
2. Battery (DC) Only Interconnect to another<br />
battery operated Firex alarm.<br />
3. AC w/Battery Back-up, Single Station<br />
Stand-alone<br />
4. AC w/Battery Back-up Interconnected with<br />
other Firex AC and AC w/Battery Back-up<br />
Alarms.<br />
Installation for Battery (DC)<br />
Operation Only<br />
1. Remove the mounting plate. Hold the alarm<br />
and turn the mounting plate clockwise to<br />
separate it from the back of the alarm.<br />
2. Hold the mounting plate against the ceiling or<br />
wall in the desired position and use a pencil to<br />
trace the inside of the mounting slots.<br />
IMPORTANT!<br />
To interconnect two Battery Operated (DC)<br />
alarms, trace a third point 1-3/8” to 2”<br />
(3.5cm to 5cm) where the interconnect wire<br />
will come through mounting surface to<br />
connect to the alarm, then proceed to<br />
“INTERCONNECTING TWO BATTERY (DC)<br />
ONLY <strong>ALARM</strong>S”.<br />
3. Use a 3/16” (5mm) drill bit to drill through the<br />
center of the outlines you made in Step 2. (For<br />
DC Interconnect–use an appropriately sized<br />
hole saw for interconnect hole.)<br />
9<br />
4. Insert screw anchors into the drilled holes. If<br />
necessary, gently tap anchors with a hammer<br />
until they are flush with the mounting surface.<br />
5. Attach the mounting plate to the mounting surface<br />
with the mounting screws provided.<br />
6. Position the combination smoke and CO alarm<br />
on the mounting plate and turn clockwise to<br />
lock the unit into place.<br />
7. Activate the battery.<br />
Remove the arrow Battery<br />
tab and close the<br />
battery door.<br />
The combination<br />
alarm will beep<br />
briefly and the RED<br />
light will flash as<br />
Battery Door<br />
the battery door is<br />
closed.<br />
8. Test the combination alarm. See “TESTING<br />
THE COMBINATION <strong>ALARM</strong>”.
Interconnecting Two Battery (DC)<br />
Only Alarms<br />
When interconnecting compatible DC alarms,<br />
location is important. Do not locate alarms on<br />
ceiling joists or other obstructions.<br />
NOTE: Use #18 AWG minimum solid or stranded<br />
wire. When interconnecting, maximum<br />
wire length between any two is 1,500 feet<br />
for #18 AWG or 4,000 feet for #14 AWG<br />
(20 OHMS loop resistance).<br />
1. Follow Steps 1 to 3 in “INSTALLATION FOR<br />
BATTERY (DC) ONLY OPERATION” for alarms<br />
being interconnected.<br />
2. Thread the low voltage wire through the interconnect<br />
hole drilled in the mounting surface.<br />
Strip off 1/2” of insulation and attach to the<br />
alarm connector with a wire nut.<br />
3. Connect yellow and white wires to the connector<br />
using a wire nut. Connect yellow to yellow<br />
and white to white for proper operation. Do not<br />
connect black wire.<br />
4. Insert the screw anchors into the holes drilled<br />
for the mounting slots. If necessary, gently tap<br />
the anchors with a hammer until they are flush<br />
with the mounting surface. Repeat Steps 2 and<br />
3 with the other Firex alarm.<br />
5. Attach the mounting plate to the mounting<br />
surface with the mounting screws provided.<br />
6. Plug alarm connector into alarm. Feed wire<br />
through hole in mounting surface. Position the<br />
combination smoke and CO alarm on the<br />
mounting plate and turn clockwise to lock the<br />
unit into place.<br />
7. Activate the battery. Remove the arrow tab<br />
and close the battery door. The combination<br />
alarm will beep briefly and the RED light will<br />
flash as the battery door is closed.<br />
8. Test the alarm with both local and interconnect<br />
tests (See TESTING AND MAINTENANCE.)<br />
10<br />
Installation For AC With<br />
Battery Back-up<br />
DANGER<br />
ELECTRICAL SHOCK HAZARD. Turn off power<br />
at the main fuse box or circuit breaker by<br />
removing the fuse or switching the circuit<br />
breaker to the OFF position.<br />
WARNING<br />
This combination alarm should be installed<br />
only by a qualified electrician. Smoke and<br />
Carbon Monoxide alarm installation must be in<br />
accordance with the requirements of Article<br />
760 of the National Electrical Code and any<br />
local codes that may apply (AC/DC models<br />
only).<br />
THIS COMBINATION <strong>ALARM</strong> SHOULD BE<br />
INSTALLED IN ACCORDANCE WITH THE NATION-<br />
AL FIRE PROTECTION ASSOCIATION’S STAN-<br />
DARD 72 (National Fire Protection Association, One<br />
Batterymarch Park, Quincy, MA 02269).<br />
• Install combination<br />
alarm on any 4-inch or<br />
single gang junction<br />
box only.<br />
1. Remove mounting<br />
plate from combination<br />
alarm box.<br />
2. Align recessed slots<br />
on plate with mounting<br />
holes of any<br />
4-inch or single gang<br />
junction box.<br />
3. Gently pull household wires through center<br />
hole of plate.
4. Secure plate to junction box using mounting<br />
screws.<br />
5. With a small wire connector, connect white wire<br />
from connector plug to white household wire.<br />
6. Connect black wire from connector plug to<br />
black household wire.<br />
7. To interconnect alarms, connect yellow wire<br />
from connector to interconnect wire between<br />
other combination or smoke alarms. Before<br />
starting, see “INTERCONNECTING COMBI-<br />
NATION AND OR <strong>SMOKE</strong> <strong>ALARM</strong>S.”<br />
WHITE<br />
YELLOW<br />
BLACK<br />
WHITE<br />
YELLOW<br />
BLACK<br />
WHITE<br />
BLACK<br />
FOR INTERCONNECT: USE #18 AWG MINIMUM WIRE<br />
TO NEUTRAL<br />
TO 120V AC<br />
NOTE: For a single-station combination alarm,<br />
cover yellow wire with electrical tape and<br />
tuck into junction box.<br />
8. Attach connector plug to pins on back of combination<br />
alarm. Plug will fit only one way and<br />
will snap into place. Gently tug connector to<br />
be sure it is attached securely.<br />
9. Position the combination alarm to mounting<br />
plate and turn clockwise to lock into place.<br />
10. Turn on power at main fuse box or circuit<br />
breaker.<br />
11. Test combination alarm. See “TESTING THE<br />
COMBINATION <strong>ALARM</strong>.”<br />
12. Activate the battery. Remove<br />
arrow tab and close battery<br />
door. The combination alarm will<br />
beep briefly and the RED light<br />
will flash as door is closed.<br />
11<br />
Interconnecting AC Only and AC/DC<br />
(With Battery Back-up) Alarms<br />
• Use #18 AWG minimum solid or stranded wire.<br />
When interconnecting, maximum wire length<br />
between any two is 1,500 feet for #18 AWG<br />
or 4,000 feet for #14 AWG (20 OHMS loop<br />
resistance).<br />
• This combination alarm may be interconnected<br />
with as many as 11 other Firex model <strong>FADCQ</strong>,<br />
FADC, TPCI, AD, ADC, PAD, G, GC, PG40, or<br />
FX1218 smoke alarms, and as many as 6 Firex<br />
model ADH heat alarms or COQ-8 CO alarms<br />
for a total of not more than 18 interconnected<br />
devices. DO NOT connect to any other type or<br />
model combination smoke, or CO alarm.<br />
WARNING<br />
While AC and AC/DC smoke alarms can be interconnected,<br />
ONLY when AC power is ACTIVE will<br />
ALL units <strong>ALARM</strong> when one unit senses smoke.<br />
WHEN AC power is DISCONNECTED, INTERRUPT-<br />
ED OR NOT PRESENT FOR ANY REASON, ONLY<br />
AC/DC UNITS WILL CONTINUE TO SEND AND<br />
RECEIVE SIGNALS AND SOUND AN <strong>ALARM</strong> IN<br />
RESPONSE TO THE PRESENCE OF <strong>SMOKE</strong>.<br />
WHEN power is DISCONNECTED, INTERRUPTED<br />
OR NOT PRESENT FOR ANY REASON, AC powered<br />
smoke alarms WILL NOT OPERATE. The<br />
Model G is an AC-only smoke alarm!<br />
• Connect combination and smoke alarms to a<br />
single dedicated AC branch circuit. If local<br />
codes do not permit such a wiring configuration<br />
or connection, be sure the neutral wire is common<br />
to both circuits or phases.
Installing AC/DC Combination<br />
Alarms as Replacements with<br />
Existing Interconnected Firex Alarms<br />
Model <strong>FADCQ</strong> combination alarms are designed<br />
to be used as replacement units for all Firex AC<br />
and AC/DC smoke alarms with a low voltage<br />
interconnect line. These models include G, GC,<br />
H, AD, ADC, and FADC. All models listed use a<br />
3-wire interconnect system. To interconnect with<br />
other models, please call our free technical<br />
support line at (800) 445-8299.<br />
IMPORTANT! READ BEFORE INSTALLING<br />
THIS <strong>SMOKE</strong> AND CO <strong>ALARM</strong> WITH EXISTING<br />
INTERCONNECTED FIREX <strong>ALARM</strong>S<br />
In residential homes, there are two ways smoke<br />
and CO alarms are hardwire installed and interconnected.<br />
One uses 4 wires, the other uses 3<br />
wires.<br />
The Model <strong>FADCQ</strong> smoke and CO alarm can be<br />
used with both 4 and 3 wire systems.<br />
1. Identify whether the installed system uses 3 or<br />
4 wires to interconnect.<br />
2. If a 4-wire system is installed, change the system<br />
to a 3-wire by connecting the independant<br />
interconnect wires (yellow and blue) at any<br />
point in the system.<br />
3. Smoke alarms generally don’t require any<br />
changes (other than replacement every ten<br />
years).<br />
4. Replace older CO alarms on the new 3-wire<br />
system with COQ-8 CO alarms or <strong>FADCQ</strong> combination<br />
alarms. These alarms can discriminate<br />
between signals coming from a smoke alarm<br />
and signals coming from a CO alarm. Older<br />
model CO models converted to 3-wire cannot.<br />
So when any alarm is triggered, all the older<br />
12<br />
CO alarms will sound, creating confusion about<br />
which danger is actually present.<br />
To Install Combination Unit as a Replacement:<br />
1. Turn off AC power at circuit breaker or main<br />
fuse box.<br />
2. Remove old alarm from mounting bracket.<br />
3. Disconnect wire connector from back of unit.<br />
4. Remove wire nuts and connect new wire connector<br />
to household wiring. Be certain not to<br />
cross the wiring.<br />
5. Connect wire connector to back of combination<br />
alarm.<br />
6. If mounting bracket is the same, reattach<br />
combo alarm to mounting bracket. Feed wiring<br />
back through hole in mounting surface.<br />
7. Turn on power at main fuse box or circuit<br />
breaker.<br />
8. Test combination alarm. See “TESTING THE<br />
COMBINATION <strong>ALARM</strong>.”<br />
9. Activate the battery. Remove arrow tab and<br />
close battery door. The combination alarm will<br />
beep briefly and the RED light will flash as<br />
door is closed.
III. IF THE <strong>ALARM</strong> SOUNDS<br />
If Your Smoke Alarm Sounds<br />
If Your CO Alarm Sounds<br />
WARNING<br />
IF THE <strong>ALARM</strong> LIGHT IS FLASHING RED-<br />
YELLOW-ORANGE AND THE <strong>ALARM</strong> IS<br />
SOUNDING, IT INDICATES THE PRESENCE<br />
OF <strong>SMOKE</strong> WHICH CAN INDICATE THE<br />
PRESENCE OF FIRE.<br />
• USA: HORN SOUNDS 3 <strong>ALARM</strong>S<br />
APPROXIMATELY EVERY FOUR SECONDS.<br />
• CANADA: HORN SOUNDS 4 QUICK <strong>ALARM</strong>S<br />
APPROXIMATELY EVERY SECOND.<br />
YOU MUST QUICKLY DO THE FOLLOWING:<br />
If the smoke alarm sounds and you have not<br />
pushed the test button, it is warning of a dangerous<br />
situation.<br />
Your immediate response is necessary. To prepare<br />
for such occurrences, develop family escape<br />
plans, discuss them with ALL household members,<br />
and practice them regularly.<br />
What to Do in Case of a Fire<br />
1. Don’t panic; stay calm.<br />
2. Leave the building as quickly as possible.<br />
Touch doors with the back of your hand to feel<br />
if they are hot before opening them. IF DOOR<br />
IS HOT USE AN ALTERNATE EXIT. Crawl<br />
along the floor, and DO NOT stop to collect<br />
anything.<br />
3. Meet at a pre-arranged meeting place outside<br />
the building.<br />
4. Call the fire department from OUTSIDE the<br />
building.<br />
5. DO NOT GO BACK INSIDE A BURNING<br />
BUILDING. Wait for the fire department to<br />
arrive.<br />
13<br />
Carbon Monoxide has no taste, feel or smell –<br />
but it can be FATAL.<br />
WARNING<br />
IF THE BLUE CO <strong>ALARM</strong> LIGHT IS FLASHING<br />
AND THE HORN SOUNDS 4 RAPID <strong>ALARM</strong>S<br />
APPROXIMATELY EVERY FIVE SECONDS, IT<br />
INDICATES THE PRESENCE OF CO WHICH<br />
CAN BE FATAL. YOU MUST QUICKLY DO THE<br />
FOLLOWING:<br />
1. Operate Test/Reset button;<br />
2. Call your emergency services [fire department<br />
or 911].<br />
3. Immediately move to fresh air — outdoors or<br />
by an open door/window. Make certain that all<br />
persons are accounted for. Do not reenter the<br />
premises nor move away from the open<br />
door/window until the emergency services<br />
responders have arrived, the premises have<br />
been aired out, and your alarm remains in its<br />
normal condition.<br />
4. After following steps 1 - 3, if your alarm<br />
reactivates within a 24 hour period, repeat steps<br />
1 - 3 and call a qualified appliance technician<br />
(__________________) to investigate sources of<br />
CO from fuel burning equipment and appliances,<br />
and to inspect for proper operation of<br />
this equipment. If problems are identified during<br />
this inspection, have the equipment serviced<br />
immediately. Note any combustion equipment<br />
not inspected by the technicians and consult<br />
the manufacturers’ instructions, or contact the<br />
manufacturers directly, for more information<br />
about CO safety and this equipment.
If Your CO Alarm Sounds (cont’d)<br />
Make sure that motor vehicles are not, and have<br />
not been, operating in an attached garage or<br />
adjacent to the residence.<br />
If the CO alarm sounds its alarm horn again, it<br />
has sensed CO. This is not a false alarm.<br />
POTENTIAL SOURCES OF CO<br />
IN YOUR HOME<br />
It is important to be familiar with the potential<br />
sources of CO in your home. In the<br />
event of an alarm, it will make it easier to<br />
pinpoint and correct the problem.<br />
Be aware of the proper uses for each device.<br />
Have these devices serviced and cleaned regularly.<br />
Use common sense, and follow safety<br />
and hazard instructions carefully whenever<br />
using any of these devices.<br />
WARNING<br />
BE AWARE OF COMMON SOURCES OF<br />
<strong>CARBON</strong> <strong>MONOXIDE</strong>. Common sources of<br />
carbon monoxide are furnaces, heating<br />
devices, water heaters, gas stoves, kerosene<br />
heaters, fireplaces, barbecues used indoors,<br />
running motors or engines in attached<br />
garages, and gasoline powered devices, such<br />
as generators or pumps used in emergency<br />
situations.<br />
WARNING<br />
Individuals with medical problems may consider<br />
using warning devices which provide<br />
audible and visual signals for carbon monoxide<br />
concentrations under 30ppm.<br />
14<br />
WARNING<br />
If alarm horn sounds, and the combination<br />
alarm is not being tested, the unit is sensing<br />
either smoke or CO. THE SOUND OF THE<br />
<strong>ALARM</strong> HORN REQUIRES YOUR IMMEDIATE<br />
ATTENTION AND ACTION. Please read and<br />
understand the following features to determine<br />
what you can do if the alarm sounds<br />
unexpectedly.<br />
Quick Quiet False Alarm Control <br />
and Smart Quiet <br />
When the alarm(s) sound, pushing the Smart<br />
Button on the nearest alarm activates either a<br />
Quick Quiet False Alarm Control or Smart<br />
Quiet response depending on the situation.<br />
NOTE: These features temporarily quiet alarms,<br />
but do not disable the sensor. They are<br />
designed to give you time to evacuate the<br />
building without the added noise of the alarm.<br />
If you push the Smart Button on the alarm<br />
sounding nearest to you...<br />
1. And all alarms including the one you touched<br />
silence, Quick Quiet has been activated. This<br />
also means the unit nearest you is the triggering<br />
unit. Assess the situation around you and<br />
take appropriate action.<br />
2. And all alarms silence except one located elsewhere<br />
in the building, the Smart Quiet has<br />
been activated and has identified the triggering<br />
alarm. This helps you identify the trigger<br />
alarm(s) and areas of immediate danger to<br />
avoid under alarm conditions.<br />
Continued...
WARNING<br />
If at any time smoke or CO is heavy enough to indicate a dangerous situation, the alarm may<br />
not silence, or may start sounding again quickly. DO NOT ignore the alarm!<br />
TAKE EMERGENCY ACTION IMMEDIATELY!<br />
QUICK QUIET FALSE <strong>ALARM</strong> CONTROL<br />
Smoke Alarm<br />
• Alarm(s) stop sounding within 10 seconds.<br />
• RED light blinks once every 10 seconds on<br />
all trigger alarms.<br />
• Quiets the smoke alarm for up to 15 minutes<br />
(unless smoke present indicates an emergency<br />
condition).<br />
CO Alarm (CO Reset)<br />
• Alarm(s) stop sounding within 10 seconds.<br />
• BLUE light blinks once every 10 seconds on<br />
all trigger alarms.<br />
• Quiets the CO alarm for up to 6 minutes<br />
(unless the CO levels present indicate an<br />
emergency condition).<br />
In an interconnected series, the RED-YELLOW-<br />
ORANGE or BLUE light will flash only on the<br />
trigger alarm(s).<br />
SMART QUIET<br />
Smoke or CO Alarm<br />
• The alarm(s) on any non-triggering units<br />
(those not actually sensing smoke or CO)<br />
stop sounding within 10 seconds. Trigger<br />
alarms will continue to sound.<br />
• Non-triggering alarms remain silent for<br />
approximately one minute to allow you time<br />
to listen for and identify the location of the<br />
triggering alarm(s) that actually detected the<br />
dangerous condition. MOVE AWAY from<br />
areas where you hear trigger alarms<br />
sounding if at all possible.<br />
15<br />
• After one minute, if a dangerous condition<br />
persists, all units will go back into alarm.<br />
DO NOT IGNORE the trigger alarm(s), and be<br />
aware that an extremely dangerous situation<br />
exists at that location(s) in your home.<br />
In an interconnected series, the RED-YELLOW-<br />
ORANGE or BLUE light will only flash on the<br />
trigger alarm(s).<br />
LATCHING LED <strong>ALARM</strong> INDICATOR<br />
The Latching LED Alarm Indicator activates<br />
automatically. It helps you identify the original<br />
trigger alarm(s) in an interconnected series after<br />
a smoke or CO event.<br />
NOTE: If the unit is operating on battery power<br />
only (GREEN light is OFF), the latching lights will<br />
blink approximately once per minute.<br />
Smoke Alarm - after a smoke alarm condition,<br />
the triggering alarm’s RED light blinks 3 times<br />
every 10 seconds until manually reset.<br />
CO Alarm - after a CO alarm condition, the<br />
triggering alarm’s BLUE light blinks 4 times every<br />
10 seconds until manually reset.<br />
SMART QUIET FOR LOW BATTERY ALERT<br />
You can silence the Low Battery Alert for up to 8<br />
hours by pressing and releasing the Smart<br />
Button. The sensor remains active.<br />
This allows family members to go back to sleep<br />
or gives you time to purchase a replacement battery.<br />
It is important that you replace the battery<br />
as soon as possible to continue your protection!
IV: UNDERSTANDING THE INDICATOR LIGHTS<br />
The Model <strong>FADCQ</strong> features 3 lights with 5 distinct colors. Use the chart below to determine what the<br />
different indicator light colors and flashes mean:<br />
• Constant GREEN on - AC power is present.<br />
• GREEN is off - AC power is NOT present. Unit may be operating on<br />
battery back-up or battery only power.<br />
• RED and BLUE blink once a minute - Unit is functioning properly and is checking for hazardous smoke<br />
and CO levels, periodically checking the battery, and monitoring the<br />
interconnect for signals from other smoke, heat, and CO alarms.<br />
• BLUE flashes four times immediately -CO alarm senses dangerous levels of CO and sounds the alarm.<br />
after four horn alarms<br />
• RED-YELLOW-ORANGE blink - Smoke alarm senses smoke and sounds an alarm.<br />
between horn alarms<br />
• RED blinks once every ten seconds - Smoke alarm is in Quick QuietTM False Alarm ControlTM mode and is<br />
quieting an unwanted alarm.<br />
• BLUE blinks once every ten seconds - The CO alarm has been reset. After approximately six minutes of<br />
silence the CO alarm will check for the presence of CO gas. If it is<br />
above 70 ppm, the unit will begin to sound the CO alarm again; if the<br />
level is below 70 ppm the unit remain quiet.<br />
• RED-YELLOW-ORANGE AND BLUE - (Interconnected alarms only) another smoke or CO alarm has<br />
are off and detector horn is sounding sensed smoke or CO and is signaling an alarm.<br />
• RED blinks 3 times every ten seconds - Latching indicator. This unit initiated and memorized a smoke alarm<br />
condition. NOTE – if GREEN is not illuminated, there is no AC<br />
power for the alarm. The RED will blink 3 times and repeat once per<br />
minute. Press Test Button to reset.<br />
• BLUE blinks 4 times every ten seconds - Latching indicator. This unit initiated and memorized a CO alarm<br />
condition. NOTE – if GREEN is not illuminated, there is no AC<br />
power for the alarm. The BLUE will blink 4 times and repeat once<br />
per minute. Press Test Button to reset.<br />
• YELLOW blinks 5 times every minute - Battery Warning. Indicates weak or improperly connected battery,<br />
preceded by an audible beep. Press the Test Button to silence the<br />
beeping for approximately 8 hours. Replace battery as soon as<br />
possible.<br />
• YELLOW blinks 7 times every minute - Low Battery Warning. Indicates very weak or improperly connected<br />
battery, preceded by an audible beep. The battery must be<br />
replaced immediately for your protection. Smart Quiet (quiets low<br />
battery warning) is inoperable.<br />
16
Understanding the Alarm LEDs and Horn Patterns<br />
CONDITION HORN LEDs SMART BUTTON KEY<br />
AC power is present Green light ON<br />
Standby condition Red and Blue blink Quick push activates False Alarm ControlTM once per minute and a longer press also activates a local<br />
Push-to-Test sequence.<br />
Standby condition Red and Blue blink Press and hold until the double chirp to<br />
once per minute activate a local Push-to-Test sequence and<br />
send a signal to other interconnected alarms.<br />
Low-battery #1 Horn beeps once Yellow light flashes 5 Quick press will eliminate the low-battery<br />
per minute times per minute after<br />
horn beeps<br />
signal for about 8 hours.<br />
Low-battery #2 Horn beeps once Yellow light flashes 7 Smart button inoperable.<br />
per minute times per minute after<br />
horn beeps<br />
Replace battery immediately.<br />
Fault condition Horn beeps 2 times Yellow light flashes 2 Press and hold to check the alarm again.<br />
per minute times per minute after Replace alarm if it remains in fault<br />
horn beeps condition.<br />
Local smoke Horn sounds 3 long Red-Yellow-Orange Quick press activates False Alarm<br />
is detected tones, then pauses, lights flash with horn ControlTM every 4 seconds<br />
.<br />
Local smoke condition Red light flashes 3 Quick press releases the latched LED.<br />
is latched times every 10 seconds<br />
Quick Quiet False Red light flashes 1<br />
Alarm Control<br />
is activated<br />
time every 10 seconds<br />
Local CO is detected Horn sounds 4 short Blue light flashes 4 Quick press activates CO Reset.<br />
tone pattern every<br />
5 seconds<br />
times right after horn<br />
Local CO condition Blue light flashes 4 Quick press erases the CO memory signal.<br />
is memorized times every 10 seconds<br />
CO Reset is activated Blue light flashes 1<br />
time every 10 seconds<br />
Remote signal is Horn sounds 3 long Quick press activates Smart Quiet Trigger<br />
received from another tones, then pauses, Alarm Locator for smoke and heat alarms.<br />
smoke or heat alarm every 4 seconds<br />
Remote signal is Horn sounds 4 short Quick press activates Smart Quiet Trigger<br />
received from another tone pattern every Alarm Locator for other Model <strong>FADCQ</strong><br />
CO alarm 5 seconds<br />
17<br />
combination smoke-CO alarms.
Testing<br />
• Local Test. Test each combination alarm to<br />
be sure it is installed correctly and operating<br />
properly.<br />
• Interconnect Test. Test all combination alarms<br />
in an interconnected system after installation.<br />
• The Smart Button accurately tests all functions.<br />
DO NOT use an open flame to test this smoke<br />
alarm. You may ignite and damage the smoke<br />
alarm or your home.<br />
• Test alarms weekly and upon returning from<br />
vacation or when no one has been in the<br />
household for several days.<br />
• Use testing to learn to distinguish the<br />
difference between the smoke and CO<br />
alarm patterns.<br />
Test all combination alarms weekly by doing<br />
the following:<br />
• Make sure the BLUE and RED lights are blinking<br />
once per minute. This indicates the unit is<br />
functioning properly and is checking for<br />
hazardous smoke and CO levels.<br />
• Check that the GREEN light is lit. A constant<br />
green light indicates the smoke and CO alarm<br />
is receiving 120V AC power. No GREEN light<br />
indicates no AC power or unit is operating on<br />
battery power.<br />
• Test one specific smoke and CO alarm (local<br />
test), or test unit and all interconnected smoke,<br />
CO, or combination smoke-CO alarms (interconnect<br />
test). We recommend a full interconnected<br />
test weekly on each and every smoke,<br />
heat, CO, and combination smoke-CO unit in<br />
your residence.<br />
V. TESTING AND MAINTENANCE<br />
18<br />
To test an individual smoke and CO alarm<br />
(local test):<br />
1. Press the Smart Button firmly until the YEL-<br />
LOW light flashes briefly. Release the Smart<br />
Button or,<br />
To run a full local test and a test of the interconnect<br />
signaling capability of all interconnected<br />
remote units:<br />
1. Push the Smart Button firmly until the YELLOW<br />
light flashes briefly, sounds one beep and then<br />
sounds a double (two in series) beep. (The two<br />
beeps mean you will hear an alarm from two or<br />
more interconnected units.) Release the Smart<br />
Button and move away from the alarm.<br />
The combination alarm will test each of its<br />
smoke and CO sensors and provide a series<br />
of audible and visual signals to let you know<br />
your unit is functioning correctly.<br />
2. Horn Ramp-up. Alarm sounds a series of short<br />
beeps in the first four seconds, starting with<br />
one beep, then two beeps, then three beeps.<br />
This allows you to move away from the alarm<br />
before the full alarm horn sounds.<br />
3. Smoke Alarm Test. Eight second test.<br />
USA Horn sounds: 3 alarms, pause, 3 alarms,<br />
pause. Canada Horn sounds: 4 alarms,<br />
pause, 4 alarms, pause. RED-YELLOW-<br />
ORANGE lights flash rapidly. During the smoke<br />
alarm test, other interconnected smoke alarms<br />
in your house also will sound their alarms to<br />
verify the interconnect is working.
4. CO Alarm Test. Ten second test. Horn<br />
sounds: 4 alarms, 5-second pause, 4 alarms,<br />
5-second pause. BLUE light flashes rapidly.<br />
During the CO alarm test, other interconnected<br />
CO alarms or combination smoke-CO alarms<br />
also will sound their alarms to verify the interconnect<br />
is working.<br />
As long as you press the Smart Button the<br />
smoke and CO alarm will alternately test the<br />
smoke and CO sensors and cause a remote<br />
alarm condition on all interconnected smoke,<br />
heat, CO, and smoke-CO alarm units. Use a<br />
broomstick or similar long object to press the<br />
Smart Button to keep a distance between you<br />
and the 85 db alarm.<br />
5. Fault Warning. If alarm sounds two short<br />
beeps followed by YELLOW light flashing<br />
twice, the unit is detecting a fault. Push the<br />
Smart Button to reset and start a self test. If<br />
the Fault Warning persists, the alarm must be<br />
replaced immediately.<br />
6. If no alarm sounds, turn off power at main fuse<br />
box or circuit breaker and check wiring and connection.<br />
Turn on power and retest the unit(s).<br />
Maintenance and Care<br />
In addition to weekly testing, this smoke and CO<br />
alarm requires yearly battery replacement and<br />
periodic cleaning to remove dust, dirt, and<br />
debris.<br />
DANGER<br />
ELECTRICAL SHOCK HAZARD. Turn off power<br />
at main service panel by removing fuse or<br />
switching appropriate circuit breaker to OFF<br />
position before replacing battery or cleaning<br />
smoke and CO alarm.<br />
Battery Replacement<br />
Always turn off power to the alarm circuit before<br />
replacing the battery. Replace the battery at least<br />
once a year or immediately when the low battery<br />
chirp sounds once a minute, even though the<br />
smoke alarm is receiving AC power. If the Low<br />
Battery Warning sounds and a replacement battery<br />
is not immediately available, pushing the<br />
Smart Button silences the Low Battery Warning<br />
for approximately 8 hours. This allows you to<br />
return to sleep, for example, and purchase a new<br />
battery the next day. If you push the Smart<br />
Button and the Low Battery Warning does not<br />
silence, replace the battery immediately.<br />
Use only the following batteries as replacements<br />
in this smoke and CO alarm: Eveready 522,<br />
Duracell MN 1604 or Ultralife U9VL-J.<br />
WARNING<br />
DO NOT USE ANY OTHER TYPE OF BATTERY,<br />
EXCEPT AS SPECIFIED IN THIS MANUAL. DO<br />
NOT USE RECHARGEABLE BATTERIES.<br />
19<br />
Continued...
TO REPLACE THE BATTERY:<br />
1. Turn off power to smoke and CO alarm at main<br />
service panel.<br />
2. Slide battery door open. See “HOW TO<br />
INSTALL THIS COMBINATION <strong>ALARM</strong>.”<br />
3. Remove drained battery from compartment<br />
and discard.<br />
4. Install a fresh 9-volt battery from the list of<br />
correct batteries listed on the previous page.<br />
5. Slide battery door closed.<br />
6. Turn on power and test smoke and CO alarm<br />
using Smart Button.<br />
NOTE: If the battery door is open, even if a good<br />
battery is correctly installed, the battery is<br />
electrically disconnected from the alarm<br />
and the low-battery circuit is disabled.<br />
CAUTION<br />
When battery door is open, the battery will not<br />
power the alarm even if the battery is properly<br />
installed. If AC power for the alarm is disconnected,<br />
interrupted or not present for any reason,<br />
the the battery back-up will not power<br />
the alarm, and your protection will be<br />
removed.<br />
CAUTION<br />
Never leave the battery door open to silence a<br />
Low Battery Warning. When the Low Battery<br />
Warning sounds, use Smart Quiet by pushing<br />
the Smart Button. Replace the battery and<br />
close the battery door after the battery is<br />
replaced.<br />
Cleaning<br />
Clean the alarm at least once a month to remove<br />
dust, dirt, or debris. Always turn off power to the<br />
alarm before cleaning.<br />
• Using the soft brush or wand attachment to a<br />
vacuum cleaner, vacuum all sides and cover of<br />
alarm. Be sure all the vents are free of debris.<br />
• If necessary, turn off power and use a damp<br />
cloth to clean alarm cover.<br />
IMPORTANT: Do not attempt to remove the<br />
cover or clean inside the smoke alarm.<br />
THIS WILL VOID YOUR WARRANTY.<br />
Do not use abrasive cleansers or spray the<br />
alarm with cleaning agents or waxes, especially<br />
cleaners containing ammonia. These liquids may<br />
impair the performance of sensors. Do not<br />
submerge the alarm in water.<br />
Repair<br />
CAUTION<br />
Not attempt to repair this combination alarm.<br />
Doing so will void your warranty.<br />
If the alarm is not operating properly, see<br />
“Troubleshooting.” If necessary and if still under<br />
warranty, return the alarm to Climate Controls<br />
Americas. Pack it in a well-padded carton, shipping<br />
prepaid, to:<br />
Climate Controls Americas<br />
Product Service Department<br />
28C Leigh Fisher Blvd<br />
El Paso, TX 79906<br />
If the combination alarm is no longer under<br />
warranty, have a licensed electrician replace the<br />
combination alarm immediately with a comparable<br />
Firex brand alarm.<br />
20
VI. TROUBLESHOOTING THE <strong>SMOKE</strong>/CO <strong>ALARM</strong><br />
DANGER<br />
Always turn off power at main fuse box or circuit breaker before taking troubleshooting action.<br />
WARNING<br />
DO NOT disconnect battery or AC power to quiet an unwanted alarm. This will remove your protection.<br />
Use Quick Quiet False Alarm Control by pushing the Smart Button.<br />
PROBLEM SOLUTION<br />
Green light is not on. 1. Alarm may be functioning properly on DC (battery) power if RED and BLUE<br />
lights flash once per minute.<br />
2. Check AC power supply at fuse box or breaker panel.<br />
3. Alarm wiring is improperly connected. Have wiring checked by a licensed<br />
electrician. Retest the alarm.<br />
Alarm does not sound and lights<br />
do not flash when unit(s) is tested.<br />
NOTE: Push and hold Smart Button<br />
for at least five (5) to ten (10) seconds<br />
if unit does not sound!<br />
Interconnected smoke, heat, or<br />
CO alarms do not sound when<br />
Smart Button is pushed to test<br />
units.<br />
Interconnected CO alarms sound<br />
with smoke alarms when Smart<br />
Button is pushed to test units.<br />
1. Check that AC power is turned on (GREEN light ON); check that a good battery<br />
is inserted correctly in the battery compartment; check that the battery<br />
door is tightly closed.<br />
2. Turn off power. Remove alarm from mounting plate and check that connector<br />
plug is securely attached.<br />
3. Clean alarm (see “Cleaning” on previous page).<br />
1. Press and hold the Smart Button longer until the second set of two quick<br />
beeps sounds to initiate the remote test.<br />
2. Check that remote alarms are receiving power and functioning properly.<br />
3. Combination alarm interconnect circuit problem. Replace and retest.<br />
4. On DC (battery powered) interconnected alarms, remove alarm from mounting<br />
bracket and check that the connector plug is securely attached.<br />
5. On an interconnected series with both AC and AC/DC powered units, wiring<br />
may have been improperly connected. Have wiring checked by a licensed<br />
electrician. Retest all alarms in the series.<br />
Indicates older CO alarms, without Smart Interconnect, are sharing the same<br />
interconnect line and cannot distinguish between alarm signals for smoke or CO.<br />
Replace with models COQ-8 or <strong>FADCQ</strong> alarms.<br />
21<br />
Continued...
Troubleshooting the Smoke/CO Alarm (Continued)<br />
PROBLEM SOLUTION<br />
The horn beeps once, then two<br />
beeps, then three beeps, pauses,<br />
and then sounds the full alarm when<br />
testing using the Smart Button.<br />
The alarm beeps once a minute<br />
and YELLOW light flashes.<br />
Horn beeps and YELLOW light<br />
flashes twice, repeating about<br />
once each minute.<br />
The alarm is operating properly. The Firex patented Horn Ramp-Up feature lets<br />
you start the test sequence and move away from the unit before the full alarm<br />
horn sounds.<br />
Alarm sounds; no hazard present. Take Emergency Safety Actions in all alarm situations! If no hazard proves to be<br />
present, test the alarm to check for proper functioning. Clean the alarm. (See<br />
MAINTENANCE AND CLEANING.) Check that the alarm is placed properly. (See<br />
WHERE TO INSTALL THIS <strong>ALARM</strong>.)<br />
The battery needs to be replaced. Turn off power and replace the battery. (See<br />
“BATTERY REPLACEMENT” in “MAINTENANCE AND CLEANING”.) Push the<br />
Smart Button to temporarily quiet the low battery signal for 8 hours.<br />
Push the Smart Button to allow alarm to reset and self test. If fault signal continues,<br />
alarm is no longer providing protection and must be replaced.<br />
22
VII: IMPORTANT SAFETY INFORMATION<br />
Fire Safety Tips<br />
These guidelines will assist you in the event of a<br />
fire. However, to reduce the chance that fires will<br />
start, practice fire safety rules and prevent hazardous<br />
situations.<br />
• Familiarize everyone with the sound of a<br />
smoke alarm and explain what it means.<br />
• Determine TWO exits from each room and an<br />
escape route to the outside from each exit.<br />
• Teach all household members to touch the<br />
door. INSTRUCT THEM NOT TO OPEN THE<br />
DOOR IF THE DOOR IS HOT.<br />
• Teach household members to crawl along the<br />
floor to stay below dangerous smoke, fumes,<br />
and gases.<br />
• Determine a safe meeting place for all<br />
members outside the building.<br />
CO Home Safety Tips<br />
CO poisoning is often caused by equipment failures<br />
due to poor maintenance, product defects,<br />
and damaged parts. The following is a list of<br />
safety tips to help prevent CO within your home:<br />
1. Have all fuel-burning appliances inspected<br />
and cleaned yearly by a qualified service<br />
technician. The furnace, water heater, and<br />
stove are some of the leading sources of CO.<br />
2. Clean fireplace vents and chimney regularly. A<br />
blocked chimney could cause a backdraft of<br />
CO into the home. Do not cap chimney. This<br />
will cause a backdraft of CO into the home.<br />
3. Do not cap or cover a draft hood or exhaust<br />
vent to any appliance. This will trap dangerous<br />
CO inside the house.<br />
23<br />
What to Do in Case of a Fire<br />
1. Don’t panic; stay calm.<br />
2. Leave the building as quickly as possible.<br />
Touch doors with the back of your hand to<br />
feel if they are hot before opening them. IF<br />
DOOR IS HOT USE AN ALTERNATE EXIT.<br />
Crawl along the floor, and DO NOT stop to<br />
collect anything.<br />
3. Meet at a pre-arranged meeting place outside<br />
the building.<br />
4. Call the fire department from OUTSIDE the<br />
building.<br />
5. DO NOT GO BACK INSIDE A BURNING<br />
BUILDING. Wait for the fire department to<br />
arrive.<br />
4. Do not close off or confine your fuel-burning<br />
appliances in a closed area. They need<br />
plenty of ventilation to operate properly.<br />
5. Do not use liquid propane (LP) or charcoal<br />
grills indoors.<br />
6. Do not operate any gasoline-powered equipment<br />
indoors.<br />
7. Allow for plenty of ventilation when using a<br />
kerosene heater. Do not use in small areas.<br />
Preventive maintenance, common sense, and a<br />
CO detection device are some of the best methods<br />
of preventing CO poisoning. However, a<br />
dangerous situation can happen to anyone at<br />
any time.<br />
Continued...
The following list illustrates some danger signs<br />
of CO presence.<br />
1. Soot and dirt build-up seeping out of chimney<br />
or other exhaust vents.<br />
2. A mostly yellow (rather than clear blue) burner<br />
flame or pilot flame in gas appliances.<br />
Symptoms of Carbon Monoxide Poisoning<br />
CO poisoning has many symptoms. Some<br />
symptoms are very similar to the flu, the effects<br />
of intoxication, or drug usage. In many CO<br />
cases, people feel ill and stay home to rest. This<br />
only compounds the CO poisoning because<br />
they stay in the home where CO is present.<br />
As CO levels rise, the symptoms become more<br />
extreme. At low levels people will suffer<br />
headaches and mild nausea. At higher levels<br />
unconsciousness, heart failure, and even death<br />
can occur.<br />
The following symptoms are related to <strong>CARBON</strong><br />
<strong>MONOXIDE</strong> POISONING and should be discussed<br />
with ALL members of the household:<br />
Mild Exposure: Slight headache, nausea, vomiting,<br />
fatigue (often described as flu-like symptoms).<br />
Medium Exposure: Severe throbbing headache,<br />
drowsiness, confusion, fast heart rate.<br />
Extreme Exposure: Unconsciousness, convulsions,<br />
cardio-respiratory failure, death.<br />
Many cases of reported carbon monoxide poisoning<br />
indicate that while victims are aware they<br />
are not well, they become so disoriented they<br />
are unable to save themselves by either exiting<br />
the building or calling for assistance. Also,<br />
young children, the elderly, and household pets<br />
may be the first affected by CO poisoning.<br />
24<br />
3. A draft of air coming from an appliance,<br />
chimney, or vents.<br />
If you have flu-like symptoms or suspect<br />
CO poisoning, seek medical assistance<br />
immediately!<br />
The important factor with any CO poisoning,<br />
however, is time. At high levels, CO can cause<br />
death in just minutes. At lower levels, it could<br />
take from hours to days of constant CO exposure<br />
to have the same life-threatening effect.<br />
The chart below illustrates the symptoms of CO<br />
poisoning by concentration of CO and its effect<br />
over time.<br />
Slight headache within 2-3 hours.<br />
Frontal headache within 1-2 hours.<br />
Dizziness, nausea, and convulsions within 45 minutes.<br />
Insensible within 2 hours.<br />
Headache, dizziness, and nausea within 20 minutes.<br />
Death within 2 hours.<br />
Headache, dizziness, and nausea within<br />
5-10 minutes. Death within 30 minutes.<br />
Death in less than 3 minutes.<br />
Headache, dizziness, 1-2 minutes.<br />
Death in less than 15 minutes.<br />
0 100 200 300 400 500 600 700 800 900 1000 1100 1200<br />
Concentration of CO in air (ppm)
Conditions That Can Cause CO Levels to Change<br />
The following conditions can result in transient<br />
CO situations in the home.<br />
1. Excessive spillage or reverse venting of fuel<br />
burning appliances caused by outdoor<br />
ambient conditions, such as:<br />
a. Wind direction and/or velocity, including<br />
high gusts of wind. Heavy air in the vent<br />
pipes (cold/humid air with extended<br />
periods between cycles).<br />
b. Negative pressure differential resulting<br />
from the use of exhaust fans.<br />
c. Simultaneous operation of several fuel<br />
burning appliances competing for limited<br />
internal air.<br />
Limitations of This Smoke/CO Alarm<br />
• Smoke and CO alarms may not alert every<br />
household member every time. The alarm horn is<br />
loud in order to alert individuals to a potential<br />
danger. However, there may be limiting circumstances<br />
where a household member may not<br />
hear the alarm (e.g. outdoor or indoor noise,<br />
sound sleepers, drug or alcohol usage, the hard<br />
of hearing, etc.). If you suspect that this alarm<br />
may not alert a household member, install and<br />
maintain specialty smoke alarms. Household<br />
members must hear the alarm’s warning sound<br />
and quickly respond to it to reduce the risk of<br />
damage, injury, or death that may result from<br />
fire. If a household member is hard of hearing,<br />
install special alarms with lights or vibrating<br />
devices to alert occupants.<br />
• Smoke alarms can sound their alarms only when<br />
they detect smoke. Smoke alarms detect combustion<br />
particles in the air. They do not sense<br />
heat, flame, or gas. This alarm is designed to<br />
give audible warning of a developing fire.<br />
25<br />
d. Vent pipe connections vibrating loose<br />
from clothes dryers, furnaces, or water<br />
heaters.<br />
e. Obstruction in the vent pipe or unconventional<br />
vent pipe designs which can<br />
amplify the above situations.<br />
2. Extended operation of unvented fuel burning<br />
devices (range, oven, fireplace, etc.).<br />
3. Temperature inversions which can trap<br />
exhaust gasses near the ground.<br />
4. Car idling in an open or closed attached<br />
garage, or near a home.<br />
However, many fires are fast-burning, explosive,<br />
or intentional. Others are caused by carelessness<br />
or safety hazards. Smoke may not reach<br />
the smoke alarm QUICKLY ENOUGH to ensure<br />
safe escape.<br />
• CO alarms can sound their alarms only when<br />
they detect CO gas. They do not sense heat,<br />
flame, or any gas other than carbon monoxide<br />
(CO). This alarm is designed to give audible<br />
warning that a dangerously high level of CO is<br />
present. You must respond immediately to the<br />
CO alarm horn.<br />
• Smoke and CO alarms have limitations. This<br />
alarm is not foolproof and is not warranted to<br />
protect lives or property from fire. Smoke and<br />
CO alarms are not a substitute for insurance.<br />
Homeowners and renters should insure their<br />
lives and property. In addition, it is possible for<br />
the alarm to fail at any time. For this reason,<br />
you must test the alarm weekly and replace<br />
every 5 years.
Important Information About This Smoke/CO Alarm<br />
Required Power Supply<br />
• This combination smoke-CO alarm requires<br />
constant 120-volt, AC power AND/OR a working<br />
9-volt battery to operate properly. This<br />
combination alarm WILL NOT work if AC<br />
power is not connected or has failed or been<br />
interrupted for any reason AND the battery is<br />
removed, drained or improperly connected.<br />
DO NOT use any other kind of battery except<br />
as specified in this manual.<br />
NOTE: AC/DC combination alarms offer<br />
added protection in the event of a power<br />
failure or a drained battery.<br />
• You may operate this combination smoke-CO<br />
alarm on battery power only. Having only one<br />
source of power is less reliable than having<br />
two different power sources. If the battery is<br />
too weak to power the alarm, or is removed<br />
from the alarm, the alarm will not protect you<br />
from hazardous conditions within your home.<br />
Make sure a battery-only installation complies<br />
with your local codes and regulations. Check<br />
with your local fire department or building<br />
code enforcement department if you are<br />
unsure of the rules.<br />
• DO NOT remove or disconnect battery or turn<br />
off AC power to quiet unwanted alarms. This<br />
will remove your protection. This combination<br />
alarm features a Quick Quiet False Alarm<br />
Control button which, when activated, will<br />
quiet unwanted smoke alarms for approximately<br />
10 minutes and quiet CO alarms for up<br />
to 6 minutes.<br />
26<br />
Coverage<br />
• Install a smoke alarm in every room and on<br />
every level of the home. Smoke may not reach<br />
the smoke alarm for many reasons. For example,<br />
if a fire starts in a remote part of the<br />
home, on another level, in a chimney, wall,<br />
roof, or on the other side of a closed door,<br />
smoke may not reach the smoke alarm in time<br />
to alert household members. A smoke alarm<br />
will not promptly detect a fire EXCEPT in the<br />
area or room in which it is installed.<br />
Installation/Interconnect<br />
• This combination alarm should be installed<br />
only by a licensed qualified electrician.<br />
Observe and follow all local and national electrical<br />
and building codes for installation.<br />
• Interconnected smoke alarms installed in every<br />
room and on every level of the household offer<br />
maximum protection. The National Fire<br />
Protection Agency (NFPA) recommends interconnecting<br />
smoke alarms so that when one<br />
smoke alarm senses smoke and sounds its<br />
alarm, all others will sound as well. Do not<br />
interconnect smoke alarms from one individual<br />
family living unit to another.<br />
• Unique power connector prevents interconnection<br />
with incompatible smoke and combination<br />
alarms or security systems.<br />
Continued...
• This combination alarm may be interconnected<br />
with as many as 11 other Firex model <strong>FADCQ</strong><br />
FADC, TPCI, AD, ADC, PAD, G, GC, PG40, or<br />
FX1218 smoke alarms, and as many as 6 Firex<br />
model ADH heat alarms or COQ-8 CO alarms<br />
for a total of not more than 18 interconnected<br />
devices.<br />
• Do not connect this combination smoke-CO<br />
alarm to any other type of alarm or auxiliary<br />
device other than Firex models <strong>FADCQ</strong> FADC,<br />
TPCI, AD, ADC, PAD, G, GC, PG40, or FX1218<br />
smoke alarms, ADH heat alarms or COQ-8 CO<br />
alarms.<br />
• You may use the multiple station interconnected<br />
features of your <strong>FADCQ</strong>, even if powered<br />
only by a battery. We recommend that you<br />
check with your local code enforcement<br />
bureau before mixing interconnected alarm<br />
devices that may be normally operating both<br />
with and without AC power.<br />
• This alarm can share the interconnect wire of<br />
smoke and heat alarms. The alarm will automatically<br />
sound a smoke alarm signal if smoke<br />
is detected by this unit or any other interconnected<br />
smoke alarm, even if the unit is already<br />
detecting carbon monoxide and sounding the<br />
carbon monoxide alarm signal.<br />
WARNING<br />
• DO NOT connect this combination alarm to<br />
any other type of smoke or combination alarm<br />
or auxiliary device, except those listed in this<br />
manual.<br />
• While AC and AC/DC smoke alarms can be<br />
interconnected, ONLY when AC power is<br />
ACTIVE will ALL units <strong>ALARM</strong> when one unit<br />
senses smoke. WHEN AC power is DISCON-<br />
NECTED, INTERRUPTED OR NOT PRESENT<br />
27<br />
FOR ANY REASON, ONLY AC/DC UNITS WILL<br />
CONTINUE TO SEND AND RECEIVE SIGNALS<br />
AND SOUND AN <strong>ALARM</strong> IN RESPONSE TO<br />
THE PRESENCE OF <strong>SMOKE</strong>. WHEN power is<br />
DISCONNECTED, INTERRUPTED OR NOT<br />
PRESENT FOR ANY REASON, AC powered<br />
smoke alarms WILL NOT OPERATE. Models G,<br />
GC, and PG40 are AC-only smoke alarms!<br />
Compliance/Proper Applications<br />
• This combination alarm is designed to be used<br />
inside a single-family household. In multi-family<br />
buildings, each individual living unit should<br />
have its own smoke alarms. It is not a substitute<br />
for a complete commercial alarm system.<br />
It should be used only as supplemental protection<br />
in hotels, motels, dormitories, hospitals,<br />
nursing homes, or group homes.<br />
• This product is intended for use in ordinary<br />
indoor locations of family living units. It is not<br />
designed to measure compliance with<br />
Occupational Safety and Health Administration<br />
(OSHA) commercial or industrial standards.<br />
Proper Use/Operation<br />
• The Smart Button accurately tests all smoke<br />
and CO alarm functions. DO NOT use any<br />
other test method. Test smoke alarm weekly to<br />
ensure proper operation.<br />
• This combination smoke-CO alarm is designed<br />
to detect smoke and carbon monoxide gas.<br />
It is NOT designed to detect any other type of<br />
gas. If this combination smoke-CO alarm<br />
sounds its alarm horn, DO NOT assume<br />
that it is a false alarm. The alarm horn<br />
requires your immediate action.
VIII: AGENCY RECOMMENDATIONS FOR <strong>ALARM</strong> PLACEMENT<br />
Invensys Climate Controls Americas<br />
recommends complete coverage protection<br />
achieved by installing a smoke alarm in every<br />
room of your home.<br />
The National Fire Protection Association’s<br />
(NFPA) minimum requirement, as stated in<br />
Standard 72, Chapter 2, reads as follows:<br />
“2-2.1.1.1 Smoke detectors shall be installed outside<br />
of each separate sleeping area in the immediate<br />
vicinity of the bedrooms and on each additional<br />
story of the family living unit including basements<br />
and excluding crawl spaces and unfinished<br />
attics. In new construction a smoke detector also<br />
shall be installed in each sleeping room.”<br />
DINING<br />
ROOM<br />
LIVING ROOM<br />
KITCHEN<br />
BEDROOM BEDROOM<br />
BEDROOM<br />
Chapter 2 also reads as follows:<br />
“2-2.2.1 In new construction, where more than<br />
one smoke detector is required by 2-2.1, they<br />
shall be so arranged that operation of any<br />
smoke detector shall cause the alarm in all<br />
smoke detectors within the dwelling to sound.”<br />
“2.5.2.1 The required number of smoke detectors<br />
might not provide reliable early warning protection<br />
for those areas separated by a door from<br />
the areas protected by the required smoke<br />
detectors. For this reason it is recommended<br />
28<br />
that the householder consider the use of additional<br />
smoke detectors for those areas for<br />
increased protection. The additional areas<br />
include the basement, bedrooms, dining room,<br />
furnace room, utility room and hallways not protected<br />
by the required smoke detectors. The<br />
installation of smoke detectors in kitchens,<br />
attics (finished or unfinished), or garages is not<br />
normally recommended, as these locations<br />
occasionally experience conditions that can<br />
result in improper operation.”<br />
This equipment should be installed in accordance<br />
with the National Fire Protection<br />
Association’s Standard 72, NFPA, Batterymarch<br />
Park, Quincy, MA 02269.<br />
THIS STANDARD MEANS YOU SHOULD<br />
INSTALL AND USE A <strong>SMOKE</strong> <strong>ALARM</strong> IN EVERY<br />
ROOM AND AREA OF YOUR HOUSEHOLD OR<br />
BUILDING FOR BEST PROTECTION.
The NFPA, 1993 Edition,<br />
Appendix A further states:<br />
“The required number of<br />
smoke detectors may not<br />
provide reliable early warning<br />
protection for those areas<br />
separated by a door from the<br />
areas protected by the<br />
required smoke detectors.<br />
TV ROOM<br />
BEDROOM<br />
DINING<br />
ROOM<br />
LIVING ROOM<br />
BEDROOM HALL BEDROOM<br />
LIVING<br />
ROOM<br />
BASEMENT<br />
KITCHEN BEDROOM<br />
BEDROOM<br />
DINING<br />
ROOM<br />
For this reason, it is recommended that the<br />
house holder consider the use of additional<br />
smoke detectors for those areas for increased<br />
protection. The additional areas include: basement,<br />
bedrooms, dining room, furnace room,<br />
utility room, and hallways not protected by the<br />
required smoke detectors.”<br />
Also, as required by the<br />
California State Fire Marshal:<br />
“Early warning fire detection is best achieved by<br />
the installation of fire detection equipment in all<br />
rooms and areas of the household as follows: a<br />
smoke detector installed in each separate sleeping<br />
area (in the vicinity, but outside the bedrooms),<br />
and heat or smoke detectors in the living<br />
rooms, dining rooms, bedrooms, kitchens,<br />
hallways, attics, furnace rooms, closets, utility<br />
and storage rooms, basements and attached<br />
garages.”<br />
For best protection, install a smoke alarm<br />
in EVERY room. In addition, we recommend<br />
that all smoke alarms be interconnected.<br />
/<br />
29<br />
Typical Efficiency Home (Apartment)<br />
• Install a combination alarm on the ceiling or<br />
wall closest to the sleeping area.<br />
Typical Mobile Home<br />
NOTE: For mobile homes built before 1978,<br />
install alarms on an inside wall between 4 and<br />
12 inches from the ceiling. (Older mobile homes<br />
have little or no insulation in the ceiling.) This is<br />
especially important if the ceiling is unusually<br />
hot or cold.<br />
• Install a combination alarm inside each<br />
bedroom and in the hallway outside each<br />
separate sleeping area.
Typical Single-Story Home<br />
• Install a combination<br />
alarm on the ceiling<br />
or wall inside each<br />
bedroom and in the<br />
hallway outside each<br />
separate sleeping<br />
area. If a bedroom<br />
area hallway is more<br />
than 30 feet long,<br />
install a smoke alarm<br />
at each end.<br />
If there is a basement:<br />
• Install a smoke or combination alarm on the<br />
basement ceiling at the bottom of the stairwell.<br />
Typical Two-Story or<br />
Split Level Home<br />
• Install a combination<br />
alarm on the ceiling<br />
or wall inside each<br />
bedroom and in the<br />
hallway outside each<br />
separate sleeping<br />
area. If a bedroom<br />
area hallway is more<br />
than 30 feet long,<br />
install a smoke alarm<br />
at each end.<br />
• Install a smoke alarm at the top of a first-tosecond<br />
floor stairwell.<br />
If there is a basement:<br />
• Install a smoke or combination alarm on the<br />
basement ceiling at the bottom of the stairwell.<br />
• Install a CO or combination alarm between<br />
5 and 20 feet from possible sources of CO.<br />
30<br />
Important Smoke Alarm Placement<br />
and Exception Information<br />
• Install a smoke alarm<br />
as close to the center<br />
of the ceiling as<br />
possible. If this is not<br />
practical, mount no<br />
closer than 4 inches<br />
from a wall or corner.<br />
Also, if local codes<br />
allow, install smoke<br />
CEILING<br />
ACCEPTABLE HERE<br />
NEVER HERE<br />
4 IN<br />
(0.1m )<br />
TOP OF DETECTOR<br />
ACCEPTABLE HERE<br />
4 IN<br />
(0.1m )<br />
MINIMUM<br />
SIDE<br />
WALL<br />
12 IN<br />
(0.3 m )<br />
MAXIMUM<br />
alarms on walls, between 4 and 12 inches<br />
from ceiling/wall intersections.<br />
• Install a minimum of two smoke alarms in<br />
every home, no matter how small the home.<br />
New construction codes require a minimum of<br />
two interconnected smoke alarms in newly<br />
built homes.<br />
• Install a smoke alarm in each room that is<br />
divided by a partial wall (either coming down<br />
from the ceiling at least 24 inches, or coming<br />
up from the floor).<br />
• Install smoke alarms on peaked, cathedral, or<br />
gabled ceilings 3 feet from the highest point<br />
(measured horizontally).<br />
• Install a smoke alarm in lived-in attics or attics<br />
which house electrical equipment like furnaces,<br />
air conditioners, or heaters.
For Optimal Performance, Avoid Installing<br />
Smoke Alarms in the Following Locations:<br />
Near appliances or areas where normal<br />
combustion regularly occurs (kitchens,<br />
near furnaces, hot water heaters).<br />
Use specialized smoke alarms with<br />
Quick QuietFalse Alarm Control<br />
alarm control for these areas.<br />
In areas with high humidity, (bathrooms<br />
or areas near dishwashers or washing<br />
machines) install at least 10 feet (3 meters)<br />
away from these areas, if possible.<br />
Near air returns or within 3 feet (1 meter)<br />
of heating and cooling supply vents. The<br />
air could blow smoke away from the<br />
detector, interrupting its alarm.<br />
In rooms where temperatures may fall<br />
below 40°F (4°C) or rise above 100°F<br />
(38°C).<br />
In extremely dusty, dirty, or insectinfested<br />
areas. Loose particles interfere<br />
with smoke alarm operation.<br />
Within 3 feet (1 meter) of fluorescent<br />
lighting. Electrical noise may cause<br />
nuisance alarms.<br />
31<br />
About Locating CO Alarms<br />
Carbon monoxide gas can be anywhere and<br />
everywhere. CO gas is equal to or slightly<br />
lighter than air, and disperses evenly with the<br />
air in a room. Therefore, install this CO alarm<br />
where air circulation is best. Since most CO<br />
fatalities occur while families are sleeping, we<br />
recommend that you install at least one CO<br />
alarm in the hallway outside each separate<br />
sleeping area and one inside each bedroom<br />
or sleeping area.<br />
We also recommend that you install a CO<br />
alarm on every separate living level of the<br />
home where household members frequently<br />
spend time, as well as in the basement.<br />
IMPORTANT!<br />
This alarm will only indicate the presence<br />
of carbon monoxide gas at the sensor.<br />
Carbon monoxide gas may be present in<br />
other areas.
IX: WARRANTY INFORMATION<br />
5-YEAR LIMITED COMBINATION <strong>SMOKE</strong> AND CO <strong>ALARM</strong> WARRANTY<br />
Climate Controls Americas warrants to the original consumer purchaser each new combination smoke and CO alarm<br />
to be free from defects in material and workmanship under normal use and service for a period of five (5) years from<br />
the date of purchase. Climate Controls Americas agrees to repair or replace, at its option, any defective combination<br />
smoke and CO alarm provided it is returned with postage prepaid and with proof of purchase date to Climate Controls<br />
Americas. This warranty does not cover damage resulting from accident, misuse or abuse or lack of reasonable care<br />
of the product. This warranty is in lieu of all other express warranties, obligations or liabilities. THE IMPLIED<br />
WARRANTIES OF MERCHANTABILITY AND FITNESS FOR A PARTICULAR PURPOSE ARE LIMITED TO A PERIOD OF<br />
FIVE (5) YEARS FROM THE DATE OF PURCHASE FOR THE COMBINATION <strong>SMOKE</strong> and CO <strong>ALARM</strong>. Some states do<br />
not allow limitations on how long an implied warranty lasts, so the above limitations may not apply to you. IN NO CASE<br />
SHALL CLIMATE CONTROLS AMERICAS BE LIABLE FOR ANY INCIDENTAL OR CONSEQUENTIAL DAMAGES FOR<br />
BREACH OF THIS OR ANY OTHER WARRANTY, EXPRESS OR IMPLIED, WHATSOEVER, EVEN IF THE LOSS OR<br />
DAMAGE IS CAUSED BY ITS NEGLIGENCE OR FAULT. Some states do not allow the exclusion or limitation of<br />
incidental or consequential damages, so the above limitation or exclusion may not apply to you. This warranty gives<br />
you specific legal rights, and you may also have other legal rights which vary from state to state.<br />
This combination smoke and CO alarm’s manufacture and distribution are licensed by the U.S. Nuclear Regulatory<br />
Commission. This product meets all the requirements of U.L. Standard 217 and U.L. Standard 2034.<br />
WHERE TO SEND YOUR <strong>ALARM</strong> FOR SERVICE<br />
To return alarms under warranty, send the alarm with postage prepaid, a note describing the nature of the difficulty,<br />
and proof of date of purchase to:<br />
Climate Controls Americas<br />
28C Leigh Fisher Blvd.<br />
El Paso Texas 79906<br />
United States of America<br />
Climate Controls Americas<br />
191 E. North Avenue<br />
Carol Stream Illinois 60188<br />
©2002 Climate Controls Americas 110-1050<br />
32