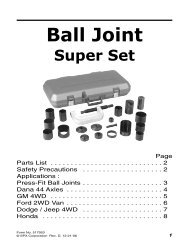
GM Ball Joint Update Kit - OTC
GM Ball Joint Update Kit - OTC
GM Ball Joint Update Kit - OTC

Create successful ePaper yourself
Turn your PDF publications into a flip-book with our unique Google optimized e-Paper software.
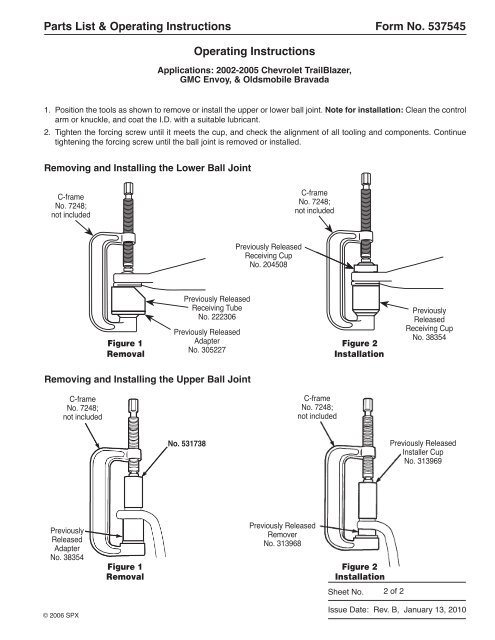
Parts List & Operating Instructions Form No. 537545<br />
© 2006 SPX<br />
Operating Instructions<br />
Applications: 2002-2005 Chevrolet TrailBlazer,<br />
<strong>GM</strong>C Envoy, & Oldsmobile Bravada<br />
1. Position the tools as shown to remove or install the upper or lower ball joint. Note for installation: Clean the control<br />
arm or knuckle, and coat the I.D. with a suitable lubricant.<br />
2. Tighten the forcing screw until it meets the cup, and check the alignment of all tooling and components. Continue<br />
tightening the forcing screw until the ball joint is removed or installed.<br />
Removing and Installing the Lower <strong>Ball</strong> <strong>Joint</strong><br />
C-frame<br />
No. 7248;<br />
not included<br />
Figure 1<br />
Removal<br />
Previously Released<br />
Adapter<br />
No. 305227<br />
Figure 2<br />
Installation<br />
Removing and Installing the Upper <strong>Ball</strong> <strong>Joint</strong><br />
C-frame<br />
No. 7248;<br />
not included<br />
Previously<br />
Released<br />
Adapter<br />
No. 38354<br />
Previously Released<br />
Receiving Tube<br />
No. 222306<br />
No. 531738<br />
Previously Released<br />
Receiving Cup<br />
No. 204508<br />
C-frame<br />
No. 7248;<br />
not included<br />
Previously Released<br />
Remover<br />
No. 313968<br />
C-frame<br />
No. 7248;<br />
not included<br />
Figure 1 Figure 2<br />
Removal Installation<br />
Sheet No.<br />
2 of 2<br />
Previously<br />
Released<br />
Receiving Cup<br />
No. 38354<br />
Previously Released<br />
Installer Cup<br />
No. 313969<br />
Issue Date: Rev. B, January 13, 2010