Laboratory Spill Procedures Handout
Laboratory Spill Procedures Handout
Laboratory Spill Procedures Handout
Create successful ePaper yourself
Turn your PDF publications into a flip-book with our unique Google optimized e-Paper software.
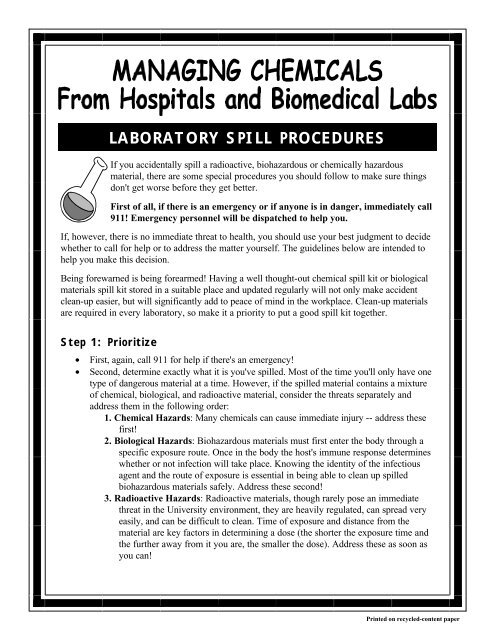
LABORATORY SPILL PROCEDURES<br />
If you accidentally spill a radioactive, biohazardous or chemically hazardous<br />
material, there are some special procedures you should follow to make sure things<br />
don't get worse before they get better.<br />
First of all, if there is an emergency or if anyone is in danger, immediately call<br />
911! Emergency personnel will be dispatched to help you.<br />
If, however, there is no immediate threat to health, you should use your best judgment to decide<br />
whether to call for help or to address the matter yourself. The guidelines below are intended to<br />
help you make this decision.<br />
Being forewarned is being forearmed! Having a well thought-out chemical spill kit or biological<br />
materials spill kit stored in a suitable place and updated regularly will not only make accident<br />
clean-up easier, but will significantly add to peace of mind in the workplace. Clean-up materials<br />
are required in every laboratory, so make it a priority to put a good spill kit together.<br />
Step 1: Prioritize<br />
• First, again, call 911 for help if there's an emergency!<br />
• Second, determine exactly what it is you've spilled. Most of the time you'll only have one<br />
type of dangerous material at a time. However, if the spilled material contains a mixture<br />
of chemical, biological, and radioactive material, consider the threats separately and<br />
address them in the following order:<br />
1. Chemical Hazards: Many chemicals can cause immediate injury -- address these<br />
first!<br />
2. Biological Hazards: Biohazardous materials must first enter the body through a<br />
specific exposure route. Once in the body the host's immune response determines<br />
whether or not infection will take place. Knowing the identity of the infectious<br />
agent and the route of exposure is essential in being able to clean up spilled<br />
biohazardous materials safely. Address these second!<br />
3. Radioactive Hazards: Radioactive materials, though rarely pose an immediate<br />
threat in the University environment, they are heavily regulated, can spread very<br />
easily, and can be difficult to clean. Time of exposure and distance from the<br />
material are key factors in determining a dose (the shorter the exposure time and<br />
the further away from it you are, the smaller the dose). Address these as soon as<br />
you can!<br />
1<br />
Printed on recycled-content paper
Step 2: Take the appropriate steps<br />
Once you know what kind of substance you're dealing with, there are special<br />
techniques to use to deal with the spill<br />
Education and Prevention<br />
Chemical <strong>Spill</strong>s<br />
The best way to deal with a chemical spill is to be educated. Your internal training should cover<br />
aspects such as:<br />
• Chemical hazards<br />
• Risk assessment<br />
• Personal protection<br />
• <strong>Spill</strong> clean-up procedures<br />
• Regulatory requirements<br />
Consider getting a proactive audit of your lab safety program and chemical spill readiness by<br />
contacting a governmental or private environmental consultation program. An outside perspective<br />
often helps.<br />
Chemical <strong>Spill</strong> Basics<br />
Hazardous material spills that do not endanger workers in the immediate area may be cleaned up<br />
by area personnel who have been trained and are properly equipped to clean up the spilled material<br />
safely. Hazardous material spills that cannot be safely adsorbed, neutralized, or otherwise<br />
controlled at the time of release by employees in the immediate release area are considered to be<br />
emergencies requiring outside assistance, typically by your local Fire Department , on-site Environmental<br />
Health & Safety (EH&S) staff, and possibly a spill cleanup contractor.<br />
When in doubt about whether you need help or not, it is best to call for help.<br />
Major Chemical <strong>Spill</strong>s<br />
A major chemical spill is:<br />
Pull the Fire Alarm or call 911<br />
•One that has caused injury to personnel or is likely to cause injury, or<br />
•Uncontained and spreading out of the immediate area endangering other labs, or<br />
•Has the potential to cause a fire.<br />
Pull the fire alarm if someone has been injured. This is the fastest way to get help and alert others<br />
nearby of the emergency. The Fire Department is the primary responder for major chemical<br />
spills.<br />
2
If you can answer YES to the following 4 questions, it is safe for you to<br />
clean up the spill:<br />
1. Do you know what chemical was spilled?<br />
2. Do you know the hazards of the spilled chemical?<br />
3. Do you have a chemical spill kit?<br />
4. Can you protect yourself from these hazards?<br />
If you answered NO to any of the above questions or need assistance with the spill cleanup,<br />
evacuate the area and call your EH&S coordinator, your spill response contractor or the fire de-<br />
Chemical <strong>Spill</strong> Kits<br />
All laboratories must have spill clean up materials available. <strong>Spill</strong> kits and replacement parts are<br />
available from many lab safety supply companies. A complete spill kit such as the one listed below<br />
may be purchased for less than $100.<br />
Adsorbent Neutralizing<br />
Materials<br />
5 <strong>Spill</strong> pads,<br />
universal for<br />
acid, base, oil,<br />
solvents<br />
Misc. Containers/Supplies Misc. Protective Gear<br />
I box baking soda 4, 20 x 30”, heavy duty (6mm)<br />
plastic bags<br />
1 five gallon reusable screw top<br />
plastic drum. Good to store all kit<br />
supplies and later used to hold<br />
bagged plastic spill waste for<br />
pickup.<br />
Snap together dust pan and whisk<br />
broom<br />
3<br />
1 goggle, chemical splash<br />
1 pair heavy-duty nitrile<br />
gloves<br />
8 pairs of Microgrip<br />
powder free nitrile gloves,<br />
chemical resistant, in<br />
various sizes, allows for<br />
dexterity.<br />
Respirators may be necessary for spill clean up. The use of respirators requires prior medical<br />
evaluation, training, and fit testing.
Biohazardous <strong>Spill</strong>s<br />
Each lab coordinator should be responsible for developing spill clean-up procedures that are<br />
appropriate for the materials used in the laboratory, as well as assuring that a spill kit is<br />
assembled and placed in a strategic location outside of, but near to, an area where a spill could<br />
occur. Furthermore, anyone working with biological materials must receive training in spill<br />
clean-up appropriate for materials routinely used.<br />
Use the following procedures to deal with a spill of biohazardous materials, either inside a<br />
Biological Safety Cabinet, or outside of one:<br />
Biohazard <strong>Spill</strong>s Outside a Biological Safety Cabinet<br />
• Hold your breath, leave the room immediately, and close the door. One good way to<br />
identify the spill area is to drop your laboratory coat on the area;<br />
• Warn others not to enter the contaminated area;<br />
• Remove contaminated garments and put them into a container for autoclaving.<br />
Thoroughly wash your hands and face and any other exposed areas of the body. If the<br />
spill involves potential exposure of bloodborne pathogens, follow your facility’s<br />
bloodborne pathogen policy for managing and reporting these exposures;<br />
• Wait 30 minutes to allow dissipation of aerosols created by the spill if in a laboratory<br />
where the airflow is negative relative to the surrounding areas. For spills in other areas, it<br />
may be appropriate to begin the clean-up immediately after assembling the needed cleanup<br />
materials;<br />
• Put on a long-sleeve gown, mask, and rubber gloves before re-entering the room. For a<br />
high risk agent, a jumpsuit with tight-fitting wrist seals and use of a respirator should be<br />
considered;<br />
• Pour a decontaminant solution appropriate for the agent involved (e.g. household bleach<br />
is an appropriate decontaminant for human blood and body fluids) around the spill and<br />
allow to flow into the spill. Paper towels soaked with the decontaminant may be used to<br />
cover the area. To minimize aerosolization, avoid pouring the decontaminant solution<br />
directly onto the spill;<br />
• Let stand for 20 minutes to allow an adequate contact time;<br />
• Using an autoclavable dust pan and squeegee, transfer all contaminated materials (paper<br />
towels, glass, liquid, gloves, etc.) into a deep autoclave pan. Cover the pan with<br />
aluminum foil or other suitable cover and autoclave according to standard directions.<br />
Reusable items should be separated from non-autoclavable plastic, as the plastic will melt<br />
and will then be impossible to remove from other items in contact with them.<br />
Biohazard <strong>Spill</strong>s Inside a Biological Safety Cabinet<br />
In order to prevent escape of contaminants from the cabinet and while the cabinet continues to<br />
operate, chemical decontamination procedures are recommended and should be initiated at once.<br />
• Spray or wipe walls, work surfaces, and equipment within the cabinet with a solution of<br />
an appropriate decontaminant for the agent involved. If the gloves being used are not<br />
puncture resistant, additional care is necessary if the spill involves broken glass or other<br />
sharp material;<br />
4
(Biohazardous <strong>Spill</strong>s continued)<br />
• Flood the top work surface tray and, if it is a Class II biological safety cabinet, the drain<br />
pans and catch basins below the work surface with the decontaminant and allow to stand<br />
for 10-15 minutes. The contact time should be extended to 30 minutes for large spills or<br />
spills containing large amounts of proteinaceous material;<br />
Remove excess decontaminant from the tray by wiping with a sponge or cloth soaked in<br />
decontaminant. For Class II biological safety cabinets, drain the tray into the catch basin<br />
below the work surface, lift out the tray and removable front intake grille, and wipe off<br />
top and bottom (underside) surfaces with a sponge or cloth soaked in a decontaminant.<br />
Replace the grille and drain decontaminant from the cabinet base into an appropriate<br />
container and autoclave according to standard procedures. Be sure to place gloves, cloth,<br />
and/or sponge into an autoclave pan to be autoclaved.<br />
*<strong>Spill</strong>s Outside the <strong>Laboratory</strong> (During Transport)<br />
If a biohazardous agent is spilled during transport outside the laboratory, the main difference<br />
from the first procedure is to initiate the cleanup immediately. Otherwise, use those procedures.<br />
Because it would already be too late to prevent aerosolization in this case, it is better to place<br />
extra emphasis on prevention of spills during transport:<br />
• Develop a procedure for the removal of biohazardous materials for incubation,<br />
refrigeration, or for any other reason from the laboratory, and enforce adherence to it;<br />
• Place all such materials in an unbreakable container that would prevent the escape of<br />
liquid or aerosol if it were dropped. One-gallon or half-gallon paint pails are good<br />
examples of acceptable containers;<br />
• Label the container with the biohazard symbol to ensure no mistake is made as to the<br />
contents.<br />
*Information taken from "<strong>Laboratory</strong> Safety, Principals and Practices, Second Edition",<br />
Chapter 14, "Decontamination, Sterilization, Disinfection, and Antisepsis" by Donald Vesley<br />
and James L. Lauer.<br />
Biohazard <strong>Spill</strong> Kit<br />
A well designed spill kit is highly recommended. It can save injury, time, and resources. The<br />
following items would be excellent choices for a Biohazard <strong>Spill</strong> Kit:<br />
• An appropriate chemical decontaminant -- in most cases a 10% household bleach<br />
solution is a good choice, but keep in mind that bleach will corrode stainless steel if left<br />
in contact with it for 30 minutes or more. For human blood and body fluids, iodophors or<br />
70% alcohol is appropriate;<br />
• Materials to absorb liquids after decontamination -- this could include paper towels,<br />
absorbent lab pads, or special materials designed to absorb large volumes of liquid. Keep<br />
in mind the volumes of liquid typically used in the laboratory area when selecting an<br />
absorbent;<br />
• Appropriate personal protective equipment to wear during clean-up -- gloves and a<br />
long-sleeved laboratory coat or gown are always necessary. Facial protection should be<br />
considered for large spills as well as protection against splash and splatter of the chemical<br />
decontaminant. Additional personal protective equipment is necessary when working<br />
with Class 3 agents.<br />
5
(Biohazardous <strong>Spill</strong>s continued)<br />
• A mechanical means for handling broken glass -- this could include tongs, forceps,<br />
small disposable scoops and sponges, autoclavable dust pans, or any other method that<br />
prevents direct contact with the broken glass. Broken glass represents a high cutting<br />
danger and should not be touched directly, especially if it is contaminated with a<br />
biohazardous agent;<br />
• Biohazard bags, sharps containers, and/or other containers to place the material in<br />
for further treatment and disposal.<br />
Mercury <strong>Spill</strong>s<br />
Mercury spills are one of the most common chemical spills. Thermometers, manometers, blood<br />
pressure cuffs, and many other instruments contain elemental mercury and are easily broken.<br />
Fortunately, mercury is simple to clean up and poses little risk to your health unless it is spilled<br />
within heated devices or gets trapped in upholstery, carpeting, or other surfaces where there is<br />
an increased likelihood of human contact.<br />
Health Hazards<br />
• Mercury is an inorganic element that is readily absorbed via the respiratory tract (as in<br />
elemental mercury vapor or mercury compound dust form), gastrointestinal tract, and<br />
skin surface. Fortunately, at room temperature mercury is not very volatile and poses little<br />
risk. If spilled on a heated surface, however, its volatility increases and therefore the<br />
risk of inhalation. Mercury spilled on fabric or carpet is also very difficult to clean and<br />
can also pose an increased risk of inhalation.<br />
• Mercury in the organic form is extremely toxic via skin contact, inhalation, and ingestion.<br />
These compounds target the central nervous system and can lead to brain damage, tremors,<br />
speech impediments, blindness, and death.<br />
• Be mindful of your accessories - jewelry can be ruined by contact with metallic mercury.<br />
Mercury <strong>Spill</strong> Kits and Assistance<br />
There are several different products available that are appropriate for cleaning up mercury spills.<br />
Example Mercury <strong>Spill</strong> Kit<br />
Number Item<br />
3 Large Nitrile Gloves<br />
3 Ziplock Bags 9x13<br />
1 Pkg. Cloth Sponges<br />
3 Syringe Aspirator<br />
1 500 g Hg Absorbent Powder<br />
3 Small Scoop-Scraper<br />
6
(Mercury <strong>Spill</strong>s continued)<br />
How to handle a variety of spill situations<br />
Mercury thermometer spills on smooth surfaces:<br />
1. Isolate the area by marking off the spill section to prevent inadvertent spreading of the<br />
mercury.<br />
2. Wear 2 pairs of chemical resistant gloves (nitrile or silver shield), lab coat, and eye<br />
protection during cleanup operations.<br />
3. Using a scraper, push the scattered mercury droplets together into a larger droplet.<br />
4. Aspirate the larger mercury droplets and place them into a zip lock bag or screw top<br />
container.<br />
5. Sprinkle mercury absorbent powder lightly over the remaining micro-droplets of<br />
mercury.<br />
6. Spray a water mist over the powder.<br />
7. Using the scraper, mix the materials into a paste amalgam. The resulting substance will<br />
not emit dangerous mercury vapors.<br />
8. Scoop up the amalgam and wipe down the surfaces with a scraper and damp sponge.<br />
Place the amalgam, sponge, gloves, scraper, scoop, and all other mercury contaminated<br />
debris into the zip lock bag or container. Tape sharp ends of the glass thermometer and<br />
place it into the bag or container as well.<br />
9. Label the bag or container with a hazardous waste label.<br />
Mercury manometer spills on any surface and mercury spills on porous surfaces (carpet,<br />
upholstery, concrete, etc.):<br />
The preferred method to clean up large mercury spills on any surface or any size<br />
mercury spill on porous flooring or carpeting is the use of a mercury vacuum. In some<br />
instances the surface cannot be cleaned or decontaminated. Carpets and fabrics are<br />
typically disposed of as hazardous waste. Post clean-up monitoring should also be<br />
conducted.<br />
Mercury spills in ovens, incubators, hot water baths or other elevated temperature<br />
situations:<br />
When the spill occurs in equipment with elevated temperature conditions such as an<br />
oven or incubator, an exposure to mercury vapor is more likely.<br />
• Shut off the equipment and leave the area immediately.<br />
• The cleanup should be performed after the device has cooled.<br />
• Mercury vapor monitoring must be performed prior to any cleanup.<br />
• Continued mercury vapor monitoring will need to be conducted after the cleanup is<br />
complete.<br />
Large mercury spills:<br />
A broken manometer or other large mercury spill will require use of a mercury vacuum<br />
and mercury monitoring. Monitoring should be part of the evacuation process and care<br />
should be taken to help isolate the spill area and prevent spreading. Post clean-up<br />
monitoring should also be conducted.<br />
7
Radioactive Materials <strong>Spill</strong>s<br />
<strong>Spill</strong>s of radioactive materials are classified into two categories, Major <strong>Spill</strong>s and Minor <strong>Spill</strong>s,<br />
based on the amount of material spilled.<br />
1. Consult the nuclide chart below and determine which Group the spilled radionuclide belongs<br />
to.<br />
2. Estimate the amount of radioactivity, in millicuries, that has been spilled.<br />
Look at the criteria for Major <strong>Spill</strong>s and Minor <strong>Spill</strong>s below to decide which set of procedures<br />
you should follow.<br />
Group 1<br />
ALI > 10 mCi<br />
H-3<br />
F-18<br />
Cr-51<br />
Cu-64m<br />
Tc-99m<br />
In-113m<br />
Major <strong>Spill</strong>s<br />
Group 2<br />
Group 3<br />
1 mCi < ALI < 10 mCi 0.1 mCi < ALI < 1 mCi<br />
C-14 Mn-54 Mo-99 Na-22 Sr-89<br />
Na-24 Fe-55 In-111 P-32 Cd-109<br />
P-33 Co-57 I-123 Cl-36 Ag-110m<br />
S-35 Co-58 Hg-197 Ca-47 Cd-115m<br />
K-42 Ga-67 Au-198 Fe-59 Ir-192<br />
Ca-45 Hg-203(inorganic) Zn-65 Hg-203(organic)<br />
(ALI = Annual Limit on Intake)<br />
8<br />
Group 4<br />
.01 mCi < ALI < 0.1 mCi<br />
Sr-90<br />
I-125<br />
I-131<br />
Criteria: Group 1 > 10 mCi ; Group 2 > 1 mCi ; Group 3 > 0.1 mCi : Group 4 > 0.01 mCi<br />
Actions to take:<br />
1. CLEAR THE AREA. Notify all persons not involved in the spill to vacate the room.<br />
2. PREVENT THE SPREAD. Cover the spill with absorbent pads or diatomaceous earth,<br />
but do not attempt to clean it up. Confine the movement of all personnel potentially<br />
contaminated to prevent the spread.<br />
3. SHIELD THE SOURCE. If necessary, the spill should be shielded, but only if it can be<br />
done without further contamination or without increasing or significantly increasing your<br />
radiation exposure.<br />
4. CLOSE THE ROOM. Leave the room and lock the door(s) to prevent entry.<br />
5. CALL FOR HELP. Notify the Radiation Safety Officer immediately.
(Radioactive Materials <strong>Spill</strong>s continued)<br />
Minor <strong>Spill</strong>s<br />
Criteria: <strong>Spill</strong>s less than major spill quantities<br />
Actions to take:<br />
1. NOTIFY. Notify persons in the area that a spill has occurred.<br />
2. PREVENT THE SPREAD. Cover the spill with absorbent paper or spread diatomaceous<br />
earth.<br />
3. CLEAN UP. Use disposal gloves and remote handling tongs. Carefully fold the absorbent<br />
paper and pad. Scoop up any absorbent diatomaceous earth with cardboard. Insert it into<br />
a plastic bag and dispose of it in the radioactive waste container. Also insert into the plastic<br />
bag all other contaminated materials such as disposable gloves.<br />
4. SURVEY. With a low-range, thin-window GM Survey meter, check the area around the<br />
spill, hands, and clothing for contamination. Survey H-3 and C-14 spills with wipes<br />
counted in a Liquid Scintillation Counter.<br />
5. REPORT. Report the incident to the Radiation Safety Officer.<br />
6. PERSONNEL DECONTAMINATION. Contaminated clothing should be removed and<br />
stored for further evaluation by the Radiation Safety Officer. If the spill is on the skin,<br />
flush thoroughly and then wash with mild soap and lukewarm water.<br />
This fact sheet was created by the Medical Industry Waste Prevention Roundtable as part of a seminar series<br />
designed to help medical industry professionals control costs through product stewardship and waste<br />
reduction. Please pass this sheet on to others who maybe interested.<br />
Medical Industry Waste Prevention Roundtable<br />
What is the Medical Industry Waste Prevention Roundtable? The Roundtable was<br />
established in early 1999 to bring together medical industry professionals who are<br />
interested in exchanging ideas on, and developing new ways of, preventing and reducing waste.<br />
During 2000 and 2001 the group is hosting a series of seminars to develop cost-effective,<br />
environmentally sound solutions for managing major medical wastes such as products and<br />
packaging.<br />
The Medical Industry Waste Prevention Roundtable is sponsored by:<br />
For more information on the Roundtable, visit our Web site at http://dnr.metrokc.gov/swd/bizprog/<br />
waste_pre/medical.htm or contact Kinley Deller at (206) 296-4434 or kinley.deller@metrokc.gov.<br />
9


