WATERPROOFING TERRACES AND BALCONIES - Mapei
WATERPROOFING TERRACES AND BALCONIES - Mapei
WATERPROOFING TERRACES AND BALCONIES - Mapei

You also want an ePaper? Increase the reach of your titles
YUMPU automatically turns print PDFs into web optimized ePapers that Google loves.
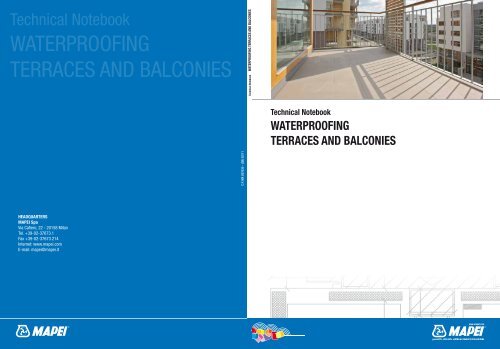
Technical Notebook<br />
<strong>WATERPROOFING</strong><br />
<strong>TERRACES</strong> <strong>AND</strong> <strong>BALCONIES</strong><br />
HEADQUARTERS<br />
MAPEI Spa<br />
Via Cafiero, 22 - 20158 Milan<br />
Tel. +39-02-37673.1<br />
Fax +39-02-37673.214<br />
Internet: www.mapei.com<br />
E-mail: mapei@mapei.it<br />
C.P. MK 837630 - (GB) 02/11<br />
Technical Notebook <strong>WATERPROOFING</strong> <strong>TERRACES</strong> <strong>AND</strong> <strong>BALCONIES</strong><br />
Technical Notebook<br />
<strong>WATERPROOFING</strong><br />
<strong>TERRACES</strong> <strong>AND</strong> <strong>BALCONIES</strong>
Technical Notebook<br />
<strong>WATERPROOFING</strong><br />
<strong>TERRACES</strong> <strong>AND</strong> <strong>BALCONIES</strong><br />
Front Cover Image:<br />
RESIDENTIAL CENTRE “ZELENE MESTO”,<br />
PRAGUE - CZECH REPUBLIC
page 02 1. INTRODUCTION<br />
page 02 2. A BRIEF HISTORY OF <strong>TERRACES</strong><br />
<strong>AND</strong> <strong>BALCONIES</strong><br />
page 04 3. MECHANICAL <strong>AND</strong> PHYSICAL STRESSES<br />
page 04 3.1 STRUCTURAL DEFORMATION <strong>AND</strong> JOINTS<br />
page 05 3.2 CREATING SLOPING LAYERS<br />
page 11 3.3 DIMENSIONS <strong>AND</strong> DESIGN OF COLLECTOR SYSTEMS<br />
FOR RAINWATER<br />
page 13 4. MAPEI <strong>WATERPROOFING</strong> SYSTEMS<br />
FOR STRUCTURES ABOVE GROUND<br />
page 16 4.1 TWO-COMPONENT WATERPROOFERS<br />
page 17 4.2 ONE-COMPONENT WATERPROOFERS<br />
page 18 4.3 READY-TO-USE WATERPROOFERS<br />
page 19 5. REPAIRS TO <strong>WATERPROOFING</strong> LAYERS<br />
ON ExISTING STRUCTURES<br />
page 19 5.1 PREVENTATIVE CHECKS<br />
page 20 5.2 <strong>WATERPROOFING</strong> SYSTEMS<br />
INSTALLED ON TOP OF ExISTING FLOORS<br />
page 29 5.3 <strong>WATERPROOFING</strong> AFTER REMOVING ExISTING FLOORS<br />
page 38 5.4 DEMOLITION <strong>AND</strong> COMPLETE REPAIR<br />
OF FLOORS <strong>AND</strong> SCREEDS<br />
page 46 6. REPAIRS TO FRONT EDGES OF <strong>BALCONIES</strong><br />
page 48 7. <strong>WATERPROOFING</strong> NEW STRUCTURES<br />
page 56 8. LAYING CERAMIC <strong>AND</strong> STONE MATERIALS<br />
page 58 9. GROUTING <strong>AND</strong> SEALING JOINTS<br />
01
02<br />
Technical Notebook<br />
<strong>WATERPROOFING</strong><br />
<strong>TERRACES</strong> <strong>AND</strong> <strong>BALCONIES</strong><br />
1. INTRODUCTION<br />
The issues dealt with in this technical notebook regard waterproofing<br />
terraces, balconies and flat roofs, and will discuss both old structures<br />
and new structures. We will start with a brief history of the structural<br />
elements analysed in the notebook, and then continue with an analysis<br />
of the physical and mechanical stresses which act upon them during their<br />
useful service life. There will also be an analysis of the characteristics,<br />
performances and advantages of MAPEI waterproofing products for<br />
structures above ground level.<br />
The aim of this pamphlet is to reduce the frequency of problems which may<br />
be traced back to incorrect design specifications and problems caused by<br />
incorrect or shoddy installation techniques. According to recent figures,<br />
more than 50% of claims for damages involve infiltration, while more than<br />
60% of these claims are due to problems with the waterproofing layer.<br />
It is quite clear, therefore, that the principal type of intervention which<br />
needs to be addressed is the waterproofing of old structures. And<br />
MAPEI, as experts in this field, have a range of quality systems<br />
available, and not only for waterproofing and decorating floors, but<br />
also for repairing substrates (in concrete and brick) deteriorated by<br />
the aggressive action of water.<br />
In the second part, dedicated to a description of various intervention<br />
techniques, we will carry out an in-depth analysis of waterproofing<br />
solutions for new constructions, starting with the installation of screeds,<br />
followed by the application of waterproofing solutions and finishing off<br />
with the laying of tiles and the grouting and sealing of joints.<br />
2. A BRIEF HISTORY OF <strong>TERRACES</strong><br />
<strong>AND</strong> <strong>BALCONIES</strong><br />
If we were to define the difference between a balcony and a terrace, we<br />
could generally define a balcony as an added element to the main body of<br />
Fig. 2.1 - Juliet's Terrace - Verona - Italy<br />
Repairing of the terrace with: ADESILEX P4,<br />
MAPELASTIC, GRANIRAPID, ULTRACOLOR PLUS
a building which usually juts out from its vertical face, while a terrace is an<br />
integral part of the building itself.<br />
Balconies were not very widely used during the Classical period. Homes for<br />
the gentry were usually single-storey buildings around internal porticoes.<br />
The living quarters for the masses during Roman times, on the other hand,<br />
were several storeys high with external wooden galleries used to connect<br />
the various areas of the buildings.<br />
In Medieval times, wooden galleries started appearing on the façades of<br />
castles, along with hanging stone balconies supported on wooden or stone<br />
stays. One of the most well-known examples is a small balcony in the heart<br />
of Verona, where according to legend Romeo courted his beloved Juliet as<br />
she looked out from the balcony.<br />
It was not until the Renaissance period that the concepts of space and<br />
perspective started to evolve in architecture, and this period witnessed<br />
the appearance of the first urban terraces and splendid gardens typical of<br />
palaces and mansion houses.<br />
Roofing terraces, on the other hand, were developed by the Modernist<br />
movement, a period in the history of architecture between the First and<br />
Second World War, oriented at modernising design and architectural<br />
principles. It was this period which witnessed the appearance of the first<br />
flat roofs, following the improvements in the technical characteristics of new<br />
building materials. And it is thanks to Le Corbusier that terraces became<br />
an architectural space to be lived in - Villa Savoye and Unité d'Habitation<br />
are the most significant examples of how a space, which had previously<br />
been considered to be of secondary importance or superfluous, became<br />
more vital and multi-purpose, a pleasant space to spend one’s spare time.<br />
And so flat roofs became solariums (such as the one at Villa Savoye), or<br />
meeting places for social functions (in Unité d’Habitation, for example).<br />
Continuing with our brief detour into the evolution of terraces tied to the<br />
design features of the great maestros of the Modernist Movement, it would<br />
be impossible not to mention the impressive hanging terraces designed by<br />
Frank Lloyd Wright in his famous house overlooking a waterfall which jut<br />
03
04<br />
Technical Notebook<br />
<strong>WATERPROOFING</strong><br />
<strong>TERRACES</strong> <strong>AND</strong> <strong>BALCONIES</strong><br />
out jut out for a breathtaking view over a mountain creek, one of the most<br />
remarkable examples of modern architecture.<br />
In order for terraces and balconies to become a space where everybody<br />
may enjoy their spare time, we must not limit our attention to simply applying<br />
a waterproofing system; we must also consider a number of other aspects<br />
such as structural stresses, the correct slope, the way they blend in and<br />
particular care for the joints. These and other items will be discussed in<br />
the following pages.<br />
3. MECHANICAL <strong>AND</strong><br />
PHYSICAL STRESSES<br />
3.1 STRUCTURAL DEFORMATION <strong>AND</strong> JOINTS<br />
The cementitious conglomerate in use since ancient times is still today<br />
one of the most widely used construction materials in the building<br />
industry. The combination of cement, inert material and water in the right<br />
proportions forms a strong, compact composition which, when used<br />
in conjunction with steel bars, forms an excellent construction system:<br />
reinforced concrete.<br />
As with all materials, a cementitious conglomerate has certain<br />
chemical and physical characteristics directly connected to particular<br />
types of deformation, some of which are manifested immediately,<br />
while others only show up with time, generated especially by the<br />
curing of the conglomerate itself. Structures are subjected to various<br />
types of deformation (thermal, dynamic, shrinkage, etc.) during<br />
their working life and every type of deformation must be carefully<br />
assessed during the design phase.<br />
As far as the behaviour of terraces and balconies is concerned,<br />
it is common knowledge that these structures are subjected to all<br />
the types of deformation mentioned above, which act both on the<br />
Fig. 3.1 - Diagram of the deformations of a suspended<br />
floor slab subjected to point loads.<br />
Fig. 3.2 - Diagram of the deformations of a supported<br />
beam subjected to evenly-distributed loads.<br />
Fig. 3.3 - Diagram of the deformations induced by<br />
drops in temperature.
Fig. 3.4 - Diagram of the deformations induced by<br />
increases in temperature.<br />
structure of the balcony itself and on the superstructure, the screed<br />
and floor, and on which structural joints, control joints and expansion<br />
joints must be created.<br />
Structural joints are interruptions in the structural continuity of<br />
manufactured pieces made by placing a physical separation piece<br />
between two adjacent bodies. They are the same depth as the<br />
manufactured piece and several centimetres wide. Their function is to<br />
absorb structural stresses (subsidence of the ground, winds, seismic<br />
activity, etc.), functional stresses (vibrations, transitory oscillations, etc.)<br />
and thermal stresses (expansion and contraction of the materials). The<br />
depth of control joints or contraction joints is generally around 1/3 of<br />
the thickness of the cementitious conglomerate and are made by cutting<br />
into the surface with a diamond-tipped disk after the conglomerate has<br />
hardened (usually 24-48 hours). They do not eliminate cracks caused<br />
by hygrometric shrinkage, but help to contain their formation and width<br />
so that any cracks that form do not provoke functional or aesthetic<br />
problems. Expansion joints are interruptions in the continuity of the<br />
surface, created to absorb thermal expansion in ceramic floors or floors<br />
in other materials, for example.<br />
3.2 CREATING SLOPING LAYERS<br />
In this section, we will describe good working practices to form ementitious<br />
screeds suitable for use on balconies and terraces.<br />
Firstly, it would be useful to analyse the various types of screeds:<br />
• isolated (unbonded);<br />
• floating;<br />
• bonded.<br />
05
06<br />
Technical Notebook<br />
<strong>WATERPROOFING</strong><br />
<strong>TERRACES</strong> <strong>AND</strong> <strong>BALCONIES</strong><br />
Isolated (unbonded) screeds<br />
They are at least 35 mm thick and are used for pedestrian traffic. They are<br />
formed by inserting a horizontal separation layer (e.g. sheets of polyethylene or<br />
PVC, for example) between the screed and substrate (e.g. reinforced concrete<br />
capping layer) and by positioning a 1 cm thick compressible layer, such as<br />
expanded polystyrene, around the perimeter of the walls and around the pillars.<br />
The sheets must be turned up against the pillars and walls to form an upstand<br />
around 10 cm wide. The sheets of the separation layer must also overlap by<br />
at least 20 cm and be taped together. The advantage of this technique is<br />
that the screed and floor are isolated from deformation which occurs in the<br />
structure (e.g. subsidence, hygrometric shrinkage, thermal expansion, etc.).<br />
It is fundamental that cuts to a depth of 1/3 of the thickness of the screed are<br />
made in the screed (control joints) to create localised weak points and pre-<br />
determined areas for future cracking due to hygrometric shrinkage.<br />
With conventional sand and cement screeds, control joints must be made in<br />
correspondence with door thresholds, between pillars and every 9-16 m 2 for<br />
external screeds, by cutting to a depth of 1/3 of the thickness, taking care not<br />
to cut the electro-welded reinforcement mesh, if present.<br />
4<br />
3<br />
Fig. 3.5 - Isolated screed<br />
1) Floor slab; 2) Polyethylene sheet;<br />
3) ≥ 3.5 cm screed;<br />
4) Compressible material<br />
2<br />
1
5<br />
Floating screeds<br />
They are comparable to isolated screeds, but are laid on a layer of<br />
soundproofing or insulating material (e.g. cork, polythene mattress,<br />
sheets of expanded polyurethane, etc.). In these cases, because of<br />
the high compressibility and low mechanical strength of the substrate,<br />
the size of the screed must be calculated accordingly and electro-<br />
welded reinforcement mesh must be inserted at the mid-point of the<br />
screed to encourage even load distribution and to avoid punching.<br />
Table 1 indicates the thickness and reinforcement of screeds for residential<br />
use according to the compressibility and thickness of the isolating layer.<br />
4<br />
Fig. 3.6 - Floating screed.<br />
1) Floor slab; 2) Insulating/soundproofing material;<br />
3) Polyethylene sheet; 4) Screed with thickness > 4 cm<br />
with electro-welded mesh; 5) Compressible material.<br />
THICKNESS<br />
OF SCREED<br />
REINFORCEMENT<br />
I: Thickness 0,5 mm e ≤ 3mm 4 cm 50x50 mm mesh, ø = 2 mm<br />
5 cm Including non-reinforced<br />
III: Crushing* >3 mm e
08<br />
Technical Notebook<br />
<strong>WATERPROOFING</strong><br />
<strong>TERRACES</strong> <strong>AND</strong> <strong>BALCONIES</strong><br />
Bonded screeds<br />
If there is not enough space available (less than 35 mm) to install an<br />
isolated screed, a screed bonded to the underlying substrate must be<br />
installed, adopting the following precautions:<br />
- Make sure that the floor slab is well cured, sufficiently strong, free<br />
from dust and loose parts and that it has a rough surface.<br />
- To guarantee a perfect bond of the screed, spread on a layer of<br />
bonding slurry made from PLANICRETE, water and the same binder<br />
used to make the screed.<br />
- If layers only a few centimetres thick need to be applied on<br />
concrete floors or if the screed is installed in areas subjected to<br />
high mechanical stresses, use EPORIP epoxy adhesive instead of<br />
bonding slurry made from PLANICRETE. Whatever type of bonding<br />
promoter is used, the new mix must be applied using the “fresh on<br />
fresh” technique. Perimeter joints must be made around the room<br />
and pillars by inserting 1 cm thick compressible material, such as<br />
expanded polystyrene.. The pattern of structural joints in the floor<br />
slab, if present, must also be followed.<br />
- To avoid water collecting on the surface and making tiled surfaces<br />
slippery, balconies and terraces must have a minimum of slope<br />
towards the collector points for rain water.<br />
If a suitable slope was not created when installing the capping<br />
layer of the floor slab, a sloping screed must be formed under the<br />
waterproofing layer to encourage water to run off.
Composition of screeds<br />
N.B. It is very risky to apply waterproofing systems on screeds which have<br />
not been well cured (at least 28 days). Any cracks which form due to<br />
hygrometric shrinkage after laying will lead to cracks in the waterproofing<br />
system and compromise its efficiency.<br />
On site, especially in the case of renovation work, there is generally<br />
quite a lot of time available, but not enough to allow floor-layers to<br />
respect the minimum time required to cure conventional cementitious<br />
screeds: 7-10 days per cm of thickness at around 20°C (and never less<br />
than 28 days). Binders are required, therefore, which allow mortar with<br />
long workability times to be prepared for substrates and which are easy<br />
to apply, while at the same time allow waterproofing layers and coating<br />
materials to be laid quickly.<br />
In these cases, MAPEI proposes the use of:<br />
TOPCEM, special normal-setting, quick-drying (4 days), controlled-<br />
shrinkage hydraulic binder for screeds.<br />
TOPCEM PRONTO, ready-to-use, pre-blended, normal-setting, quickdrying<br />
(4 days), controlled-shrinkage mortar, class CT-C30-F6-A1 fl according to EN<br />
13813 standards, with very low emission levels of volatile organic compounds<br />
(EMICODE EC1 R). Since this product is ready-to-use and only requires<br />
mixing with water, it offers the following advantages:<br />
• there is no longer the problems of having to use good quality aggregates<br />
with the right grain size, which are often hard to find;<br />
• dosage errors and problems due to poor workmanship are avoided;<br />
• the ideal solution where storage of raw materials (inert materials,<br />
cement, etc.) is a problem, when carrying out renovation work in<br />
ancient town centres, for example.<br />
09
10<br />
Technical Notebook<br />
<strong>WATERPROOFING</strong><br />
<strong>TERRACES</strong> <strong>AND</strong> <strong>BALCONIES</strong><br />
Unlike conventional sand and cement screeds, screeds made using<br />
TOPCEM and TOPCEM PRONTO are characterised by their quick-drying<br />
and controlled-shrinkage properties. As a result, waterproofing layers or<br />
ceramic tiles may be laid on balconies and terraces after just 24 hours.<br />
If capping layers on floor slabs are installed without forming a suitable<br />
slope, or if they need to be modified before installing an isolating<br />
screed, the products mentioned above may be used after spreading a<br />
layer of bonding slurry on the base by mixing PLANICRETE with water<br />
and the same binder or pre-blended mortar used to make the screed<br />
(recommended dose PLANICRETE-water-cement = 1:1:2 parts by<br />
weight, PLANICRETE-water-TOPCEM = 1:1:3 parts by weight and<br />
PLANICRETE-water-TOPCEM PRONTO = 1:1:12 parts by weight).<br />
As an alternative to the products mentioned above, if the thickness<br />
foreseen for the slope is low, MAPEI proposes the use of:<br />
ADESILEx P4, quick-hardening cementitious smoothing and levelling<br />
compound for thicknesses from 3 to 20 mm or, alternately:<br />
PLANITOP FAST 330, quick-setting, fibre-reinforced cementitious mortar<br />
for evening out irregularities from 3 to 30 mm on internal and external<br />
walls, floors and uneven substrates.<br />
ADESILEx P4 or PLANITOP FAST 330 may also be used for smoothing<br />
and levelling old screeds which need to be evened out. At normal<br />
temperatures, balconies and terraces may be waterproofed 3-4 hours<br />
after applying ADESILEx P4 or PLANITOP FAST 330.<br />
N.B. We recommend evening out only the capping layer. In those cases<br />
where the isolating screed also forms the slope (quite common when the<br />
screed is installed on a bituminous membrane), make sure the thickness<br />
of the layer, which will not be constant, is at least 35 mm.<br />
Fig. 3.7 - Applying TOPCEM PRONTO with a special<br />
pump<br />
Fig. 3.8 - Levelling the surface of a TOPCEM PRONTO<br />
screed with a straight-edge
3.3 DIMENSIONS <strong>AND</strong> DESIGN OF COLLECTOR<br />
SYSTEMS FOR RAINWATER<br />
The architectural features discussed in this pamphlet have to face up to<br />
the rigours of atmospheric agents, such as wind, snow and rain. The first<br />
precaution to be adopted is undoubtedly to design and create the correct<br />
slope to encourage rainwater to flow into dedicated outlets to avoid the<br />
formation of pools of water. Systems to collect rainwater are regulated by<br />
the European Standard UNI EN 12056, which replaced UNI 9184.<br />
The size of drains for rainwater depends on the maximum amount of<br />
precipitation during intense rain storms. The average value of rain intensity<br />
(IP) is expressed in l/s∙m 2 calculated over a period of 10 years.<br />
Rain intensity values are available in the UNI EN 12056 Standard, but the<br />
value generally used is IP=0.04 l/s∙m 2 or 2.4 l/min∙m 2 , which corresponds<br />
to a rainwater height (HP) of 144 mm/h, where IP=HP/60 [l/ min/m 2 ].<br />
The rainwater load (C) required to calculate the size of drainage systems<br />
depends on the total surface area exposed to rain and the slope and<br />
type of surface exposed. The surface considered when calculating the<br />
size of drains is defined as equivalent surface (ES), which is calculated<br />
by considering the horizontal surface area (or sloping up to 60°) and<br />
a part of the vertical surface (Tab. 2). The coefficient K (Tab. 3), on the<br />
other hand, reduces the effective intensity of rainwater according to the<br />
roughness and absorption capacity of the surfaces exposed to rain, in<br />
that they slow down the water running off the surface.<br />
Horizontal surfaces<br />
or with a slope (up to 60°)<br />
vertical surfaces or with slope<br />
more than 60°:<br />
- ONE<br />
- TWO<br />
- THREE or MORE<br />
Tab. 2<br />
CASE EQUIVALENT SURFACE (ES)<br />
100% of the sum of all surfaces<br />
50% of the surface<br />
35% of the sum of the two surfaces<br />
35% of the sum of the two larger surfaces<br />
11
12<br />
Technical Notebook<br />
<strong>WATERPROOFING</strong><br />
<strong>TERRACES</strong> <strong>AND</strong> <strong>BALCONIES</strong><br />
TYPES OF EXPOSED SURFACES K<br />
- Sloping roofs, corrugated plastic sheets, cement-fibre,<br />
1,0<br />
plastic sheets<br />
- Flat roofs covered with plastic or similar material<br />
- Flat roofs covered with cement or similar slabs<br />
1,0<br />
- Courtyards, driveways, etc with a hard coating<br />
- Flat roofs with a gravel dressing<br />
0,6<br />
- Courtyards, driveways, etc. with gravel or similar material<br />
- Flat roofs covered with earth (roof gardens, for example) 0,6<br />
Tab. 3<br />
The formula to calculate rainwater load is as follows:<br />
C = IP x SE x K [l/s]<br />
Table 4 establishes the diameter of rainwater drains according to the<br />
equivalent surface in m 2 and the coefficient K, considering rain intensity<br />
as IP = 0.04 l/s∙m 2 .<br />
Table 5, on the other hand, shows the diameters of rainwater manifolds<br />
inside and outside buildings according to their flow-rate and slope,<br />
considering a filling rate of h/d=0.8 (80%).<br />
ø INTERNAL/ FLOW-RATE Q MAXIMUM DRAINABLE SURFACE IN M<br />
EXTERNAL<br />
2<br />
PER I.P. = 0.04 I/S/M2 mm I/s K = 1,0 K = 0,6 K = 0.3<br />
57/63 1,9 47 79 158<br />
69/75 3,6 90 150 300<br />
83/90 5,0 125 208 417<br />
101/110 8,9 222 371 742<br />
115/125 12,5 312 521 1042<br />
147/160 25,0 625 1042 2083<br />
187/200 47,0 1175 1958 3917<br />
234/250 85,0 2125 3542 7083<br />
295/315 157,0 3925 6542 13083<br />
Tab. 4
SLOPE IN %<br />
h d<br />
h/d=0.8<br />
0.5 % 1.0 % 1.5 % 2.0 % 2.5 % 3.0 % 4.0 % 5.0 %<br />
ø mm flow-rate Q in l/s<br />
69/75 1.3 1.8 2.3 2.6 3.0 3.2 3.8 4.2<br />
83/90 2.0 2.8 3.4 4.0 4.5 4.9 5.6 6.3<br />
101/110 3.6 5.0 6.2 7.2 8.0 8.9 10.2 11.5<br />
115/125 5.2 7.4 9.0 10.5 11.7 12.9 14.9 16.7<br />
147/160 10.0 15.0 18.0 21.0 23.5 26.0 30.0 33.0<br />
187/200 19.0 27.0 33.1 38.1 42.8 47.0 54.3 60.8<br />
234/250 34.5 49.0 60.1 69.5 77.7 85.2 98.4 110.1<br />
295/315 62.8 90.6 111.1 128.4 143.6 157.4 181.8 203.3<br />
Tab. 5<br />
4. MAPEI <strong>WATERPROOFING</strong> SYSTEMS<br />
FOR STRUCTURES ABOVE GROUND<br />
The dynamic and physical stresses (see section 3) to which the structures<br />
in discussion are subjected imply that the waterproofing layer possesses<br />
high performance characteristics. Not only must it have the capacity<br />
to guarantee waterproofing, it must also increase the durability of the<br />
structure and follow it when it deforms.<br />
In waterproofing applications, and more so than in any other sector, attention<br />
to details makes all the difference. The quality of the products used guarantees<br />
their water-tightness and meticulous laying of the products guarantees their<br />
continuity and full compliance with their respective Technical Data Sheets.<br />
The points where railings are attached, drains, channels, fillet joints between<br />
horizontal and vertical surfaces, joints in general and the other critical points<br />
are fundamental elements which must not be overlooked. And it is exactly<br />
in these points that an “attention to detail” improves the already excellent<br />
quality of MAPEI products. With their “attention to detail”, MAPEI clearly<br />
demonstrate their know-how, by offering simple, sure technical solutions.<br />
Therefore, it is incorrect to talk about a single waterproofing product. We<br />
should rather talk about waterproofing systems, comprising a group of<br />
13
14<br />
Technical Notebook<br />
<strong>WATERPROOFING</strong><br />
<strong>TERRACES</strong> <strong>AND</strong> <strong>BALCONIES</strong><br />
indispensable products to guarantee that a system is watertight, and which<br />
MAPEI offers with each and every one of their components.<br />
The MAPEI products which form waterproofing systems for structures<br />
above ground are as follows:<br />
TWO-COMPONENT WATERPROOFERS<br />
• MAPELASTIC, two-component, flexible cementitious mortar for<br />
protection against aggressive agents and for waterproofing concrete<br />
surfaces, balconies, terraces, bathrooms and swimming pools.<br />
• MAPELASTIC SMART, two-component, high-flexibility<br />
cementitious mortar for waterproofing concrete surfaces, such<br />
as balconies, terraces, bathrooms and swimming pools, and for<br />
protection against aggressive agents.<br />
ONE-COMPONENT WATERPROOFERS<br />
• MONOLASTIC, one-component cementitious mortar for<br />
waterproofing balconies, terraces and bathrooms.<br />
• MONOLASTIC ULTRA, mono-component, highly-flexible<br />
cementitious mortar for waterproofing balconies, terraces,<br />
bathrooms and swimming pools.<br />
READY-TO-USE WATERPROOFERS<br />
• MAPELASTIC AQUADEFENSE, ready-to-use, ultra-quick drying,<br />
flexible liquid membrane for internal and external waterproofing<br />
applications.<br />
STRENGTHENING REINFORCEMENT<br />
• MAPENET 150, alkali-resistant glass fibre mesh for reinforcing<br />
protective waterproofing layers and cementitious smoothing and<br />
levelling compounds.<br />
Fig. 4.1 - Application of MAPELASTIC reinforced with<br />
MAPENET 150 on a substrate with crazed cracking<br />
Fig. 4.2 - MAPELASTIC SMART applied with a roller on<br />
existing floor<br />
Fig. 4.3 - MAPELASTIC SMART applied with a trowel<br />
on existing floor
Fig. 4.4 - Application of the first coat of MAPELASTIC<br />
AQUADEFENSE<br />
Fig. 4.5 - MONOLASTIC applied by trowel on a screed<br />
Fig. 4.6 - DRAIN VERTICAL and DRAIN LATERAL kit<br />
complete with accessories<br />
• MAPETEx SEL, non-woven macro-holed fabric for waterproofing<br />
membranes.<br />
ACCESSORY COMPONENTS<br />
• MAPEB<strong>AND</strong>, alkali-resistant rubber tape with felt for cementitious<br />
waterproofing systems and liquid membranes.<br />
To complete the system, MAPEI also offers gaskets for outlets, 90°<br />
and 270° angle pieces and T and cross profiles.<br />
• DRAIN VERTICAL and DRAIN LATERAL kits for floor drains<br />
comprising: outlet drain (vertical or horizontal) in PP available in<br />
various diameters with a welded 400x400 mm PP drain cover,<br />
telescopic extension, “anti-odour” plug and a removable stainless<br />
steel grate. Ideal for draining off water from terraces, balconies,<br />
bathrooms, boiler rooms, wash-rooms, etc.<br />
• DRAIN FRONT, TPE angular outlet (available in the colours ivory<br />
and copper) for balconies.<br />
• MAPEB<strong>AND</strong> TPE, TPE tape for flexible sealing and<br />
waterproofing of structural joints, complete with T and cross<br />
profiles.<br />
The waterproofing systems mentioned above allow preventative measures<br />
to be carried out on terraces and balconies:<br />
• limiting the thickness of the protective layers;<br />
• avoiding having to remove old floors, with clear undeniable<br />
advantages regarding the time required and the amount of waste<br />
material to dispose of, therefore a considerable saving on overall costs;<br />
15
16<br />
Technical Notebook<br />
<strong>WATERPROOFING</strong><br />
<strong>TERRACES</strong> <strong>AND</strong> <strong>BALCONIES</strong><br />
• permits new tiles to be laid directly on the waterproofing<br />
layer. Compared with conventional waterproofing membranes<br />
placed between the floor slab and screed, this solution protects<br />
substrates to avoid the formation of efflorescence on porous tiles<br />
and joints and deterioration caused by freeze-thaw cycles.<br />
4.1 TWO-COMPONENT WATERPROOFERS<br />
MAPELASTIC is a two-component flexible cementitious mortar.<br />
MAPELASTIC is impermeable to water: thanks to the high content of<br />
synthetic resin in the composition, it guarantees permanent, flexible<br />
protection and impermeability to water up to a pressure of 1,5 bar<br />
(15 m of water head) of positive pressure.<br />
MAPELASTIC is flexible, even at low temperatures: thanks to its flexibility<br />
and high elongation at failure, it guarantees protection and impermeability<br />
even on structures with cracks of 1 mm.<br />
MAPELASTIC is easy to apply: thanks to its rheological properties which<br />
make the product very workable, it may be applied both manually with a<br />
flat metal trowel and by spray with suitable equipment, with the added<br />
advantage of reducing application times and creating a surface finish<br />
which requires no further treatment.<br />
MAPELASTIC forms a barrier against aggressive agents: protects concrete<br />
structures from the aggressive action of carbon dioxide and, as a result,<br />
corrosion of steel reinforcement, the action of sodium chlorides in sea<br />
water, for example, and the presence of calcium chloride de-icing salts,<br />
which often cause deterioration of even high quality manufactured pieces.<br />
MAPELASTIC is versatile: it may be used for an extremely wide range<br />
of applications, from waterproofing large infrastructures such as dams,<br />
channels and concrete basins for water storage, to the protection of<br />
viaduct piles and flexible waterproof protective layers on balconies,<br />
terraces and in bathrooms.<br />
MAPELASTIC is long-lasting: its excellent bond strength, appropriate<br />
Fig. 4.7 - Example of application of MAPELASTIC:<br />
terrace<br />
Fig. 4.8 - Example of application of MAPELASTIC:<br />
swimming pool<br />
Fig. 4.9 - Example of application<br />
of MAPELASTIC: viaduct
Fig. 4.10 - Example of application<br />
of MAPELASTIC: façade<br />
Fig. 4.11 - Example of application<br />
of MAPELASTIC: dam<br />
Fig. 4.12 - Example of application of MAPELASTIC:<br />
suspended storage tank<br />
flexibility which does not vary with time and elevated permeability leave<br />
surfaces treated with MAPELASTIC much more durable.<br />
MAPELASTIC is a calibrated mix: with more than 70 years experience<br />
of MAPEI’s Research & Development laboratories, you can be sure that<br />
the blend of components is perfectly calibrated, so nothing else needs<br />
to be added.<br />
MAPELASTIC has been used for around 20 years to successfully<br />
waterproof and protect more than 170 million m 2 of surfaces. The product<br />
was developed to protect and waterproof large infrastructures such as<br />
viaduct piles, dams and channels, and over the years its outstanding<br />
quality has also become highly appreciated for waterproofing terraces,<br />
balconies and flat roofs, and for protecting façades and any other<br />
type of structure. Also, over the last few years, the MAPEI Research &<br />
Development laboratories have developed and perfected MAPELASTIC<br />
SMART, which is more fluid, has excellent workability when applied by<br />
trowel, brush or with a roller and is also highly flexible. When reinforced<br />
with MAPETEx SEL, non-woven, macro-holed polypropylene fabric,<br />
the crack-bridging capacity of MAPELASTIC SMART exceeds 3 mm,<br />
which makes it particularly suitable for roofing terraces and terraces<br />
with a surface area of more than 50 m 2 or for substrates subjected to<br />
high dynamic stresses.<br />
4.2 ONE-COMPONENT WATERPROOFERS<br />
MAPEI’s one-component waterproofing products are MONOLASTIC<br />
and MONOLASTIC ULTRA, one-component, waterproof cementitious<br />
mortars made from cementitious binders, selected fine-grained inert<br />
materials and highly flexible acrylic polymers. Once mixed with water,<br />
they form a mix with excellent workability characteristics which is easy<br />
to apply with a trowel, roller or brush, and which may also be applied on<br />
vertical surfaces without running and without waste.<br />
MONOLASTIC and MONOLASTIC ULTRA must be reinforced by laying<br />
17
18<br />
Technical Notebook<br />
<strong>WATERPROOFING</strong><br />
<strong>TERRACES</strong> <strong>AND</strong> <strong>BALCONIES</strong><br />
MAPETEx SEL non-woven, macro-holed polypropylene fabric on the first<br />
layer of the product while still fresh.<br />
The main difference between MONOLASTIC and MONOLASTIC<br />
ULTRA is their crack-bridging ability - MONOLASTIC is suitable for<br />
cracks up to 0.75 mm wide while MONOLASTIC ULTRA bridges cracks<br />
up to 1.8 mm wide.<br />
4.3 READY-TO-USE WATERPROOFERS<br />
MAPELASTIC AQUADEFENSE is a totally solvent-free, ready-to-use, one-<br />
component light blue synthetic resin paste in water dispersion which dries<br />
extremely quickly. MAPELASTIC AQUADEFENSE may be applied on:<br />
concrete; cementitious substrates and substrates made using special binders<br />
(TOPCEM, TOPCEM PRONTO, MAPECEM or MAPECEM PRONTO);<br />
plasterboard (internal applications only); internal anhydrite screeds (which<br />
must be treated beforehand with PRIMER G); existing ceramic, terrazzo and<br />
stone finishes; cementitious and gypsum-based plaster.<br />
MAPELASTIC AQUADEFENSE is supplied ready-to-use and does not<br />
need to be mixed with a drill or mixer. It must be applied using a brush,<br />
long-haired roller or trowel in two even coats around 0.4 mm thick each,<br />
to obtain a final thickness of at least 0.8 mm.<br />
MAPELASTIC AQUADEFENSE dries very quickly to form a flexible<br />
membrane without a sticky surface. It is resistant to light pedestrian traffic<br />
after just 3 hours and forms an excellent grip with all types of adhesive for<br />
laying ceramic, stone and mosaic finishes. MAPELASTIC AQUADEFENSE<br />
does not need to be reinforced in that is has an inherent crack-bridging<br />
ability of 3 mm at 23°C and 0.9 mm at -20°C.<br />
If MAPELASTIC AQUADEFENSE is applied on existing floors, we<br />
recommend inserting MAPETEx SEL reinforcement in the first coat of the<br />
product while it is still fresh.<br />
MAPELASTIC AQUADEFENSE must always be covered by ceramic,stone<br />
or mosaic finishes, and ceramic tiles mat be laid after just 4 hours.<br />
Fig. 4.13- Second layer of MONOLASTIC applied by<br />
trowel on MAPETEX SEL<br />
Fig. 4.14 - Second layer of MONOLASTIC ULTRA<br />
applied by trowel on MAPETEX SEL<br />
Fig. 4.15 - MAPELASTIC AQUADEFENSE applied<br />
by brush on a floor-wall fillet joint before applying<br />
MAPEB<strong>AND</strong>
Fig. 4.16 - Applying MAPELASTIC AQUADEFENSE<br />
around a floor drain<br />
Fig. 4.17 - Application of DRAIN VERTICAL on fresh<br />
MAPELASTIC AQUADEFENSE<br />
Fig. 4.18 - Application with a roller of the second coat<br />
of MAPELASTIC AQUADEFENSE<br />
5. REPAIRS<br />
TO <strong>WATERPROOFING</strong> LAYERS<br />
ON EXISTING STRUCTURES<br />
5.1 PREVENTATIVE CHECKS<br />
The first phase of interventions on old structures is an in-depth<br />
analysis to determine the condition of the substrates to be repaired.<br />
This phase is fundamentally important in order to define the most<br />
suitable type of waterproofing intervention on the structure and the<br />
required decorative finish.<br />
The initial checks include an analysis of:<br />
• the strength of the floor and screed;<br />
• the presence of dips and hollows;<br />
• the correct slope.<br />
On the basis of the results of the analysis, three main types of intervention<br />
may be defined:<br />
1. waterproofing installed on top of existing floors;<br />
2. waterproofing after removing existing floors;<br />
3. demolition and complete repair of floors and screeds.<br />
Also, before installing a waterproofing system, construction features which<br />
represent discontinuity in the waterproofing layer must be adequately<br />
protected:<br />
• bodies which pass through horizontal surfaces;<br />
• cracks;<br />
19
20<br />
Technical Notebook<br />
<strong>WATERPROOFING</strong><br />
<strong>TERRACES</strong> <strong>AND</strong> <strong>BALCONIES</strong><br />
• attachment points for railings;<br />
• drains;<br />
• fillet joints between horizontal and vertical surfaces;<br />
• structural and expansion joints.<br />
A suitable method to protect each of these critical points will be illustrated<br />
in the following paragraphs.<br />
5.2 <strong>WATERPROOFING</strong> SYSTEMS<br />
INSTALLED ON TOP OF EXISTING FLOORS<br />
If the old floor is in good condition and well-bonded to the substrate, the<br />
system may be laid on top without having to carry out demolition work.<br />
MAPEI waterproofing systems are suitable for waterproofing balconies<br />
and terraces, even if they are already tiled, without removing the old<br />
tiles, with a waterproofing layer-adhesive-tile system which is generally<br />
no more than 15 mm thick.<br />
Before applying the waterproofing system, the skirting tiles need to be<br />
removed along with the first 10 cm of render above the floor. Detached<br />
and/or cracked tiles must be removed. Then clean the old floor with a<br />
mixture of soap and caustic soda (30%) and rinse the floor thoroughly<br />
with water to remove all traces of caustic soda.<br />
The floor should now be clean enough and rough enough to form a<br />
good bond with the layer of flexible cementitious mortar which is to<br />
be applied.<br />
After the cleaning operation, seal all the elements which pass through<br />
the horizontal surface as follows:<br />
• make a slit approximately 6 cm deep around each feature (Fig. 5.4);<br />
Fig. 5.1 - Cracked screed<br />
Fig. 5.2 - Floor drain with infiltrations<br />
Fig. 5.3 - Deteriorated structural joint
Fig. 5.4 - Demolition around a drain-pipe<br />
Fig. 5.5 - Extrusion of MAPEPROOF SWELL<br />
Fig. 5.6 - Repairs to a substrate<br />
using MAPEGROUT 430<br />
• remove all the dust from inside the slit and apply a coat of EPORIP<br />
solvent-free, two-component epoxy adhesive on the surface of the slit.<br />
Apply EPORIP on the substrate, which should be dry or only slightly<br />
damp, making sure it penetrates into the particularly rough and porous<br />
areas to guarantee a perfect bond over the whole surface;<br />
• apply MAPEPROOF SWELL one-component hydro-expanding paste<br />
for waterproof seals at the bottom of the slit (Fig. 5.5);<br />
• repair the substrate while the EPORIP is still fresh with MAPEGROUT<br />
430 fine-grained, fibre-reinforced, compensated-shrinkage thixotropic<br />
mortar (Fig. 5.6).<br />
If there are cracks in the floor, before continuing with the next steps, remove<br />
the cracked tiles and open the cracks (with a hand-grinder for example).<br />
Remove all traces of dust, seal the cracks with EPORIP and sprinkle the<br />
surface with quartz (fresh on fresh) to create a good gripping surface. The<br />
cracks in the floor must be carefully analysed to check if they have formed<br />
as the result of a control joint made in the underlying screed whose pattern<br />
has not been traced on the floor, a joint created naturally in the substrate<br />
due to the lack of control joints when installing the screed or a structural joint<br />
whose pattern has not been traced in the superstructure. In such cases,<br />
after removing the area of floor involved, the crack must be opened up with<br />
a hand grinder and sealed as described below and according to the type of<br />
joint. If the problem is due to a structural joint whose pattern has not been<br />
traced on the screed or floor, they must be demolished locally to bring the<br />
structural joint to the surface. The joint must then be sealed as described<br />
below. If the correct slope needs to be restored, dips and hollows need to<br />
be eliminated and the voids formed after removing the tiles need to be filled,<br />
use ADESILEx P4 quickhardening cementitious smoothing and levelling<br />
compound for internal and external applications, for layers of from 3 to 20<br />
mm. Apply the mix using a long, metal trowel. If necessary, several layers<br />
21
22<br />
Technical Notebook<br />
<strong>WATERPROOFING</strong><br />
<strong>TERRACES</strong> <strong>AND</strong> <strong>BALCONIES</strong><br />
may be applied one after the other in rapid succession, as soon as the<br />
previous layer is set to light foot traffic. If thicknesses of more than 3 cm<br />
need to be applied, make up the difference using TOPCEM PRONTO<br />
pre-blended, ready-to-use, normal-setting, controlled-shrinkage mortar<br />
for quickdrying screeds after applying a bonding slurry made from<br />
PLANICRETE, water and TOPCEM PRONTO at a ratio of 1:1:12 (parts<br />
by weight). In this case, the remainder of the screed must be applied<br />
using the fresh on fresh technique, that is, by spreading on the required<br />
thickness of mortar immediately after applying the bonding slurry.<br />
After completing the substrate as described above, or directly on the<br />
substrate if there are no hollows or other defects to be repaired, the<br />
construction features, such as attachment points for railings, drains,<br />
channels and fillets between horizontal surfaces, vertical surfaces and<br />
joints, must be treated. Where there are attachment points for railings and,<br />
therefore, metallic fittings which pass through the horizontal substrate, the<br />
continuity of the waterproofing layer must be guaranteed. We recommend<br />
sanding all metallic fittings to remove traces of loose material or material<br />
which is not well bonded, and applying a coat of EPORIP two-component,<br />
solvent-free epoxy adhesive. While the resin is still fresh, sprinkle quartz<br />
on the surface to create a rough surface to form a good bond with the<br />
flexible cementitious waterproofing mortar which will be applied later.<br />
Waterproofing around drains must be carried out using the special kits<br />
and components from the DRAIN range as described below:<br />
• Even out the surface with PLANITOP FAST 330.<br />
• Around the drain (Fig. 5.7) apply the first coat of the chosen<br />
waterproofing product (see section 4) to cover a larger area than that<br />
of the non-woven fabric.<br />
• Position the DRAIN VERTICAL or DRAIN LATERAL and press the<br />
fabric on to the waterproofing layer while it is still fresh (Fig. 5.8).
Fig. 5.7 - Applying MAPELASTIC or MAPELASTIC<br />
SMART around a floor drain<br />
Fig. 5.8 - Application of DRAIN VERTICAL on fresh<br />
MAPELASTIC or MAPELASTIC SMART<br />
Fig. 5.9 - Applying MAPELASTIC or MAPELASTIC<br />
SMART on DRAIN VERTICAL fabric<br />
• Cover the fabric with the waterproofing product and blend it in with<br />
the previous layer (Fig. 5.9).<br />
Waterproofing in correspondence with drains in parapets must<br />
be carried out using DRAIN FRONT, TPE angular pipe unions for<br />
balconies, applied as follows:<br />
• Make a hole in the parapet and floor large enough to insert the<br />
DRAIN FRONT.<br />
• Spread on an even layer of ADESILEx PG4 two-component,<br />
thixotropic epoxy adhesive with a smooth trowel on the clean, dry<br />
substrate.<br />
• Place the DRAIN FRONT in position and press down lightly so that it<br />
is embedded in the ADESILEx PG4 (Fig. 5.10).<br />
• Spread on a second coat of ADESILEx PG4 fresh on fresh to<br />
completely cover the DRAIN FRONT (Fig. 5.11).<br />
• Smooth over the surface with a flat trowel and, while the product<br />
is still fresh, sprinkle on a layer of 0.5 spheroid quartz (Fig. 5.12) to<br />
create a substrate which is rough enough to form a good bond with the<br />
waterproofing product.<br />
• Once the curing process of the ADESILEx PG4 has been<br />
completed, remove any loose quartz.<br />
Flexible waterproofing of the fillets between horizontal and vertical<br />
surfaces must be carried out using MAPEB<strong>AND</strong>, alkali-resistant<br />
rubber tape with felt. Firstly, even out the masonry where the render has<br />
been removed using NIVOPLAN, levelling mortar with added synthetic<br />
rubber latex, such as PLANICRETE at a rate of 2 litres per bag of<br />
23
24<br />
Technical Notebook<br />
<strong>WATERPROOFING</strong><br />
<strong>TERRACES</strong> <strong>AND</strong> <strong>BALCONIES</strong><br />
mortar (used to partially replace the mixing water). The masonry may<br />
also be evened out using PLANITOP FAST 330, quick-setting, fibre-<br />
reinforced cementitious mortar for evening out irregularities from 3 to<br />
30 mm on uneven substrates.<br />
Once this layer has dried, bond MAPEB<strong>AND</strong> to the substrate as follows:<br />
• Apply an even coat of the waterproofing product chosen (see section 4)<br />
with a smooth trowel on the clean, dry substrate.<br />
• Lay MAPEB<strong>AND</strong> by pressing along the sides, making sure there<br />
are no creases or air bubbles.<br />
• Lay another layer of the waterproofing product fresh on fresh to<br />
completely cover the sides of the tape.<br />
In the corners, use the special components from the MAPEB<strong>AND</strong> range<br />
(90° ANGLES and 270° ANGLES), while the joints between the strips and<br />
special pieces must be made using a double-buttering polychloroprenic<br />
contact adhesive in solvent such as ADESILEx LP. Apply MAPEB<strong>AND</strong><br />
on the control joints in the substrate using the same technique as<br />
described above, making sure the strips are turned towards the inside of<br />
the joint in an upside-down “Ω” shape.<br />
The structural joints must be waterproofed by bonding MAPEB<strong>AND</strong><br />
TPE 1.2 mm thick tape with borders reinforced with polyester fabric.<br />
Bond in position using ADESILEx PG4 two-component thixotropic<br />
epoxy adhesive as follows<br />
• Apply an even layer (Fig. 5.14) approximately 1-2 mm thick of<br />
ADESILEx PG4 with a smooth trowel on the clean, dry substrate. Try<br />
to avoid the adhesive running into the joint.<br />
Fig. 5.10 - Application of DRAIN FRONT on fresh<br />
ADESILEX PG4<br />
Fig. 5.11 - Application of ADESILEX PG4 to completely<br />
cover DRAIN FRONT<br />
Fig. 5.12 -Sprinkling quartz on fresh ADESILEX PG4
Fig. 5.13 - Boundary around the zone where ADESILEX<br />
PG4 is to be applied<br />
Fig. 5.14 - Applying the first layer of ADESILEX PG4<br />
Fig. 5.15 - Applying MAPEB<strong>AND</strong> TPE on fresh<br />
ADESILEX PG4<br />
• Lay on the upside-down “Ω” shaped MAPEB<strong>AND</strong> TPE so that only<br />
the polyester felt bonds to the ADESILEx PG4. Press down along the<br />
sides, making sure there are no creases or air bubbles (Fig. 5.15).<br />
• Apply a second layer of ADESILEx PG4 fresh on fresh, and<br />
completely cover the sides of the tape with the second coat (Fig. 5.16).<br />
• Smooth over the surface with a flat trowel and, while the product<br />
is still fresh, sprinkle on a layer of 0.5 spheroid quartz (Fig. 5.17) to<br />
create a substrate which is rough enough to form a good bond with the<br />
waterproofing product.<br />
• Once the curing process of the ADESILEx PG4 has been completed,<br />
remove any loose quartz (Fig. 5.18).<br />
The joints between the strips of MAPEB<strong>AND</strong> TPE may be made with a hot-<br />
air welding gun or by cold welding by overlapping the TPE part by at least<br />
5 cm and bonding them together with a double-buttering polychloroprenic<br />
contact adhesive in solvent such as ADESILEx LP. We recommend laying<br />
the MAPEB<strong>AND</strong> TPE inside the joint to form an upside-down “Ω” shape.<br />
After waterproofing and sealing the interruptions and critical points as<br />
described above, apply the waterproofing product chosen.<br />
FOR TWO-COMPONENT PRODUCTS<br />
Mixing of MAPELASTIC or MAPELASTIC SMART is carried out by<br />
pouring component B (liquid) into a suitable clean container and slowly<br />
adding component A (powder) while mixing. Mix the two components<br />
together for several minutes. Remove all traces of powder from the sides<br />
and bottom of the container and keep mixing until it is perfectly blended.<br />
Never carry out this operation manually. Use a low-speed mixer (to avoid<br />
air being dragged in) or a mortar mixer, which is generally supplied with<br />
25
26<br />
Technical Notebook<br />
<strong>WATERPROOFING</strong><br />
<strong>TERRACES</strong> <strong>AND</strong> <strong>BALCONIES</strong><br />
rendering machines. If a mortar mixer is used, before pouring the mix out<br />
of the hopper, make sure that it is well mixed and that there are no lumps.<br />
MAPELASTIC and MAPELASTIC SMART must be applied within 60<br />
minutes after mixing.<br />
Spread two coats of MAPELASTIC on the clean, dry substrate using a<br />
smooth or notched trowel to form a total thickness of at least 2 mm.<br />
Insert MAPENET 150 (alkali-resistant glass fibre mesh) between the<br />
first and second coat to increase flexibility and guarantee its capacity to<br />
cover cracks up to 1.5 mm wide. After applying the first layer, insert the<br />
MAPENET 150 (alkali-resistant glass fibre mesh) while it is still fresh.<br />
Overlap adjacent strips of mesh at least 10 cm, and press it into the<br />
substrate with a flat trowel to guarantee perfect buttering. Please note that<br />
the first layer of product must be applied in pitch areas wider than 1.2<br />
metres, so that when the MAPENET 150 (width 1 metre) is applied, there<br />
will be at least 10 cm per side of the MAPELASTIC to guarantee that it<br />
forms a continuous layer when the next pitch of product is applied. 4-5<br />
hours after applying the first layer in good weather, and in all cases before<br />
the first layer has completely dried, the second layer may be applied.<br />
Make sure the second layer completely covers the mesh, and finish off the<br />
surface with a flat trowel.<br />
If a more flexible product is required, such as when the surfaces to be<br />
waterproofed has particularly large pitch areas (between one control joint<br />
and another) and are subject, therefore, to high dynamic stresses, we<br />
recommend the use of MAPELASTIC SMART. The product may be applied<br />
by trowel or with a roller, making sure that the layer is even and at least 1<br />
mm thick. While the product is still fresh, apply a layer of MAPETEx SEL<br />
(macro-holed polypropylene non-woven fabric). Overlap adjacent strips of<br />
fabric by at least 10 cm and press the fabric with a flat trowel to make sure<br />
it is perfectly buttered. Please note that the first layer of product must be<br />
applied in pitch areas wider than 1.2 metres, so that when the MAPETEx<br />
SEL (width 1 metre) is applied, there will be at least 10 cm per side of the<br />
MAPELASTIC SMART to guarantee that it forms a continuous layer when<br />
the next pitch of product is applied. 4-5 hours after applying the first layer in<br />
Fig. 5.16 - Applying the second layer of ADESILEX PG4<br />
Fig. 5.17 - Sprinkling quartz on the second fresh layer<br />
Fig. 5.18 - Removing the quartz not bonded after<br />
complete cure of ADESILEX PG4
Fig. 5.19 - Applying MAPETEX SEL on fresh<br />
Fig. 5.20 - Impregnating the MAPETEX SEL in the first<br />
layer of MAPELASTIC SMART<br />
Fig. 5.21 - Applying the second layer of<br />
MAPELASTIC SMART<br />
good weather, and in all cases before the first layer has completely dried,<br />
the second layer may be applied. Make sure the second layer completely<br />
covers the mesh, and finish off the surface with a flat trowel.<br />
After applying the MAPELASTIC or MAPELASTIC SMART, let it cure for<br />
at least 4-5 days (according to weather conditions; in low temperatures<br />
more time is required) before laying the ceramic.<br />
FOR ONE-COMPONENT PRODUCTS<br />
Pour the water required for mixing into a suitable clean container. Then<br />
slowly add the MONOLASTIC or MONOLASTIC ULTRA while mixing,<br />
and continue mixing carefully for a further 3 minutes until it is completely<br />
blended, making sure that all the product is also removed from the sides and<br />
bottom of the container. A low-speed mechanical mixer is recommended<br />
for this operation, to avoid too much air being entrapped in the mix. Avoid<br />
mixing the product manually.<br />
MONOLASTIC or MONOLASTIC ULTRA must be applied with a brush,<br />
roller or by trowel, making sure that the layer is even and at least 1 mm<br />
thick. While the product is still fresh, apply a layer of MAPETEx SEL<br />
(macro-holed polypropylene non-woven fabric). Overlap adjacent strips<br />
of fabric by at least 10 cm and press the fabric with a flat trowel to make<br />
sure it is perfectly buttered. Please note that the first layer of product must<br />
be applied in pitch areas wider than 1.2 metres, so that when the MAPETEx<br />
SEL (width 1 metre) is applied, there will be at least 10 cm per side of<br />
the MONOLASTIC or MONOLASTIC ULTRA to guarantee that it forms<br />
a continuous layer when the next pitch of product is applied. 2 hours after<br />
applying the first layer in good weather, and in all cases before the first<br />
layer has completely dried, the second layer may be applied. Make sure<br />
the second layer completely covers the mesh, and finish off the surface<br />
with a flat trowel. After completing the application cycle of MONOLASTIC<br />
or MONOLASTIC ULTRA wait at least 2 days before laying the ceramic.<br />
27
28<br />
Technical Notebook<br />
<strong>WATERPROOFING</strong><br />
<strong>TERRACES</strong> <strong>AND</strong> <strong>BALCONIES</strong><br />
FOR READY-TO-USE PRODUCTS<br />
MAPELASTIC AQUADEFENSE is supplied ready to use and does<br />
not need to be mixed. On existing floors, after carrying out the checks<br />
mentioned in section 5.1, carefully check the condition of the tile joints.<br />
If the joints are empty, deteriorated or are not flush with the surface of<br />
the floor, fill all the gaps with ADESILEx P4, quick-hardening cementitious<br />
smoothing and levelling compound for internal and external layers from 3<br />
to 20 mm thick. Apply MAPELASTIC AQUADEFENSE with a longhaired<br />
roller, brush or trowel in an even layer at least 0.4 mm thick. Approximately<br />
1 hour after applying the first layer in good weather, and in all cases<br />
before the first layer has completely dried, the second layer may be<br />
applied and the surface finished off with a flat trowel. The final thickness of<br />
MAPELASTIC AQUADEFENSE must be at least 0.8 mm in order to create<br />
a robust, flexible continuous film. Make sure there are no interruptions in<br />
the film caused by imperfections in the substrate.<br />
After applying the MAPELASTIC AQUADEFENSE wait approximately 4<br />
hours for curing and then lay the ceramic. Before laying the tiles, carefully<br />
check the surface of MAPELASTIC AQUADEFENSE to make sure it is<br />
continuous and that there are no pin-holes or small craters. If there are<br />
such defects, apply a further coat where they are located.<br />
The render removed (as described in section 5.2) to make space for a<br />
skirt of waterproofing product directly on the masonry, must be repaired<br />
with PLANITOP FAST 330 or NIVOPLAN + PLANICRETE, reinforced with<br />
metallic mesh. For indications regarding tiling and grouting and sealing<br />
joints, please refer to sections 8 and 9.<br />
Note. If flat roofs are not accessible, MAPELASTIC and MAPELASTIC<br />
SMART may be left exposed in that they are resistant to UV rays. If a<br />
coloured finish is required, MAPELASTIC and MAPELASTIC SMART<br />
may be painted over with ELASTOCOLOR PAINT, protective and<br />
Fig. 5.22 - Second layer of MONOLASTIC applied by<br />
trowel on MAPETEX SEL<br />
Fig. 5.23 - Second layer of MONOLASTIC ULTRA<br />
applied by trowel on MAPETEX SEL<br />
Fig. 5.24 - MAPELASTIC AQUADEFENSE applied<br />
by brush on a floor-wall fillet joint before applying<br />
MAPEB<strong>AND</strong>
Fig. 5.25 - Impregnating the white fabric of<br />
MAPEB<strong>AND</strong> in fresh MAPELASTIC AQUADEFENSE<br />
Fig. 5.26 - Completed covering of the non-woven<br />
DRAIN VERTICAL fabric with MAPELASTIC<br />
AQUADEFENSE<br />
Fig. 5.27 - Application with a roller of the second coat<br />
of MAPELASTIC AQUADEFENSE<br />
decorative flexible acrylic resin paint in water dispersion.<br />
MONOLASTIC, MONOLASTIC ULTRA and MAPELASTIC AQUADEFENSE<br />
on the other hand, must always be covered with a flooring material.<br />
5.3 <strong>WATERPROOFING</strong> AFTER REMOVING<br />
EXISTING FLOORS<br />
If the floor is in a poor state and is not well bonded to the substrate, it<br />
must be removed and the substrate must be scarified (with a trimmer,<br />
singlehead brush with a carbide disk or other suitable means) to eliminate<br />
the layer of hardened adhesive on the old screed.<br />
The skirting also needs to be removed along with the first 10 cm of render<br />
above the floor.<br />
Then check the compactness and mechanical characteristics of the<br />
screed. If it is compact with just a light layer of dust on the surface, before<br />
proceeding with the next steps of the renovation, treat the surface with<br />
PRIMER 3296 diluted 1:1 with water, applied on the clean, dry substrate<br />
with a roller, large brush or watering can.<br />
After the cleaning operation, seal all the elements which pass through<br />
the horizontal surface as follows:<br />
• make a slit approximately 6 cm deep around each feature;<br />
• remove all the dust from inside the slit and apply a coat of EPORIP,<br />
solvent-free, two-component epoxy adhesive on the surface of the slit.<br />
Apply EPORIP on the substrate, which should be dry or only slightly<br />
damp, making sure it penetrates into the particularly rough and<br />
porous areas to guarantee a perfect bond over the whole surface;<br />
• apply MAPEPROOF SWELL, mono-component hydro-expanding<br />
paste for waterproof seals at the bottom of the slit;<br />
29
30<br />
Technical Notebook<br />
<strong>WATERPROOFING</strong><br />
<strong>TERRACES</strong> <strong>AND</strong> <strong>BALCONIES</strong><br />
• repair the substrate, while EPORIP is still fresh, with MAPEGROUT<br />
430, fine-grained, fibre-reinforced, compensated-shrinkage thixotropic<br />
mortar.<br />
Before passing on to the next phase, if there are cracks, in the screed,<br />
open them up (Fig. 5.31) with a hand grinder for example, and after<br />
removing all traces of dust, seal the cracks with EPORIP (Fig. 5.32)<br />
and, sprinkle a layer of quartz on the surface (Fig. 5.33) fresh on fresh<br />
to form a good gripping surface. As with the case examined previously,<br />
the cracks in the screed must be analysed carefully. If the cracks are<br />
caused by structural joints whose pattern has not been traced on the<br />
screed, it must be demolished locally to bring the structural joint into<br />
the open. The joint must then be sealed as described below.<br />
If the correct slope needs to be restored and dips and hollows<br />
have to be eliminated, use ADESILEx P4, quick-hardening<br />
cementitious smoothing and levelling compound for internal and<br />
external applications, for layers from 3 to 20 mm, or PLANITOP<br />
FAST 330, fibre-reinforced, quick-setting cementitious mortar to even<br />
out thicknesses from 3 to 30 mm of irregular, uneven substrates.<br />
If thicknesses of more than 3 cm need to be applied, make up<br />
the difference using TOPCEM PRONTO, pre-blended, readyto-<br />
use, normal-setting, shrinkage-controlled mortar for quick-drying<br />
screeds after applying bonding slurry made from PLANICRETE,<br />
water and TOPCEM PRONTO, at a ratio of 1:1:12 (parts by weight).<br />
In this case the screed must be applied using the fresh on<br />
fresh technique, that is, by spreading on the required thickness<br />
of mortar immediately after applying the bonding slurry.<br />
After completing the substrate as described above, or directly on<br />
the substrate if there are no hollows or other defects to be repaired,<br />
the construction features, such as attachment points for railings,<br />
drains, channels and fillets between horizontal surfaces, vertical<br />
surfaces and joints, must be treated. Where there are attachment<br />
Fig. 5.28 - Removing the existing floor not bonded to<br />
the substrate<br />
Fig. 5.29 - Sanding the substrate to remove the old<br />
adhesive from the screed<br />
Fig. 5.30 - Applying PRIMER 3296 to consolidate the<br />
screed with a sprinkling of sand on the surface
Fig. 5.31 - Opening the cracks in the screed with<br />
a grinder<br />
Fig. 5.32 - Sealing the cracks with EPORIP<br />
Fig. 5.33 - Sprinkling quartz on fresh EPORIP<br />
points for railings and, therefore, metallic fittings which pass through<br />
the horizontal substrate, the continuity of the waterproofing layer<br />
must be guaranteed. We recommend sanding all metallic fittings<br />
to remove traces of loose material or material which is not well<br />
bonded, and applying a coat of EPORIP two-component, solvent-<br />
free epoxy adhesive. While the resin is still fresh, sprinkle quartz<br />
on the surface to create a rough surface to form a good bond with<br />
the flexible cementitious waterproofing mortar which will be applied<br />
later. Waterproofing around drains must be carried out using special<br />
kits and components from the DRAIN range as described below:<br />
• Even out the surface where required with PLANITOP FAST 330.<br />
• Around the drain (Fig. 5.34) apply the first coat of the chosen<br />
waterproofing product (see section 4) to cover a larger area than that of<br />
the non-woven fabric.<br />
• Position DRAIN VERTICAL or DRAIN LATERAL and press the<br />
fabric onto the waterproofing layer while it is still fresh (Fig. 5.35).<br />
• Cover the fabric with the waterproofing product and blend it in with<br />
the previous layer (Fig. 5.36).<br />
Waterproofing in correspondence with drains in parapets must be carried<br />
out using DRAIN FRONT, TPE angular pipe unions for balconies, applied<br />
as follows:<br />
• Make a hole in the parapet and floor large enough to insert<br />
DRAIN FRONT.<br />
• Spread on an even layer of ADESILEx PG4, two-component, thixotropic<br />
epoxy adhesive with a smooth spatula on the clean, dry substrate.<br />
31
32<br />
Technical Notebook<br />
<strong>WATERPROOFING</strong><br />
<strong>TERRACES</strong> <strong>AND</strong> <strong>BALCONIES</strong><br />
• Place DRAIN FRONT, n position and press down lightly so that it is<br />
embedded in ADESILEx PG4 (Fig. 5.37).<br />
• Spread on a second coat of ADESILEx PG4, resh on fresh, to<br />
completely cover DRAIN FRONT (Fig. 5.38).<br />
• Smooth over the surface with a flat trowel and, while the product is<br />
still fresh, sprinkle on a layer of spheroid quartz (Fig. 5.39) to create<br />
a substrate which is rough enough to form a good bond with the<br />
waterproofing product.<br />
• Once the curing process of the ADESILEx PG4, has been completed,<br />
remove any loose quartz.<br />
Flexible waterproofing of the fillets between horizontal and vertical<br />
surfaces must be carried out using MAPEB<strong>AND</strong>, alkali-resistant<br />
rubber tape with felt. Firstly, even out the masonry where the render<br />
has been removed using NIVOPLAN, levelling mortar with added<br />
synthetic rubber latex, such as PLANICRETE at a rate of 2 litres per<br />
bag of mortar (used to partially replace the mixing water). The masonry<br />
may also be evened out using PLANITOP FAST 330, quick-setting,<br />
fibre-reinforced cementitious mortar for evening out irregularities from<br />
3 to 30 mm on irregular, uneven substrates. Once this layer has dried,<br />
bond MAPEB<strong>AND</strong> to the substrate as follows:<br />
• Apply an even coat of the waterproofing product chosen (see section 4)<br />
with a smooth trowel on the clean, dry substrate.<br />
• Lay MAPEB<strong>AND</strong>, by pressing along the sides, making sure there are<br />
no creases or air bubbles.<br />
• Lay another layer of the waterproofing product fresh on fresh to<br />
completely cover the sides of the tape.<br />
Fig. 5.34 - Applying MAPELASTIC or MAPELASTIC<br />
SMART around a floor drain<br />
Fig. 5.35 - Application of DRAIN VERTICAL on fresh<br />
MAPELASTIC or MAPELASTIC SMART<br />
Fig. 5.36 - Applying MAPELASTIC or MAPELASTIC<br />
SMART on DRAIN VERTICAL fabric
Fig. 5.37 - Application of DRAIN FRONT on fresh<br />
ADESILEX PG4<br />
Fig. 5.38 - Application of ADESILEX PG4 to completely<br />
cover DRAIN FRONT<br />
Fig. 5.39 - Sprinkling quartz on fresh ADESILEX PG4<br />
In the corners, use the special components from the MAPEB<strong>AND</strong><br />
range (90° ANGLES and 90° ANGLES) while the joints between the<br />
strips and special pieces must be made using a double-buttering<br />
polychloroprenic contact adhesive in solvent solution such as<br />
ADESILEx LP.<br />
Apply MAPEB<strong>AND</strong> in the control joints in the substrate using the<br />
same technique as described above, making sure the strips are turned<br />
towards the inside of the joint in an upside-down “Ω” shape. Structural<br />
joints must be waterproofed by bonding MAPEB<strong>AND</strong> TPE, in the<br />
upside-down “Ω” shape, taking care to bond only the polyester felt of the<br />
1.2 mm thick TPE tape reinforced along the edges with polyester fabric.<br />
Bond in position using ADESILEx PG4, two-component thixotropic<br />
epoxy adhesive as follows:<br />
• Apply an even layer (Fig. 5.43) approximately 1-2 mm thick of<br />
ADESILEx PG4, with a smooth trowel on the clean, dry substrate. Try<br />
to avoid the adhesive running into the joint.<br />
• Lay on the upside-down “Ω” shaped MAPEB<strong>AND</strong> TPE, so that only<br />
the polyester felt bonds to the ADESILEx PG4, Press down along the<br />
sides, making sure there are no creases or air bubbles.<br />
• Apply a second layer of ADESILEx PG4, fresh on fresh, and<br />
completely cover the sides of the tape with the second coat (Fig. 5.44).<br />
• Smooth over the surface with a flat trowel and, while the product<br />
is still fresh, sprinkle on a layer of 0.5 spheroid quartz (Fig. 5.45) to<br />
create a substrate which is rough enough to form a good bond with the<br />
waterproofing product.<br />
• Once the reticulation process of the ADESILEx PG4, has been<br />
completed, remove any loose quartz.<br />
33
34<br />
Technical Notebook<br />
<strong>WATERPROOFING</strong><br />
<strong>TERRACES</strong> <strong>AND</strong> <strong>BALCONIES</strong><br />
The joints between the strips of MAPEB<strong>AND</strong> TPE may be made<br />
with a hot-air welding pistol or by cold welding by overlapping the<br />
TPE part by at least 5 cm and bonding them together with a double-<br />
buttering polychloroprenic contact adhesive in solvent solution, such<br />
as ADESILEx LP. We recommend laying the MAPEB<strong>AND</strong> TPE inside<br />
the joint to form an upside-down “Ω” shape.<br />
After waterproofing and sealing the interruptions and critical points as<br />
described above, apply the waterproofing product chosen.<br />
FOR TWO-COMPONENT PRODUCTS<br />
Mixing of MAPELASTIC or MAPELASTIC SMART is carried out by<br />
pouring component B (liquid) into a suitable clean container and slowly<br />
adding component A (powder) while mixing. Mix the two components<br />
together for several minutes. Remove all traces of powder from the sides<br />
and bottom of the container and keep mixing until it is perfectly blended.<br />
Never carry out this operation manually. Use a low-speed mixer (to avoid<br />
air being dragged in) or a mortar mixer, which is generally supplied with<br />
rendering machines. Make sure that the mortar is well mixed and that<br />
there are no lumps before pouring the mix out of the hopper, even when<br />
a mortar mixer is used.MAPELASTIC or MAPELASTIC SMART must be<br />
applied within 60 minutes after mixing.<br />
Spread two coats of MAPELASTIC on the clean, dry substrate using a<br />
smooth or notched trowel to form a total thickness of at least 2 mm. Insert<br />
MAPENET 150 (alkali-resistant glass fibre mesh) between the first and<br />
second coat to increase flexibility and guarantee its capacity to cover<br />
cracks up to 1.5 mm wide. After applying the first coat, insert MAPENET<br />
150 (alkali-resistant glass fibre mesh) on the product while it is still fresh,<br />
overlapping the adjacent strips at least 10 cm, and press down with a<br />
flat trowel on the substrate to guarantee perfect buttering. Please note<br />
that the first layer of product must be applied in pitch areas wider than<br />
1.2 metres, so that when MAPENET 150 (width 1 metre) is applied, there<br />
Fig. 5.40 - Spreading ADESILEX LP on MAPEB<strong>AND</strong> T<br />
Fig. 5.41 - Spreading ADESILEX LP on MAPEB<strong>AND</strong><br />
Fig. 5.42 - Bonding MAPEB<strong>AND</strong> T and MAPEB<strong>AND</strong><br />
together by overlapping their ends
Fig. 5.43 - Applying the first layer of ADESILEX PG4<br />
Fig. 5.44 - After laying MAPEB<strong>AND</strong> TPE on fresh<br />
ADESILEX PG4 apply the second layer<br />
Fig. 5.45 - Sprinkling quartz on the second fresh layer<br />
will be at least 10 cm per side of the MAPELASTIC to guarantee that<br />
it forms a continuous layer when the next pitch of product is applied.<br />
4-5 hours after applying the first layer in good weather, and in all cases when<br />
the first layer hasn't completely dried, the second layer may be applied.<br />
Make sure the second layer completely covers the mesh, and finish off<br />
the surface with a flat trowel. If a more flexible product is required, such as<br />
when the surfaces to be waterproofed has particularly large pitch areas<br />
(between one control joint and another) and are subject, therefore, to high<br />
dynamic stresses, we recommend the use of MAPELASTIC SMART.<br />
The product may be applied by trowel or with a roller, making sure that<br />
the layer is even and at least 1 mm thick. While the product is still fresh,<br />
apply a layer of MAPETEx SEL (macro-holed polypropylene non-woven<br />
fabric). Overlap adjacent strips of fabric by at least 10 cm and press<br />
the fabric with a flat trowel to make sure it is perfectly buttered. Please<br />
note that the first layer of product must be applied in pitch areas wider<br />
than 1.2 metres, so that when the MAPETEx SEL (width 1 metre) is<br />
applied, there will be at least 10 cm per side of the MAPELASTIC<br />
SMART to guarantee that it forms a continuous layer when the next<br />
pitch of product is applied. 4-5 hours after applying the first layer in<br />
good weather, and in all cases before the first layer has completely<br />
dried, the second layer may be applied. Make sure the second layer<br />
completely covers the mesh, and finish off the surface with a flat trowel.<br />
FOR ONE-COMPONENT PRODUCTS<br />
Pour the water required for mixing into a suitable clean container. Then<br />
slowly add MONOLASTIC or MONOLASTIC ULTRA, while mixing, and<br />
continue mixing carefully for a further 3 minutes until it is completely<br />
blended, making sure that all the product is also removed from the<br />
sides and bottom of the container. A low-speed mechanical mixer is<br />
recommended for this operation, to avoid too much air being entrapped<br />
in the mix. Avoid mixing the product manually.<br />
MONOLASTIC or MONOLASTIC ULTRA must be applied with a brush,<br />
35
36<br />
Technical Notebook<br />
<strong>WATERPROOFING</strong><br />
<strong>TERRACES</strong> <strong>AND</strong> <strong>BALCONIES</strong><br />
roller or by trowel, making sure that the layer is even and at least 1 mm<br />
thick. While the product is still fresh, apply a layer of MAPETEx SEL<br />
(macro-holed polypropylene non-woven fabric). Overlay adjacent strips<br />
of fabric by at least 10 cm and press the fabric with a flat trowel to make<br />
sure it is perfectly buttered. Please note that the first layer of product must<br />
be applied in pitch areas wider than 1.2 metres, so that when MAPETEx<br />
SEL (width 1 metre) is applied, there will be at least 10 cm per side of<br />
the MONOLASTIC o MONOLASTIC ULTRA to guarantee that it forms a<br />
continuous layer when the next pitch of product is applied. 2 hours after<br />
applying the first layer in good weather, and in all cases before the first<br />
layer has completely dried, the second layer may be applied. Make sure<br />
the second layer completely covers the mesh, and finish off the surface<br />
with a flat trowel. After completing the application cycle of MONOLASTIC<br />
or MONOLASTIC ULTRA wait at least 2 days before laying the ceramic.<br />
FOR READY-TO-USE PRODUCTS<br />
MAPELASTIC AQUADEFENSE is supplied ready to use and does not<br />
need to be mixed. Apply with a long-haired roller, brush or trowel in two<br />
even layers at around 0.4 mm thick per coat for a final thickness of at<br />
least 0.8 mm in order to create a robust, flexible continuous film. Make<br />
sure there are no interruptions in the film caused by imperfections in<br />
the substrate.<br />
After applying the MAPELASTIC AQUADEFENSE wait approximately<br />
4 hours for curing and then lay the ceramic. Before laying the coating,<br />
carefully check the surface of MAPELASTIC AQUADEFENSE to make<br />
sure it is continuous and that there are no pin-holes or small craters.<br />
If there are such defects, apply a further coat where they are located.<br />
The render removed (as described in section 5.3) to make space for a<br />
skirt of waterproofing product directly on the masonry, must be repaired<br />
with MAPEGROUT 430, fine-grained, fibre-reinforced, controlled-<br />
shrinkage thixotropic mortar. For indications regarding laying coatings<br />
Fig. 5.46 - Spreading the first coat of MAPELASTIC<br />
starting from the structural joint<br />
Fig. 5.47 - Impregnating MAPENET 150 in the first<br />
fresh layer of MAPELASTIC<br />
Fig. 5.48 - Application of the second coat of<br />
MAPELASTIC
Fig. 5.49 - Application of the first coat of MAPELASTIC<br />
Fig. 5.50 - Impregnating MAPENET 150 in the first<br />
fresh layer of MAPELASTIC<br />
Fig. 5.51 - Application of the second layer of<br />
MAPELASTIC SMART<br />
and grouting and sealing joints, please refer to sections 8 and 9.<br />
Note. If flat roofs are not accessible, MAPELASTIC and MAPELASTIC<br />
SMART may be left exposed as they are resistant to UV rays. If a coloured<br />
finish is required, MAPELASTIC and MAPELASTIC SMART may be<br />
painted over with ELASTOCOLOR PAINT protective and decorative<br />
flexible acrylic resin paint in water dispersion.<br />
MONOLASTIC, MONOLASTIC ULTRA and MAPELASTIC AQUADEFENSE,<br />
on the other hand, must always be covered with a flooring material.<br />
37
38<br />
Technical Notebook<br />
<strong>WATERPROOFING</strong><br />
<strong>TERRACES</strong> <strong>AND</strong> <strong>BALCONIES</strong><br />
5.4 DEMOLITION <strong>AND</strong> COMPLETE REPAIR<br />
OF FLOORS <strong>AND</strong> SCREEDS<br />
If the mechanical properties and other characteristics (see Technical<br />
Notebook for the installation of screeds) of the screed are considered to<br />
be unsuitable for the installation of a waterproofing system and floor, the<br />
floor must be demolished and the underlying screed must be removed.<br />
The skirting also needs to be removed along with the first 10 cm of<br />
render above the floor. After the above operations, seal all the elements<br />
which pass through the floor slab as follows:<br />
• make a slit approximately 6 cm deep around each element;<br />
• remove all the dust from inside the slit and apply a coat of EPORIP,<br />
solvent-free, two-component epoxy adhesive on the surface of the slit.<br />
Apply EPORIP on the substrate, which should be dry or only slightly<br />
damp, making sure it penetrates into the particularly rough and porous<br />
areas to guarantee a perfect bond over the whole surface;<br />
• apply MAPEPROOF SWELL, mono-component hydro-expanding paste<br />
for waterproof seals at the bottom of the slit;<br />
• repair the substrate while EPORIP is still fresh with MAPEGROUT<br />
430, fine-grained, fibre-reinforced, shrinkage-compensated thixotropic<br />
mortar.<br />
If there are structural joints on the floor slab, their pattern must be traced<br />
on the screed and floor and sealed as described below.<br />
The new screed must be installed according to the guidelines in section<br />
3.2, making sure that the right slope is installed to permit rainwater to 39<br />
flow off. If a stone or marble kerb is to be installed around the external<br />
perimeter of the balcony or terrace, a drop must be formed in the screed in<br />
correspondence with the kerb. The waterproofing layer will then be able to be<br />
Fig. 5.52 - Second layer of MONOLASTIC applied by<br />
trowel on MAPETEX SEL<br />
Fig. 5.53 - Second layer of MONOLASTIC ULTRA<br />
applied by trowel on MAPETEX SEL<br />
Fig. 5.54 - Spreading ADESILEX LP on the ends of<br />
MAPEB<strong>AND</strong> and MAPEB<strong>AND</strong> 90° ANGLE
Fig. 5.55 - Application of MAPEB<strong>AND</strong> on fresh<br />
MAPELASTIC AQUADEFENSE<br />
Fig. 5.56 - Application with a roller of the first coat of<br />
MAPELASTIC AQUADEFENSE<br />
Fig. 5.57 - Application with a roller of the second coat<br />
of MAPELASTIC AQUADEFENSE<br />
installed under the kerb to guarantee a complete, continuous waterproofing<br />
layer. The step created when installing the screed will help to perfectly align<br />
the floor and kerb, which often have different thicknesses. Once the screed<br />
has completely cured (usually 1 week per cm of thickness, or at least 28<br />
days for sand and cement screeds, 24 hours foro TOPCEM and TOPCEM<br />
PRONTO and 4 hours for MAPECEM and MAPECEM PRONTO), the<br />
construction elements, such as attachment points for railings, drains,<br />
channels and fillets between horizontal and vertical surfaces may be<br />
prepared. Where there are attachment points for railings and, therefore,<br />
metallic fittings which pass through the horizontal susbstrate, the continuity<br />
of the waterproofing layer must be guaranteed. We recommend sanding all<br />
metallic fittings to remove traces of loose material or material which is not<br />
well bonded, and applying a coat of EPORIP, two-component, solvent-free<br />
epoxy adhesive. While the resin is still fresh, sprinkle quartz on the surface<br />
to create a rough surface to form a good bond with the flexible cementitious<br />
waterproofing mortar which will be applied later. Waterproofing around<br />
drains must be carried out using special kits and components from the<br />
DRAIN range as described below:<br />
• Even out the surface where required with PLANITOP FAST 330.<br />
• Around the drain (Fig. 5.58) apply the first coat of the chosen<br />
waterproofing product (see section 4) to cover a larger area than<br />
that of the non-woven fabric.<br />
• Position DRAIN VERTICAL o DRAIN LATERAL (Fig. 5.60) and<br />
press the fabric on to the waterproofing layer while it is still fresh.<br />
• Cover the fabric with the waterproofing product and blend it in with<br />
the previous layer (Fig. 5.62).<br />
39
40<br />
Technical Notebook<br />
<strong>WATERPROOFING</strong><br />
<strong>TERRACES</strong> <strong>AND</strong> <strong>BALCONIES</strong><br />
Waterproofing in correspondence with drains in parapets must be<br />
carried out using DRAIN FRONT, TPE angular pipe unions for<br />
balconies, applied as follows:<br />
• Make a hole in the parapet and floor large enough to insert the<br />
DRAIN FRONT.<br />
• Spread on an even layer of ADESILEx PG4, two-component,<br />
thixotropic epoxy adhesive with a smooth trowel on the clean,<br />
dry substrate.<br />
• Place DRAIN FRONT in position and press down lightly so that it is<br />
embedded in ADESILEx PG4 (Fig. 5.64).<br />
• Spread on a second coat of ADESILEx PG4, fresh on fresh to<br />
completely cover the DRAIN FRONT (Fig. 5.65).<br />
• Smooth over with a flat trowel and, while the product is still fresh,<br />
sprinkle on a layer of 0.5 spheroid quartz to form a rough layer to help<br />
the waterproofing product to form a good bond.<br />
• Once the curing process of the ADESILEx PG4, has been completed,<br />
remove any loose quartz.<br />
Flexible waterproofing of the fillets between horizontal and vertical<br />
surfaces must be carried out using MAPEB<strong>AND</strong>, alkali-resistant rubber<br />
tape with felt. Firstly, even out the masonry where the render has been<br />
removed using NIVOPLAN, levelling mortar with added synthetic rubber<br />
latex, such as PLANICRETE at a rate of 2 litres per bag of mortar (used to<br />
partially replace the mixing water). The masonry may also be evened out<br />
using PLANITOP FAST 330, quick-setting, fibre-reinforced cementitious<br />
mortar for evening out irregularities from 3 to 30 mm on uneven substrates.<br />
Once this layer has dried, bond MAPEB<strong>AND</strong> to the substrate as follows:<br />
Fig. 5.43 - Applying MAPELASTIC or MAPELASTIC<br />
SMART around a floor drain<br />
Fig. 5.44 - Positioning DRAIN VERTICAL<br />
Fig. 5.45 - Inserting DRAIN VERTICAL on fresh<br />
MAPELASTIC or MAPELASTIC SMART
Fig. 5.46 - Press the non-woven DRAIN VERTICAL<br />
fabric on MAPELASTIC or MAPELASTIC SMART<br />
Fig. 5.47 - Application of MAPELASTIC or<br />
MAPELASTIC SMART on DRAIN VERTICAL fabric<br />
Fig. 5.48 - Accessory pieces for DRAIN VERTICAL:<br />
telescopic extension, anti-odour plug and removable<br />
stainless steel grat<br />
• Apply an even coat of the waterproofing product chosen (see section<br />
4) with a smooth trowel on the clean, dry substrate.<br />
• Lay the MAPEB<strong>AND</strong>, by pressing along the sides, making sure there<br />
are no creases or air bubbles.<br />
• Apply another layer of the waterproofing product fresh on fresh to<br />
completely cover the sides of the tape.<br />
In the corners, use the special components from the MAPEB<strong>AND</strong> (90°<br />
ANGLES and 90° ANGLES) while the joints between the strips and special<br />
pieces must be made using a double-buttering polychloroprenic contact<br />
adhesive such as ADESILEx LP. Apply MAPEB<strong>AND</strong> in the control joints<br />
in the substrate using the same technique as described above, making<br />
sure the strips are turned towards the inside of the joint in an upside-<br />
down “Ω” shape. The structural joints must be waterproofed by bonding<br />
MAPEB<strong>AND</strong> TPE, 1.2 mm thick tape with borders reinforced with polyester<br />
fabric. Bond in position using ADESILEx PG4, two-component thixotropic<br />
epoxy adhesive as follows:<br />
• Apply a 1-2 mm thick layer of ADESILEx PG4, with a smooth<br />
trowel on the clean, dry substrate. Try to avoid the adhesive running<br />
into the joint.<br />
• Lay on the upside-down “Ω” shaped MAPEB<strong>AND</strong> TPE, so that only<br />
the polyester felt bonds to ADESILEx PG4. Press down along the<br />
sides, making sure there are no creases or air bubbles.<br />
• Apply a second layer of ADESILEx PG4, fresh on fresh, and<br />
completely cover the sides of the tape with the second coat.<br />
41
42<br />
Technical Notebook<br />
<strong>WATERPROOFING</strong><br />
<strong>TERRACES</strong> <strong>AND</strong> <strong>BALCONIES</strong><br />
• Smooth over with a flat trowel and, while the product is still fresh,<br />
sprinkle on a layer of 0.5 spheroid quartz to form a rough layer to help<br />
the waterproofing product form a good bond.<br />
• Once the curing process of ADESILEx PG4 has been completed,<br />
remove any loose quartz.<br />
The joints between the strips of MAPEB<strong>AND</strong> TPE may be made with a hot-<br />
air welding gun or by cold welding by overlapping the TPE part by at least<br />
5 cm and bonding them together with a double-buttering polychloroprenic<br />
contact adhesive in solvent such as ADESILEx LP. We recommend laying<br />
MAPEB<strong>AND</strong> TPE inside the joint to form an upsidedown “Ω” shape.<br />
After waterproofing and sealing the interruptions and critical points as<br />
described above, apply the waterproofing product chosen.<br />
FOR TWO-COMPONENT PRODUCTS<br />
Mixing of MAPELASTIC or MAPELASTIC SMART is carried out by<br />
pouring component B (liquid) into a suitable clean container and slowly<br />
adding component A (powder) while mixing. Mix the two components<br />
together for several minutes. Remove all traces of powder from the sides<br />
and bottom of the container and keep mixing until it is perfectly blended.<br />
Never carry out this operation manually. Use a low-speed mixer (to avoid<br />
air being dragged in) or a mortar mixer, which is generally supplied with<br />
rendering machines. If a mortar mixer is used, before pouring the mix out<br />
of the hopper, make sure that it is well mixed and that there are no lumps.<br />
MAPELASTIC and MAPELASTIC SMART must be applied within 60<br />
minutes after mixing.<br />
Spread 2 coats of MAPELASTIC on the clean, dry substrate using a<br />
smooth or notched trowel to form a total thickness of at least 2 mm. Insert<br />
MAPENET 150 (alkali-resistant glass fibre mesh) between the first and<br />
second coat to increase flexibility and guarantee its capacity to cover<br />
Fig. 5.64 - Application of DRAIN FRONT on fresh<br />
ADESILEX PG4<br />
Fig. 5.65 - Application of ADESILEX PG4 to completely<br />
cover DRAIN FRONT<br />
Fig. 5.66 - Application of MAPELASTIC or<br />
MAPELASTIC SMART in the wall-floor fillet joint to<br />
apply MAPEB<strong>AND</strong> around DRAIN FRONT
Fig. 5.67 - Insertion of upside-down “Ω” shaped<br />
MAPEB<strong>AND</strong> CROSS in the control joint and<br />
application of MAPELASTIC or<br />
MAPELASTIC SMART around the joint<br />
Fig. 5.68 - Impregnating the white fabric of<br />
MAPEB<strong>AND</strong> in fresh MAPELASTIC or<br />
MAPELASTIC SMART.<br />
Fig. 5.69 - Application of MAPELASTIC or<br />
MAPELASTIC SMART on white MAPEB<strong>AND</strong> fabric<br />
cracks up to 1.5 mm wide. Insert MAPENET 150 on MAPELASTIC while<br />
it is still fresh, overlapping the adjacent strips at least 10 cm, and press<br />
down with a flat trowel on the substrate to guarantee perfect buttering.<br />
Please note that the first layer of product must be applied in pitch areas<br />
wider than 1.2 metres, so that when MAPENET 150 (width 1 metre)<br />
is applied, there will be at least 10 cm per side of MAPELASTIC to<br />
guarantee that it forms a continuous layer when the next pitch of product<br />
is applied. 4-5 hours after applying the first layer in good weather, and<br />
in all cases only when the first layer has dried, the second layer may be<br />
applied. Make sure the second layer completely covers the mesh, and<br />
finish off the surface with a flat trowel.<br />
If a more flexible product is required, such as when the surfaces to be<br />
waterproofed has particularly large pitch areas (between one control<br />
joint and another) and are subject, therefore, to high dynamic stresses,<br />
we recommend the use of MAPELASTIC SMART. The product may<br />
be applied by trowel or with a roller, making sure that the layer is even<br />
and at least 1 mm thick. While the product is still fresh, apply a layer of<br />
MAPETEx SEL (macro-holed polypropylene non-woven fabric). Overlap<br />
adjacent strips of fabric by at least 10 cm and press the fabric with a<br />
flat trowel to make sure it is perfectly buttered. Please note that the first<br />
layer of product must be applied in pitch areas wider than 1.2 metres,<br />
so that when MAPETEx SEL (width 1 metre) is applied, there will be<br />
at least 10 cm per side of MAPELASTIC SMART to guarantee that it<br />
forms a continuous layer when the next pitch of product is applied. 4-5<br />
hours after applying the first layer in good weather, and in all cases only<br />
when the first layer has dried, the second layer may be applied. Make<br />
sure the second layer completely covers the mesh, and finish off the<br />
surface with a flat trowel.<br />
43
44<br />
Technical Notebook<br />
<strong>WATERPROOFING</strong><br />
<strong>TERRACES</strong> <strong>AND</strong> <strong>BALCONIES</strong><br />
FOR ONE-COMPONENT PRODUCTS<br />
Pour the water required for mixing into a suitable clean container. Then<br />
slowly add MONOLASTIC or MONOLASTIC ULTRA, while mixing, and<br />
continue mixing carefully for a further 3 minutes until it is completely<br />
blended, making sure that all the product is also removed from the<br />
sides and bottom of the container. A low-speed mechanical mixer is<br />
recommended for this operation, to avoid too much air being entrapped<br />
in the mix. Avoid mixing the product manually.<br />
MONOLASTIC and MONOLASTIC ULTRA must be applied with a<br />
brush, roller or by trowel, making sure that the layer is even and at least 1<br />
mm thick. While the product is still fresh, apply a layer of MAPETEx SEL<br />
(macro-holed polypropylene non-woven fabric). Overlay adjacent strips<br />
of fabric by at least 10 cm and press the fabric with a flat trowel to make<br />
sure it is perfectly buttered. Please note that the first layer of product must<br />
be applied in pitch areas wider than 1.2 metres, so that when MAPETEx<br />
SEL (width 1 metre) is applied, there will be at least 10 cm per side of<br />
MONOLASTIC o MONOLASTIC ULTRA to guarantee that it forms a<br />
continuous layer when the next pitch of product is applied ca. 2 hours<br />
after applying the first layer in good weather, and in all cases before the<br />
first layer has completely dried, the second layer may be applied.<br />
Make sure the second layer completely covers the mesh, and finish off<br />
the surface with a flat trowel. After completing the application cycle of<br />
MONOLASTIC or MONOLASTIC ULTRA wait at least 2 days before<br />
laying the ceramic.<br />
FOR READY-TO-USE PRODUCTS<br />
MAPELASTIC AQUADEFENSE is supplied ready to use and does not<br />
need to be mixed. Apply with a long-haired roller, brush or trowel in 2 even<br />
layers at around 0.4 mm thick per coat for a final thickness of at least 0.8<br />
mm in order to create a robust, flexible continuous film. Make sure there<br />
are no interruptions in the film caused by imperfections in the substrate.<br />
5.70 - Spreading the first coat of MAPELASTIC starting<br />
from the control joint<br />
5.71 - Application of MAPENET 150 starting from the<br />
control joint followed by impregnating the MAPENET<br />
150 in the first fresh layer of MAPELASTIC<br />
5.72 - Application of the second coat of MAPELASTIC,<br />
being careful not to let it run into the control joint
5.73 - Laying MAPETEX SEL<br />
on fresh MAPELASTIC SMART<br />
5.74 - Impregnating the MAPETEX SEL in the first fresh<br />
layer of MAPELASTIC SMART<br />
5.75 - Application of the second coat<br />
of MAPELASTIC SMART<br />
After applying MAPELASTIC AQUADEFENSE wait approximately 4<br />
hours for curing and then lay the tiles. Before laying the coating, carefully<br />
check the surface of MAPELASTIC AQUADEFENSE to make sure it is<br />
continuous and that there are no pin-holes or small craters. If there are<br />
such defects, apply a further coat where they are located.<br />
The render removed (as described in section 5.4) to make space for a skirt<br />
of waterproofing product directly on the masonry, must be repaired with<br />
MAPEGROUT 430, fine-grained, fibre-reinforced, controlled-shrinkage<br />
thixotropic mortar. For indications regarding laying coatings and grouting<br />
and sealing joints, please refer to sections 8 and 9.<br />
Note. If flat roofs are not accessible, MAPELASTIC and MAPELASTIC<br />
SMART may be left exposed in that they are resistant to UV rays. If a<br />
coloured finish is required, MAPELASTIC and MAPELASTIC SMART<br />
may be painted over with ELASTOCOLOR PAINT, protective and<br />
decorative flexible acrylic resin paint in water dispersion. MONOLASTIC,<br />
MONOLASTIC ULTRA and MAPELASTIC AQUADEFENSE on the<br />
other hand, must always be covered with a flooring material.<br />
45
46<br />
Technical Notebook<br />
<strong>WATERPROOFING</strong><br />
<strong>TERRACES</strong> <strong>AND</strong> <strong>BALCONIES</strong><br />
6. REPAIRS TO FRONT EDGES OF <strong>BALCONIES</strong><br />
When carrying out repairs to waterproofing layers on balconies and<br />
terraces, it will probably be necessary to intervene on the deteriorated<br />
front edges. In this case, all the render must be demolished and all the<br />
deteriorated concrete must be removed down to the reinforcement steel<br />
and all rust and foreign bodies must be removed mechanically from the<br />
reinforcement steel. The entire surface must be thoroughly cleaned to<br />
remove all dust and residues of loose concrete which was not removed<br />
during demolition, to form a sound, strong irregular substrate with a<br />
surface roughness of several mm. Isolate the reinforcement steel by<br />
applying MAPEFER 1K, one-component, anti-corrosion cementitious<br />
mortar for protecting steel.<br />
As an alternative to MAPEFER 1K, if there are particularly aggressive<br />
agents present such as chlorides, MAPESHIELD I, pure zinc galvanic<br />
anodes dressed with a special conductive paste may be applied in the<br />
layer of repair mortar. MAPESHIELD I is connected to the reinforcement<br />
rods using special metallic ties to fix them firmly in place so they do<br />
not move during the repair operations. Leave enough space around the<br />
anodes to allow the mortar to penetrate when it is applied.<br />
After isolating the reinforcement rods (with MAPEFER 1K or MAPESHIELD<br />
I) repair the concrete layer as follows:<br />
• saturate the surface with water so that the substrate is saturated<br />
with a dry surface;<br />
• re-build the concrete layer removed during demolition with<br />
MAPEGROUT 430, fine-grained, fibre-reinforced, medium-strength,<br />
shrinkage compensated thixotropic mortar. MAPEGROUT 430 may<br />
also include 0.25% of MAPECURE SRA, curing agent, which has<br />
Fig. 6.1 - Corner of the concrete expelled due to<br />
corrosion of the reinforcement steel<br />
Fig. 6.2 - Deteriorated front edge of a balcony<br />
Fig. 6.3 - MAPESHIELD I applied on the reinforcement<br />
steel of an element under repair
Fig. 6.4 - Cutting a self-bonding plate of pure zinc<br />
MAPESHIELD E 25<br />
Fig. 6.5 - Removing the protective backing from the<br />
conductive adhesive gel<br />
Fig. 6.6 - Detail of the connections leading from the<br />
reinforcement steel<br />
the property of reducing plastic and hydraulic shrinkage and the<br />
formation of micro cracks;<br />
• protect and even out all the surface with MAPELASTIC o<br />
MAPELASTIC SMART, two-component, flexible cementitious<br />
mortar, applied in two coats by trowel, brush or roller. We<br />
recommend inserting a layer of 4x4.5 mm MAPENET 150, alkali-<br />
resistant glass fibre reinforcement mesh on the first layer while still<br />
fresh;<br />
• apply a finishing coat of ELASTOCOLOR PITTURA, flexible,<br />
protective and decorative synthetic resin-based paint in water<br />
dispersion for concrete.<br />
If galvanic protection has been selected for the reinforcement rods and<br />
there is not enough space to apply MAPESHIELD I, use MAPESHIELD<br />
E 25, self-adhesive zinc plates which are placed directly on the external<br />
surface of the structure. Before re-building the demolished concrete,<br />
connect one or two electric cables to the reinforcement rods and join<br />
them to the anodes by welding or with mechanical fasteners. Then<br />
continue as follows:<br />
• repair the section using MAPEGROUT 430, as described above;<br />
• apply MAPESHIELD E 25;<br />
• seal the plates in the exposed ends and joints with MAPEFLEx<br />
PU45, flexible polyurethane sealant and adhesive after treating the<br />
edges with PRIMER M.<br />
Sealing the plates will stop water seeping in between the plates and<br />
substrate;<br />
47
48<br />
Technical Notebook<br />
<strong>WATERPROOFING</strong><br />
<strong>TERRACES</strong> <strong>AND</strong> <strong>BALCONIES</strong><br />
• protect and even out all the surface with two layers of MAPELASTIC<br />
or MAPELASTIC SMART two-component, flexible cementitious<br />
mortar applied by trowel, brush or roller. We recommend inserting<br />
a layer of 4x4.5 mm MAPENET 150 alkali-resistant glass fibre<br />
reinforcement mesh on the first layer while still fresh;<br />
• apply a finishing coat of ELASTOCOLOR PAINT, flexible,<br />
protective and decorative synthetic resin-based paint in water<br />
dispersion for concrete.<br />
7. <strong>WATERPROOFING</strong><br />
NEW STRUCTURES<br />
If the external render has already been applied while installing the<br />
waterproofing system, it's necessary to remove the render up to a ca. 10<br />
cm height from the extrados plane of the floor to be laid. This operation is<br />
necessary to ensure the possibility of turning the waterproofing system<br />
directly on the masonry and not on the render.<br />
If there are structural joints on the floor slab, their pattern must be traced<br />
on the screed and floor and sealed as described below. The screed must<br />
be installed according to the guidelines in section 3.2, making sure that<br />
the right slope is installed to permit rainwater to flow off. If a stone or<br />
marble kerb is to be installed around the external perimeter of the balcony<br />
or terrace, a drop must be formed in the screed in correspondence with<br />
the kerb. The waterproofing layer will then be able to be installed under<br />
the kerb to guarantee a complete, continuous waterproofing layer. The<br />
step created when installing the screed will help to perfectly align the<br />
floor and kerb, which often have different thicknesses. Once the screed<br />
has completely cured (usually 1 week per cm of thickness, and never<br />
less than 28 days), the construction elements, such as attachment points<br />
for railings, drains, channels and fillets between horizontal and vertical<br />
Fig. 6.7 - Fastening the metallic connectors of<br />
MAPESHIELD E 25 in place with clips<br />
Fig. 6.8 - Protection and smoothing of the surface<br />
of MAPELASTIC<br />
Fig. 6.9 - Impregnating the MAPENET 150 in the first<br />
fresh layer of MAPELASTIC
Fig. 7.1 - Applying MAPELASTIC or MAPELASTIC<br />
SMART around a floor drain<br />
Fig. 7.2 - Application of DRAIN VERTICAL on fresh<br />
MAPELASTIC or MAPELASTIC SMART<br />
Fig. 7.3 - Application of MAPELASTIC or MAPELASTIC<br />
SMART on DRAIN VERTICAL fabric<br />
surfaces may be prepared. Where there are attachment points for<br />
railings and, therefore, metallic fittings which pass through the horizontal<br />
substrate, the continuity of the waterproofing layer must be guaranteed.<br />
We recommend sanding all metallic fittings to remove traces of loose<br />
material and applying a coat of EPORIP, two-component, solvent-free<br />
epoxy adhesive. While the resin is still fresh, sprinkle quartz on the<br />
surface to create a rough surface to form a good bond with the flexible<br />
cementitious waterproofing mortar which will be applied later.<br />
Waterproofing around drains must be carried out using special kits and<br />
components from DRAIN range as described below:<br />
• Even out the surface where required with PLANITOP FAST 330.<br />
• Around the drain, apply the first coat of the chosen waterproofing<br />
product (see section 4) to cover a larger area than that of the<br />
nonwoven fabric.<br />
• Position DRAIN VERTICAL or DRAIN LATERAL and press the fabric<br />
on to the waterproofing layer while it is still fresh.<br />
• Cover the fabric with the waterproofing product and blend it in with<br />
the previous layer.<br />
Waterproofing in correspondence with drains in parapets must be carried<br />
out using DRAIN FRONT, TPE angular pipe unions for balconies, applied<br />
as follows:<br />
• Make a hole in the parapet and floor large enough to insert the<br />
DRAIN FRONT.<br />
• Spread on an even layer of ADESILEx PG4, two-component, thixotropic<br />
epoxy adhesive with a smooth trowel on the clean, dry substrate.<br />
49
50<br />
Technical Notebook<br />
<strong>WATERPROOFING</strong><br />
<strong>TERRACES</strong> <strong>AND</strong> <strong>BALCONIES</strong><br />
• Place DRAIN FRONT in position and press down lightly so that it is<br />
embedded in ADESILEx PG4 (Fig. 7.3).<br />
• Spread on a second coat of ADESILEx PG4 fresh on fresh to<br />
completely cover the DRAIN FRONT.<br />
• Smooth over with a flat trowel and, while the product is still fresh,<br />
sprinkle on a layer of 0.5 spheroid quartz to form a rough layer to help<br />
the waterproofing product form a good bond.<br />
• Once the curing process of ADESILEx PG4 has been completed,<br />
remove any loose quartz.<br />
Flexible waterproofing of the fillets between horizontal and vertical<br />
surfaces must be carried out using MAPEB<strong>AND</strong> alkali-resistant rubber<br />
tape with felt. Firstly, even out the masonry where the render has been<br />
removed using NIVOPLAN levelling mortar with added synthetic rubber<br />
latex, such as PLANICRETE at a rate of 2 litres per bag of mortar<br />
(used to partially replace the mixing water). The masonry may also be<br />
evened out using PLANITOP FAST 330, quick-setting, fibre-reinforced<br />
cementitious mortar for evening out irregularities from 3 to 30 mm on<br />
uneven substrates. Once this layer has dried, bond MAPEB<strong>AND</strong> to the<br />
substrate as follows:<br />
• Apply an even coat of the waterproofing product chosen (see section 4)<br />
with a smooth trowel on the clean, dry substrate.<br />
• Lay MAPEB<strong>AND</strong> by pressing along the sides, making sure there are<br />
no creases or air bubbles.<br />
• Apply another layer of the waterproofing product fresh on fresh to<br />
completely cover the sides of the tape.<br />
Fig. 7.4 - Application of DRAIN FRONT on fresh<br />
ADESILEX PG4<br />
Fig. 7.5 - Application of ADESILEX PG4 to completely<br />
cover DRAIN FRONT<br />
Fig. 7.6 - Sprinkling quartz on fresh ADESILEX PG4
Fig. 7.7 - Application of MAPELASTIC or MAPELASTIC<br />
SMART around a control joint and a wall-floor fillet joint<br />
Fig. 7.8 - After impregnating the white fabric of<br />
MAPEB<strong>AND</strong> T (special T-shaped piece) in the fresh<br />
product, apply MAPELASTIC or MAPELASTIC SMART<br />
on the white fabric part of MAPEB<strong>AND</strong><br />
Fig. 7.9 - Impregnating the white fabric of MAPEB<strong>AND</strong><br />
CROSS (special cross-shaped piece) in fresh<br />
MAPELASTIC or MAPELASTIC SMART<br />
In the corners, use the special components from MAPEB<strong>AND</strong> (90°<br />
ANGLES and 270° ANGLES), while the joints between the strips and<br />
special pieces must be made using a double-buttering polychloroprenic<br />
contact adhesive such as ADESILEx LP. Apply MAPEB<strong>AND</strong> in<br />
the control joints in the substrate using the same technique as<br />
described above, making sure the strips are turned towards the inside<br />
of the joint in an upside-down “Ω” shape. The structural joints must<br />
be waterproofed by bonding MAPEB<strong>AND</strong> TPE 1.2 mm thick tape<br />
with borders reinforced with polyester fabric. Bond in position using<br />
ADESILEx PG4 twocomponent thixotropic epoxy adhesive as follows:<br />
• Apply a 1-2 mm thick layer of ADESILEx PG4, with a smooth<br />
trowel on the clean, dry substrate. Try to avoid the adhesive<br />
running into the joint.<br />
• Lay on the upside-down “Ω” shaped MAPEB<strong>AND</strong> TPE aso that<br />
only the polyester felt bonds to ADESILEx PG4. Press down along<br />
the sides, making sure there are no creases or air bubbles.<br />
• Apply a second layer of ADESILEx PG4 fresh on fresh, and completely<br />
cover the sides of the tape with the second coat.<br />
• Smooth over with a flat trowel and, while the product is still fresh,<br />
sprinkle on a layer of 0.5 spheroid quartz to form a rough layer to help<br />
the waterproofing product form a good bond.<br />
• Once the curing process of ADESILEx PG4 has been completed,<br />
remove any excess quartz.<br />
The joints between the strips of MAPEB<strong>AND</strong> TPE may be made with<br />
a hot-air welding pistol or by cold welding by overlapping the TPE part<br />
by at least 5 cm and bonding them together with a double-buttering<br />
51
52<br />
Technical Notebook<br />
<strong>WATERPROOFING</strong><br />
<strong>TERRACES</strong> <strong>AND</strong> <strong>BALCONIES</strong><br />
polychloroprenic contact adhesive in solvent such as ADESILEx LP.<br />
We recommend laying MAPEB<strong>AND</strong> TPE inside the joint to form an<br />
upsidedown “Ω” shape.<br />
After waterproofing and sealing the interruptions and critical points as<br />
described above, apply the waterproofing product chosen.<br />
FOR TWO-COMPONENT PRODUCTS<br />
Mixing of MAPELASTIC or MAPELASTIC SMART is carried out by<br />
pouring component B (liquid) into a suitable clean container and slowly<br />
adding component A (powder) while mixing. Mix the two components<br />
together for several minutes. Remove all traces of powder from the sides<br />
and bottom of the container and keep mixing until it is perfectly blended.<br />
Never carry out this operation manually. Use a low-speed mixer (to avoid<br />
air being dragged in) or a mortar mixer, which is generally supplied with<br />
rendering machines. If a mortar mixer is used, before pouring the mix out<br />
of the hopper, make sure that it is well mixed and that there are no lumps.<br />
MAPELASTIC and MAPELASTIC SMART must be applied within 60<br />
minutes after mixing.<br />
Spread two coats of MAPELASTIC on the clean, dry substrate using a<br />
smooth or notched trowel to form a total thickness of at least 2 mm. We<br />
recommend inserting MAPENET 150 (alkali-resistant fibre glass mesh)<br />
between the first and second coat of MAPELASTIC to increase flexibility<br />
and guarantee its capacity to cover cracks up to 1.5 mm wide. After applying<br />
the first coat, insert the glass fibre mesh by overlapping the adjacent<br />
strips at least 10 cm, and press down with a flat trowel on the substrate to<br />
guarantee perfect buttering. Please note that the first layer of product must<br />
be applied in pitch areas wider than 1.2 metres, so that when MAPENET<br />
150 (width 1 metre) is applied, there will be at least 10 cm per side of the<br />
MAPELASTIC to guarantee that it forms a continuous layer when the next<br />
pitch of product is applied. 4-5 hours after applying the first layer in good<br />
weather, and in all cases never before the first layer has completely dried,<br />
Fig. 7.10 -Applying the first layer of ADESILEX PG4<br />
Fig. 7.11 - After laying MAPEB<strong>AND</strong> TPE on fresh<br />
ADESILEX PG4 apply the second layer<br />
Fig. 7.12 - Sprinkling quartz on the second fresh layer
Fig. 7.13 - Spreading the first coat of MAPELASTIC<br />
starting from the structural joint<br />
Fig. 7.14 - Impregnating the MAPENET 150 in the first<br />
fresh layer of MAPELASTIC<br />
Fig. 7.15 - Application of the second coat of<br />
MAPELASTIC<br />
the second layer may be applied. Make sure the second layer completely<br />
covers the mesh, and finish off the surface with a flat trowel.<br />
If a more flexible product is required, such as when the surfaces to be<br />
waterproofed have particularly large pitch areas (between one control<br />
joint and another) and are subject, therefore, to high dynamic stresses,<br />
we recommend the use of MAPELASTIC SMART. The product may<br />
be applied by trowel or with a roller, making sure that the layer is even<br />
and at least 1 mm thick. While the product is still fresh, apply a layer of<br />
MAPETEx SEL (macro-holed polypropylene non-woven fabric). Overlap<br />
adjacent strips of fabric by at least 10 cm and press the fabric with a flat<br />
trowel to make sure it is perfectly buttered. Please note that the first layer of<br />
product must be applied in pitch areas wider than 1.2 metres, so that when<br />
MAPETEx SEL (width 1 metre) is applied, there will be at least 10 cm per<br />
side of MAPELASTIC SMART to guarantee that it forms a continuous<br />
layer when the next pitch of product is applied. 4-5 hours after applying<br />
the first layer in good weather, and in all cases only when the first layer<br />
has dried, the second layer may be applied. Make sure the second layer<br />
completely covers the mesh, and finish off the surface with a flat trowel.<br />
FOR ONE-COMPONENT PRODUCTS<br />
Pour the water required for mixing into a suitable clean container.<br />
Then slowly add the MONOLASTIC or MONOLASTIC ULTRA while<br />
mixing, and continue mixing carefully for a further 3 minutes until it is<br />
completely blended, making sure that all the product is also removed<br />
from the sides and bottom of the container. A low-speed mechanical<br />
mixer is recommended for this operation, to avoid too much air being<br />
entrapped in the mix. Avoid mixing the product manually.<br />
MONOLASTIC and MONOLASTIC ULTRA must be applied with a<br />
brush, roller or by trowel, making sure that the layer is even and at least<br />
1 mm thick. While the product is still fresh, apply a layer of MAPETEx<br />
SEL (macro-holed polypropylene non-woven fabric). Overlay adjacent<br />
53
54<br />
Technical Notebook<br />
<strong>WATERPROOFING</strong><br />
<strong>TERRACES</strong> <strong>AND</strong> <strong>BALCONIES</strong><br />
strips of fabric by at least 10 cm and press the fabric with a flat trowel<br />
to make sure it is perfectly buttered. Please note that the first layer<br />
of product must be applied in pitch areas wider than 1.2 metres, so<br />
that when MAPETEx SEL (width 1 metre) is applied, there will be at<br />
least 10 cm per side of MONOLASTIC or MONOLASTIC ULTRA to<br />
guarantee that it forms a continuous layer when the next pitch of product<br />
is applied. 2 hours after applying the first layer in good weather, and in<br />
all cases never before the first layer has completely dried, the second<br />
layer may be applied. Make sure the second layer completely covers<br />
the mesh, and finish off the surface with a flat trowel. After completing<br />
the application cycle of MONOLASTIC or MONOLASTIC ULTRA,wait<br />
at least 2 days before installing the tiles.<br />
FOR READY-TO-USE PRODUCTS<br />
MAPELASTIC AQUADEFENSE is supplied ready to use and does not<br />
need to be mixed. Apply with a long-haired roller, brush or trowel in two<br />
even layers at around 0.4 mm thick per coat for a final thickness of at least<br />
0.8 mm in order to create a robust, flexible continuous film. Make sure there<br />
are no interruptions in the film caused by imperfections in the substrate.<br />
After applying MAPELASTIC AQUADEFENSE wait approximately 4 hours<br />
for curing and then lay the ceramic tiles. Before tiling, carefully check the<br />
surface of MAPELASTIC AQUADEFENSE to make sure it is continuous<br />
and that there are no pin-holes or small craters. If there are such defects,<br />
apply a further coat where they are located. For indications regarding laying<br />
tiles and grouting and sealing joints, please refer to sections 8 and 9.<br />
Fig. 7.16 - Application of a second coat of<br />
MONOLASTIC by trowel on MAPETEX SEL<br />
7.17 - Application of a second coat of MONOLASTIC<br />
ULTRA by trowel on MAPETEX SEL<br />
7.18 - MAPELASTIC AQUADEFENSE applied on a<br />
floor-wall fillet joint before applying MAPEB<strong>AND</strong>
7.19 - Application of MAPEB<strong>AND</strong> on fresh<br />
MAPELASTIC AQUADEFENSE<br />
7.20 - Application with a roller of the first coat of<br />
MAPELASTIC AQUADEFENSE<br />
7.21 - Application with a roller of the second coat of<br />
MAPELASTIC AQUADEFENSE<br />
Note. If flat roofs are not accessible, MAPELASTIC and MAPELASTIC<br />
SMART may be left exposed in that they are resistant to UV rays. If a<br />
coloured finish is required, MAPELASTIC and MAPELASTIC SMART<br />
may be painted over with ELASTOCOLOR PAINT protective and<br />
decorative flexible acrylic resin paint in water dispersion. MONOLASTIC,<br />
MONOLASTIC ULTRA and MAPELASTIC AQUADEFENSE, on the<br />
other hand, must always be covered with a flooring material.<br />
55
56<br />
Technical Notebook<br />
<strong>WATERPROOFING</strong><br />
<strong>TERRACES</strong> <strong>AND</strong> <strong>BALCONIES</strong><br />
8. LAYING CERAMIC<br />
<strong>AND</strong> STONE MATERIALS<br />
Waiting times before laying floor finishes depend on the type of<br />
waterproofing system used, and in particular:<br />
• 4-5 days for MAPELASTIC and MAPELASTIC SMART;<br />
• 2 days for MONOLASTIC and MONOLASTIC ULTRA;<br />
• just 4 hours for MAPELASTIC AQUADEFENSE.<br />
The times indicated may obviously vary slightly according to climatic<br />
conditions.<br />
Floor coatings on a terrace or balcony are exposed to direct sunlight<br />
and, therefore, to very large temperature variations between day-time<br />
and night-time. These variations provoke the formation of strains due to<br />
the different thermal expansion coefficients of the substrate and finishing<br />
material. In such conditions, it is very important that tiles are laid with<br />
joints sufficiently large to absorb movement due to thermal expansion<br />
and according to the type of coating laid and its service conditions. Floor<br />
coatings must follow the same pattern as the joints in the substrate<br />
(structural and control joints) and, if they are not present or if their pitch<br />
is particularly large, expansion joints must be created (in the coating)<br />
every 9-12 m 2 . If the floor is long and rectangular, such as with balconies,<br />
the joints must be made at a maximum of every 4-5 m. The joints must be<br />
sealed with special silicone or polyurethane sealants as indicated below.<br />
The adhesive chosen to bond the coating is fundamental: under the<br />
aforementioned exposure conditions and on flexible substrates such as<br />
the waterproofing system applied, a class C2 adhesive system according<br />
to EN 12004 will be required, with a deformation rate according to the<br />
size of the tiles and shape and size of the terrace. The adhesive must<br />
be applied using the double-buttering technique to avoid the formation of<br />
gaps under the tiling and water collecting under the tiles to a minimum.<br />
Fig. 8.1 - Measuring the height to position the floor<br />
drain flush with the surface of the finished floor<br />
Fig. 8.2 - Cutting the telescopic extension for the grate<br />
to the length measured in the previous step<br />
Fig. 8.3 - Bonding the telescopic extension for the<br />
grate (with anti-odour plug in place) with four spots of<br />
MAPESIL AC silicone sealant
Fig. 8.4 - Bonding the tiles on perfectly dry<br />
MAPELASTIC or MAPELASTIC SMART with a class<br />
C2 adhesive<br />
Fig. 8.5 - Spreading the adhesive on the back of a tile<br />
to avoid the formation of gaps under the coating<br />
Fig. 8.6 - Bonding the tiles on perfectly dry<br />
MAPELASTIC AQUADEFENSE with a class C2<br />
adhesive<br />
MAPEI has a wide range of suitable adhesives available for laying tiles<br />
on balconies and terraces. Which adhesive to use will depend on the<br />
type of coating (size and type of material) and the time available before<br />
putting the floor into service.<br />
For example, ceramic and stone which are stable in the presence of<br />
humidity may be laid using:<br />
• KERAFLEx improved, high-performance cementitious adhesive<br />
with no vertical slip and long open time, class C2TE according to<br />
EN 12004.<br />
• KERAFLEx MAxI S1 high-performance flexible cementitious<br />
adhesive with no vertical slip and long open time with Low Dust<br />
technology, class C2TE S1 according to EN 12004.<br />
• KERABOND + ISOLASTIC high-performance, high-flexibility<br />
cementitious adhesive system, class C2E S2 according to EN 12004.<br />
For large tiles and for laying in winter, a quick-setting adhesive must be<br />
used such as:<br />
• GRANIRAPID two-component, high-performance, flexible,<br />
quicksetting and drying cementitious adhesive, class C2F S1<br />
according to EN 12004.<br />
• ELASTORAPID two-component, high-performance, high-flexibility,<br />
quick-setting and drying cementitious adhesive with no vertical slip<br />
and long open time, class C2FTE S2 according to EN 12004.<br />
57
58<br />
Technical Notebook<br />
<strong>WATERPROOFING</strong><br />
<strong>TERRACES</strong> <strong>AND</strong> <strong>BALCONIES</strong><br />
9. GROUTING<br />
<strong>AND</strong> SEALING JOINTS<br />
After installing the tiles, all the joints must be grouted and sealed. With<br />
this particular type of work, use the following products:<br />
• KERACOLOR high-performance, polymer-modified cementitious<br />
mortar available in two different grain sizes (FF and GG) according to<br />
the size of the joints. KERACOLOR FF contains special water-repellent<br />
additives (DropEffect ® technology) and is suitable for grouting joints<br />
up to 6 mm wide. KERACOLOR GG is suitable for joints from 4 to 15<br />
mm wide. Mixing KERACOLOR with FUGOLASTIC special synthetic<br />
resin polymer admix improves the characteristics of the grout so it is<br />
resistant to even the most severe service conditions.<br />
• KERACOLOR and KERACOLOR + FUGOLASTIC are class CG2<br />
according to EN 13888 and floors grouted with KERACOLOR are set<br />
to foot traffic after approximately 24 hours.<br />
• For quicker operations, use ULTRACOLOR PLUS highperformance,<br />
polymer-modified, anti-efflorescence mortar for joints from 2<br />
to 20 mm wide. This product sets quickly, is water-repellent<br />
with DropEffect ® technology, mould-resistant with BioBlock ®<br />
technology, is available in 26 different colours and is class CG2<br />
according to EN 13888. Floors grouted with ULTRACOLOR PLUS<br />
are set to foot traffic in 3 hours in normal climatic conditions.<br />
The following ranges of sealing products should be used for the<br />
interventions discussed in this pamphlet:<br />
• MAPESIL AC, solvent-free, acetic-cure, mould-resistant silicone<br />
sealant with a low modulus of elasticity, available in the same colours as<br />
Fig. 9.1 - Grouting the joints<br />
Fig. 9.2 - Sealing with MAPESIL AC in correspondence<br />
with the grate on the floor drain<br />
Fig. 9.3 - Sealing with MAPESIL AC in correspondence<br />
with the skirting board-wall fillet joint
Fig. 9.4 - Inserting MAPEFOAM cord in the structural<br />
joint to regulate the thickness of MAPEFLEX PU40<br />
Fig. 9.5 - Sealing the structural joint with<br />
MAPEFLEX PU40<br />
Fig. 9.6 - Smoothing over the MAPEFLEX PU40<br />
the grouting mortars. To guarantee a better bond with the edges of tiles,<br />
we recommend treating them beforehand with PRIMER FD.<br />
MAPESIL AC is used for sealing expansion joints and control joints<br />
(see section 3.1) and joints around the perimeter of rooms (fillets<br />
between skirting tiles and floors and between skirting tiles and walls).<br />
• MAPEFLEx PU40 or MAPEFLEx PU50 SL one-component<br />
polyurethane sealant with a low modulus of elasticity and a thixotropic<br />
or fluid consistency respectively. These products are used for sealing<br />
structural joints (see section 3.1). Where attachment points for railings<br />
pass through the floor, we recommend sealing the areas between the<br />
floor and metallic fittings with MAPEFLEx PU40.<br />
The sealant only offers the correct water-tightness and duration if the<br />
joints are the correct size. As a general rule, sealing must be carried out<br />
according to the indications in the table below:<br />
WIDTH DEPTH OF THE SEALANT IN THE JOINT<br />
Up to 10 mm Same as width<br />
From 10 to 30 mm Half the width<br />
To regulate the depth of the sealant (according to the indications in the table<br />
above) and avoid it sticking to the bottom of the joint, insert MAPEFOAM<br />
closed-cell polyethylene cord in the joint by pressing it lightly in with a<br />
pointed trowel or wooden slat.<br />
59
60<br />
Technical Notebook<br />
<strong>WATERPROOFING</strong><br />
<strong>TERRACES</strong> <strong>AND</strong> <strong>BALCONIES</strong><br />
RESTAURANT<br />
MEDITERRANEO<br />
Sopron – Hungary<br />
Waterproofing and tiling<br />
an external terrace with<br />
MAPELASTIC, GRANIRAPID,<br />
KERAFLEX and MAPESIL AC<br />
PRIvATE vIllA<br />
Milan – Italy<br />
Waterproofing and tiling<br />
an external terrace with<br />
MAPELASTIC, GRANIRAPID,<br />
ULTRACOLOR PLUS and<br />
MAPESIL AC
HOTEl PAlACE<br />
Milano Marittima - Italy<br />
Waterproofing and tiling<br />
balconies and terraces with<br />
MAPELASTIC, KERABOND,<br />
ISOLASTIC, KERAFLEX MAXI<br />
and ULTRACOLOR PLUS<br />
PRIvATE HOME<br />
Cereseto<br />
(Alessandria) – Italy<br />
Waterproofing and tiling<br />
an external terrace with<br />
TOPCEM, TOPCEM PRONTO,<br />
MAPELASTIC, MAPEB<strong>AND</strong>,<br />
KERABOND, ISOLASTIC and<br />
MAPESIL AC<br />
61
62<br />
Technical Notebook<br />
<strong>WATERPROOFING</strong><br />
<strong>TERRACES</strong> <strong>AND</strong> <strong>BALCONIES</strong><br />
HOTEl HIlTON IMPERIAl<br />
Dubrovnik – Croatia<br />
Waterproofing and tiling<br />
balconies with MAPELASTIC,<br />
MAPEB<strong>AND</strong>, MAPEGUM WPS,<br />
KERAFLEX MAXI, KERAPOXY,<br />
GRANIRAPID, ULTRACOLOR<br />
PLUS and MAPESIL AC<br />
PRIvATE vIllA<br />
Stritez – Czech Republic<br />
Waterproofing and tiling<br />
an external terrace with<br />
MAPELASTIC, KERAFLEX and<br />
KERAPOXY
HOTEl RADISON<br />
Bukkfurdo – Hungary<br />
Waterproofing and tiling<br />
an external terrace with<br />
MAPELASTIC, MAPEB<strong>AND</strong>,<br />
KERAFLEX and KERABOND<br />
HOTEl CONCHIGlIA<br />
Cervia – Italy<br />
Waterproofing and tiling<br />
balconies with MAPELASTIC,<br />
GRANIRAPID, KERAFLEX,<br />
KERAFLEX MAXI S1 and<br />
KERACOLOR FF<br />
63
64<br />
NOTES