
Create successful ePaper yourself
Turn your PDF publications into a flip-book with our unique Google optimized e-Paper software.
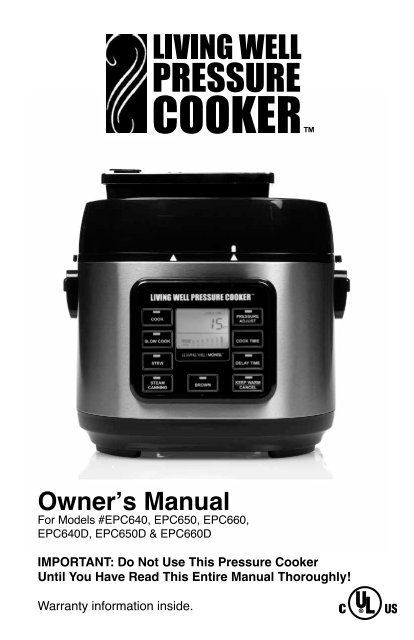
Owner’s <strong>Manual</strong><br />
For Models #EPC640, EPC650, EPC660,<br />
EPC640D, EPC650D & EPC660D<br />
IMpOrtant: Do not Use this pressure Cooker<br />
Until You Have read this Entire <strong>Manual</strong> thoroughly!<br />
Warranty information inside.
Owner’s<br />
<strong>Manual</strong><br />
For Models #EPC640, EPC650, EPC660,<br />
EPC640D, EPC650D & EPC660D
Healthier Cooking Begins Here...<br />
As a new owner of the Living Well Pressure Cooker, you are about<br />
to discover what so many other food aficionados have known for<br />
years. Simply, that meals prepared properly in a good pressure<br />
cooker, taste better, and cook faster than those prepared using<br />
conventional cooking methods.<br />
We have taken the art of cooking with pressure to the next level.<br />
Our culinary design division tested numerous materials, metals<br />
and cooking surfaces before deciding on the combination that<br />
would work best with the latest digital electronics to create<br />
The Living Well Pressure Cooker.<br />
Once familiar with the system, you’ll find that many of your favorite<br />
family recipes can be cooked perfectly in a fraction of the time.<br />
The sealed cooking chamber builds up heat and pressure... the<br />
result ... more flavor stays locked within the food and less energy<br />
is wasted in a shorter cooking time. The “sealed” cooking process<br />
eliminates messy stove top spills while “trapping” heat, making for<br />
cooler kitchens and easier cleanups.<br />
The Living Well Pressure Cooker has been designed to provide<br />
you and your family with many years of delicious meals and<br />
memories around the dinner table… but before you begin it is very<br />
important that you read this entire manual making certain that you<br />
are totally familiar with its operation and precautions.<br />
Index<br />
page<br />
Important Safeguards 1 - 3<br />
Special Features 4<br />
Operating The Control Panel 5 - 6<br />
Built In Safety Features 6<br />
Instructions For Use 7 - 10<br />
Care and Cleaning 11<br />
Pressure Cooking Guide 12<br />
Frequently Asked Questions 13<br />
Limited Warranty 14
Important Safeguards<br />
When using electrical appliances, basic safety precautions<br />
should always be followed including the following:<br />
1. Read and follow all instructions carefully.<br />
2. Do not touch hot surfaces. Use handles or knobs.<br />
3. To protect against electric shock do not immerse or rinse cords<br />
or plugs in water or other liquid.<br />
4. Close supervision is necessary when any appliance is used by<br />
or near children.<br />
5. Unplug from outlet when not in use and before cleaning. Allow to<br />
cool before putting on or taking off parts.<br />
6. Do not operate any appliance with a damaged cord or plug or after<br />
the appliance malfunctions or has been damaged in any manner.<br />
Return appliance to the nearest authorized service facility for<br />
examination, repair, or adjustment.<br />
7. The use of accessory attachments not recommended by the<br />
appliance manufacturer may cause injuries.<br />
8. Do not use outdoors.<br />
9. Do not let cord hang over edge of table or counter, or touch<br />
hot surfaces.<br />
10. Do not place on or near a hot gas or electric burner, or in a<br />
heated oven.<br />
11. Extreme caution must be used when moving an appliance<br />
containing hot oil or other hot liquids.<br />
12. Always attach plug to appliance first, then plug cord into the wall<br />
outlet. To disconnect, turn any control to ”Off”, then remove plug<br />
from wall outlet.<br />
13. Do not use appliance for other than intended use.<br />
14. Do not place the pressure cooker in a heated oven.<br />
15. This appliance cooks under pressure. Improper use may result<br />
in scalding injury. Make certain unit is properly closed before<br />
operating. See Instructions For Use.<br />
16. Never fill the unit above the MAX LINE in the Inner Pot (fig.1, page<br />
8). When using foods that expand during cooking such as rice or<br />
dried beans, follow the recipe for “pressure cooking” those products,<br />
and as a rule of thumb, do not fill the unit above the “halfway”<br />
point. Over filling may cause clogging, allowing excess pressure to<br />
develop. See Instructions For Use.<br />
SAVE THESE INSTRUCTIONS<br />
1<br />
Important Safeguards (continued)<br />
17. Be aware that certain foods, such as applesauce, cranberries,<br />
pearl barley, oatmeal or other cereals, split peas, noodles, macaroni,<br />
rhubarb, and spaghetti, can foam, froth, sputter, and clog the<br />
pressure release device (steam vent). Recipes using these items<br />
must be followed carefully to avoid problems.<br />
18. Always check the pressure release devices for clogs before use.<br />
19. Do not open the pressure cooker until the unit has cooled and all<br />
internal pressure has been released. If the unit is difficult to open,<br />
this indicates that the cooker is still pressurized – do not force it<br />
open. Any pressure in the cooker can be hazardous. See Instructions<br />
For Use.<br />
20. Do not use this pressure cooker for pressure frying with oil.<br />
21. This appliance has been designed for use with a 3 prong,<br />
grounded, 120V electrical outlet only. Do not use any other<br />
electrical outlet.<br />
22. The Pressure Cooker generates extreme heat and steam in its<br />
operation. All necessary precautions must be taken to avoid fire,<br />
burns and other personal injury during its operation.<br />
23. When in operation the Pressure Cooker requires sufficient air<br />
space on all sides including top and bottom. Never operate the<br />
unit near any flammable materials such as dish towels, paper<br />
towels, curtains, paper plates, etc.<br />
24. Always plug the electrical cord directly into the wall outlet. Never<br />
use this unit with an extension cord of any kind.<br />
25. Anyone who has not fully read and understood all operating and<br />
safety instructions contained in this manual is not qualified to<br />
operate or clean this appliance.<br />
26. If this unit falls or accidentally becomes immersed in water, unplug<br />
it from the wall outlet immediately. Do not reach into the water!<br />
27. When using this unit, provide adequate air space above and on<br />
all sides for air circulation. Do not operate this appliance near<br />
curtains, wall coverings, clothing, dish towels and other flammable<br />
materials.<br />
28. To reduce the risk of fire, do not leave this appliance unattended<br />
during use.<br />
29. Do not use this appliance in an unstable position.<br />
30. If this appliance begins to malfunction during use, immediately<br />
unplug the cord. Do not use or attempt to repair a malfunctioning<br />
appliance!<br />
SAVE THESE INSTRUCTIONS<br />
2
Important Safeguards (continued)<br />
31. NEVER FORCE OPEN THE PRESSURE COOKER. If you need<br />
to open the pressure cooker, press the “KEEP WARM/CANCEL”<br />
button and carefully slide the Rapid Release Button (fig.4, page<br />
8) to the open position to fully release the building pressure inside<br />
the cooker. Make sure that all the steam has dissipated from the<br />
cooker and the Float Valve (fig. 6, Page 8) fully settled back into<br />
the lid shell. Carefully turn the handle counter clockwise. Always<br />
open the lid away from you to avoid skin contact with any remaining<br />
heat or steam.<br />
32. CAUTION: TO REDUCE RISK OF ELECTRIC SHOCK, COOK<br />
ONLY IN THE REMOVABLE CONTAINER. Do not immerse the<br />
housing or base in water. Before use, clean the bottom of the inner<br />
pot and the surface of the heater plate… insert the inner pot, turning<br />
it slightly clockwise and counterclockwise until you are sure it<br />
is sitting correctly on the heater plate. Failure to do so will prevent<br />
proper operation and may cause damage to the unit.<br />
33. CAUTION HOT SURFACES. This appliance generates heat and<br />
escaping steam during use. Proper precautions must be taken to<br />
prevent the risk of personal injury, fires, and damage to property.<br />
SHOrt COrD InStrUCtIOnS<br />
A short power-supply cord is provided to reduce the risk resulting from<br />
becoming entangled in or tripping over a longer cord. Do not use an<br />
extension cord with this product.<br />
pLaStICIZEr WarnInG<br />
CaUtIOn: To prevent Plasticizers from migrating from the finish of the<br />
counter top or table top or other furniture, place NON-PLASTIC<br />
coasters or place mats between the appliance and the finish of the<br />
counter top or table top. Failure to do so may cause the finish to<br />
darken, permanent blemishes may occur or stains can appear.<br />
ELECtrIC pOWEr<br />
If the electrical circuit is overloaded with other appliances, your<br />
appliance may not operate properly. It should be operated on a<br />
dedicated electrical circuit.<br />
note: This product must be grounded. If it should malfunction or break down,<br />
grounding provides a path of least resistance for electric current to reduce<br />
the risk of electric shock. This product is equipped with a cord having an<br />
equipment grounding conductor and a grounding plug. The plug must be<br />
plugged into an appropriate outlet that is properly installed and grounded in<br />
accordance with all local codes and ordinances.<br />
SaVE tHESE InStrUCtIOnS.<br />
FOr HOUSEHOLD USE OnLY<br />
3<br />
Special Features<br />
1. The Digital Display on your Living Well Pressure Cooker offers a<br />
wide range of choices including Browning, Slow Cooking, Stewing<br />
and Steaming.<br />
2. Cooking Time and Pressure Levels may be adjusted to suite any<br />
recipe or personal preference. At the completion of the cooking<br />
cycle, the unit will automatically shift to the Keep Warm mode.<br />
3. Cooking Electronically with Pressure saves time and energy. For<br />
example, rice dishes cook 20% quicker and save 25% on energy.<br />
Most other dishes average a 40% time saving and 45% on energy.<br />
4. Digital Pressure Cooking utilizes temperatures up to 248 O F (120 O<br />
C) creating a more sterile and healthier environment when compared<br />
to traditional cooking methods.<br />
5. The Living Well Pressure Cooker creates a “sealed environment”<br />
that preserves flavor and “locks in” valuable vitamins and nutrients.<br />
6. Hot kitchens, messy spills and “boil-over’ are a thing of the past.<br />
7. The Living Well Pressure Cooker has a BROWN MODE that<br />
allows you to sear or brown food using the inner pot before cooking<br />
under pressure.<br />
8. The Rapid Release Feature allows you to lower pressure quickly<br />
and completely. To do so, carefully slide the Rapid Release<br />
Button (fig 4., page 8) forward in short bursts at first. After initial short<br />
bursts, leave the button in the full forward position until all pressure<br />
has escaped and the digital pressure indicator does not register.<br />
CAUTION: During this process protect your skin from any contact<br />
with escaping steam.<br />
9. The STEAM MODE heats cooking liquid in the inner pot to a boil in<br />
a matter of minutes, for steaming and cooking an endless variety of<br />
foods like vegetables, shellfish and rice.<br />
10. The KEEP WARM MODE holds and keeps cooked food warm for<br />
an unlimited period of time. Foods kept at WARM MODE for periods<br />
beyond 4 hours may loose their good flavor and texture.<br />
11. Cooker Housing is both attractive and functional.<br />
4
Operating the Control panel<br />
1. KEEp WarM/CanCEL: The KEEP WARM Mode keeps cooked food<br />
warm for extended time periods. When you press the KEEP WARM/CANCEL<br />
Button the yellow Indicator Light illuminates. During any operation, you can<br />
press the “KEEP WARM/CANCEL” button to clear the current operation. You<br />
will know that the operation has been cleared when the background LCD<br />
color becomes Green. Select the “KEEP WARM/CANCEL” button again and<br />
the background LCD becomes Yellow, indicating that the unit is in the “KEEP<br />
WARM” mode.<br />
2. COOK: Press the “COOK” Button ... the indicator light will blink for 8<br />
seconds then cooking will begin. The Default COOK TIME is 15min and the<br />
default pressure setting is “40kPa”*. The default COOK TIME will begin count<br />
down when the designated pressure is reached. Press the COOK TIME<br />
button to reset the COOK TIME from 10 - 90 minutes.<br />
3. SLOW COOK: Press THE “SLOW COOK” button ... the indicator light<br />
will blink 8 seconds then SLOW COOKING will begin. The Default time is 6<br />
hours. The default SLOW COOK TIME will begin count down when the<br />
designated temperature is reached. Press the COOK TIME button to reset<br />
the SLOW COOK TIME from 3-20 hours.<br />
4. StEW: Press the “STEW” button ... the indicator light will blink 8 seconds<br />
then STEWING will begin. The Default time is 30 minutes and the default<br />
pressure setting is “80kPa”. The STEW TIME will begin count down when the<br />
designated pressure is reached. Press the COOK TIME button to reset the<br />
STEWING TIME from 20-90 minutes.<br />
*“kPa” as a unit of pressure measurement, is widely used throughout the world instead of the<br />
“pounds per square inch, PSI” method. kPa to PSI ratio is approximately 7kPa to 1PSI.<br />
For example 2PSI is equal to 14kPa.<br />
5<br />
Operating the Control panel (continued)<br />
5. StEaM /CannInG: Press the “STEAM/CANING” button, the indicator<br />
light will blink 8 seconds then the process will begin. The Default time<br />
is 30min. The cooker will count down when proper temperature is reached.<br />
Press the COOK TIME button to reset the STEAM TIME from 10-90min.<br />
6. BrOWn: Press the “BROWN” button, the indicator light will blink 8<br />
seconds then “BROWNING” will begin. The Default time is 30min. The cooker<br />
will count down when proper temperature is reached. Press the COOK TIME<br />
button to reset the BROWN TIME from 10-90min.<br />
7. prESSUrE aDJUSt: When the “PRESSURE ADJUST” button is selected,<br />
the indicator light will blink 8 seconds then pressure will begin to build.<br />
The Default time and pressure setting is 15 minutes at 40kPa. To increase or<br />
decrease pressure, reselect the Pressure Adjust Button until the desired setting<br />
appears on the Control Panel readout. - from 20kPa-80kPa.<br />
8. COOK tIME: Press “COOK TIME” button to set the desired cooking time.<br />
9. DELaY tIME: This feature can only be activated when selected within 8<br />
seconds after another cooking process has been programmed. Selecting the<br />
“DELAY TIME” button gives you the option of delaying the cooking process<br />
by 4-12 hours.<br />
Built In Safety Features<br />
1. Lid Safety Device: Prevents pressure build-up if lid is not closed<br />
properly and prevents lid from opening until all pressure is released.<br />
2. pressure and temperature Sensor Controls: Maintain even heat<br />
and pressure by automatically activating or deactivating the power<br />
supply.<br />
3. “Back-up” Safety release Valve: Should the Temperature/Pressure<br />
Sensor device malfunction, causing pressure to build beyond<br />
maximum setting, the “Back-Up” will automatically “kick in” and<br />
release the built up pressure.<br />
4. “Clog resistant” Feature: Prevents food from blocking the steam<br />
release port.<br />
5. “Spring Loaded” Safety pressure release: Should all safety<br />
features listed above fail, this “spring-loaded” device located beneath<br />
the heating element will automatically lower the inner pot, causing it to<br />
separate automatically from the Rubber Gasket (fig. 3, page 8). This<br />
will enable the steam and pressure to automatically escape around<br />
the pot lid, avoiding a dangerous situation.<br />
6. temperature “Cut-Off” Device: Should the unit malfunction and<br />
cause the internal temperature to rise beyond the “Safe” limit, this<br />
device will cut-off the power supply and will not automatically reset.<br />
6
Instructions For Use<br />
BEFOrE tHE FIrSt USE<br />
1. Before using the Living Well Pressure Cooker for the first time,<br />
wash the inner pot (fig.1, page 8), the Lid (fig.2, page 8) and the<br />
Rubber Gasket (fig.3, page 8 ) with warm soapy water. Rinse with<br />
clean water and dry thoroughly.<br />
2. Make sure the Rubber Gasket (fig.3, page 8 ) is seated properly<br />
inside the Lid. To ensure correct fitting of the Rubber Gasket, fill the<br />
inner Pot ( fig.1,page 8 ) 2/3 full with water and run on Stew Mode<br />
for 15 minutes. Wait 15 minutes, then release pressure by pressing<br />
on the Rapid Release Button ( fig.4, page 8 ) in short bursts. The<br />
Float Valve (fig 6, Page 8) will drop. Let the appliance cool to room<br />
temperature. Pour out the water. Rinse and towel dry the inner Pot.<br />
The Pressure Cooker is now ready for use.<br />
BEFOrE EaCH USE<br />
For best results, always check that the Pressure Valve (fig.5, page 8),<br />
Float Valve ( fig.6, page 8 ), Rapid Release Button ( fig.4 , page 8),<br />
Safety Valve ( fig. 7, page 8 ) and Rubber Gasket ( fig.3, page 8 ) are<br />
in good working order and that there are no foreign particles blocking<br />
the Valve openings on the underside of the Lid. See CARE &<br />
CLEANING INSTRUCTIONS.<br />
pOWEr SUrGE prOtECtIOn FEatUrE<br />
The Living Well Pressure Cooker has a back-up feature to prevent<br />
malfunction in the event of a power surge. In the event of a system<br />
shut down caused by a power surge, unplug the cooker allow it to<br />
“clear” for 1 hour before plugging it back into the outlet.<br />
7<br />
4.<br />
Instructions For Use (continued)<br />
5.<br />
Pressure Valve<br />
Rapid Release<br />
Button<br />
Lid Handle<br />
2. Lid Shell<br />
3. Rubber Gasket<br />
1. Inner Pot<br />
Outer Pot<br />
Support Ring<br />
LCD<br />
Control Panel<br />
AC Cord<br />
parts & assembly<br />
8<br />
Float Valve<br />
Housing Handle<br />
Housing<br />
Sensor<br />
Heater Plate<br />
Base<br />
6.<br />
7.<br />
Safety Valve<br />
(located on<br />
underside of Lid)
Instructions For Use (continued)<br />
Fig. A<br />
For General Use<br />
1. Place Inner Pot into the main housing and load food. Never load<br />
Inner Pot above the MAX line. Rotate the Inner Pot to make certain<br />
that it is seated properly on the Heating Plate.<br />
2. Check for proper placement of Rubber Gasket (underside Lid rim)<br />
then, place Cooker Lid on Cooker with Lid Handle and Pressure<br />
Valve pointed to the “10:00 O’clock” position (fig. A). Rotate Lid<br />
counter clockwise until you feel a click and the symbols on the Lid<br />
and Support Ring are properly aligned (fig. B).<br />
3. Before cooking, make certain that the Rapid Release button is in<br />
the Closed position (fig. C) and the Pressure Valve is free floating<br />
and clear of any obstructions.<br />
9<br />
Lid Open<br />
Lid Close<br />
Fig. D<br />
Instructions For Use (continued)<br />
4. Plug the AC cord into a dedicated 120V wall outlet.<br />
5. You may now program the unit for cooking using the Control Panel<br />
and this manual as a guide. When the cooking process is finished<br />
the TIME Clock will return to zero. The unit will be in the Keep<br />
Warm Mode until Cancelled or unplugged.<br />
6. Steam and Pressure must be released completely from the Cooker<br />
before the Lid will open. To do this, carefully slide the Rapid<br />
Release Button forward (fig. D) in short bursts at first. After initial<br />
short bursts, leave the button in the forward position until all pressure<br />
has escaped and the digital pressure indicator does not register.<br />
CAUTION: During this process protect your skin from any contact<br />
with escaping steam.<br />
7. Press down gently on Lid and turn clockwise until Lid meets<br />
resistance... lift carefully and place aside. Avoid personal injury<br />
resulting from hot unit surfaces and dripping liquids.<br />
8. Press Cancel and unplug cooker from AC outlet.<br />
SprInG LOaDED CaKE pan aSSEMBLY<br />
Step 1<br />
Place the cake pan<br />
on its base. (Make<br />
sure the pan’s latch is<br />
open and fits securely<br />
into its base.)<br />
Specifications<br />
Step 2<br />
Secure the latch.<br />
Model Supply Power Rated Power Capacity of Inner Pot Working Pressure Safety Working<br />
Pressure<br />
EPC640D AC 120V 60HZ 1000W 4 LITRES 10-80 kPa 96-110 kPa<br />
EPC650D AC 120V 60HZ 1000W 5 LITRES 10-80 kPa 96-110 kPa<br />
EPC660D AC 120V 60HZ 1000W 6 LITRES 10-80 kPa 96-110 kPa<br />
10<br />
Step 3<br />
Cover with lid.
Care and Cleaning<br />
CLEANING THE SAFETY DEVICES: In addition to the gasket, the other safety devices on the<br />
pressure cooker must also be cleaned after each use.<br />
THE PRESSURE VALVE: To remove the Pressure Valve, simply pull up and valve will release from<br />
it’s spring lock mechanism. Apply mild detergent and wash it under warm running water. After<br />
cleaning, check to see that the interior spring-loaded part moves freely by pressing down on it. Put<br />
the Pressure Valve back in place by pushing it down onto the spring-loaded mechanism. This<br />
appliance requires little maintenance. It contains no user serviceable parts. Do not try to repair it<br />
yourself. Contact customer service for qualified repair information.<br />
TO CLEAN: After use, unplug unit and allow to cool completely before cleaning. The Pressure<br />
Cooker must be cleaned thoroughly after each use in order to avoid staining caused by a build-up of<br />
food or cooking residue.<br />
DO NOT POUR COLD WATER INTO A HOT PRESSURE COOKER.<br />
Note: To ensure safe operation of this pressure cooker, strictly follow the cleaning and maintenance<br />
instructions after each use, should a tiny fragment of food (such as a grain of rice or pea shell)<br />
remain in the unit, it could prevent the safety devices from operating during subsequent use.<br />
IMPORTANT: Always remove the Pressure Valve and clean the opening with pin to remove any<br />
blockage that might have occurred during the cooking process. This must be done after each use.<br />
The removable cooking pot and lid are immersible for cleaning. Rinse cooking pot and lid under hot<br />
running water. Use only a mild liquid detergent and a soft cloth, sponge or nylon scrubber for<br />
cleaning. Do not use abrasive powders, bicarbonate of soda or bleach. Do not use scouring pads.<br />
WIPE BASE AFTER EACH USE WITH A SOFT, DAMP CLOTH OR SPONGE, MAKING SURE<br />
ALL FOOD RESIDUE IS REMOVED. DO NOT IMMERSE BASE IN WATER<br />
When cleaning the lid, the Rubber Gasket must be lifted out and washed separately. Clean all<br />
around The Rubber Gasket housing with a sponge or soft cloth and warm, soapy water. Rinse under<br />
running water. To replace the Rubber Gasket, ease it back into place under the rim of the lid.<br />
• Unplug and let the pressure cooker cool to room temperature before cleaning.<br />
• Wash the removable pot with warm, soapy water and clean with a soft cloth or sponge.<br />
Rinse off with clean water and towel dry.<br />
• Remove the Rubber Gasket from the underside of the self-locking lid, Wash both with<br />
warm, soapy water and clean with a soft cloth or sponge. Rinse off with clean water and towel dry.<br />
• The Rubber Gasket must always be properly positioned on the underside of the lid. Check<br />
periodically to make sure that it is clean, flexible and not torn. If damaged, do not use this unit.<br />
• Wipe the mirror finished outer housing with a damp soft cloth or sponge (glass cleaner gives<br />
housing a brilliant lustre).<br />
• Never use harsh chemical detergents, scouring pads or powders on any of the parts<br />
or components.<br />
• Always check that the Pressure Valve and Float Valve are in good working order and<br />
debris free.<br />
Note: The Rubber Gasket must be replaced every year, or sooner if necessary. The Rubber<br />
Gasket may also need replacing if pressure cooker is not used for a long period of time, as it<br />
can harden from disuse, making it unable to form an airtight seal. The Rubber Gasket must be<br />
replaced only with another one of the correct type and size for this pressure cooker.<br />
11<br />
pressure Cooking Guide<br />
NOTE: All pressure cooking modes with the possible exception of BROWN, require the<br />
addition of liquid in some form (water, stock, etc.). Unless you are familiar with the pressure<br />
cooking process, follow recipes carefully for liquid addition suggestions. A glass lid has been<br />
provided to be used during the Cook, Brown, Steam/Canning modes. Never fill inner pot<br />
above MAX line. Always use Rapid Release button to lower pressure quickly.<br />
Meats Liquid / Cups Approximate Minutes Pressure Setting<br />
Beef/Veal, roast or brisket 3-4 35-40 High<br />
Beef Meatloaf, 2 lbs 1 5-10 Medium<br />
Beef, Corned 4 50-60 High<br />
Pork, roast 1 40-45 High<br />
Pork, ribs, 2 lbs. 3 15 High<br />
Leg of Lamb 2-4 35-40 High<br />
Chicken, whole, 2-3 lbs. 3-4 15-20 High<br />
Chicken, pieces, 2-3 lbs. 3-4 15-20 High<br />
Cornish Hens, two 1 15 High<br />
Meat/Poultry Soup/Stock 4-6 10-15 High<br />
Vegetables Liquid / Cups Approximate Minutes Pressure Setting<br />
Asparagus, thin whole 1 1 -1 1/2 High<br />
Beans, fava 1 4 High<br />
Beans, green 1 2-3 High<br />
Beans, lima 1 2 High<br />
Beets, medium 1 10 High<br />
Broccoli, pieces 1 3 High<br />
Brussel sprouts, whole 1 4 High<br />
Carrots, 1-inch pieces 1 4 High<br />
Corn, on-the-cob 1 3 High<br />
Onions, whole 1 2 High<br />
Potatoes, 1 1/2” chunks 1 6 High<br />
Potatoes, whole, medium 1 10-11 High<br />
Squash, acorn, halved 1 7 High<br />
Squash, summer, zucchini 1 4 High<br />
Seafood / Fish Liquid / Cups Approximate Minutes Pressure Setting<br />
Clams 1 2-3 Medium<br />
Lobster, 1 1/2 - 2 lbs. 1 2-3 Medium<br />
Shrimp 1 1-2 Medium<br />
Fish, Soup or Stock 1-4 5-6 High<br />
12
Frequently asked Questions<br />
1. DOES tHE prESSUrE COOKEr HaVE LEaD In It?<br />
No!<br />
2. WHat tYpE OF StEEL IS tHE UnIt MaDE OF?<br />
Stainless Steel<br />
3. IS It nOrMaL tO HaVE StEaM COME OUt tHE SIDES?<br />
If there is steam coming out the sides and the button on top of the lid<br />
is in the closed position, then the lid has not seated. This sometimes<br />
happens when the unit is new or when the Rubber Gasket is not in<br />
place around the inside of the rim. If the gasket is in place try pushing<br />
down on the lid. This should seal the lid and the steam should stop<br />
coming out.<br />
4. HOW DO YOU aSSEMBLE/DISaSSEMBLE tHE UnIt?<br />
See Diagram on page 8 of this manual.<br />
5. WHY WOULD tHE LID COME OFF WHEn It SHOULDn’t?<br />
It would only come off if there was no pressure inside,<br />
see answer to question 3 above.<br />
6. WHat IS tHE DEFaULt tIME?<br />
Each Cooking Mode has a default time that appears as soon as you<br />
select that desired Mode button. Before the Default Time “minute<br />
count down” clock begins, the unit must first reach the proper<br />
pressure and or temperature for that Mode.<br />
7. Can YOU LEaVE tHE UnIt On WHILE at WOrK?<br />
Yes!<br />
8. Can YOU pUt FrOZEn FOODS In WItHOUt DEFrOStInG?<br />
Yes, remember to add an extra 10 minutes for frozen meats.<br />
9. WHY DOES tHE DELaY tIME OnLY Start at 4 HOUrS?<br />
This is default time for Delay Time Mode (see page 6). Press the<br />
Delay Time button and set desired time ... 4-12 hours.<br />
Manufacturer’s Limited Warranty<br />
The manufacturer warrants that your Living Well Pressure Cooker is free of<br />
defects in materials and workmanship and will, at its option, repair or replace<br />
any defective Living Well Pressure Cooker that is returned to it. All parts and<br />
components of the Living Well Pressure Cooker are warranted for 60 days from<br />
the original date of purchase. This warranty is valid only in accordance with the<br />
conditions set forth below:<br />
1. Normal wear and tear are not covered by this warranty. This warranty applies<br />
to consumer use only, and is void when the product is used in a commercial<br />
or institutional setting.<br />
2. The warranty extends only to the original consumer purchaser and is not<br />
transferable. In addition, proof of purchase must be demonstrated. This<br />
warranty is void if the product has been subject to accident, misuse, abuse,<br />
improper maintenance or repair, or unauthorized modification.<br />
3. This limited warranty is the only written or express warranty given by the<br />
manufacturer. Any implied warranty of merchantability or fitness for a<br />
particular purpose on this product is limited in duration to the duration of<br />
this warranty. Some states do not allow limitations on how long an implied<br />
warranty lasts, so the above limitation may not apply to you.<br />
4. Repair or replacement of the product (or, if repair or replacement is not<br />
feasible, a refund of the purchase price) is the exclusive remedy of the<br />
consumer under this warranty. The manufacturer shall not be liable for<br />
any incidental or consequential damages for breach of this warranty or any<br />
implied warranty on this product. Some states do not allow the exclusion or<br />
limitation of incidental or consequential damages,<br />
so the above limitation or exclusion may not apply to you.<br />
5. This warranty gives you specific legal rights, and you may also have other<br />
rights which vary from state to state.<br />
Procedure for Warranty Repairs or Replacement:<br />
If warranty service is necessary, the original purchaser must pack the product<br />
securely and send it postage paid with a description of the defect, proof of purchase,<br />
and a check or money order for $24.99 to cover return postage and handling<br />
to the following address: Living Well Pressure Cooker, P.O. Box 3007,<br />
Wallingford, CT 06492.<br />
13 14
We are very proud of the design<br />
and quality of our<br />
This product has been manufactured<br />
to the highest standards.<br />
Should you have any problem,<br />
our friendly customer service staff<br />
is here to help you.<br />
1-800-718-5135<br />
Distributed By:<br />
tristar products, Inc.<br />
Fairfield, NJ 07004<br />
© 2009 Tristar Products, Inc.<br />
LWPC_INST_TP_ENG_v1.090624