

Owner's Manual - Air & Water
Owner's Manual - Air & Water
Owner's Manual - Air & Water

Create successful ePaper yourself
Turn your PDF publications into a flip-book with our unique Google optimized e-Paper software.
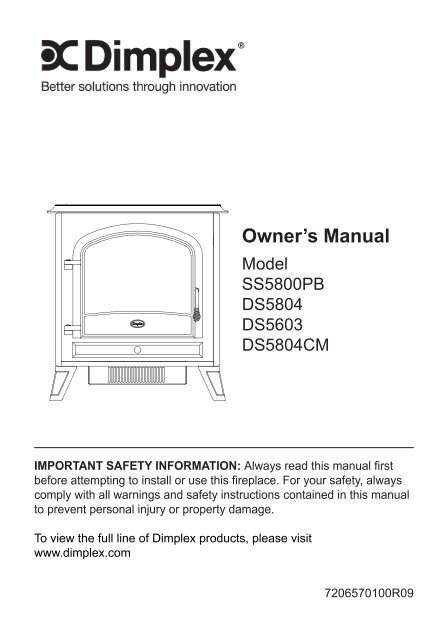
Owner’s <strong>Manual</strong><br />
Model<br />
SS5800PB<br />
DS5804<br />
DS5603<br />
DS5804CM<br />
IMPORTANT SAFETY INFORMATION: Always read this manual first<br />
before attempting to install or use this fireplace. For your safety, always<br />
comply with all warnings and safety instructions contained in this manual<br />
to prevent personal injury or property damage.<br />
To view the full line of Dimplex products, please visit<br />
www.dimplex.com<br />
7206570100R09
Table of Contents<br />
Welcome & Congratulations . . . . . . . . . . . . . . . . .3<br />
IMPoRtant InStRuCtIonS . . . . . . . . . . . . . . .4<br />
Stove Installation ..........................7<br />
operation . . . . . . . . . . . . . . . . . . . . . . . . . . . . . . . .8<br />
Maintenance . . . . . . . . . . . . . . . . . . . . . . . . . . . .10<br />
Warranty . . . . . . . . . . . . . . . . . . . . . . . . . . . . . . .13<br />
Replacement Parts . . . . . . . . . . . . . . . . . . . . . . . .16<br />
Always use a qualified technician<br />
or service agency to repair<br />
this stove.<br />
! NOTE: Procedures and<br />
techniques that are<br />
considered important<br />
enough to emphasize.<br />
CAUTION: Procedures and<br />
techniques which, if not<br />
carefully followed, will result<br />
in damage to the equipment.<br />
WARNINg: Procedures<br />
and techniques which, if not<br />
carefully followed, will expose<br />
the user to the risk of fire,<br />
serious injury, or death.<br />
2 www.dimplex.com
Welcome & Congratulations<br />
Thank you and congratulations for choosing to purchase an electric<br />
fireplace from Dimplex, the world leader in electric fireplaces.<br />
Please carefully read and save these instructions.<br />
CAUTION: Read all instructions and warnings carefully before<br />
starting installation. Failure to follow these instructions may result in a<br />
possible electric shock, fire hazard and will void the warranty.<br />
Please record your model and serial numbers below for future<br />
reference: model and serial numbers can be found on the Model and<br />
Serial Number Label of your stove.<br />
NO NEED TO RETURN TO THE STORE<br />
Model Number<br />
Questions with operation or assembly? Require Parts Information?<br />
Product Under Manufacturer’s Warranty?<br />
Contact us at: www.dimplex.com/customer_support<br />
For Troubleshooting and Technical Support<br />
OR Toll-Free 1-888-DIMPLEX (1-888-346-7539)<br />
Monday to Friday 8:00 a.m. to 4:30 p.m. EST<br />
Please have your model number and product serial<br />
number ready. (See above)<br />
3
! NOTE: this equipment has<br />
been tested and found to comply<br />
with the limits for Class B digital<br />
device, pursuant to part 15 of<br />
the FCC Rules. These limits are<br />
designed to provide reasonable<br />
protection against harmful<br />
interference in a residential<br />
installation. This equipment<br />
generates, uses and can radiate<br />
radio frequency energy and, if not<br />
installed and used in accordance<br />
with the instructions, may cause<br />
harmful interference to radio or<br />
television reception, which can<br />
be determined by turning the<br />
equipment off and on, the user is<br />
encouraged to try to correct the<br />
interference by one or more of<br />
the following measures:<br />
•<br />
IMPORTANT INSTRUCTIONS<br />
Reorient or relocate the<br />
receiving antenna.<br />
Increase the separation<br />
between the equipment and<br />
the receiver.<br />
6 www.dimplex.com<br />
•<br />
•<br />
•<br />
Connect the equipment into<br />
an outlet on a circuit different<br />
from that to which the receiver<br />
is connected.<br />
Consult the dealer or an<br />
experienced radio/TV<br />
technician for help.<br />
Operation is subject to the<br />
following two conditions: (1)<br />
this device may not cause<br />
interference and; (2) this device<br />
must accept any interference,<br />
including interference that may<br />
cause undesired operation of the<br />
device.
Stove Installation<br />
! NOTE: A 15amp, 120 volt<br />
alternating current (VAC) circuit<br />
is required. A dedicated circuit is<br />
preferred but not essential in all<br />
cases. A dedicated circuit will be<br />
required if, after installation, the<br />
circuit breaker trips or fuse blows<br />
on a regular basis when the<br />
heater is operating. Additional<br />
appliances on the same circuit<br />
may exceed the current rating of<br />
the circuit breaker.<br />
WARNINg: Ensure the power<br />
cord is not installed so that it is<br />
pinched or against a sharp edge<br />
and ensure that the power cord<br />
is stored or secured to avoid<br />
tripping or snagging to reduce the<br />
risk of fire, electric shock or injury<br />
to persons.<br />
WARNINg:Construction<br />
and electrical outlet wiring must<br />
comply with local building codes<br />
and other applicable regulations<br />
to reduce the risk of fire, electric<br />
shock and injury to persons.<br />
WARNINg:Do not attempt<br />
to wire your own new outlets or<br />
circuits. To reduce the risk of fire,<br />
electric shock or injury to persons,<br />
always use a licensed electrician.<br />
1.<br />
2.<br />
Make sure the units Main On/<br />
Off switch is switched Off<br />
(refer to operating instruction<br />
section).<br />
Plug the unit directly into a 15<br />
Amp/120 Volt outlet.<br />
7
Operation<br />
Figure 1<br />
To access the controls go to the<br />
back of the Stove (Figure 1).<br />
A. Three Position On/Off<br />
Switch<br />
The switch has two On positions<br />
marked with “-” and “=”. The “-”<br />
position is for manual operation.<br />
In this position, the built-in remote<br />
control is bypassed.<br />
the “=” position is for operating<br />
the unit with the provided remote<br />
control. When in “=” position<br />
the unit is operated with the on<br />
and OFF buttons of the remote<br />
control.<br />
B<br />
A<br />
C<br />
When the switch is in the center<br />
position the unit is off.<br />
B. Heater On/Off Switch<br />
The Heater On/Off Switch<br />
supplies power to the heater fan<br />
and the heater element.<br />
C. Heater Thermostat Control<br />
to adjust the temperature to<br />
your individual requirements,<br />
turn the thermostat control<br />
clockwise all the way to turn<br />
on the heater. When the room<br />
reached the desired temperature,<br />
turn the thermostat knob counter<br />
clockwise until you hear a click.<br />
Leave in this position to maintain<br />
the room temperature at this<br />
setting. For additional heat, turn<br />
clockwise until you hear the click<br />
again and the heater will turn on.<br />
To turn the heater off, switch the<br />
Heater On/Off Switch to the Off<br />
position.<br />
! NOTE: When the heater is<br />
switched On, the heater fan will<br />
operate. The heater element may<br />
or may not be on, depending on<br />
the thermostat control setting.<br />
8 www.dimplex.com
2.<br />
3.<br />
4.<br />
Maintenance<br />
handle.<br />
Locate the upper bulb<br />
bracket.Bend light retainer<br />
bracket down.Locate and<br />
remove the light bulb.Insert<br />
new bulb.<br />
Bend light retainer bracket<br />
back into its original position.<br />
Close the door.<br />
Lower Light Bulb Requirements<br />
Quantity of two (2) clear<br />
chandelier or candelabra bulbs<br />
with an E-12 (small) socket base,<br />
60 Watt rating.<br />
Lower Bulb Replacement<br />
1.<br />
2.<br />
3.<br />
4.<br />
5.<br />
open door by pulling the<br />
handle.Remove the screw<br />
from the log set located in the<br />
center of the ember bed and<br />
remove the log set from the<br />
unit.<br />
Locate and examine the bulbs<br />
to determine which bulb(s)<br />
required replacement.<br />
Locate and remove the light<br />
bulb(s).<br />
Insert new bulb(s).<br />
Install the log set into the<br />
unit, pushing firmly against<br />
the glass. Replace the log<br />
set retaining screw into the<br />
6.<br />
ember bed.<br />
Close the door.<br />
glass Cleaning<br />
The clear door is cleaned in<br />
the factory during the assembly<br />
operation. During shipment,<br />
installation, handling, etc., the<br />
clear door may collect dust<br />
particles, these can be removed<br />
by dusting lightly with a clean dry<br />
cloth.<br />
To remove fingerprints or other<br />
marks, the clear door can be<br />
cleaned with a damp cloth. The<br />
clear door should be completely<br />
dried with a lint free cloth to<br />
prevent water spots. To prevent<br />
scratching, do not use abrasive<br />
cleaners or spray liquids on the<br />
clear door surface.<br />
Plastic Door Cleaning<br />
To remove fingerprints or other<br />
marks, the clear door can be<br />
cleaned with a damp cloth. The<br />
clear door should be completely<br />
dried with a lint free cloth to<br />
prevent water spots. To prevent<br />
scratching, do not use abrasive<br />
cleaners or spray liquids on the<br />
clear door surface.<br />
11
Maintenance<br />
Brass Door Cleaning<br />
To remove fingerprints or other<br />
marks, the clear door can be<br />
cleaned with a damp cloth. The<br />
clear door should be completely<br />
dried with a lint free cloth to<br />
prevent water spots. To prevent<br />
scratching, do not use abrasive<br />
cleaners or spray liquids on the<br />
clear door surface.<br />
Nickel Door Cleaning<br />
To remove fingerprints or other<br />
marks, the clear door can be<br />
cleaned with a damp cloth. The<br />
clear door should be completely<br />
dried with a lint free cloth to<br />
prevent water spots. To prevent<br />
scratching, do not use abrasive<br />
cleaners or spray liquids on the<br />
clear door surface.<br />
Stove Surface Cleaning<br />
Use warm water only to clean<br />
painted surfaces of the Compact<br />
Stove. Do not use abrasive<br />
cleaners.<br />
Servicing<br />
WARNINg: Except for light<br />
bulb replacement and cleaning<br />
described above, an authorized<br />
service representative should<br />
perform any other servicing.<br />
12 www.dimplex.com
Warranty<br />
Products to which this limited<br />
warranty applies<br />
this limited warranty applies to<br />
the following models of your newly<br />
purchased Dimplex electric stove<br />
SS5800PB, DS5804, DS5603,<br />
DS5804CM and to newly purchased<br />
Dimplex fireplace surrounds<br />
(mantels) and trims. This limited<br />
warranty applies only to purchases<br />
made in any province of Canada<br />
except for Yukon Territory, Nunavut,<br />
or northwest territories or in any<br />
of the 50 States of the uSa (and<br />
the District of Columbia) except for<br />
Hawaii and Alaska. This limited<br />
warranty applies to the original<br />
purchaser of the product only and is<br />
not transferable.<br />
Products excluded from this limited<br />
warranty<br />
Light bulbs are not covered by<br />
this limited warranty and are the<br />
sole responsibility of the owner/<br />
purchaser. Products purchased in<br />
Yukon Territory, Nunavut, Northwest<br />
Territories, Hawaii, or Alaska are<br />
not covered by this limited warranty.<br />
Products purchased in these States,<br />
provinces, or territories are sold<br />
AS IS without warranty or condition<br />
of any kind (including, without<br />
limitation, any implied warranties<br />
or conditions of merchantability or<br />
fitness for a particular purpose) and<br />
the entire risk of as to the quality and<br />
performance of the products is with<br />
the purchaser, and in the event of a<br />
defect the purchaser assumes the<br />
entire cost of all necessary servicing<br />
or repair.<br />
What this limited warranty covers<br />
and for how long<br />
Products covered by this limited<br />
warranty have been tested and<br />
inspected prior to shipment and,<br />
subject to the provisions of this<br />
warranty, Dimplex warrants such<br />
products to be free from defects<br />
in material and workmanship for a<br />
period of 12 months from the date of<br />
the first purchase of such product.<br />
the limited 12 month warranty period<br />
also applies to any implied warranties<br />
that may exist under applicable<br />
law. Some jurisdictions do not allow<br />
limitations on how long an implied<br />
warranty lasts, so the above limitation<br />
may not apply to the purchaser.<br />
What this limited warranty does not<br />
cover<br />
this limited warranty does not apply<br />
to products that have been repaired<br />
(except by Dimplex or its authorized<br />
service representatives) or otherwise<br />
altered. This limited warranty does<br />
further not apply to defects resulting<br />
from misuse, abuse, accident,<br />
neglect, incorrect installation,<br />
improper maintenance or handling,<br />
or operation with an incorrect power<br />
source.<br />
13
Warranty<br />
What you must do to get service<br />
under this limited warranty<br />
Defects must be brought to the<br />
attention of Dimplex Technical<br />
Service by contacting Dimplex at<br />
1-888-DIMPLEX (1-888-346-7539),<br />
or 1367 Industrial Road, Cambridge<br />
Ontario, Canada N1R 7G8. Please<br />
have proof of purchase, catalogue/<br />
model and serial numbers available<br />
when calling. Limited warranty<br />
service requires a proof of purchase<br />
of the product.<br />
What Dimplex will do in the event of<br />
a defect<br />
In the event a product or part<br />
covered by this limited warranty is<br />
proven to be defective in material or<br />
workmanship during the 12 month<br />
limited warranty period you have the<br />
following rights:<br />
•<br />
•<br />
Dimplex will in its sole discretion<br />
either repair or replace such<br />
defective product or part without<br />
charge. If Dimplex is unable to<br />
repair or replace such product or<br />
part, or if repair or replacement<br />
is not commercially practicable<br />
or cannot be timely made,<br />
Dimplex may, in lieu of repair or<br />
replacement, choose to refund<br />
the purchase price for such<br />
product or part.<br />
Limited warranty service will<br />
be performed solely by dealers<br />
or service agents of Dimplex<br />
authorized to provide limited<br />
warranty services.<br />
The purchaser is responsible<br />
for removal and transportation<br />
of such product or part (and<br />
any repaired or replacement<br />
product or part) to and from the<br />
authorized dealer’s or service<br />
agent’s place of business.<br />
14 www.dimplex.com<br />
•<br />
•<br />
•<br />
this limited warranty does not<br />
entitle the purchaser to on-site<br />
or in-home services. On-site<br />
or in-home services may be<br />
performed at the purchaser’s<br />
specific request and expense at<br />
Dimplex’s then-current rates for<br />
such services.<br />
Dimplex will not be responsible<br />
for, and the limited warranty<br />
services shall not include, any<br />
expense incurred for installation<br />
or removal of the product<br />
or part (or any replacement<br />
product or part) or any labour<br />
or transportation costs. Such<br />
costs shall be the purchaser’s<br />
responsibility.<br />
What Dimplex and its dealers<br />
and service agents are also not<br />
responsible for:<br />
IN NO EVENT WILL DIMPLEX,<br />
OR ITS DIRECTORS, OFFICERS,<br />
OR AGENTS, BE LIABLE to<br />
THE PURCHASER OR ANY<br />
THIRD PARTY, WHETHER IN<br />
CONTRACT, IN TORT, OR ON
Warranty<br />
ANY OTHER BASIS, FOR ANY<br />
INDIRECT, SPECIAL, PUNITIVE,<br />
EXEMPLARY, CONSEQUENTIAL,<br />
OR INCIDENTAL LOSS, COST,<br />
OR DAMAGE ARISING OUT OF<br />
OR IN CONNECTION WITH THE<br />
SALE, MAINTENANCE, USE,<br />
OR INABILITY TO USE THE<br />
PRODUCT, EVEN IF DIMPLEX OR<br />
ITS DIRECTORS, OFFICERS, OR<br />
AGENTS HAVE BEEN ADVISED<br />
OF THE POSSIBILITY OF SUCH<br />
LOSSES, COSTS OR DAMAGES,<br />
OR IF SUCH LOSSES, COSTS, OR<br />
DAMAGES ARE FORESEEABLE.<br />
IN NO EVENT WILL DIMPLEX,<br />
OR ITS OFFICERS, DIRECTORS,<br />
OR AGENTS BE LIABLE FOR<br />
ANY DIRECT LOSSES, COSTS,<br />
OR DAMAGES THAT EXCEED<br />
THE PURCHASE PRICE OF THE<br />
PRODUCT.<br />
SOME JURISDICTIONS DO NOT<br />
ALLOW THE EXCLUSION OR<br />
LIMITATION OF INCIDENTAL OR<br />
CONSEQUENTIAL DAMAGES,<br />
SO THE ABOVE LIMITATION OR<br />
EXCLUSION MAY NOT APPLY TO<br />
THE PURCHASER.<br />
How State and Provincial law apply<br />
this limited warranty gives you<br />
specific legal rights, and you may<br />
also have other rights which vary<br />
from jurisdiction to jurisdiction. The<br />
provisions of the united nations<br />
Convention on Contracts for the<br />
Sale of Goods shall not apply to<br />
this limited warranty or the sale of<br />
products covered by this limited<br />
warranty.<br />
15
Replacement Parts<br />
FLICKER MOTOR ...................................2000210100RP<br />
(SS5800PB Flicker Motor) ...........................2000140100RP<br />
HEATER ASSEMBLY . . . . . . . . . . . . . . . . . . . . . . . . . . . . . . . .2200490700RP<br />
(SS5800PB Heater assembly) ........................2000230100RP<br />
CaPaCItoR . . . . . . . . . . . . . . . . . . . . . . . . . . . . . . . . . . . . . . .2300030100RP<br />
THERMOSTAT . . . . . . . . . . . . . . . . . . . . . . . . . . . . . . . . . . . . .2300150100RP<br />
3 POSITION ON/OFF/ON SWITCH . . . . . . . . . . . . . . . . . . . . .2800071100RP<br />
HEATER ON/OFF SWITCH . . . . . . . . . . . . . . . . . . . . . . . . . . .2800070200RP<br />
TERMINAL BLOCK ..................................4000070100RP<br />
CORD SET . . . . . . . . . . . . . . . . . . . . . . . . . . . . . . . . . . . . . . . .4100040900RP<br />
SINGLE LAMP HOLDER ..............................4200121000RP<br />
MIRRoR . . . . . . . . . . . . . . . . . . . . . . . . . . . . . . . . . . . . . . . . . .5900060400RP<br />
REFLECTOR ASSEMBLY .............................5900080500RP<br />
CONTROL KNOB . . . . . . . . . . . . . . . . . . . . . . . . . . . . . . . . . . .8800000300RP<br />
REMOTE CONTROL .................................3000370500RP<br />
REMOTE RECEIVER . . . . . . . . . . . . . . . . . . . . . . . . . . . . . . . 3000380200RP<br />
Dimplex North America Limited<br />
1367 Industrial Road<br />
Cambridge on<br />
Canada n1R 7G8<br />
© 2011 Dimplex North America Limited<br />
16 www.dimplex.com


