
Create successful ePaper yourself
Turn your PDF publications into a flip-book with our unique Google optimized e-Paper software.
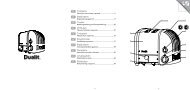
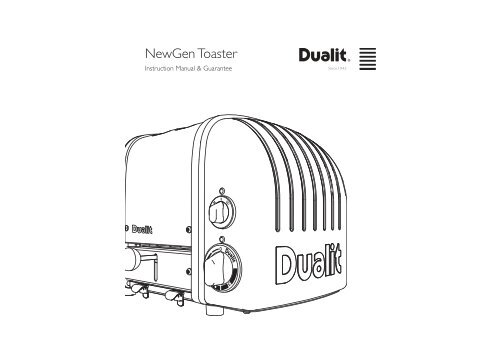
<strong>NewGen</strong> Toaster<br />
Instruction <strong>Manual</strong> & Guarantee
TOASTING SINCE 1945<br />
For over sixty five years, <strong>Dualit</strong> toasters have reflected an attitude that’s fundamentally<br />
British. They are a symbol of the fact that it’s the simple things in life that are the most<br />
rewarding and the most important.<br />
<strong>Dualit</strong> toasters can turn out hundreds of crisp,<br />
golden slices per hour. They are gleaming, sturdy<br />
and tough as old boots. And as much a part of<br />
British life as toast itself.<br />
It should come as no surprise that the man who<br />
invented the <strong>Dualit</strong> toaster was an engineer. In<br />
1946, Max Gort-Barten produced the original<br />
<strong>Dualit</strong> toaster from his workshop just off<br />
London’s Old Kent Road.<br />
Combining strength, versatility and ingenuity it<br />
was a toaster that set new standards, soon<br />
followed by a commercial toaster, incorporating<br />
a time switch among its many (entirely) original<br />
features.<br />
<strong>Manual</strong>ly operated and designed for heavy-duty use, each <strong>Dualit</strong> toaster is a blend of the<br />
simple and highly sophisticated. Each toaster is assembled by hand, much as it always was.<br />
The assembler’s individual number will be found on the base plate.<br />
In an age in which so much becomes obsolete overnight, the <strong>Dualit</strong> toaster is built without<br />
compromise. It remains one of the few objects to survive the passing of the years with<br />
grace and style.<br />
CONTENTS<br />
Safety precautions<br />
Before first use<br />
Knowing your toaster<br />
Accessories<br />
sandwich cage<br />
warming rack<br />
Toasting tips<br />
Height adjustable foot<br />
The Selector (2 slot model)<br />
The Selector (4 slot model)<br />
Toasting<br />
Toasting frozen bread<br />
Making toasted sandwiches<br />
Cleaning and care<br />
Replacement parts<br />
Replacing elements<br />
Troubleshooting<br />
Guarantee<br />
2 3<br />
4<br />
5<br />
6<br />
8<br />
9<br />
9<br />
10<br />
11<br />
12<br />
13<br />
14<br />
15<br />
16<br />
17<br />
18<br />
19
SAFETY PRECAUTIONS<br />
READ ALL<br />
INSTRUCTIONS<br />
BEFORE USING THE TOASTER<br />
KEEP THESE INSTRUCTIONS FOR<br />
FUTURE REFERENCE<br />
WARNING: This appliance must be<br />
earthed.<br />
We recommend that the toaster is<br />
plugged into a socket that has no other<br />
appliance connected to it.<br />
Failure to do this may cause an<br />
overload, trip a circuit breaker or blow<br />
a fuse. Preferably the socket outlet<br />
should be protected by a Residual<br />
Current device (RCD)<br />
Before plugging in, check that the<br />
voltage on the rating label is the same<br />
as the mains supply.<br />
To protect against electric shock, do not<br />
immerse any part of this product in<br />
water or other liquid.<br />
Unplug from outlet when not in use<br />
and before cleaning. Allow to cool<br />
before putting on or taking off parts.<br />
Do not operate the appliance with a<br />
damaged cord or plug.<br />
Do not allow cable to touch hot<br />
surfaces, or to hang over edge of a<br />
table or counter top.<br />
When in use a fire may occur if the<br />
toaster is covered or touching<br />
flammable material.<br />
4<br />
Do not attempt to dislodge bread<br />
when the toaster is plugged in.<br />
Bread may burn. Therefore toasters<br />
must not be used near or below<br />
curtains and other combustible<br />
materials.<br />
When toasting do not leave appliance<br />
unattended.<br />
THIS IS AN ATTENDED APPLIANCE<br />
This appliance is not intended for use<br />
by persons (including children) with<br />
reduced physical, sensory or mental<br />
capabilities, or lack of experience and<br />
knowledge, unless they have been given<br />
supervision or instruction concerning<br />
use of the appliance by a person<br />
responsible for their safety.<br />
Children should be supervised to<br />
ensure that they do not play with this<br />
appliance.<br />
Do not store toaster in an appliance<br />
garage or under cupboards.<br />
Do not use outdoors.<br />
The toaster is not intended to be<br />
operated by means of an external timer<br />
or separate remote-control system.<br />
Accessible surfaces of the toaster may<br />
get hot during use.<br />
NOTE: Any plug cut from power supply<br />
cord should be disposed of<br />
immediately. Inserting any cut off Plug<br />
into a 13A socket-outlet is hazardous.<br />
Never use the plug without the fuse<br />
cover fitted. Ensure replacement fuse is<br />
the same current value as original.<br />
Replacement fuses should be ASTA<br />
approved to BS 1362.<br />
Do not operate any appliance with a<br />
damaged lead or plug, or after the<br />
appliance malfunctions, or has been<br />
damaged in any manner.<br />
If the supply cord is damaged, it must<br />
be replaced by the manufacturer, its<br />
service agent or similarly qualified<br />
persons in order to avoid a hazard.<br />
SAVE THESE<br />
INSTRUCTIONS<br />
Accessible surfaces of<br />
the toaster may get<br />
hot during use.<br />
In the interest of improving products, <strong>Dualit</strong> Ltd. reserves the<br />
right to change the product specification without prior notice.<br />
5<br />
IMPORTANT -<br />
BEFORE USING<br />
Your <strong>Dualit</strong> toaster has patented ProHeat<br />
elements. These elements need to be<br />
conditioned before toasting for the very<br />
first time. Then continue to toast as per the<br />
instructions.<br />
Set the selector switch so ALL the slots<br />
are active, with NO bread in the slots, turn<br />
the timer all the way round and let it run<br />
back to the off position.<br />
Some smoke may vent from the slots,<br />
THIS IS NOT A FAULT and is perfectly<br />
safe. There may be a slight popping crinkling<br />
sound, this is due to heat expansion of the<br />
elements and is perfectly normal.<br />
Your toaster is now conditioned and ready<br />
for use.
KNOW YOUR TOASTER<br />
Unpack the box with care, keeping all the packaging<br />
materials until you are satisfied everything is present and in<br />
working order. Once satisfied remove any tags from the<br />
toaster and recycle the packaging appropriately.<br />
PROHEAT ELEMENTS<br />
Patented heavy duty<br />
replaceable elements.<br />
STAINLESS STEEL<br />
COVER<br />
MANUAL EJECTOR<br />
Mechanical Peek & Pop ejector<br />
for greater toasting control.<br />
CRUMB TRAY<br />
Keeps your work surfaces clear<br />
of crumbs.<br />
6<br />
WIDE SLOTS<br />
Wide slots to fit thick bread,<br />
buns and sandwich cages.<br />
7<br />
ALUMINIUM CASTINGS<br />
Heavy duty cast aluminium castings.<br />
SELECTOR SWITCH<br />
Select number of slices or buns<br />
you are toasting.<br />
2 Slot model 4 Slot model<br />
POWER NEON<br />
Illuminates when toasting.<br />
MECHANICAL TIMER<br />
WITH DEFROST<br />
Timer controlled defrost and<br />
toasting.<br />
FEET<br />
Compensate for uneven<br />
surfaces.<br />
All illustrations are for representation only, your<br />
model may have a different selector switch and<br />
number of slots from illustrations shown.
ACCESSORIES - SOLD SEPARATELY<br />
THE SANDWICH CAGE<br />
Convert your toaster into a toasted sandwich maker with<br />
this quick and easy to use accessory.<br />
Using a cage also offers greater toasting control, for<br />
toasting smaller items such as crumpets, scones, teacakes<br />
or muffins.<br />
THE WARMING RACK<br />
The ‘warming rack’ is a universal accessory for all <strong>Dualit</strong><br />
<strong>NewGen</strong> Toasters.<br />
Perfect for warming or lightly toasting any bread product<br />
that will not fit inside the slots. Items like croissants, scones,<br />
pastries or tortillas are just a few.<br />
8<br />
TOASTING TIPS<br />
Here are a few tips to help get the best out of your toaster.<br />
FULLY LOAD ALL HEATED UP SLOTS. If a slot is heated but no bread is<br />
inserted, the bread in the adjacent slot will toast unevenly.<br />
ALWAYS LOAD YOUR SLOTS STARTING FROM THE LEFT.<br />
DIFFERENT BREADS WILL TOAST AT DIFFERENT RATES, wholemeal<br />
bread take longer than white bread, fresh bread will take longer than day old bread.<br />
Remember to adjust your timer to allow for your particular type of bread.<br />
After the first round of toast, the elements and toaster body will be at full operating<br />
temperature, subsequent rounds will take less time to toast.<br />
Use the bagel setting to toast burger buns, bagels, muffins or tea cakes, this setting<br />
toasts one side whilst gently warming the other.<br />
The thickest slice of bread that will fit in your toaster is 28mm thick. Forcing bread<br />
which is too thick or too long into the slots will be difficult to eject once toasted.<br />
You may find it easier to use a ‘sandwich cage’ to toast smaller items. Inserting, checking<br />
and removing will all be easier (sold separately).<br />
When hand cutting a fresh loaf, cut the slices as evenly as possible. Uneven slices will<br />
toast unevenly.<br />
Keep elements free from breadcrumbs and broken pieces of bread. If left these may<br />
burn out the elements. With the toaster unplugged use a soft brush to clean inside<br />
your toaster, do not use a knife!<br />
To reheat recently made toast set timer to ‘defrost’ symbol.<br />
Cancel toasting manually at any time by rotating the timer back to ‘O’.<br />
This will not damage your timer.<br />
HEIGHT ADJUSTABLE FOOT<br />
Your toaster is fitted with one adjustable foot which<br />
may be raised or lowered to compensate for uneven<br />
surfaces.<br />
The adjustable foot is located on the base of the toaster<br />
and is hexagonal in shape, rotate it to adjust the height.<br />
9
THE SELECTOR (2 SLOT MODEL)<br />
ONLY HEAT UP SLOTS YOU ARE GOING TO USE.<br />
This avoids uneven toasting and saves energy at the same time.<br />
1 ONE SLICE 2 TWO SLICE 3 ONE BAGEL<br />
Rotate the ‘selector switch’<br />
clockwise to the one slice<br />
indicator.<br />
Only the left hand slot will<br />
toast on both sides.<br />
Rotate the ‘selector switch’<br />
clockwise to the two slice<br />
indicator.<br />
Both slots will toast on both<br />
sides.<br />
10<br />
ACTIVE<br />
ELEMENT<br />
Rotate the ‘selector switch’<br />
anti-clockwise to the bagel<br />
indicator.<br />
Only the centre element will<br />
heat up. Ensure the cut side<br />
of your bagel or bun is facing<br />
the active centre element.<br />
THE SELECTOR (4 SLOT MODEL)<br />
ONLY HEAT UP SLOTS YOU ARE GOING TO USE.<br />
This avoids uneven toasting and saves energy at the same time.<br />
1 2<br />
ONE SLICE TWO SLICE<br />
Rotate the ‘selector switch’<br />
clockwise to the one slice<br />
indicator. The left hand slot<br />
will heat up on both sides.<br />
Rotate the ‘selector switch’<br />
clockwise to the four slice<br />
indicator. All slots will heat<br />
up.<br />
Rotate to the two slice<br />
indicator. The first two slots<br />
from the left will toast on<br />
both sides.<br />
5 3 ONE BAGEL 6<br />
ACTIVE<br />
ELEMENT<br />
Rotate the ‘selector switch’<br />
anti-clockwise to the one<br />
bagel symbol. Only the<br />
second element from the<br />
left will heat up.<br />
11<br />
4<br />
THREE SLICE<br />
Rotate the ‘selector switch’<br />
clockwise to the three slice<br />
indicator. The first three slots<br />
from the left will toast on<br />
both sides.<br />
FOUR SLICE TWO BAGEL<br />
ACTIVE<br />
ELEMENTS<br />
Rotate the ‘selector switch’<br />
anti-clockwise to the two<br />
bagel symbol. Only the<br />
second and forth element<br />
from the left will heat up.
TOASTING<br />
The longer the bread is in the toaster the darker the toast will become. After a few goes,<br />
you will quickly get to know where to set the ‘timer’ for your particular bread.<br />
1 2<br />
FROM COLD FURTHER ROUNDS<br />
When the toaster is cold and being used for the first time<br />
set the ‘timer’ to the ‘circle’ indicator, the extra time is<br />
because the metal body will absorb some heat. After the<br />
toaster has warmed up, slightly reduce the toasting time to<br />
give consistent results.<br />
4 5 6<br />
PEEK & POP STOP TOASTING EJECT<br />
Check the progress of your<br />
toast at any time by pushing<br />
down on the ‘ejector knob’.<br />
The ‘timer’ will click off from<br />
0.5 to 0 position. You can<br />
Cancel toasting manually at<br />
any time by rotating the the<br />
‘timer’ back to ‘O’.<br />
12<br />
Set ‘timer’ to desired level.<br />
1.5 = Lightly toasted<br />
2.0 = Medium toast<br />
2.5 = Well done toast.<br />
The toast will not pop up,<br />
but will keep warm inside<br />
the toaster. Press down the<br />
‘ejector knob’ and the toast<br />
will pop up ready for<br />
serving.<br />
TOASTING FROZEN BREAD<br />
Toast bread directly from the freezer with this handy setting.<br />
1 2<br />
SELECTOR DEFROST<br />
Rotate the ‘selector switch’<br />
clockwise to the desired<br />
number slots you require<br />
and insert your frozen slices<br />
of bread.<br />
4 READY<br />
Your bread will now be<br />
defrosted and ready for<br />
toasting.<br />
Rotate the ‘Timer’ to the<br />
defrost symbol and let the<br />
timer wind down to ‘0’.<br />
5 AFTER DEFROSTED<br />
13<br />
3 WAIT<br />
When the timer stops wait<br />
20 seconds.<br />
Wind the ‘timer’ to the ‘2’ indicator for well done toast<br />
or ‘1.5’ for medium toast.<br />
Then continue to toast as if toasting fresh bread as shown<br />
on previous page.
MAKING TOASTED SANDWICHES<br />
The sandwich cage accessory will transform your toaster into a versatile sandwich toaster.<br />
1 2 3<br />
BUTTER BREAD CREATE INSERT<br />
Use medium sliced bread,<br />
lightly butter the OUTSIDE<br />
OF EACH SLICE.<br />
4 5 6<br />
Toast until the sandwich is<br />
golden. Setting 3 on the<br />
‘timer’. Adjust for your<br />
bread type.<br />
Place your fillings between<br />
the unbuttered sides.<br />
DO NOT OVERFILL<br />
THE SANDWICH.<br />
Place sandwich in cage.<br />
Allow to rest for a further<br />
minute inside the toaster to<br />
allow fillings to fully warm.<br />
14<br />
Set ‘selector’ and starting<br />
from the left insert cage into<br />
the slots. Push down until<br />
clamped tightly shut.<br />
TOAST REST CUT & SERVE<br />
Remove, Cut and Serve.<br />
CAUTION: FILLINGS<br />
CAN BE HOT.<br />
CLEANING & CARE<br />
IMPORTANT: ENSURE THE TOASTER IS UNPLUGGED AND<br />
ALLOWED TO FULLY COOL BEFORE STARTING TO CLEAN.<br />
1 2<br />
THE COVER THE CASTINGS<br />
AFTER EACH USE<br />
Wipe the ‘stainless steel cover’ with a non-abrasive cloth.<br />
A stainless steel cleaner can be used to restore shine to the<br />
cover only, but do not use an aggressive cleaner or one that<br />
contains ammonia.<br />
3 4<br />
THE CRUMB TRAY THE INTERNALS<br />
Empty the ‘crumb tray’ on a<br />
regular basis. Daily if being<br />
used in a commercial<br />
kitchen.<br />
With the toaster unplugged use a SOFT BRUSH to<br />
clean inside your toaster, do not use a sharp or metal<br />
utensil! Crumbs should be carefully brushed off the<br />
elements using only a soft brush, the toaster can be<br />
turned upside down and excess crumbs be shaken out.<br />
15<br />
Wipe the aluminium end<br />
castings with a damp cloth.<br />
Do not use a chemical or<br />
abrasive cleaner.
REPLACEMENT PARTS<br />
The <strong>NewGen</strong> toaster is also kind on the environment,<br />
all parts are repairable or replaceable, you don’t throw a<br />
<strong>Dualit</strong> <strong>NewGen</strong> toaster, for a nominal cost we fix it for you!<br />
<strong>Dualit</strong> repairs department regularly receive toasters over<br />
40 years old. They are fixed and go back to the owner in full<br />
working order. If your toaster needs a repair, simply contact<br />
our helpline on 01293 652 500 for repair or servicing<br />
advice.<br />
ALL SERVICING MUST BE CARRIED OUT BY A<br />
QUALIFIED ELECTRICIAN OR REPAIRER.<br />
For your own protection only use original <strong>Dualit</strong> spares in<br />
your toaster.<br />
When replacing ProHeat elements, only use genuine<br />
<strong>Dualit</strong> elements (stamped “DUALIT”).<br />
The safety and the performance of the toaster cannot be<br />
guaranteed if inferior elements are used.<br />
Fitting of non <strong>Dualit</strong> parts will also invalidate the<br />
guarantee.<br />
16<br />
REPLACING ELEMENTS<br />
ALL SERVICING MUST BE CARRIED OUT BY A QUALIFIED<br />
ELECTRICIAN OR REPAIRER & PAT TESTED.<br />
1 2 3<br />
Unplug and place toaster on<br />
a soft cloth. Remove crumb<br />
tray and unscrew feet<br />
to remove the base plate.<br />
4 5<br />
Bend brass links and wires<br />
away from the element.<br />
Loosen locking nuts on<br />
retaining plate using a 6.5mm<br />
spanner and slide back.<br />
17<br />
6MM<br />
DUALIT<br />
Unscrew brass links and<br />
wires.<br />
Remove element. To re-assemble, reverse procedure<br />
ensuring wires and parts are correctly positioned. Ensure<br />
new element is marked the same as the one removed and<br />
is seated correctly in the channels either side.<br />
PAT test before use.<br />
2-END<br />
6MM
TROUBLESHOOTING<br />
MY TOASTER IS NOT WORKING:<br />
Check the toaster is plugged in.<br />
Check if the ‘neon’ is glowing red.<br />
If yes, your elements or ‘selector’ switch<br />
may need replacing.<br />
If no, your plug fuse may have blown<br />
or your timer may need replacing.<br />
I GET UNEVEN TOASTING:<br />
Check the selector switch is set for the<br />
number of slots being used.<br />
Starting from the left, ensure you have<br />
loaded all heated up slots.<br />
The heavy duty Proheat elements can<br />
take a few moments to reach<br />
optimum toasting temperature.<br />
Preheating the slots prior to inserting<br />
your bread will eliminate this. Rotate<br />
the ‘timer’ all the way round, let it wind<br />
down to the circle indicator then insert<br />
your bread into the active slots.<br />
Ensure size and type of bread being<br />
toasted is the same.<br />
End elements take a little longer to<br />
warm up than centre elements, once<br />
toaster is at optimum operating<br />
temperature this will no longer occur.<br />
MY TOASTER WOBBLES ON MY<br />
WORK SURFACE:<br />
Use the adjustable foot under the<br />
toaster to compensate for uneven<br />
surfaces.<br />
18<br />
MY TOAST GETS STUCK WHEN I<br />
EJECT FROM THE TOASTER:<br />
Slices thicker than 28mm will get stuck.<br />
Hand cut slice must be cut evenly<br />
Using a ‘sandwich cage’ can make<br />
toasting thicher items eaiser.<br />
ONE SIDE OF MY BREAD IS NOT<br />
TOASTING:<br />
Check the ‘selector’ switch is set<br />
correctly. If set to Bagel setting only<br />
one side will toast and remember<br />
insert bread from the very left hand<br />
slot.<br />
One or more of the elements may<br />
need replacing, call the helpline or visit<br />
www.dualit.com for replacements.<br />
SMOKE COMING OUT OF THE<br />
SLOTS<br />
If this is the first time using your toaster,<br />
this is normal your elements are being<br />
conditioned.<br />
Empty the crumb tray. A build up of<br />
crumbs can burn or cause a fire.<br />
Some crumbs or pieces of bread may<br />
be stuck in the toaster. Unplug, remove<br />
the crumb tray then turn the toaster<br />
upside down over a sink or bin and<br />
gently shake the crumbs out or use a<br />
soft brush to clean inside your toaster.<br />
GUARANTEE<br />
This appliance is of excellent quality and construction. However, if any defects in materials<br />
or workmanship do appear during the relevant guarantee period, we will, at our discretion,<br />
either repair or replace the defective parts, free of charge, subject to the terms and<br />
conditions of our Guarantee shown below.<br />
This Guarantee covers both parts and<br />
labour. Carriage is not included.<br />
Your guarantee period is as follows:<br />
1 years on parts<br />
2 years on ProHeat elements<br />
This Guarantee provides benefits which are<br />
additional to, and do not affect, your<br />
statutory rights. This guarantee does not<br />
cover the cost of returning the product to<br />
the dealer from whom it was purchased or<br />
to ourselves. This guarantee applies only to<br />
products sold and located in mainland<br />
Great Britain. It does not cover liability in<br />
respect of or replacement of plugs, cables<br />
or fuses and also does not cover defects<br />
due to:<br />
Failure to use or maintain product in<br />
accordance with <strong>Dualit</strong>'s instructions.<br />
The product being connected to an<br />
unsuitable electricity supply.<br />
Accidental damage to or abuse or<br />
misuse of the product.<br />
The product has not been modified<br />
except by <strong>Dualit</strong> or approved agent.<br />
Dismantling of or interference with the<br />
product.<br />
Theft or attempted theft of the<br />
product.<br />
Before returning any product under this<br />
guarantee, please check that:<br />
You have followed the product<br />
instructions correctly.<br />
19<br />
Your mains electricity supply is<br />
functional.<br />
The defect is not due to a blown fuse.<br />
If you wish to claim under this guarantee<br />
you should:<br />
Send the product, postage or carriage<br />
paid, to the dealer from whom it was<br />
purchased or to <strong>Dualit</strong> direct.<br />
Ensure that the product is clean and<br />
packed carefully (preferably in its<br />
original carton).<br />
Enclose details of your name, address<br />
and telephone number and when and<br />
where the product was purchased,<br />
together with proof of purchase (e.g. a<br />
till receipt).<br />
Give exact details of the nature of the<br />
defect.<br />
This Guarantee does not cover any other<br />
claims whatsoever, including, without<br />
limitation, any liability for incidental, indirect<br />
or consequential damage, nor does it cover<br />
any claims for conversion or modification or<br />
for the costs of repair carried out by any<br />
third party without the prior consent of<br />
<strong>Dualit</strong>. If replacement parts are fitted to the<br />
product this will not extend the period of<br />
the guarantee.<br />
For further advise contact the <strong>Dualit</strong><br />
customer helpline on +44 (0)1293 652 500<br />
(09:00 to 17:00 Monday to Friday).<br />
Alternatively, email <strong>Dualit</strong> at info@dualit.com<br />
or visit www.dualit.com.
<strong>Dualit</strong> Limited County Oak Way Crawley West Sussex RH11 7ST<br />
Telephone: +44 (0) 1293 652 500 Facsimile: +44 (0) 1293 652 555<br />
Email: info@dualit.com Web: www.dualit.com GB1110