Fluebindning 2009 - Guideline
Fluebindning 2009 - Guideline
Fluebindning 2009 - Guideline

You also want an ePaper? Increase the reach of your titles
YUMPU automatically turns print PDFs into web optimized ePapers that Google loves.
www.guidelineflyfish.com<br />
When I was asked to put one fly pattern in I was totally<br />
flummox as I looked in my boxes to try and find just one<br />
pattern. Firstly I looked at my Loch Style boxes and there<br />
are a lot of them, secondly I looked at my small Stillwater<br />
boxes, a few less but still too many to choose from so I finally<br />
decided to pick some from my river box. Again I could<br />
not just pick one pattern but decided on a style of fishing<br />
and what flies I tie on first on my cast.<br />
The style I chose was New Zealand Style as this is the one I<br />
will use when I first go to a river when I cannot see any fish<br />
rising and it is a great way of searching out areas to find out<br />
where the fish are and at what level they are feeding at.<br />
Firstly I will tie on a tapered leader on to the end of the line then at the end of this I tie 20-30cm of Fluorocarbon and the attach the<br />
Clinkhammer. This is tied with strike indicator yarn as the post. This will support any nymphs you want to hang below and will also<br />
stand out in all light conditions.<br />
I will tie the next piece of flour.(50-60cm) onto the bend of the dry. This will give you direct contact with the nymph below and the<br />
nymph will make sure the dry fishes correctly. You can have one, two or three nymphs below the dry and it all depends on the depth<br />
of water you are going to fish. If I am going to use two or three nymphs below I will use a 3 turn water know to create the droppers<br />
and the spacing will again be 50-60cm.<br />
When you are fishing this method you are covering all your basis- top of the water with the dry, mid water with the middle nymph<br />
and deep water with the point fly.<br />
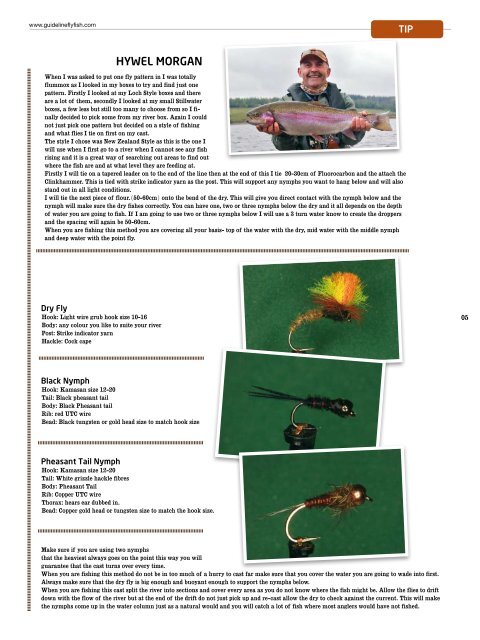
Hook: Light wire grub hook size 10-16<br />
Body: any colour you like to suite your river<br />
Post: Strike indicator yarn<br />
Hackle: Cock cape<br />
Hook: Kamasan size 12-20<br />
Tail: Black pheasant tail<br />
Body: Black Pheasant tail<br />
Rib: red UTC wire<br />
Bead: Black tungsten or gold head size to match hook size<br />
Hook: Kamasan size 12-20<br />
Tail: White grizzle hackle fibres<br />
Body: Pheasant Tail<br />
Rib: Copper UTC wire<br />
Thorax: hears ear dubbed in.<br />
Bead: Copper gold head or tungsten size to match the hook size.<br />
Make sure if you are using two nymphs<br />
that the heaviest always goes on the point this way you will<br />
guarantee that the cast turns over every time.<br />
When you are fishing this method do not be in too much of a hurry to cast far make sure that you cover the water you are going to wade into first.<br />
Always make sure that the dry fly is big enough and buoyant enough to support the nymphs below.<br />
When you are fishing this cast split the river into sections and cover every area as you do not know where the fish might be. Allow the flies to drift<br />
down with the flow of the river but at the end of the drift do not just pick up and re-cast allow the dry to check against the current. This will make<br />
the nymphs come up in the water column just as a natural would and you will catch a lot of fish where most anglers would have not fished.<br />
05