Additional Information for all Xylophone Kits - Rockler.com
Additional Information for all Xylophone Kits - Rockler.com
Additional Information for all Xylophone Kits - Rockler.com

You also want an ePaper? Increase the reach of your titles
YUMPU automatically turns print PDFs into web optimized ePapers that Google loves.
www.triparinc.<strong>com</strong><br />
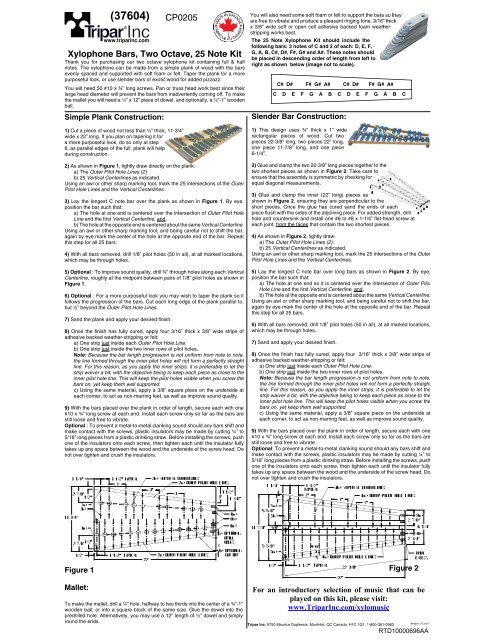
CP0205<br />
<strong>Xylophone</strong> Bars, Two Octave, 25 Note Kit<br />
Thank you <strong>for</strong> purchasing our two octave xylophone kit containing full & half<br />
notes. The xylophone can be made from a simple plank of wood with the bars<br />
evenly spaced and supported with soft foam or felt. Taper the plank <strong>for</strong> a more<br />
purposeful look, or use slender bars of exotic wood <strong>for</strong> added pizzazz.<br />
You will need 50 #10 x ¾” long screws. Pan or truss head work best since their<br />
large head diameter will prevent the bars from inadvertently <strong>com</strong>ing off. To make<br />
the m<strong>all</strong>et you will need a ¼” x 12” piece of dowel, and option<strong>all</strong>y, a ½”-1” wooden<br />
b<strong>all</strong>.<br />
Simple Plank Construction:<br />
1) Cut a piece of wood not less than ½” thick, 11-3/4”<br />
wide x 22” long. If you plan on tapering it <strong>for</strong><br />
a more purposeful look, do so only at step<br />
6, as par<strong>all</strong>el edges of the full plank will help<br />
during construction.<br />
®<br />
2) As shown in Figure 1 , lightly draw directly on the plank:<br />
a) The Outer Pilot Hole Lines (2)<br />
b) 25 Vertical Centerlines as indicated.<br />
Using an awl or other sharp marking tool, mark the 25 intersections of the Outer<br />
Pilot Hole Lines and the Vertical Centerlines .<br />
3) Lay the longest C note bar over the plank as shown in Figure 1 . By eye,<br />
position the bar such that:<br />
a) The hole at one end is centered over the intersection of Outer Pilot Hole<br />
Line and the first Vertical Centerline , and ,<br />
b) The hole at the opposite end is centered about the same Vertical Centerline .<br />
Using an awl or other sharp marking tool, and being careful not to shift the bar,<br />
again by eye mark the center of the hole at the opposite end of the bar. Repeat<br />
this step <strong>for</strong> <strong>all</strong> 25 bars.<br />
4) With <strong>all</strong> bars removed, drill 1/8” pilot holes (50 in <strong>all</strong>), at <strong>all</strong> marked locations,<br />
which may be through holes.<br />
5) Optional : To improve sound quality, drill ¾” through holes along each Vertical<br />
Centerline , roughly at the midpoint between pairs of 1/8” pilot holes as shown in<br />
Figure 1 .<br />
6) Optional : For a more purposeful look you may wish to taper the plank so it<br />
follows the progression of the bars. Cut each long edge of the plank par<strong>all</strong>el to,<br />
but ½” beyond the Outer Pilot Hole Lines.<br />
7) Sand the plank and apply your desired finish.<br />
8) Once the finish has fully cured, apply four 3/16” thick x 3/8” wide strips of<br />
adhesive backed weather-stripping or felt:<br />
a) One strip just inside each Outer Pilot Hole Line .<br />
b) One strip just inside the two inner rows of pilot holes.<br />
Note: Because the bar length progression is not uni<strong>for</strong>m from note to note,<br />
the line <strong>for</strong>med through the inner pilot holes will not <strong>for</strong>m a perfectly straight<br />
line. For this reason, as you apply the inner strips, it is preferable to let the<br />
strip waiver a bit, with the objective being to keep each piece as close to the<br />
inner pilot hole line. This will keep the pilot holes visible when you screw the<br />
bars on, yet keep them well supported.<br />
c) Using the same material, apply a 3/8” square piece on the underside at<br />
each corner, to act as non-marring feet, as well as improve sound quality.<br />
9) With the bars placed over the plank in order of length, secure each with one<br />
#10 x ¾” long screw at each end . Inst<strong>all</strong> each screw only so far as the bars are<br />
still loose and free to vibrate.<br />
Optional : To prevent a metal-to-metal clanking sound should any bars shift and<br />
make contact with the screws, plastic insulators may be made by cutting ¼” to<br />
5/16” long pieces from a plastic drinking straw. Be<strong>for</strong>e inst<strong>all</strong>ing the screws, push<br />
one of the insulators onto each screw, then tighten each until the insulator fully<br />
takes up any space between the wood and the underside of the screw head. Do<br />
not over tighten and crush the insulators.<br />
Figure 1<br />
M<strong>all</strong>et:<br />
(37604)<br />
To make the m<strong>all</strong>et, drill a ¼” hole, halfway to two thirds into the center of a ¾”-1”<br />
wooden b<strong>all</strong>, or into a square block of the same size. Glue the dowel into the<br />
predrilled hole. Alternatively, you may use a 12” length of ½” dowel and simply<br />
round the ends.<br />
You will also need some soft foam or felt to support the bars so they<br />
are free to vibrate and produce a pleasant ringing tone. 3/16” thick<br />
x 3/8” wide soft or open cell adhesive backed foam weather-<br />
stripping works best.<br />
The 25 Note <strong>Xylophone</strong> Kit should include the<br />
following bars: 3 notes of C and 2 of each: D, E, F,<br />
G, A, B, C#, D#, F#, G# and A#. These notes should<br />
be placed in descending order of length from left to<br />
right as shown below (image not to scale).<br />
C# D# F# G# A# C# D# F# G# A#<br />
C D E F G A B C D E F G A B C<br />
Slender Bar Construction:<br />
1) This design uses ¾” thick x 1” wide<br />
rectangular pieces of wood. Cut two<br />
pieces 22-3/8” long, two pieces 22” long,<br />
one piece 11-7/8” long, and one piece<br />
6-1/4”.<br />
2) Glue and clamp the two 22-3/8” long pieces together to the<br />
two shortest pieces as shown in Figure 2 . Take care to<br />
ensure that the assembly is symmetric by checking <strong>for</strong><br />
equal diagonal measurements.<br />
3) Glue and clamp the inner (22” long) pieces as<br />
shown in Figure 2 , ensuring they are perpendicular to the<br />
short pieces, Once the glue has cured sand the ends of each<br />
piece flush with the sides of the adjoining piece. For added strength, drill<br />
hole and countersink and inst<strong>all</strong> one #6 to #8 x 1-1/4” flat-head screw at<br />
each joint, from the faces that contain the two shortest pieces.<br />
4) As shown in Figure 2 , lightly draw:<br />
a) The Outer Pilot Hole Lines (2) .<br />
b) 25 Vertical Centerlines as indicated.<br />
Using an awl or other sharp marking tool, mark the 25 intersections of the Outer<br />
Pilot Hole Lines and the Vertical Centerlines .<br />
5) Lay the longest C note bar over long bars as shown in Figure 2 . By eye,<br />
position the bar such that:<br />
a) The hole at one end so it is centered over the intersection of Outer Pilot<br />
Hole Line and the first Vertical Centerline , and ,<br />
b) The hole at the opposite end is centered about the same Vertical Centerline .<br />
Using an awl or other sharp marking tool, and being careful not to shift the bar,<br />
again by eye mark the center of the hole at the opposite end of the bar. Repeat<br />
this step <strong>for</strong> <strong>all</strong> 25 bars.<br />
6) With <strong>all</strong> bars removed, drill 1/8” pilot holes (50 in <strong>all</strong>), at <strong>all</strong> marked locations,<br />
which may be through holes.<br />
7) Sand and apply your desired finish.<br />
8) Once the finish has fully cured, apply four 3/16” thick x 3/8” wide strips of<br />
adhesive backed weather-stripping or felt:<br />
a) One strip just inside each Outer Pilot Hole Line .<br />
b) One strip just inside the two inner rows of pilot holes.<br />
Note: Because the bar length progression is not uni<strong>for</strong>m from note to note,<br />
the line <strong>for</strong>med through the inner pilot holes will not <strong>for</strong>m a perfectly straight<br />
line. For this reason, as you apply the inner strips, it is preferable to let the<br />
strip waiver a bit, with the objective being to keep each piece as close to the<br />
inner pilot hole line. This will keep the pilot holes visible when you screw the<br />
bars on, yet keep them well supported.<br />
c) Using the same material, apply a 3/8” square piece on the underside at<br />
each corner, to act as non-marring feet, as well as improve sound quality.<br />
9) With the bars placed over the plank in order of length, secure each with one<br />
#10 x ¾” long screw at each end . Inst<strong>all</strong> each screw only so far as the bars are<br />
still loose and free to vibrate.<br />
Optional : To prevent a metal-to-metal clanking sound should any bars shift and<br />
make contact with the screws, plastic insulators may be made by cutting ¼” to<br />
5/16” long pieces from a plastic drinking straw. Be<strong>for</strong>e inst<strong>all</strong>ing the screws, push<br />
one of the insulators onto each screw, then tighten each until the insulator fully<br />
takes up any space between the wood and the underside of the screw head. Do<br />
not over tighten and crush the insulators.<br />
Tripar Inc. 9750 Maurice Duplessis, Montréal, QC Canada, H1C 1G1, 1-800-361-0983<br />
Figure 2<br />
For an introductory selection of music that can be<br />
played on this kit, please visit:<br />
www.TriparInc.<strong>com</strong>/xylomusic<br />
PP220 ©03/2009<br />
RTD10000696AA
<strong>Additional</strong> <strong>In<strong>for</strong>mation</strong> <strong>for</strong> <strong>all</strong><br />
<strong>Xylophone</strong> <strong>Kits</strong><br />
To further simplify the building process <strong>for</strong> the xylophone kits, please<br />
refer to these additional instructions:<br />
The 8 Note <strong>Xylophone</strong> Kit includes the following bars: 2 notes of C and 1 of<br />
each: D, E, F, G, A and B. These notes should be placed in descending order of<br />
length from left to right as shown below (image not to scale).<br />
C D E F G A B C<br />
The 13 Note <strong>Xylophone</strong> Kit includes the following bars: 2 notes of C and 1 of<br />
each: D, E, F, G, A, B, C#, D#, F#, G# and A#. These notes should be placed in<br />
descending order of length from left to right as shown below (image not to<br />
scale).<br />
C# D# F# G# A#<br />
C D E F G A B C<br />
The 25 Note <strong>Xylophone</strong> Kit includes the following bars: 3 notes of C and 2 of<br />
each: D, E, F, G, A, B, C#, D#, F#, G# and A#. These notes should be placed in<br />
descending order of length from left to right as shown below (image not to<br />
scale).<br />
C# D# F# G# A# C# D# F# G# A#<br />
C D E F G A B C D E F G A B C