Create successful ePaper yourself
Turn your PDF publications into a flip-book with our unique Google optimized e-Paper software.
<strong>BPI240</strong> <strong>Pie</strong> <strong>Maker</strong>
Contents<br />
2<br />
<strong>Breville</strong> Recommends Safety First 4<br />
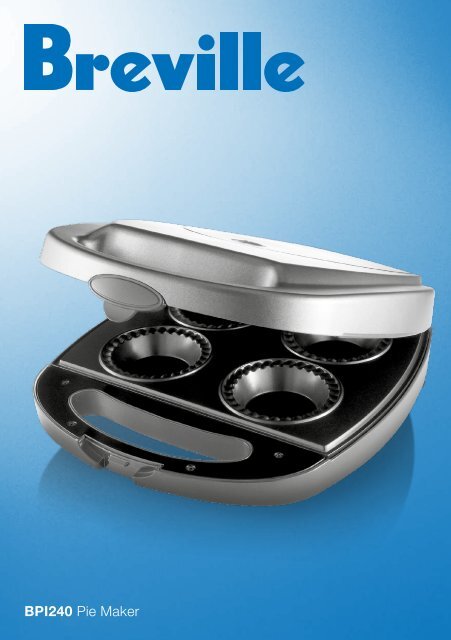
Know Your <strong>Breville</strong> <strong>Pie</strong> <strong>Maker</strong> 6<br />
Operating Your <strong>Breville</strong> <strong>Pie</strong> <strong>Maker</strong> 7<br />
Care, Cleaning and Storage 9<br />
Page<br />
Hints and Tips for Best Results 10<br />
Recipes R2
Congratulations<br />
on the purchase of your new <strong>Breville</strong> <strong>Pie</strong> <strong>Maker</strong><br />
3
<strong>Breville</strong> recommends safety first<br />
At <strong>Breville</strong> we are very safety conscious. We design and manufacture consumer products<br />
with the safety of you, our valued customer, foremost in mind. In addition we ask that you<br />
exercise a degree of care when using any electrical appliance and adhere to the following<br />
precautions.<br />
IMPORTANT SAFEGUARDS FOR YOUR BREVILLE PIE MAkER<br />
• Carefully read all instructions before operating the<br />
<strong>Breville</strong> <strong>Pie</strong> <strong>Maker</strong> and save for future reference.<br />
• Remove and safely discard any packaging material<br />
and promotional labels before using the appliance for<br />
the first time.<br />
• To eliminate a choking hazard for young children,<br />
remove and safely discard the protective cover fitted<br />
to the power plug of this appliance.<br />
• Do not place the appliance near the edge of a bench<br />
or table during operation. Ensure the surface is level,<br />
clean and free of water and other substances.<br />
• Do not use the appliance on a sink drain board.<br />
• Do not place the appliance on or near a hot gas or<br />
electric burner, or where it could touch a heated<br />
oven.<br />
• Position the appliance at a minimum distance of<br />
20cm away from walls, curtains, cloths and other heat<br />
sensitive materials.<br />
• Always operate the appliance on a stable and heat<br />
resistant surface. Do not use on a cloth-covered<br />
surface, near curtains or other flammable materials.<br />
• Always ensure the appliance is properly assembled<br />
before use. Follow the instructions provided in this<br />
book.<br />
4<br />
• This appliance is not intended to be operated by<br />
means of an external timer or separate remote control<br />
system.<br />
• The lid and the outer surface will be hot when the<br />
appliance is operating. Use the handles when lifting<br />
and opening the top plate.<br />
• The temperature of accessible surfaces will be high<br />
when the appliance is operating and for some time<br />
after use.<br />
• Do not touch hot surfaces. Remove the hot pies with a<br />
heat-proof plastic spatula or plastic tongs.<br />
• Do not place anything on top of the appliance when<br />
the lid is closed, when in use and when stored.<br />
• Always switch the appliance off at the power outlet,<br />
then unplug the power cord from the power outlet<br />
and cool completely, if appliance is not in use, before<br />
cleaning, before attempting to move the appliance, if<br />
left unattended and before disassembling, assembling<br />
and when storing the appliance.<br />
• Be careful when eating hot pies, especially with fillings<br />
such as cheese, tomato or jam, as these retain heat<br />
and may burn if eaten too quickly.<br />
• Keep the appliance clean. Follow the cleaning<br />
instructions provided in this book.
<strong>Breville</strong> recommends safety first continued<br />
IMPORTANT SAFEGUARDS FOR ALL ELECTRICAL APPLIANCES<br />
• Unwind the power cord fully before use.<br />
• Do not let the power cord hang over the edge of<br />
a bench or table, touch hot surfaces or become<br />
knotted.<br />
• To protect against electric shock, do not immerse the<br />
appliance, power cord or power plug in water or any<br />
other liquid.<br />
• The appliance is not intended for use by persons<br />
(including children) with reduced physical, sensory<br />
or mental capabilities, or lack of experience and<br />
knowledge, unless they have been given supervision<br />
or instruction concerning use of the appliance by a<br />
person responsible for their safety.<br />
• Children should be supervised to ensure that they do<br />
not play with the appliance.<br />
• It is recommended to regularly inspect the appliance.<br />
Do not use the appliance if the power cord, power plug<br />
or appliance becomes damaged in any way. Return<br />
the entire appliance to the nearest authorised <strong>Breville</strong><br />
service centre for examination and/or repair.<br />
• Any maintenance, other than cleaning, should be<br />
performed at an authorised <strong>Breville</strong> Service Centre.<br />
• This appliance is for household use only. Do not use<br />
this appliance for anything other than its intended use.<br />
Do not use in moving vehicles or boats. Do not use<br />
outdoors. Misuse may cause injury.<br />
• The installation of a residual current device (safety<br />
switch) is recommended to provide additional safety<br />
protection when using electrical appliances. It is<br />
advisable that a safety switch with a rated residual<br />
operating current not exceeding 30mA be installed in<br />
the electrical circuit supplying the appliance. See your<br />
electrician for professional advice.<br />
5
Know Your <strong>Breville</strong> <strong>Pie</strong> <strong>Maker</strong><br />
<strong>BPI240</strong> BREVILLE PIE MAkER<br />
1. Ready-to-bake green light<br />
indicates when the appliance has reached the correct<br />
temperature and is ready to use<br />
2. Power ‘On’ red light<br />
indicates that the appliance is switched on and heating<br />
3. 4 deep pie wells<br />
for a variety of pie fillings<br />
4. <strong>Pie</strong> cutter<br />
for perfectly round and even pie bases and tops<br />
5. <strong>Pie</strong> press<br />
assists with inserting pastry bases into pie wells<br />
6<br />
2<br />
6<br />
1<br />
3<br />
6. Cool touch handle<br />
with locking latch holds the appliance closed for perfectly<br />
sealed pies<br />
7. Easy clean non-stick plates<br />
with crimper seal ensures pie edges are completely sealed<br />
8. Sturdy non-skid feet<br />
Cord wrap (not shown)<br />
for easy storage<br />
7<br />
5<br />
4<br />
8
Operating Your <strong>Breville</strong> <strong>Pie</strong> <strong>Maker</strong><br />
Before first use<br />
Remove and safely discard any packaging material and<br />
promotional labels.<br />
Wipe the cooking plates and outer housing with a soft<br />
damp cloth and dry thoroughly.<br />
Season the cooking plates (top and base) with a little<br />
vegetable oil and remove any excess oil with absorbent<br />
kitchen paper towel. After the initial seasoning, there is no<br />
need to season the plates before each use as the pastry<br />
leaves the plates slightly seasoned. Avoid using spray on<br />
oils unless specified to do so in a recipe.<br />
Using the <strong>Pie</strong> <strong>Maker</strong><br />
NOTE<br />
When using the <strong>Pie</strong> <strong>Maker</strong> for the first time you<br />
may notice a fine smoke haze. This is caused by<br />
the heating of some of the components and will<br />
dissipate with use. There is no need for concern.<br />
NOTE<br />
<strong>Pie</strong> bases can be made with shortcrust pastry,<br />
butter puff pastry, puff pastry, filo pastry or bread.<br />
<strong>Pie</strong> tops can be made with butter puff pastry, puff<br />
pastry, filo pastry, or bread. Shortcrust pastry should<br />
not be used for pie tops as it does not rise or brown<br />
properly. Pastry can be homemade or purchased<br />
ready-made from supermarkets.<br />
NOTE<br />
The pie cutter is designed to cut the pastry tops<br />
and bases to perfectly fit the pie wells. The smaller<br />
cutter is for the pie tops and the large cutter is for<br />
the pie bases (refer to image below).<br />
Bases<br />
Tops<br />
NOTE<br />
If using pre-purchased frozen pastry sheets, remove<br />
from the freezer in sufficient time for the pastry to<br />
thaw slightly for easy cutting. Pastry becomes<br />
difficult to handle if completely thawed. Two<br />
standard 25cm square pastry sheets are sufficient<br />
for making four pies. Any excess pastry rounds can<br />
be refrozen for future use.<br />
NOTE<br />
Prepare the pie fillings in advance.<br />
NOTE<br />
The <strong>Pie</strong> <strong>Maker</strong> is designed for making four pies at a<br />
time. Uneven cooking or burning may occur if only<br />
one or two pies are cooked at a time.<br />
1. Insert the plug into a 230/240v power outlet.<br />
2. Close the lid of the <strong>Pie</strong> <strong>Maker</strong> and switch on at the<br />
power outlet. The Power ‘ON’ red light will illuminate<br />
until the <strong>Pie</strong> <strong>Maker</strong> is switched off at the power<br />
outlet.<br />
3. The Ready-to-bake green light illuminates when the<br />
appliance has reached the correct temperature and<br />
is ready to use<br />
4. Lightly flour the top surface of each pastry sheet<br />
for easy cutting and to prevent pastry bases from<br />
sticking to the pie press.<br />
5. Cut 4 pastry bases and 4 pastry tops (if required) by<br />
positioning the pie cutter over partially thawed pastry<br />
sheets and press down firmly to make a straight cut<br />
into the pastry. Do not twist. Ensure the cut is smooth<br />
around the edges.<br />
7
Operating Your <strong>Breville</strong> <strong>Pie</strong> <strong>Maker</strong> continued<br />
6. Place a pastry base (floured side up) into the centre<br />
of each pie well and use the pie press to press and<br />
mould into the shape of the pie well, ensuring the<br />
edges of the pastry overlap the crimping area of the<br />
pie well.<br />
7. Spoon ½ cup of pre-prepared or pre-cooked and<br />
cooled filling into the pastry base unless specified to<br />
do otherwise in the recipe. Do not overfill the pastry<br />
bases.<br />
NOTE<br />
Do not use liquid ingredients only (such as sauces<br />
and gravies or in large proportion to solids) for the<br />
pie fillings, as liquid will overflow and make the<br />
pastry soggy. Always combine liquid ingredients<br />
with solid ingredients.<br />
8. Place the pastry tops over the filling, ensuring the<br />
edges are positioned evenly and aligned with the<br />
pastry base edges.<br />
9. Close the lid, ensuring the locking latch clicks into<br />
position. The lid has to be securely closed to ensure<br />
when baking pies that pastry tops and bases are<br />
crimped together to seal in the filling.<br />
NOTE<br />
The lid must be closed when baking pies, but check<br />
progress during baking so that desired shade of<br />
golden brown is reached.<br />
8<br />
10. Cooking times will vary depending on the recipe. For<br />
example, pies will require approximately 8 minutes.<br />
NOTE<br />
Do not use metal utensils to remove the cooked<br />
items as these may scratch the non-stick surface of<br />
the cooking plates.<br />
11. Open the lid and remove the baked items using a<br />
heat-proof plastic spatula or plastic tongs.<br />
12. If more baking is required, close the lid and follow<br />
Steps 3-10.<br />
13. At the end of baking, switch off at the power outlet<br />
and unplug the power cord from the power outlet.<br />
Allow the appliance to cool slightly. The appliance<br />
is easier to clean when slightly warm. (Refer to the<br />
cleaning and storage instructions in this booklet).
Care, Cleaning and Storage<br />
Care and Cleaning<br />
Before cleaning, ensure the power is switched off at the<br />
power outlet and the power cord is then unplugged from<br />
the power outlet.<br />
Allow the appliance to cool slightly. The appliance is<br />
easier to clean when slightly warm. Always clean after<br />
each use to prevent a build up of baked-on foods.<br />
Cleaning the cooking plates<br />
Wipe cooking plates with a soft, damp cloth and dry<br />
thoroughly.<br />
Do not use abrasive or metal utensils or scourers as they<br />
will scratch the non-stick surface of the cooking plates.<br />
Do not use harsh, abrasive or caustic cleaners, or oven<br />
cleaners, when cleaning this appliance.<br />
Cleaning the outer housing<br />
Wipe the outer housing with a soft, damp cloth and dry<br />
thoroughly with a soft dry cloth.<br />
Wipe any excess food particles from the power cord.<br />
Do not use abrasive or metal utensils or scourers as<br />
these may scratch the outer housing.<br />
Storage<br />
Before storage, turn the power off at the power outlet<br />
and then remove the power plug. Ensure the appliance<br />
has completely cooled and is clean and dry. Close the<br />
lid, ensuring the locking latch clicks into position, then<br />
wrap the power cord around the cord storage. Store the<br />
appliance flat or upright on the bench or in a convenient<br />
cupboard. Do not place anything on top of the appliance<br />
during storage.<br />
9
Hints and Tips for Best Results<br />
Pastry <strong>Pie</strong>s<br />
• A wide selection of ready-rolled pastry, such as<br />
shortcrust, puff, butter puff and wholemeal, is<br />
available in your supermarket freezer. These preprepared<br />
pastry sheets give great results and are<br />
handy to keep in the freezer.<br />
• Pastry can be homemade or purchased ready rolled.<br />
• Allow sufficient time to defrost frozen pastry sheets<br />
before use but do not allow the pastry to become too<br />
soft as it will be difficult to handle.<br />
• Filo pastry can be used for some pies. Filo pastry from<br />
the chilled refrigerator section of the supermarket is<br />
much more pliable and easy to use than frozen filo<br />
pastry as it can be brittle and difficult to shape.<br />
• Pastry sheets should be kept chilled in between each<br />
use. Soft pastry sheets are difficult to handle and to<br />
cut clean shapes.<br />
• For a more buttery taste, use puff pastry or butter puff<br />
pastry for the pastry tops with shortcrust pastry for<br />
the pastry bases. This combination is ideal for dessert<br />
pies.<br />
• Shortcrust pastry should not be used for pie tops as it<br />
does not rise or brown properly.<br />
• Unused pastry sheets or cut rounds can be refrozen.<br />
Flat pack into a large freezer bag and seal before<br />
placing back into the freezer.<br />
10<br />
Bread <strong>Pie</strong>s<br />
• Prepare healthy pies in the <strong>Pie</strong> <strong>Maker</strong> using bread for<br />
the bases and tops. Most types of sandwich bread<br />
such as white and wholemeal, can be used.<br />
• Do not use thick or toast bread slices as they will<br />
prevent the lid from closing correctly.<br />
• Avoid heavy grained breads as they may scratch the<br />
cooking plates and are not sufficiently pliable for<br />
shaping into the pie wells.<br />
• Cut 4 bread tops and 4 bread bases using 8 slices of<br />
sandwich bread. Position the cutter over each slice<br />
and cut by pressing down into the bread. Do not twist.<br />
Ensure the cut is smooth around the edges.<br />
• The bread does not require buttering before placing<br />
into the pie wells.<br />
<strong>Pie</strong> Fillings<br />
• Fillings should be cooked and cooled before adding<br />
to the pie base. The cooking time for the pies is not<br />
sufficient to cook raw meat fillings or soften fresh fruit<br />
or vegetable fillings.<br />
• Use canned or pre-cooked fruit, as fresh fruit may<br />
lose juice when heated.<br />
• <strong>Pie</strong>s with insufficient filling will not form a good shape<br />
and brown on top.<br />
• Excess prepared fillings can be frozen or stored in a<br />
covered container in the refrigerator for up to 2 days.<br />
• Be careful when biting into hot pies, especially with<br />
fillings such as cheese, tomato or jam, as these retain<br />
heat and may burn your mouth if eaten too quickly.
Hints and Tips for best Results continued<br />
Reheating<br />
• When making several batches, keep pies hot after<br />
baking by placing onto a rack inserted into an ovenproof<br />
dish. Place into a slow oven preheated to 100-<br />
120ºC for up to 20 minutes. <strong>Pie</strong>s will begin to dry out<br />
if kept for longer in the oven.<br />
• If pies are not being served immediately, place onto<br />
a cooling rack or onto a paper napkin to absorb<br />
condensation.<br />
• <strong>Pie</strong>s should be cooled and kept in an air-tight container<br />
in the refrigerator if not required immediately after<br />
baking. Reheat in a preheated hot oven 160-170ºC<br />
for 10 minutes or until heated through.<br />
• Do not reheat pies in a microwave oven as the pastry<br />
will soften.<br />
11
Contents<br />
R1<br />
Page<br />
Traditional <strong>Pie</strong>s R3<br />
Gourmet <strong>Pie</strong>s R6<br />
Dessert <strong>Pie</strong>s and Sweet Ideas R9
Recipes<br />
Delicious recipes from <strong>Breville</strong><br />
R2
Traditional <strong>Pie</strong>s<br />
BACON AND EGG BREAkFAST PIES<br />
4 bacon rashers, shortcut rindless, finely chopped<br />
4 x 60g eggs<br />
1 tablespoon cream<br />
8 slices bread<br />
1 tablespoon shallots, thinly sliced<br />
Salt and Pepper to taste<br />
1. Place chopped bacon into a heated frypan and cook<br />
until crisp.<br />
2. Combine and lightly whisk eggs and cream.<br />
3. Use the pie cutter to cut the bases from the<br />
bread slices.<br />
4. Preheat Classic <strong>Pie</strong> 4 Creations until the 'ready-tobake'<br />
light illuminates.<br />
5. Insert the bread bases into the Classic <strong>Pie</strong> 4 Creations<br />
using the pie press.<br />
6. Sprinkle bacon and shallots evenly into the bread<br />
bases and top each with ¼ of egg mixture.<br />
7. Close lid and cook for 3-5 minutes or until egg is<br />
cooked to your liking. Season with salt and pepper<br />
if required.<br />
R3<br />
QUICk MEAT PIES<br />
Makes 4<br />
1 tablespoon olive oil<br />
100g minced beef<br />
1 ⁄3 cup finely chopped onion<br />
2 tablespoons tomato sauce<br />
1 tablespoon powdered gravy mix<br />
½ cup/125ml water<br />
¼ teaspoon mixed herbs<br />
Salt and pepper, to taste<br />
2 teaspoons cornflour<br />
2 teaspoons water<br />
1 tablespoon finely chopped parsley<br />
1 sheet ready-rolled shortcrust pastry, for bases<br />
1 sheet ready-rolled puff pastry, for tops<br />
1. Heat oil in a saucepan, add minced beef and onion,<br />
cook over moderate heat for 4 minutes, add sauce,<br />
gravy mix, water, herbs and season with salt and<br />
pepper if required.<br />
2. Blend cornflour with water, add to meat mixture and<br />
stir until mixture boils and thickens. Allow to cool and<br />
add parsley.<br />
3. Preheat <strong>Pie</strong> <strong>Maker</strong> until the ‘Ready-to-bake’ light<br />
illuminates.<br />
4. Insert pastry bases, fill each base with ½ cup meat<br />
mixture and cover with pastry tops.<br />
5. Close lid and cook pies. Check after 3-5 minutes and<br />
remove when pies are golden brown.<br />
NOTE<br />
More information on making Pastry <strong>Pie</strong>s, Bread <strong>Pie</strong>s<br />
and <strong>Pie</strong> Fillings can be found in ‘Hints and Tips for<br />
Best Results’ on Page 10.
Traditional <strong>Pie</strong>s continued<br />
ITALIAN PIES<br />
Makes 4<br />
1 tablespoon olive oil<br />
100g minced beef<br />
1 ⁄3 cup finely chopped onion<br />
½ cup Italian-style tomato sauce<br />
1 tablespoon finely chopped basil<br />
Salt and pepper, to taste<br />
1 sheet ready-rolled shortcrust pastry, for bases<br />
1 sheet ready-rolled puff pastry, for tops<br />
1. Heat olive oil in a saucepan, add minced beef, onion,<br />
tomato sauce and basil, cook over moderate heat<br />
for 5-6 minutes and season with salt and pepper if<br />
required. Allow to cool.<br />
2. Preheat <strong>Pie</strong> <strong>Maker</strong> until the ‘Ready-to-bake’ light<br />
illuminates.<br />
3. Insert pastry bases, fill each base with ½ cup meat<br />
mixture and cover with pastry tops.<br />
4. Close lid and cook pies. Check after 3-5 minutes and<br />
remove when pies are golden brown.<br />
POTATO AND CURRY PIES<br />
Makes 4<br />
100g minced beef<br />
1 ⁄3 cup small diced potato<br />
1 ⁄3 cup finely chopped onion<br />
1 teaspoon curry powder<br />
½ cup/125ml water<br />
2 teaspoons cornflour<br />
2 teaspoons water<br />
Salt, to taste<br />
1 sheet ready-rolled shortcrust pastry, for bases<br />
1 sheet ready-rolled puff pastry, for tops<br />
1. Combine minced beef, potato, onion, curry powder<br />
and water in a saucepan and cook over moderate<br />
heat for 5 minutes or until potato is cooked and soft.<br />
2. Blend cornflour with water. Add to meat mixture and<br />
stir over heat until mixture boils and thickens. Season<br />
with salt if required. Allow to cool.<br />
3. Preheat <strong>Pie</strong> <strong>Maker</strong> until the ‘Ready-to-bake’ light<br />
illuminates.<br />
4. Insert pastry bases, fill each base with ½ cup meat<br />
mixture and cover with pastry tops.<br />
5. Close lid and cook pies. Check after 3-5 minutes and<br />
remove when pies are golden brown.<br />
NOTE<br />
All recipes use Australian metric cup and spoon<br />
measurements.<br />
R4
Traditional <strong>Pie</strong>s continued<br />
CHICkEN AND LEEk PIES<br />
Makes 4<br />
2 tablespoons butter<br />
½ cup thinly sliced leek<br />
2 tablespoons finely chopped parsley<br />
1 cup cooked shredded chicken<br />
½ cup/125ml chicken stock<br />
2 teaspoons cornflour<br />
2 teaspoons water<br />
Salt and pepper, to taste<br />
1 sheet ready-rolled shortcrust pastry, for bases<br />
1 sheet ready-rolled puff pastry, for tops<br />
1. Heat butter in saucepan, add leek and lightly sauté for<br />
2 minutes. Add parsley, chicken and stock and bring<br />
to the boil.<br />
2. Blend cornflour with water, add to chicken mixture<br />
and stir until mixture boils and thickens. Season with<br />
salt and pepper if required. Allow to cool.<br />
3. Preheat <strong>Pie</strong> <strong>Maker</strong> until the ‘Ready-to-bake’ light<br />
illuminates.<br />
4. Insert pastry bases, fill each base with ½ cup mixture<br />
and cover with pastry tops<br />
5. Close lid and cook pies. Check after 3-5 minutes and<br />
remove when pies are golden brown.<br />
R5<br />
MUSHROOM AND BACON PIES<br />
Makes 4<br />
2 teaspoons olive oil<br />
2 bacon rashers, rind removed, finely chopped<br />
1<br />
⁄3 cup chopped onion<br />
¼ cup chicken stock<br />
80g button mushrooms, chopped<br />
1 tablespoon chopped parsley<br />
2 teaspoons cornflour<br />
2 teaspoons water<br />
Salt and pepper, to taste<br />
1 sheet ready-rolled shortcrust pastry, for bases<br />
1 sheet ready-rolled puff pastry, for tops<br />
1. Heat oil in a saucepan, add bacon and onion, cook over<br />
medium heat for 2 minutes add stock, mushrooms<br />
and parsley and cook for 2-3 minutes.<br />
2. Blend cornflour with water, add to mushroom mixture<br />
and stir until mixture boils and thickens. Season with<br />
salt and pepper if required. Allow to cool.<br />
3. Preheat <strong>Pie</strong> <strong>Maker</strong> until the ‘Ready-to-bake’ light<br />
illuminates.<br />
4. Insert pastry bases, fill each base with ½ cup mixture<br />
and cover with pastry tops.<br />
5. Close lid and cook pies. Check after 3-5 minutes and<br />
remove when pies are golden brown.<br />
NOTE<br />
All recipes use Australian metric cup and spoon<br />
measurements.
Gourmet <strong>Pie</strong>s<br />
THAI RED CURRY PIES<br />
Makes 4<br />
1 tablespoon olive oil<br />
100g minced beef<br />
1 tablespoon red curry paste<br />
2cm piece fresh ginger, peeled and grated<br />
1<br />
⁄3 cup finely chopped onion<br />
¼ cup coconut cream<br />
1 sheet ready-rolled shortcrust pastry, for bases<br />
1 sheet ready-rolled puff pastry, for tops<br />
1. Heat oil in a saucepan, add minced beef, curry paste,<br />
ginger and onion, cook over moderate heat for 5<br />
minutes. Add coconut cream, stir well. Allow to cool.<br />
2. Preheat <strong>Pie</strong> <strong>Maker</strong> until the ‘Ready-to-bake’ light<br />
illuminates.<br />
3. Insert pastry bases, fill each base with ½ cup mixture<br />
and cover with pastry tops..<br />
4. Close lid and cook pies. Check after 3-5 minutes and<br />
remove when pies are golden brown.<br />
PESTO CHICkEN PIES<br />
Makes 4<br />
¼ cup shredded English spinach<br />
¾ cup cooked shredded chicken<br />
1 tablespoon pesto sauce<br />
½ cup /125ml chicken stock<br />
2½ teaspoons cornflour<br />
2 teaspoons water<br />
Salt and pepper, to taste<br />
1 sheet ready-rolled shortcrust pastry, for bases<br />
1 sheet ready-rolled puff pastry, for tops<br />
1. Combine spinach, chicken, pesto and chicken stock<br />
in a saucepan and cook over moderate heat for 4<br />
minutes.<br />
2. Blend cornflour with water, add to chicken mixture<br />
and stir until mixture boils and thickens. Season with<br />
salt and pepper if required. Allow to cool.<br />
3. Preheat <strong>Pie</strong> <strong>Maker</strong> until the ‘Ready-to-bake’ light<br />
illuminates.<br />
4. Insert pastry bases, fill each base with ½ cup mixture<br />
and cover with pastry tops.<br />
5. Close lid and cook pies. Check after 3-5 minutes and<br />
remove when pies are golden brown.<br />
VEGETABLE AND PARMESAN PIES<br />
Makes 4<br />
1 tablespoon butter<br />
½ cup thinly sliced leek<br />
½ cup/125ml water<br />
1 ⁄3 cup diced potato<br />
1 ⁄3 cup diced pumpkin<br />
½ cup small broccoli florets, chopped<br />
2 teaspoons cornflour<br />
2 teaspoons water, extra<br />
Salt and pepper, to taste<br />
¼ cup grated Parmesan cheese<br />
1 sheet ready-rolled shortcrust pastry, for bases<br />
1 sheet ready-rolled puff pastry, for tops<br />
1. Heat butter in a saucepan, add leek and sauté for 3<br />
minutes.<br />
2. Add water, potato and pumpkin, cook over moderate<br />
heat for 4 minutes, add broccoli and cook until tender,<br />
approximately 2 minutes.<br />
3. Blend cornflour with water, add to vegetables and stir<br />
until mixture boils and thickens. Season with salt and<br />
pepper if required. Allow to cool.<br />
4. Preheat <strong>Pie</strong> <strong>Maker</strong> until the ‘Ready-to-bake’ light<br />
illuminates.<br />
5. Insert pastry bases, fill each base with ½ cup mixture<br />
and sprinkle with Parmesan cheese before placing<br />
pastry tops into position.<br />
6. Close lid and cook pies. Check after 3-5 minutes and<br />
remove when pies are golden brown.<br />
R6
Gourmet <strong>Pie</strong>s continued<br />
MEDITERRANEAN PIES<br />
Makes 4<br />
2 teaspoons olive oil<br />
1 ⁄3 cup chopped leek<br />
1 ⁄3 cup vegetable stock<br />
¼ cup char grilled eggplant, chopped<br />
¼ cup roasted capsicum, chopped<br />
1 tablespoon tomato paste<br />
1 tablespoon chopped black olives<br />
2 teaspoons finely chopped basil<br />
1 teaspoon cornflour<br />
1 teaspoon water<br />
Salt and pepper, to taste<br />
1 sheet ready-rolled shortcrust pastry, for bases<br />
1 sheet ready-rolled puff pastry, for tops<br />
1. Heat oil in saucepan, add leek, lightly sauté for 2<br />
minutes, add stock, eggplant, capsicum, tomato<br />
paste, olives and basil. Stir and cook over moderate<br />
heat for 2 minutes.<br />
2. Blend cornflour with water, add to vegetables and stir<br />
until mixture boils and thickens. Season with salt and<br />
pepper if required. Allow to cool.<br />
3. Preheat <strong>Pie</strong> <strong>Maker</strong> until the ‘Ready-to-bake’ light<br />
illuminates.<br />
4. Insert pastry bases, fill each base with ½ cup mixture<br />
and cover with pastry tops.<br />
5. Close lid and cook pies. Check after 3-5 minutes and<br />
remove when pies are golden brown.<br />
NOTE<br />
More information on <strong>Pie</strong> Fillings and Reheating<br />
can be found in ‘Hints and Tips for Best Results’ on<br />
Pages 10 and 11.<br />
R7<br />
LEMON TUNA AND CORN PIES<br />
Makes 4<br />
1 x 100g can tuna in lemon and cracked pepper, drained<br />
1 x 130g can pureed sweet corn, drained<br />
¼ cup mashed potato or cooked white rice<br />
2 teaspoons finely chopped fresh basil<br />
1 sheet ready-rolled shortcrust pastry, for bases<br />
1 sheet ready-rolled puff pastry, for tops<br />
1. Combine tuna, corn, potato or rice and basil in a bowl<br />
and stir until well combined.<br />
2. Preheat <strong>Pie</strong> <strong>Maker</strong> until the ‘Ready-to-bake’ light<br />
illuminates.<br />
3. Prepare pastry bases, fill each base with ½ cup<br />
mixture and cover with pastry tops.<br />
4. Close lid and cook pies. Check after 3-5 minutes and<br />
remove when pies are golden brown.
Gourmet <strong>Pie</strong>s continued<br />
SALMON AND CARROT PIES<br />
Makes 4<br />
1 teaspoon butter<br />
2 tablespoons finely chopped shallots<br />
1 x 10⁵g can salmon, drained<br />
1<br />
⁄3 cup finely grated carrot<br />
1<br />
⁄3 cup/75ml milk<br />
2 teaspoons cornflour<br />
2 teaspoons water<br />
Salt and pepper, to taste<br />
1 sheet ready-rolled shortcrust pastry, for bases<br />
1 sheet ready-rolled puff pastry, for tops<br />
1. Heat butter in saucepan, add shallots and lightly sauté<br />
for 2 minutes. Add salmon, carrot and milk, cook over<br />
moderate heat for 4 minutes.<br />
2. Blend cornflour with water, add to salmon mixture and<br />
stir until mixture boils and thickens. Season with salt<br />
and pepper if required. Allow to cool.<br />
3. Preheat <strong>Pie</strong> <strong>Maker</strong> until the ‘Ready-to-bake’ light<br />
illuminates.<br />
4. Insert pastry bases, fill each base with ½ cup mixture<br />
and cover with pastry tops.<br />
5. Close lid and cook pies. Check after 3-5 minutes and<br />
remove when pies are golden brown.<br />
NOTE<br />
All recipes use Australian metric cup and spoon<br />
measurements.<br />
SPINACH AND FETA PIES<br />
Makes 4<br />
100g English spinach<br />
1 teaspoon butter<br />
1 ⁄3 cup finely chopped onion<br />
100g feta cheese, crumbled<br />
1 tablespoon pine nuts<br />
Cracked black pepper, to taste<br />
1 sheet ready-rolled shortcrust pastry, for bases<br />
1 sheet ready-rolled puff pastry, for tops<br />
1. Blanch spinach, drain in sieve, push out excess<br />
moisture and finely chop.<br />
2. Heat butter in a saucepan, add onion and lightly sauté<br />
for 4 minutes. Remove from heat and add spinach,<br />
cheese, and pine nuts. Season with pepper if required.<br />
Allow to cool.<br />
3. Preheat <strong>Pie</strong> <strong>Maker</strong> until the ‘Ready-to-bake’ light<br />
illuminates.<br />
4. Insert pastry bases, fill each base with ½ cup mixture<br />
and cover with pastry tops.<br />
5. Close lid and cook pies. Check after 3-5 minutes and<br />
remove when pies are golden brown.<br />
R8
Dessert <strong>Pie</strong>s and Sweet Ideas<br />
APPLE PIES<br />
Makes 4<br />
1 cup/250g grated apple<br />
½ teaspoon cinnamon<br />
1½ tablespoons caster sugar<br />
2 teaspoons cornflour<br />
2 teaspoons water<br />
1 sheet ready-rolled shortcrust pastry, for bases<br />
1 sheet ready-rolled puff pastry, for tops<br />
1. Combine apple, cinnamon and sugar in a saucepan<br />
and sauté over moderate heat until apple is cooked.<br />
2. Mix cornflour and water together and add to the apple<br />
mixture. Cook for a further 1 minute.<br />
3. Preheat <strong>Pie</strong> <strong>Maker</strong> until the ‘Ready-to-bake’ light<br />
illuminates.<br />
4. Insert pastry bases, fill each base with ½ cup mixture<br />
and cover with pastry tops.<br />
5. Close lid and cook pies. Check after 3-5 minutes and<br />
remove when pies are golden brown.<br />
STRAWBERRY AND VANILLA BEAN PIES<br />
Makes 4<br />
1 punnet strawberries, hulled<br />
3 tablespoons caster sugar<br />
½ teaspoon vanilla bean paste or extract<br />
Filo pastry x 8 sheets<br />
1. Preheat <strong>Pie</strong> <strong>Maker</strong> until the ‘Ready-to-bake’ light<br />
illuminates.<br />
2. Combine strawberries, sugar, vanilla and 1 tablespoon<br />
of water in a saucepan and bring to the boil. Lower<br />
the heat and stir for 2 minutes.<br />
3. Prepare pastry bases by placing 1 sheet of filo pastry<br />
onto bench. Lightly spray with oil, then place next<br />
filo sheet on top. Repeat spraying and layering with<br />
2 more filo pastry sheets. Repeat using the last 4<br />
sheets of filo pastry.<br />
4. Slice each filo pastry sheet in half.<br />
5. Insert half of filo pastry into pie well and equally<br />
distribute strawberry, vanilla mixture into the bases.<br />
Fold excess pastry over and into the middle of each pie.<br />
6. Close lid and cook for 5 minutes or until pastry is<br />
golden brown.<br />
R9<br />
CHOC BANANA HAZELNUT TARTS<br />
Makes 4<br />
1 cup diced banana<br />
2 tablespoons hazelnut choc spread<br />
8 sheets filo pastry<br />
Canola oil spray<br />
1. Preheat <strong>Pie</strong> <strong>Maker</strong> until the ‘Ready-to-bake’ light<br />
illuminates.<br />
2. Prepare pastry bases by placing 1 sheet of filo pastry<br />
onto bench. Lightly spray with oil, then place next<br />
filo sheet on top. Repeat spraying and layering with<br />
2 more filo pastry sheets. Repeat using the last 4<br />
sheets of filo pastry.<br />
3. Slice each filo pastry sheet in half.<br />
4. Insert half of filo pastry into pie well and equally<br />
distribute hazelnut chocolate spread and banana into<br />
the bases. Fold excess pastry over and into the middle of<br />
each pie.<br />
5. Close lid and cook for 5 minutes or until pastry is light<br />
golden brown.
Notes<br />
R10
Notes<br />
R11
Notes<br />
R12
<strong>Breville</strong> Customer Service Centre<br />
Australian Customers<br />
✉<br />
<strong>Breville</strong> Customer Service Centre<br />
PO Box 22<br />
Botany NSW 2019<br />
AUSTRALIA<br />
☎<br />
Customer Service: 1300 139 798<br />
Fax (02) 9384 9601<br />
Email Customer Service:<br />
askus@breville.com.au<br />
www.breville.com.au<br />
<strong>Breville</strong> is a registered trademark of <strong>Breville</strong> Pty Ltd<br />
ABN 98 000 092 928<br />
© Copyright <strong>Breville</strong> Pty Ltd 2008<br />
New Zealand Customers<br />
✉<br />
<strong>Breville</strong> Customer Service Centre<br />
Private Bag 94411<br />
Greenmount<br />
Auckland, New Zealand<br />
☎<br />
Customer Service: 0800 273 845<br />
Fax 0800 288 513<br />
Email Customer Service:<br />
askus@breville.com.au<br />
Due to continual improvements in design or otherwise,<br />
the product you purchase may differ slightly from the one illustrated in this booklet.<br />
Model <strong>BPI240</strong> Issue B10<br />
PRINTED ON<br />
RECYCLED PAPER<br />
AUSTRALIAN<br />
OWNED


