
You also want an ePaper? Increase the reach of your titles
YUMPU automatically turns print PDFs into web optimized ePapers that Google loves.
Operating Your <strong>Breville</strong> <strong>Pie</strong> <strong>Maker</strong> continued<br />
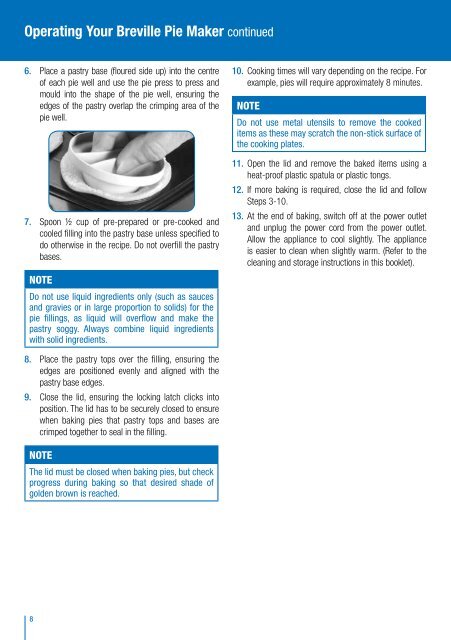
6. Place a pastry base (floured side up) into the centre<br />
of each pie well and use the pie press to press and<br />
mould into the shape of the pie well, ensuring the<br />
edges of the pastry overlap the crimping area of the<br />
pie well.<br />
7. Spoon ½ cup of pre-prepared or pre-cooked and<br />
cooled filling into the pastry base unless specified to<br />
do otherwise in the recipe. Do not overfill the pastry<br />
bases.<br />
NOTE<br />
Do not use liquid ingredients only (such as sauces<br />
and gravies or in large proportion to solids) for the<br />
pie fillings, as liquid will overflow and make the<br />
pastry soggy. Always combine liquid ingredients<br />
with solid ingredients.<br />
8. Place the pastry tops over the filling, ensuring the<br />
edges are positioned evenly and aligned with the<br />
pastry base edges.<br />
9. Close the lid, ensuring the locking latch clicks into<br />
position. The lid has to be securely closed to ensure<br />
when baking pies that pastry tops and bases are<br />
crimped together to seal in the filling.<br />
NOTE<br />
The lid must be closed when baking pies, but check<br />
progress during baking so that desired shade of<br />
golden brown is reached.<br />
8<br />
10. Cooking times will vary depending on the recipe. For<br />
example, pies will require approximately 8 minutes.<br />
NOTE<br />
Do not use metal utensils to remove the cooked<br />
items as these may scratch the non-stick surface of<br />
the cooking plates.<br />
11. Open the lid and remove the baked items using a<br />
heat-proof plastic spatula or plastic tongs.<br />
12. If more baking is required, close the lid and follow<br />
Steps 3-10.<br />
13. At the end of baking, switch off at the power outlet<br />
and unplug the power cord from the power outlet.<br />
Allow the appliance to cool slightly. The appliance<br />
is easier to clean when slightly warm. (Refer to the<br />
cleaning and storage instructions in this booklet).