Ghost Ships - Model Ship Builder
Ghost Ships - Model Ship Builder
Ghost Ships - Model Ship Builder

Create successful ePaper yourself
Turn your PDF publications into a flip-book with our unique Google optimized e-Paper software.
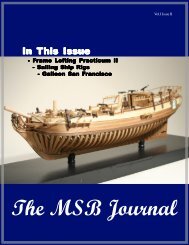
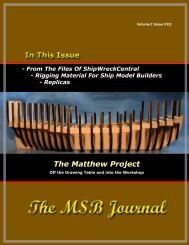
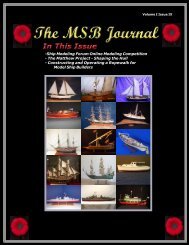
- The RNLB Helen Wycherly<br />
- <strong>Ghost</strong> <strong><strong>Ship</strong>s</strong><br />
- Cutting Logs and Planks<br />
- From the Files of<br />
<strong>Ship</strong>WreckCentral<br />
- More Contributors Pictures<br />
Vol. II Issue VIII
The<br />
MSB<br />
Journal<br />
Vol. II Issue VIII<br />
October 2008
The MSB Journal<br />
ISSN 1913-6943<br />
Volume II, Issue VIII<br />
October 2008<br />
© www.modelshipbuilder.com<br />
All articles published in The MSB Journal are<br />
covered under international copyright laws.<br />
This newsletter may be re-distributed freely as long as it remains,<br />
whole, intact and un-altered. We also urge you to print a copy for your<br />
workshop or reading area.<br />
Published by<br />
www.modelshipbuilder.com<br />
On the Cover<br />
Stadiometer<br />
National Maritime Museum<br />
How to Contact The MSB Journal<br />
By email: msbjournal@modelshipbuilder.com<br />
By Snail-Mail<br />
<strong>Model</strong><strong>Ship</strong><strong>Builder</strong>.com<br />
c/o Winston Scoville<br />
117 Victoria St.<br />
P.O Box 1195<br />
Clinton, Ontario, N0M 1L0<br />
Canada<br />
Article / Content Contributions<br />
Please submit all article and content<br />
contributions to:<br />
msbjournal@modelshipbuilder.com
In This Issue of<br />
The MSB Journal<br />
The RNLB<br />
Helen<br />
Wycherly … 6<br />
From the Files<br />
of <strong>Ship</strong>Wreck<br />
Central … 10<br />
<strong>Ghost</strong><br />
<strong><strong>Ship</strong>s</strong> … 11<br />
What is this?<br />
… 12<br />
Contributors<br />
Pictures … 15<br />
On The<br />
Cover … 22<br />
Cutting<br />
Logs and<br />
Planks … 17<br />
Badges:<br />
Heraldry of<br />
Canadian<br />
Naval <strong><strong>Ship</strong>s</strong><br />
… 23<br />
B S E E O M E I P I H I N E A<br />
H H M T P N H N K N I R G D<br />
D O T O L T S O S T<br />
Y O U S R Y T W<br />
Crossword &<br />
Trivia ...24
Editors Notes<br />
Ever have a feeling you were being watched?<br />
www.modelshipbuilder.com<br />
5<br />
Volume II Issue VII<br />
I snapped this picture this past summer in my back yard<br />
while sitting on my deck. This was one very busy squirrel.<br />
It even drove the neighbourhood cats a little crazy while<br />
avoiding their efforts to make him their lunch! :-)<br />
Unfortunately, due to time constraints beyond my control<br />
and some work that I have scheduled to work on at the<br />
website, next month I will not be able to put out an issue<br />
of The MSB Journal. Fear not though, as it will be back the<br />
first of December.<br />
And on that note, our electoral leadership debates are on TV tonight here in Canada so I’m<br />
going to get this issue out without further delay.<br />
Happy <strong>Model</strong>ing.<br />
Winston Scoville<br />
www.modelshipbuilder.com
The RNLB Helen Wycherly<br />
An ongoing project by Mike Pendlebury<br />
Mike sent in some more progress pictures of his lifeboat project.<br />
The sliding rudder has been built and trial fitted in place to check that the<br />
function is correct, and the wooden fendering around the top of the hull<br />
laminated in place.<br />
www.modelshipbuilder.com<br />
6<br />
Volume II Issue VII<br />
Next the whole hull has had four coats of primer, sanded down between<br />
coats, until the finish was acceptable. This was then followed by masking<br />
off the delineation between the lower white hull section and the blue upper<br />
hull and again four coats of colour painted on to give a good finish.
After these coats hardened off<br />
the fender was painted in its<br />
typical red.<br />
www.modelshipbuilder.com<br />
7<br />
Volume II Issue VII<br />
As this is to be a working model the<br />
power plants and associated control gear<br />
were added and checked out in the test<br />
tank (the bathtub!!).<br />
After a successful test attention was directed to fitting the raised bulwarks<br />
at the bow and stern. The supports were built up from steamed timber<br />
laminated over accurate tracings of the deck edge and then pinned in place<br />
on the deck.
www.modelshipbuilder.com<br />
8<br />
Volume II Issue VII<br />
The sides were then steamed, bent and glued in place up to the correct level.<br />
The final section of the bulwarks was the bow block, which on the original boat was a solid<br />
bronze casting, it was built up from several sections of timber, filled with epoxy putty,<br />
sanded to shape and painted in a bronze colour then fitted in place ready to add the roller<br />
at a later date.
www.modelshipbuilder.com<br />
9<br />
Volume II Issue VII<br />
And that’s it for Mike’s update this month. She’s really starting to shape up Mike!
From the Files of <strong>Ship</strong>Wreck Central<br />
USS Cumberland, a 1,726-ton sailing frigate,<br />
was built between 1825 and 1843 at<br />
the Boston Navy Yard. She was commissioned<br />
in November 1843 and served for<br />
the next few years in the Mediterranean.<br />
She was in the Home Squadron in 1846-48,<br />
sometimes as its flagship, and participated<br />
in Mexican War operations during this time.<br />
Cumberland made two more deployments<br />
to the Mediterranean in 1849-51 and in<br />
1852-55.<br />
In 1855-56, Cumberland was converted to<br />
a sloop of war, allowing her to carry a battery<br />
of heavier, though fewer, guns. She<br />
was flagship of the Africa Squadron in 1857-59 and was again flagship of the Home<br />
Squadron in 1860.<br />
www.modelshipbuilder.com<br />
10<br />
Volume II Issue VII<br />
As the secession crisis turned warlike in the spring of 1861, Cumberland was at the Norfolk<br />
Navy Yard, Virginia, and was towed to safety when that facility was burned and abandoned<br />
on 20 April. Thereafter, she served on Civil War blockading duty off the Confederacy's<br />
Atlantic coast, taking part in, among other things, the capture of Forts Hatteras and<br />
Clark in late August 1861.<br />
Last Voyage<br />
Cumberland was anchored off Newport News, Virginia, on 8 March 1862, when the ironclad<br />
CSS Virginia (aka Merrimack) came out to attack Federal warships in Hampton Roads.<br />
In a battle that decisively demonstrated the power of the armoured steam-powered warships<br />
against the earlier wooden sailing types, Cumberland was rammed and sunk by the<br />
Virginia. Her own guns were unable to significantly hinder the Confederate ironclad, and<br />
she was incapable of sailing away from the encounter. (U.S. Naval Historical Center)<br />
The sinking of the Cumberland on March 8, 1862 was one of the more dramatic moments<br />
of the Civil War. Her captain was absent that day, presiding at a court martial on board<br />
the U.S.S. Roanoke, and the command devolved upon the executive officer, Lt. George U.<br />
Morris. That the battle with the Merrimac would really be no contest became apparent<br />
when the Confederate ship's guns raked the deck of the U.S.S. Congress, inflicting severecasualties,<br />
and the return fire failed to penetrate, or even seriously damage, the ironclad's<br />
armour.<br />
The Merrimac's captain asked Morris to surrender, to which he replied "Never! I'll sink<br />
alongside!" and gave orders to commence firing. The ironclad steamed directly towards<br />
the Cumberland and rammed her in the forward starboard quarter. The Merrimac backed<br />
off, breaking her recently extended prow in the process. The pinon ship lurched and her<br />
main deck began to sink beneath the waters of the James River, but not before she had<br />
fired a series of broadsides, killing or wounding nineteen men and causing more damage<br />
to the ironclad than she sustained at any other time in her combat career. Within a short<br />
time the Cumberland had settled on the river bottom with only her flag and mainmast top<br />
still visible above the waves.- Over 120 members of her brave crew accompanied the<br />
proud warship on this final descent.
GHOST SHIPS<br />
by Gene Bodnar<br />
www.modelshipbuilder.com<br />
11<br />
Volume II Issue VII<br />
In the past hundred years all the way up to present<br />
times, there have been numerous accounts<br />
of ghost ship sightings, and most of the sightings<br />
have been reported repeatedly by many<br />
different witnesses. Three of the most famous<br />
“ghost ships” are the “Flying Dutchman,” the<br />
“Mary Celeste,” and the “Queen Mary.”<br />
The legend of the “Flying Dutchman,” is probably<br />
the best known, and many superstitious<br />
folks believe that sighting the vessel is an omen<br />
of disaster. While under sail around the Cape of<br />
Good Hope in 1660, she encountered a bad<br />
storm. The captain, refusing to sail for safe harbor,<br />
lost all of its crew. Today, many believe<br />
that the ship and its crew are doomed to sail<br />
forever on the open sea. Numerous reports of<br />
its sighting have been made, and most often<br />
they include stormy weather. Legend has carried<br />
the story a step further, especially in a play<br />
by Richard Wagner, by saying that the Captain<br />
goes ashore every seventh year in order to redeem<br />
himself by winning the hand of a maiden.<br />
Slightly past midnight on January 26, 1923 four seamen sighted the “Flying Dutchman,”<br />
which they viewed with binoculars. The vessel appeared to have two luminous masts, but<br />
instead of sails, they saw a thin mist where the sails should have been. As it approached<br />
nearer, it suddenly disappeared.<br />
The second famous “ghost ship” is the<br />
“Mary Celeste.” On December 5,<br />
1872, the ship “Dei Gratia” spotted the<br />
“May Celeste” floundering at sea. Approaching<br />
the ship, the captain, who<br />
has an excellent reputation, was surprised<br />
to see the ship derelict and<br />
boarded the apparently abandoned<br />
vessel, where it appeared as though<br />
the crew had left in a great hurry. No<br />
evidence of foul play was every discovered,<br />
and theories ranging from<br />
foul play to seaquakes to being eaten<br />
by sharks. Ever since this time, numerous<br />
people have claimed to still<br />
see the “Mary Celeste” sailing on the sea.<br />
The third famous “ghost ship” is the “Queen Mary,” an ocean liner that accidentally nudged<br />
the “HMS Curacoa” on October 2, 1942. The “Queen Mary” did not stop because her or-
www.modelshipbuilder.com<br />
12<br />
Volume II Issue VII<br />
ders were to continue on course, no matter what. As a result, the “Queen Mary” collided<br />
with the “HMS Curacoa” and snapped her in half. Of 439 men on board “HMS Curacoa,<br />
339 were lost.<br />
In 1967, the “Queen Mary” would be converted<br />
into a floating hotel in Long Beach, California.<br />
En route to California, strange things started to<br />
happen. Crew members heard clanging noises,<br />
as if the ship was under repair, but not a soul<br />
was there. One crew member sighted a woman<br />
at the swimming pool dressed in a bathing suit<br />
from the early 1950s, and said she was about<br />
to jump into the completely empty pool. When<br />
the crew member shouted at her to stop, she<br />
vanished. Later, ship’s records revealed that a<br />
woman had drowned in that swimming pool<br />
many years earlier.<br />
Numerous other incidents have been reported<br />
on the “Queen Mary.” Hatches open by themselves; sounds are heard in various areas of<br />
the ship; wet footprints have appeared along the empty swimming pool; and the ship’s<br />
first captain, who died on one of her voyages, has been sighted pacing on the bridge.<br />
Are you skeptical? Are you superstitious? Is there any truth to any of these sightings.<br />
Many sightings have been reported by highly respectable and upstanding citizens. It is difficult<br />
to dismiss all of them.<br />
The “Queen Mary” is still a floating hotel today, and she offers ghost tours on a daily basis.<br />
If you go on a Saturday night, you can dine with their resident psychic, too. You might<br />
want to check it out.
What is this?<br />
Can you name this object and what it was used for?<br />
The Lumberyard for <strong>Model</strong> <strong>Ship</strong>wrights<br />
We are proud to be your supplier of rough lumber,<br />
milled sheets and strips, plank on frame hull kits<br />
and model ship kits<br />
Visit us Today!<br />
www.dlumberyard.com<br />
www.modelshipbuilder.com<br />
13<br />
Volume II Issue VII
What is this? From the last Issue<br />
The Stadiometer is a rangefinder that looks very<br />
similar to a telescope but which has no lenses. This<br />
particular Stadiometer circa 1860 has a leathercovered<br />
barrel with an inset panel that holds a conversion<br />
table of tube length against height. The silvered<br />
brass fittings include two draw tubes with a<br />
scale of length inscribed along them. Looking<br />
through the eyepiece, there are two pairs of parallel<br />
wires at right angles to each other - the narrower<br />
wires are used for larger<br />
distances.<br />
www.modelshipbuilder.com<br />
14<br />
Volume II Issue VII<br />
To use the instrument, the<br />
mariner lines up the top<br />
and bottom of the ship observed<br />
with the two parallel<br />
wires and then reads<br />
off the length from the<br />
scale inscribed on the<br />
Stadiometer<br />
draw tubes. They would<br />
then use the table in the inset<br />
panel to work out the distance based on the known (or estimated)<br />
height of the ship observed.<br />
Rangefinders were designed principally to determine how far away other ships were, either<br />
for travelling in convoy or when fighting an enemy ship. This type was invented by G.H.<br />
Blakey, who was a master in the Royal Navy from 1849 (retiring with the rank of commander<br />
in 1870), and was made solely by W. Heath of Devonport, whose name is printed<br />
on the table.
Contributors Pictures<br />
www.modelshipbuilder.com<br />
15<br />
Volume II Issue VII<br />
Here are some more pictures sent by from Brian Lemon of Australia of some of his models.<br />
This first set of is a 1/16” scale model of the Scottish Fishing Smack “Loch Fyne”
Next are some pictures of the West Australian Cargo Cutter “GEM” which<br />
sank of Rottnest in 1876.<br />
www.modelshipbuilder.com<br />
16<br />
Volume II Issue VII
This article is an addendum<br />
to the "Lumber Mill" article<br />
published in the June issue<br />
(Vol. II Issue IV). There<br />
have been a lot of questions<br />
and discussions about how<br />
to harvest your own wood,<br />
or what to do with that log<br />
or plank you were given or<br />
you bought.<br />
Cutting Logs and Planks<br />
By: Gene Larson<br />
It should be realized that<br />
there are many excellent woods available<br />
in addition to the highly coveted English<br />
boxwood. As our Washington club member<br />
Howard Chapelle said, and echoed by Merritt<br />
Edson when he was Secretary of the<br />
Nautical Research Guild, woods such as<br />
maple, cherry, and holly make beautiful<br />
models, and in are of equal status with box<br />
wood. They both suggested that model<br />
builders use these woods local to us in the<br />
U.S. rather than pay exorbitant prices for<br />
foreign materials that are really no better.<br />
In order to pursue this endeavour you<br />
must realize that you need the proper<br />
equipment and know how to use it safely.<br />
There is a considerable investment involved<br />
if your only purpose is to produce<br />
model building woods as you will realize as<br />
you read further.<br />
I have harvested many interesting logs<br />
from various locations. I found apple in an<br />
old orchard to be replaced in West Virginia<br />
and a cousin's home in Wisconsin, walnut<br />
from a farm in Northern Virginia and our<br />
lake home in North Carolina, cherry from<br />
my brother-in-law's farm in southern Maryland,<br />
basswood and pear in a backyard in<br />
Alexandria, holly from a street development<br />
in one of George Washington's old<br />
farms (probably an original tree based on<br />
the size), Yoshino cherry from storm damaged<br />
cherry blossom trees on the D.C.<br />
mall, and silver and sugar maple, pine, cedar,<br />
plum and oak from our NC home.<br />
www.modelshipbuilder.com<br />
17<br />
Volume II Issue VII<br />
When you run out of those<br />
types of sources you can<br />
search the specialty wood<br />
stores for more exotic species.<br />
However, use caution<br />
in selecting your wood. It<br />
can be very expensive and<br />
you need to be sure the<br />
quality you want is consistent<br />
throughout the plank<br />
you choose. In some cases<br />
the mills subject the woods<br />
such as walnut to a boiling process to<br />
spread the dark color in the heart wood<br />
into the light colored areas of the softer<br />
sapwood. This has an effect on the original<br />
rich color of the heartwood. This misleads<br />
the customer and you can end up with a lot<br />
of expensive scrap. Also, the planks in<br />
wood stores usually are rough cut, not<br />
planed smooth. The surfaces of these<br />
planks age quickly, and it is difficult to tell<br />
the grain pattern and the amount of sapwood.<br />
This is especially true of cherry. The<br />
greatest advantage of store bought planks<br />
is they are already dry.<br />
Several factors to realize are:<br />
This "logging" process takes time to do and<br />
to wait for the wood to dry.<br />
There is probably up to 50% waste by the<br />
time you get to the final pieces of modeling<br />
wood.<br />
The cost of tools can be high.<br />
You potentially could be tagged as a purist.<br />
The final satisfaction is high.<br />
The anatomy of the tree is important to<br />
understand. There have been many articles<br />
in wood magazines on the subject, and<br />
there are numerous web sites on the subject.<br />
I will only touch on the more important<br />
aspects.
The three typical cuts that can be made in<br />
a log. The quarter sawn is the most stable,<br />
and usually gives a straight grain pattern<br />
down the length of the plank. The flat sawn<br />
will usually cup up on the ends as it dries<br />
(as shown in this location), and will have a<br />
more pronounced grain down its length.<br />
The rift cut will come out somewhere in the<br />
middle.<br />
The entire log could be quarter sawn by<br />
making all radial cuts, but that would be a<br />
very large project, and the rift and flat<br />
sawn sections do have some use after thorough<br />
drying.<br />
The initial log as the tree is removed. This<br />
happens to be a large oak tree in North<br />
Carolina. The log on the ground is 22<br />
inches in diameter and is one of three<br />
joined trunks on this tree. It is ten feet<br />
long, and very heavy.<br />
Note the absence of knots in this log from<br />
the lowest portion of the trunk.<br />
This wood was harvested for "furniture"<br />
pieces. Oak is not suitable for exterior<br />
wood on ship models due to its pronounced<br />
www.modelshipbuilder.com<br />
18<br />
Volume II Issue VII<br />
grain which is not to scale and is difficult to<br />
fill to a smooth finish. It can be used for<br />
strength members on ship models in locations<br />
where it will not be seen.<br />
The 22" diameter log was reduced in length<br />
to five feet. It still weighs much more than<br />
even two people can pick up due partly to<br />
being "wet", The quartering process has<br />
begun.<br />
Note the sap wood (light color next to the<br />
bark, and the darker coloured heart wood.<br />
The quarters are then cut into slabs about<br />
4" thick. The second slab cut in each quarter<br />
of the log is made perpendicular to the<br />
first to keep grain as much as possible in<br />
the "quarter sawn" orientation. However it<br />
does approach the "rift sawn" condition in<br />
some areas,<br />
The pieces to the left are "scrap" for fire<br />
wood.<br />
This same principle can be used on any<br />
size log. Just scale down the size of the<br />
cuts to fit your needs. Typically the plank<br />
thickness would be between 1" and 2".
The oak slabs are stacked with spacers<br />
(called "sticks') to permit air circulation.<br />
The rule of thumb is to allow drying of one<br />
year per inch of thickness if no "forced drying"<br />
is done. Note that the ends of the<br />
slabs have not as yet been coated with<br />
sealing wax. Note also the sap wood at the<br />
right edges of each slab. This will be<br />
trimmed off, thus removing the unwanted<br />
bark.<br />
Some black walnut lumber harvested in<br />
North Carolina from a rotting tree. (Walnut<br />
and holly trees are much more desirable<br />
when they are<br />
alive and growing.)<br />
Note the<br />
white areas are<br />
sap wood that<br />
must be removed<br />
in the<br />
final cutting<br />
process. These<br />
slabs were harv<br />
e s t e d f o u r<br />
years ago, and<br />
even without<br />
end sealing only<br />
www.modelshipbuilder.com<br />
19<br />
Volume II Issue VII<br />
one split can be seen. Due to the poor condition<br />
of the tree, there are areas in the<br />
walnut that are not usable due to knots, rot<br />
and staining. The better pieces have already<br />
been used for a model case base,<br />
decorations (cross), etc.<br />
Typical cutting of an 8" log into 1" thick<br />
approximate quarter sawn planks. The<br />
plank grain actually ranges from quarter<br />
sawn to rift sawn.<br />
Keep in mind that<br />
the final piece of<br />
wood required for<br />
a ship model is<br />
typically 1/4" x<br />
1/16", but usually<br />
not over 3/8"<br />
thick. This is<br />
smaller than the<br />
size of this "o" in<br />
the drawing.<br />
A stack of sugar maple that has been drying<br />
since 1997. The layers are separated<br />
by plastic strips. The ends have been<br />
sealed. Note the species and date of cutting<br />
are marked on each piece.
The Final Step<br />
Plan ahead so your final cuts are approximately<br />
as shown in either drawing. The<br />
drawing represents final planks of 1/6"<br />
thick by 1/4" wide, This is typical of planks<br />
required for ship models. See separate<br />
shop note on one process for achieving the<br />
final planks. The upper cutting process is<br />
well suited to representing deck caulking<br />
by, prior to cutting, coating the "top surface"<br />
with dark pencil, varnish and then<br />
black paint, or black craft paper, depending<br />
on the model scale and thickness of the<br />
caulking.<br />
Wood ready for a model. The model is a<br />
Chesapeake Bay Oyster Sloop at a scale of<br />
3/8" = 1' (1/32). The long cherry strips for<br />
hull planks are 1/16" x 1/4" (2" x 8"). The<br />
holly deck planks are 1/16" x 1/8" (2" x<br />
4"). The holly has black craft paper glued<br />
to one edge to represent deck caulking.<br />
Note the larger pieces of uncut holly with<br />
the black paper attached.<br />
Reference: See the following web page for<br />
more specifics on log cutting<br />
Reference: Wood Magazine issues 155,<br />
156, 157 and 158 (May, June/July, Sep-<br />
www.modelshipbuilder.com<br />
20<br />
Volume II Issue VII<br />
tember, and October 2004) had a four part<br />
article on understanding wood. Perhaps<br />
you can find copies in the library or on the<br />
web.<br />
A great example of the beautiful "flat<br />
sawn" patterns available on some woods<br />
such as walnut and cherry is the veneer cut<br />
from the logs. The cutting process involves<br />
very sharp blades slicing off sheets of wood<br />
like unrolling paper towel. These are the<br />
patterns not desirable in model building.<br />
Generally you only want to keep the heartwood<br />
of any log. Usually the sapwood is<br />
softer and a different color. I also avoid the<br />
very center of the log The pith, and try to<br />
work around knots. If you can manage to<br />
get a log from the bottom of the trunk it<br />
should generally have fewer or no knots.<br />
It is not necessary to remove the bark from<br />
the log as it will become a part of the scrap<br />
wood as the cutting progresses. It will usually<br />
be removed with the sapwood. Also I<br />
recommend cutting the log down to the<br />
minimum size you think you will need.<br />
There are two reasons for this. One is the<br />
wet wood cuts much easier than dry wood<br />
and is not as rough on your saw blades.<br />
The second reason is that the wood will dry<br />
faster in the smaller dimensions. However,<br />
leave sufficient material to allow for warpage,<br />
twisting and bending during drying.<br />
The initial cuts you make in a log are not<br />
critical to the desired final grain pattern of<br />
the model wood, especially if the log is<br />
large. It is advisable, however, to plan<br />
ahead.<br />
The quarter sawn rule is not absolute.<br />
There can be some degree of rotation to<br />
flat sawn without greatly electing the pattern<br />
or the tendency to warp. Every piece<br />
cut out of a log cannot be exactly quarter<br />
sawn.<br />
For large logs I use a chain saw to make<br />
the longitudinal cuts. This is very imprecise,<br />
but a magic marker guide line helps.<br />
The surface will be very rough, uneven,<br />
and probably curved. Cut slabs and chunks<br />
of the log down to approximately 6 inches
thick in one dimension. After this a band<br />
saw can handle the cutting. For modeling<br />
woods I prefer quarter sawn lumber. For<br />
furniture, model cases, and stands I prefer<br />
the plain/flat sawn because of the more<br />
prevalent grain even though there is more<br />
probability of warpage. After the planks are<br />
dry the warpage can be removed by running<br />
them through a planer.<br />
If the log is in the 6 to 9 inch diameter<br />
range you can usually make your cuts on a<br />
heavy duty band saw with a large blade<br />
(3/4 inch minimum). Just draw a line down<br />
the log and follow it as closely as possible.<br />
Continue cutting the wood down to the<br />
minimum possible thickness based on the<br />
final usage. For me this is usually one to<br />
two inches thick and whatever width comes<br />
out of the cutting process.<br />
There are mixed opinions regarding the<br />
need to "seal" the ends of the wood prior<br />
to the drying process below. Some woods,<br />
especially when extremely wet when cut,<br />
have a tendency to split along the grain<br />
several inches into the billet. This is due to<br />
the end grain drying and shrinking faster<br />
than the rest of the wood. Rather than experiment<br />
with what wood will and will not<br />
split as they dry, I always seal the ends. I<br />
usually use wax, or paraffin as it is called in<br />
the home canning process. I melt the wax<br />
in an old pan carefully on the stove, then<br />
take it outside and dip the ends in about an<br />
inch. When in the "field" without the wax<br />
readily available I will use anything around<br />
that I think might work such as shellac,<br />
varnish, or regular paint. These do not<br />
work as well as wax as it has been proven<br />
and reported in woodworking magazines<br />
the paint/varnish finishes are not a complete<br />
moisture barrier when used in furniture<br />
applications. However they are a help<br />
and the wax treatment can be accomplished<br />
later.<br />
Now stack the wood in a dry, out of the<br />
way location, and allow the drying process<br />
to take place, with the rule of thumb of one<br />
inch per year. This can be expedited somewhat<br />
if a fan is directed on the stack and<br />
www.modelshipbuilder.com<br />
21<br />
Volume II Issue VII<br />
left running. In stacking the wood use layers,<br />
and place thin pieces of the same<br />
wood (or plastic) across each layer to permit<br />
better air circulation. A different wood<br />
for the "sticks", as they are called, could<br />
create stains in your wood.<br />
When the wood is dry it is ready to process<br />
into model planks. Now you can go to the<br />
shop note on Your Own Lumber Mill on this<br />
web site. Just realize that you will still need<br />
a band saw, a jointer, maybe a planer,<br />
maybe a 10 inch, or so, table saw, a thickness<br />
sander, and maybe a model builder's<br />
miniature table saw. There is a new very<br />
small model builder's planer available. It<br />
appears to be an excellent machine, but I<br />
find that I have no need for this size. My<br />
larger equipment handles all the jobs, and<br />
I do not need the extra investment in such<br />
a highly specialized machine. The thickness<br />
sander performs the dimensioning perfectly<br />
down to the thickness of a sheet of paper,<br />
if necessary. Sanding "lines" (scratches) in<br />
the wood are no problem at all, and in fact,<br />
after the final installation of the wood there<br />
will almost always be the need of fine<br />
sanding.<br />
Have fun with woods!
On The Cover<br />
www.modelshipbuilder.com<br />
22<br />
Volume II Issue VII<br />
On the cover of this issue is the Stadiometer that was in last months “What’s This” section.<br />
Have an interesting picture you’d like to see on the cover? We’d love to hear from you.<br />
Drop us a line a line at msbjournal@modelshipbuilder.com with your picture.<br />
The Lumberyard for <strong>Model</strong> <strong>Ship</strong>wrights<br />
We are proud to be your supplier of rough lumber,<br />
milled sheets and strips, plank on frame hull kits<br />
and model ship kits<br />
Visit us Today!<br />
www.dlumberyard.com
www.modelshipbuilder.com<br />
23<br />
Volume II Issue VII<br />
Badges:<br />
Heraldry of Canadian Naval <strong><strong>Ship</strong>s</strong><br />
Description:<br />
HMCS Athabaskan<br />
Blazon On a field argent, a North American Indian clad in buckskin<br />
breeches, leggings and beaded moccasins, but bare to the<br />
waist except for a necklace of bear’s claws and blue shells, and<br />
ear ornaments of the last The Indian wears the full-feathered<br />
headdress and is mounted bareback upon an Indian pony being<br />
halted from the trot. The Indian holds a red bow and arrow in<br />
the “ready” position, the latter pointing down.<br />
Colours:<br />
White and scarlet<br />
Motto:<br />
We fight as one<br />
Battle Honours:<br />
Arctic, 1943-1944; English Channel, 1944; Korea, 1950,1953
TRAWLER’S SLANG<br />
by Gene Bodnar<br />
www.modelshipbuilder.com<br />
24<br />
Volume II Issue VII<br />
Directions: Match the definition with the appropriate term found at the bottom of this<br />
page. Each term will be used only once.<br />
1. _____ Compartment into which herring are shoveled.<br />
2. _____ Trawler that carried duty-free schnapps and tobacco to sell to its crew members.<br />
3. _____ Hidden, uncharted reef.<br />
4. _____ Dockside scrounger on the look-out for fishermen who may have money in<br />
their pocket.<br />
5. _____ To gossip, especially when two trawlers meet at sea.<br />
6. _____ Senior skipper of a trawler fleet.<br />
7. _____ Line-fishing schooner from America, Canada, Newfoundland, France, Spain,<br />
or Portugal.<br />
8. _____ Man who stands on a cliff top and guides a trawler to where he saw shoals of<br />
herring, pilchard, or mackerel.<br />
9. _____ Fisherman who takes fish under the legal size.<br />
10. _____ Portion of profits due to a tawlerman not paid in wages.<br />
11. _____ Fisherman who mends nets.<br />
12. _____ A successful trawling vessel.<br />
13. _____ A trawler that is so successful that another vessel can be builtfrom its profits.<br />
14. _____ A vessel that line-fishes for cod.<br />
A. ADMIRAL H. DOLE<br />
B. BALKER I. FLEWER<br />
C. BETESTER J. GRAND BANKER<br />
D. BLINDER K. KID<br />
E. COD BANGER` L. MARDLE<br />
F, COPER M. MOTHER<br />
G. COW KILLER N. WESLEY HUNTER<br />
NAUTICAL KNOWLEDGE<br />
An interesting quotation has been fit into the diagram below. You will have to rearrange<br />
the letters considerably to find it. Looking at each column of letters vertically, distribute<br />
the letters in it into the empty squares directly below. The black squares show you the<br />
spaces between the words in the quotation. They’ll help you decide just which box to use<br />
for each letter over it in order to spell out the quotation.<br />
B S E E O M E I P I H I N E A<br />
H H M T P N H N K N I R G D<br />
D O T O L T S O S T<br />
Y O U S R Y T W
CRYPTOGRAMS<br />
by Gene Bodnar<br />
www.modelshipbuilder.com<br />
25<br />
Volume II Issue VII<br />
The words in each Cryptogram are related to a single subject. A simple substitution code has been used<br />
for each cryptogram. Frequently used letters and double letters are clues that will help you break the<br />
code.<br />
<strong>Ship</strong>’s Crew Parts of a Sail<br />
Example: Deck hand Example: Cringle<br />
P F X E R L F E F L P X T U J H<br />
H M P P F T B R L U J O G B S<br />
Q G L X E P F E R I W B B U F<br />
P G B X V G Y F T O U U C I J B H<br />
F B P G L F Z I U V V L I J B H<br />
X R F P F T I W V F O W Z U<br />
Q M L R E M Y P F T Z U J E<br />
H M K X D F G T F J I V G B S<br />
H F L Y R T E R L K V U X<br />
H F N G T N M S V U U K T
NAUTICAL ALPHABET<br />
www.modelshipbuilder.com<br />
26<br />
Volume II Issue VII<br />
There is one place for each letter of the alphabet in the 26 empty squares in the diagram below. Fill in<br />
each letter so that a nautical word of at least four letters is formed reading across only. Not all the letters<br />
to the left and right of the empty box are used; it’s up to you to discover which ones are needed to complete<br />
the words. Only one arrangement of all the letters of the alphabet will complete a word in each<br />
row. Plurals are not allowed. Cross out each letter as you use them.<br />
A B C D E F G H I J K L M N O P Q R S T U V W X Y Z<br />
S P L O N E T T Y R<br />
C H O S T P P E R N<br />
A S T O R I L I T S<br />
P E S C O R S E T E<br />
R E S C O S W A I N<br />
A C B A S U P P E R<br />
A S P A W T O S T E<br />
R I N K E E L L O S<br />
R E S T A L O C K O<br />
T O M M I Z E N N E<br />
B O W I N L A S S T<br />
C O L A T T U D E R<br />
R O A S H A V E T A<br />
B R A N S A N K E R<br />
S T O R E U O I N D<br />
P O S L I E L I N E<br />
A L L A B I D L E N<br />
B A N I C C L O N E<br />
S C A M A A Z I N E<br />
T R A R O H R O U D<br />
A B I G H S T O P E<br />
R O B A T I M B L E<br />
G A G R O M E T R E<br />
H A S H A T Y C O N<br />
S P L A N R O N E T<br />
Q U A T H A R T S P
ANSWERS:<br />
Trawlers Slang: 1-K, 2-F, 3-D, 4-N, 5-L, 6-A, 7-J, 8-B, 9-I, 10-H, 11-C, 12-G,<br />
13-M, and 14-E.<br />
www.modelshipbuilder.com<br />
27<br />
Volume II Issue VII<br />
Nautical Knowledge: The only thing some men know about ships is that port is red.<br />
Cryptograms:<br />
<strong>Ship</strong>’s Crew: Master at arms; Commander; First Mate; Midshipman; Admiral;<br />
Seaman; Foretopman; Coxswain; Carpenter; Cabin Boy.<br />
Parts of a Sail: Head; Earing; Bonnet; Reef Band; Belly Band; Boltrope; Peak; Tabling;<br />
Clew; Leech.<br />
Nautical Alphabet:<br />
J E T T Y<br />
S T O P P E R<br />
R A I L<br />
C O U R S E<br />
C O X S W A I N<br />
S C U P P E R<br />
P A W L<br />
K E V E L<br />
B L O C K<br />
M I Z Z E N<br />
W I N D L A S S<br />
L A T I T U D E<br />
S H E A V E<br />
S P A N K E R<br />
Q U O I N<br />
L I F E L I N E<br />
A B R I D L E<br />
C Y C L O N E<br />
M A G A Z I N E<br />
S H R O U D<br />
B I G H T<br />
T H I M B L E<br />
G R O M M E T<br />
S H A N T Y C<br />
P L A N K<br />
T H W A R T