
You also want an ePaper? Increase the reach of your titles
YUMPU automatically turns print PDFs into web optimized ePapers that Google loves.
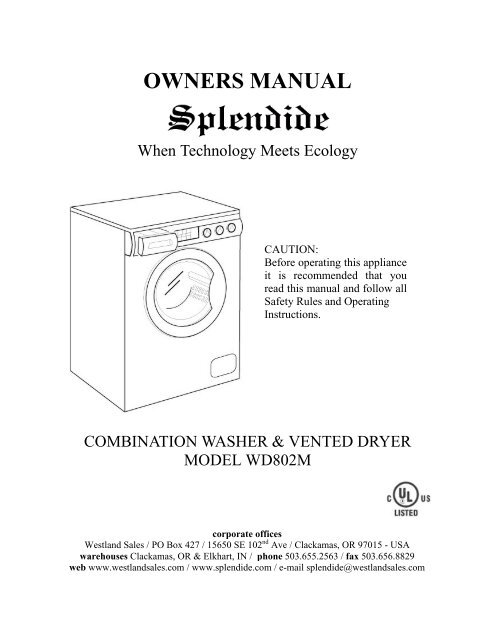
<strong>OWNERS</strong> <strong>MANUAL</strong><br />
When Technology Meets Ecology<br />
CAUTION:<br />
Before operating this appliance<br />
it is recommended that you<br />
read this manual and follow all<br />
Safety Rules and Operating<br />
Instructions.<br />
COMBINATION WASHER & VENTED DRYER<br />
MODEL WD802M<br />
corporate offices<br />
Westland Sales / PO Box 427 / 15650 SE 102 nd Ave / Clackamas, OR 97015 - USA<br />
warehouses Clackamas, OR & Elkhart, IN / phone 503.655.2563 / fax 503.656.8829<br />
web www.westlandsales.com / www.splendide.com / e-mail splendide@westlandsales.com
TABLE OF CONTENTS<br />
Record Serial & Model Number....…….. 1 Line Drawing and Images..............……… 8<br />
Installation...........................................…. 2 How To Wash.....................................…... 9<br />
Removing Shipping Brackets…... 2 Operating Steps.......................…... 9<br />
Leveling..................................….. 2 Your First Load......................…… 9<br />
Grounding...........................................….. 2 Pre-Wash..................................….. 9<br />
Plumbing………………………………... 3-4 How To Use Your Washer..................…... 10<br />
Exhausting.................………………….. 4 Tumble Dry..............................….. 10<br />
Important Safety Instructions.............….. 4 To Rinse, Spin and Tumble-Dry… 10<br />
Recessed, Closet and Alcove Installation. 5 Wash Table..............................….. 10<br />
Laundry Preparation................................. 6 Laundry Aids.......................................….. 11<br />
Sorting.......................................... 6 Detergent Recommendations...….. 11<br />
Inspection..................................... 6 Bleaches....................................…. 11<br />
Pre-Treating.................................. 6 Liquid Fabrics Softeners..........….. 11<br />
Pre-Washing................................. 6 Stain Removal Chart...........................…... 11-12<br />
Laundry Aids................................ 6 Care and Cleaning............................…….. 13<br />
Washer Features....................................... 7 Cleaning the Exterior................…. 13<br />
On-Off Button.............................. 7 Cleaning the Interior..................… 13<br />
Medium/High Spin Button........... 7 General Maintenance..................... 13<br />
High/Heat Half/Heat Button......... 7 Cleaning the Drain Screen............. 13<br />
Wash Timer.................................. 7 Winterizing...........................................….. 13<br />
Water Cycle Selector.................... 7 Avoid-Service Check List ...................….. 13-14<br />
Drying Timer................................ 7<br />
Cool Drying Period....................... 7<br />
Drain Screen................................. 7<br />
Detergent Dispenser..................... 7
CAUTION<br />
RISK OF ELECTRIC SHOCK DO NOT OPEN<br />
CAUTION: TO REDUCE THE RISK OF ELECTRIC SHOCK.<br />
DO NOT REMOVE COVER (OR BACK).<br />
NO USER SERVICEABLE PARTS INSIDE.<br />
REFER SERVICING TO QUALIFIED SERVICES PERSONNEL.<br />
The lightning flash with arrowhead symbol, within an equilateral triangle, is intended to alert the user to<br />
the presence of uninsulated "Dangerous Voltage" within the product's enclosure that may be of sufficient<br />
magnitude to constitute a risk of electric shock to persons.<br />
The exclamation point within an equilateral triangle is intended to alert the user to the presence of important<br />
operating and maintenance (servicing) instructions in the literature accompanying the<br />
appliance.<br />
The model number of this product may be found on the back of the unit; and the serial number on the label affixed to<br />
the back of the unit.<br />
You should note the model and serial numbers of this unit in the space provided, and retain this booklet as a permanent<br />
record of your purchase to aid in identification in the event of theft.<br />
MODEL NUMBER______________________________<br />
SERIAL NUMBER______________________________<br />
WARNING:<br />
TO PREVENT FIRE OR SHOCK HAZARD, DO NOT EXPOSE THIS PRODUCT TO RAIN OR MOISTURE.<br />
USE AND CARE OF YOUR<br />
AUTOMATIC WASHER-DRYER<br />
TO AVOID UNNECESSARY SERVICE CALLS<br />
Your new appliance is a carefully engineered product.<br />
Many times what appears to be a reason to call for service,<br />
requires nothing more than a simple adjustment you can<br />
easily make in your own home.<br />
You will be charged for a service call while the<br />
appliance is in warranty if the problem is not caused by<br />
defective product workmanship or materials covered<br />
by this warranty.<br />
To avoid a charge for an unnecessary service call, and<br />
before calling a serviceman, please refer to the Avoid<br />
Service Check List for situations that you can remedy.<br />
This list is included at the back of this Use and Care Book.<br />
•The washer must be installed on a strong level floor, and<br />
in a protected, dry, and well-ventilated area close to a<br />
power and water supply of sufficient capacity, and a sufficient<br />
drain outlet.<br />
•Dryer installation and grounding should be done in<br />
accordance with local codes by a qualified installer.<br />
BEFORE USING WASHER-DRYER<br />
Page 1<br />
This appliance is an automatic washer-dryer. It is front<br />
loading, with an extra large door opening for easier access.<br />
It has 5 wash cycles in addition to extra rinse and extra<br />
spin cycles.<br />
You will obviously want to obtain the best possible wash.<br />
By reading and following the instructions in this booklet<br />
you will achieve excellent results.<br />
Please ensure that the instructions are followed. If you<br />
should need any further advice or assistance please contact<br />
the dealer where your machine was purchased.<br />
•"Installation Instructions" are included in your Use and<br />
Care Manual for the installers reference.<br />
•The washer should be plugged into a properly grounded<br />
three (3) prong electrical outlet of 115 Volt, 1300W, 12.5<br />
A, 60 Hertz. It should not be controlled by a wall switch<br />
or pull cord which might be turned off accidentally.
IMPORTANT<br />
In the accessories bag you will also find a spanner that is to be used for removing brackets and leveling washer-dryer<br />
feet.<br />
REMOVE SHIPPING BRACKETS<br />
1. Remove back panel screws and lift panel clear<br />
(Fig. 1, Item. A).<br />
2. Remove fixing screws from the four brackets and<br />
cross bearing (Fig. 2, Item Y) then remove<br />
brackets.<br />
3. Fix back panel with 3 screws previously removed<br />
(Fig. 1, Item A).<br />
4. Close the 4 holes on the cabinet with the plastic<br />
blanking plugs that you will find in the accessories<br />
bag (Fig. 2, Item X & Z).<br />
Leveling<br />
After selecting a permanent location, the machine<br />
should be properly leveled to prevent vibration.<br />
To do this, adjust one or both front levelers, as<br />
needed, after loosening the lock nuts. Once your<br />
washer is perfectly leveled, be sure to tighten the lock<br />
nuts (Fig. 3).<br />
FOR YOUR OWN PROTECTION, AND TO PREVENT ACCIDENTS, INJURY AND FIRE, PLEASE READ<br />
THE FOLLOWING CAREFULLY:<br />
• Destroy the carton and plastic bags after the washerdryer<br />
has been unpacked.<br />
• Children should never be left alone or unattended in<br />
the area where appliances are located.<br />
• Washer installation and grounding must be done in<br />
accordance with local codes by a qualified installer.<br />
Installation instructions are included in this manual for<br />
the installer's reference.<br />
• Use only low sudsing detergents suitable for front<br />
loading washers, or a small amount of regular detergent.<br />
The soap suds should never exceed the mid-line<br />
of the port-hole.<br />
• The washer must be plugged into a properly grounded<br />
three (3) prong electrical outlet. For your safety, the<br />
third or round grounding prong must never be<br />
removed. DO NOT USE AN EXTENSION CORD.<br />
GROUNDING INSTRUCTIONS<br />
This appliance must be grounded. In the event of malfunction or breakdown, grounding will reduce the risk of electric<br />
shock by providing a path of least resistance for electric current. This appliance is equipped with a cord having an<br />
equipment-grounding conductor and a grounding plug. The plug must be plugged into an appropriate outlet that is<br />
properly installed and grounded in accordance with all local codes and ordinances.<br />
WARNING - Improper connection of the equipment-grounding conductor can result in a risk of electric shock.<br />
Check with a qualified electrician or serviceman if you are in doubt as to whether the appliance is properly grounded.<br />
Do not modify the plug provided with the appliance.<br />
If it will not fit the outlet, have a proper outlet installed by a qualified electrician.<br />
Page 2<br />
• Repair or replacement of a part should be made only<br />
by a qualified service technician to prevent personal<br />
injury or damage to the machine. Ask your dealer for a<br />
list of authorized repair service companies.<br />
• Disconnect power to the washer at the circuit breaker<br />
or fuse box, or unplug the machine in an emergency,<br />
or when servicing is required. Have the installer show<br />
you and label the proper switch or fuse at the electrical<br />
disconnect box.<br />
WARNING - The Appliance Should Be Connected To<br />
An Individual Branch Circuit With No. 14 AWG<br />
Wire And Protected By 15 A Fuse or Breaker.
PLUMBING (Water Inlet)<br />
The straight end of these hoses should be connected to the supply (Fig. 4).<br />
The 90° angled end of these hoses should be connected to the inlet valves<br />
on the back of the machine, using one of the washers to make a water<br />
tight seal on each connection. The couplings should be tightened by hand,<br />
a tool should only be used if a leak occurs. Do not use excessive force<br />
(see M, Fig. 5).<br />
The Inlet valves are color-coded:<br />
Red = Hot<br />
White = Cold<br />
It is possible to run the machine on cold water only, but a water supply<br />
must be connected to each inlet valve. To do this we suggest you use "F"<br />
connector, supplied with the washer-dryer (see N, Fig. 6).<br />
PLUMBING (Water Outlet)<br />
You should carefully position the drain hose to avoid kinks and ensure<br />
proper drainage of the water.<br />
The outlet end of the drain hose must be at least 20" (50 cm) above the<br />
base of the machine. At this point it is possible for the water to be<br />
discharged into a sink, standpipe or drainpipe.<br />
No more than 6" of the drain hose should insert into a standpipe. Assure<br />
an air break is available to prevent the machine from siphoning in a<br />
standpipe.<br />
IMPORTANT<br />
Make sure the drain hose is not kinked and the water flow is not<br />
restricted.<br />
Standpipe Drain System:<br />
When a standpipe installation is used it<br />
must be at least 1¼" (3.2 cm) in diameter<br />
with a minimum carry away capacity of 7<br />
gallons (26 liters) per minute.<br />
Wall or Floor Standpipe Drain:<br />
Top of standpipe must be at least 25" (62<br />
cm) high and no higher than 34" (86 cm)<br />
from bottom of washer (A & B).<br />
Page 3
Sink Drainpipe System:<br />
You should carefully position the drain hose to avoid<br />
kinks and ensure proper drainage of the water. Use a<br />
drain loop or suitable clamp to support drain hose at<br />
25" (62 cm) minimum 34" (86 cm) maximum. The outlet<br />
end of the drain hose must be at least 20" (50 cm) above<br />
the base of the machine. Entry into sink drain system<br />
must be above trap. When routing the drain hose through<br />
cabinets or walls assure no ruff or sharp edges can<br />
damage the drain hose. All sharp edges MUST be<br />
covered by a protective material such as electrical or duct<br />
tape. Use a drain hose clamp to secure drain hose to<br />
"Wye" Branch or Disposer (not included).<br />
EXHAUSTING<br />
The appliance should not be exhausted into a chimney, wall,<br />
ceiling, or any concealed space of a building. Only rigid or flex<br />
metal/metallic duct should be used for exhausting, unless the<br />
appliance has been investigated for use with non-metal/metallic<br />
duct (See Fig. 7).<br />
To prevent large amounts of lint and moisture from accumulating<br />
and to maintain drying efficiency, consider exhausting outdoors.<br />
OPTIONAL AIR OUTLET FILTER<br />
The optional air outlet filter (Fig. 6 Page 3) is included as an<br />
IMPORTANT SAFETY INSTRUCTIONS<br />
WARNING - To reduce the risk of fire, electrical shock, or injury to persons when using your appliance, follow basic<br />
precautions, including the following:<br />
• Read all instructions before using the appliance.<br />
• Do not wash or dry articles that have been previously<br />
cleaned washed or spotted with gasoline dry cleaning<br />
solvents or other flammable or explosive substances as<br />
they emit vapors that could ignite or explode.<br />
• Do not allow children to play on or in the appliance.<br />
Close supervision of children is necessary.<br />
• Before the appliance is removed from service or<br />
discarded remove the door to the washer-dryer<br />
compartment.<br />
• Do not reach into the appliance if the drum is moving.<br />
• Do not install or store this appliance where it will be<br />
exposed to the weather<br />
• Do not tamper with controls.<br />
• Do not repair or replace any part of the appliance or<br />
attempt any servicing unless specifically recommended<br />
in the user-maintenance instructions or in<br />
published user-repair instructions that you understand<br />
and have the skills to carry out.<br />
• Do not add gasoline dry-cleaning solvents or other<br />
flammable or explosive substances to the wash water.<br />
These substances give off vapors that could ignite or<br />
explode.<br />
Page 4<br />
• You may connect directly to a "Wye" Branch Tailpiece<br />
available at most hardware stores.<br />
• You may connect directly to a Disposer by following<br />
the manufacturer attachment method.<br />
• You may connect directly through the floor to a<br />
separate trap. The trap must be vented to prevent<br />
siphoning. To provide proper venting; install an Air<br />
Gap Kit available at most hardware stores.<br />
• You may connect to the manufacturers sink drain kit<br />
(sold separately) that will supply water from your<br />
faucet and discharge water directly into your sink.<br />
• Under certain conditions, Hydrogen gas may be<br />
produced in a hot water system that has not been<br />
used for 2 weeks or more. HYDROGEN GAS IS<br />
EXPLOSIVE. If the hot water system has not been<br />
used for such a period, before using this combination<br />
washer-dryer, turn on all hot water faucets and let the<br />
water flow from each for several minutes. This will<br />
release any accumulated Hydrogen Gas.<br />
• Do not use heat to dry articles containing foam rubber<br />
or similar textured rubber-like materials.<br />
• Keep the exhaust opening and surrounding areas free<br />
from accumulation of lint, dust, and dirt.<br />
• The interior of the machine should be cleaned periodically<br />
by qualified service personnel.<br />
• Do not place items exposed to cooking oil in your<br />
dryer. Items contaminated with cooking oils may<br />
contribute to a chemical reaction that could cause a<br />
load to catch fire.<br />
• Clean dry filter assembly at rear of machine, if<br />
applicable, regularly.<br />
• Clean drain filter assembly at front of machine<br />
regularly.
Recessed, Closet And Alcove Installation<br />
Instructions<br />
The Machine may be installed in a<br />
recessed area, closet or alcove.<br />
The installation spacing is in inches and<br />
is the minimum acceptable.<br />
Additional spacing should be considered<br />
for easy installation, servicing and compliance<br />
with local codes and ordinances.<br />
Closet installation must be exhausted.<br />
Other installations must use the minimum<br />
dimensions indicated.<br />
WARNING - To Reduce The Risk Of Fire<br />
This Appliance<br />
MUST BE EXHAUSTED OUTDOOR.<br />
Minimum Installation Spacing<br />
* Additional clearances for wall, door and floor moldings may be required.<br />
** Additional space is needed when an external exhaust elbow is used.<br />
Page 5
• Color - Separate clothes into three groups: whites and<br />
pastels medium and bright colors and dark colors.<br />
Items which bleed color should be washed alone.<br />
• Type of fabrics - Delicate items should be separated<br />
from sturdier items. Fabrics that shed lint should be<br />
separated from those which shed none or attract lint.<br />
SAVE THESE INSTRUCTIONS<br />
OPERATING INSTRUCTIONS<br />
LAUNDRY PREPARATION<br />
Sorting<br />
Clothes should be sorted to separate items which could damage other garments. Sort items into loads according to<br />
similar colors, fabrics, garment construction and degrees of soil.<br />
Inspection<br />
• Garment constructions - Garments that fray easily or<br />
that have unusual trim require gentle care. These garments<br />
may be washed in the front loader using the knit<br />
cycle. If garments are fragile and delicate hand washing<br />
may be desirable.<br />
• Degree of soil - Heavily soiled items should be separated<br />
from the rest of the wash to prevent transfer of<br />
soil in the wash water.<br />
While sorting clothes into wash-loads, also inspect each garment to see if it requires special care.<br />
• Remove stains while they are fresh and easy to get<br />
out. Try cold water first to remove unknown stains.<br />
Hot water sets stains containing protein such as blood,<br />
egg, meat and milk. To remove difficult stains, refer to<br />
the Stain Removal Chart at the end of this book.<br />
• Pre-treat heavily soiled areas such as collars cuffs and<br />
centers of pillow cases. Refer to the "Pre-treating"<br />
section for specific instructions.<br />
• Mend rips and tears before washing so further damage<br />
is not done to garments.<br />
• Empty pockets. Objects left in pockets such as crayons<br />
pens markers or tobacco crumbs may stain an entire<br />
wash load. Paper tissues will shred leaving bits on<br />
each item in the washer. Remove coins and other<br />
foreign objects to prevent damage to the machine.<br />
Pre-treating<br />
Pre-treat heavily soiled areas such as collars, cuffs and<br />
centers of pillow cases by using a pre-wash spray, or<br />
brushing liquid detergent or a laundry detergent and<br />
water paste over the areas before washing.<br />
Refer to the Stain Removal Chart for treatment of<br />
specific stains. If an entire item is heavily soiled or very<br />
stained, it may be easier and more effective to pre-wash<br />
the item before laundering than to pre-treat every spot.<br />
Pre-Washing<br />
Pre-wash excessively soiled clothes, such as work or<br />
children's play clothes.<br />
They often contain deeply embedded dirt. Pre-washing<br />
with detergent will help loosen the soil.<br />
Page 6<br />
• Fasten all hooks zippers and buttons.<br />
• Turn knit garments wrong side out to reduce the<br />
tendency of knits to "pill". Fabric "pills" are balls of<br />
fiber on the surface of the garment caused by wear or<br />
friction.<br />
• Remove loose dirt and sand. Brush dirt from trouser<br />
cuffs. Shake or vacuum rugs to remove loose surface<br />
soil.<br />
• If buckle is washable place a scrap of material<br />
securely around the ornament before washing and drying<br />
to prevent scratching and damage to the machine.<br />
Remove non-wash-able trims, buckles, buttons and<br />
belts.<br />
• Tie strings, belts and apron sashes into bows to avoid<br />
tangling during washing.<br />
Laundry Aids<br />
Detergents are the most popular cleaning agents for<br />
home laundry. Using too little detergent results in poor<br />
washability, while using too much causes over sudsing<br />
and poor rinsing. Detergents not only remove soil, but<br />
also hold it in suspension in the wash water to prevent<br />
redepositing it on the wash load. The amount to use<br />
depends on wash load size, amount of soil, Water<br />
hardness and detergent type. ALWAYS measure the<br />
amount of detergent. The amount of suds formed is not<br />
necessarily an indication of how much to use. Some<br />
detergents form a great amount of suds, others only a<br />
few.<br />
Use only detergents suitable for front loading washers for<br />
best results.
WASHER FEATURES<br />
ON-OFF Button<br />
After the clothes have been loaded and the desired water<br />
temperature and cycle selected, pressing the ON-OFF<br />
button causes the cycle to begin.<br />
Medium/High Spin Button<br />
When the button is pressed, the spin speed will be<br />
reduced from high to low during the regular cycle.<br />
High Heat Half/Heat Button<br />
When this button is pressed, the half heat drying<br />
temperature is obtained. Release for maximum heat. Half<br />
heat should only be used with delicate fabrics.<br />
Wash Timer<br />
Enables the operator to select the wash program required<br />
according to the type of fabric and degree of soiling.<br />
Refer to the program chart on page 10.<br />
Water Cycle Selector<br />
Allows operator to select the temperature of the wash/<br />
rinse water.<br />
Drying Timer<br />
This control allows you to preset the drying time you<br />
want according to your requirements which may be<br />
"damp dry", "ready for ironing" or "dry" ready for<br />
putting away. The drying time depends largely on the<br />
type of material (some fibers absorb more water than others),<br />
the dampness of the articles when the drying is<br />
started and the amount of laundry. Table napkins, towels,<br />
and similar (rather thick) articles will take a longer time<br />
to dry. After all the controls have been correctly set, the<br />
dryer will start to operate as soon as you close the door.<br />
During operation the Drying Timer will gradually return<br />
to the "Stop" position "O". The final 12 minutes of the<br />
drying cycle is the cooling phase. At the end of this<br />
cooling phase it will automatically switch itself off.<br />
Cool Drying Period<br />
Towards the end of the tumble-drying cycle there is a<br />
cool drying period which lasts about 12 minutes.<br />
The heater is off during this period, while the machine<br />
continues to tumble.<br />
When setting a wash/dry cycle the dryer pre-heats the<br />
drum during the final spin on all cycles.<br />
The cooling feature helps minimize creasing, and is<br />
particularly important with synthetic fabrics. It is also<br />
important to cool snaps, zippers, buttons and the machine<br />
interior. Practice will soon tell you just how much drying<br />
time to allow to get the effect you want.<br />
Page 7<br />
Drain Screen<br />
The removable drain screen which protects the pump<br />
from lint and foreign matter needs to be cleaned periodically.<br />
How often will depend on your wash load, e.g.<br />
cotton towels cause more lint to collect than nylon loads.<br />
Open the service door by pressing on the left hand side.<br />
Turn drain screen counter-clockwise and pull the drain<br />
screen out. Have a cloth or shallow tray under the drain<br />
screen housing, as a small quantity of water may run out.<br />
You may find it helpful to first set the machine to spin,<br />
allow the unit to start, then remove the drain screen once<br />
unit starts. This procedure reduces the amount of water<br />
released.<br />
Clean the screen under running water to help remove any<br />
lint. Replace the screen by sliding back into the housing<br />
within 3 minutes. Lastly turn clockwise to secure.<br />
Under no circumstances should the drain screen be<br />
removed while the machine is full of water.<br />
Detergent Dispenser<br />
The detergent dispenser is designed so detergent,<br />
additives and bleach will flush automatically into your<br />
machine.<br />
Use only 1 to 2 tablespoons of powder detergent or liquid<br />
equivalent.<br />
It is divided into 4 compartments, for cold wash, hot<br />
wash, detergents, additives (i.e. fabric softeners) and<br />
bleach.<br />
At the end of the wash program, any remaining liquids<br />
will be automatically siphoned out leaving the dispenser<br />
ready for the next wash.<br />
A small amount of water may remain in compartment<br />
"C" and/or "D" at the end of the wash program. This can<br />
easily be removed by pouring a small additional amount<br />
of water into this compartment, which allows the siphon<br />
to operate and draw all the water into the machine.<br />
Note: The detergent dispenser drawer and housing<br />
should be cleaned to prevent a build up of detergent and<br />
fabric softener. This dispenser drawer is easily removed<br />
by pulling out. Rinse it under the tap, dry and replace.
Page 8
Operating Steps<br />
Before using the washer for the first time, wipe the inside<br />
and outside with a damp cloth to remove any travel dust<br />
that has accumulated and we recommend operating a<br />
rinse<br />
cycle to rinse out your machine.<br />
Be sure the hot and cold water faucets are turned on fully.<br />
Make sure that the power cord is plugged in and that the<br />
circuit is energized.<br />
To familiarize you with a load of convenience we suggest<br />
"Your First Load" be typical queen-size bedding. This<br />
machine may be set to wash and dry automatically in any<br />
cycle. Single-size sets will dry quicker and king-size<br />
longer. Different types of materials may benefit from<br />
being shaken out once the dry cycle has run long enough<br />
(approximately 2 minutes) to allow the door to be opened.<br />
It is important the clothes are able to tumble freely to<br />
allow the drying process to occur. Dry times of over 100<br />
minutes indicate an over load condition that has resulted<br />
in a loss of dry performance.<br />
Your First Load<br />
• Use only 1 to 2 tablespoons of powder detergent or<br />
liquid equivalent. For cold/cold wash and rinse add<br />
detergent to dispenser "A"; for all other wash cycles,<br />
add detergent to dispenser "B". Refer to Wash Table<br />
for other additive options.<br />
• Set the wash timer to regular wash. Set the water<br />
selector to the desired wash rinse temperatures.<br />
• Set the heat and spin buttons to the out positions.<br />
• Set the dry timer to 80 minutes (This automatically<br />
includes a 12 minute cool down).<br />
• Place a set of queen-size sheets and pillow-cases in the<br />
drum loosely.<br />
• Push the on button.<br />
• Water will begin to enter the drum and the wash cycle<br />
will start. Wash time will be approximately 60 minutes,<br />
upon completion, the machine will automatically<br />
start to dry the load. When the dryer has completely<br />
finished it's cycle the machine will automatically stop.<br />
HOW TO WASH<br />
Page 9<br />
• After washing and drying are complete the hot and<br />
cold water faucets should be turned off and push the<br />
ON/OFF switch. Wipe the inside off the washer door<br />
and rubber boot with a soft cloth or sponge to remove<br />
any remaining moisture.<br />
• Once the machine is started in the wash cycle, for your<br />
safety, the door is automatically locked and cannot be<br />
opened. Attempting to open the door may break the<br />
handle or the latch. If for some reason the door must be<br />
opened during the cycle, operate in the following way:<br />
• Press push button OFF.<br />
• Turn timer knob to spin position.<br />
• Press push button ON and wait until water is<br />
discharged.<br />
• Press push button OFF and wait at least 2 minutes for<br />
door lock to open.<br />
• To restart go back to "Operating Steps".<br />
Pre-Wash<br />
On more heavily soiled wash loads a pre-wash will help<br />
to obtain a better wash. It will disperse any superficial dirt<br />
and help loosen soil ready for the main wash.<br />
To pre-wash, select the main wash cycle you wish to use.<br />
Then turn the timer knob to the pre-wash setting<br />
immediately preceding the regular cycle. If pre-wash with<br />
detergent is required, the detergent must also be added in<br />
compartment "A" of detergent dispenser. After the<br />
pre-wash is completed the machine will automatically<br />
perform the regular wash.<br />
NOTE: When you set a combined program of washing<br />
and tumble-drying, the cylinder must not be loaded with<br />
more than the required load size stated earlier in this<br />
manual.<br />
Judge this load by the dry times achieved. Dry times of<br />
over 100 minutes indicate an overload condition that has<br />
resulted in a loss of dry performance.
HOW TO USE YOUR NEW WASHER-DRYER<br />
• Load the drum with clothes as previously described.<br />
Close the door.<br />
• Select a program. See chart below.<br />
• Select drying time (and half heat if required).<br />
• Select desired spin speed (high spin only occurs in<br />
regular wash cycle).<br />
• Put the detergent, bleach and fabric conditioner into<br />
the dispenser.<br />
• Press the ON-OFF button to start the machine.<br />
Note: Woolen garments should under no circumstances<br />
be tumble dried.<br />
TUMBLE-DRY<br />
If you want to tumble dry a load without washing, rinsing<br />
or spinning, proceed as follows:<br />
Note: The dry weight of the load must not exceed<br />
requirements previously mentioned.<br />
• Make sure that the power cord is plugged in and that<br />
circuit is energized.<br />
• Make sure that the wash timer knob is at an OFF-DRY<br />
position.<br />
• Press the Half Heat button, if you wish to dry at a low<br />
temperature.<br />
• Set the Dryer Timer knob to the drying time you<br />
require.<br />
**Compartments may be used with the selections<br />
indicated.<br />
*With the cycle C/C please proceed as follows.<br />
COLD WASH<br />
Add detergent in compartment "A"<br />
WASHING TABLE<br />
Page 10<br />
• Open the door, load the articles to be dried into the<br />
cylinder and close the door.<br />
• Press the ON/OFF button in and the machine will then<br />
start the drying cycle.<br />
• Door may be opened during drying cycle.<br />
TO RINSE, SPIN AND TUMBLE-DRY<br />
It is possible to rinse, spin and tumble-dry articles which<br />
have not been previously washed in the machine. The dry<br />
weight of the load must not exceed load size previously<br />
described.<br />
• Make sure that the power cord is plugged in and that<br />
the circuit is energized.<br />
• Open the hot and cold water taps fully.<br />
• Load the machine with the articles to be rinsed.<br />
• If you wish, put fabric conditioner in the additives<br />
compartment "D" of the Detergent Dispenser.<br />
• Turn the program selector knob to the position marked<br />
"Rinse". Select the desired heat setting. Press the half<br />
heat if you want a low dry temperature. Set the dryer<br />
timer to the desired time.<br />
• Select the desired spin speed. High speed spin only<br />
occurs in the regular cycle.<br />
• Switch the machine on by pressing the ON/OFF<br />
button.<br />
PRE-WASH/COLD WASH<br />
Add detergent in compartment "A" and Switch the<br />
machine on.<br />
When the machine starts the pre-wash, open the<br />
detergent dispenser drawer and add further detergent<br />
to compartment “A” for the REGULAR wash cycle.
Detergent Amount Recommendations<br />
• Use only a low sudsing detergent, one or two tablespoons<br />
(maximum) of the standard powder detergent<br />
or liquid equivalent.<br />
• The degree of soil will change detergents amounts.<br />
For heavier soiled loads, increase the amount of detergent<br />
used, for lightly soiled loads decrease the amount<br />
of detergent used.<br />
• If water is extremely hard, detergent should be<br />
increased. Reduced detergent amounts should be used<br />
in soft water (under 3.5 grains per gallon).<br />
• If garments have been pre-treated, decrease the<br />
amount of detergent. If garments have been heavily<br />
pre-treated, it may not be necessary to add detergent.<br />
• If the previous machine owned was a top loader, the<br />
initial wash loads in a front loader may require a<br />
reduced amount of detergent until the detergent<br />
remaining in the clothes is removed. Old detergent<br />
trapped in the garments will be released during the<br />
tumble action wash cycle.<br />
Detergent will be flushed automatically into the machine<br />
from the detergent dispenser. The suds level should never<br />
rise more than halfway up the porthole. Too much foam<br />
will not only impede the wash action of your machine<br />
but will rinse through the detergent dispenser and make a<br />
mess on the floor!<br />
If this should happen clear excessive suds by setting<br />
the timer to the beginning of the first rinse and allow<br />
the machine to rinse out.<br />
Blood<br />
Rinse or soak fresh stain in cold water. Work detergent<br />
into any remaining stain. Rinse. If stain persists, put a<br />
few drops of ammonia on stain and repeat detergent<br />
treatment. Rinse. If necessary bleach.<br />
Candle Wax<br />
Scrape off excess. Place stain between clean white<br />
blotters or several layers of facial tissues. Press with<br />
warm iron. Sponge with cleaning fluid. If dye spot<br />
remains, bleach.<br />
Chewing Gum<br />
Rub with ice to harden. Scrape off excess with dull blade<br />
Sponge with cleaning fluid.<br />
Chocolate or Cocoa<br />
Soak 15 minutes in cold water. Rub detergent paste into<br />
stain, then rinse thoroughly. Launder in hottest water safe<br />
for fabric. If colored stain remains, sponge with<br />
hydrogen peroxide, rinse and launder.<br />
Cod Liver Oil<br />
Sponge article with cleaning fluid. Soak in warm suds.<br />
If stain persists, wash with bleach safe for fabric.<br />
LAUNDRY AIDS<br />
STAIN REMOVAL CHART<br />
Page 11<br />
Bleach<br />
Bleach functions to whiten clothes, remove certain<br />
problem stains, to deodorize and in some cases to<br />
sanitize; however bleaching is not a substitute for good<br />
laundry techniques. Bleach only during the wash cycle.<br />
Bleach should never be added to the rinse water. Always<br />
dilute bleach before using.<br />
To add bleach, open detergent dispenser door and pour it<br />
in required compartment front left.<br />
WARNING: Under no circumstances overfill the bleach<br />
dispenser. Excessive bleach will run directly into the<br />
machine, and may damage the clothes.<br />
Liquid Fabrics Softeners<br />
All fabrics, particularly towels and diapers, benefit from<br />
the use of fabric conditioners in the final rinse. Items of<br />
laundry feel softer, are more easily ironed and the<br />
clinging affect of synthetics is considerably reduced.<br />
We recommend using a bio-friendly softener or other<br />
softeners that appear light or white in color and have a<br />
more liquid consistency. These type products are found<br />
to dissolve more thoroughly in less water in this type<br />
machine.<br />
Add one to two tablespoons of softener to the<br />
“Additives” compartment “D” of the detergent dispenser.<br />
Under no circumstances overfill, as the softener will<br />
immediately siphon into the machine and in so doing<br />
impair the wash results.<br />
To remove yellow stain, sponge with hydrogen peroxide.<br />
Rinse and launder. Old stains may be nearly impossible<br />
to remove.<br />
Coffee or Tea (Black)<br />
Soak fresh stains immediately in cold water. Then use<br />
bleach treatment with hottest water safe for fabric. Or if<br />
safe for the fabric pour boiling water through spot from a<br />
height of 1 to 3 feet. Launder.<br />
Coffee or Tea (With Cream)<br />
Rinse or soak in cold water. Work detergent into stain.<br />
Rinse. Dry. If grease stain remains, sponge with cleaning<br />
fluid. Repeat, if necessary. If stain remains, bleach.<br />
Cosmetics: Eye Shadow, Lipstick, Liquid Make-Up,<br />
Mascara, Powder, Pancake Make-Up or Rouge<br />
Apply undiluted liquid detergent to stain, or dampen<br />
stain and rub in soap or detergent paste until thick suds<br />
are formed. Work in until stain is gone, rinse well.<br />
Repeat if necessary. If color remains, bleach is safe for<br />
fabrics.
Cream, Ice Cream or Milk<br />
Sponge stain with cool water or soak stain in cool water<br />
for 30 minutes or longer. If stain remains, work a detergent<br />
into spot then rinse. Bleach if necessary.<br />
Deodorants and Antiperspirant<br />
Wash or sponge stain thoroughly with warm water and<br />
detergent; rinse. If stain remains, bleach with hot sudsy<br />
water. Launder. You may be able to restore fabric color<br />
by sponging with ammonia. Rinse thoroughly.<br />
Dye<br />
Rinse or soak in cold water. Work detergent into stain.<br />
Rinse. If necessary, bleach. Stain is not always possible<br />
to remove. A commercial color remover may also be<br />
used.<br />
Egg or Meat Juice<br />
Rinse in cold water. If stain remains, sprinkle with meat<br />
tenderizer - let stand 15 to 20 minutes. If stain still<br />
remains, sponge with cleaning fluid or diluted bleach.<br />
Launder in hot water. The use of hot water first may set<br />
stain.<br />
Fabric Softener Stain<br />
Rub with bar soap until stain has lightened. Rinse<br />
thoroughly. Launder. Rubbing alcohol is sometimes<br />
effective if the color of the garment can take it. Launder.<br />
If desired, dry cleaning can be used.<br />
Felt Tip Pen<br />
Spray spot with cleaners suitable to this purpose. Sponge<br />
stain thoroughly. Rinse with cold water. Reapply cleaner<br />
if necessary.<br />
Fruit, Wine<br />
Soak fresh stains immediately with cool water. Then use<br />
bleach treatment with hottest water safe for fabrics, pour<br />
boiling water through spot from a height of 1 to 3 feet.<br />
Launder.<br />
Grass<br />
Work detergent into stain. Sponge with denatured<br />
alcohol. Bleach, if necessary.<br />
Grease or Oil<br />
Scrape away excess. Rub detergent paste or a general<br />
purpose liquid house hold cleaner into stain, rinse with<br />
hot water. If stain remains, sponge thoroughly with a<br />
grease solvent. Dry. Repeat if necessary. To remove<br />
Yellow stain, use a chlorine or oxygen bleach.<br />
Ink, Ball-Point<br />
Some ball-point inks are set by water. First test a scrap of<br />
cloth. Sponge stain repeatedly with acetone, amyl acetate<br />
or rubbing alcohol. Hair spray is effective. Launder.<br />
Bleach if necessary. Use amyl acetate on triacetate, arnel,<br />
dynel and verel. Use acetone on other fabrics.<br />
NOTE: Some inks cannot be removed.<br />
Ketchup<br />
Scrape of excess. Soak in cold water 30 minutes. Pretreat<br />
with a detergent paste. Launder.<br />
Mildew<br />
Brush off surface growth to keep mold spores from<br />
spreading. Dip article into solution of ½ cup bleach per 1<br />
gallon of cool sudsy water for 5 to 10 minutes. Rinse<br />
well. Launder.<br />
Page 12<br />
Mud<br />
Let stain dry; then brush well. Rinse repeatedly in cool<br />
water until mud comes out. Launder.<br />
Note: Hot soap suds set a red or yellow clay stain.<br />
Mustard<br />
Soak in hot detergent water for several hours. If stain<br />
remains, bleach.<br />
Nail Polish<br />
Treat while fresh, scraping or wiping off as much as<br />
possible, before it dries. Place stain face down on white<br />
paper towels. Sponge back of stain acetone (nail polish<br />
remover) or sponge with denatured alcohol and a few<br />
drops of household ammonia. Sponge stain frequently.<br />
Launder with water at temperature suitable for fabric.<br />
Note: Do not use acetone on acetate, arnel, dynel or<br />
rayon.<br />
Paint<br />
Sponge or soak in turpentine or solvent recommended as<br />
a thinner on label. Launder.<br />
Perfume<br />
Rinse in cold water. Rub undiluted liquid detergent or a<br />
detergent paste into stain. Rinse. If stain remains, bleach.<br />
Perspiration<br />
Wash or sponge stain thoroughly with warm water and<br />
detergent paste. If perspiration has changed the color of<br />
the fabric, restore it by treating with ammonia or vinegar.<br />
Apply ammonia to fresh stains; rinse with water. Apply<br />
vinegar to old stains; rinse with water.<br />
Rust and Iron<br />
Apply commercial rust remover, according to manufacturer's<br />
directions. Rinse. Or, if safe for fabric, boil stained<br />
article in solution of 4 teaspoons of cream of tartar to 1<br />
pint water.<br />
Scorch<br />
Rinse or soak in cold water. Work detergent into stain.<br />
Rinse. Bleach, if necessary. Stain may be impossible to<br />
remove.<br />
Shoe Polish<br />
Scrape off as much as possible. Pre-treat with a detergent<br />
paste; rinse. If stain persists, sponge with rubbing alcohol<br />
(1 part to 2 parts water) or turpentine. Remove turpentine<br />
by sponging again with warm detergent solution or with<br />
alcohol. Bleach if necessary.<br />
Soft Drinks<br />
Sponge with cold water, some stains are invisible when<br />
they have dried, but turn brown when heated and may be<br />
impossible to remove.<br />
Tar and Asphalt<br />
Act quickly before stain is dry. Sponge with grease<br />
solvent or turpentine. Launder.<br />
Urine<br />
Soak in cool water. If stain is dry, work a detergent paste<br />
into the spot then rinse. If necessary, bleach.
Cleaning The Exterior<br />
As you use the washer, occasionally wipe the cabinet<br />
with a damp cloth or sponge; wipe dry with a soft cloth.<br />
Do not use polish or any kind on the plastic trim. Some<br />
polishes contain agents which may damage plastics.<br />
Cleaning The Interior<br />
If you live an area where phosphate detergents are<br />
banned, it may be necessary to recondition the washer<br />
periodically. Because a non-phosphate detergent must be<br />
used, body oils and detergent may accumulate in the<br />
washer tub. This is particularly evident in hard water<br />
areas or in homes, where heavily soiled garments are<br />
regularly laundered.<br />
To remove this build-up, run the washer through a<br />
complete cycle using hot water and 2 cups of a non<br />
precipitating water conditioner. Do not add any clothes,<br />
laundry detergent or other laundry aids.<br />
Once all accumulation has been removed, your laundry<br />
should be satisfactory if you follow the preventive<br />
suggestions in this guide-book.<br />
• Turn off the hot and cold water source to machine.<br />
• Set machine to fill in regular cycle on warm wash.<br />
• Turn machine on for a few minutes so machine can<br />
take on any water.<br />
• Lift inlet hoses to assure no water is left in inlet hoses.<br />
• Turn unit off.<br />
• Advance the wash timer to spin cycle and turn on.<br />
This will activate the water pump and will evacuate as<br />
much water as possible.<br />
CARE AND CLEANING<br />
Washer Does Not Start<br />
• Washer may not be plugged in or connection may be<br />
loose.<br />
• House fuse blown or circuit breaker tripped.<br />
• Timer knob not in correct position.<br />
• Cycle selector knob not in correct position.<br />
• Door is not securely shut.<br />
Washer Stops During Cycle<br />
• Drain hose is kinked or clogged (Fig. 1).<br />
• House fuse blown, circuit breaker tripped, or wall plug<br />
not firmly in receptacle.<br />
• No more than 6" of the drain hose should insert into a<br />
standpipe.<br />
• The outlet end of the drain hose must be at least<br />
20" (50 cm) above the base of the machine.<br />
WINTERIZING<br />
General Maintenance<br />
After washing is complete, the water faucets should be<br />
turned off to relieve water pressure on the hoses.<br />
Wipe the inside of the washer door with a soft cloth to<br />
remove any remaining moisture. Periodically, a thin coat<br />
of paste wax should be applied to the inner door of the<br />
washer; especially to the area which is immediately next<br />
to the door window.<br />
This will protect the door finish from laundry aid spills<br />
and any discoloration which may results from these<br />
spills.<br />
The interior of the machine should be cleaned periodically<br />
by qualified service personnel.<br />
Cleaning The Drain Screen<br />
Clean the drain screen frequently. For instruction please<br />
refer to page 7 of this manual.<br />
• Turn unit to off.<br />
• Place a towel under the drain filter area and remove<br />
drain filter. This will drain any water left in the bottom<br />
of unit.<br />
• Install drain filter correctly to assure it does not leak<br />
water.<br />
• In extreme conditions you may wish to completely<br />
remove the inlet hoses.<br />
• Complete<br />
AVOID-SERVICE CHECK LIST<br />
You may save the cost and inconvenience of an unnecessary service call by first reviewing this easy-to-use check list<br />
of the most frequently encountered situations that are not the result of defective workmanship or materials.<br />
You will be charged for a service call while the appliance is in warranty if the problem is not caused by<br />
defective workmanship or materials.<br />
Review this Avoid-Service Check List before calling for service. It may save time and expense.<br />
Page 13<br />
• Assure an air break is available to prevent the machine<br />
from siphoning in a standpipe.<br />
• The standpipe should be at 25" (62 cm) minimum<br />
34" (86 cm) maximum height.<br />
• Assure the drain loop or suitable clamp to support drain<br />
hose has been used.<br />
Water Does Not Enter The Washer, Or It Enters<br />
Slowly<br />
• Water supply is not adequate in the area.<br />
• Hot and cold water faucets for the inlet hoses are not<br />
turned completely on.<br />
• Water is being used elsewhere in the house, when the<br />
washer is running.<br />
• Water inlet hose filter are clogged (Fig. 3).<br />
• Water inlet hoses are kinked.
Wash And Rinse Water Temperatures Are Incorrect<br />
• The hot water hose and cold water hose are connected<br />
to the wrong faucets.<br />
Water Is Entering Washer But Tub Does Not Fill<br />
• Standpipe for the drain hose is not the correct height.<br />
(Fig. 2), drain hose is to far into standpipe or air break<br />
does not exist.<br />
Water Leaks<br />
• Hose connections at faucet and/or machine not tight.<br />
• Rubber washers are not inside the metal hose<br />
connectors (Fig. 3).<br />
• Drain hose not securely fastened (Fig. 1,2). Drain<br />
pipes in the house are clogged.<br />
• Too much detergent or a high sudsing detergent in soft<br />
water is being used.<br />
• Soil may be on the door seal or gasket of the washer<br />
preventing a tight seal.<br />
Water In Washer Does Not Drain Or Drains Slowly<br />
• Drain hose is kinked or clogged (Fig. 1).<br />
• Standpipe does not have a large enough diameter and<br />
is slowing the draining process.<br />
• Machine is over soaped.<br />
• Wash filter plugged.<br />
Page 14<br />
Over Sudsing<br />
• Too much detergent used.<br />
• Detergent used is not compatible with water conditions.<br />
• Garments were pretreated, before washing.<br />
• Additional laundry aids such as oxygen bleach may<br />
cause additional sudsing.<br />
"Chugging" Noise"<br />
• A certain amount of "chugging" noise is normal in a<br />
heavy-duty machine.<br />
Rattling And Clanking Noise<br />
• Foreign objects such as coins or safety pins may be in<br />
the tub.<br />
• Foreign objects may be in the pump.<br />
• Belt buckles and metal fasteners are hitting the washer<br />
tub during the washing cycle.<br />
Vibrating Noise<br />
• Washer is not level and lock nuts may not be securely<br />
tightened on front adjusting feet.<br />
• A rubber cap may be missing from one of the leveling<br />
legs.<br />
• Washer may not be installed on a solid, firm floor.<br />
• The four shipping brackets are still on the machine.<br />
Thumping Noise<br />
• Heavy wash loads may produce a thumping noise at<br />
the beginning of the spin cycle.