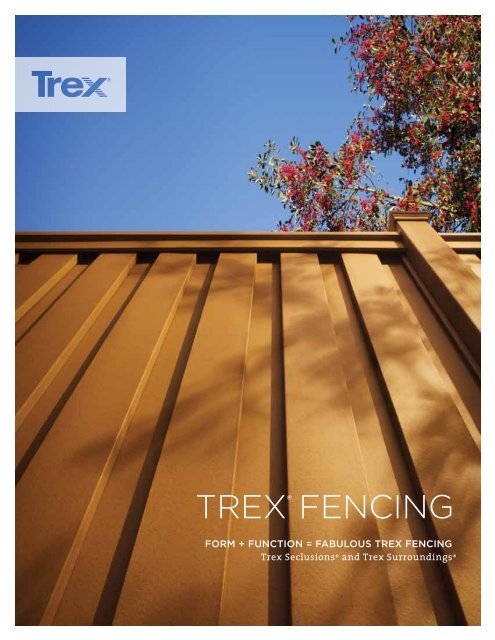
TREX® FENCING
TREX® FENCING
TREX® FENCING

You also want an ePaper? Increase the reach of your titles
YUMPU automatically turns print PDFs into web optimized ePapers that Google loves.
<strong>TREX®</strong><br />
fEncing<br />
form + function = fabulous trex fencing<br />
Trex Seclusions® and Trex Surroundings®
sAfe AnD soUnD<br />
There’s something immensely comforting about one’s line in the sand, the tidy little barrier between you<br />
and the rest of the world that subtly announces: interesting people live here. Keeping playgrounds safe and<br />
upping the value of new developments? That’s the least we could do. Providing a splinter-free backdrop from<br />
which to survey one’s kingdom for generations? Now that’s Trex ® fencing, offered in two great systems–<br />
Trex Seclusions ® , for total privacy and beauty, and Trex Surroundings ® , offering a more traditional, picket look.<br />
Complete with all the stamina the Trex name suggests, rich natural colors and fool-proof installation<br />
techniques, Trex fencing is more than just the end of the yard. It’s the beginning of a lifetime of freedom.<br />
ALWAYS GREEN: Trex fencing is made of 95%<br />
recycled materials, including plastic shopping<br />
bags, reclaimed wood and sawdust.<br />
front coVer: Trex Seclusions ® in Saddle<br />
Guarantee greatness<br />
Trex fencing combines unprecedented performance<br />
with lasting beauty and low maintenance. All backed<br />
by Trex’s 25-Year Limited Residential Warranty.<br />
» Resists insect damage<br />
» Won’t warp, rot or splinter<br />
» No painting or staining required<br />
fencing: Trex Seclusions ® in Woodland Brown<br />
A Trex ®<br />
fence.<br />
How neigHborly.<br />
Whether the goal is privacy, safety or a stunning<br />
garden backdrop, a Trex fence makes for grateful<br />
neighbors indeed. Our low maintenance beauty<br />
and lasting durability outperforms the unsightly<br />
peeling wood variety, while our rich, warm finish<br />
enhances backyards miles beyond shiny white<br />
vinyl. Trex fencing is an upgrade that adds value<br />
well beyond the initial investment. Plus, it’s<br />
incredibly easy to install, leaving no painting,<br />
staining, splintering or rotting to worry about–ever.<br />
A homeowner’s dream.<br />
we’Ve goT yoUr<br />
bAcK(yArD) coVereD.<br />
Backed by an industry leading 25-Year Limited<br />
Residential Warranty, Trex fencing features a<br />
natural, no-glare finish that is sure to keep your<br />
backyard beaming for years to come.<br />
Trex fencing offers two great systems in Trex<br />
Seclusions ® and Trex Surroundings ® , with the<br />
performance and beauty you’ve come to expect<br />
from Trex. Select the system that fits your style,<br />
budget and assembly preference to complete your<br />
backyard oasis. And take comfort in the durability,<br />
security and elegance of Trex fencing. The perfect<br />
frame for your personal retreat.<br />
fencing: Trex Seclusions ® in Saddle<br />
01
fencing: Trex Seclusions ® in Saddle<br />
miles of stYle<br />
beAUTy AnD priVAcy<br />
from eVery Angle.<br />
Made from reclaimed wood fiber and recycled<br />
polyethylene, Trex Seclusions ® offers unprecedented<br />
performance and aesthetics. With lasting beauty, low<br />
maintenance and high performance, it’s exactly what<br />
you expect from Trex ® , the perfect fencing solution for<br />
high-end homes and communities.<br />
trex seclusions:<br />
» Unique interconnecting picket design provides<br />
unprecedented strength<br />
» Clean, finished appearance on both sides–<br />
no structural boards visible inside or out<br />
» Proprietary bracket design allows for easy<br />
racking on slopes<br />
» Fewer fasteners means faster installation<br />
» Installs with posts on 8’ centers to save time,<br />
labor and materials<br />
» Performs to Miami/Dade wind load certification<br />
of 110 mph steady winds and 130 mph wind gusts<br />
» Rich color palette with matte finish<br />
WooDlanD<br />
broWn<br />
saDDle<br />
WincHester<br />
greY<br />
ALWAYS GREEN: Trex buys recycled wood<br />
by the truckload and reformulates it<br />
(along with plastic bags, stretch film<br />
and agricultural film) into the longlasting<br />
fencing, decking and railing.<br />
Plus, buying materials in bulk also saves<br />
fuel, shipping materials and other<br />
natural resources.<br />
03
fencing: Trex Surroundings ® in Saddle<br />
Welcome to the bAckYARd REvoLutioN<br />
yoUr Home’s<br />
besT complemenT.<br />
Sun, wind, rain, sleet, snow…termites? No worries.<br />
A Trex Surroundings ® fence won’t buckle, warp, rot or<br />
sag. In fact, there’s no paint to scrape, no once-a-year<br />
water seal, just install and go– the perfect complement<br />
to your Trex ® outdoor living experience.<br />
trex surrounDings:<br />
» Beauty and performance at a great value<br />
» True 6” pickets accommodate easy project<br />
design and layout<br />
» Flexible design allows for privacy, semi-privacy<br />
and shadowbox configurations<br />
» Hidden bracket system eliminates hardware<br />
from fading and rusting<br />
» Standard picket system and minimal components<br />
allow for easy, do-it-yourself installation<br />
» Available in rich Saddle color<br />
saDDle<br />
Visit trex.com/designtools/estimator.aspx<br />
to find out how much fencing you need to<br />
make the fence of your dreams a reality.<br />
Trex Surroundings ® shadowbox configuration in Saddle<br />
ALWAYS GREEN: Trex regularly<br />
seeks out third-party audits<br />
to make sure we’re continuously<br />
improving our green practices<br />
while meeting all environmental,<br />
health and safety guidelines and<br />
regulations.<br />
05
mAKe A grAnD enTrAnce<br />
The perfect extension of a Trex ® fence? An equally carefree Trex gate. Customize our standard gate design<br />
with any of our other Trex products to add a unique look to playgrounds, pools and inviting street entrances.<br />
seclusions gates:<br />
» No assembly required<br />
» offer same look as fencing, providing a seamless finish<br />
» Backed by 25-Year Limited Residential Warranty<br />
» stainless steel hinges and latch system prevents<br />
unsightly rusting<br />
» Available in same rich color palette– saddle, Woodland<br />
Brown and Winchester Grey– as Trex seclusions ®<br />
fencing system<br />
gate: Trex Seclusions ®<br />
in Saddle<br />
surrounDings gate Kit:<br />
» Features patented Adjust-A-Gate technology<br />
» Gate will not sag or drag<br />
» Unique steel sleeve construction allows frame to<br />
adjust to any opening for a perfect fit<br />
» Frame allows for easy installation of saddle dog-eared<br />
pickets to complement Trex surroundings ® fencing system<br />
eAse + opTions<br />
A builder’s dream.<br />
a HomeoWner’s realitY.<br />
scHeDule accorDinglY<br />
Installing a low maintenance Trex ® fence is not only<br />
quick but simple. In fact, our step-by-step instructions<br />
make installing our fencing perhaps the easiest part of<br />
your job. See page 10 for complete installation details.<br />
care & cleaning<br />
A little mud splatter here and there? Hardly a match<br />
for Trex, the finish that can easily keep looking new<br />
with a semiannual cleaning using soap and hot water.<br />
If someone gets creative with the sidewalk<br />
chalk or leaves get particularly stubborn,<br />
consult our full care information at<br />
trex.com/care<br />
THe looK of wooD wiTHoUT THe HAssles.<br />
sTUnning looKs<br />
low mAinTenAnce<br />
lAsTing DUrAbiliTy<br />
eAsy To insTAll<br />
miAmi / DADe winD<br />
loAD cerTificATion*<br />
ricH color cHoices<br />
TrUe priVAcy<br />
(no gaps between pickets)<br />
gooD neigHbor fence<br />
(no one gets bad side of fence)<br />
non-reflecTiVe sUrfAce<br />
sTAnDArD 5” nominAl posTs<br />
trex fencing WooD<br />
VinYl<br />
limiTeD resiDenTiAl wArrAnTy<br />
(number of years) 25 0 – 12 20+<br />
Top oUTDoor liVing brAnD<br />
gate & fencing: Trex Surroundings ® in Saddle<br />
some some<br />
* Trex Seclusions ® passes Miami/Dade wind load certification tests of 110 mph steady winds and 130 mph wind gusts.<br />
07
Posts<br />
Top Rail<br />
Bottom Rail<br />
Picket<br />
Post Caps<br />
Inserts<br />
Corner Bracket<br />
Gate Panel<br />
Gate Post Insert<br />
comPonents<br />
Gate Hardware Kit<br />
Trex seclUsions ®<br />
fencing AnD gATes<br />
fencing sPecifications & Profiles<br />
8’ Post – 5”x 5” x 96”<br />
9’ Post – 5” x 5” x 108”<br />
12’ Post – 5”x 5” x 144”<br />
90.5” length<br />
90.5” length<br />
65.75” length<br />
DescriPtion<br />
Pyramid Post Cap – 5” x 5”<br />
Flat Top Post Cap – 5” x 5”<br />
Galvanized steel - 90.5” length<br />
Aluminum - 90.5” length<br />
Bracket (24 per box / 4 boxes per carton)<br />
Consumer Bracket Packs (24 bags /4 brackets per bag)<br />
Bracket Adaptor<br />
seclusions gate comPonents<br />
item number<br />
XX050508UF36<br />
XX050509UF36<br />
XX050512UF27<br />
XX050491LF52<br />
XX010691LF154<br />
XX0100664LF154<br />
XXoYFCAP5x5<br />
XXsQFCAP5x5<br />
FINseRT<br />
FsUPPoRT08<br />
FBRACKeT<br />
FBRKTReTAIL<br />
FBRKTADAPT<br />
comPonents DescriPtion<br />
item number<br />
44 3/8” x 70.25”<br />
3.5” x 3.5” x 108”<br />
Handle (1), Hinge (2), Latch (1), striker (1)<br />
All fasteners are included<br />
xx= insert color Prefix WB—Woodland Brown sD—saddle WG—Winchester Grey<br />
XXFGATe<br />
FGATeINseRT4x4<br />
FGATeHDW<br />
Posts<br />
Pickets<br />
Cross Member<br />
Cover<br />
Post Caps<br />
Brackets<br />
comPonents<br />
Trex sUrroUnDings ®<br />
fencing AnD gATes<br />
fencing sPecifications & Profiles<br />
8’ Post – 5”x 5” x 96”<br />
9’ Post – 5” x 5” x 108”<br />
12’ Post – 5”x 5” x 144”<br />
Dog-eared Picket Bundles<br />
DescriPtion<br />
Cross member Cover – 2 x 4<br />
Pyramid Post Cap – 5” x 5”<br />
Flat Top Post Cap – 5” x 5”<br />
item number<br />
sD050508UF36<br />
sD050509UF36<br />
sD050512UF27<br />
sD050491LF52<br />
sD010691LF154<br />
sDoYFCAP5x5<br />
sDsQFCAP5x5<br />
Bracket (36 brackets in bags / 4 boxes per carton) sBRACKeT<br />
surrounDings gate comPonents<br />
comPonents DescriPtion<br />
item number<br />
Adjustable Gate Frame Kit<br />
Gate Post Insert<br />
Frame (1), Hinge (2), Latch (1), striker (1)<br />
All fasteners are included<br />
3.5” x 3.5” x 108”<br />
GATeFRAmesUR<br />
FGATeINseRT4x4<br />
09
Stakes<br />
String line<br />
Tape measure<br />
Miter box<br />
Circular saw<br />
Shovel or post hole digger<br />
Level<br />
Drill<br />
Hammer<br />
Wheel barrow<br />
Spray paint<br />
Pencil<br />
tools neeDeD<br />
Trex seclUsions ®<br />
insTAllATion insTrUcTions<br />
before You begin<br />
items useD Per 8’ section<br />
» Confirm location of underground utilities with local providers before you dig.<br />
a 1 Post Cap<br />
b 1 Post<br />
c 4 Brackets<br />
D 1 Top Rail<br />
e 19 Pickets<br />
f 2 Bottom Rails<br />
g 1 Bottom Rail Insert<br />
» Check local zoning laws, which may regulate the size and placement of your fence. If you live in a historic district or<br />
subdivision, check with the neighborhood association before proceeding with the plan.<br />
» Apply for local permit as directed by local code.<br />
steP 1: laY out fence line<br />
a. Locate property pins and stake out fence lines 6” inside of property line<br />
making sure that you go beyond property line about 3’ with stake in<br />
order to not disturb when digging.<br />
b. Determine corners of the fence by locating the places where the strings<br />
intersect. From this location measure 2¼” inside and mark location<br />
with a line perpendicular using a can of spray paint. make sure to mark<br />
the string.<br />
c. mark locations for posts starting with the first location and measuring<br />
every 96” on center. spray an additional line parallel to the marked<br />
locations approximately 2¼” inside of string.<br />
D. Determine number of gate locations and size. see page 14 for complete<br />
seclusions Gate Instructions Guide.<br />
a.<br />
6”<br />
3’<br />
b.<br />
3’<br />
6”<br />
Trex seclUsions ®<br />
insTAllATion insTrUcTions<br />
steP 2: Dig Holes<br />
a. Dig holes 30” deep or below frost line making sure not to interfere with<br />
strings or stakes. Hole size should be 12” in diameter.<br />
b. Clean holes and check for straight walls.<br />
c. Fill hole with 6” layer of gravel or dirt to allow drainage.<br />
* Post hole depth may vary. Refer to local code regulations & requirements.<br />
steP 3: set tHe Posts<br />
a. Insert post into hole. Determine rough height (approximately 78”<br />
above ground).<br />
b. Fill hole around post with concrete mix (sand, gravel and cement)<br />
to approximately 2” below grade.<br />
c. Tamp concrete in hole to eliminate air pockets.<br />
D. Level and square posts making sure post is next to string but not<br />
touching. Allow concrete to set per manufacturer’s instructions before<br />
installing rails and pickets.<br />
steP 4: install tHe first bracKets<br />
a. Determine how much space is needed at the bottom of the fence line.<br />
b. Attach the bottom bracket using the fasteners provided.<br />
c. measure 68” up from the bottom of the lower bracket. This point<br />
will mark the bottom of the upper bracket. Attach the top bracket<br />
using the fasteners provided.<br />
a.<br />
a. 2”<br />
a.<br />
30”<br />
78”<br />
b.<br />
b.<br />
12”<br />
c.<br />
D.<br />
c.<br />
6”<br />
11
Trex seclUsions ®<br />
insTAllATion insTrUcTions<br />
steP 5: install bracKets<br />
a. For sloped landscapes, determine next post bracket location using<br />
one of the following methods:<br />
1. steP metHoD: This fence gradually “steps” up the slope so that each<br />
section is the same length and the rails are level instead of parallel to<br />
the slope. When staking out line posts on a slope for the step method<br />
installation, you will need a true horizontal measurement for post placement.<br />
Do not measure parallel to the ground slope. To obtain the proper<br />
layout, measure from the previous stake while holding the tape horizontally.<br />
Use a 2x4 to extend from the proper tape placement to the ground<br />
to locate the placement of the stake. Properly executed, the tape will<br />
form a right angle with the 2x4. Use metal insert as measuring stick<br />
between posts on a flat grade.<br />
2. sloPing metHoD: This fence follows the grade or slope with its<br />
bottom rails parallel to the ground. Another term for this type of installation<br />
is “racking.” Grade may add length required for material span.<br />
Use metal insert as measuring stick to set distance between posts and<br />
ensure proper spanning. Continue this measuring method for the rest<br />
of the slope until the ground levels out. miter cut top & bottom rails to<br />
fit grade. on very steep grades pickets may require cutting.<br />
3. transition: Fence can be seamlessly transitioned to a different<br />
height. A 6’ section may be transitioned continuously to a 4’ section by<br />
using the metal insert as a measuring stick and miter cutting the top<br />
and bottom rail. Pickets will require cutting and they can be installed,<br />
marked and then cut with reciprocating or hand saw.<br />
4. for sections not in-line or at rigHt angles: Designed to attach<br />
to the back of a fence bracket is a bracket adapter in order to create<br />
different angles. engineered in 22.5 degree increments, it takes two<br />
fence bracket adapters to make a 45 degree angle. Attach angle bracket<br />
to post at the 2 center holes using a 1 5 /8” screw. Place fence bracket<br />
on the angle bracket. Attach bracket with 2½” screws.<br />
a. slide the Bottom Rails over the Bottom Rail insert.<br />
Bottom Rail may need to be cut to the same length as<br />
the insert.<br />
b. Place the Bottom Rail / Insert onto the lower brackets.<br />
c. secure the Bottom Rail / Insert with 1 5 /8” screw.<br />
steP 6: install bottom rails<br />
a.<br />
1.<br />
2.<br />
3.<br />
b.<br />
c.<br />
Trex seclUsions ®<br />
insTAllATion insTrUcTions<br />
steP 7: install PicKets<br />
a. Notch first and last picket in an 8’ section at a 45 degree angle, 2” on a<br />
side. This will keep the picket from interfering with the bracket.<br />
b. secure first picket to post using a 1 5 /8” screw. We recommend 3 places.<br />
c. Insert pickets into the bottom rail, alternating their orientation so that<br />
they interconnect.<br />
D. Repeat the process until 19 pickets are installed in the 8’ section.<br />
e. secure last picket to post.<br />
f. For fence sections shorter than 8’, remove the appropriate number of<br />
pickets and cut the top rail and assembled bottom rail.<br />
g. Adjust pickets to evenly fill fence section.<br />
steP 8: install toP rail<br />
a. Cut Top Rail to fit between posts. Place the Top Rail onto the<br />
upper brackets.<br />
b. secure the Top Rail to the upper brackets with 1 5 /8” screws.<br />
c. Finish nail Top Rail into pickets to prevent picket movement.<br />
secure at each picket joint.<br />
a. Place Post Caps onto the post.<br />
b. Caps may be secured using adhesive or a finish nail.<br />
steP 9: install Post caPs<br />
a.<br />
e.<br />
a.<br />
c.<br />
a.<br />
b.<br />
D.<br />
b.<br />
b.<br />
13
a<br />
b<br />
c<br />
D<br />
e<br />
f<br />
g<br />
H<br />
i<br />
tools neeDeD<br />
Seclusions 5x5 fence post<br />
Seclusions fence gate<br />
Steel post insert<br />
Seclusions fence hinge bracket (2)<br />
Seclusions fence latch<br />
Seclusions striker<br />
Seclusions gate handle (2)<br />
1½” self-tapping screws (20)<br />
1” self-tapping screws (4)<br />
» Read all instructions before installation.<br />
Trex seclUsions ®<br />
gATe insTAllATion gUiDe<br />
seclusions gate comPonents<br />
before You begin<br />
» Follow steps 1 and 2 of Trex seclusions Installation Instructions to lay out fence and dig holes.<br />
Note: Due to concrete cure times, set the gate posts 2-3 days before<br />
gate is installed.<br />
a. Distance for Trex seclusions gate opening should be<br />
46”. Inside faces must be plumb and parallel.<br />
b. set the steel post insert directly into the hole on the<br />
side that the hinges will be installed. open side of<br />
insert should face away from gate opening. Insert<br />
does not need to extend above location of top hinge.<br />
c. Fill the hole with concrete to approximately 6” from<br />
the top. ensure steel insert is plumb and square to<br />
opening, and allow to set.<br />
D. Cut post to give correct finished height. slide the<br />
seclusions 5x5 post over the steel insert and fill the<br />
remainder of the hole with concrete and allow to set<br />
2-3 days.<br />
Note: If no fence is built on opposite side of gate post, install an<br />
insert in the latch post for added stability.<br />
steP 1: set tHe gate Posts<br />
Gate opening<br />
a. b.<br />
Check for level.<br />
46”<br />
c.<br />
6”<br />
Trex seclUsions ®<br />
gATe insTAllATion gUiDe<br />
steP 2: install tHe gate Panel<br />
a. Attach the hinges to the gate panel approximately 6” from the top<br />
and bottom of the gate using the (4) 1½” supplied self-tapping<br />
screws. Pre-drilling with a 3 /16” drill bit will make installation easier.<br />
Note: Install hinges on the side of the gate that you want the gate to swing toward.<br />
b. Place the gate panel in the opening. Adjust the gate to be level<br />
and to the desired height by placing blocks under gate panel.<br />
Allow ample clearance for full swing of gate.<br />
c. Using (4) 1½” supplied self-drilling screws, attach each hinge to<br />
the steel inserted gate post. Pre-drilling with a 3 /16” drill bit will<br />
ease installation.<br />
D. open the panel and attach the inside corner of the bracket to<br />
the gate post.<br />
e. Adjust hinges using the adjustment mechanism so that there is a<br />
minimum of 1” clearance between the gate panel and gate post.<br />
Looking for a unique gate? The flexibility of Trex makes<br />
creating a custom gate achievable, limited only by one’s<br />
imagination. For a customized gate, please consult your<br />
local installer.<br />
a.<br />
steP 3: attacH tHe latcH anD HanDles<br />
a. Attach the latch to the unreinforced gate post approximately 36”<br />
from the ground using (6) 1½” supplied self-tapping screws. The<br />
catch is to be placed in the direction of the gate swing.<br />
b. Using the (4) 1½” supplied self-tapping screws, attach the striker<br />
to the gate panel, lining the striker rod up with the catch on the<br />
post latch.<br />
c. Attach gate handles to the gate panel, using (2) 1” supplied selftapping<br />
screws. Handles should be attached 1¾” from the edge<br />
of the gate panel. The height must be staggered front and back<br />
as shown.<br />
steP 4: maKe anY final aDjustments to tHe gate Hinge as neeDeD<br />
b.<br />
6”<br />
6”<br />
a.<br />
Gate<br />
swing<br />
Catch<br />
b.<br />
x4<br />
c.<br />
D.<br />
swing direction<br />
x4<br />
c.<br />
x2<br />
15
Stakes<br />
String line<br />
Tape measure<br />
Miter box<br />
Circular saw<br />
Shovel or post hole digger<br />
Level<br />
Drill<br />
Hammer<br />
Wheel barrow<br />
Spray paint<br />
Pencil<br />
tools neeDeD<br />
Scissors or tin snips<br />
Trex sUrroUnDings ®<br />
insTAllATion insTrUcTions<br />
before You begin<br />
items useD Per 8’ section<br />
» Confirm location of underground utilities with local providers before you dig.<br />
a 1 Post Cap<br />
b 2 5x5 Posts<br />
(use as a fence post only)<br />
c 6 Brackets<br />
D 3 2x4 Cross Members<br />
e 3 Cross Member Covers<br />
f Minimum of 15 Pickets<br />
» Check local zoning laws, which may regulate the size and placement of your fence. If you live in a historic district or<br />
subdivision, check with the neighborhood association before proceeding with the plan.<br />
» Apply for local permit as directed by local code.<br />
steP 1: laY out fence line<br />
a. Locate property pins and stake out fence lines 6” inside of property line<br />
making sure that you go beyond property line about 3’ with stake in<br />
order to not disturb when digging.<br />
b. Determine corners of the fence by locating the places where the strings<br />
intersect. From this location measure 2¼” inside and mark location<br />
with a line perpendicular using a can of spray paint. make sure to mark<br />
the string.<br />
c. mark locations for posts starting with the first location and measuring<br />
every 96” on center. spray an additional line parallel to the marked locations<br />
approximately 2¼” inside of string.<br />
D. Determine number of gate locations and size. see page 19 for complete<br />
surroundings Gate Instructions Guide.<br />
a.<br />
6”<br />
3’<br />
b.<br />
3’<br />
6”<br />
steP 2: Dig Holes<br />
a. Dig holes below frost line making sure not to interfere with strings or<br />
stakes. Hole size should be 12” in diameter.<br />
b. Clean holes and check for straight walls.<br />
c. Fill hole with 6” layer of gravel or dirt to allow drainage.<br />
* Post hole depth may vary. Refer to local code regulations & requirements.<br />
Trex sUrroUnDings ®<br />
insTAllATion insTrUcTions<br />
steP 3: set tHe Posts<br />
a. Insert post into hole. Determine rough height (approximately 78” above ground).<br />
b. Fill hole around post with concrete mix (sand, gravel and cement) to approximately<br />
2” below grade.<br />
c. Tamp concrete in hole to eliminate air pockets.<br />
D. Level and square posts making sure post is next to string, but not touching. Allow<br />
concrete to set per manufacturer’s instructions before installing rails and pickets.<br />
a. secure brackets to the post at approximately<br />
6”, 34½””, and 63” from grade level using two of<br />
the screws provided.<br />
a. measure each 2x4 separately at bracket locations to ensure<br />
a proper fit.<br />
b. When racking, be sure to cut the 2x4’s at the angle of installation.<br />
Note: 2x4’s should be cut 1/8” shorter than measurement for ease of installation.<br />
c. Place the appropriate 2x4 in each bracket and fasten with at<br />
least one screw on the side of the bracket and one screw in<br />
either the top or bottom of the bracket.<br />
steP 4: install bracKets<br />
steP 5: install cross members<br />
a.<br />
a.<br />
mark each end for cut.<br />
Check for level.<br />
a.<br />
78”<br />
b.<br />
b.<br />
12”<br />
c.<br />
c.<br />
D.<br />
c.<br />
6”<br />
17
a. Leave a 1 /16” gap between the picket and post.<br />
b. Raise the picket off the ground 1 to 2 inches.<br />
c. Fasten with two fasteners on each picket at each<br />
cross member.<br />
Note: Trex recommends “ballistic screw nails” 1½” long for a fast,<br />
clean look, but other stainless fasteners of this length may be<br />
substituted & suitable for the installation.<br />
D. Add pickets across the cross member using the<br />
desired pattern. Be sure to leave a 1 /16” gap between<br />
pickets if you choose the privacy method.<br />
e. The last picket may need to be ripped to fit into<br />
the system.<br />
Trex sUrroUnDings ®<br />
insTAllATion insTrUcTions<br />
a. Cut each cross member cover at the exact length and<br />
angle at the brackets.<br />
b. When cutting the cross member it is best to use heavy duty<br />
scissors or tin snips. If you choose to use a saw, add a piece<br />
of 2x4 blocking at the cut line for stability.<br />
c. Place the covers over each 2x4 and bracket. There is no<br />
need to fasten the cover to the 2x4.<br />
a. Place Post Caps onto the post.<br />
b. Caps may be secured using adhesive or a finish nail.<br />
steP 6: install cross member coVers<br />
steP 7: Hang tHe PicKets<br />
1 - 2”<br />
1/16”<br />
steP 8: install Post caPs<br />
Privacy method shadowbox method<br />
a.<br />
b.<br />
Ripped<br />
Picket<br />
5x5 Trex fence post (2)<br />
Surroundings gate frame kit<br />
Surroundings pickets (to cover frame)<br />
Pressure-treated 2x4s cut to length (3)<br />
Cross member covers cut to length (3)<br />
Gate post insert<br />
Post caps (2)<br />
Trex sUrroUnDings ®<br />
gATe insTAllATion gUiDe<br />
tools neeDeD surrounDings gate comPonents<br />
before You begin<br />
» Read all instructions before<br />
installation.<br />
38½”<br />
» Follow steps 1 and 2 of Trex<br />
44½”<br />
surroundings Installation<br />
Instructions to 50½ lay out fence<br />
and dig holes.<br />
56½<br />
size oPening<br />
38½”<br />
44½”<br />
50½”<br />
56½”<br />
size opening<br />
oPening WiDtHs WitH corresPonDing 2x4 lengtHs<br />
steP 1: set tHe gate Posts<br />
Note: Due to concrete cure times, set the gate posts 2-3 days before gate is installed.<br />
a. Install gate post insert in hole designated for the hinge post.<br />
The insert does not need to extend beyond the height of the top<br />
gate hinge. The open side of the insert should face away from gate<br />
opening.<br />
b. Fill hole with concrete to 6” below ground level. ensure insert<br />
is plumb and that the center line is aligned with the fence. Allow<br />
concrete to set.<br />
Note: If there is not a fence section on the opposite side of the latch, install latch post<br />
with an insert as well.<br />
PicKets neeDeD<br />
6<br />
7<br />
8<br />
9<br />
b.<br />
a.<br />
cut lengtH for 2x4<br />
6”<br />
33”<br />
39”<br />
45”<br />
51”<br />
19
a. Cut 5x5 Trex Fence Post to give correct finished height.<br />
Trex sUrroUnDings ®<br />
gATe insTAllATion gUiDe<br />
steP 2: install trex Post<br />
b. slide Post over Insert and ensure sides are centered and aligned<br />
with the fence.<br />
c. Fill the remainder of the hole with concrete and allow to cure for<br />
2-3 days before installing gate.<br />
D. Install Post Cap.<br />
a. Lay gate frame on a flat surface. Insert the Inside slip<br />
members into the openings on the vertical members.<br />
b. slide pressure-treated 2x4’s into frame and attach with<br />
provided screws.<br />
c. Cover pressure-treated 2x4’s with surroundings 2x4<br />
Cross member Covers.<br />
Note: 2x4 Cross Member Cover must be slipped over bottom<br />
pressure-treated 2x4 after it is screwed into place.<br />
D. Install the “s” Hook for the truss cable kit into the hole<br />
at the top of the gate on the hinge side. Install the truss<br />
cable kit by hooking the turnbuckle into the hole at the<br />
bottom of the gate on the latch side. Use the clamp<br />
provided to secure the cable, cut off excess. Adjust<br />
turnbuckle to mild tension.<br />
steP 3: assemble gate frame<br />
b.<br />
c.<br />
b. c.<br />
a.<br />
D.<br />
D.<br />
Trex sUrroUnDings ®<br />
gATe insTAllATion gUiDe<br />
tools neeDeD surrounDings steP 4: attacH gate PicKets comPonents<br />
a. Attach surroundings Pickets to frame and pressure-treated<br />
2x4’s as described in surroundings Installation Instructions.<br />
b. Install the first and last pickets flush with the edge of the<br />
frame. Leave a 1 /16” gap between the central pickets.<br />
a. Attach hinges to gate. screws must attach to the<br />
metal frame through the surroundings Pickets.<br />
b. set gate on blocks to level. Allow 1” on either side<br />
of gate opening. Attach hinges to gate post.<br />
1/16”<br />
steP 5: attacH Hinges<br />
steP 6: install latcH<br />
a. Install latch with screws into metal or wood of gate frame.<br />
Two-sided latch shown.<br />
Looking for a unique gate? The flexibility of Trex makes<br />
creating a custom gate achievable, limited only by one’s<br />
imagination. For a customized gate, please consult your<br />
local installer.<br />
a.<br />
x2<br />
x2<br />
b.<br />
x4<br />
x4<br />
21
visit trex.com or call 1-800-buY-tREX<br />
© 2010 Trex Company, Inc. All rights reserved. Trex ® , the Trex logo, Trex Seclusions ® and Trex Surroundings ® are either<br />
federally registered trademarks, trademarks or trade dress of Trex Company, Inc., Winchester, Virginia.<br />
fencing: Trex Surroundings ®<br />
shadowbox configuration in Saddle<br />
fclt010110